 BERNINA Corporate Blog -
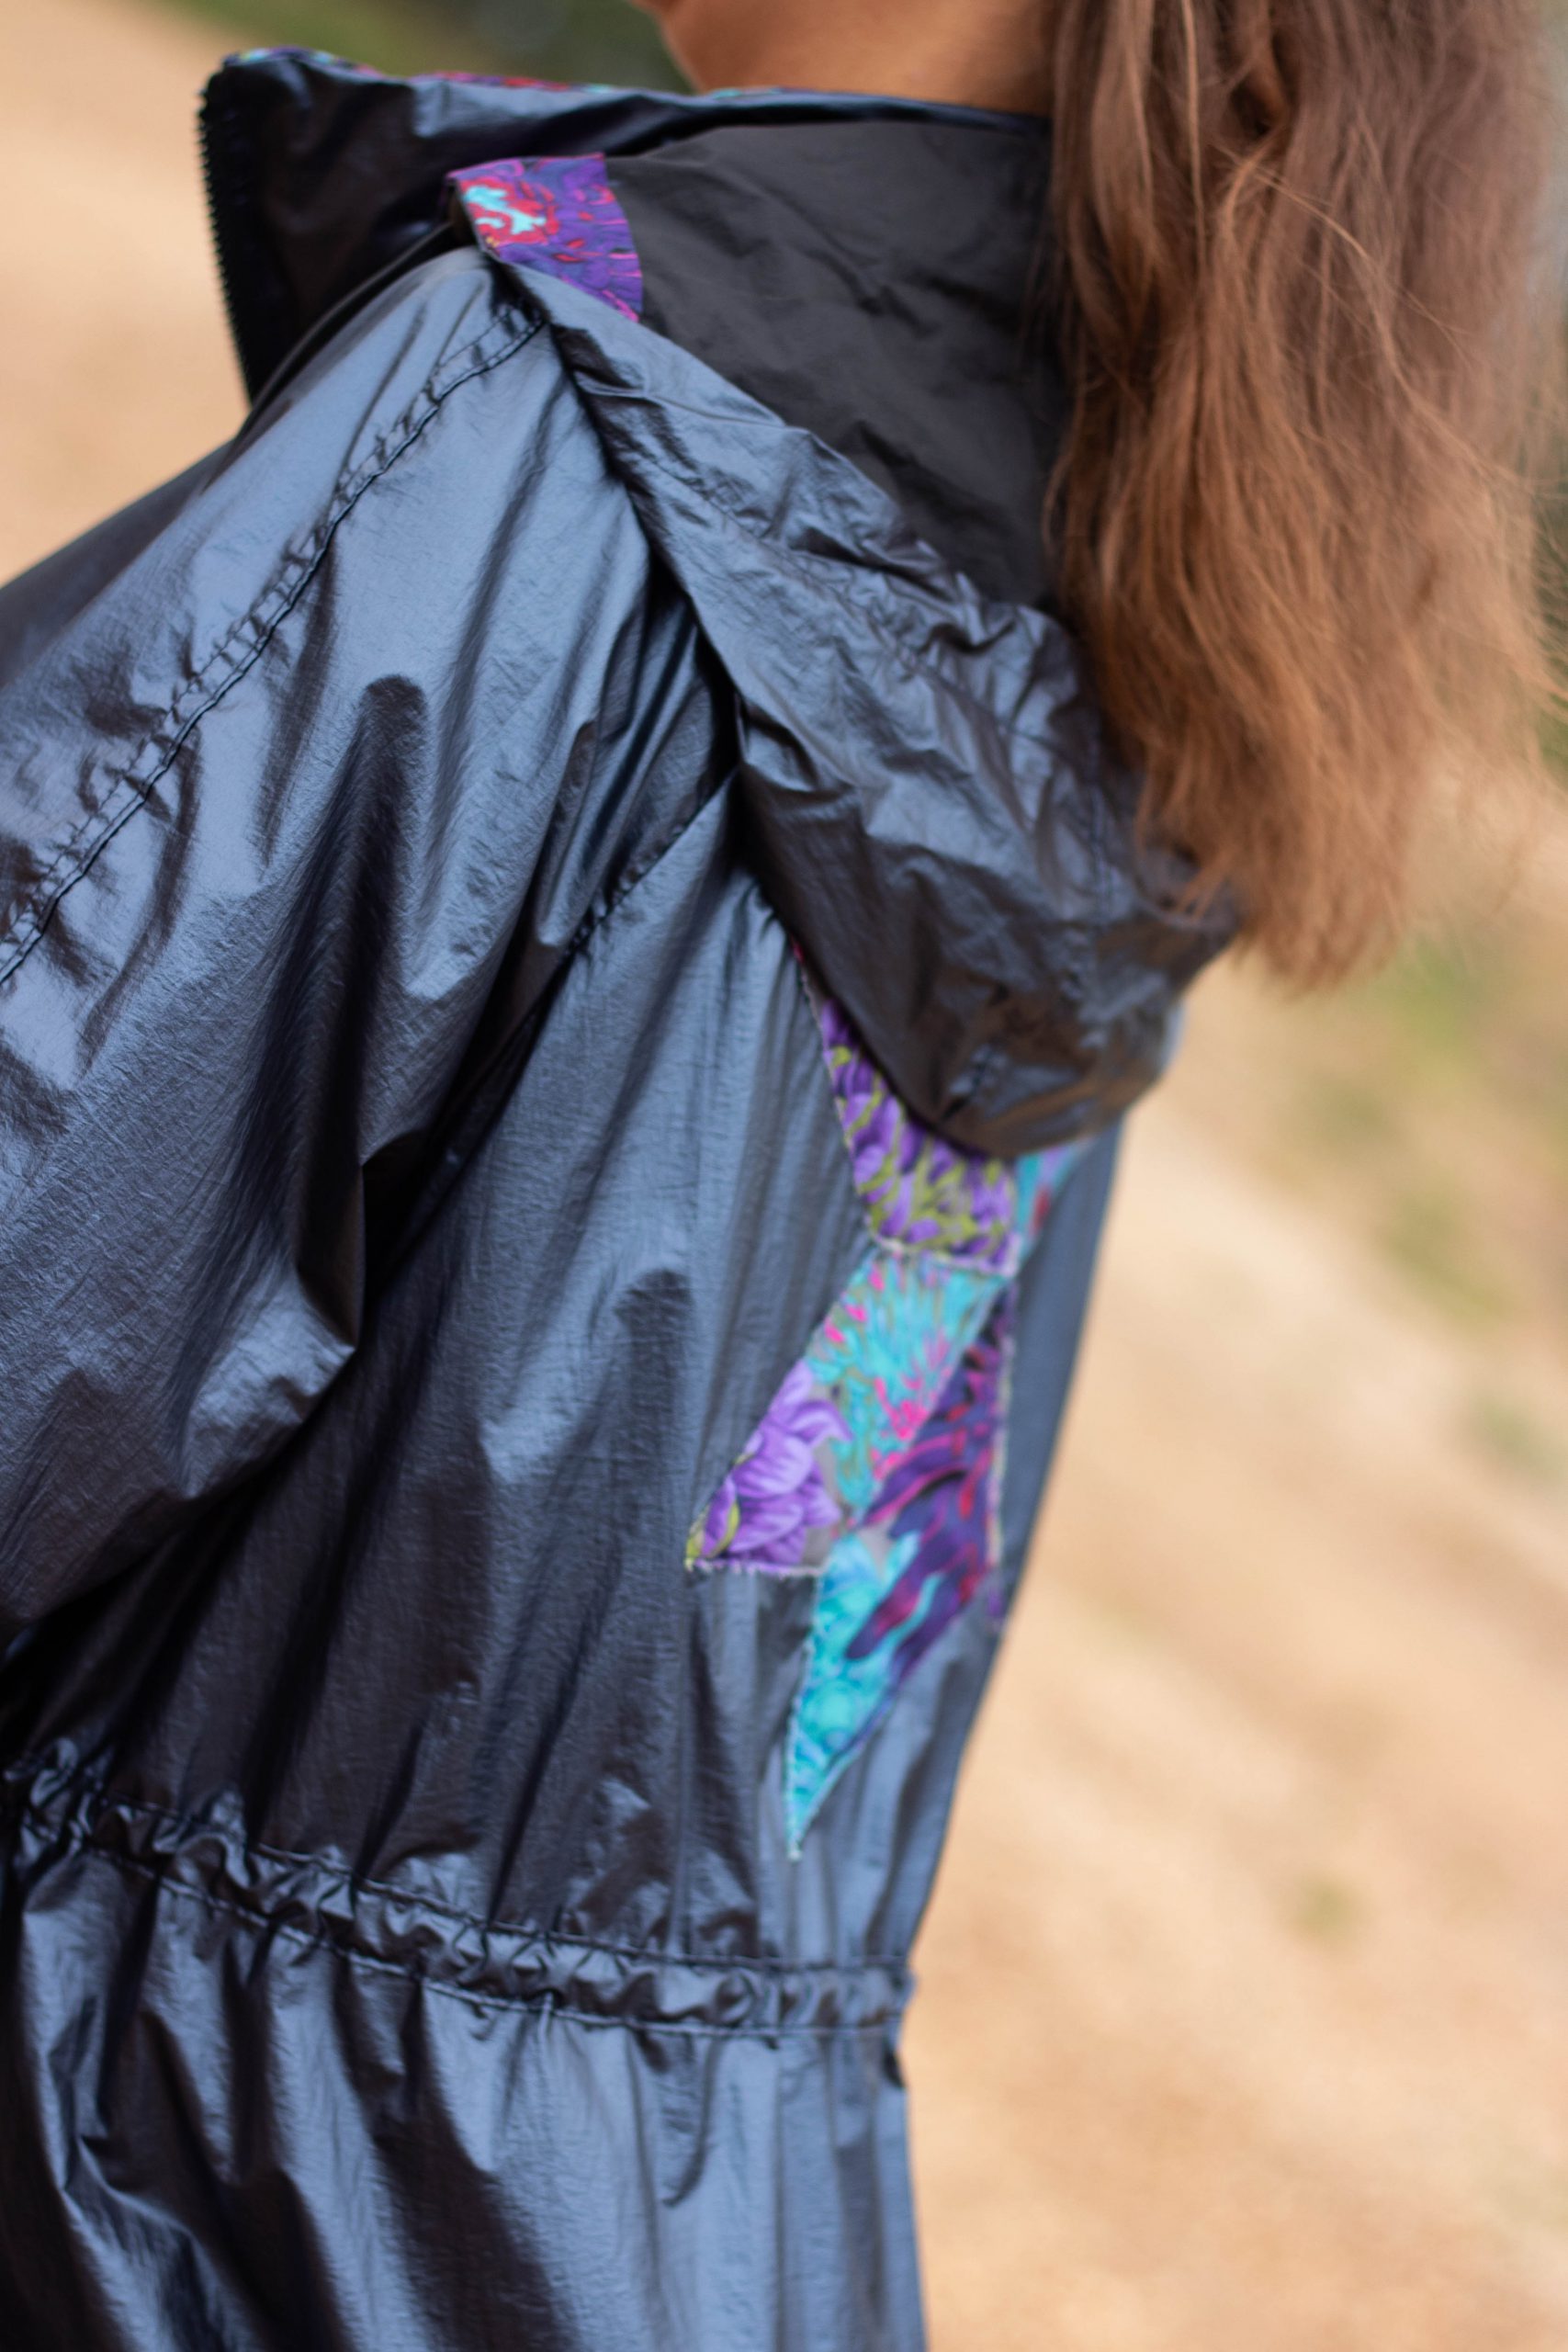
Sew the Fashion Look – tutorial for the “Gentian” raincoat
Fall is just around the corner and with horses and dogs I could really do with a functional and at the same time stylish raincoat.
Perfect that this one in the BERNINA Fashion Look collection immediately caught my eye. This collection was created by Swiss designer Irène Münger and is inspired by English textile designer Kaffe Fassett’s fabrics. It is the first fashion collection for you to sew at home. The fashionable patterns are available online in the inspirations shop. You can find more information about the collection and the different looks on www.bernina.com/looks.


Today, you are getting a detailed tutorial from me to make it as easy as possible to sew this raincoat. I’m going to show you how to sew your own raincoat using a lot of pictures.
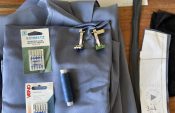
You need the following fabrics for the raincoat:
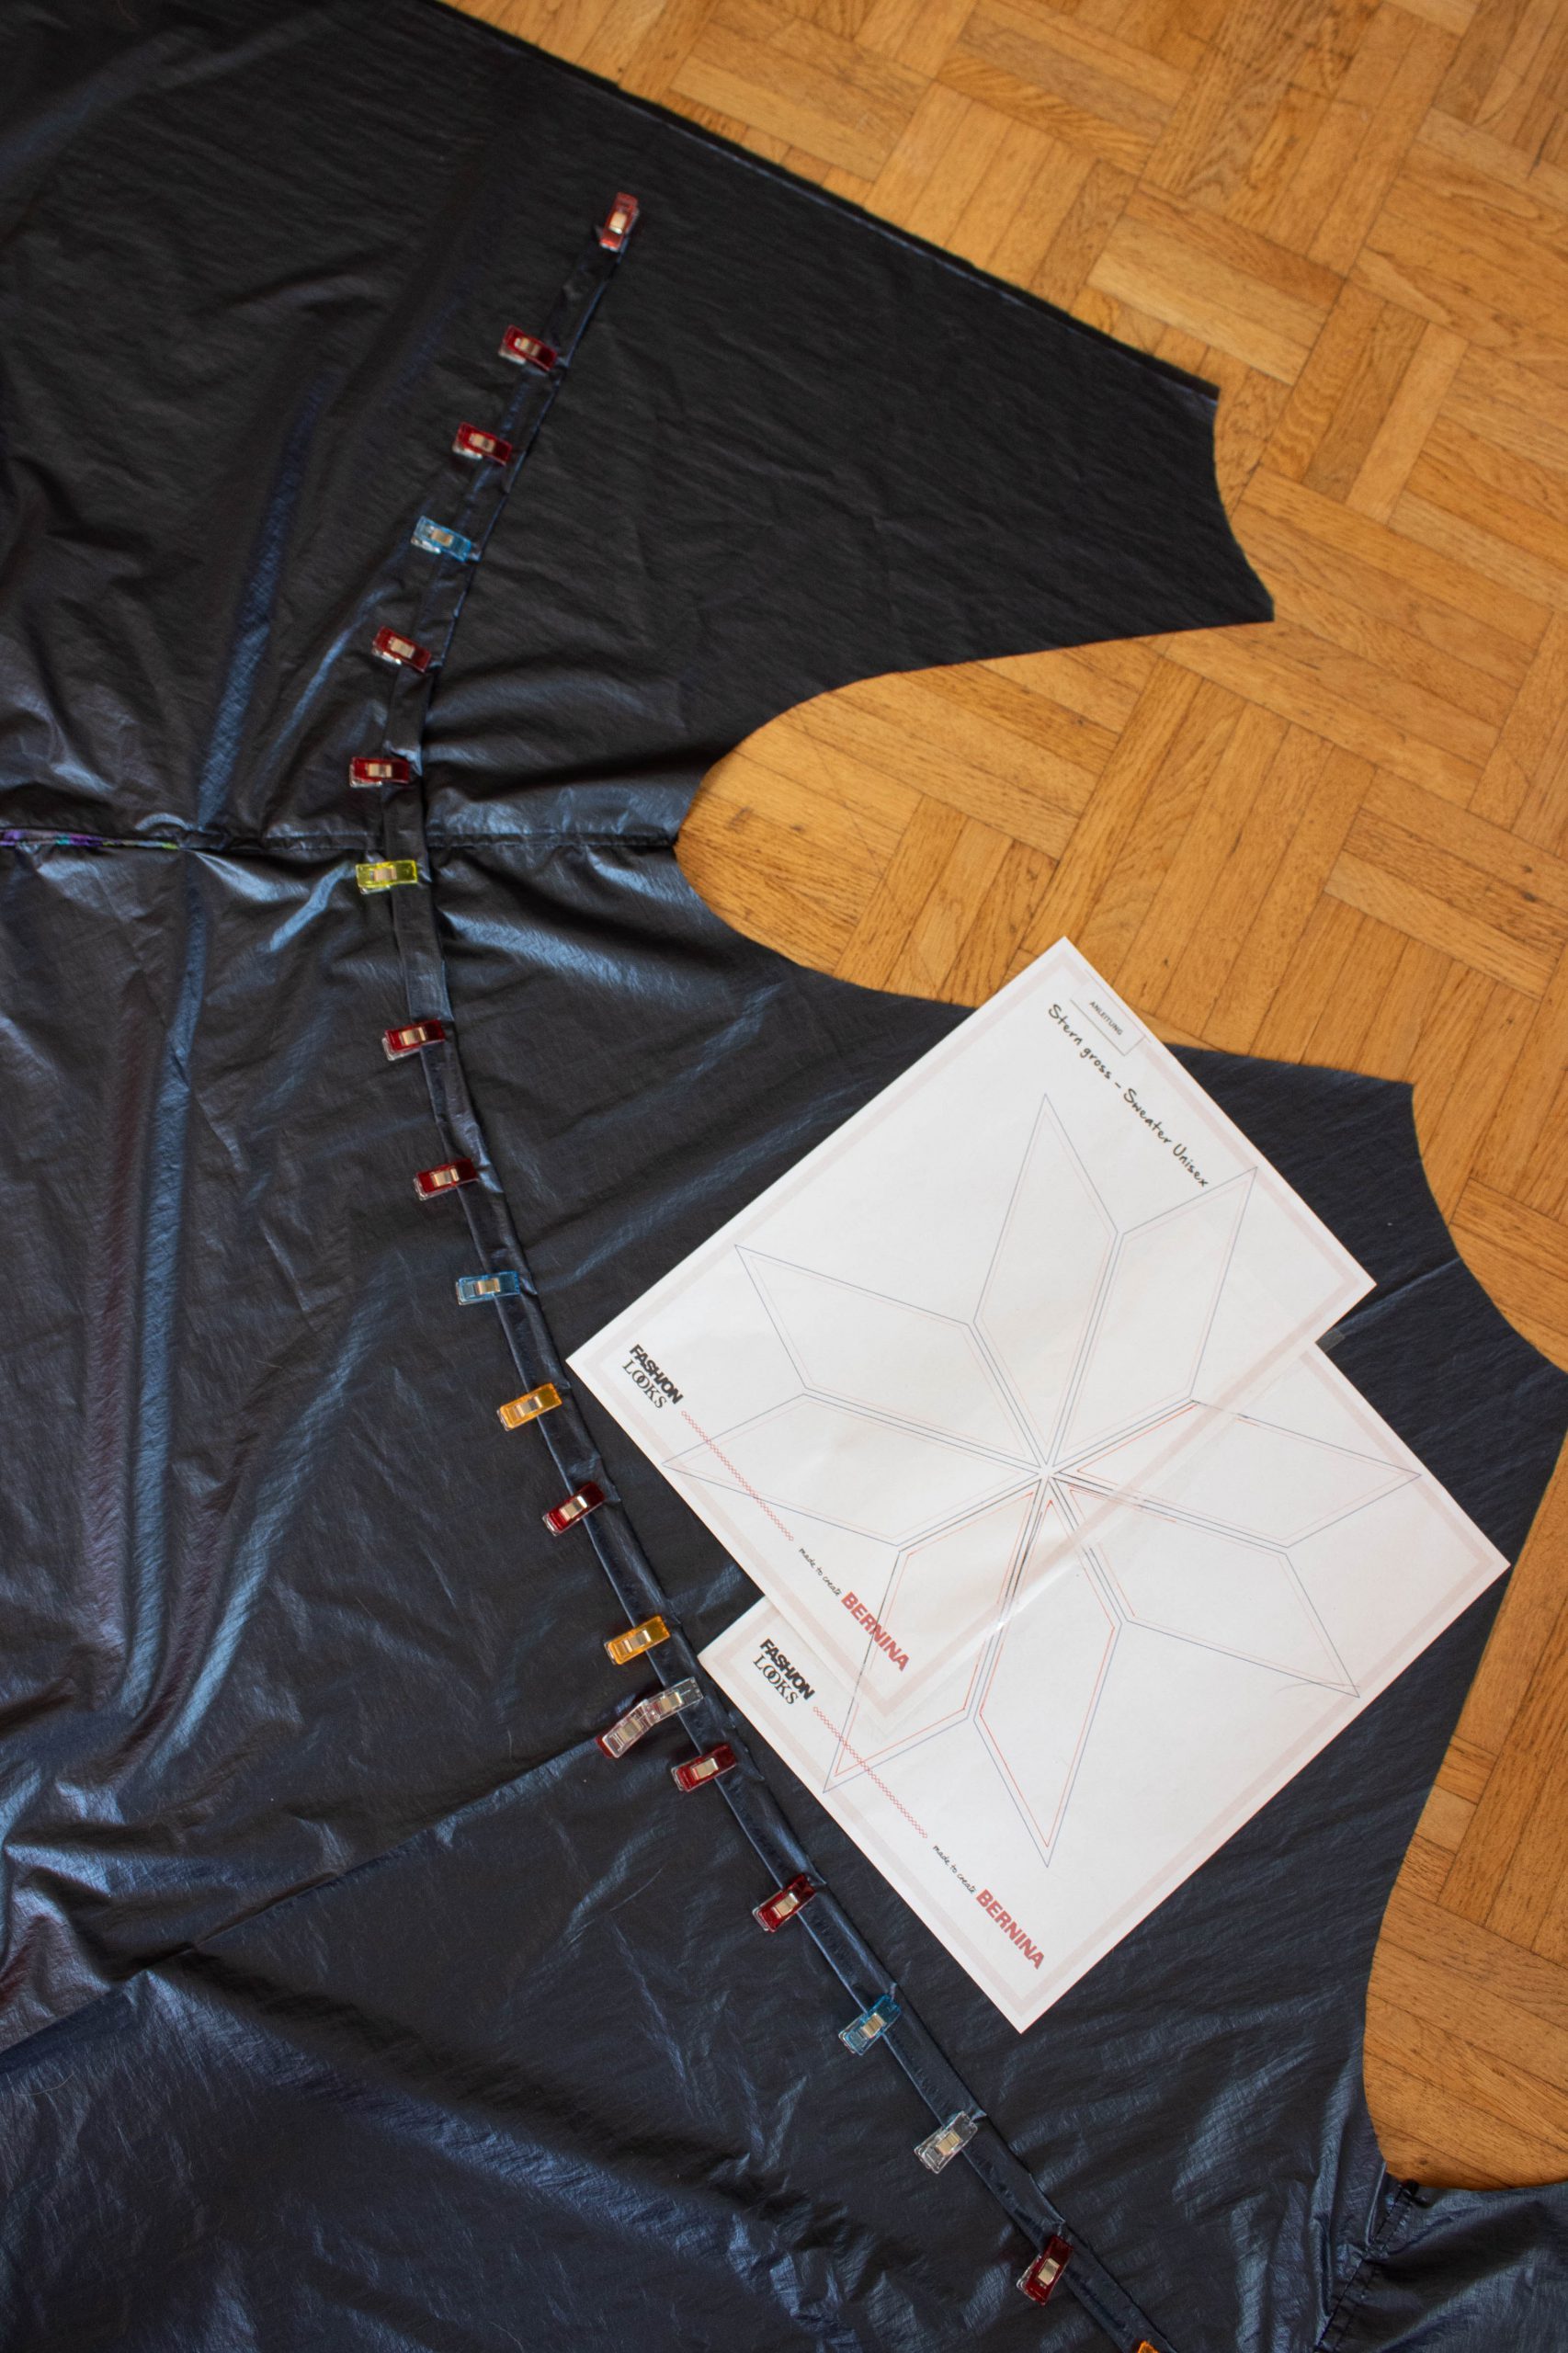
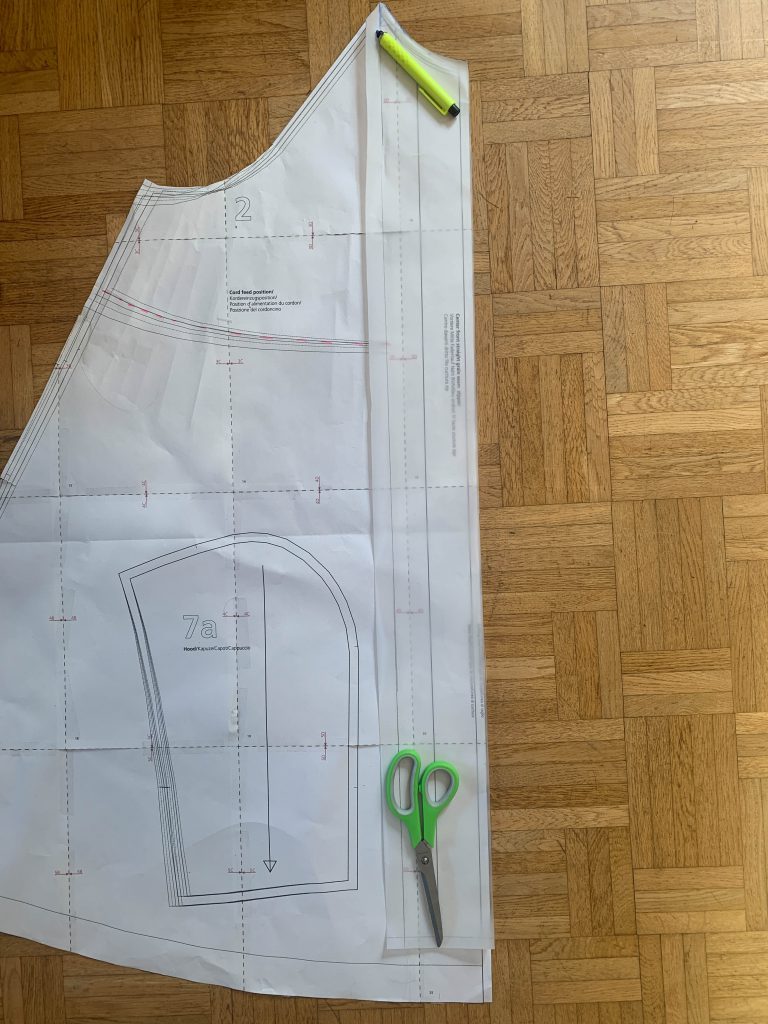
I strongly recommend that before buying/cutting the fabric you prepare the whole pattern and lay it out on the floor to determine exactly how much fabric you need for your size.
- Approx. 3 m of windbreaker fabric, 140 cm wide
- Approx. 1 m of Kaffe fabric, 110 cm wide (plus facing length, if you want to work with facing like I do)
- Two-way zipper, 100 cm long
- 45 cm zipper for the collar
- 4 drawstring stoppers
- 5 medium snap fasteners
- Eyelets for the hood
- 3 m elastic band
- Walking foot, if applicable
- Edgestitch foot, if applicable
- Zipper foot, if applicable
For the star on the back:
• R 80 bulky, sewable wadding from Vliesline, approx. 40 cm x 40 cm.
• Tear-away embroidery backing, 2 squares approx. 40 cm x 40 cm
• Patterned cotton fabric, 8 pieces approx. 20 cm x 8 cm, cut into 30° diagonals
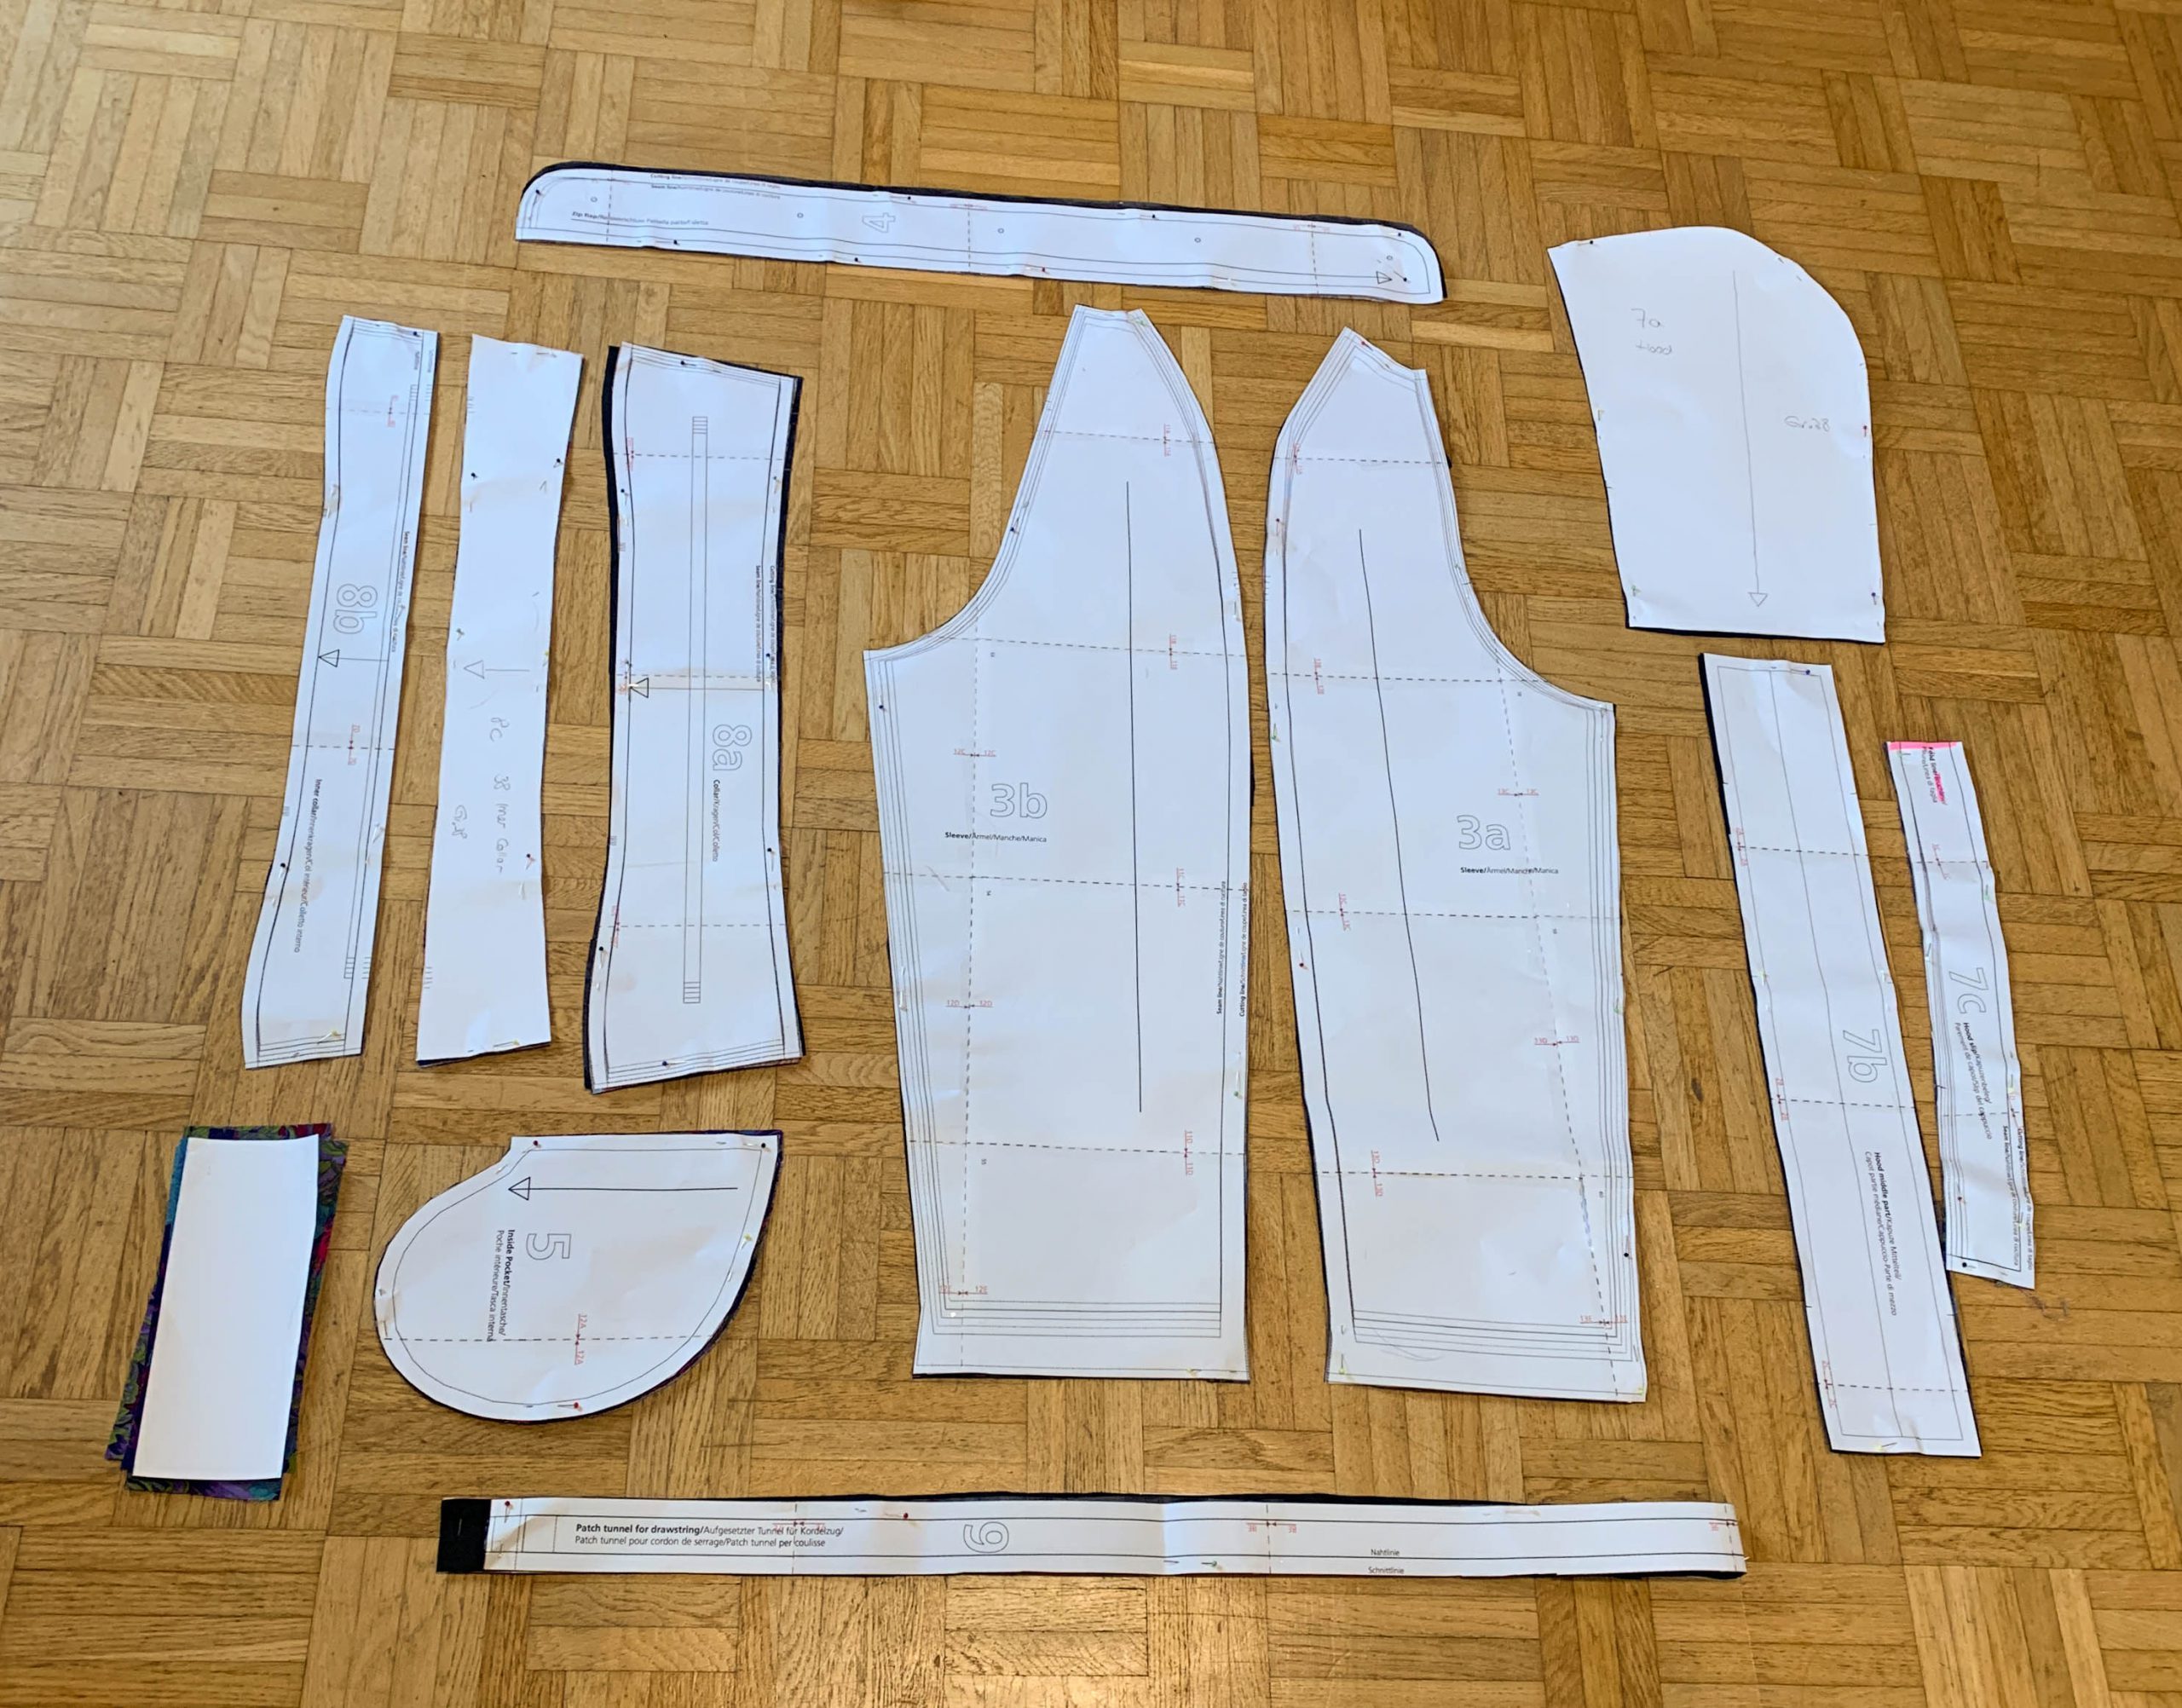
Preparations/Cutting the fabric
This pattern is part of BERNINA Fashion Looks: To the Gentian raincoat pattern.
You can find all the cuts in the overview here.
When you print out the pattern, make sure that you do not adjust the size. You can check this using the test square on the pattern.
The pattern already includes all seam and hem allowances.
- Cut the following pieces:
- 1 back piece on the fold (piece 1) – main fabri
- 2 front pieces (piece 2) – main fabric
- 2 raglan sleeves (piece 3a) – main fabric
- 2 raglan sleeves (part 3b) – main fabric
- 1 zipper panel (piece 4) – main fabric
- 1 zipper panel (piece 4) – Kaffe fabric
- 4 pocket pouches (2 mirror-inverted) (piece 5) – Kaffe fabric
- 1 drawstring (piece 6) – main fabric
- 2 hoods (piece 7a) – main fabric
- 1 hood strip (piece 7b) – main fabric
- 1 hood facing on the fold (piece 7c) – Kaffe fabric
- 2 outside collars (piece 8a) – main fabric
- 1 collar (piece 8a) – Kaffe fabric
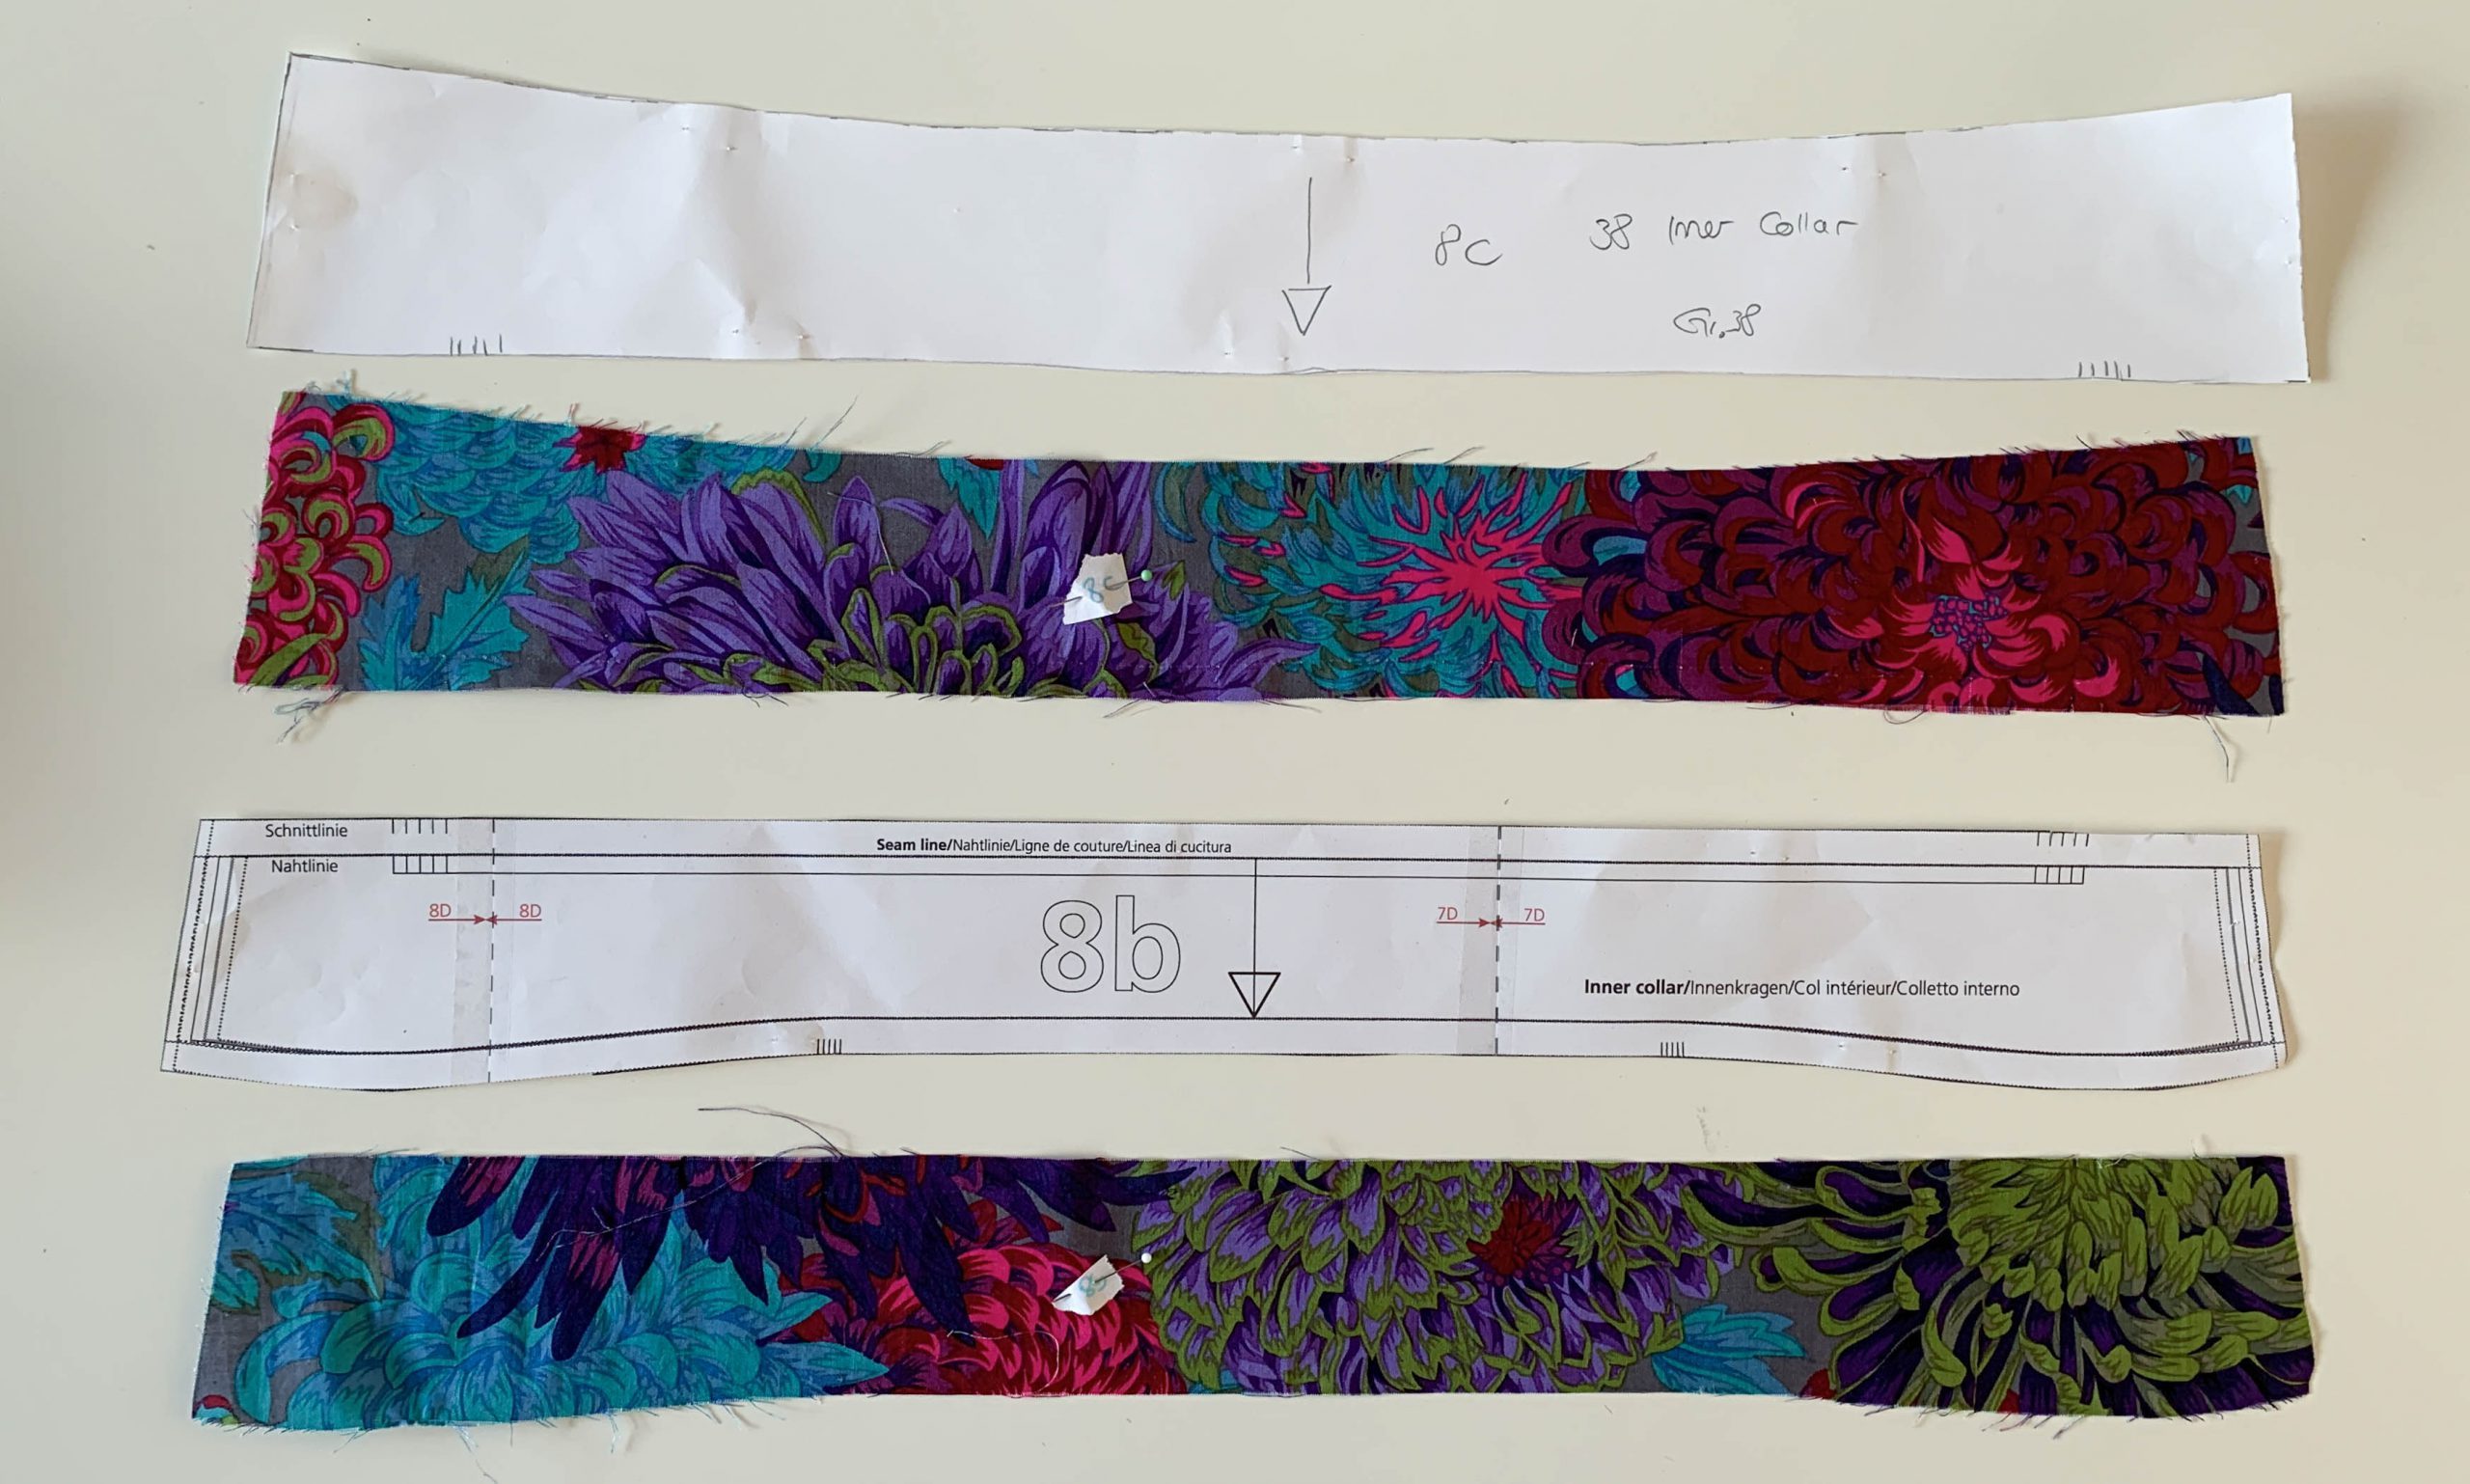
- 1 inside collar (piece 8b) – Kaffe fabric
- 1 inside collar (piece 8c) – Kaffe fabric
- 2 facings drawn by you, if you want to finish the edge inside on the zipper according to my tutorial. You can find the instructions to draw this piece below in my tutorial. You will not be able to find these facings on the photo of the cut pieces, as I cut them afterwards.
- 8 rectangles approx. 20 cm x 8 cm, in 30° diagonals for the star on the back – Kaffe fabric

For the star on the back:
- 8 rectangles approx. 20 cm x 8 cm, in 30° diagonals – Kaffe fabric

Sewing the raincoat – let’s get started!
Please read the tutorial carefully before you start sewing. As you know, there are always different approaches and you may want to sew one or two steps differently to me.
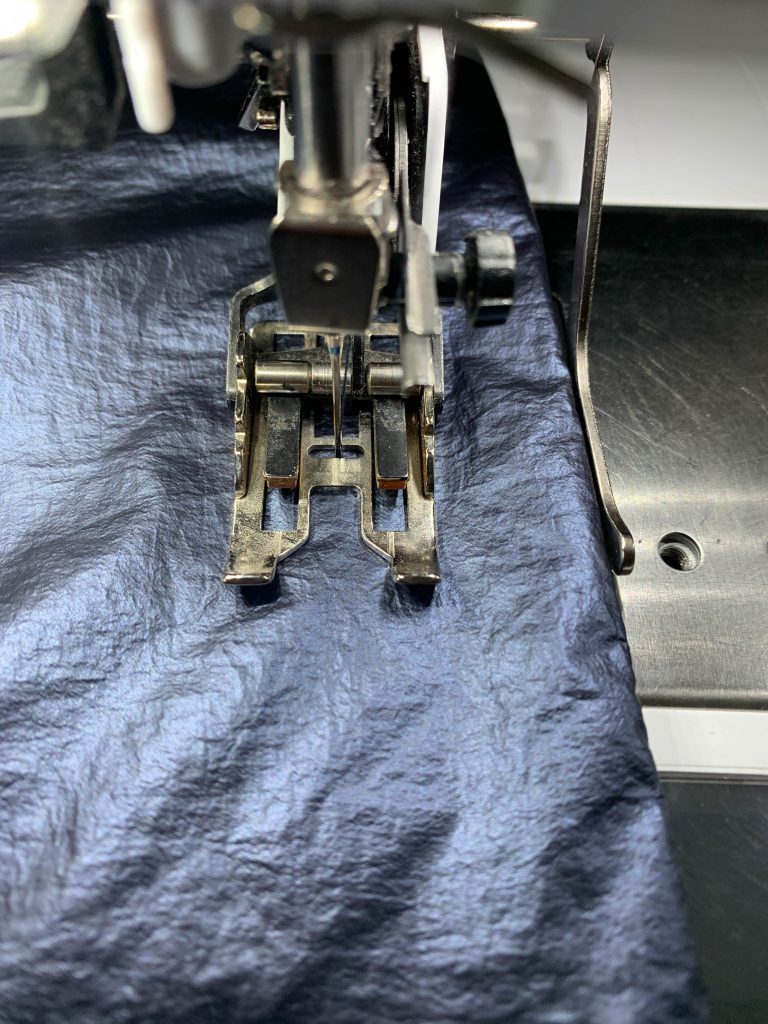
I sew most of the raincoat using the walking foot #50. If I used another foot, I specify this in the tutorial.
Pocket pouches and side seams
It’s best to finish the 4 pocket pieces before you sew them on.
NOTE: I decided to use a flat fell seam inside on the side pieces as I found such a lovely solution for sewing on pocket pouches. If you want to sew a “normal” fell seam on the side pieces, you have to sew the pocket pouch a bit differently.
You can find an excellent tutorial on how to sew flat fell seams here.
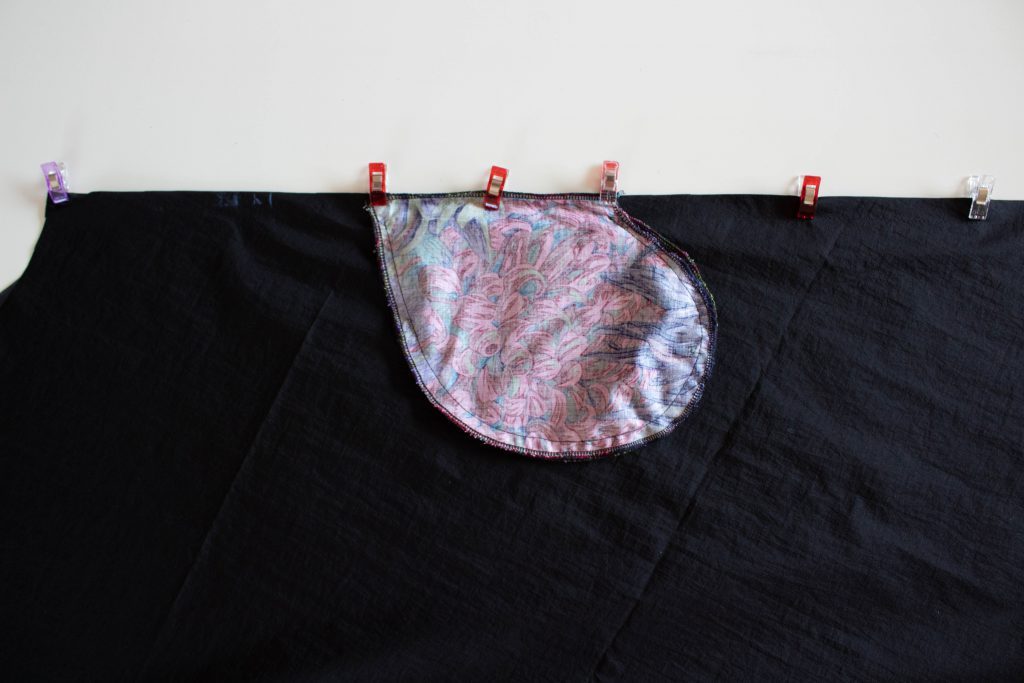
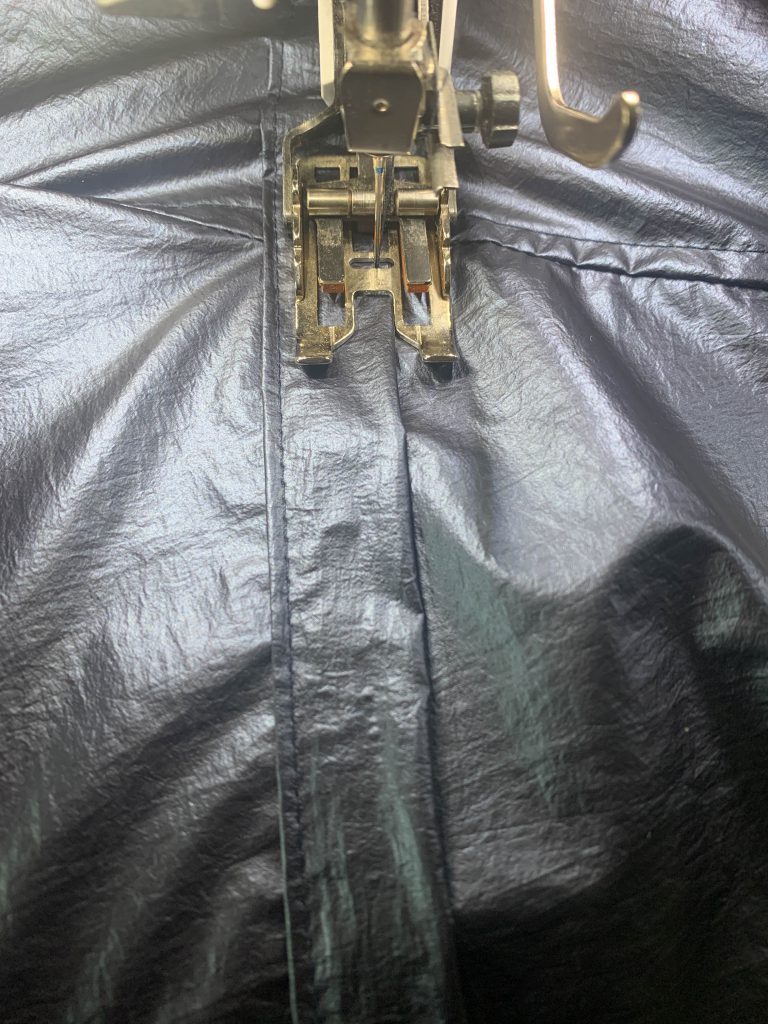
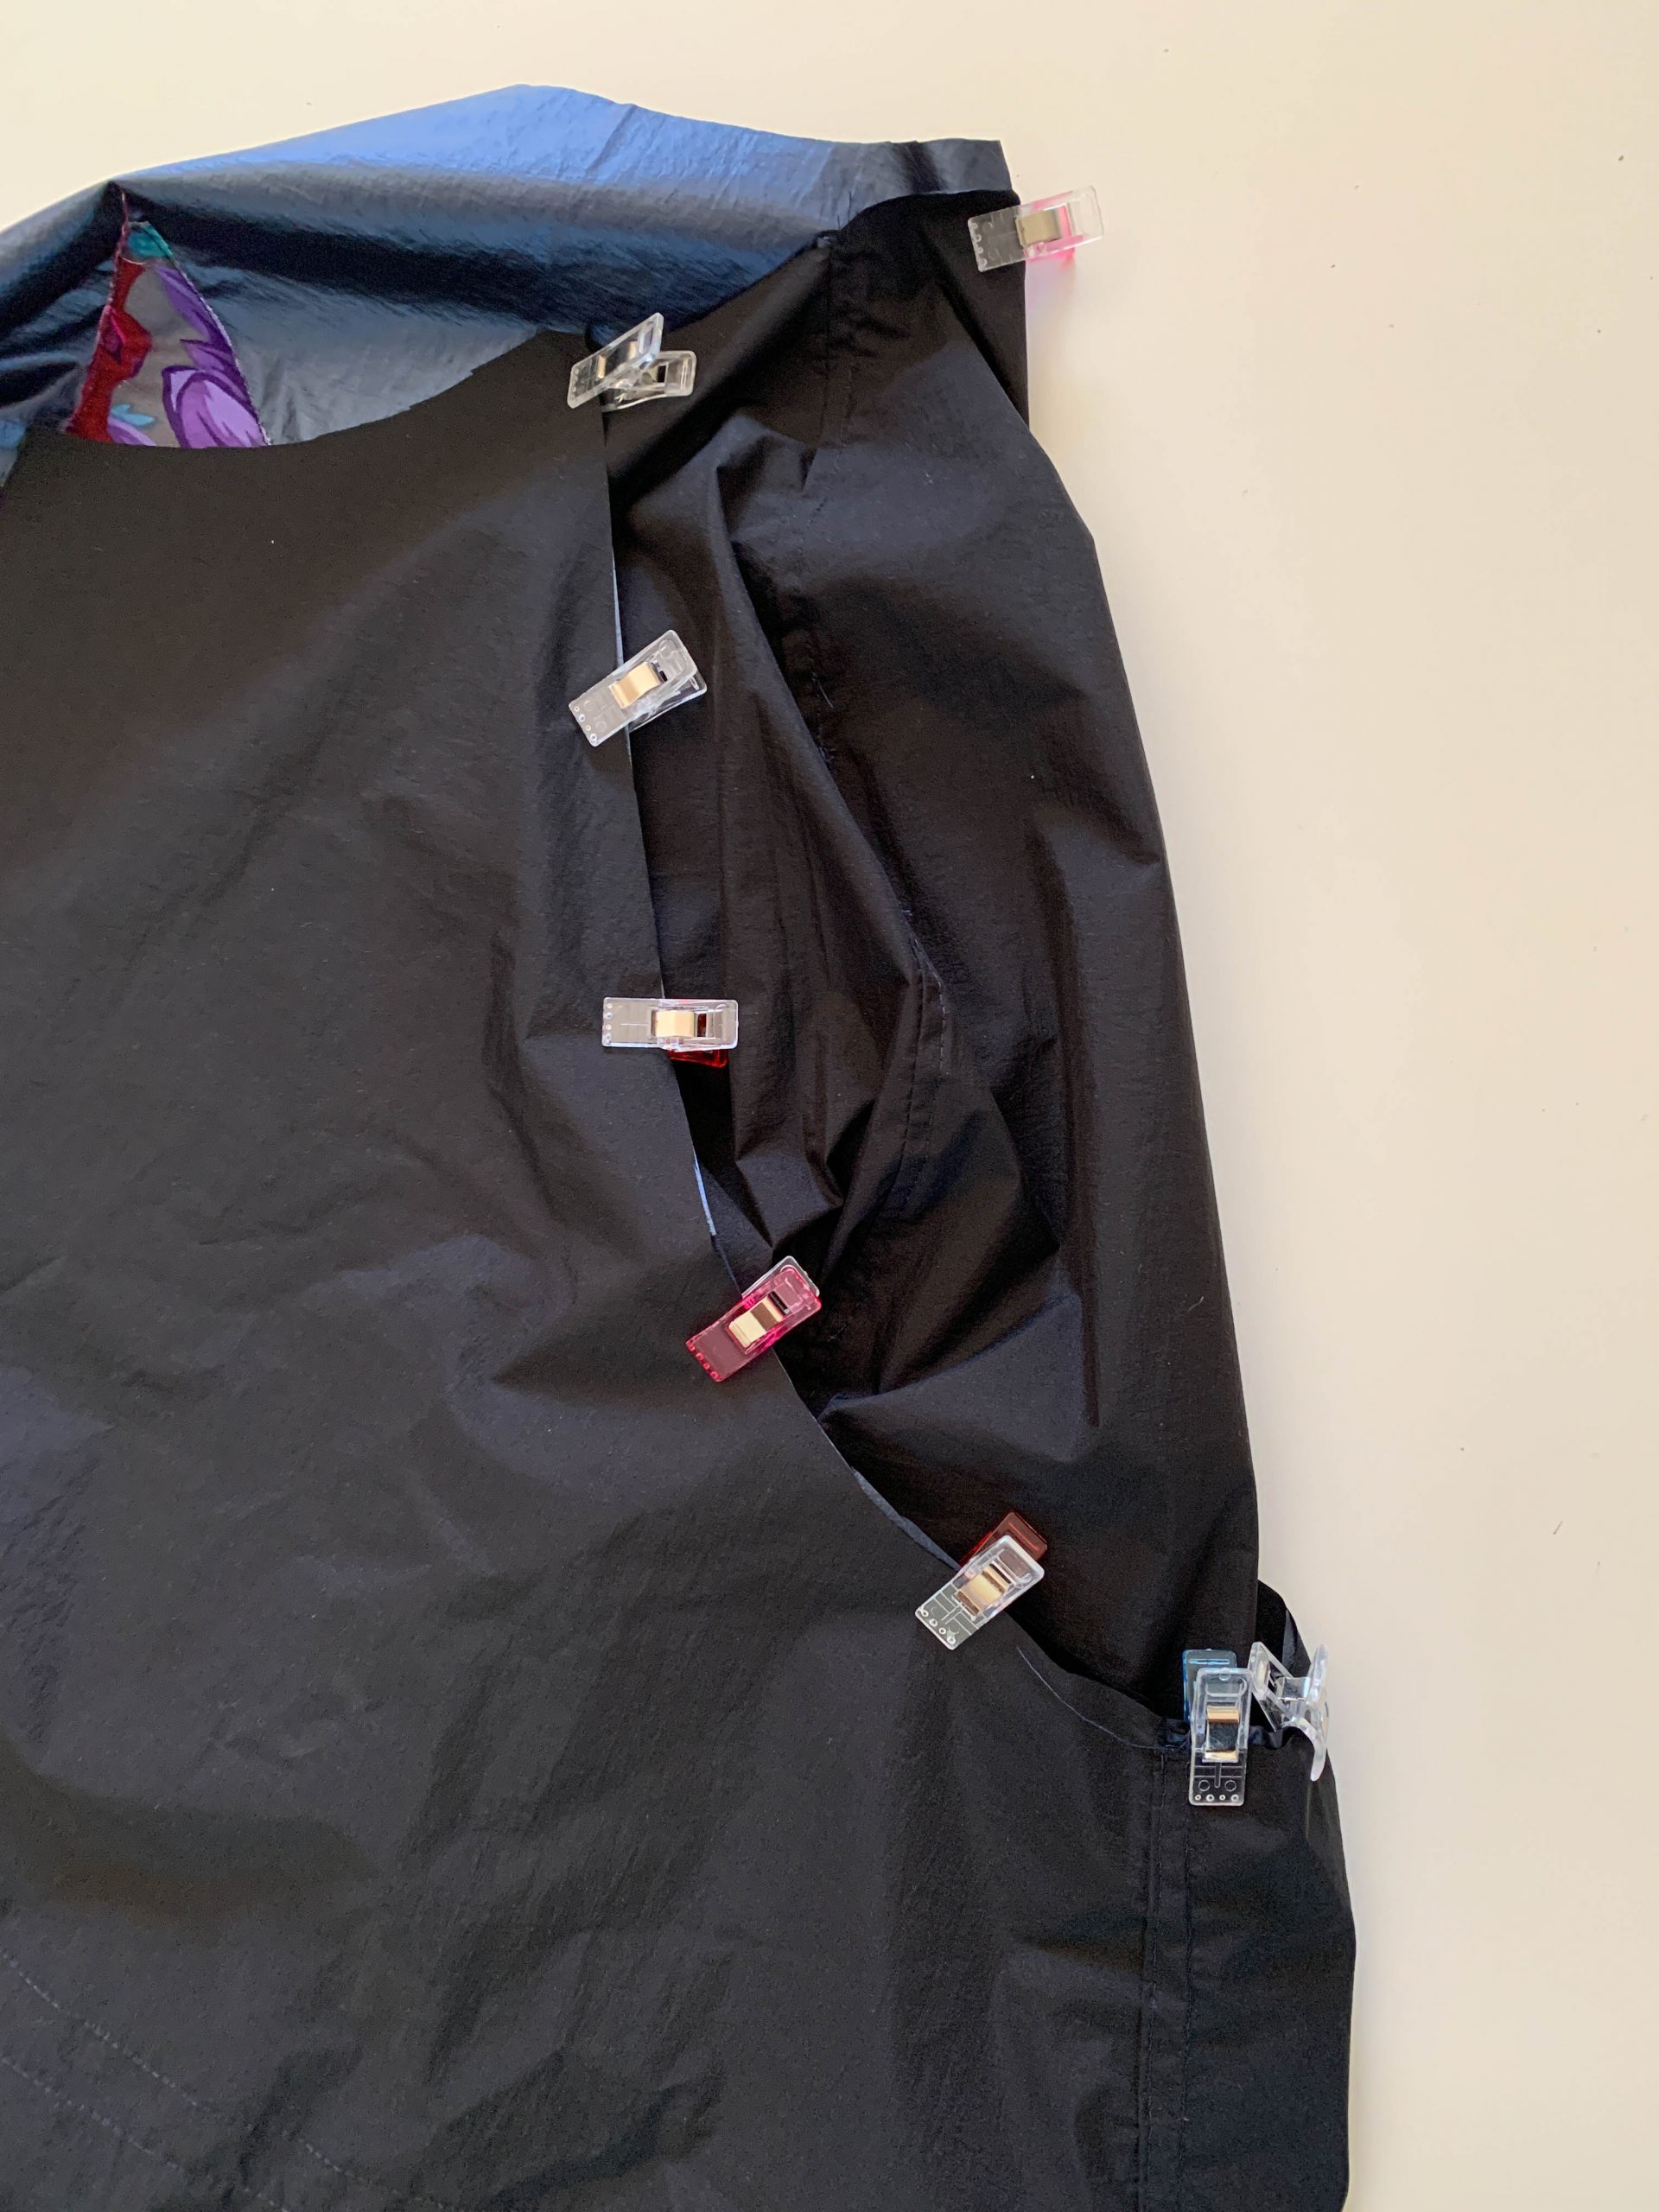
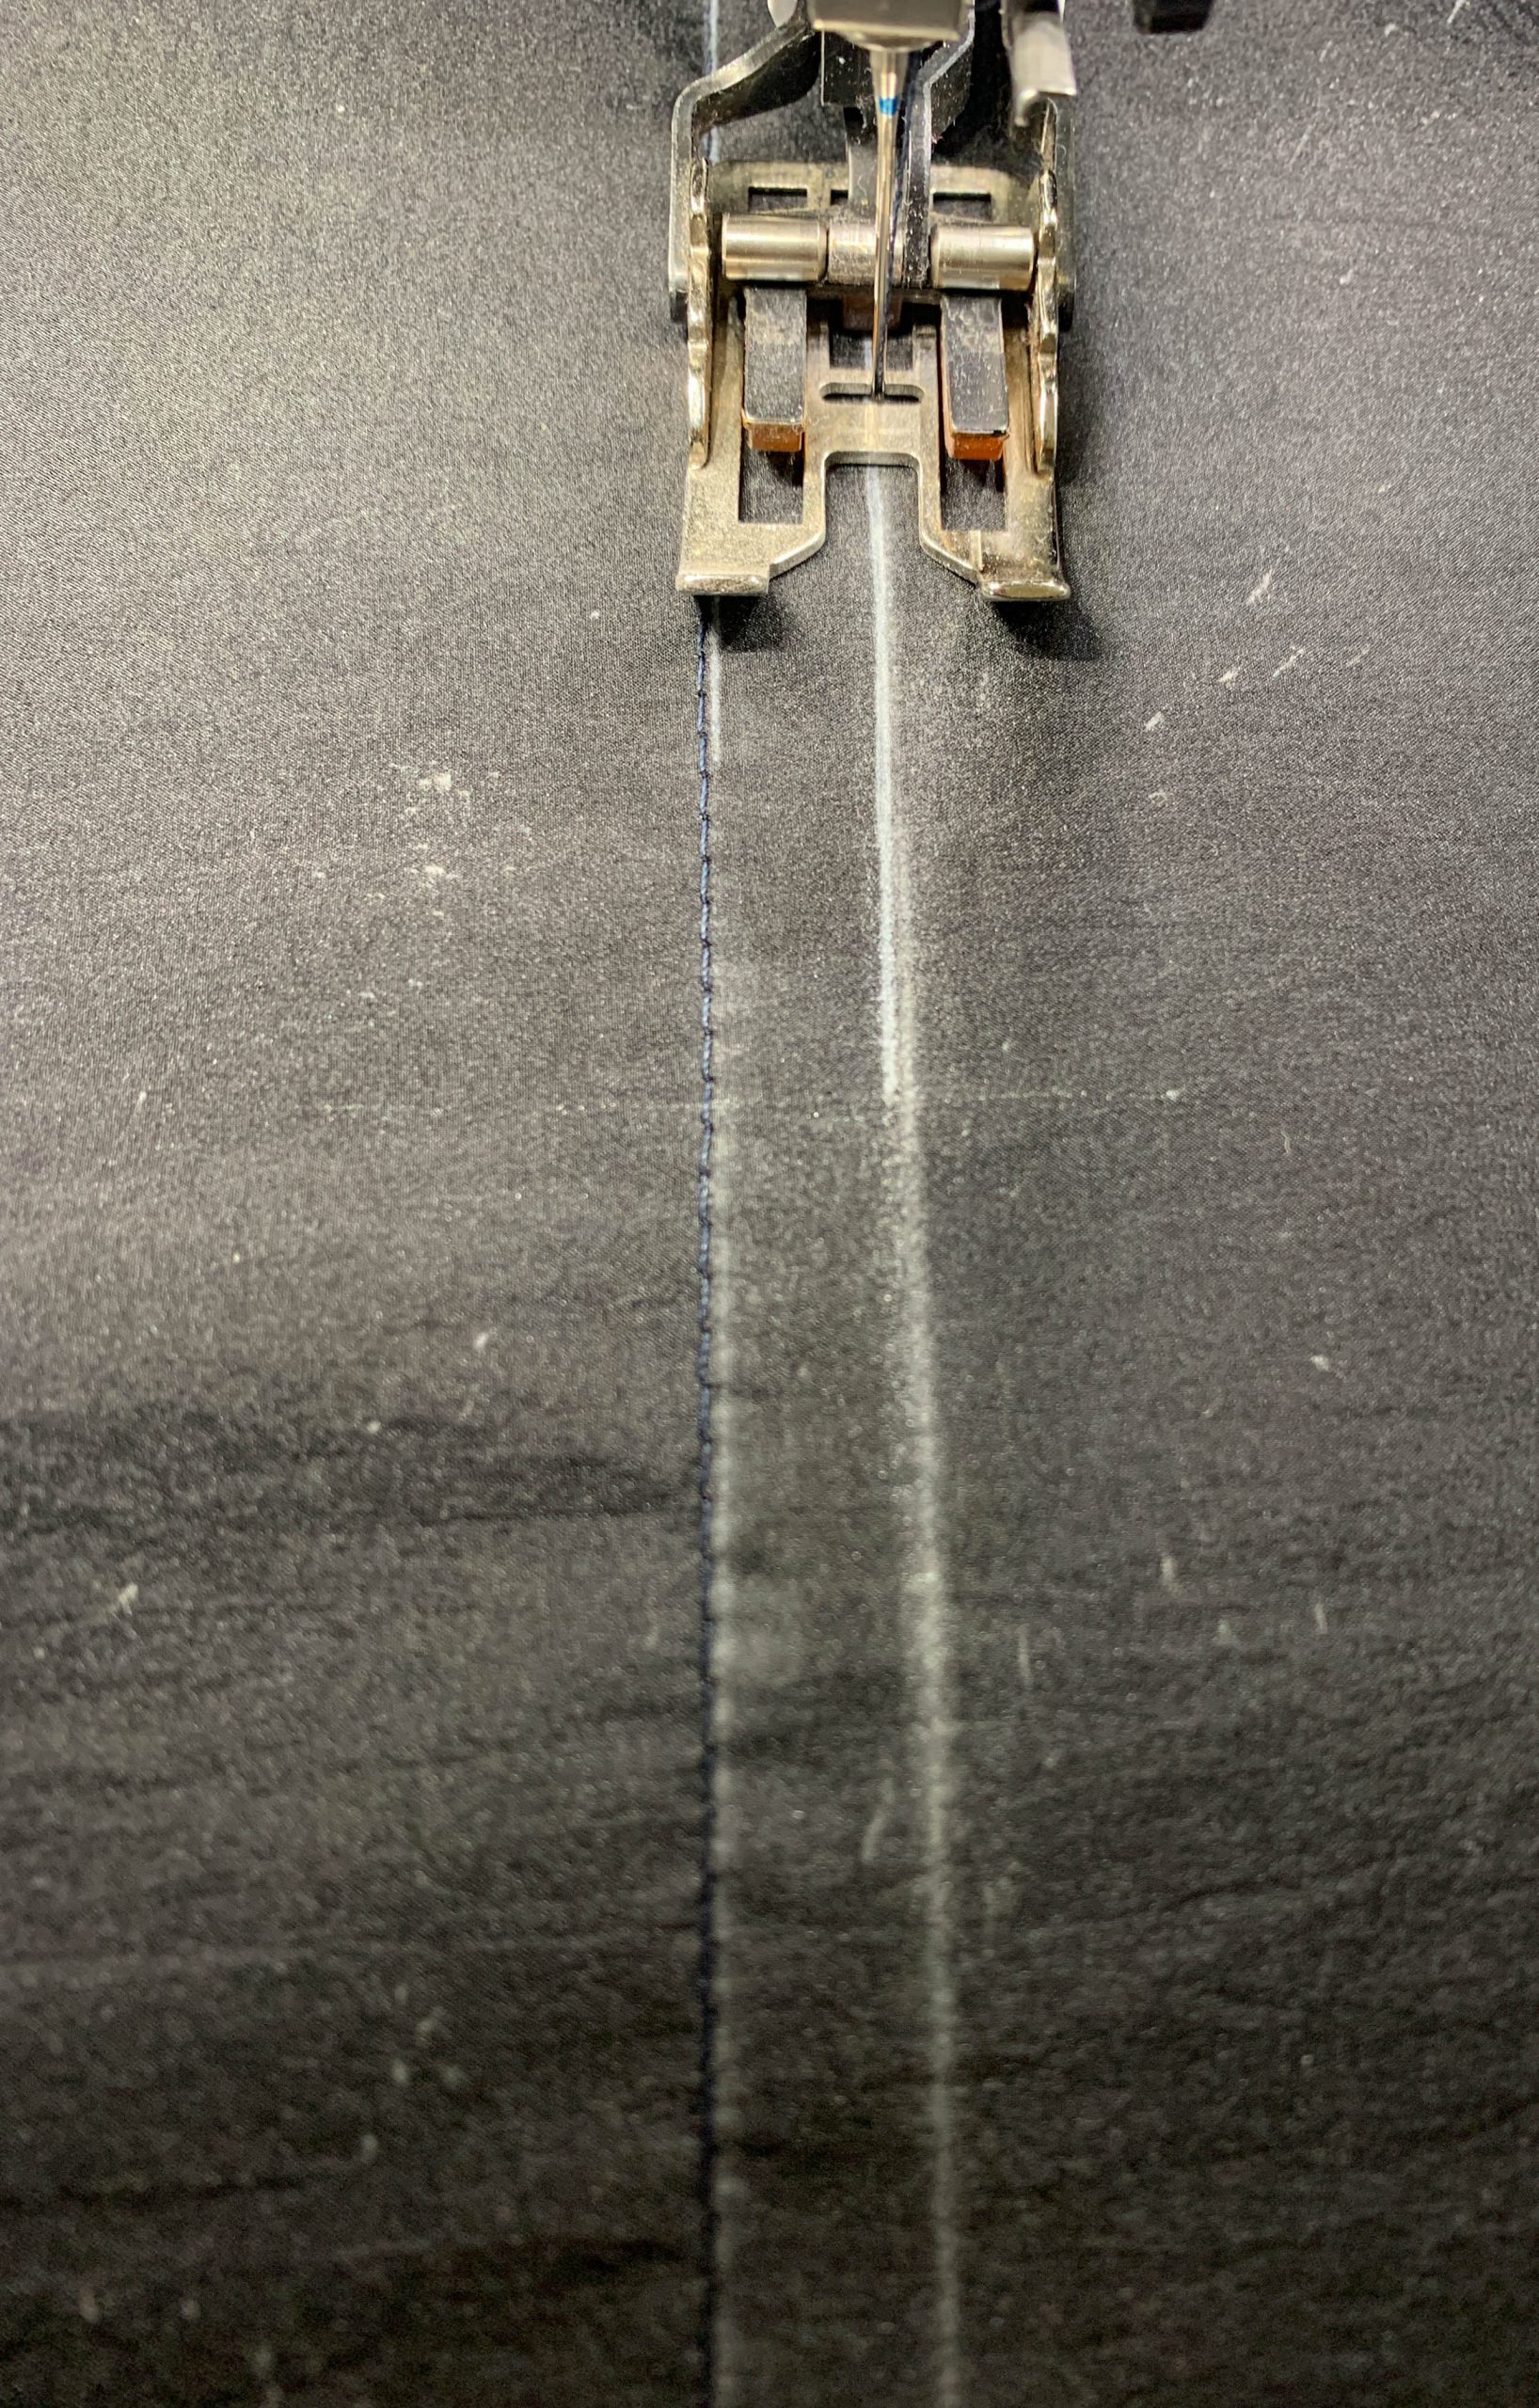
Sew the pocket pouches onto the front piece with right sides together using the markings. Leave a 1 cm seam allowance free at the top and bottom – see picture (sew along the marked blue line).
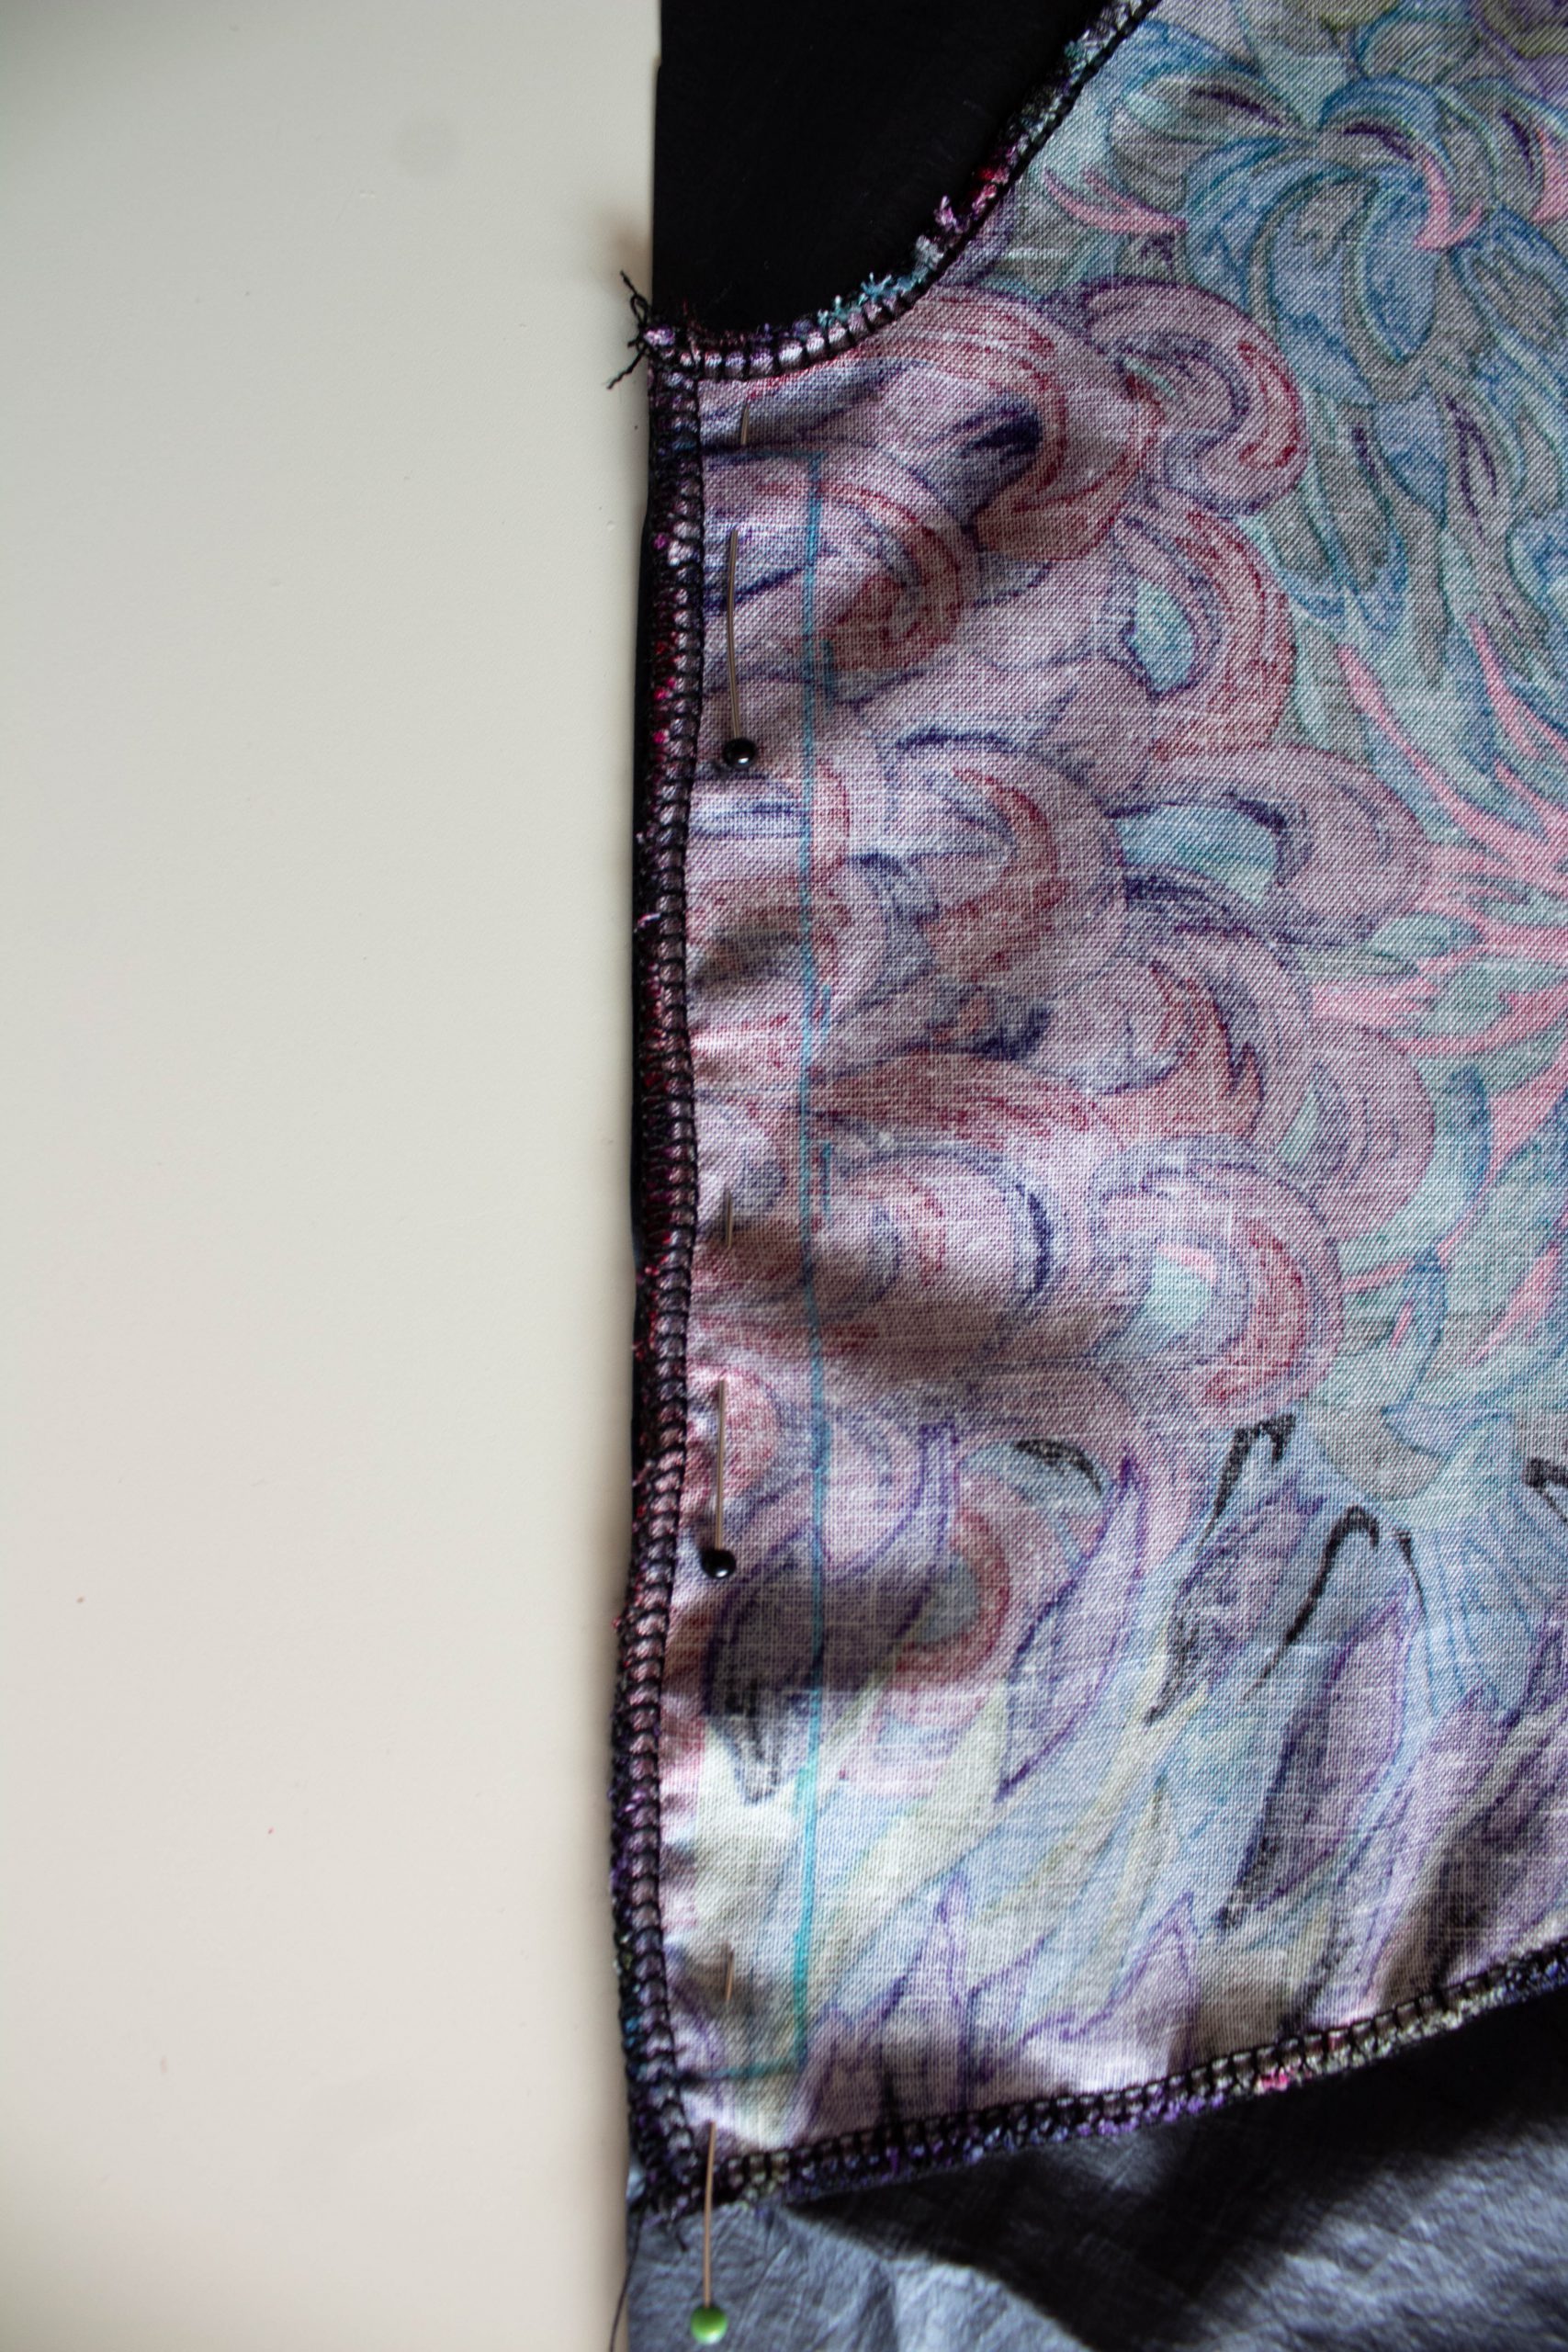
Now trim the sewn seam allowance.
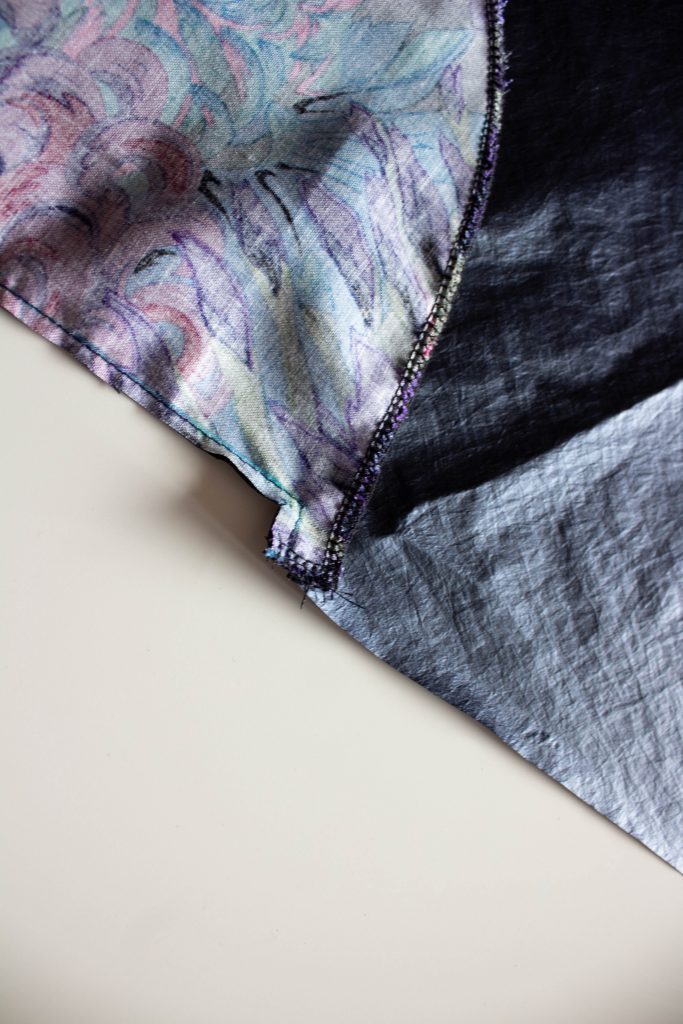
The pocket pouch can now be folded onto the wrong side and topstitched. In this case, only the pocket bag is stitched, not the centimeter above and below it.
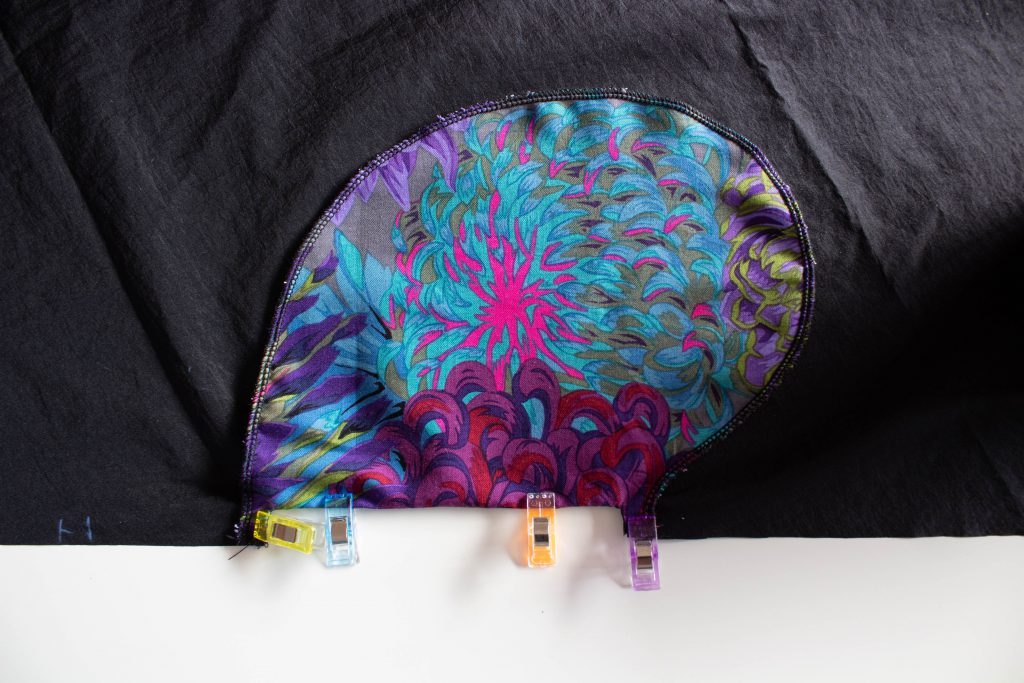
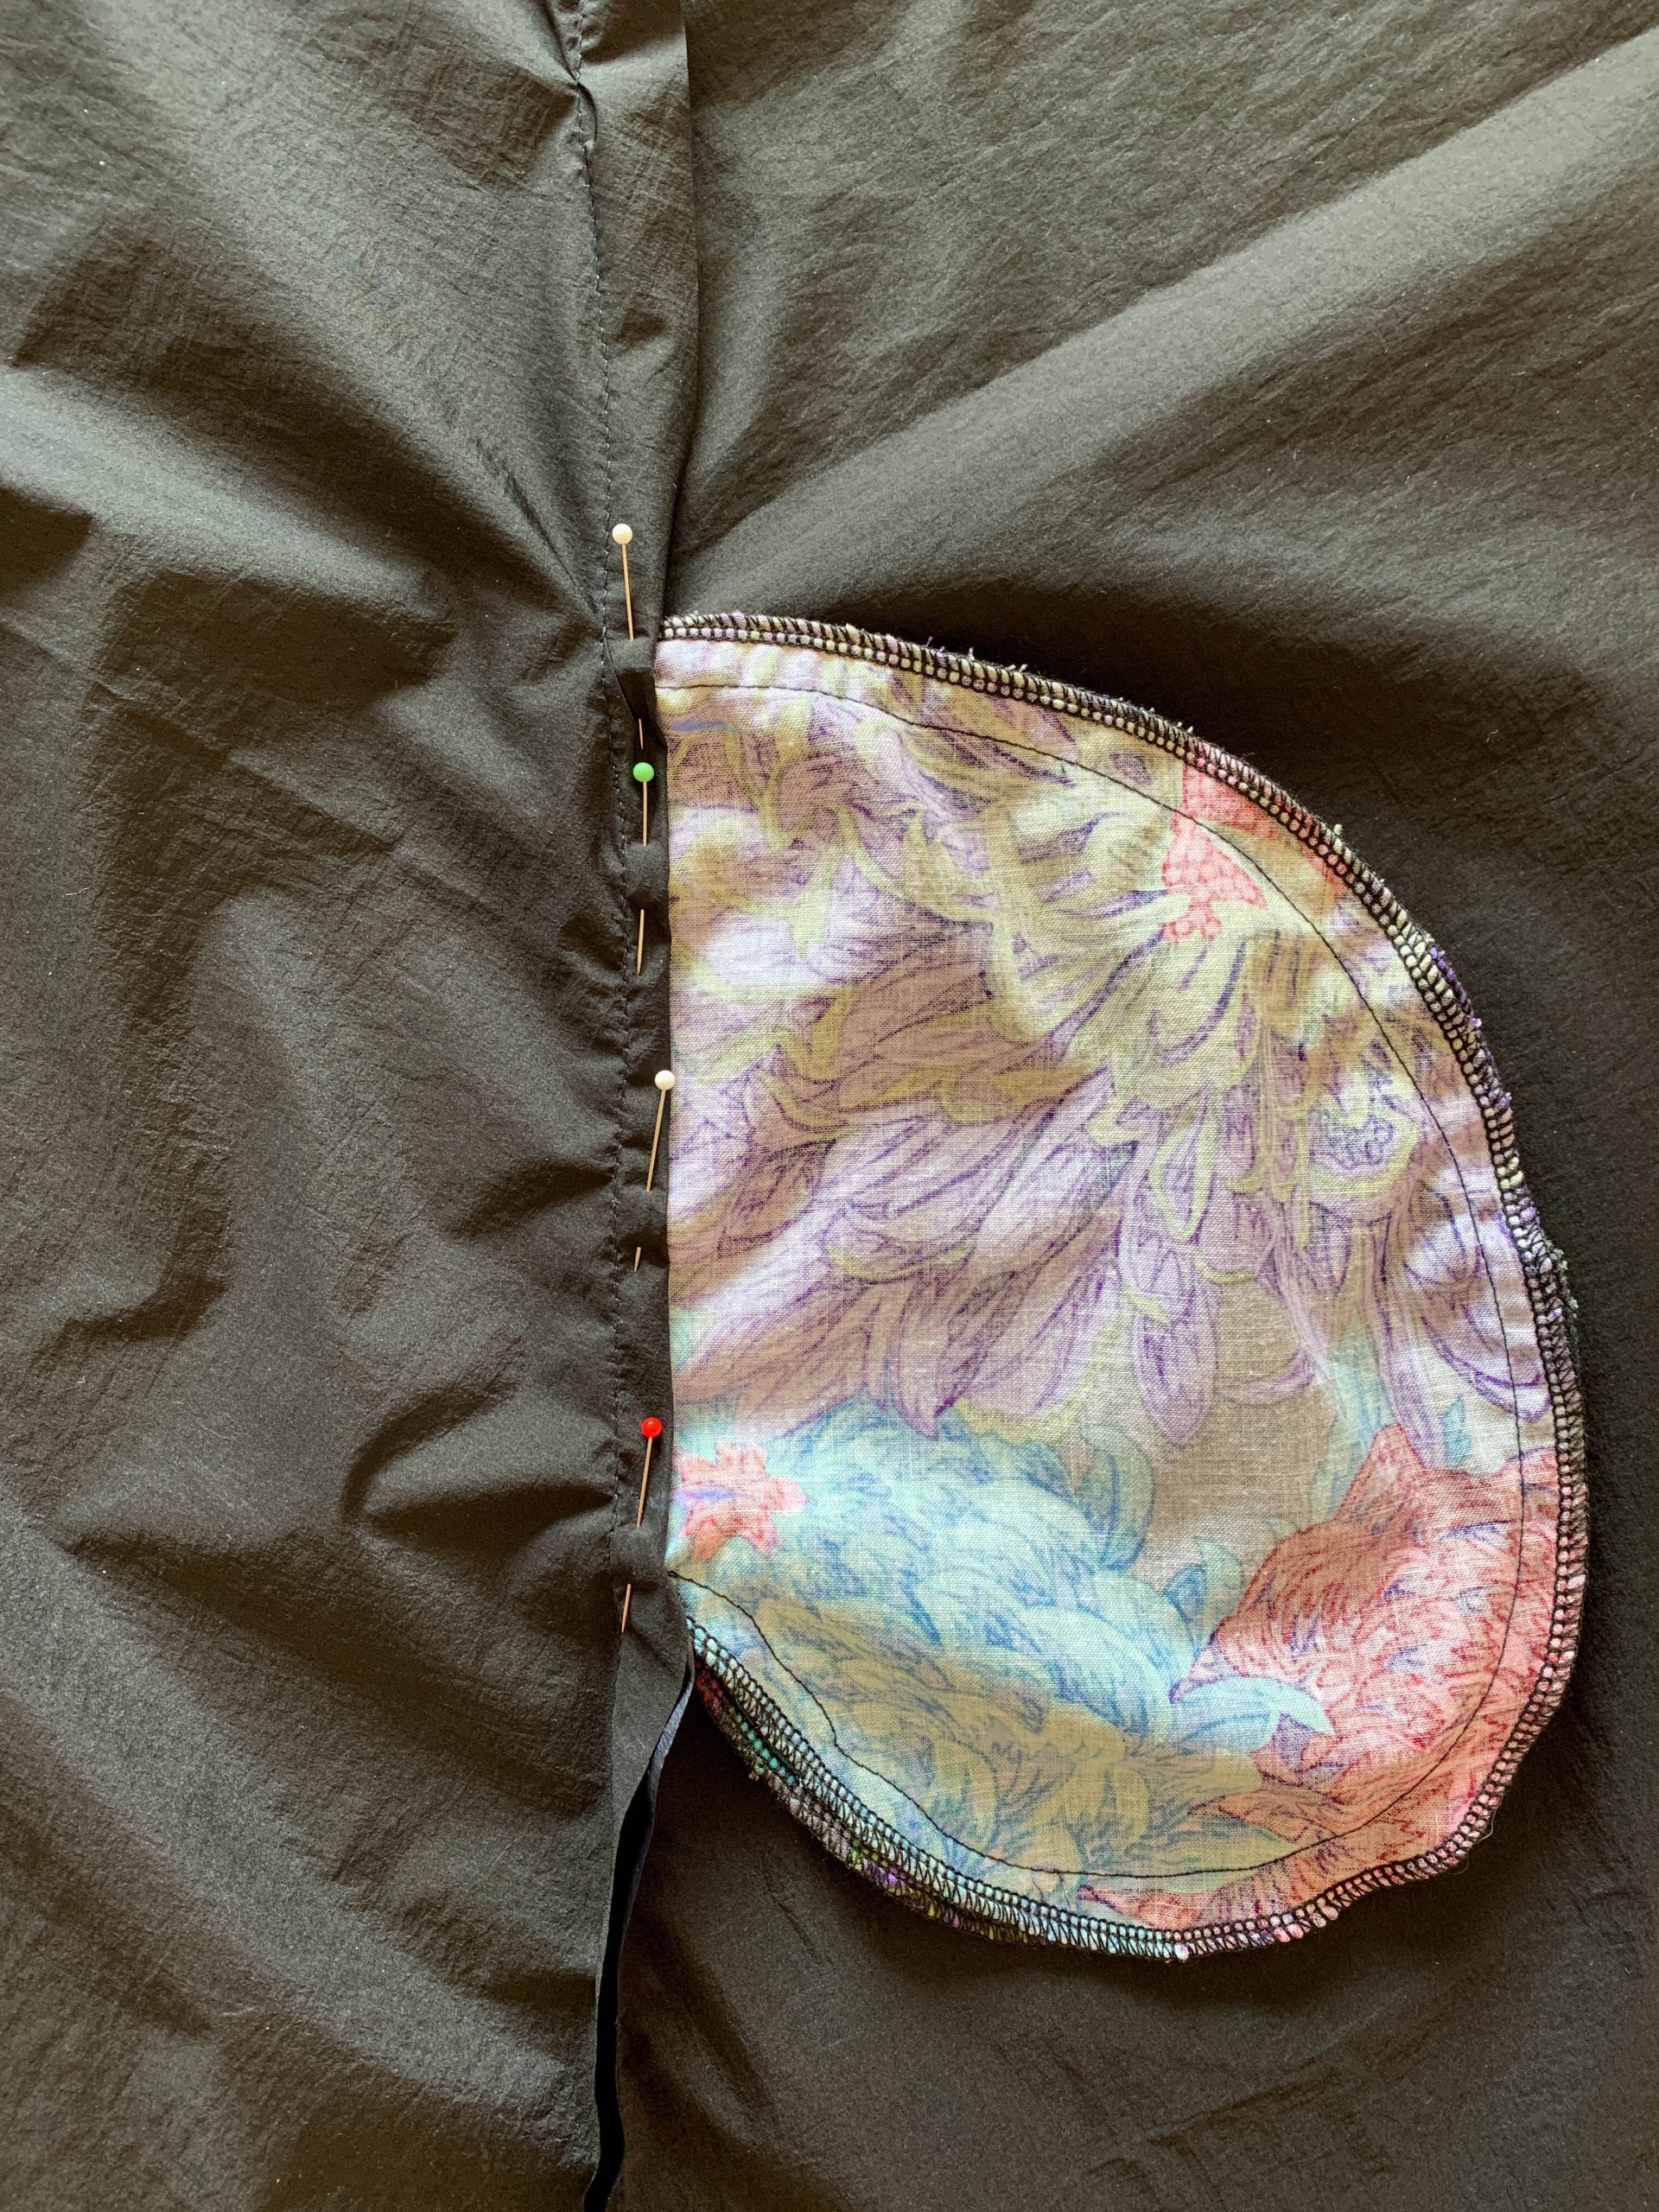
The second pocket pouch is now placed on the pouch just sewn with the right sides together and stitched on. Do not sew right up to the outer edge but just to the point where the other pouch is already sewn on the main fabric.
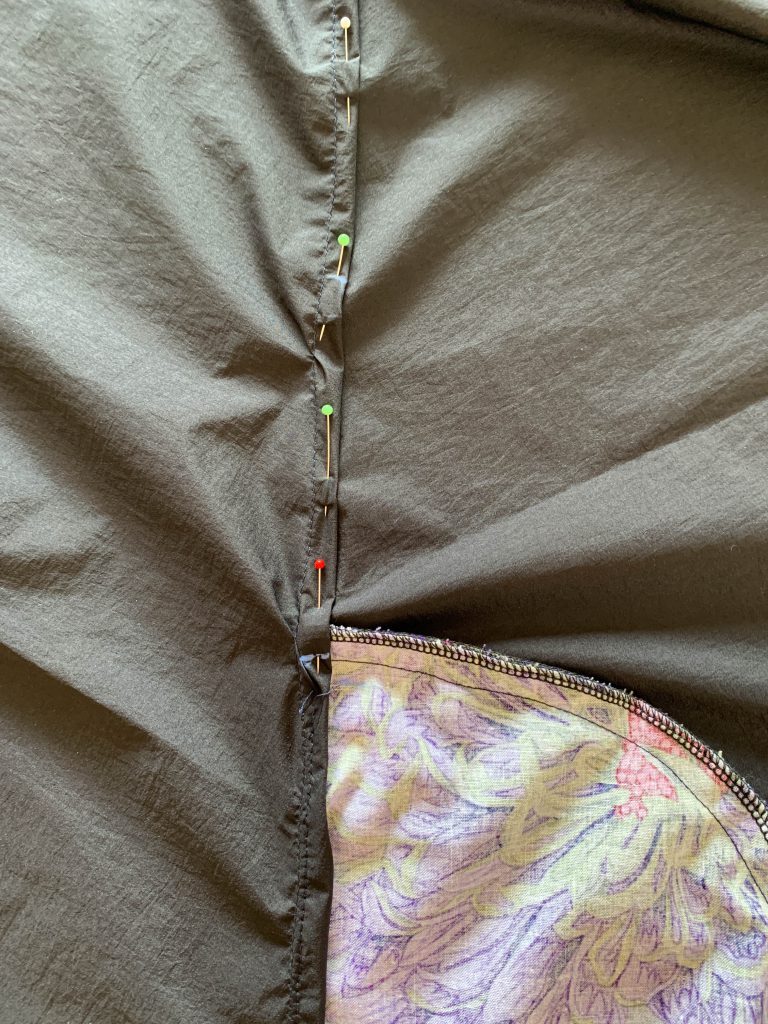
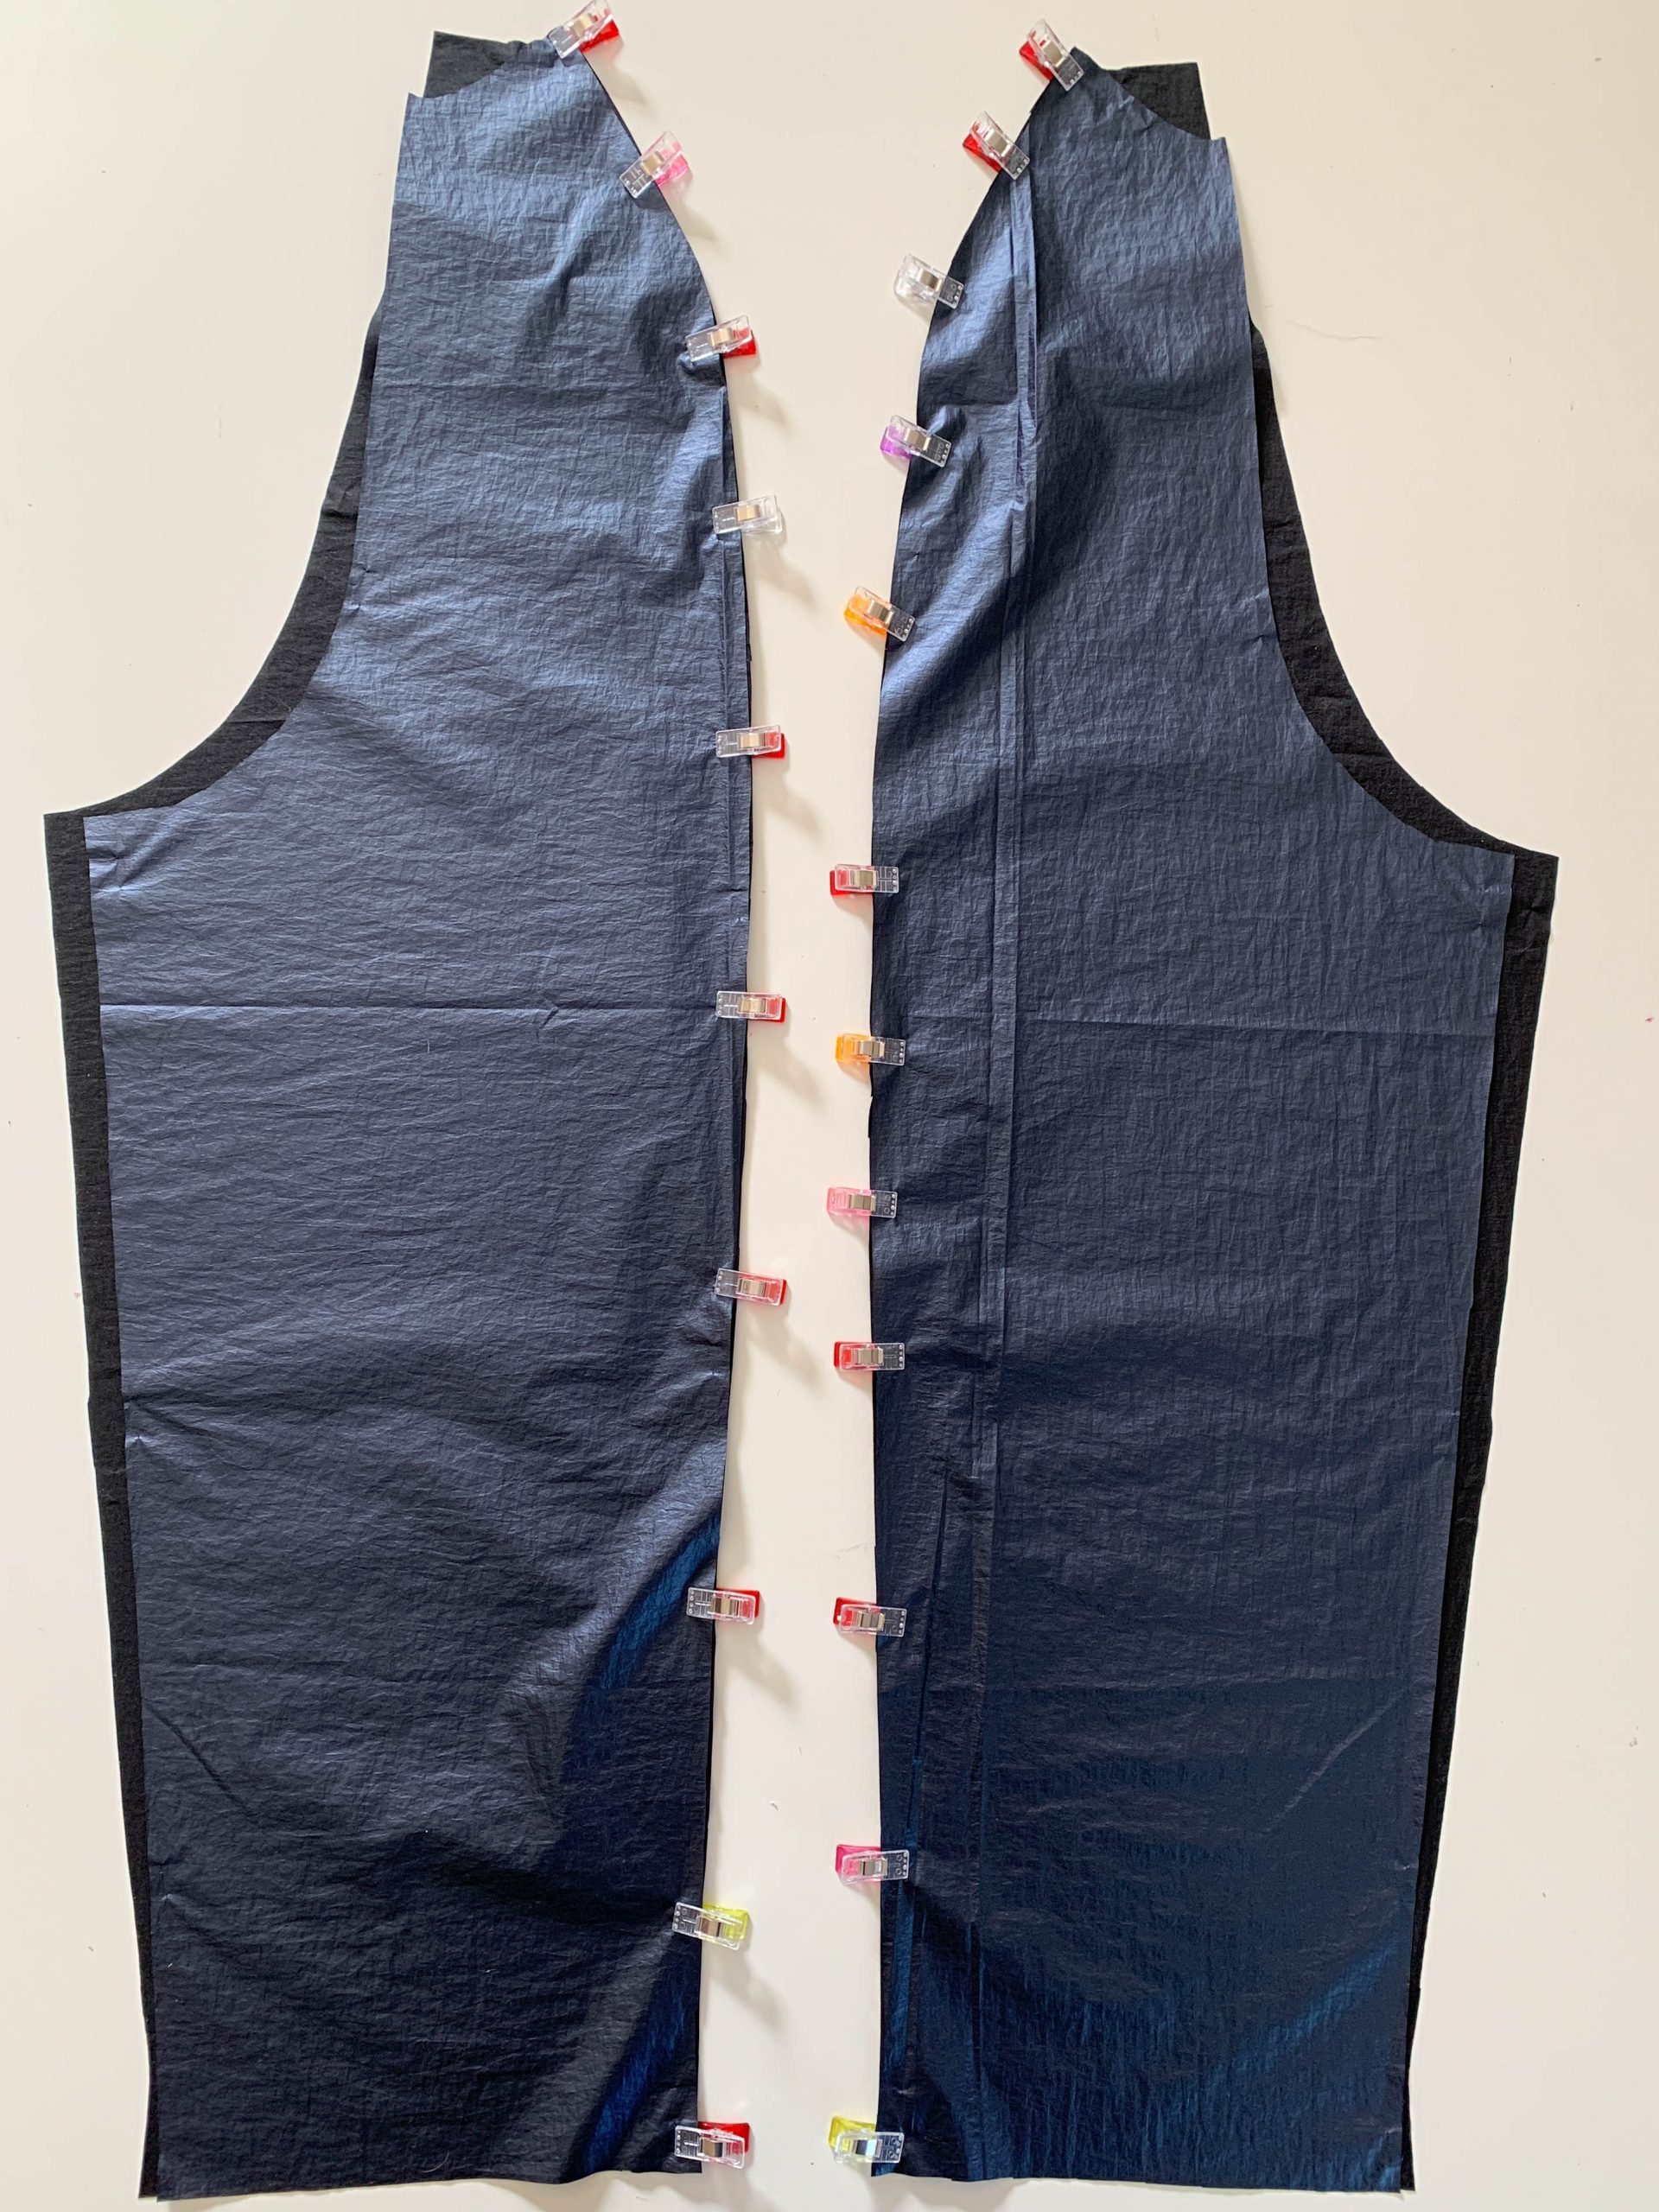
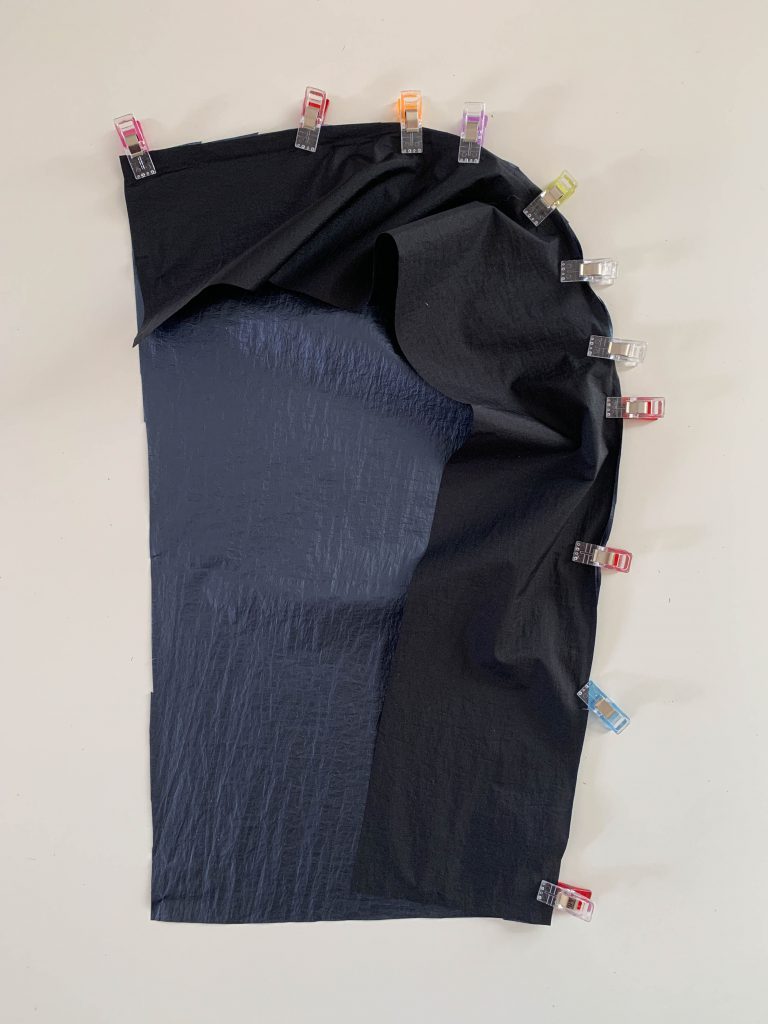
As mentioned above, I sewed a flat fell seam inside, so the front and back piece are now sewn together with the right sides together. Remember that the flat fell seam is sewn with a 1.5 cm seam allowance. The previously topstitched side of the pocket must not be included accidentally – just the “loose”, second pocket pouch.
Then you can finish the flat fell seam on the wrong side of the fabric. If you need any further assistance with this, you can find it here.
I recommend you sew the flat fell seam on the pocket pouch first.
Then sew the remaining two sections above and below the pocket pouch.
Repeat these steps for the other side/pocket.
Drawstring
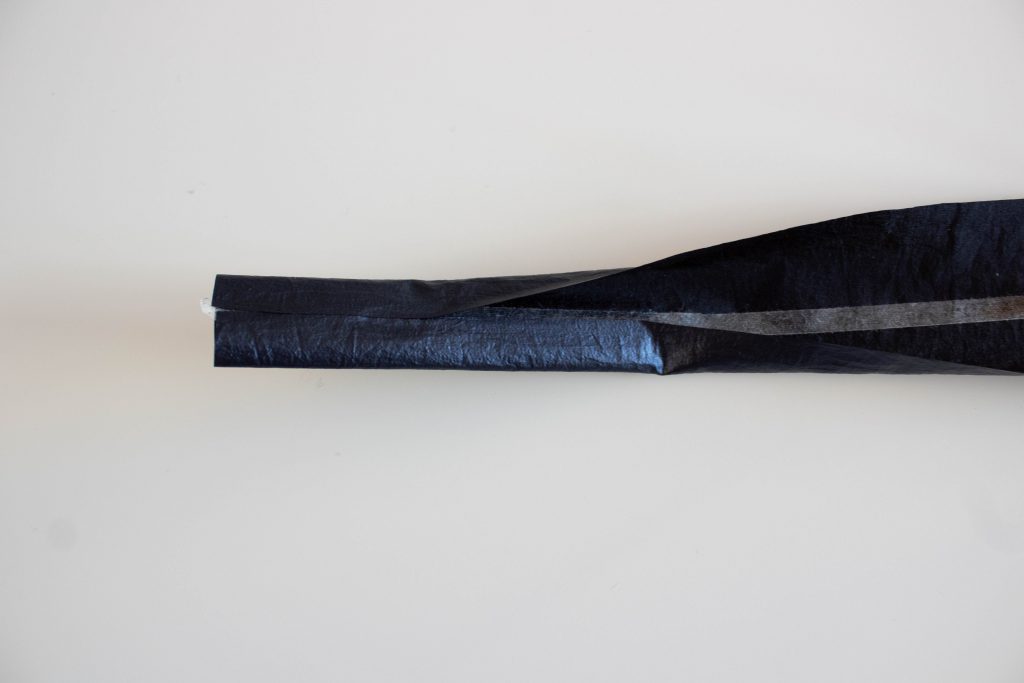
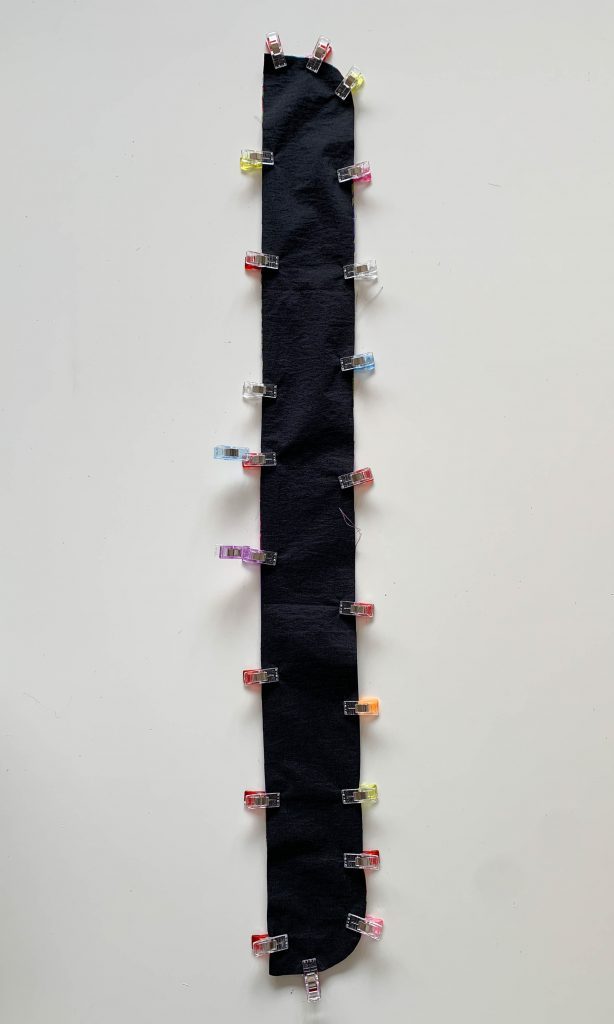
The long sides of the casing are folded in half onto the wrong side. The easiest way to do this is to place some adhesive tape in the middle. I also folded the short sides inwards afterwards to also have a nice finish on this edge.
Transfer the marking for the casing position from the pattern onto the right side of the coat.

Position the drawstring on it, pin it and sew it along both long edges on the coat.
TIP: Make sure that the drawstring is the same distance from the front center at its ends and that it is attached at the same height on both sides.
Applying the star
BERNINA provides you with a detailed and illustrated guide for the appliqué star here. But I’m also going to show you how to apply the star here, using “real” pictures again. I will then use this tutorial for my other BERNINA Fashion Looks.
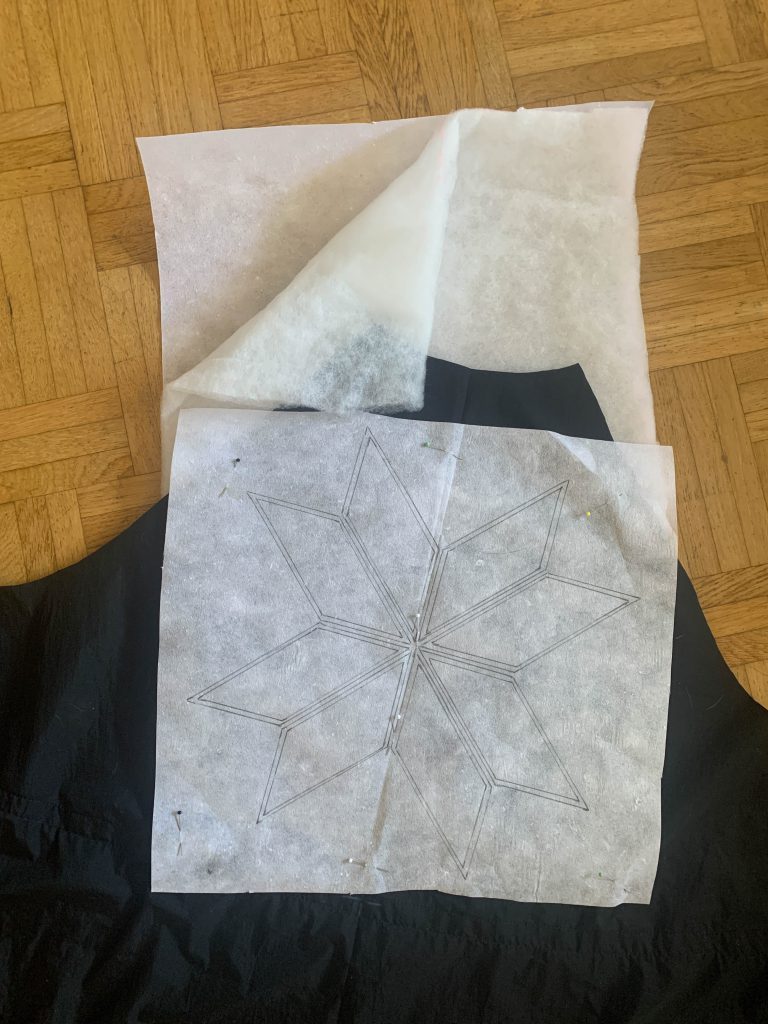
First, trace the star’s seam lines onto your cut embroidery backing. Then position it on the wrong side of the fabric where you want it to go. On the right side of the fabric, place bulky, sewable wadding against it (underneath it, directly on the fabric) and then embroidery backing over it again.
TIP: When positioning it, make sure that the star is aligned how you want it to be and that all the points of the star are really on the bulky wadding and embroidery backing. I had to correct this a number of times, as something was not quite right every time.
We now always work on the wrong side of the fabric.
The whole star is now stitched along the inner lines (!), so the bulky wadding is sewn onto your fabric.
TIP: I proceeded from the center outwards with every spiked point of the star so that the bulky wadding is “spread out” and does not bunch up. I also always sewed the points opposite each other first. When you start sewing, always hold the two threads to avoid any unsightly knots.
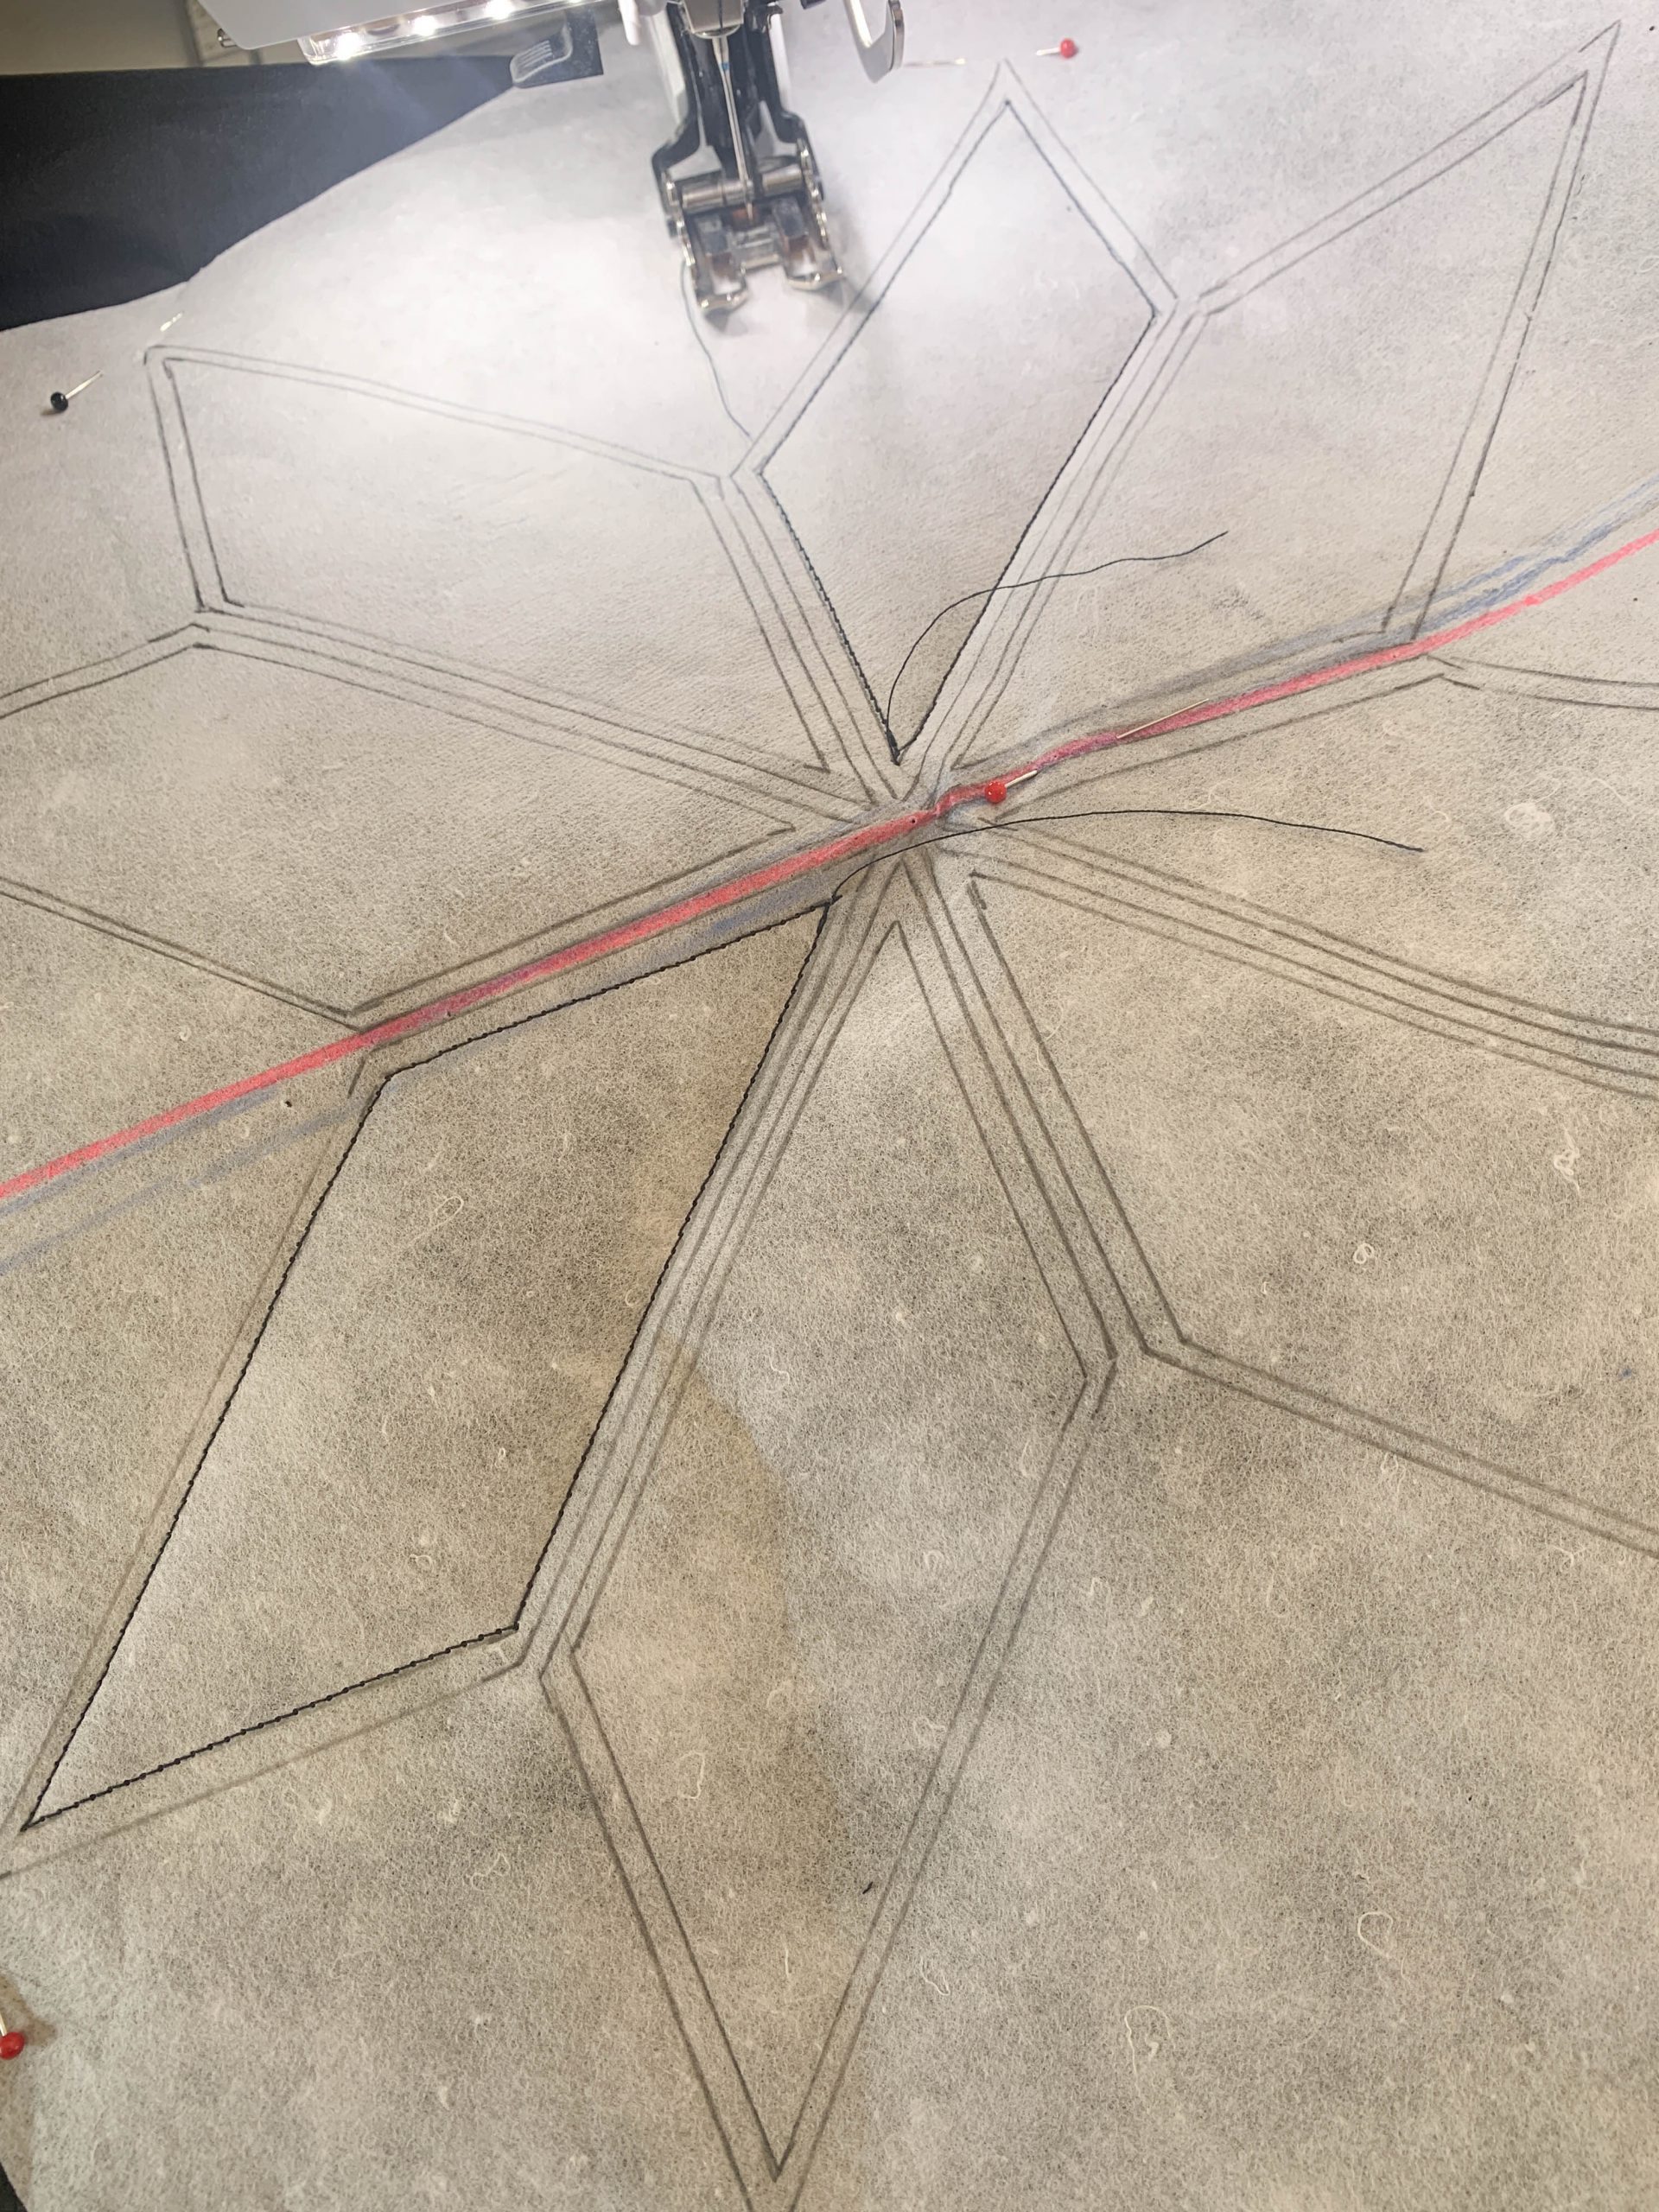
Once you have stitched the whole star along the inner lines, carefully remove the embroidery backing from the right side of the fabric and then trim the bulky wadding back to the seam.
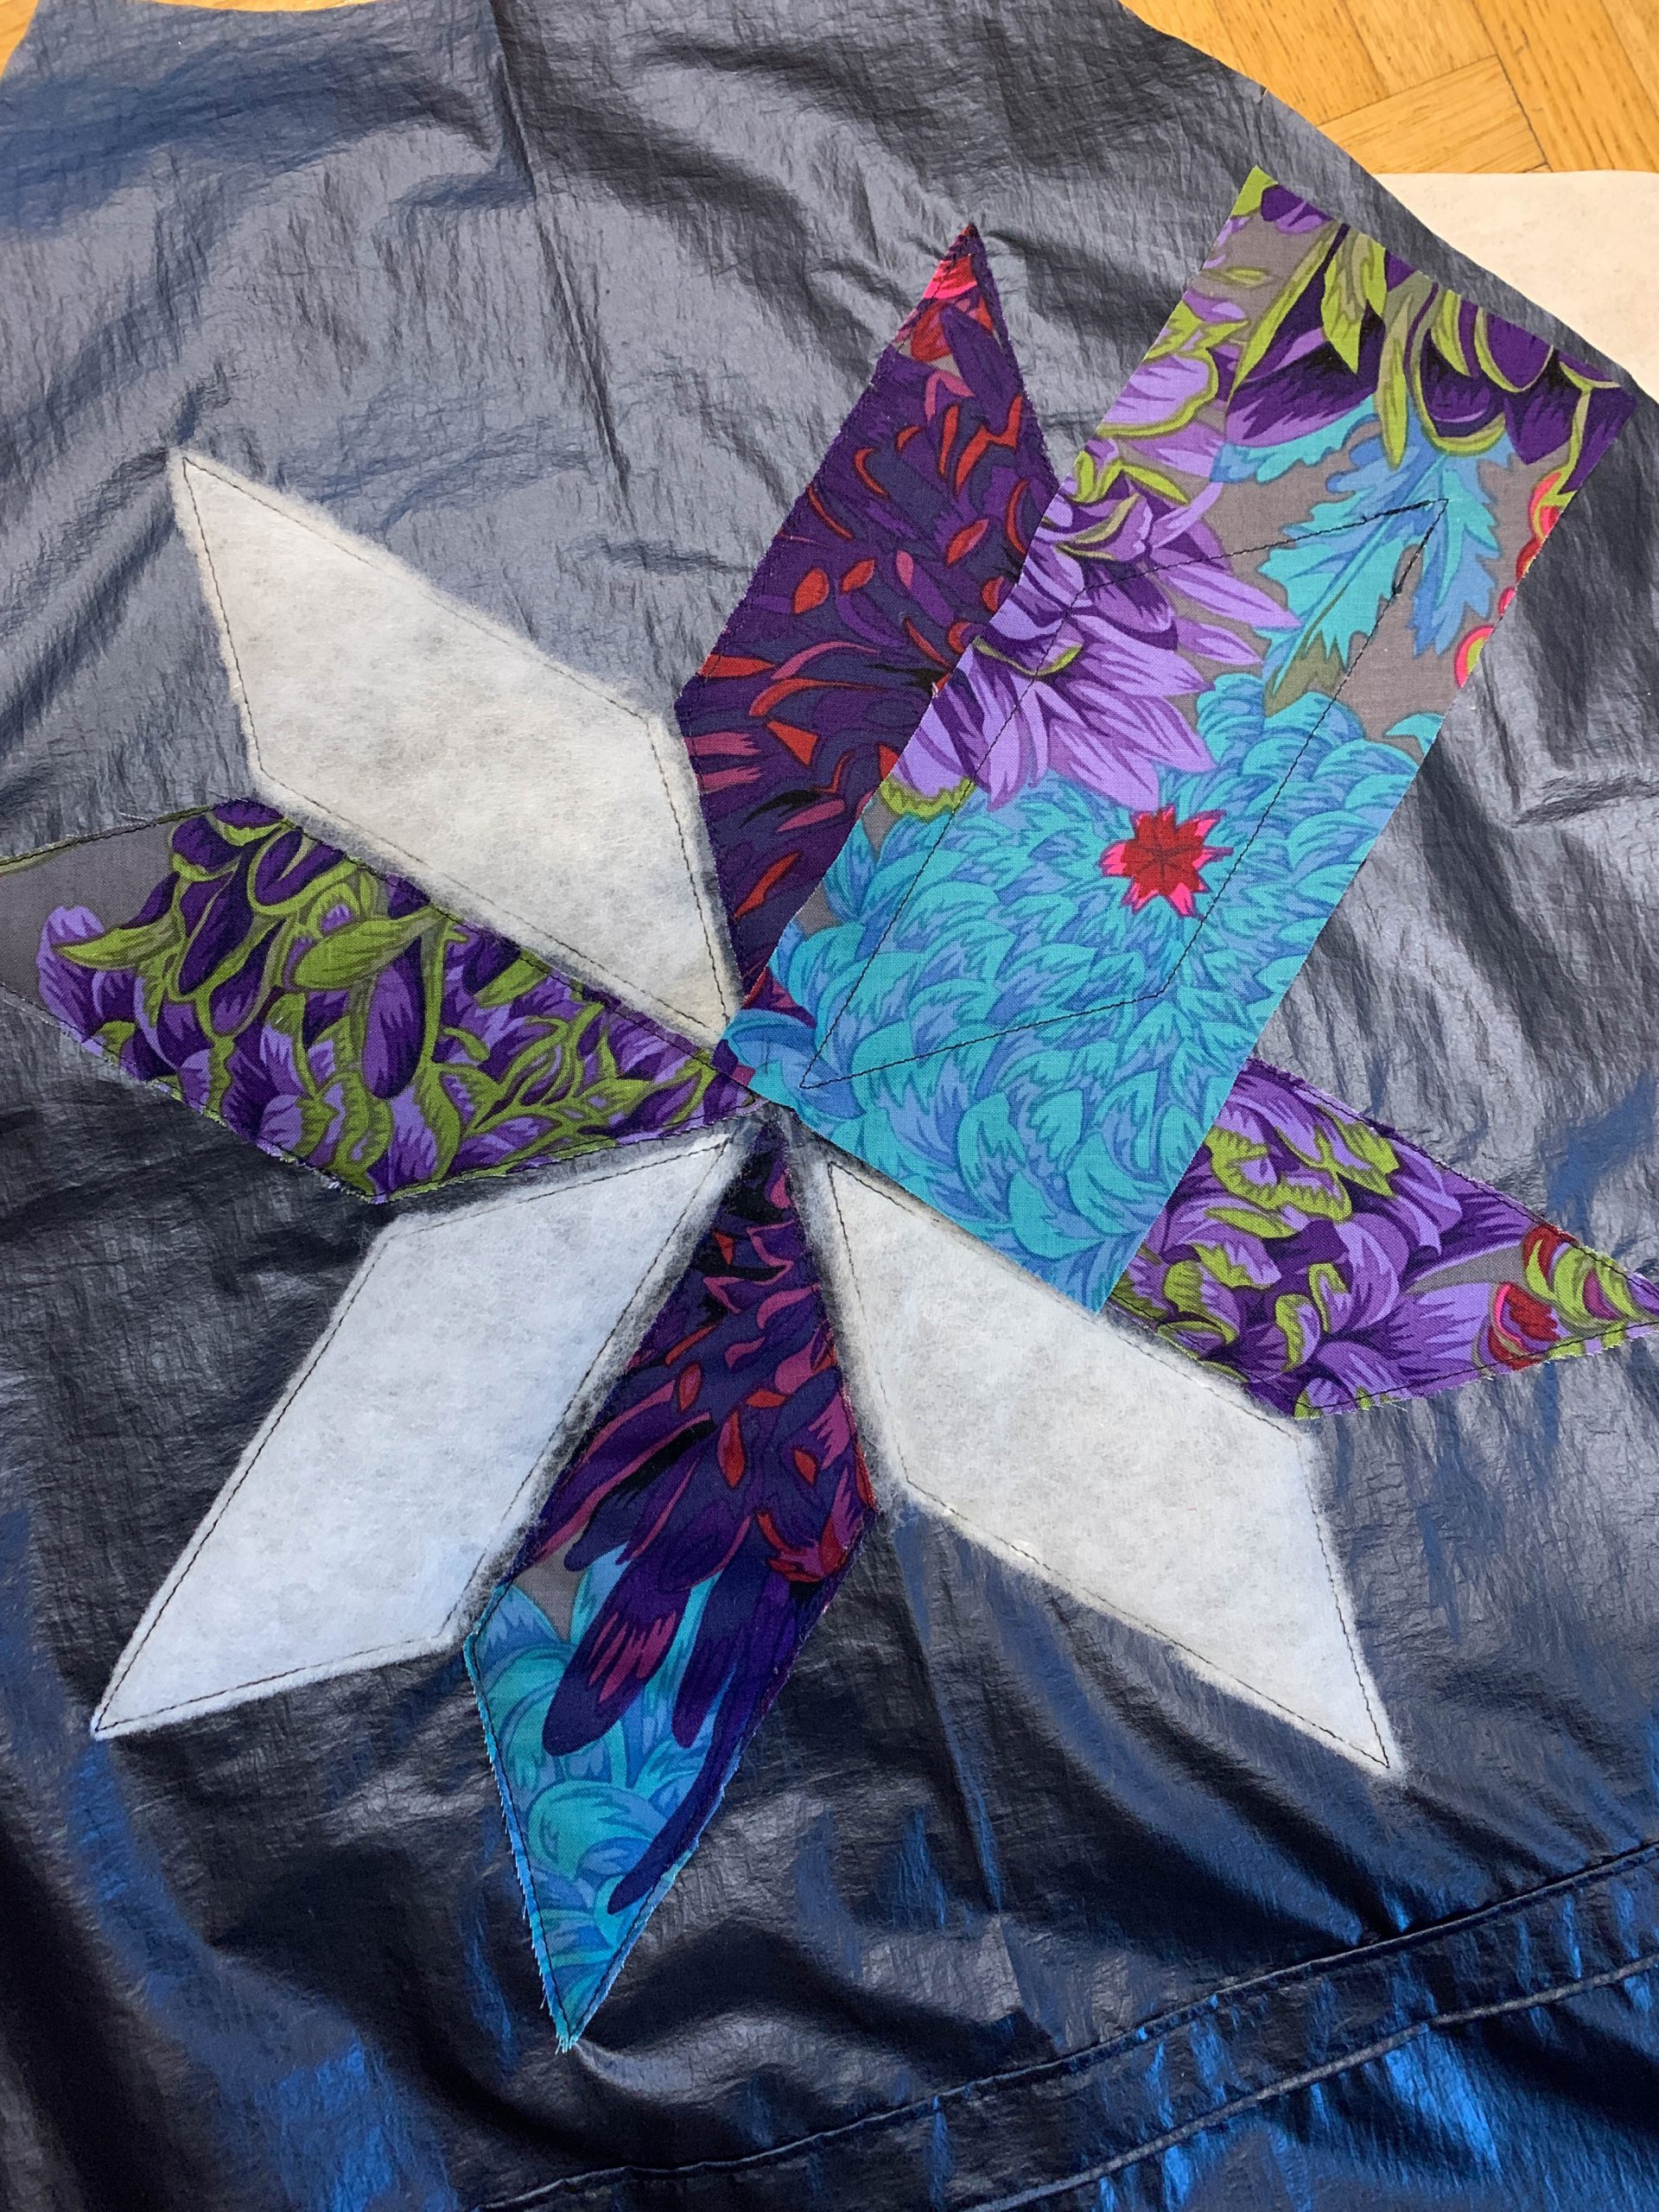
Now you place one piece of fabric (with the right side facing you) one after the other on the right side of the jacket on a point and sew from the wrong side on the template’s outer line. Then you trim the fabric back to about 2 mm on the right side and continue with the next point.
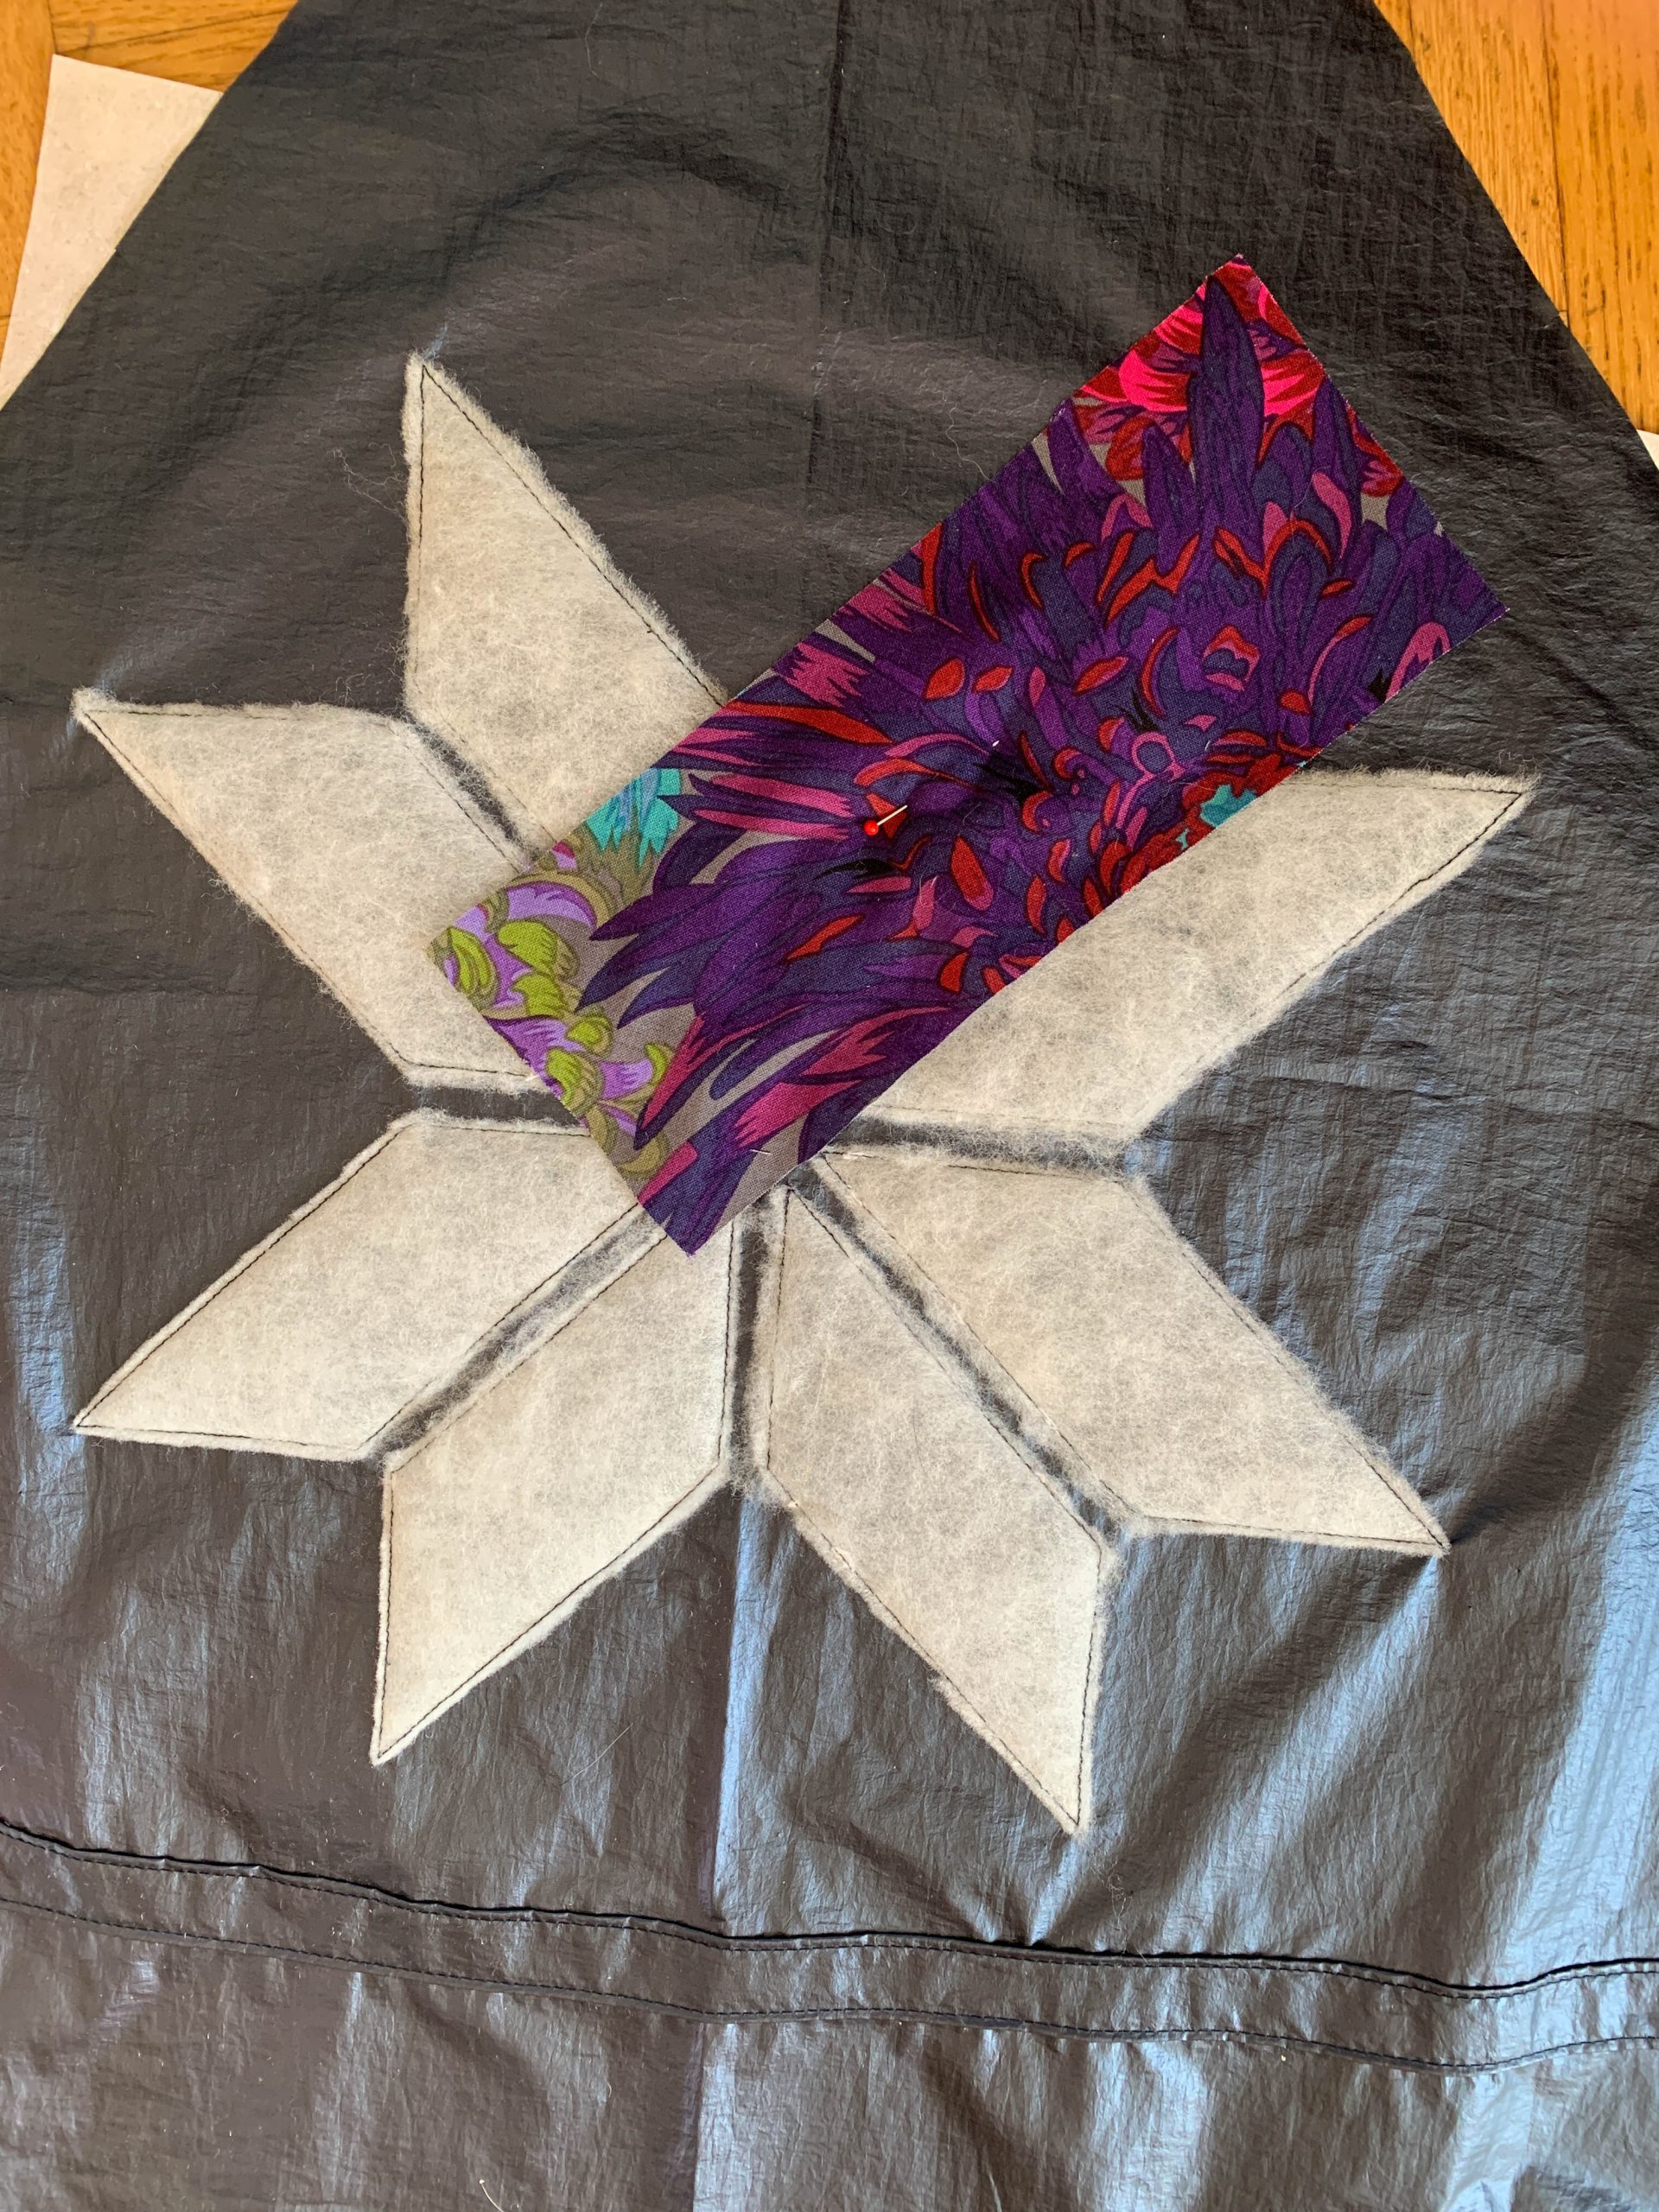
TIP: Make sure that everything is always clear underneath and that you do not accidentally sew anything on that should not be sewn on. Also make sure that nothing twists/slips. Every time I turned the fabric, I always checked underneath. This is extremely laborious, but accidentally sewing something on and then having to unpick it is much more laborious 😉
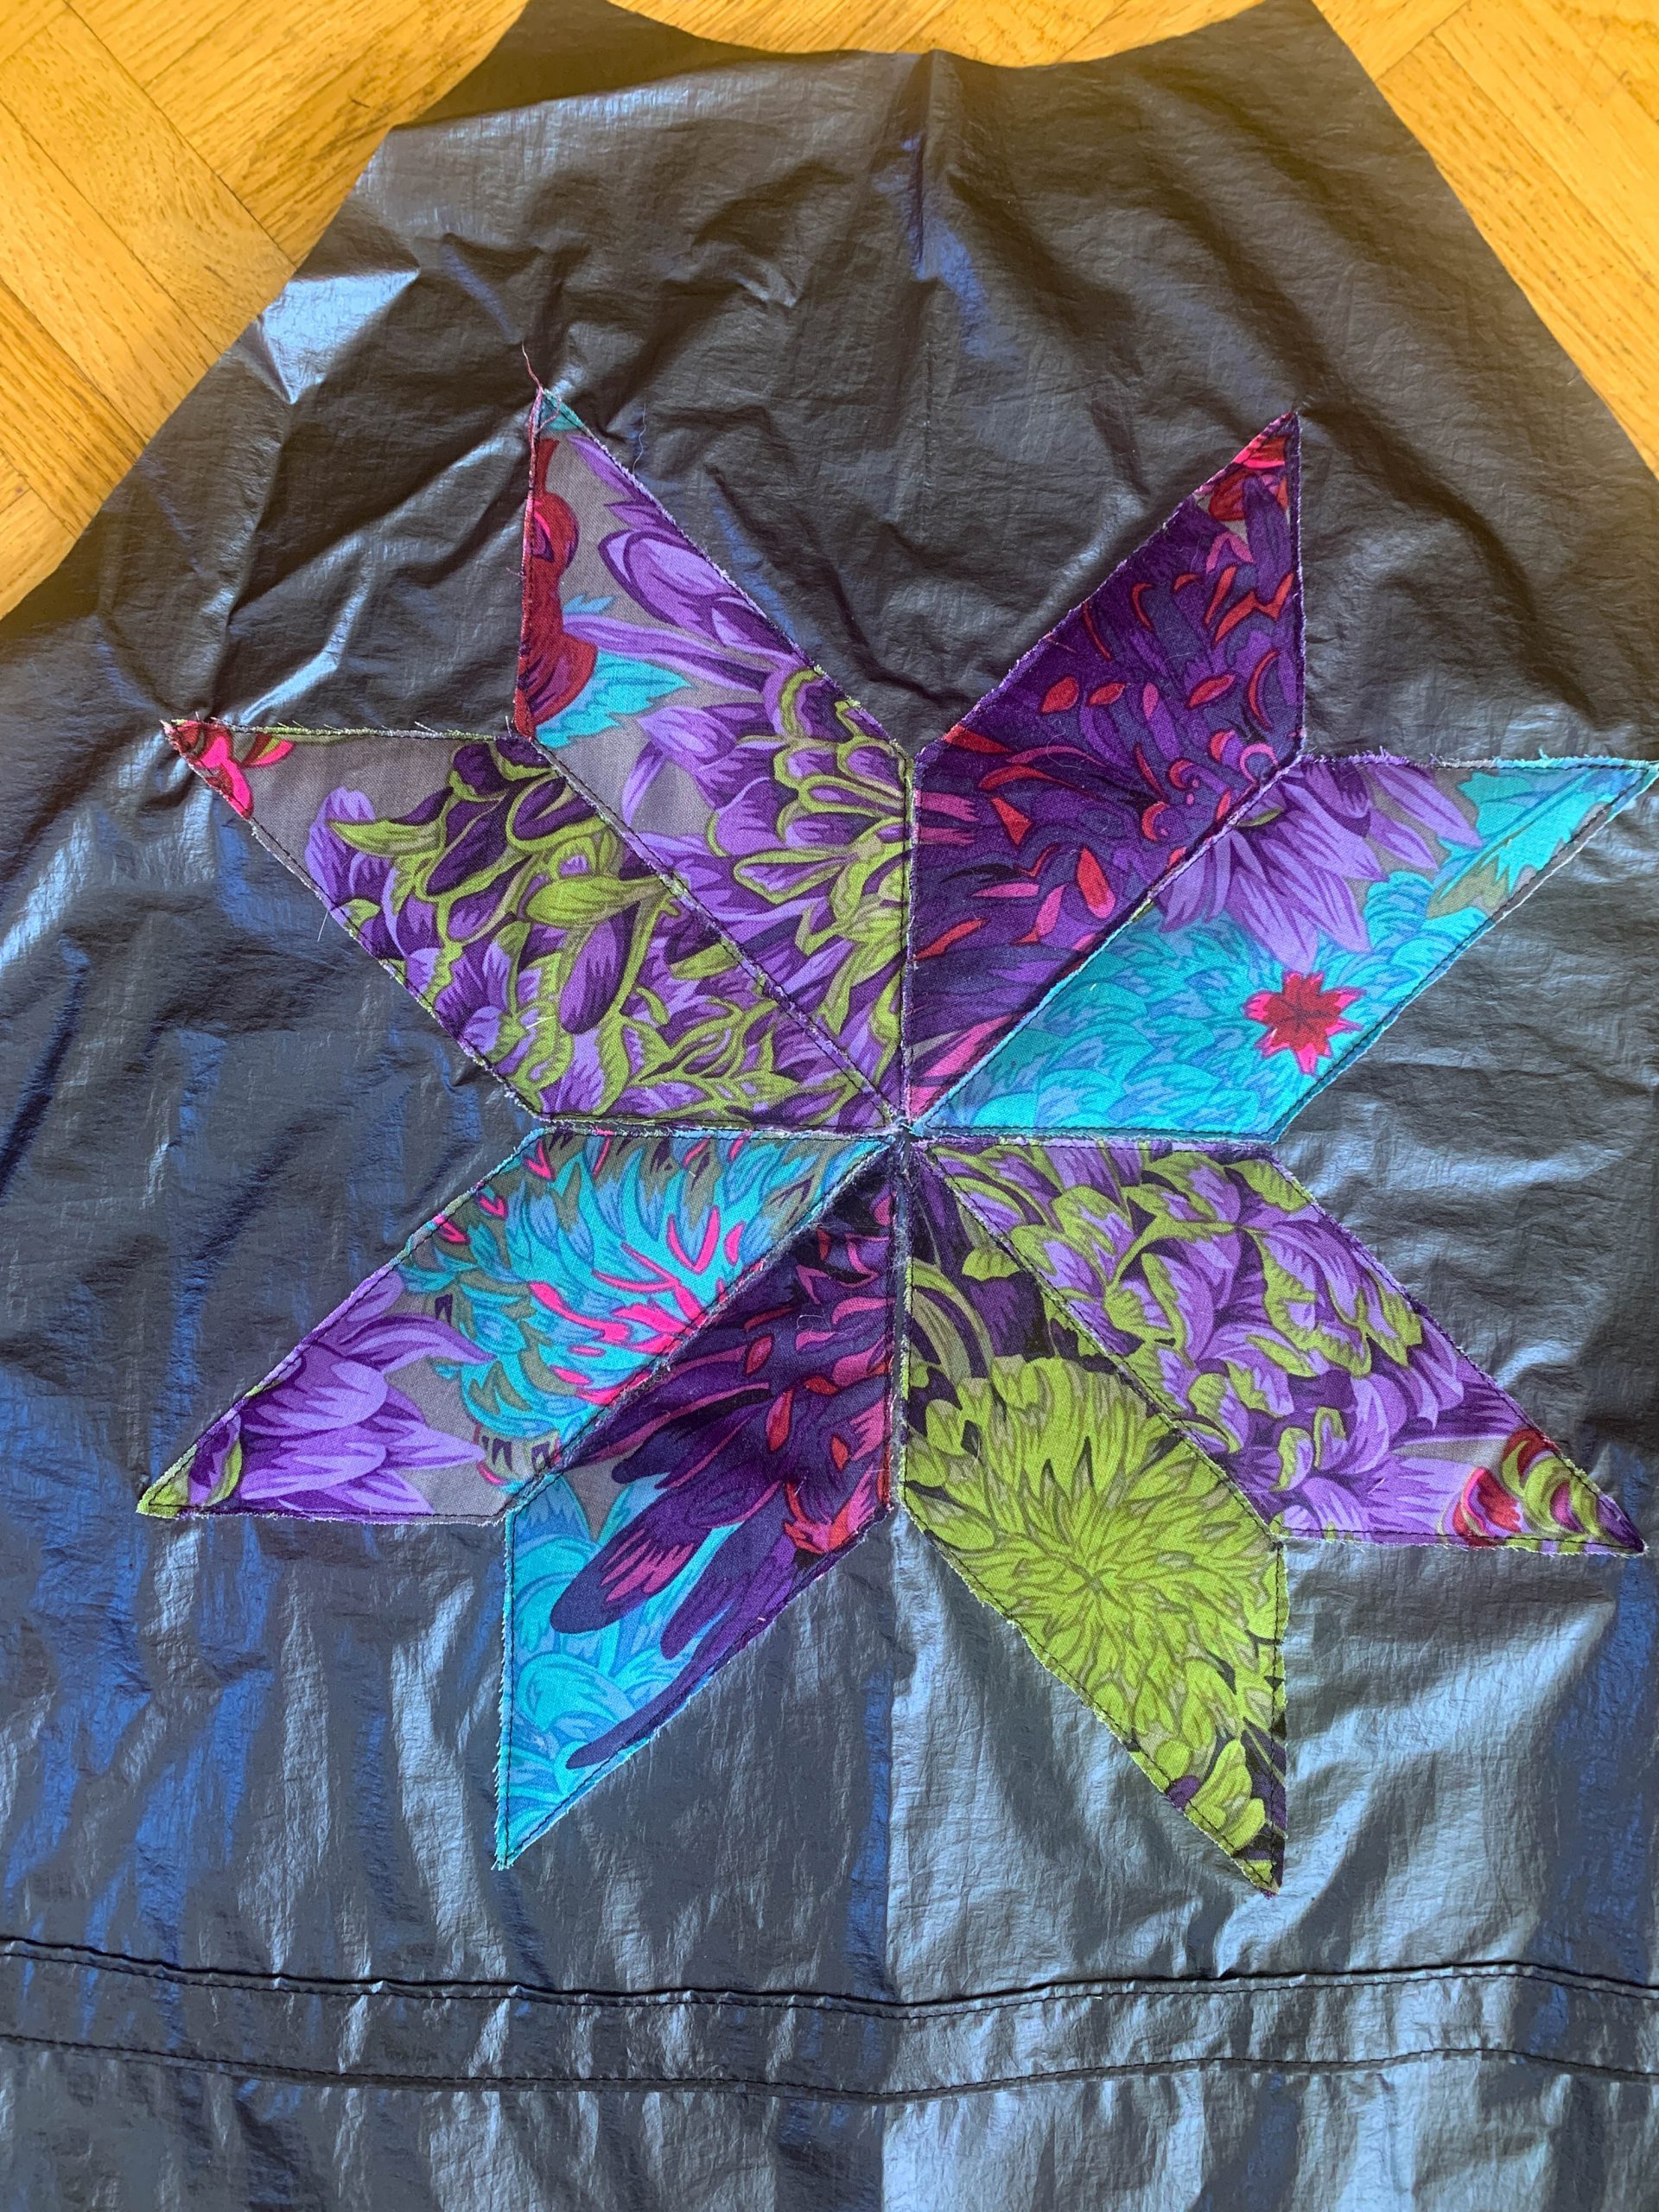
Once you’ve finished it, your star should look something like this:
Sleeves
Sew the long sides of the sleeves together with the wrong sides together using a flat fell seam to create one sleeve.
Then you have to close the second seam on both sleeves. I did not use a flat fell seam for the second seam because it would have been relatively fiddly. If you decide to do so, you must sew the “normal” seam with a 1.5 cm seam allowance.
The sleeves are now inserted into the coat with the right sides together. Make sure you sew the right sleeve onto the right side (notches).
Collar (preparation, zipper piece)
BERNINA also provides you with an illustrated guide to sewing the collar here. But I’m also going to show you how you can sew the collar here, using “real” pictures again.
I proceeded a bit differently, but as always you can choose the right way to suit you 🙂
Place the two pieces of outer fabric 8a on top of each other with the right sides together and draw the rectangle for the zipper on the one wrong side of the fabric (see pattern). Then topstitch the drawn rectangle.
Now cut the fabrics in the middle between the lines you’ve just sewn.

Turn the piece and shape it carefully.
Now insert the zipper from below and sew it on from above.
I use the zipper foot #4 for this.

Hood
Sew the middle part of the hood onto the two hood pieces one after the other with the right sides together. You can then topstitch these seams from the outside.
Hood facing
Sew the hood facing onto the hood with the right sides together.
I then pressed the edge of the facing inside the hood 1 cm on the wrong side so that it lies/looks lovely when sewn into the hood.
Now attach the eyelets to the outer fabric (!).
TIP: To do this, fold the facing away from the outside so that you don’t accidentally punch a hole in it too.
Then fold the drawstring casing inwards into the hood and topstitch it from the right side. I like to use the seam guide in these cases.
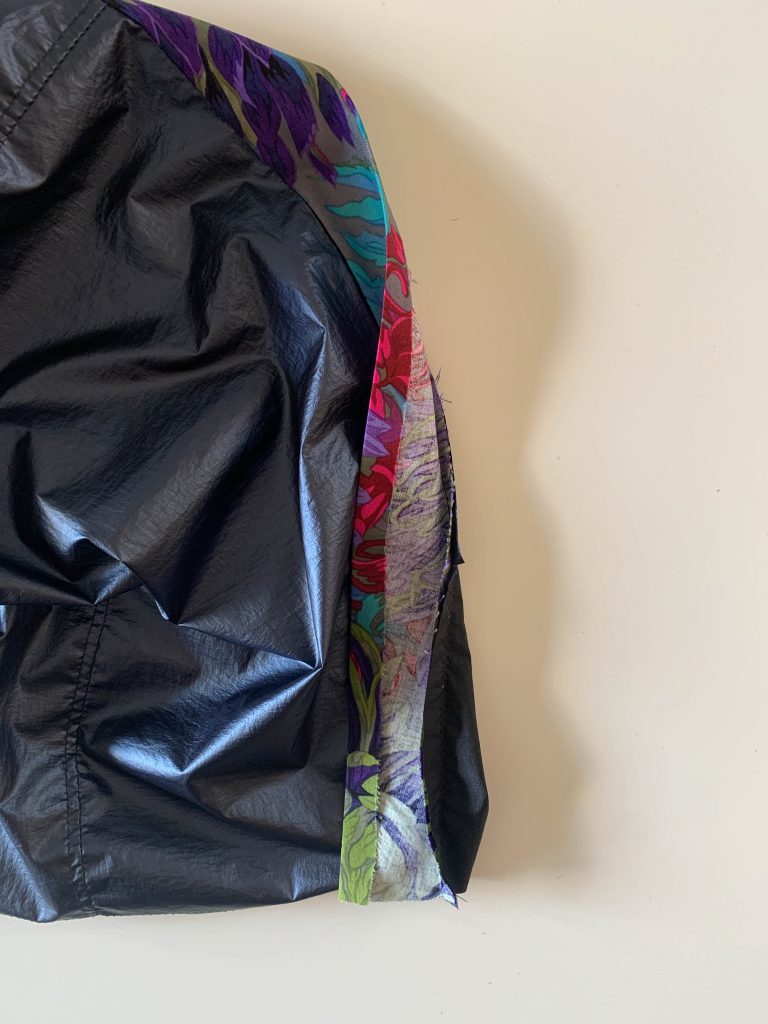
Zipper facing
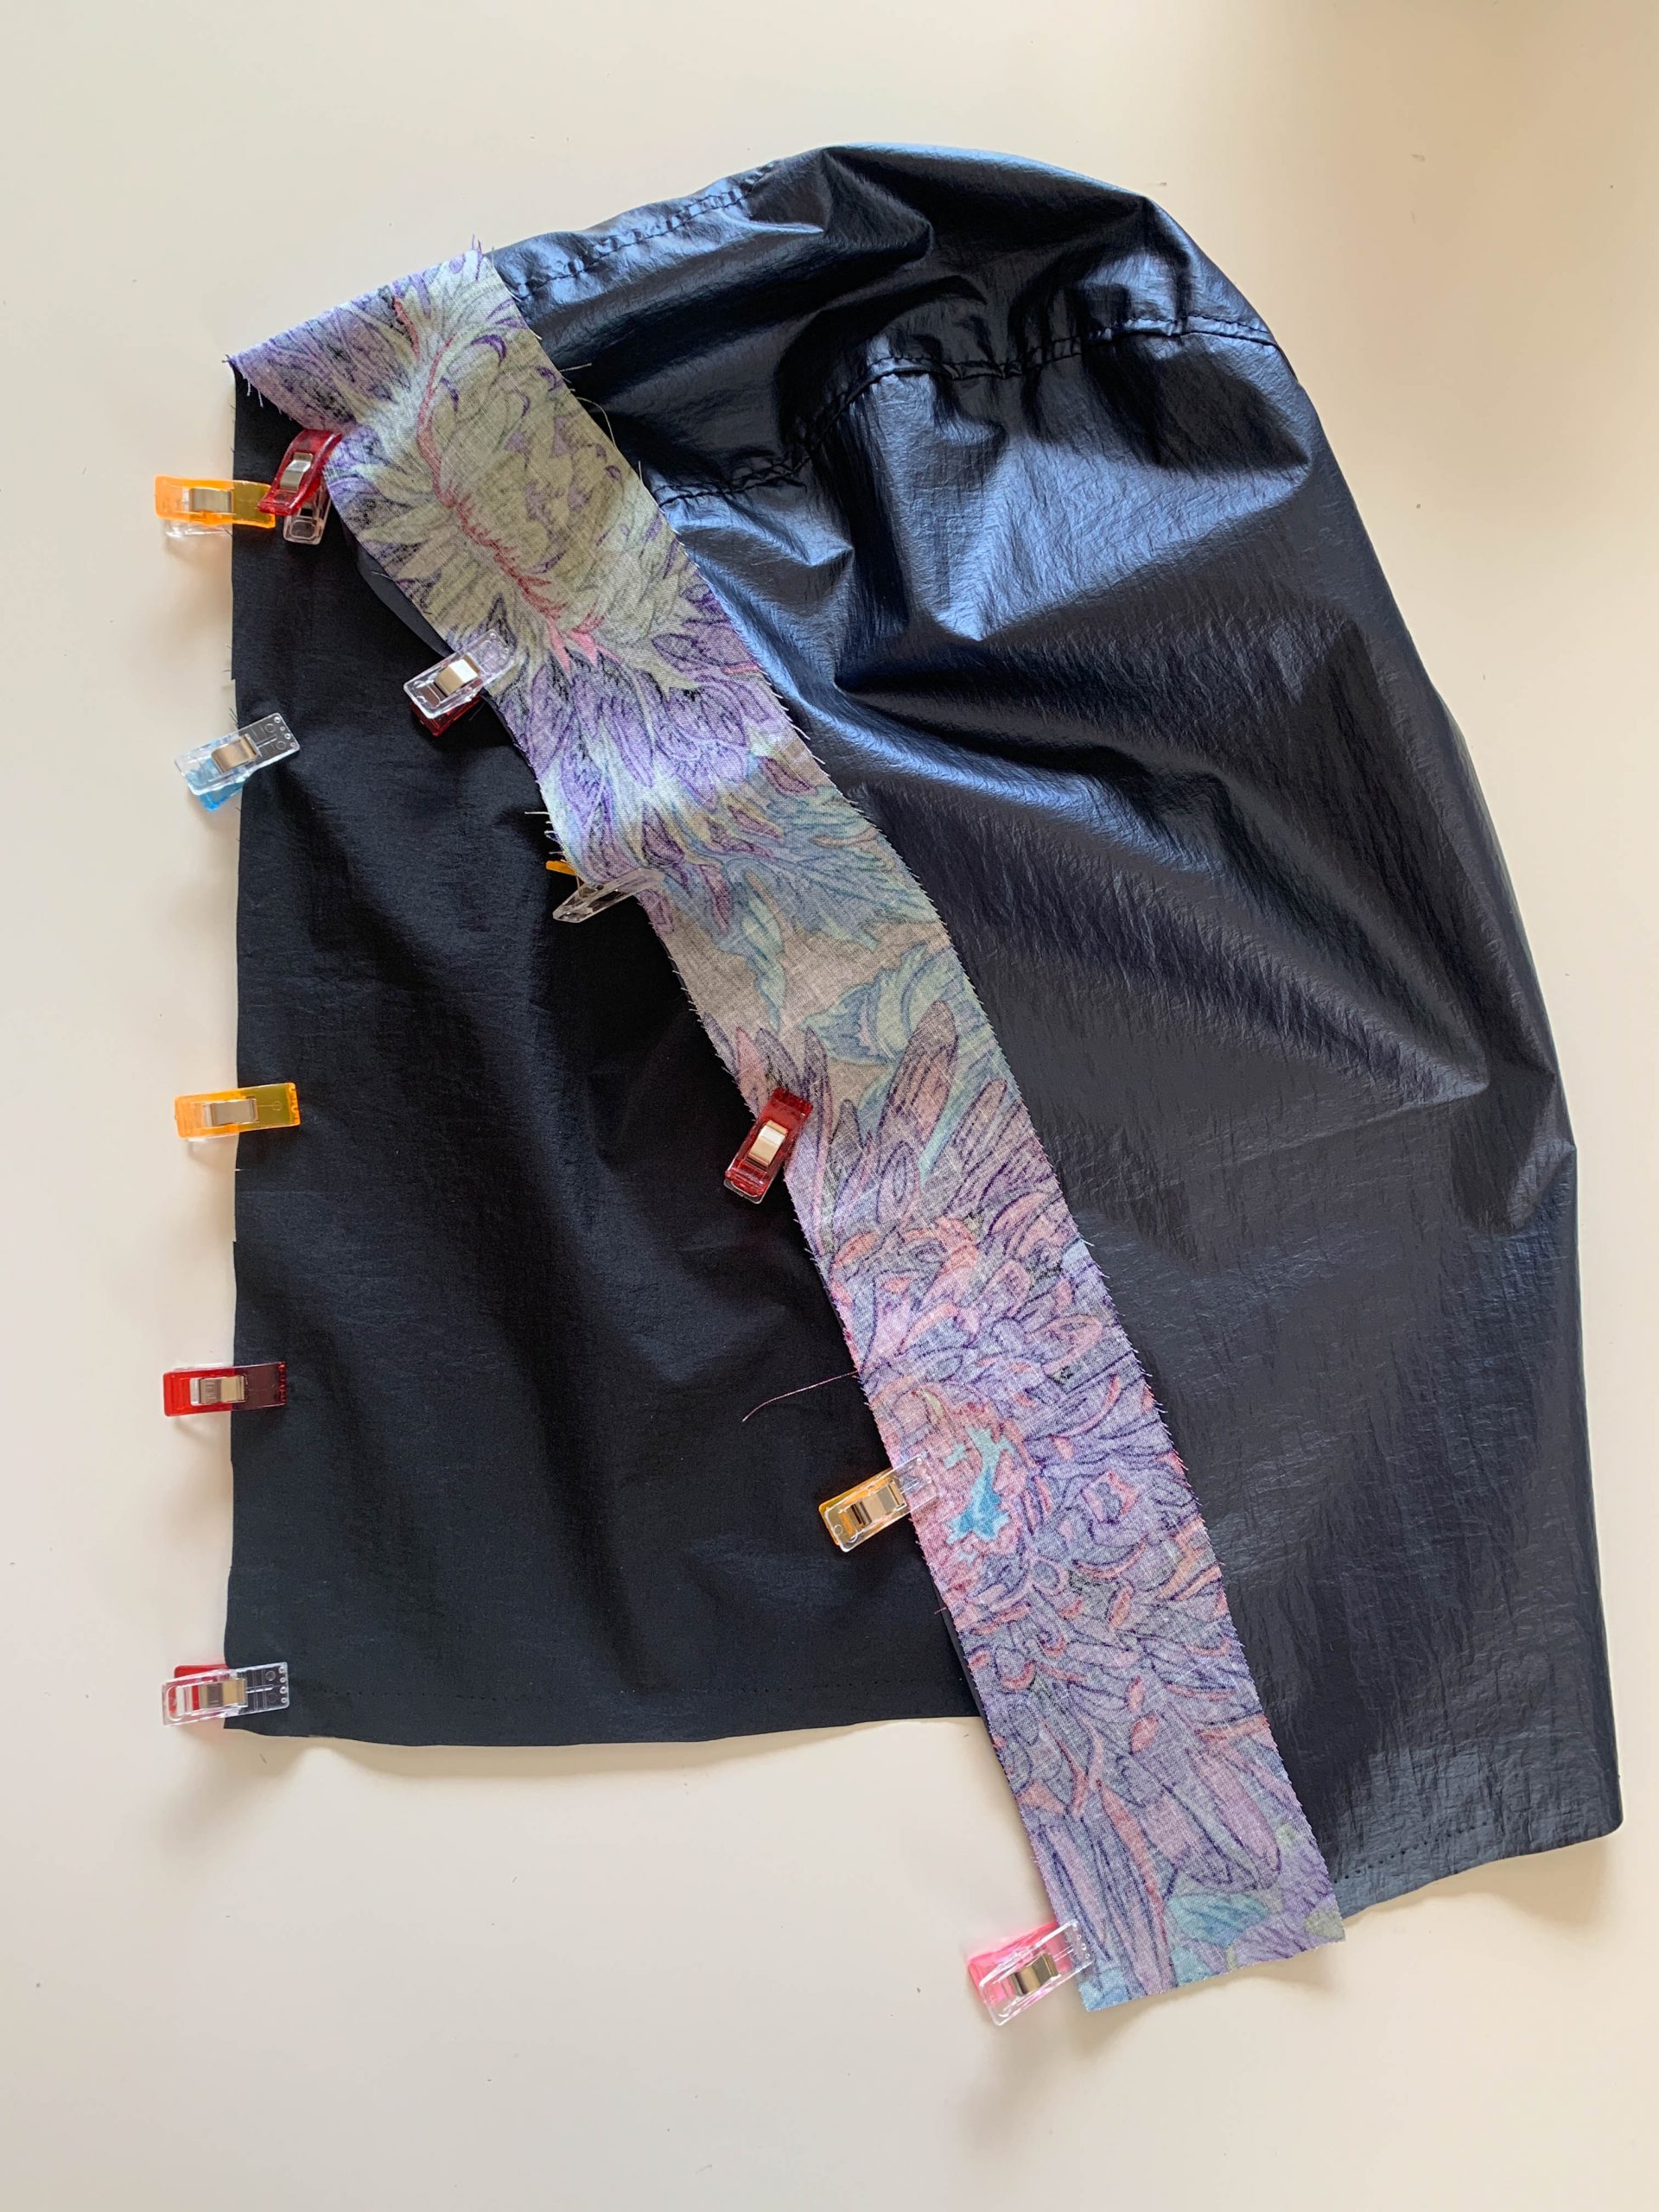
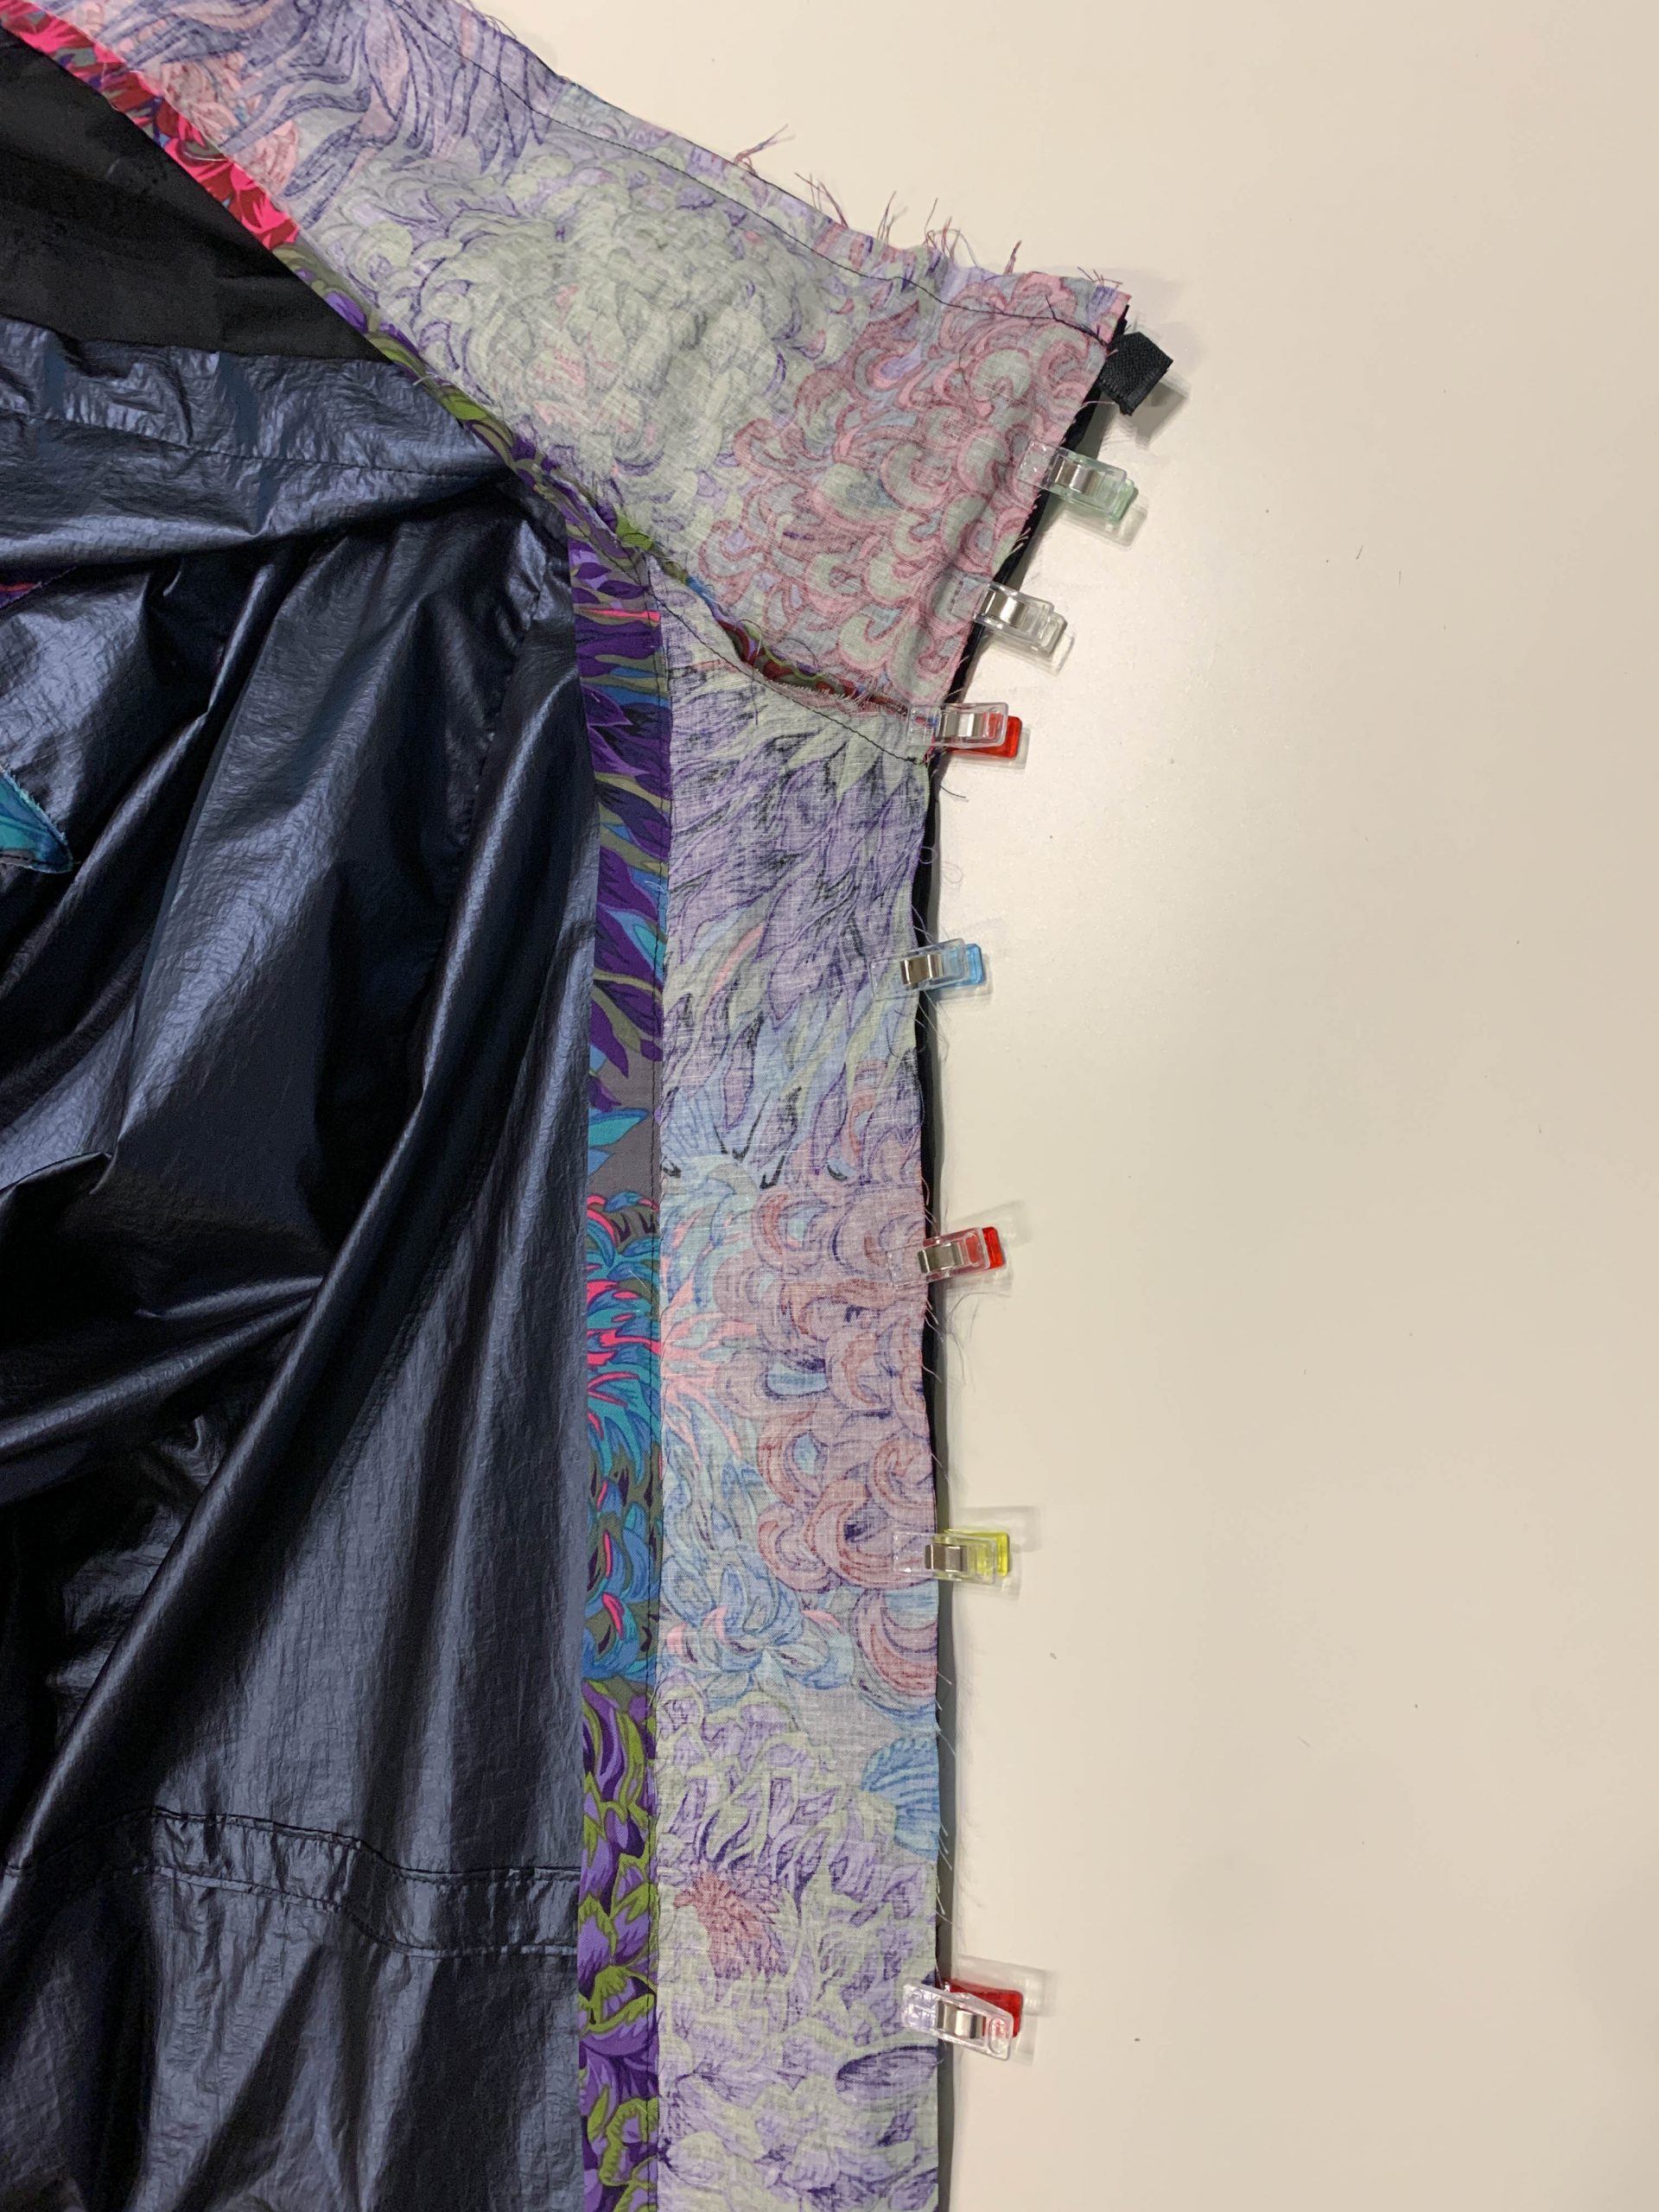
I then drew the facing, because, as I mentioned at the beginning, I want to work with facing on the long edge of the coat (zipper). The next steps in my tutorial therefore refer to a finish using facing.
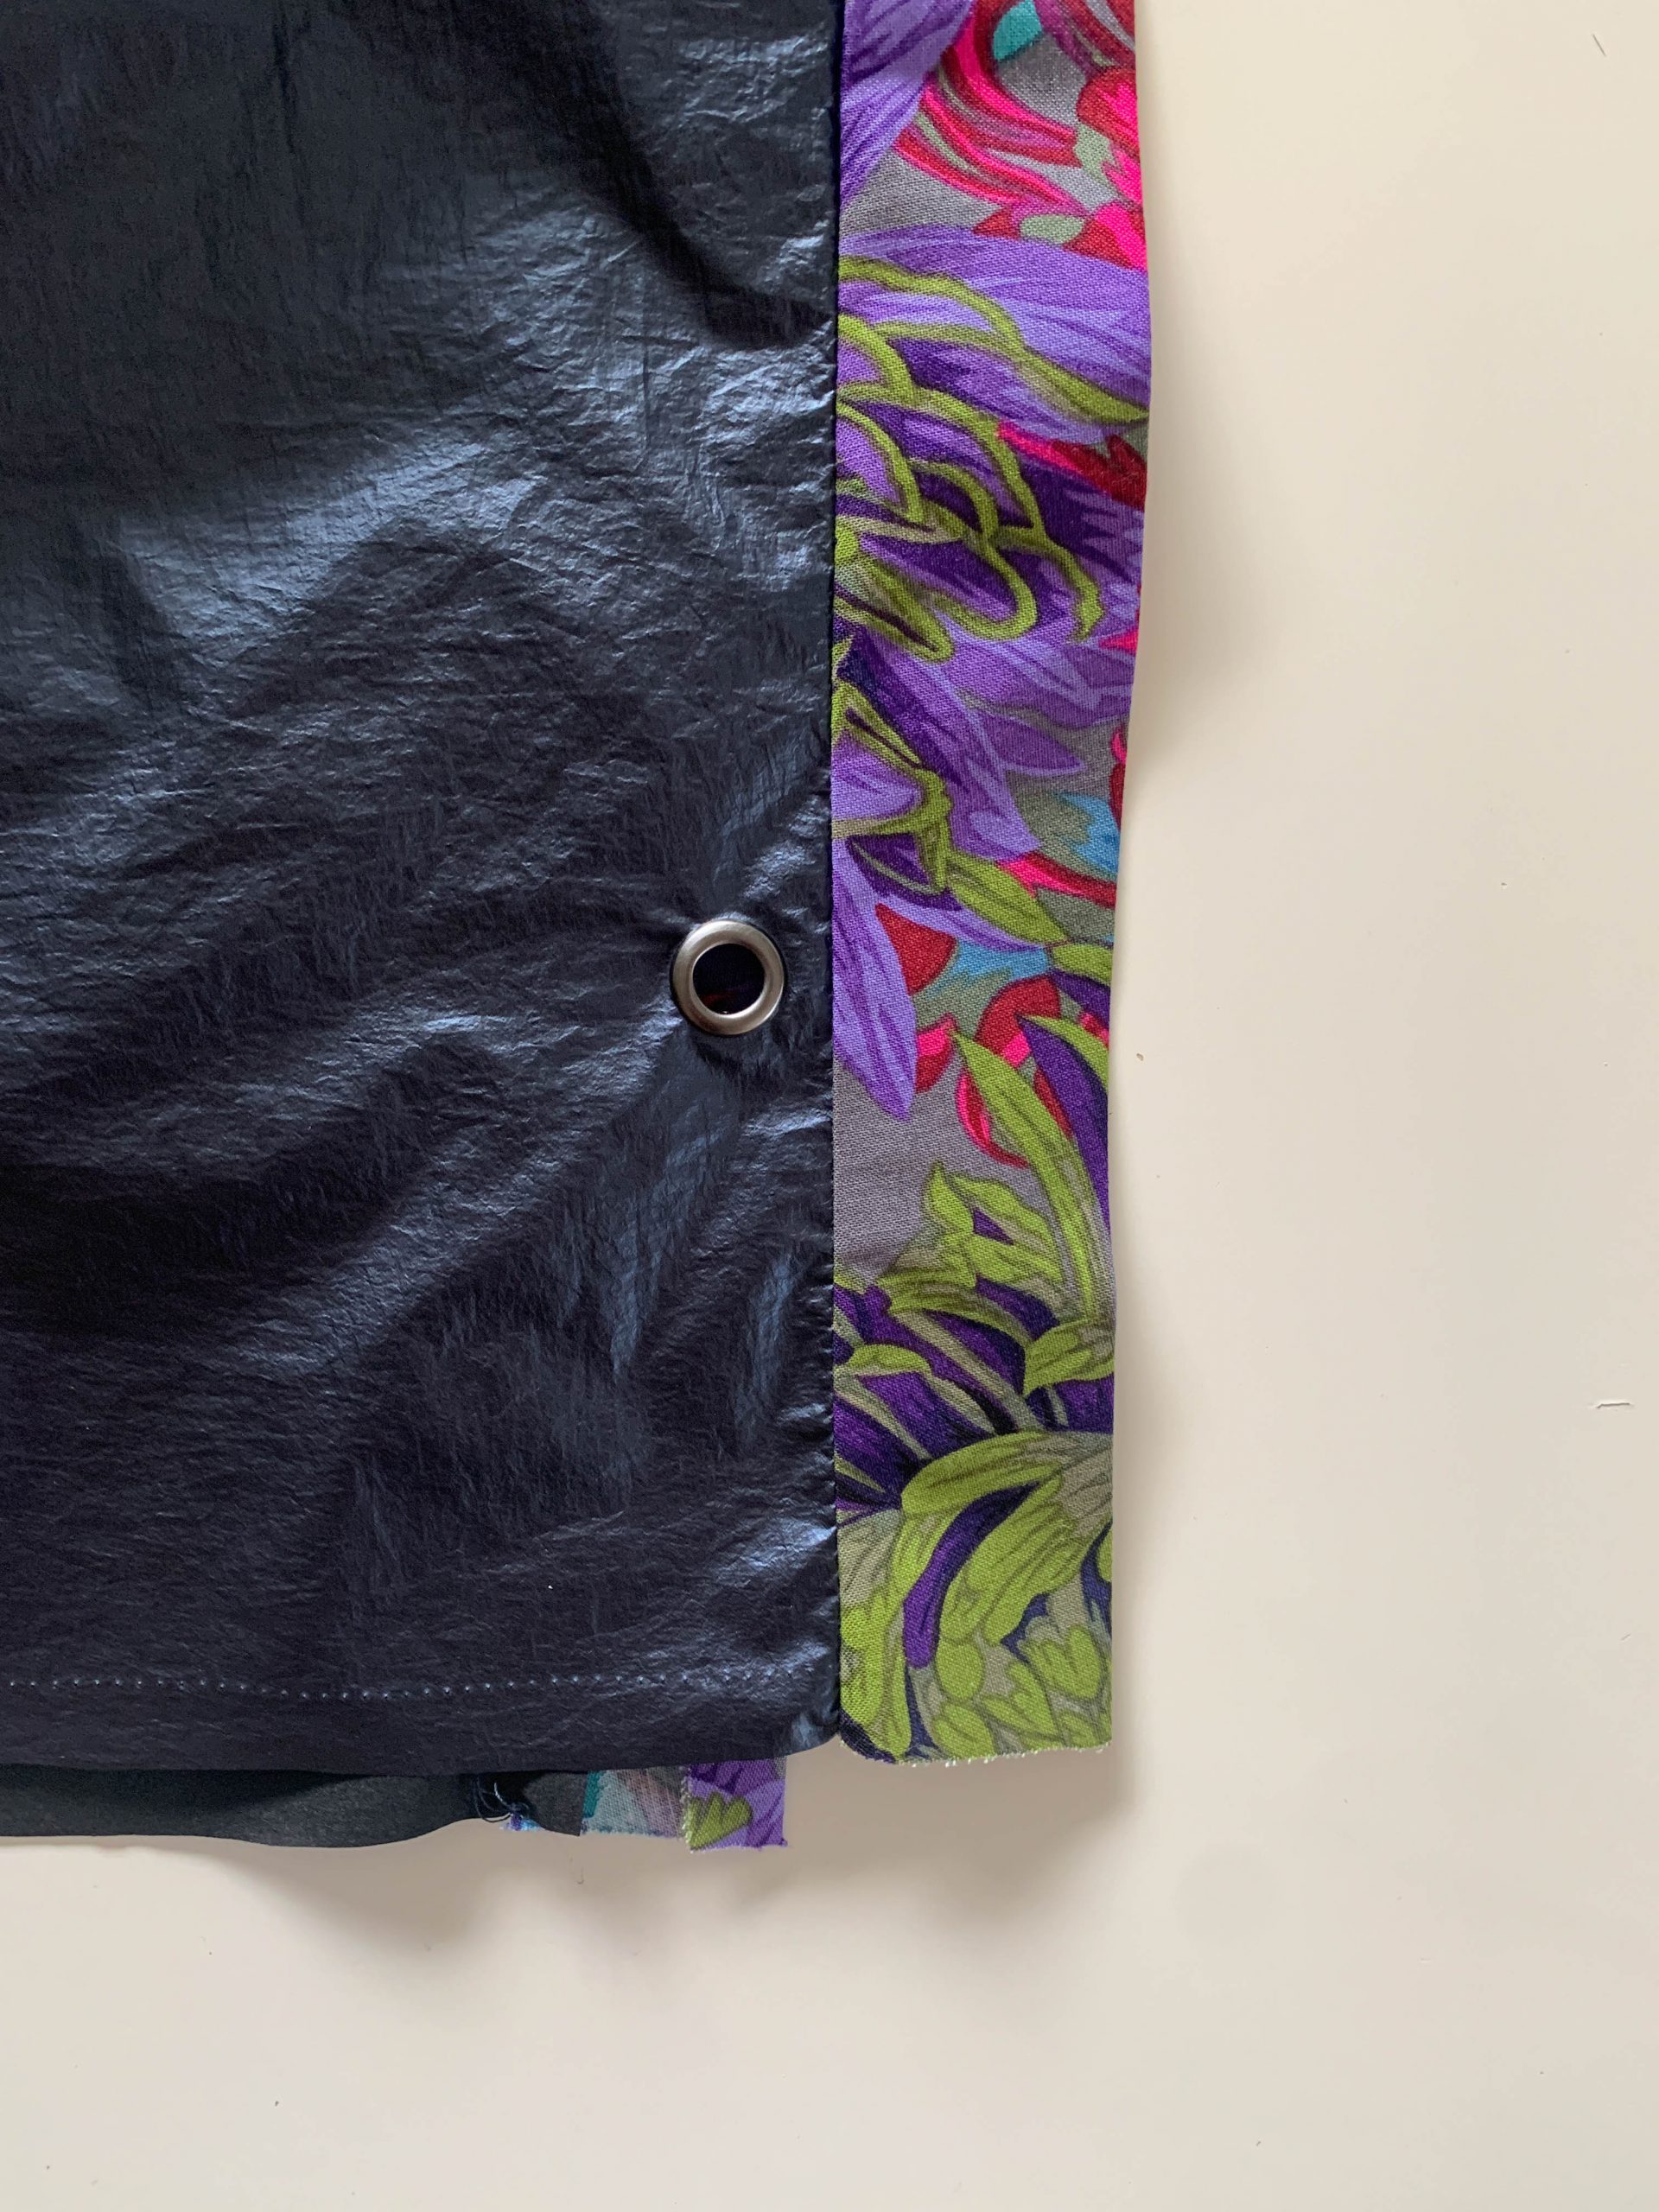
I drew the facing 2 cm wider than the required width so that I can press it 2 cm inwards for a neat edge. The actual width of the facing therefore goes up to the fold line (chalk marking) in the picture. I chose the facing length minus the hem allowance and minus 1 cm seam allowance.
Once the Kaffe fabric facing had been cut to size, I pressed the 2 cm on the wrong side of both facing pieces and stitched them. You can also fold over 2 x 1 cm, then you will have a neater edge (or finish it beforehand) – I unfortunately forgot this step.
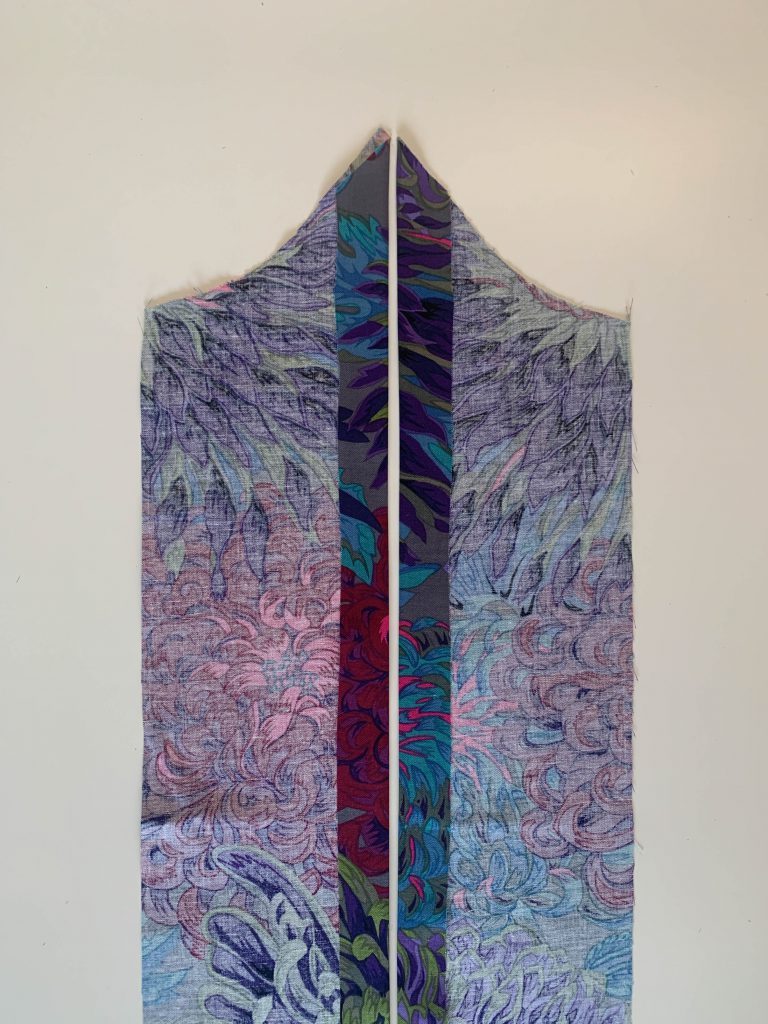
Joining the collar and hood pieces
It is best to label the pieces 8b and 8c so you don’t mix them up.
Place the hood on piece 8b with the right sides together (top edge).
Place piece 8c on top of it with the right sides together (with the lower edge). Then sew the long edges of all three layers together.
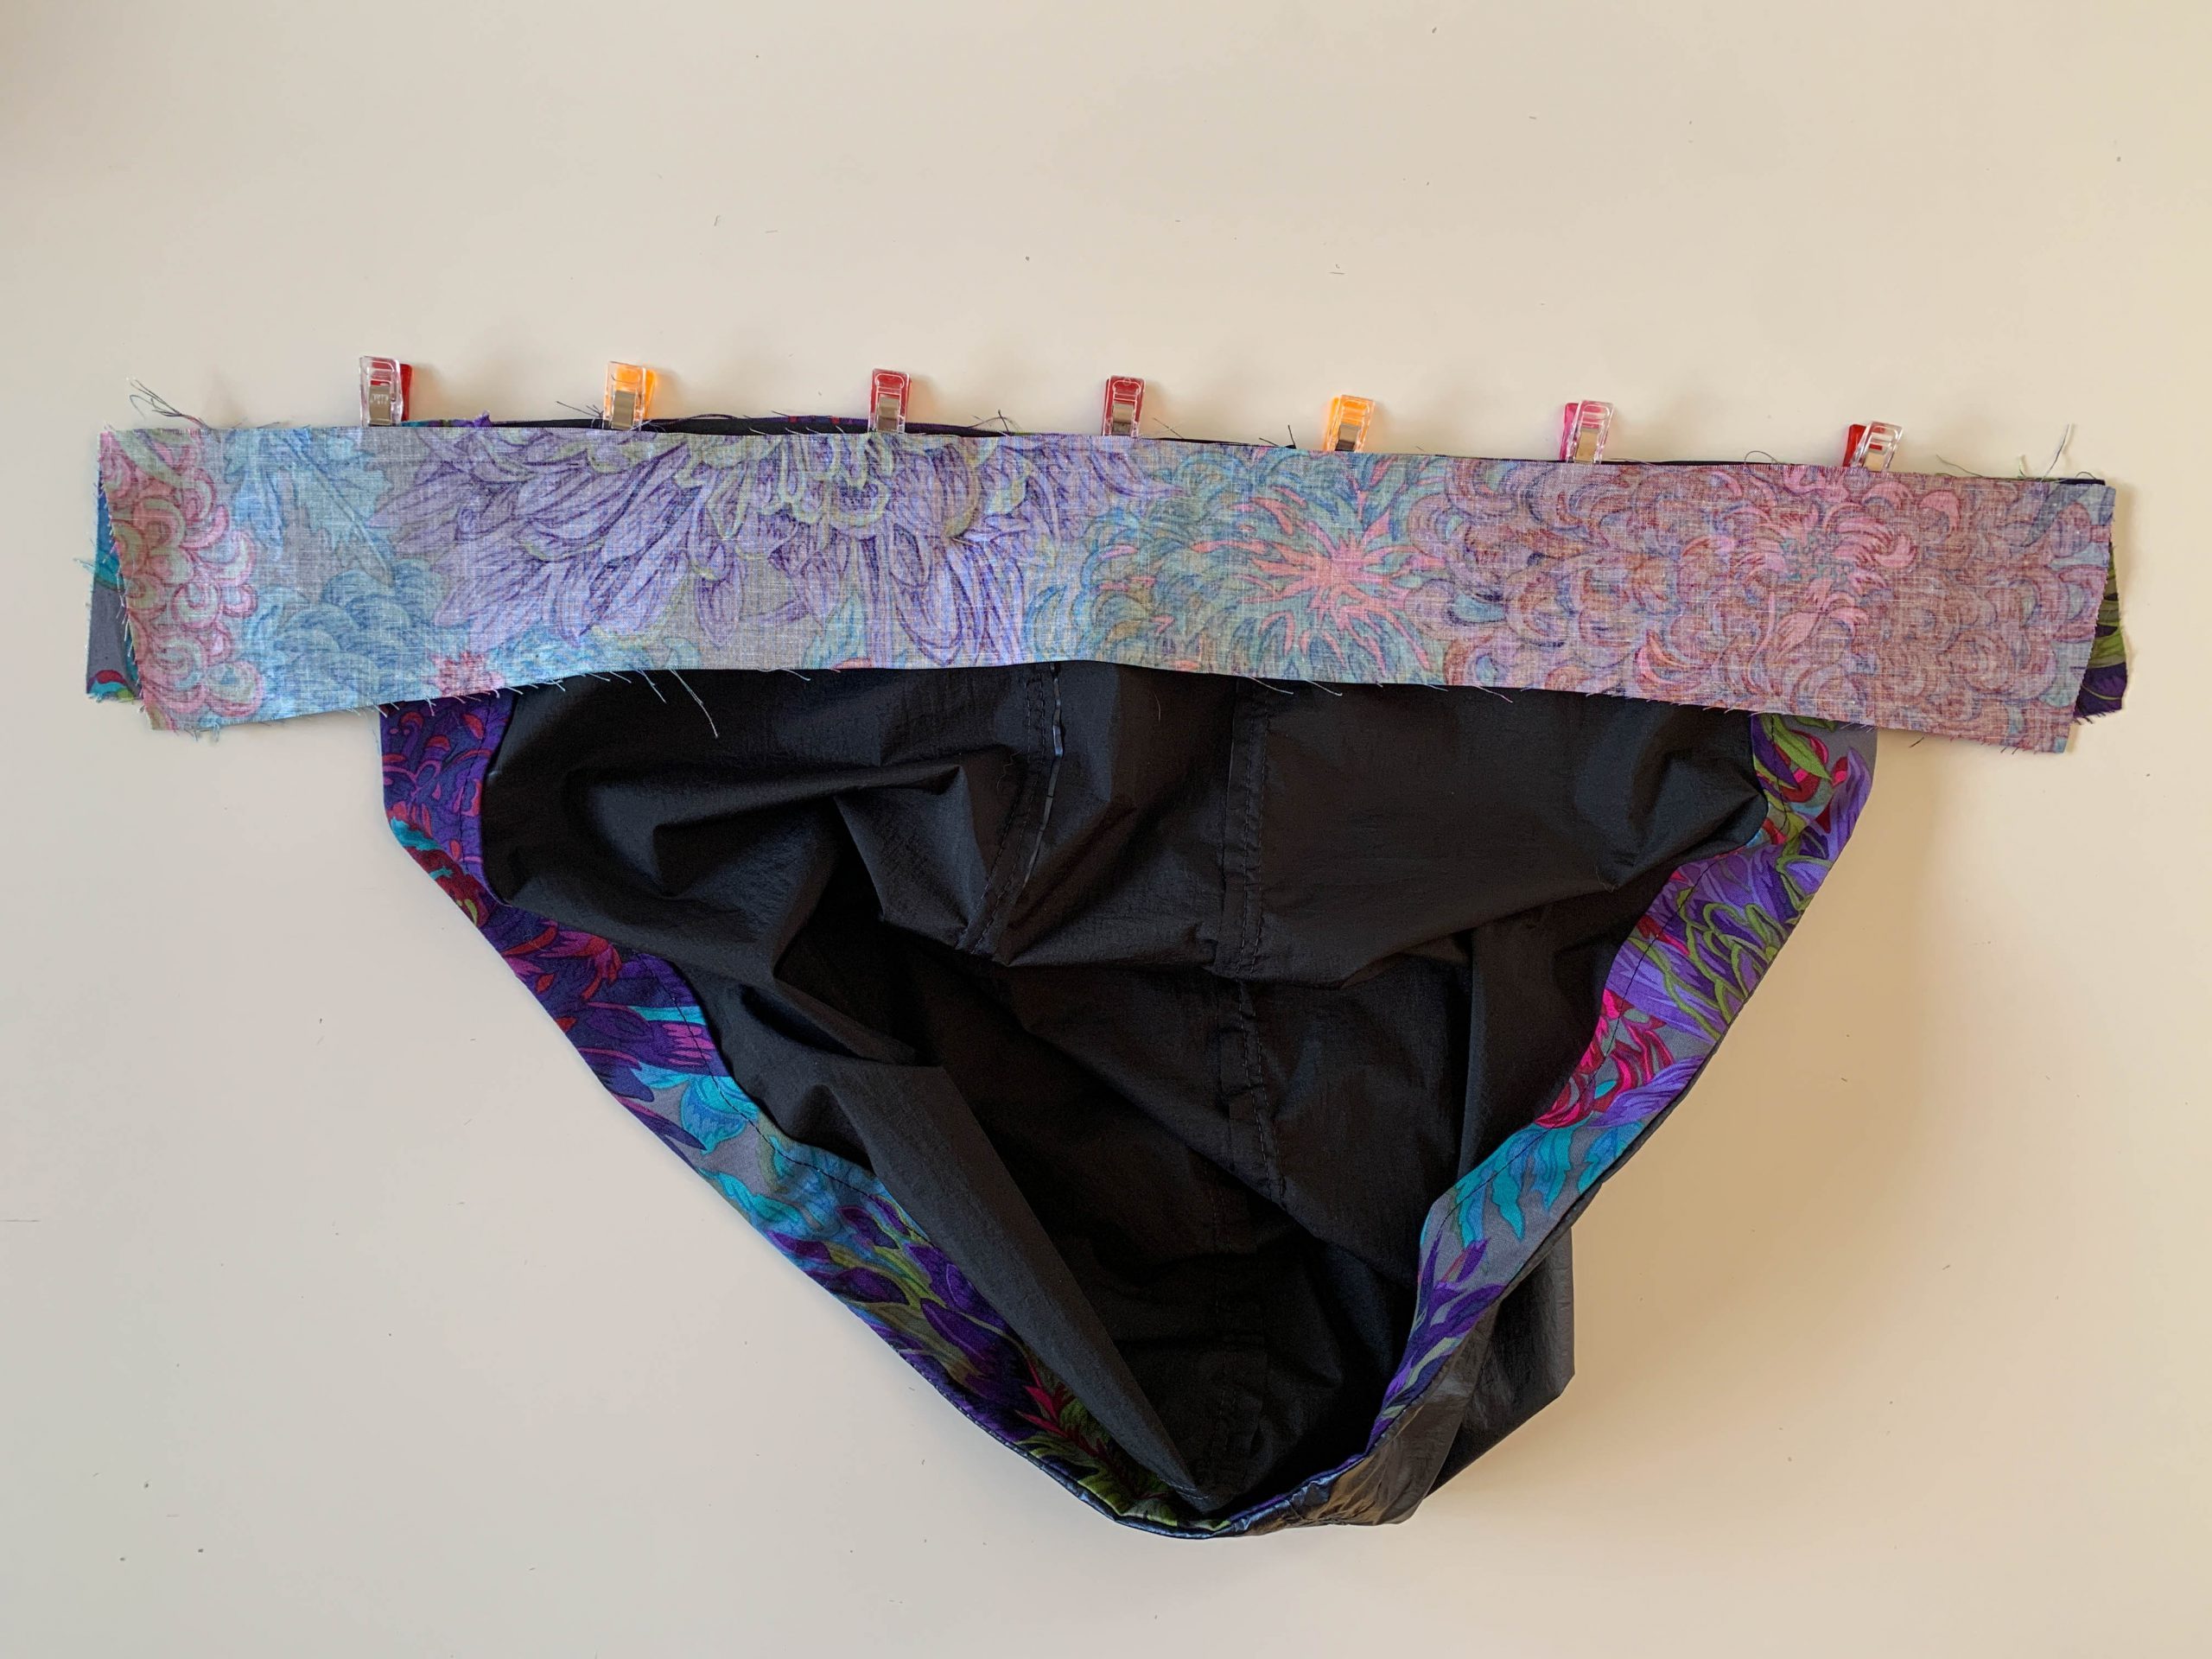
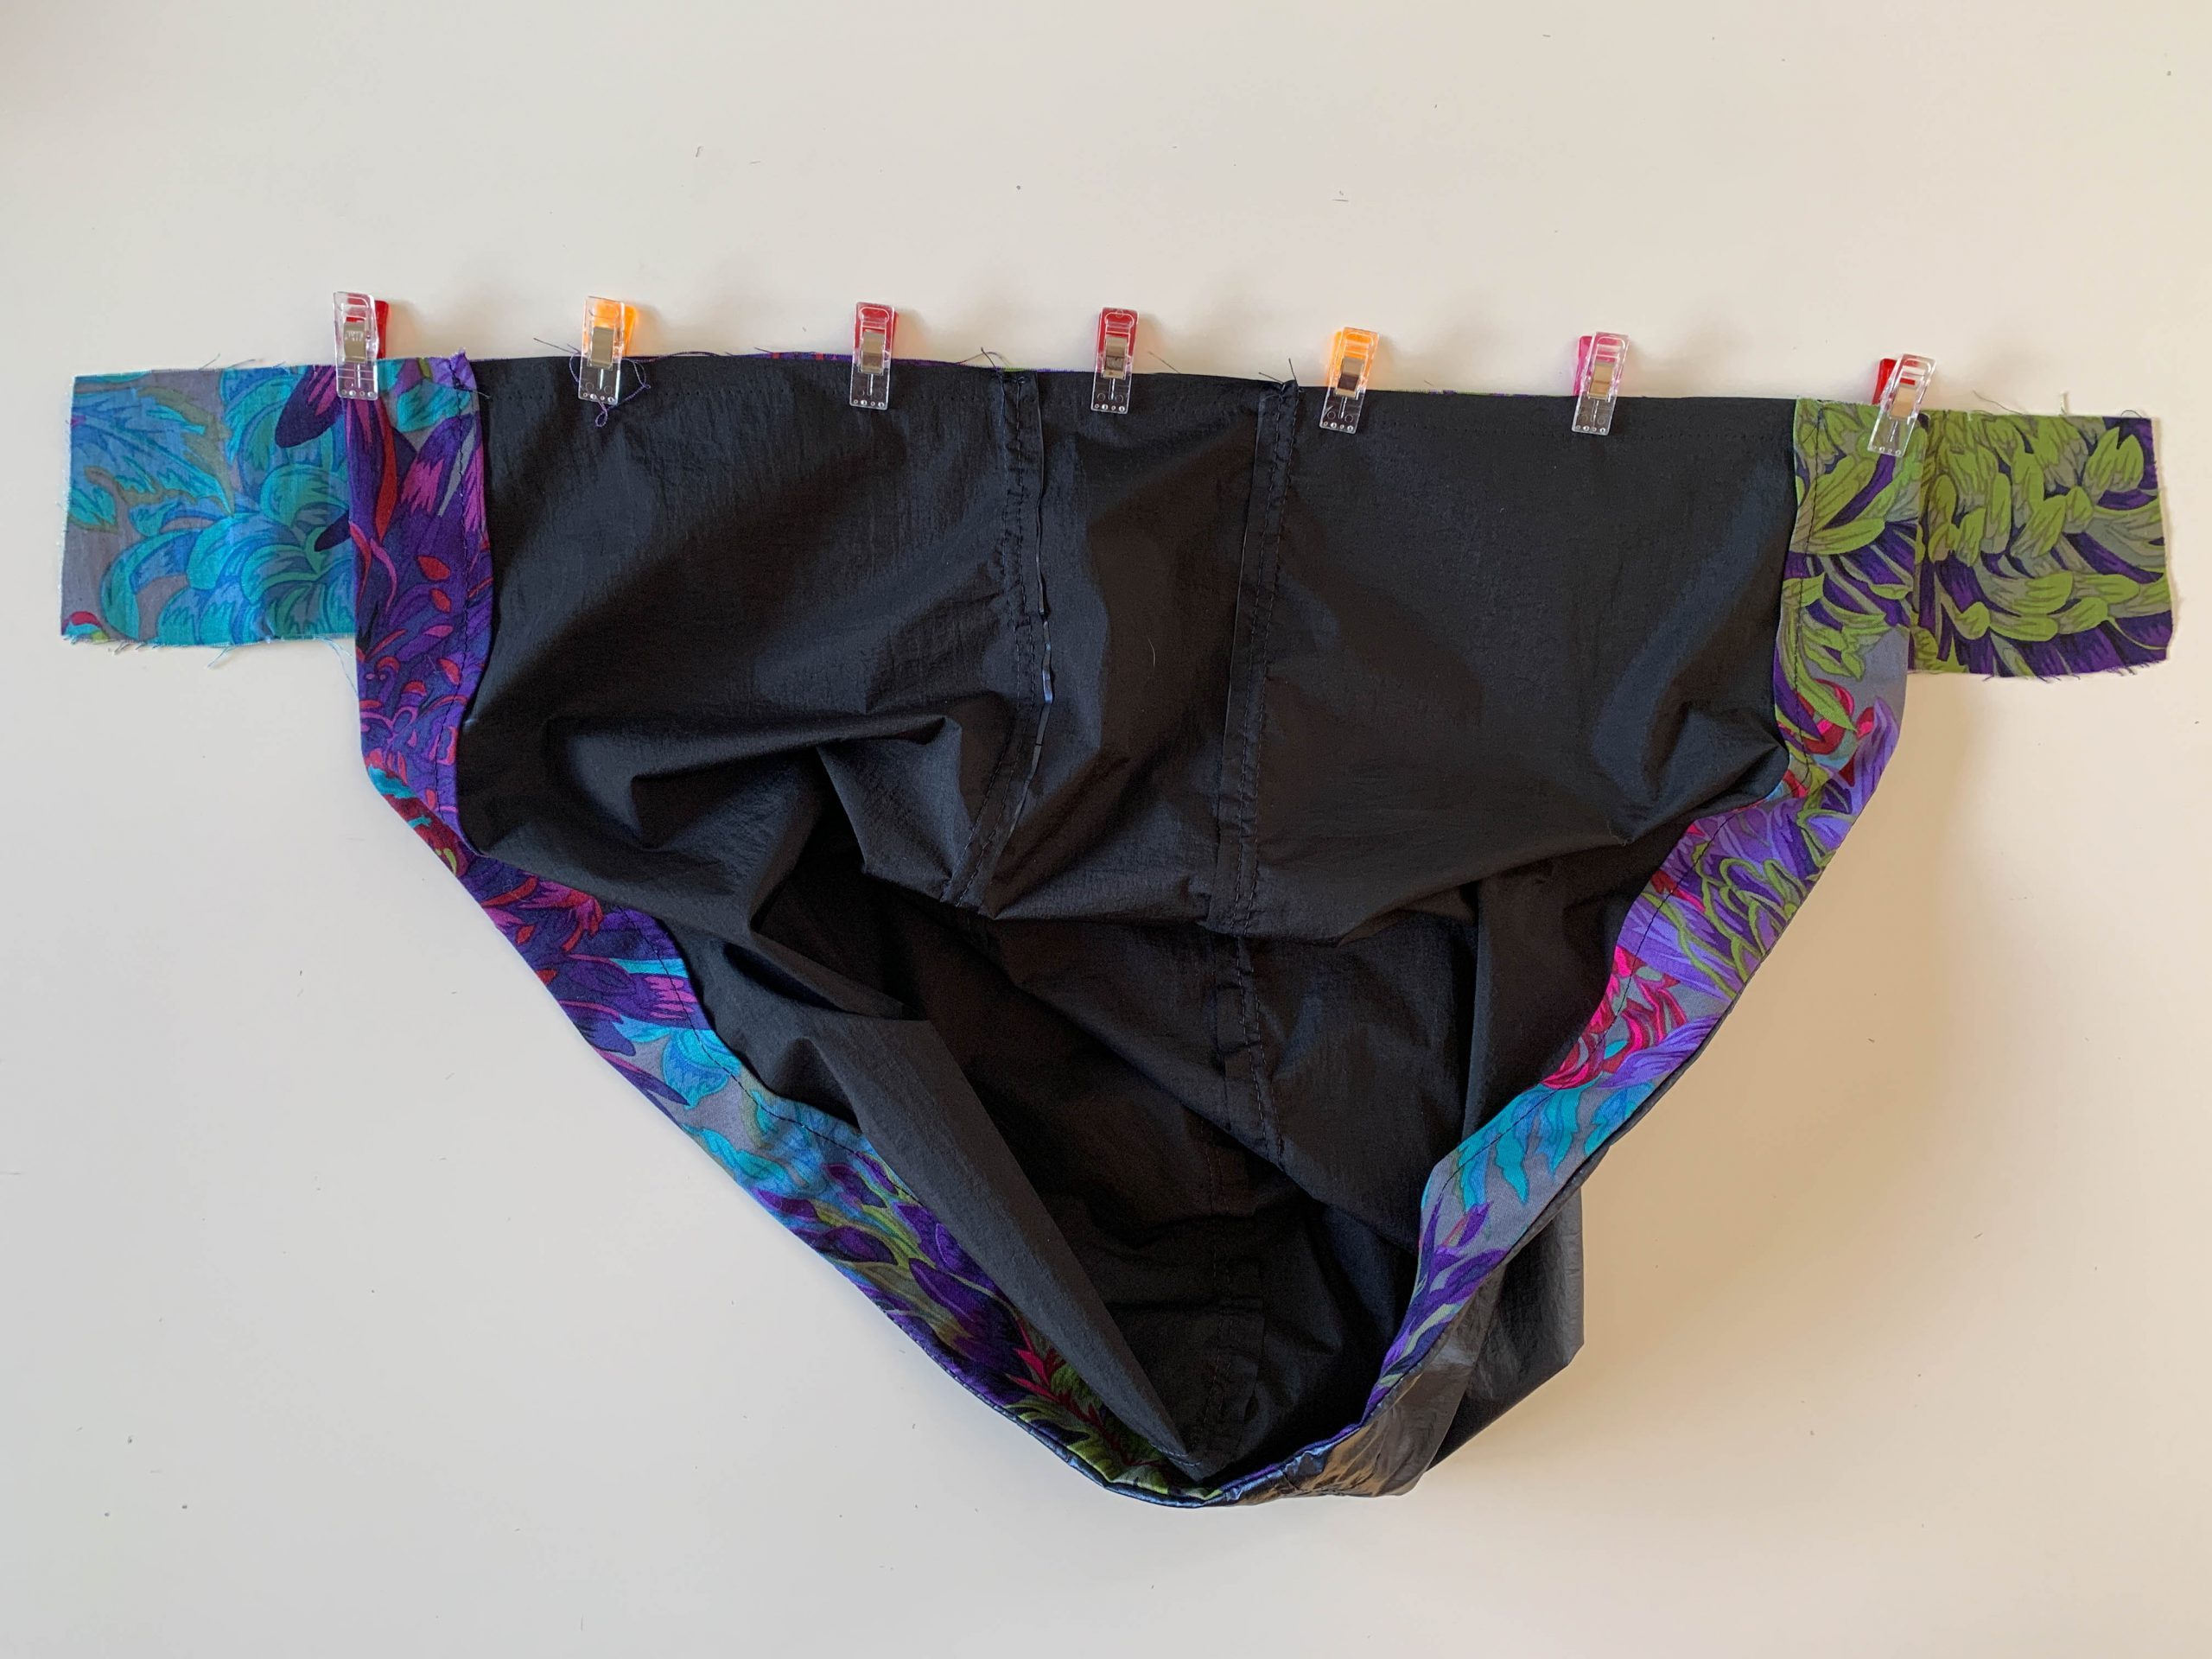
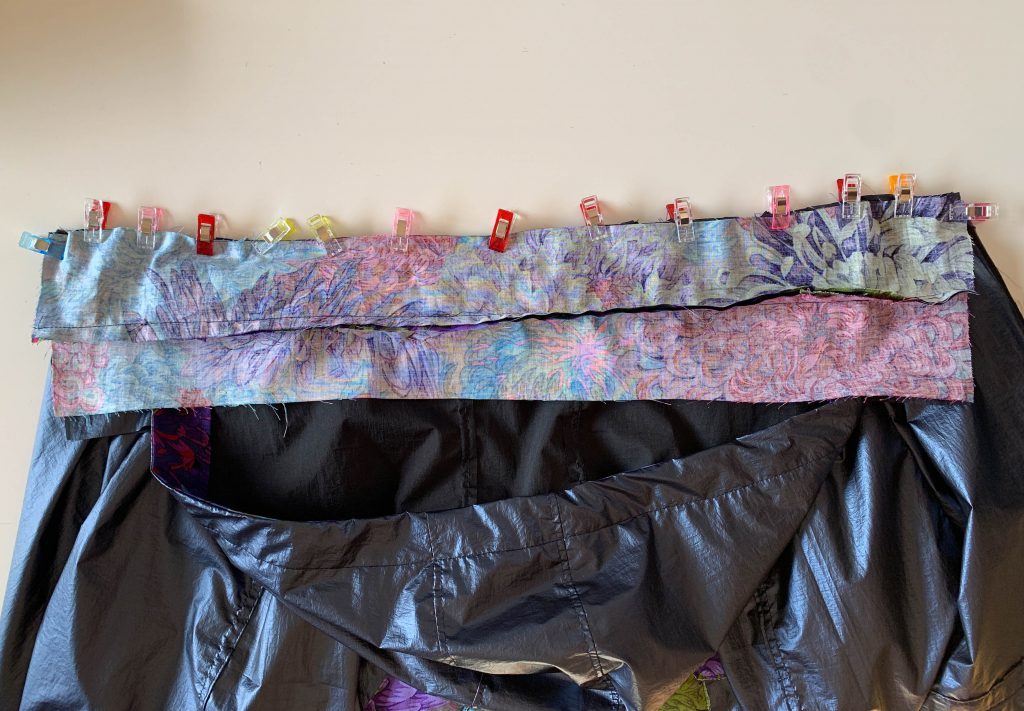
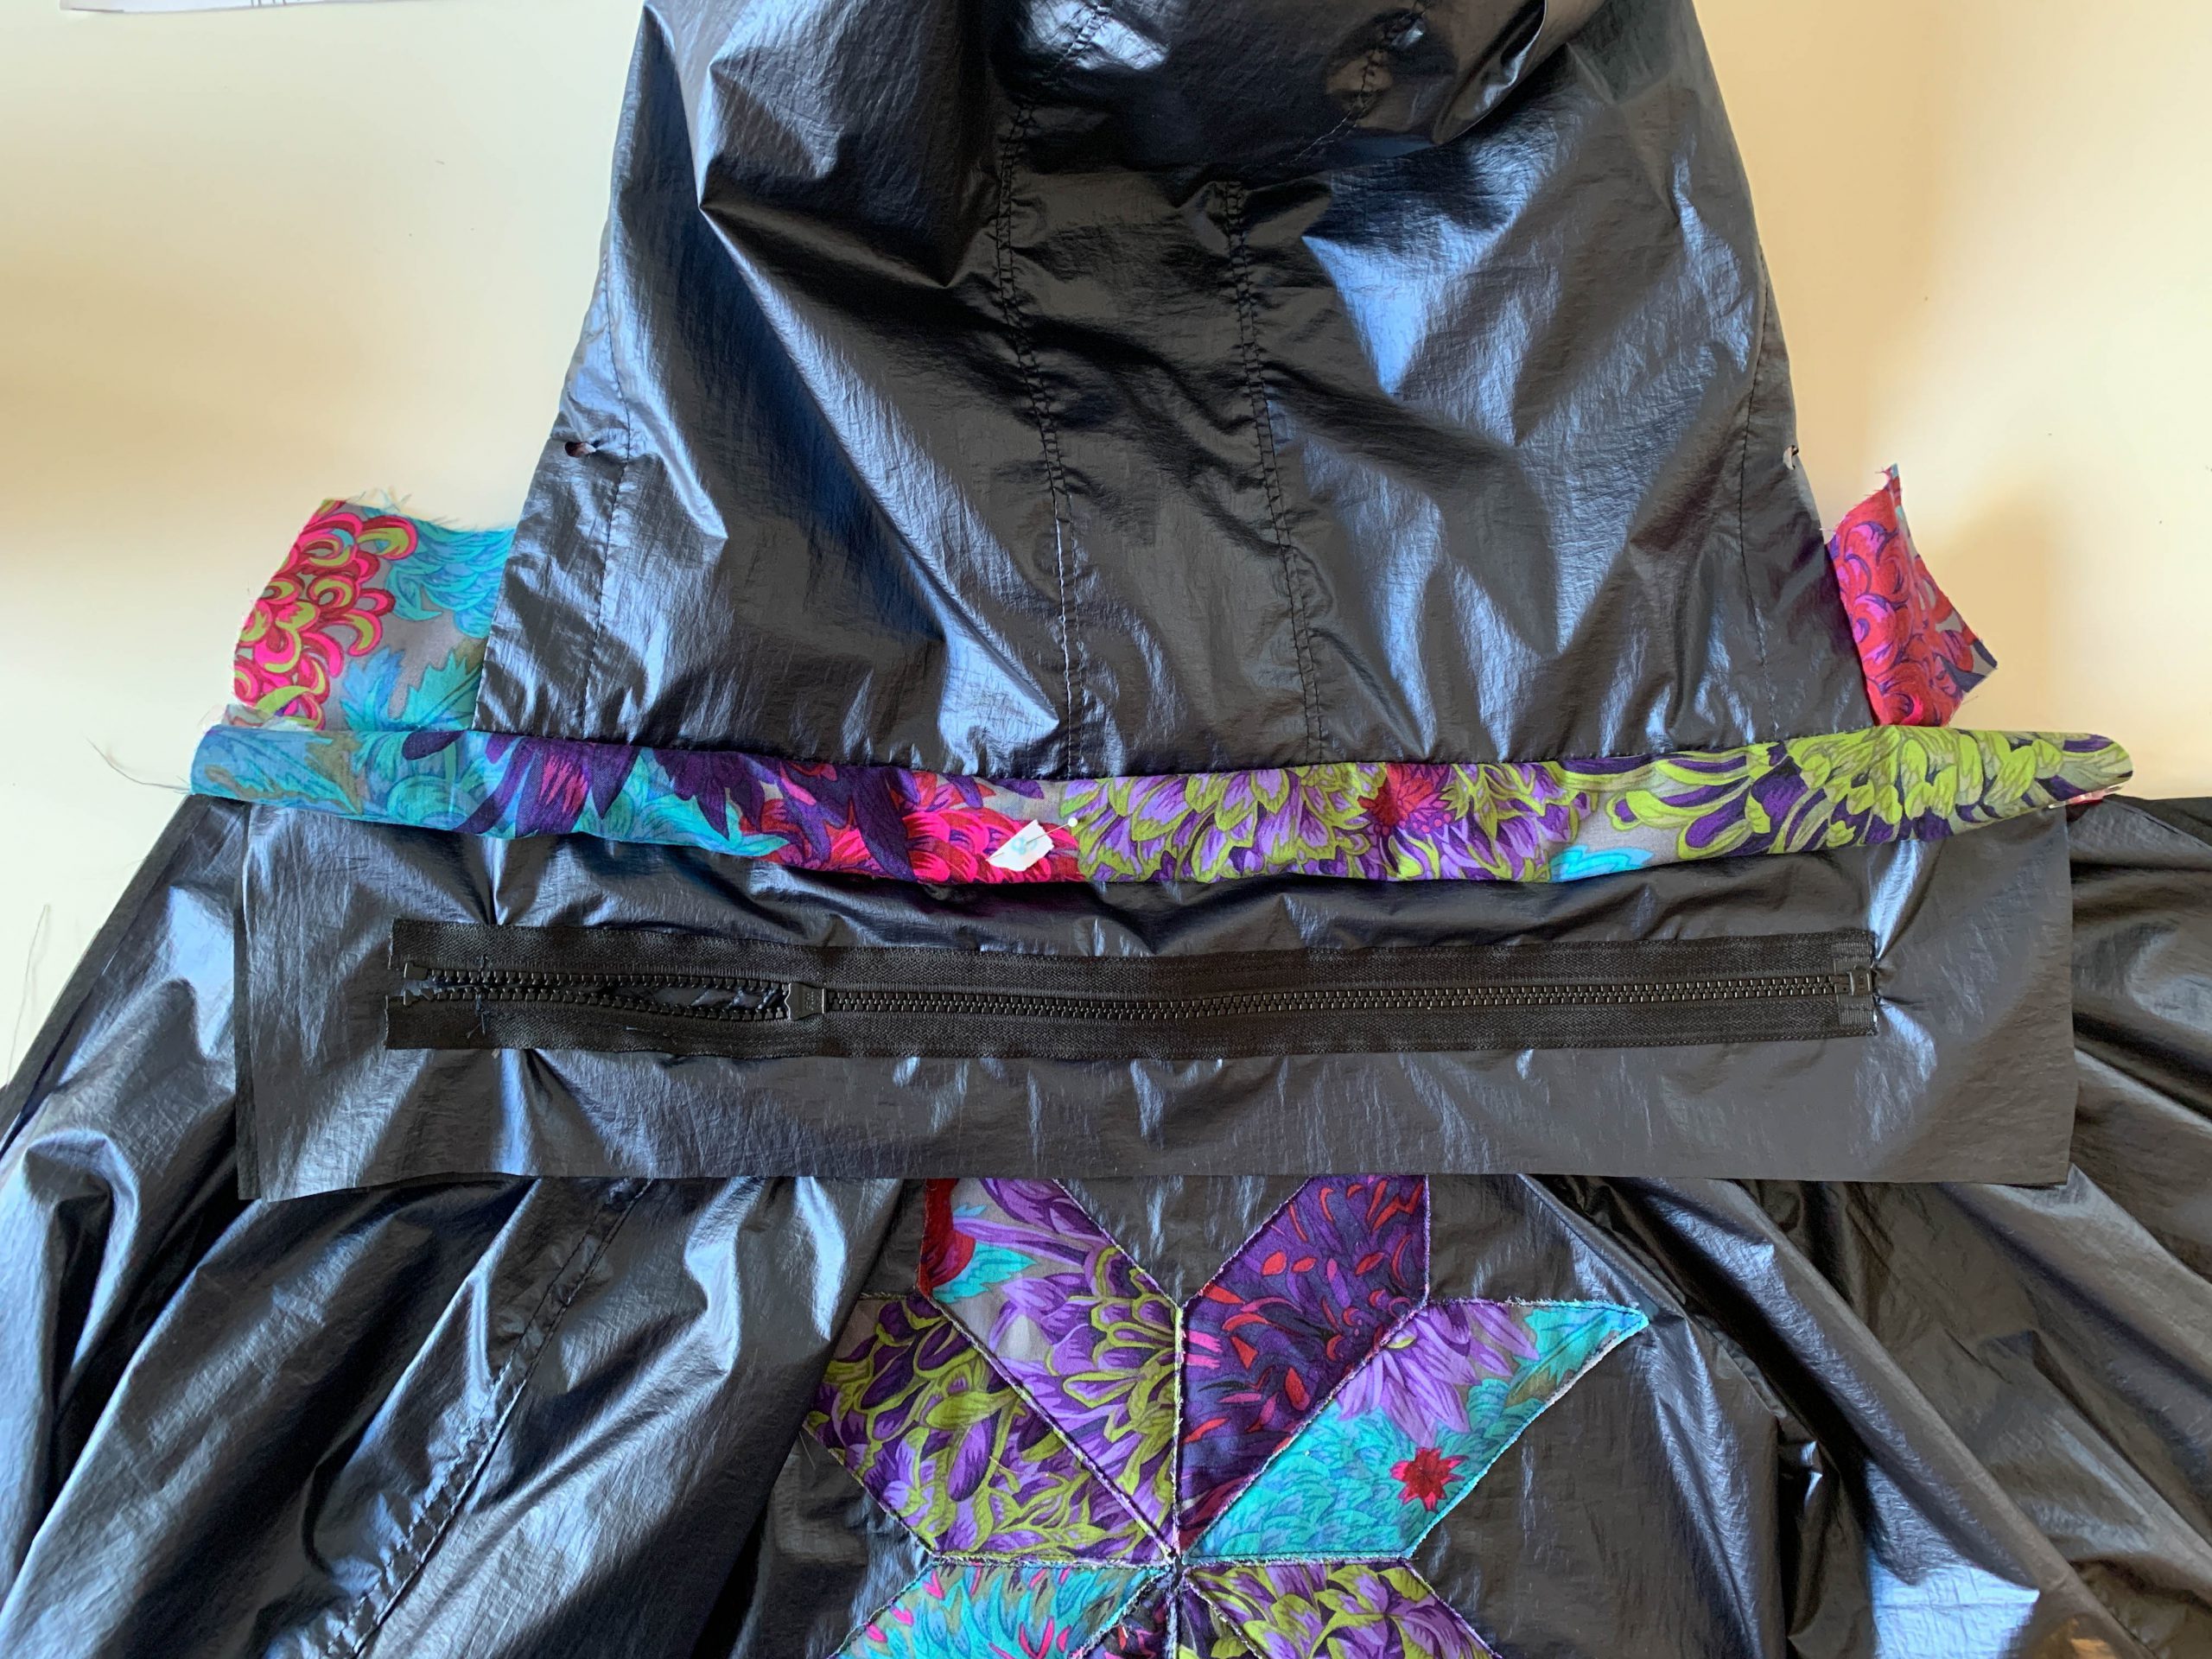
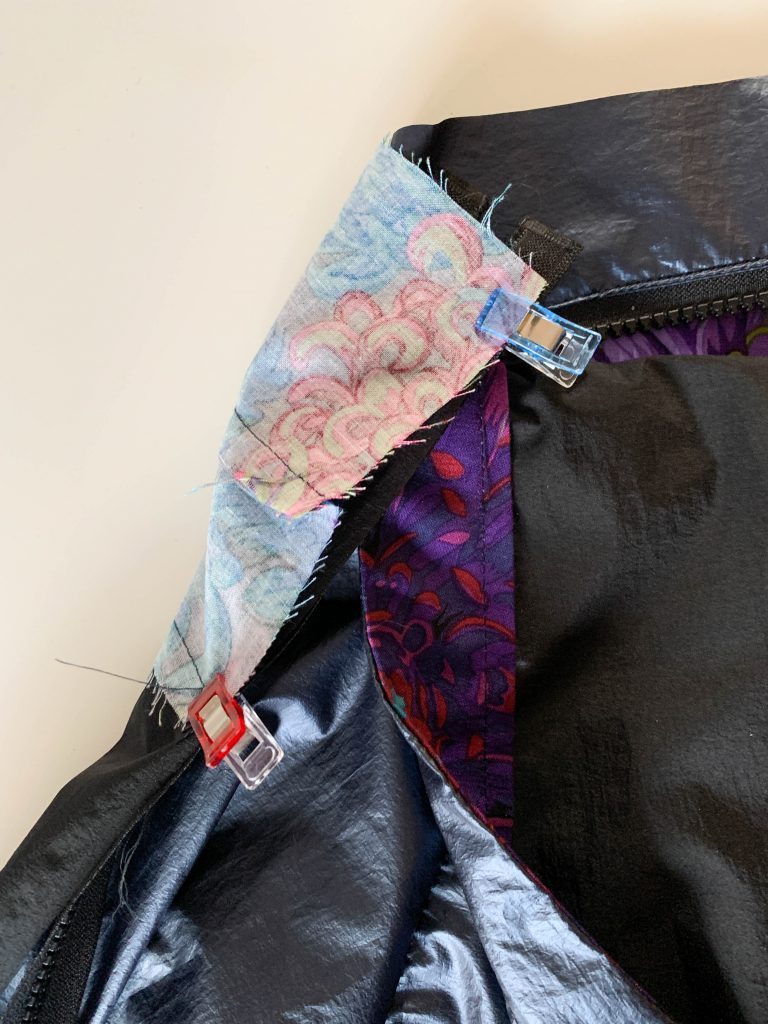
Now place the already prepared piece with the zipper onto the edge of the coat’s neckline with the right sides together. In the sandwich that’s now being made, this piece is right at the bottom on the coat.
Place piece 8b on top of it with the right sides together and then sew through all layers on the long edge.
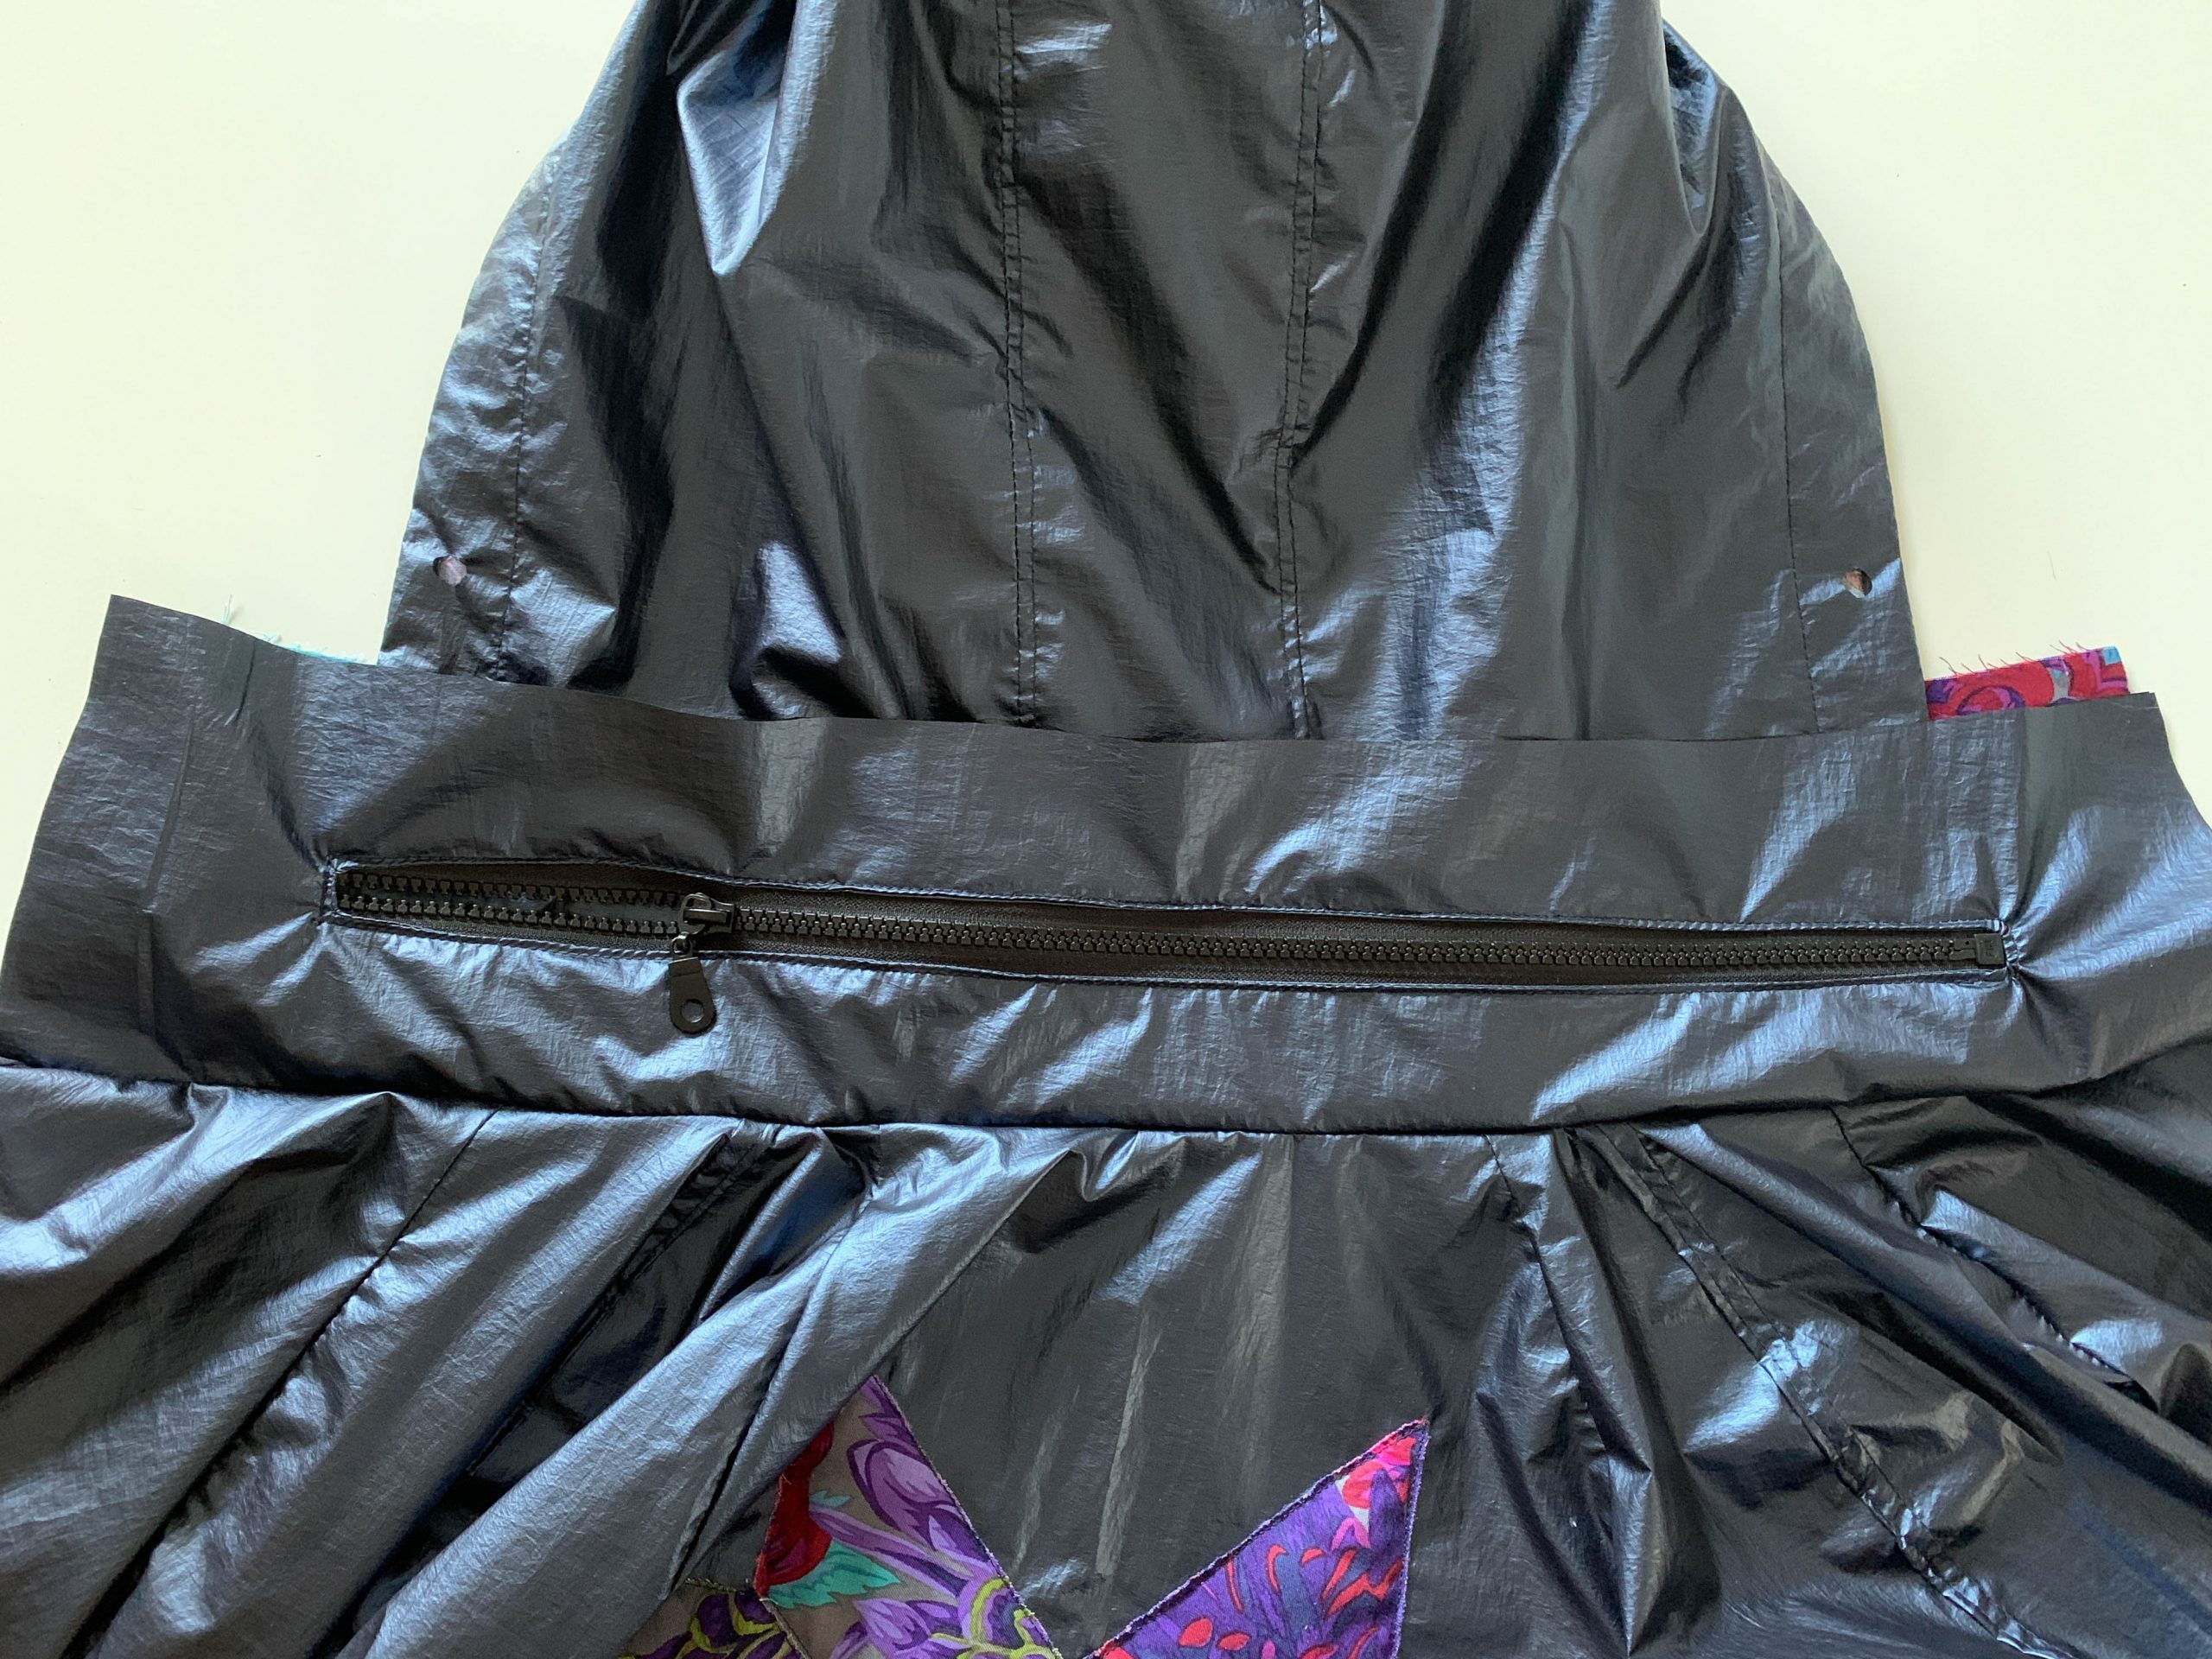
Once you have sewn all the pieces together correctly, you can now pull the hood out through the zipper and be proud of your work 🙂
Sewing in the zipper
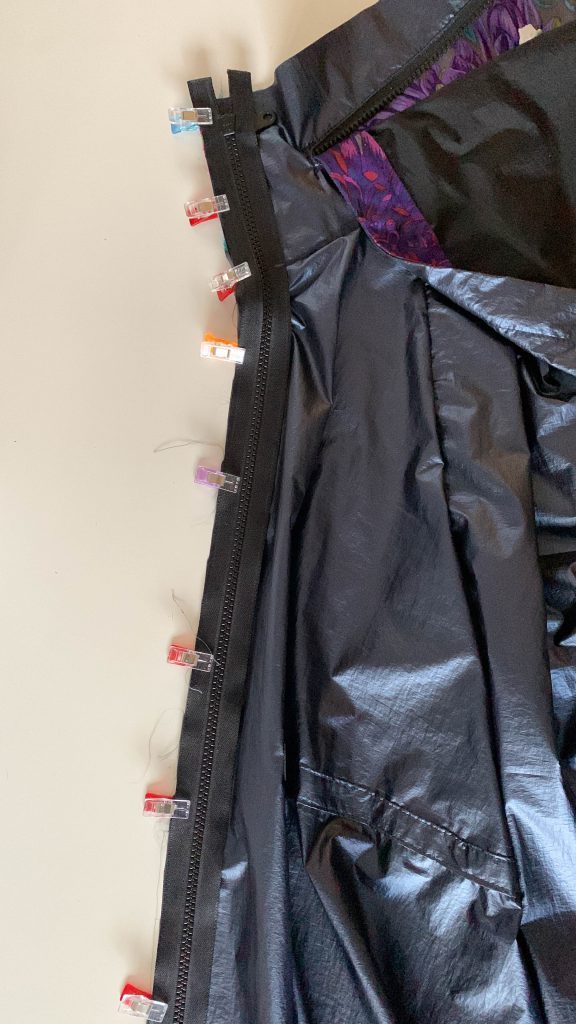
Pin the top edge together carefully (8a outer piece with zipper and 8c lining).
Sew the zipper onto the two outer edges one after the other with the right sides together. Pin it right up to the collar but do not forget to leave 1 cm seam allowance on top. I use the zipper foot #4 for this.
Sew the lining (collar pieces) onto the back.
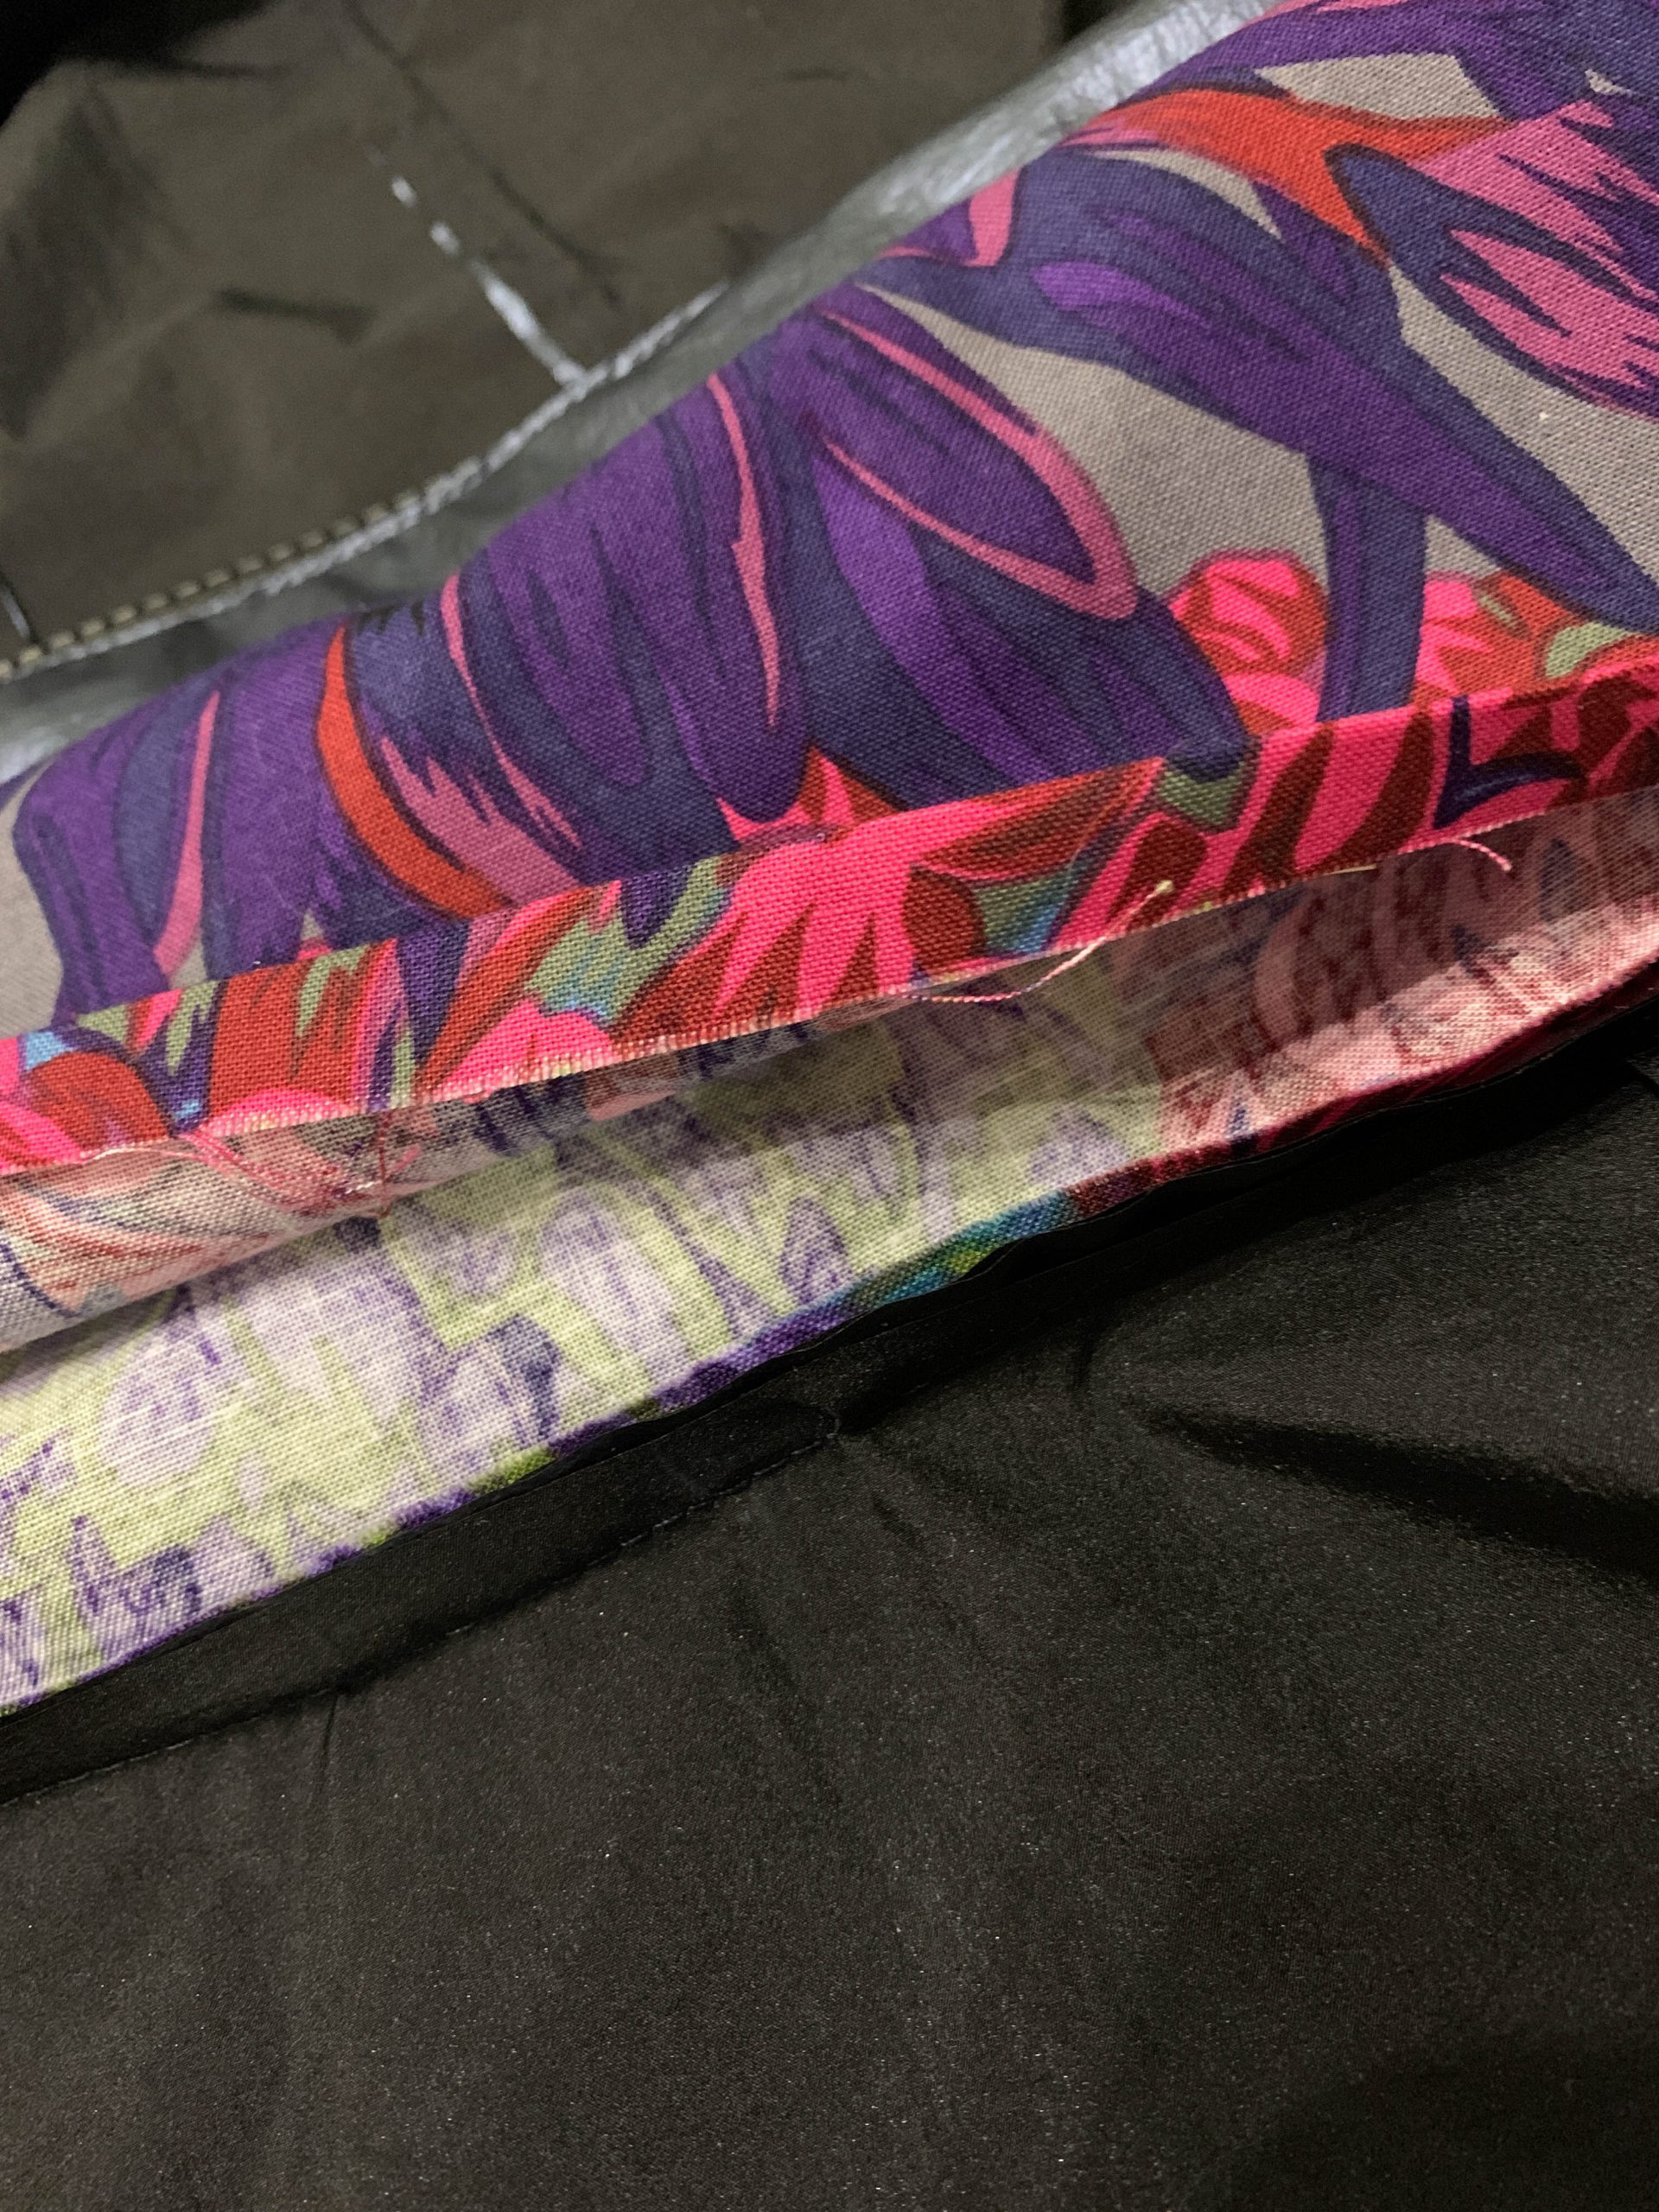
Sew the lining piece 8a onto the top collar edge with the right sides together. Then press the second open edge 1 cm over onto the wrong side. This makes the next step easier.
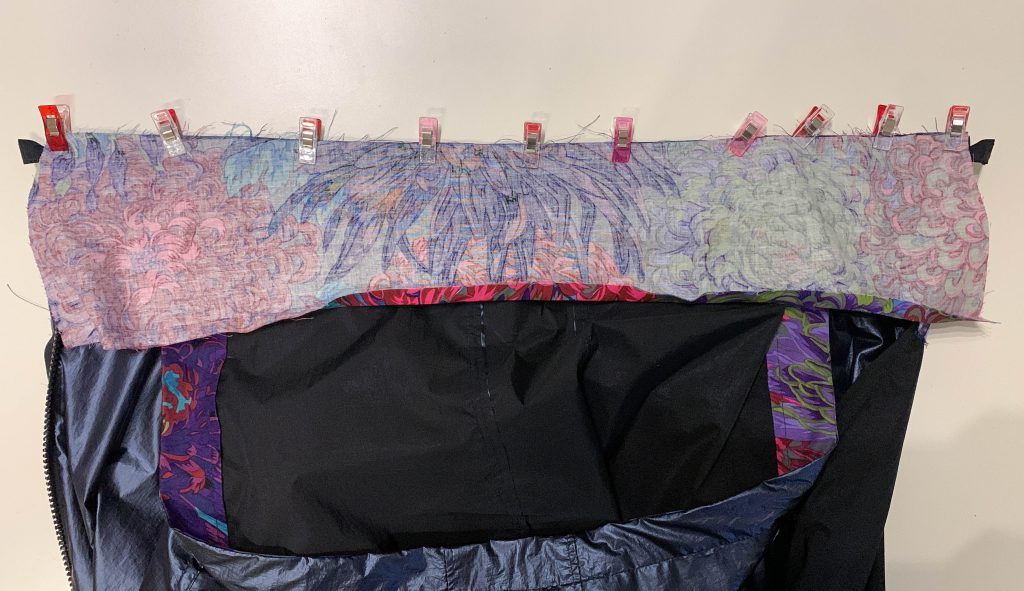
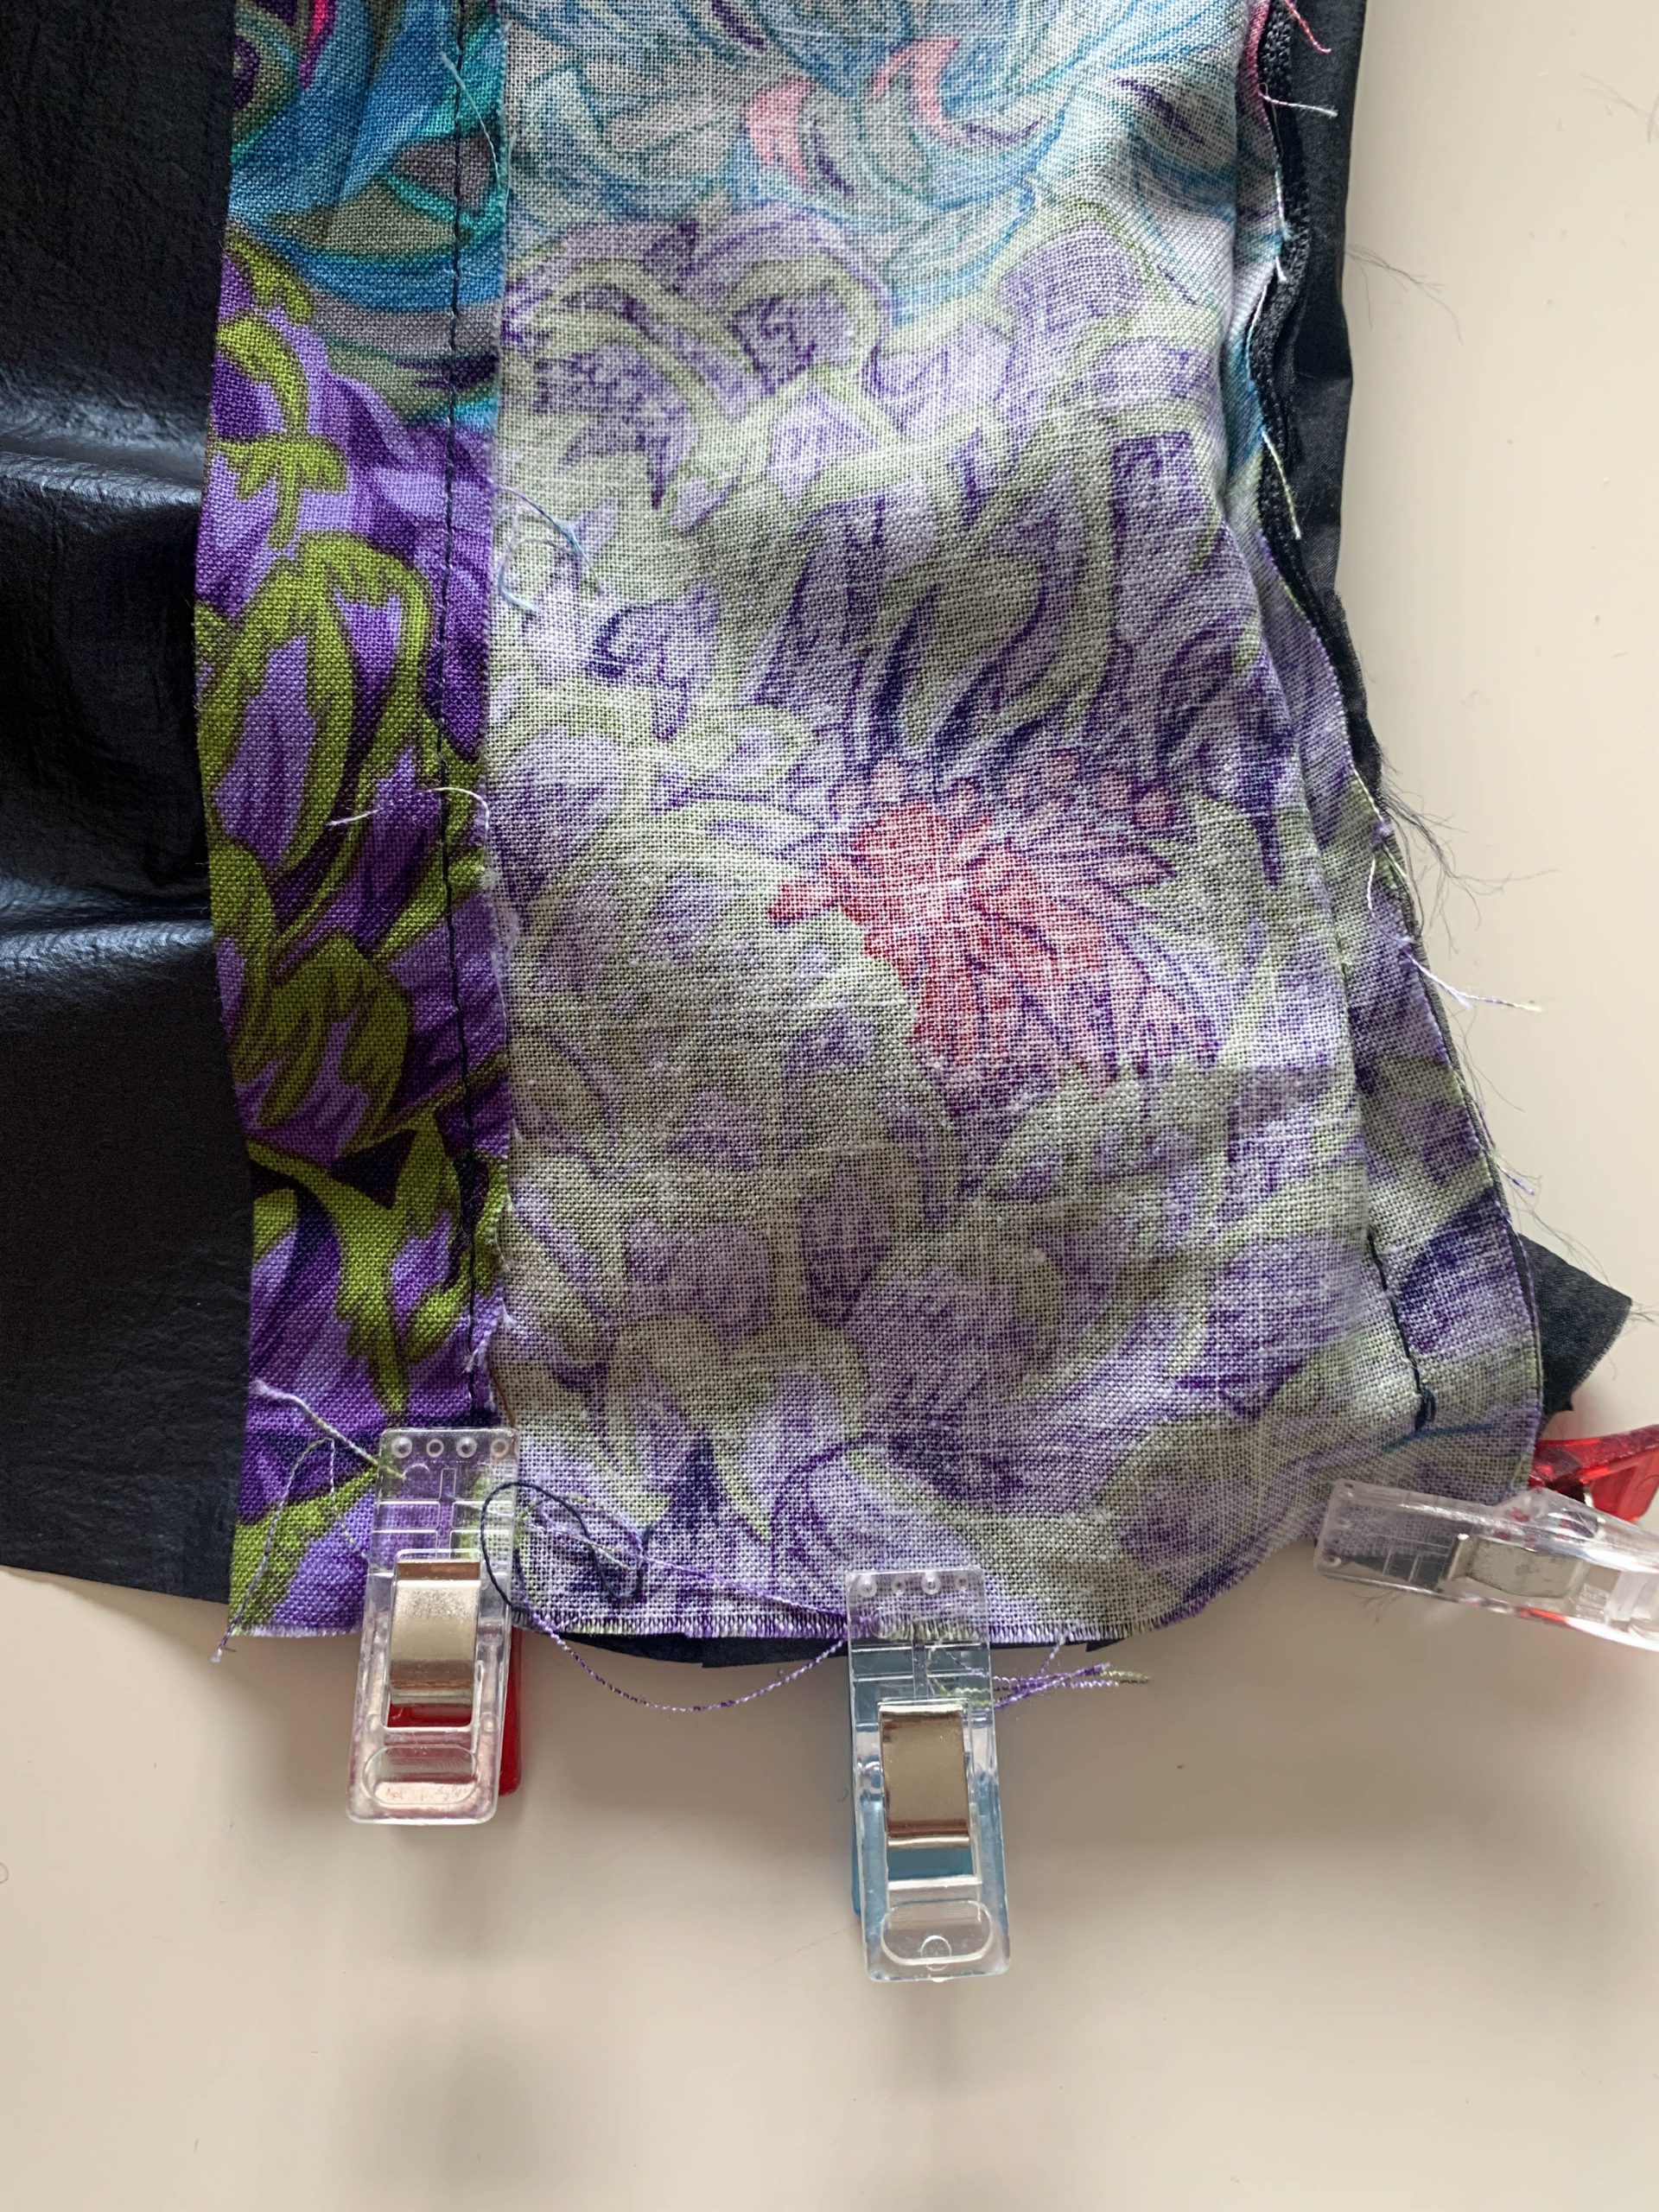
Then sew the two facing pieces onto 8a with the right sides together.
Now sew the facing onto both long edges on the zipper with the right sides together. Leave 1 cm open at the end of the facing, as the hem is still to be sewn on there. I use the zipper foot #4 for this.
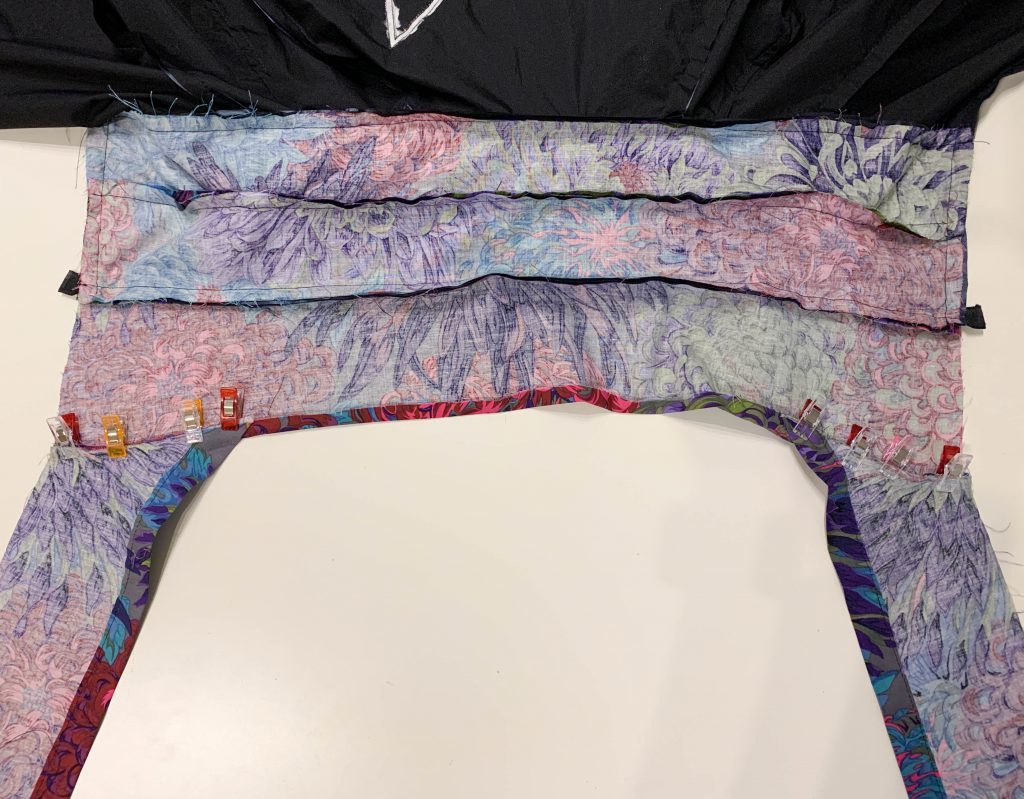
Finish the still open (and already pressed) piece on the facing now.
Place it on the collar’s seam allowance, pin it and topstitch the edge. I used the edgestitch foot #10 for this.
The finished (and tucked away ;-)) hood now looks like this from the outside:
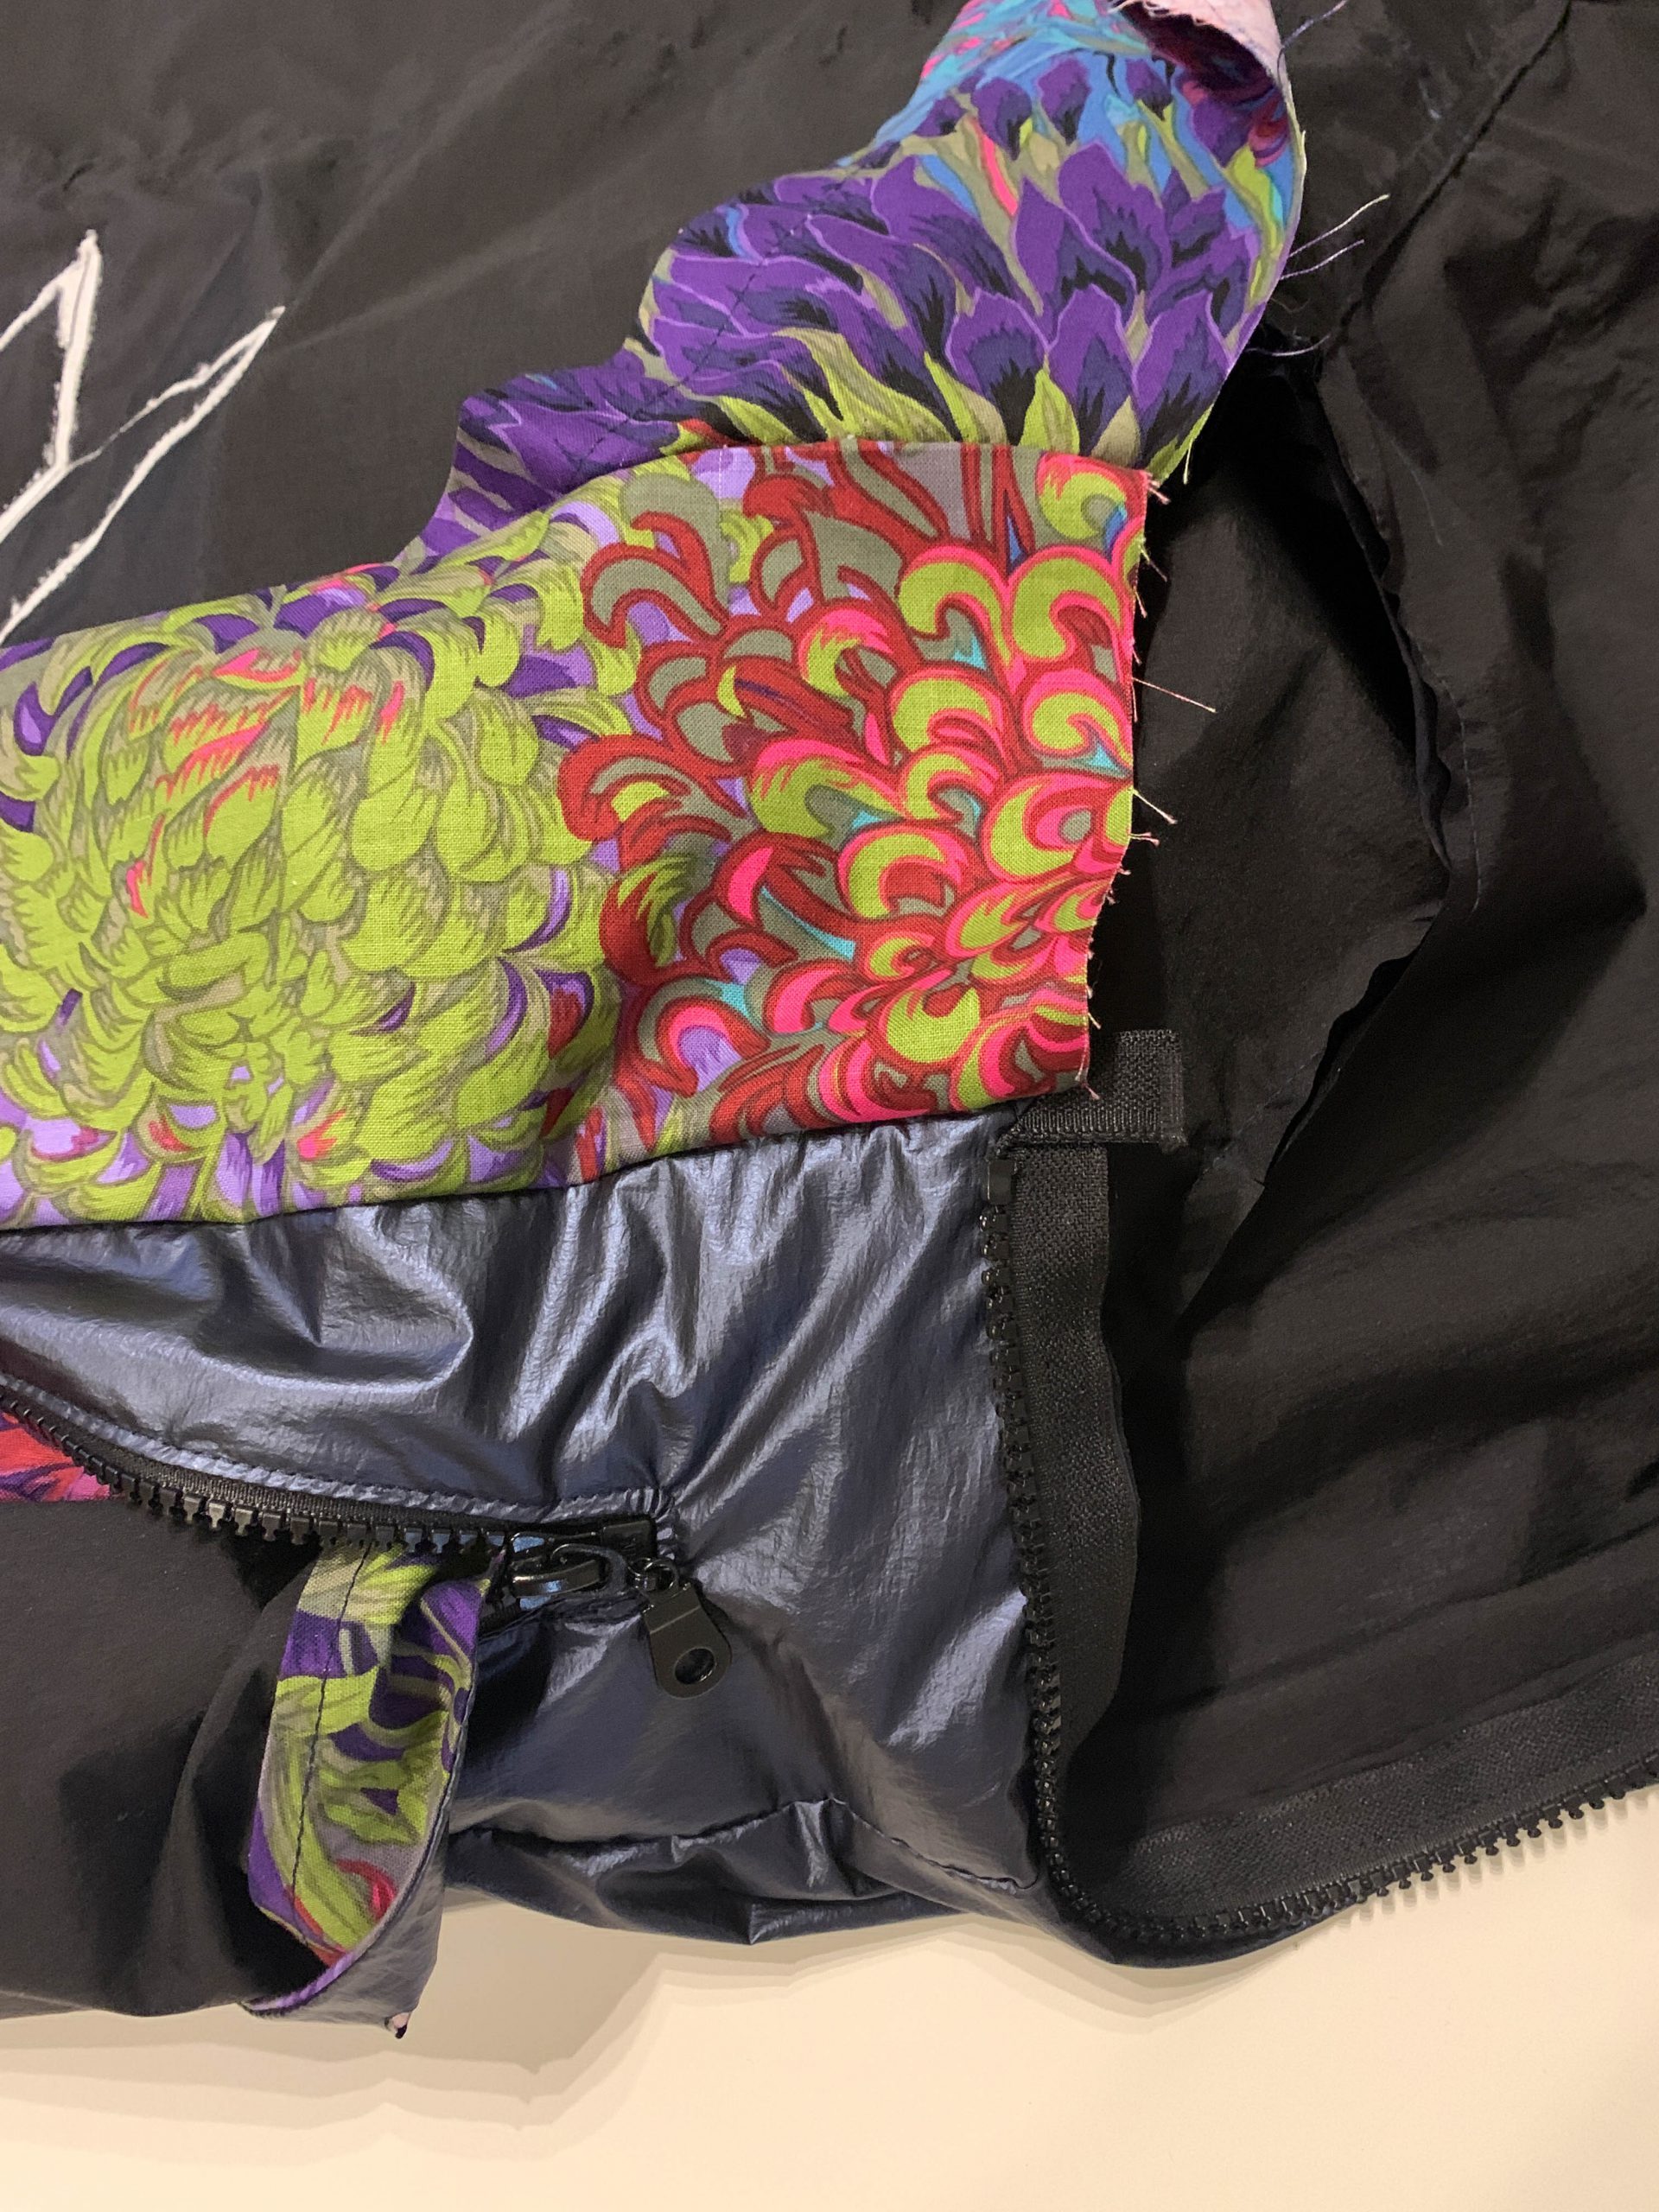
Hem
Sew the two sides of the facing onto the short side of the facing on the hem with the right sides together (!).
Since the facing has been cut shorter, the hem already now automatically pulls up.
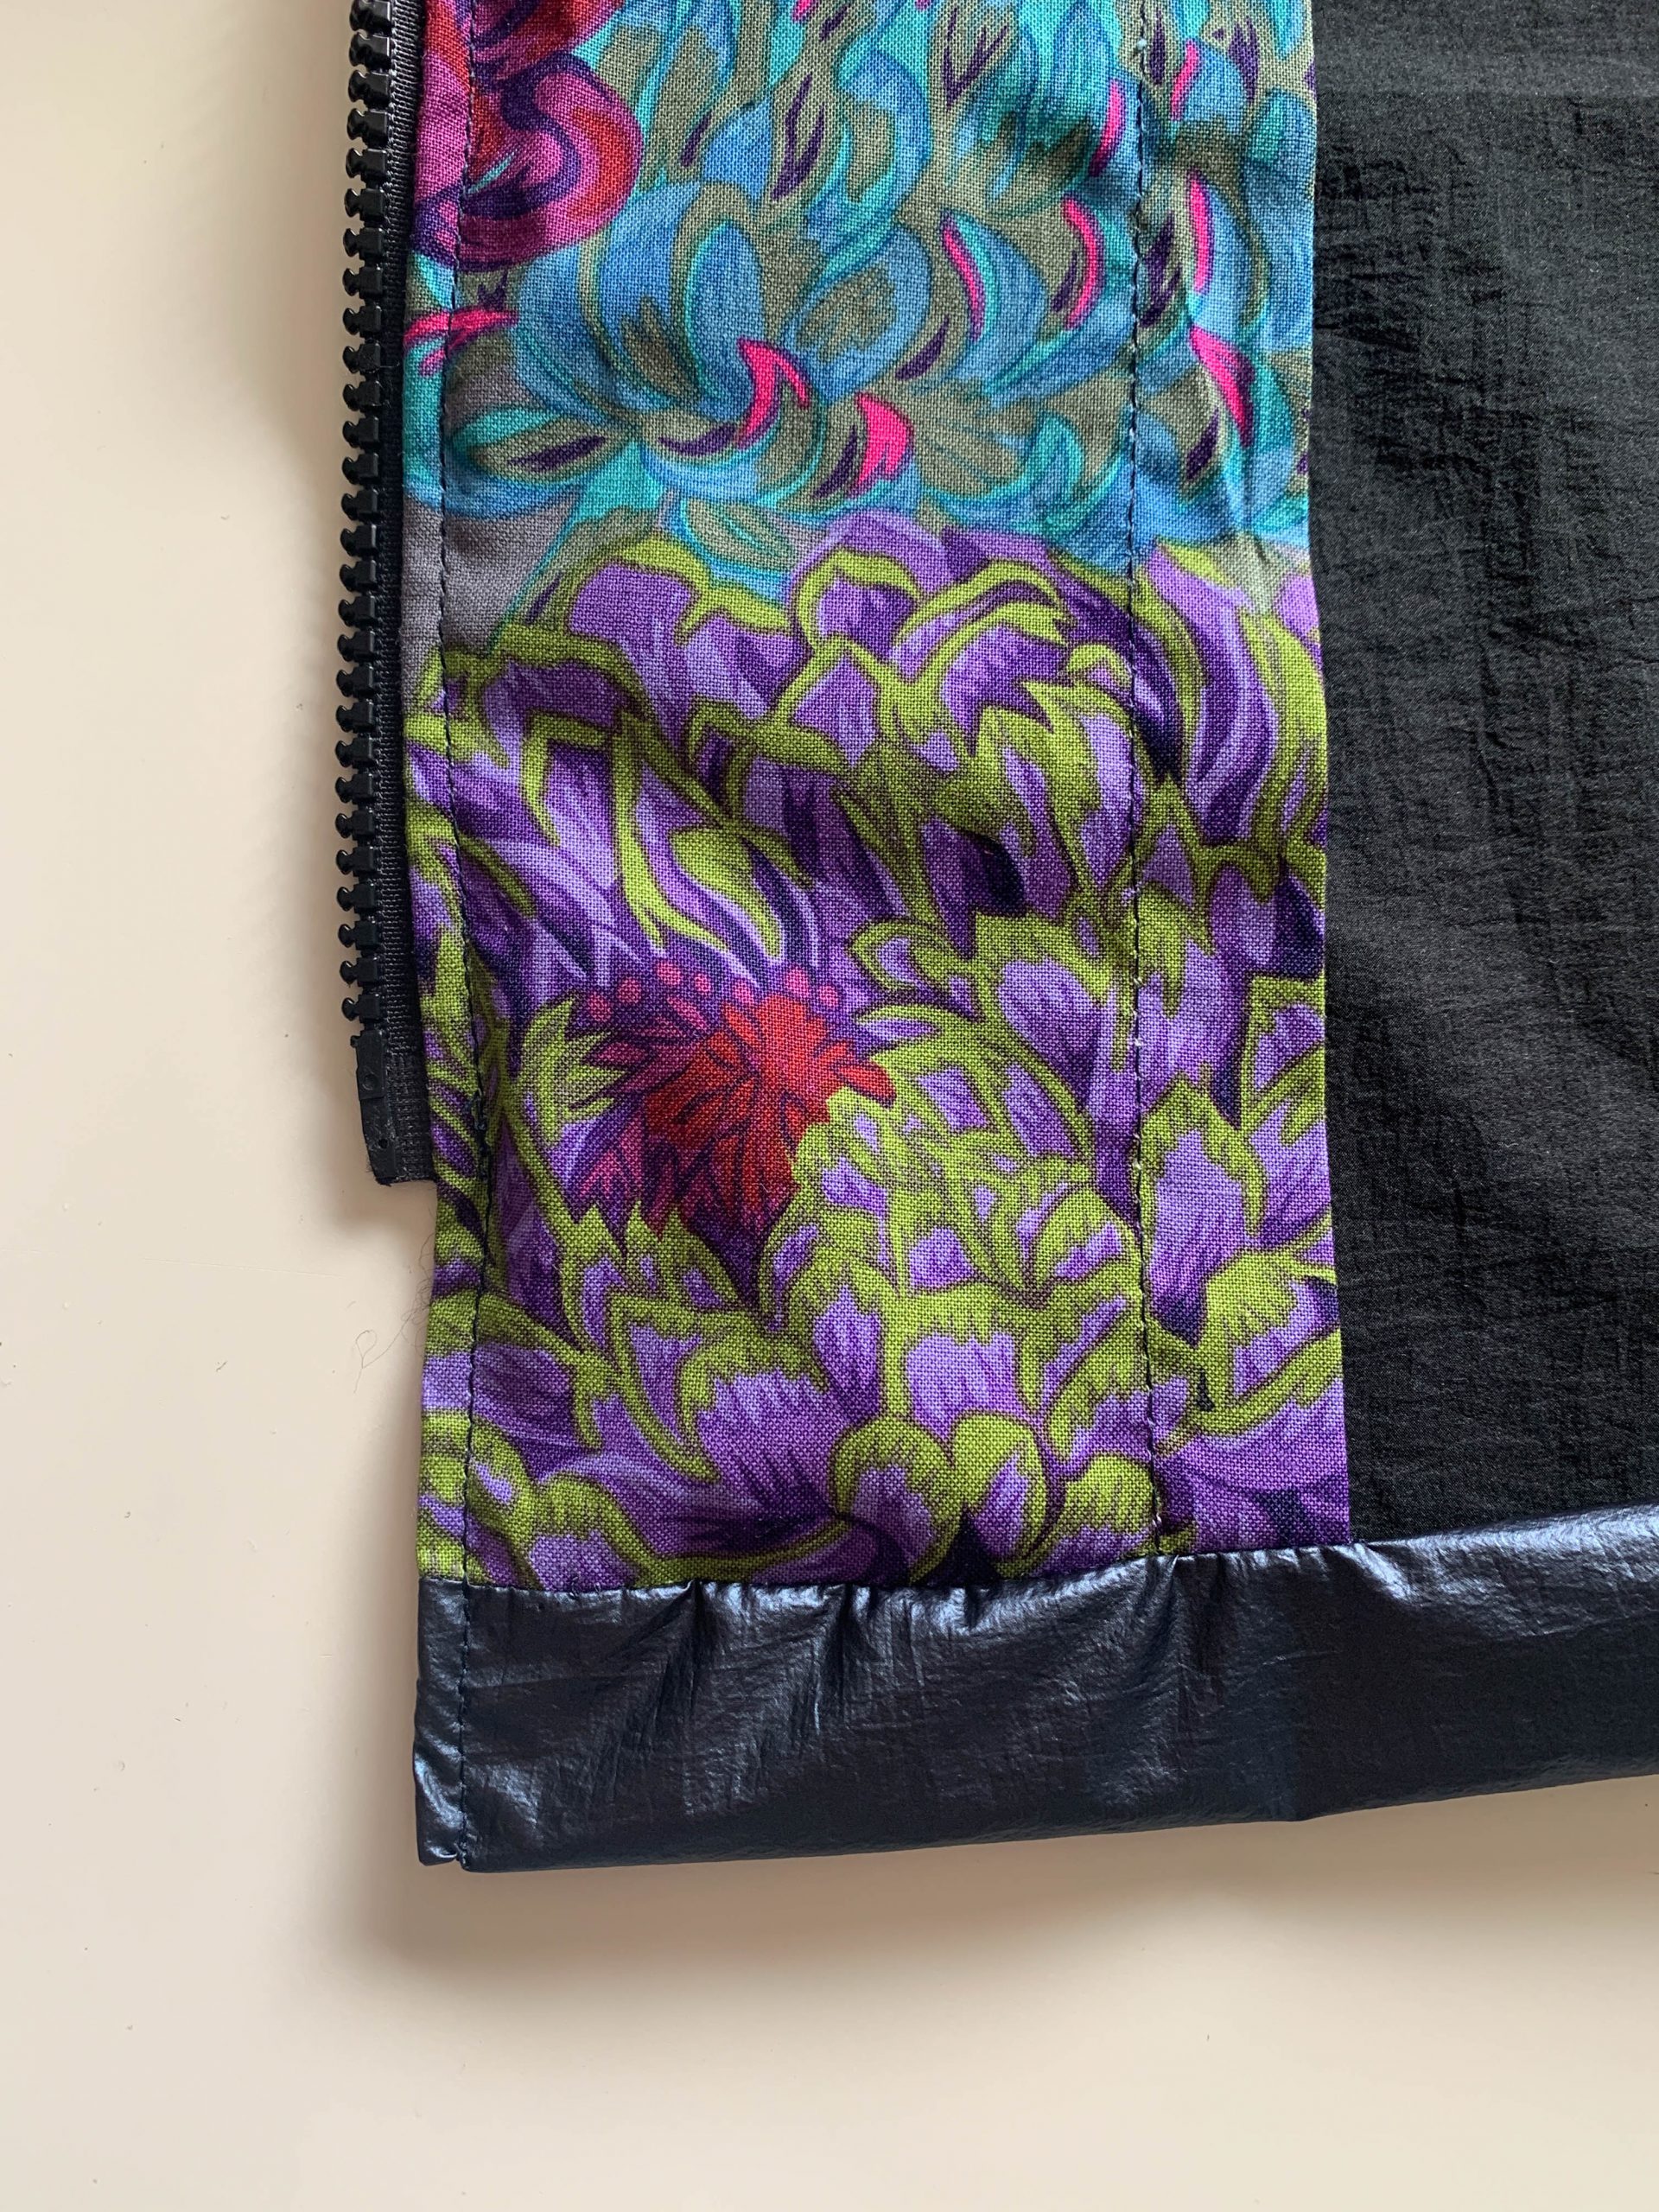
You can now pin the hem inside all the way round and sew it.
If you like, you can now topstitch the zipper on both sides close to the edge so that no fabric can get caught when opening and closing the zipper. I use the zipper foot #4 again for this.
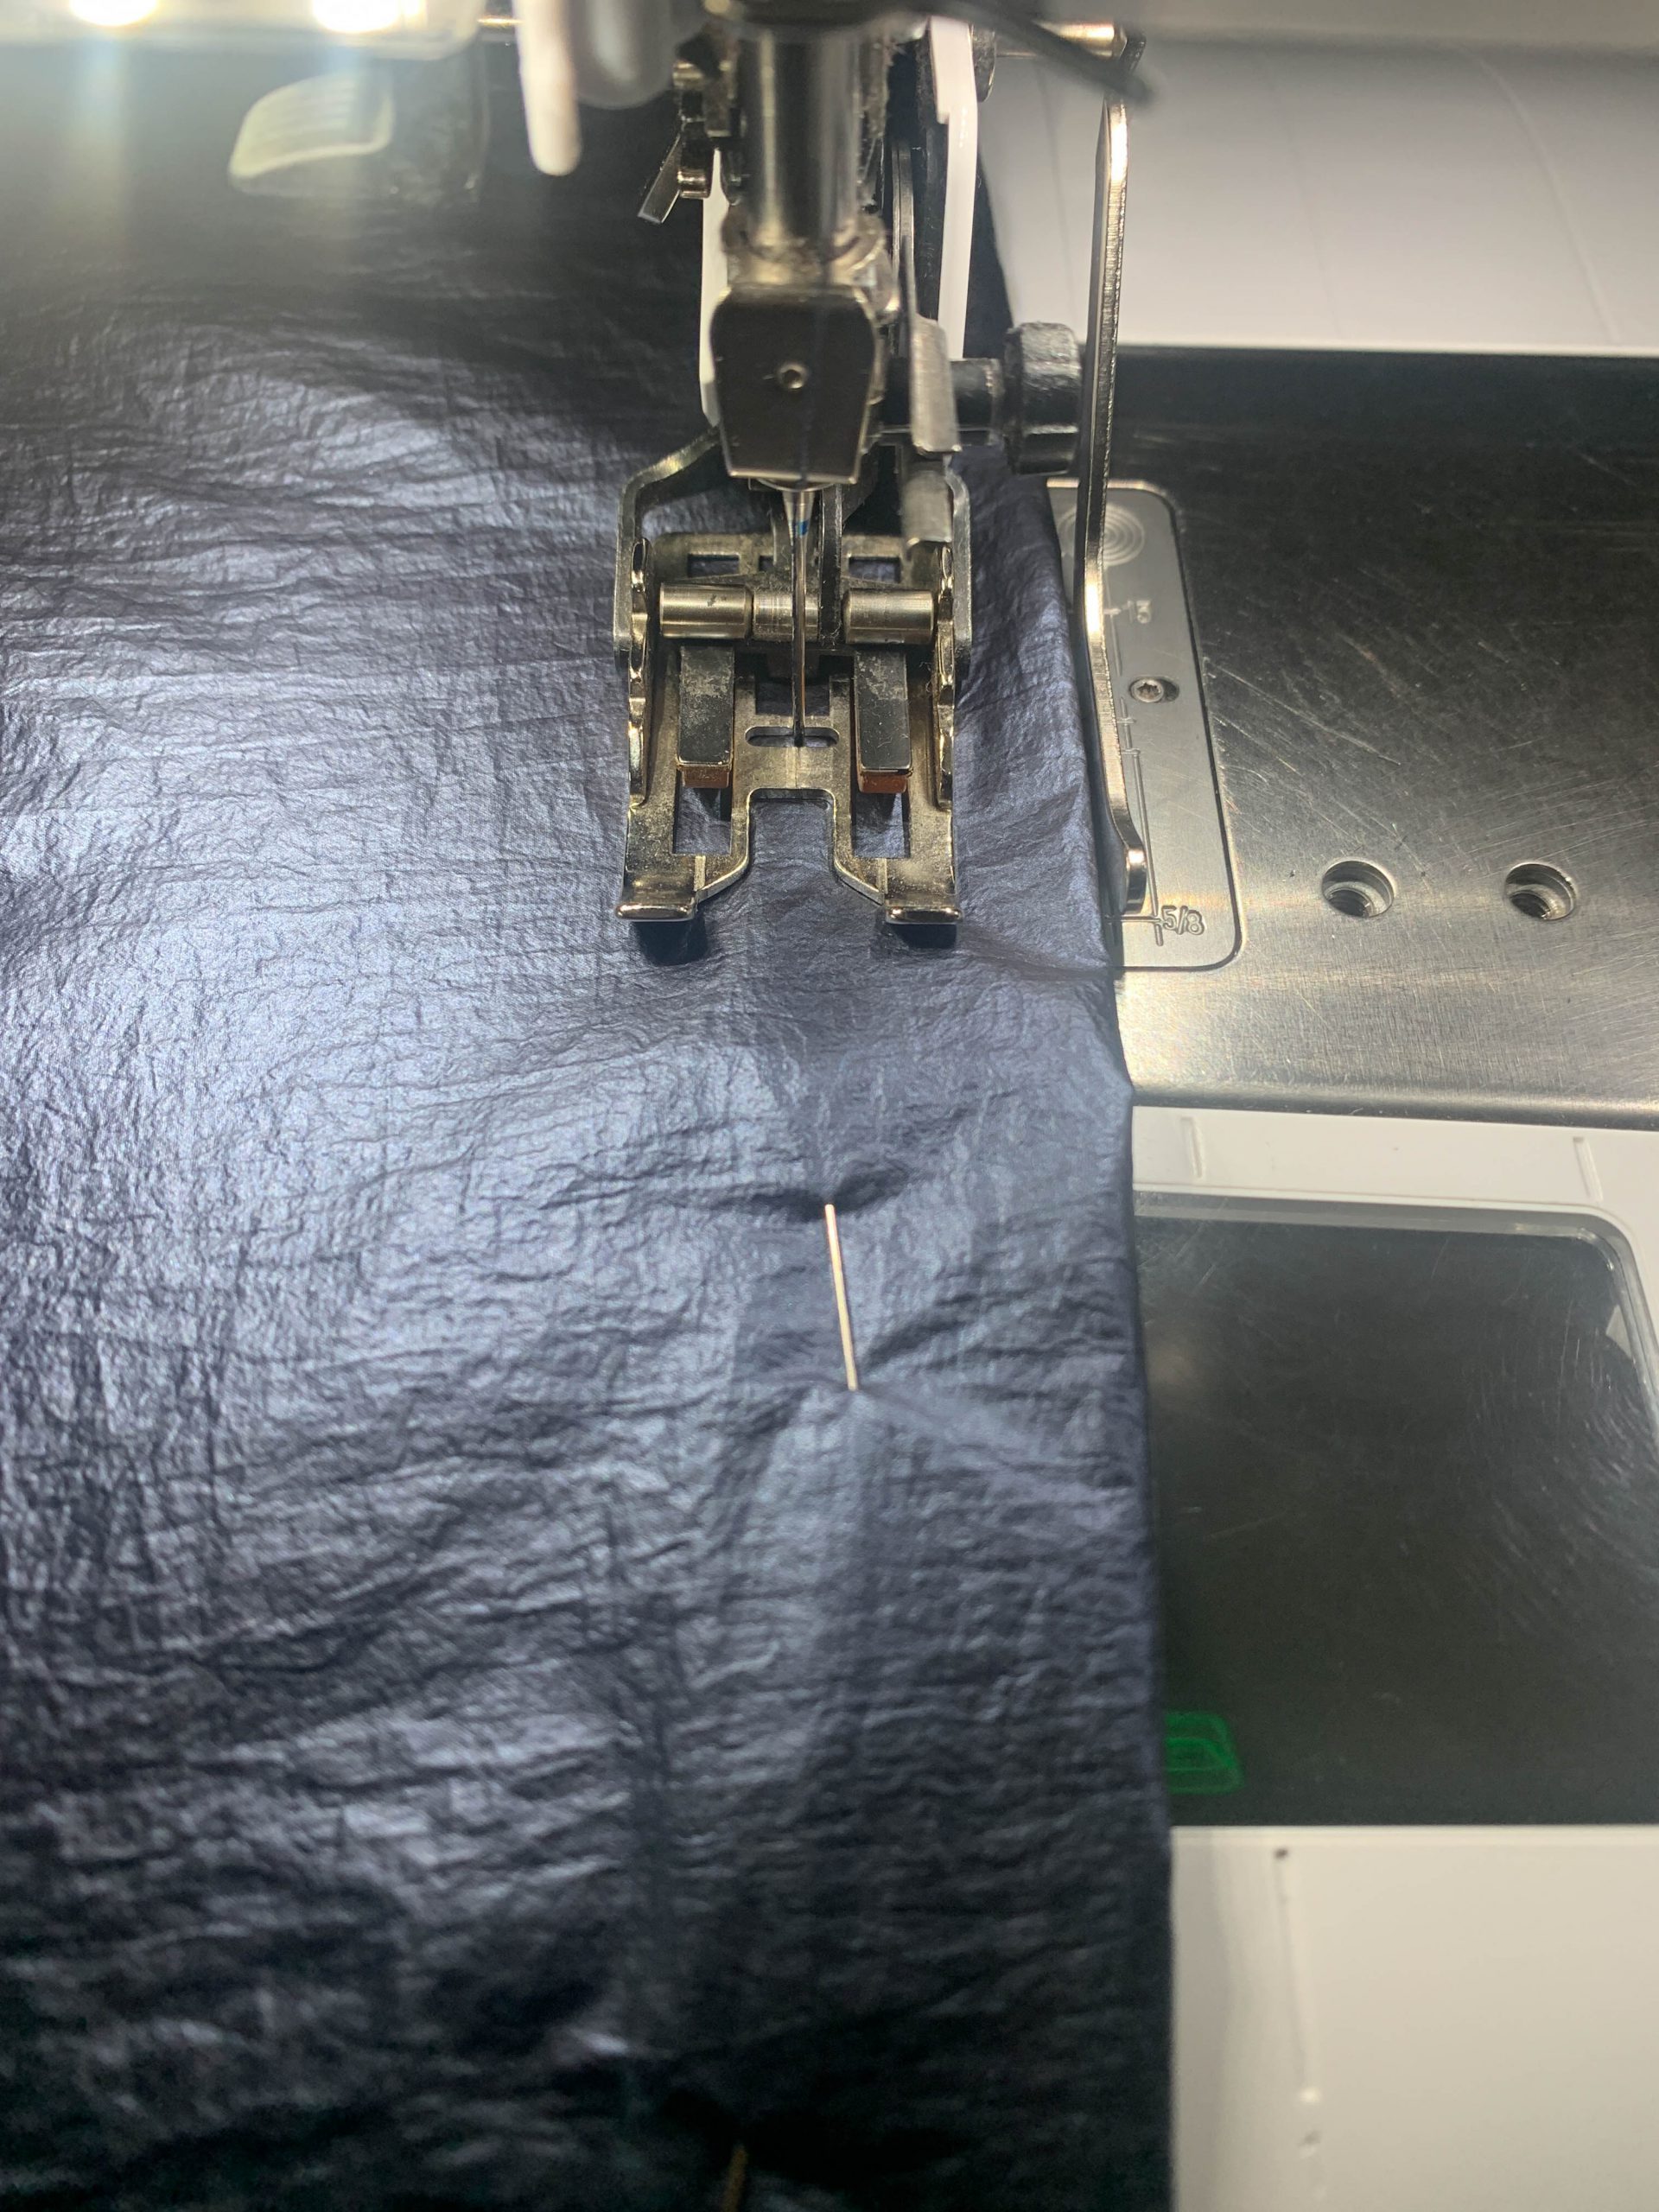
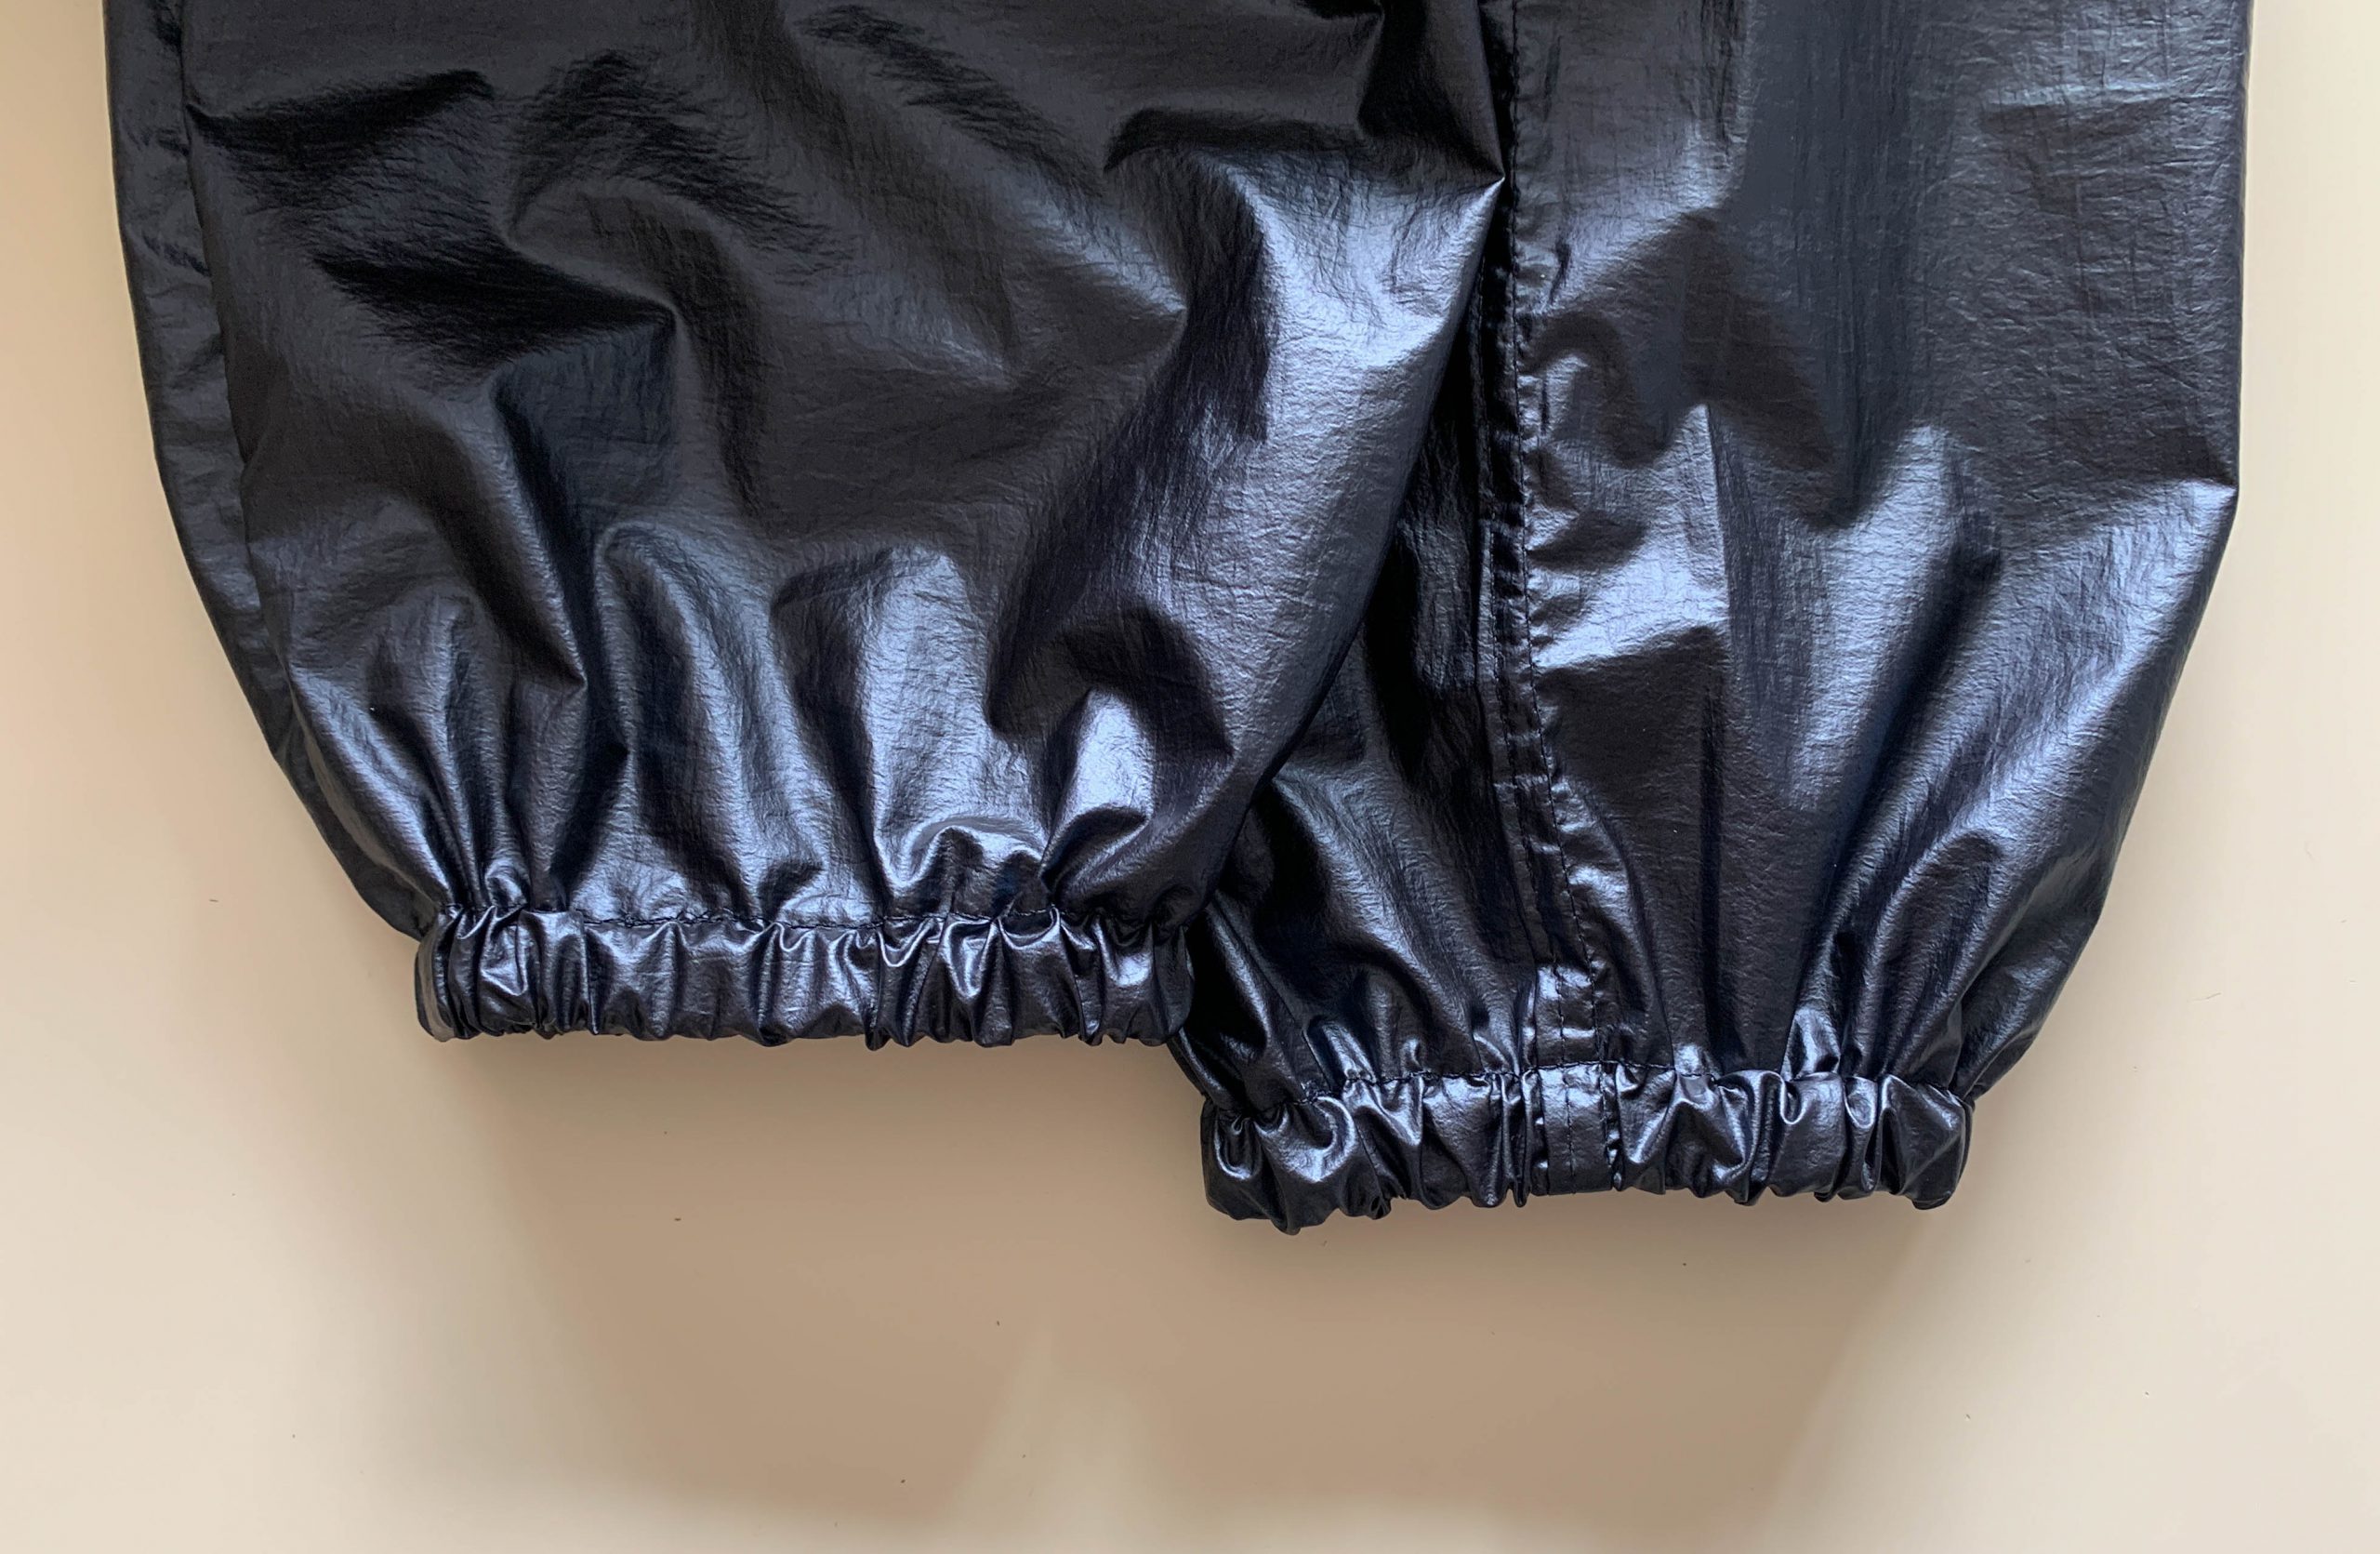
Hemming the sleeves
I use the machine’s free arm to hem the sleeves. As I was using an elastic band, I had to leave a small gap, then pull in the elastic band and then close the gap.
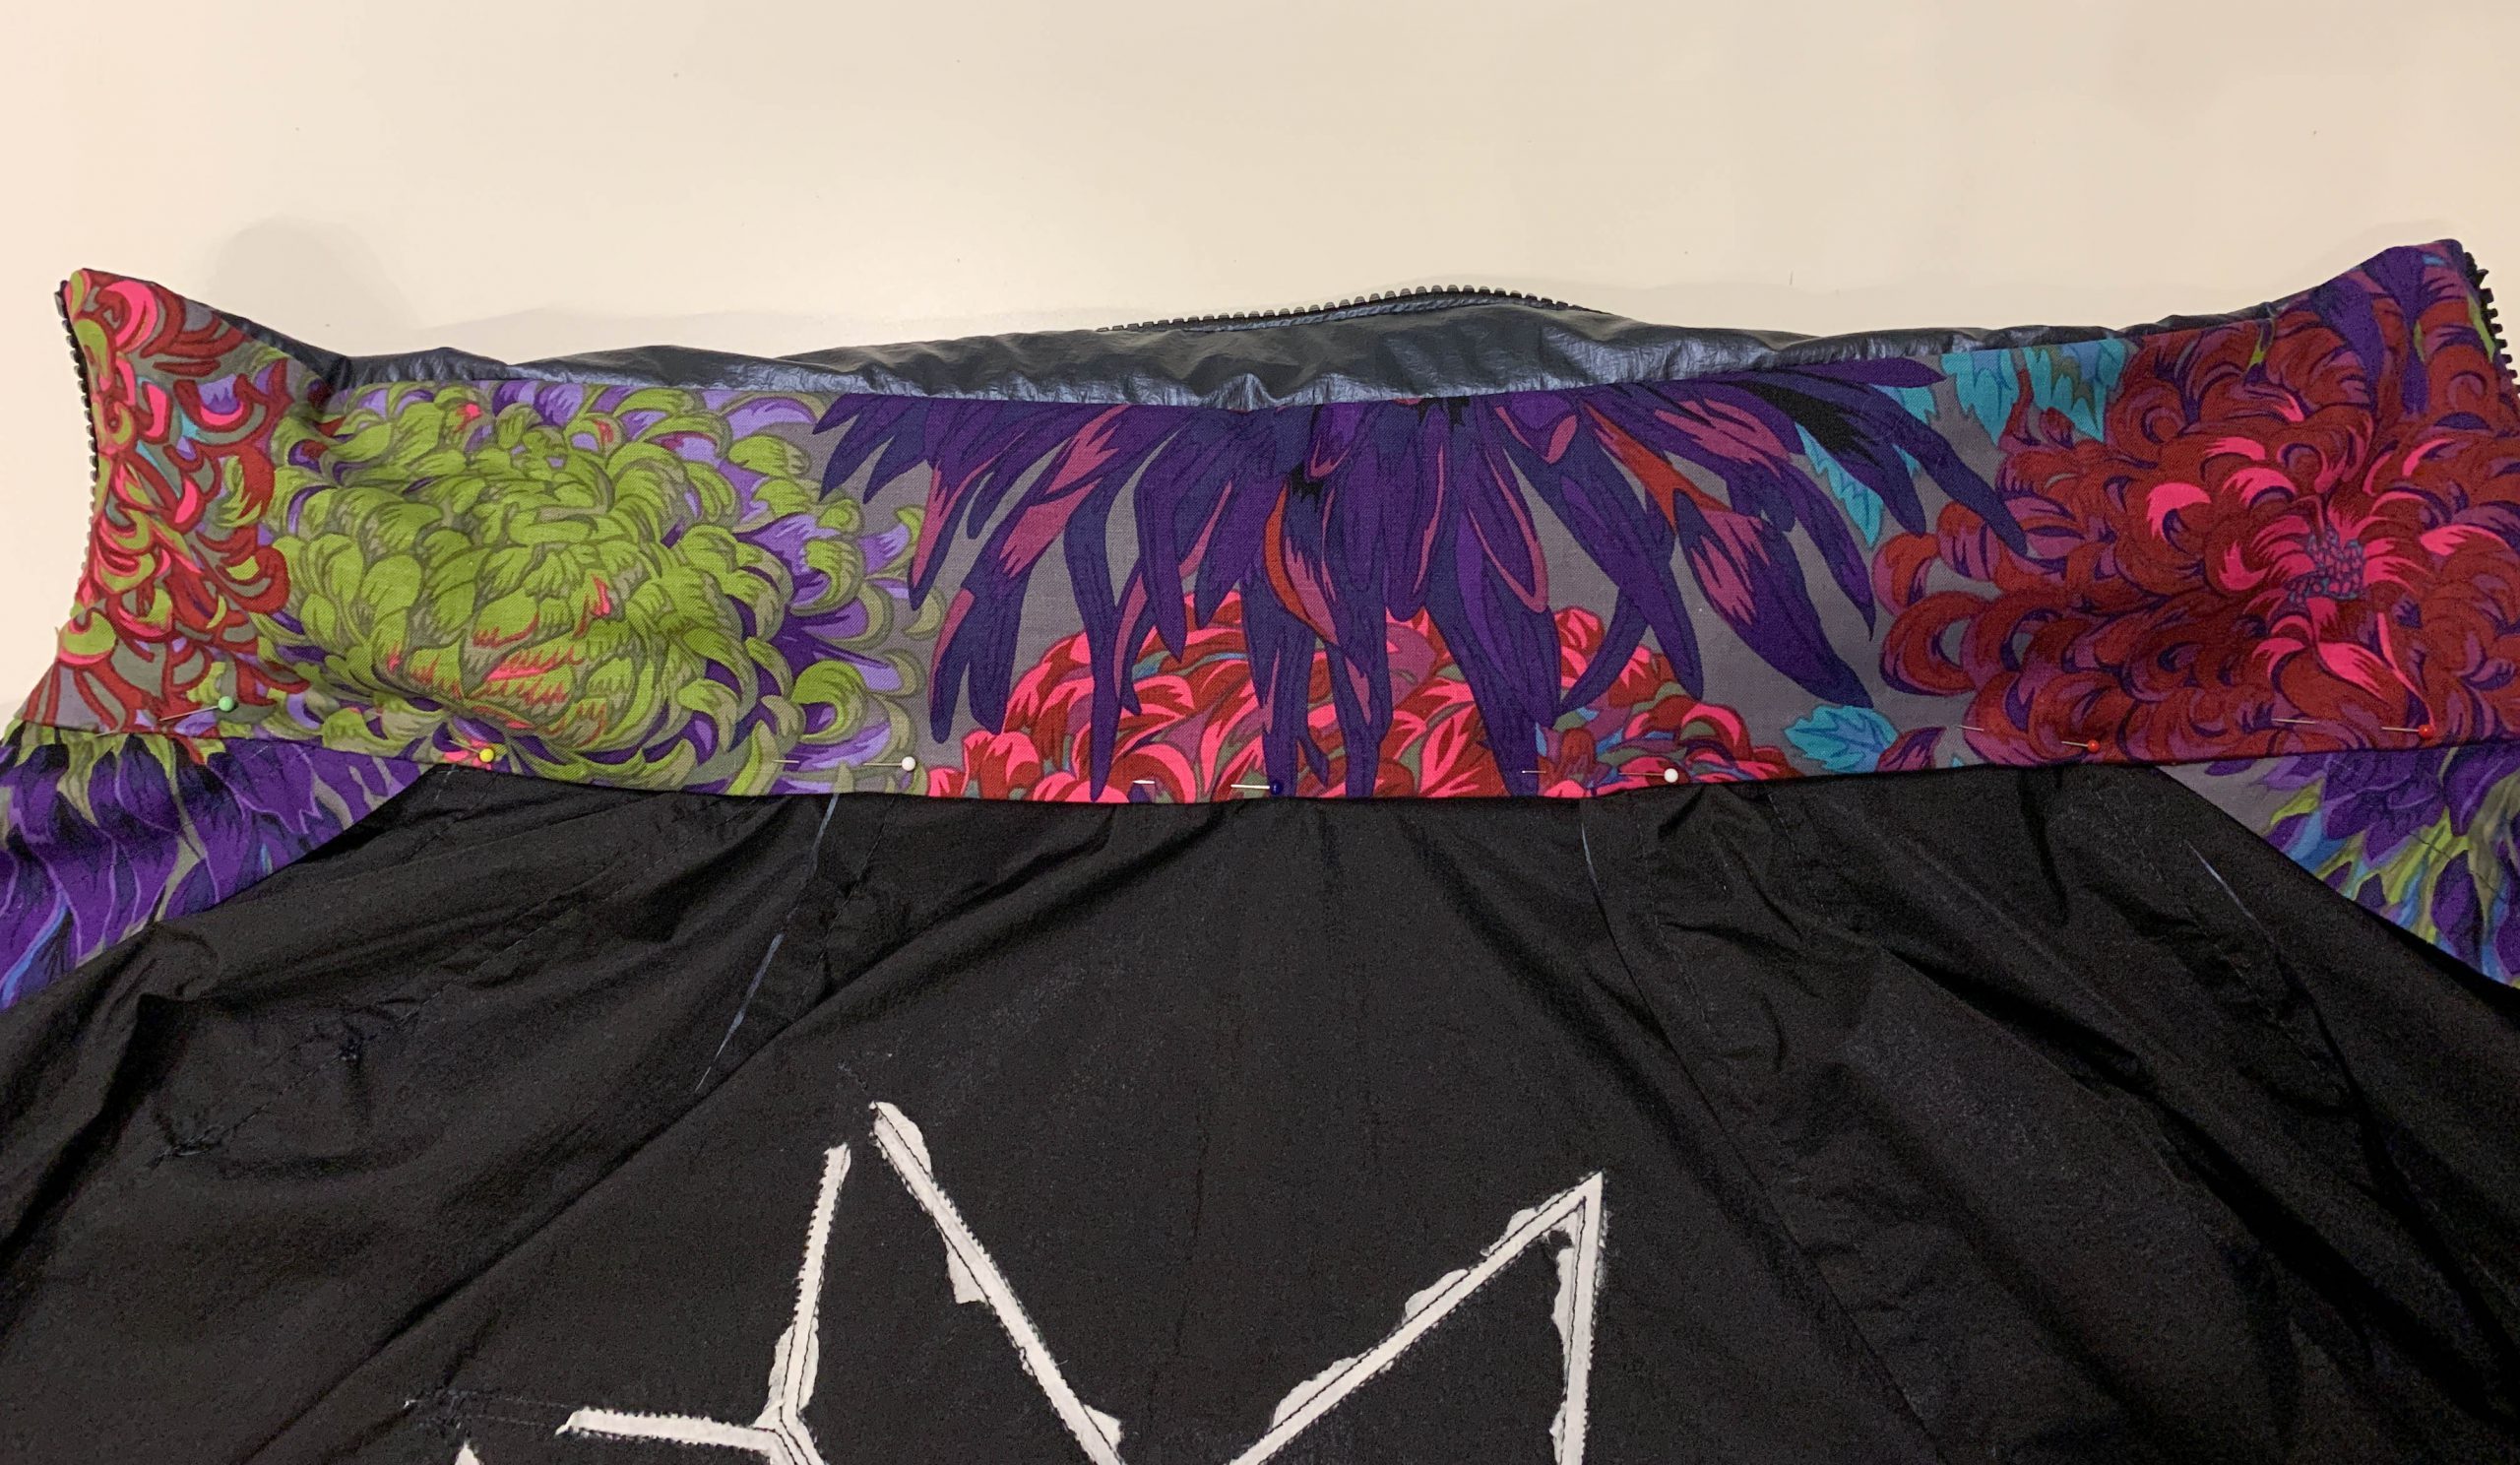
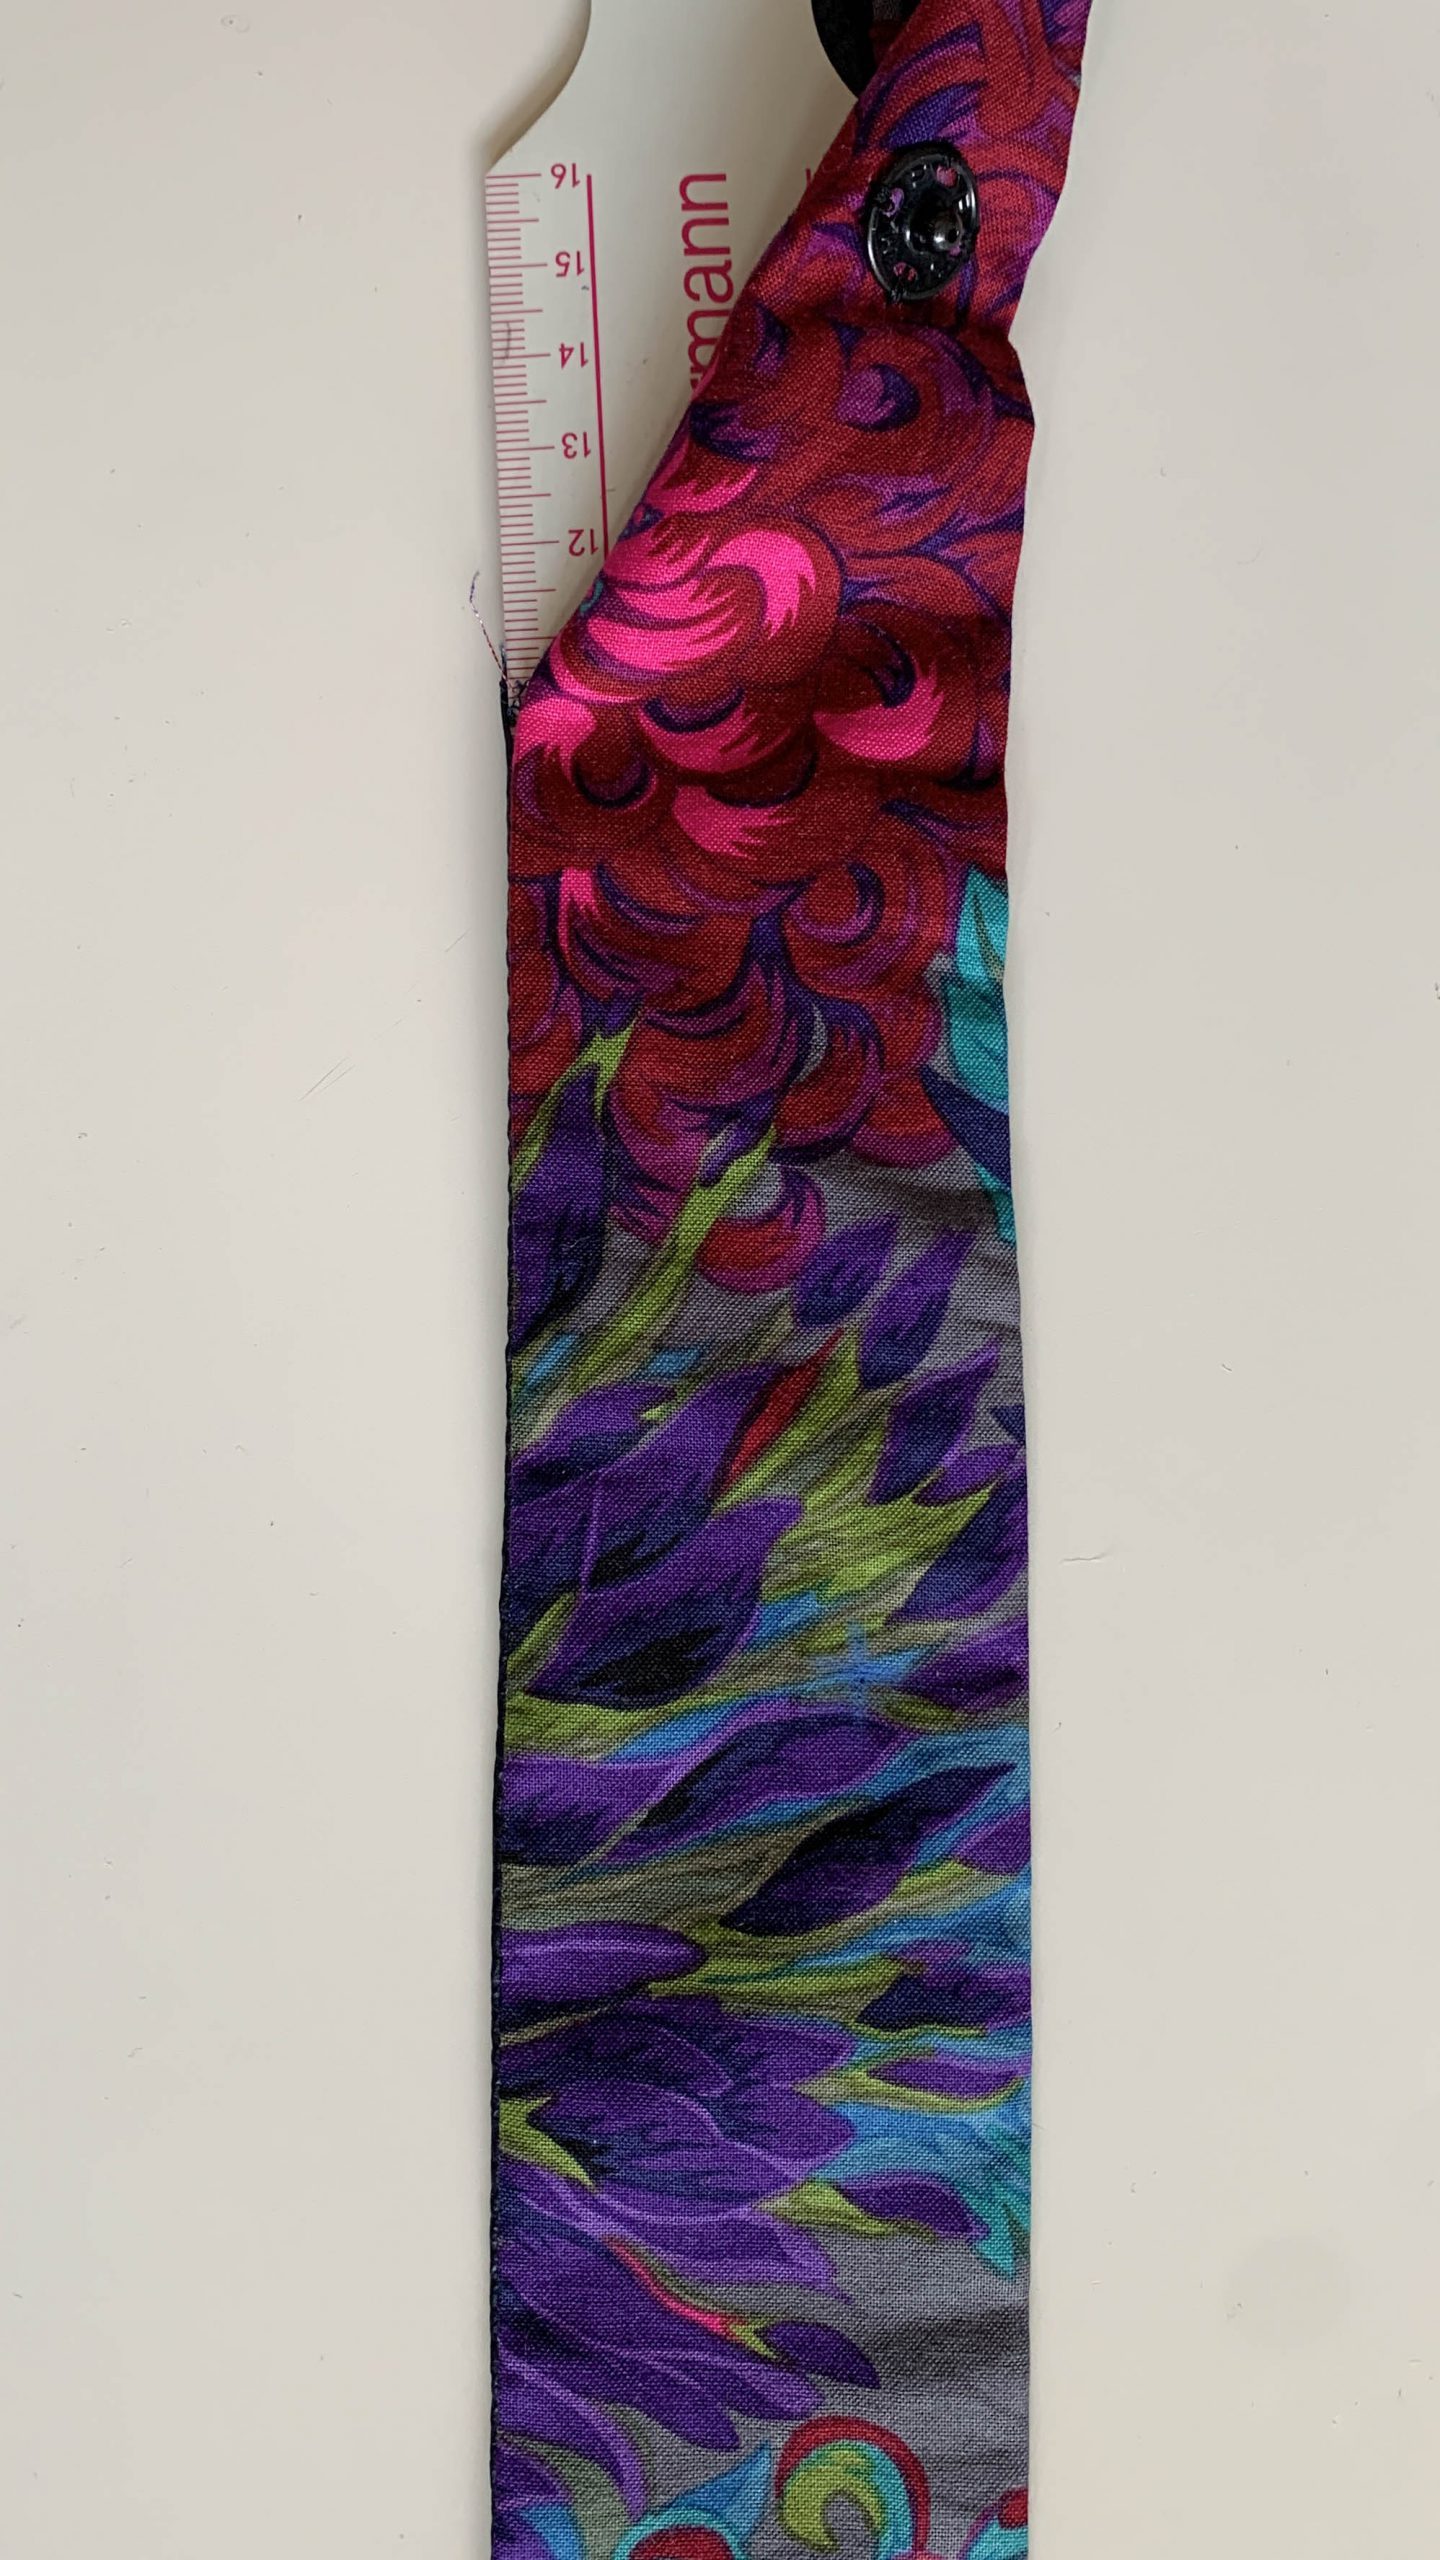
Zipper panel
Sew the two pieces together with the right sides together, leaving a turning opening on the long, straight edge, which is then sewn onto the coat. Trim and cut the seam allowances in the curves and turn and shape the piece.
Sew the buttons on the lining fabric using the markings on the pattern. I’m doing this now, because I can reach through the turning opening on the wrong side and the button stitching is then invisible later on. I put something between the layers of fabric so I don’t accidentally sew the outer fabric.
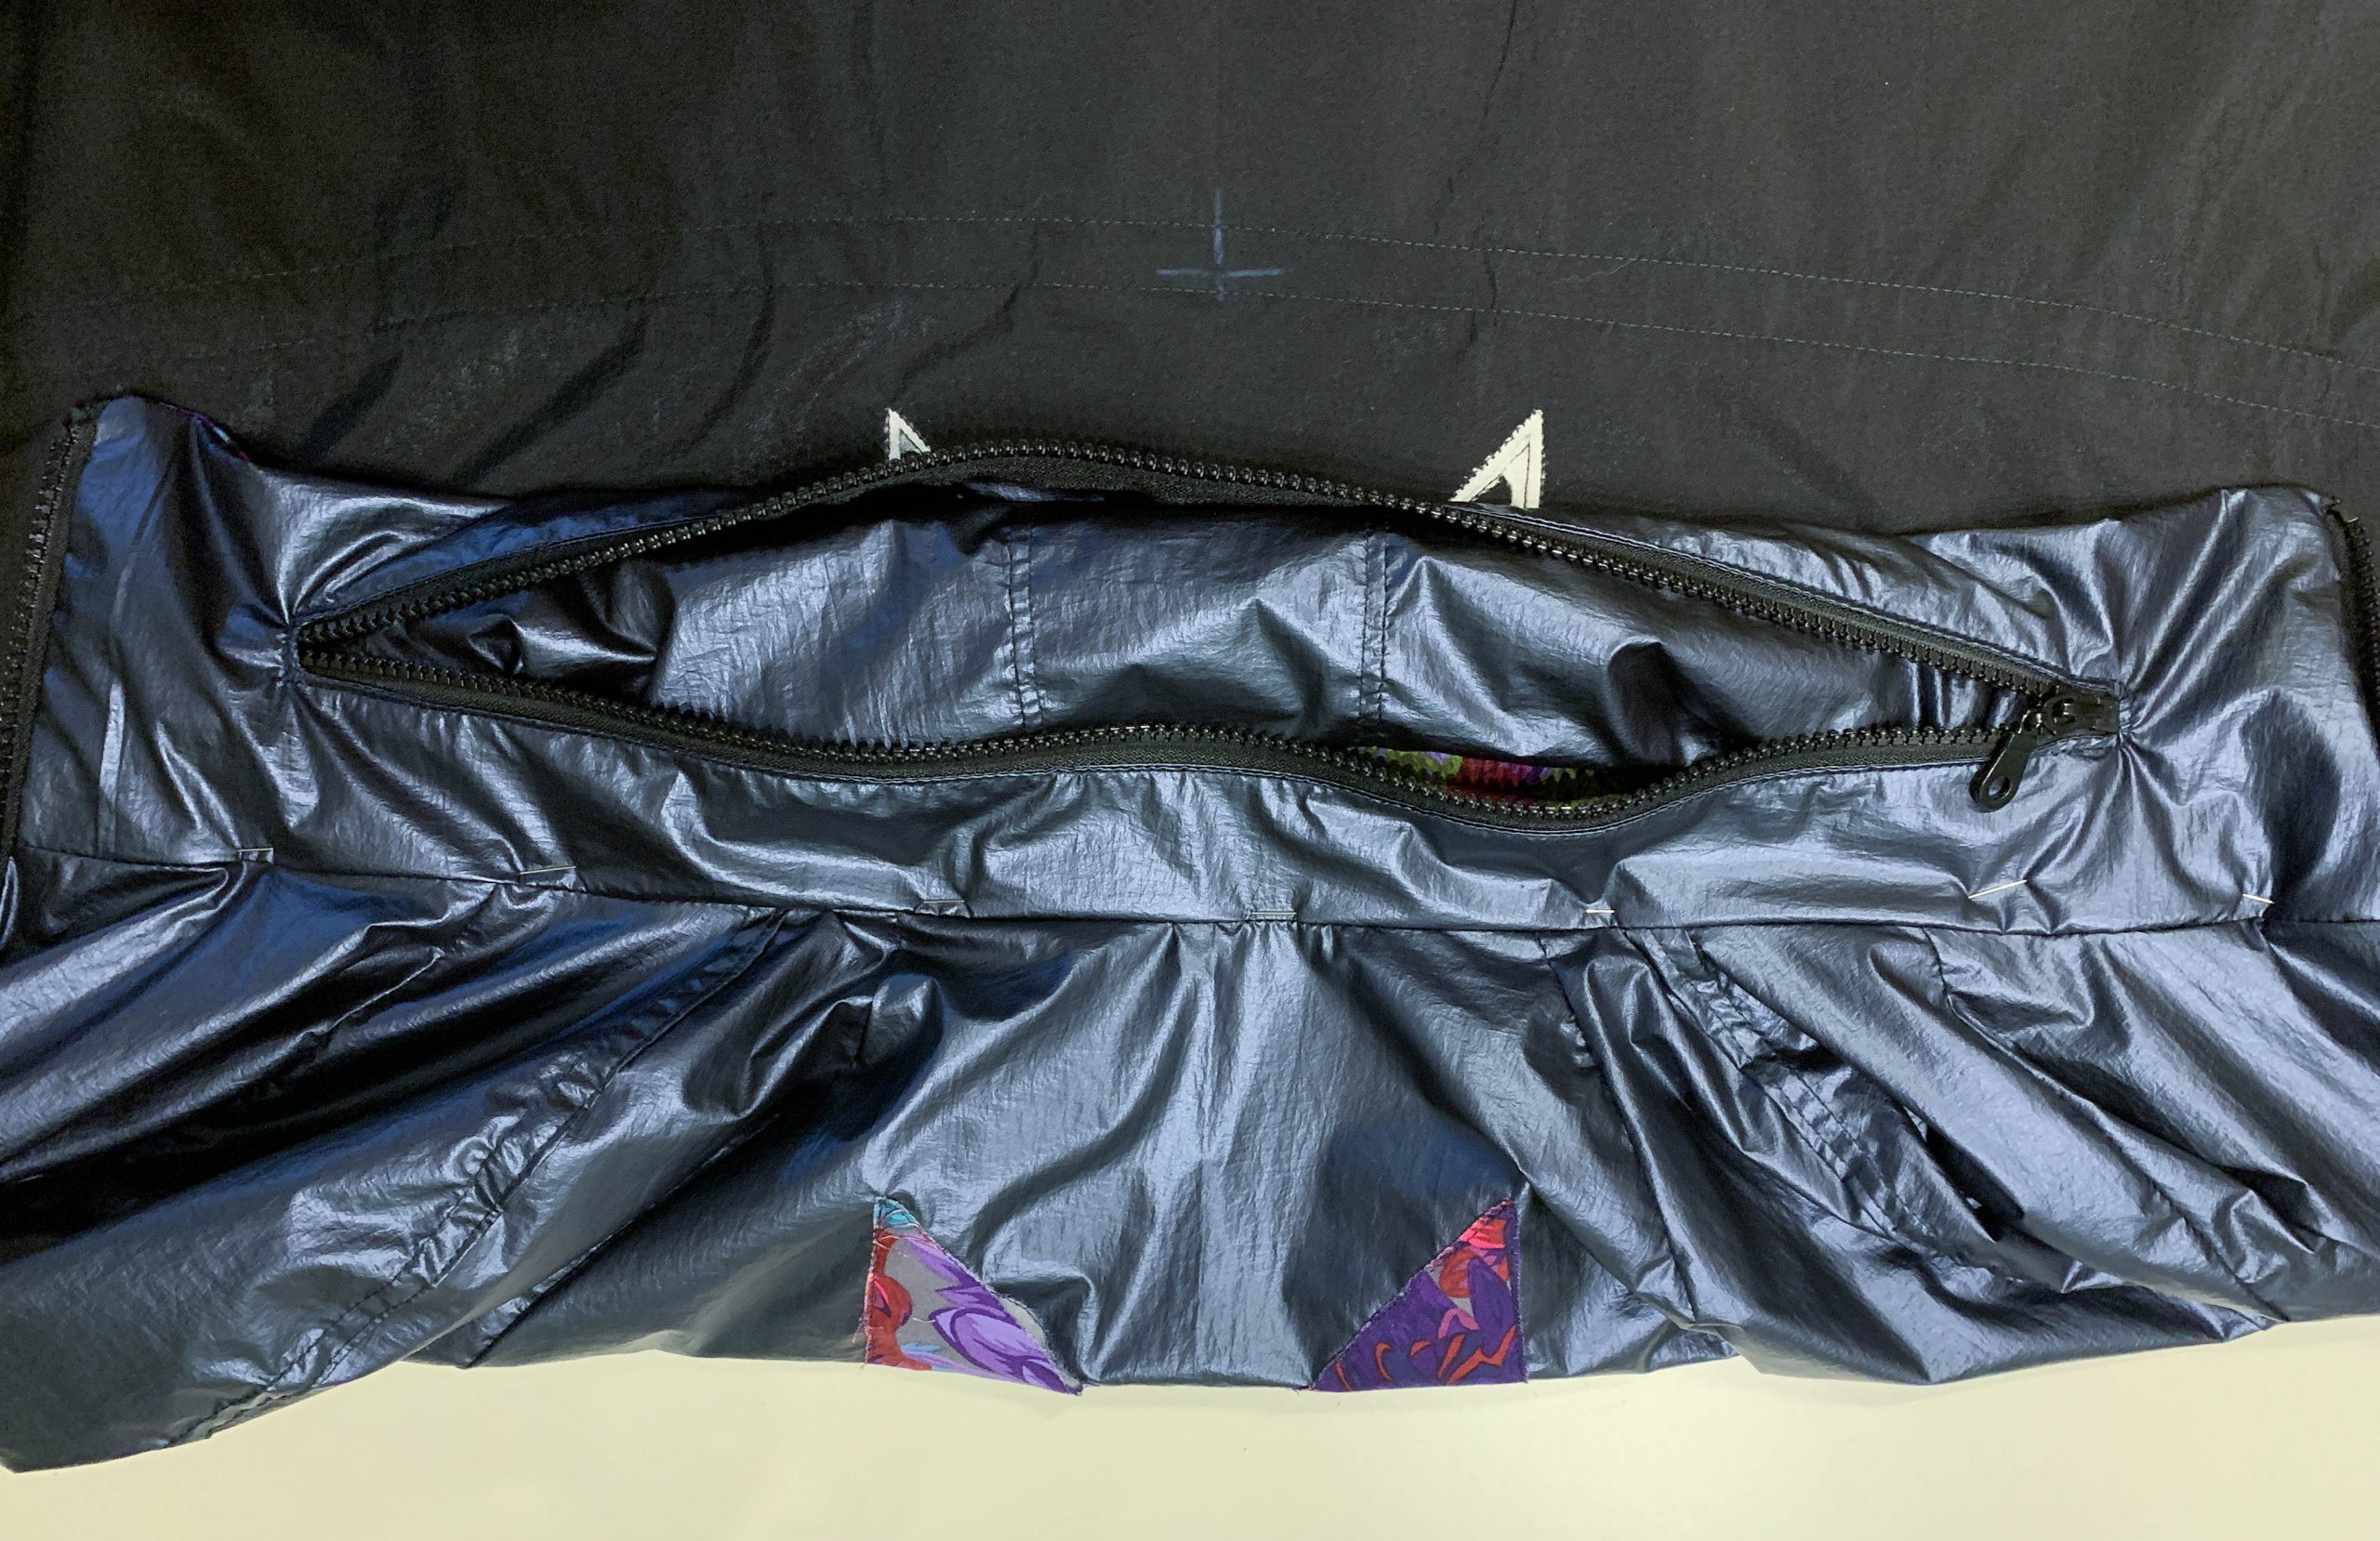
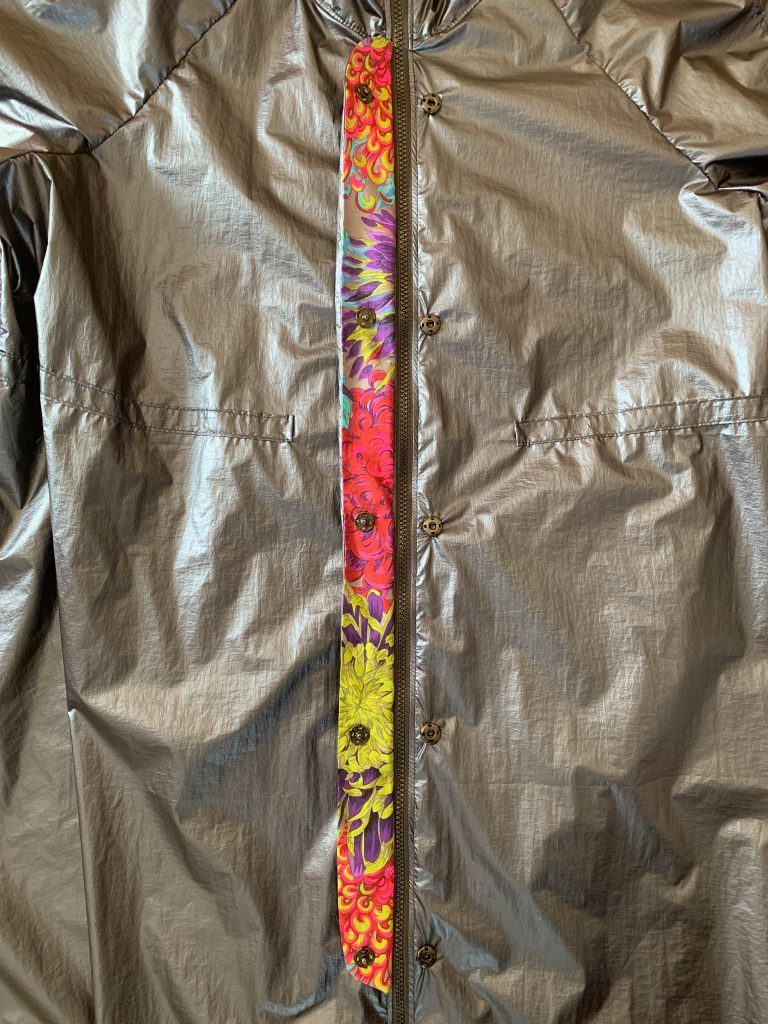
Now you can place the finished panel with the buttons on the coat and sew it on close to the edge. I use the edgestitch foot #10 for this. Close the turning opening at the same time.
TIP: Make sure that the zipper facing underneath is also nice and flat, as you are also going to sew this on.
Sew the female part for the buttons on the outer fabric on the opposite side.
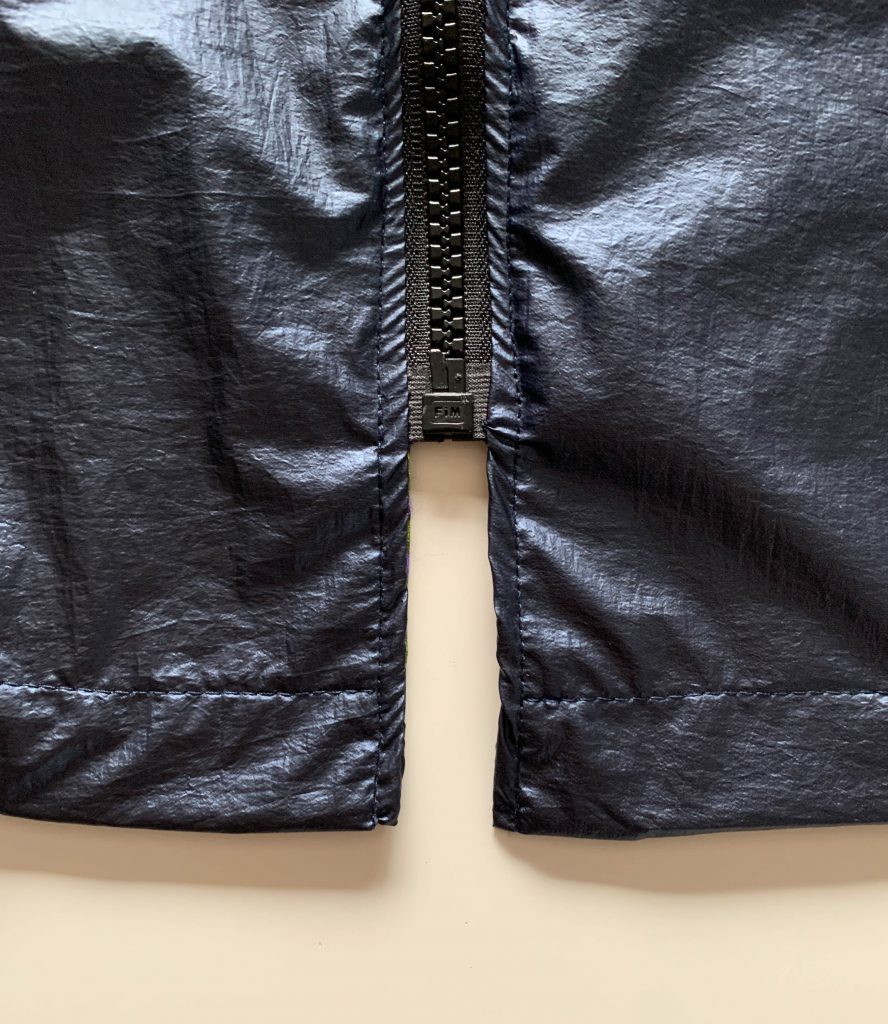
Finishing your raincoat
Last but not least, insert the elastic band into the coat and hood drawstring casing and attach the cord stoppers.
You can also remove any leftover embroidery backing on the inside of the jacket.

Your raincoat is finished!


I hope that my tutorial on this Fashion Look will help you and that you have lots of fun making this raincoat!


Where did you find that awesome windbreaker fabric? Really makes coat look more beautiful
Dear Merry,
Lisa found her fabric here: https://www.kreando.ch/funktionsstoff-windbreaker-marine/
But the shop does not have international shipping, they only send to Switzerland and Liechtenstein.
Hi so beautiful look raincoat. Very nice tutorial. Beautiful design. Very helpful information sharing you. I like.