 BERNINA Corporate Blog -
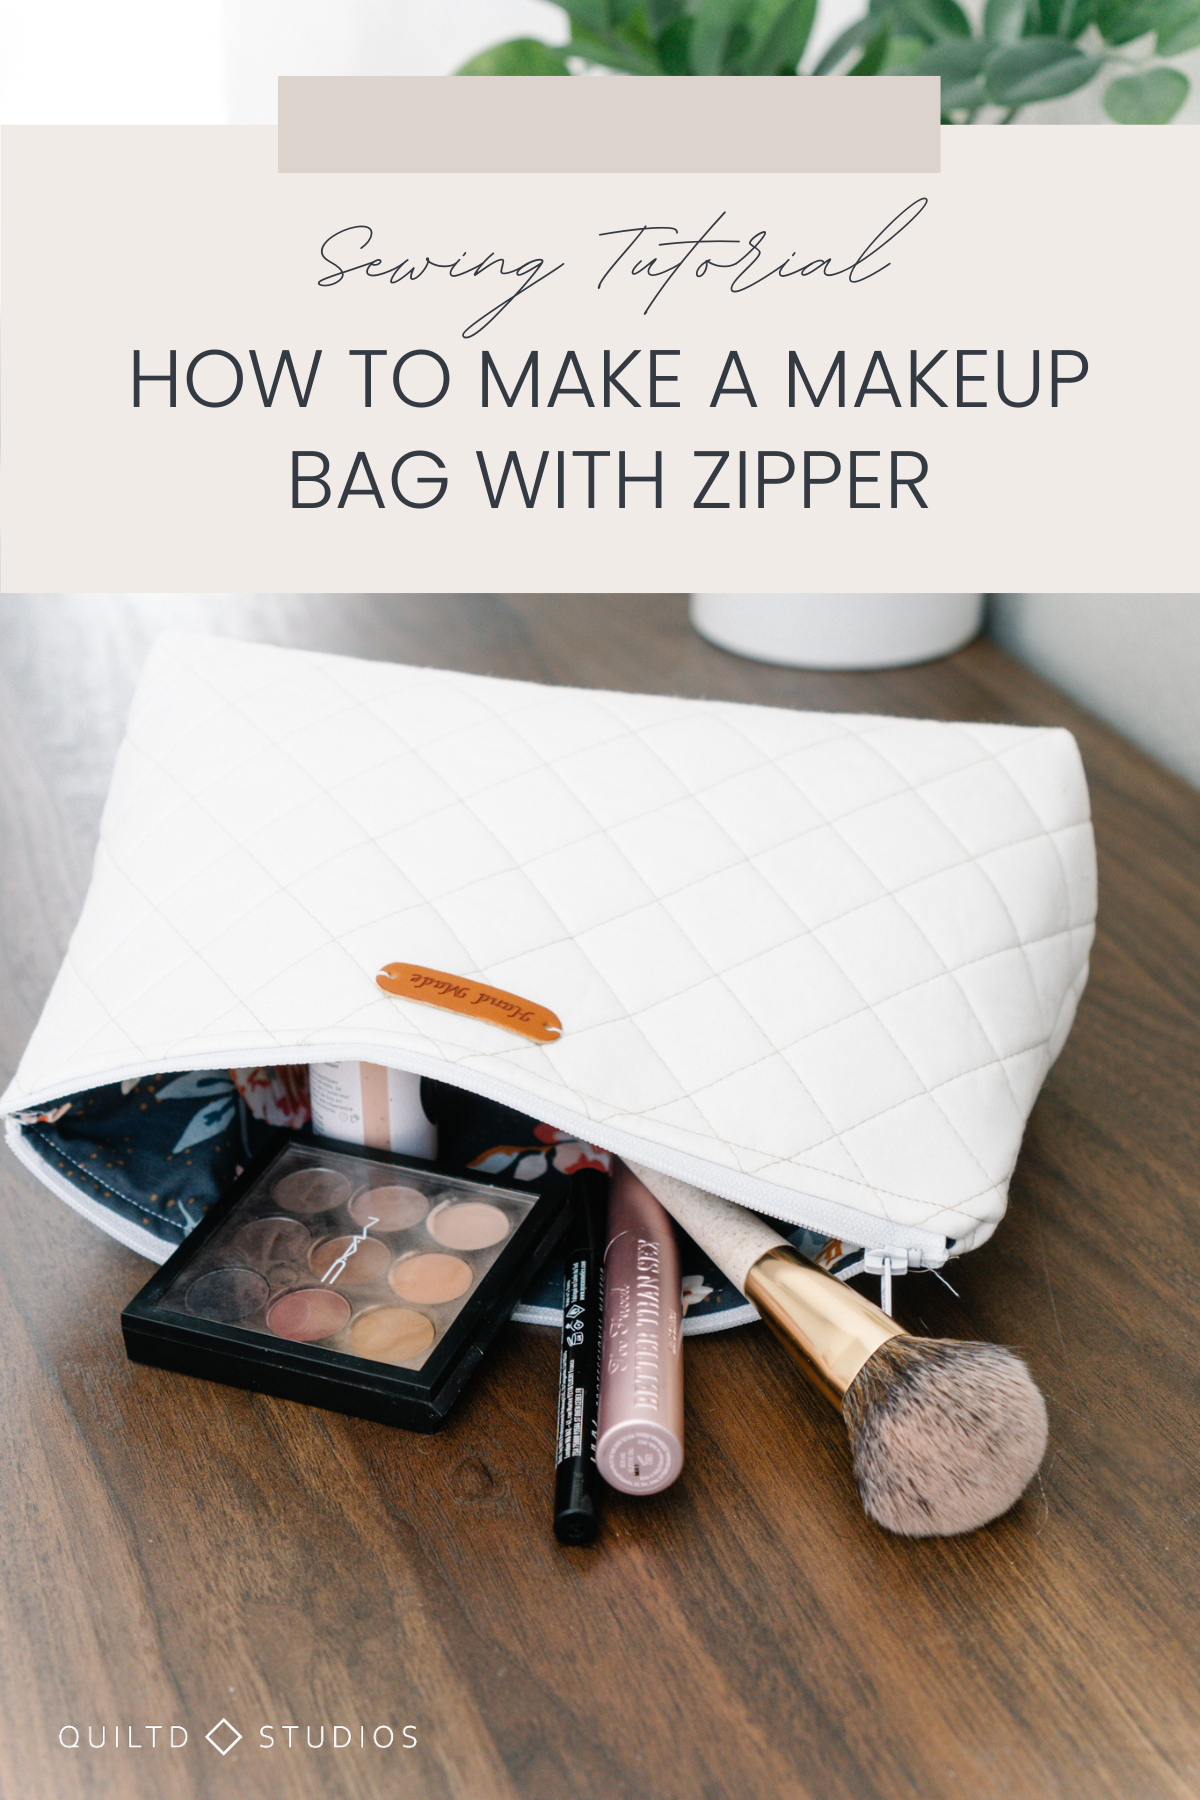
Hello friend! This is my inaugural blog post on the Bernina Blog and I couldn’t be more excited to share all the fun things that Quiltd Studios is doing. I promise there will be lots of fun tutorials, How-To’s, and even a quilt-along!
So dear reader, sign up for Quiltd Studios and the Bernina newsletter to be notified of new posts!
Let’s get down to business, making a super easy and fast makeup bag with zipper. These quilted bags are perfect for holiday gifts (or even just yourself!). So let’s dive in!
Supplies Needed:
- ½ Yard Fabric for Outside
- ½ Yard Fabric for Lining
- ½ Yard Iron on Felt Interfacing (stabilizer) (for lighter weight fabrics like quilting cotton)
- 10” Standard Zipper
Note: you’ll have excess fabric to use for other projects!
Cutting Instructions:
- (2) 9” x 14” rectangles Outside Fabric
- (2) 9” x 14” rectangles Lining Fabric
- (2) 9” x 14” rectangles Iron-on Felt (for lighter weight fabrics like quilting cotton)
Preparing the Outside of the Zipper Bag
Note: Seam Allowance is 1/4″ unless otherwise noted
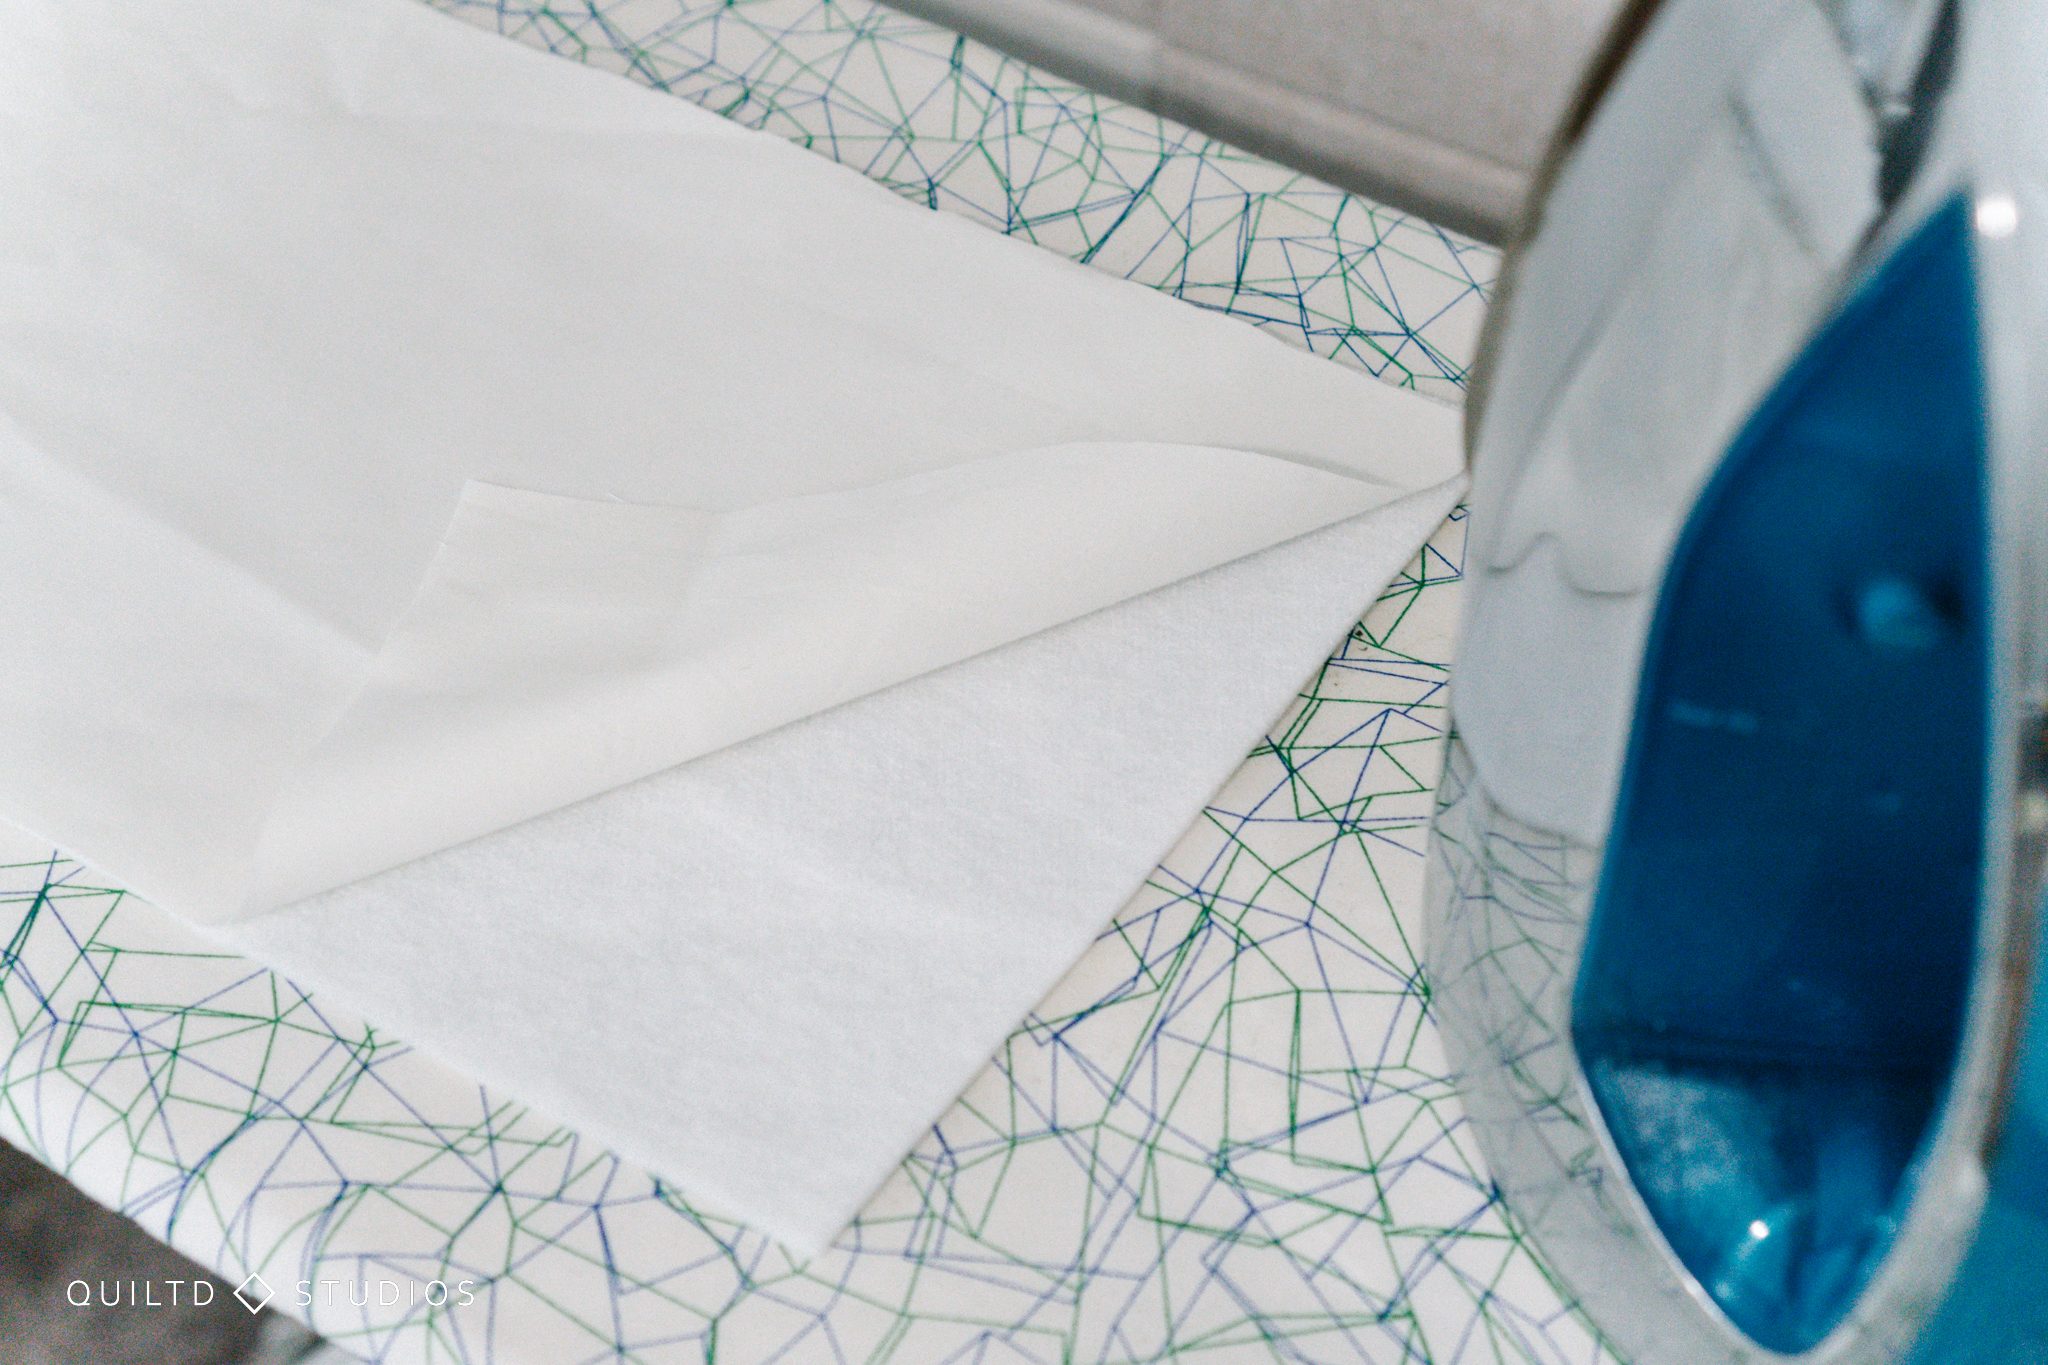
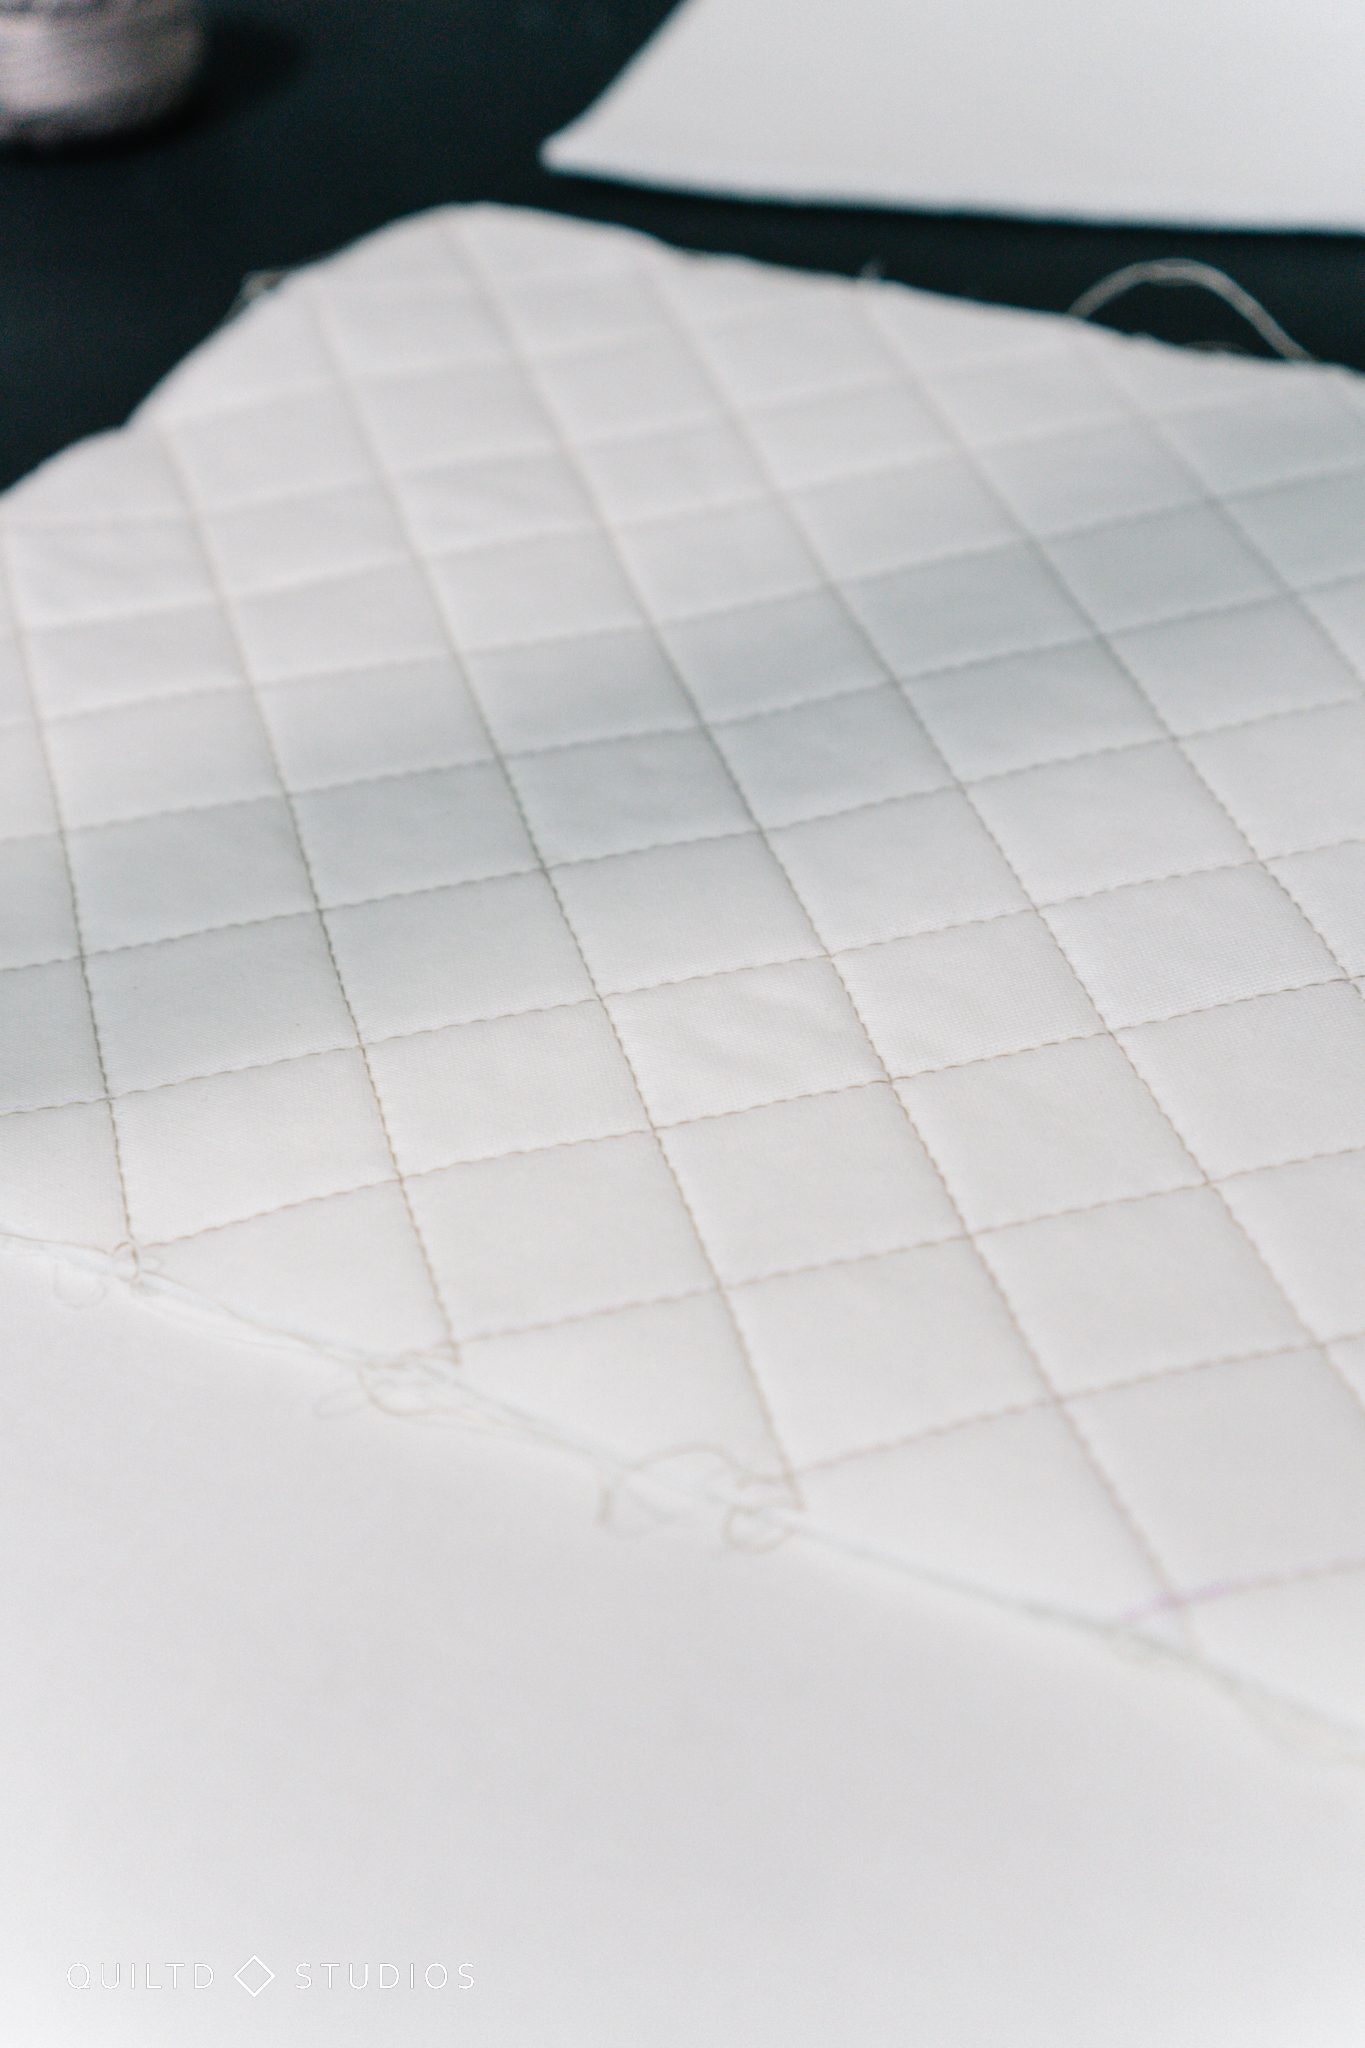
Iron the felt to the (2) 9” x 14” rectangles of Outside Fabric. These panels will make up the outside of your bag, and need to be secured to the felt by quilting. You can do any number of quilting designs (even hand quilting!).
I chose to do a diagonal 1”x 1” grid. I started by marking a 45 degree line from the bottom two left and right corners. Then moved the ruler 1” to the left and right making parallel lines.
Marking the Fabric to the Needed Shape
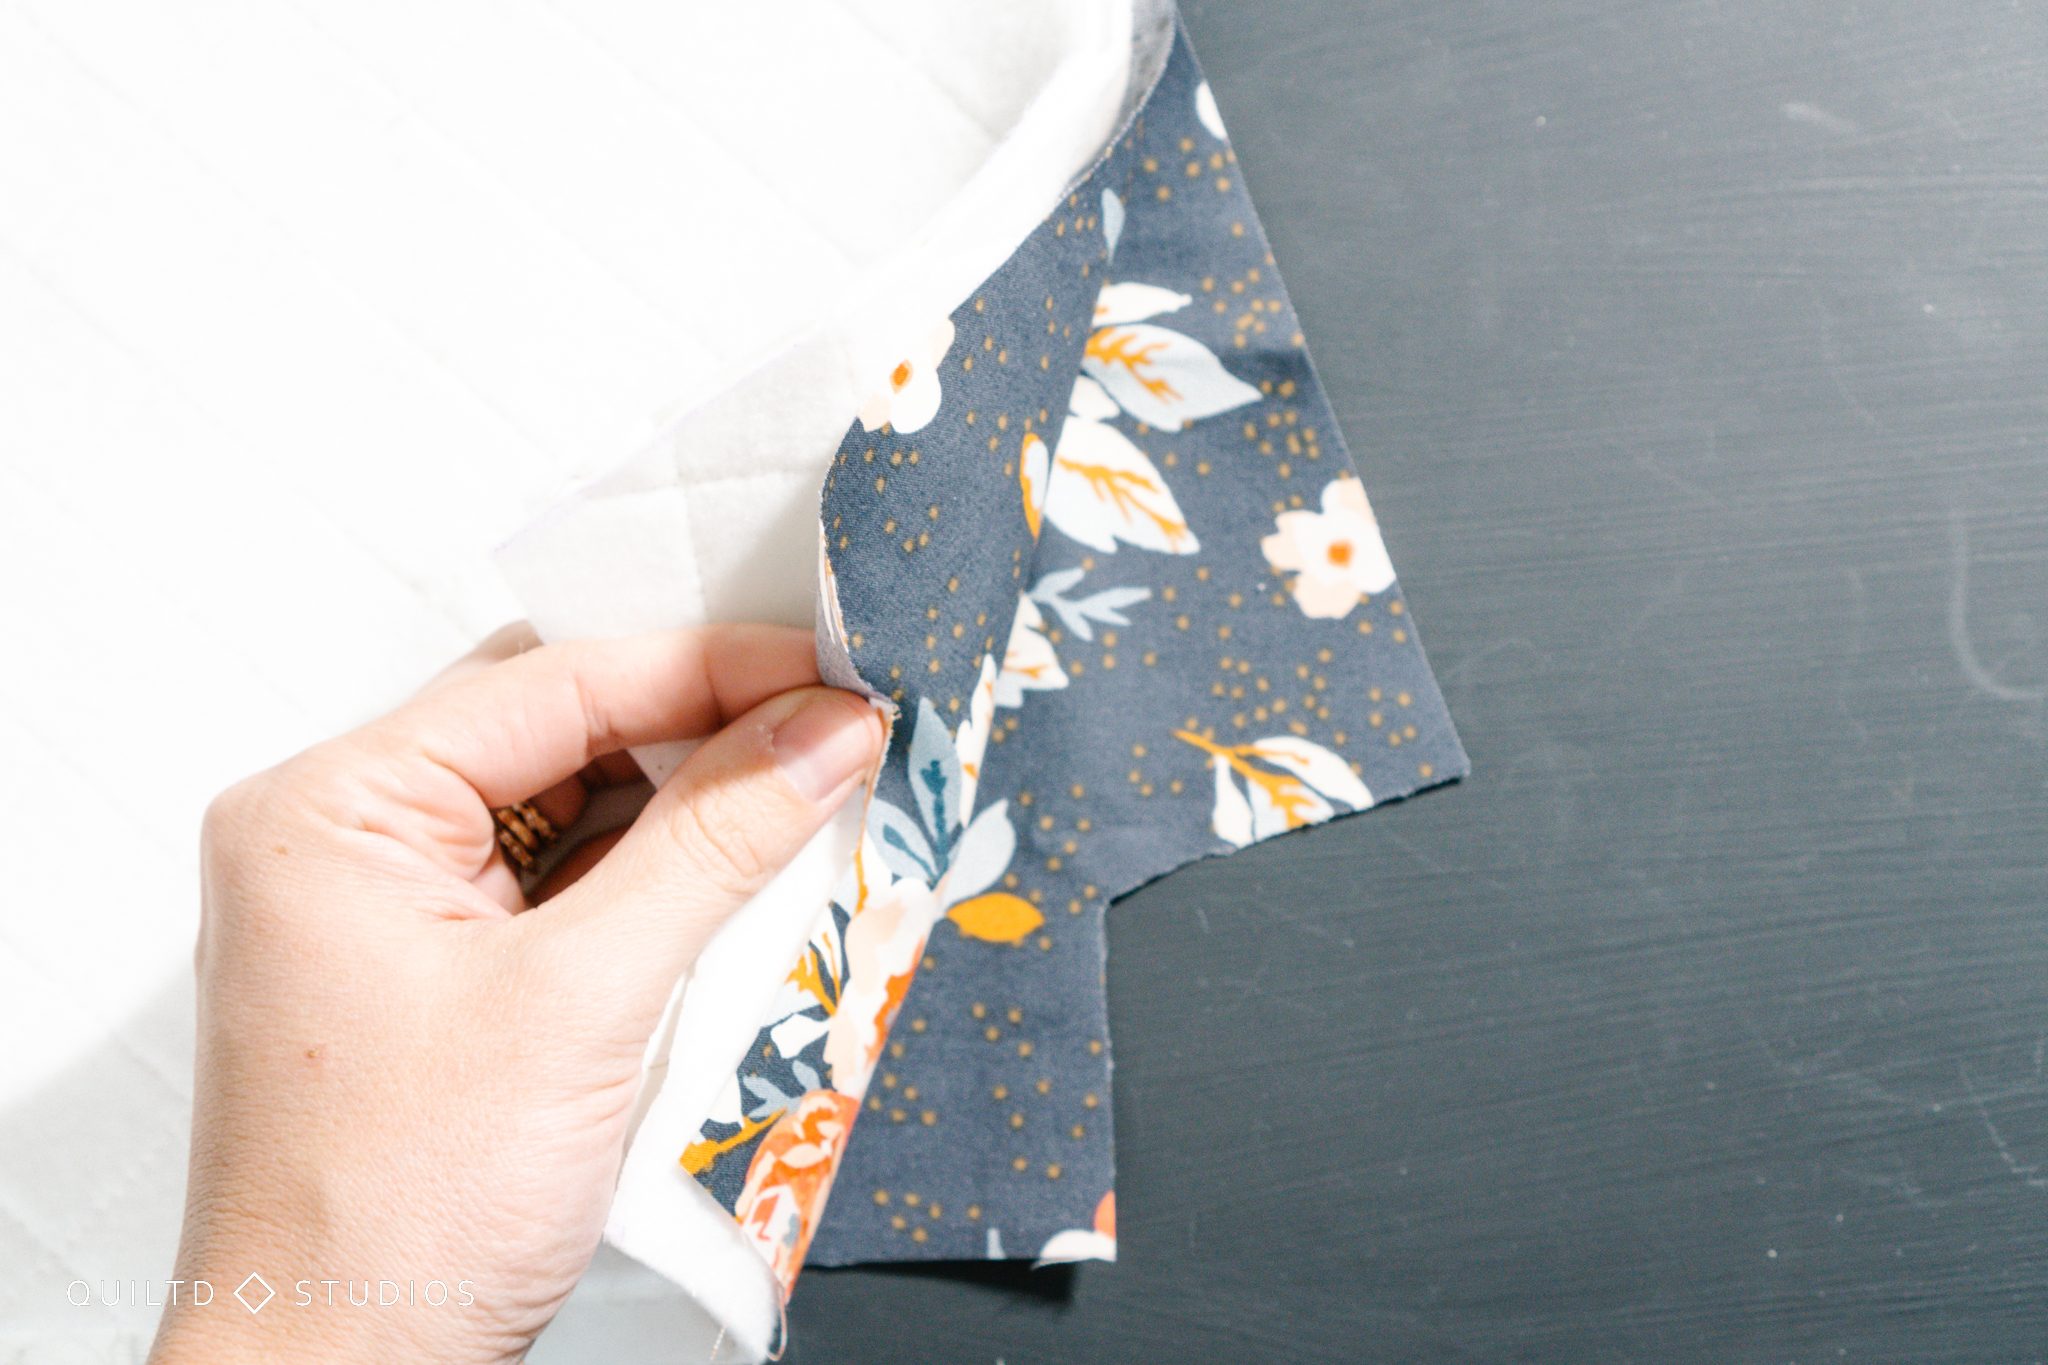
Once you’re finished quilting the Outside Fabric panels, we need to cut the Outside Fabric panels and the Lining Fabric to a specific shape. Rather than use a template, I’m going to show you how to make the necessary angle, and then you’ll be able to make bags of any size with this angle
Mark 2” to the left of the bottom left corner of the Outside Fabric panel, mark 2” up from the 2” mark. Now mark 2 ½” up from the bottom left corner. Draw lines connecting each mark, there will be three lines. It will form a shape that looks like half of a house.
Now mark 2” from the top left corner, the mark should be on the top of the panel, not the side. Now draw a line from the 2” top mark to the 2 1/2 “ mark on the left side of the panel.
Please review the images to see how the angles should look. You can do this exact angle on any size rectangle to make bags of different sizes (you will need to change the zipper length however).
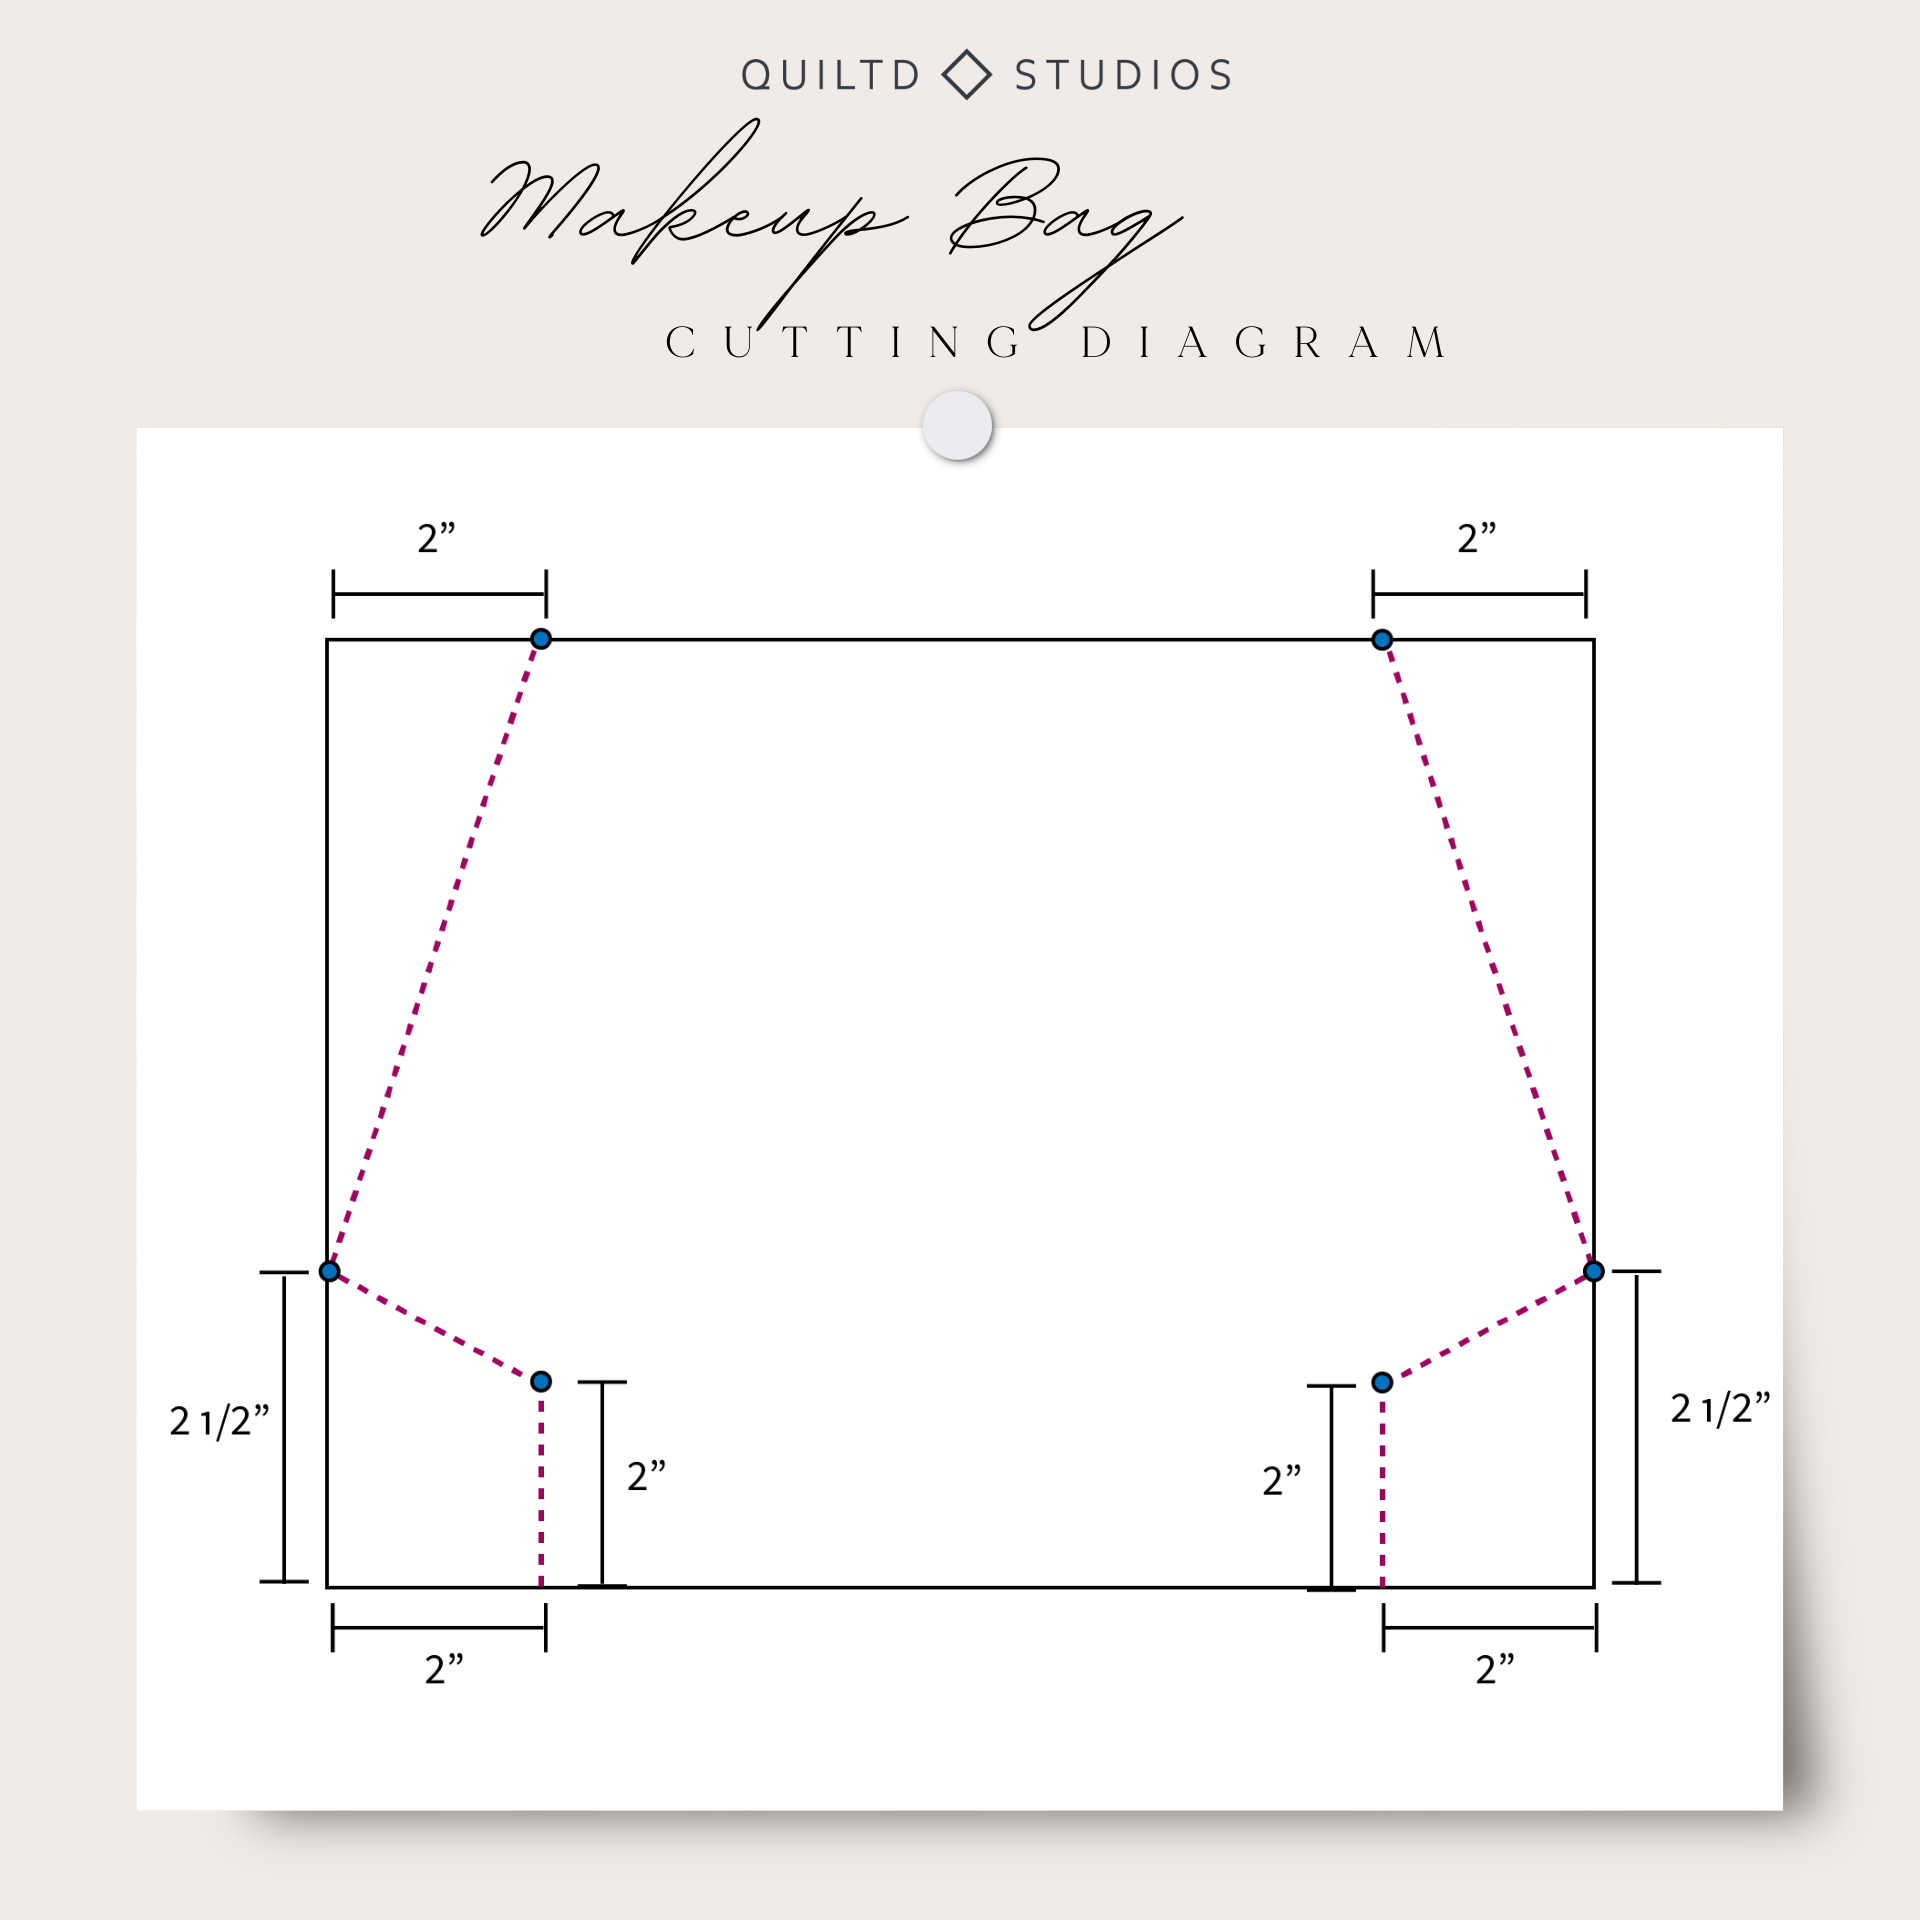
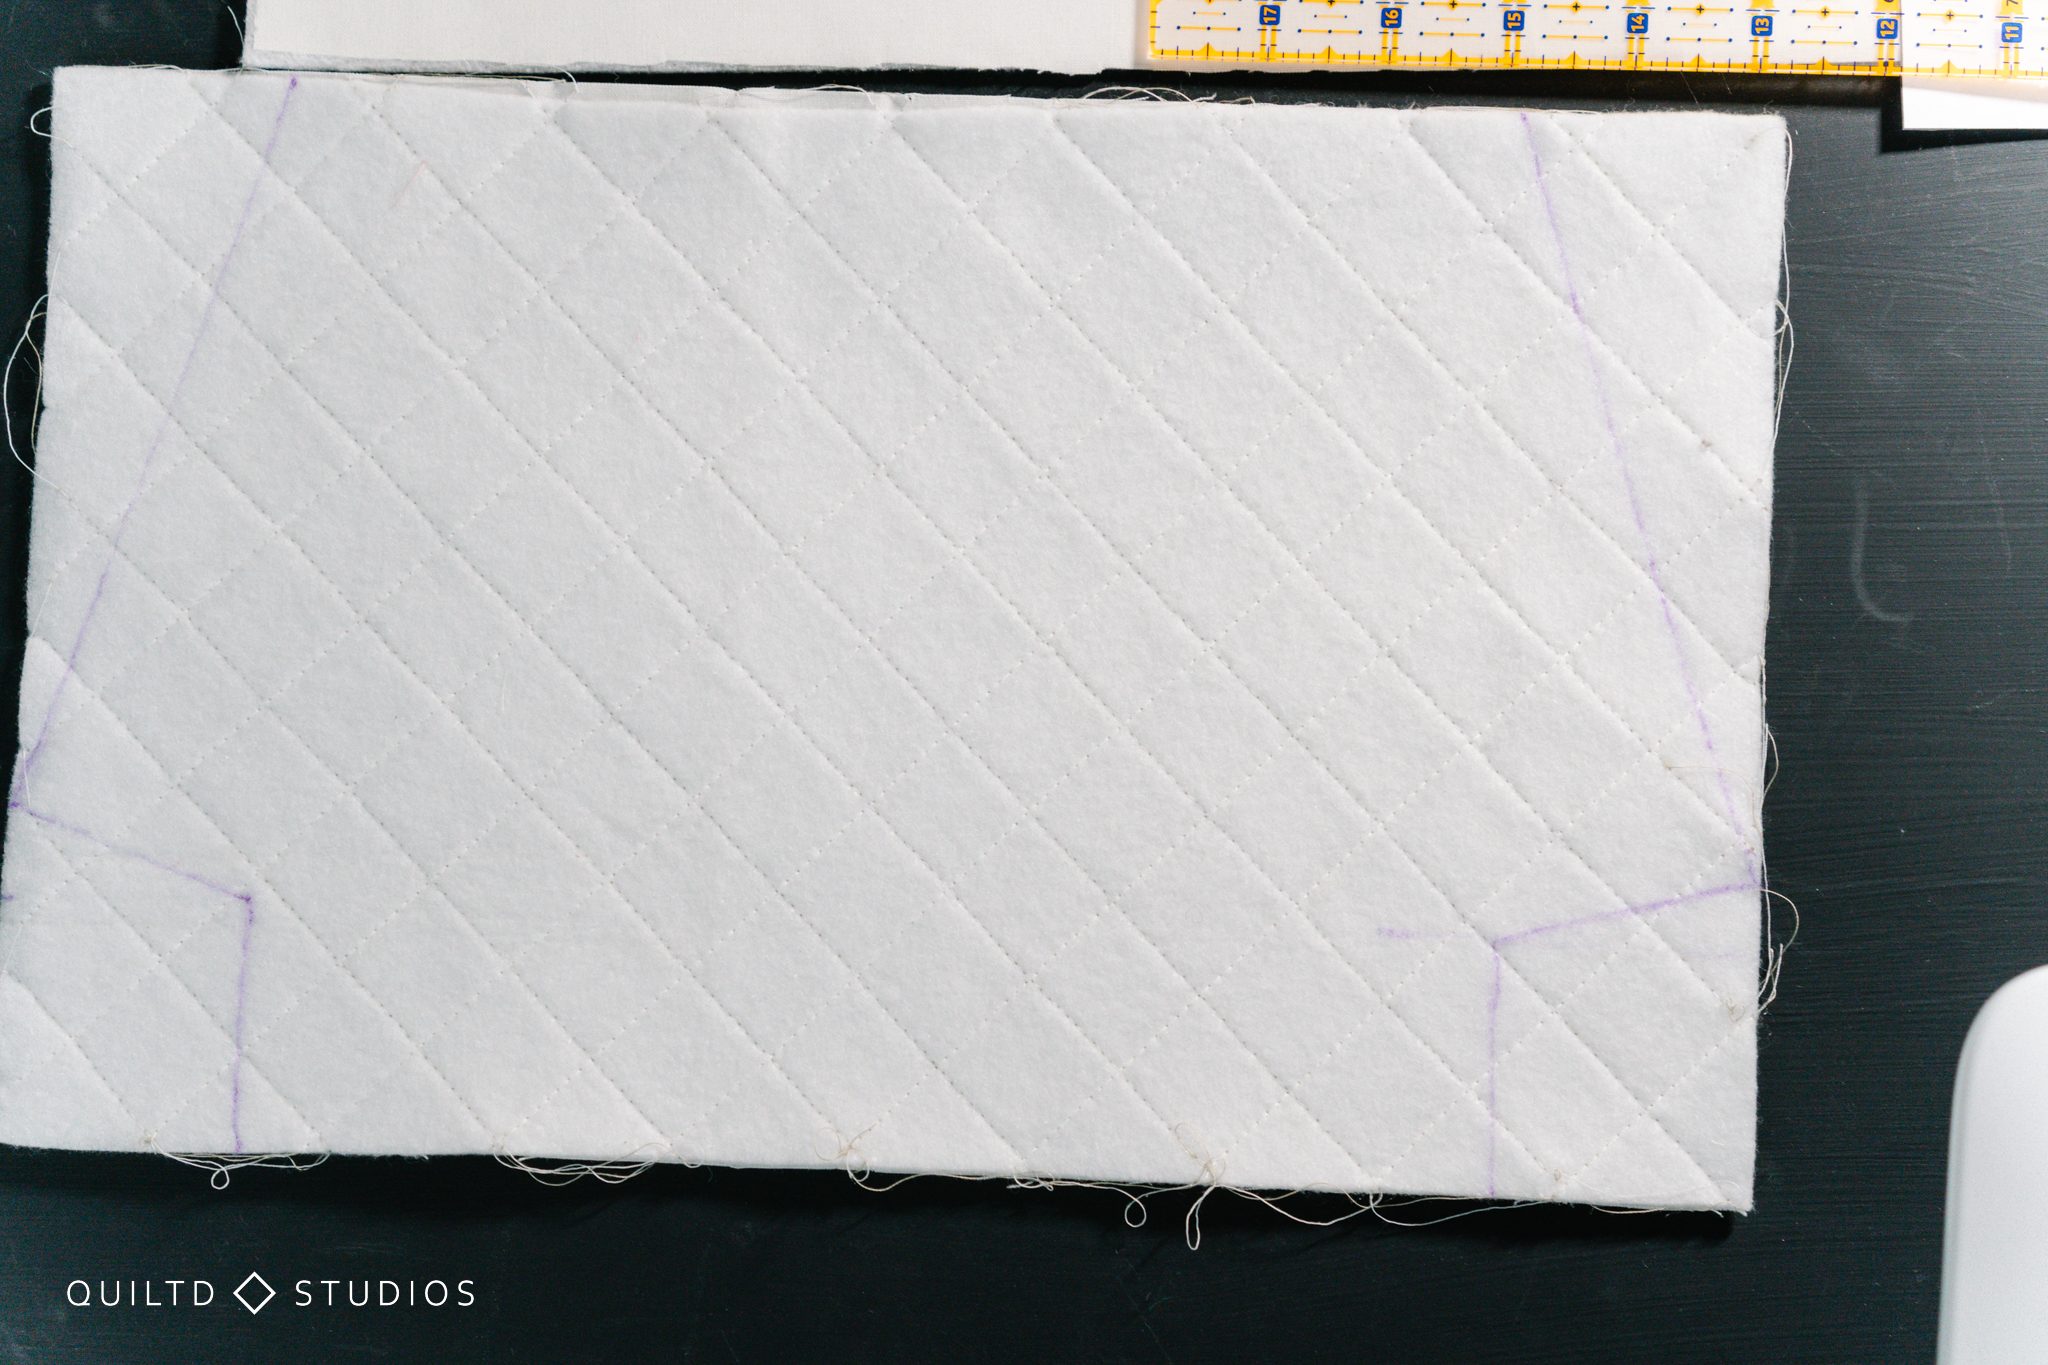
Repeat the exact same process on the right side of the top panel. 2” mark over from the bottom corner, 2” mark up from that mark, 2 ½” mark on the right side of the panel, 2” mark on the top, connect the top mark with the side 2 1/2” mark.
Repeat for the second Outside Fabric panel.
Cutting The Shape for the Bag
Layer the lining fabric rectangle under the top to make cutting faster, cut both at the same time. Repeat with the second panel and lining. There will now be 4 pieces of fabric, two Outside and two Lining.

Assembling the Bag
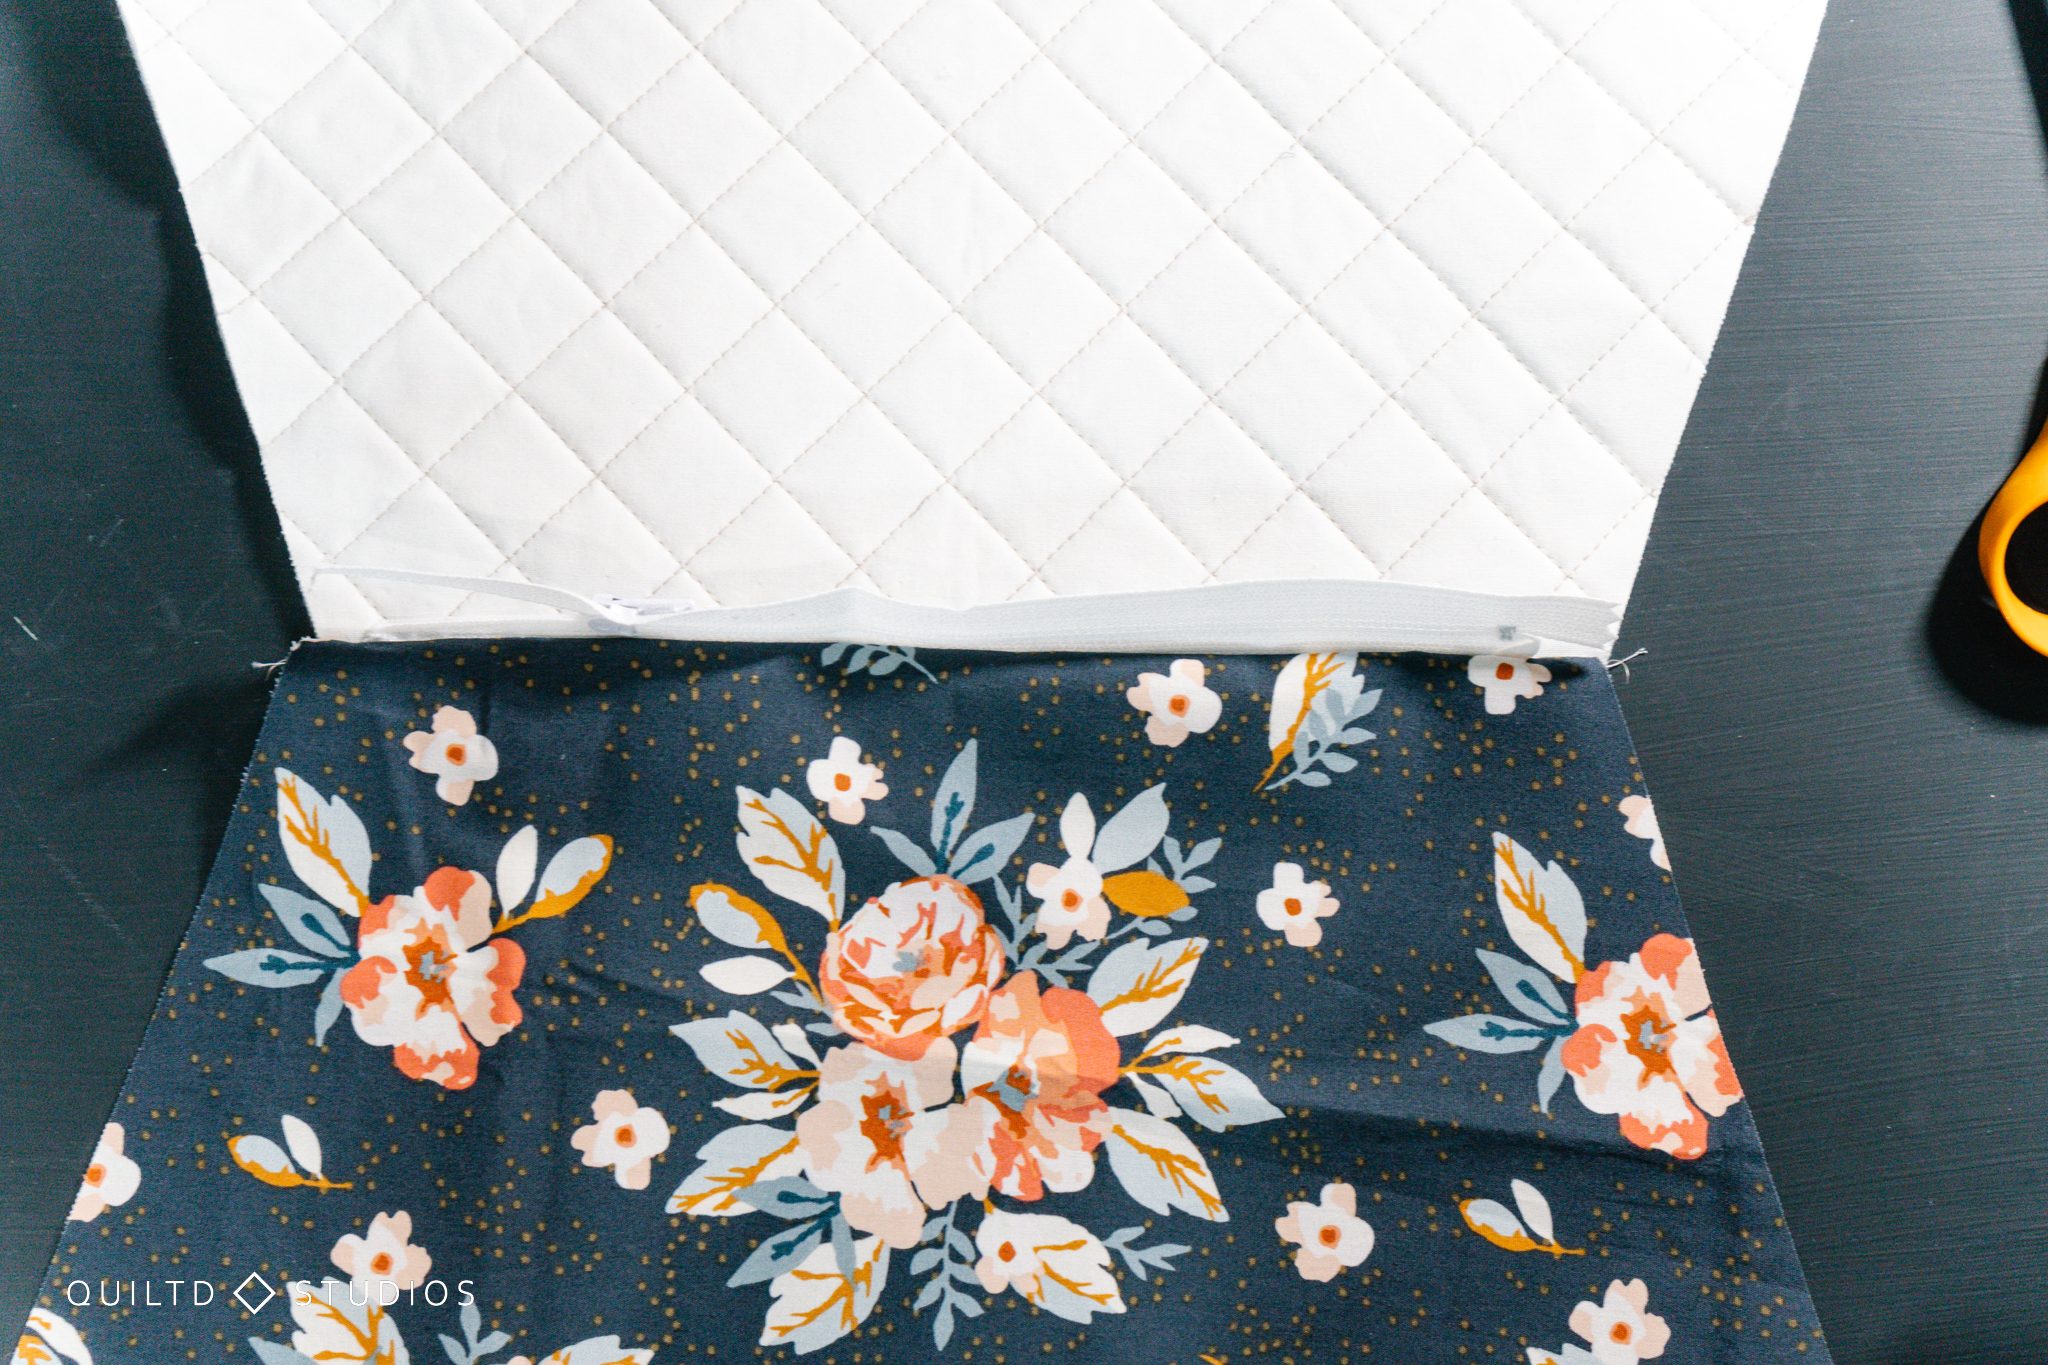
Ready? This is going to go faster than you think! Take one Lining Fabric panel and lay it face up on the table. Center the zipper on the top of the panel, as shown. To help with centering, you can fold the zipper in half and make a notch, and repeat with the fabric panel.
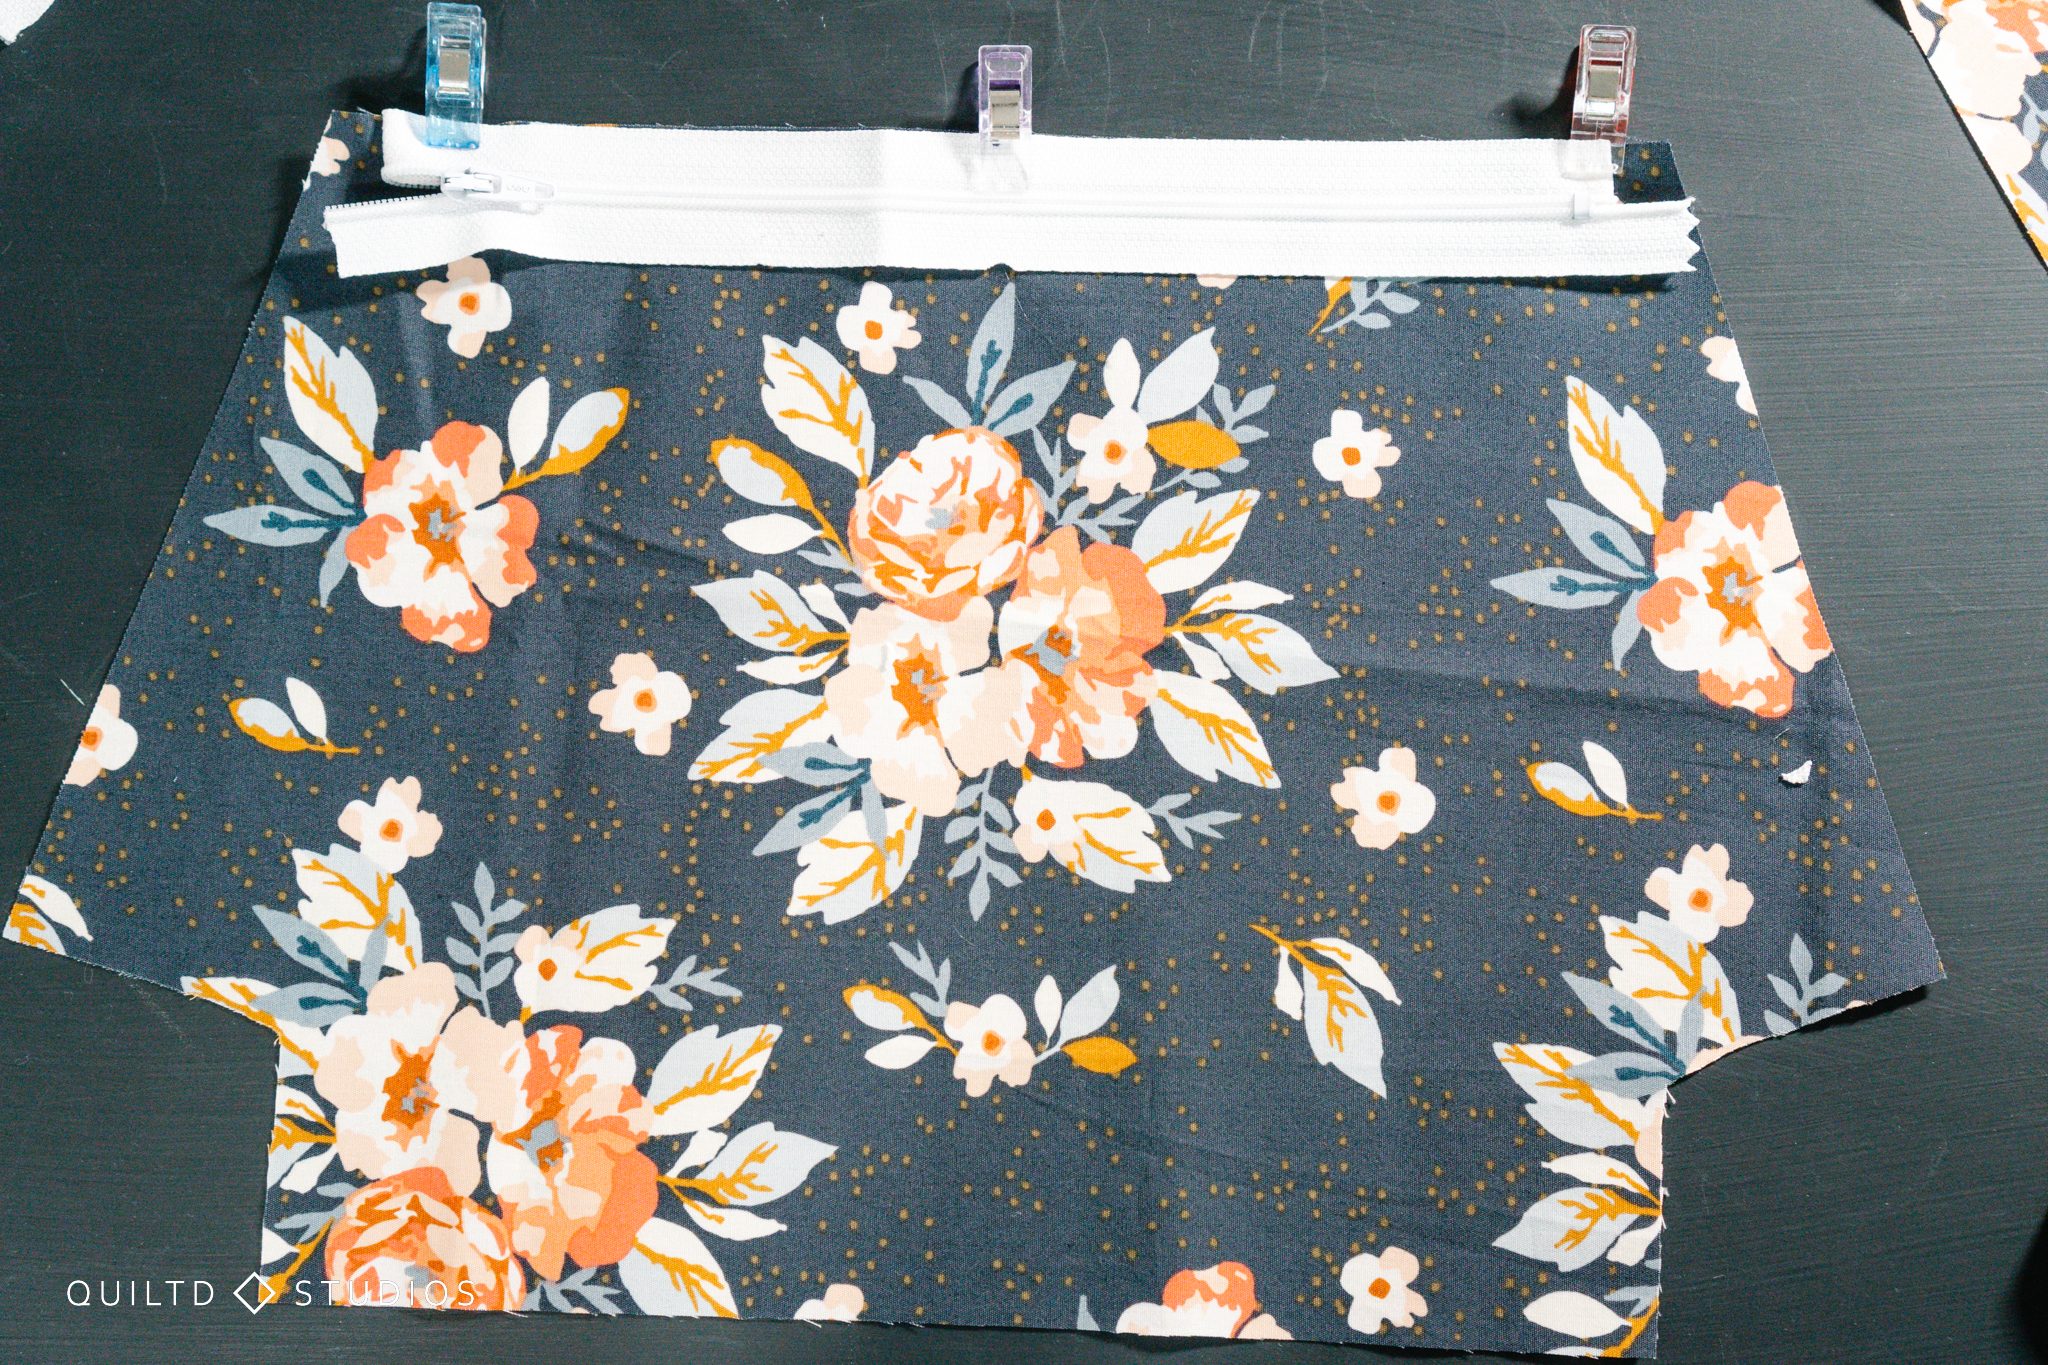
Fold the end up the zipper under, and optionally fold up one of the corners of the zipper that you just folded (I could do this with one side but the other not so much).
Now lay an Outside Fabric panel right side down, on top of the zipper unit. Match up the top so it’s all even and pin it.

Sew across the top using a scant ¼” seam allowance (or more depending on the width of your zipper).
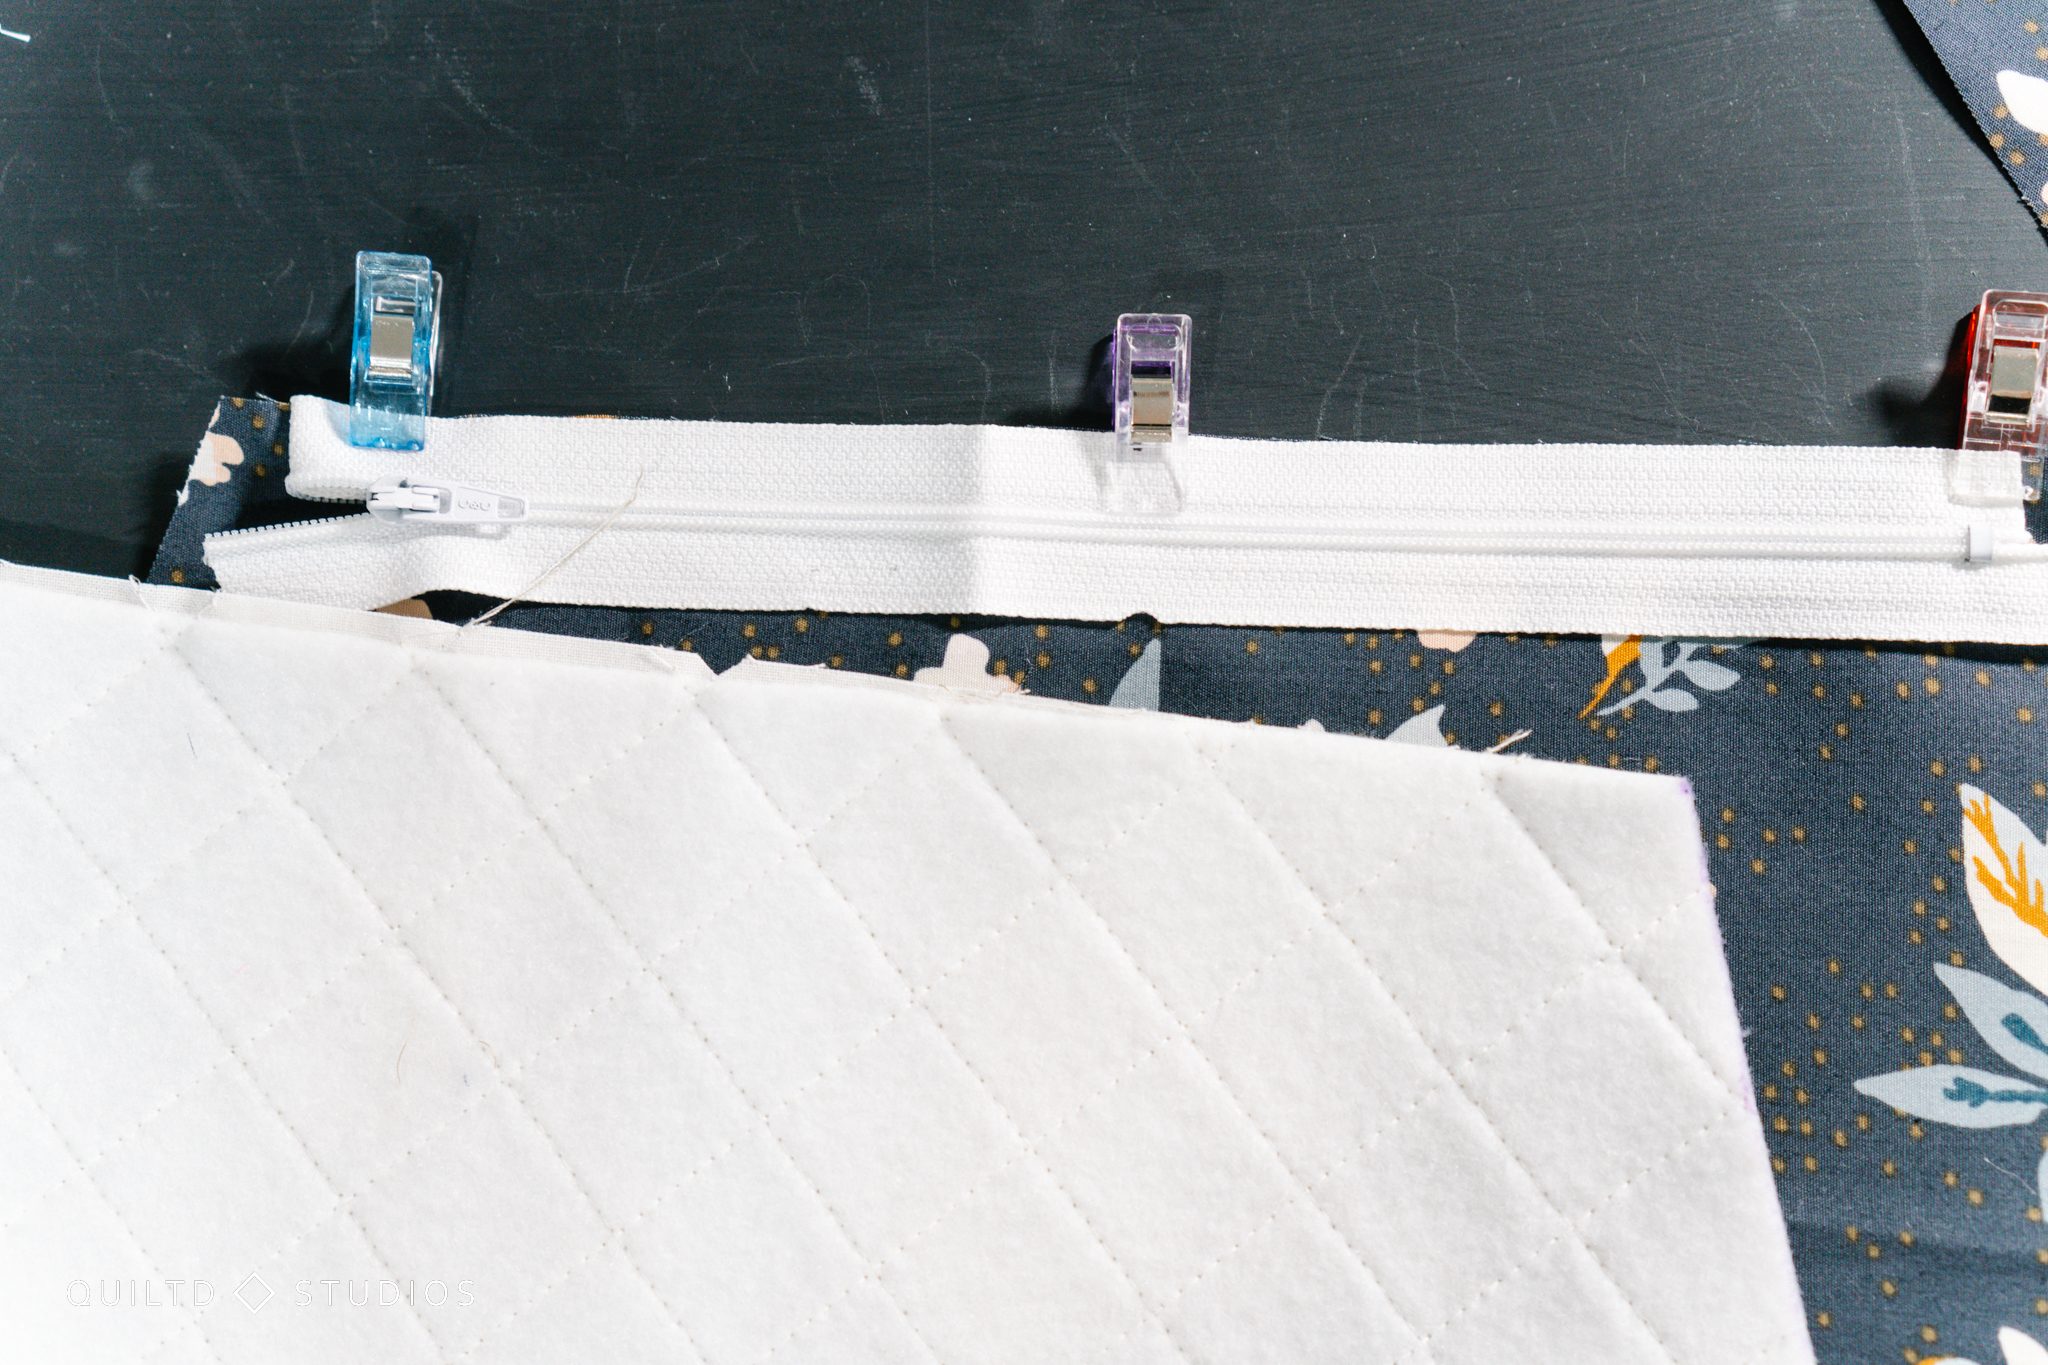
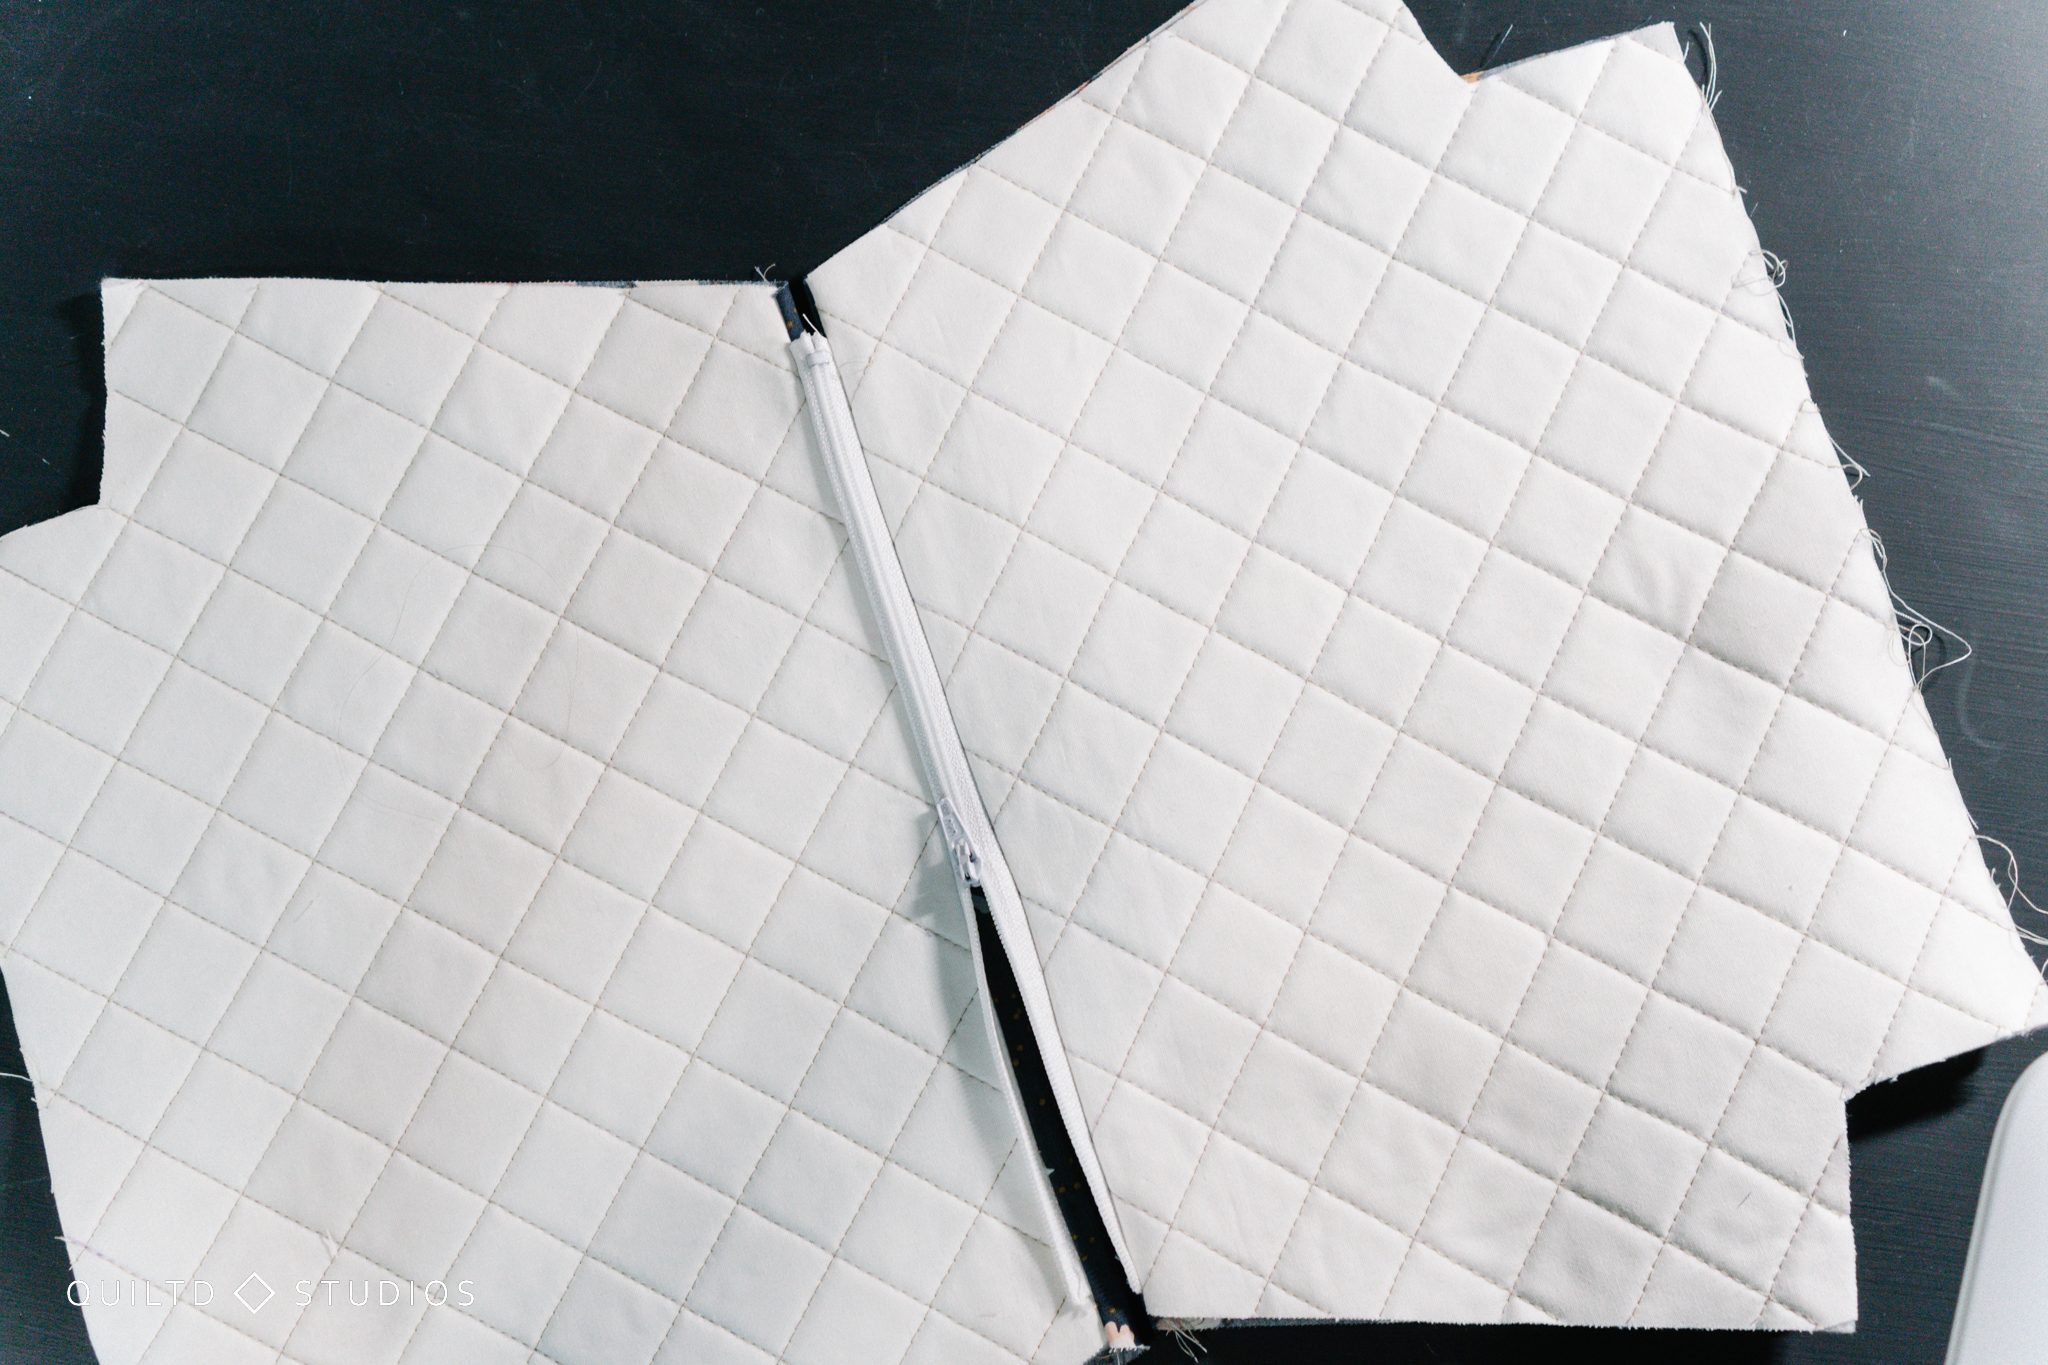
Fold that panel open and flip it over as shown in the pictures. The zipper should be at the top, Lining Fabric should be right side down, Outside Fabric should be right side up.
Now we’ll sew on the last two layers. Lay a Lining Fabric panel face up on the table, place the zipper panel on it with the Lining Fabrics closest to each other, they will be right sides facing each other.
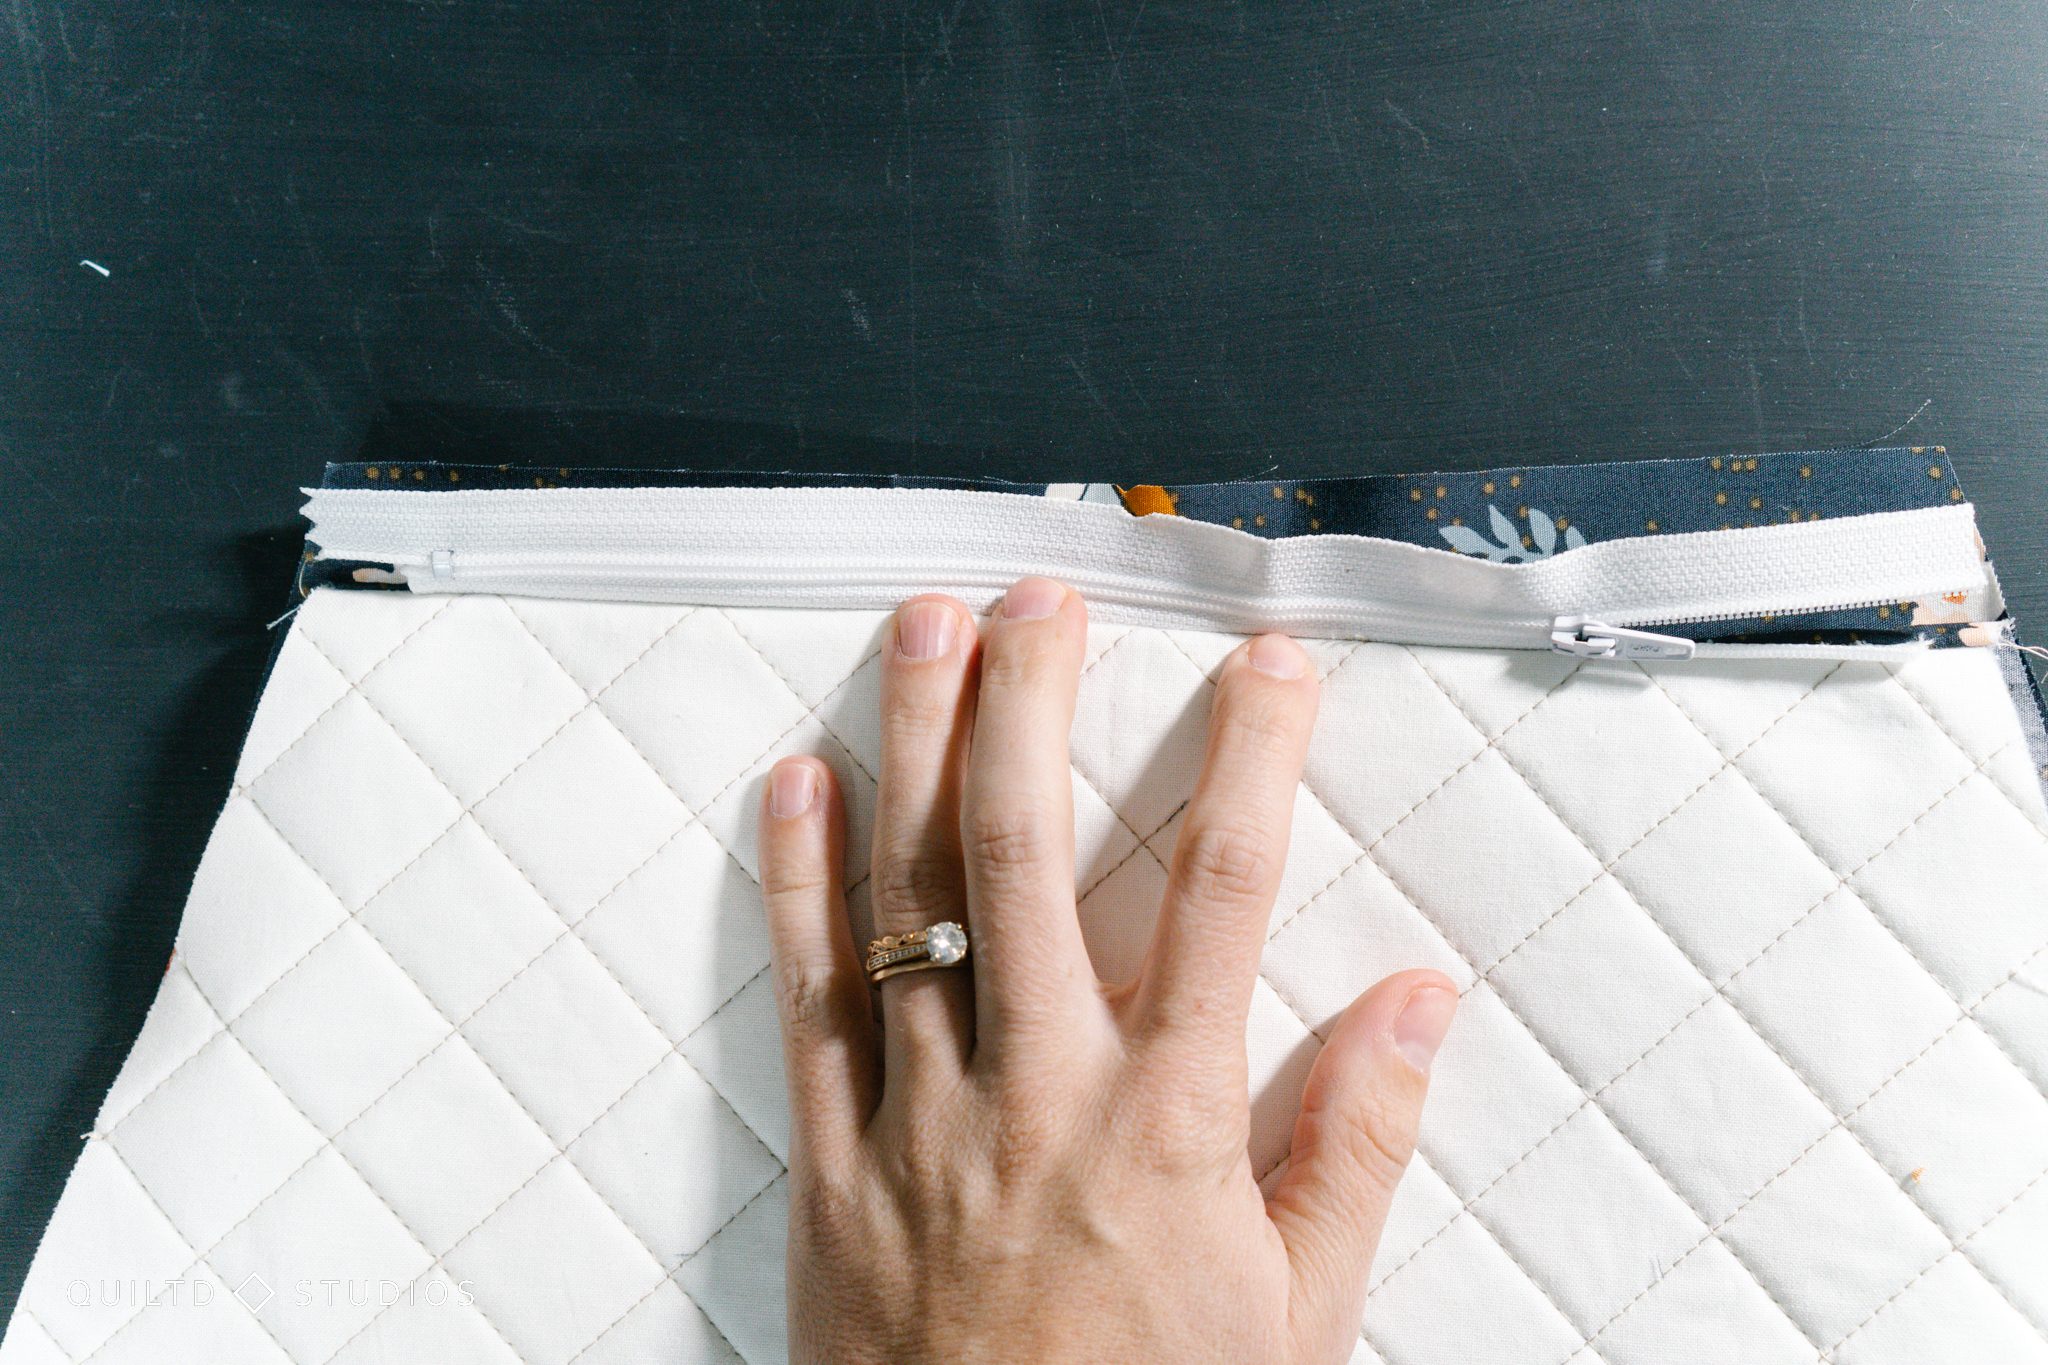
Now place the second Outside Fabric panel on top, face down so that both outside panels have right sides facing each other. Pin/Clip the top and again sew a ¼” seam along the top with the zipper sandwiched in between.
We’re almost done!
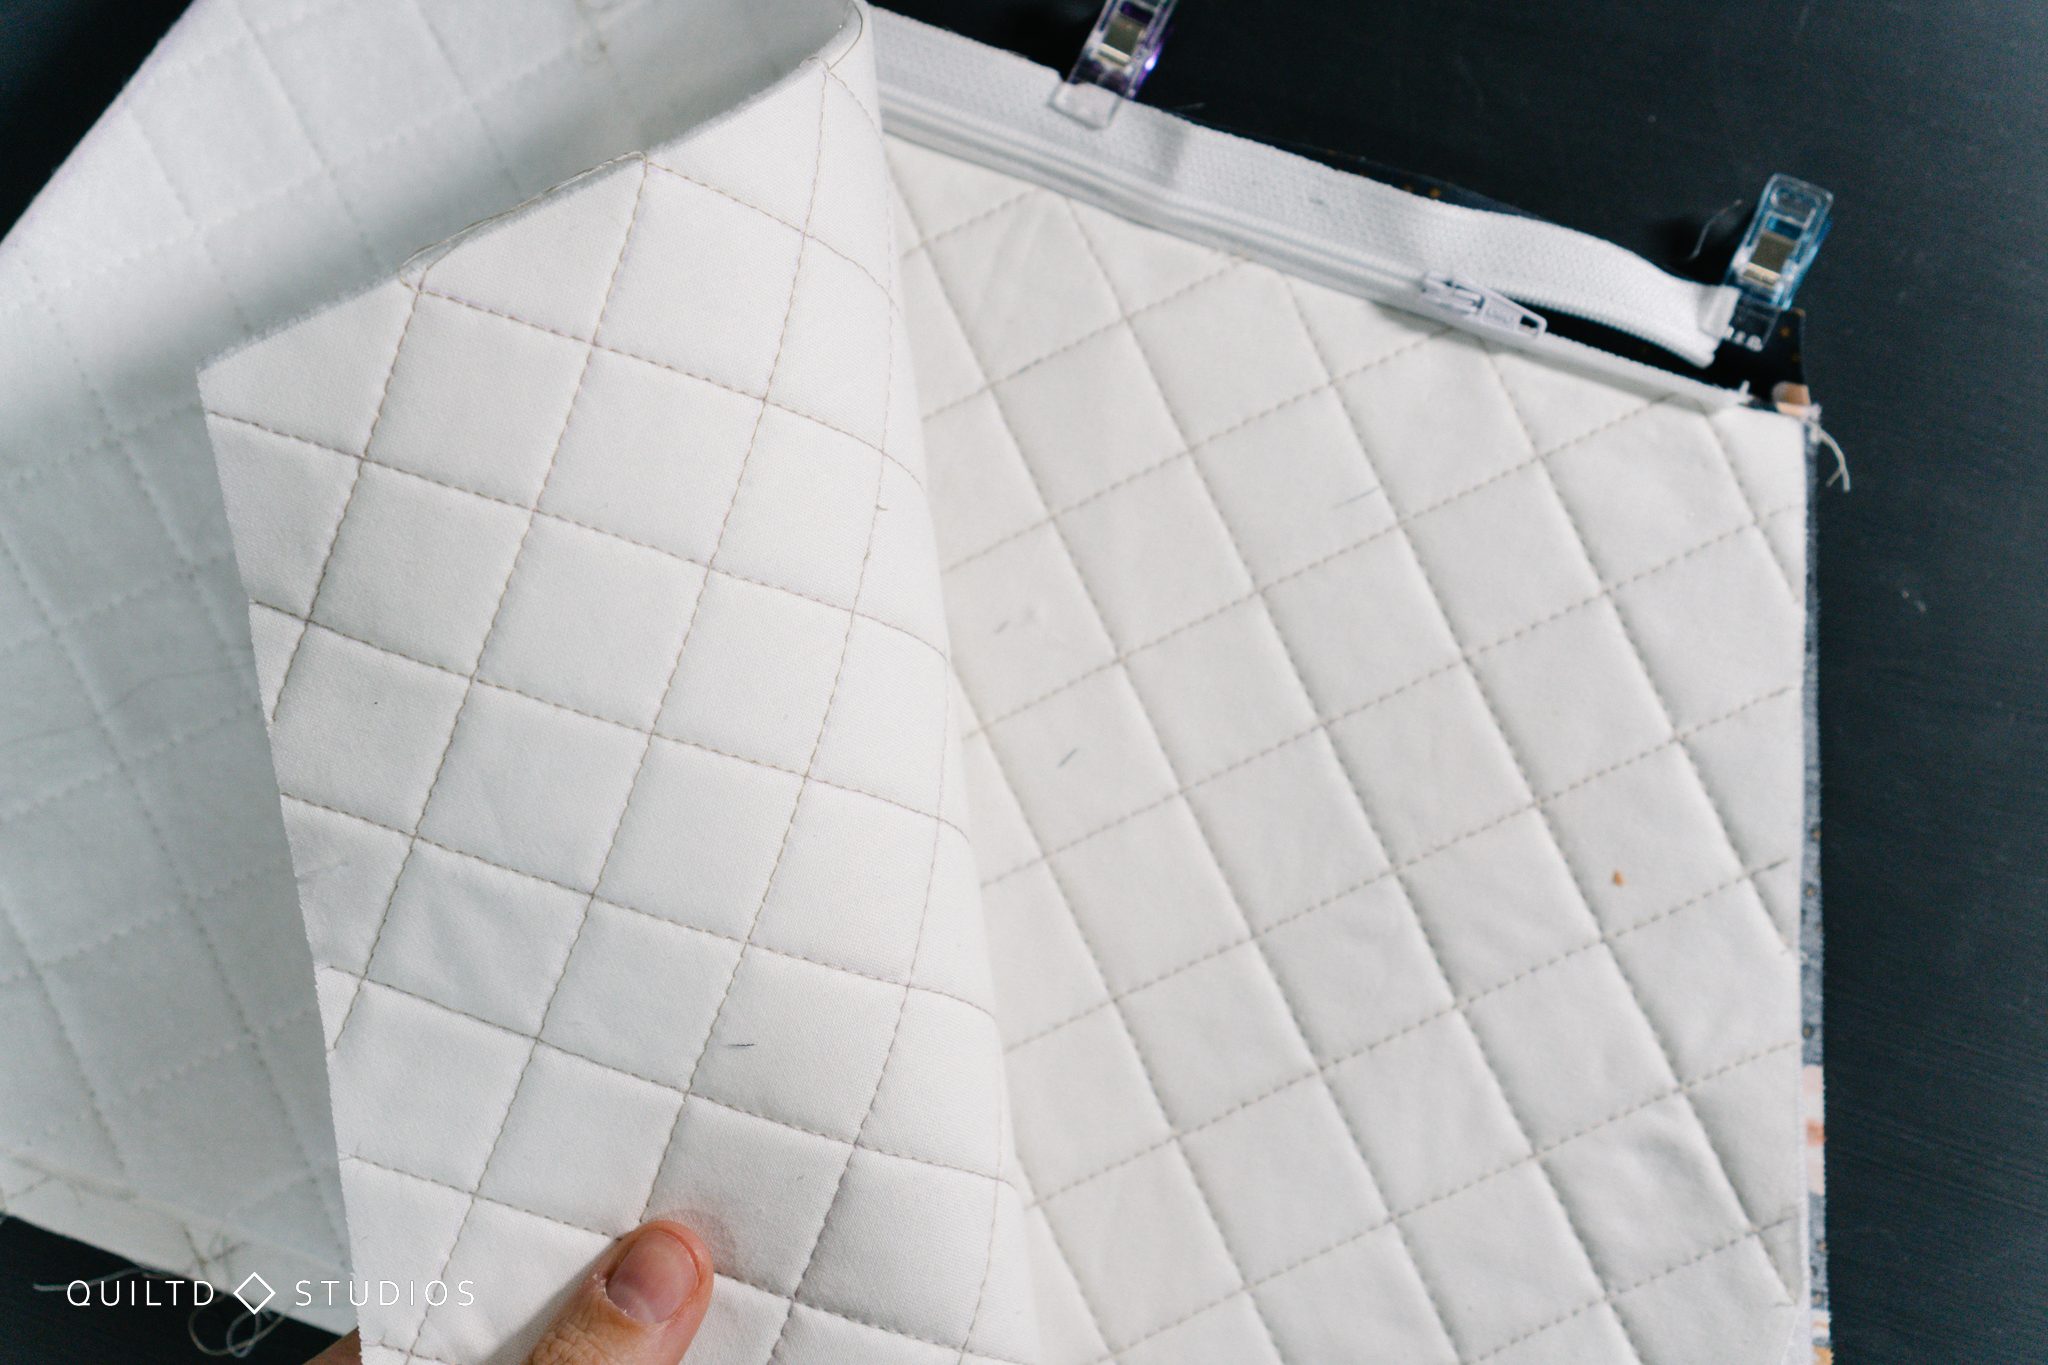
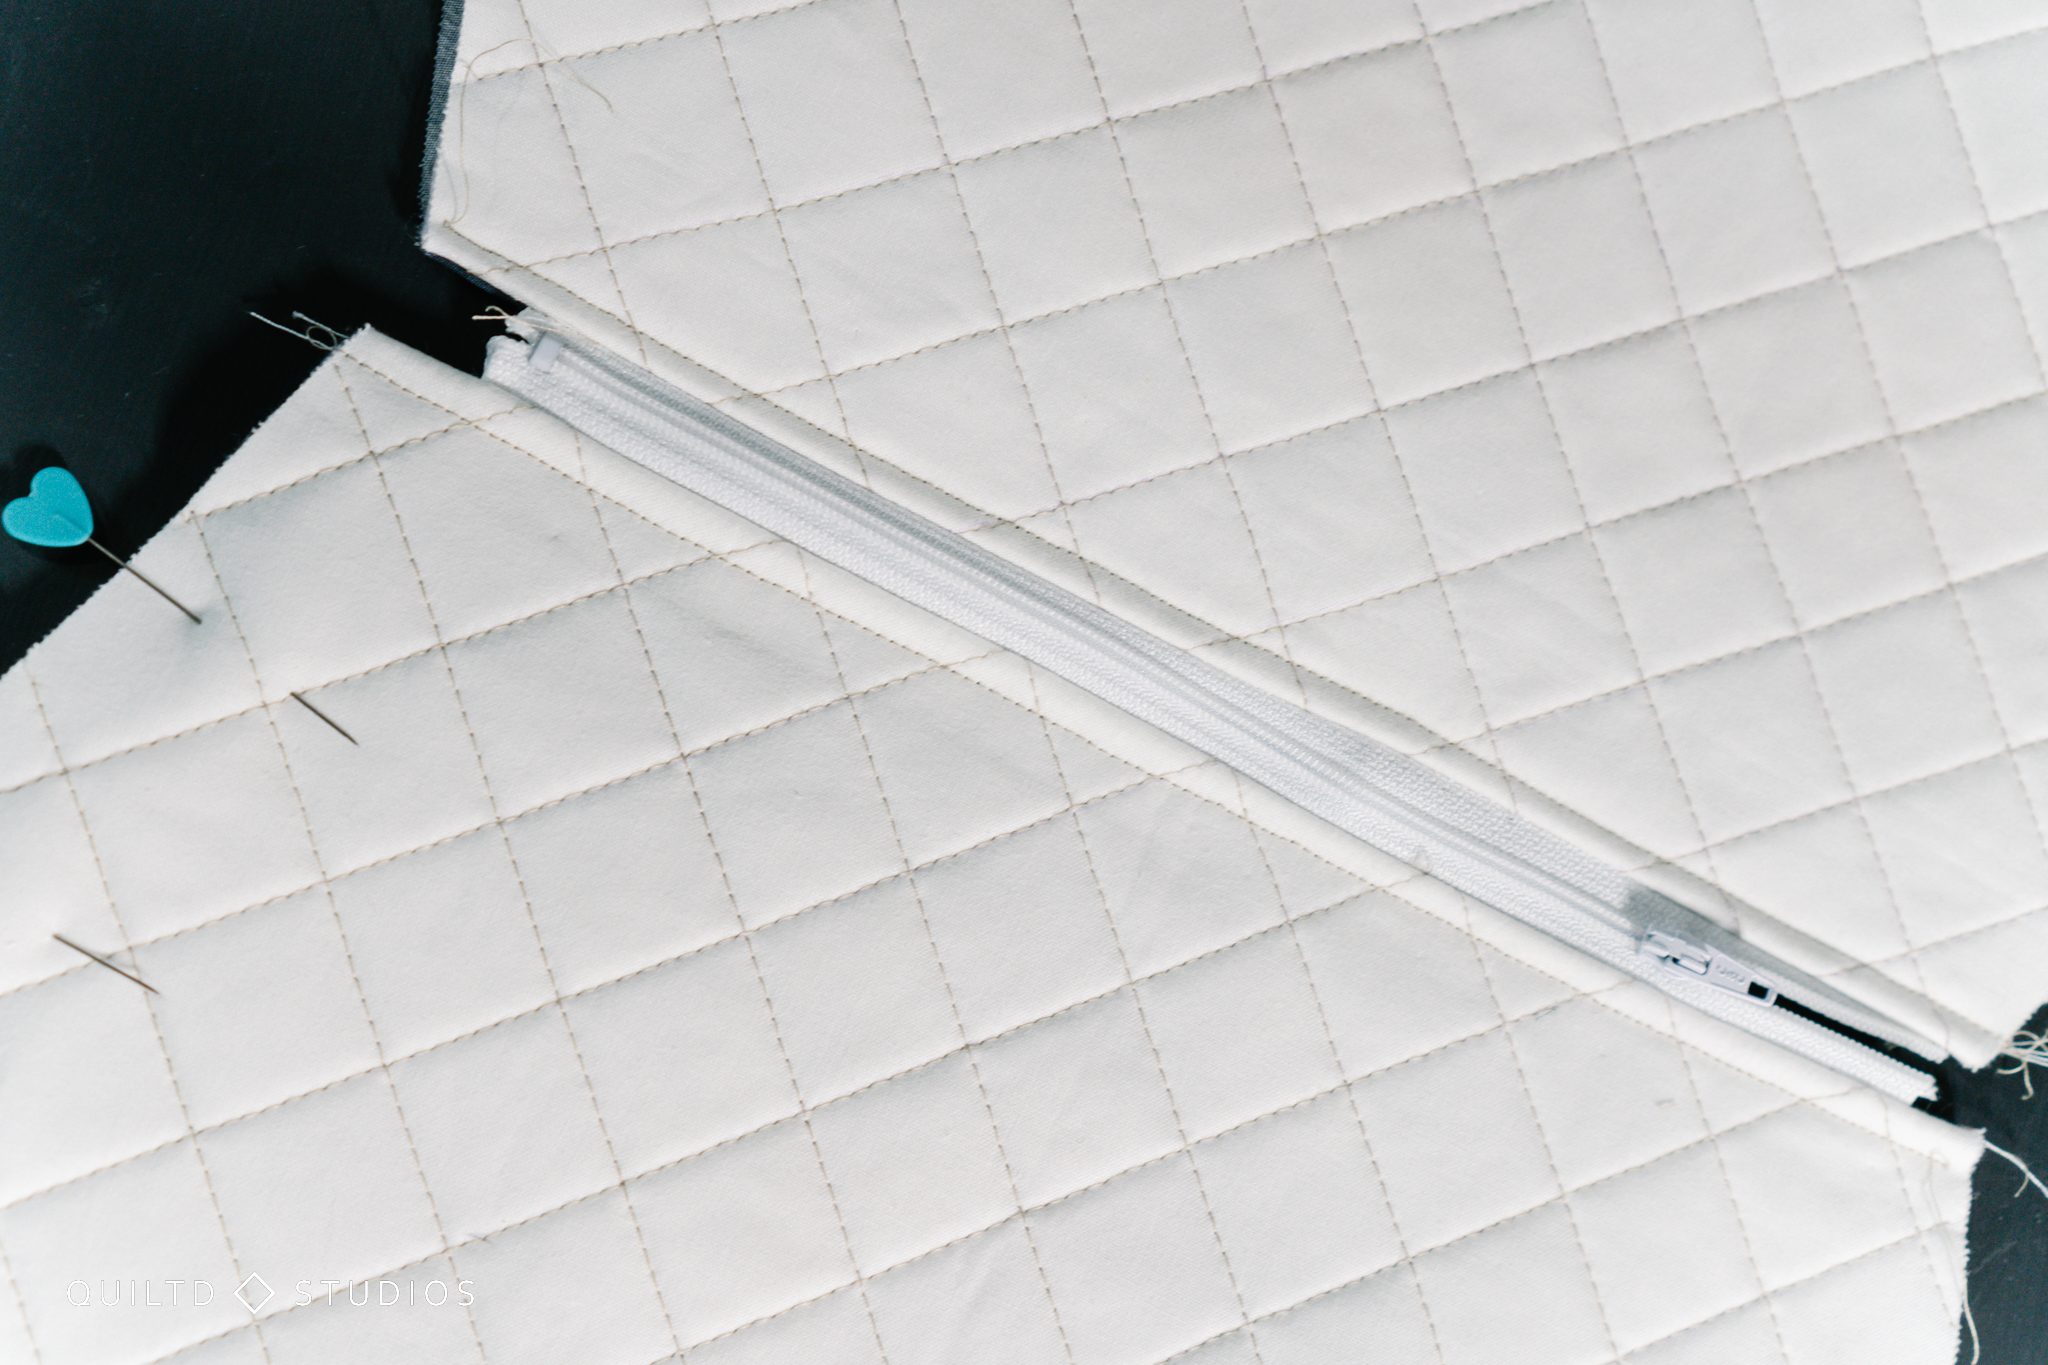
Open up the bag so that each side has one Lining panel and one Outside panel with the Outside panel facing up. The zipper top should be up. Finger press down the center and sew a 1/8”- ¼” away from the zipper to secure the sides (and to make everything nice and flat!)
Sewing the Perimeter of the Zipper Bag
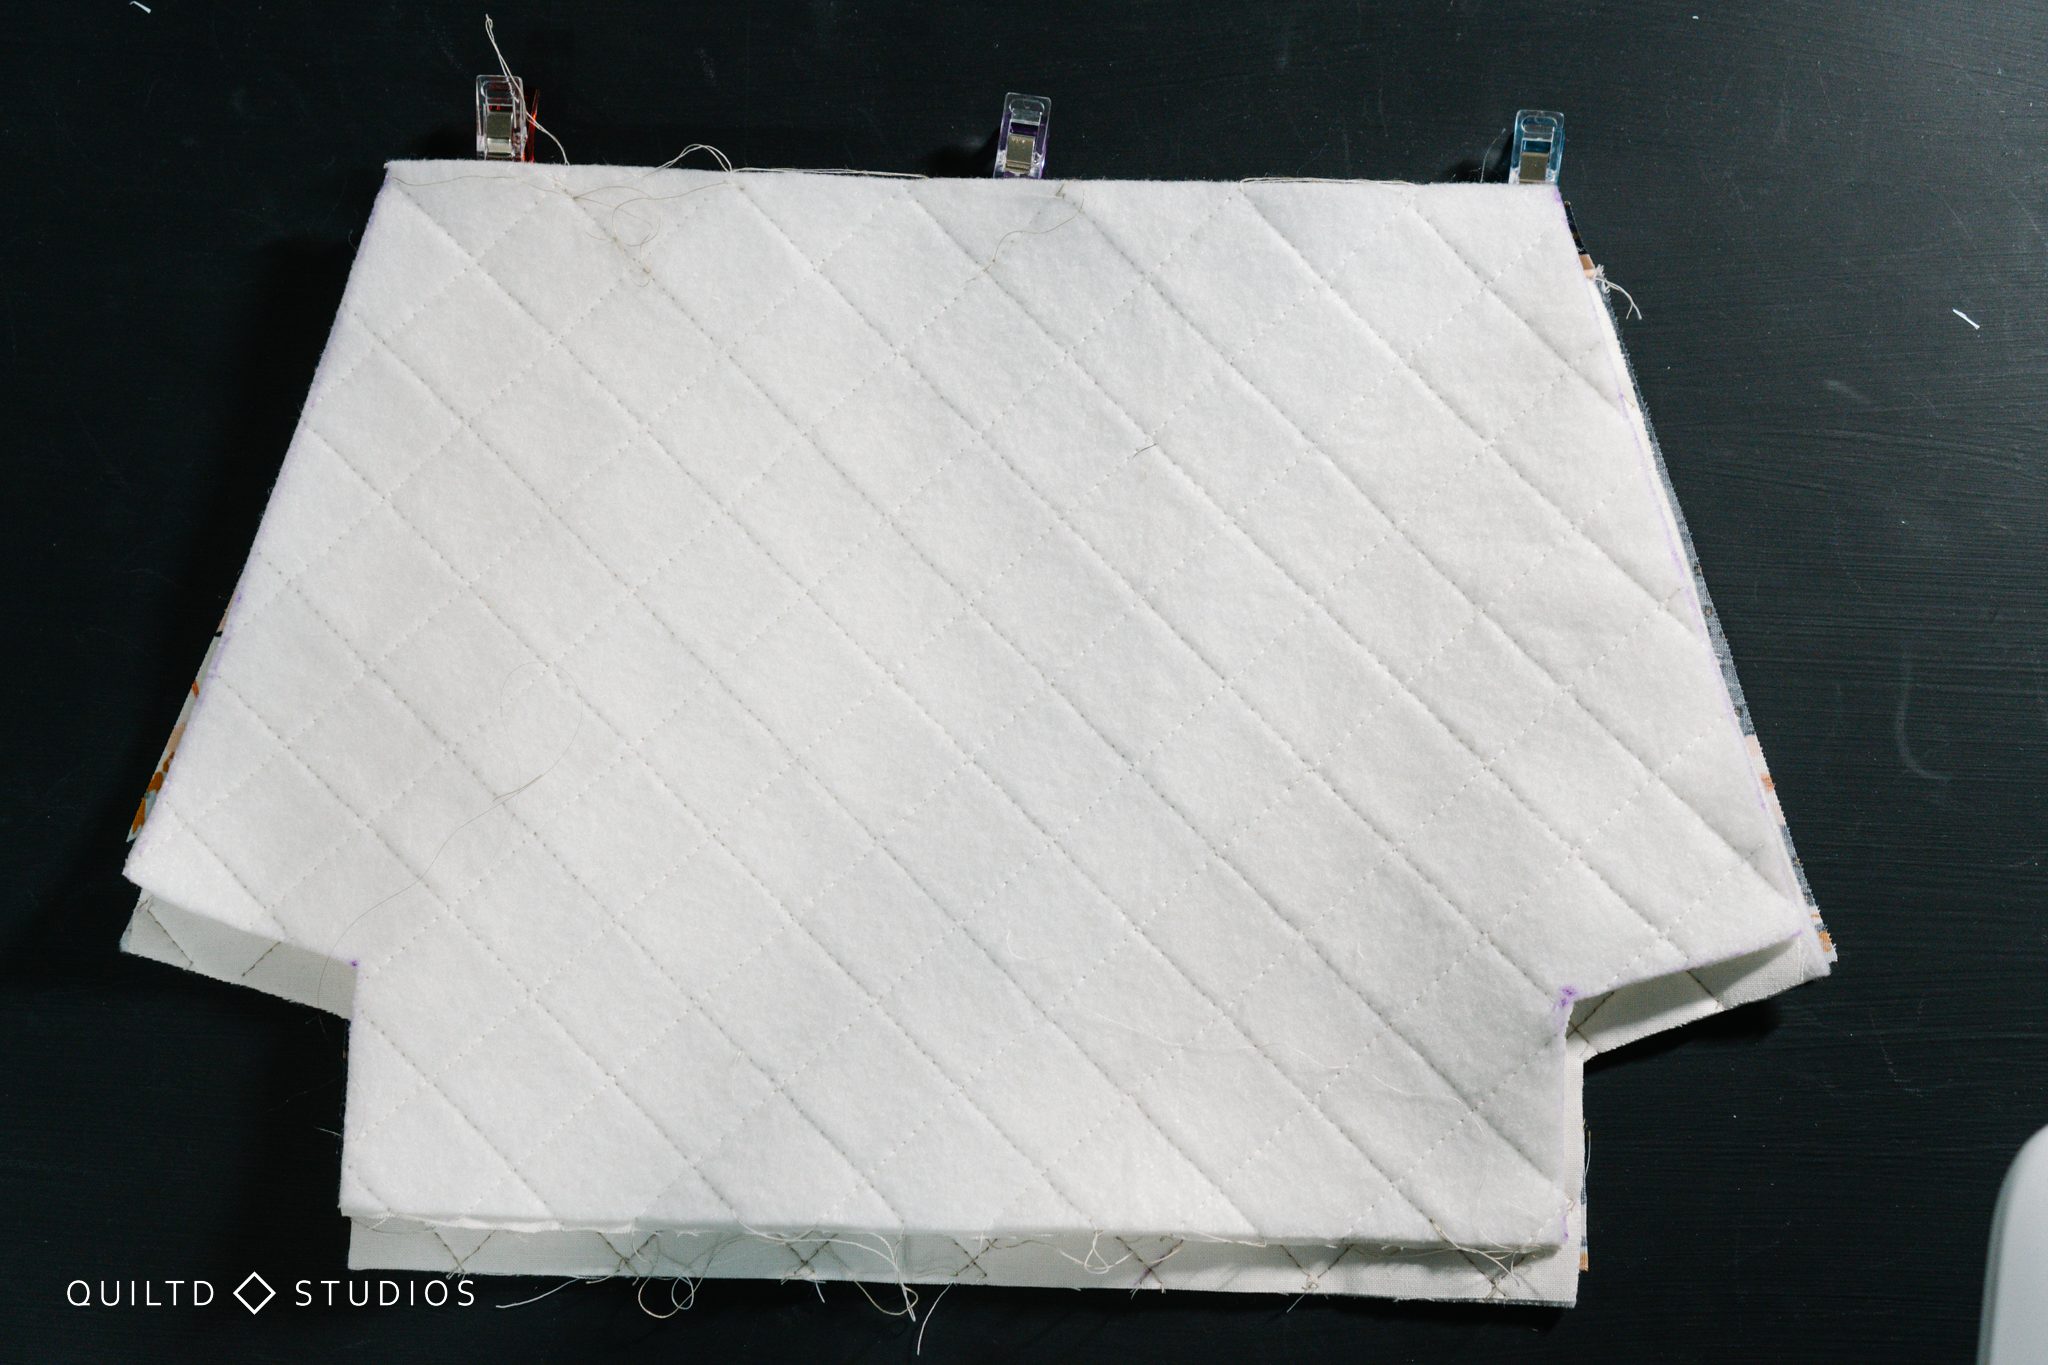
Once that is complete, flip the bag so that both Outside panels are facing each other and both Lining panels are facing each other (Outside on the right side, and Lining on the left side). Make sure the zipper is half open under the fabric layers.
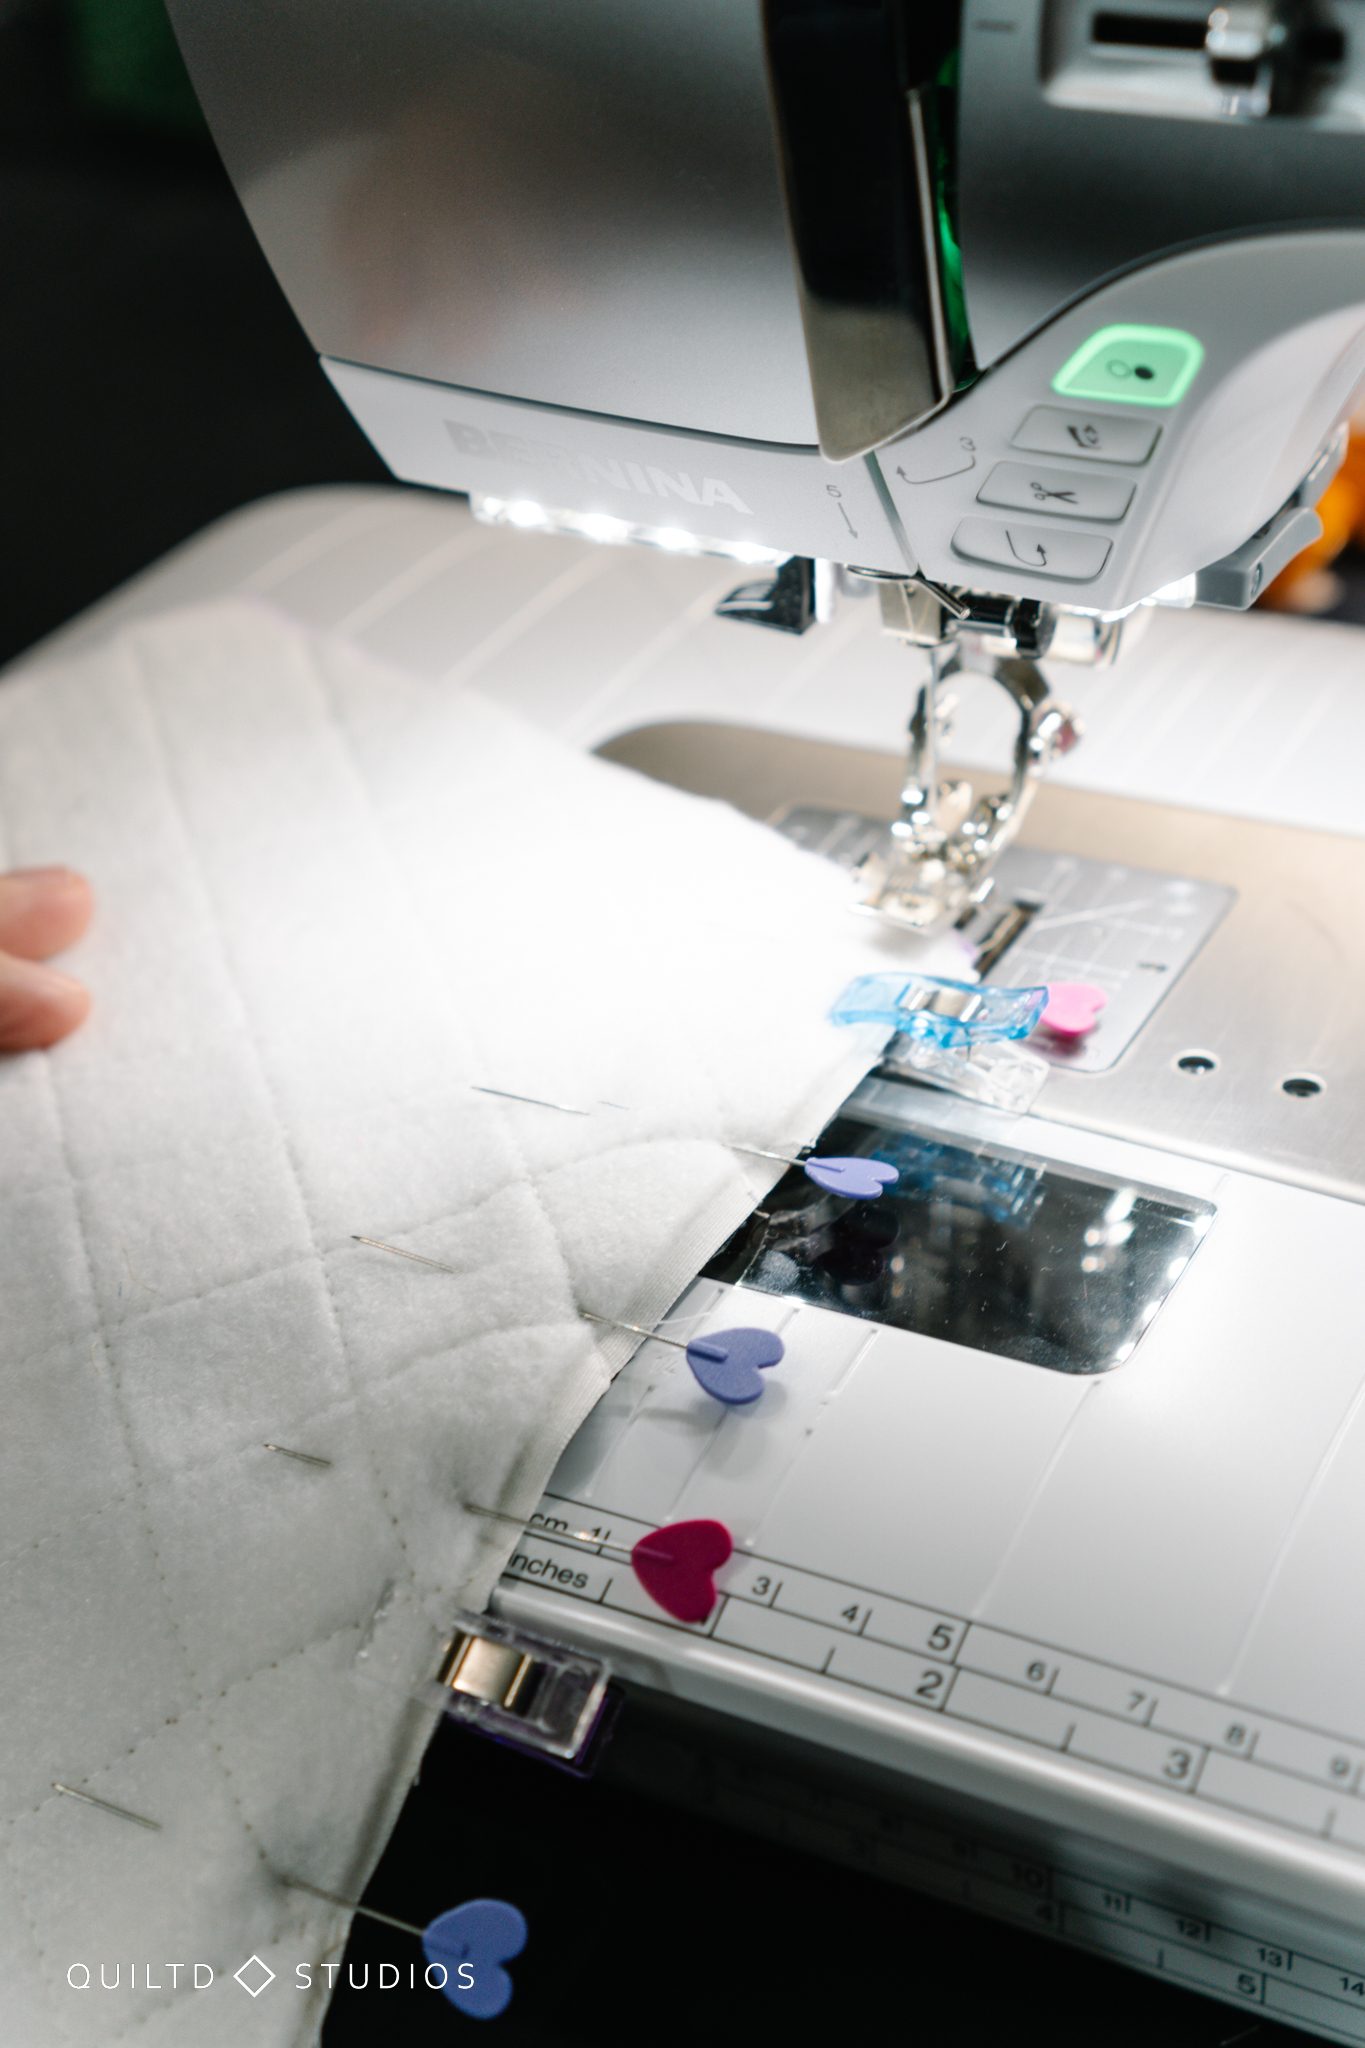
Pin the around the perimeter, starting with the center nearest the zipper ends, leaving the corners unpinned and a small section of the lining unpinned. Those will be sewn in later steps.

Sew around edges of the bag, again leaving the corners (both little edges of the corner) open and a small 3-4” section of the lining open (to turn the bag in the final step).
When sewing over the zippers, go slow and use reverse to get your stitches very secure.
Sewing the Corners of the Bag
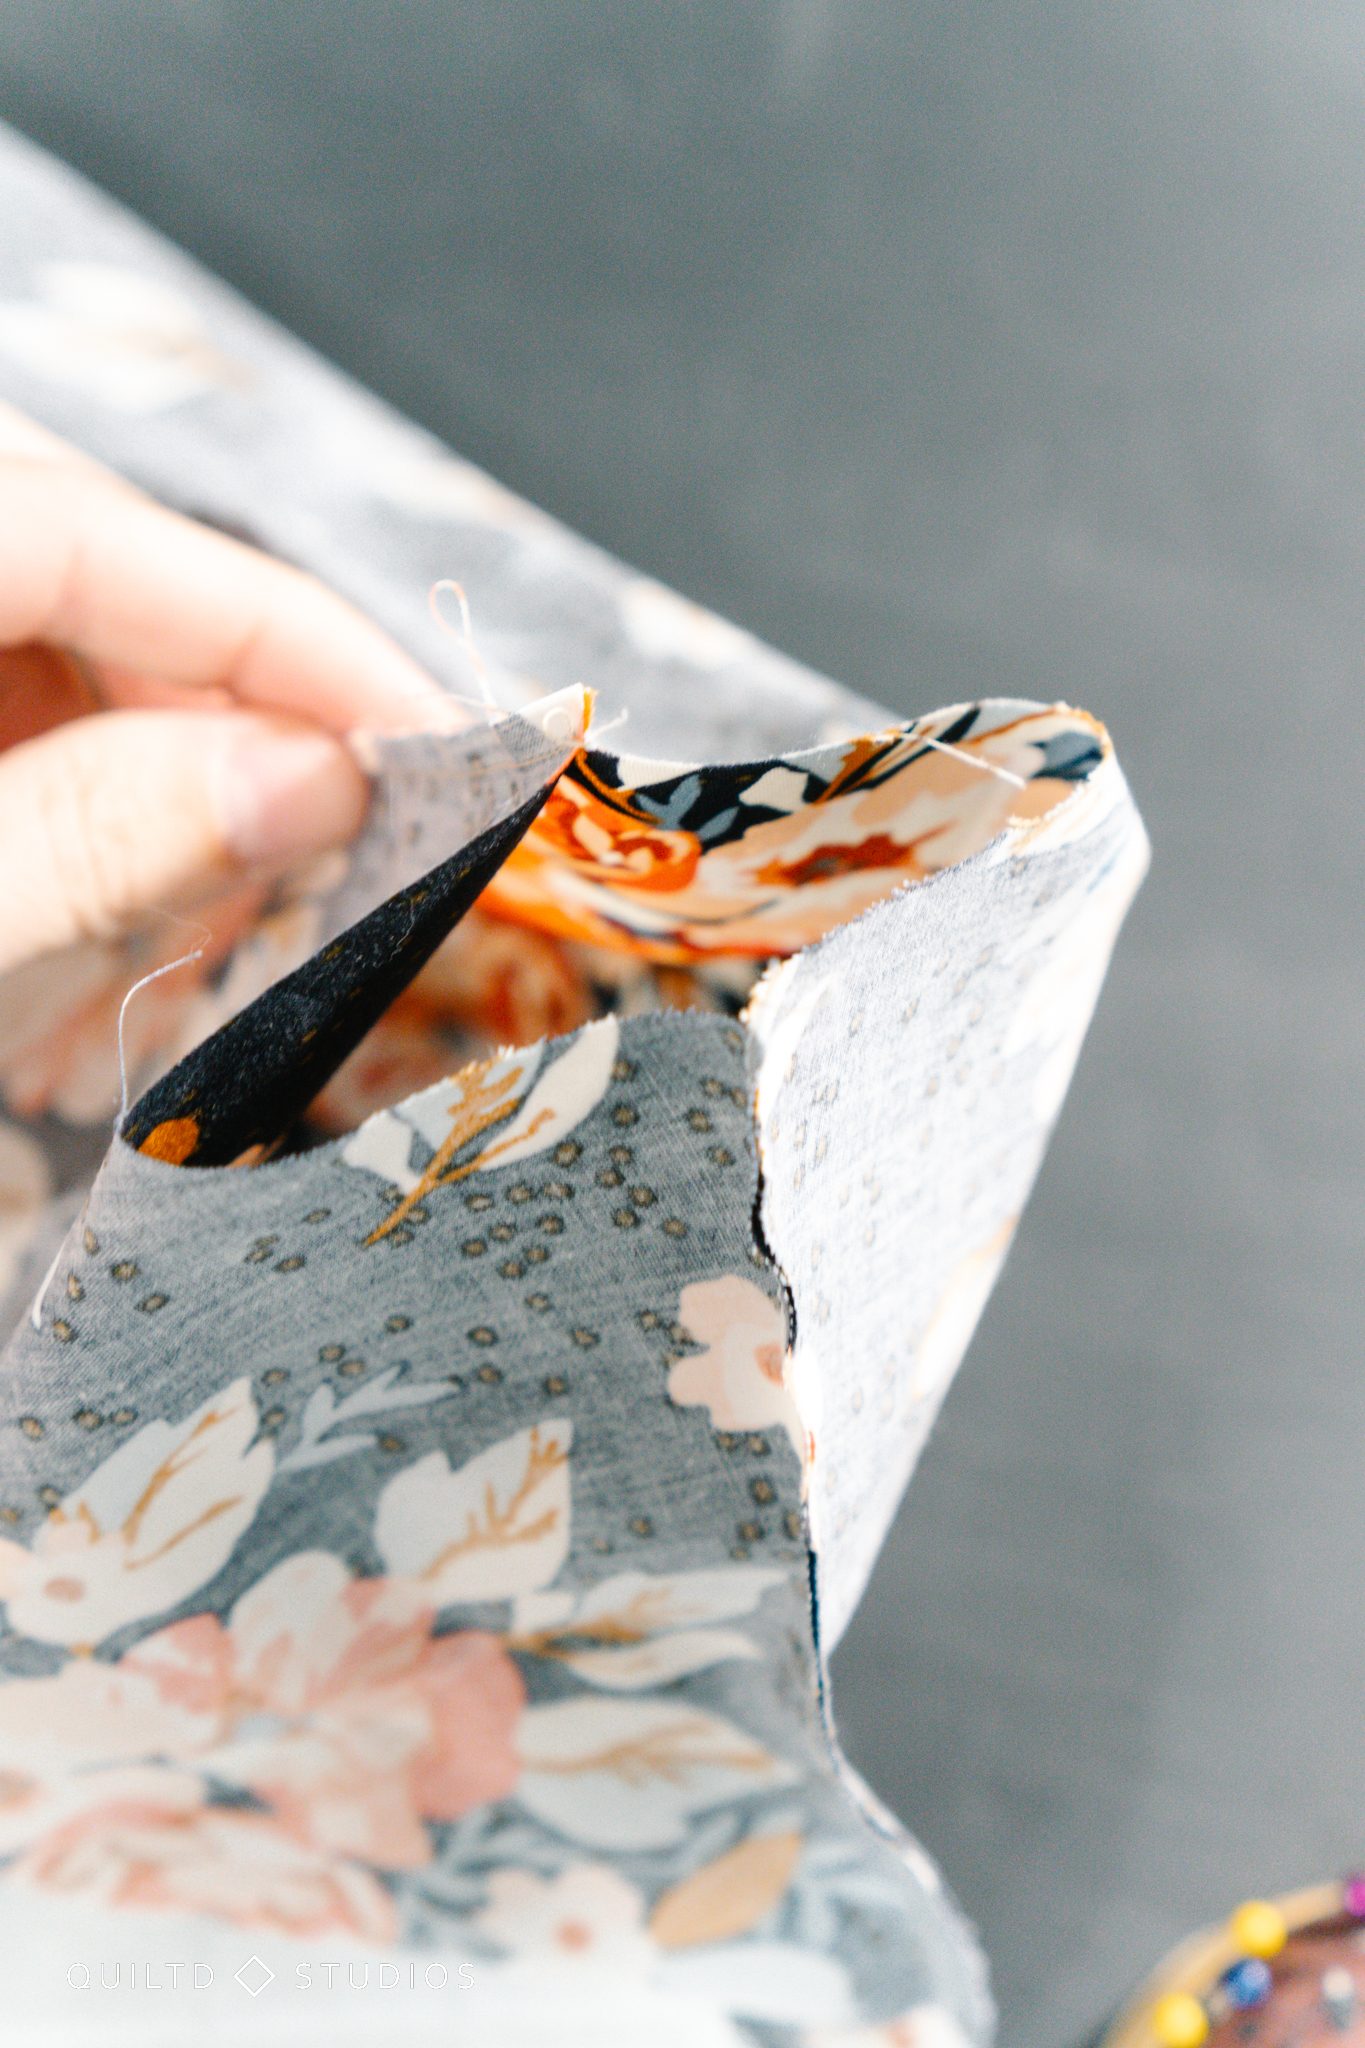
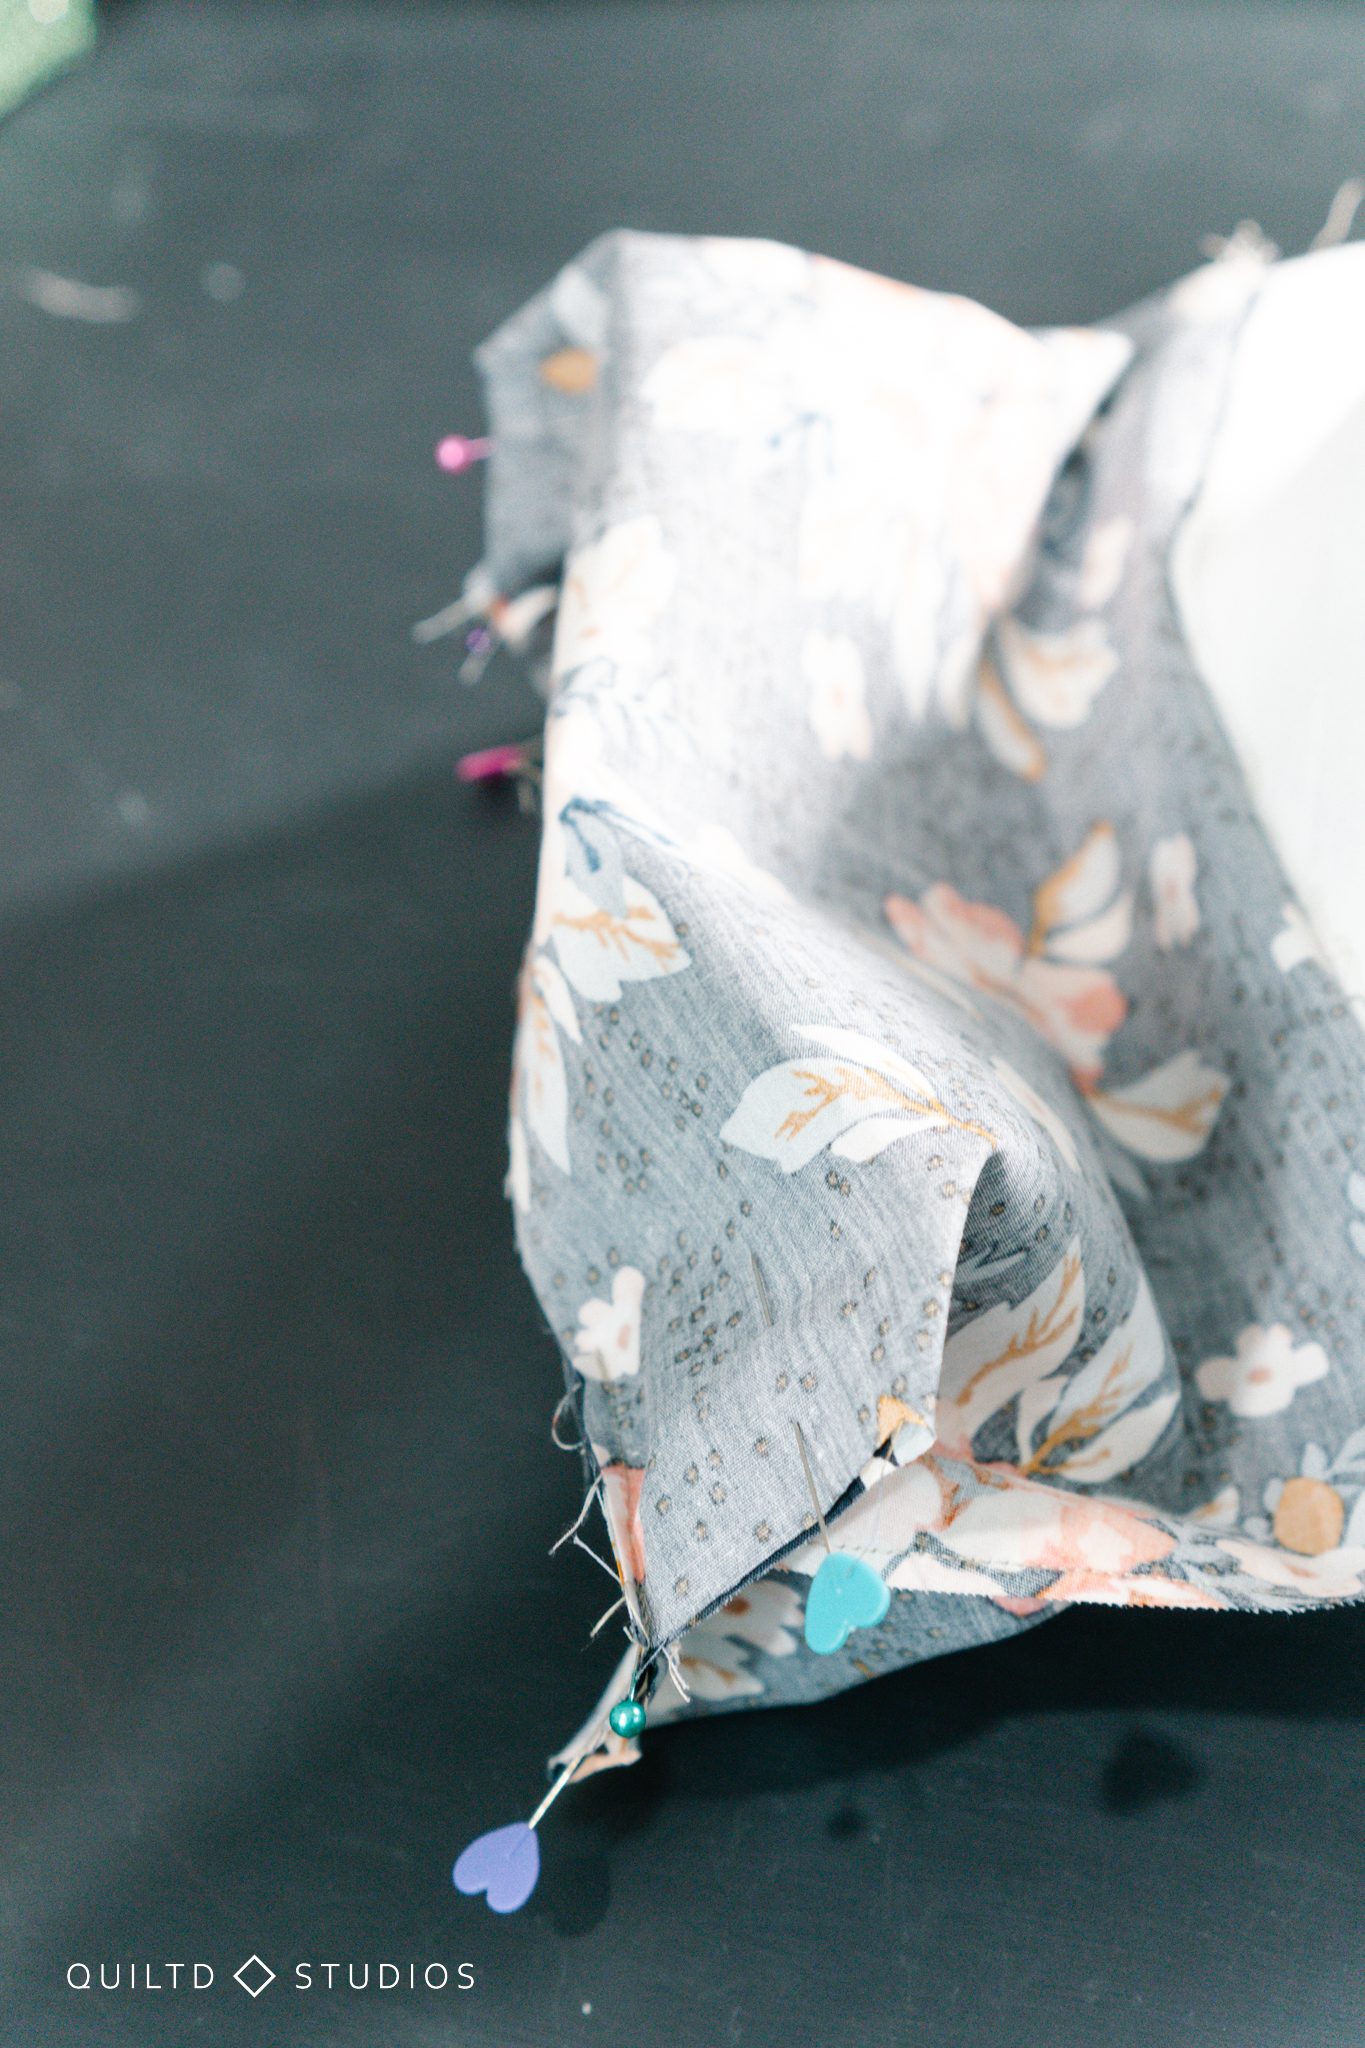
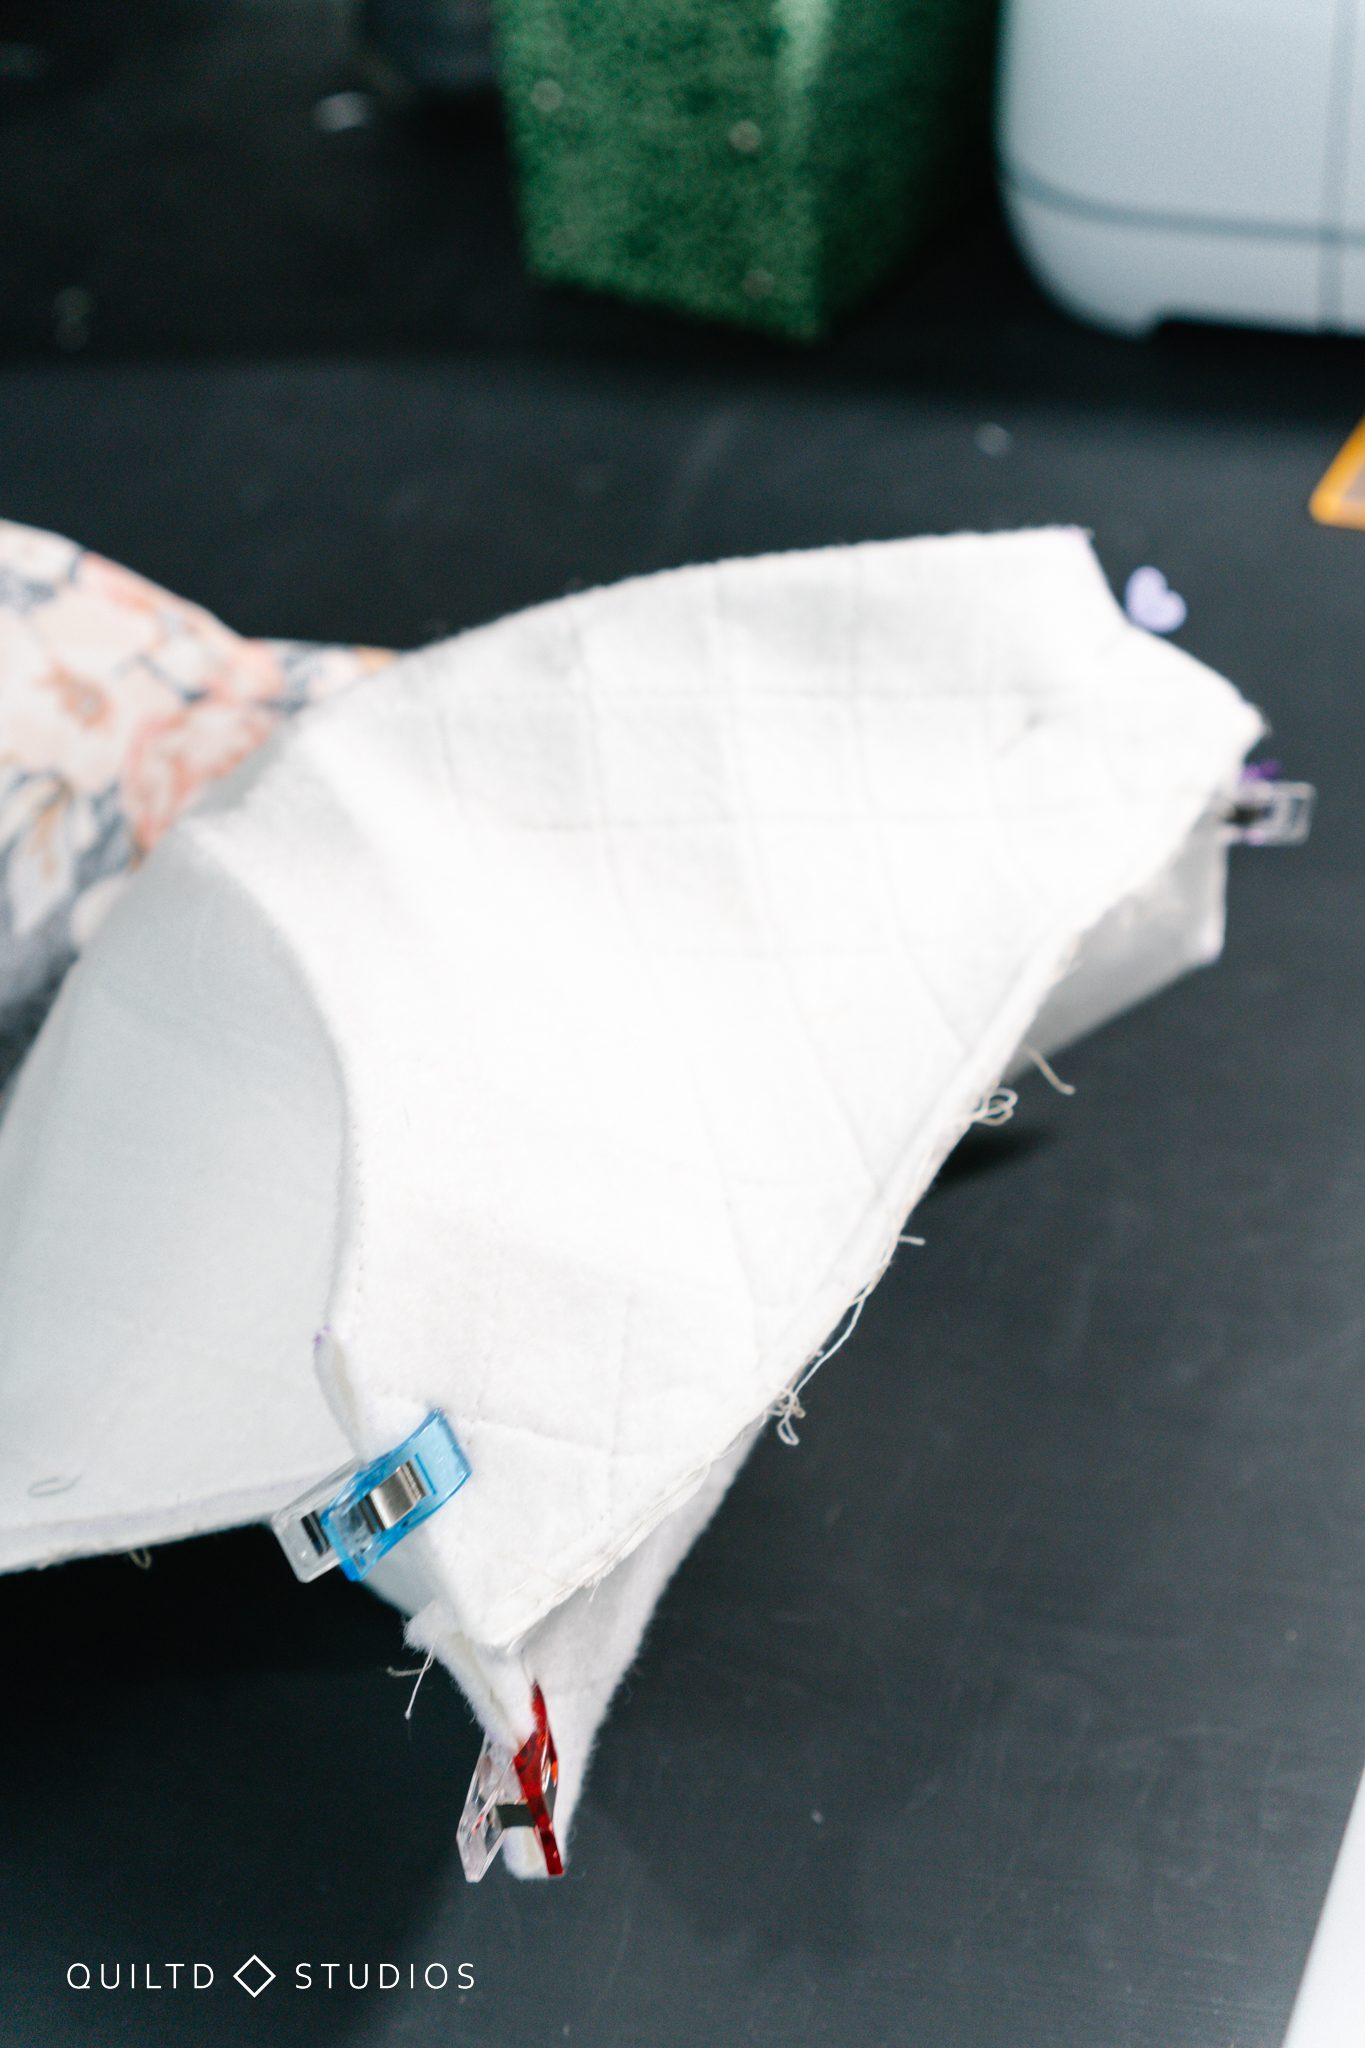 Once the perimeter is sewn, open each corner and pinch it together, so that each seam is touching as shown in the images. Sew a straight line across the corners.
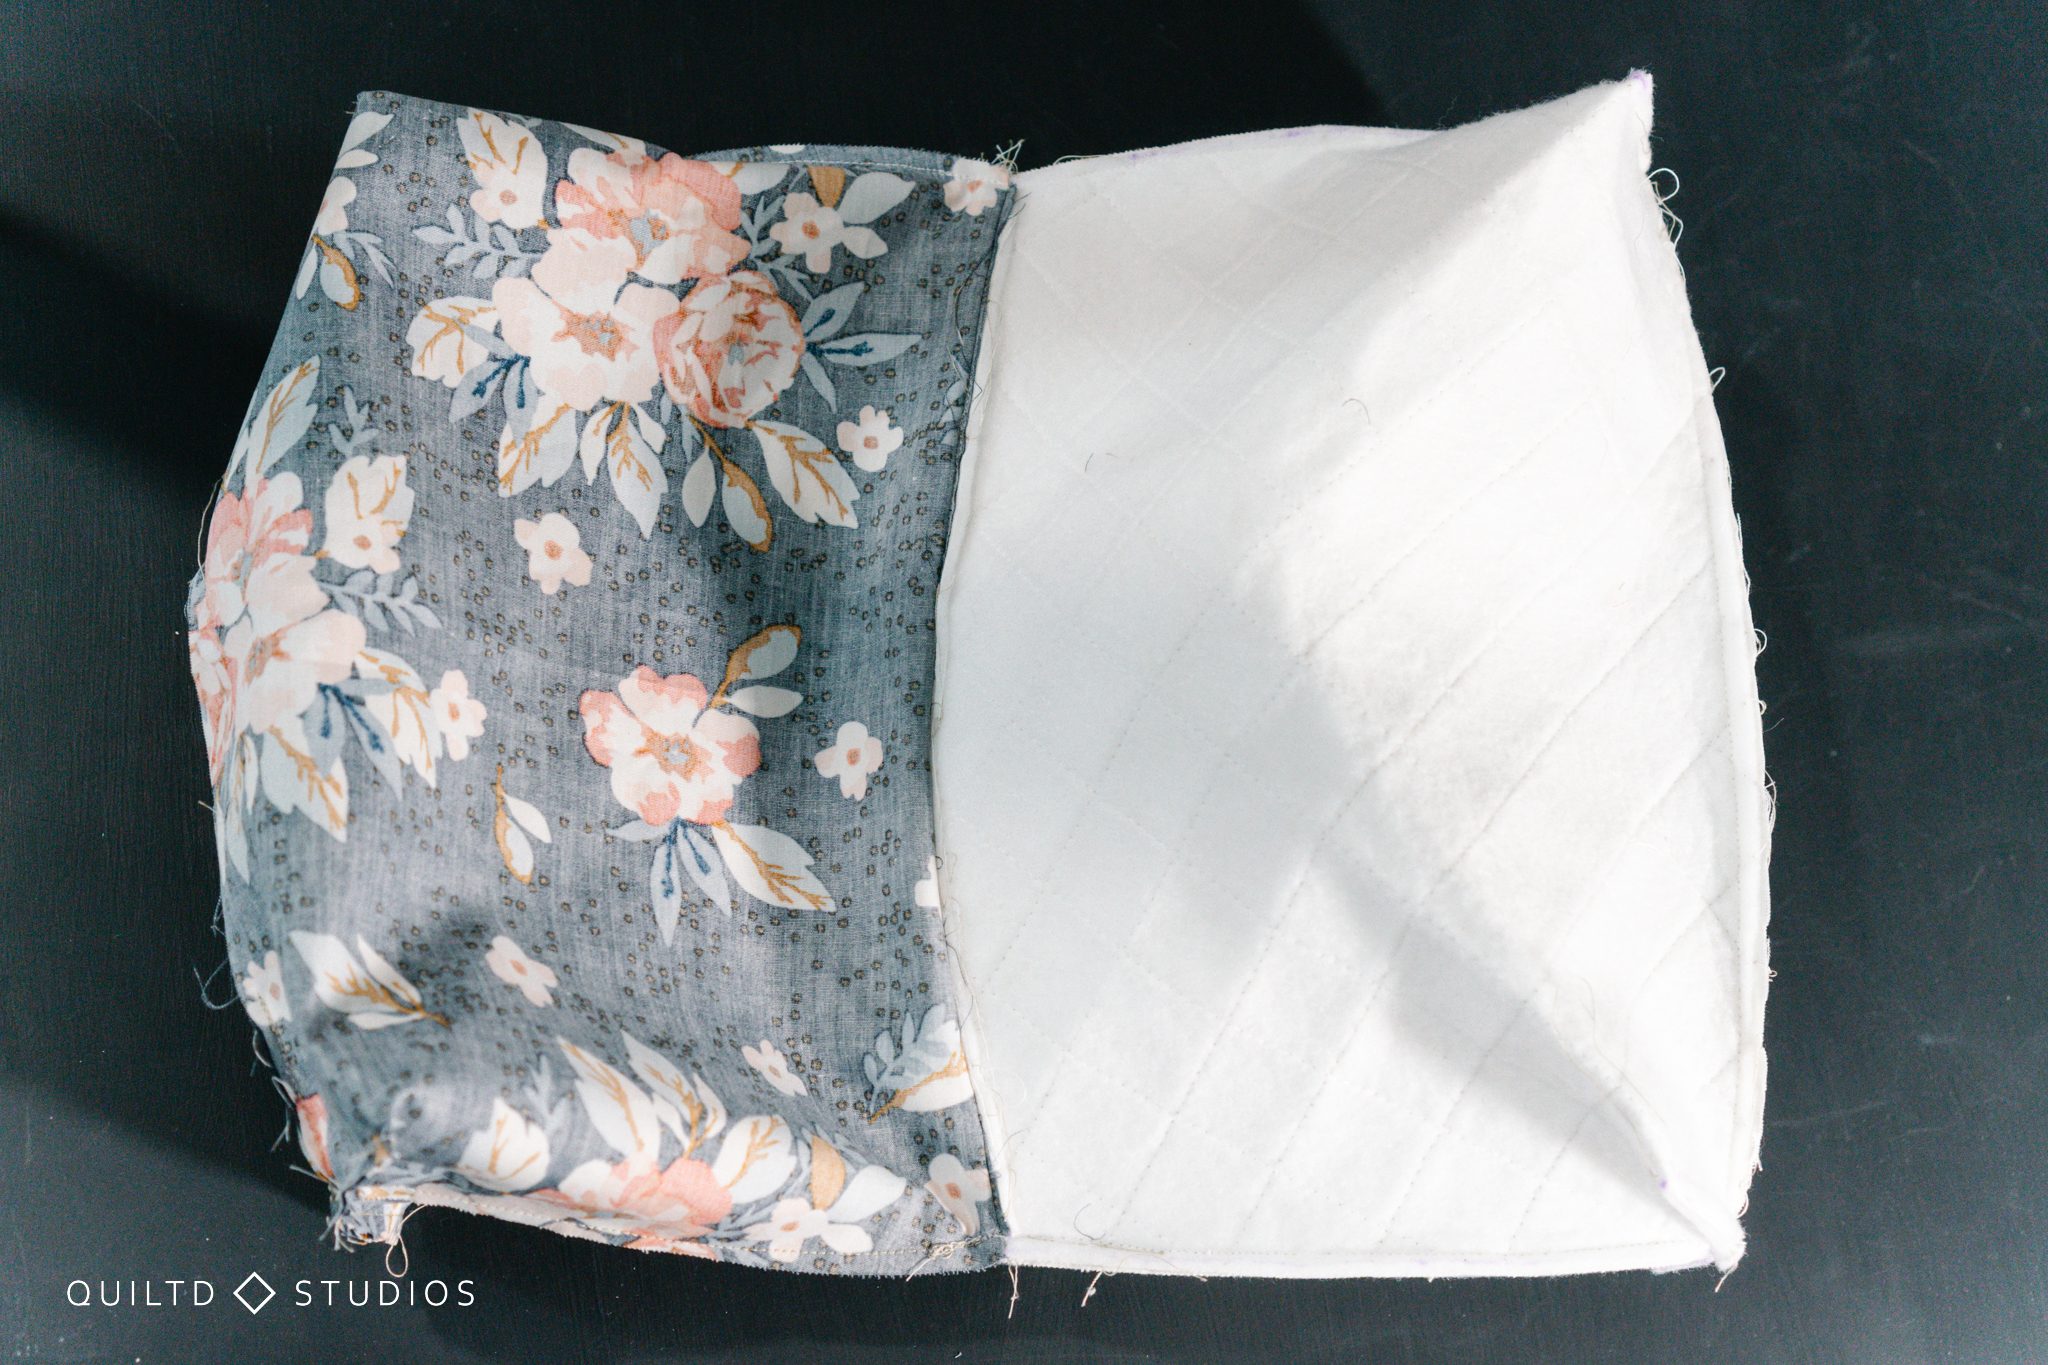
Flipping the Bag
This is it! Great job! Using the little open hole in the lining, pull the bag right side out, making sure to push the corners out. With the lining still out, tuck ¼” of the lining fabric where the hole is and sew across the line to finish the lining.
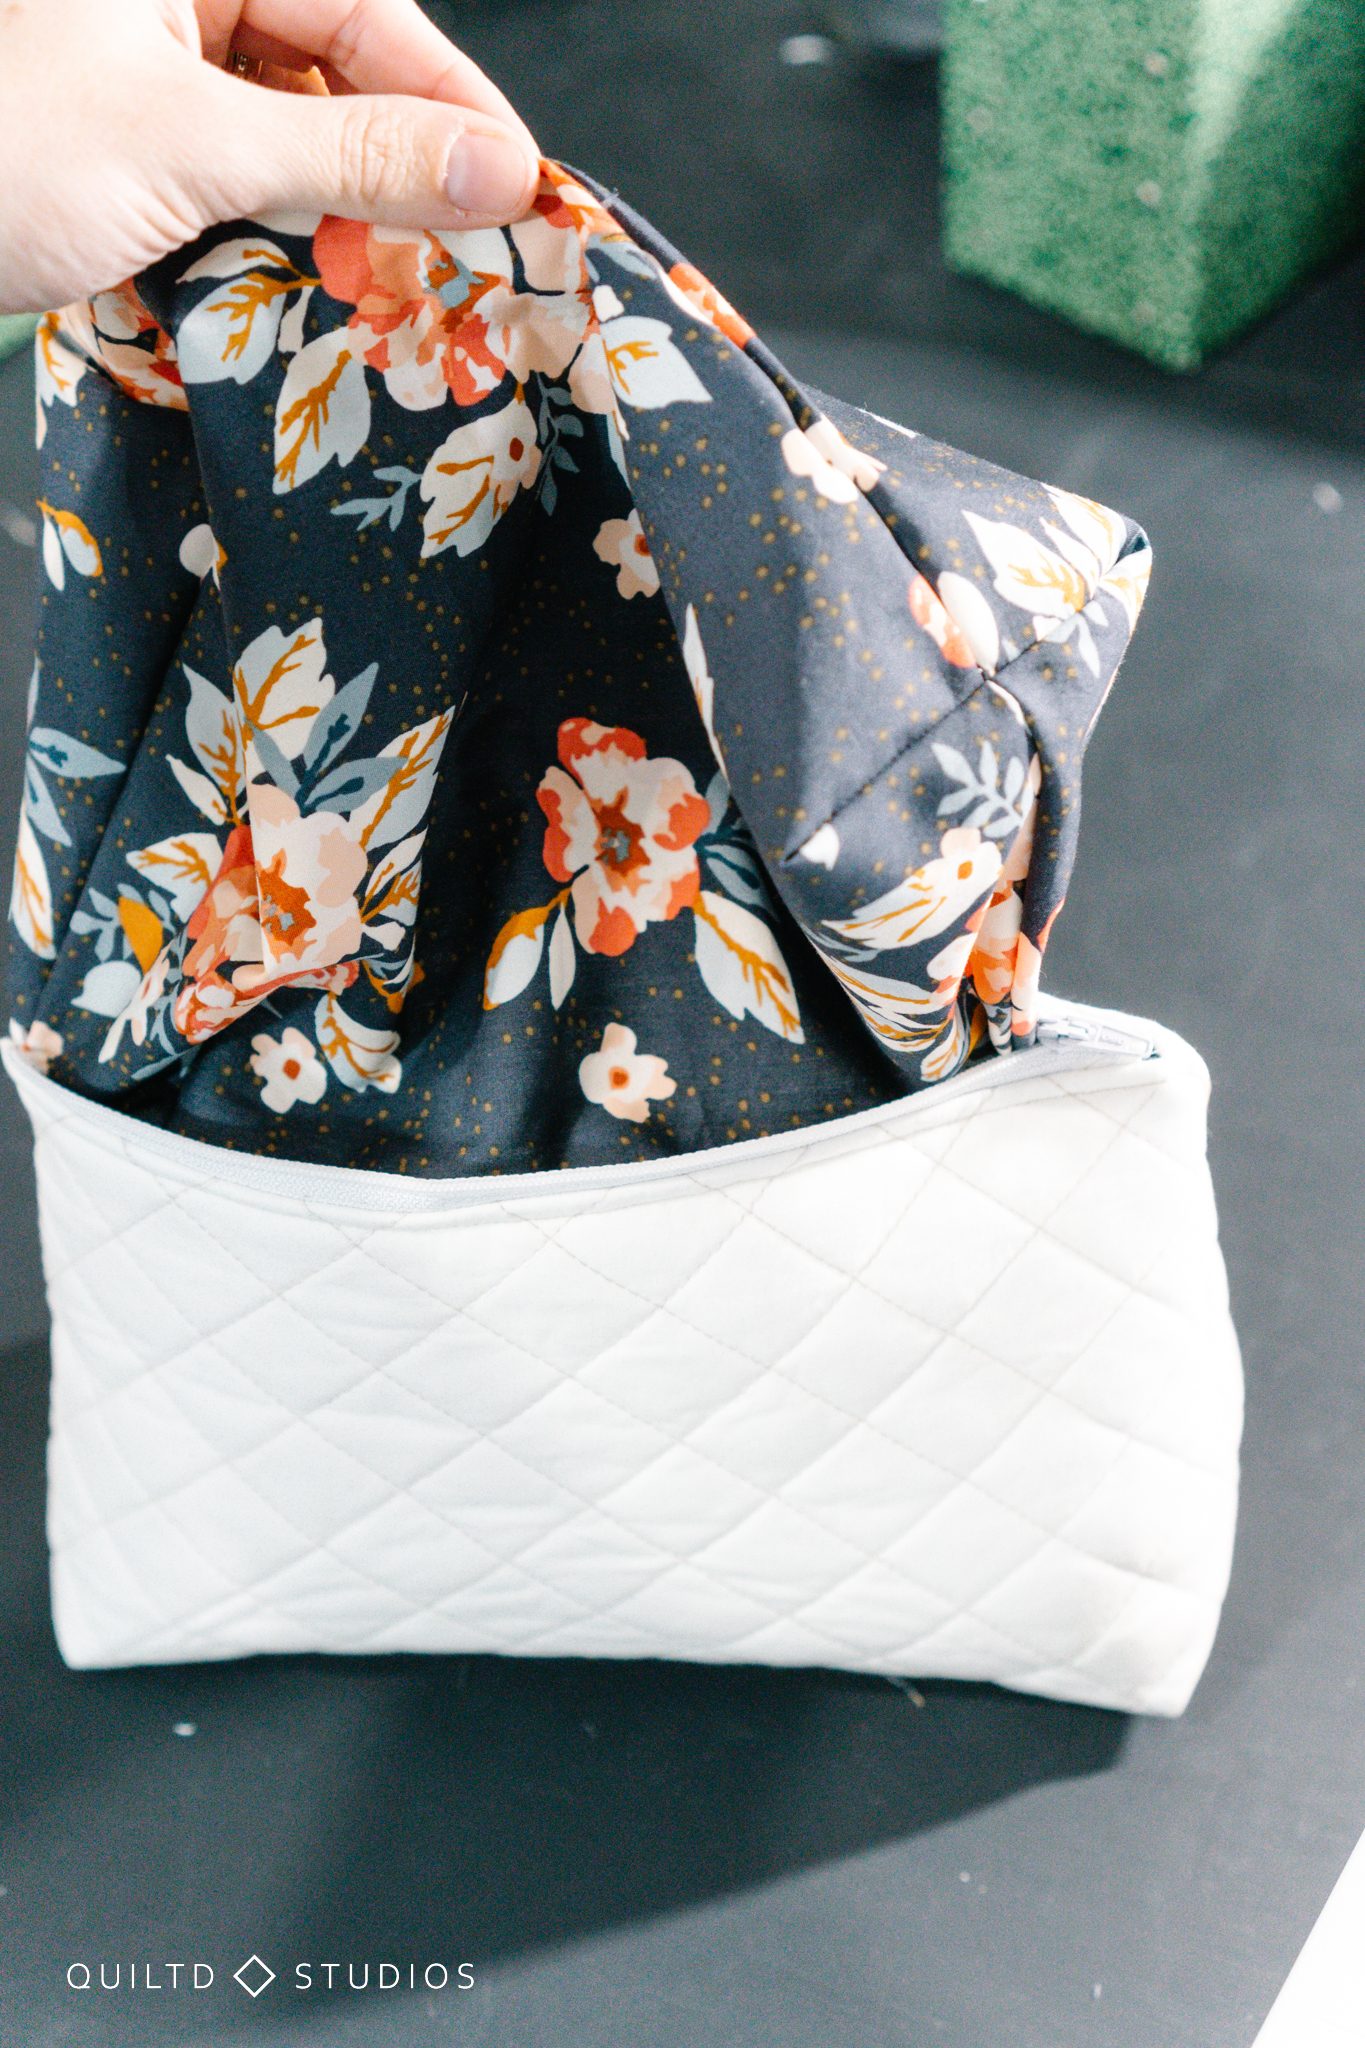

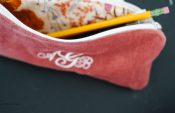
Your Makeup Bag with Zipper is now complete! And I can guarantee once you make one.. you’re going to want to make more!
Tag @quiltdstudios on social media so I can share your beautiful zipper bags!


Nice bag, thanks Jessica. Usually at the bottom of Bernina blog posts there is detail of which machine and which foot/feet are used. Not this time. I’m curious to know which foot was used to stitch the zipper in. I’ve made bags on my B770QEE but struggle to find a foot that will attach zippers nicely. All the Bernina feet are very wide and want to ride on top of the zipper teeth. If I use a bag zipper – chunkier and wider tape – it’s not so tricky, but using a regular zipper – as illustrated here – I get frustrated.
Hi Pam – thanks for your questions, for some reason I can’t get the feet/machine to update! I apologize, but I have a 570 QE and I used the zipper foot with guide #14D. I have to say that zippers are still pretty difficult to install and I end up battling it out to get them even and straight. I did move my needle as far to the left as possible and then used the foot on the edge of the zipper, that seemed to help.
Oh,I love this pattern and tutorial, esp as a visual sewer. Perfect! Thank you Jessica!