 BERNINA Corporate Blog -
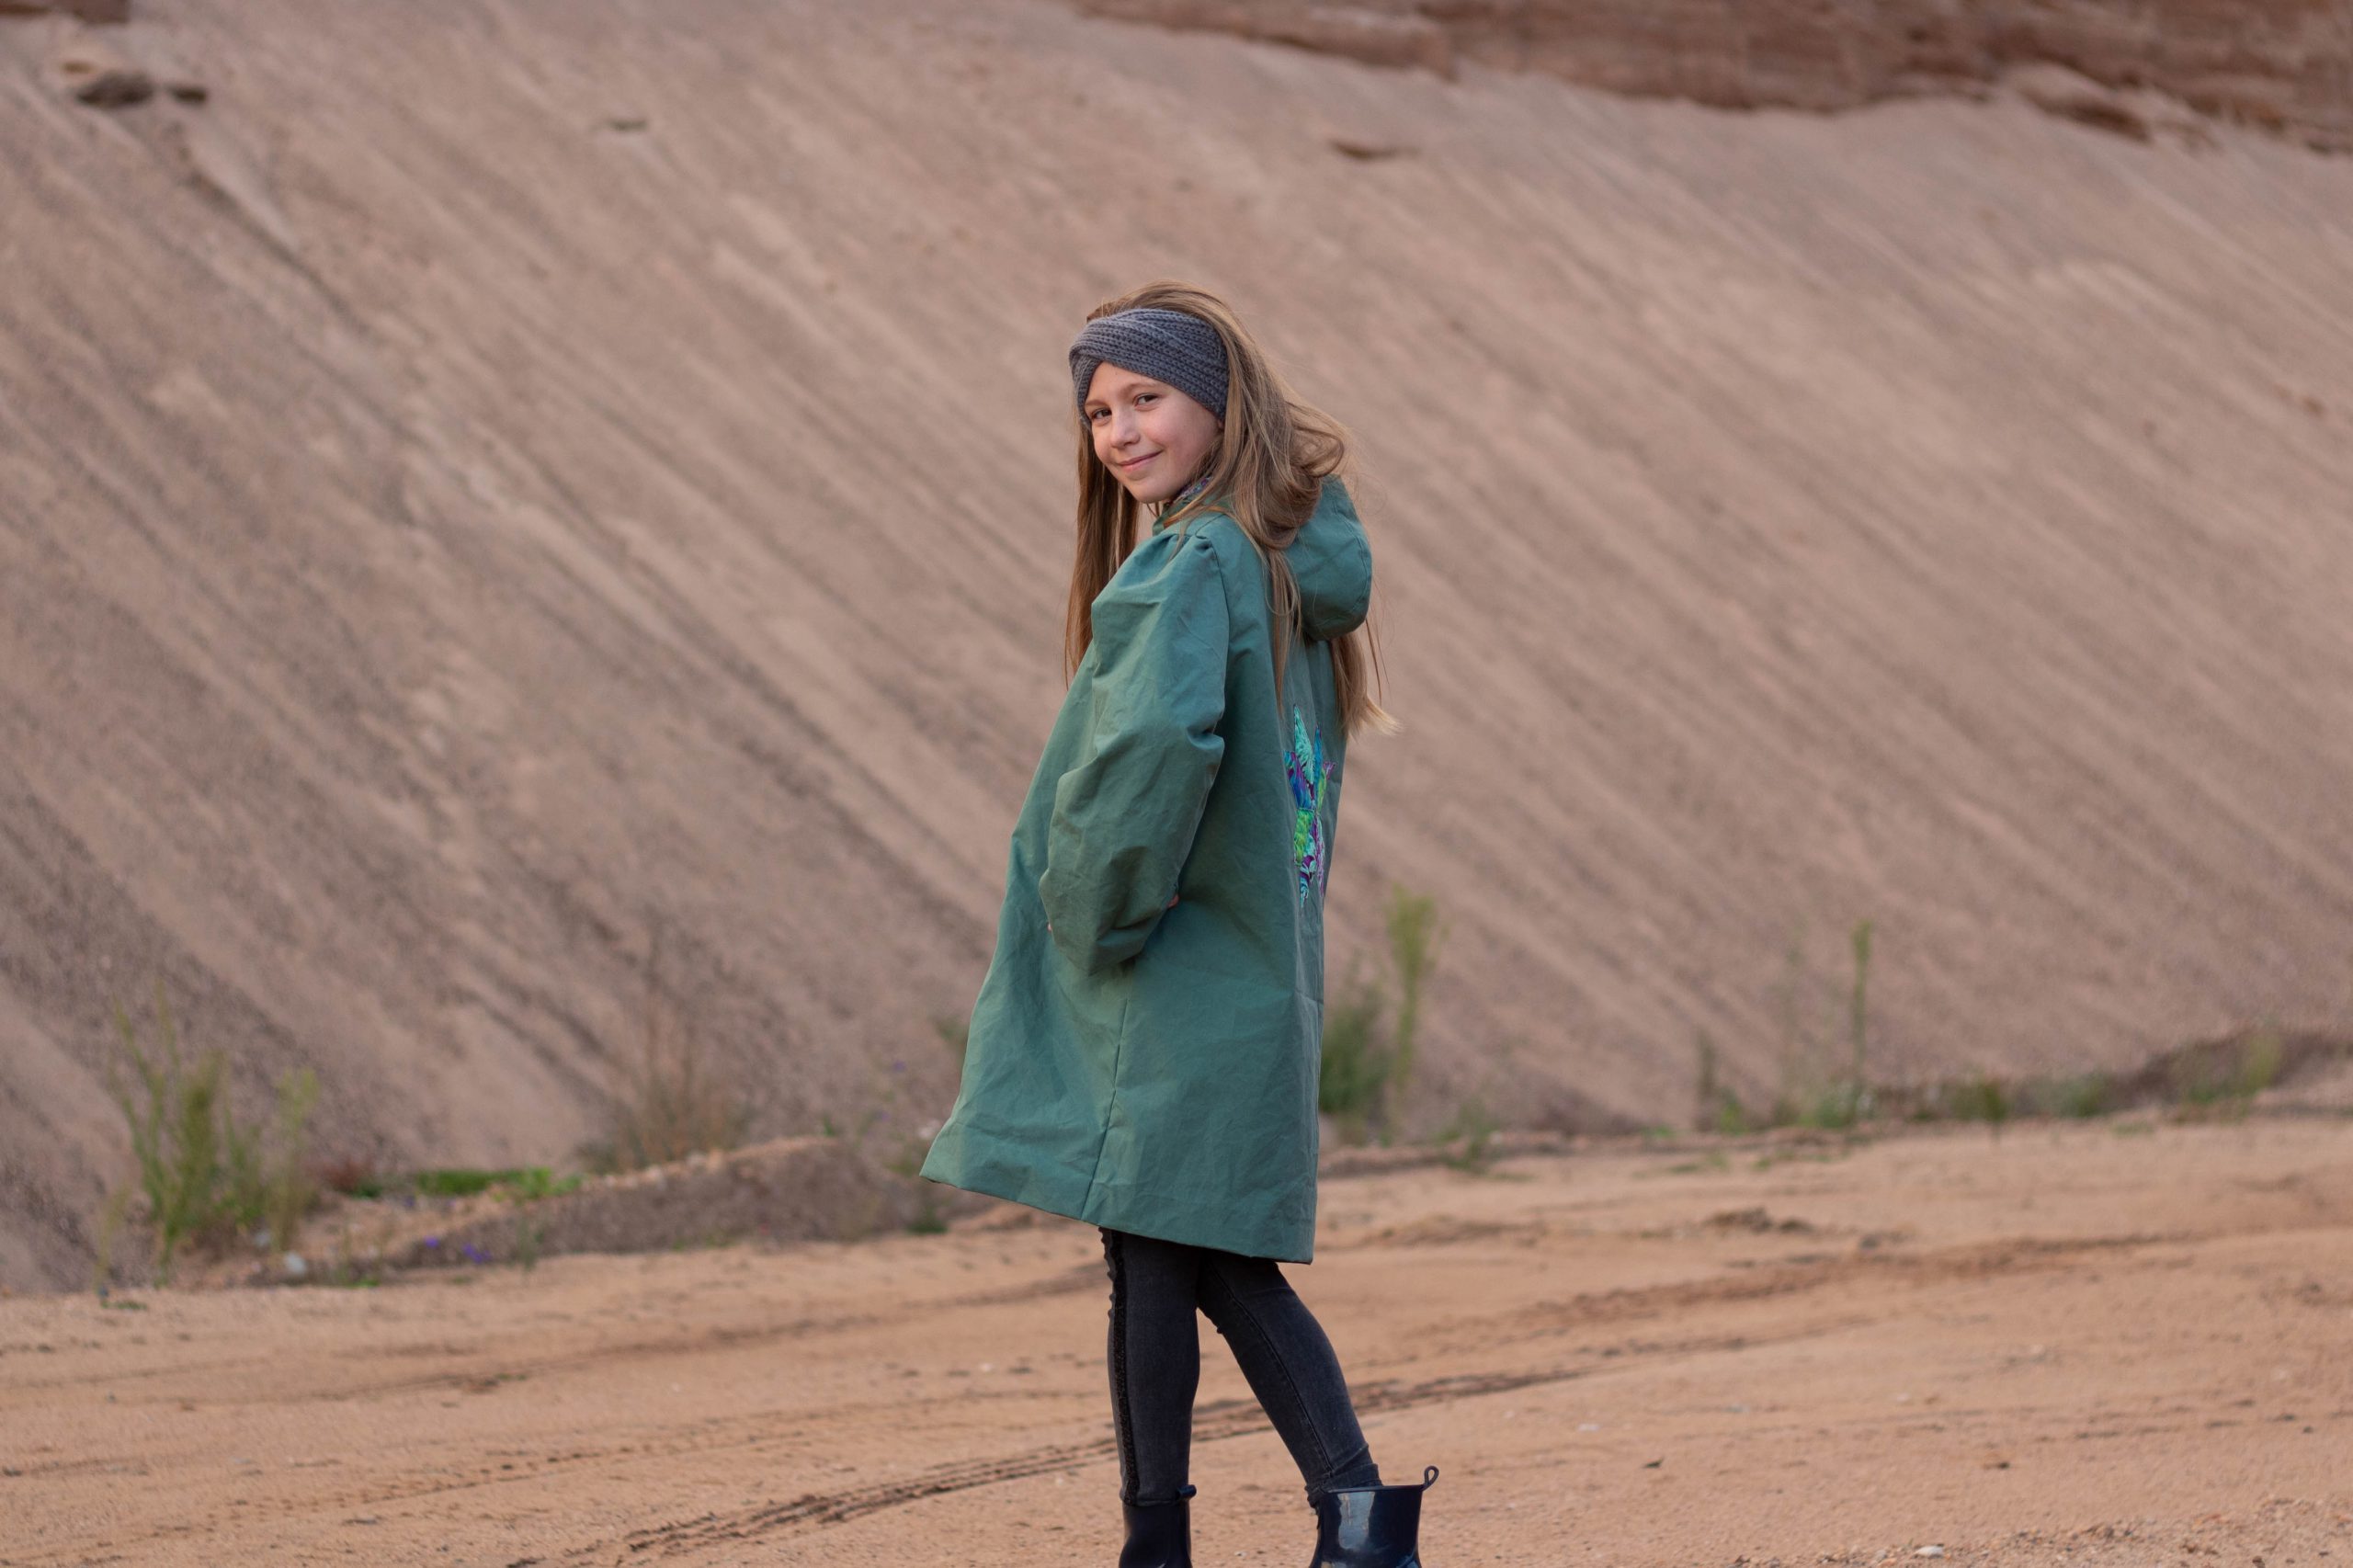
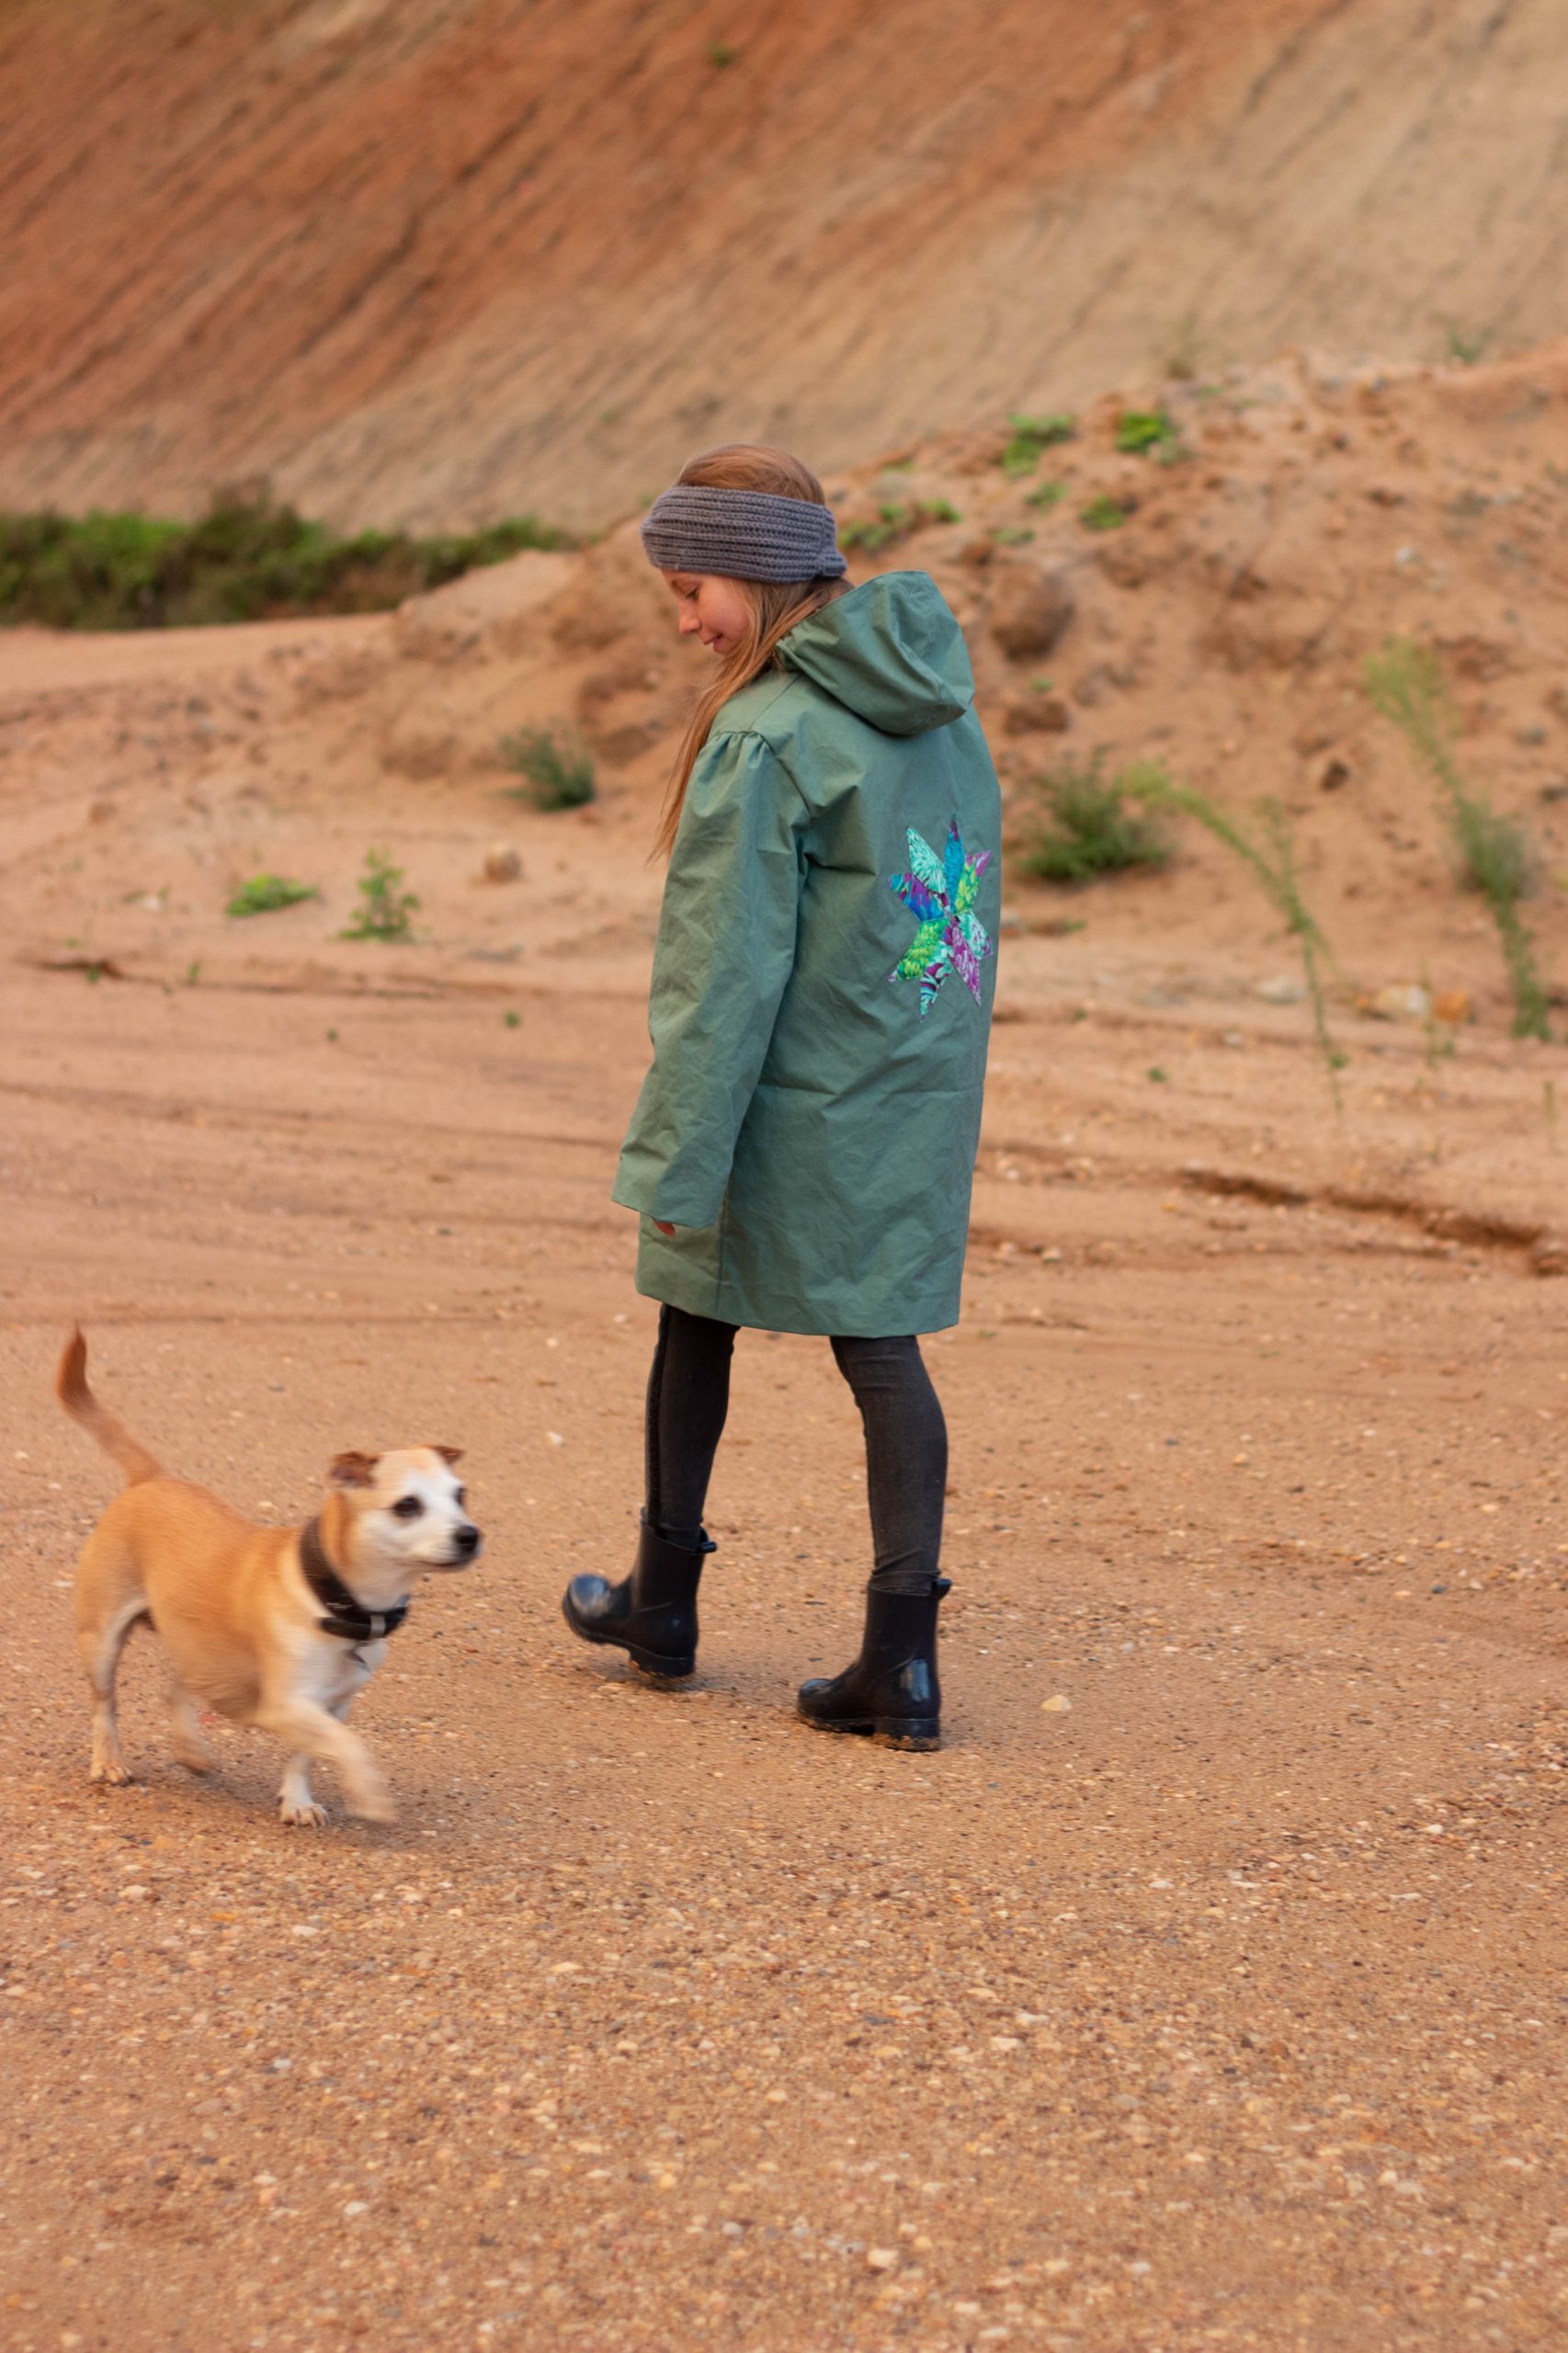
BERNINA Fashion Looks – tutorial for the “Geranium” children’s jacket
The Fashion Looks collection was created by Swiss designer Irène Münger and is inspired by English textile designer Kaffe Fassett’s fabrics. It is the first fashion collection for you to sew at home. It includes this casual children’s jacket, which I have sewn for you.
The fashionable patterns are available online at inspirations-Shop.

Today, you are getting a detailed tutorial from me to make it as easy as possible to sew this children’s jacket. I’m going to show you how to sew your own jacket using a lot of pictures.
You need the following fabrics for the jacket:
I strongly recommend that before buying/cutting the fabric you prepare the whole pattern and place it on the floor to determine exactly how much fabric you need for your size. I also recommend that you measure the cut pieces to determine beforehand whether the sleeve length is suitable for you, for example.
- Approx. 2 m oilskin fabric, 155 cm wide
- Approx. 2 m lining fabric, 140 cm wide
- Approx. 1 m of Kaffe fabric, 110 cm wide (please add the appliqué on the back)
- 1 split zipper, 75 cm long
- Elastic band, if applicable
For the embroidery on the front:
- Embroidery yarn
- Free BERNINA embroidery file (here)
- Embroidery backing
For the appliqué star on the back:
- R 80 bulky, sewable wadding from Vliesline (you can find the care and processing instructions here), approx. 40 cm x 40 cm.
- Tear-away embroidery backing, 2 squares approx. 40 cm x 40 cm
- Patterned cotton fabric, 8 pieces approx. 20 cm x 8 cm, cut into 30° diagonals
Preparations/Cutting the fabric
This pattern is part of BERNINA Fashion Looks: To the Geranium jacket pattern.
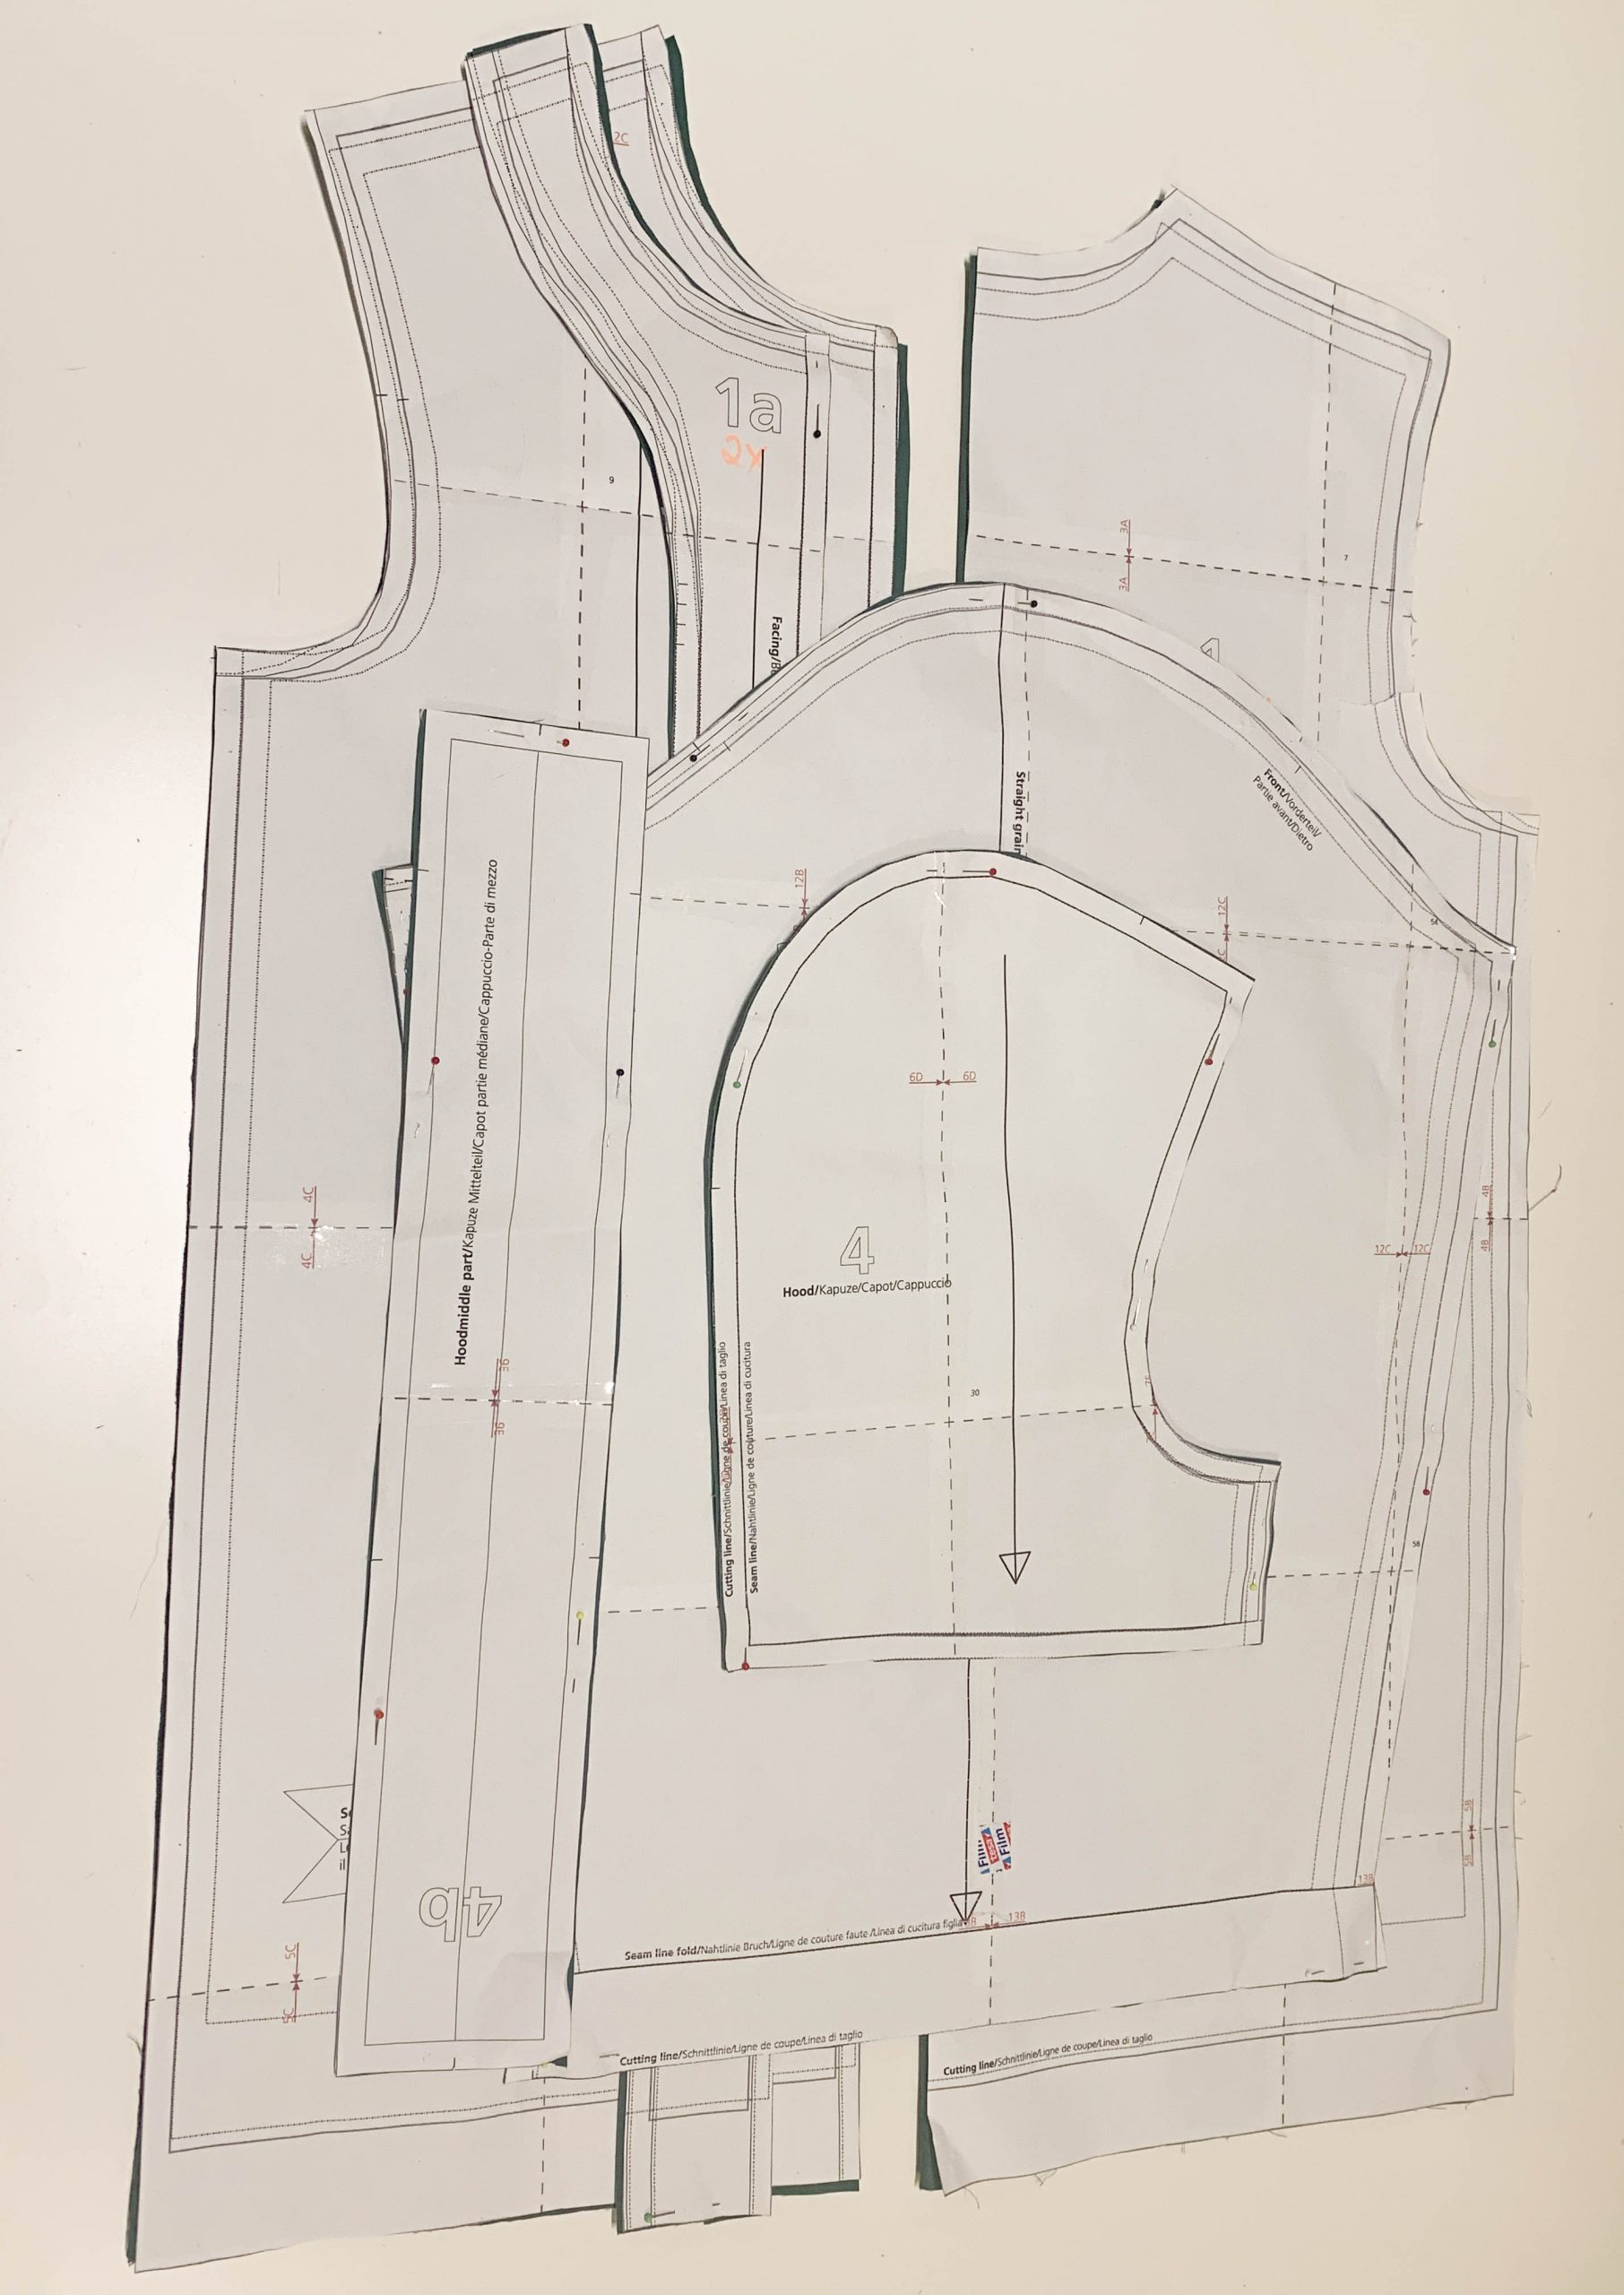
You can find all the cuts in the overview here.
When you print out the pattern, make sure that you do not adjust the size. You can check this using the test square on the pattern.
The pattern already includes all seam and hem allowances.
Cut the following pieces:
- 1 back piece on the fold (piece 1) – main fabric
- 2 front pieces (piece 2) – main fabric
- 2 sleeves (piece 3) – main fabric
- 2 hoods (piece 4) – main fabric
- 1 hood middle piece (piece 4b) – main fabric
- 2 hoods (piece 4) – Kaffe fabric
- 1 middle piece (piece 4b) – Kaffe fabric
- 2 sleeves (piece 3a) – lining fabric
- 1 back piece on the fold (piece 2a) – lining fabric
- 2 front pieces (piece 1b) – lining fabric
- 2 facings (piece 1a) – main fabric
- 1 neckline facing on the fold (piece 2b) – Kaffe fabric (or lining fabric)
- 2 sleeve pieces (piece 1c) – Kaffe fabric (or lining fabric)
- 8 rectangles approx. 20 cm x 8 cm, in 30° diagonals for the star on the back – Kaffe fabric

Before I started sewing, I prepared the following:
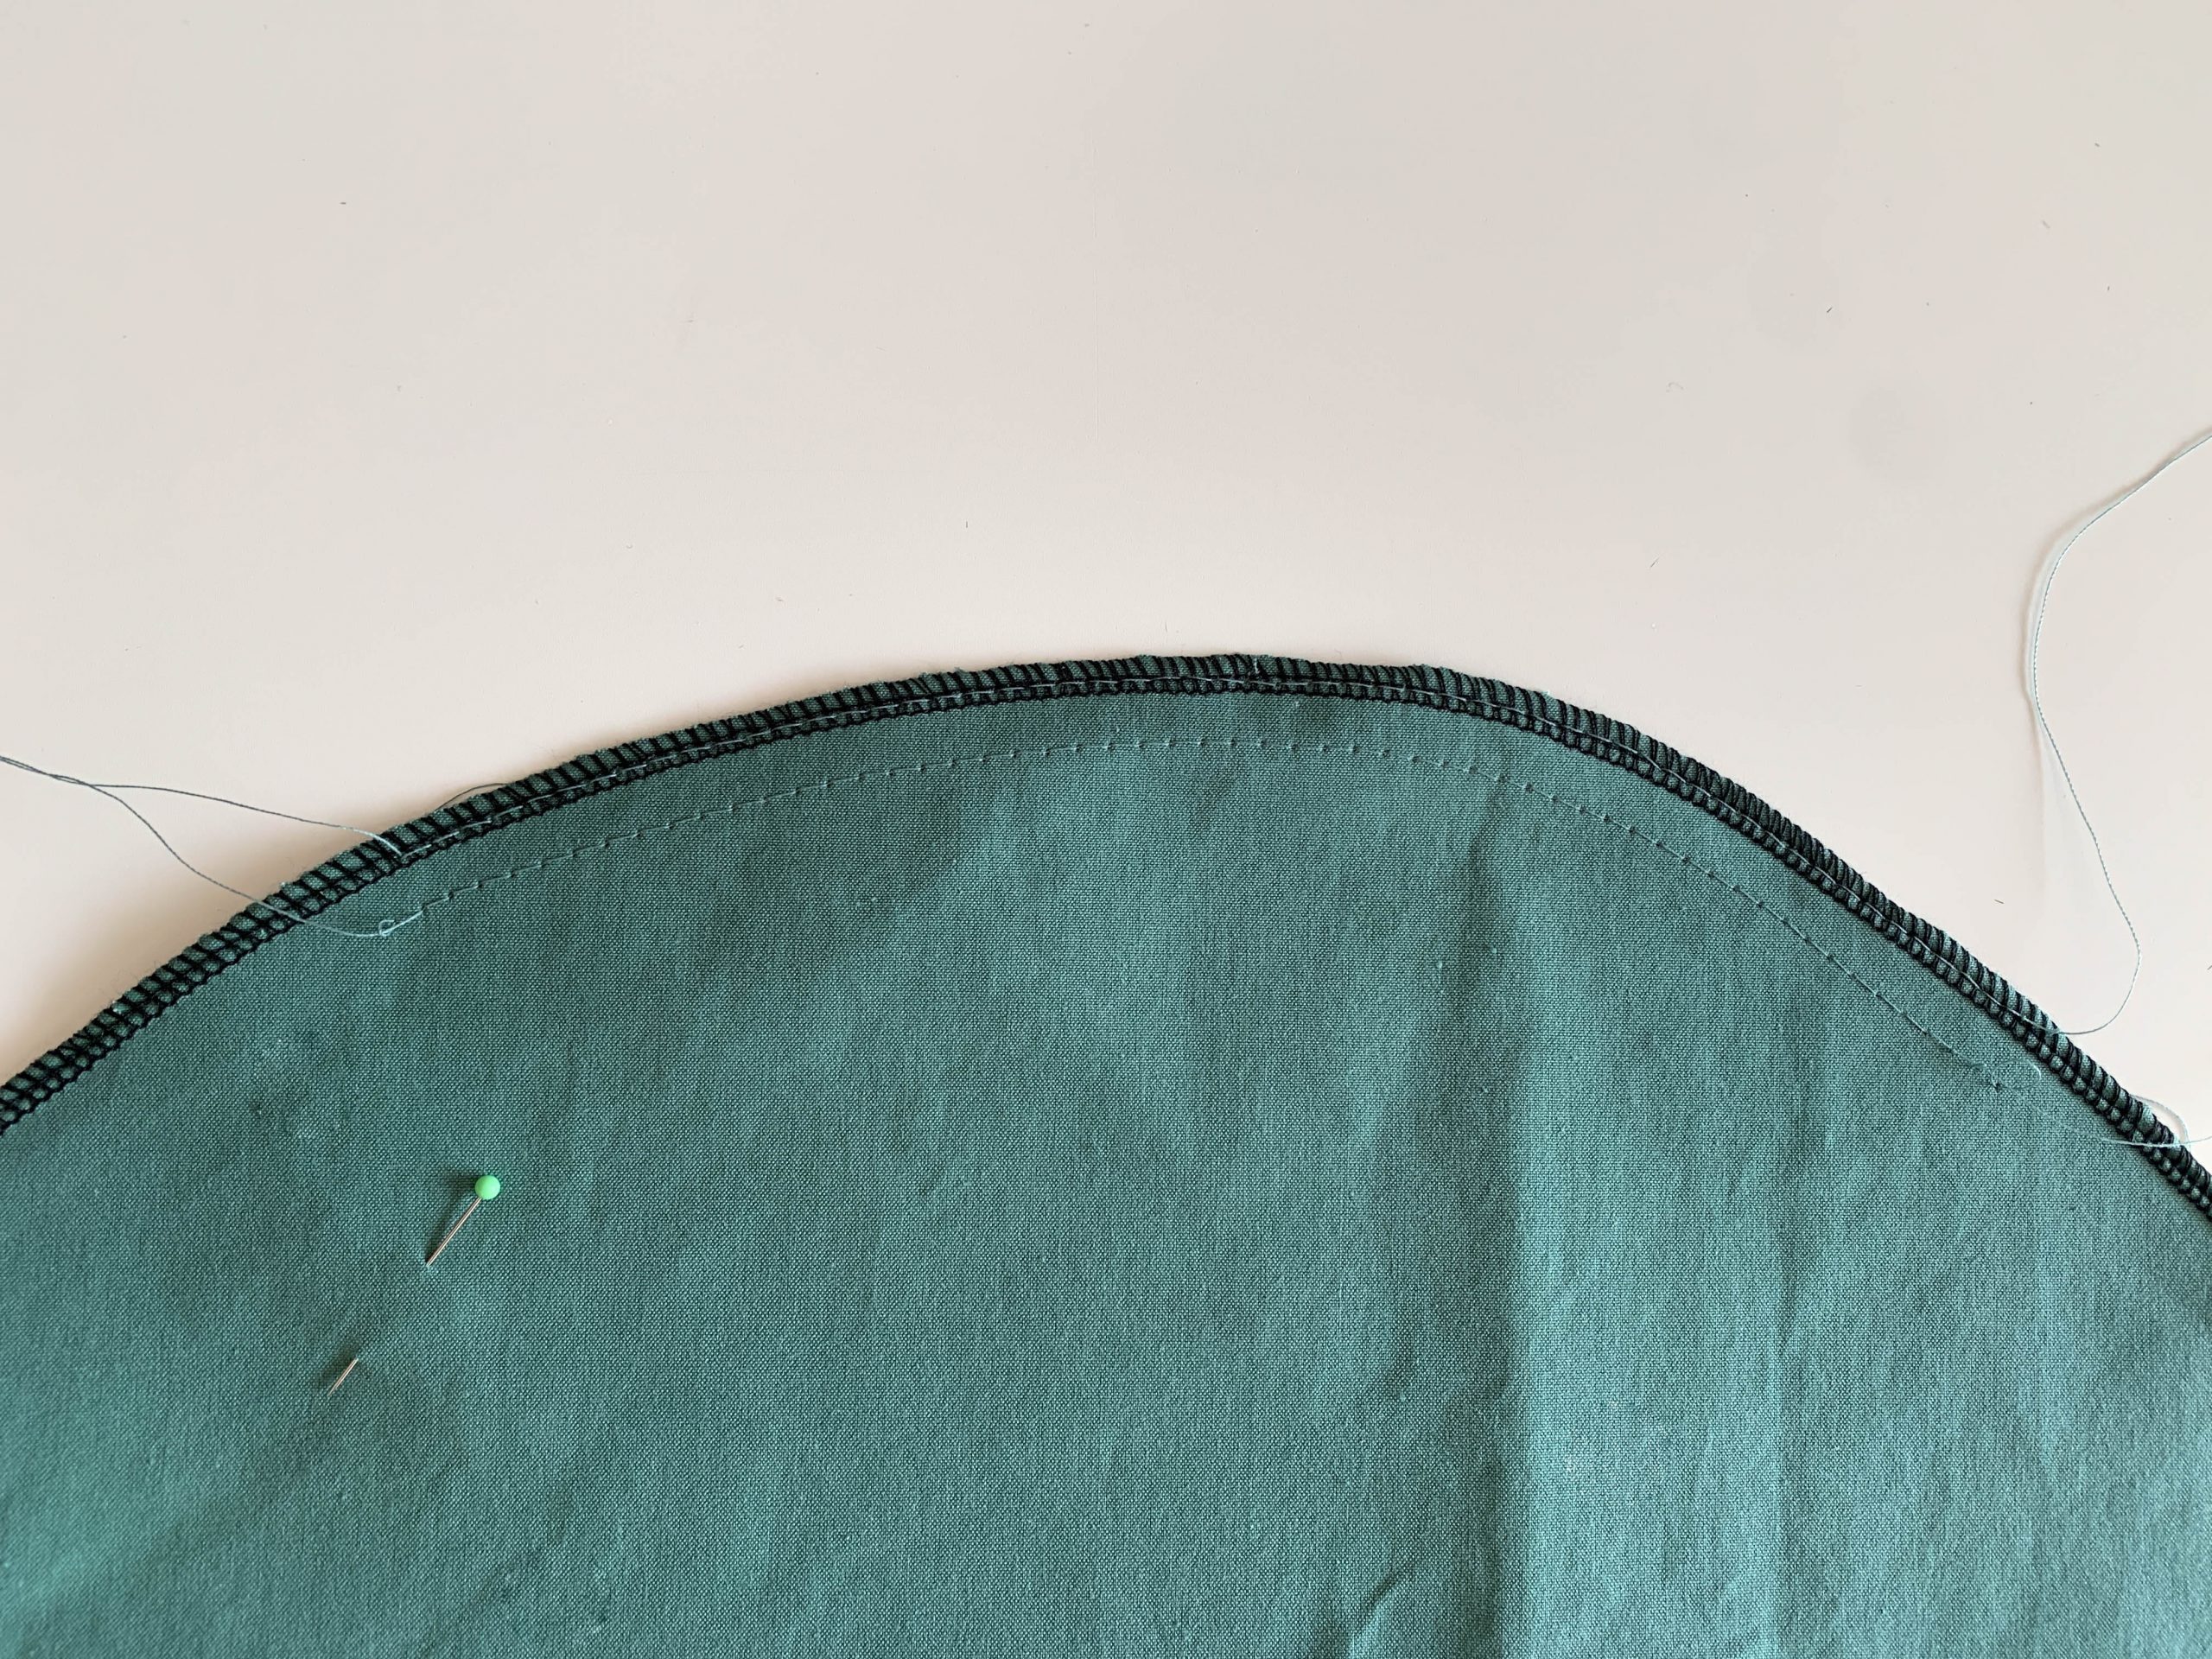
- I finished all pieces with the overlock so that the woven fabrics don’t unravel.
Sewing the jacket – let’s get started!
Please read the tutorial carefully before you start sewing. My tutorial includes a lined hood. If you don’t want to line the hood, you can sew a few steps differently.
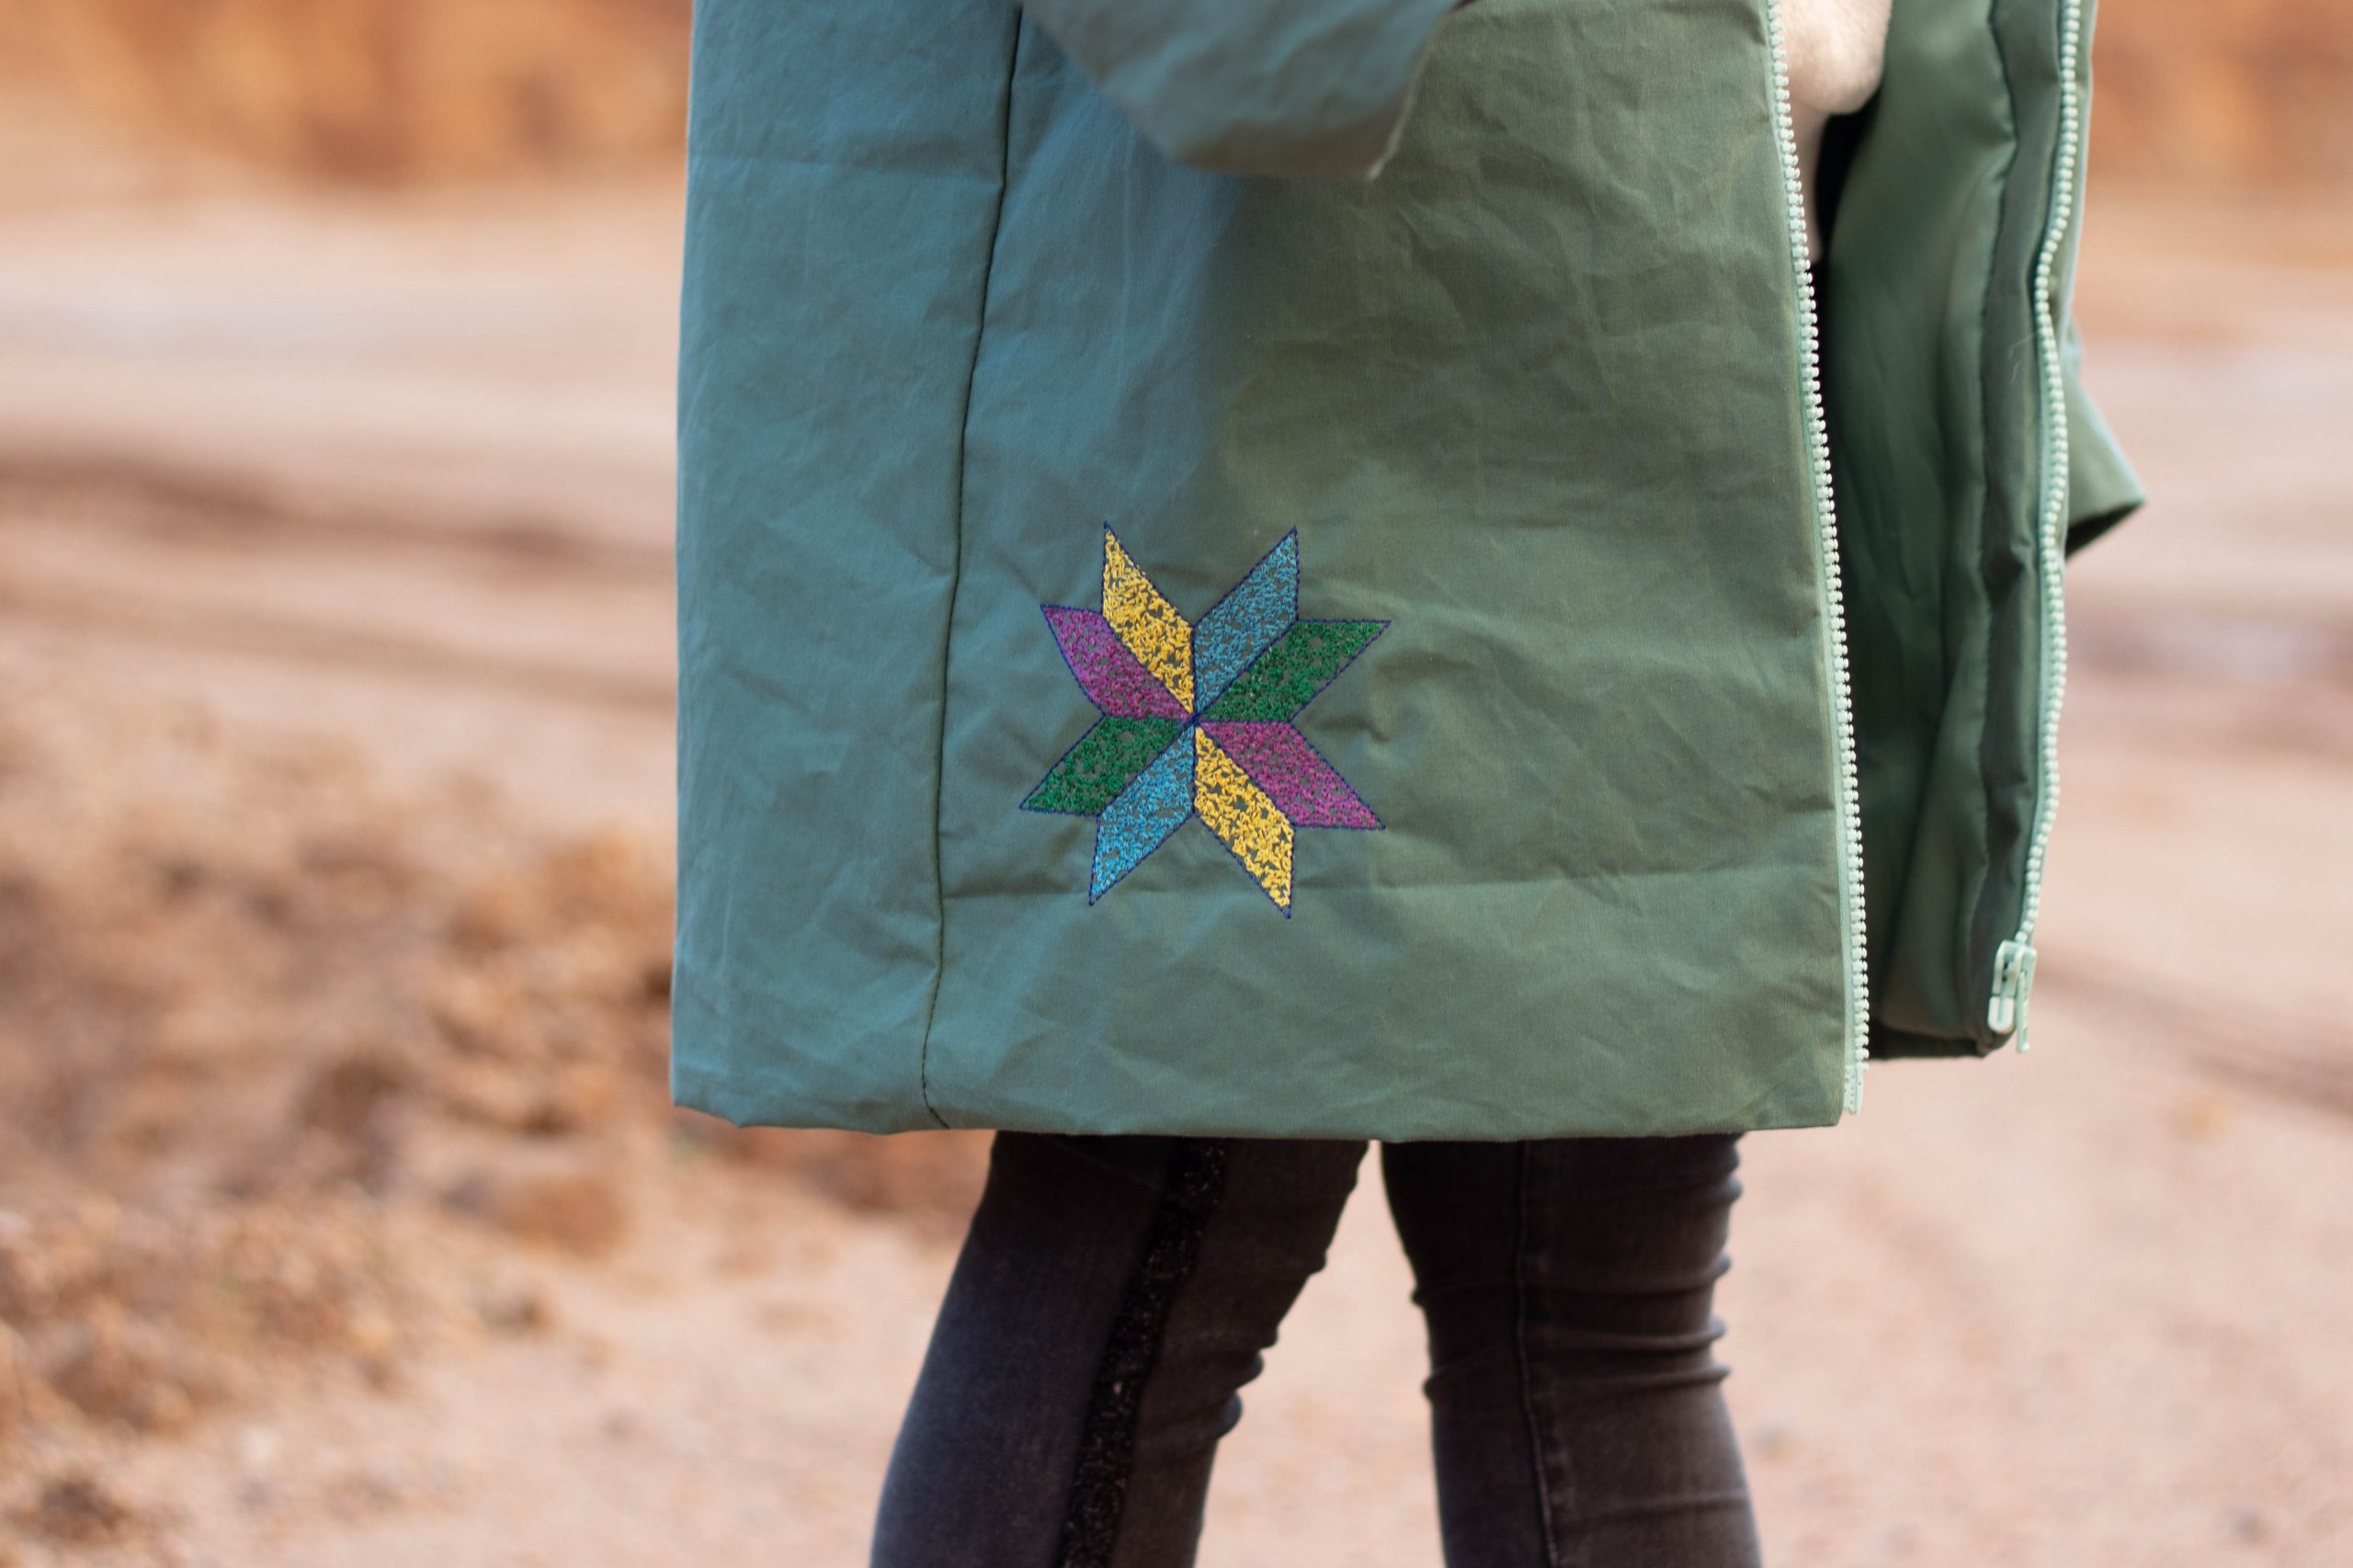
Embroidering the star onto the front
I have already explained how you can embroider the star onto the front in another tutorial for a Fashion Look. You can find the tutorial here.
Sewing the appliqué star onto the back
I have already explained how you can sew the appliqué star onto the back in another tutorial for a Fashion Look. You can find the tutorial here.
Preparing the sleeves
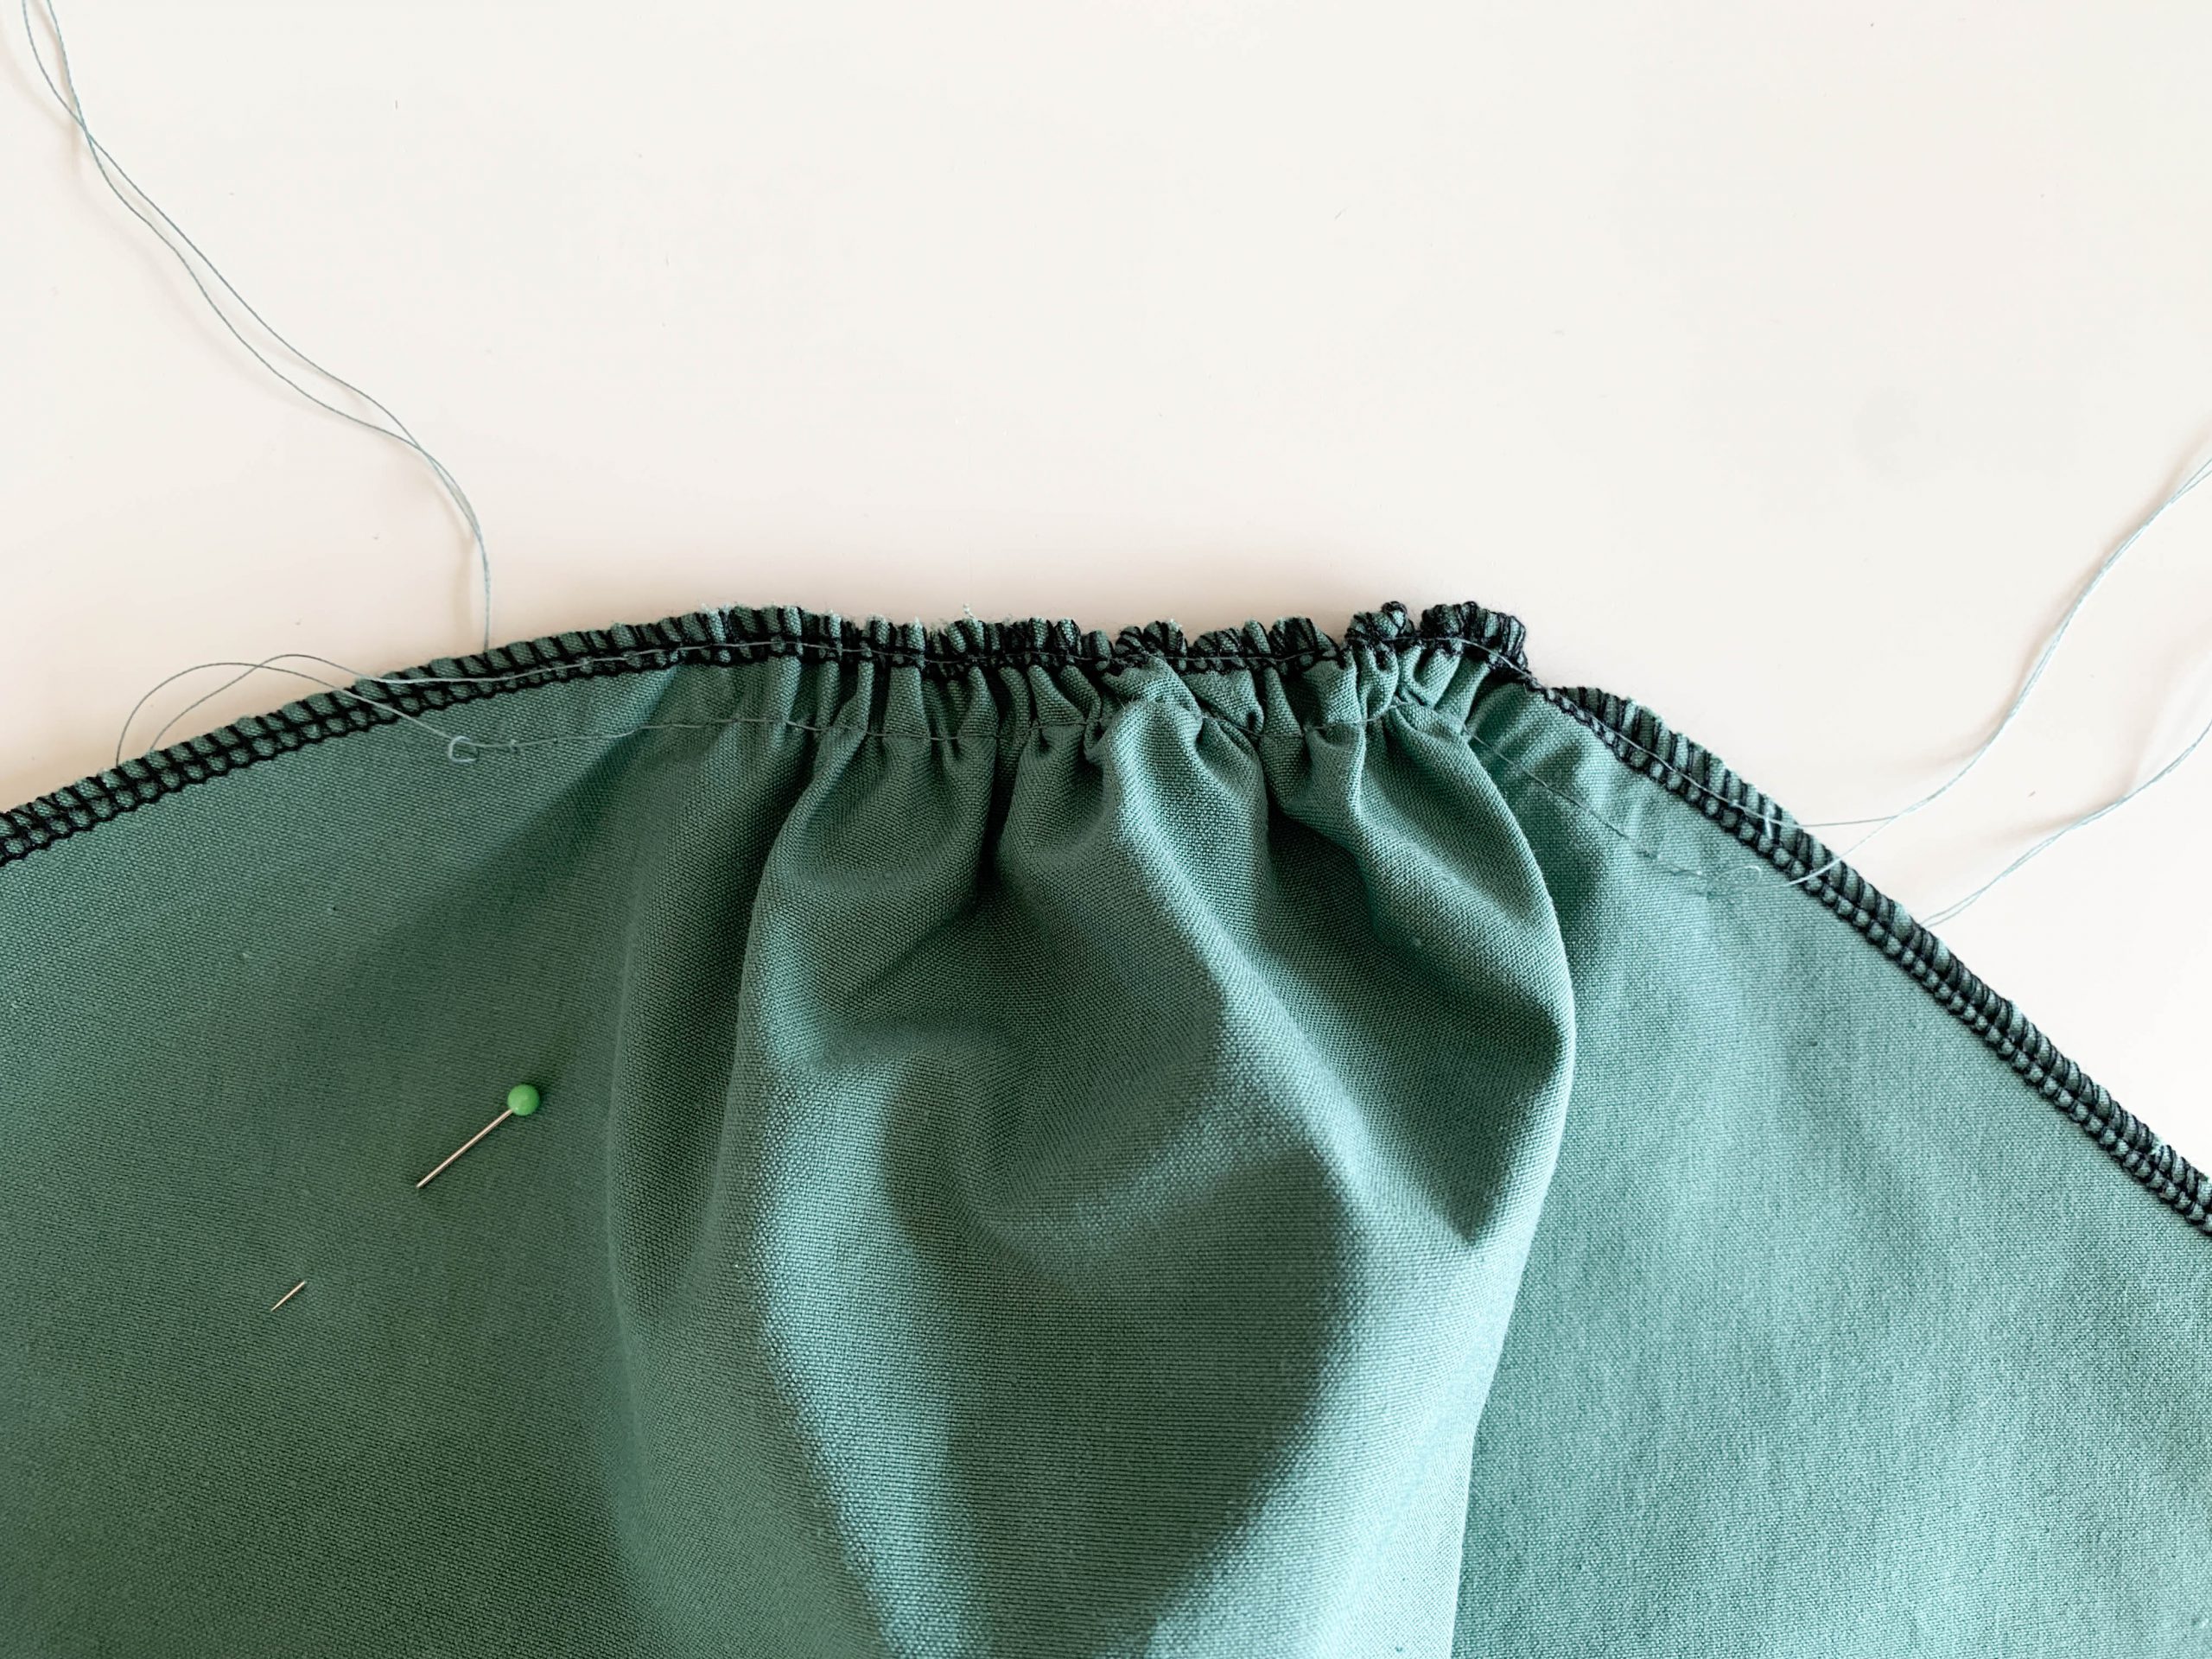
The sleeves (both main fabric and lining fabric) are gathered a few centimeters on each shoulder seam.
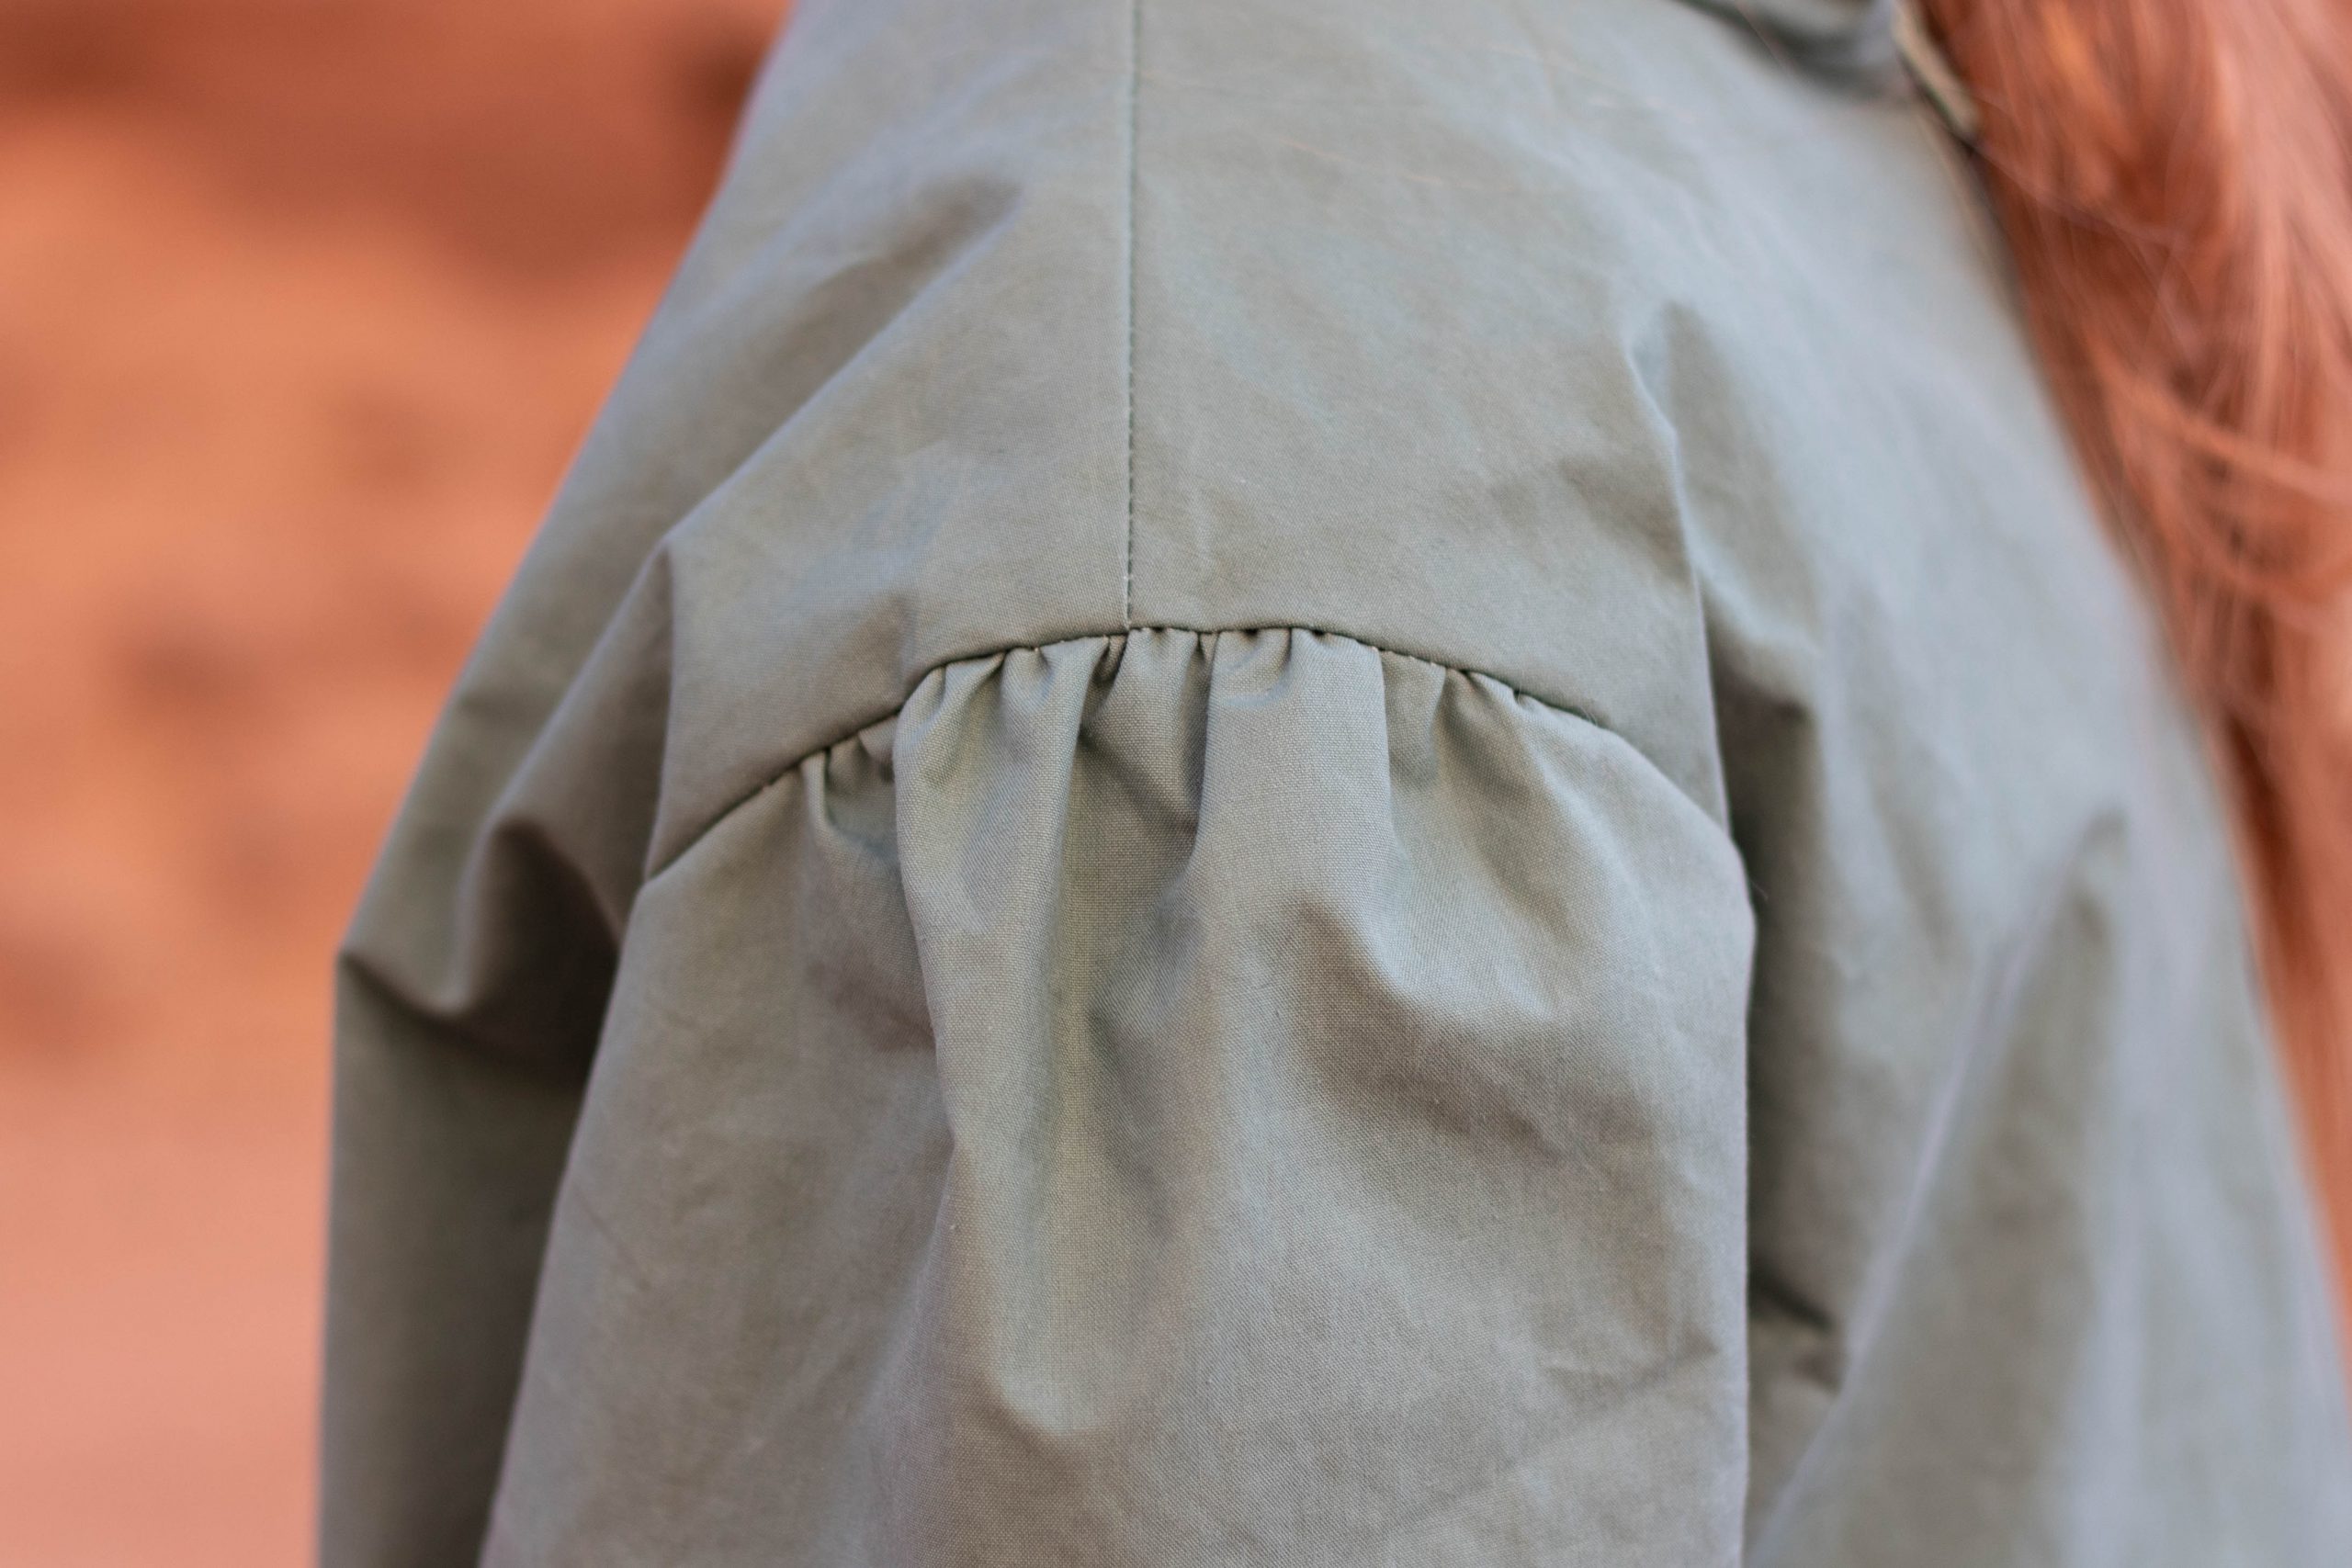
The gathering works very simply by following these tips:
- Stitch length: Maximum
- The start and end of the seam are not finished with a lock stitch
- Before you start sewing, also pull the top and bottom threads out of the machine a bit, because if the threads are longer, they are much easier to pull
- Now first sew a straight line in the marked area very close to the edge
- Then sew another straight seam right next to it
- Now, it is possible to carefully pull one end of each thread so that the fabric gathers to the width you want
- Spread the gathering evenly in the marked area and knot the threads at the end so the whole thing can no longer unravel.
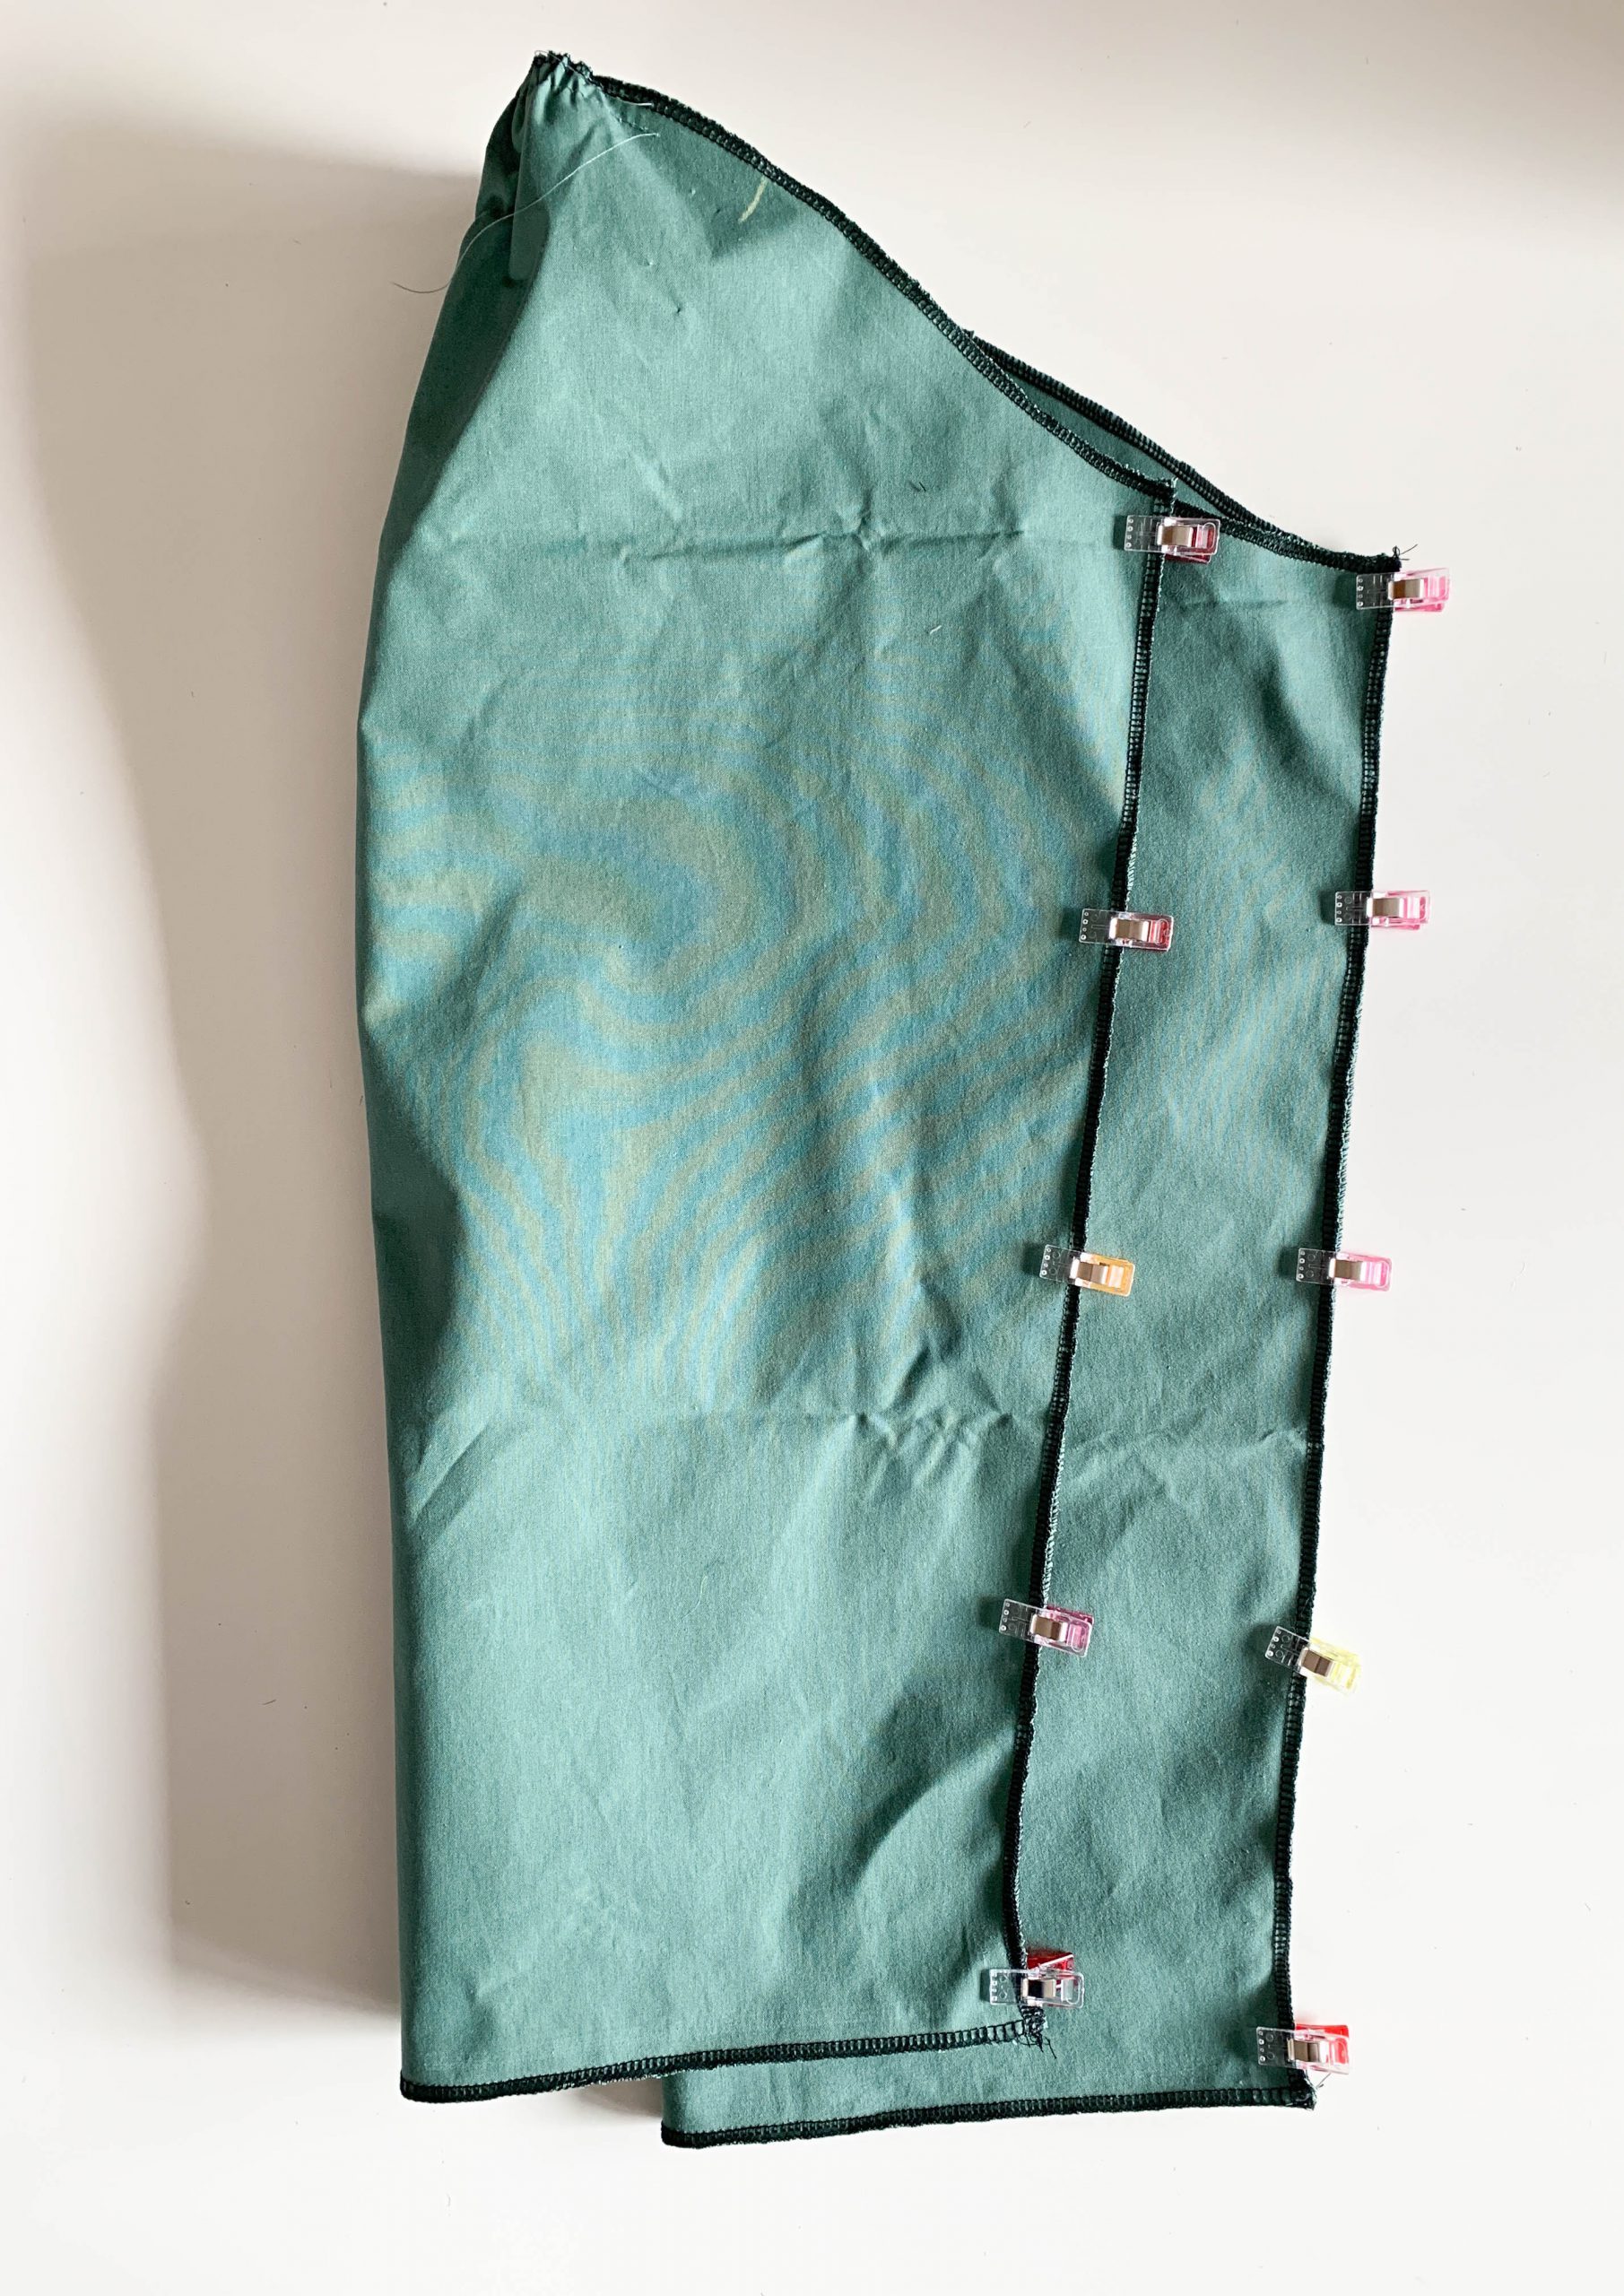
Then sew up all the sleeves with the right sides together.

Sewing the outer jacket
Place the two front pieces on the back piece with the right sides together and close the shoulder and side seams.
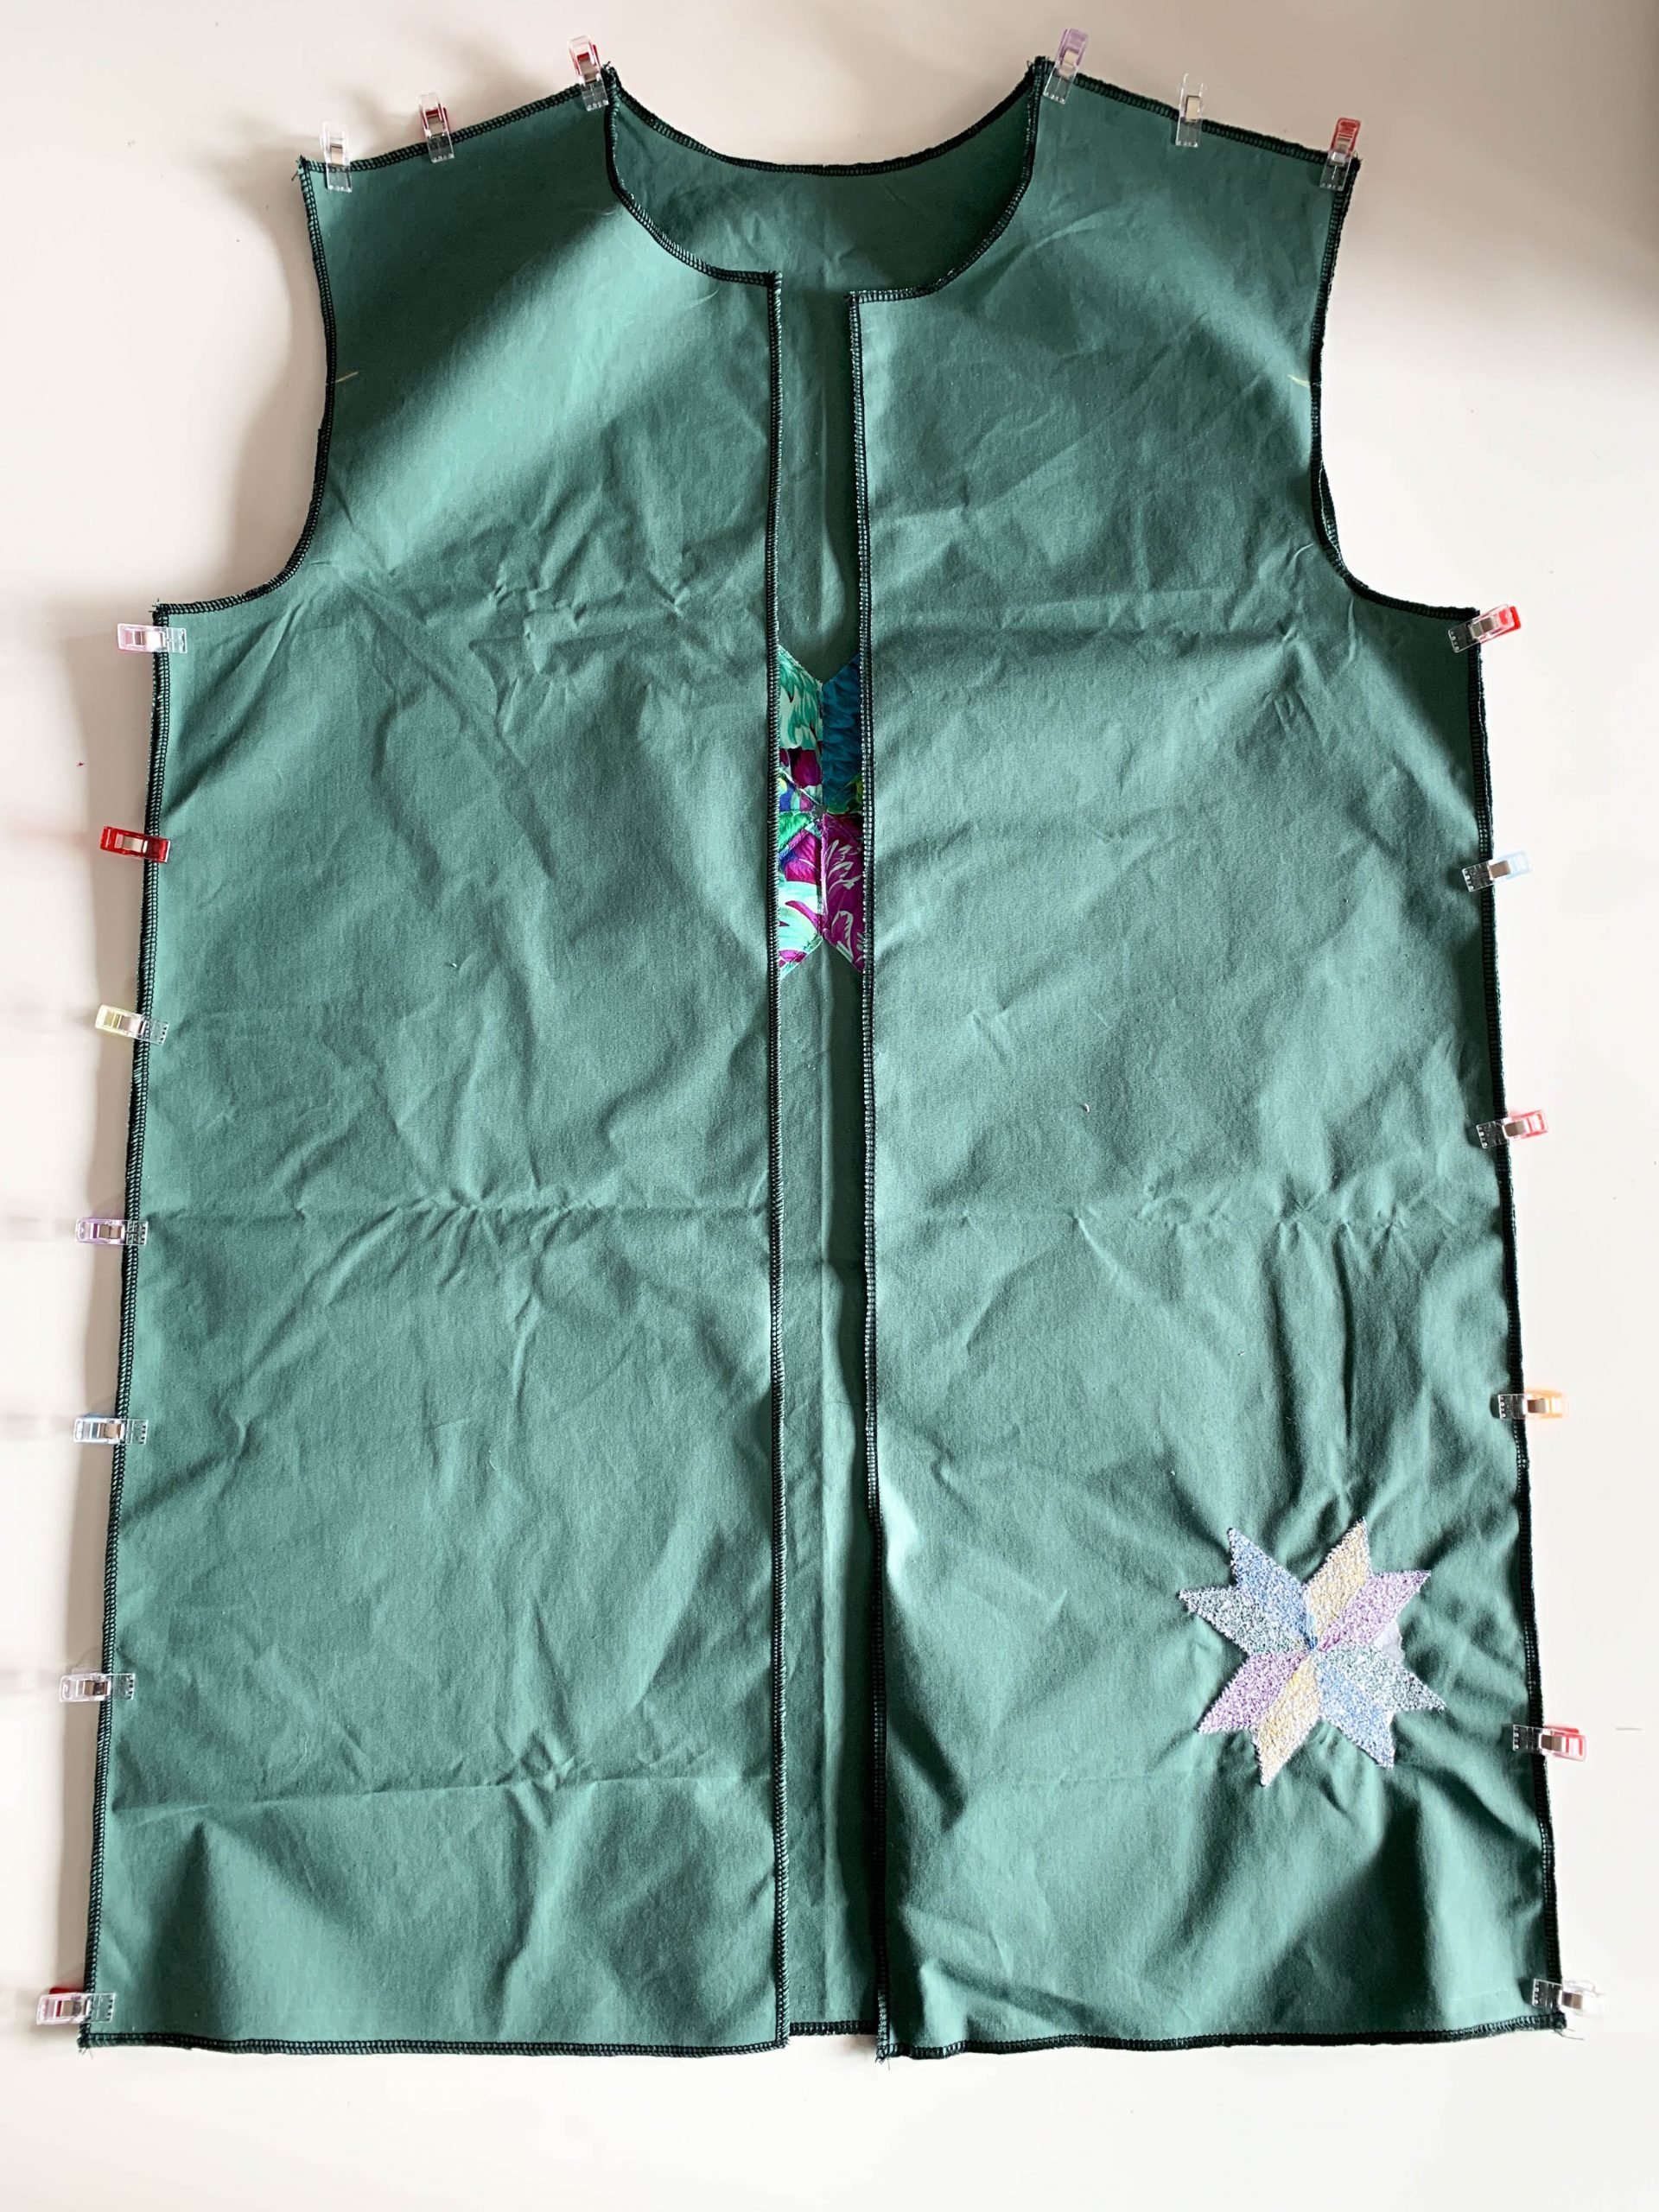
In the next step, sew in the already prepared outer sleeves. Make sure that the gathering is evenly distributed and is also sewn on evenly.
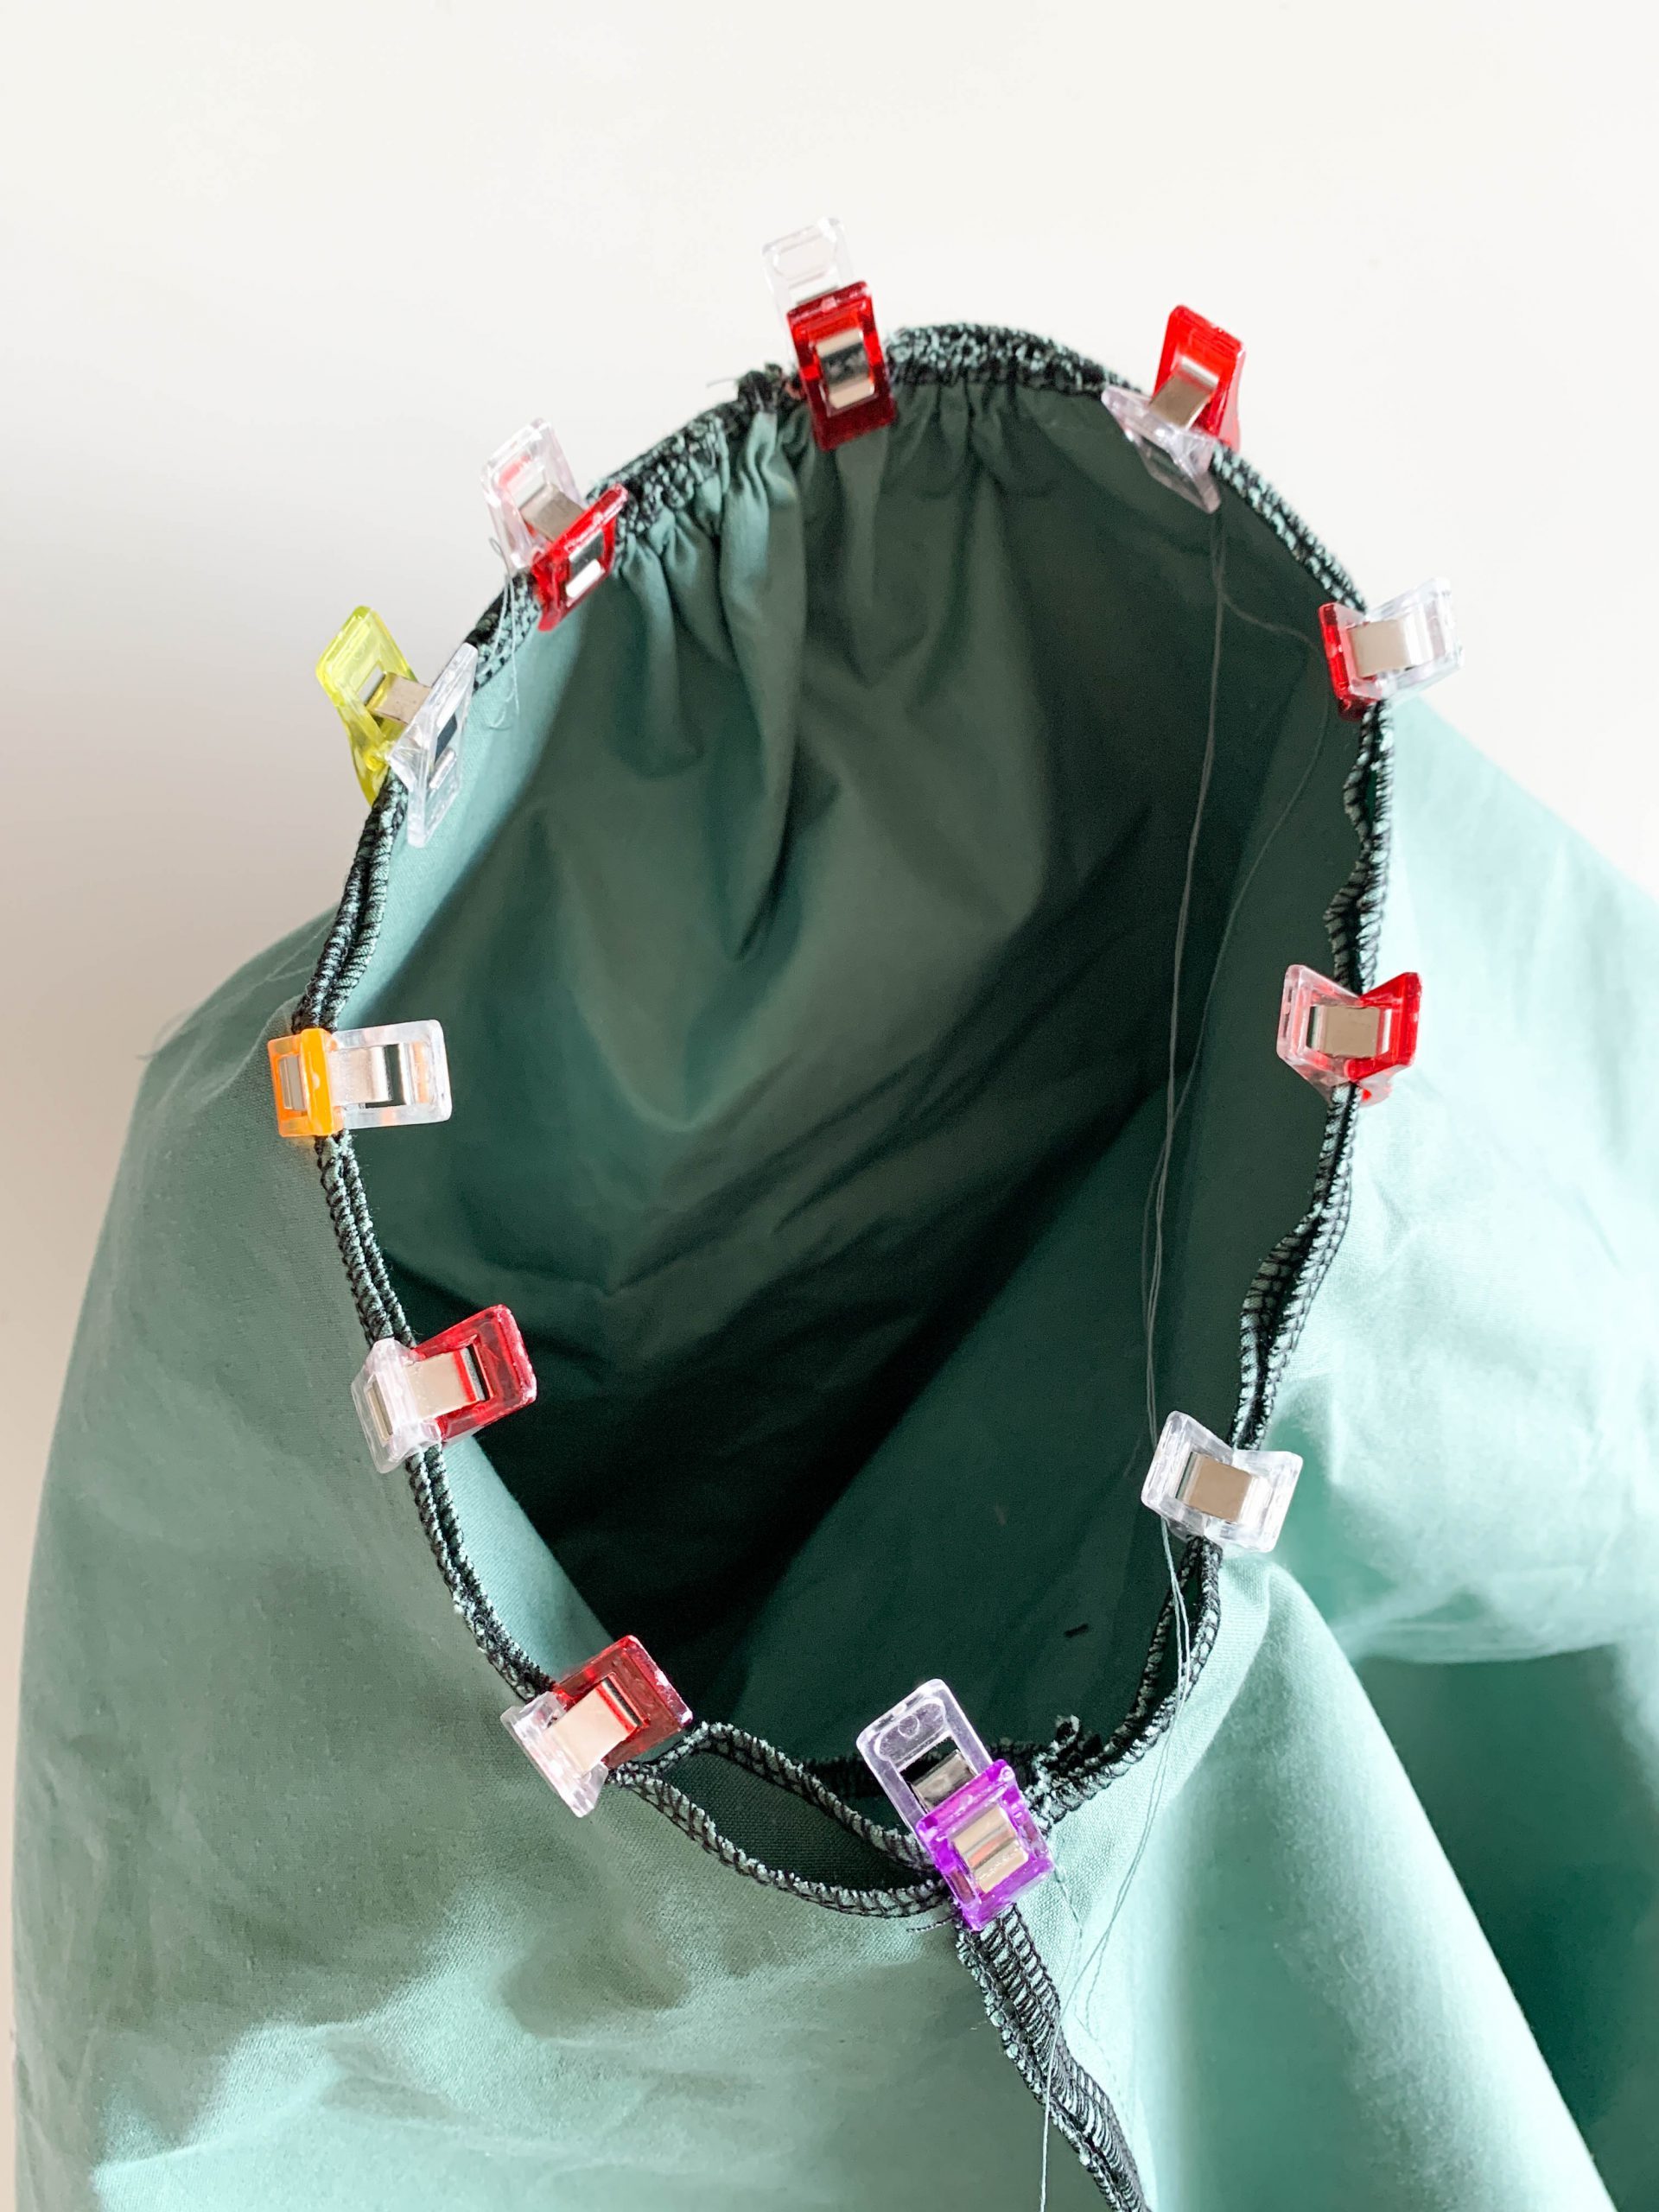
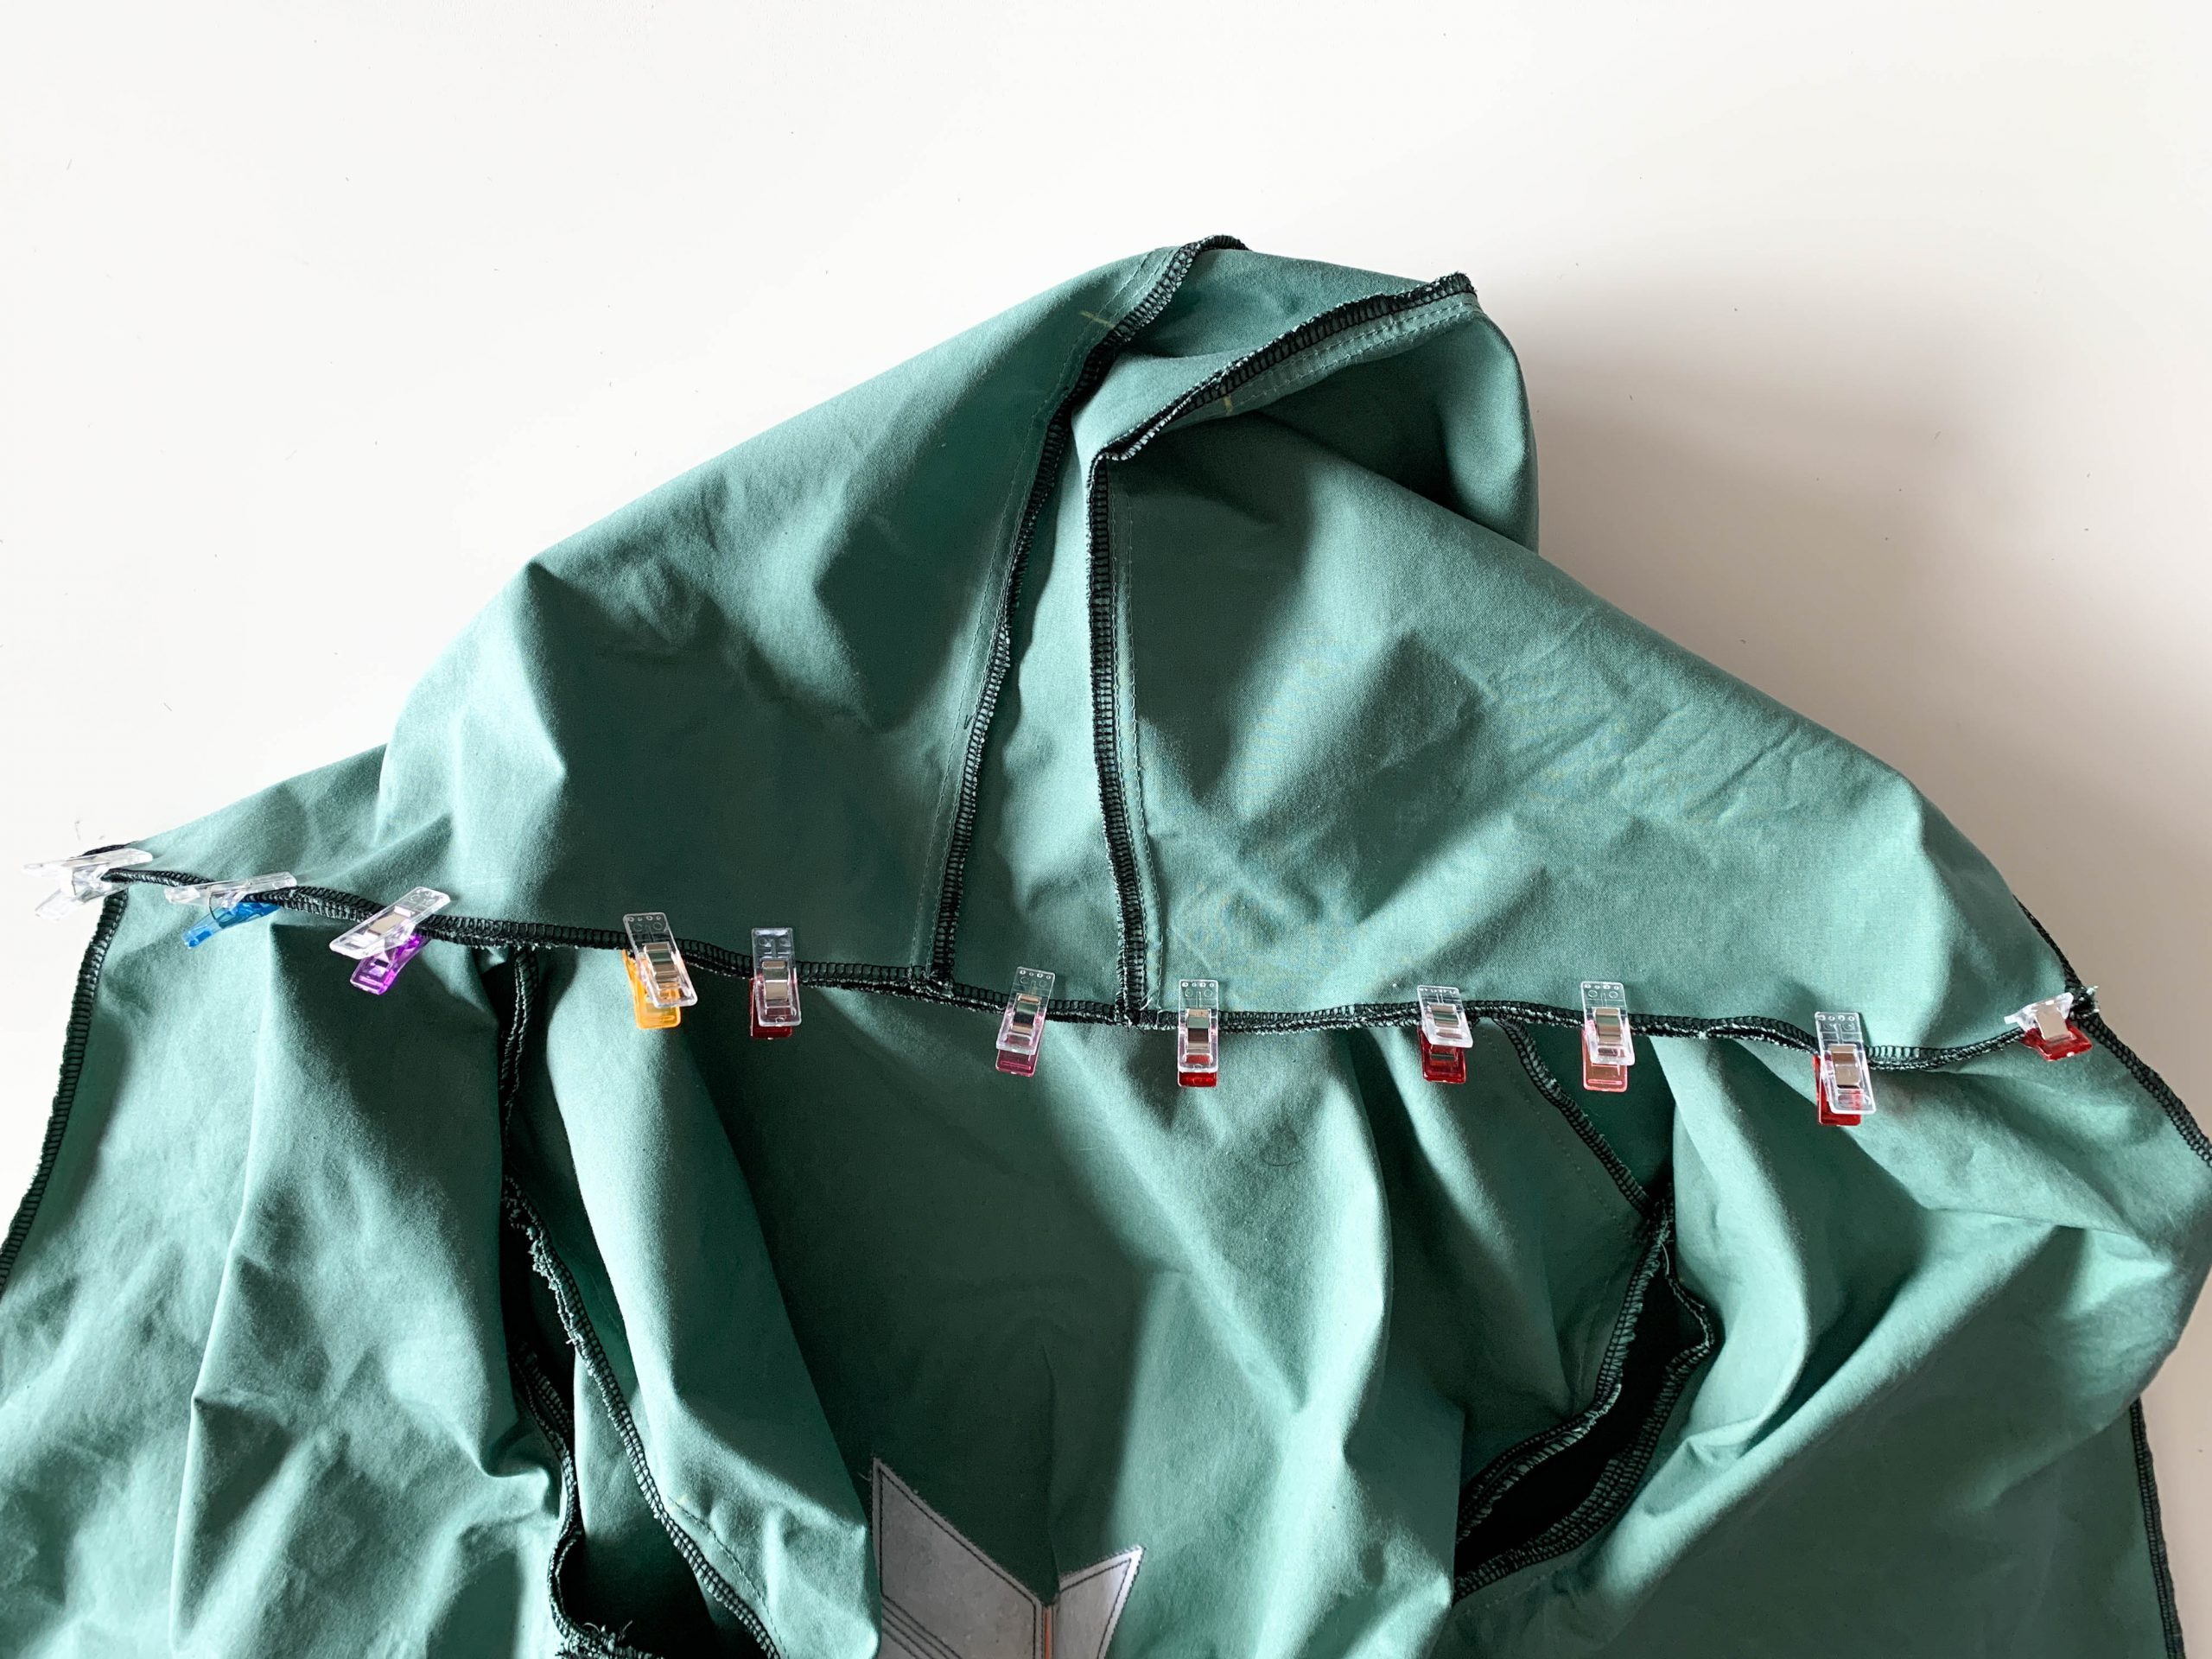
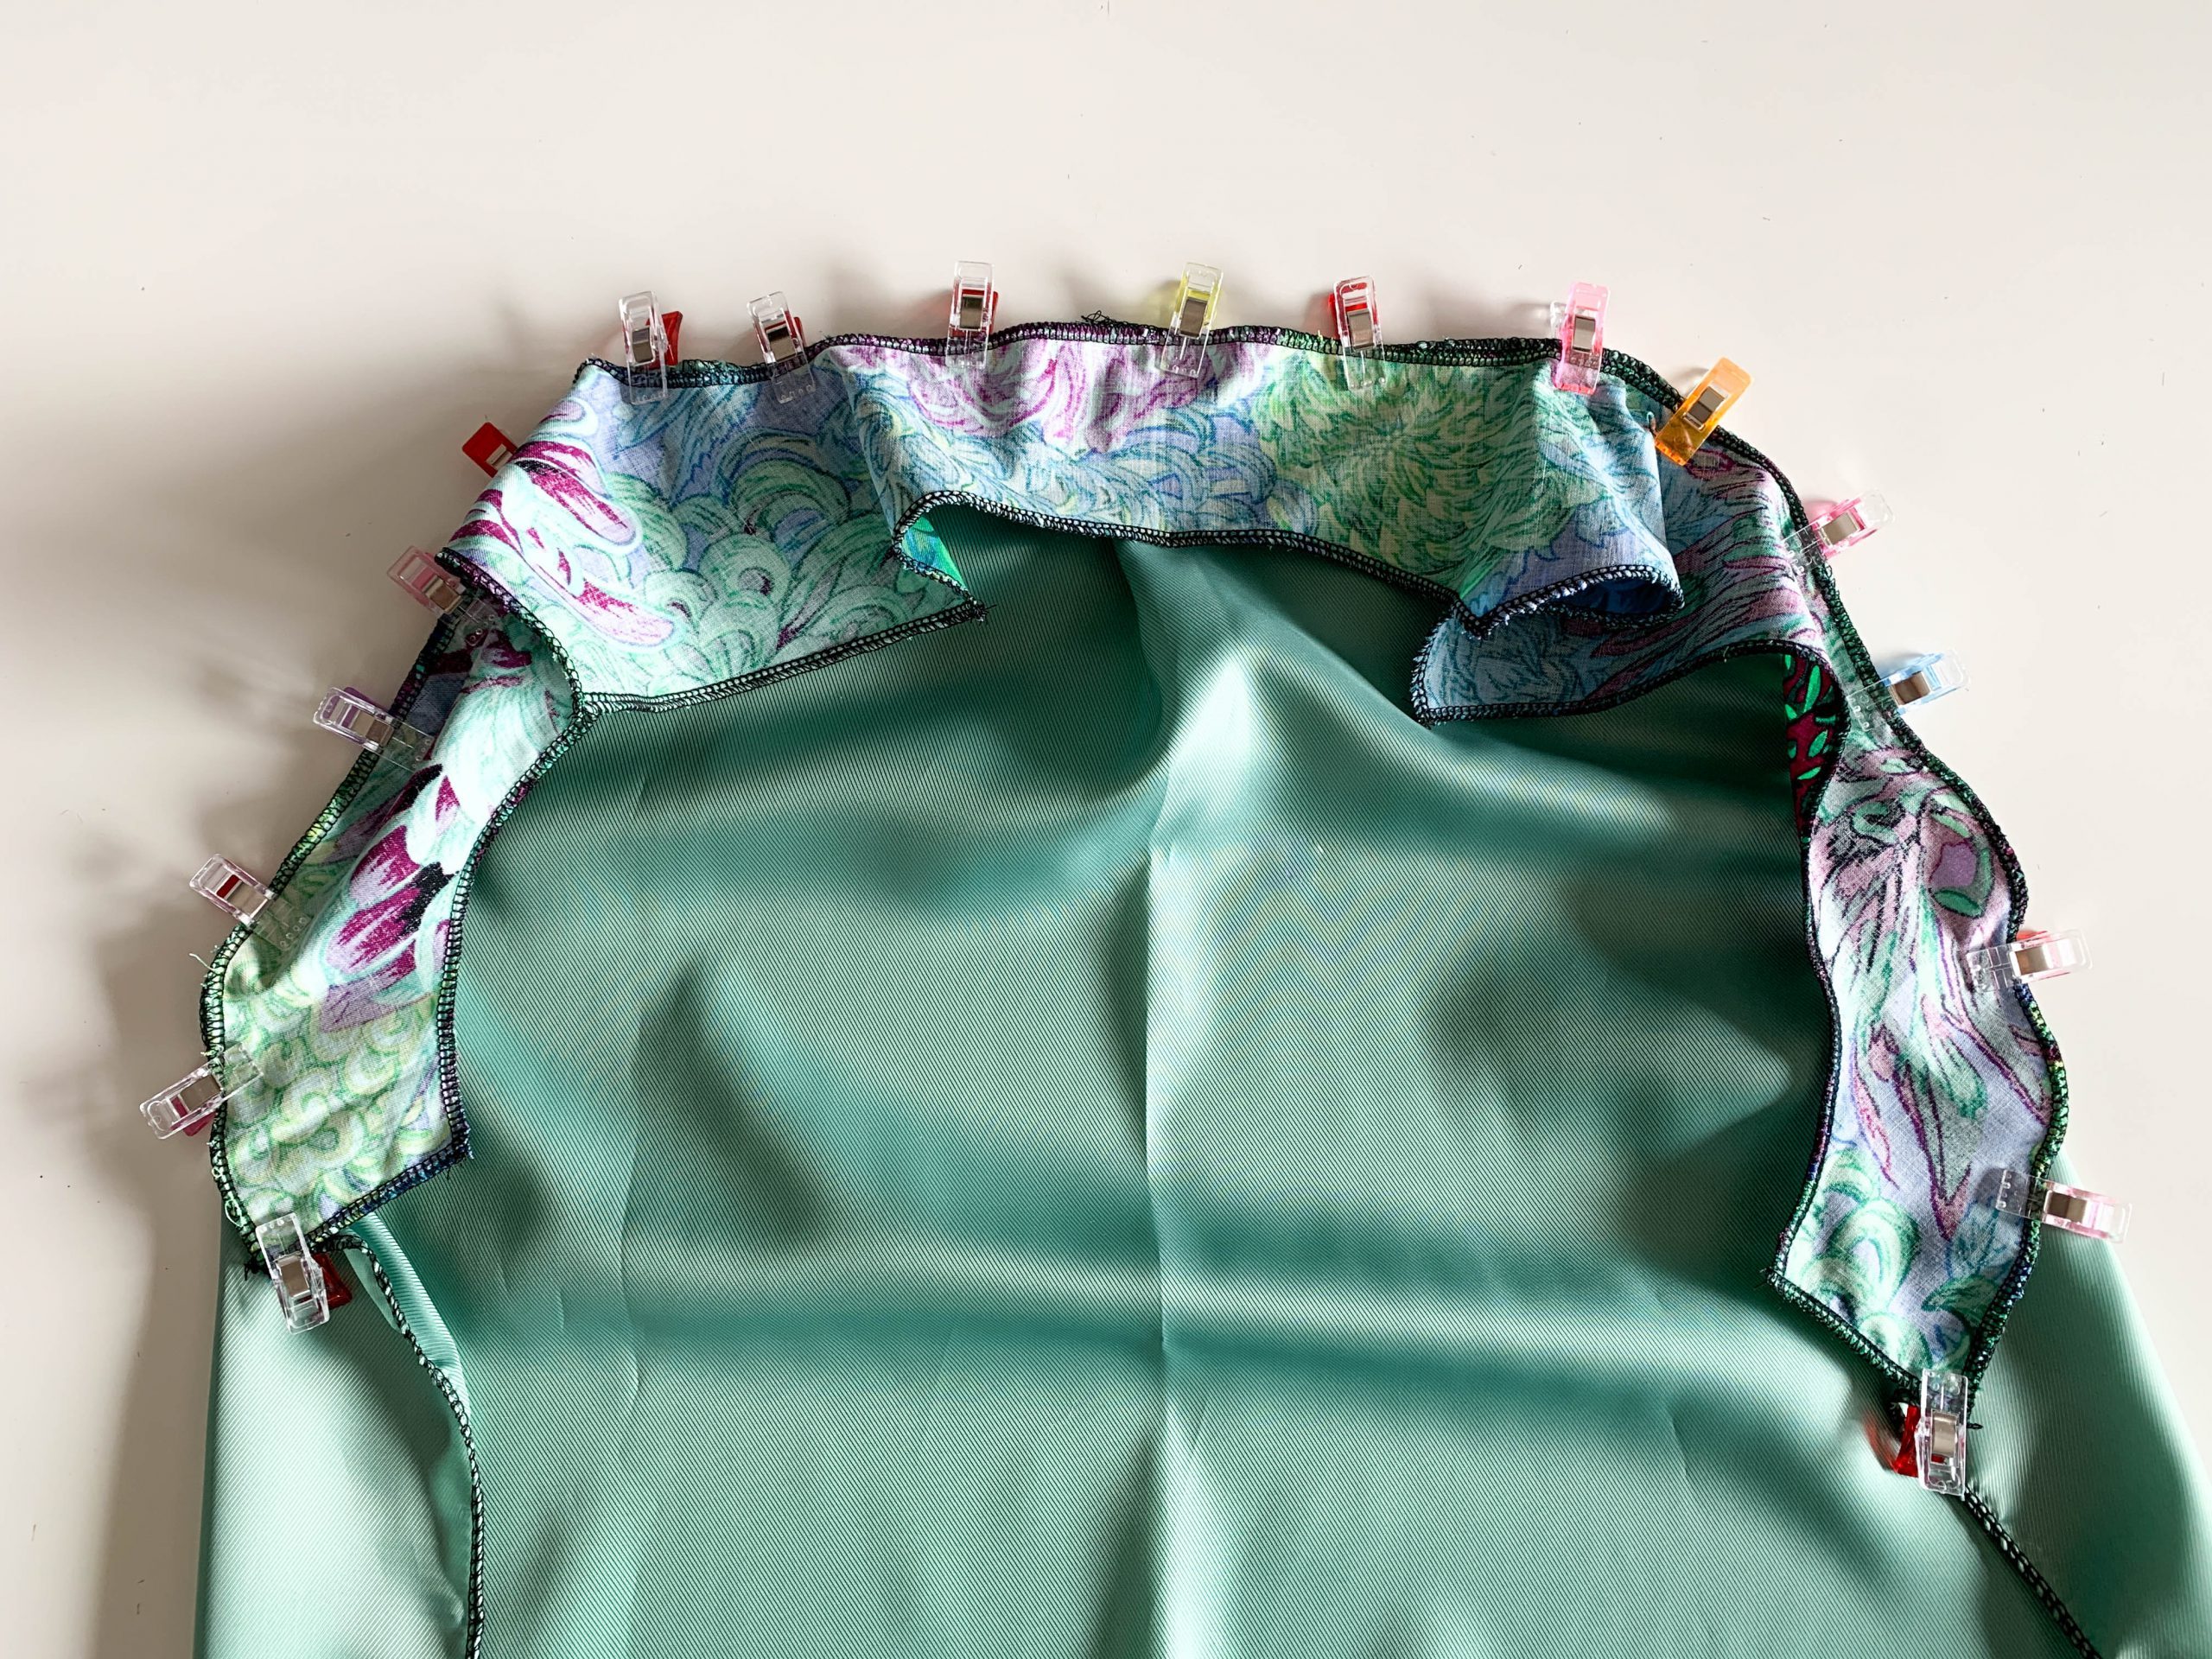
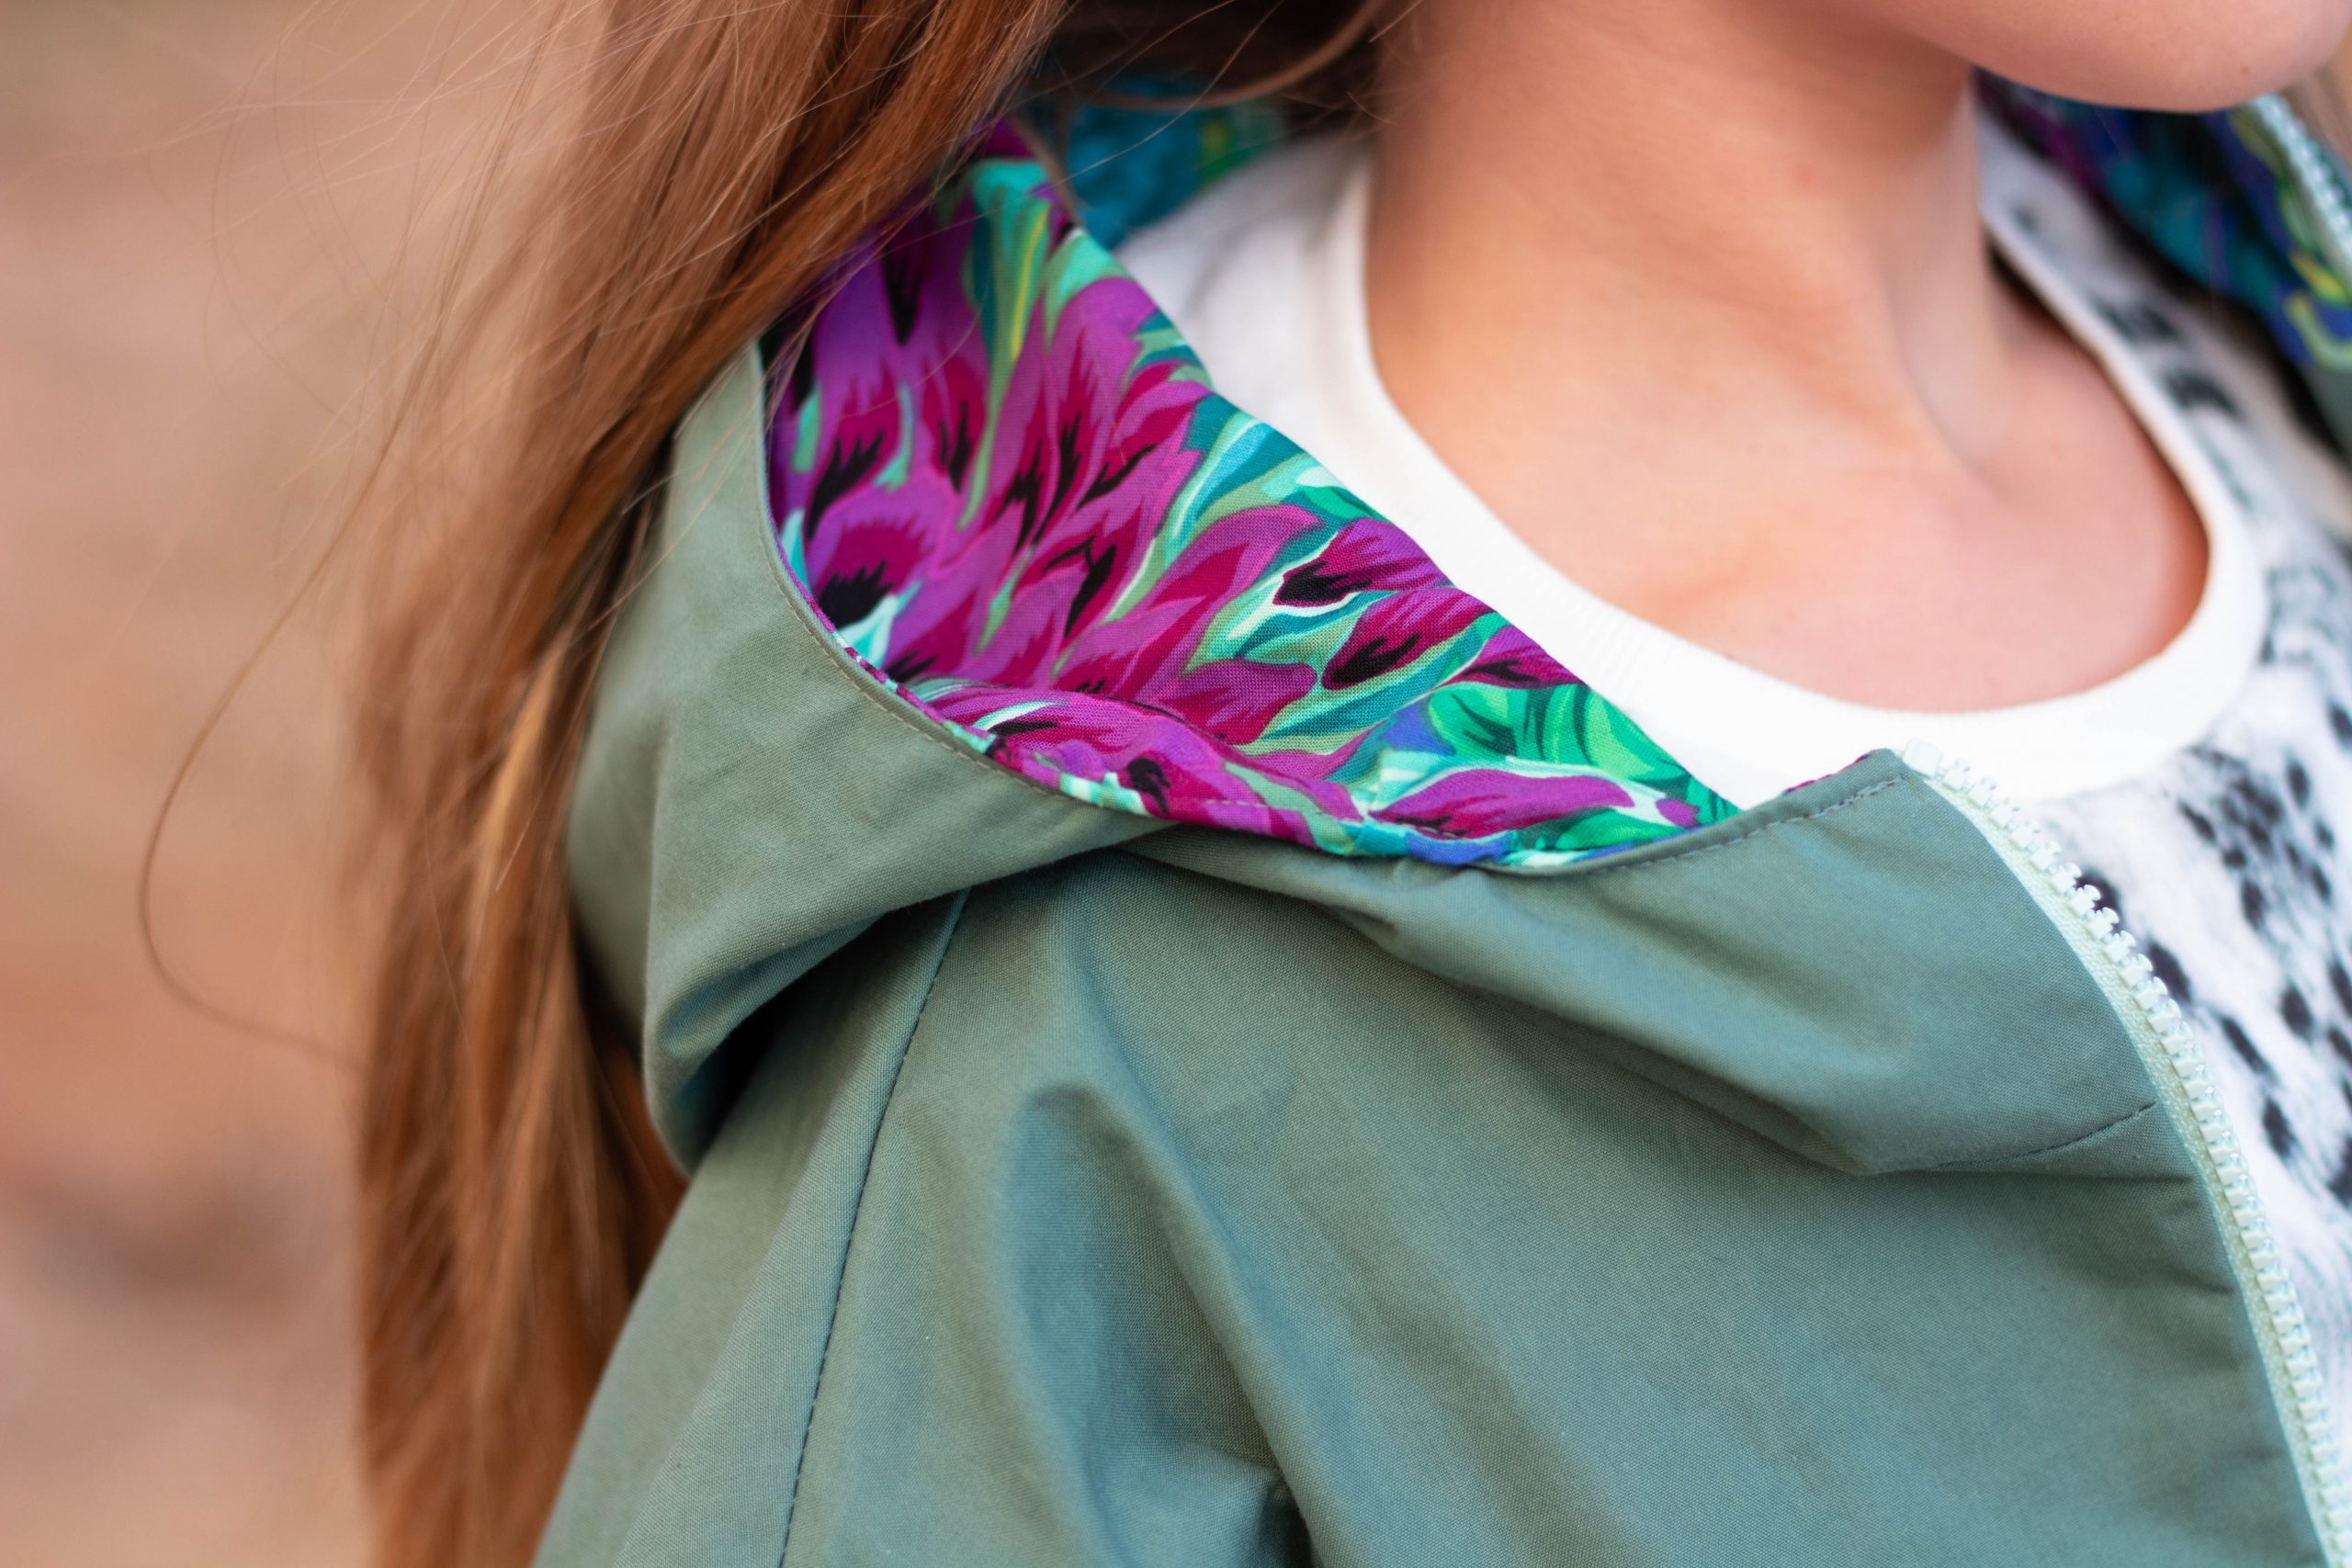
Preparing the hood
Sew the middle strip onto both hood pieces one after the other with the right sides together. You can then topstitch these seams on the right side. Repeat these steps for the hood lining.
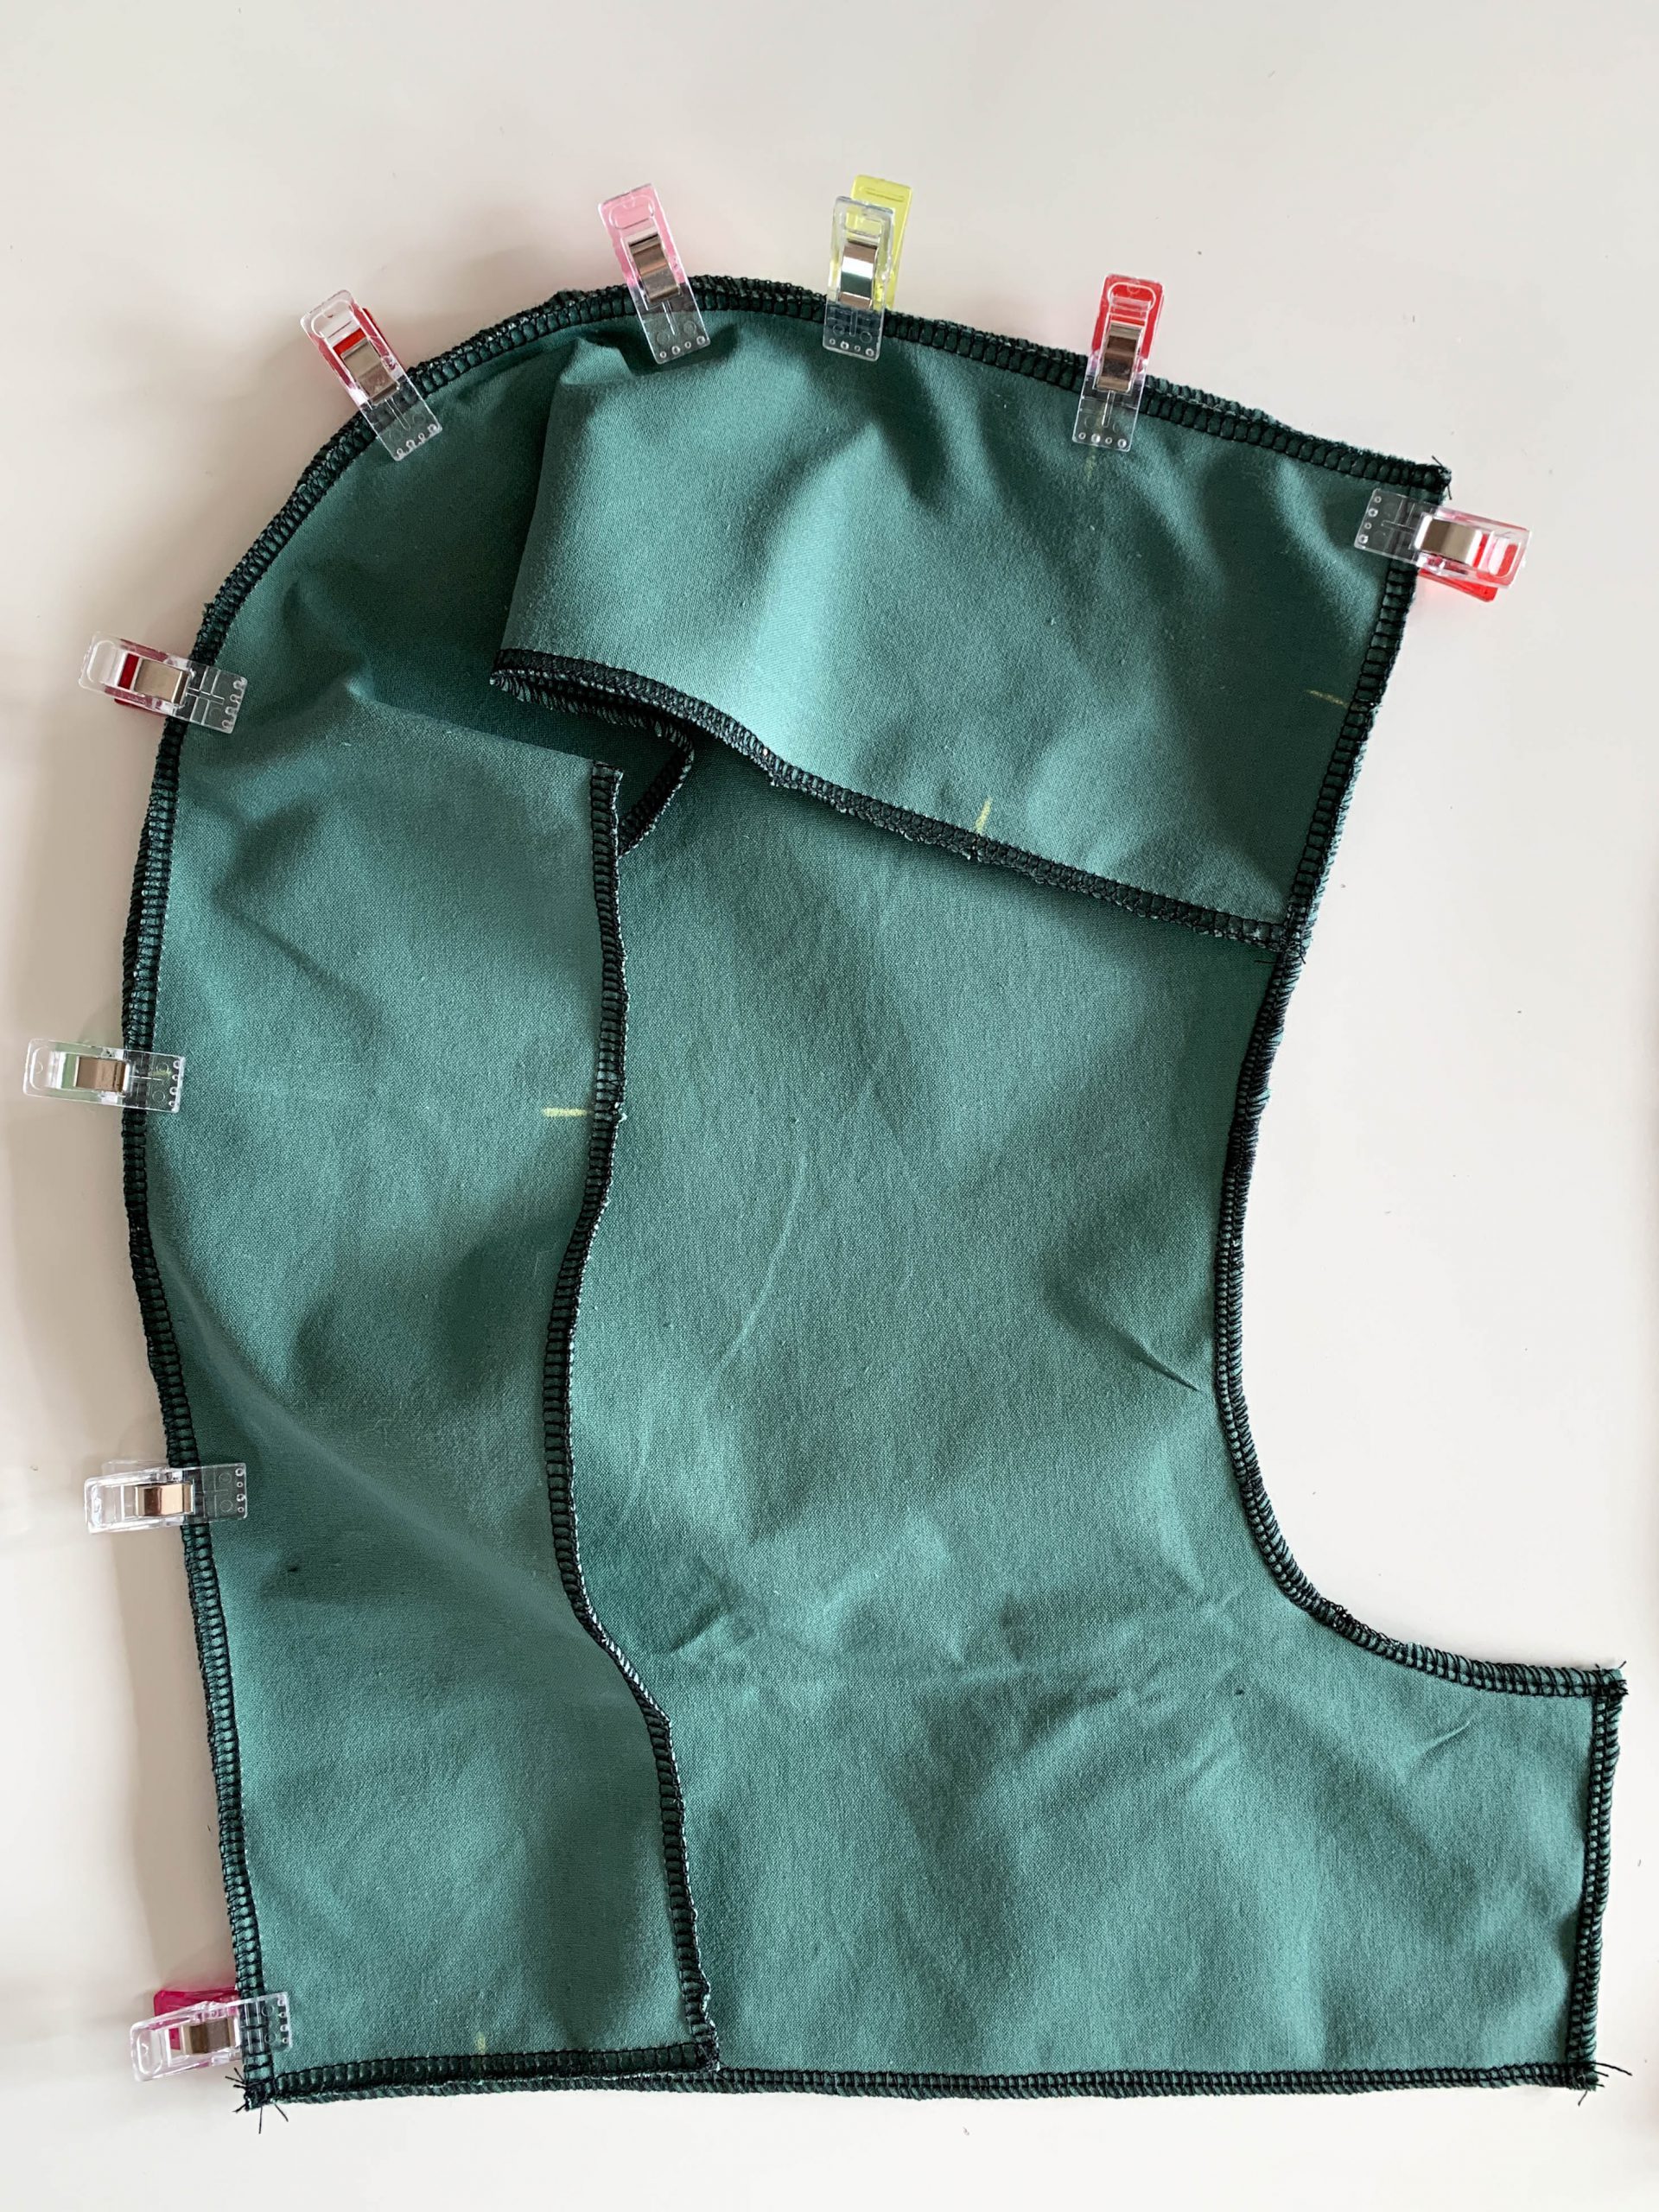
Sewing on the hood
Sew the hood made out of the main fabric onto the neckline with the right sides together.
Sewing in the zipper to the children’s jacket
The zipper is sewn onto both long sides of the front center (outer fabric) one after the other with the right sides together. I use the zipper foot #4 for this.
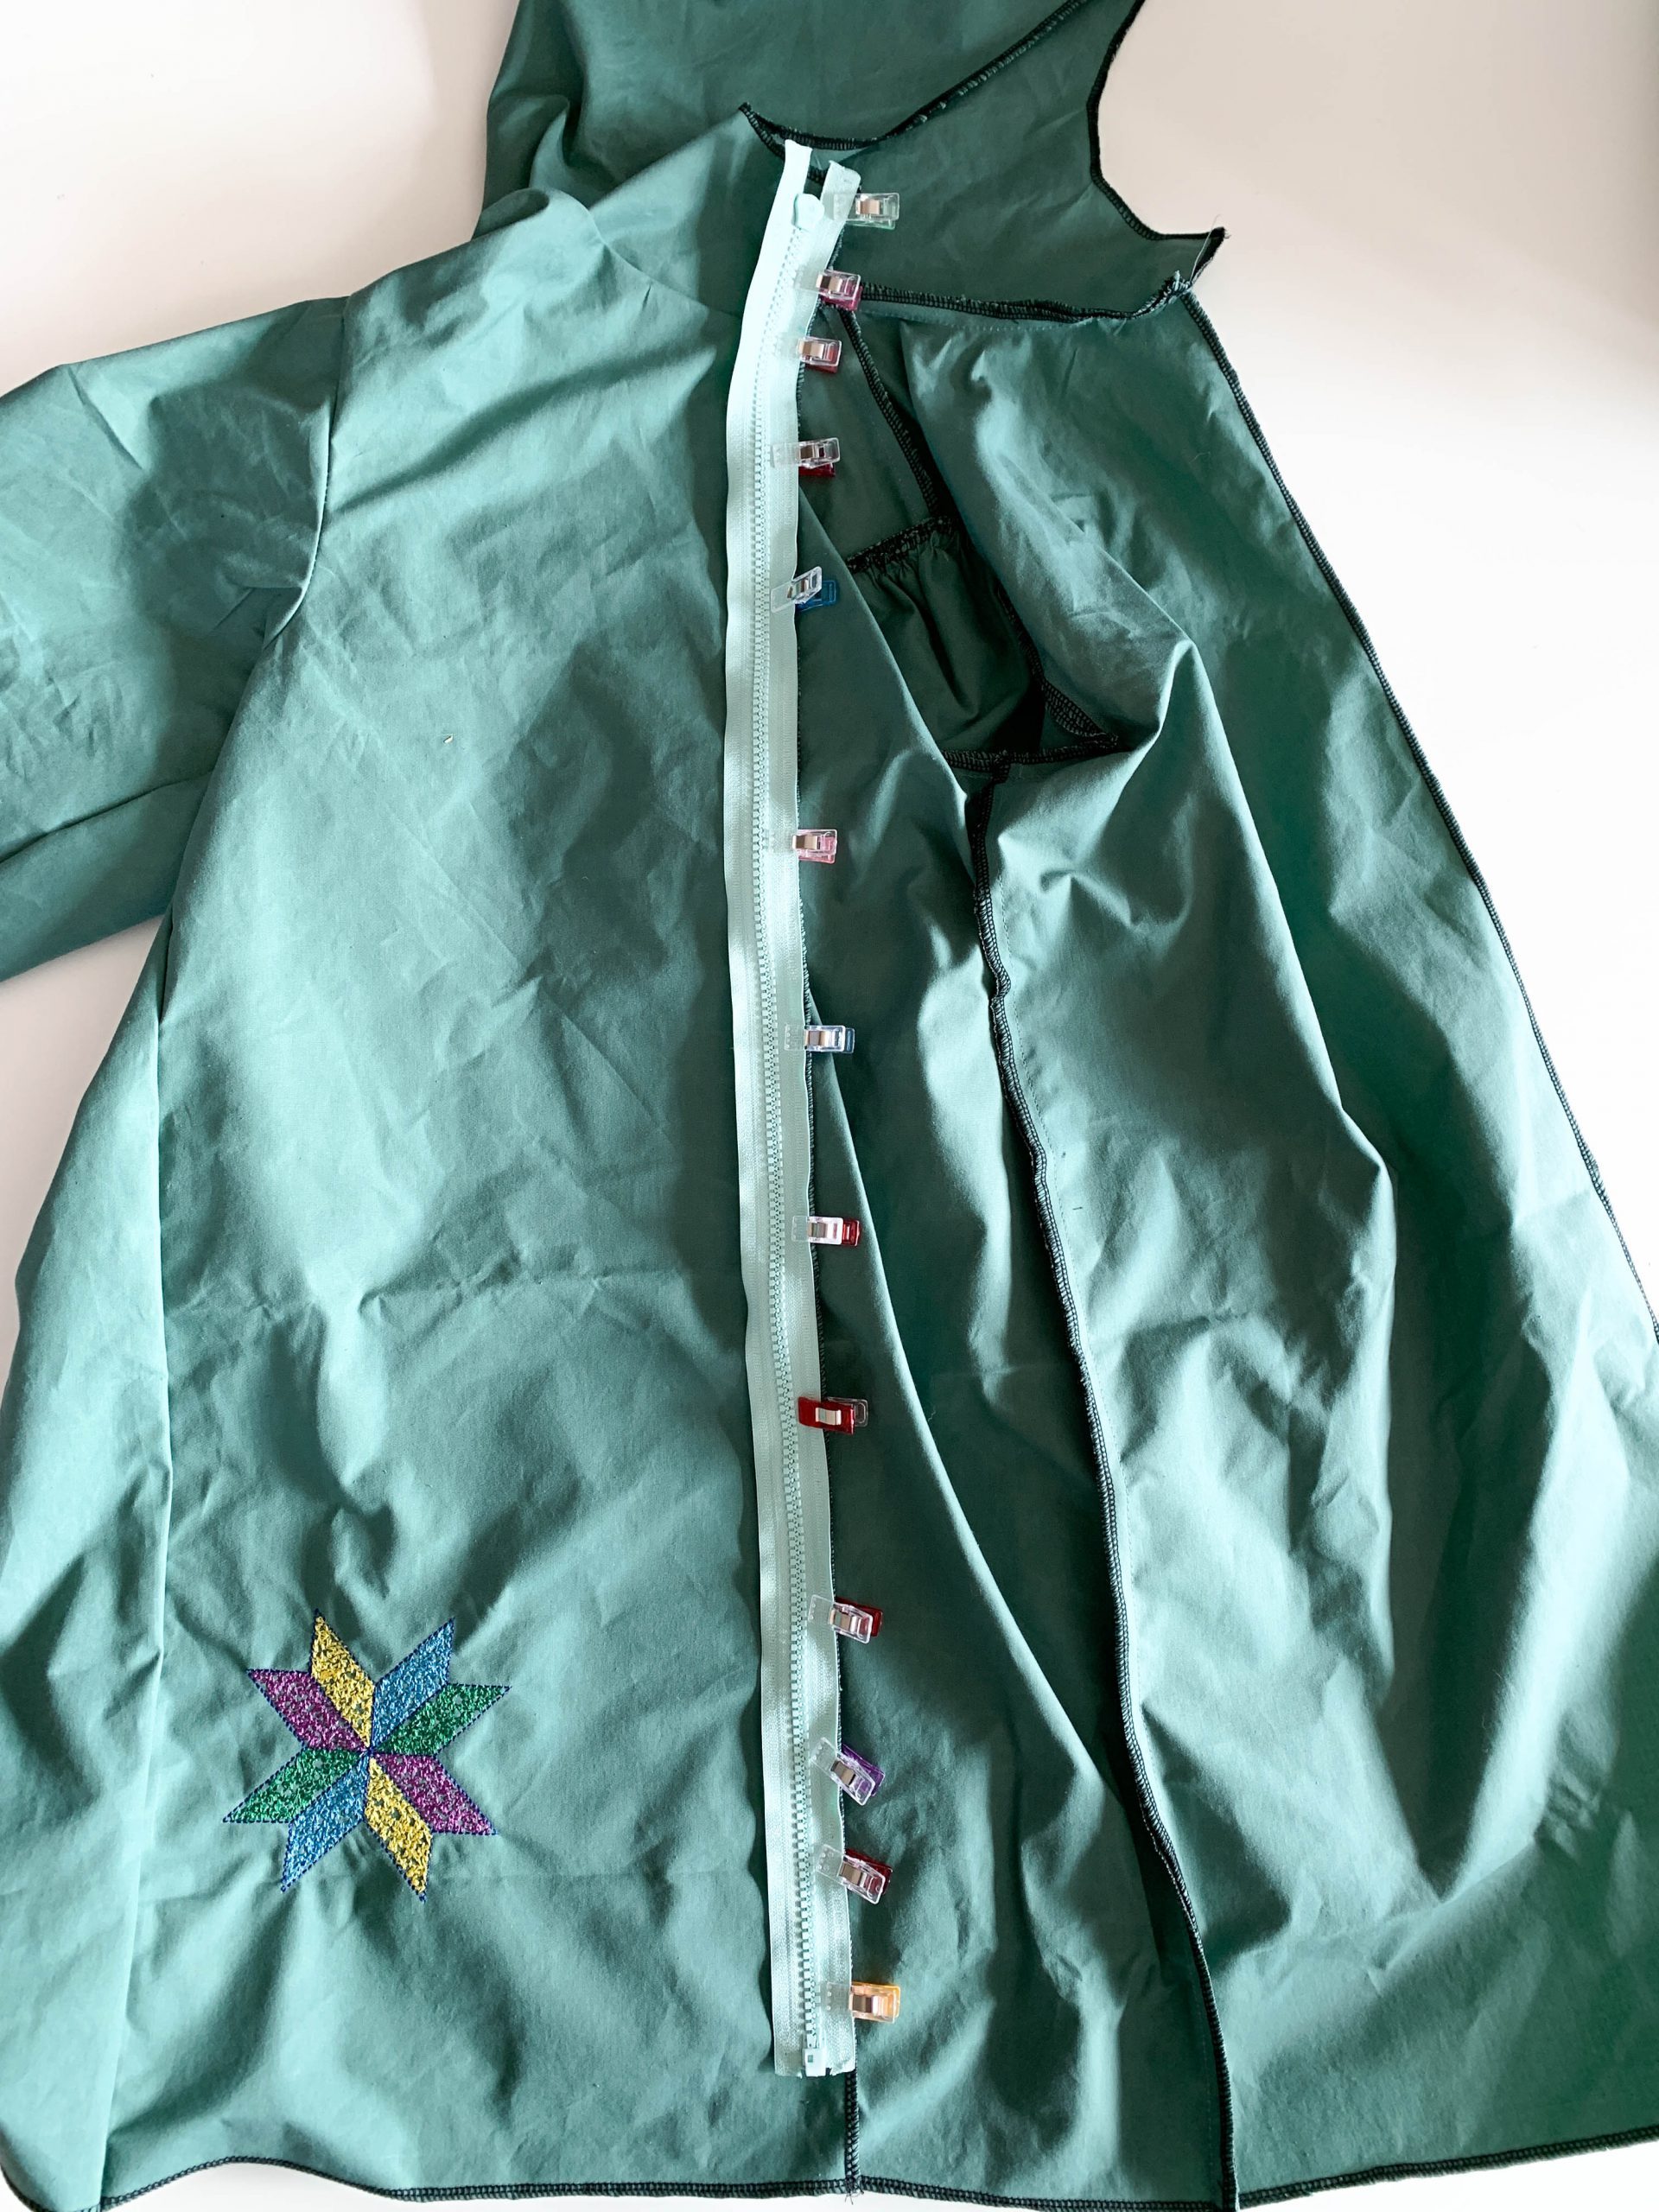
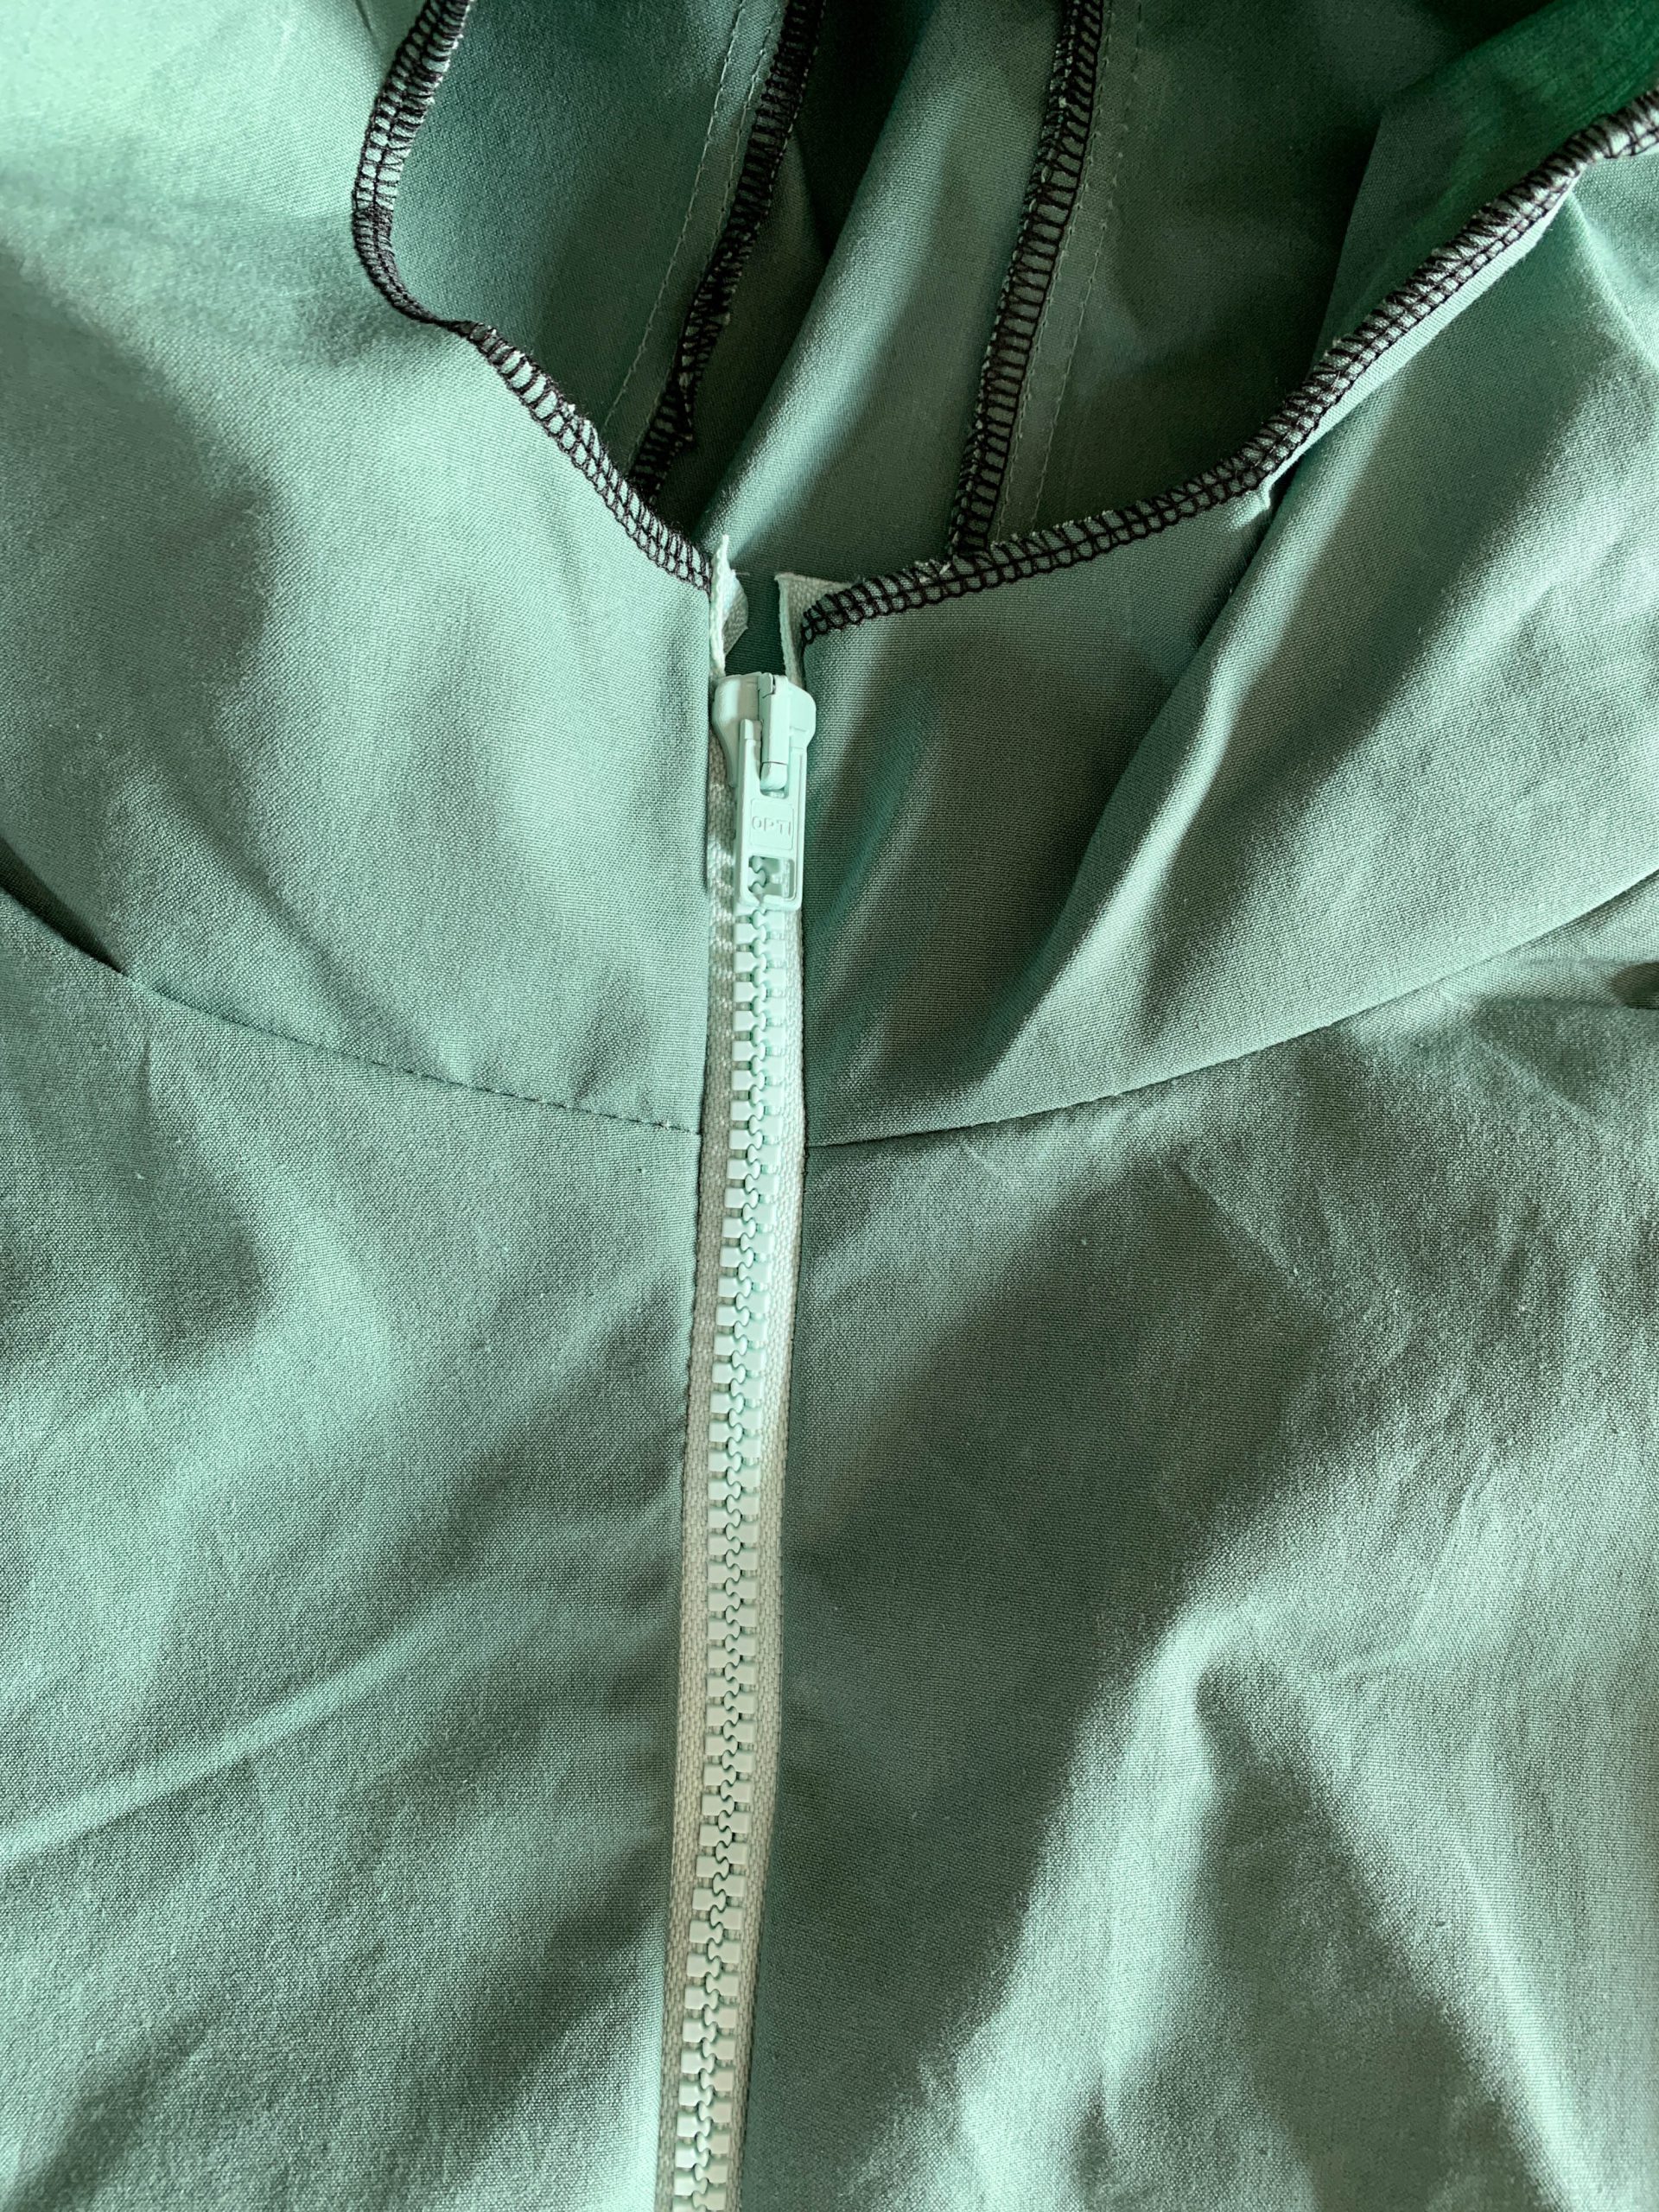
1 cm is left open towards the neck so that the jacket can be sewn directly onto the lining.

TIP: When sewing, make sure that the zipper is sewn evenly on both sides and, for example, the hood attaching seam is at the same height on both sides.
Sewing the jacket lining
Sew the lining’s back pleat for easier movement up approx. 4-5 cm from the hem at the top and bottom. Piece 2b is then sewn onto back piece 2a with the right sides together.
Sew the facings made out of the main fabric onto the front pieces with the right sides together. Then also sew the pieces 1c onto the front pieces with the right sides together.
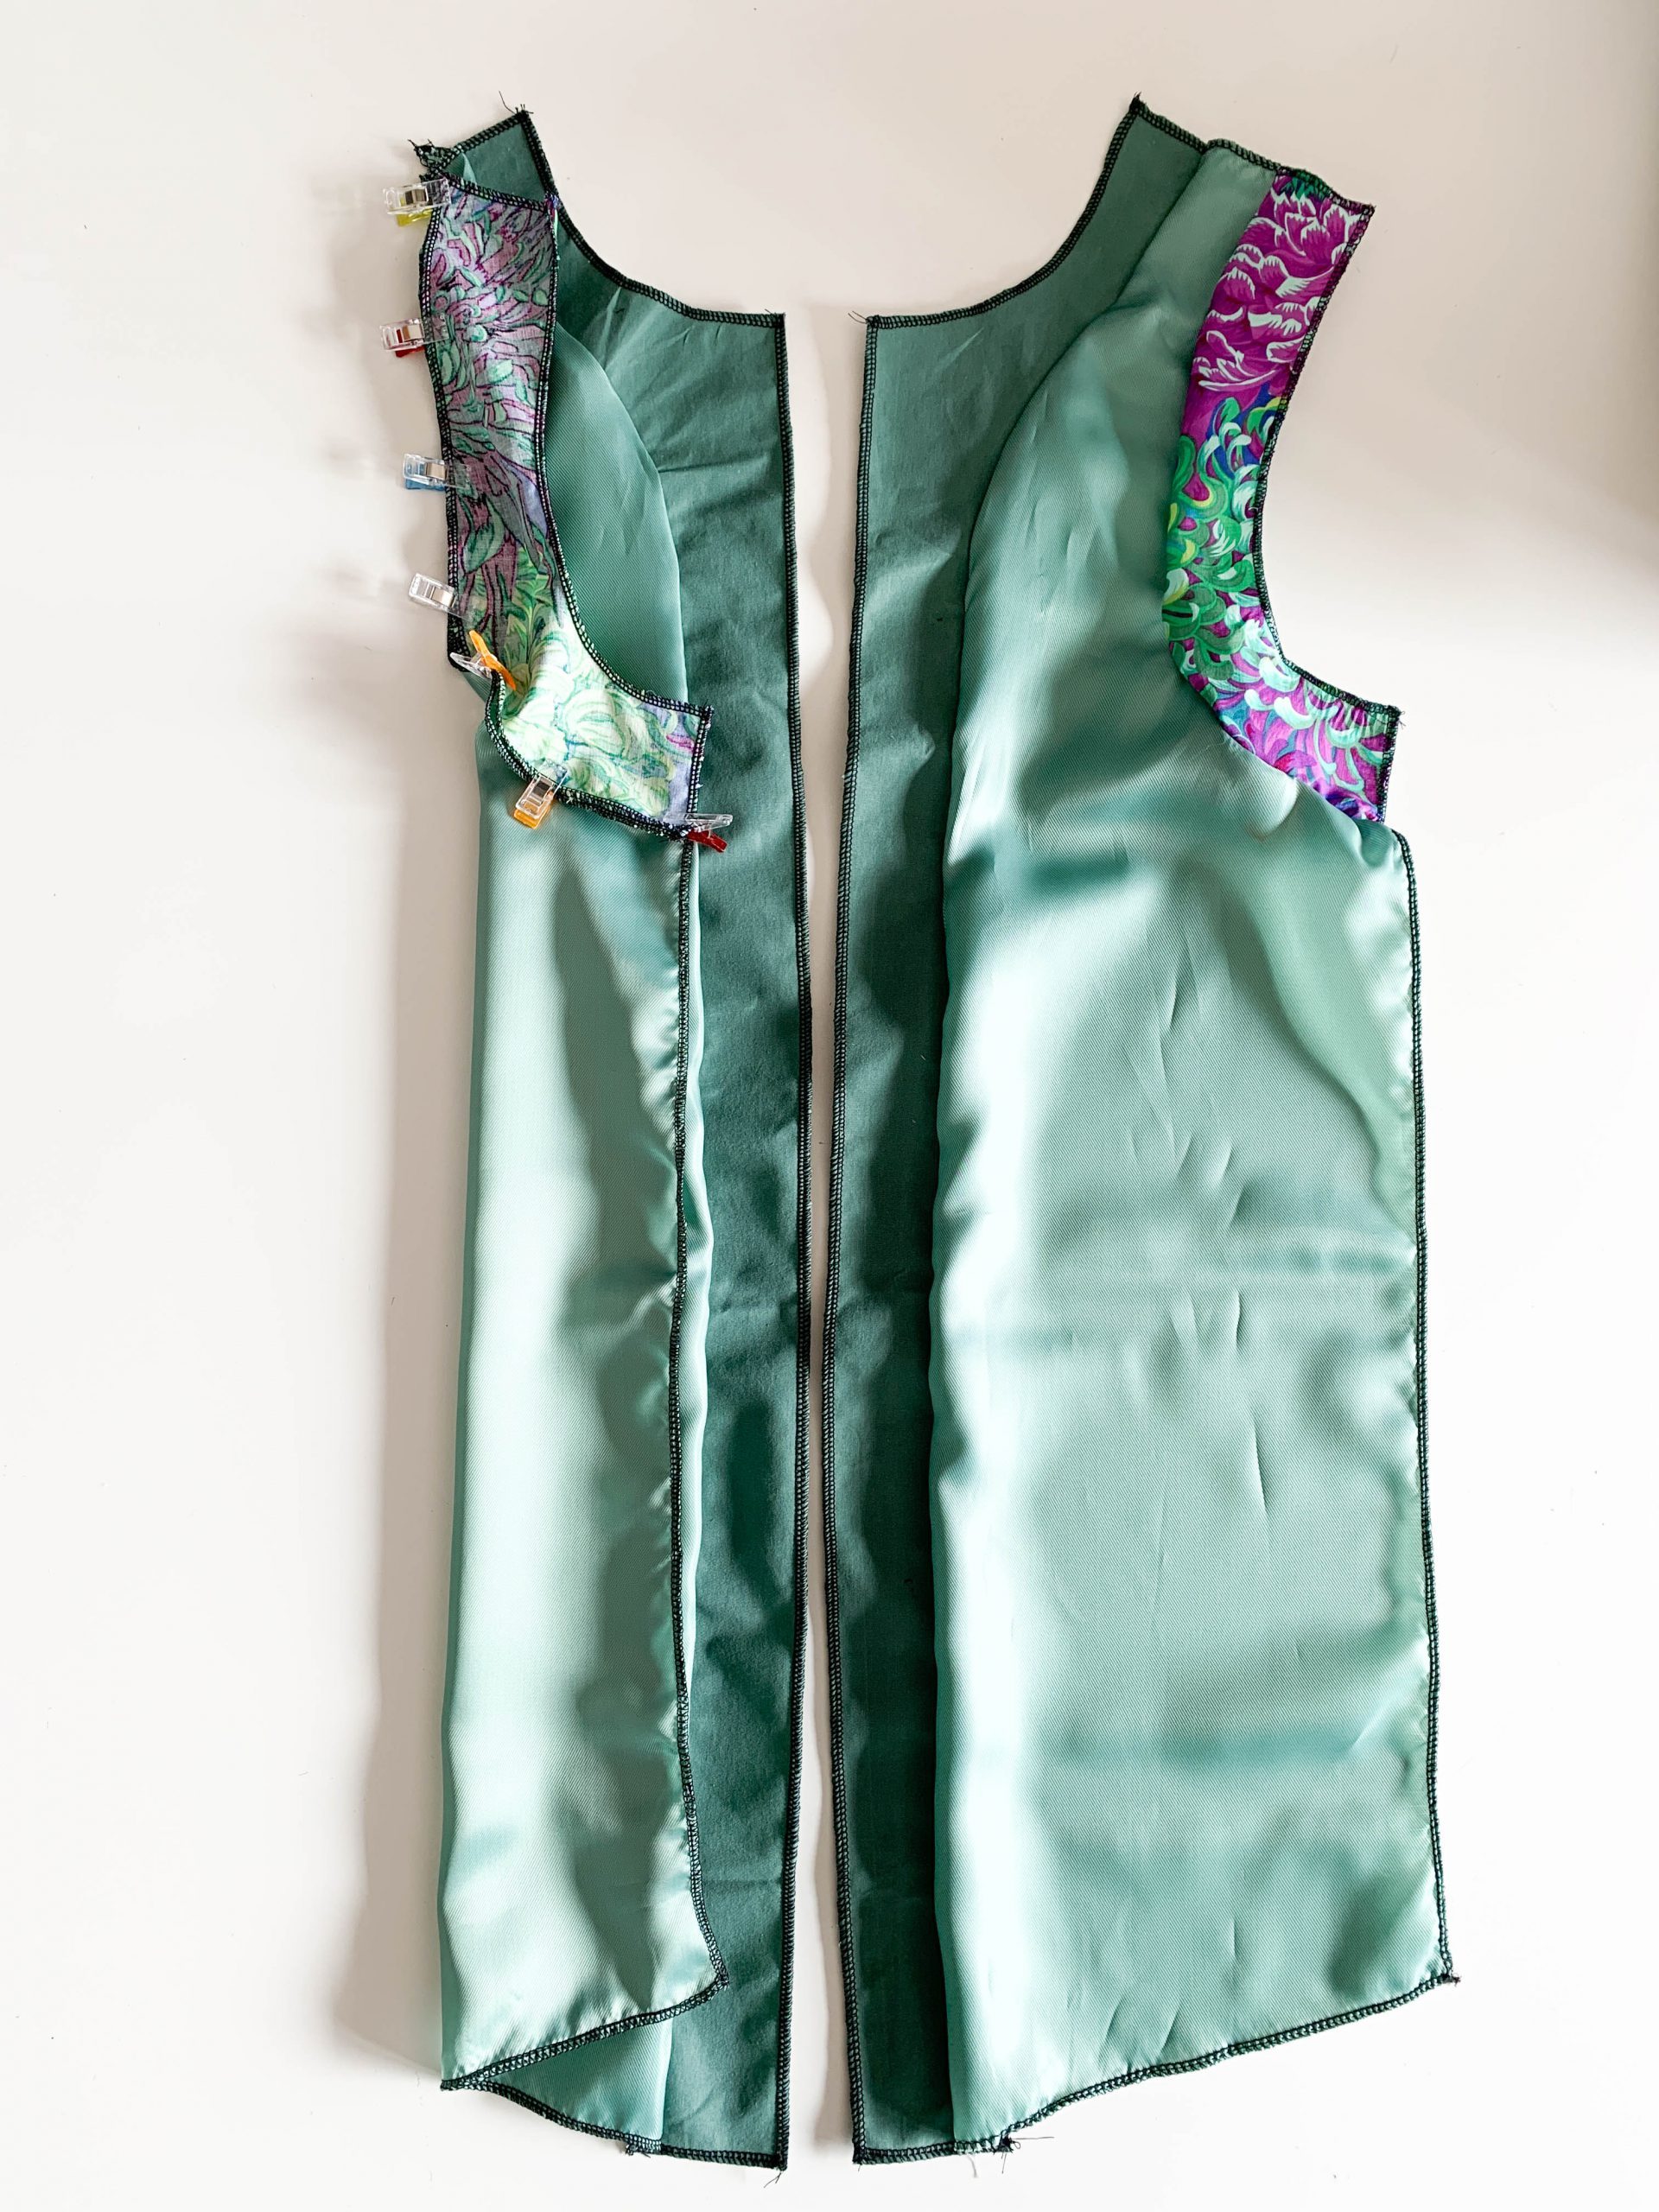
Before the sleeves and the hood can be sewn on, the back and the two front pieces must be sewn together at the shoulders and side seams with the right sides together. Leave a large turning opening.
Sew the prepared sleeves and hood in with the right sides together.
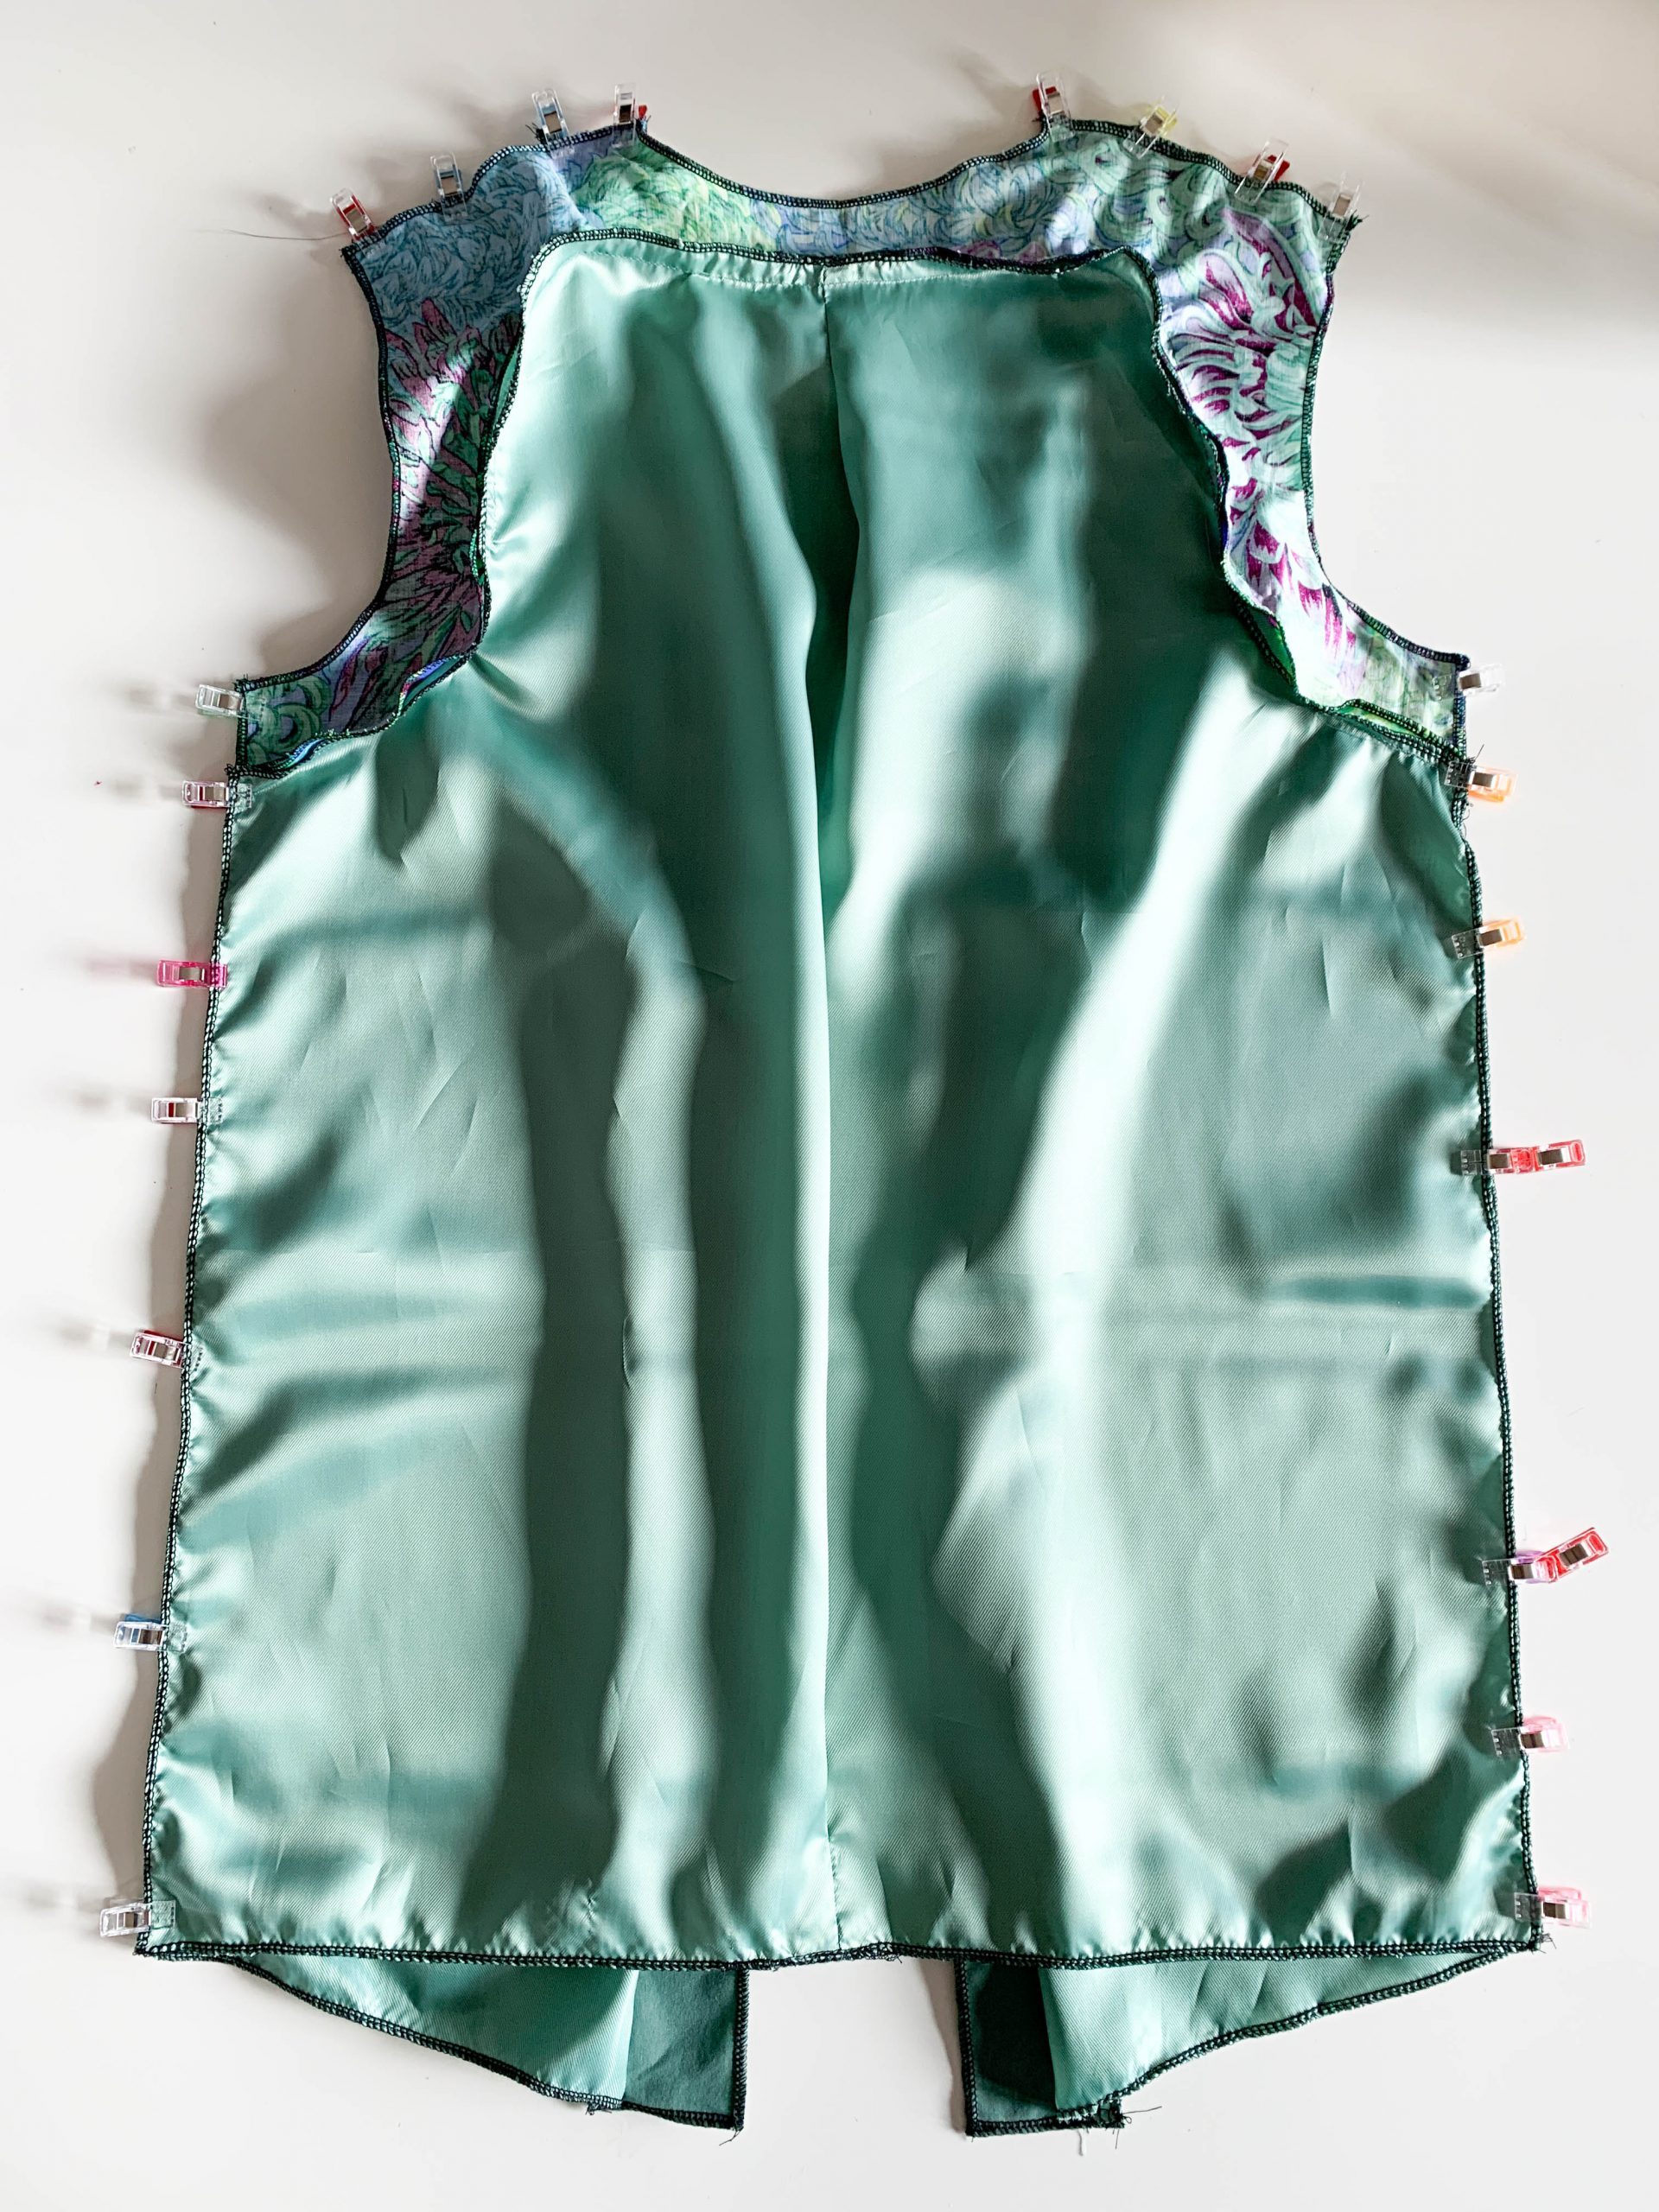
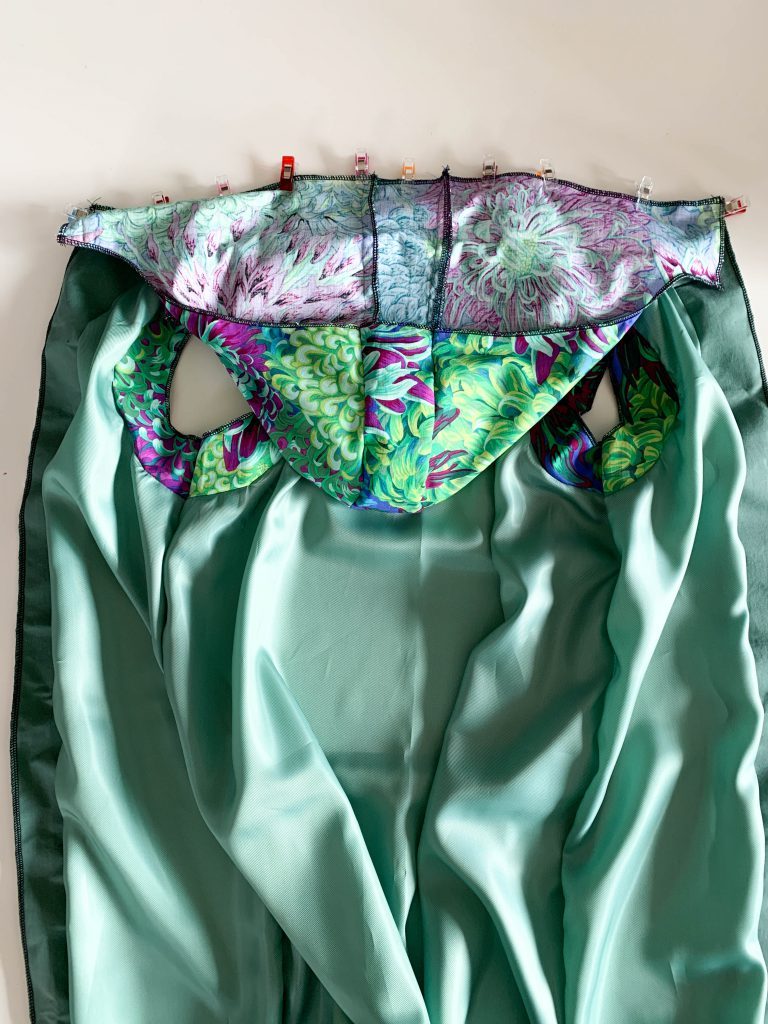 Joining the jackets together

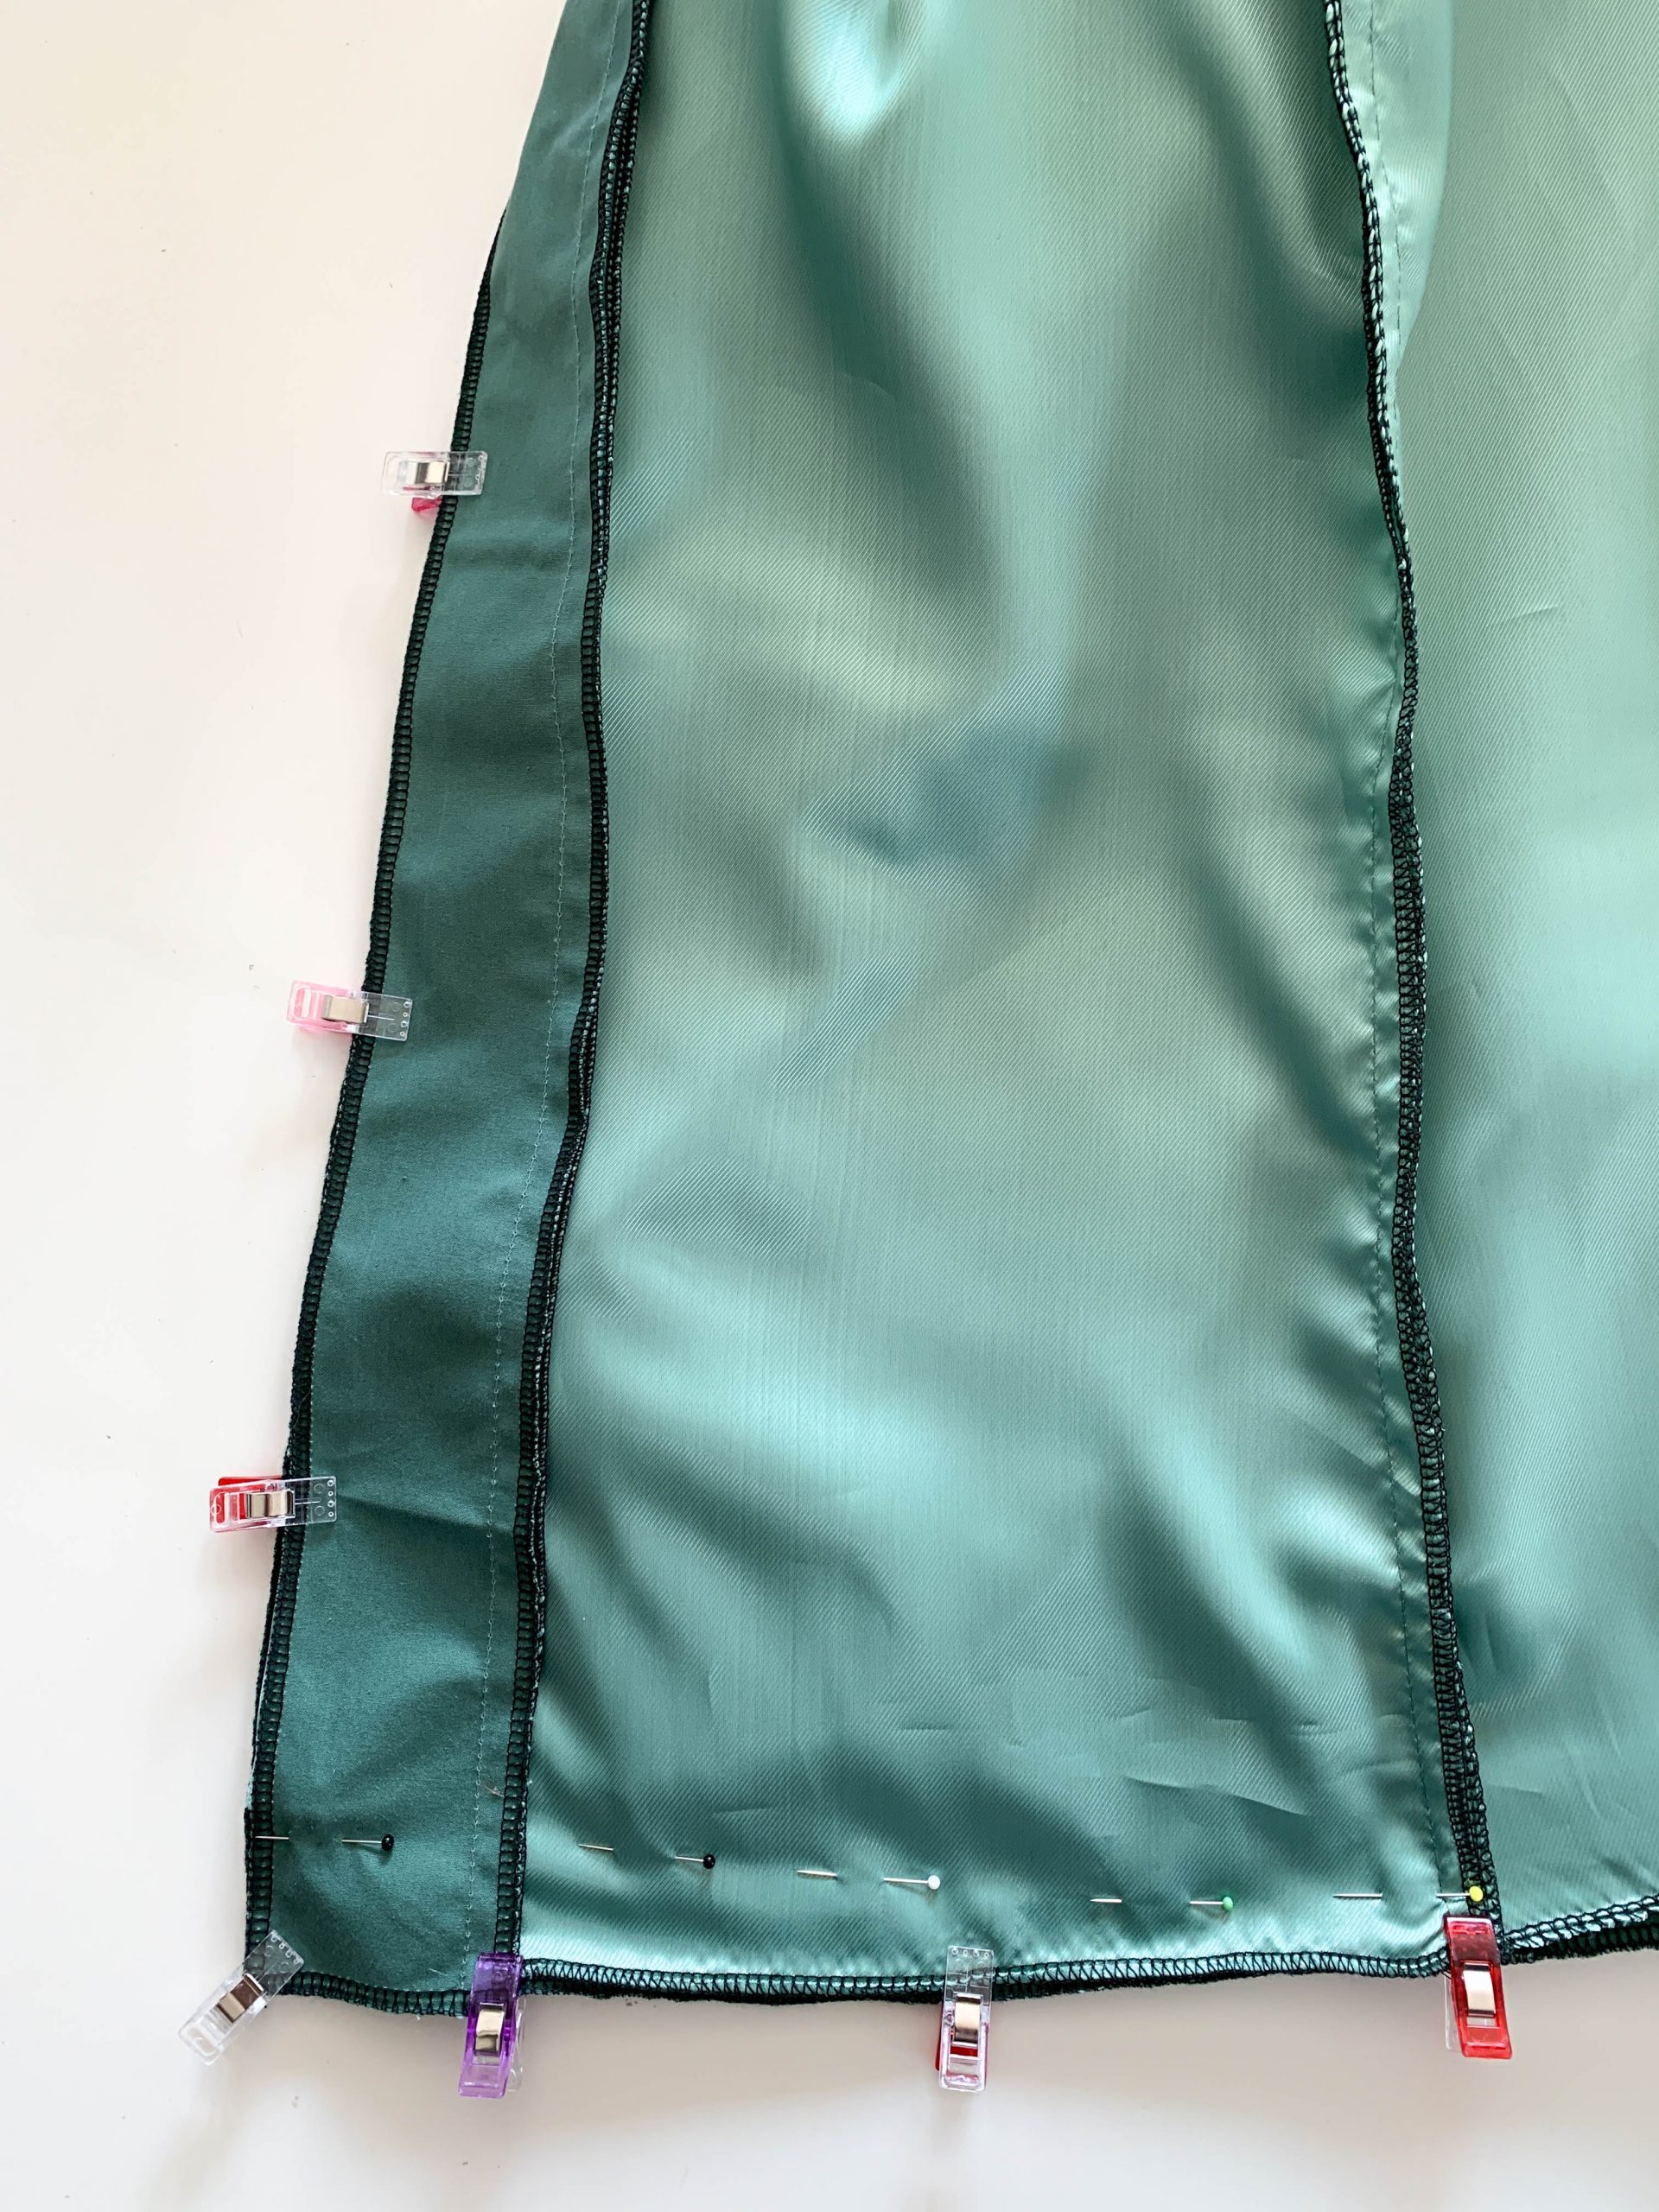
Place both jackets on top of each other with the right sides together and close them all the way round.

Sew the hem as follows: Since the facings include a 4 cm seam allowance, but the lining (back piece) only 1 cm, I start to sew the facing on the front at 4 cm high and let it run out diagonally to the back piece at 1 cm.
The best way to draw the slanted line is to draw it before the seam is straight. Sew up to the other side and then diagonally up again to the facing at 4 cm.
Now turn the jacket through the turning opening and shape all the corners carefully.
If you like, you can topstitch the hood edges and the zipper close to the edge.
Sewing the sleeve hems of the children’s jacket
I did not sew an elastic band into the sleeves and therefore closed the sleeves as follows. If you want to sew in an elastic band, you have to close the sleeves a bit differently.
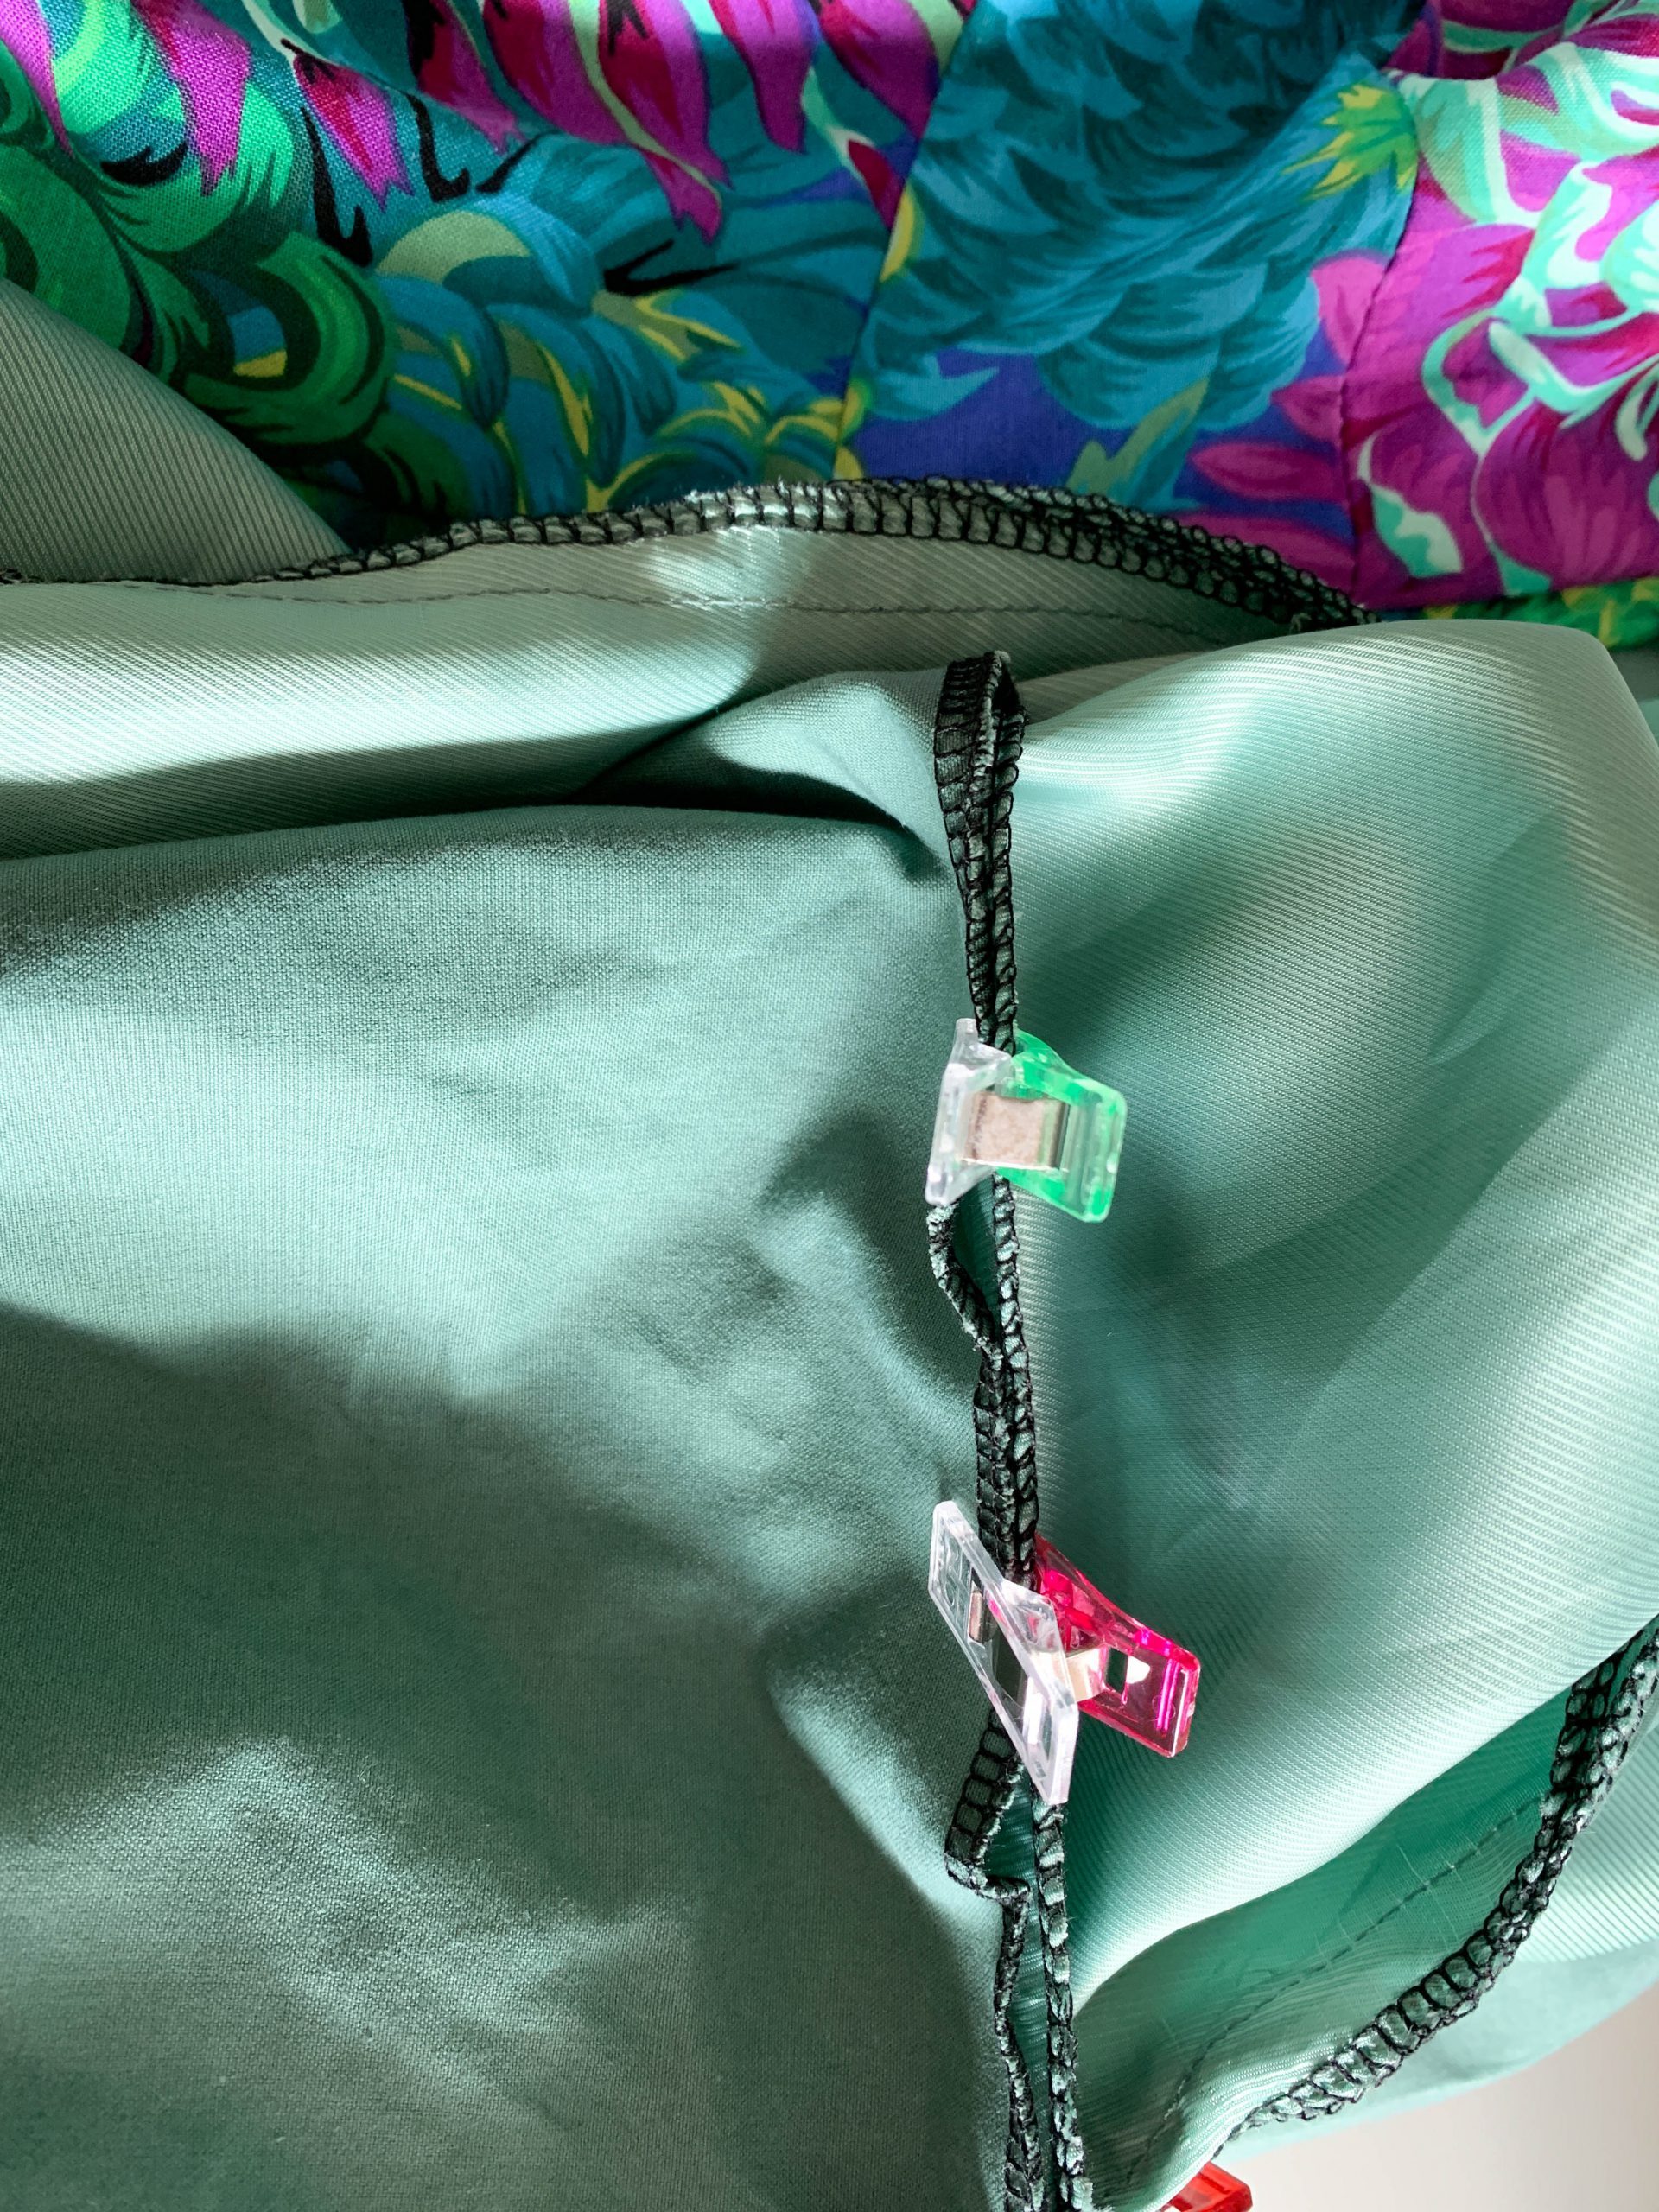
To close the sleeve hems, insert the sleeves into each other and fold the seam allowances at the sleeve hems over onto the wrong side. The outer fabric and lining are then lying “nicely” against each other. Pin this point well and make sure that nothing is twisted.

Now reach through the turning opening at exactly this point, hold it firmly and pull the sleeves through the turning opening to the outside. Then you open the folded seam allowances at exactly the marked point and fix the sleeve seams to each other with the right sides together and then sew them up.
If you want, you can topstitch the sleeves close to the edge from the outside.
Your children’s jacket is finished!
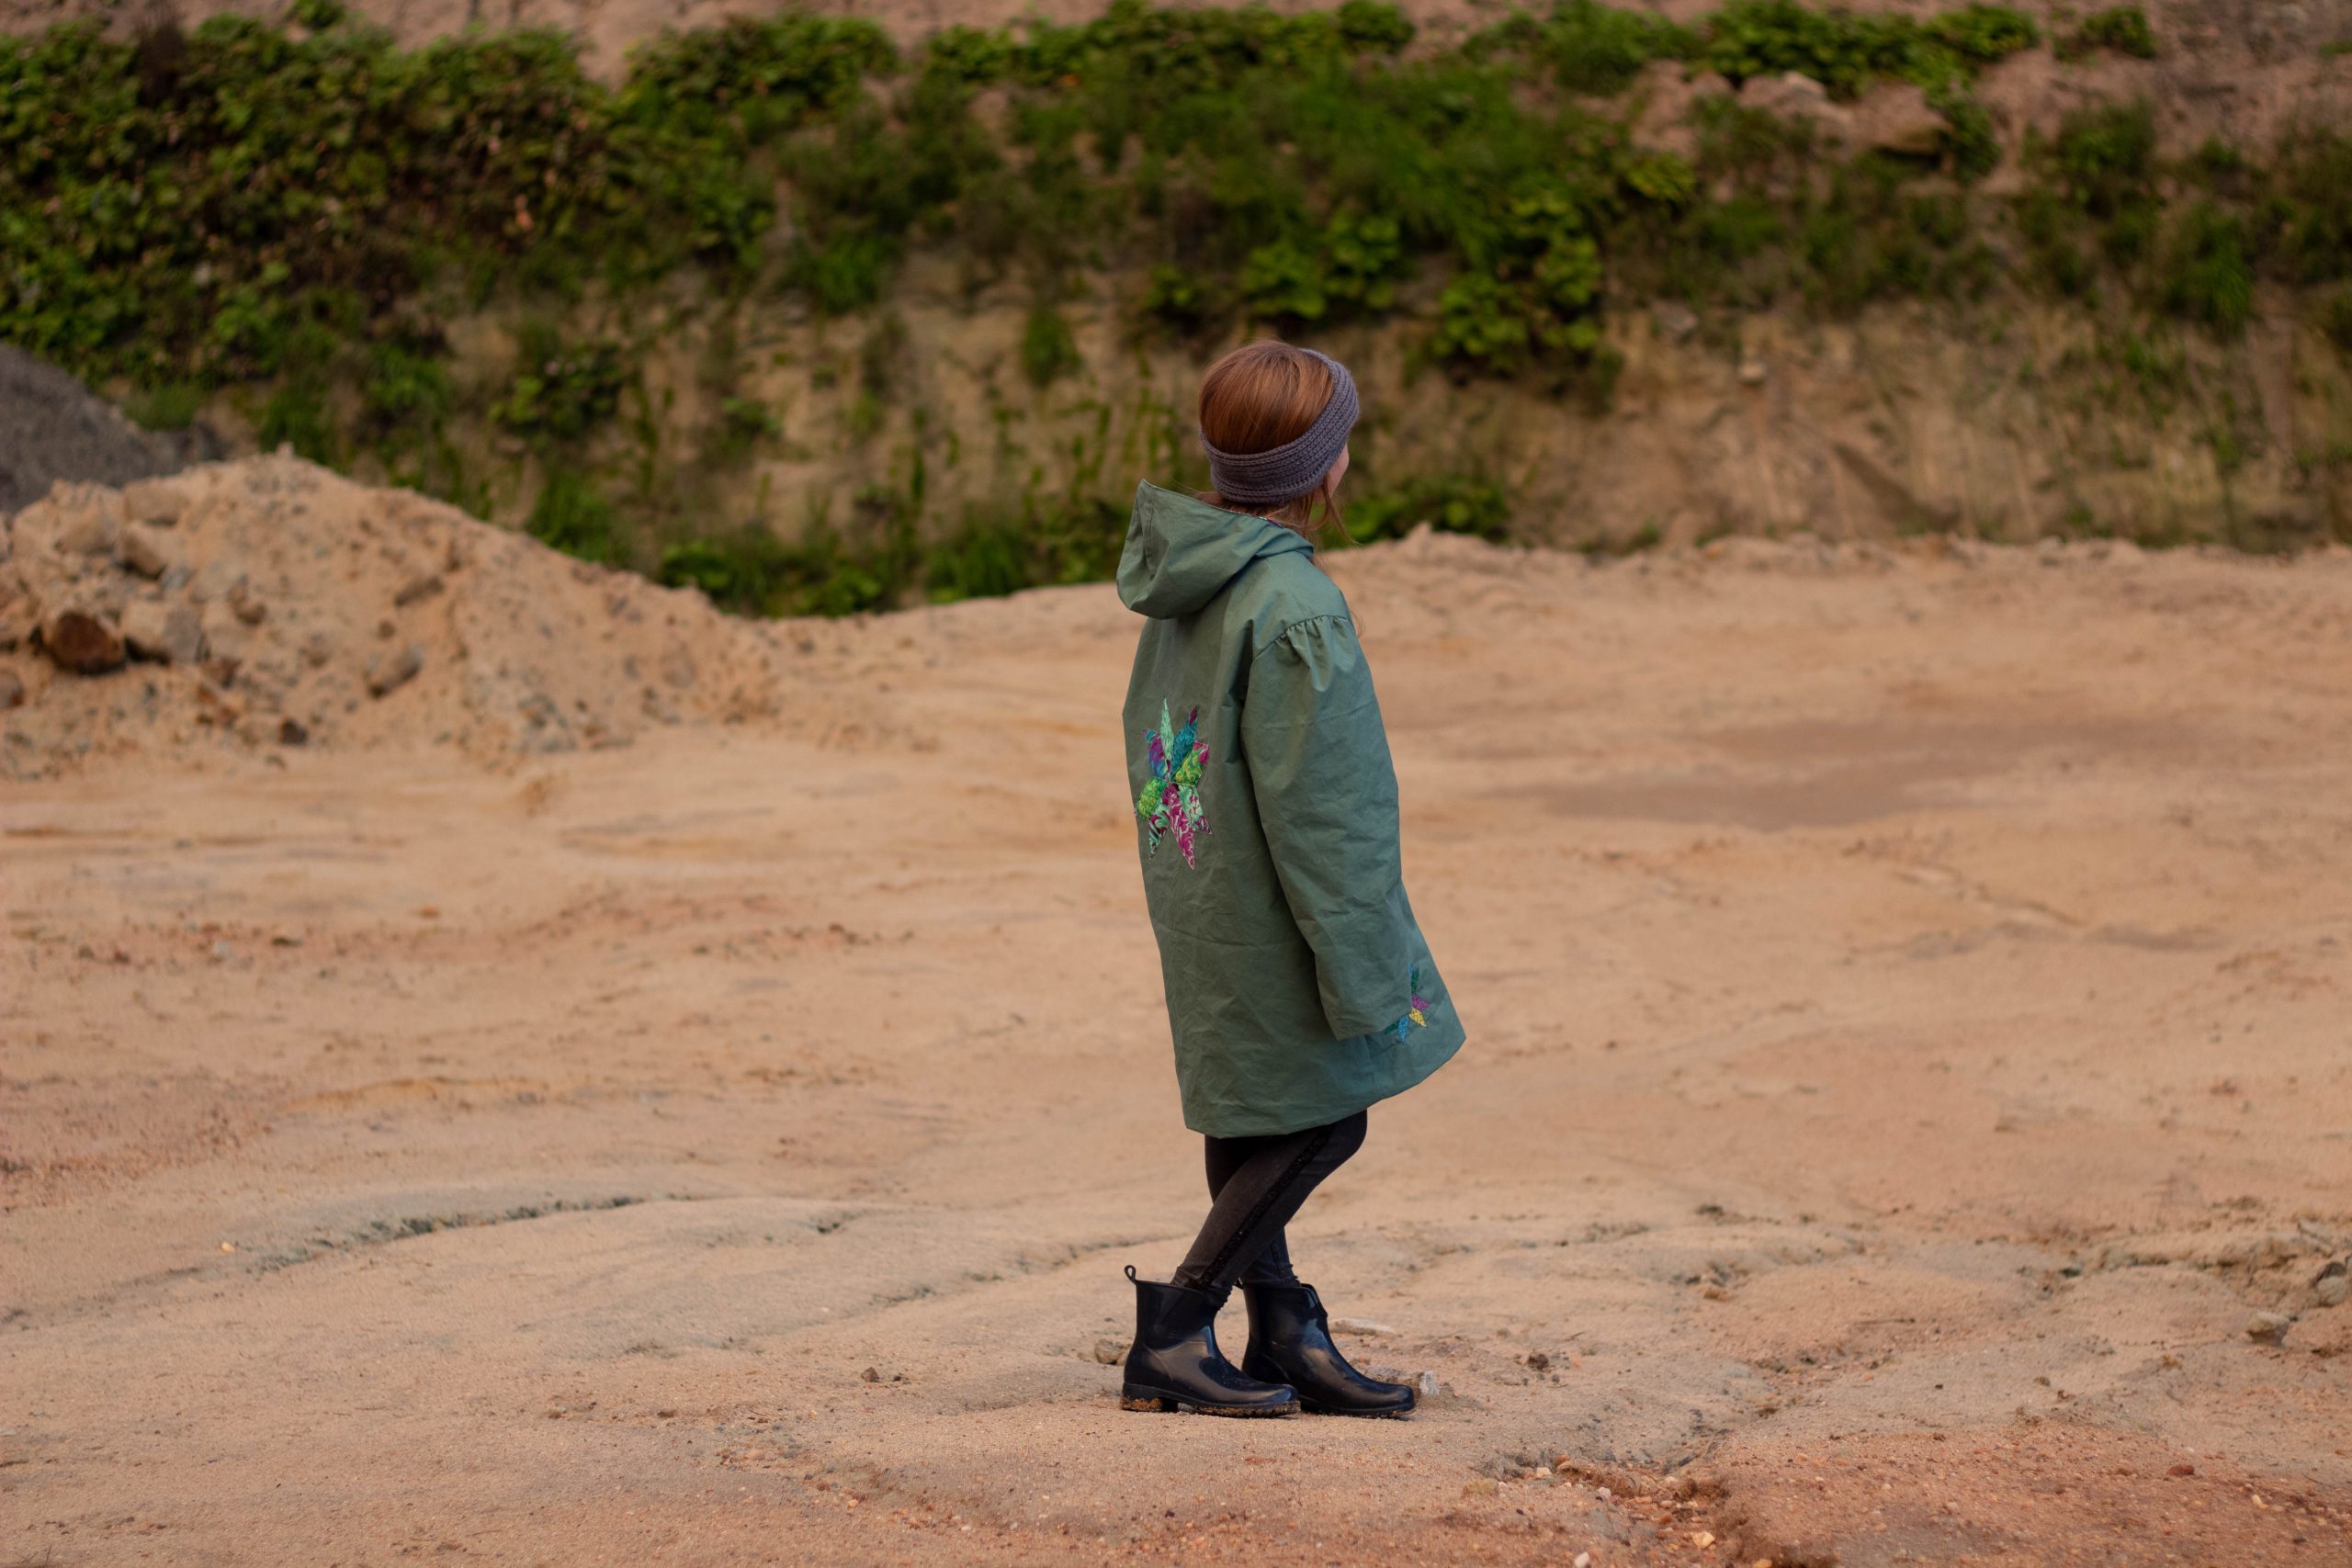
I hope that my tutorial on this jacket will help you and that you have lots of fun making it!


0 Responses