 BERNINA Corporate Blog -
Frills are absolutely hip: Here we show you practical accessories that will help you getting to your desired result quickly and reliably. This eliminates the need for the tedious gathering and subsequently the even spreading of the ruffled fabric. 
Processing tips for sewing pleats and frills
- Frills made of thin fabrics can be worked in two layers, which saves hemming. First topstitch the edges to be gathered on top of each other.
- Hem narrow frills before gathering. It is best to use the rolled hem of the overlock machine or to narrowly fold it in twice before topstitching.
- The thicker the fabric, the less gathering effect.
- Always sew a test piece first, alternatively leave the fabric strip longer and cut off the remaining fabric after gathering.
- Smooth, surface-treated materials and heavy fabrics can hardly/not at all be gathered.
The suitable accessories
Ruffler Foot #86 ‒ your supporting accessory for ruffles and pleats
The Ruffler Foot #86 creates beautiful, even pleats or frills. It might look a bit sophisticated, but it is amazingly easy to use and saves time when pleating or gathering. The frills can also be sewn to a flat piece of fabric in the same step.
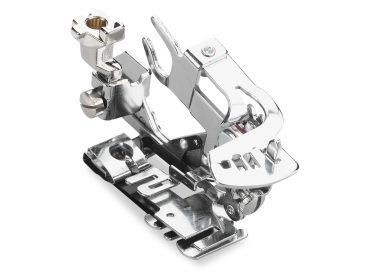
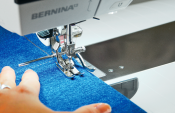
Attaching the Ruffler Foot #86
Thread the needle. Position the drive fork of the foot from the front right over the needle fixing screw and attach the foot as usual. With the stitch selection lever for the pleat density at the top, the density of pleats can be set: a pleat with every stitch, a pleat with every sixth stitch or a pleat with every twelfth stitch. The stitch selection lever is set to 0 for a flat piece.
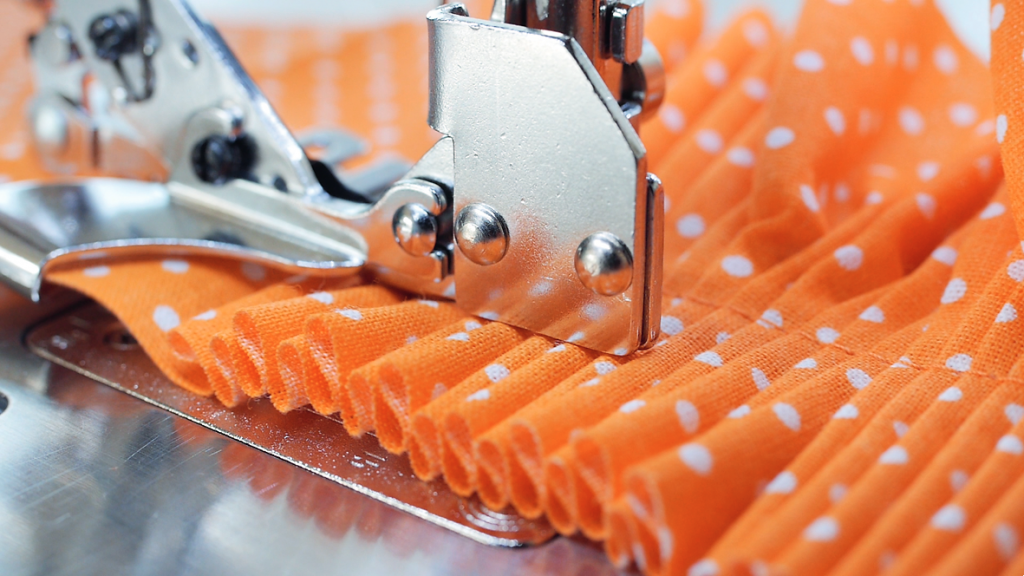
Determine pleat depth
The pleat depth can be determined with the adjusting screw. Turn the screw clockwise for deeper pleats and anti-clockwise for less deep pleats. Define the distance between the pleats with the stitch length. With exceptionally long stitches, the pleats are further apart than with a shorter stitch length.
NOTE
Further options are also available with Basting or Long stitch.
Single pleats
Move the setting lever to 6 ( fold at every 6th stitch ) or 12. Straight stitch at length 3.5 mm. Alterations are possible as described above.
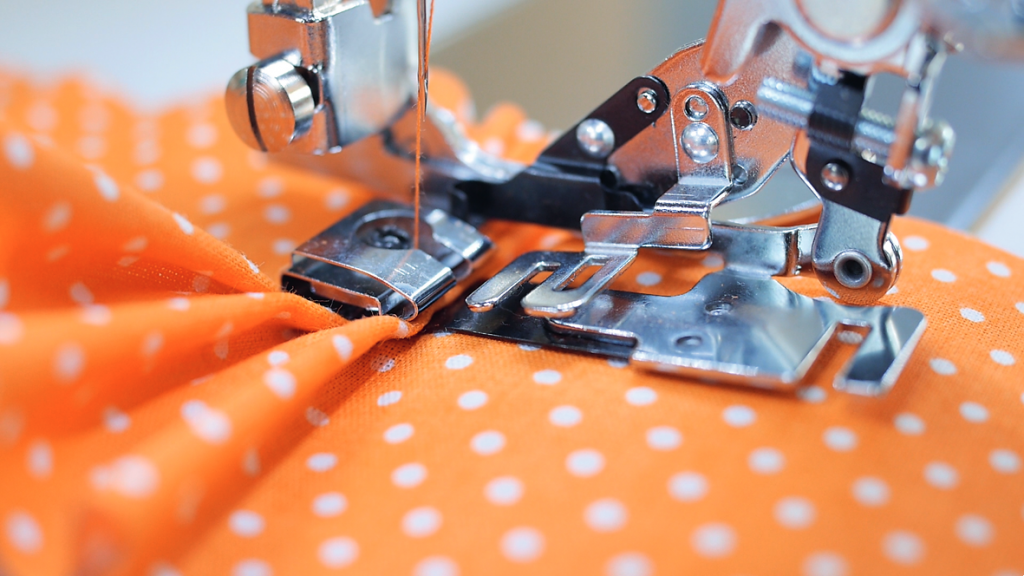
Gathering one layer of fabric
Place the edge of the fabric between the ruffle sheet and the separating tongue. For gathering with simultaneous sewing in one step, the fabric to be gathered is inserted as above with the right side of the fabric facing down between the ruffle blade and the separating tongue.

The flat fabric is placed with the right side up under the Ruffler Foot and guided through the guide slot. For pleated ruffles set the adjustment lever to 1. Straight stitch at stitch length 1–5 mm. Any questions? You can find a detailed video here.
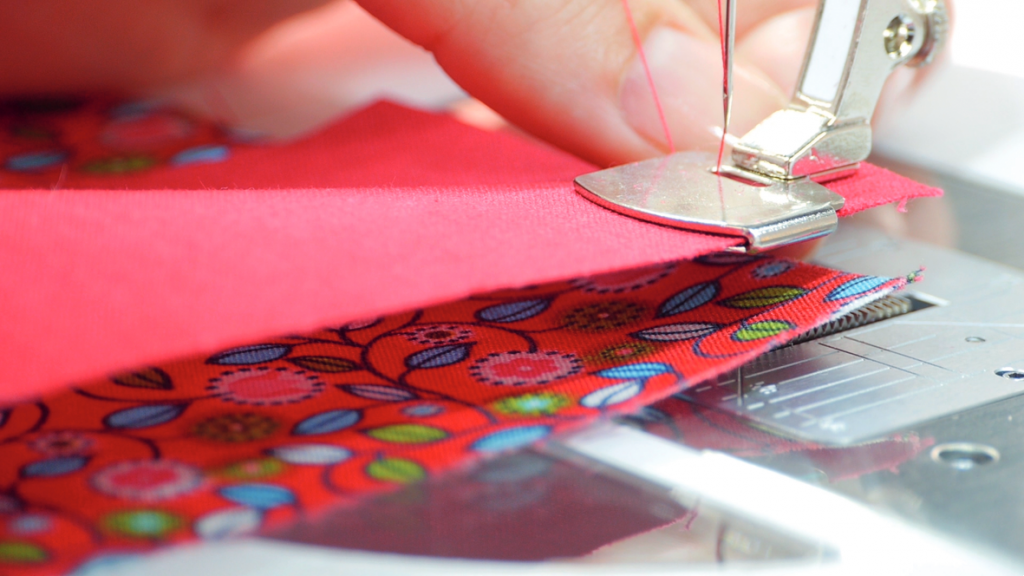
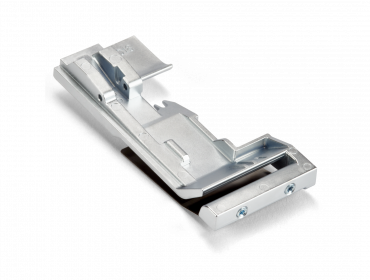
Gathering Foot #16 ‒ your ideal tool for uneven gathering
Gathering individual layers
This Gathering Foot #16 is suitable for gathering individual layers of fabric or for gathering and simultaneous sewing on a flat piece of fabric. The thin or medium-weight fabric is fed unevenly while sewing and thereby gets its characteristic ruffling. The special foot recess on the Gathering Foot also makes it possible to sew the ruffled material directly on a flat piece of fabric in one step.

NOTE
The longer the stitch and the thinner the fabric, the stronger the gathering. By increasing the upper thread tension, even more ruffles can be formed. Additionally, you can influence the ruffle formation by slowing down the feed of the upper fabric.
 Gathering one layer of fabric
To gathering one layer of fabric, the fabric is placed under the Gathering Foot. For simultaneous gathering and sewing, the piece of fabric to be gathered is placed under the presser foot with the right side of the fabric facing upwards, the flat piece of fabric with the right side facing downwards into the foot recess. The needle position is far left. Guide the flat fabric with the right hand and the other with the left hand. Keep the cutting edges flush with each other. Gather jersey or knitted fabrics with a zigzag stitch. 😉 Any questions? You can find a detailed tutorial here:

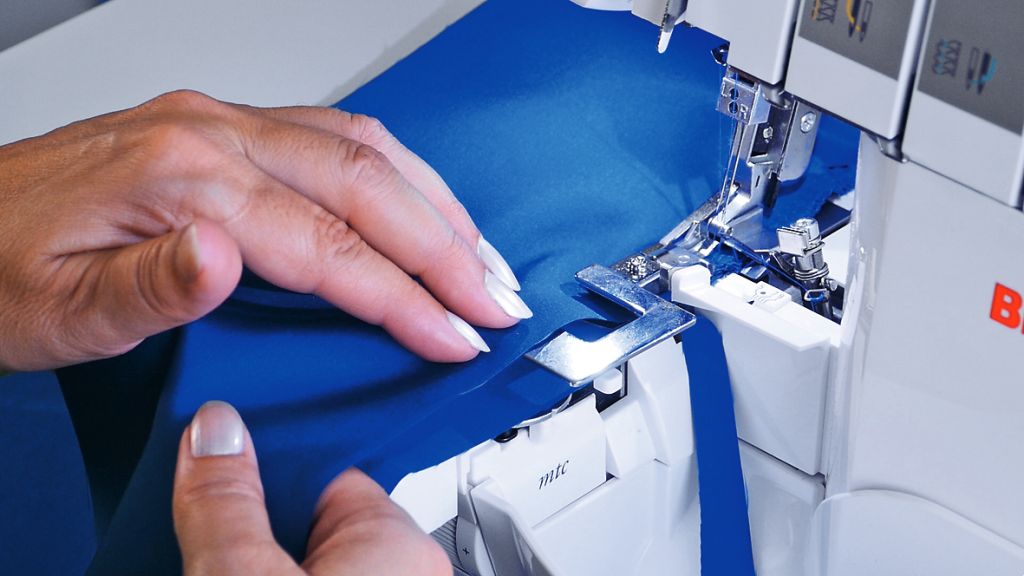
Ruffling accessories for the overlocker
On the overlocker, the pleat density is adjusted with the Differential Feed and the stitch length. Since the overlock machine ruffles and finishes at the same time, you save one operation and are therefore faster.
- Stitch selection: 4-thread overlock,
- Stitch length: 2.5–4 mm
Please note the following when making the settings
- Fine, soft fabrics ruffle best
- The thicker and more structured the fabric, the less ruffles
- The longer the stitch, the stronger the ruffling
- The higher the setting of the Differential Feed, the stronger the ruffles (strongest at 2).
It can only be gathered or simultaneously gathered and sewn on a flat piece of fabric. So, everything is neatened up and finished right away! The Gathering Foot is required for simultaneous sewing.

Place the fabric correctly
To ruffle one fabric layer with the Ruffler Foot, the fabric is passed under the guide lug. For gathering and simultaneous sewing, the fabric to be gathered is placed with the right side up under the ruffler guide, with the edge of the fabric parallel to the front of the overlocker. Sew a few stitches, then stop with the needle down. Cut the second fabric, which is not to be gathered, 1.5 cm from the edge and parallel to the sewing line, approx. 5 cm in advance.
Place the fabric with the right side down between the Gathering Foot, touching the needles so that the first stitch is in the fabric. Sewing slowly, it is easier to guide the lower fabric layer with the right hand and the upper one with the left hand. You can find a detailed video of the Gathering Foot #L18 here:

Additional BERNINA tips for you
You may have noticed that we have already published a few blog posts with helpful tips. These tips are written for various BERNINA inspiration magazines.
Are you looking for a specific topic right now? You’ll find a lot of supporting content on this page. And if the topic you’re looking for isn’t listed yet, check back regularly for the latest tips.
If you have any other useful tricks, feel free to share them below in the comments. Let’s take your sewing experience to the next level! 
Creative regards,
Jasmin


0 Responses