 BERNINA Corporate Blog -
DAINTY DRAGONFLY in INKTENSE
MY INSPIRATION FOR THIS WORK
I was sitting outside when I saw something struggling on the surface of my pool. When I went for a closer look, I realised it was a dragonfly that must have misjudged how close he was to the water. It took a while for him to recover after I rescued him as his wings were wet and it was during this time that I studied him. They are such magical creatures and one seldom has the chance of looking at one so closely!
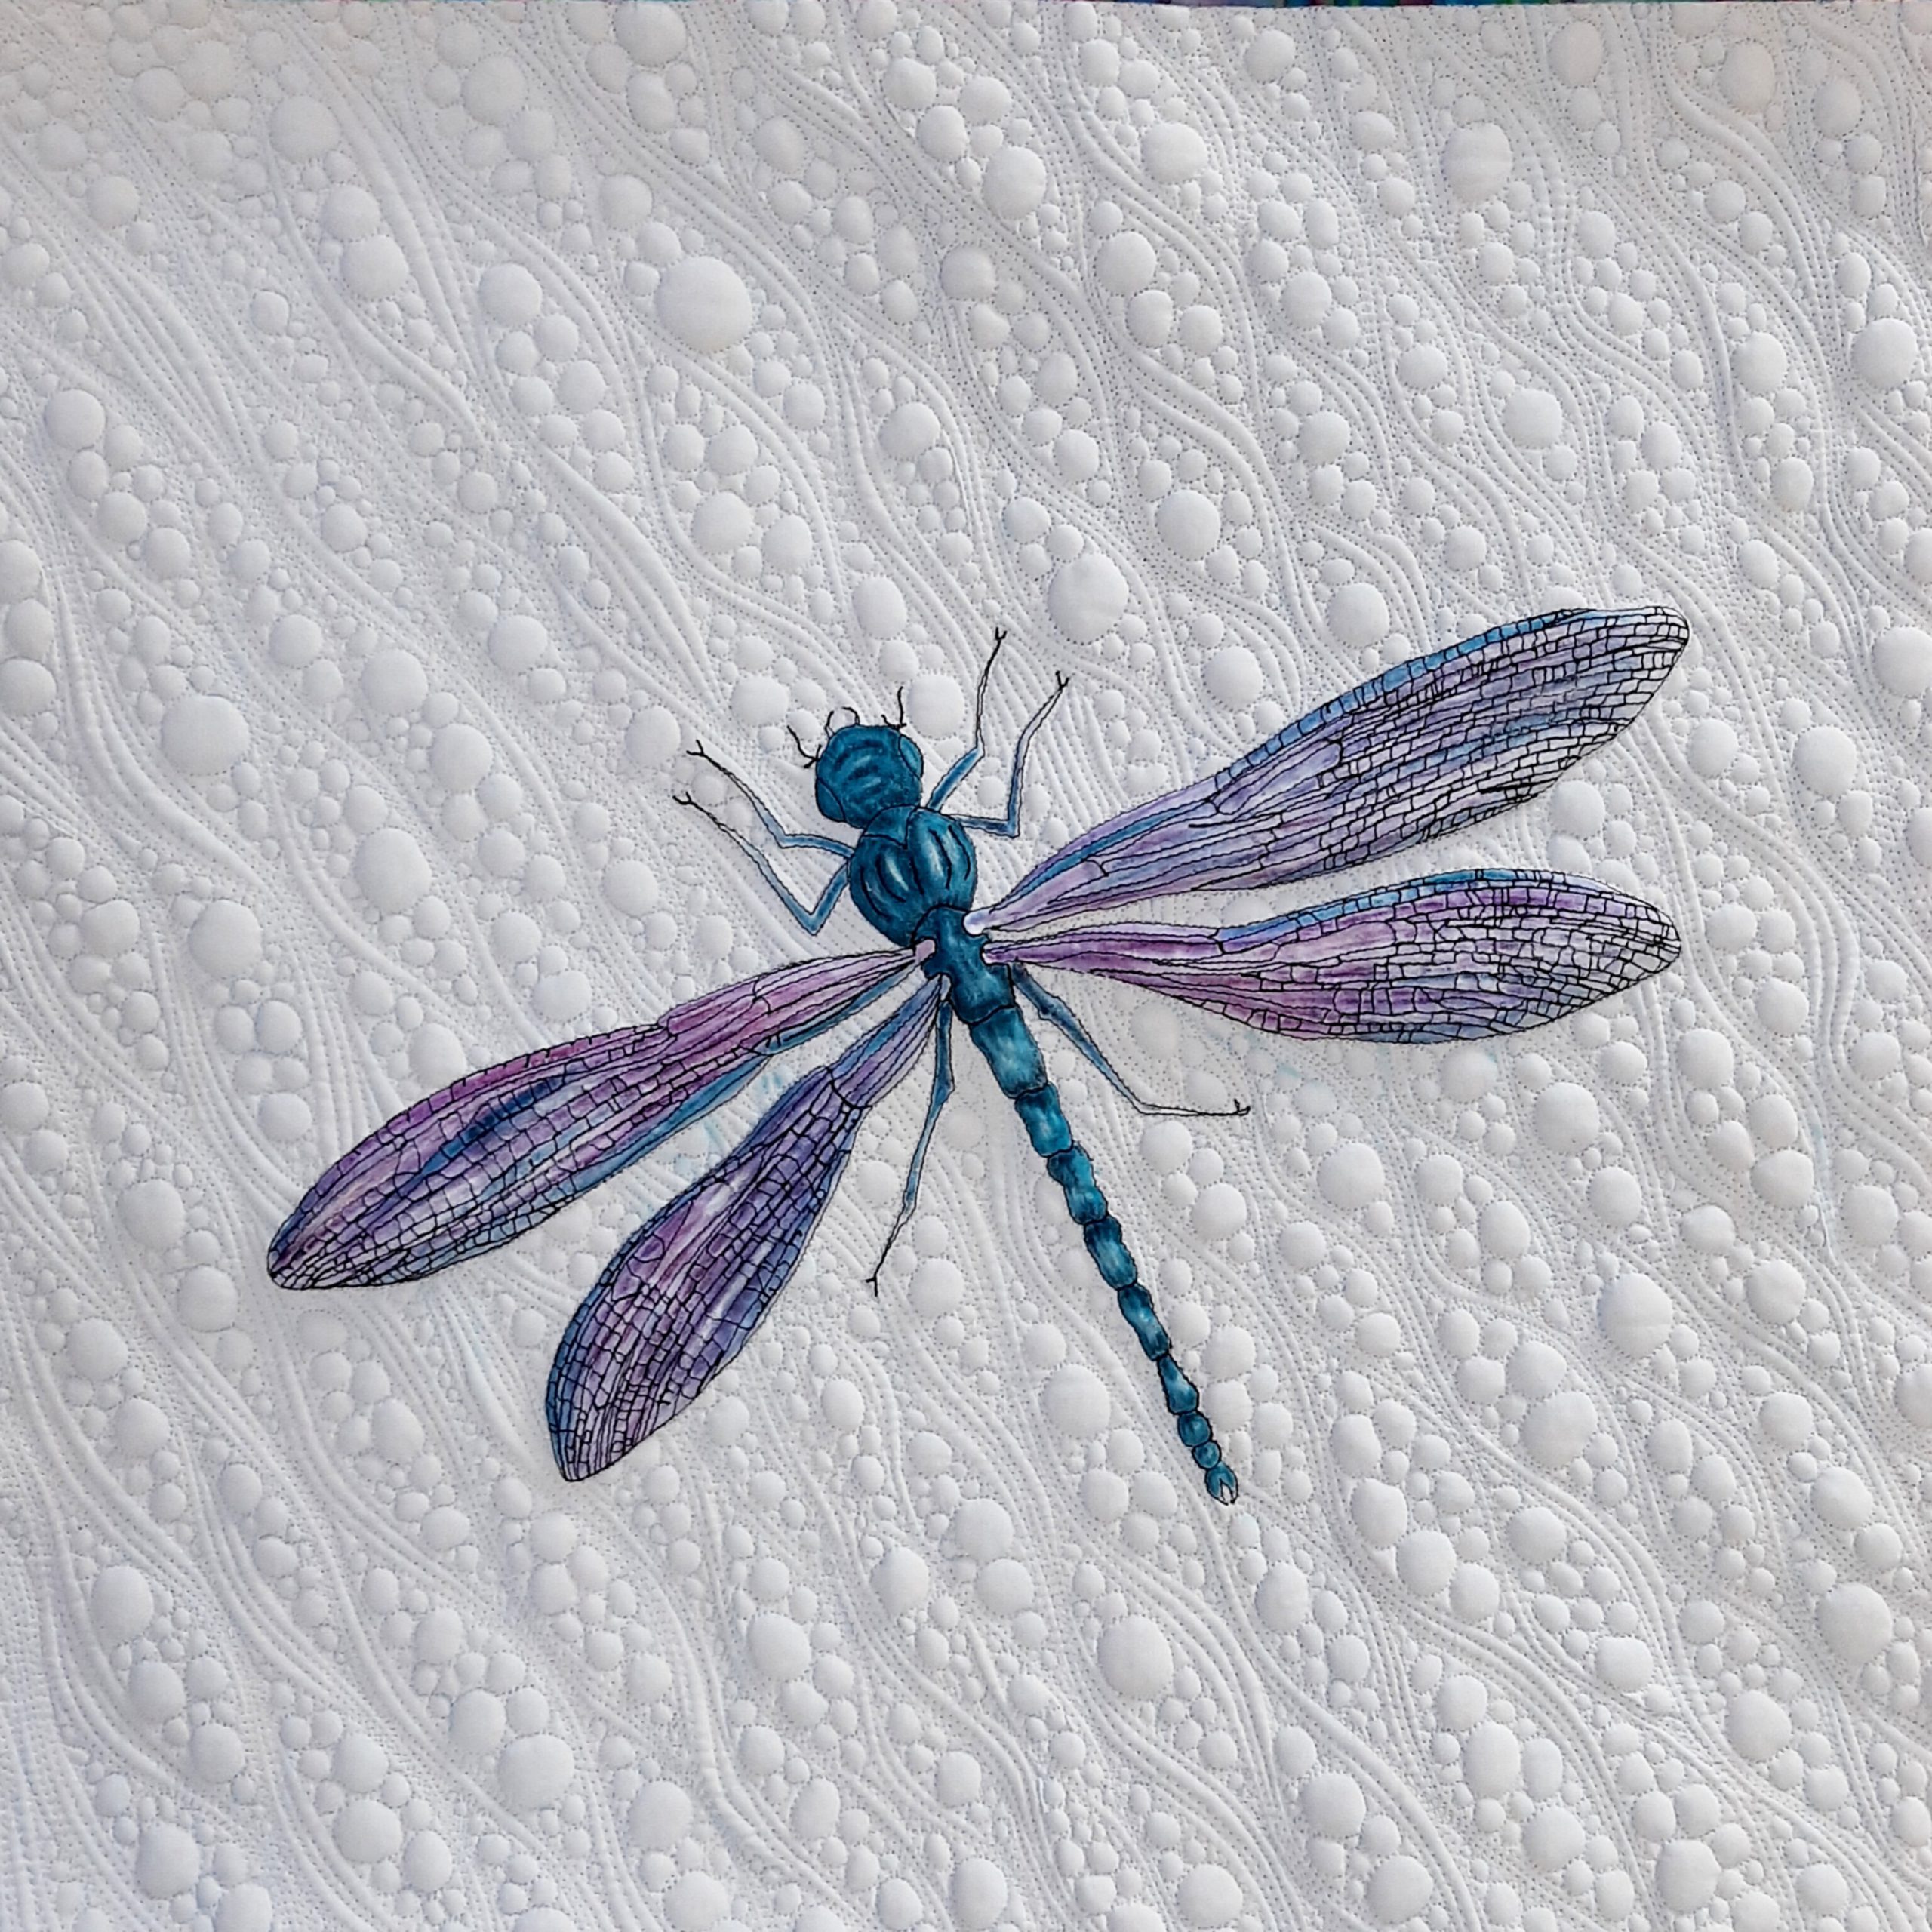
THE DAINTY DRAGONFLY in Inktense and Quilted
HOW I DESIGNED THIS DRAGONFLY QUILT
Using a photograph, I sketched the dragonfly and simplified the lines. This was done in a dark permanent pen. It served as a pattern.
(Patterns will be available on my website soon)
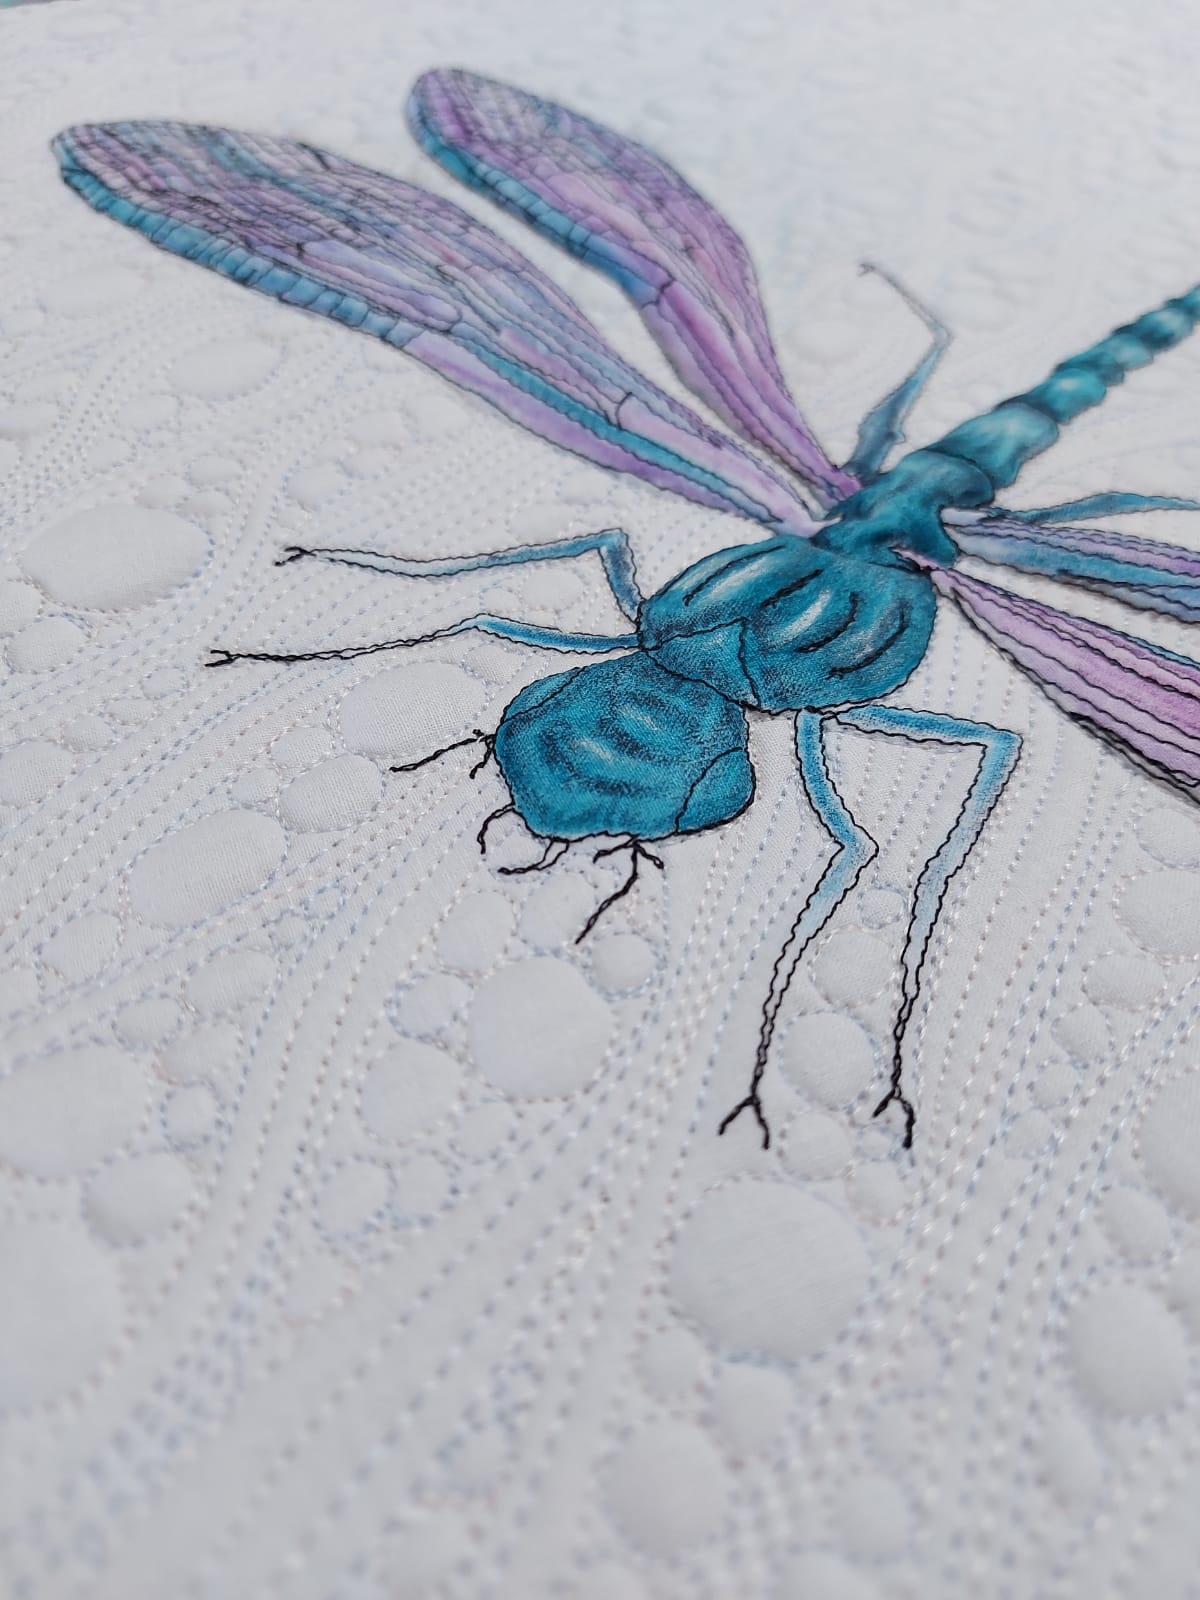
DRAGONFLY UP CLOSE AND PERSONAL
TO CREATE YOUR DRAGONFLY QUILT YOU WILL NEED:
- metre white 100% cotton fabric. (You can choose your own colour background fabric)
- Freezer paper
- 2 X 75cm X 75cm Loomtex batting
- 75cm x75cm backing fabric
- Neutral colour all-purpose thread.
- Black machine embroidery thread (outline)
- Pale machine embroidery thread (quilting)
- Sewing machine of which feed dogs can drop
- Inktense pencils
- Fabric medium
- Paintbrush
- Kitchen paper
- Container with water
- Light box
- Water soluble pen
- Spray glue or quilting safety pins
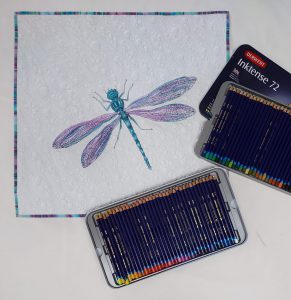
DRAGONFLY AND INKTENSE PENCILS, Embroidery Thread and Quilting.
TO CREATE YOUR DRAGONFLY QUILT
You need to trace the pattern onto the white background fabric. Use a light box as the fabric might not be transparent enough.
- Set your machine up as for FMQ
- Using black machine embroidery thread, stitch on all the marked lines.
- Iron freezer paper onto the wrong side of your background paper.
- Use Inktense pencils in pale purple, turquoise and lilac.
- Colour the dragonfly in and set the colour with fabric medium.
- You may want to iron over it once it is dry to set the colour 100%.
- Layer the quilt top, Loomtex batting and background fabric and use spray glue or quilting safety pins to keep the layers together.
- Draw a couple of pale guidelines for the quilting pattern
- Thread your machine with a pale machine embroidery thread.
- Quilt the background but leave the dragonfly un-quilted for better loft.
- Square off.
- Cut strips for binding and sew binding on, mitring the corners after which, turn work over and hand-sew binding in place.
Sew a hanging sleeve and label on the back of your work and enjoy your own quilted abstract wall-hanging!
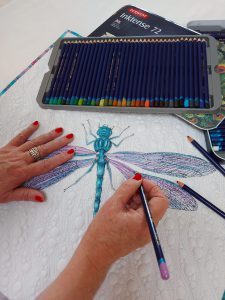
COLOUR IN USING INKTENSE PENCILS, FABRIC MEDIUM and WATER.
INTERESTED TO FIND OUT MORE?
If you are passionate about textiles and want to learn more about how to incorporate my innovative techniques into your work, visit my website www.tillydeharde.com & subscribe to my mailing list! Follow me on Instagram @tillydeharde and Facebook, Tilly de Harde Fibre Artist & Teacher. Please don’t forget to leave a comment in the comment box below!
PS: In the spirit of the festive season, I’m going to be teaching a FREE online class on how to create a beautiful, arty Christmas tree decoration so join my mailing list and I’ll send you the link! Don’t miss out!


Looks like a good challenge
Dear Janet, It is such fun to do that even if you find it a bit challenging, I guarantee you will have fun! Enjoy! Love, Tilly
Looks great
This is beautiful, I love the dragon fly, will we have an broidery soon?thank u so much.
That’s beautiful! Thanks for your explanation and clear instructions.
Dear Carol, thank you for your nice compliment! Have you thought of joining my newsletter (link in blog) and perhaps doing some of my online classes? You will really love it! Looking forward to hearing from you soon! Love, Tilly
I have always enjoyed Tilly’s classes and I’ve learnt such a lot from her on how to play & have fun with fabric and threads.
Dear Sharon, thank you for your comment! I enjoy sharing my knowledge with you and hope to see more of you this coming year so that we can ‘play’ together more often! Love, Tilly