 BERNINA Corporate Blog -
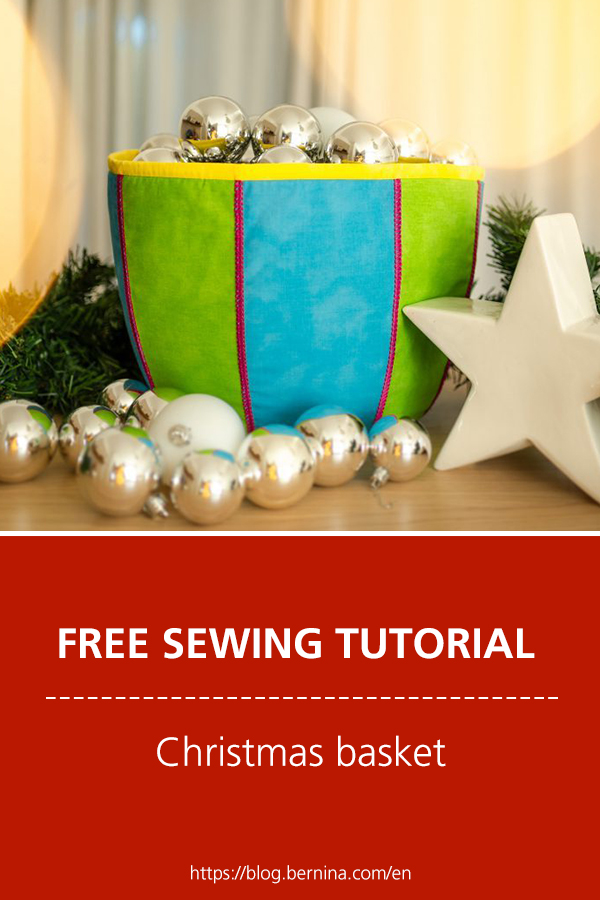
Christmas is always a time of warmth, full of cozy and pleasant moments. We gather with our loved ones and spend time together. The season can sometimes be quite hectic – you need more space than usual, and you often find yourself looking for handy storage, for example to tidy up your knitting accessories or gather your presents. I am going to show you how to sew a basket that will perfectly fulfill this purpose. In keeping with the theme of this year’s Blog Advent Calendar, it is sewn in a vibrant color-blocking style.

Sewing a basket | The pattern
As you can see in the picture above, the basket is of a decent height. This way, you can fit a little bit more inside – and it won’t just end up being used as a bread basket.
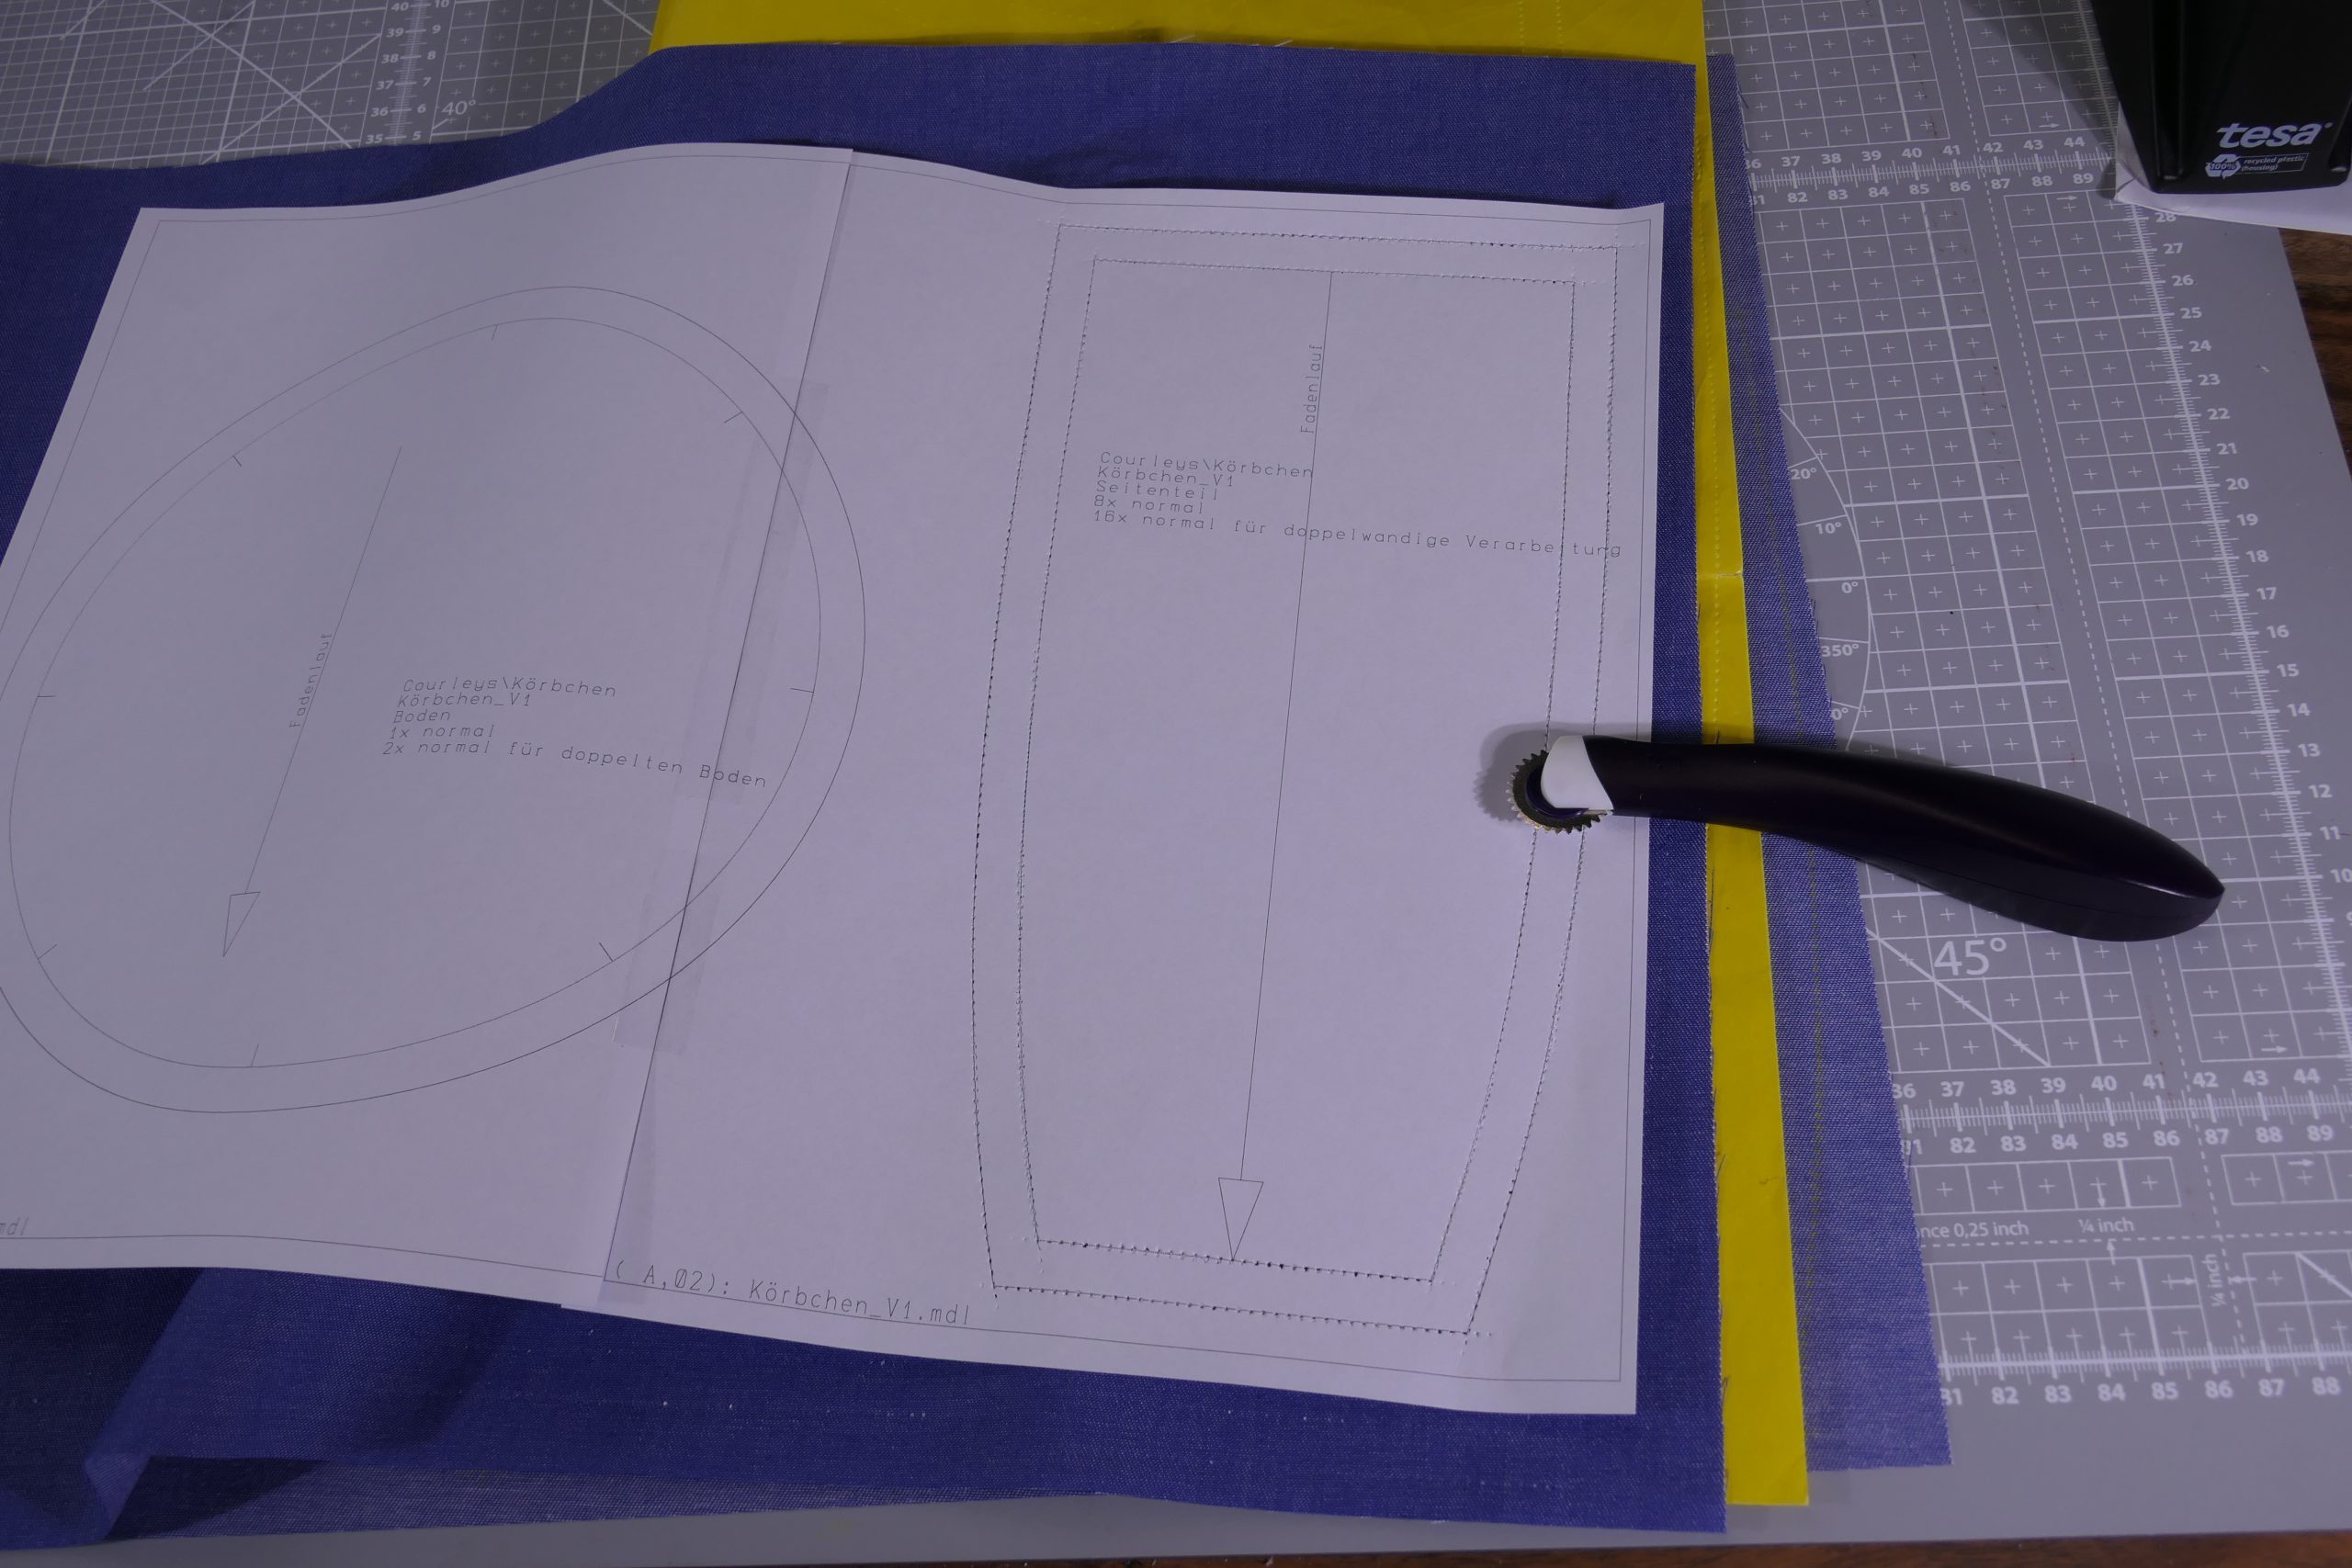
To create a proper basket, you will of course need the pattern. You can download this in A4 format via the following link:
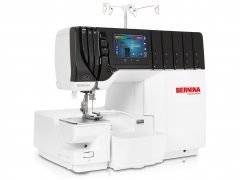
In this project, both the sewing machine and the overlocker are used. In my sewing instructions, I will show you the individual steps in detail and will also discuss the options provided by my BERNINA L 890.
Required materials
In addition to the pattern, you will need fabric. The amount will vary depending on what will be cut out, and in which color. However, a half meter in total is enough to sew the basket.
In addition, you must have a copier wheel on hand, along with carbon paper, and thick overlocker thread in a suitable color.
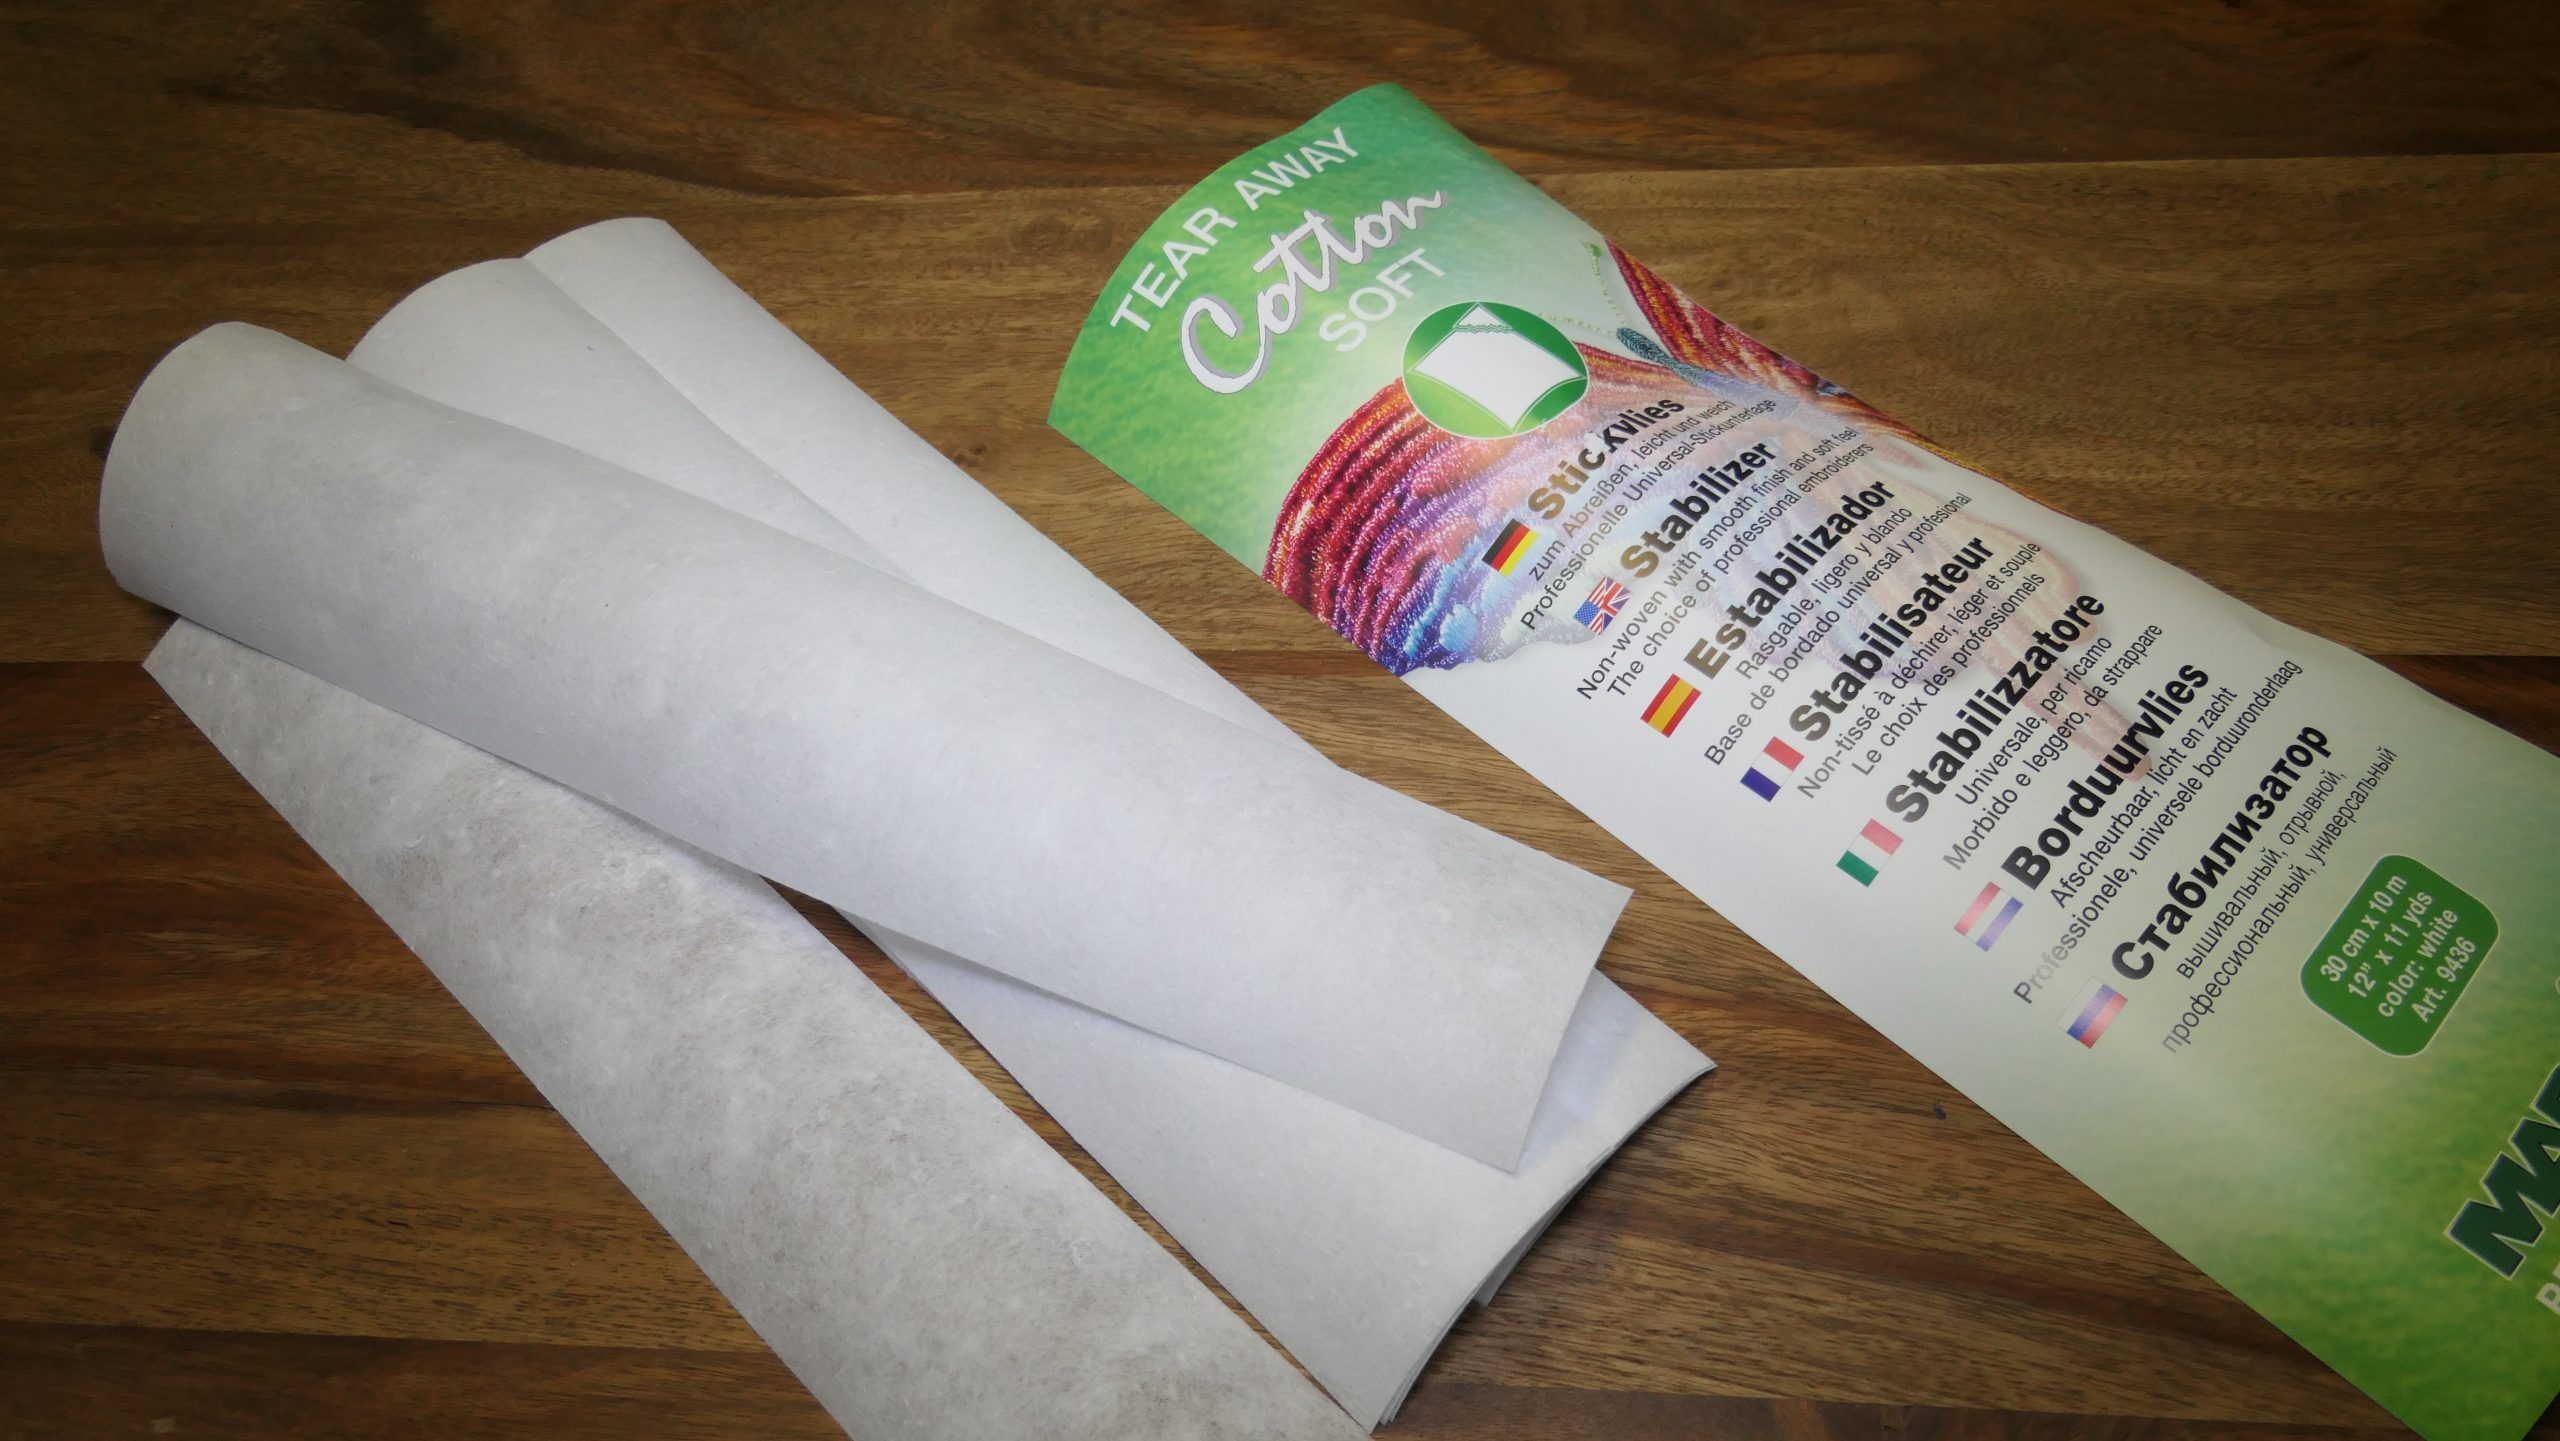
I also need a half meter of Style-Vil and a half meter of fabric for the inside of the basket. I also need embroidery stabilizer so that I can sew around the side of the thick overlock seam at the end.
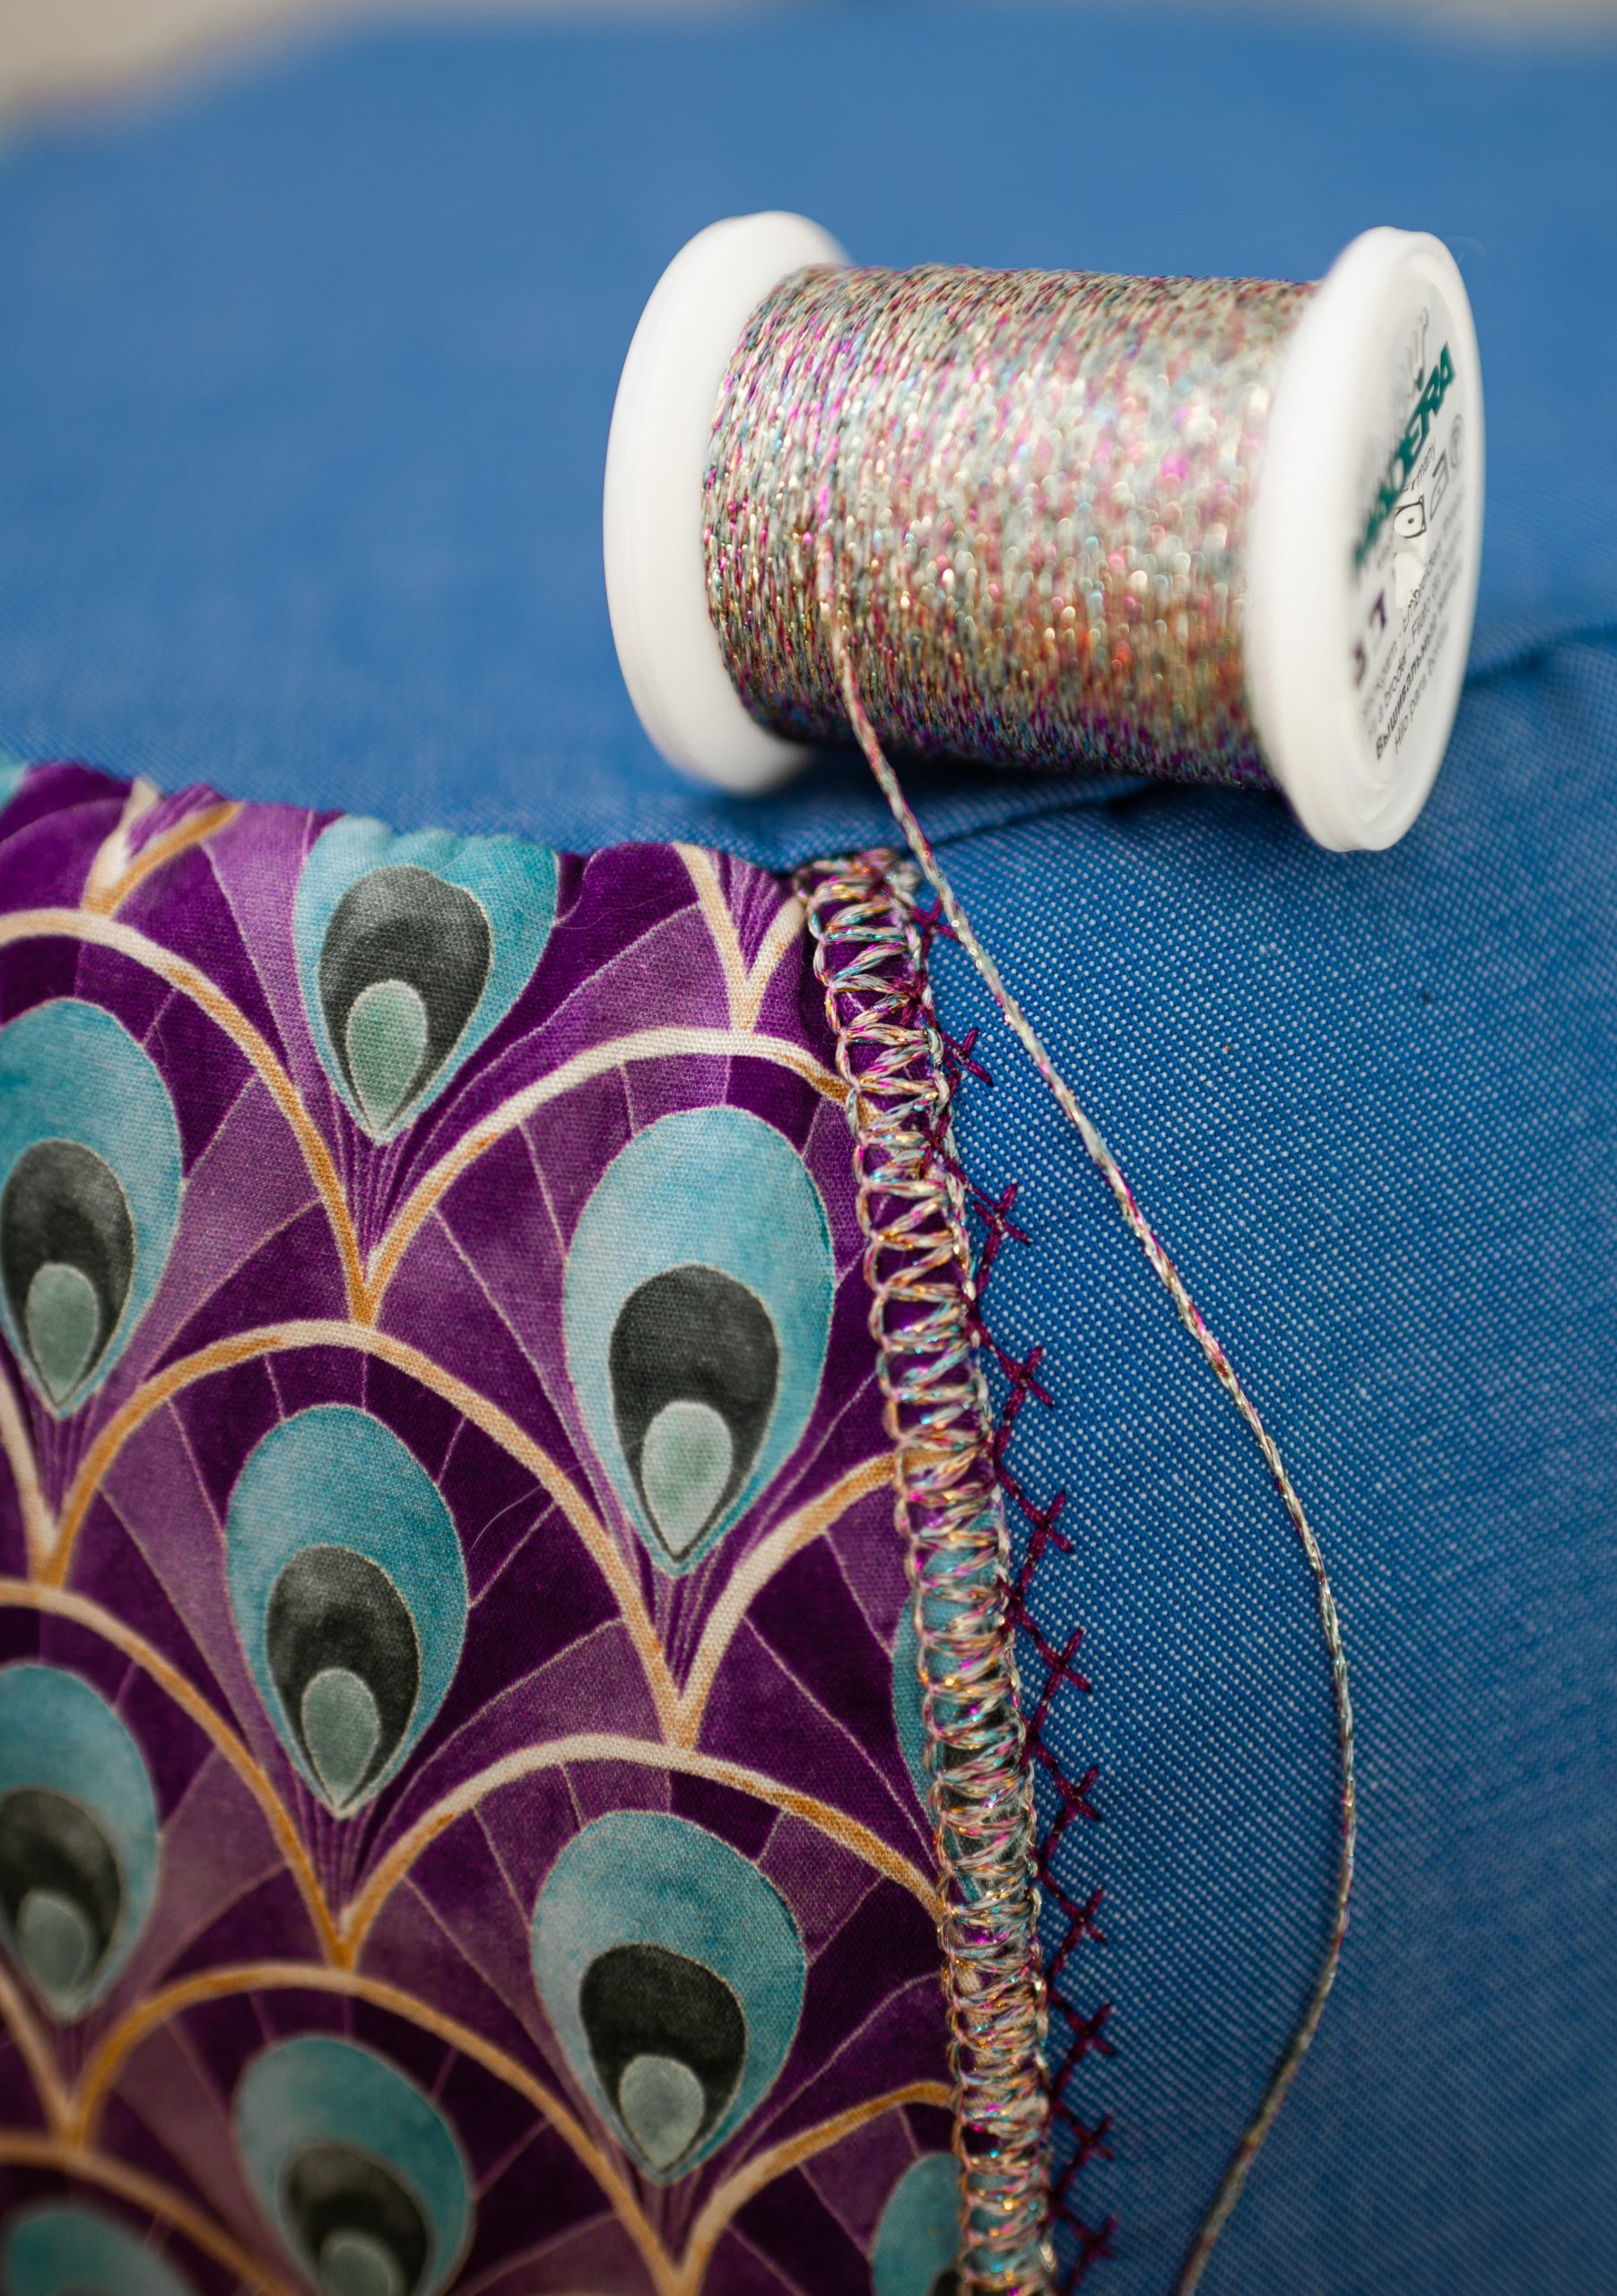
I’ve sewn two baskets. For one of them I used the Glamour thread from Madeira. The basket, in a color blocking style, has been given a very simple embroidery twist, which is threaded in the same way as the Glamour thread.

Cutting
First, all the pattern pieces are attached together and cut out. The seam allowance of 1 cm is included. The lines are then transferred to the fabric using the copy paper. Since we are creating a circular container, where everything must fit precisely together afterwards, it is important to know exactly where to sew. The colored lines help us to do this.

For this, I lay my fabric with the right side facing down. Then I put the carbon paper with the colored side on top of it. My pattern goes all the way up. Now, by moving along the lines with the copying wheel, I have transferred all the lines onto the wrong side of the fabric.
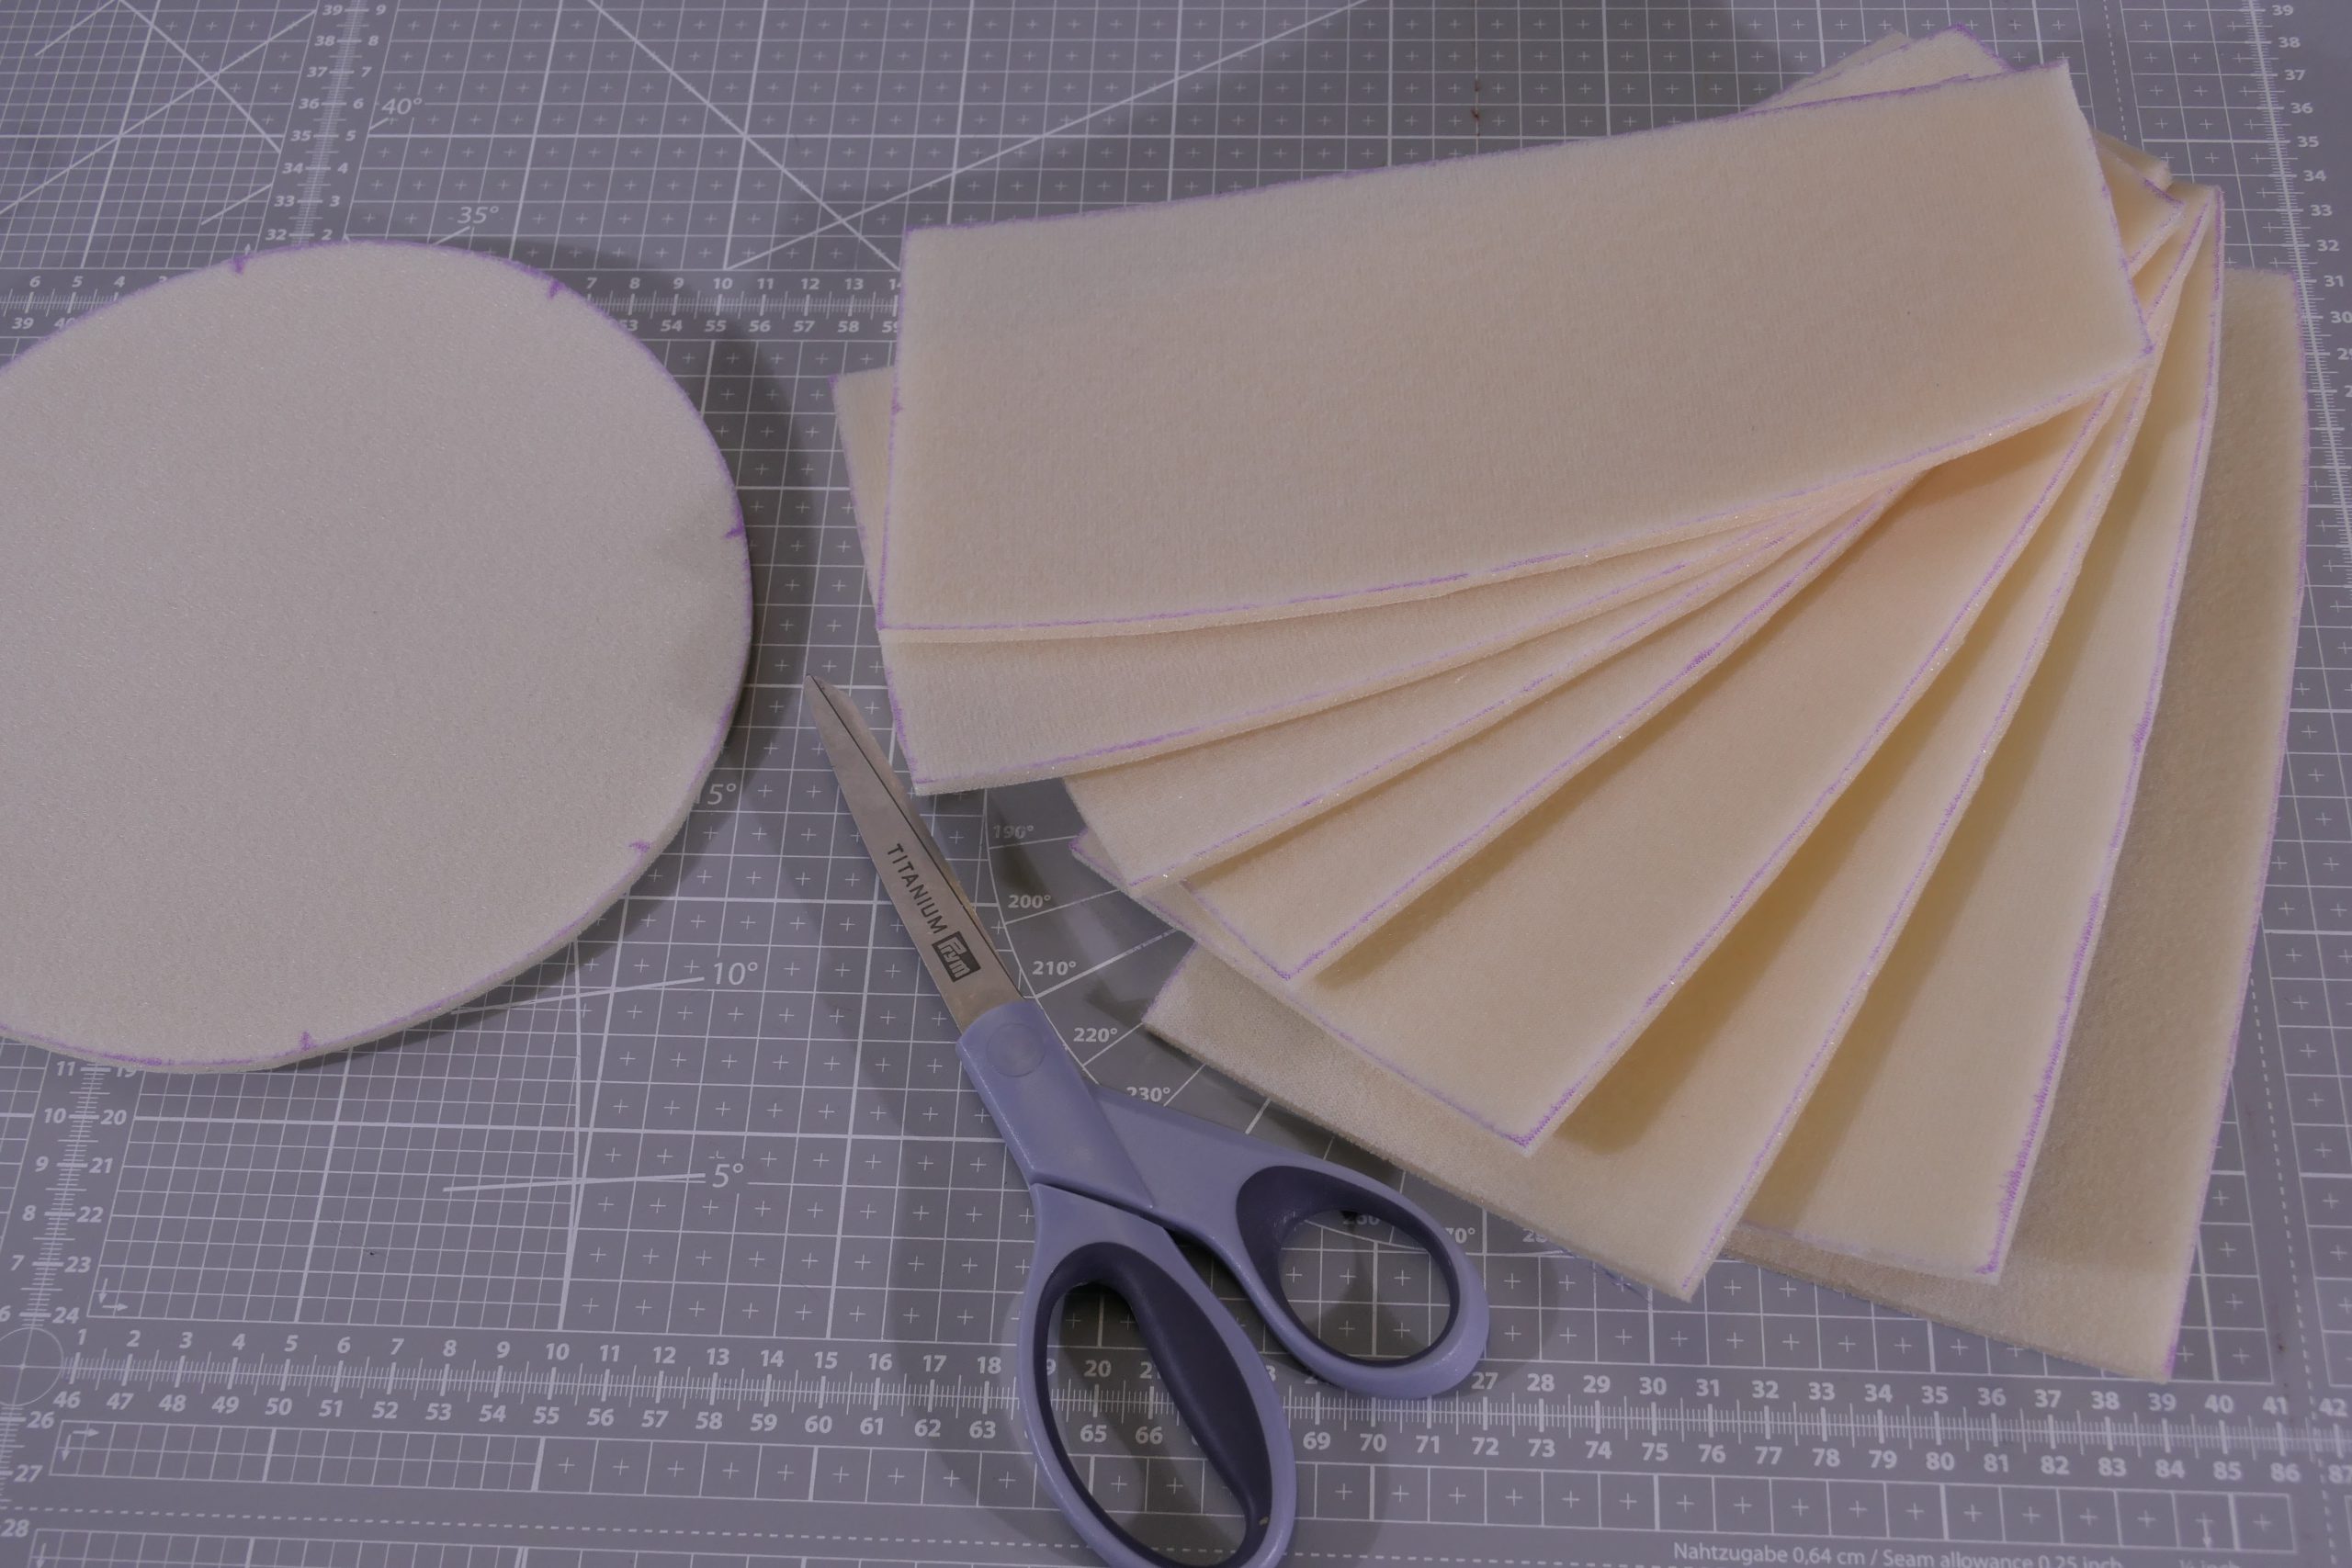
The lining is cut out in the same way as the outer cover, only here I cut out the Style Vil without a seam allowance.

If my carbon paper is not clearly visible on the Style Vil, I simply go over all the lines with a darker water-soluble pen.

My cut out fabric now looks like this; the outer basket is on the left and the lining is on the right:

And here are my Style Vil pieces:
Sewing the basket | The inner basket
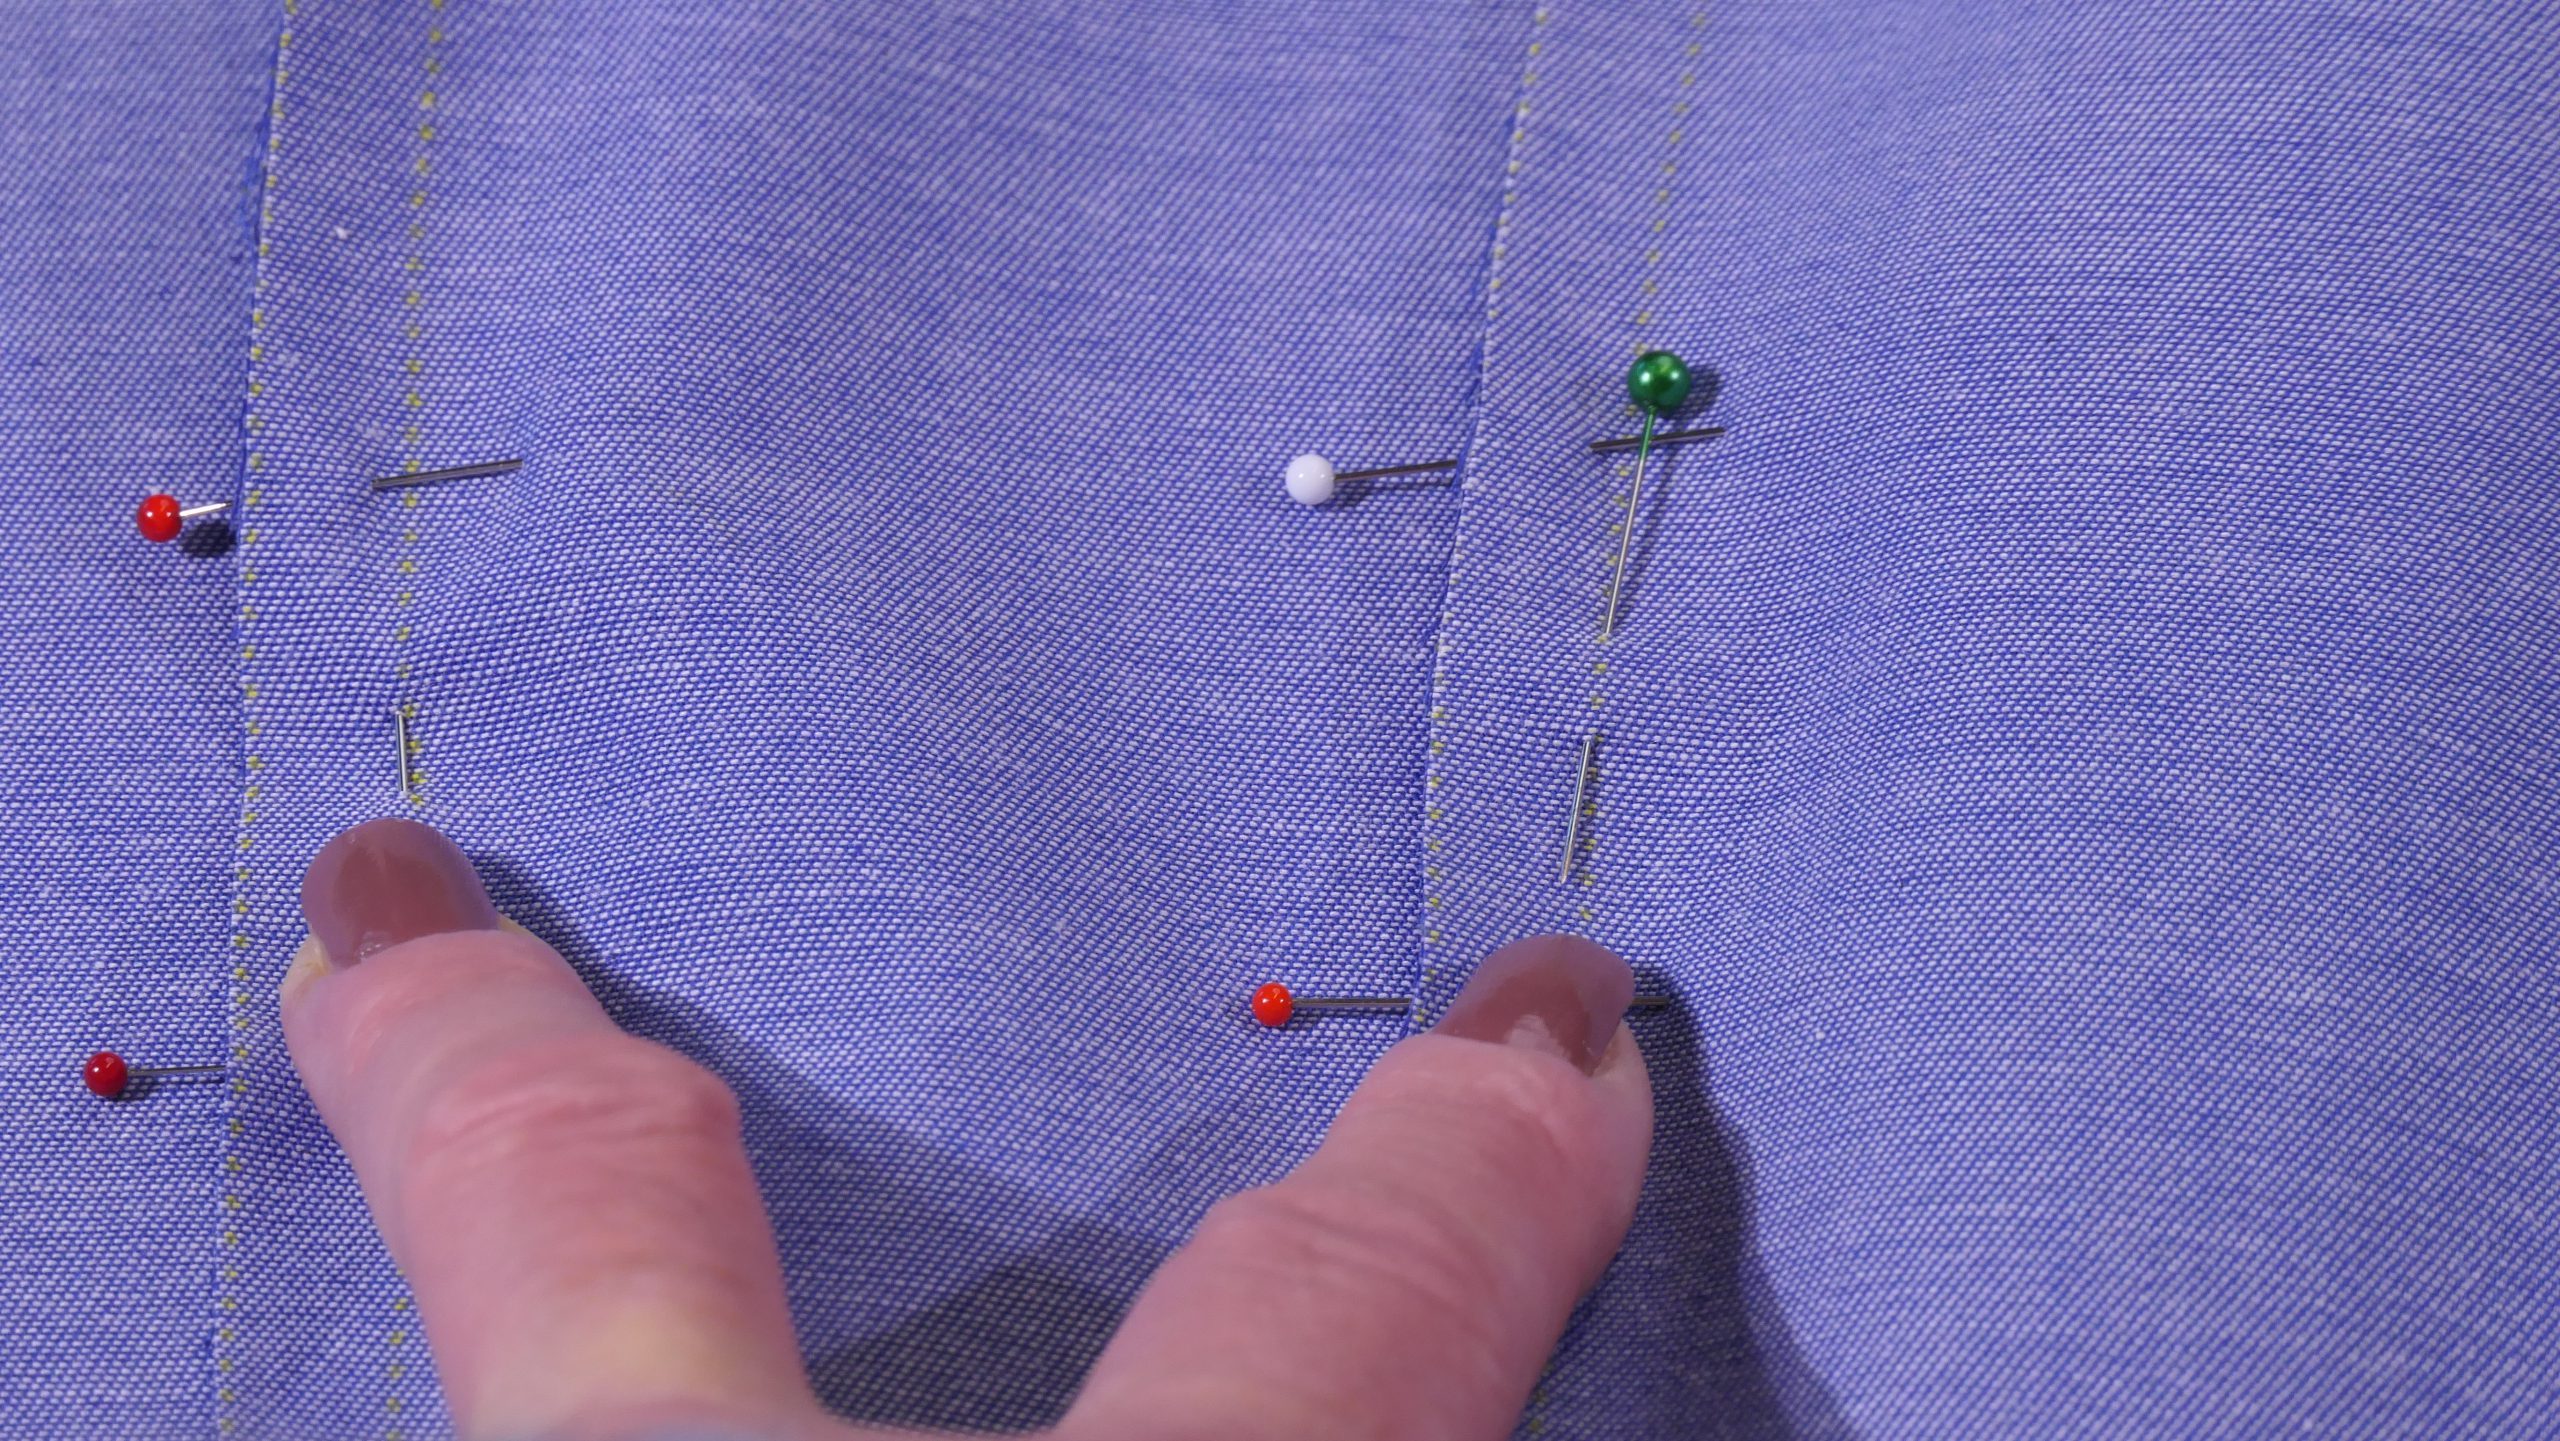
I pin all the parts of the inner basket together (right sides together). When doing this, make sure that the pieces are all narrow at the bottom when placed together and that they become wider as they go up.
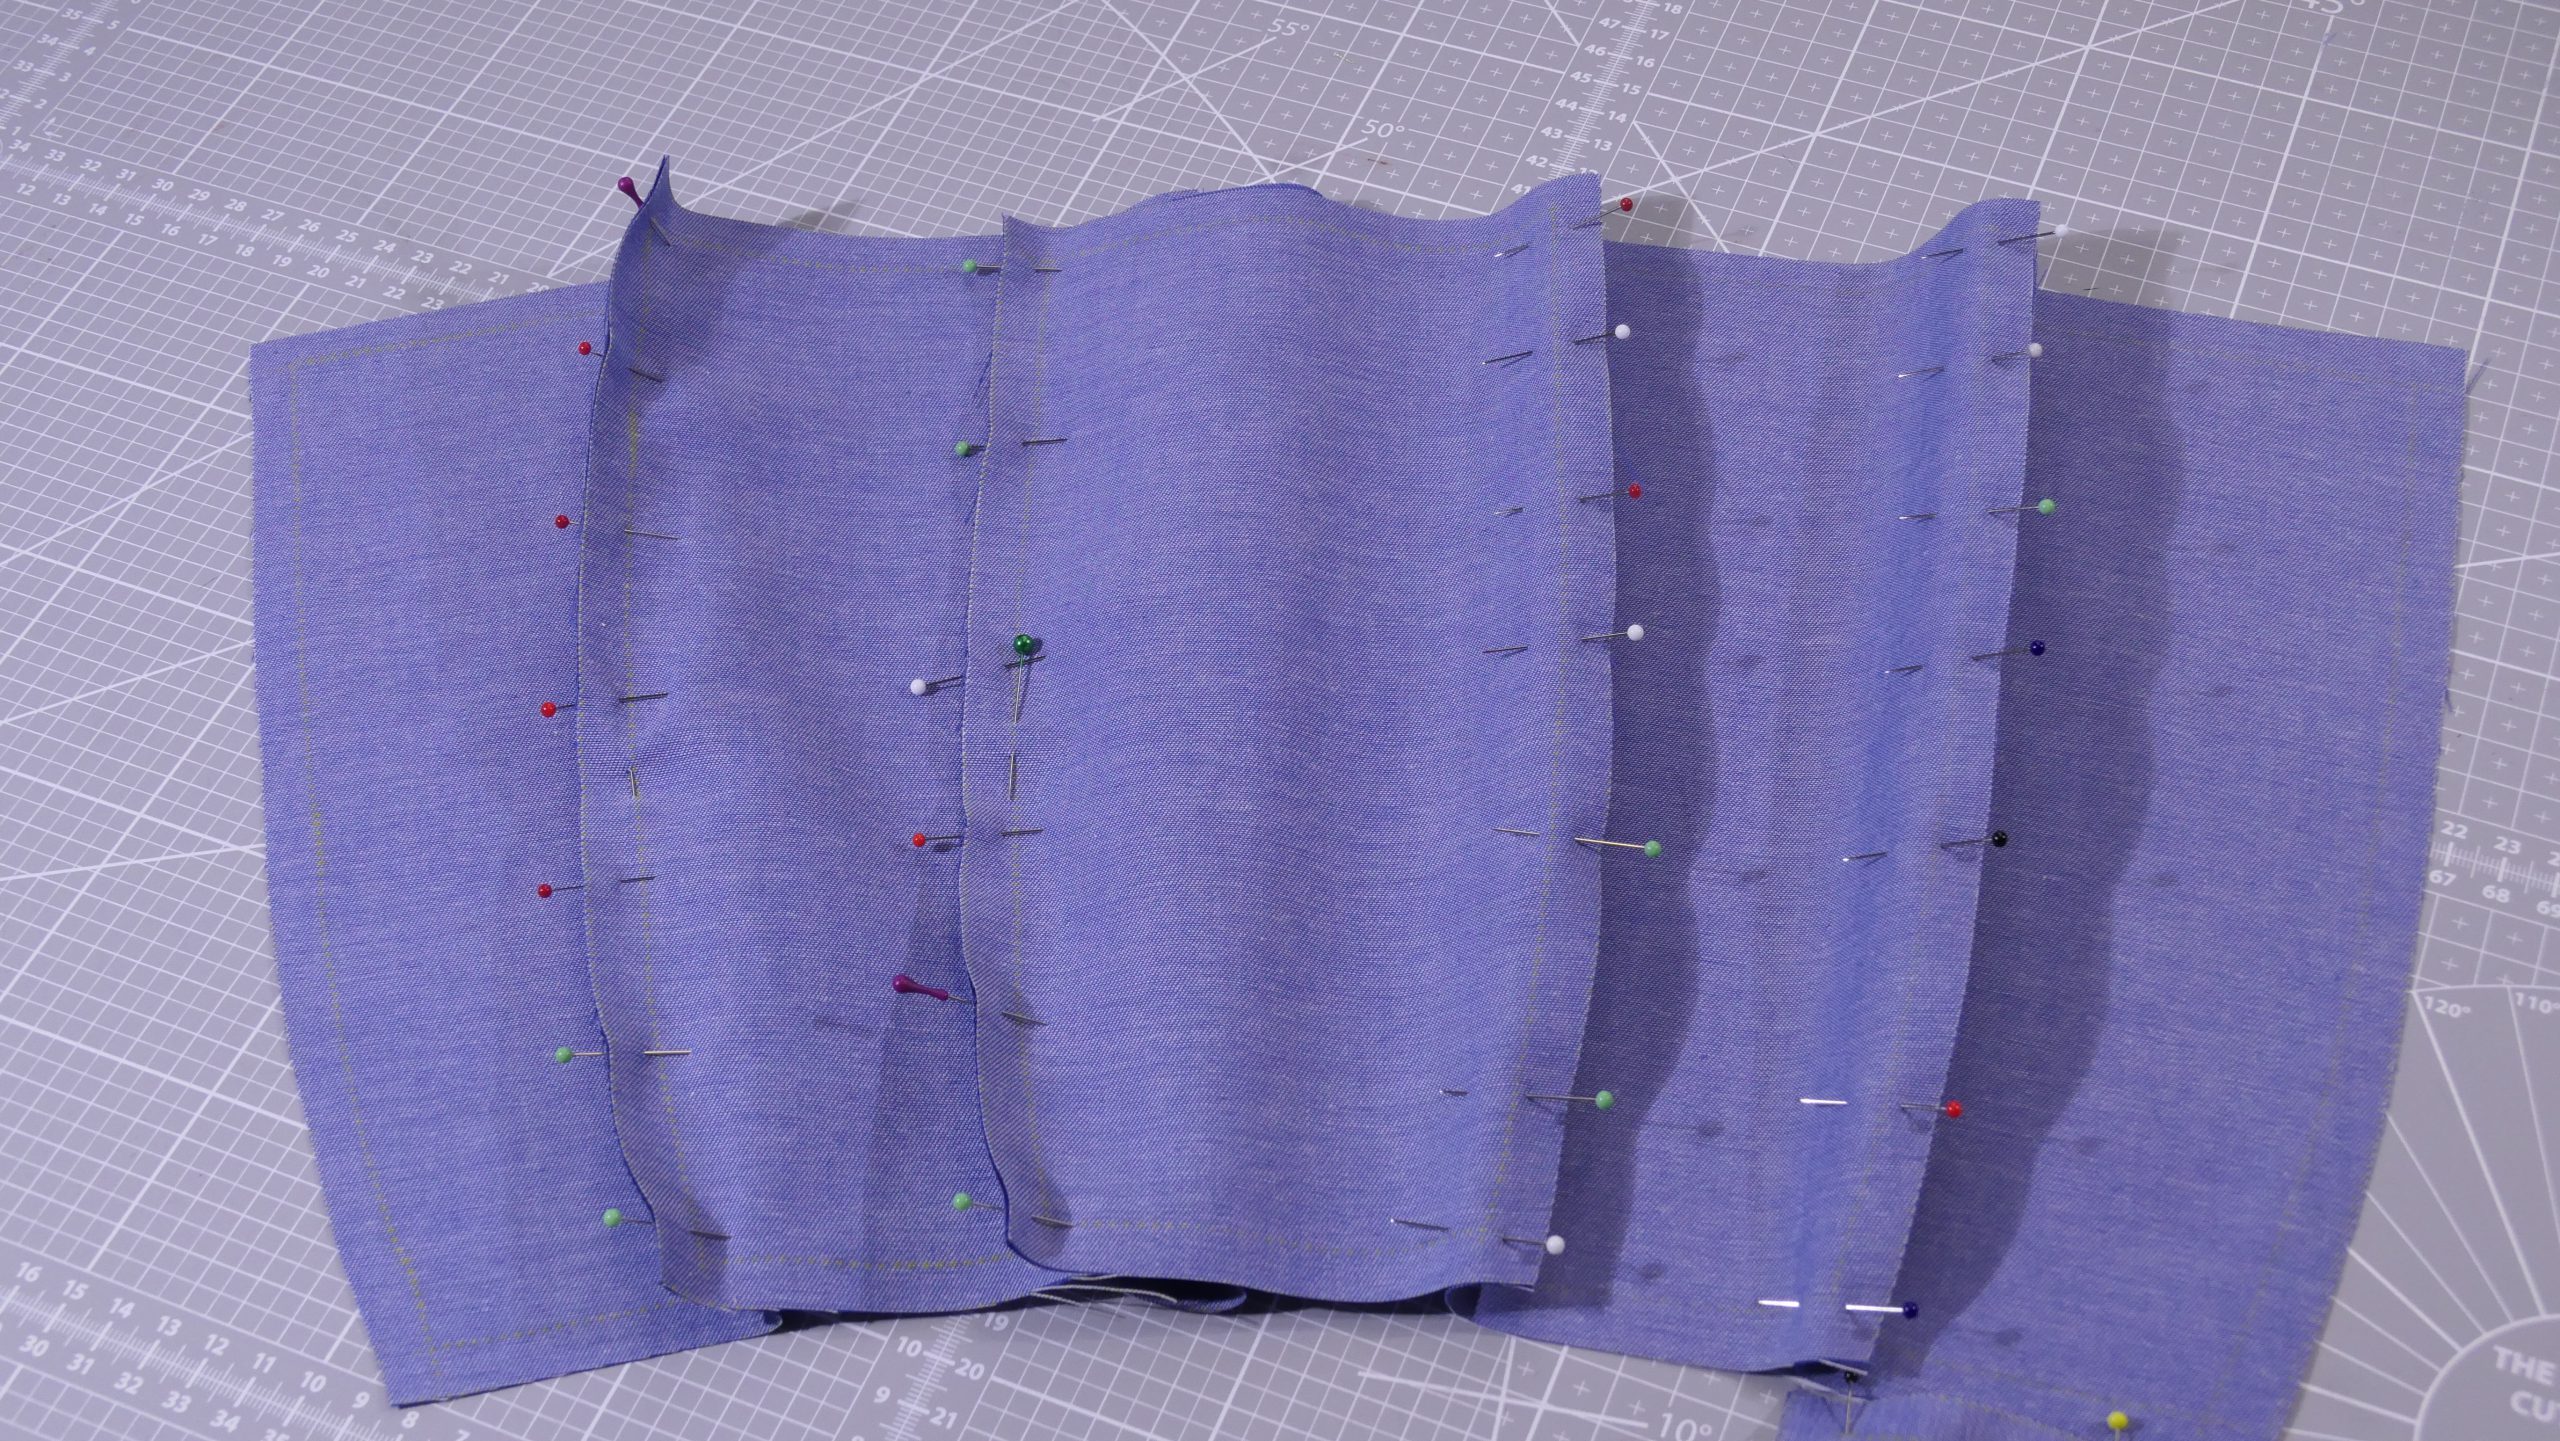
You must sew precisely along the line:
I sew this together on the sewing machine using a simple straight stitch. Then I iron the seam allowances neatly apart.
After ironing, I close the last seam, which I then iron, as this is easier.

In order to make the bottom of my basket as tidy as possible, I lay out my bottom pattern again and use needles to indicate the markings.

Now I can place my inner basket on the bottom with the right sides together. The needles are my markers, whereby the seams on the side have to meet the needles.
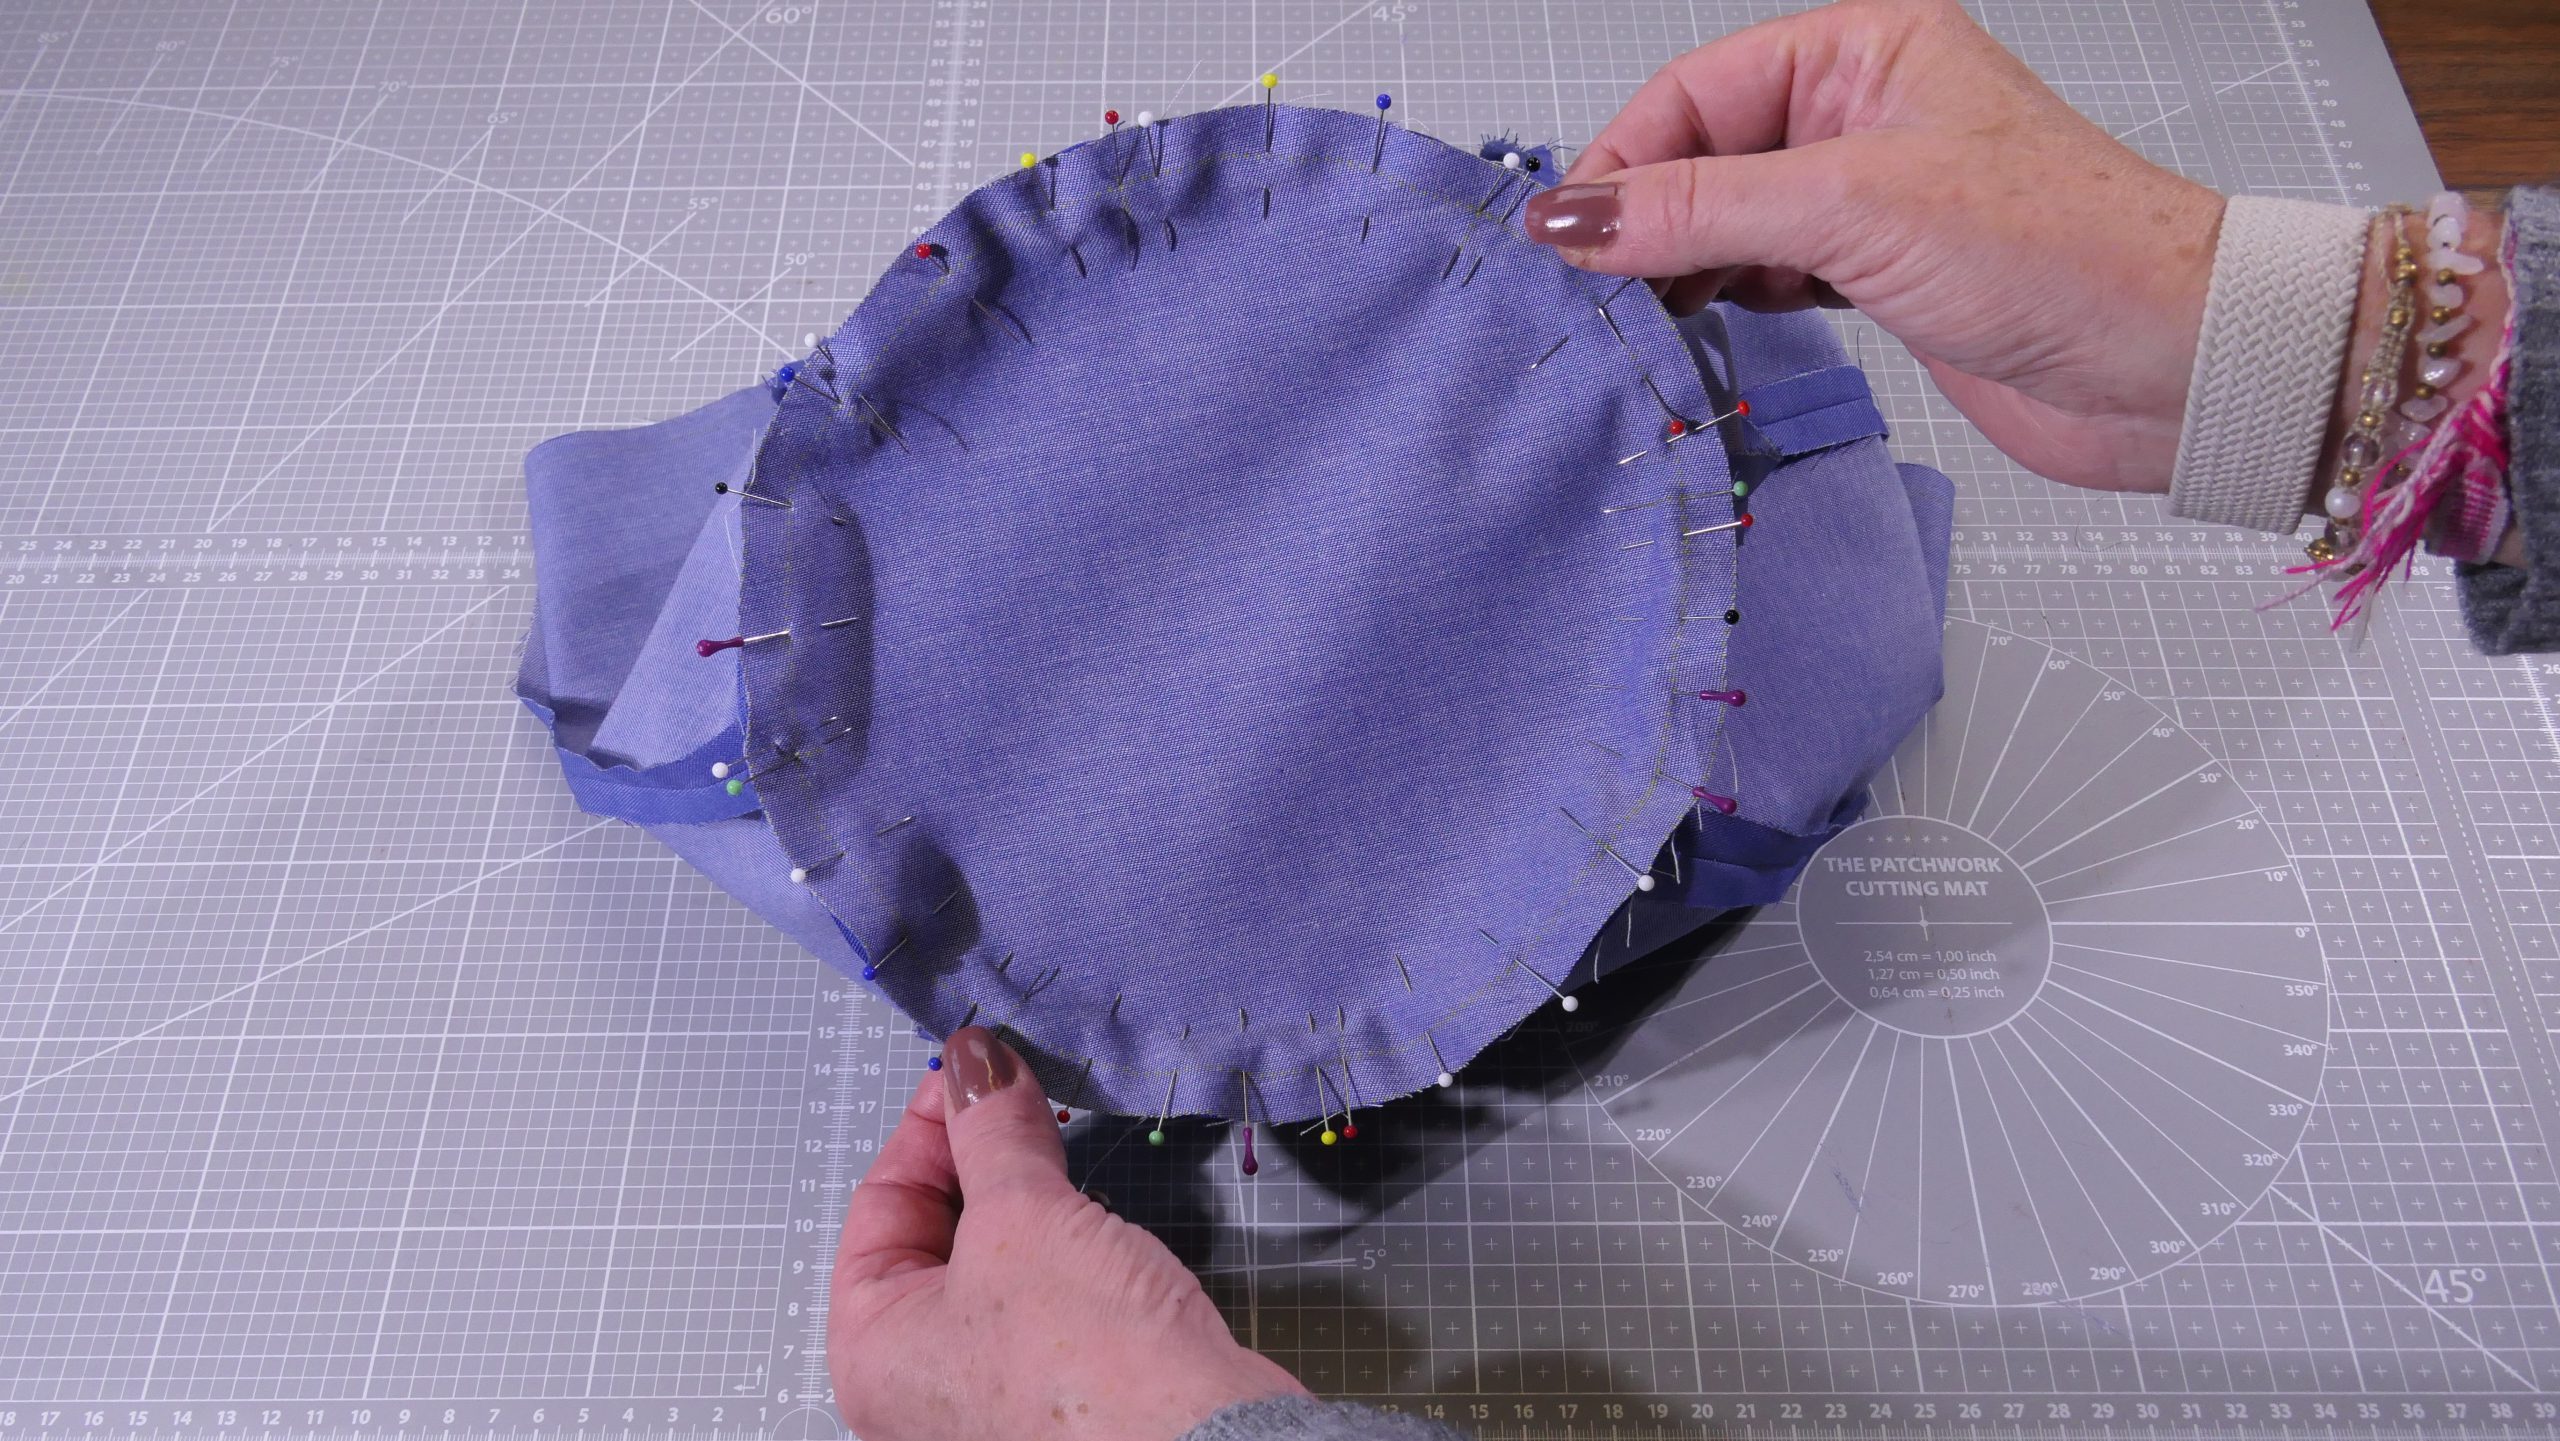

In order to ensure that everything is sitting nicely, I kink the seam allowance at the bottom slightly
Sewing the reinforcement
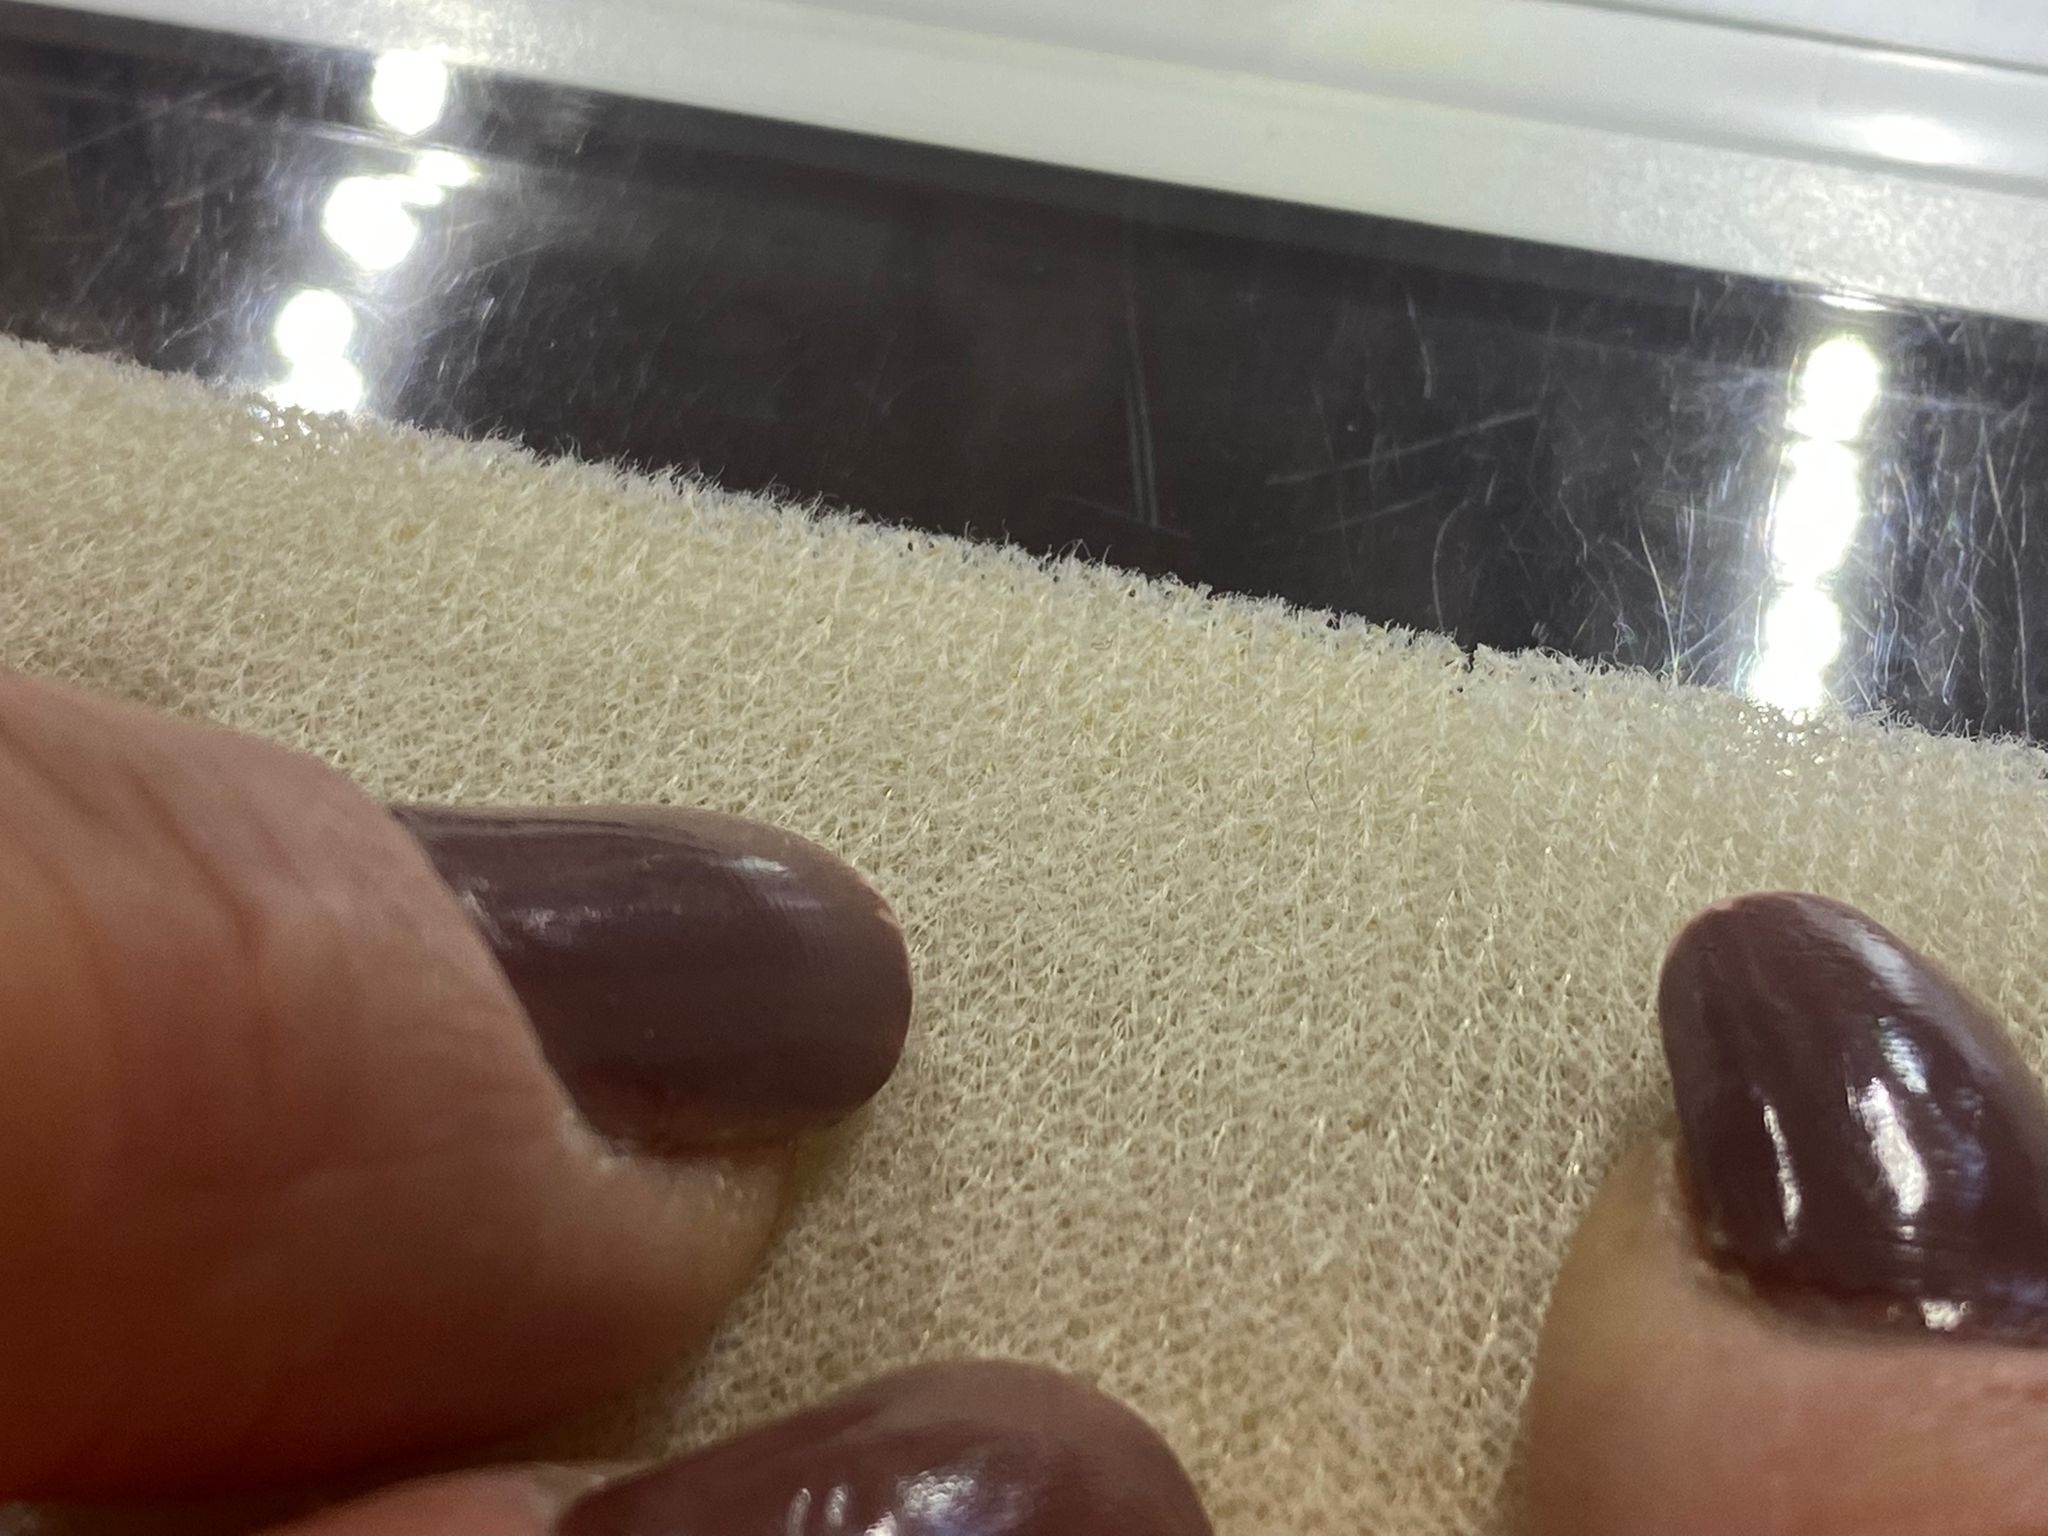
In order to be able to sew the Style Vil neatly, I make sure to use Edgestitch Foot #10.

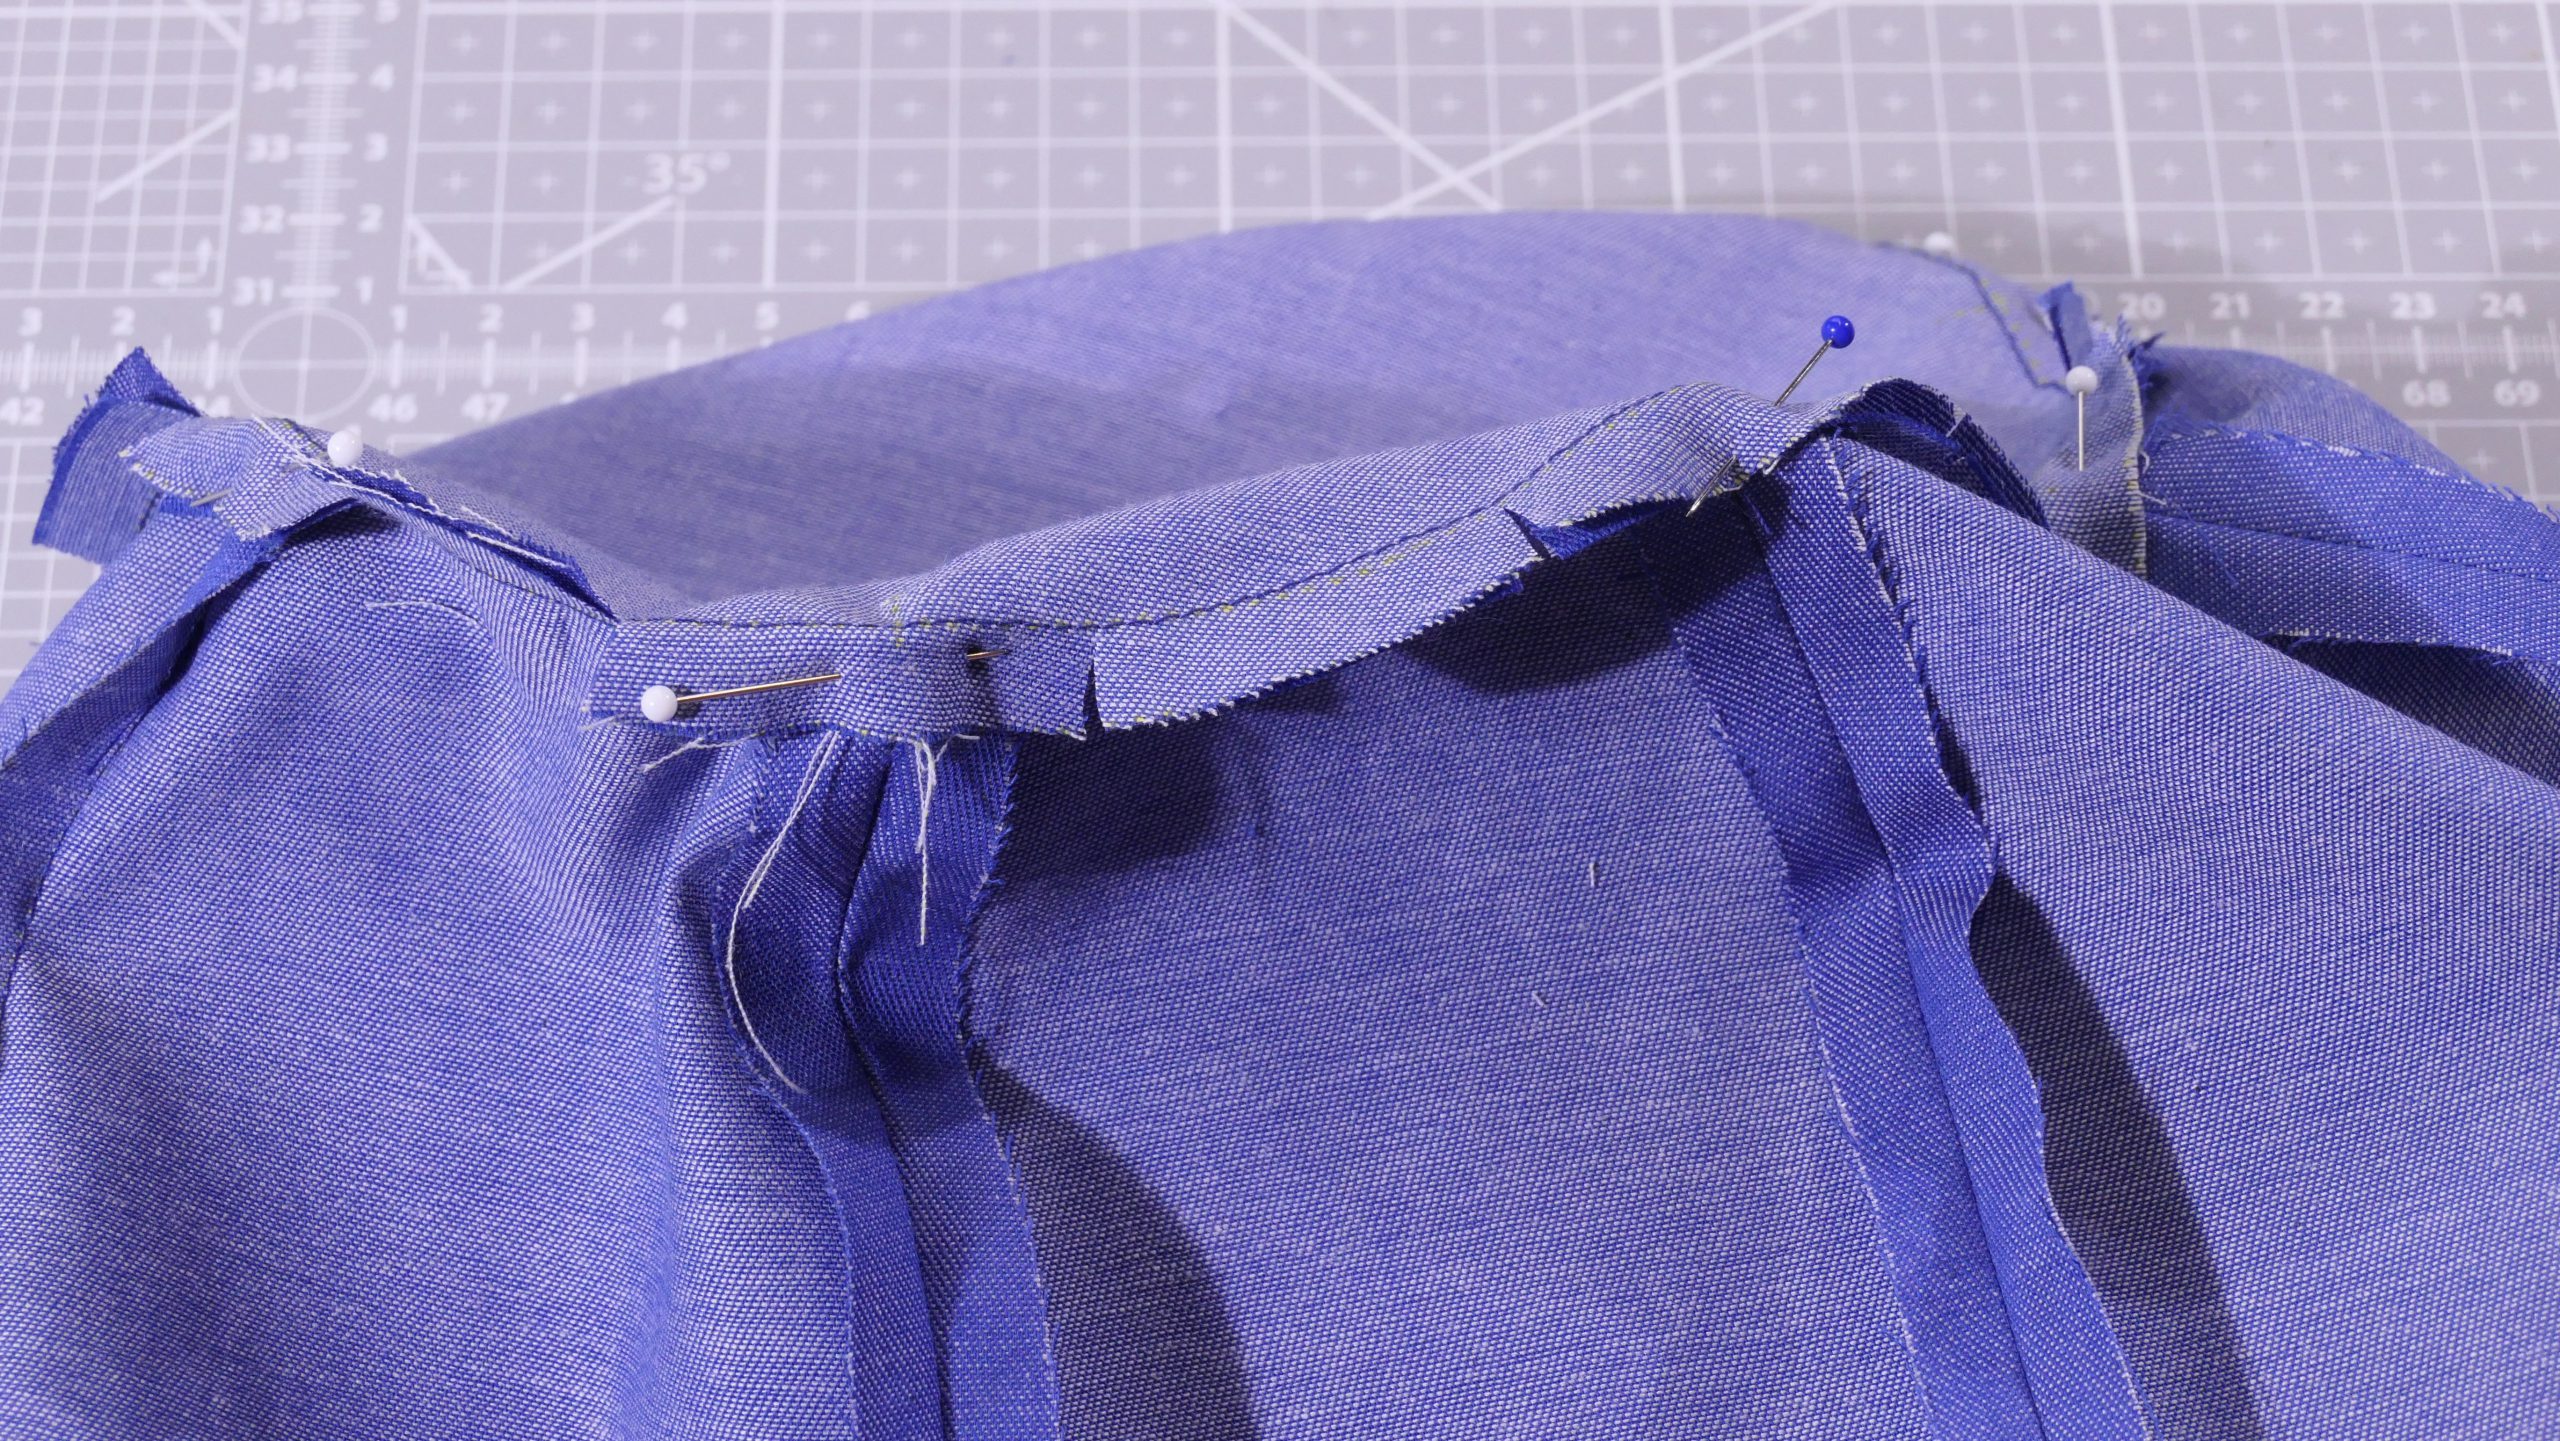
Thanks to the small guide at the front, I can push my two pattern pieces to the middle and everything is sewn neatly. It is important that both cut pieces actually start together. A one-millimeter shift in each cut piece can make the basket uneven.
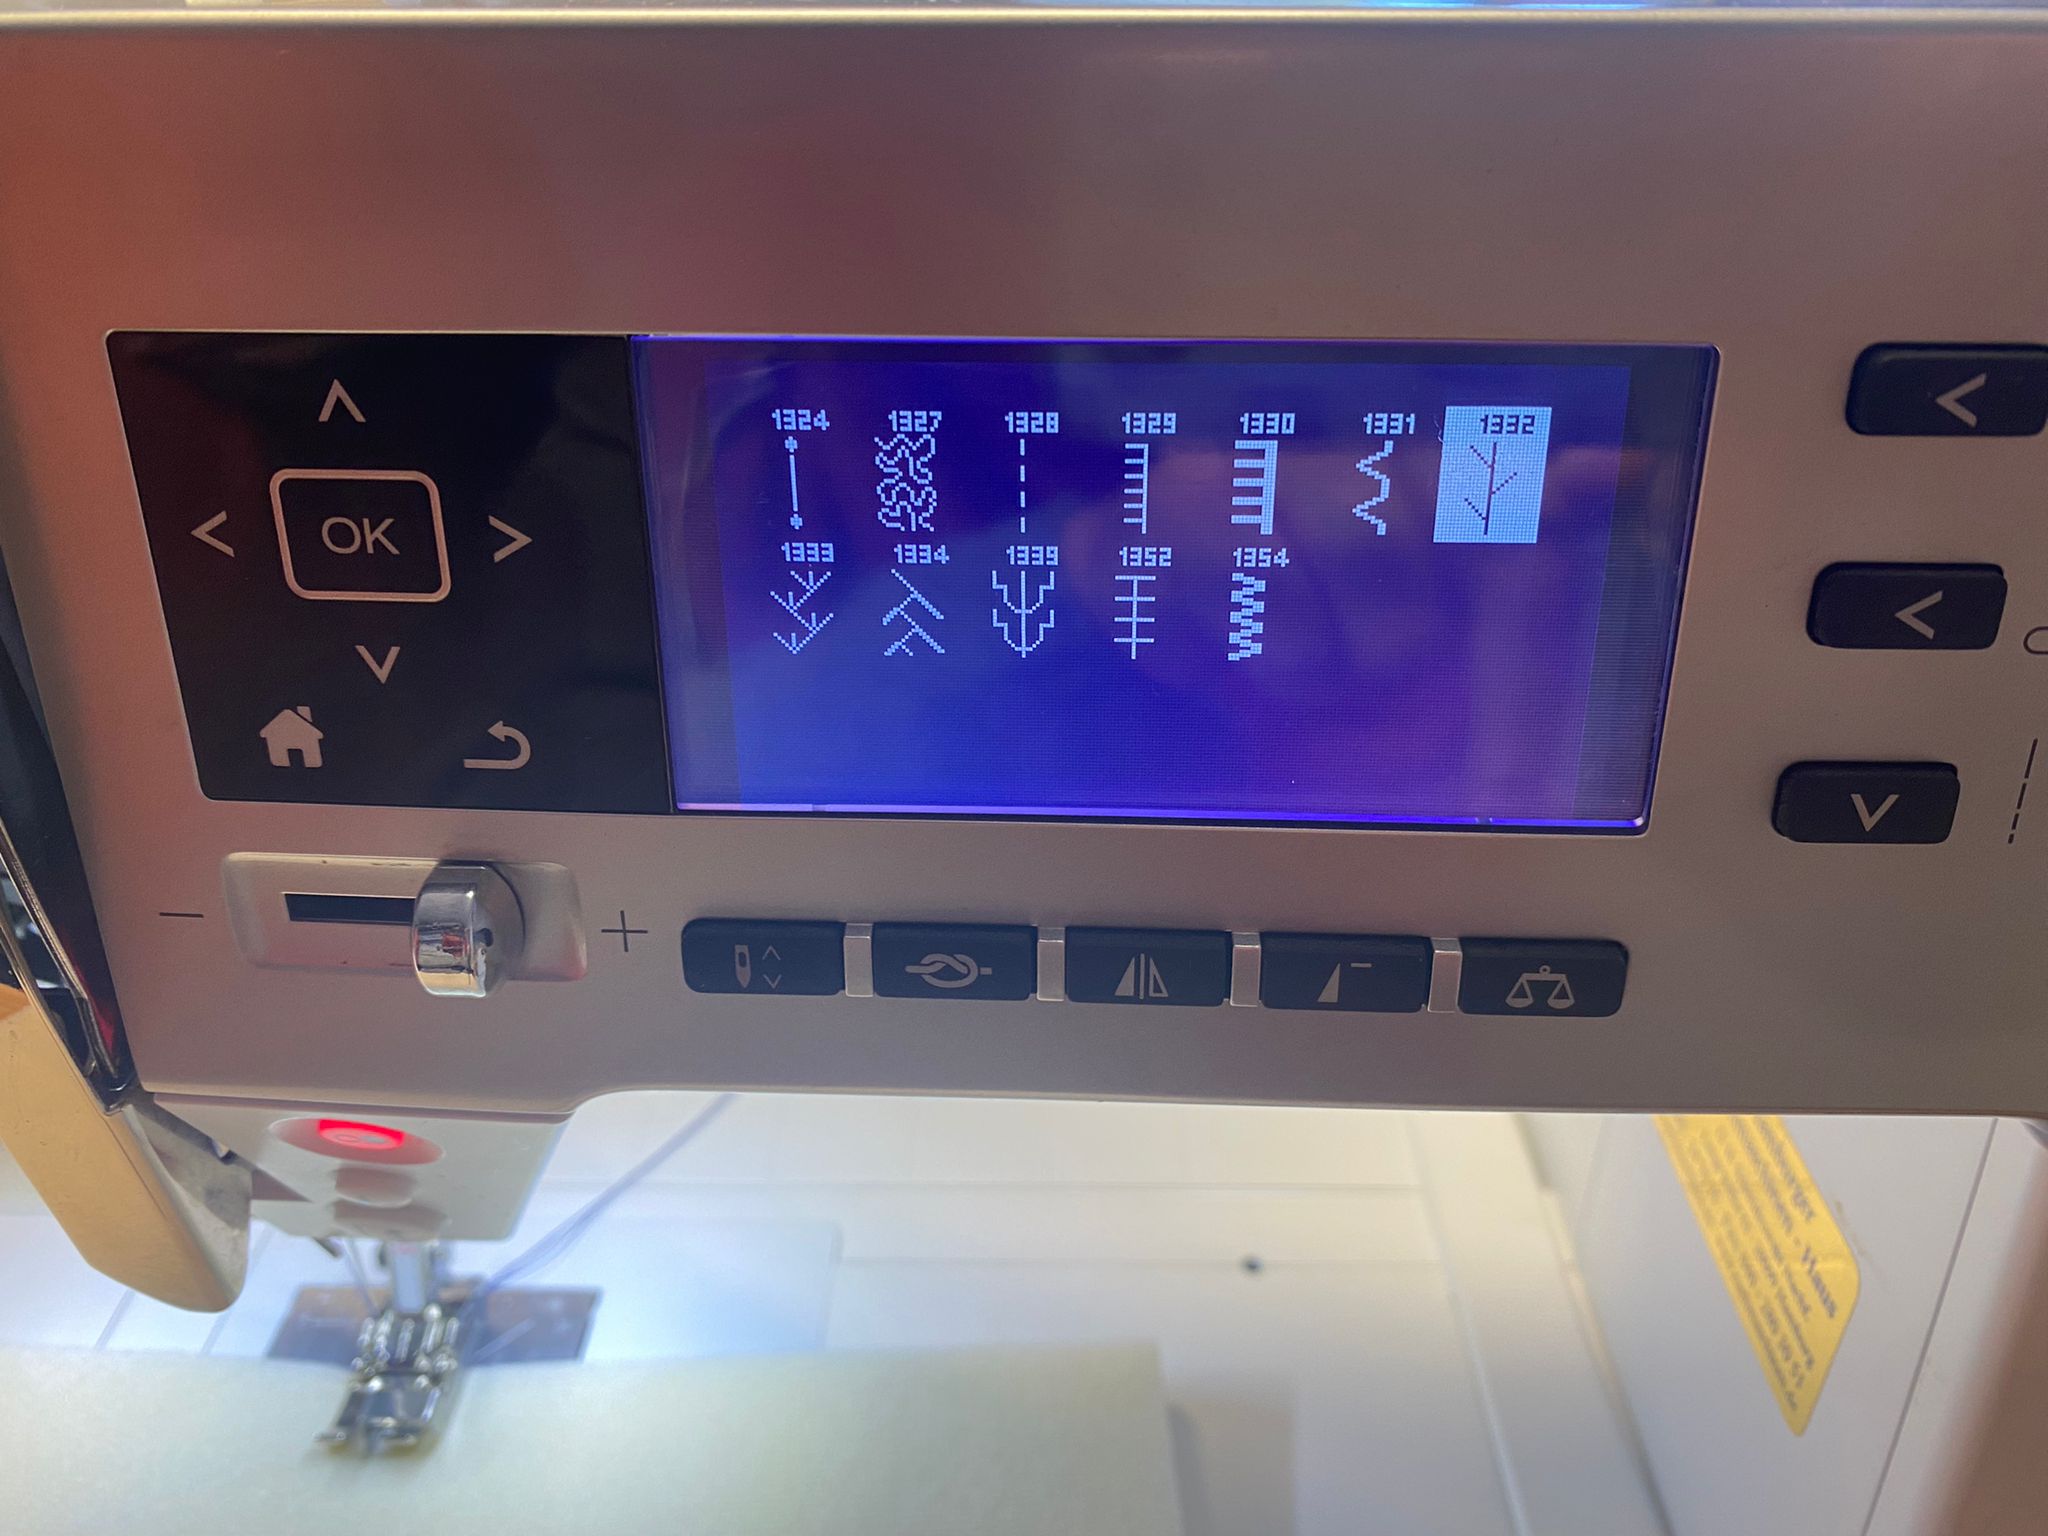
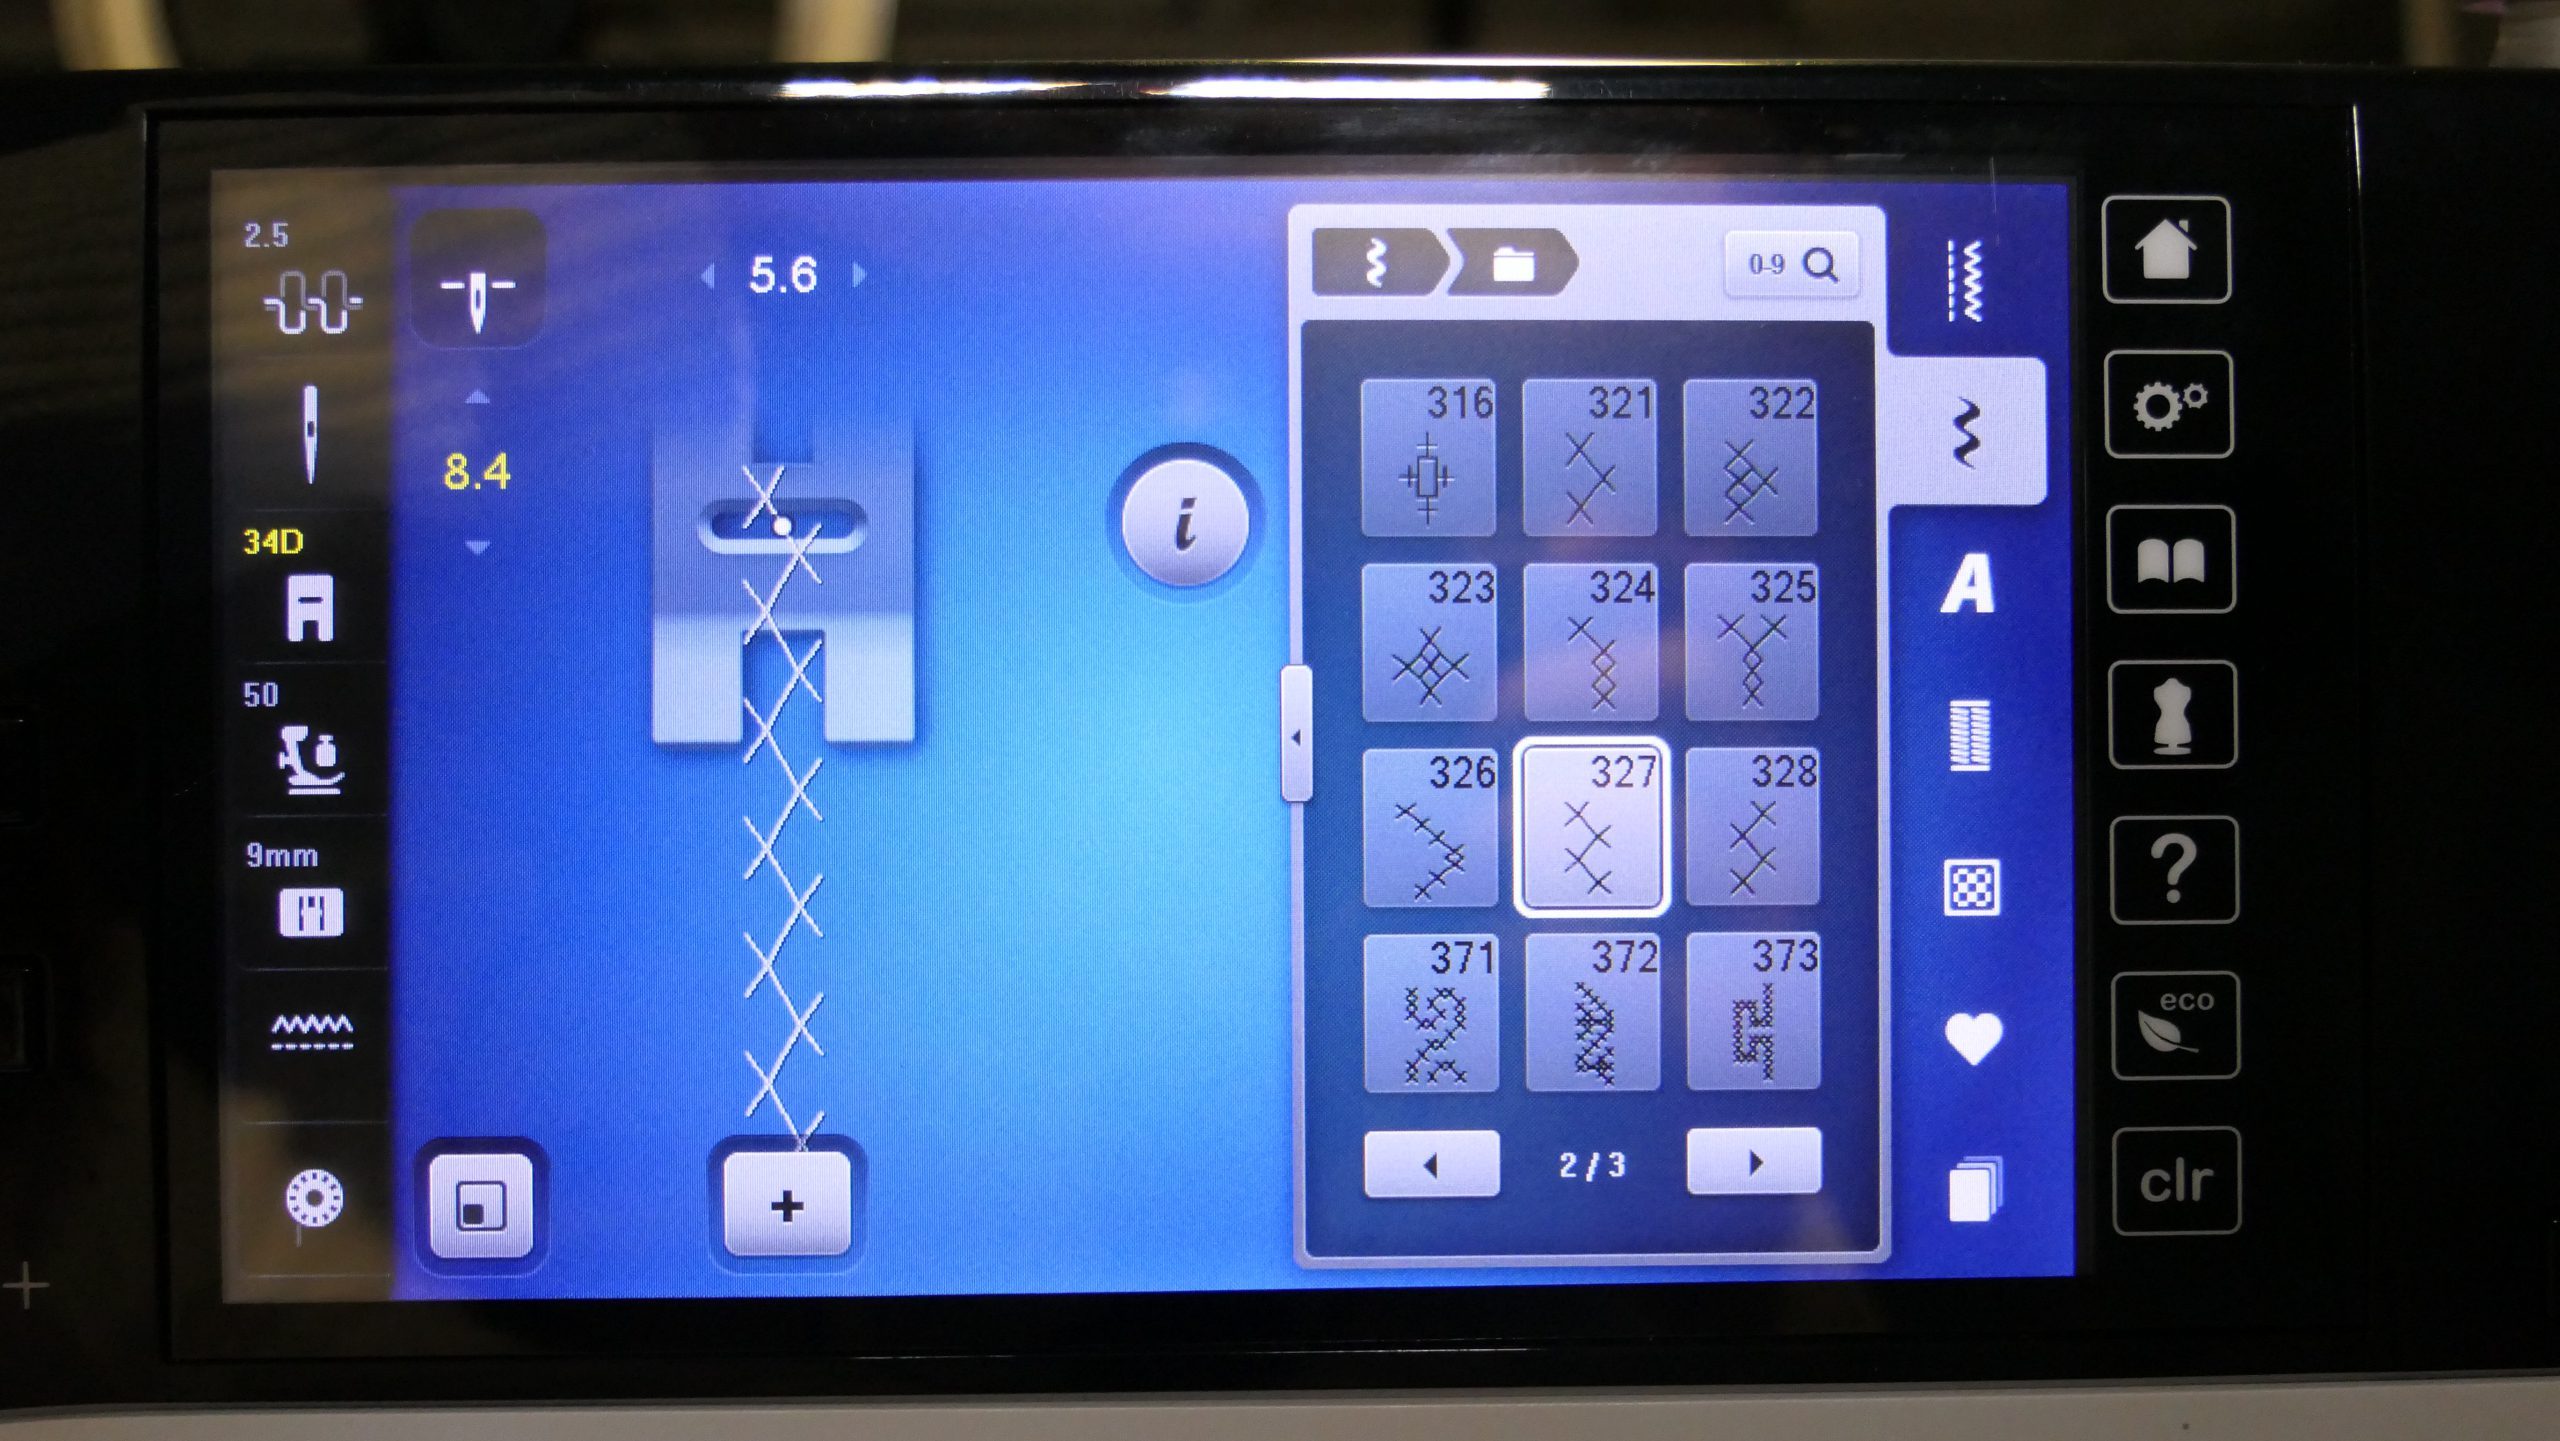
I can choose any stitch that works with the width. I have used stitch no. 1332 on my BERNINA 530, but any other stitch would be suitable as well.
The B 530 is a 5.5 mm machine, i.e. the stitch width is 5.5 mm. When sewing in both directions, this 5.5 mm stitch width means that I only reach 2.75 mm to the left and 2.75 mm to the right. If I sew the same seam on a 9 mm machine, I can of course achieve a 4.5 mm width in both directions.
I now start the bottom in the same way – I place my pattern back and mark the seams. I then sew the bottom using the same stitch. It gets pretty fiddly towards the end, but the result is worth it later on.

I can now push the lining in my reinforcement – the first milestone has been reached.
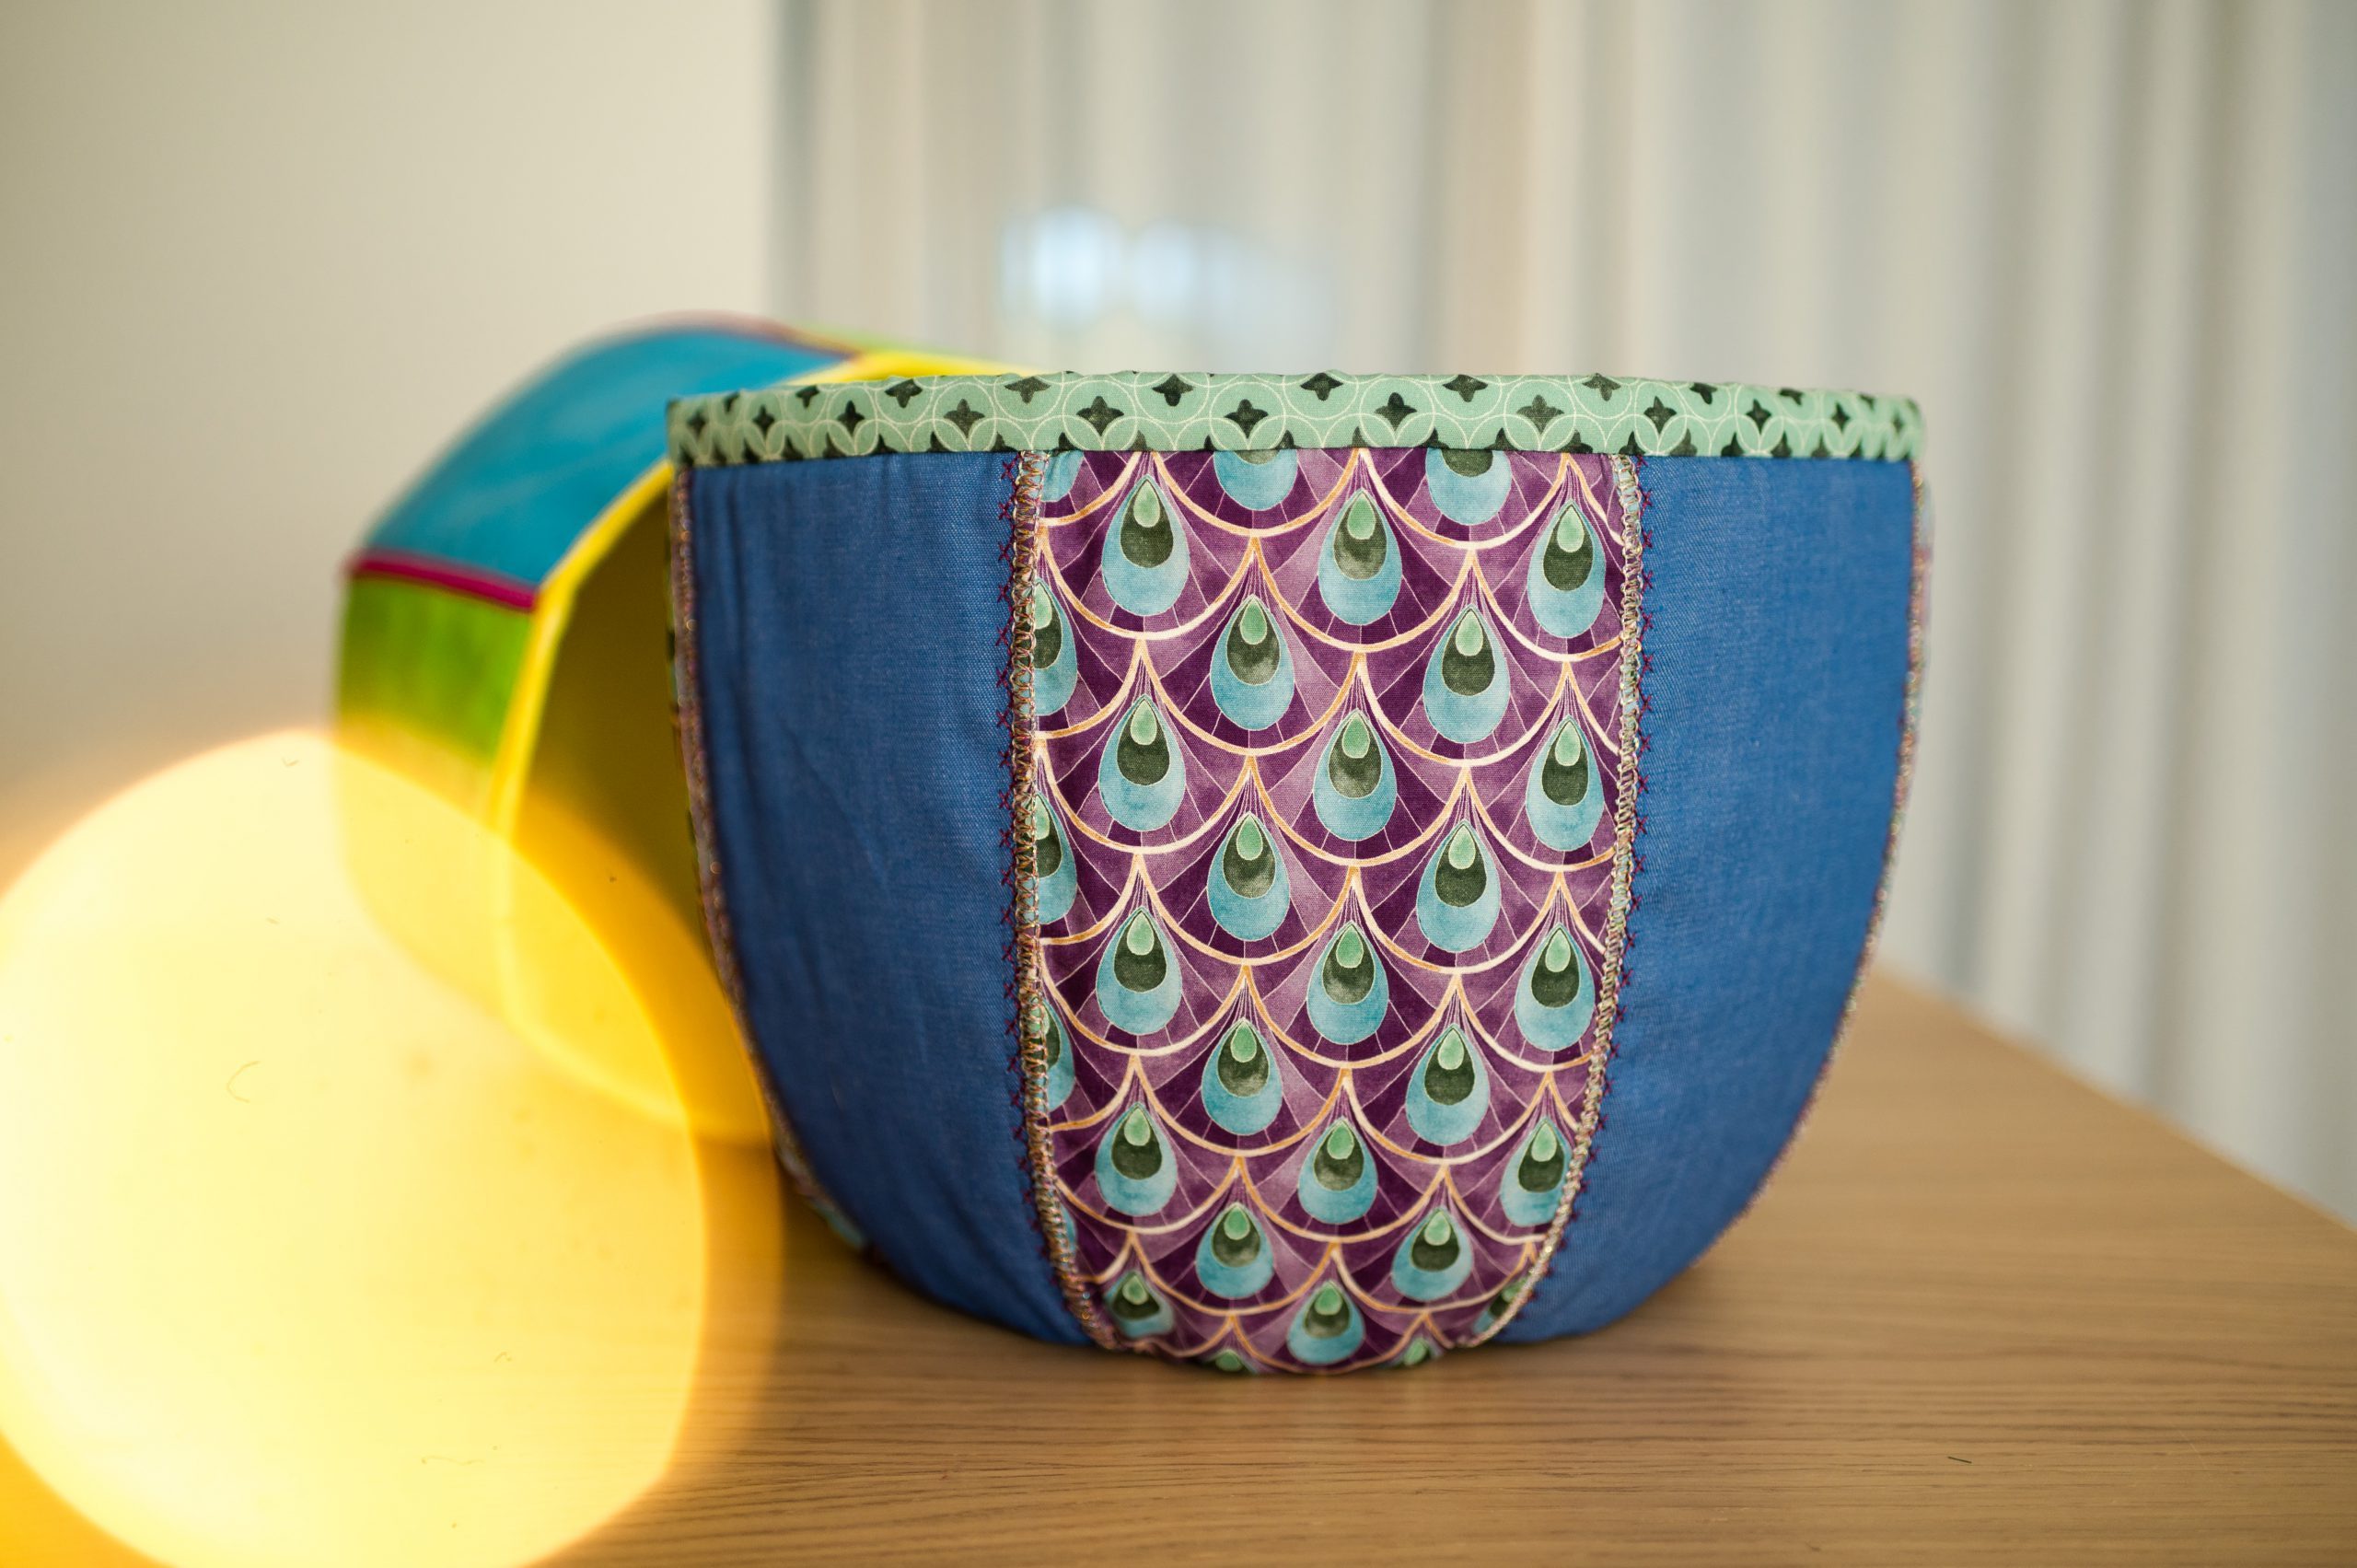
Sewing the outer shell
For the outer shell, I always alternate between sewing two fabrics – one blue and one patterned. The Glamour thread goes in between, and it should of course run through the BERNINA L 890. So, I thread it in. The thick thread should not pass through the air threader channels, and because I can’t yet decide how to lay everything out afterwards, to be on the safe side, I thread the thick Glamour thread onto the upper looper AND the lower looper. You can see how easy it is here, in this video:

I then try to find the proper setting.
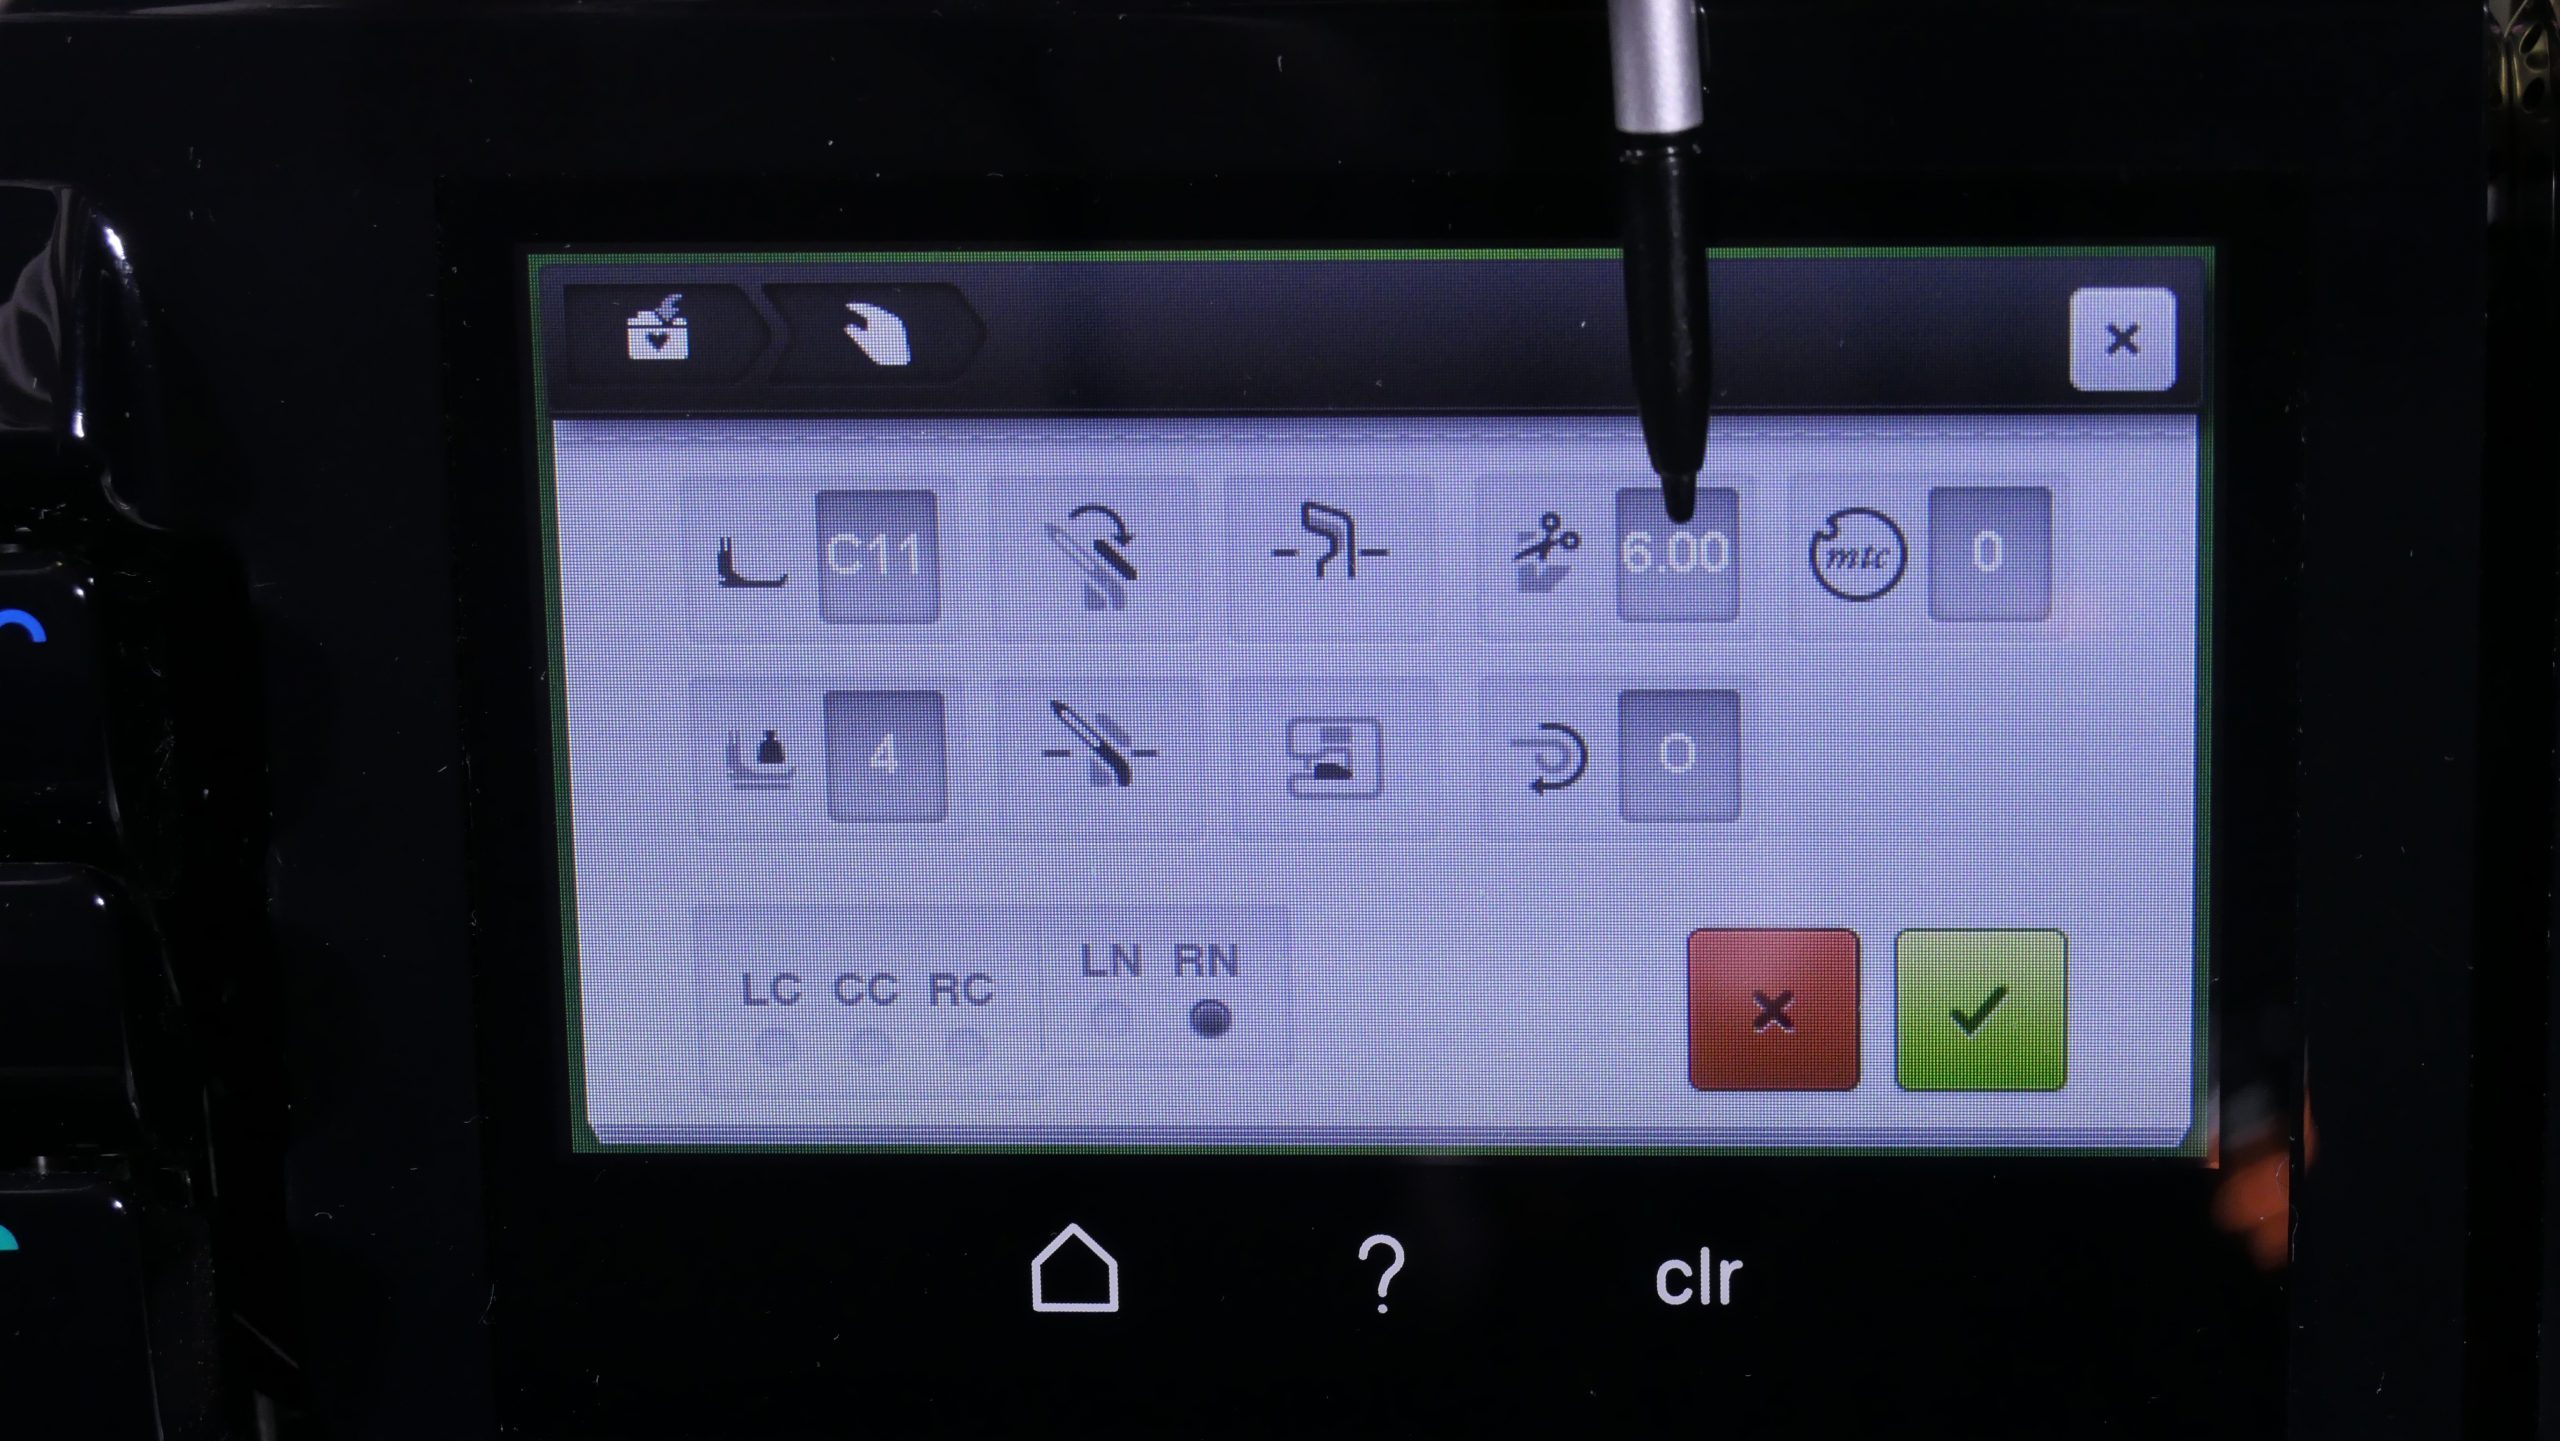
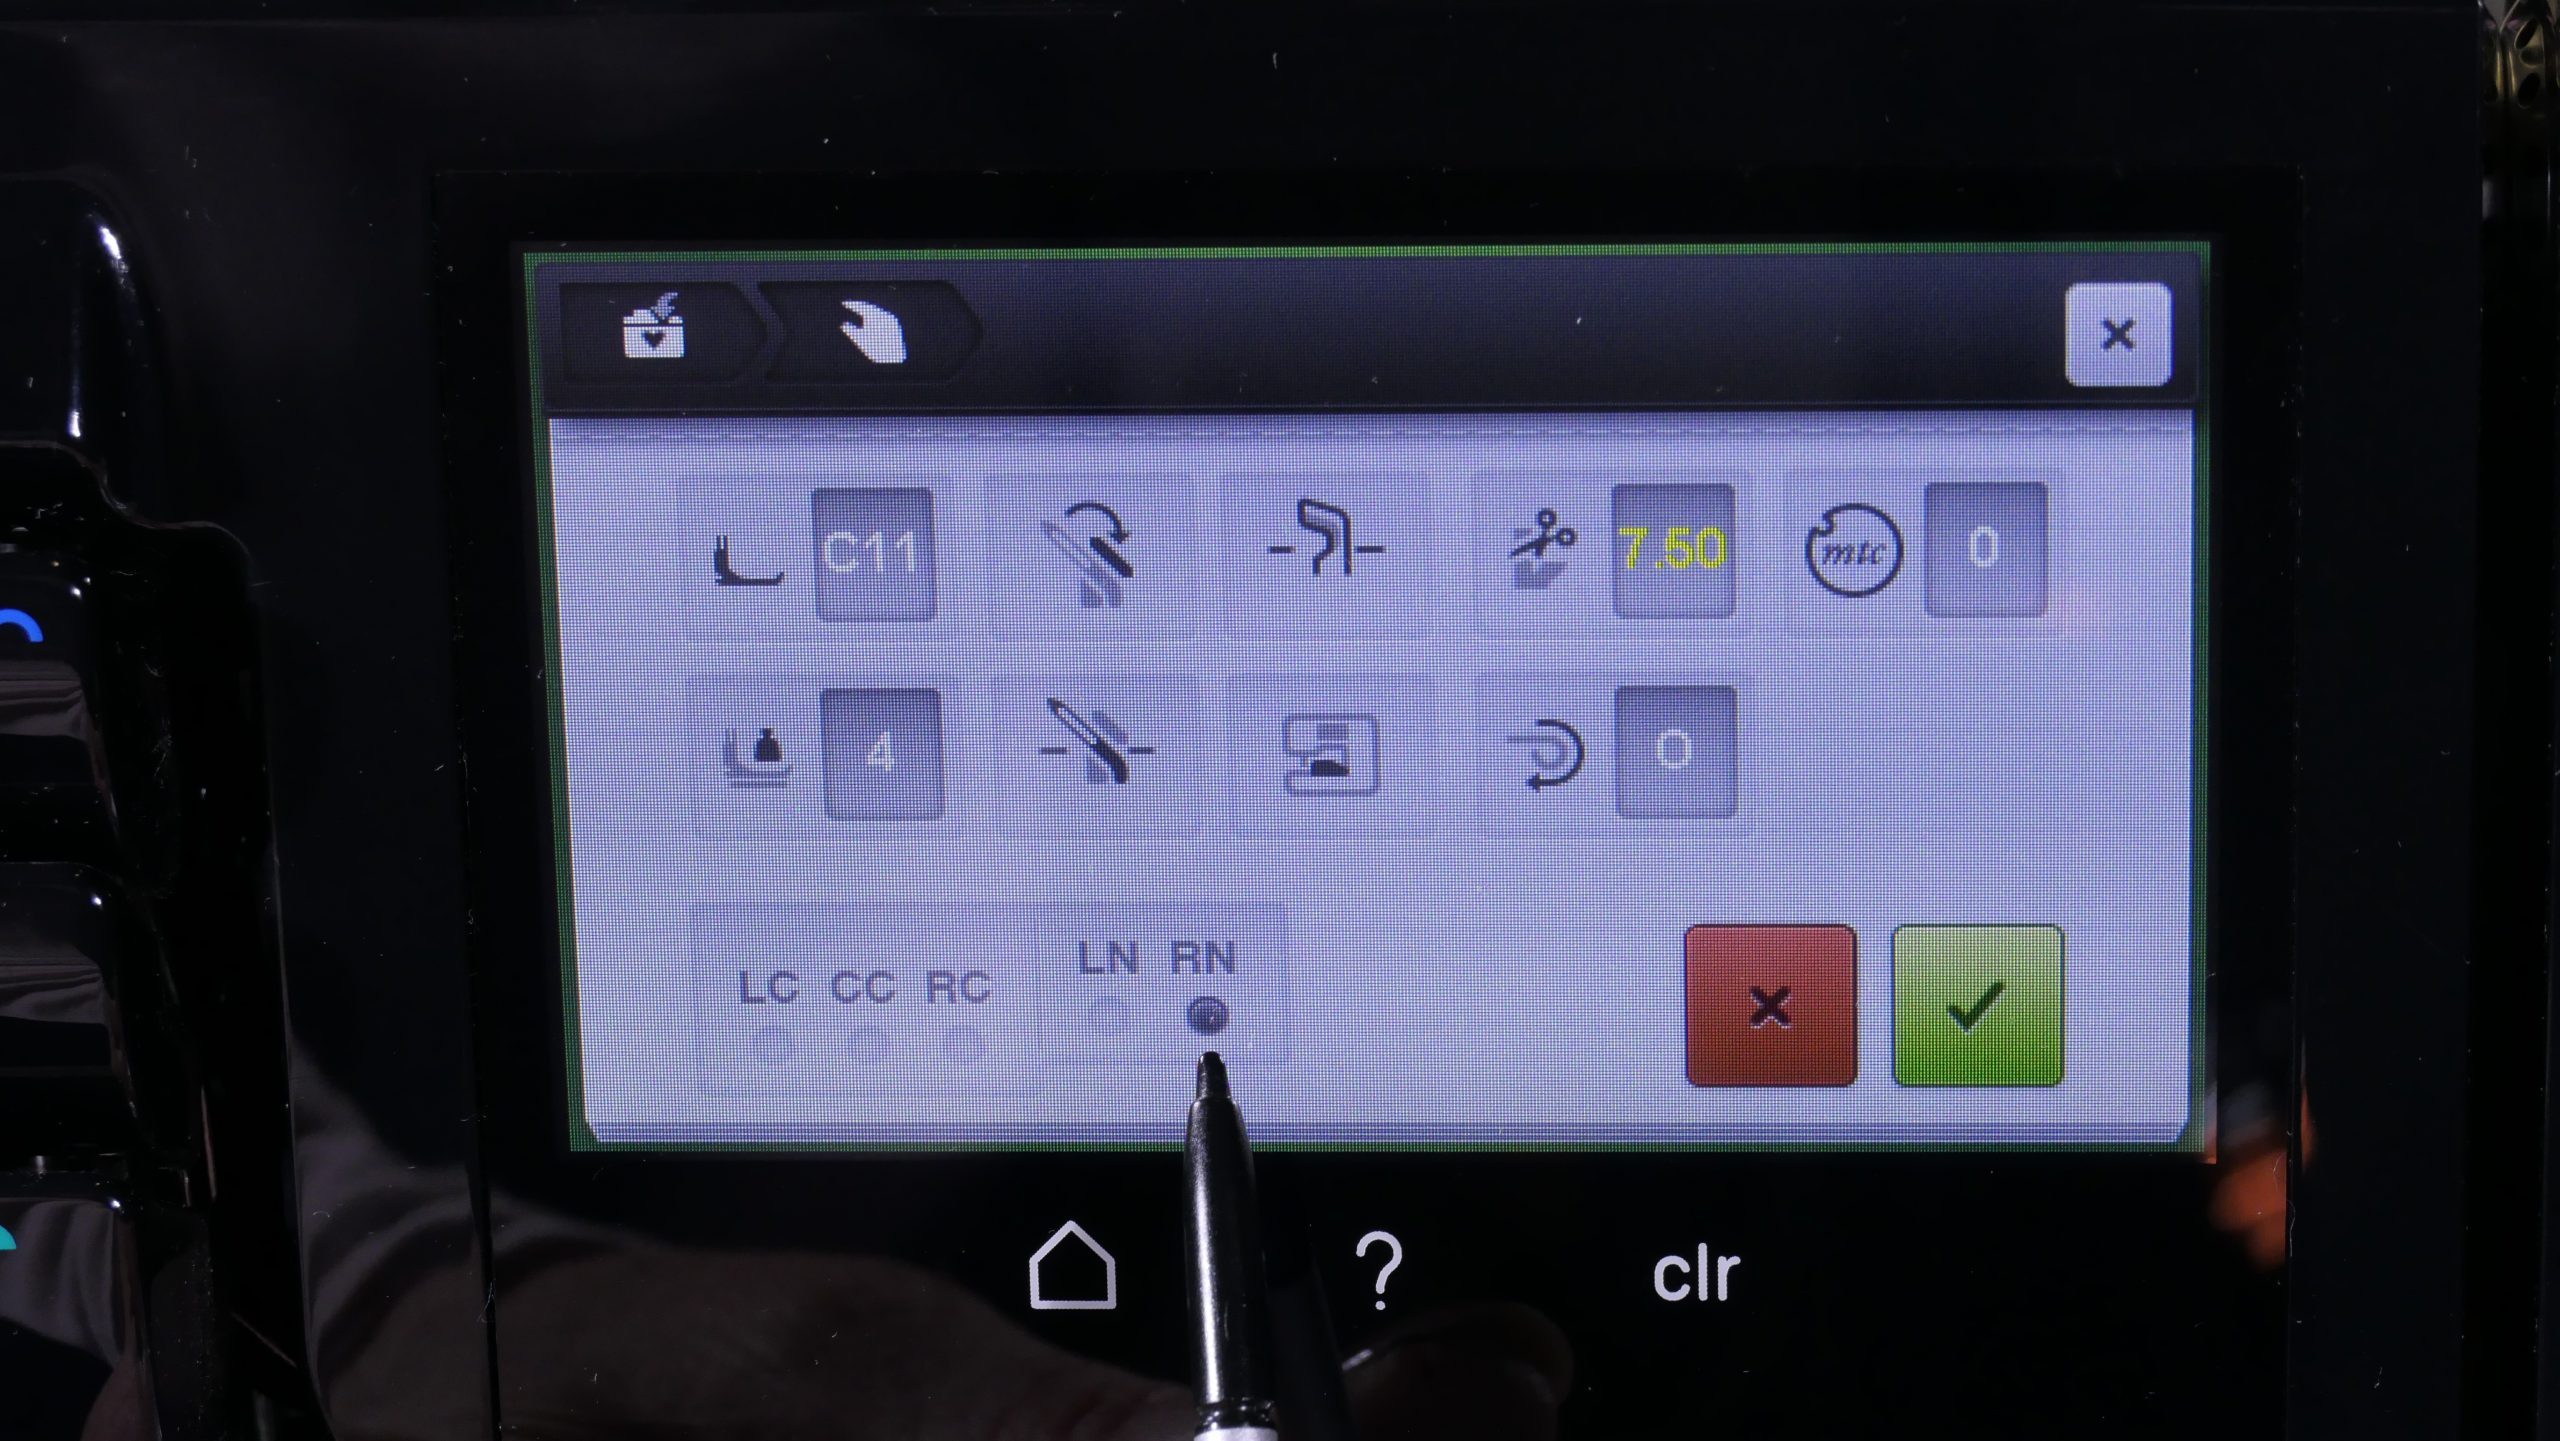
Set the thread tension for decorative thread on the BERNINA L 890
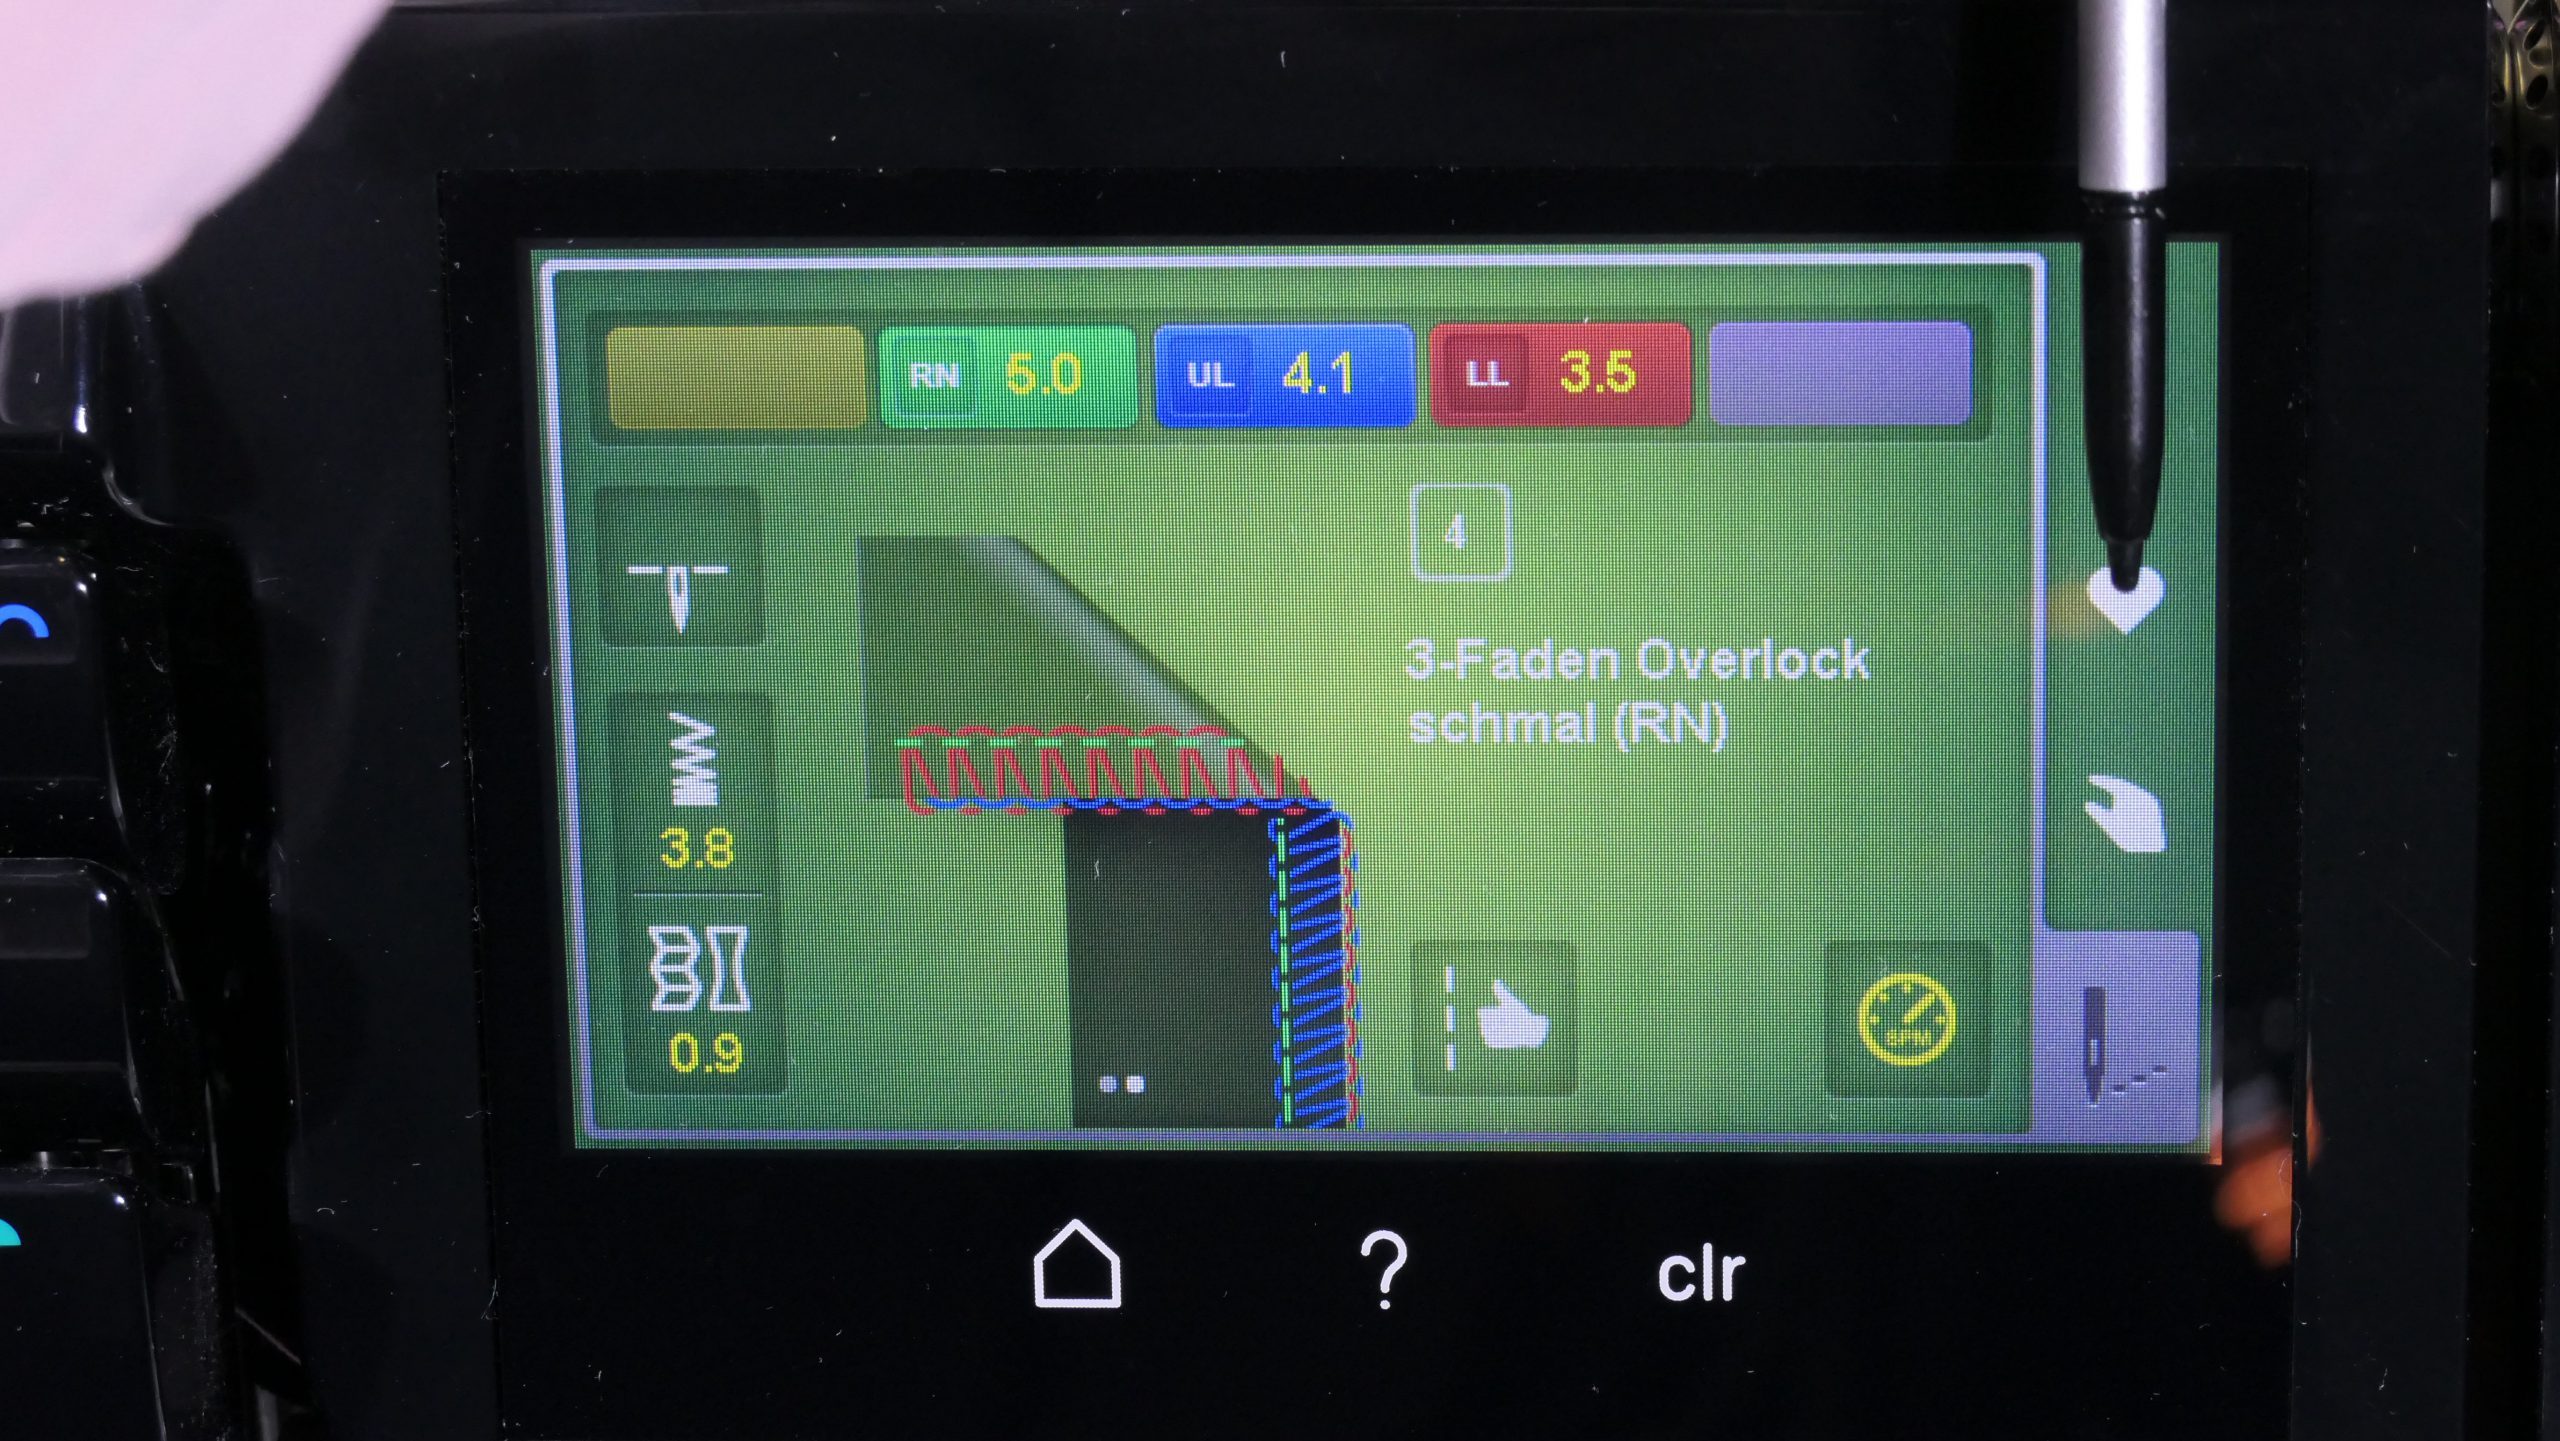
In the Overlock area, I select the wide 3-thread overlock seam and make my test seam. The result is frustrating, because regardless of what I change, the result always remains shifted in relation to the seam (seam on the right):
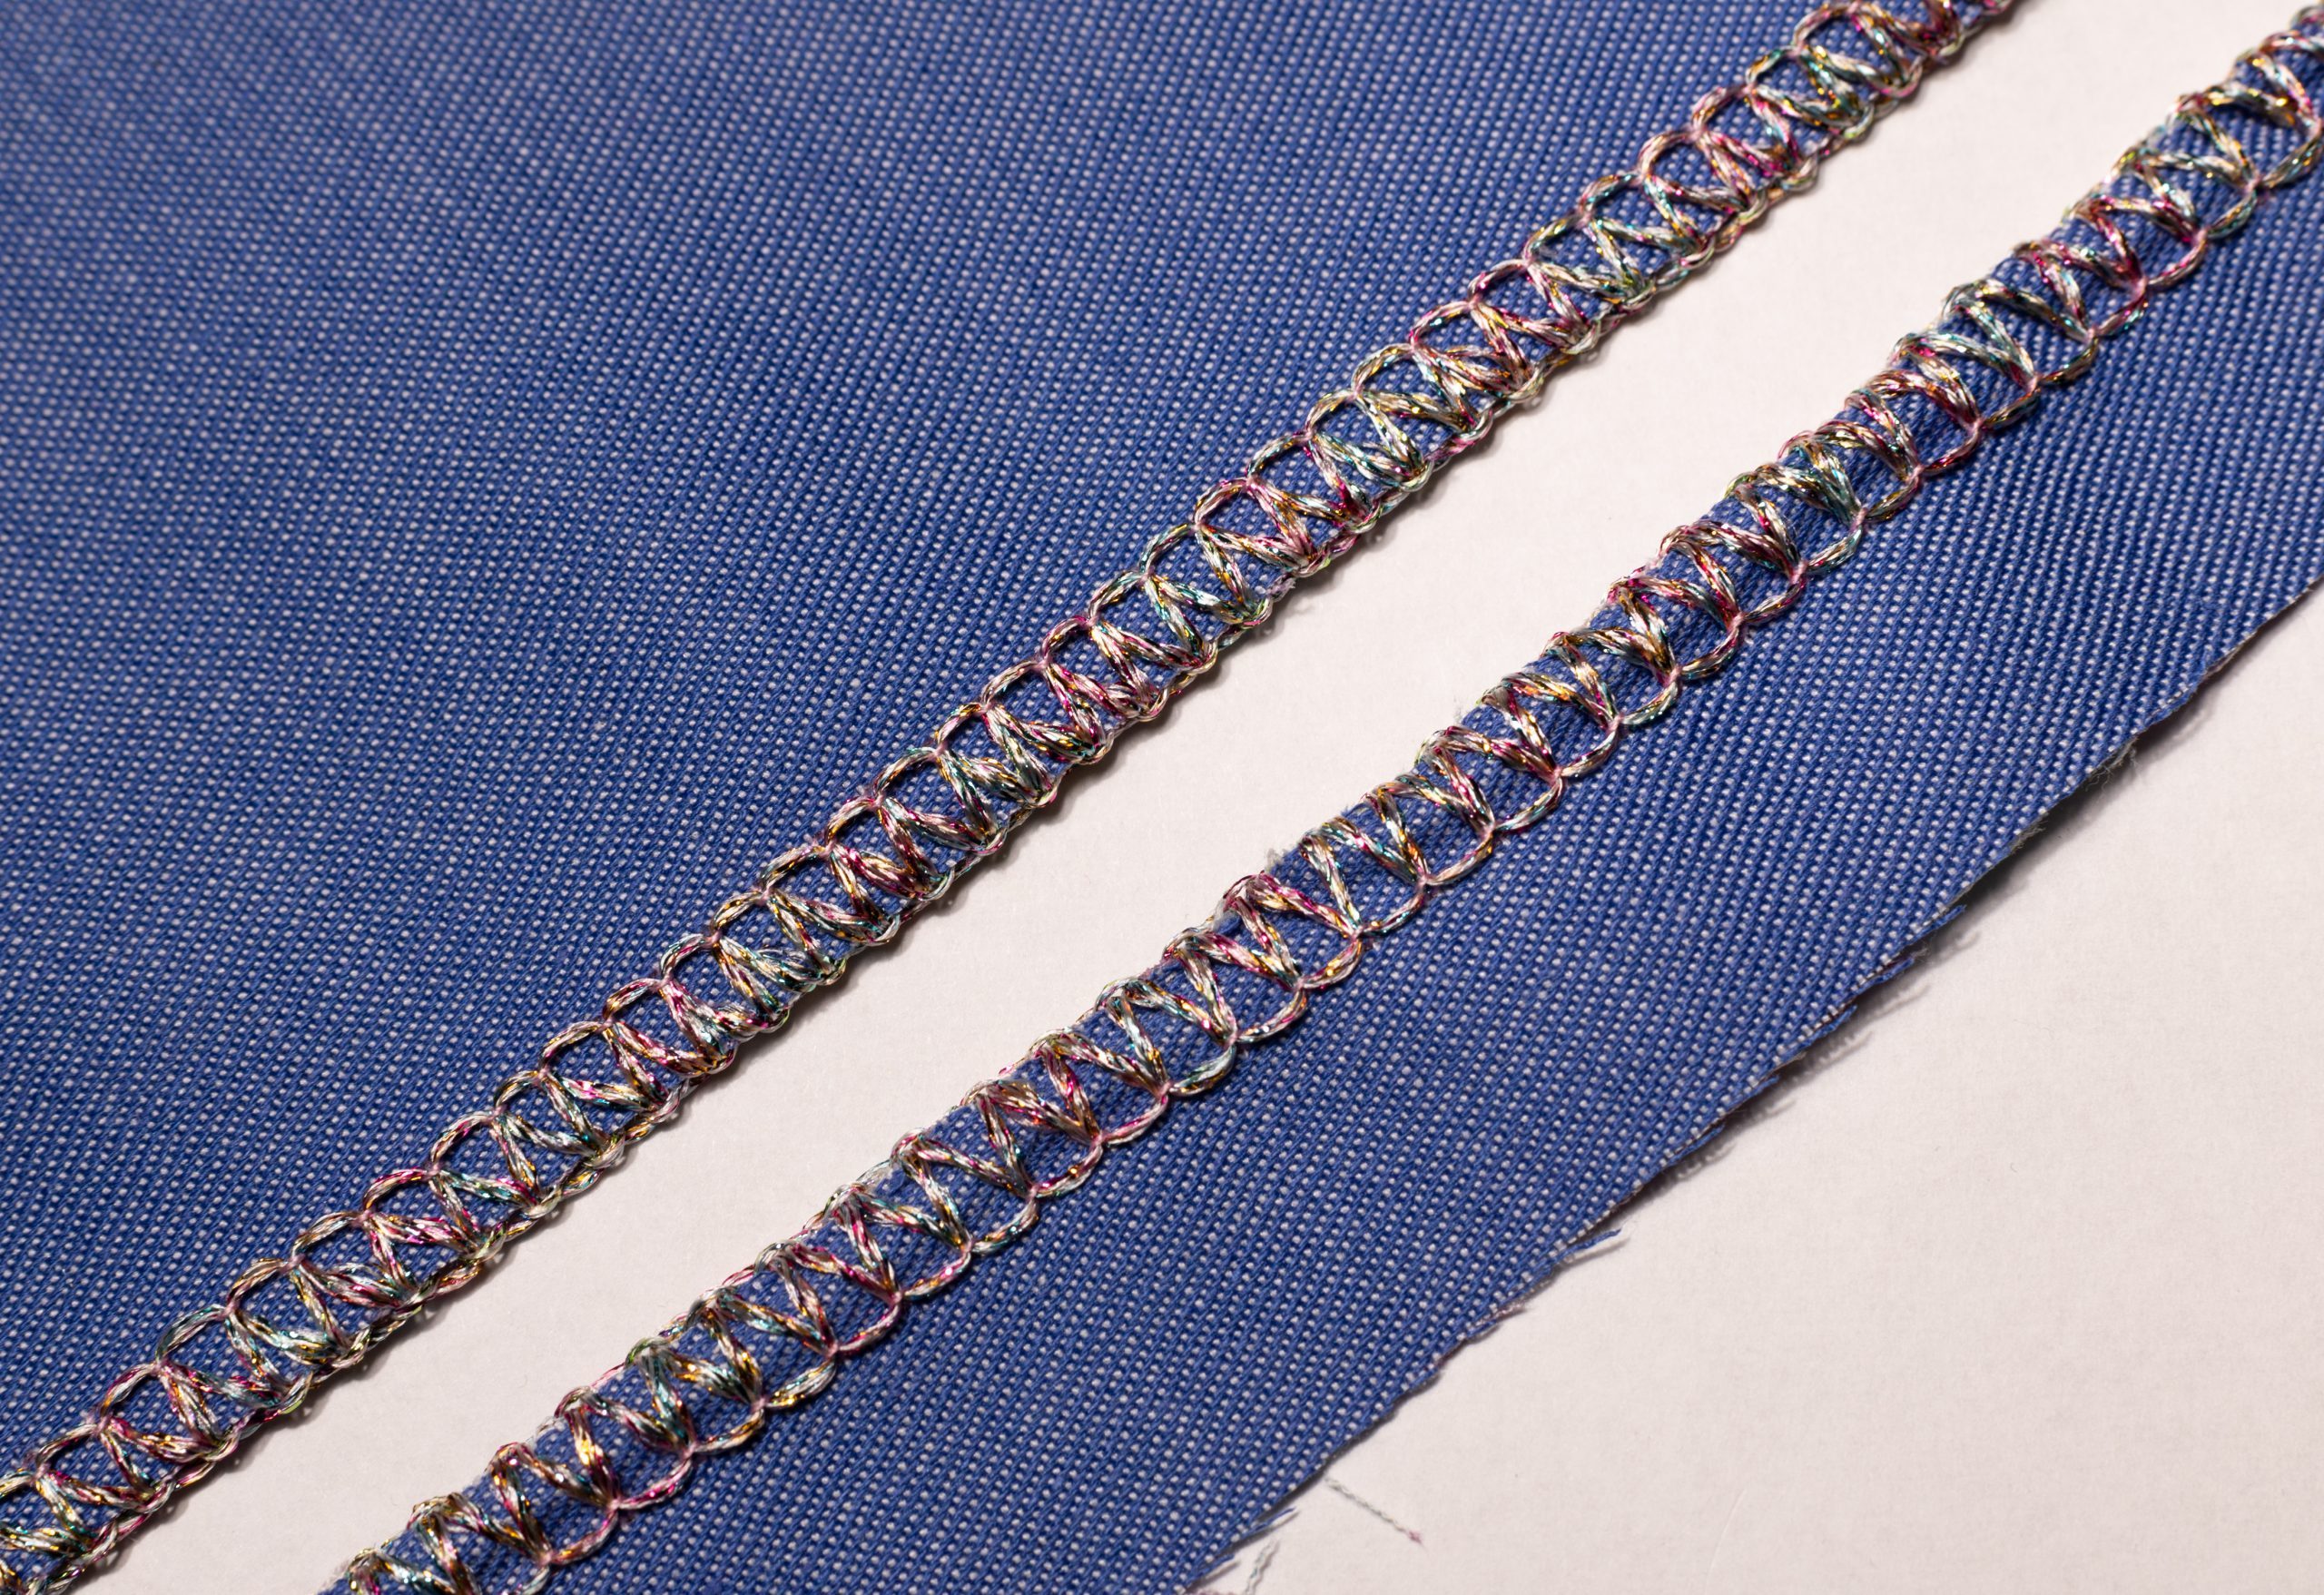
Why does this happen? It’s really simple: my rather delicate cotton woven fabric is simply not strong enough to hold the thick, heavy thread. I therefore switch to the narrow seam (needle on the right, the result on the left in the image above).
I set my stitch length to 3.8 and I take my differential down a little.
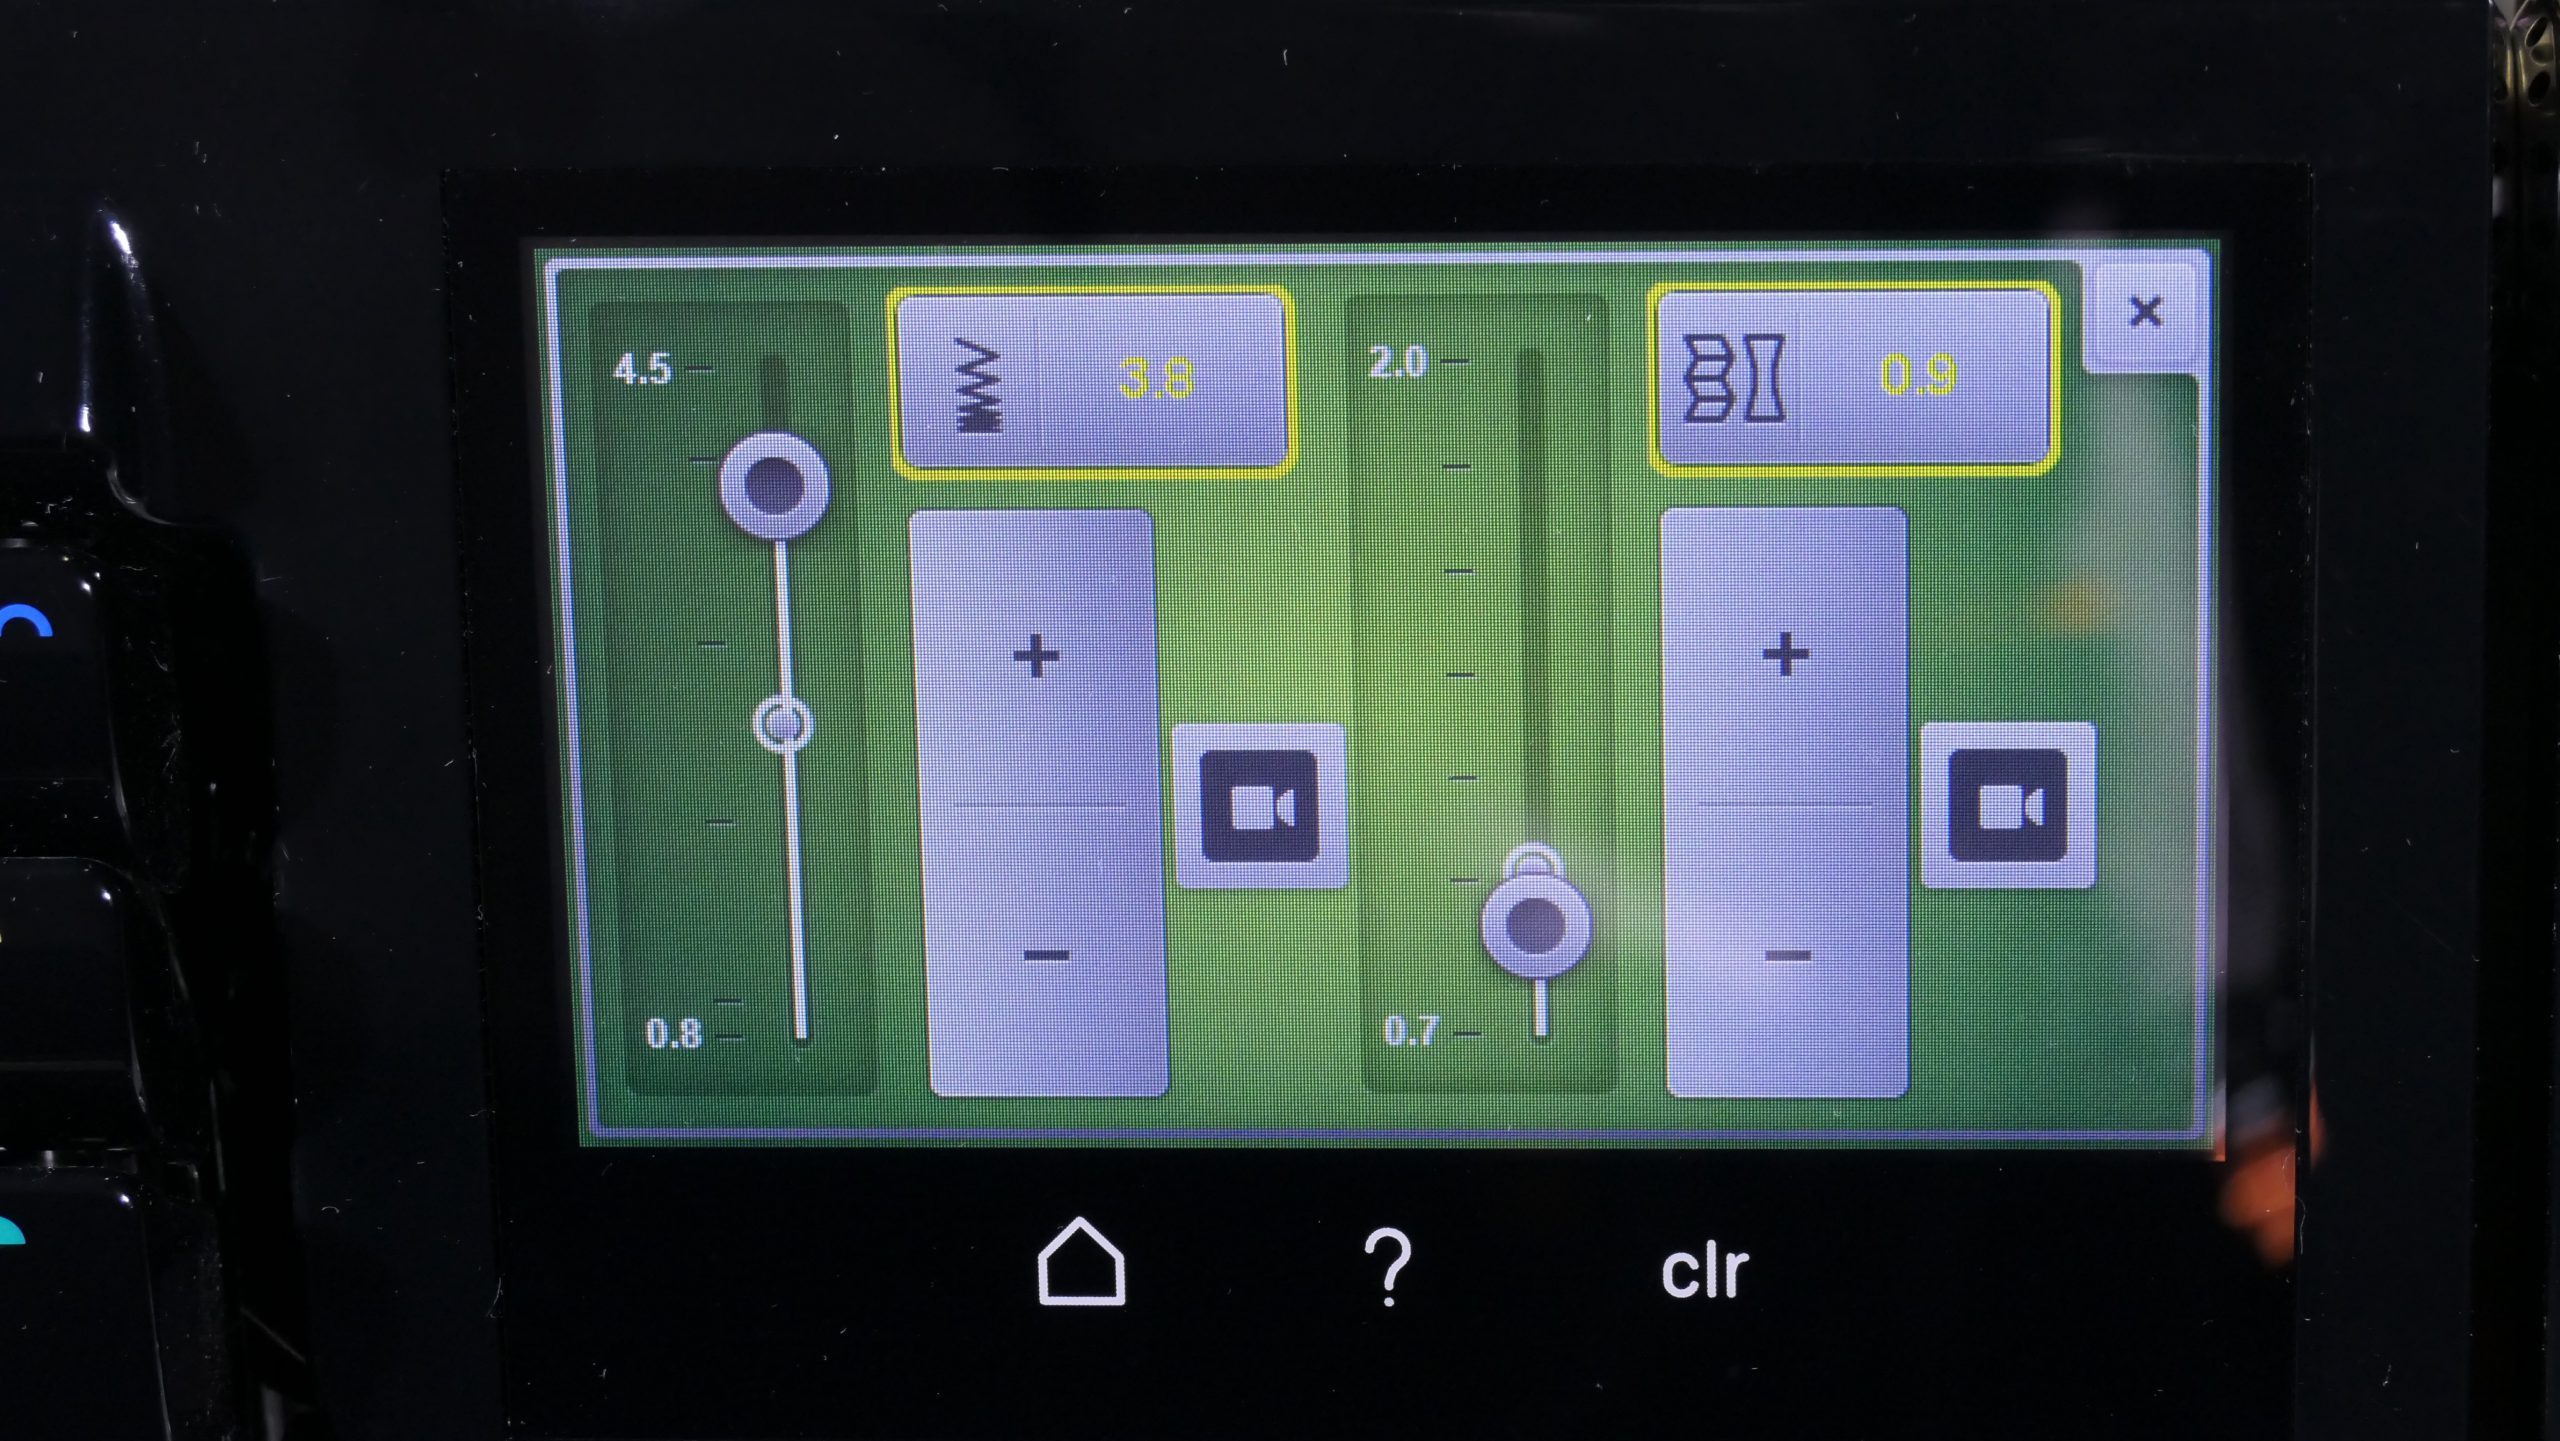
Explanation regarding the length: thick thread takes up space.
Explanation for the differential: this allows the machine to take away some of the pull at the back, making my seam smoother.
I lower my speed:
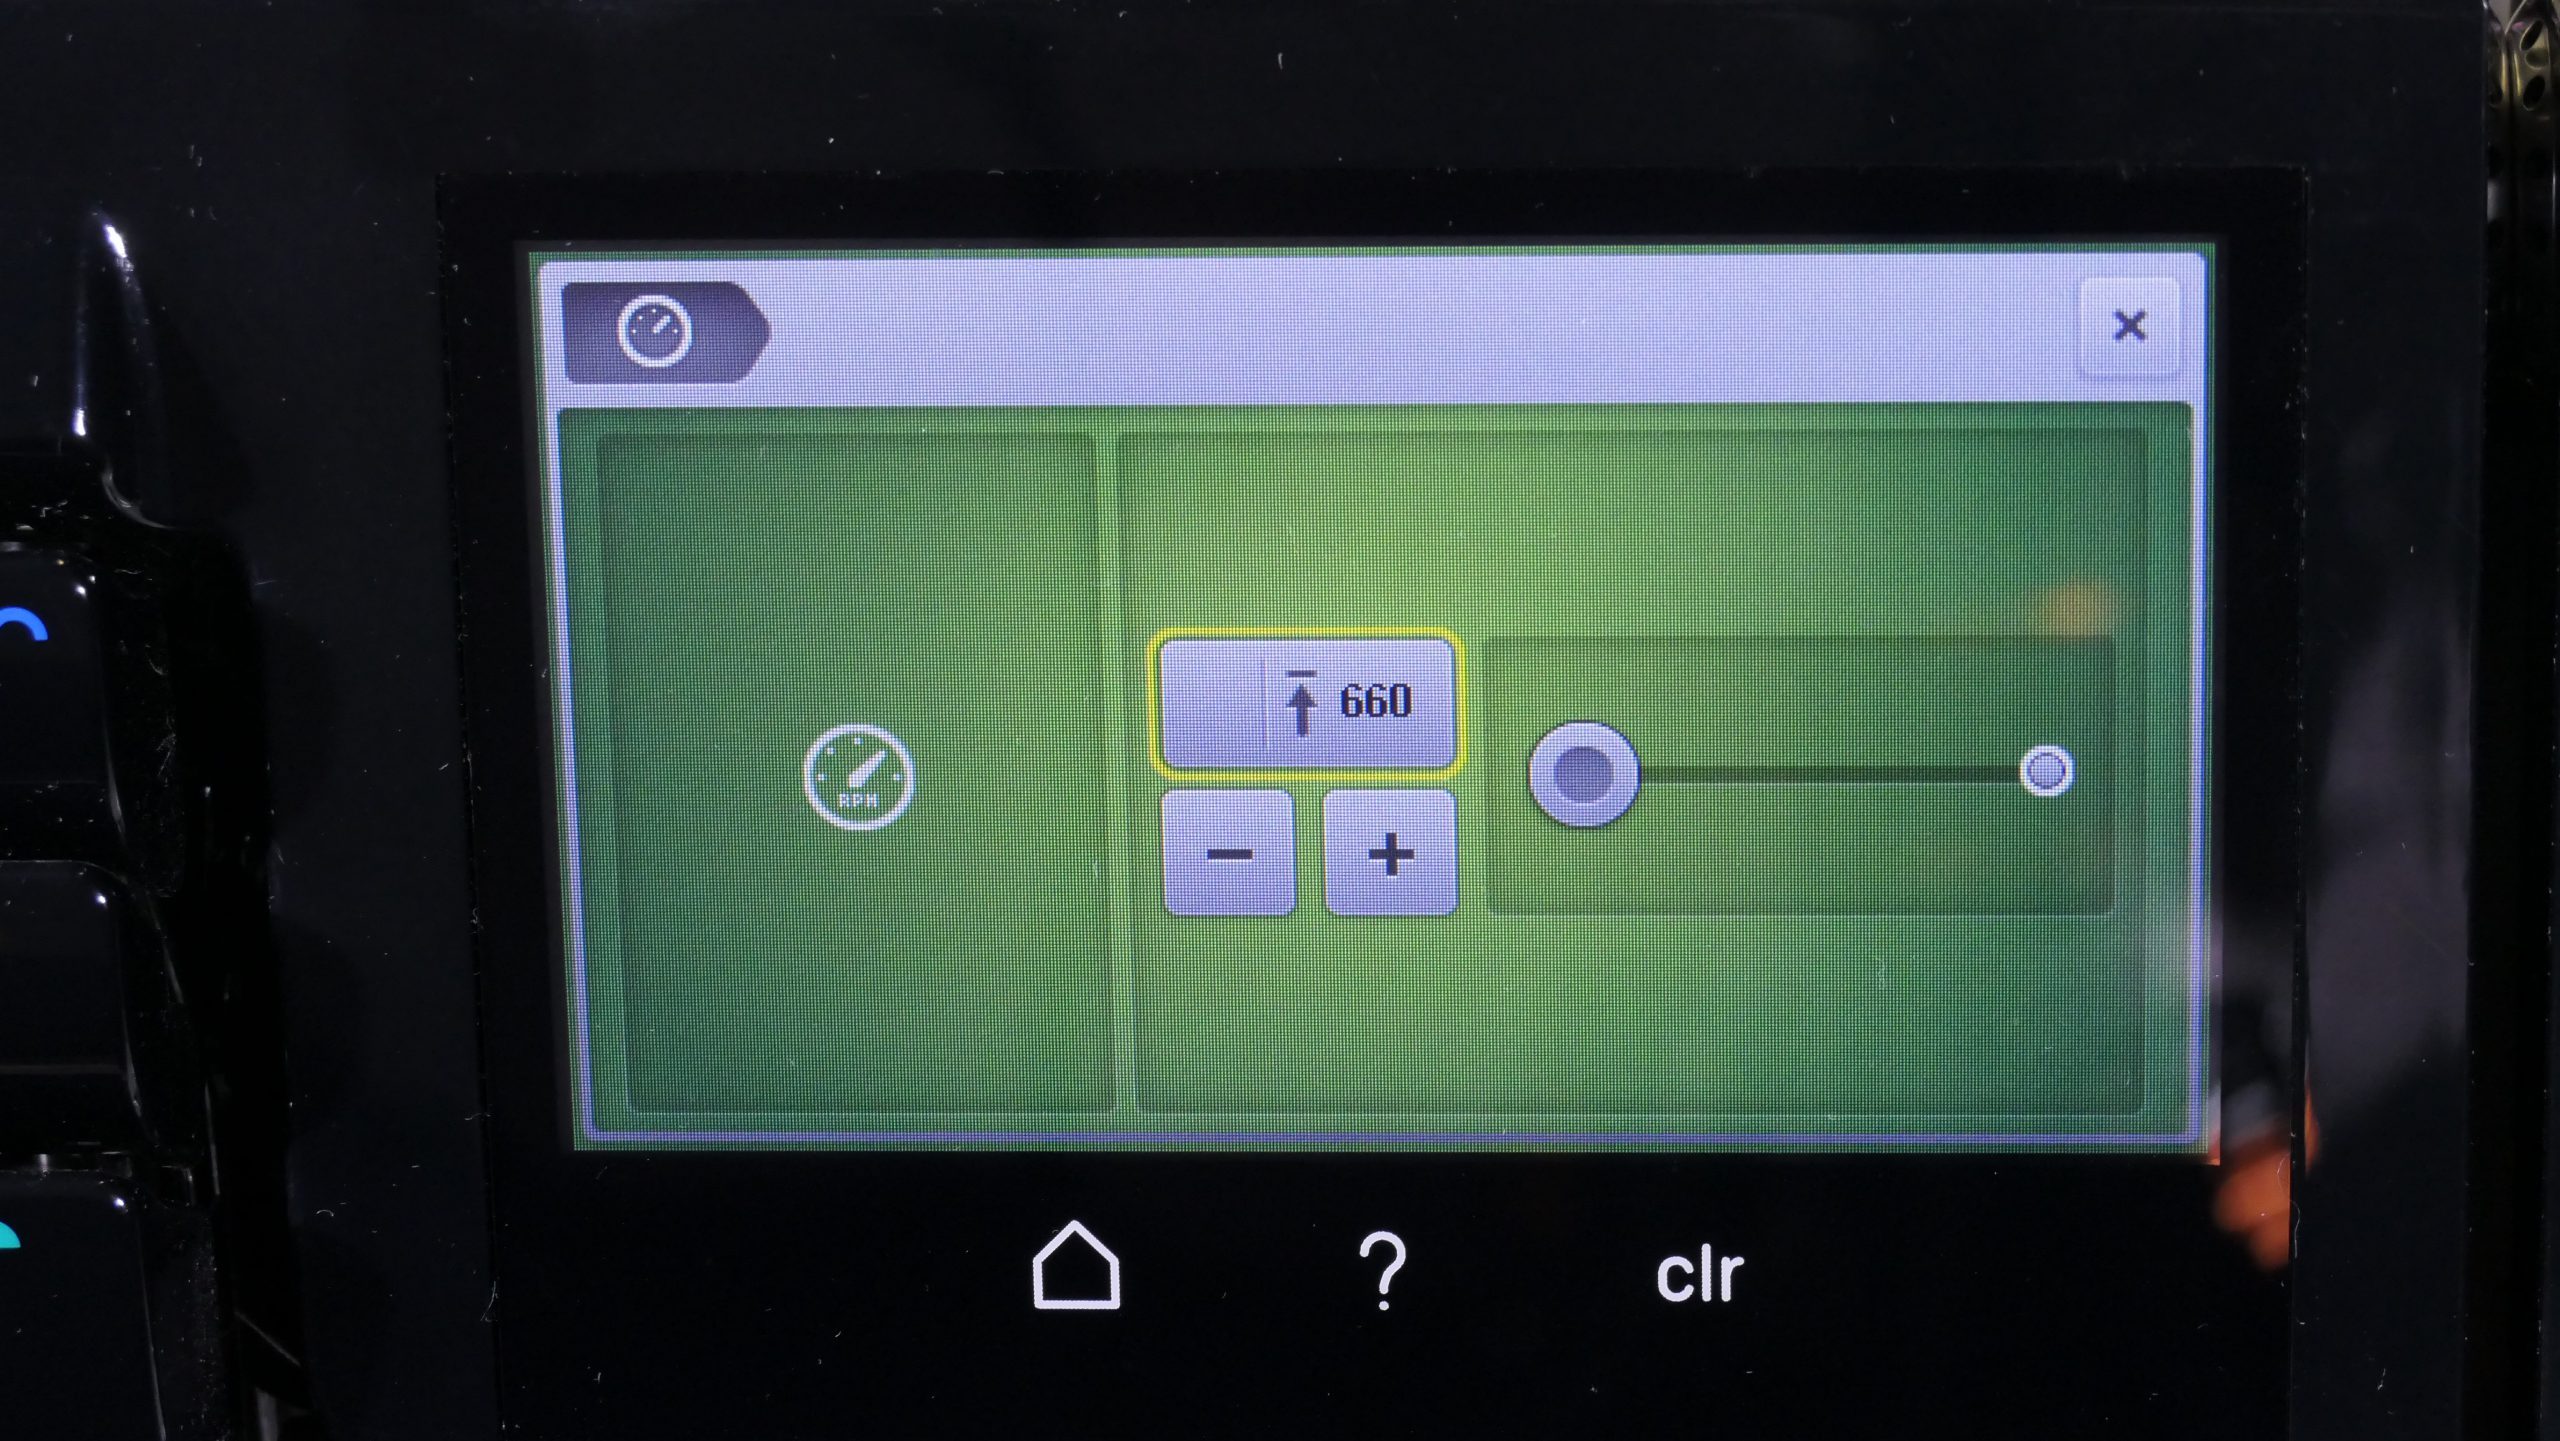
I sew with the needle in the low position, at tension level 5, with my upper looper set to 4.1 and my lower looper at 3.5:
Saving the settings.
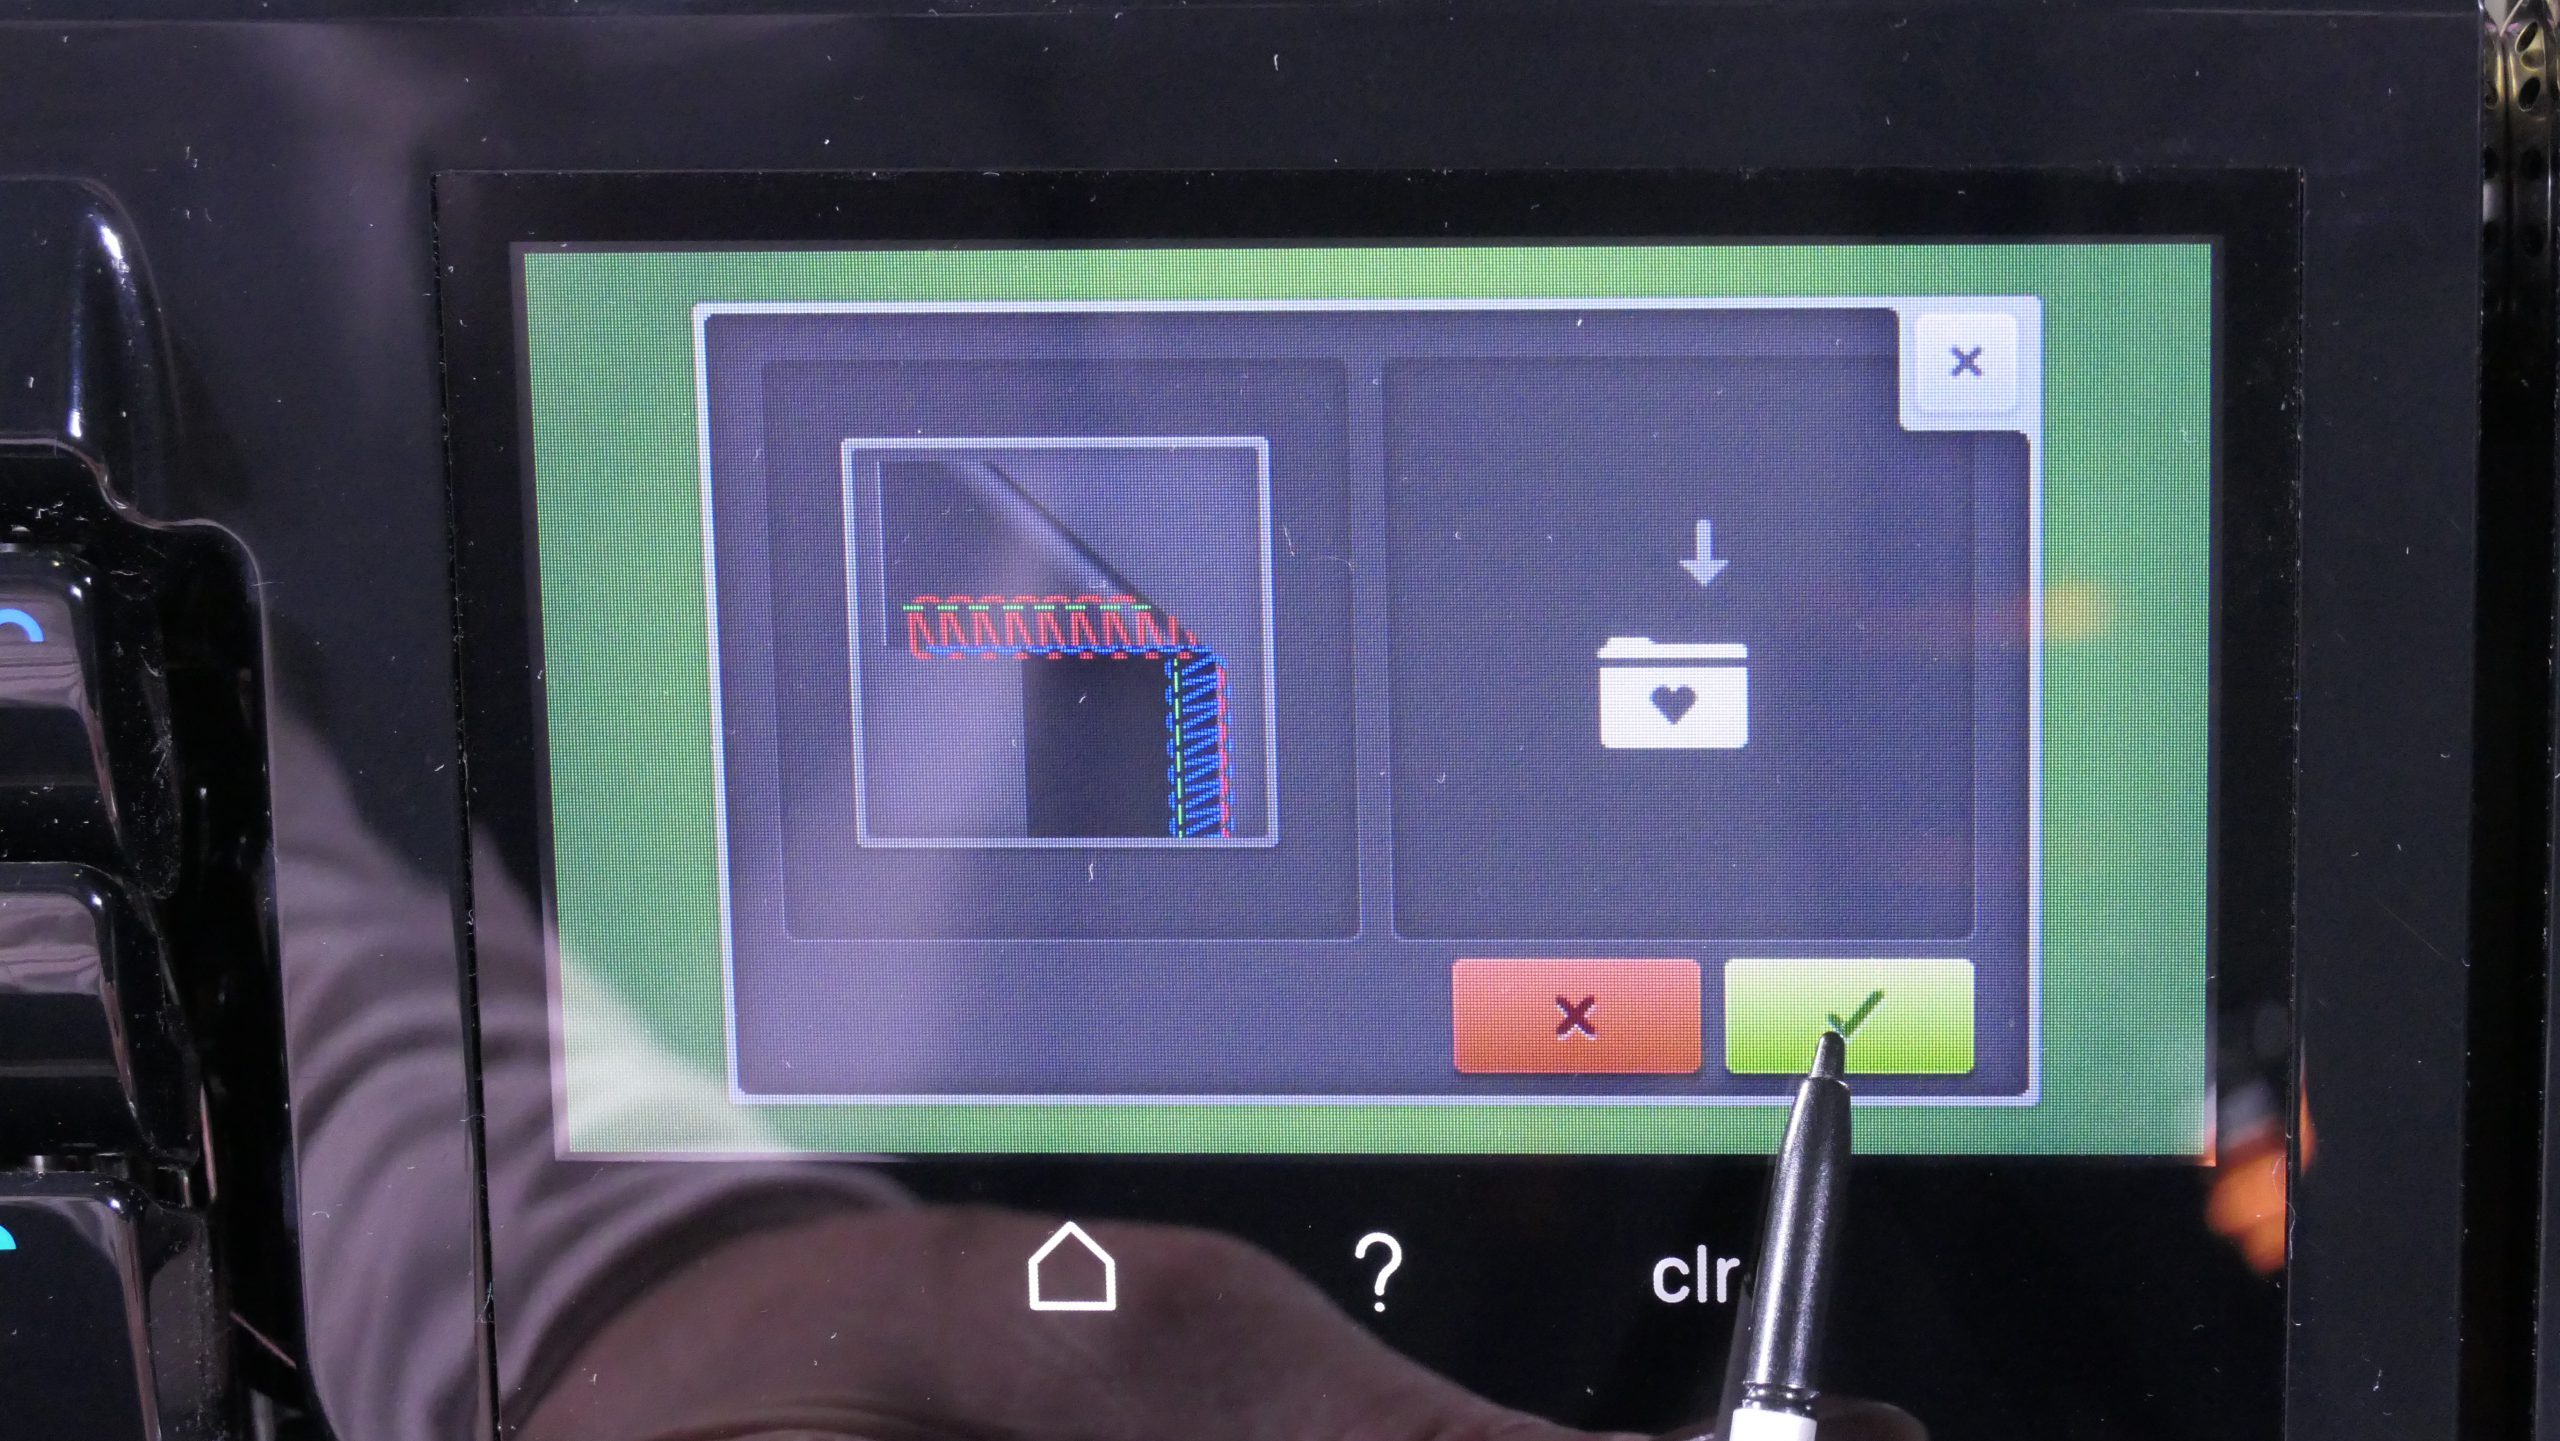
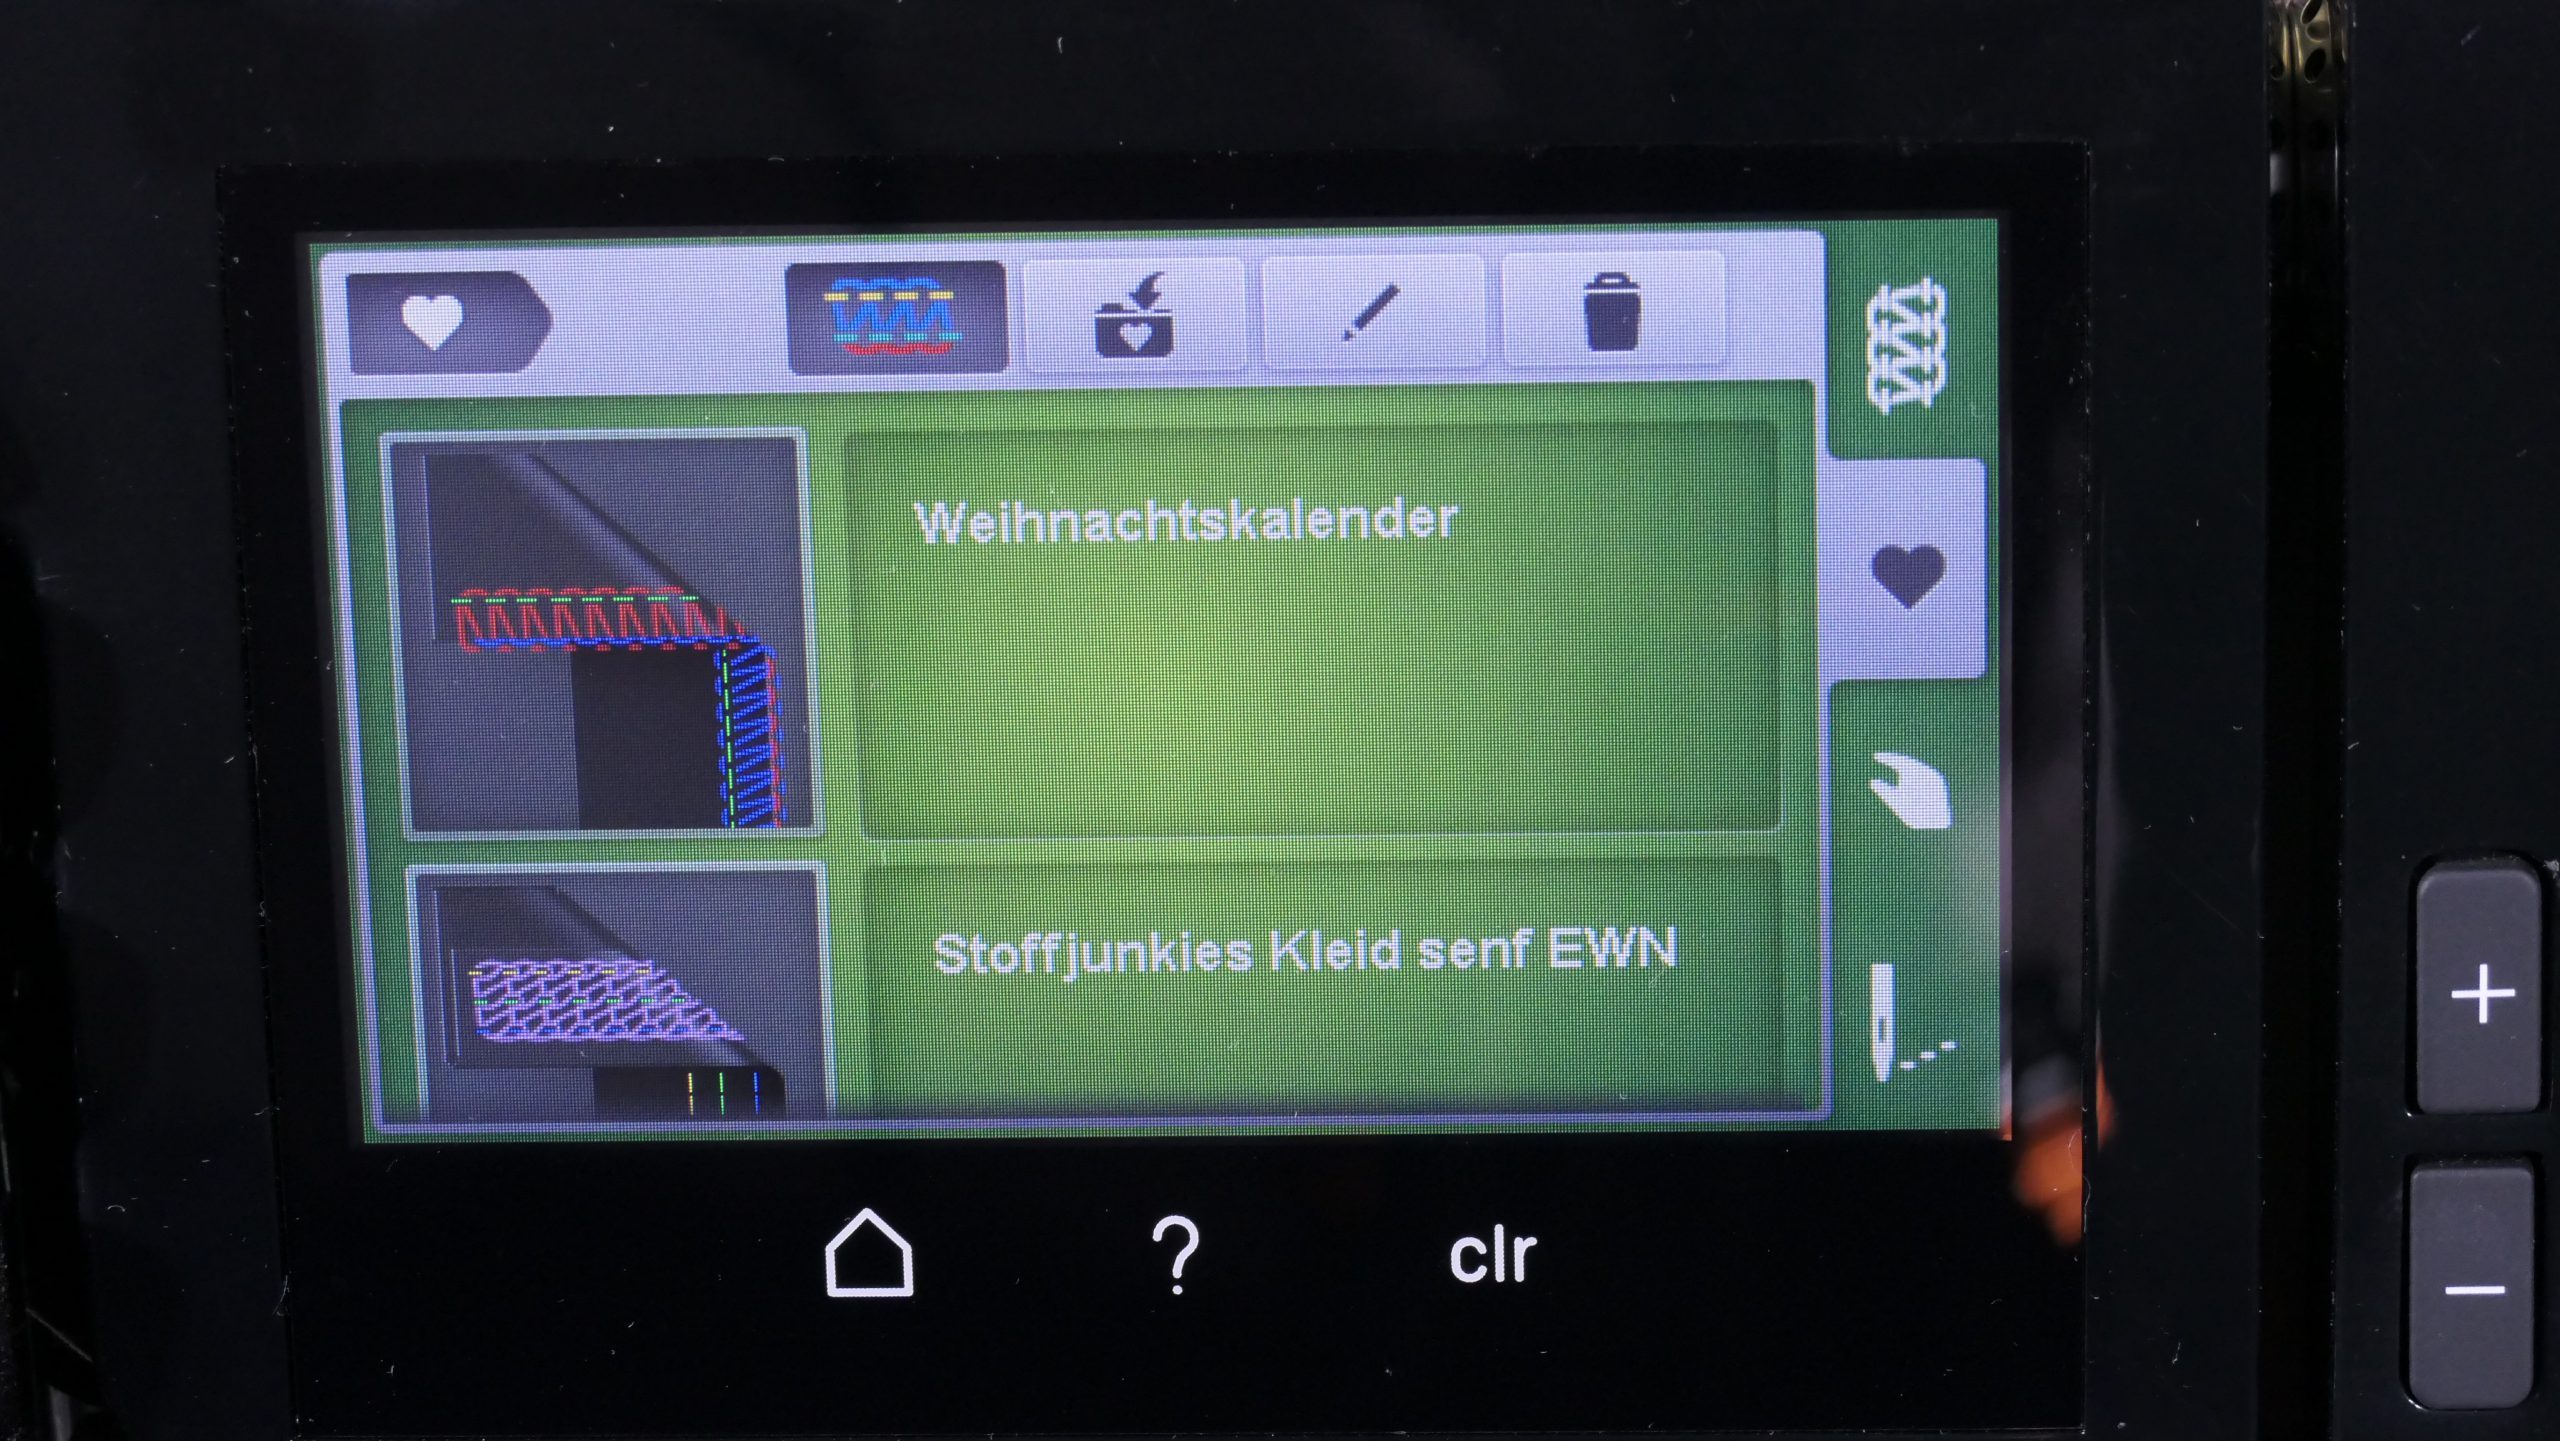
I save everything now, in case I am unable to finish this project today. Clicking on the heart on the right opens the following menu:
Here I tap on the image …
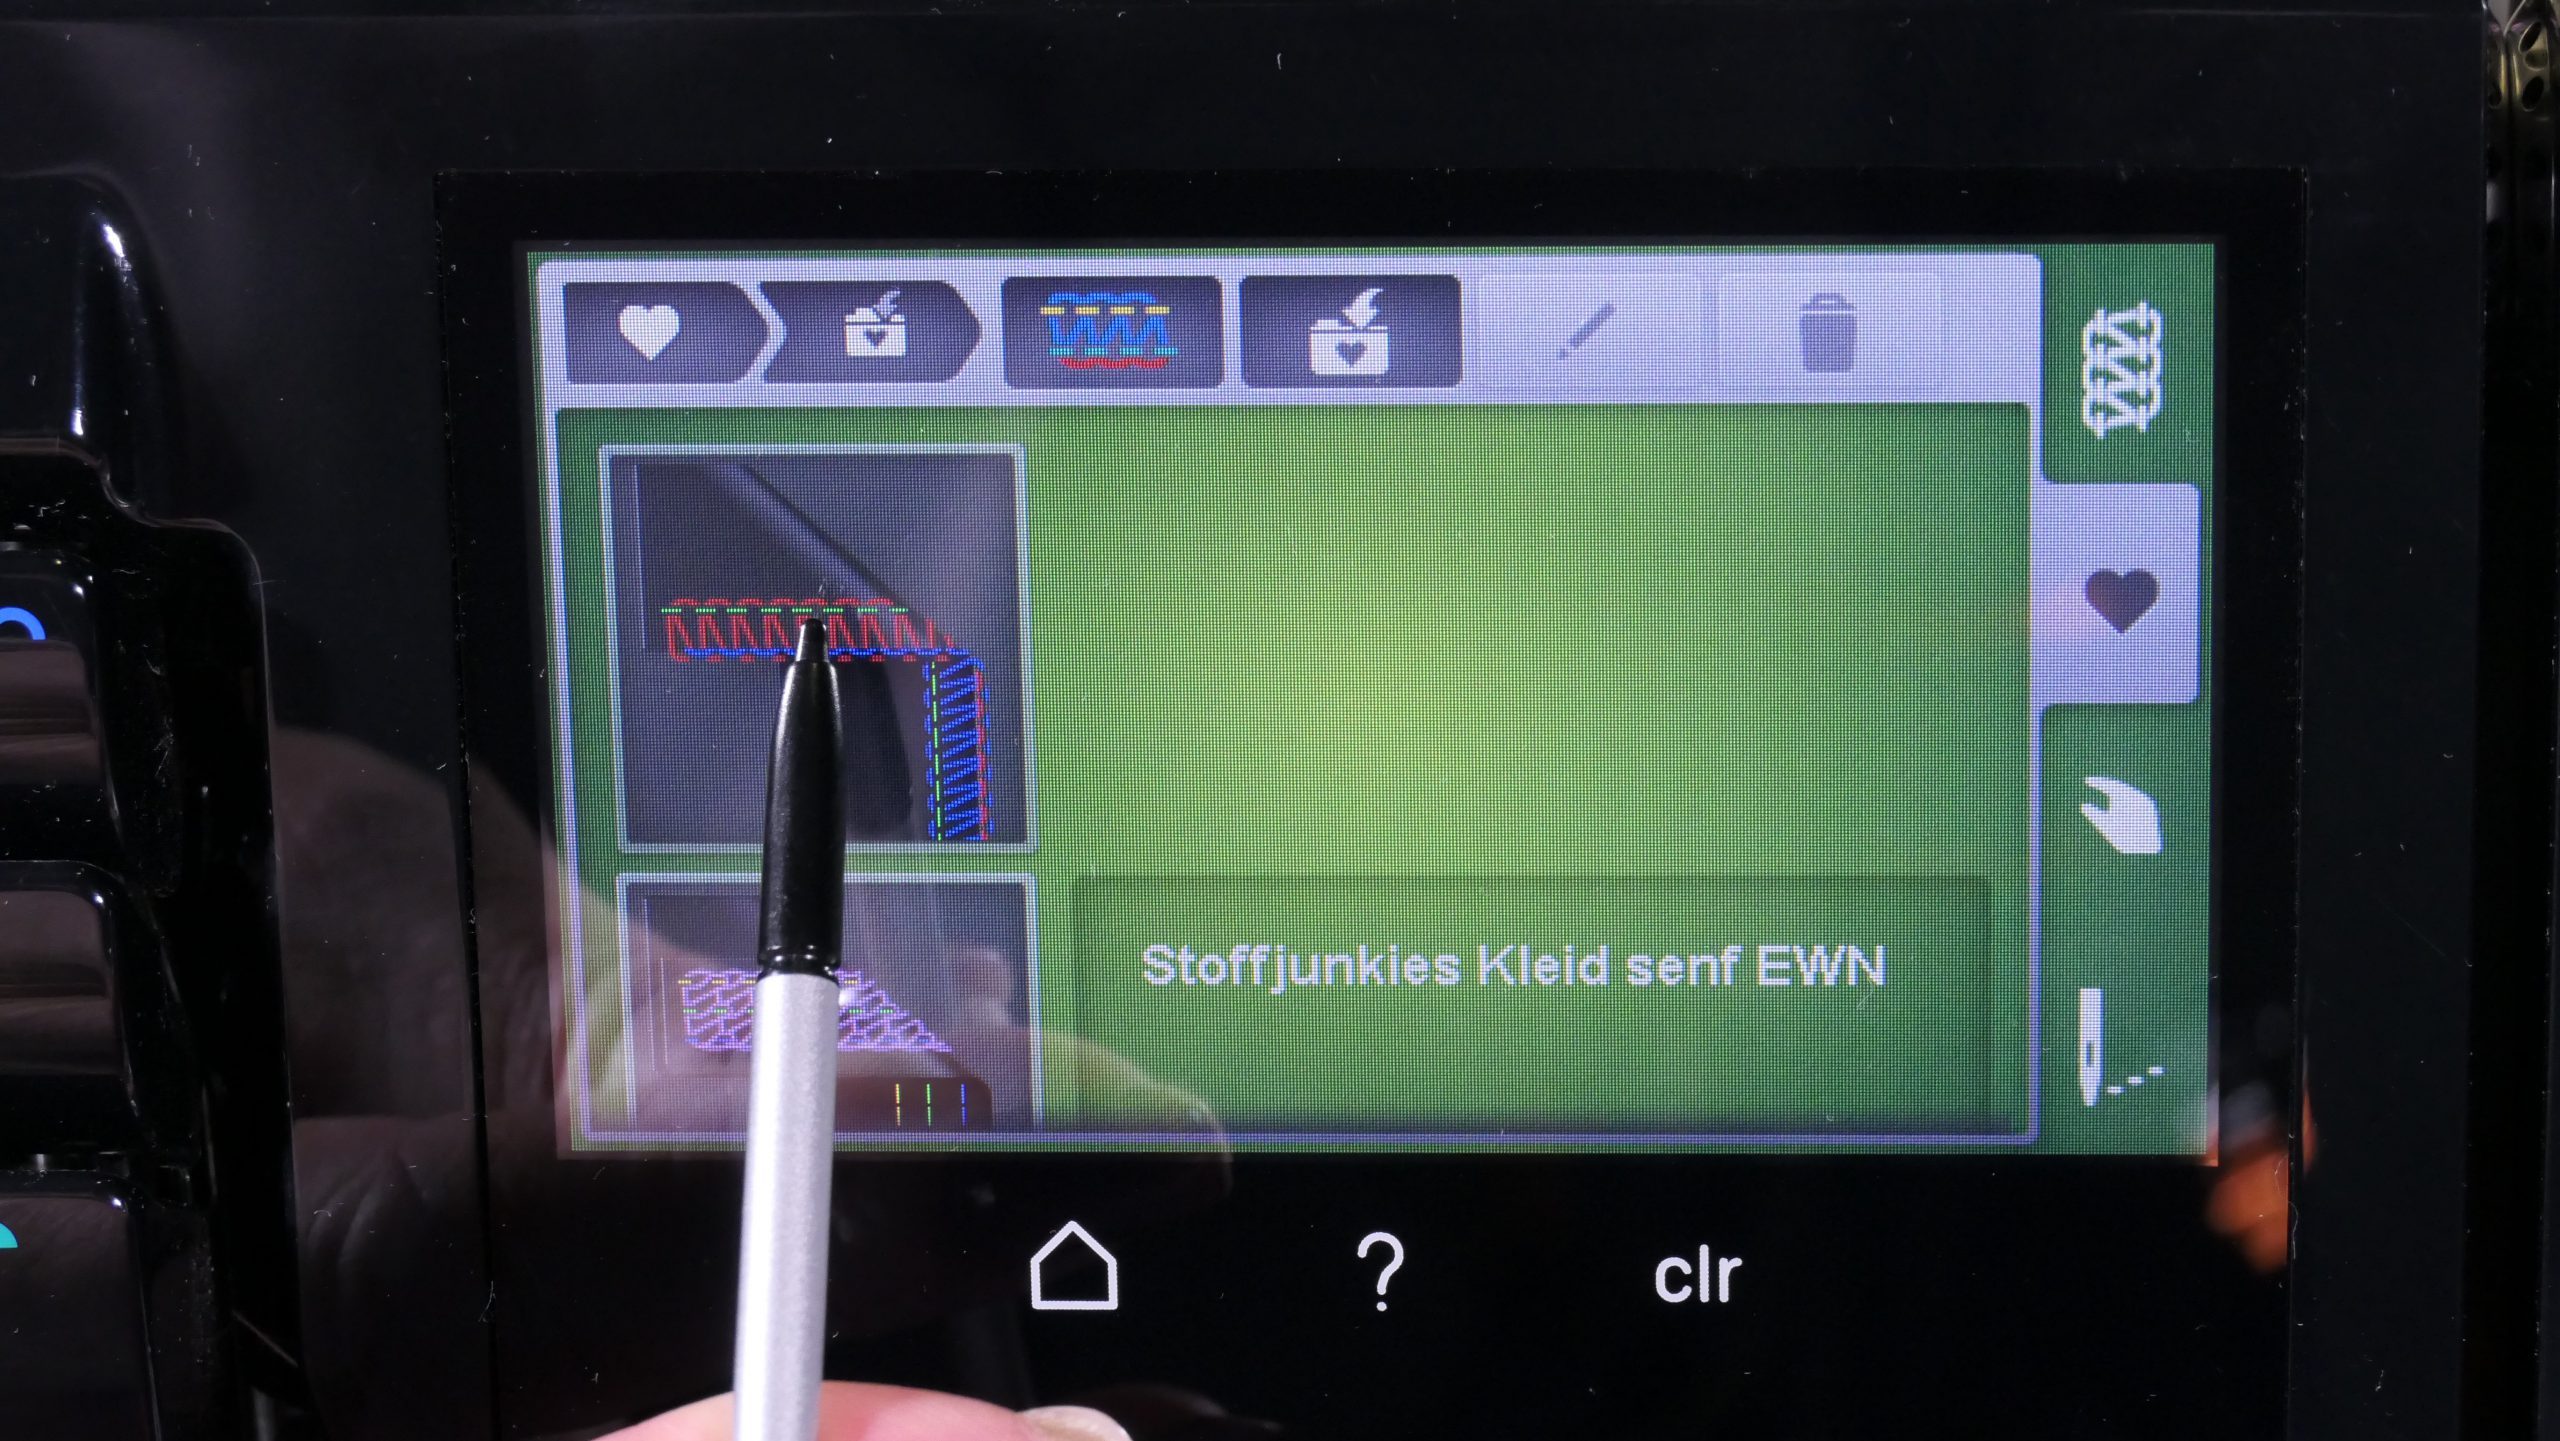
… and I can now give the seam a name:
After a quick confirmation …
… a new window opens where I can manually enter everything I just changed.
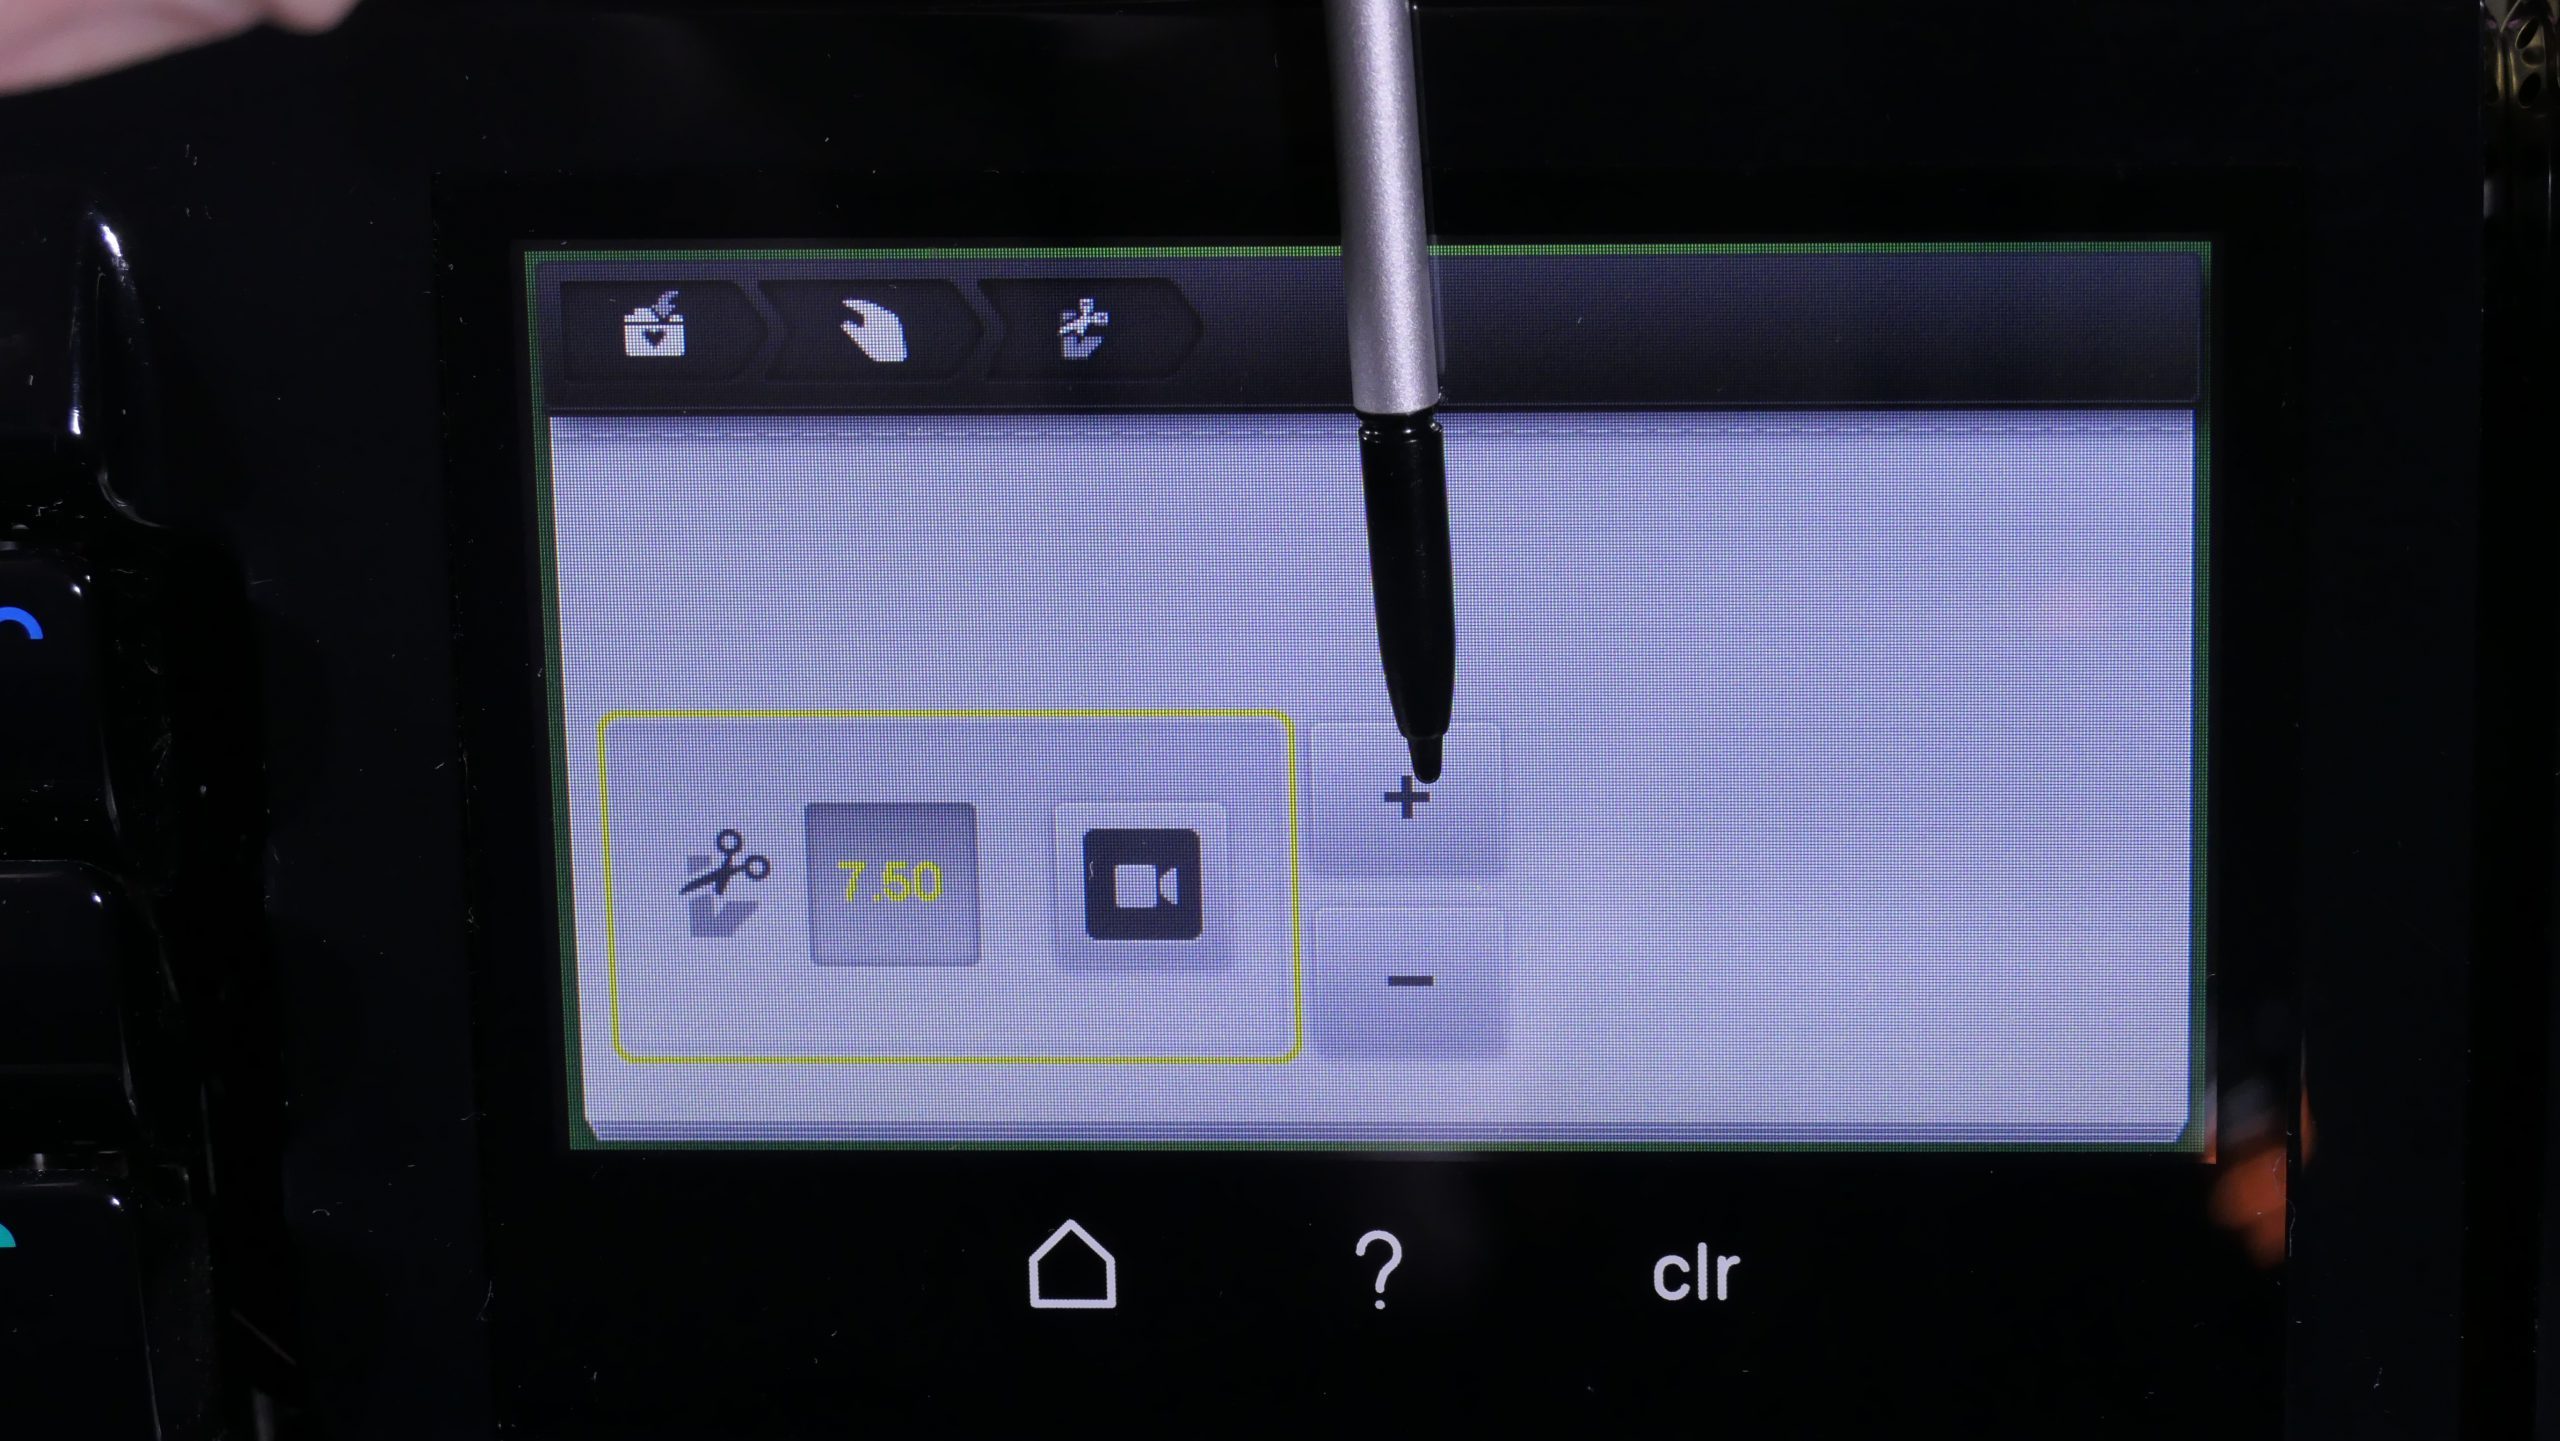
I increased the stitch width:
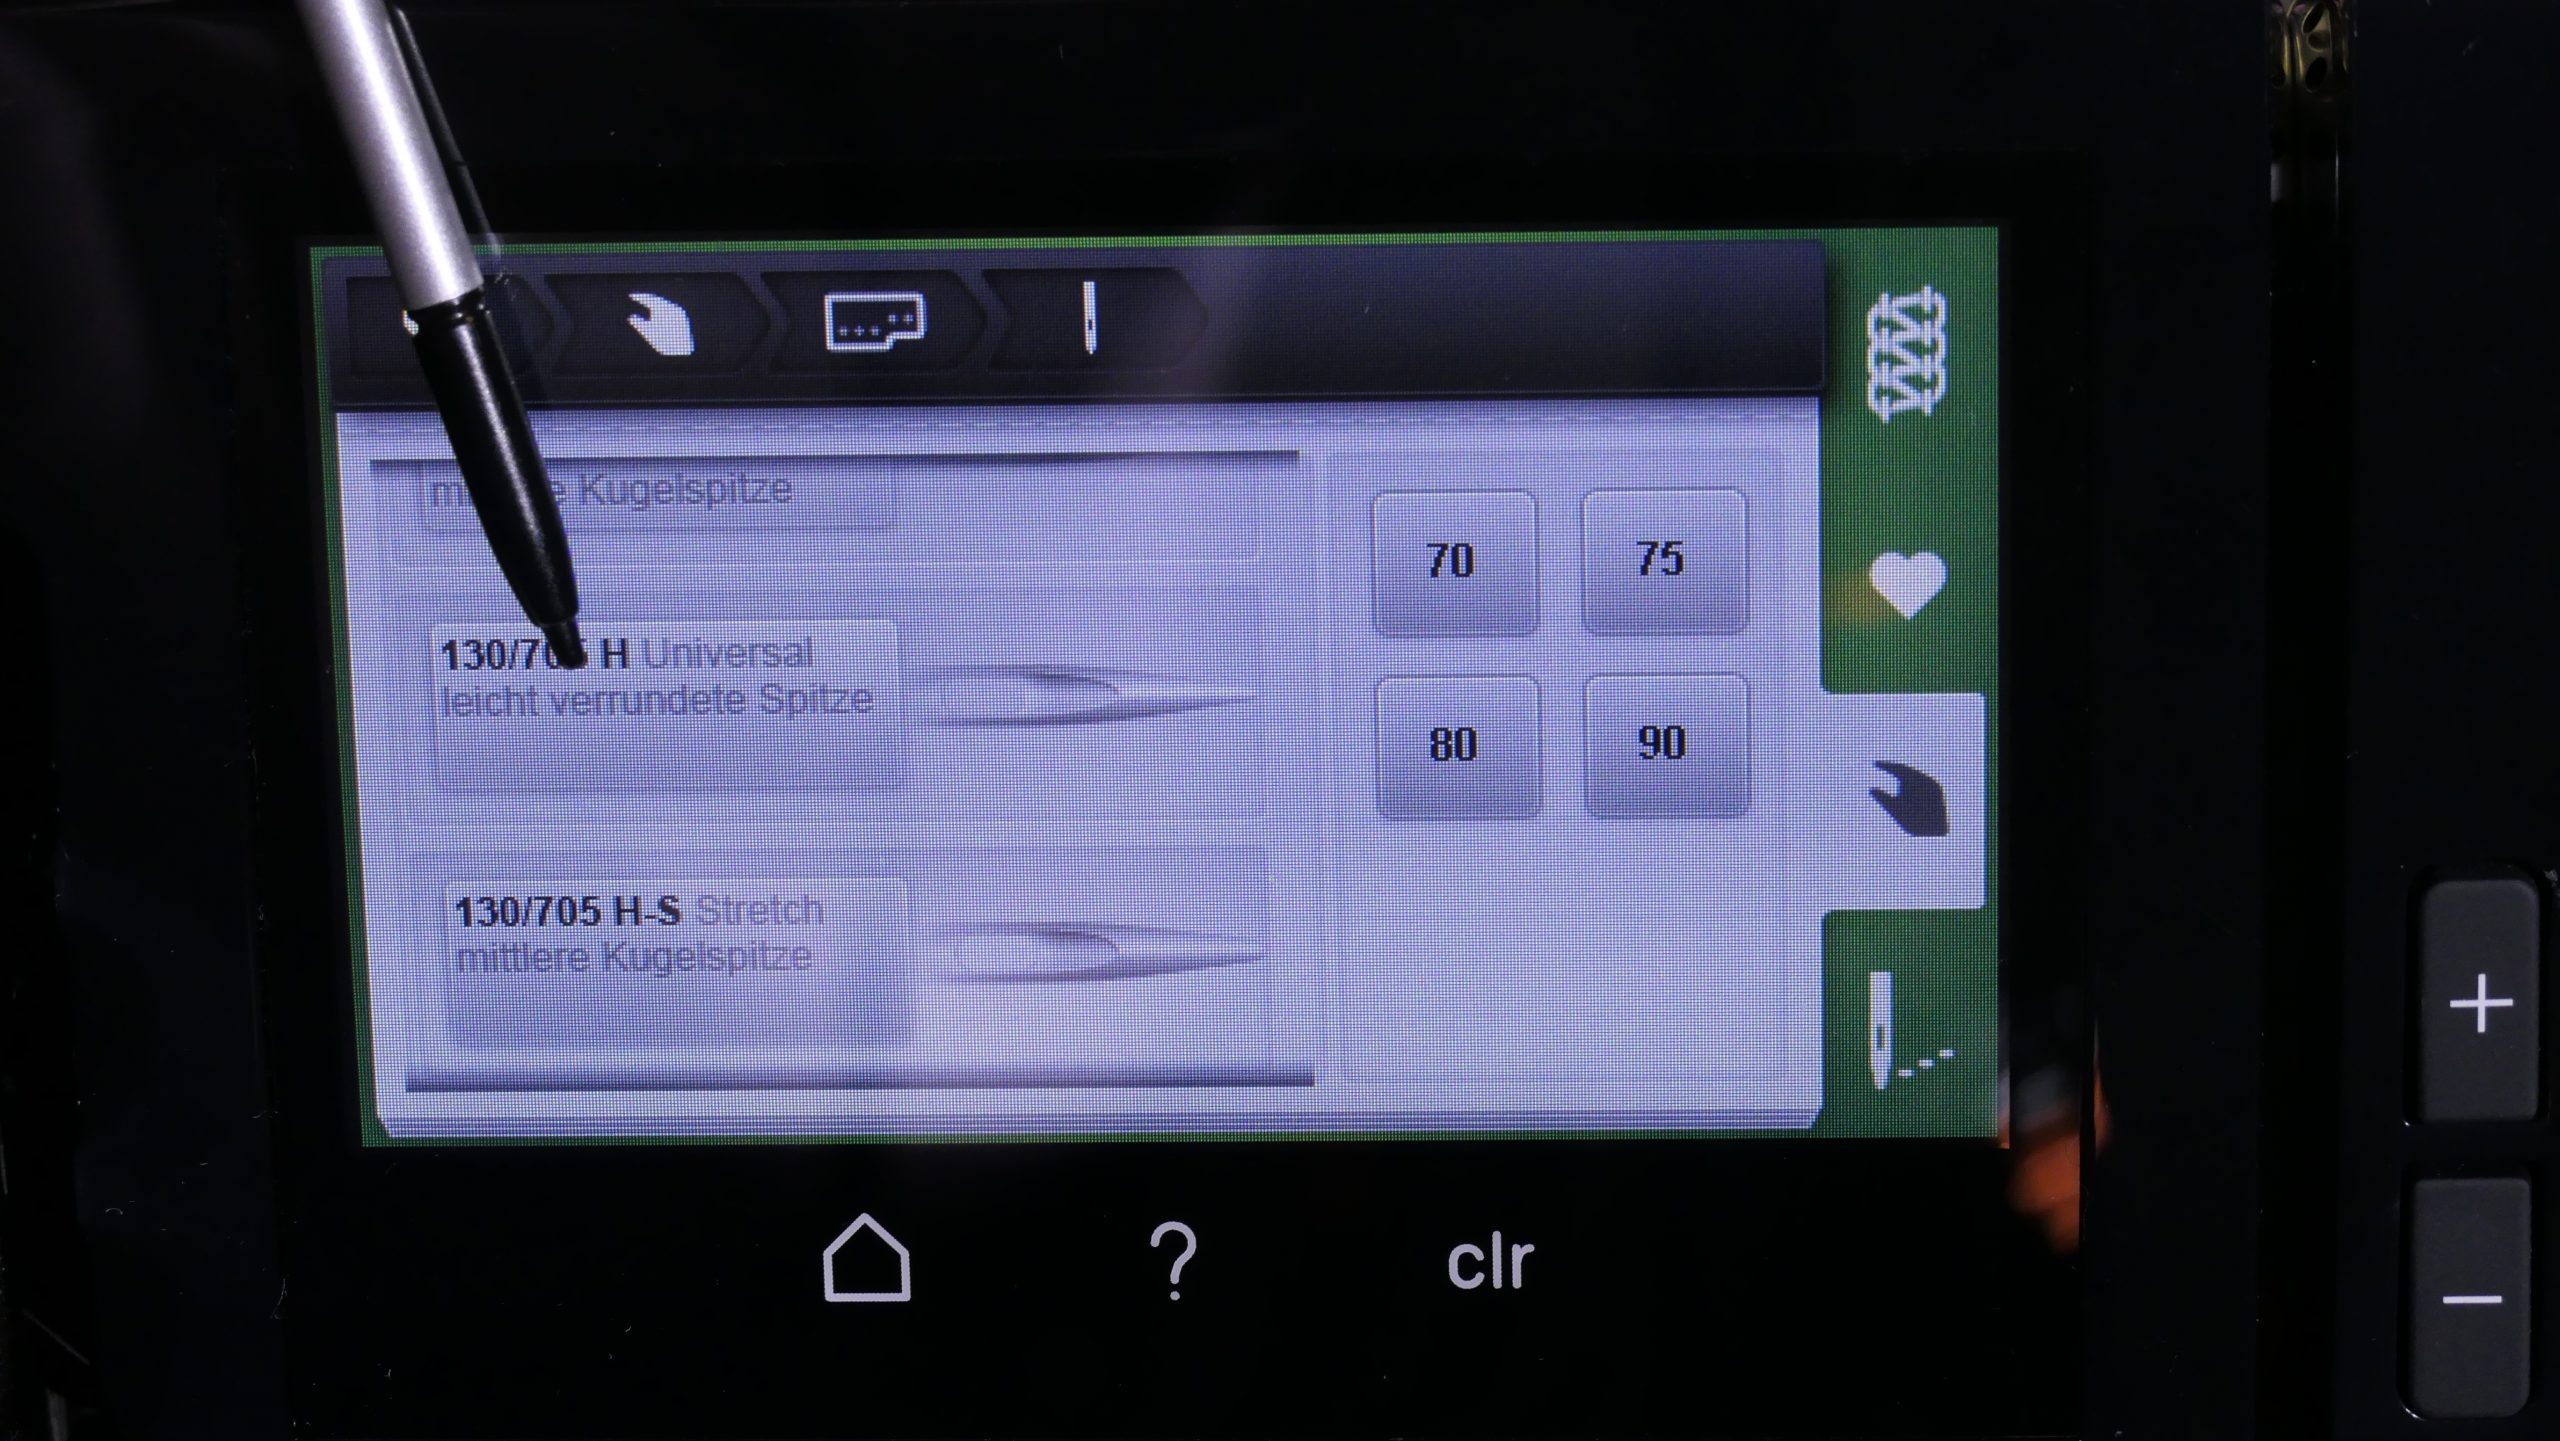
I have the right needle on the inside:
And by tapping on the needle, I can even enter precisely which needle I have inserted:

In this case I have a 90 Universal needle, which I now indicate to the machine as well.
I can easily retrieve all this information the next time I want to sew similar projects. This way, I simply have to find the setting and I am ready.
Finally, Confirm and Save again, and the information is saved.
Now I sew my outer cover just like my lining. At the beginning of the seam, it is essential to hold onto the bead made of thick thread at the back.
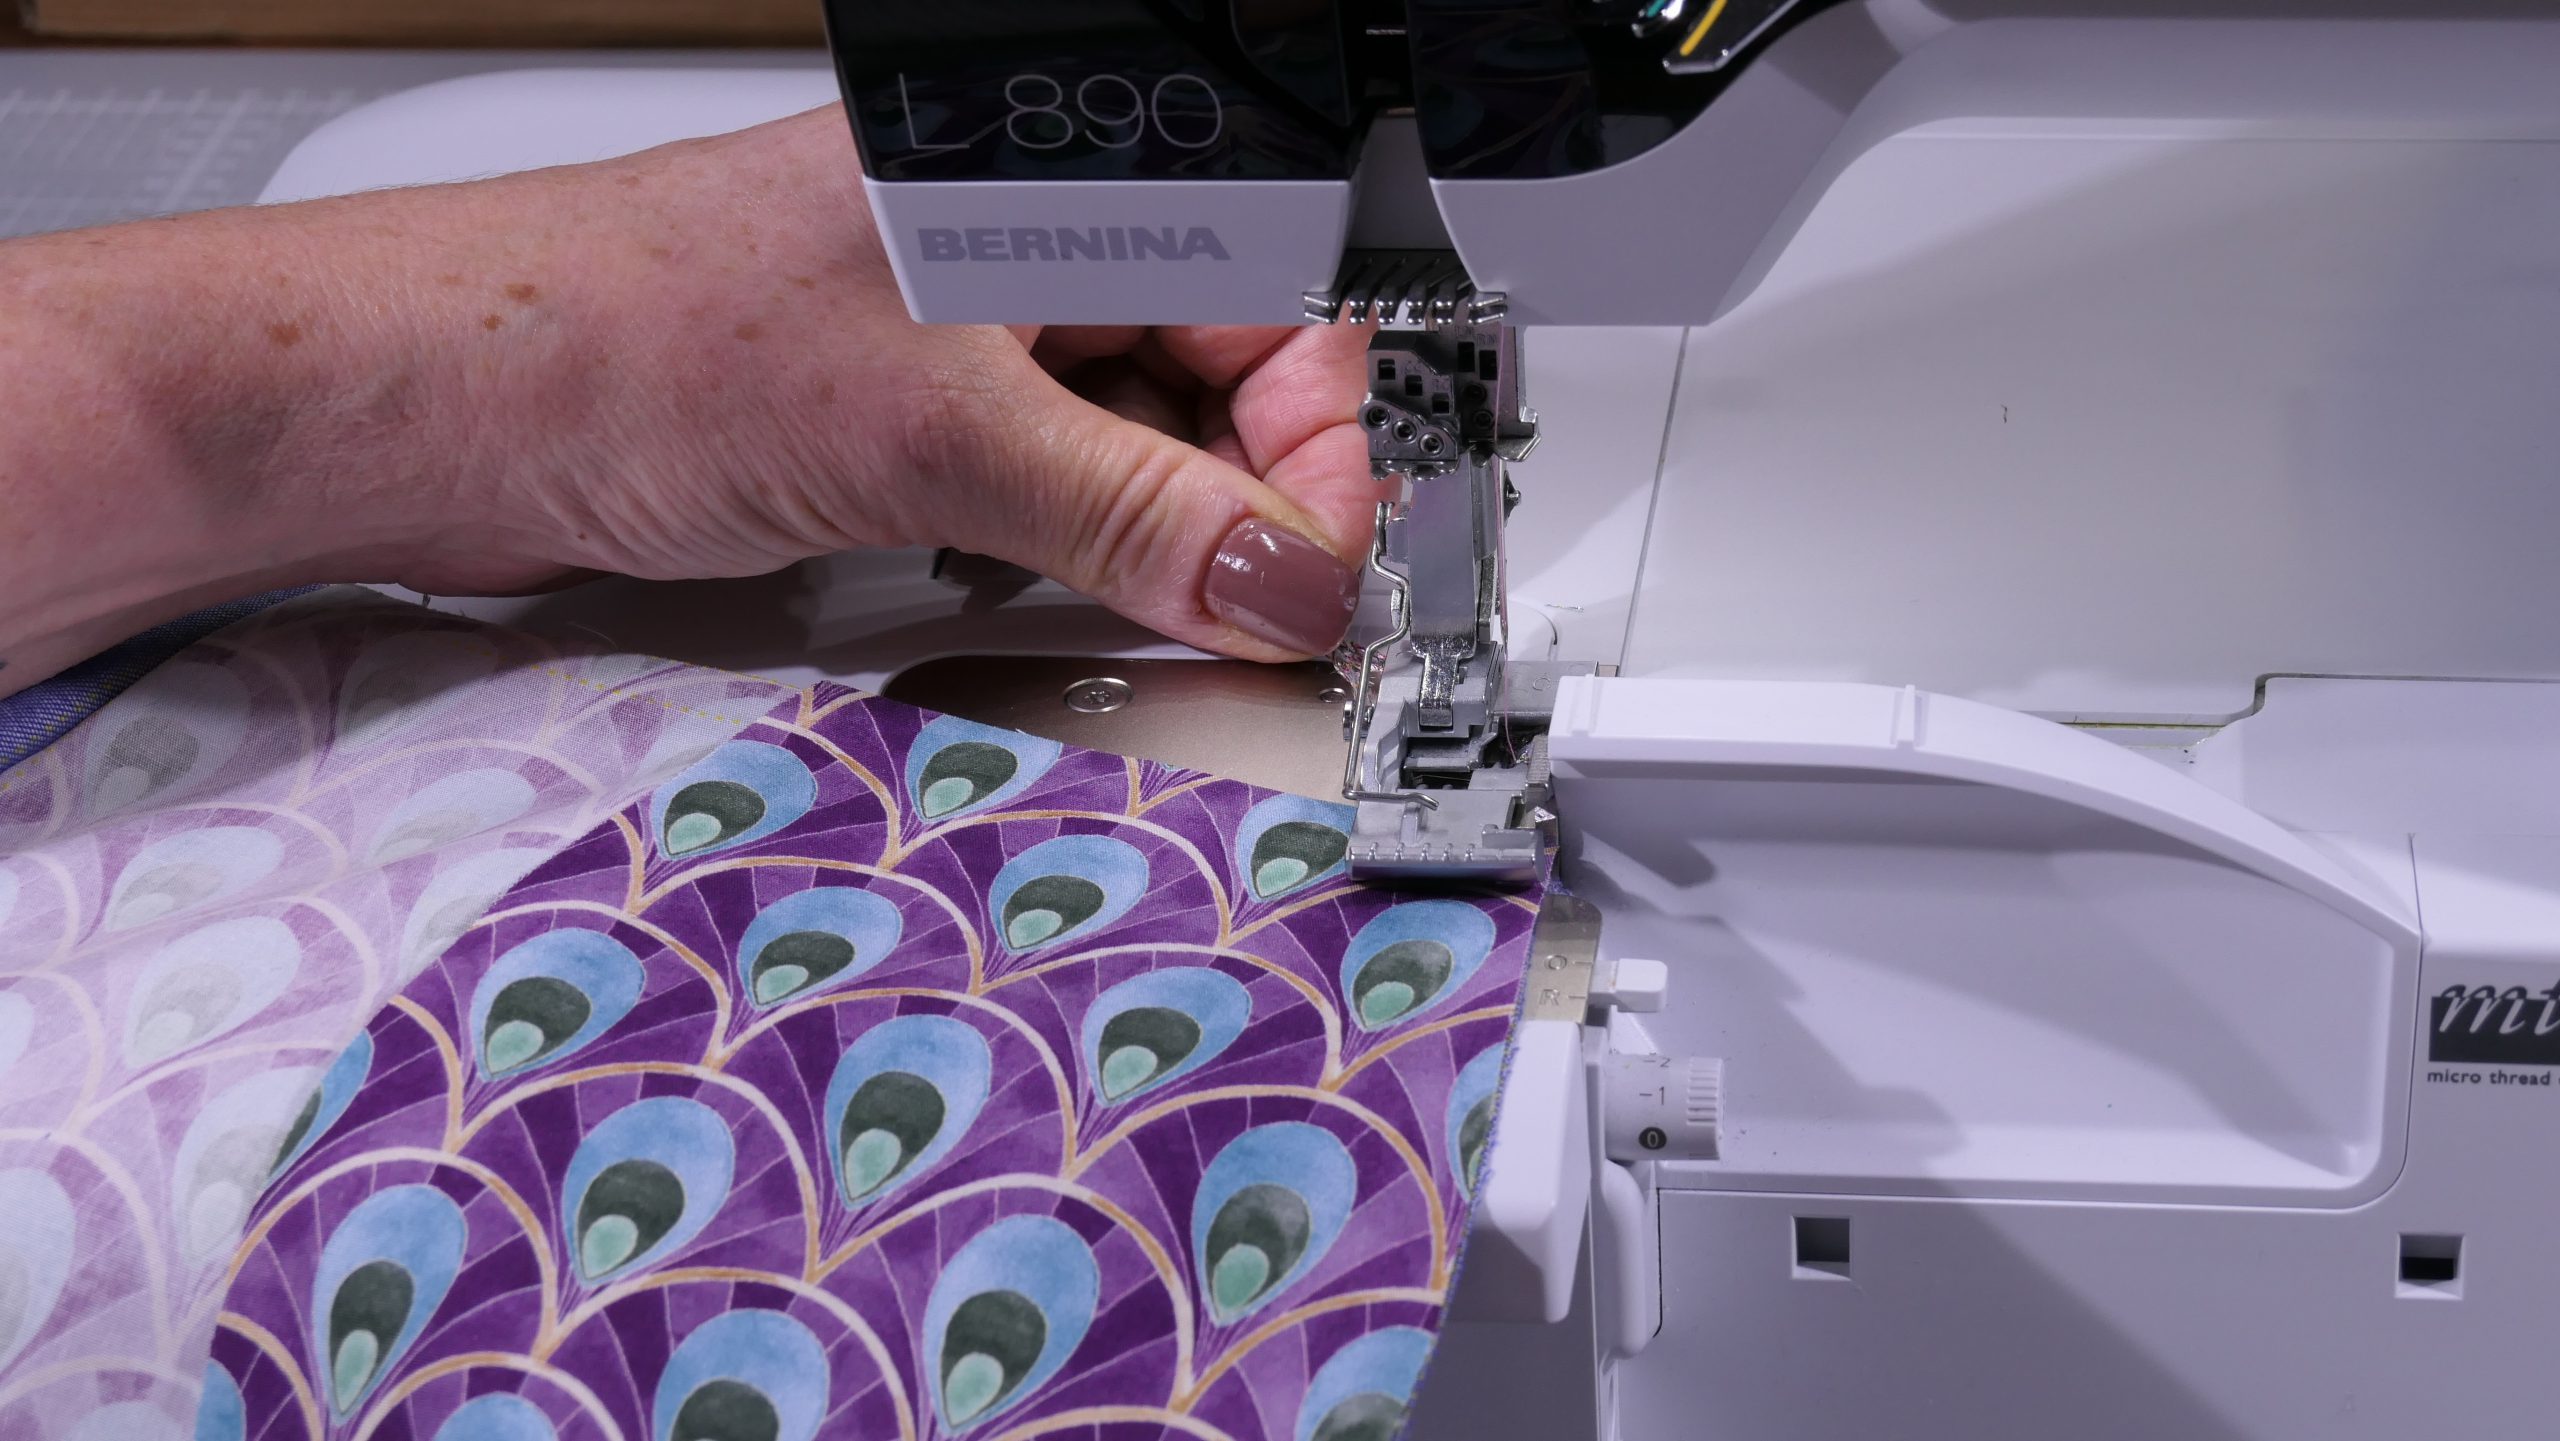
Sew around the overlock seams using a decorative stitch
Then I sew the thick decorative seams onto one side – I can choose how I want to design it as I have the decorative thread on both hooks.
To do this, I go to the BERNINA 780 and choose a cross stitch:
I always pierce the folded-over overlock seam close to the edge. The rest of the stitch goes into single-layer fabric.

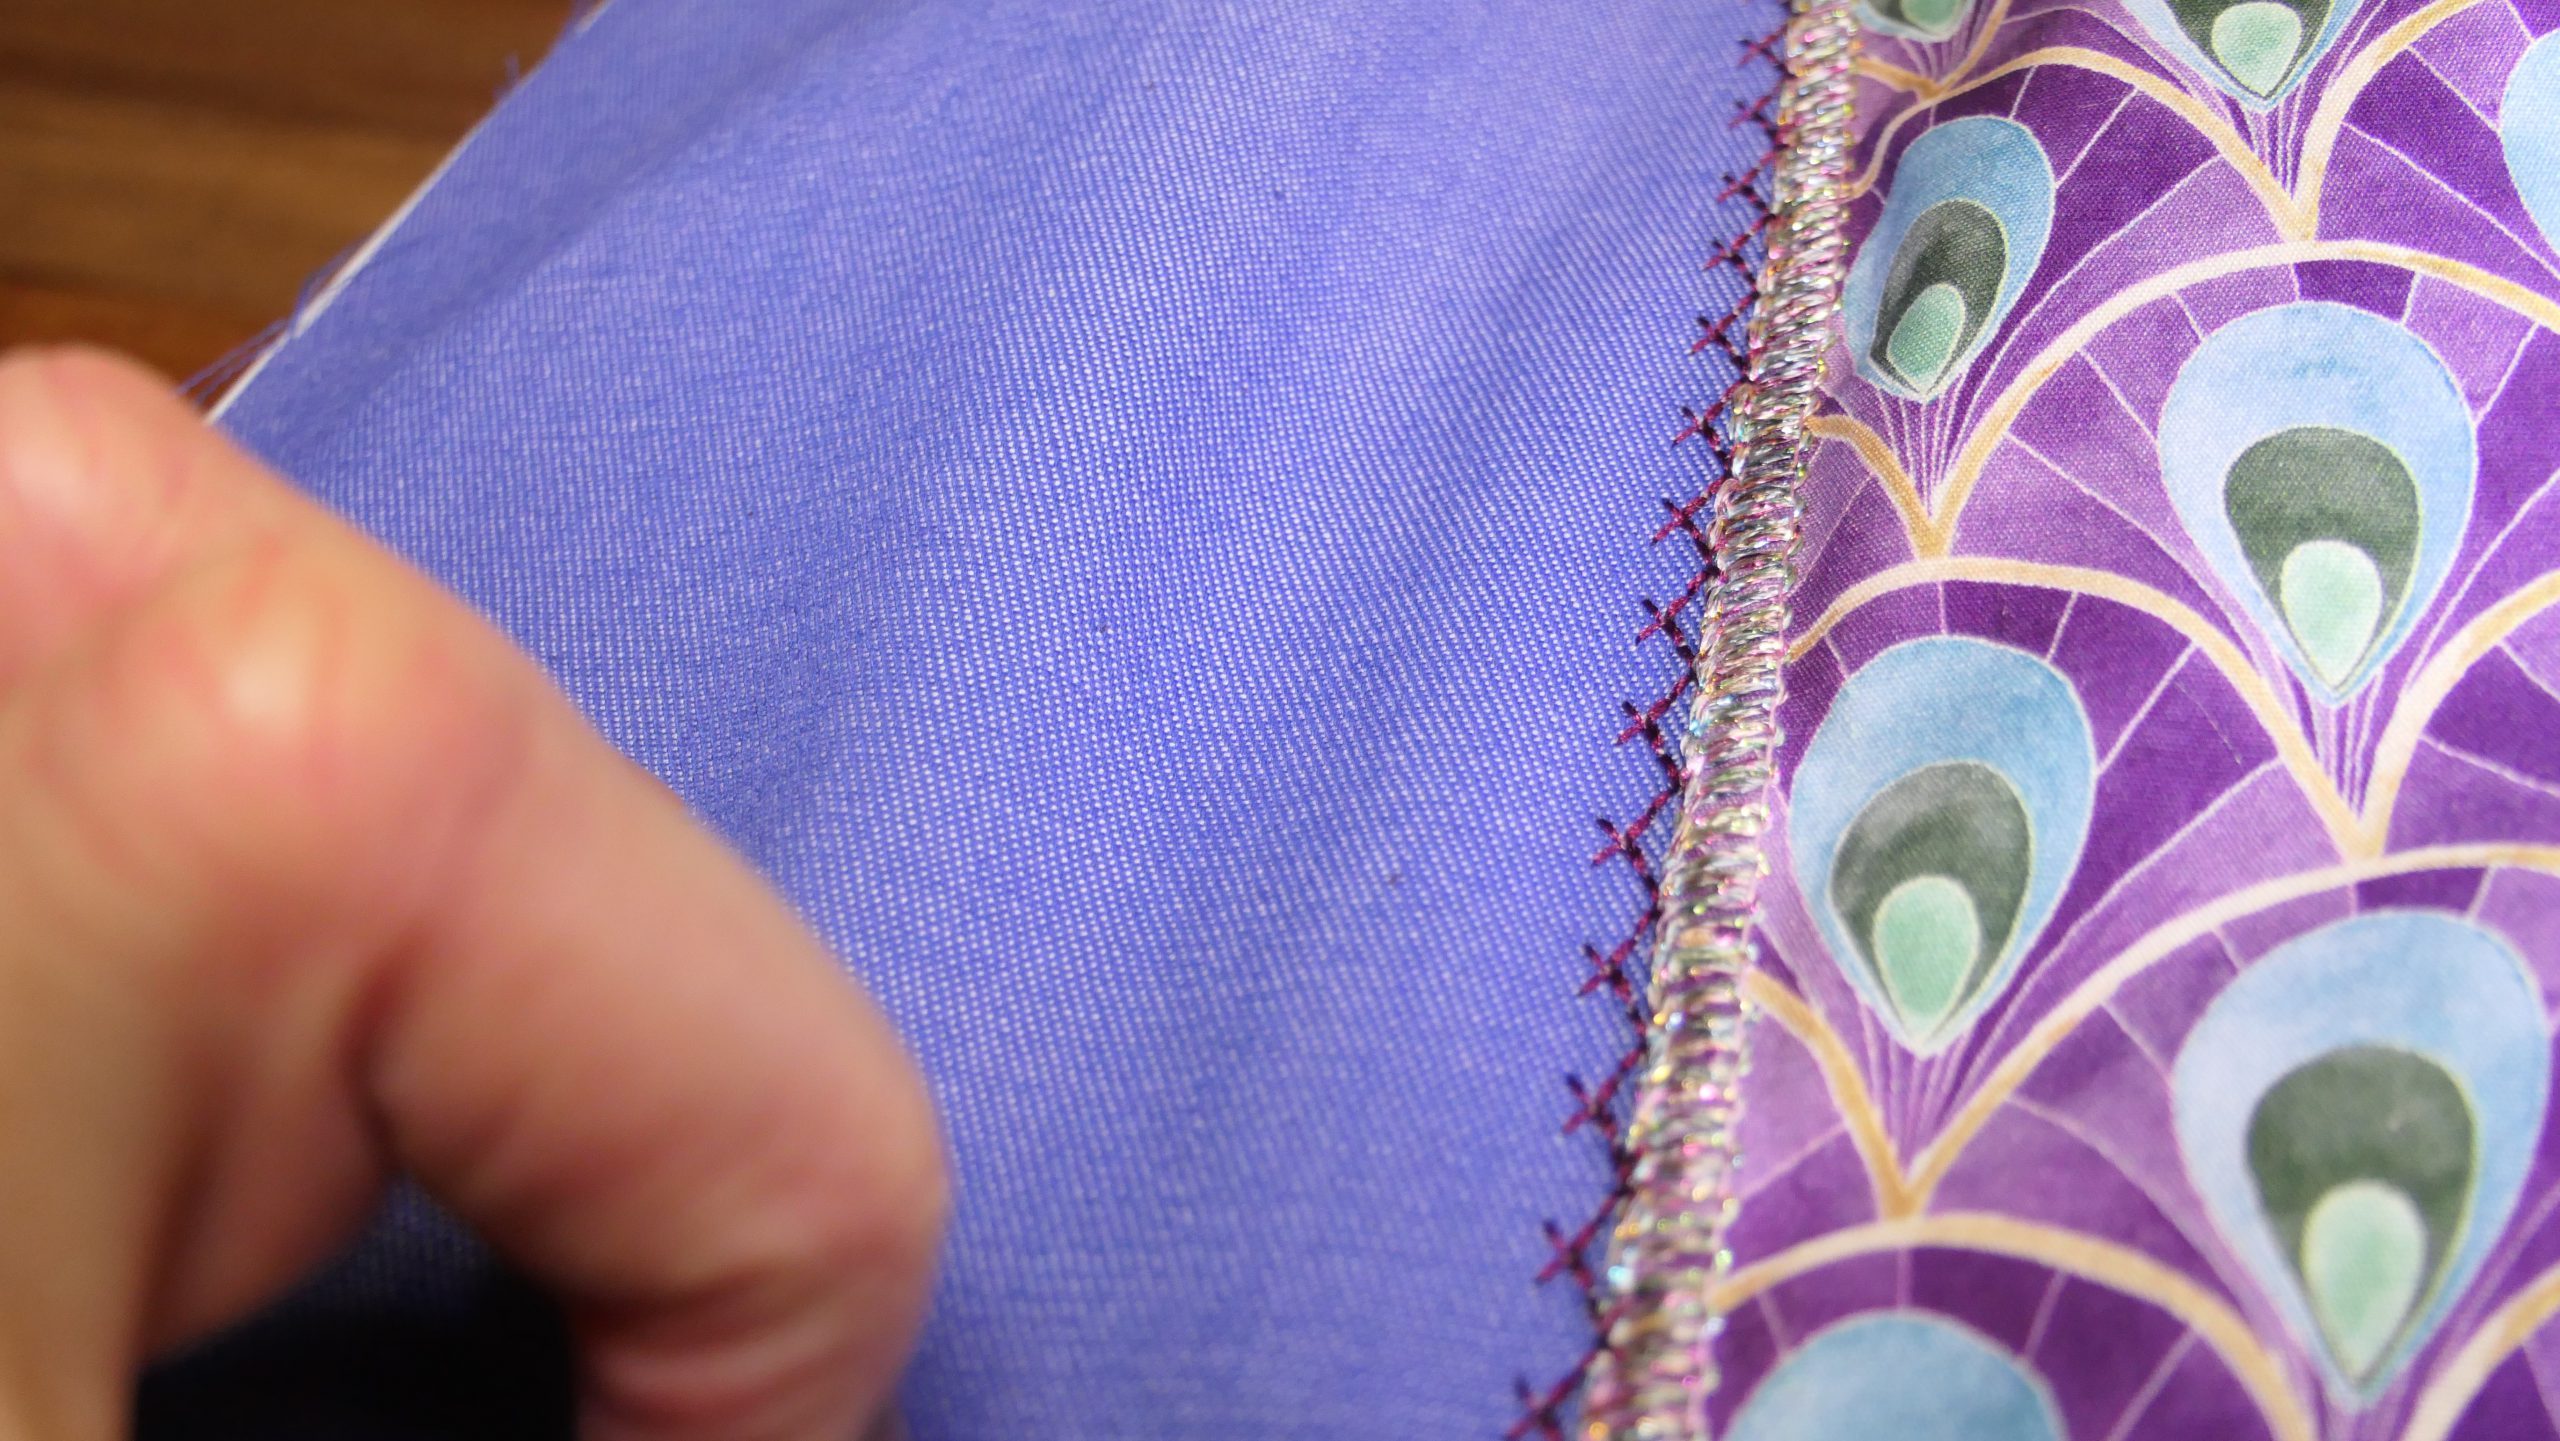
For this reason, it is important to place the embroidery stabilizer underneath. Without the embroidery stabilizer, the decorative seam would pull together.
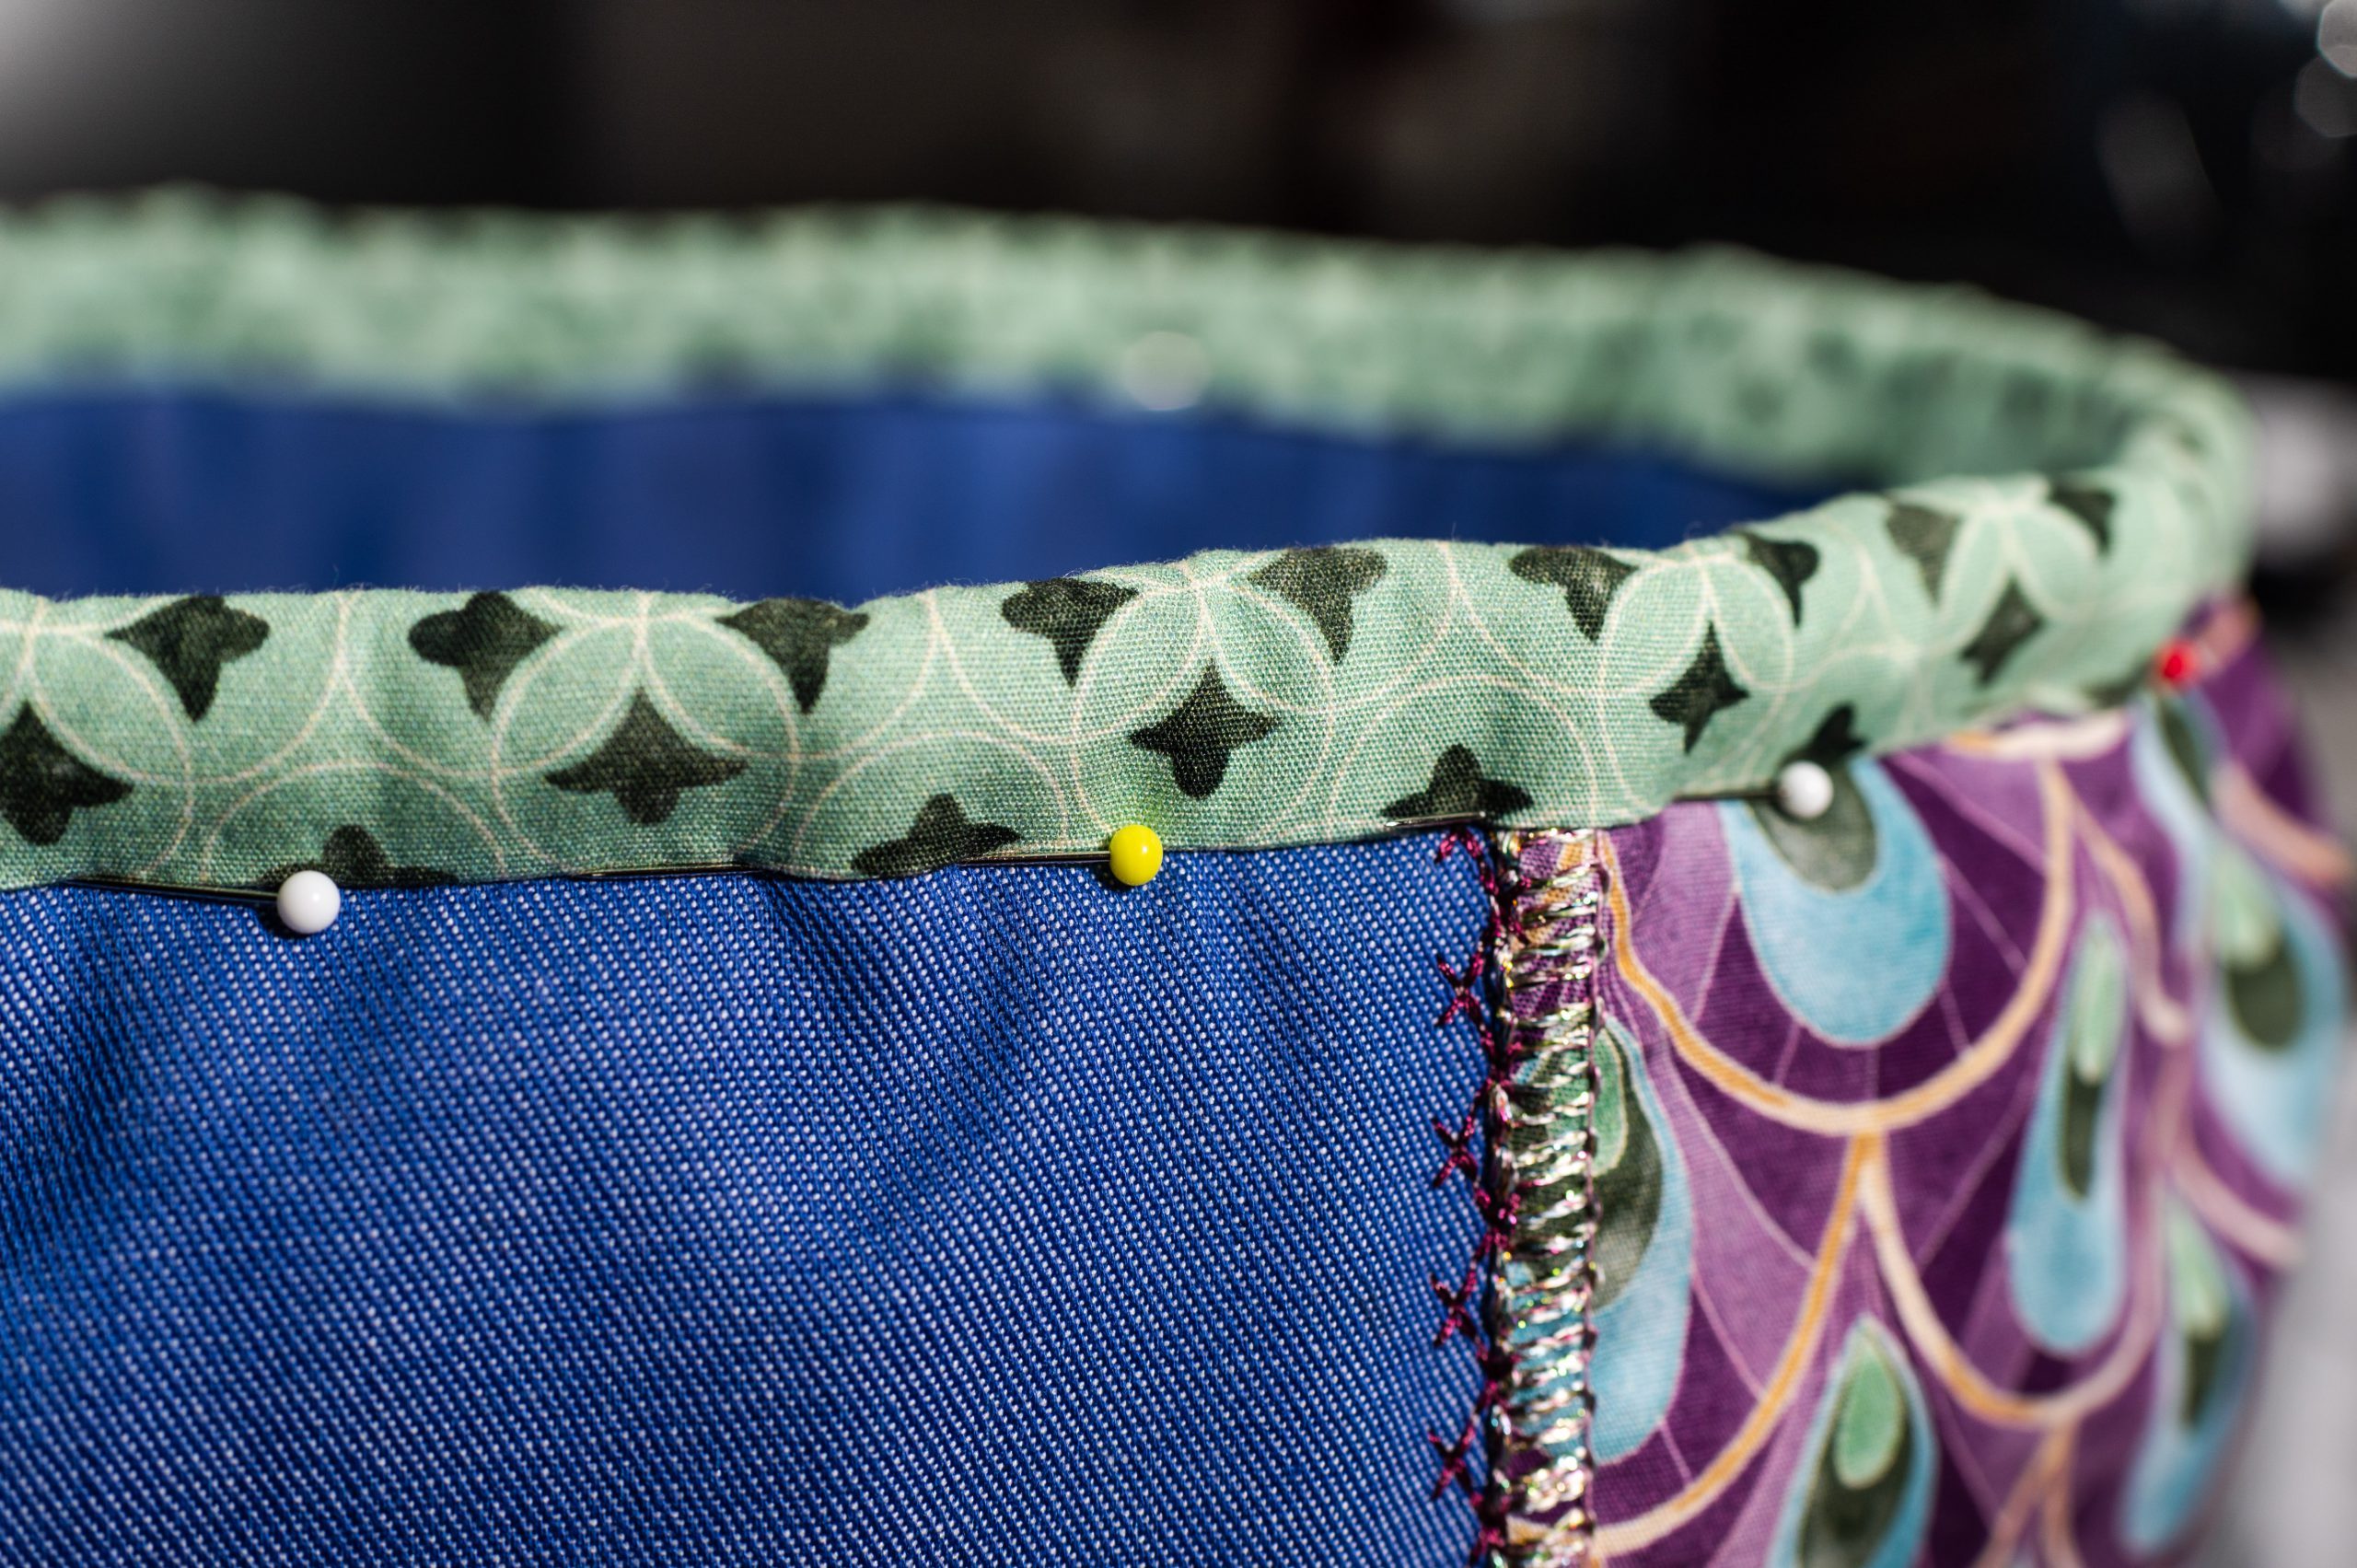
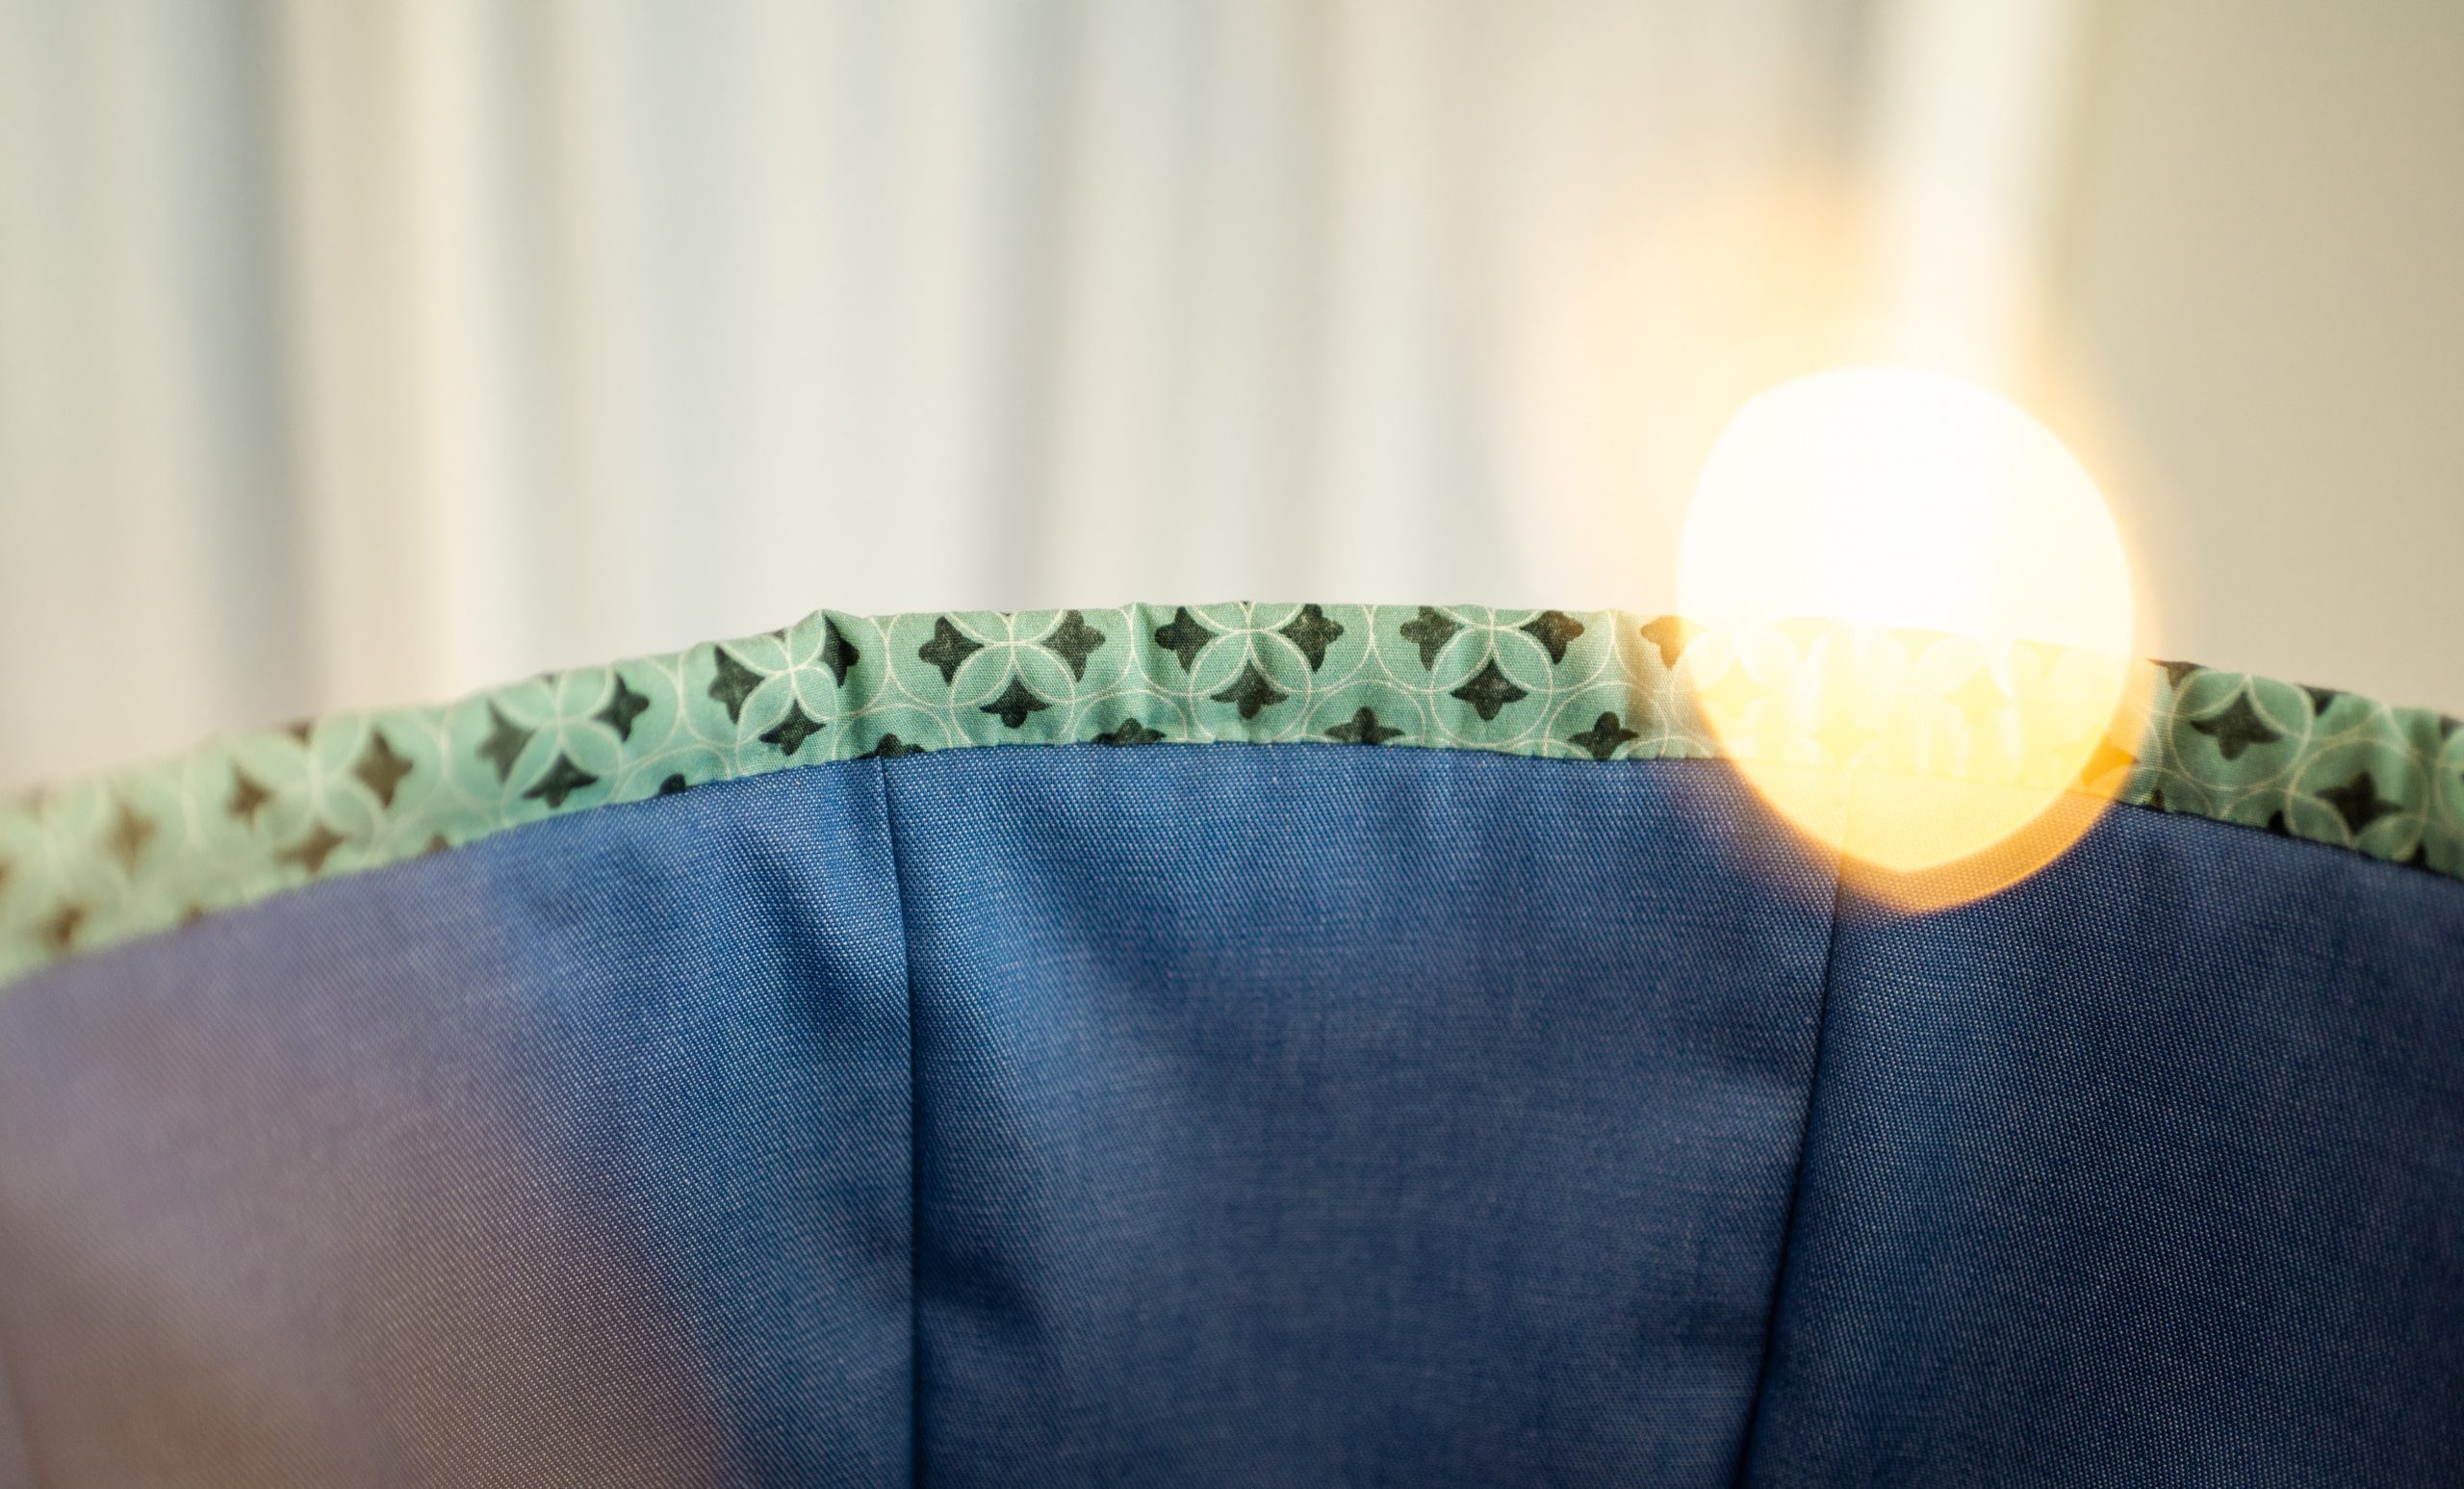
Sewing the top edging
Last but not least, it is time for the top edging. For this, I cut an 8 cm wide strip and iron it over twice – first to the middle, then from either side, back towards the middle.
I then sew this onto my outer shell from the outside – right sides together – precisely along the first ironed seam.

I fold the strip over the edge and sew it from the inside using small hand-stitches.
My Christmas basket is finished – and it is also a great design to use on other occasions throughout the year.
I hope you enjoy this sewing project!
Yours truly, Manu


0 Responses