 BERNINA Corporate Blog -
Advent is slowly moving toward the finish line and today we are already opening the 21st window of the colorful Advent calendar on the BERNINA blog. You have been invited to recreate many creative and colorful ideas, and you have probably already made one or two of the gift ideas provided here.
If you are currently in the process of lovingly wrapping your Christmas presents, I have the perfect idea for you today:
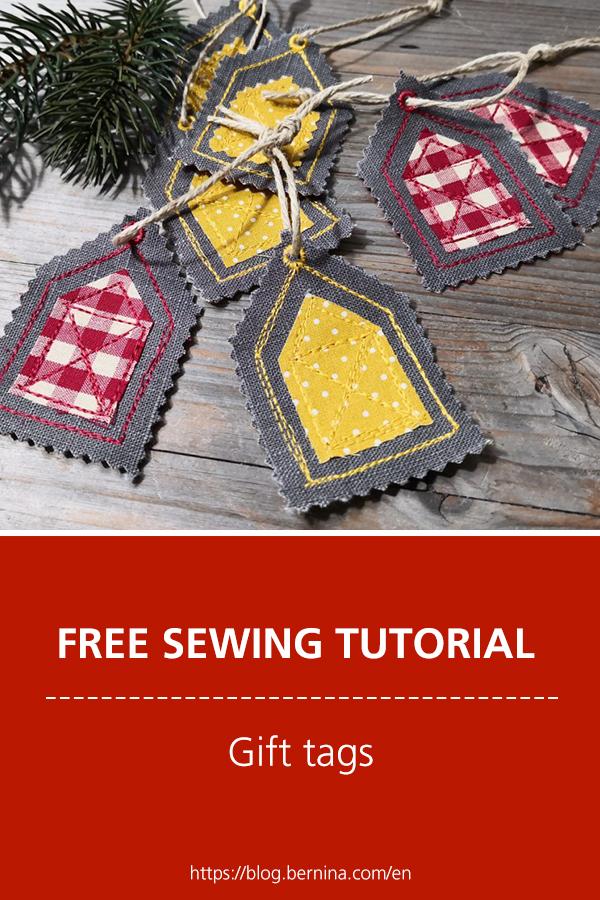
Last-minute gift tag
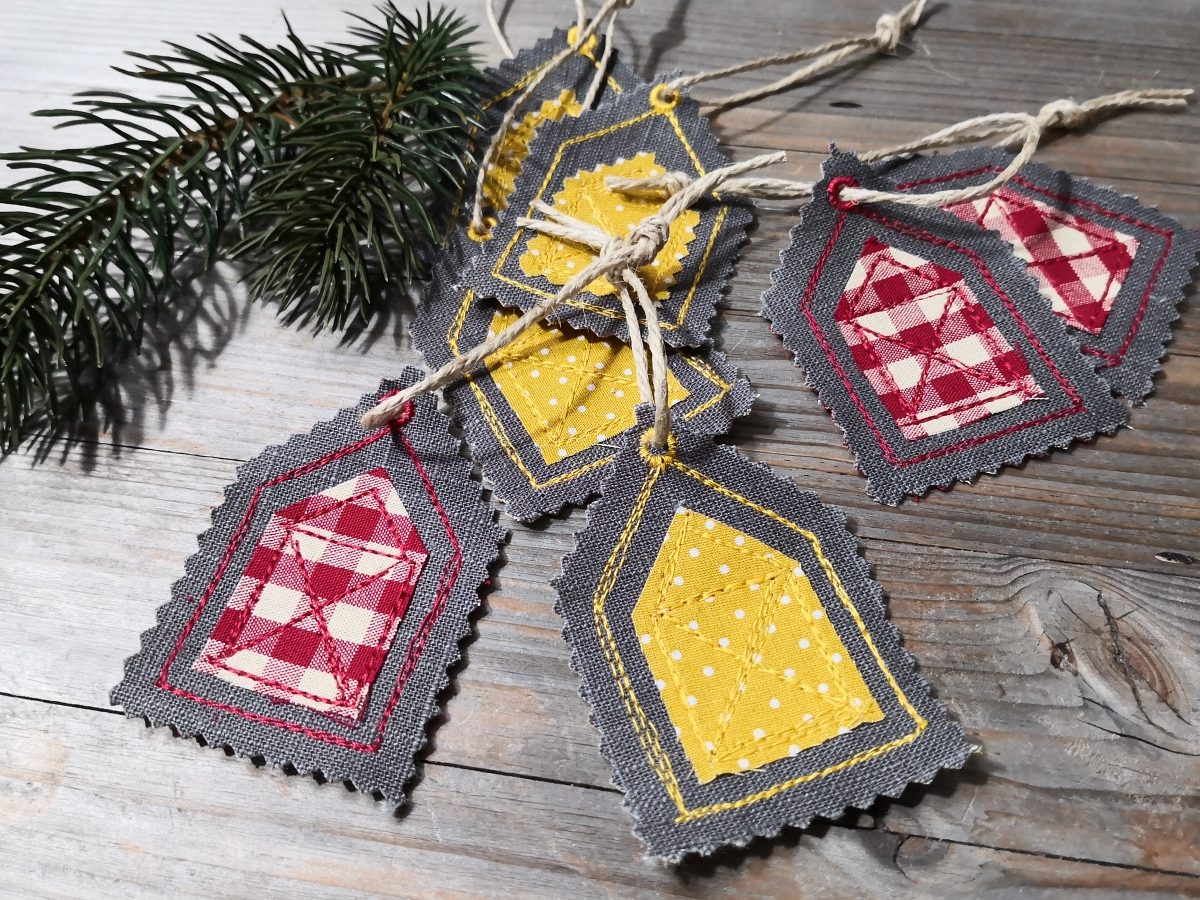
These textile tags are very easy to sew and are a great way to work with small fabric remnants. What’s more, the tags can be reused year after year and add a vibrant splash of color to the Christmas gift table.
From your remnants box
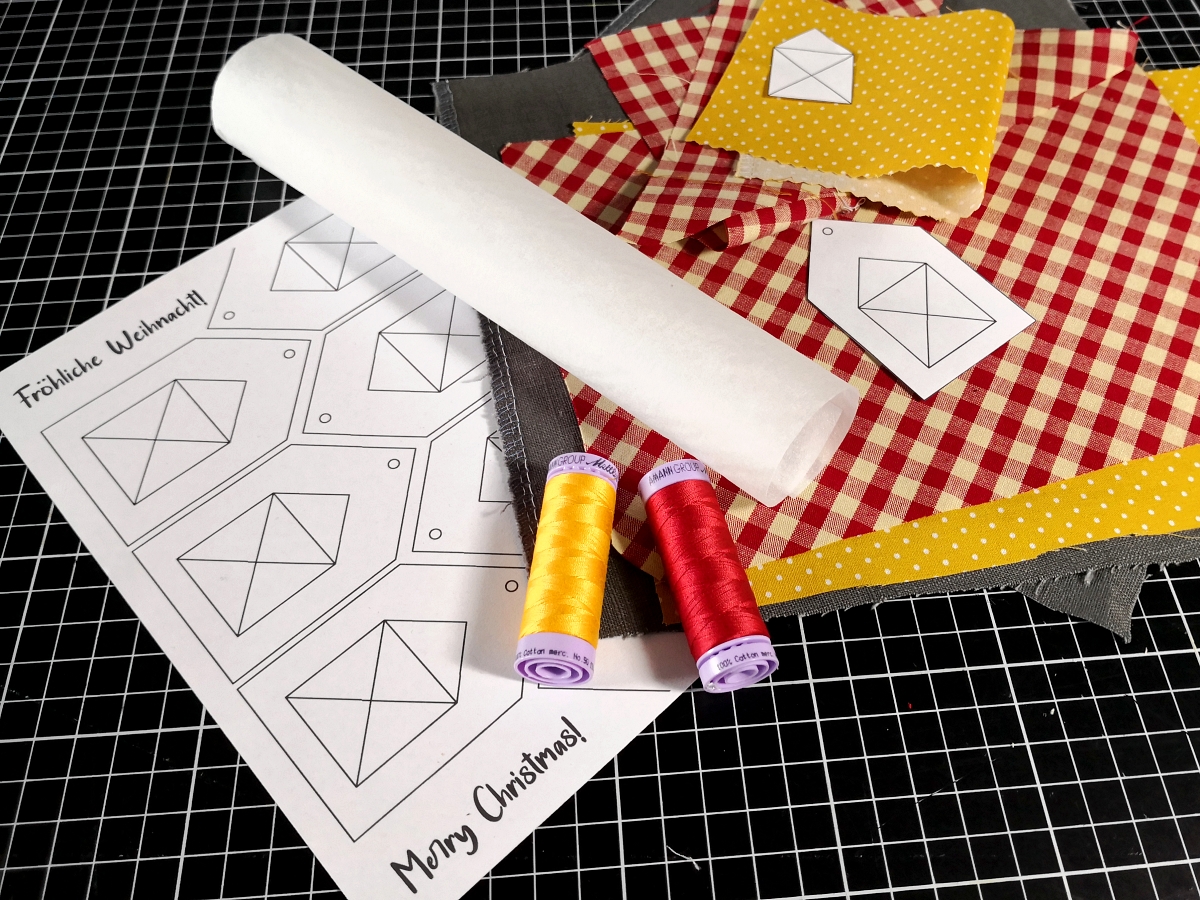
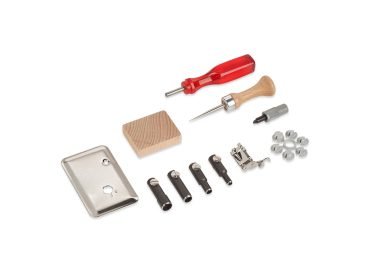
You will need
- Fabric remnants (about A5 size)
- Matching sewing thread (I used the delicate, shiny Silk-Finish Cotton from Mettler)
- Bondaweb from Freudenberg for joining and stabilizing the layers
- Pinking shears if required
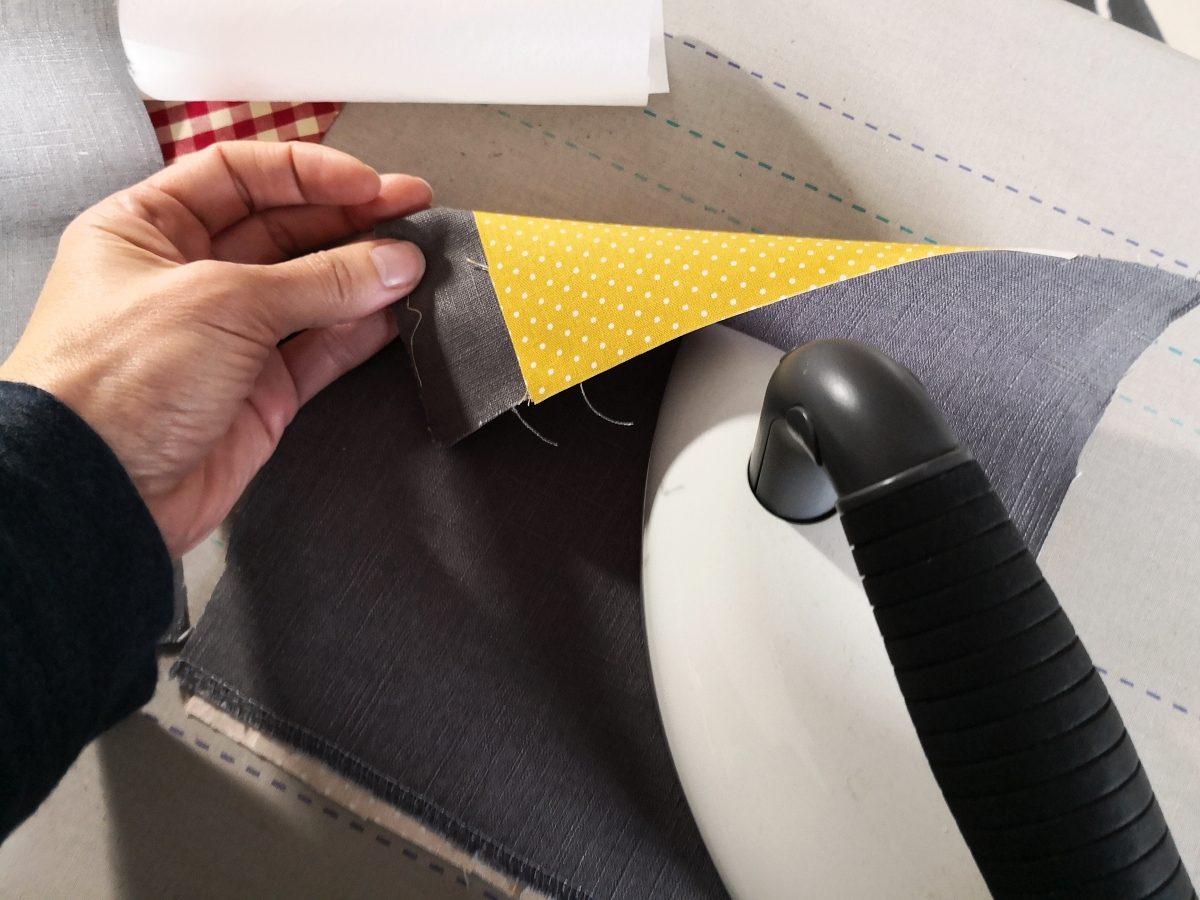
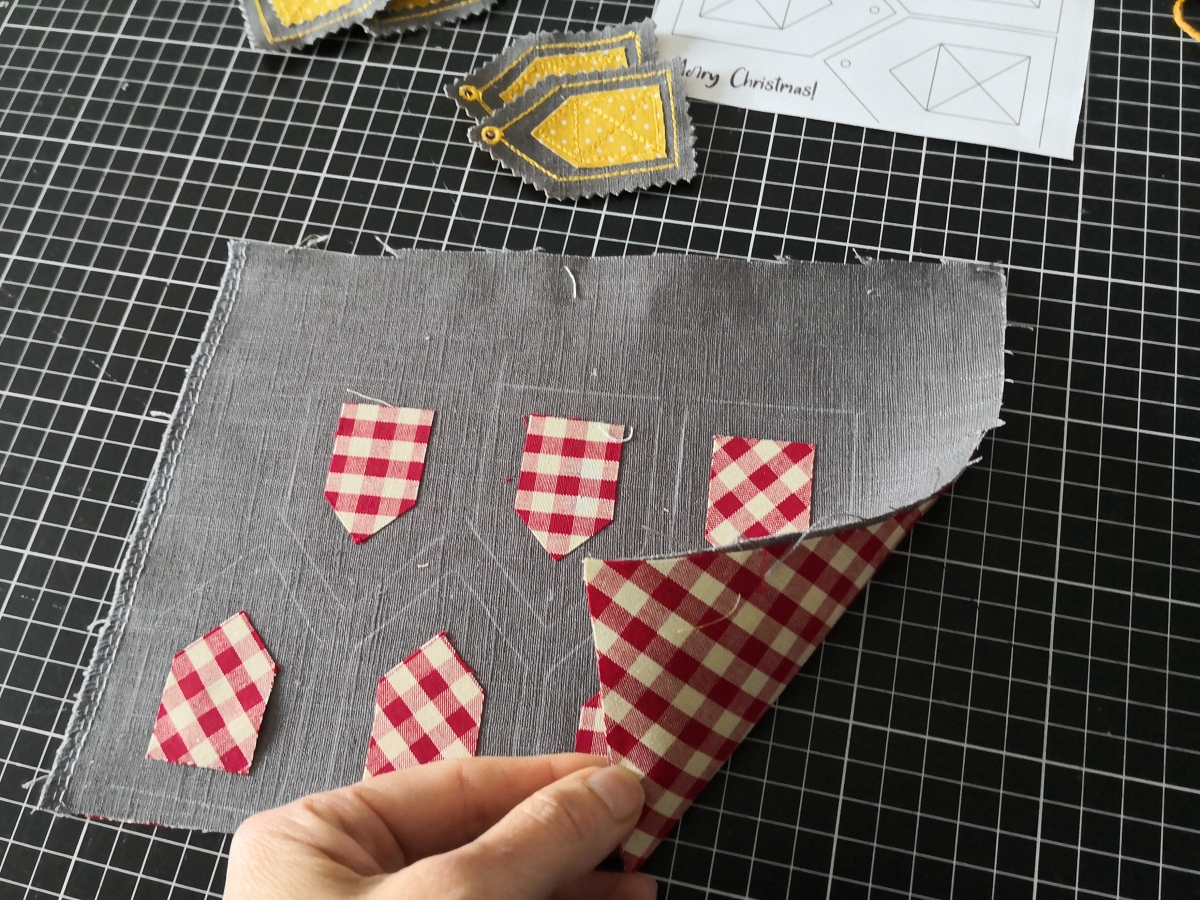
First, select two pieces of fabric of approximately the same size and attach them to the Bondaweb with the wrong sides together. I combined a plain linen fabric with a colorful cotton fabric
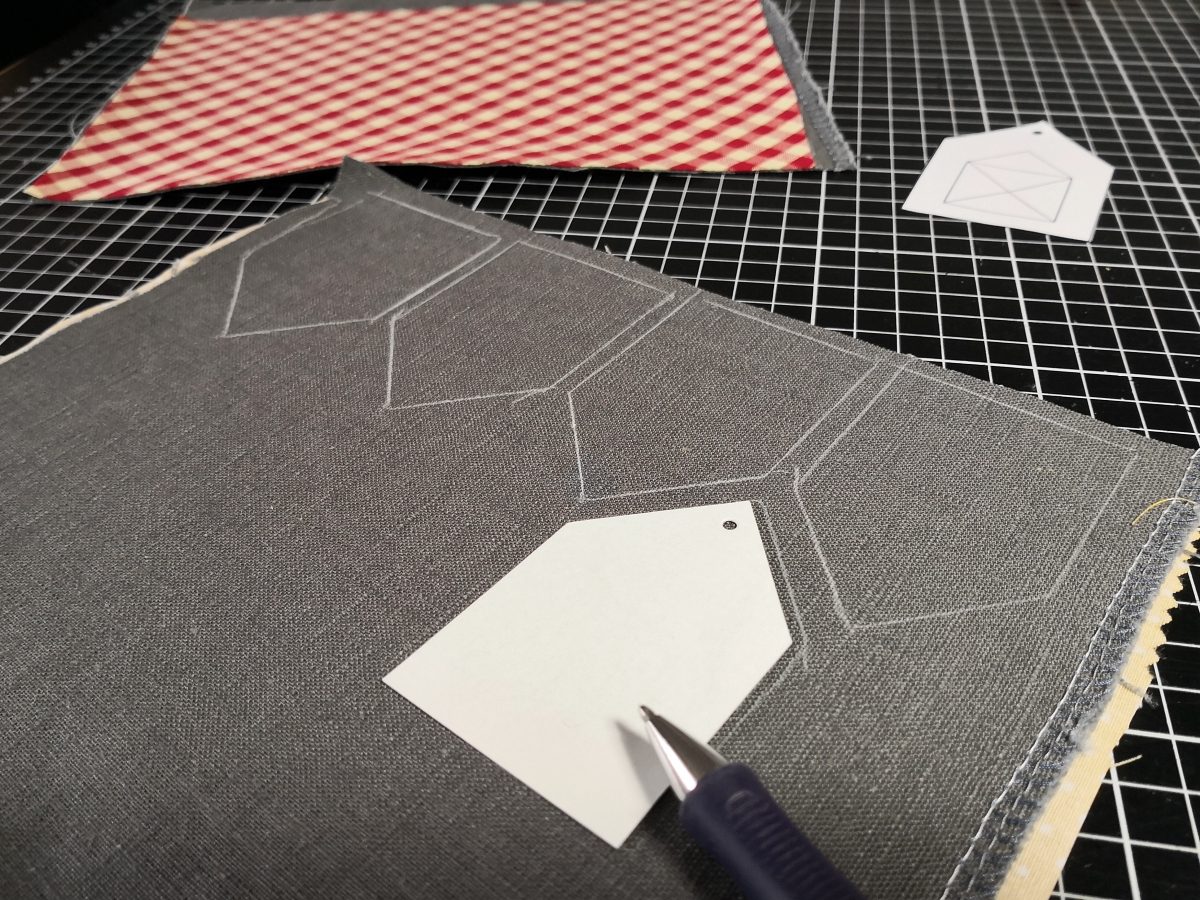
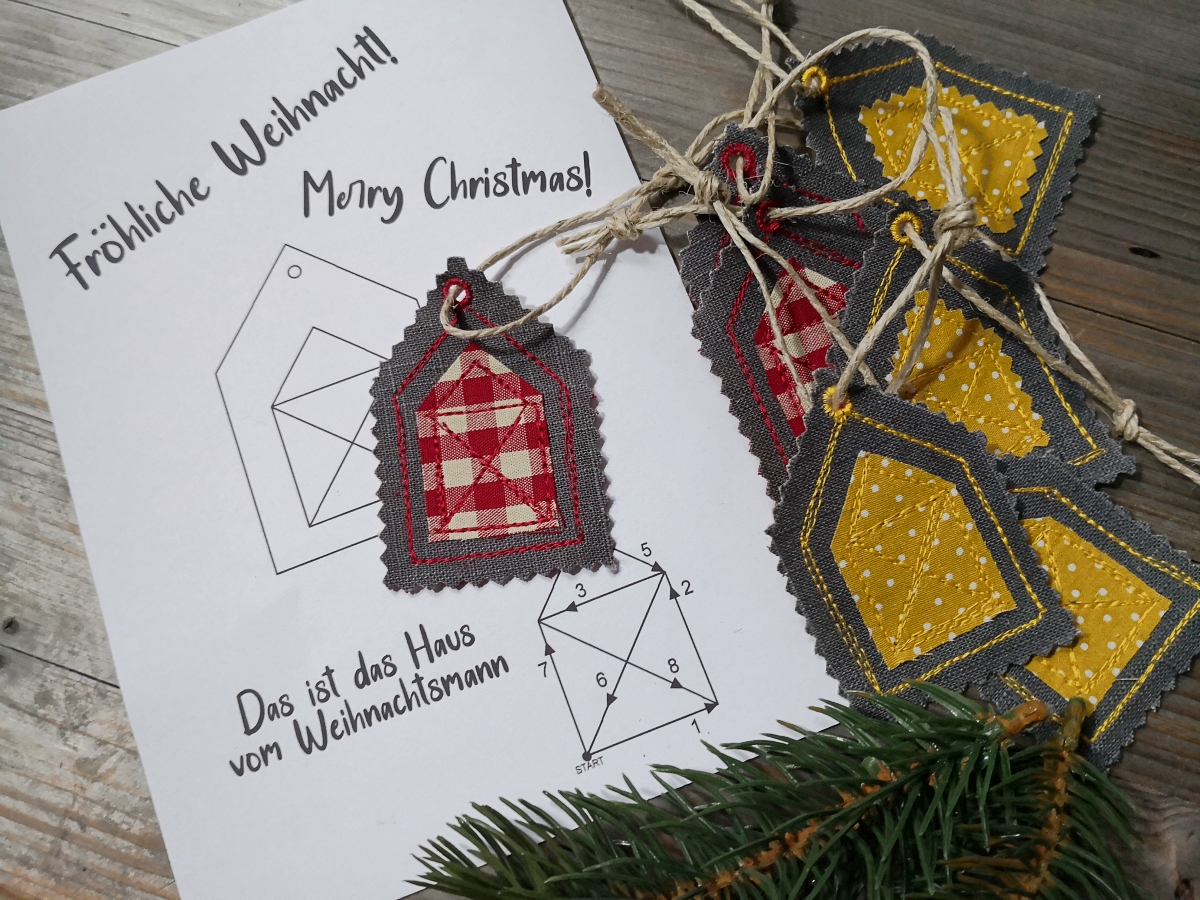
Then draw the outlines of the tags onto the plain fabric. I like to use a fine chalk pen for this. You can download a pattern for cutting out here:
Download Bernina Christmas gift tag
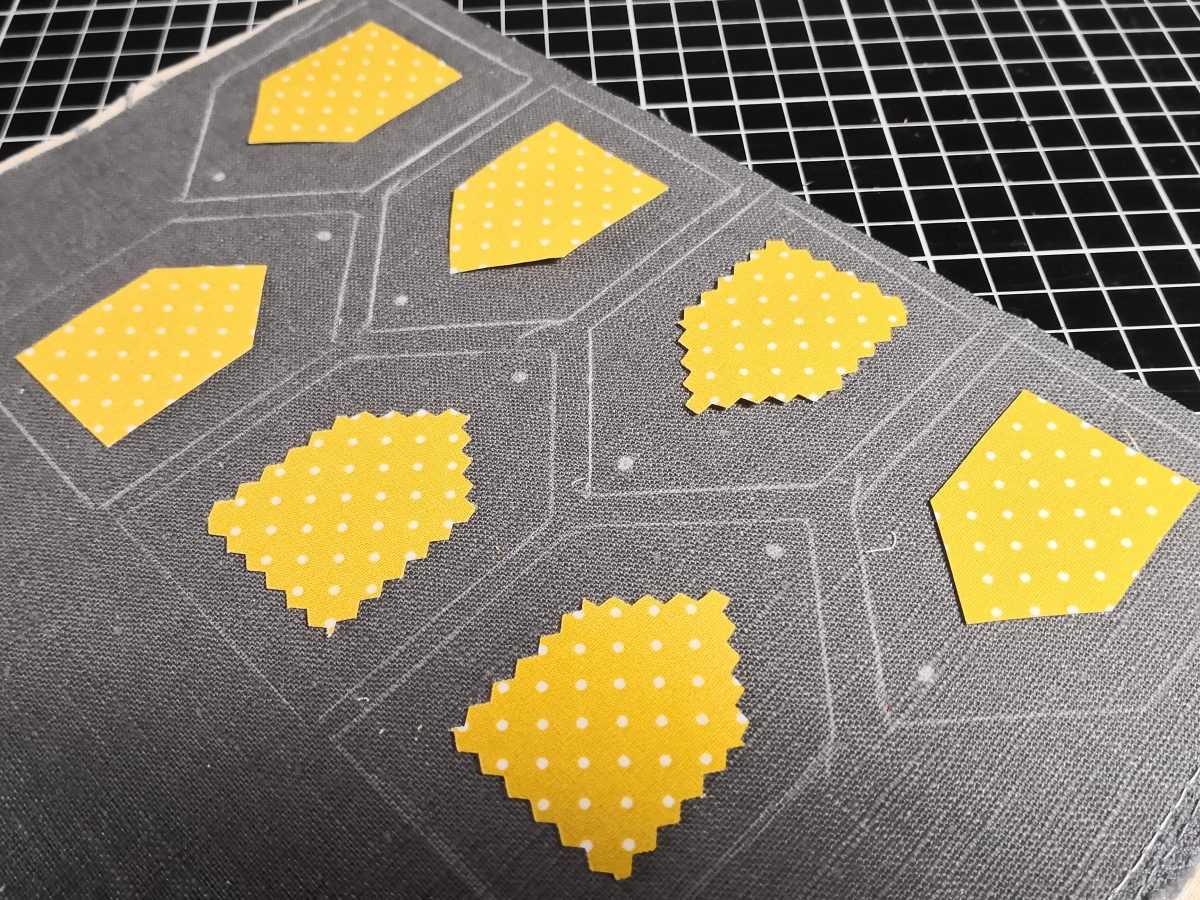
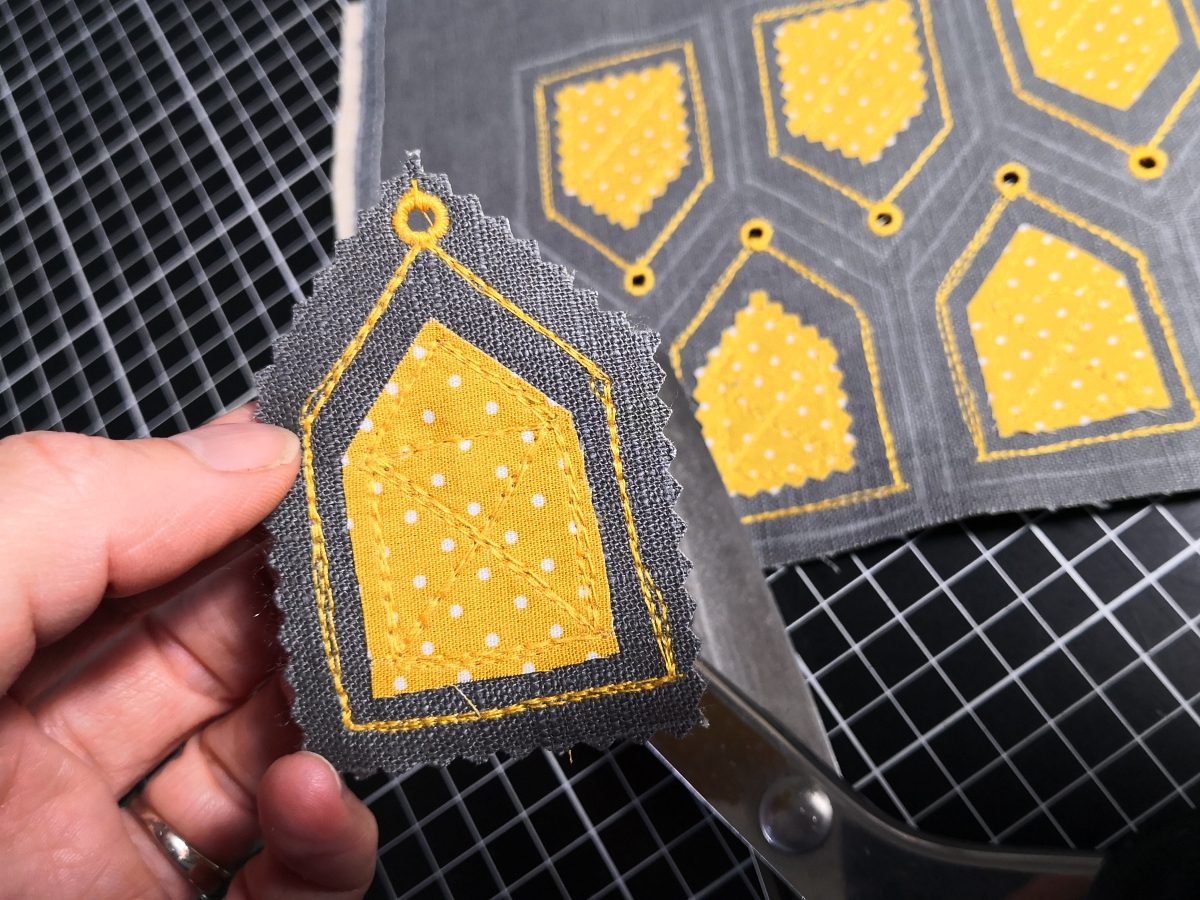
For the small appliqué details, iron Bondaweb onto a colorful fabric remnant and transfer the outline of the small house onto the backing paper. Of course, you can decorate the gift tags with other designs of your choice.
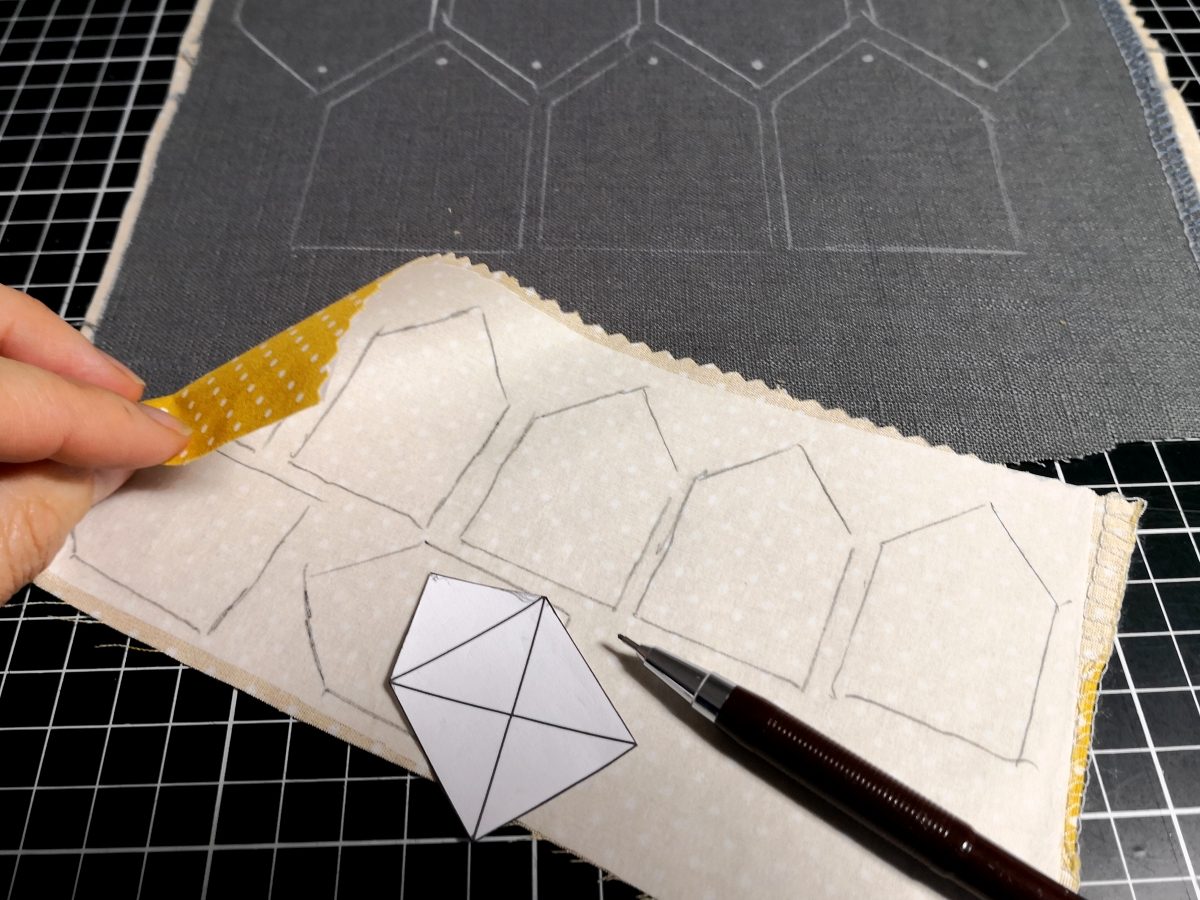
Cut out the designs, remove the backing paper, and iron onto the fabric pieces.
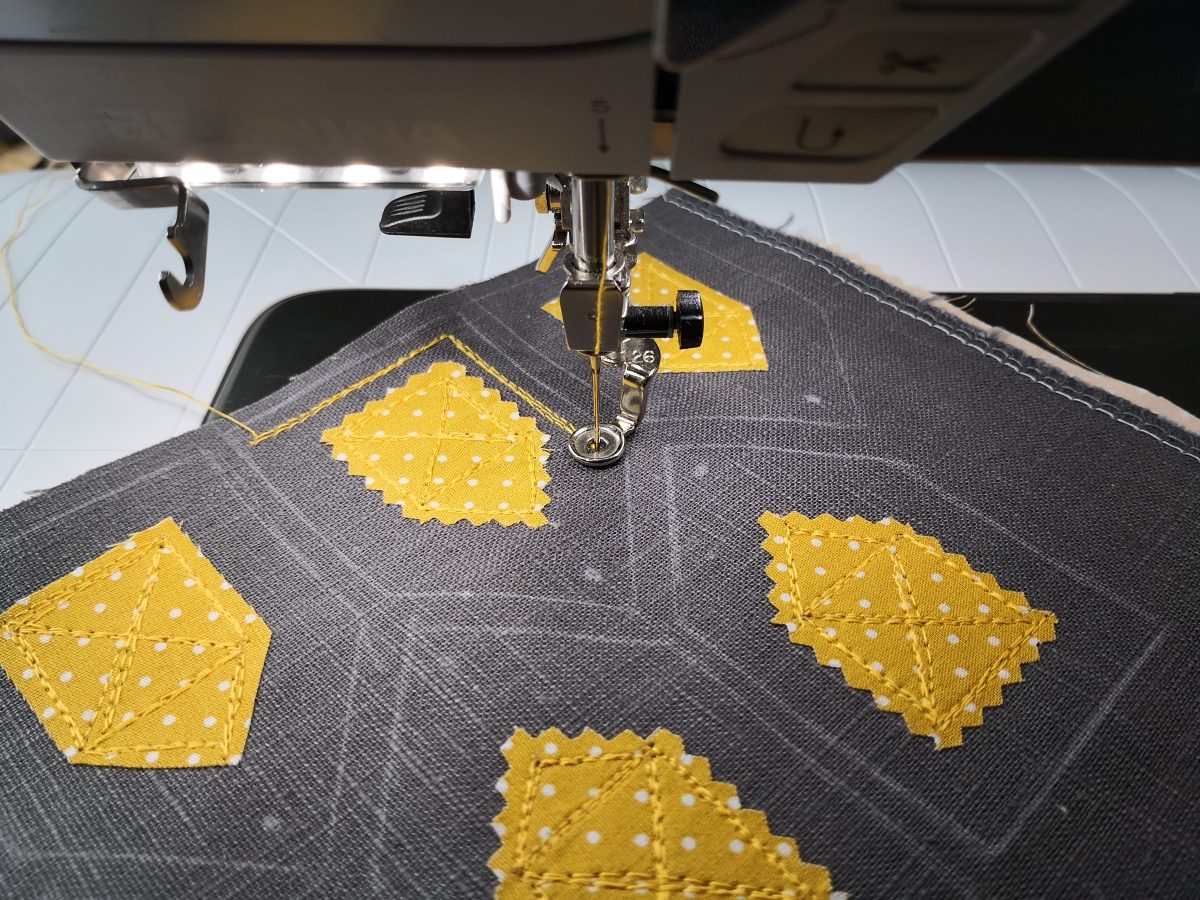
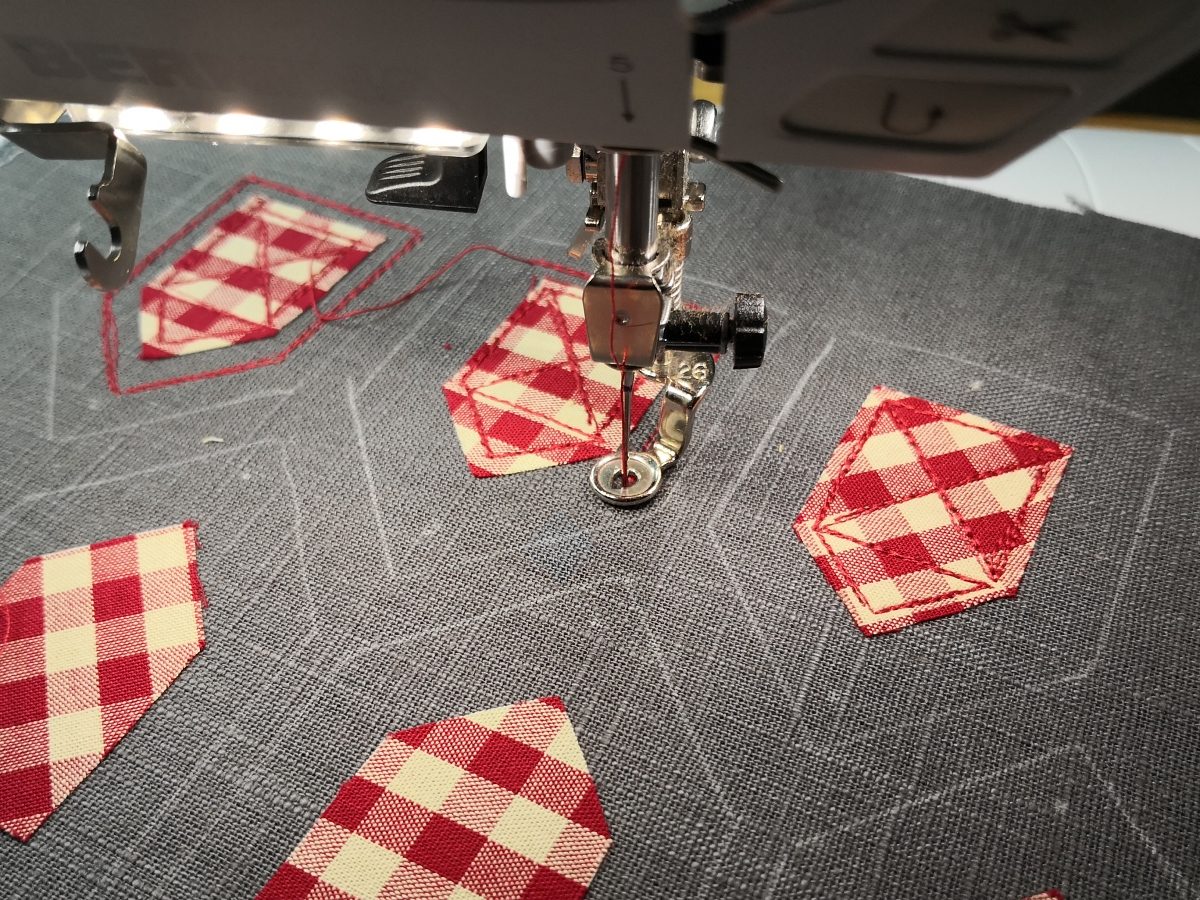
Now it’s time for the sewing machine: I decided to use relaxed free-motion embroidery for the little houses. To do this, simply lower the feed dog of the sewing machine and attach Drop-Shaped Embroidery Foot #26.


I made a small cheat sheet so that I could follow the same lines as the “Santa’s House” for the Christmas cottage. You can find the number sequence for the stitching lines on the template.
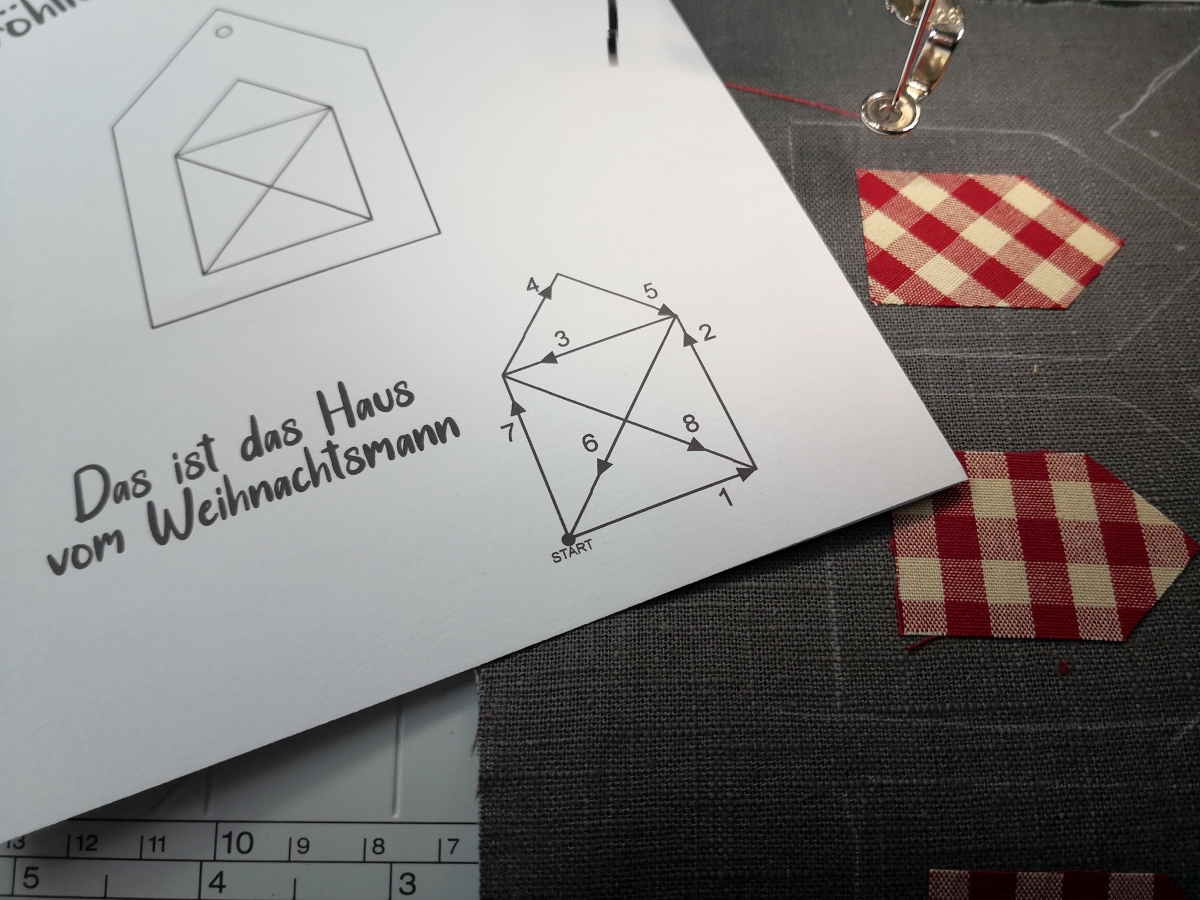
Then I kept sewing from corner to corner – back and forth and back again. Thus, each line is re-plotted with three loose free-hand stitch lines. I also sewed the outlines of the gift tag with the contrasting thread.
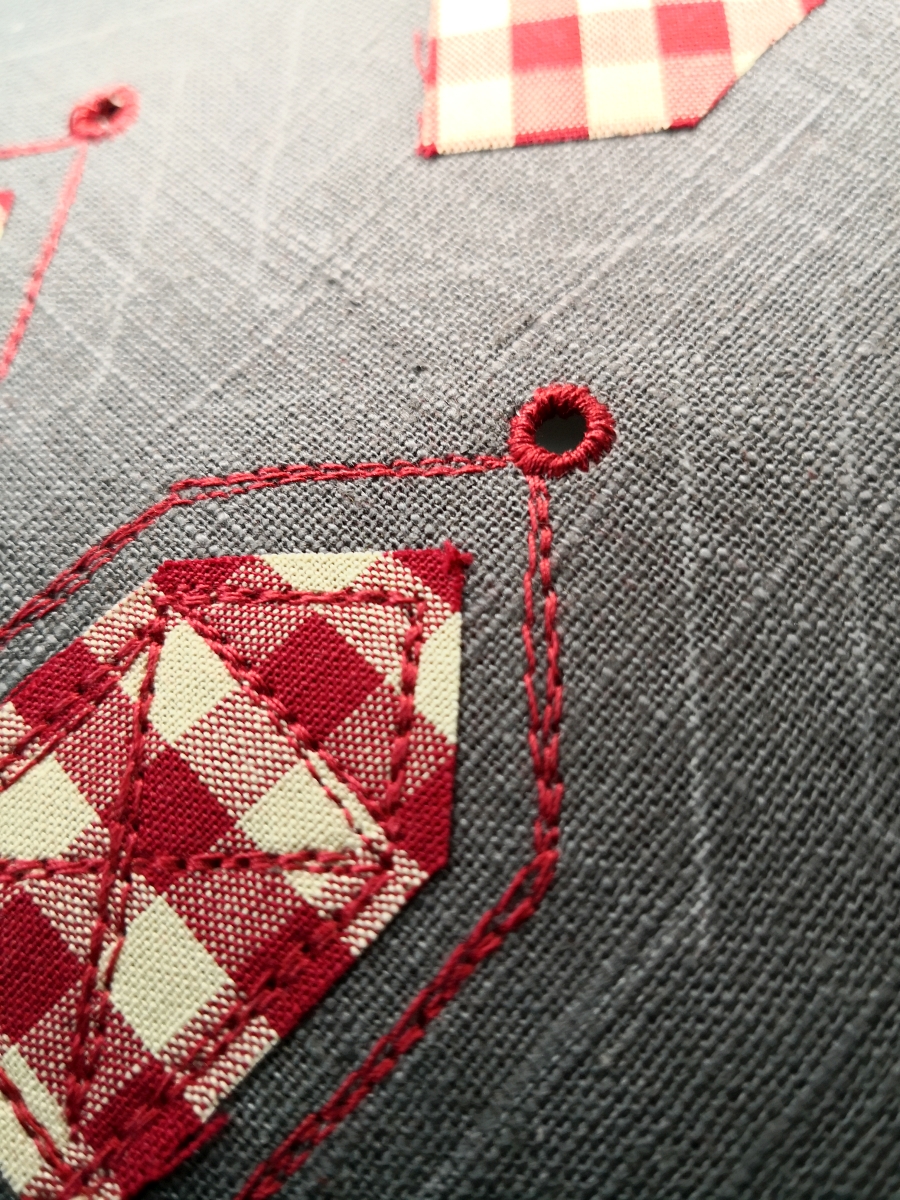
Now all it needs is an eyelet so that the gift tag can be attached to the present. I was finally able to use my new Eyelet embroidery attachment # 82, Presser foot for eyelet embroidery # 92 for the first time. It is a great sewing gadget for sewing eyelets in a wide range of sizes.

It’s magic
Select the insert according to size, punch the hole, attach the fabric, and simply turn it in a circle. As if by magic, a beautifully stitched hole is created.

For those who don’t have a practical eyelet embroidery device: it is, of course, possible to sew the small eyelet using your sewing machine’s buttonhole program, or to punch in a small metal eyelet. But perhaps you could ask Santa to bring you this great sewing gadget for Christmas; then you will always be prepared to sew a proper eyelet.
Gift tag final steps
Now the gift tags just have to be cut out. I did this with the pinking shears and I think that the serrated edges match well with the loose stitch lines.
Since sewing the Christmas gift tags was so laid back and easy, I made the second color version right away.
The sewing went faster with every little house I made. Handle the material in a relaxed and loose manner – this is the perfect project to help you unwind a little during the at times hectic Christmas season.
Sewing flow
And I am already looking forward to using the practical eyelet embroidery feature for other projects and to making use of the wide range of eyelet sizes.
Gift tag in detail
Here you can see an eyelet and the decorative seams in detail again. The slightly stronger silk-finish cotton thread perfectly accentuates the free-hand seam lines.
I hope you like my little sewing idea. Maybe you will want to make it and can find the time to complete it before Christmas.
I wish you all a happy and peaceful holiday season: let us keep a glimmer of hope in our hearts!
With warm regards,
Schneiderherz Ute


0 Responses