 BERNINA Corporate Blog -
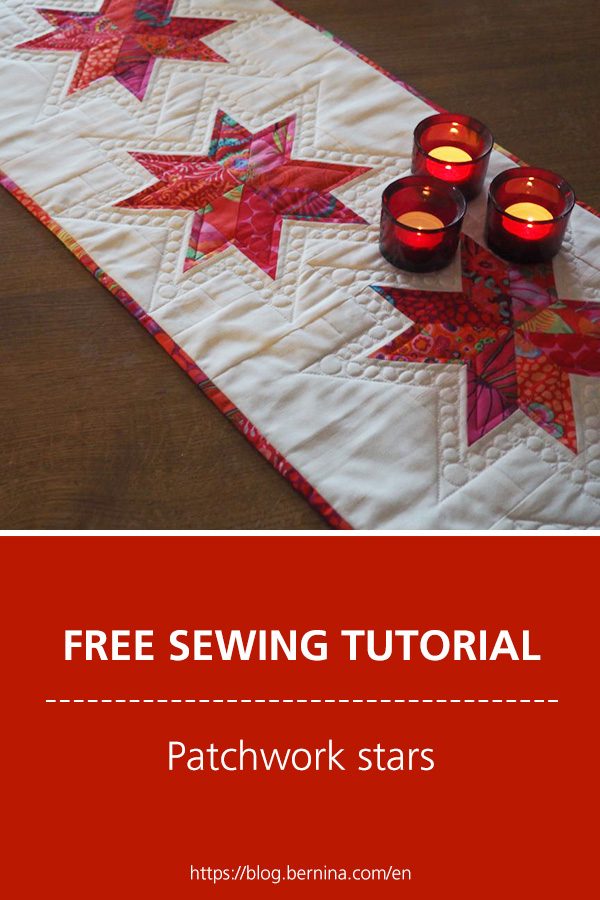
Today is already the second Sunday of Advent – and we are opening the fourth door of the Blog Advent calendar. Today I will sew colorful patchwork stars with you! I believe stars are the Christmas messengers. For me, they are an essential part of the Advent and Christmas season.

This year, we can make the stars a bit more colorful. I sewed five of these colorful stars, the shape of which is also called “Eight Point Star”, for a table runner so that our table will also be festively colorful at Christmas. However, the colorful star can also be used for other projects.

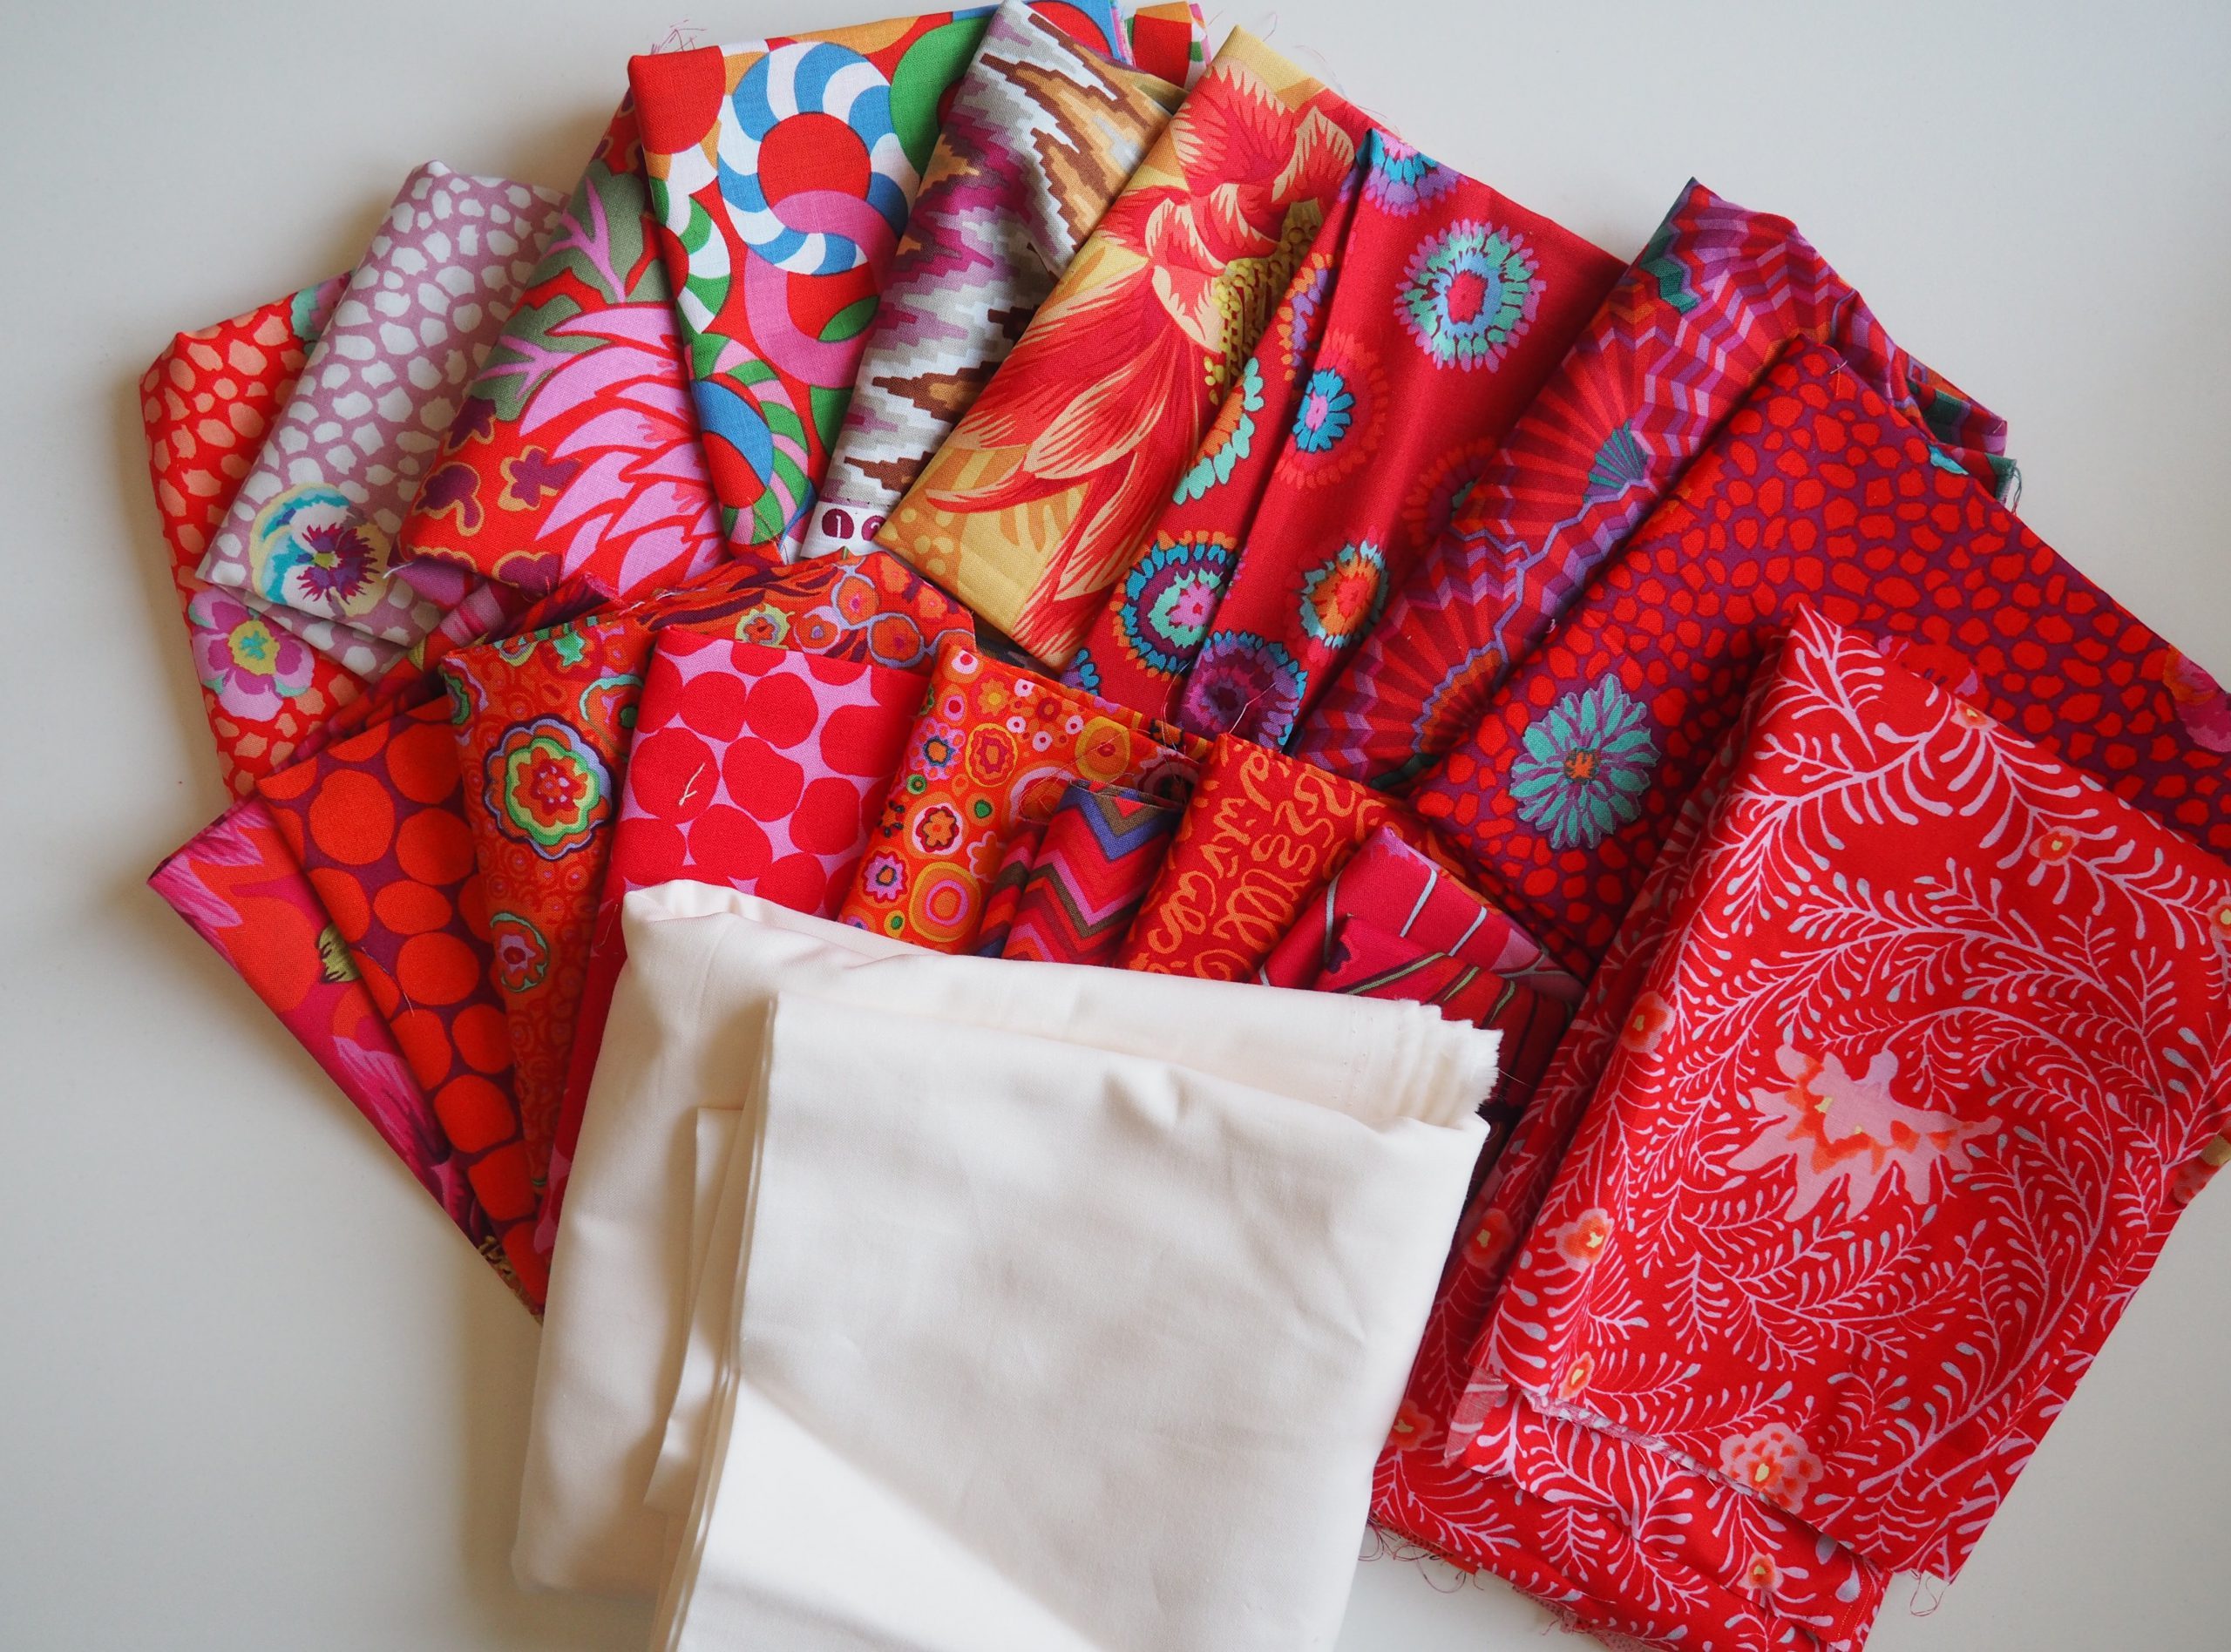
Material and pattern for colorful patchwork stars
For the colorful stars, you need small colorful fabric remnants for each star and, depending on the project in which you want to use the stars, a certain amount of background fabric. I used coffee-fiber fabrics in red-orange tones and background fabric in a white shade for my stars.
One star measures 8″ x 8″ – but the size can be changed as required so that it fits your project. Sew with a seam allowance of 1/4″.
The following pattern is required for a half star:
| Size | Amount | |
|---|---|---|
| colorful fabric A | 3“ x 3“ | (2) |
| colorful fabric B | 3“ x 3“ | (2) |
| Background fabric H | 3“ x 3“ | (2) |
| 2,5“ x 2,5“ | (2) |
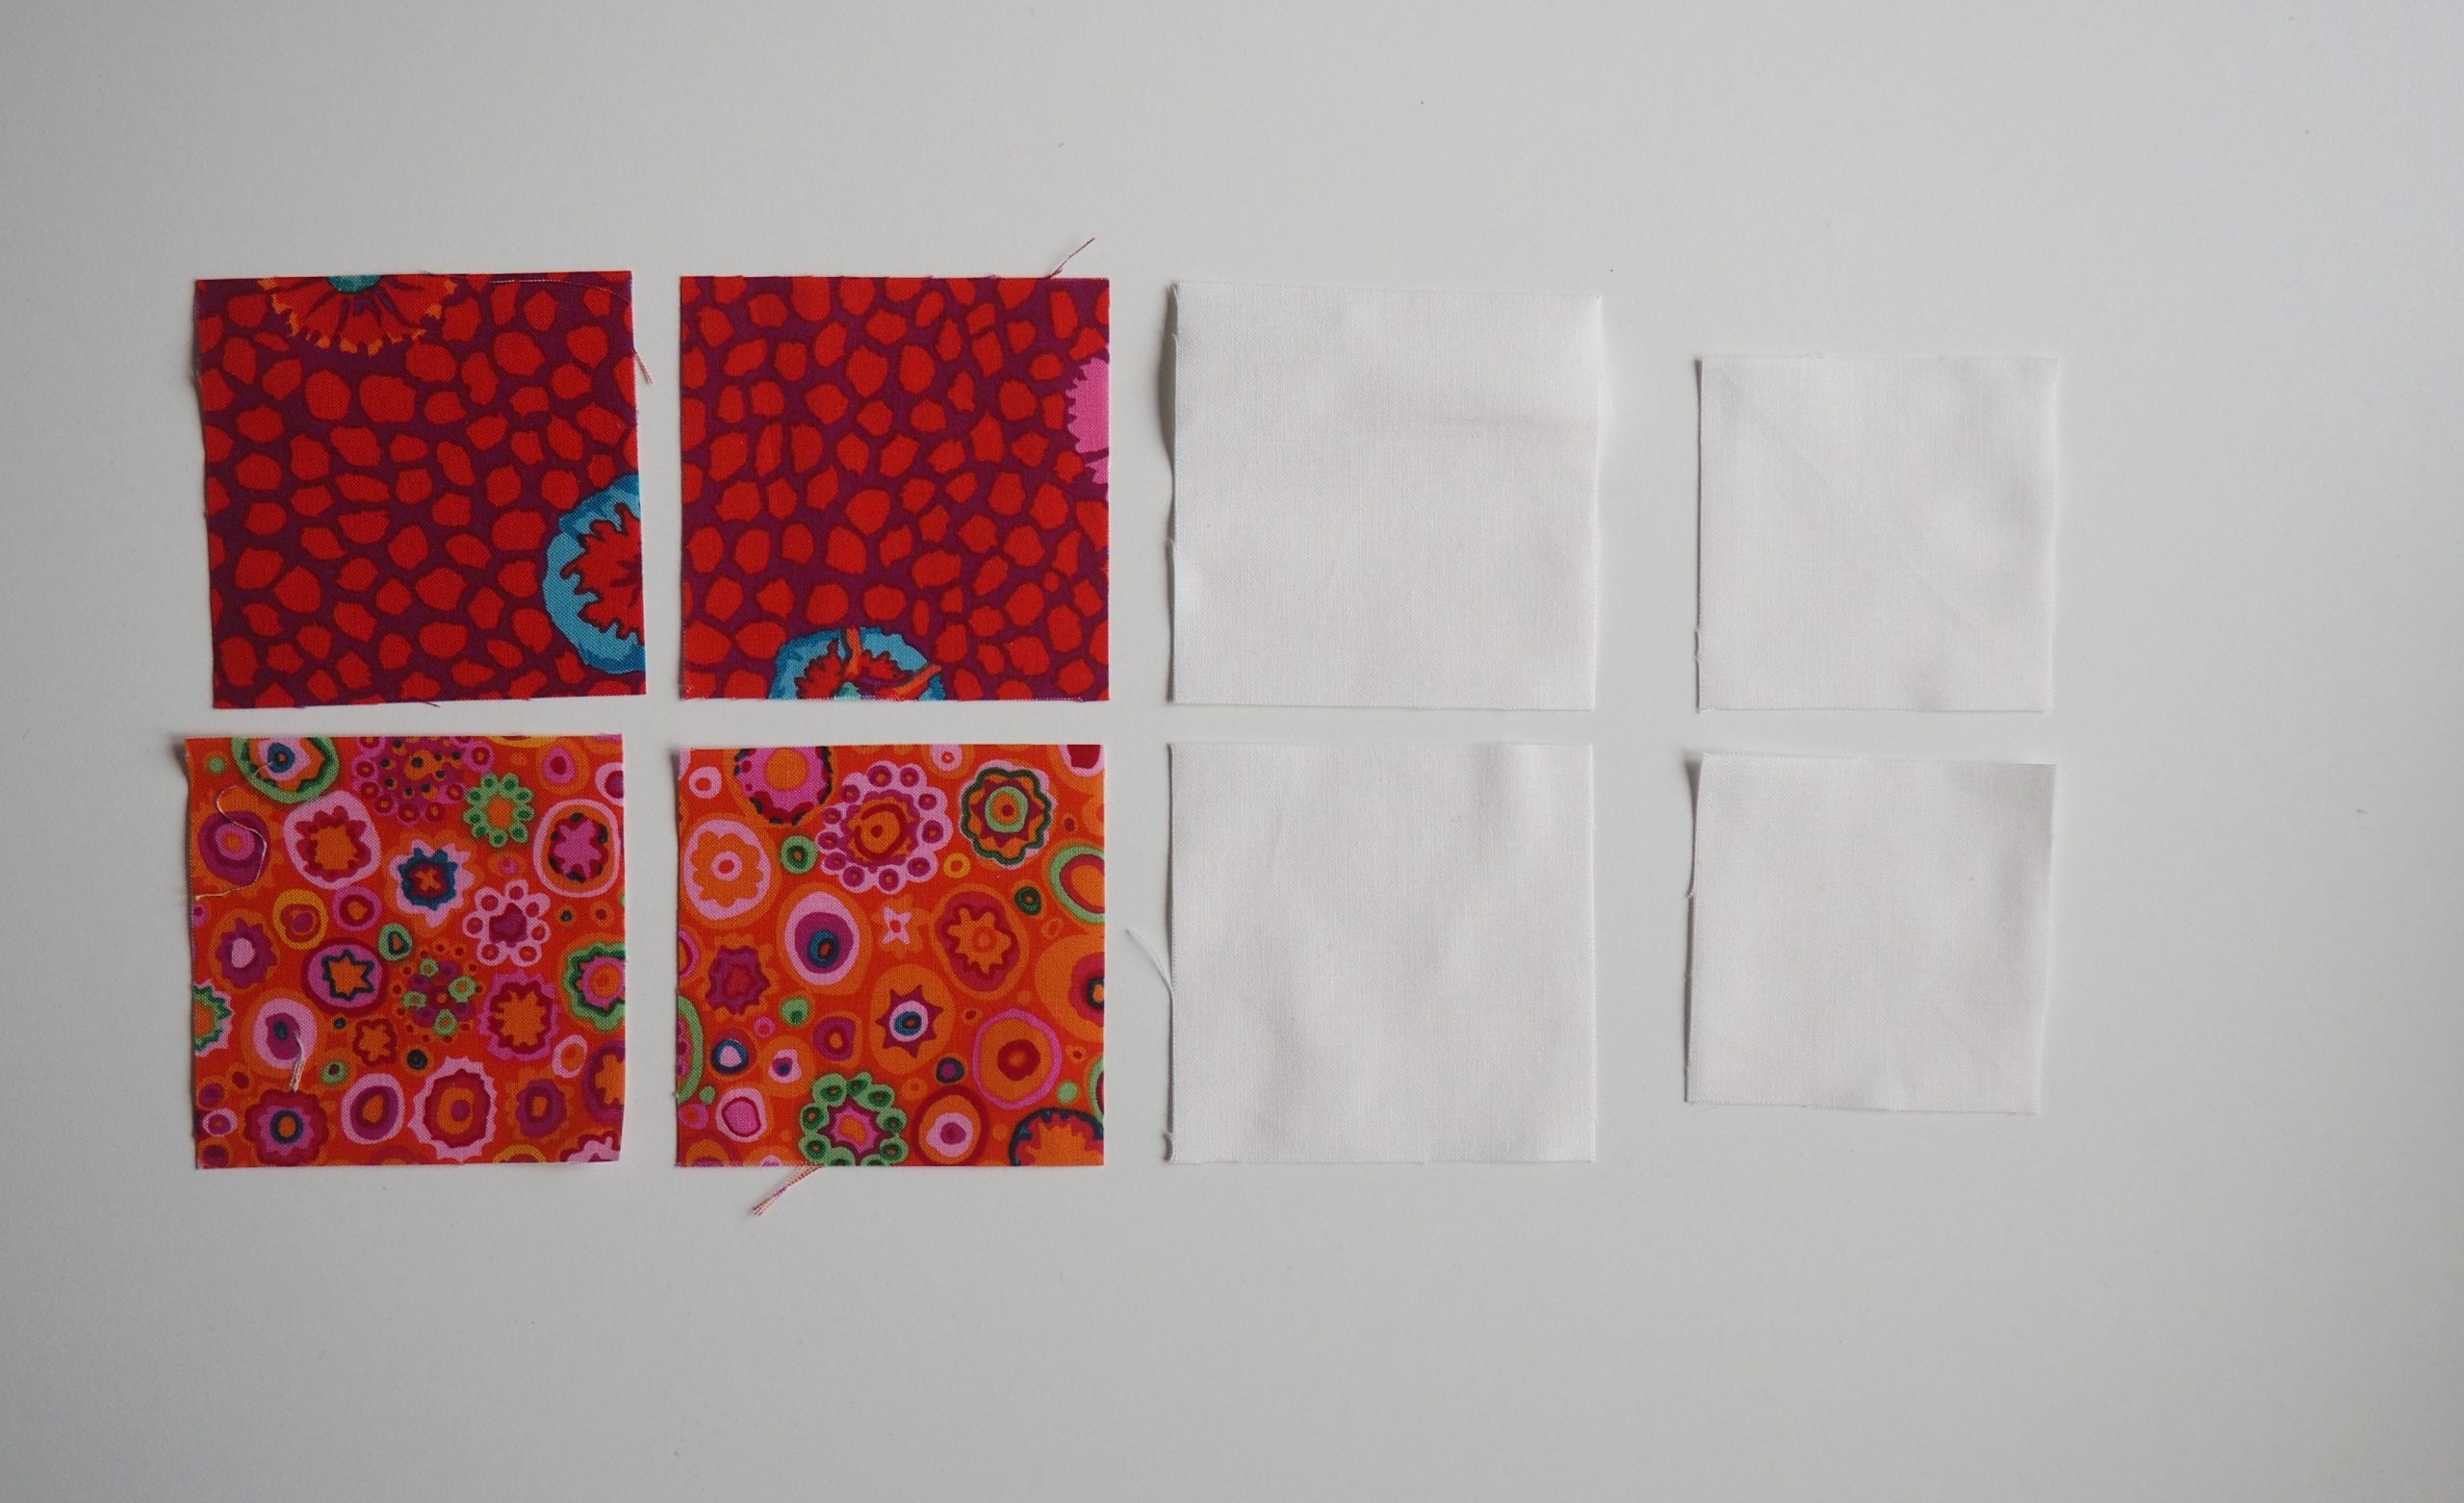
For a complete star , cut double the amount of the respective squares. If you are a skilled patchworker and want to change the size, simply cut out larger or smaller squares. It is best to read the complete instructions before starting to sew.
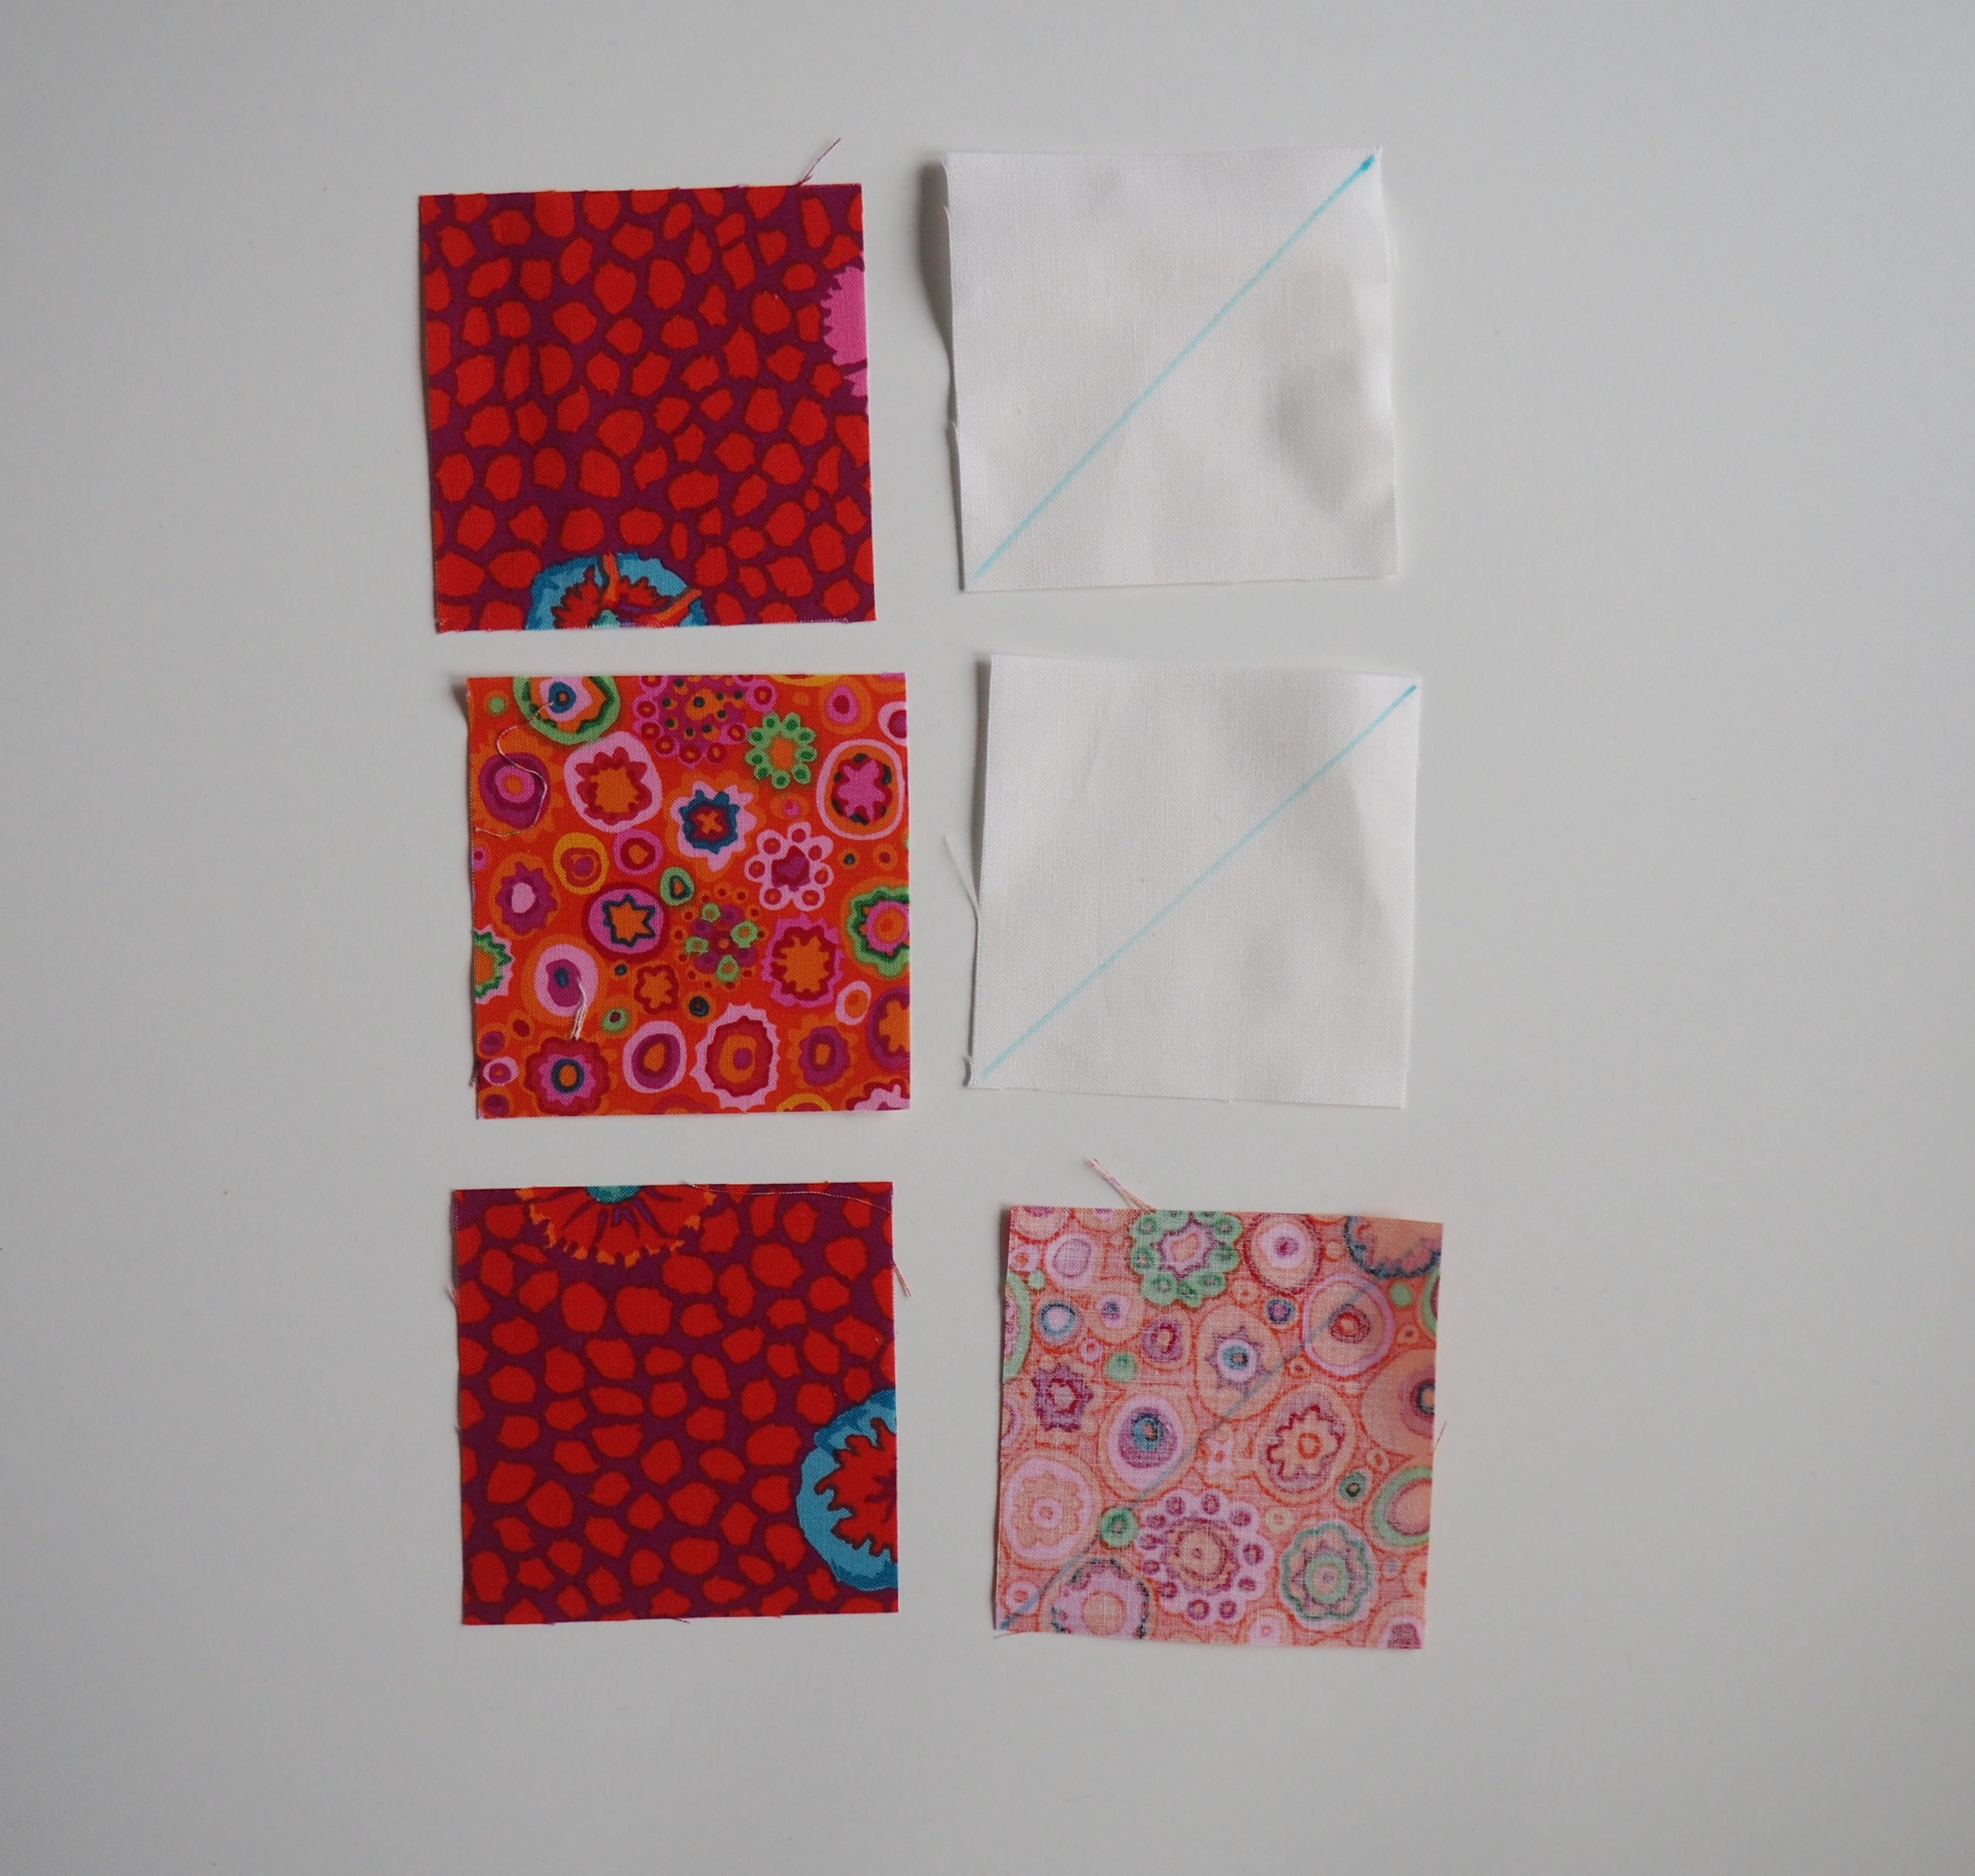
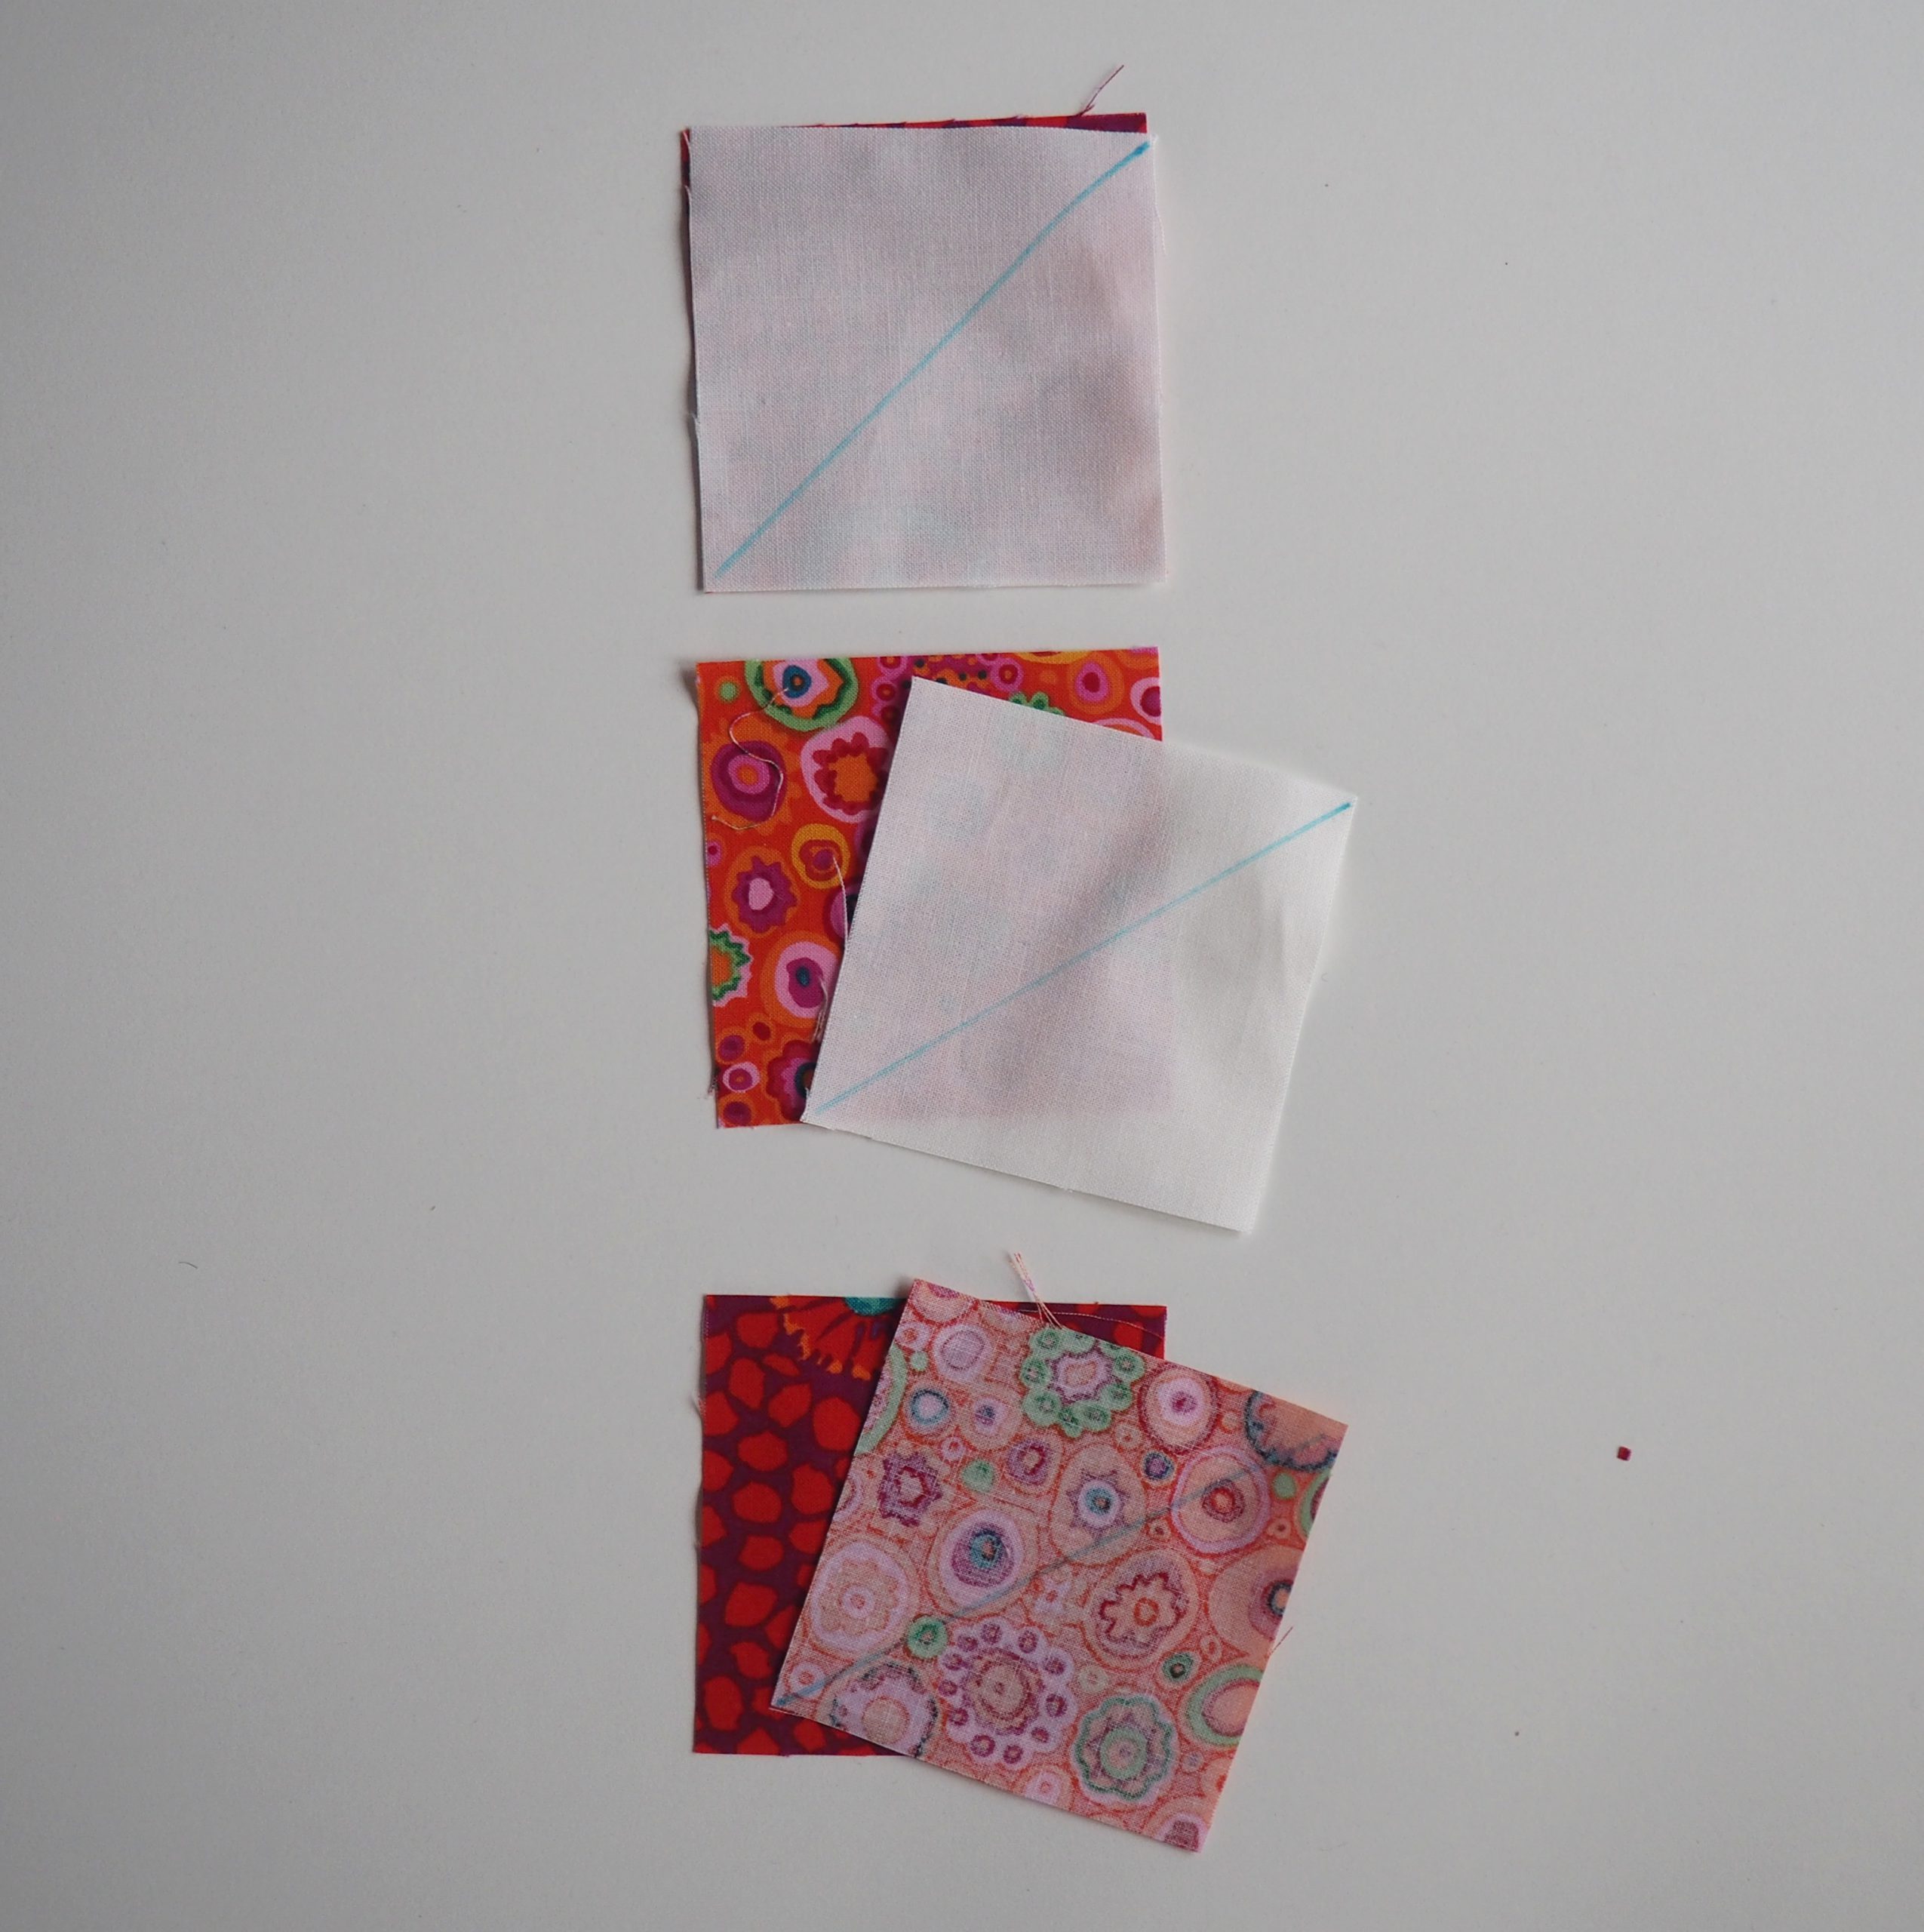
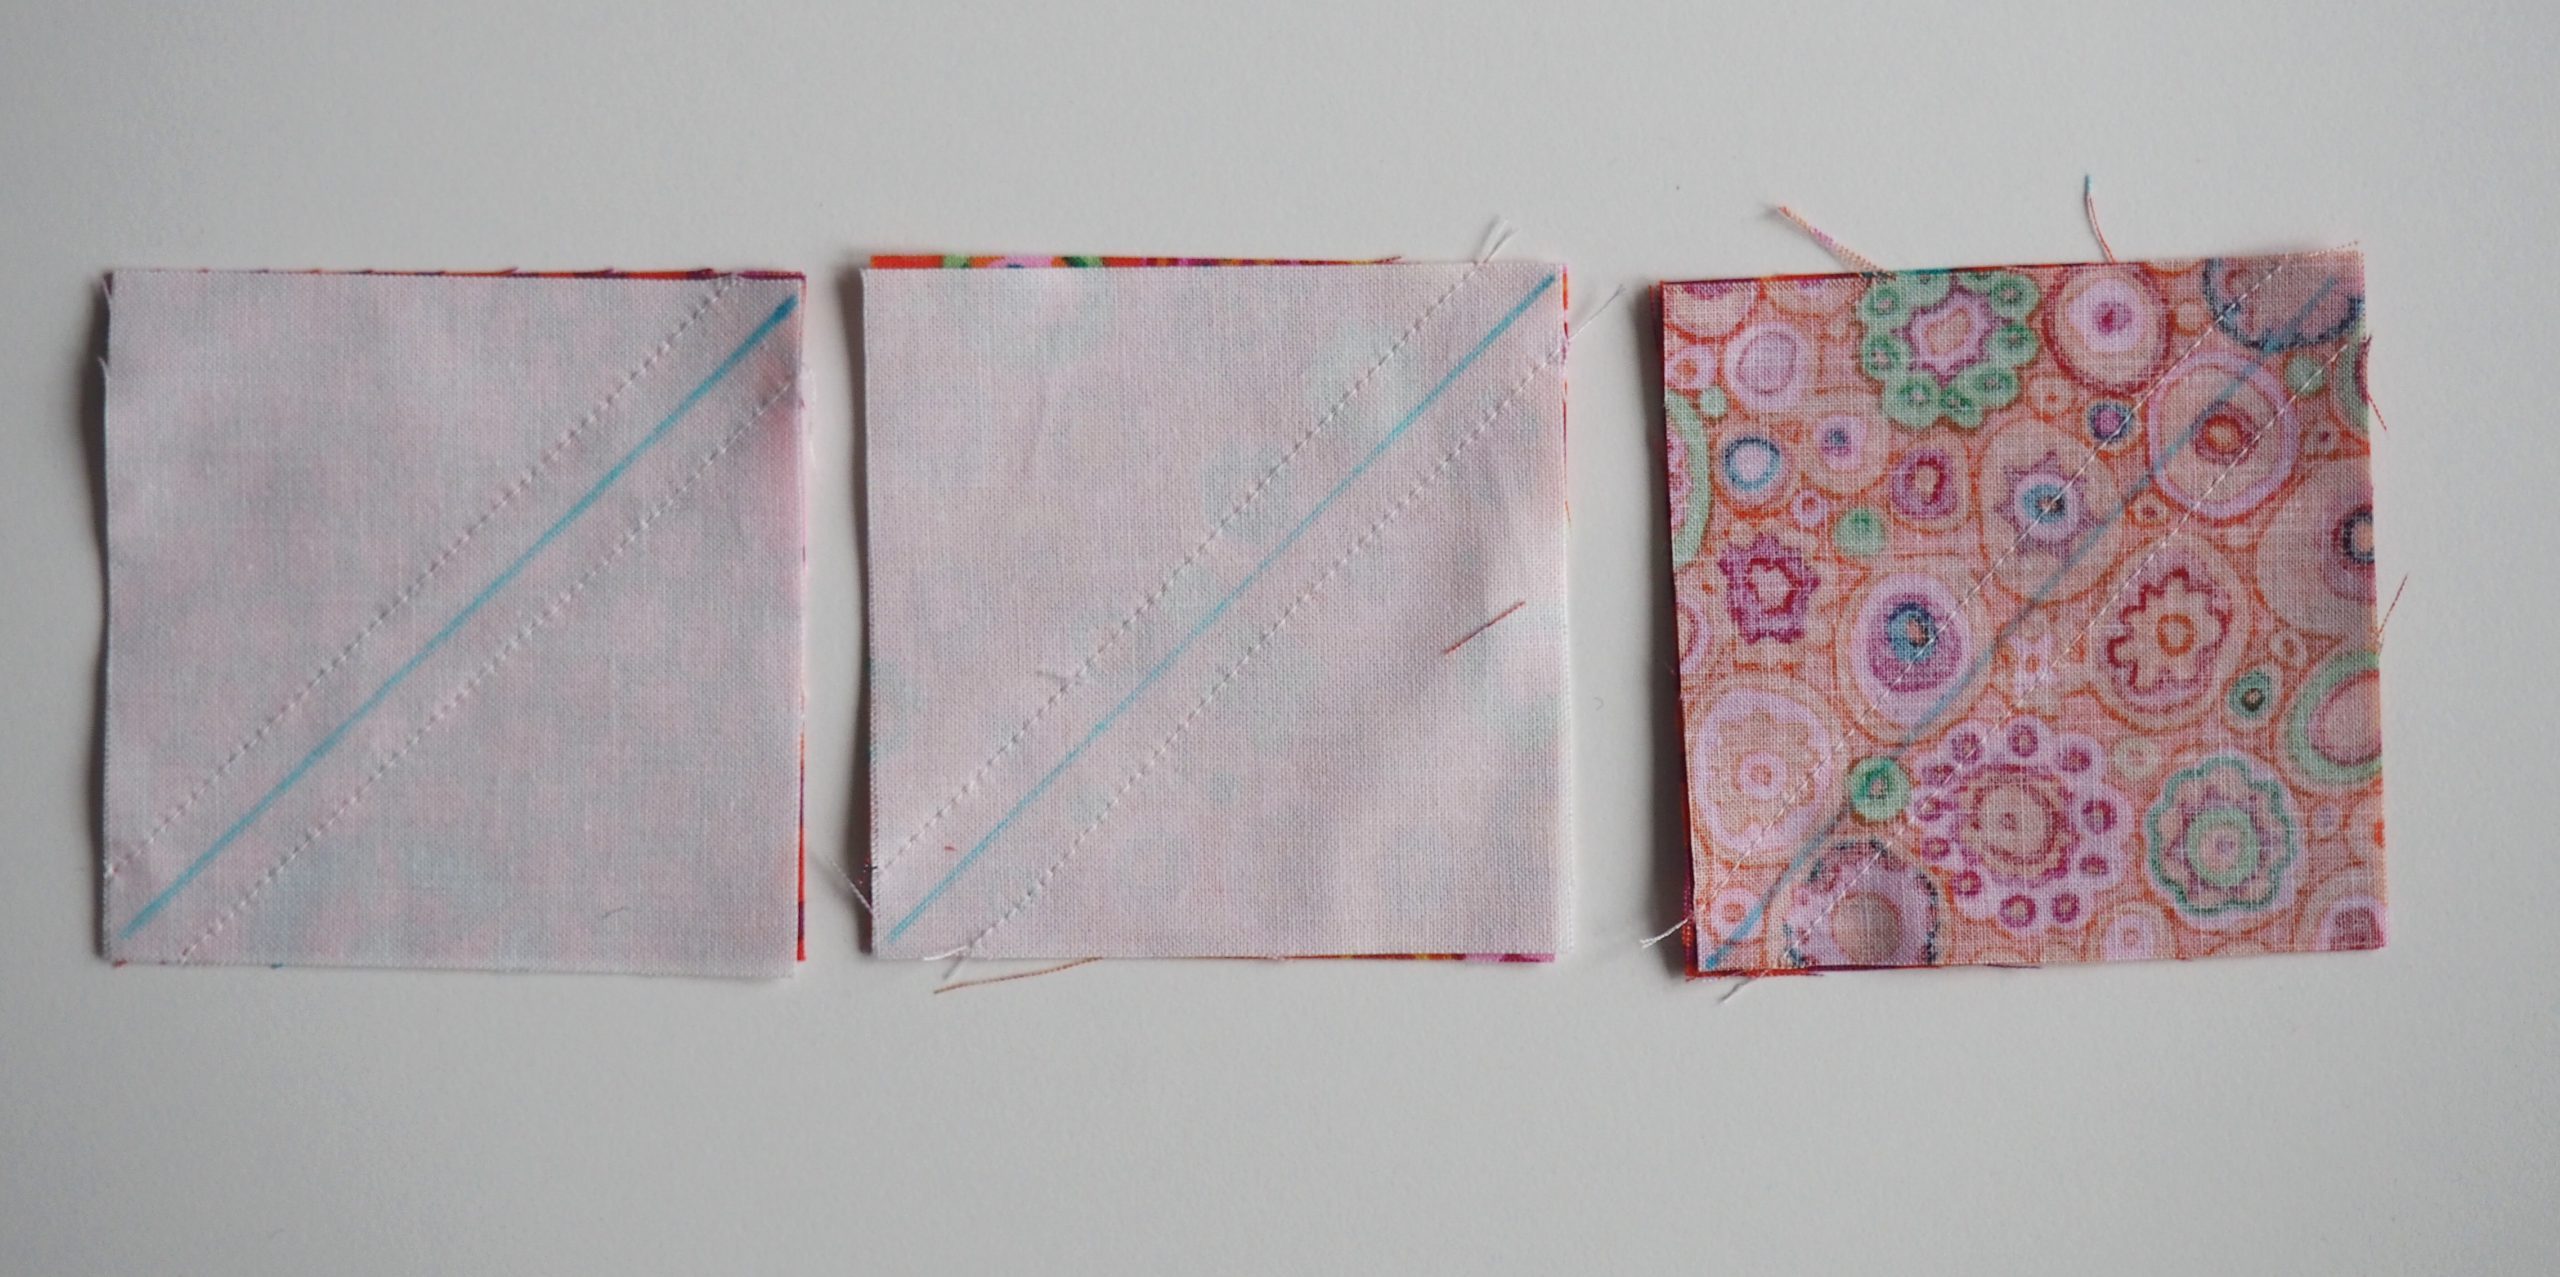
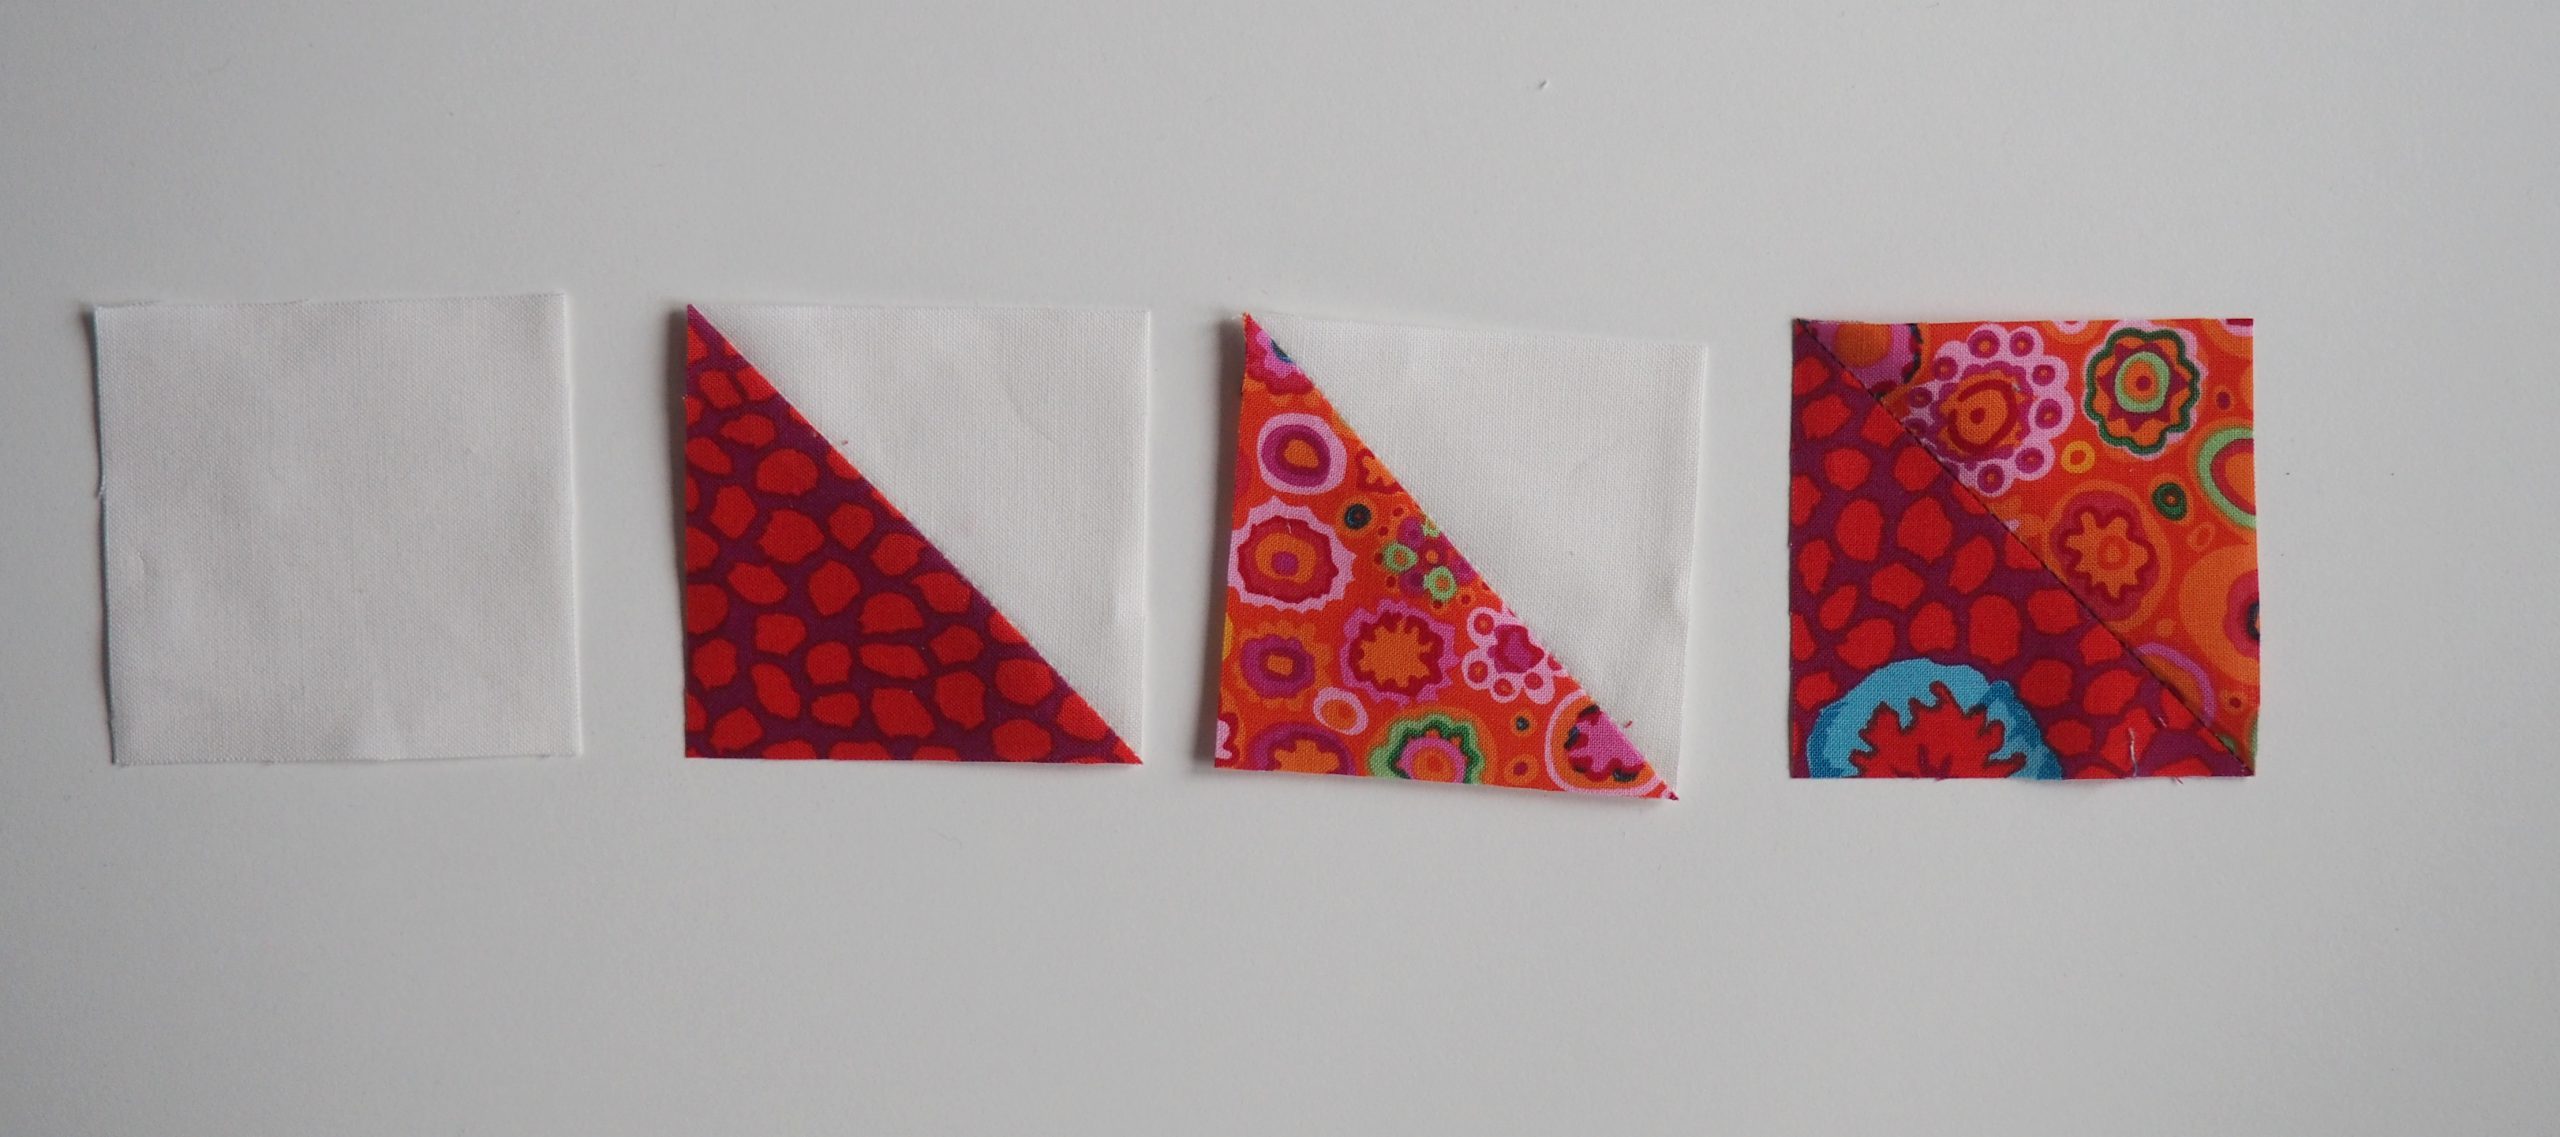
On the two 3″ x 3″ triangles on the background fabric, I draw the diagonal, and also do this on one of the colorful squares (here, the right vertical row). I assign the 3″ x 3″ squares to each other as shown in the following picture:
A – H
B – H
A – B
Sewing a quarter star
Now I place the squares that are assigned to each other with the right sides together.
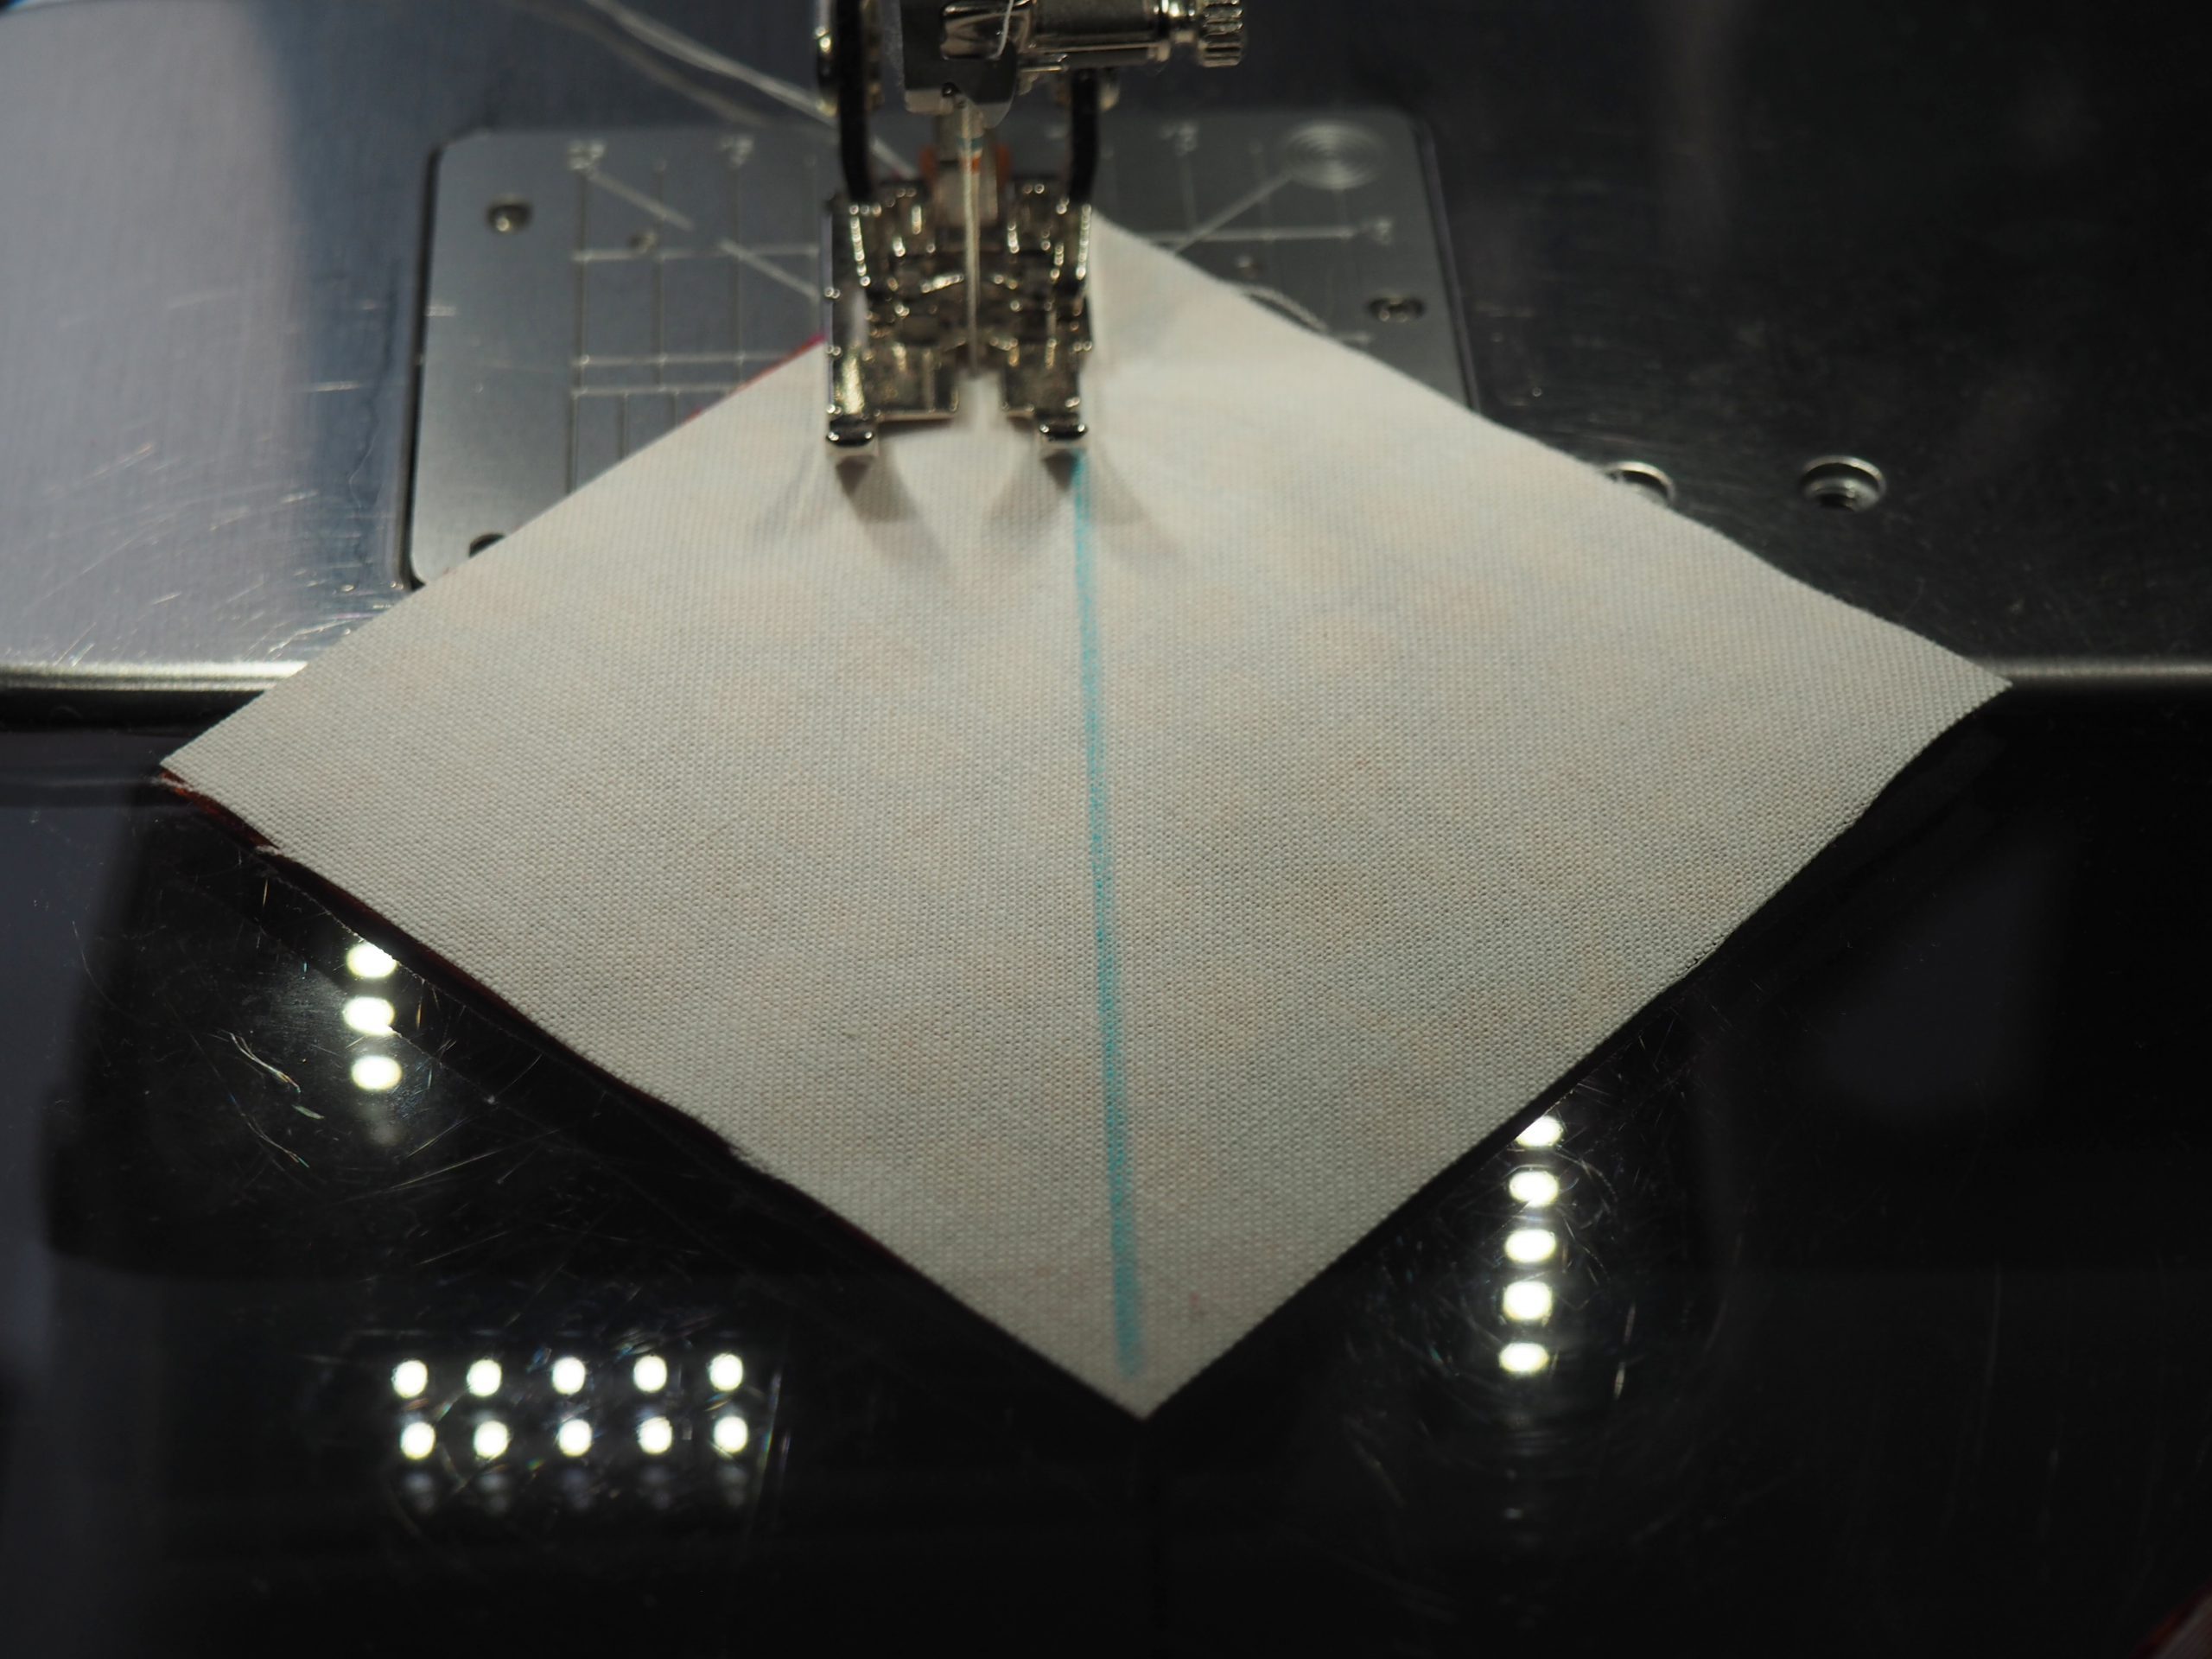
In the next step, I sew the two squares together with each square double to the right and left of the marked diagonal (thick blue here) with a spacing of 1/4″ (black dotted line).
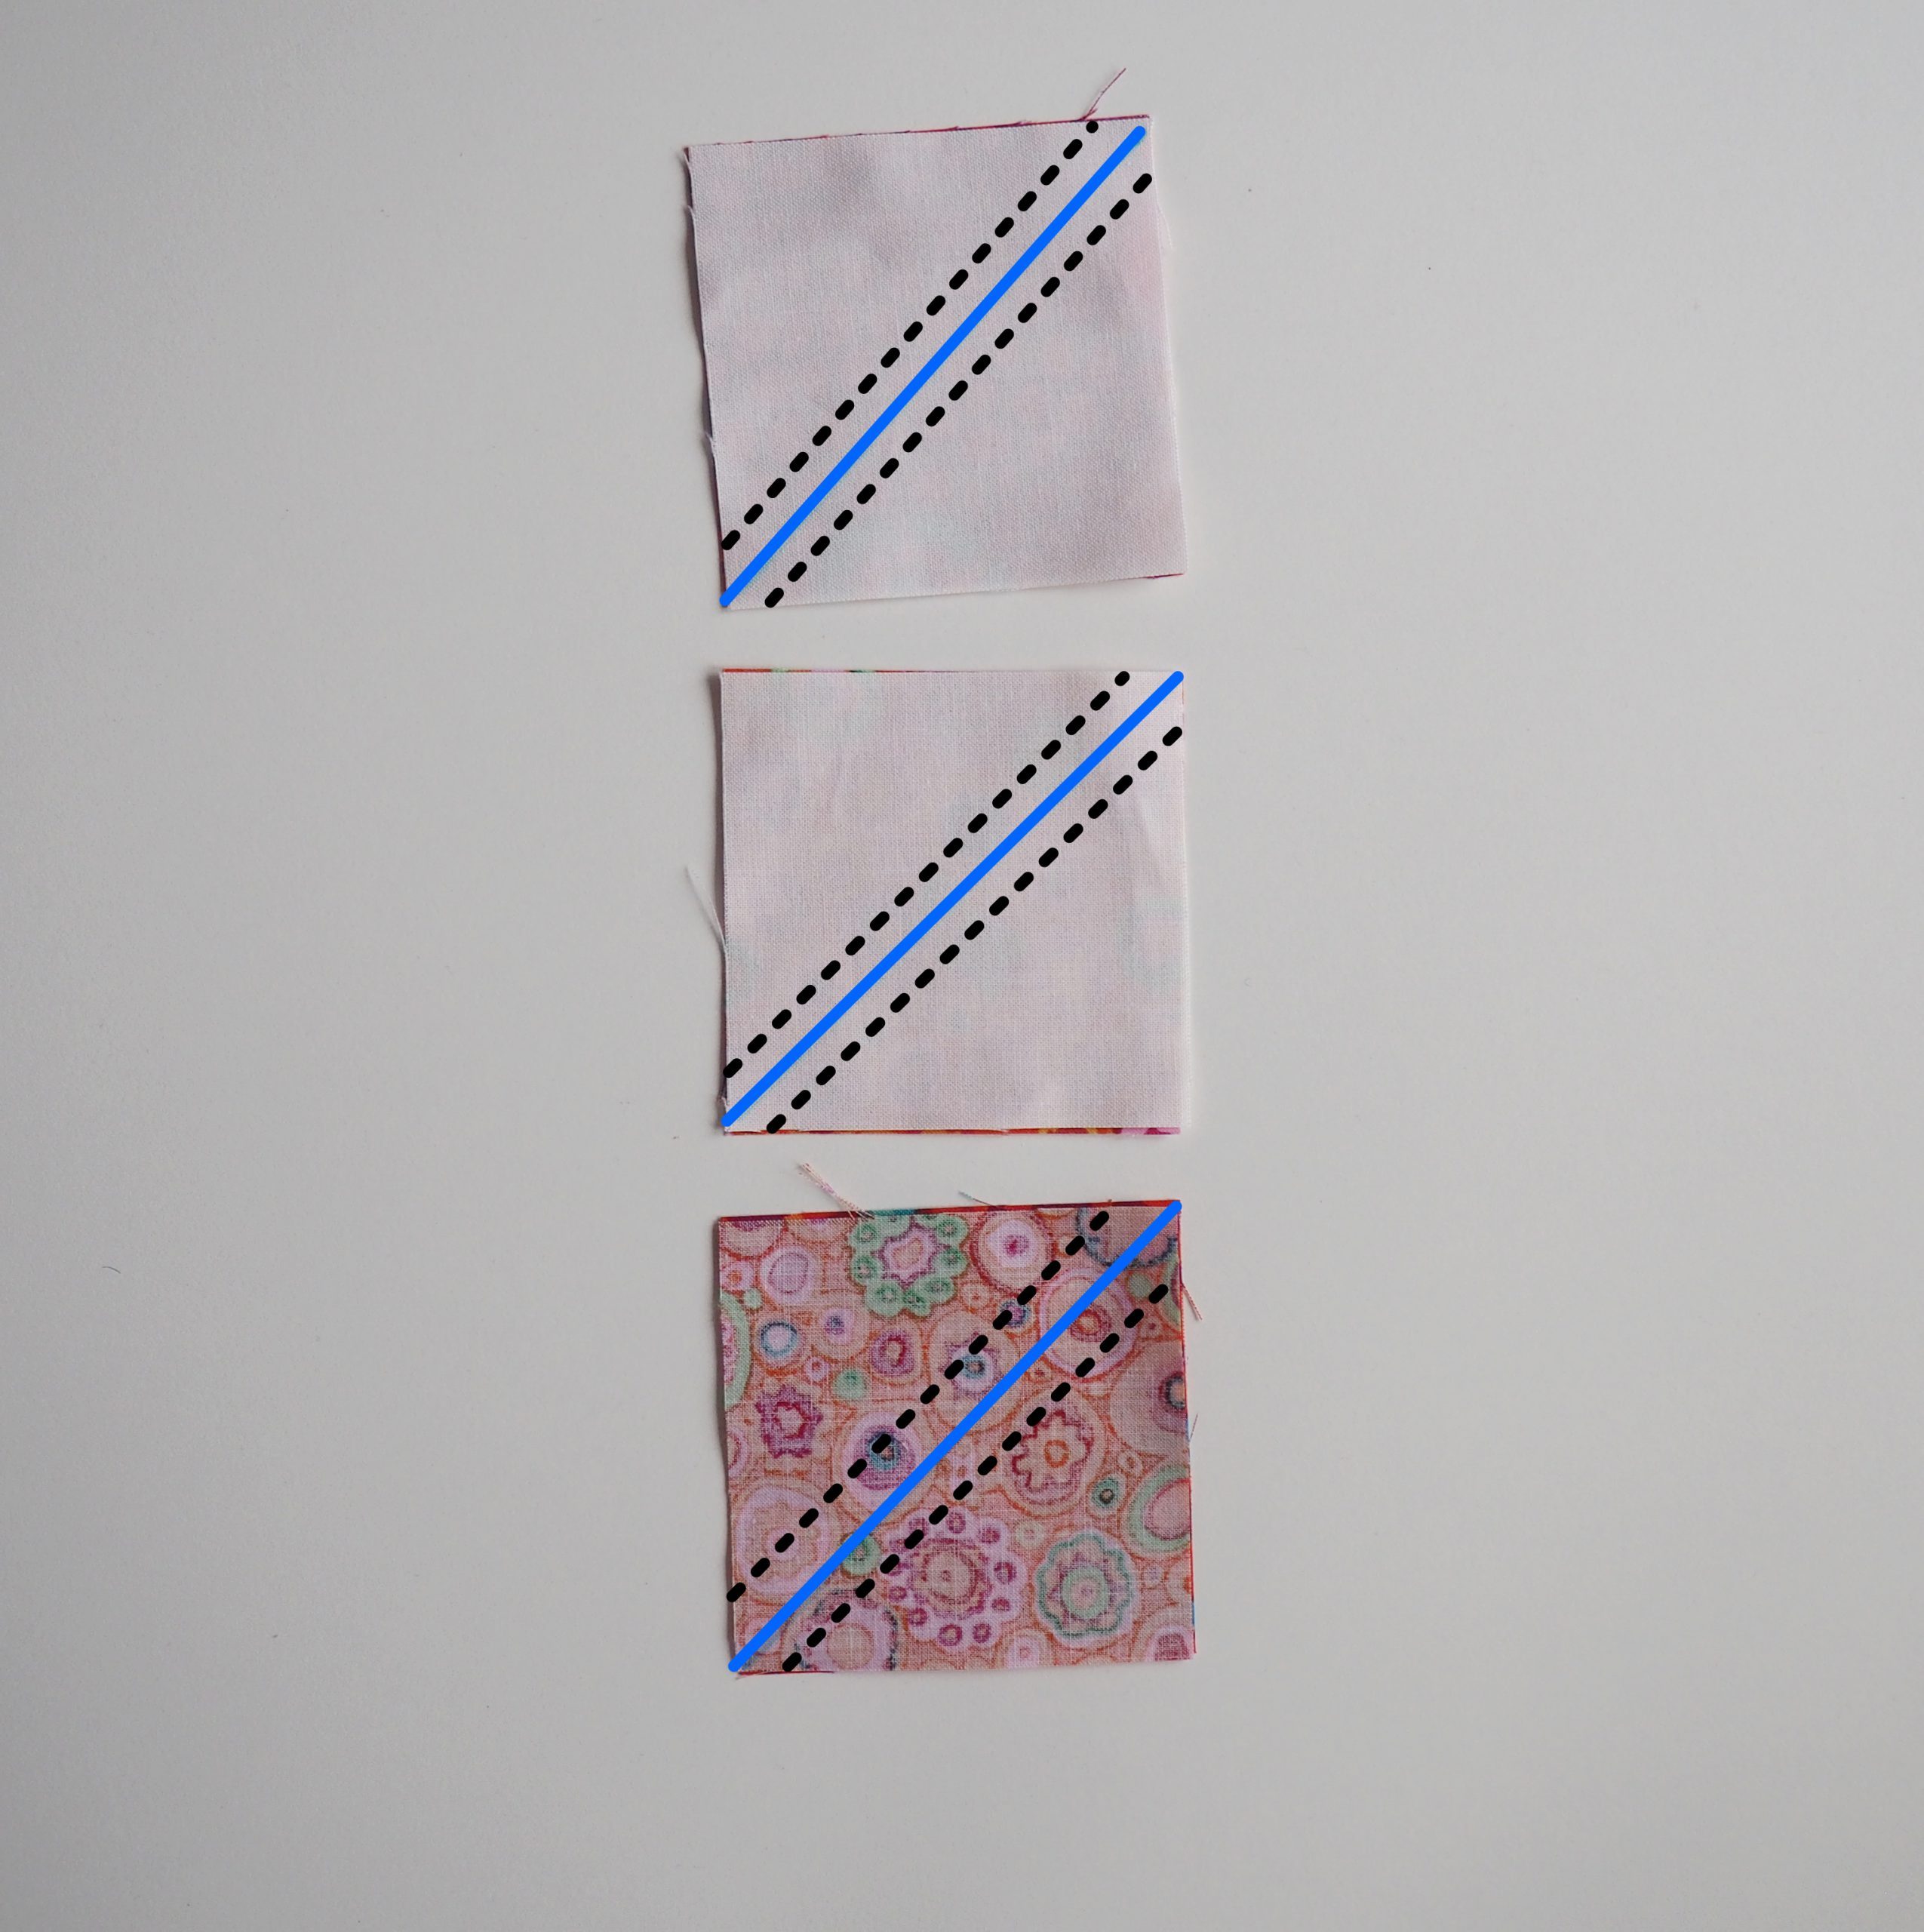
I use the Patchwork Foot #97, whose right edge I guide along the marked diagonal. For this seam, I choose a short stitch length of 1.8-2.0 mm and do not secure the seam start and end with back stitches.

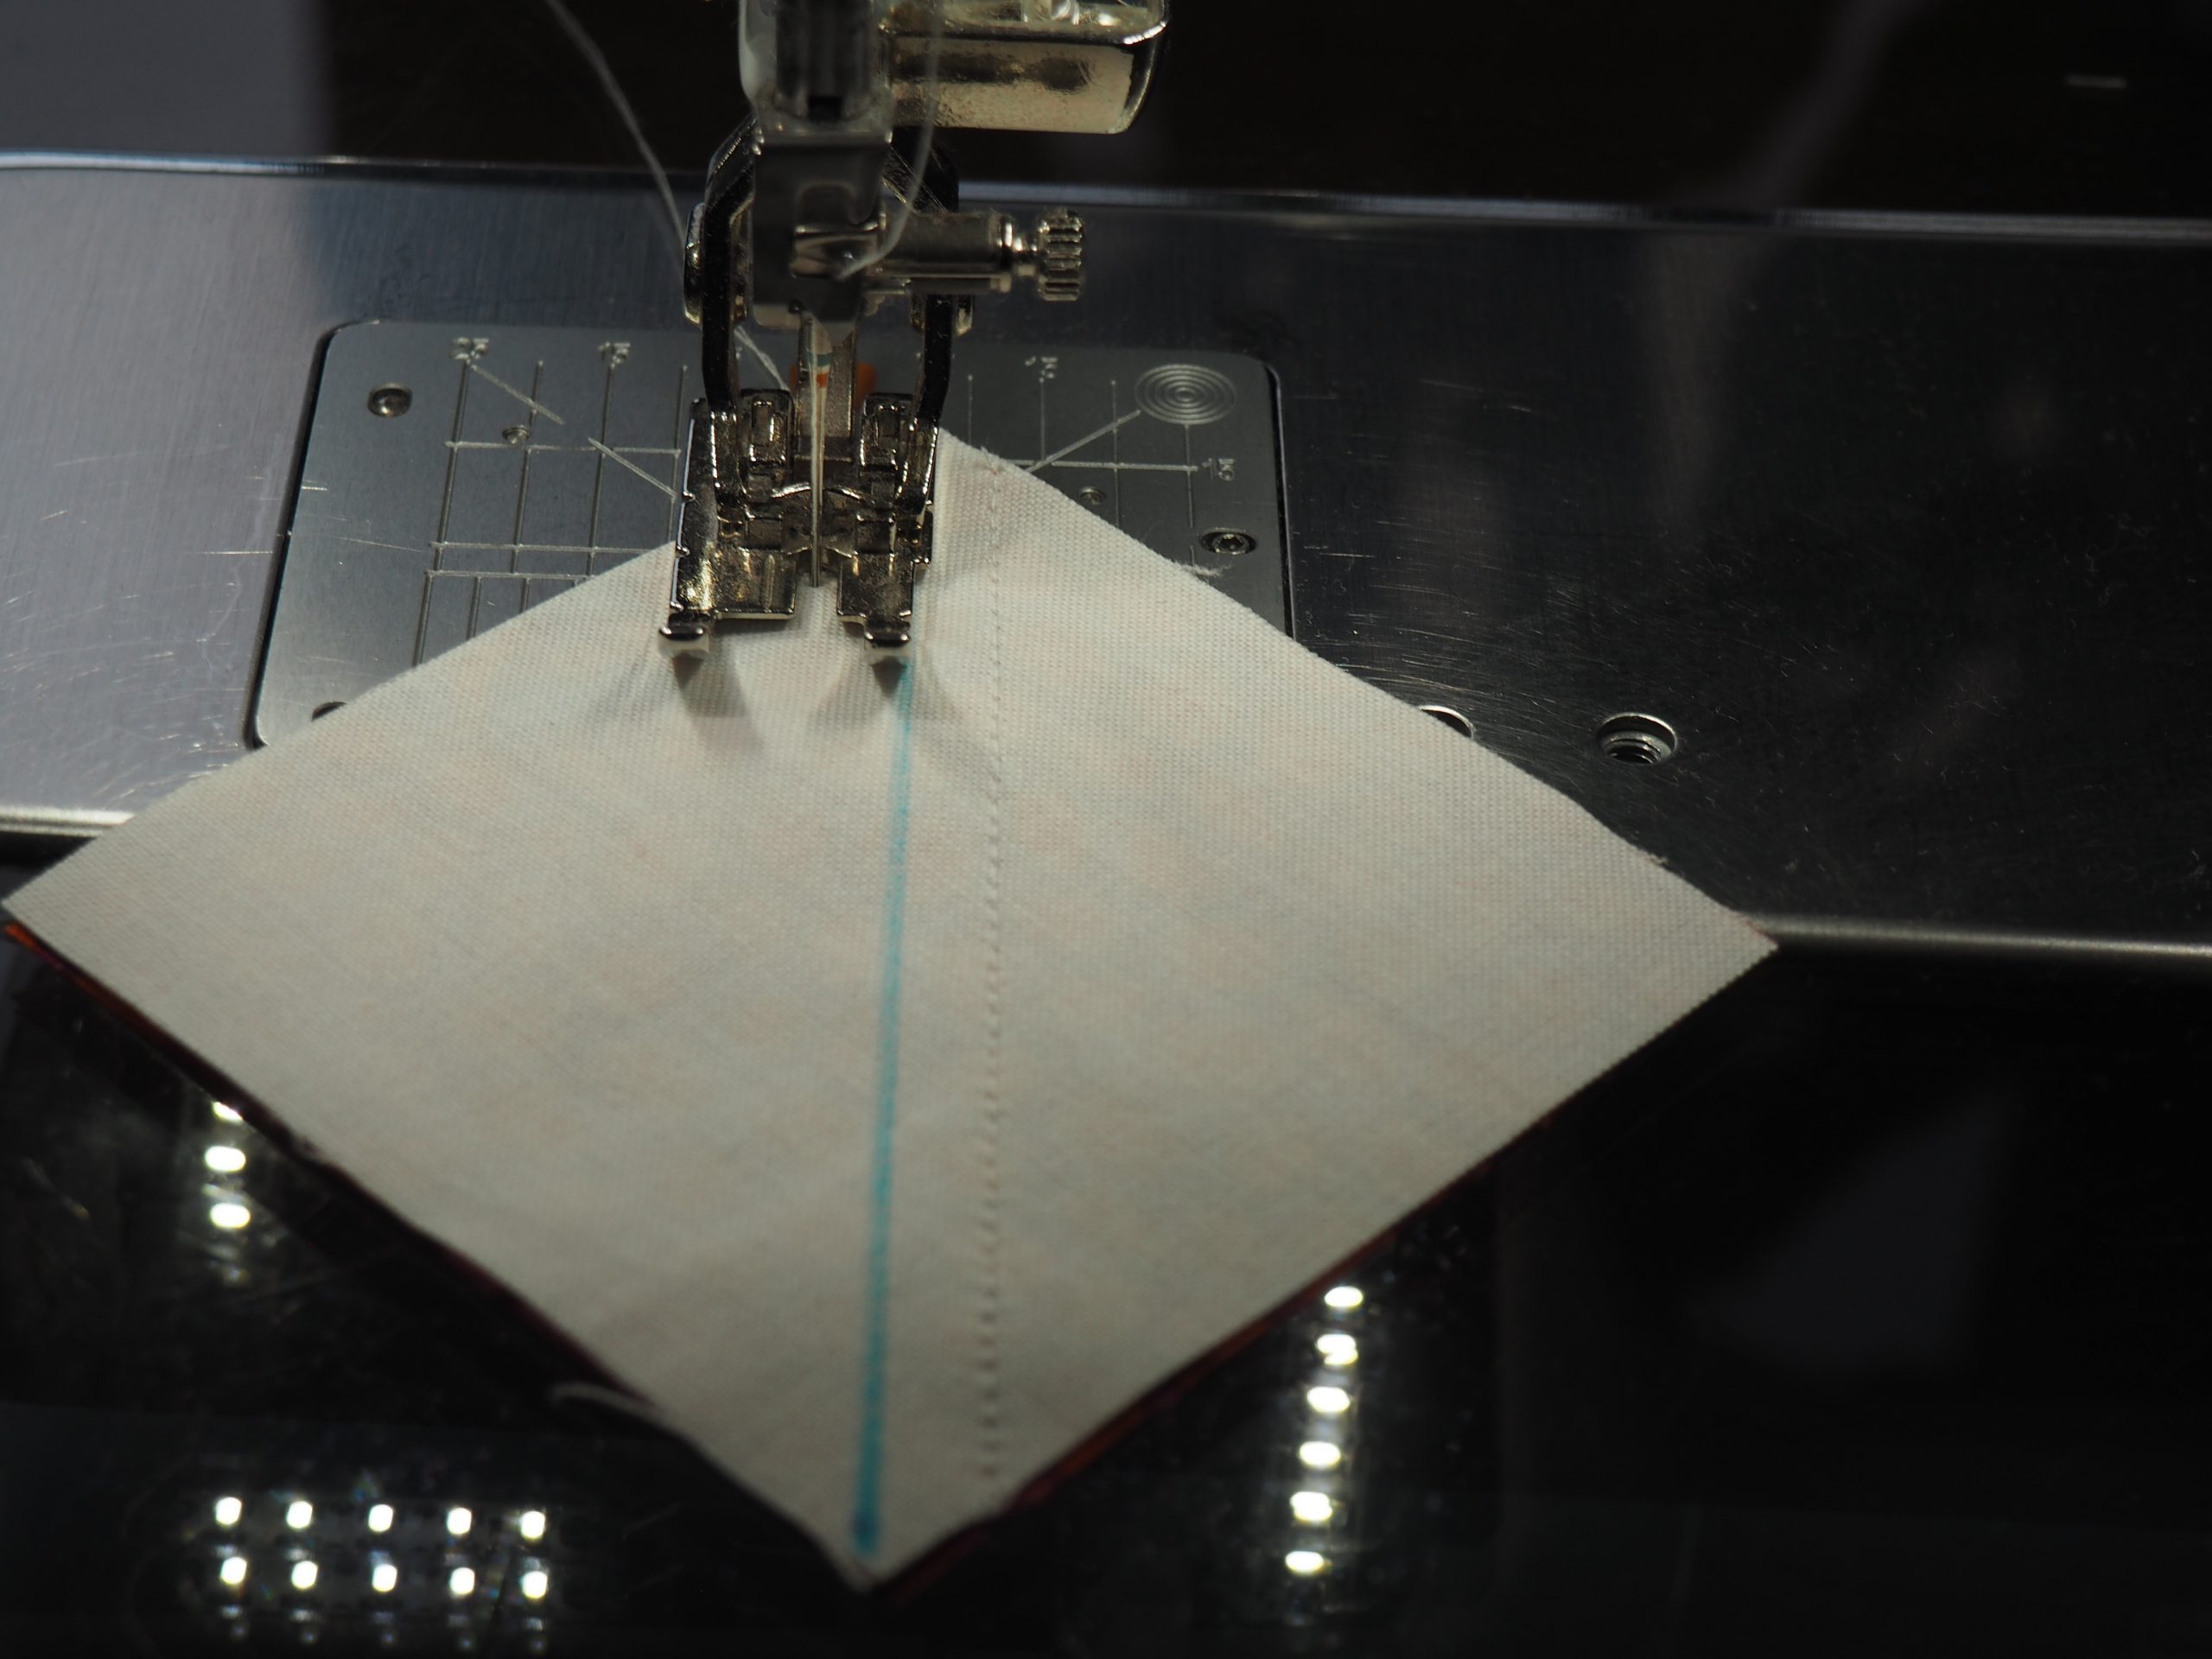
Rotate the square. On the other side of the diagonal, I also sew a seam with a distance of 1/4″ from the line.
I sew all three squares in this way.
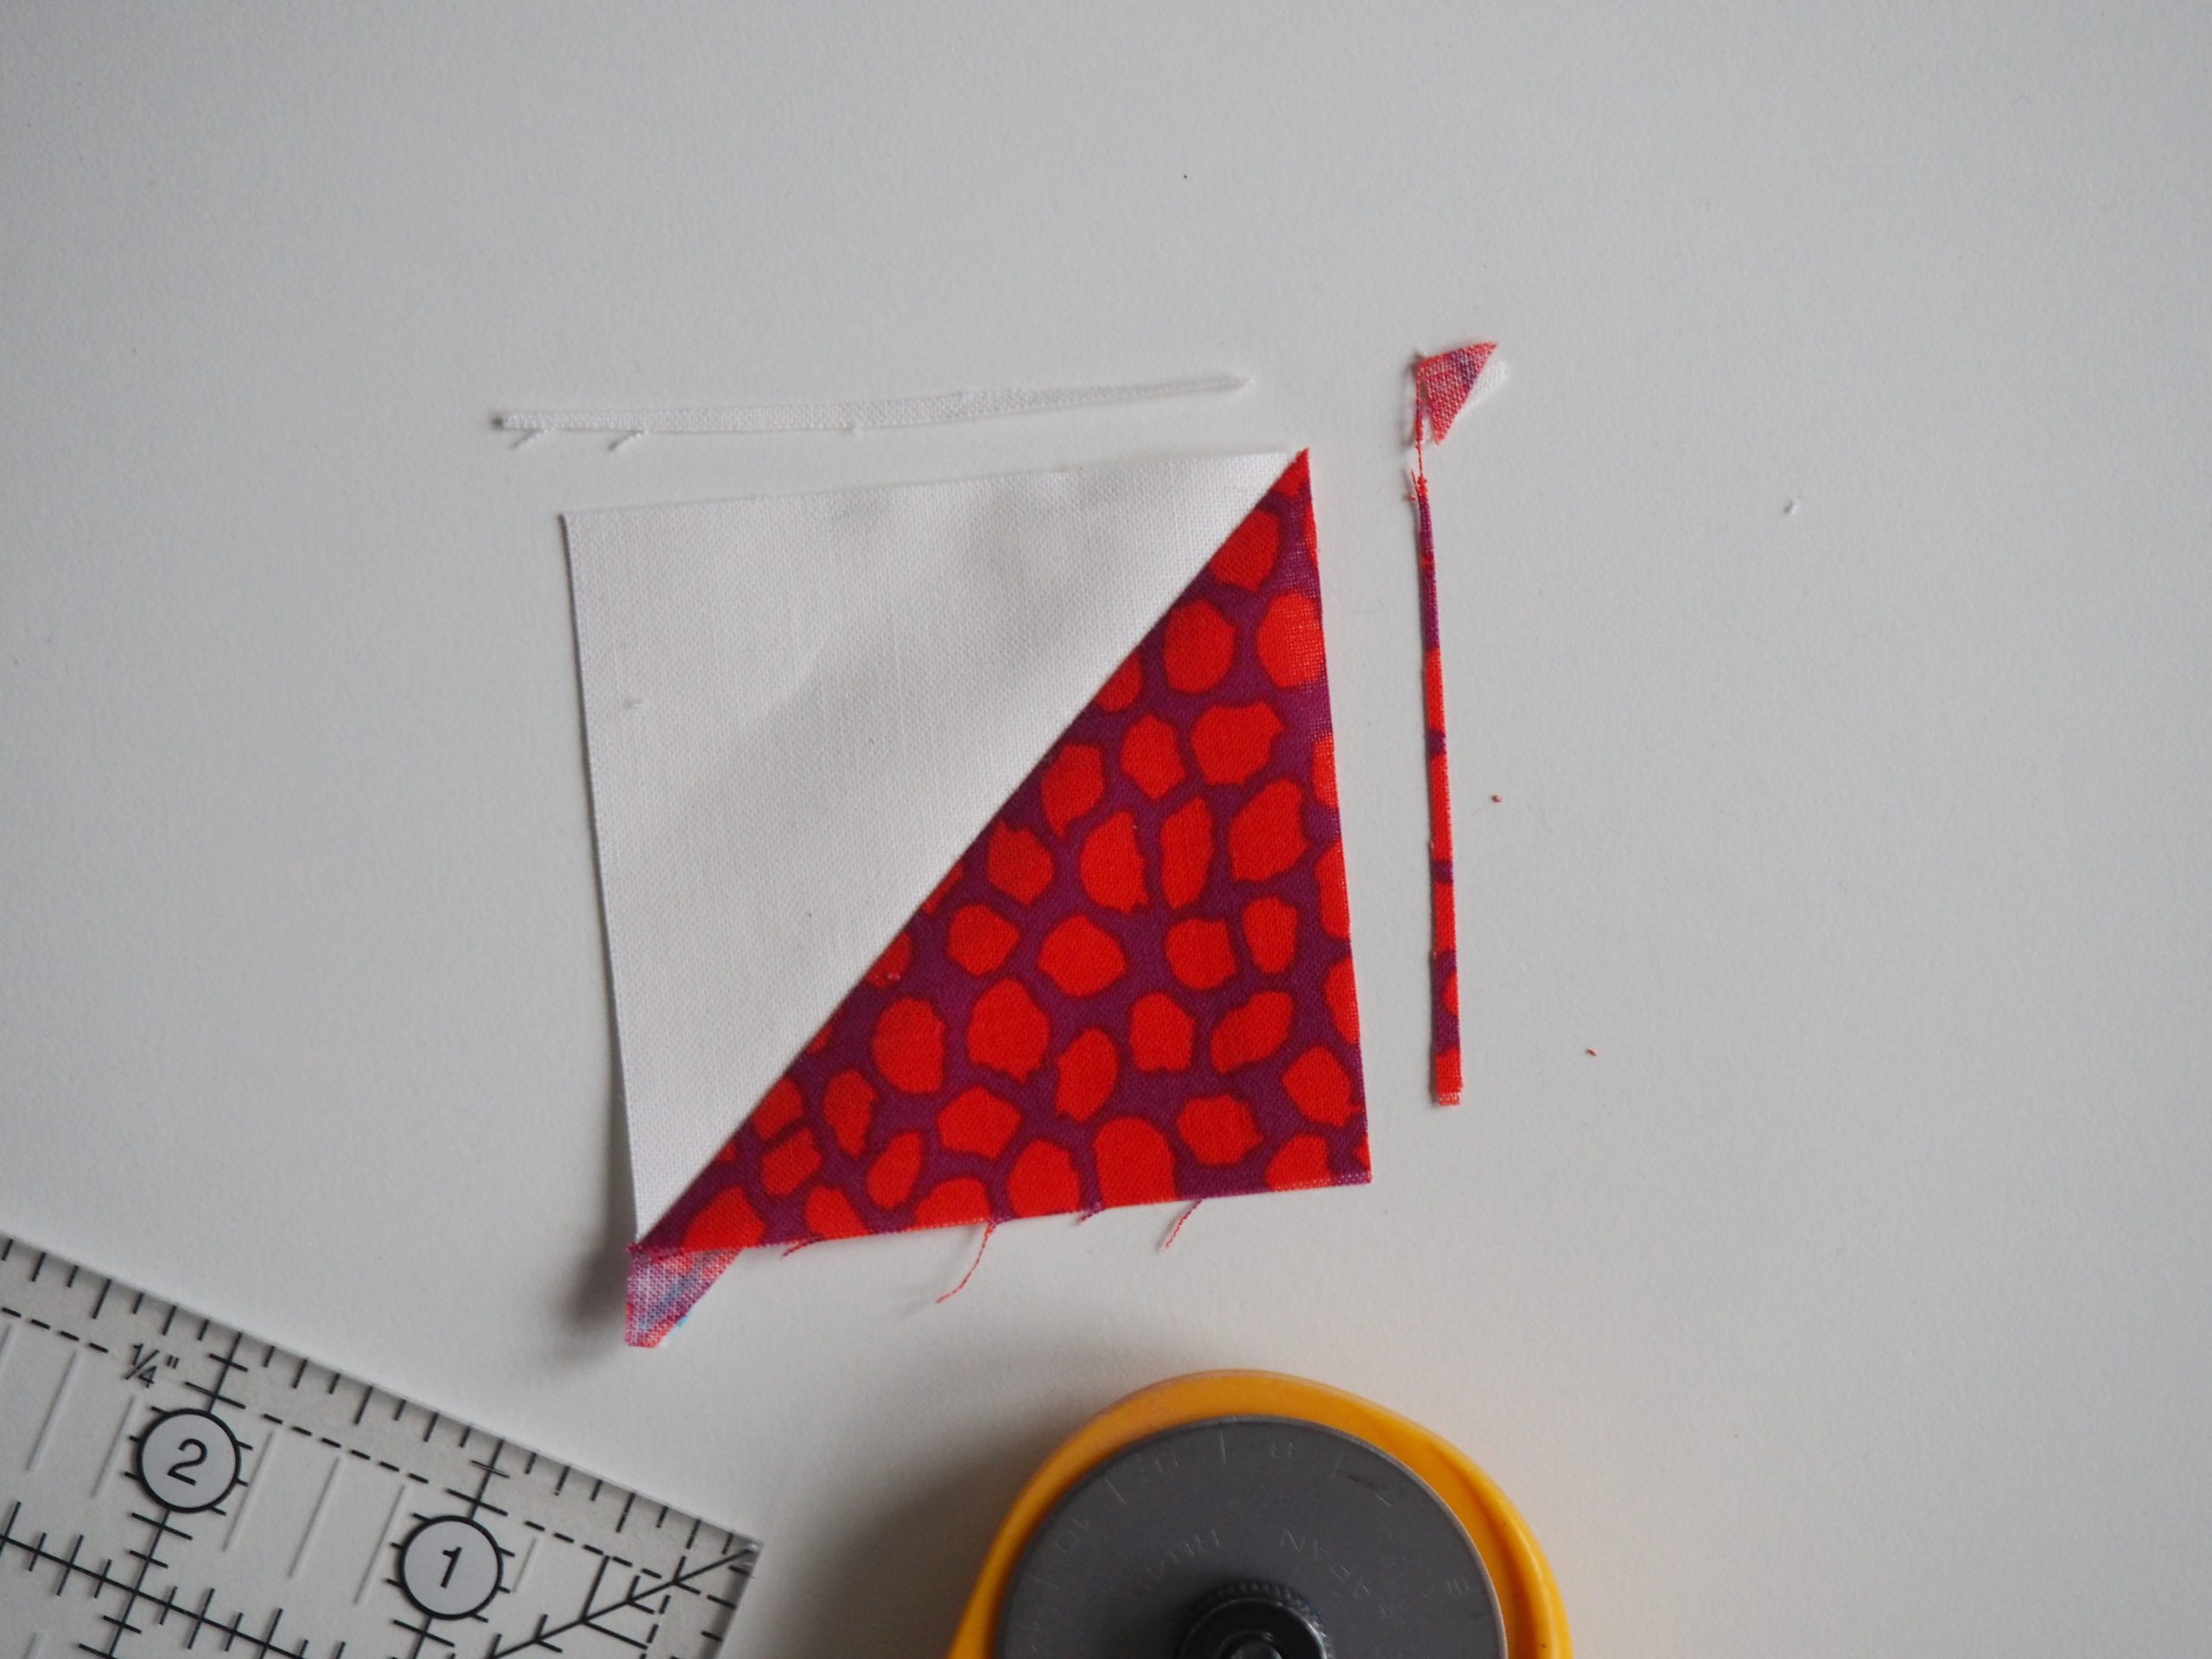
I cut the squares apart precisely on the diagonal using a ruler and rotary cutter.
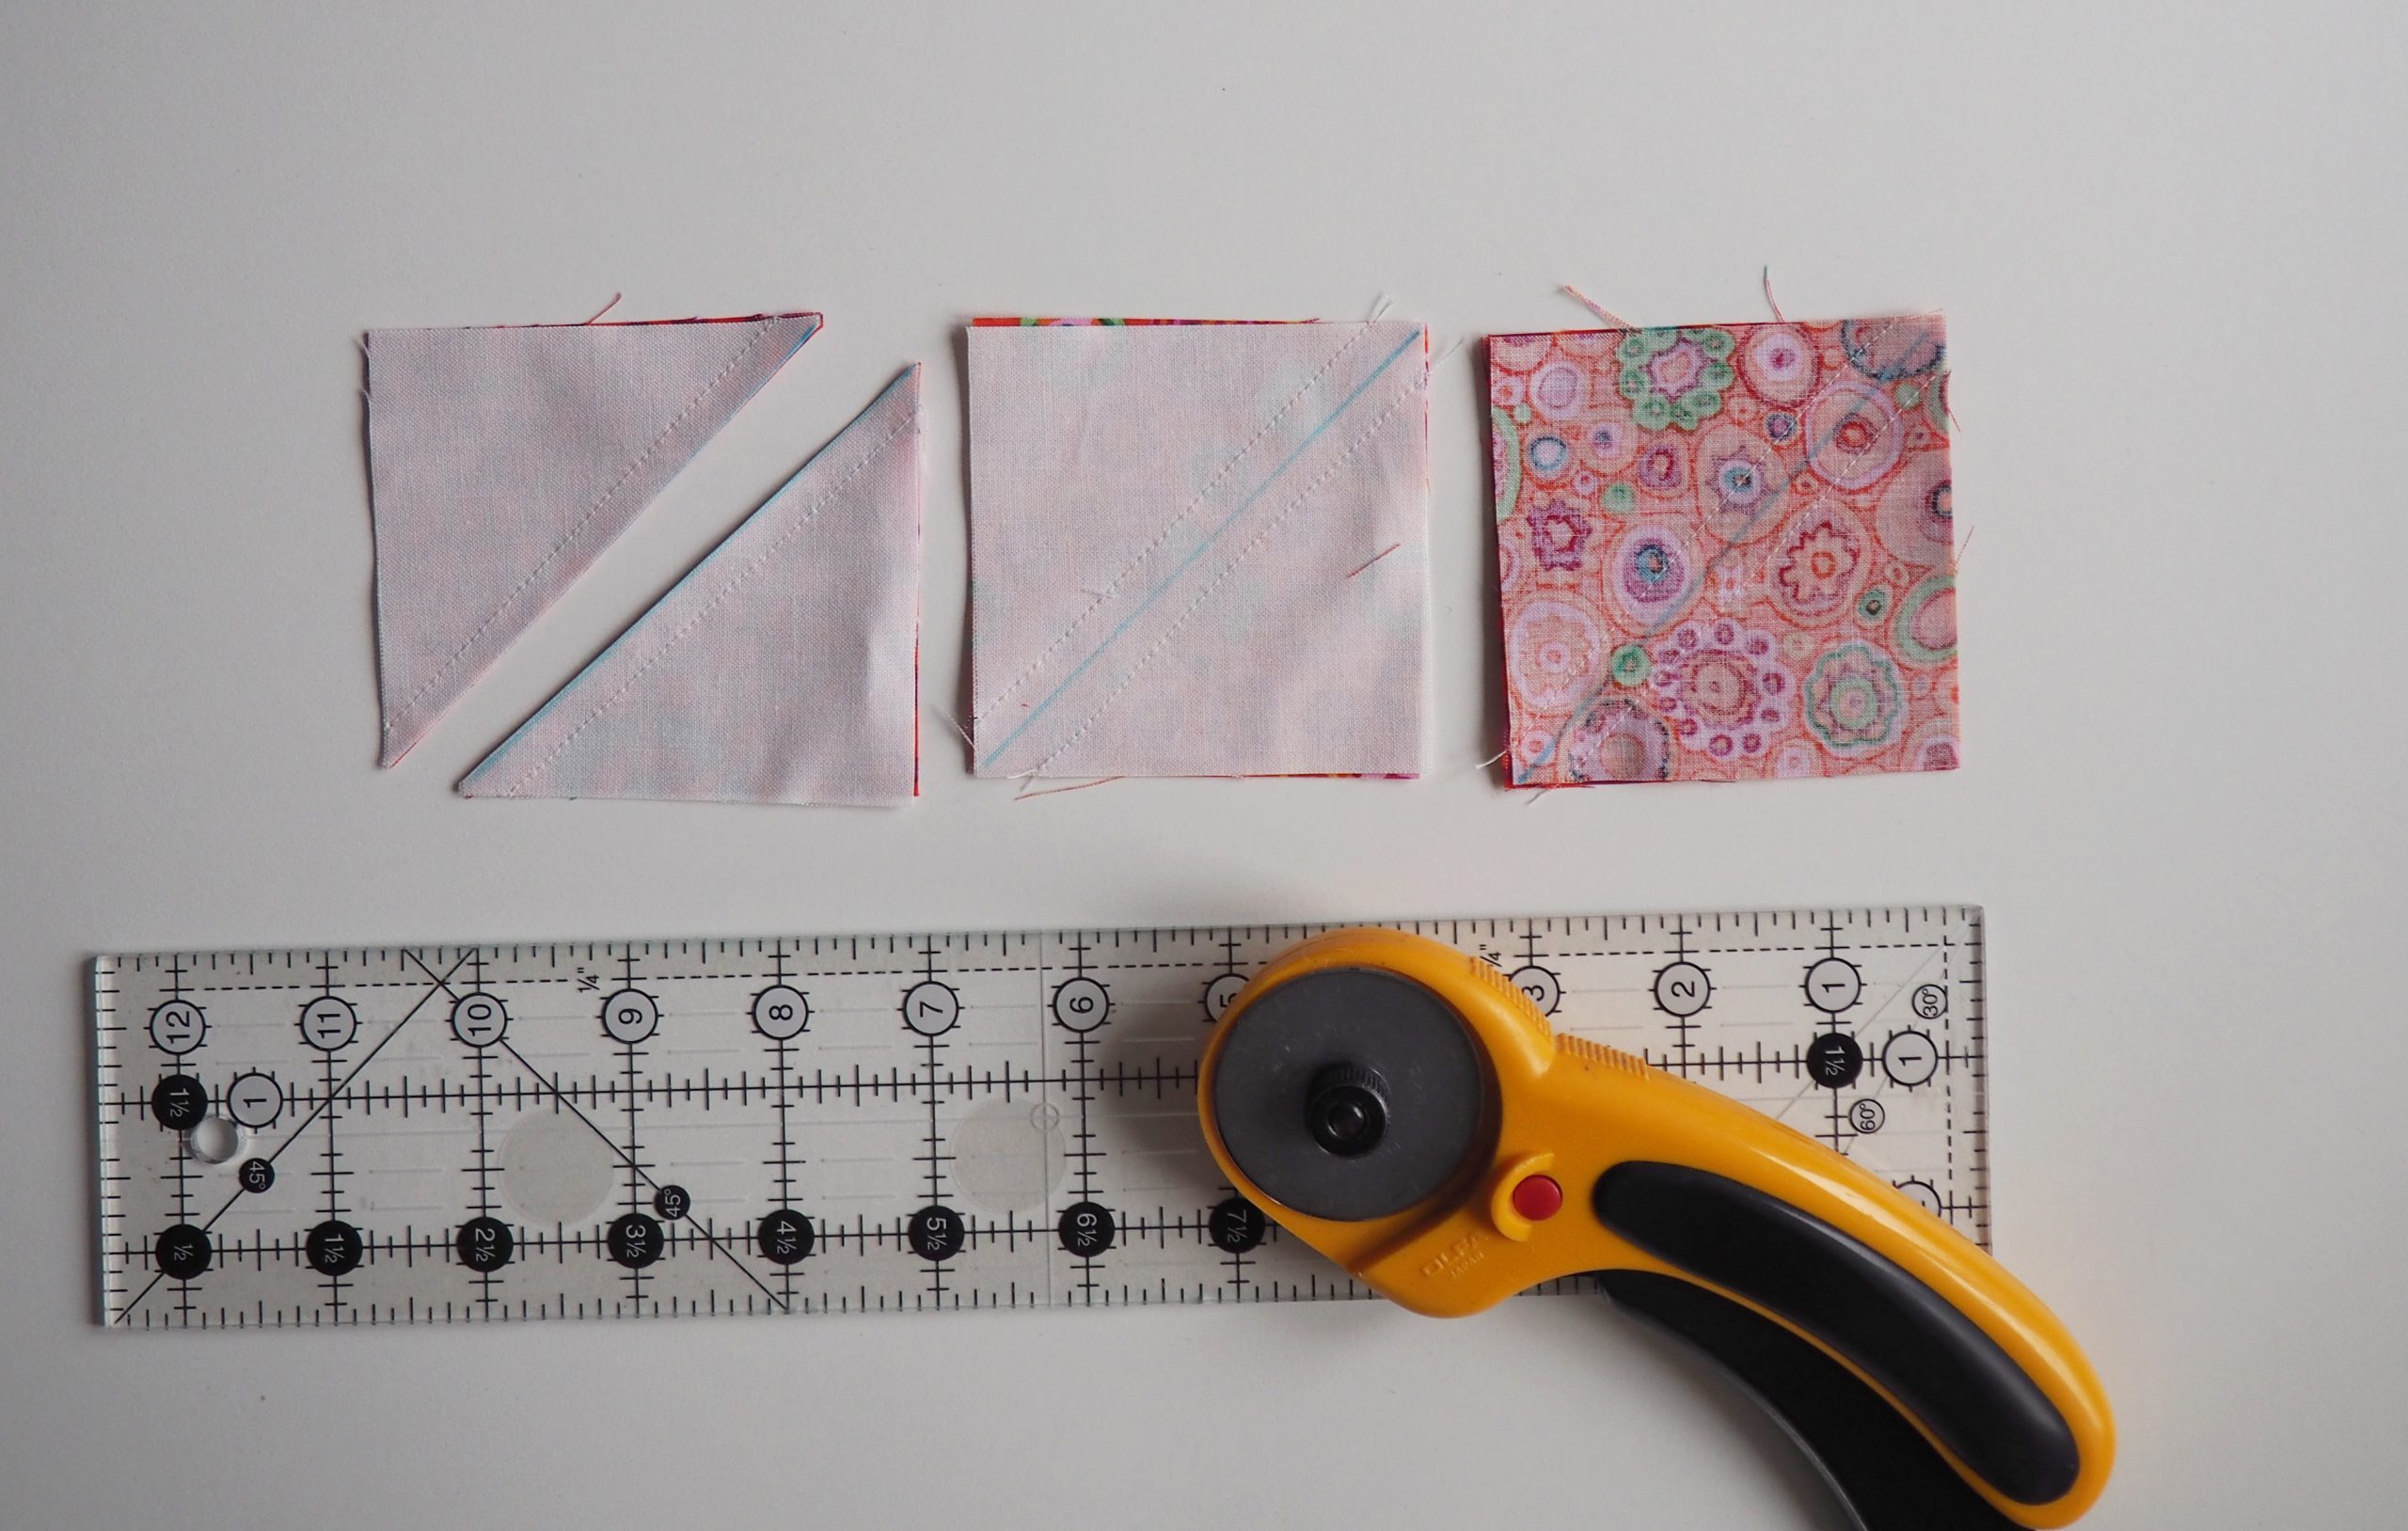
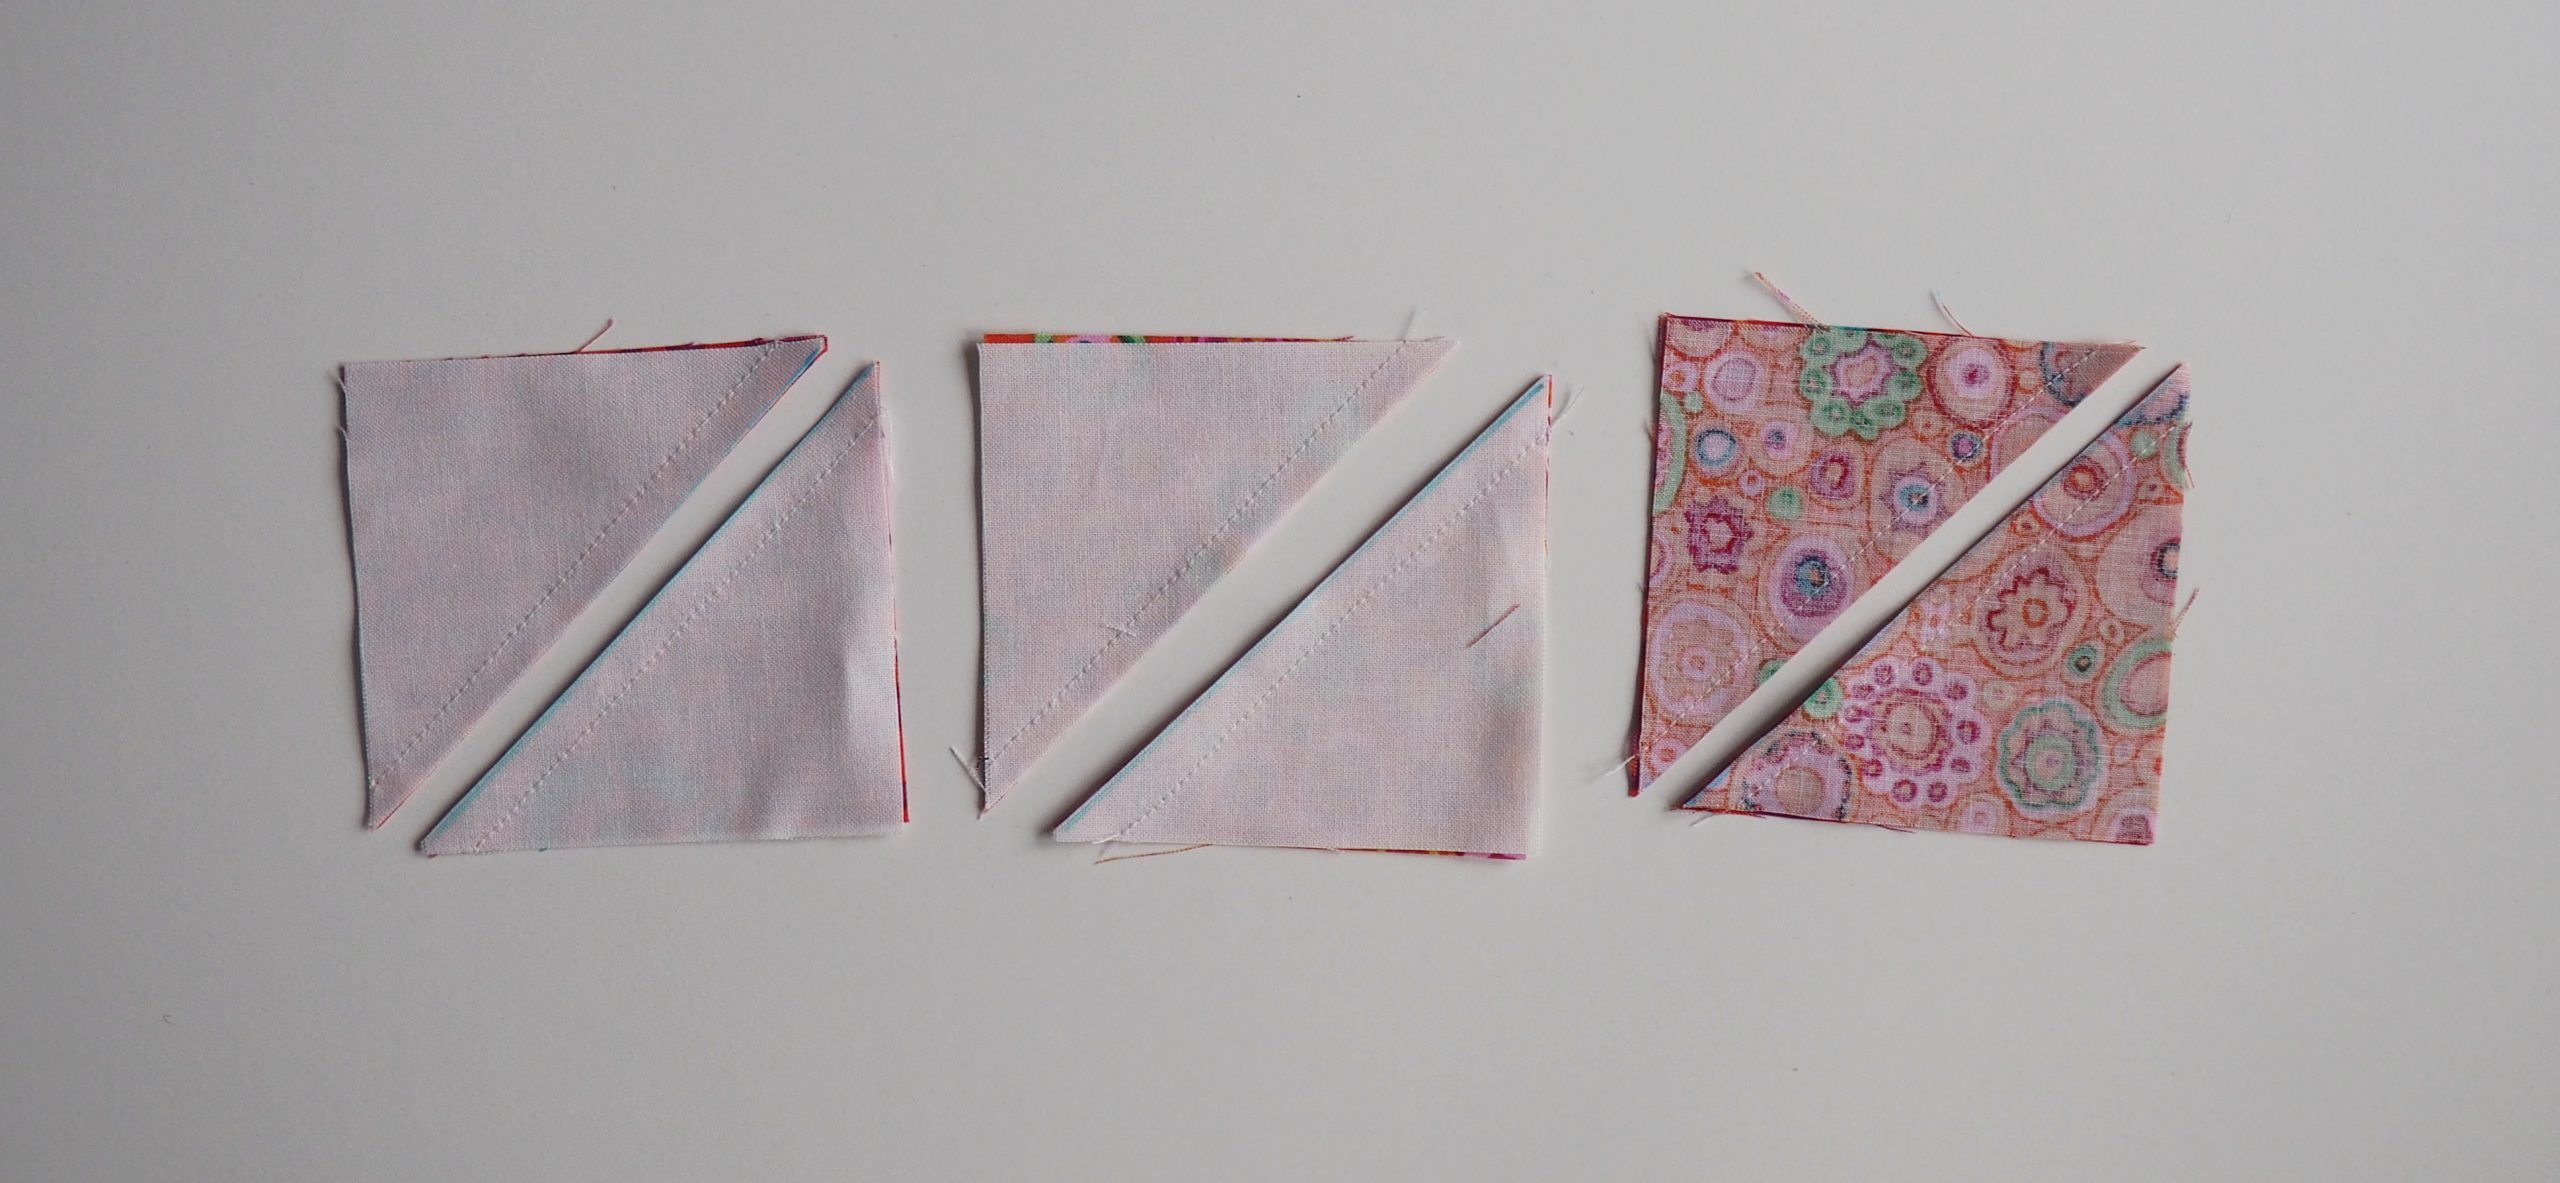
I fold the resulting triangles apart and iron them apart to create new squares. These are half square triangles (HST).
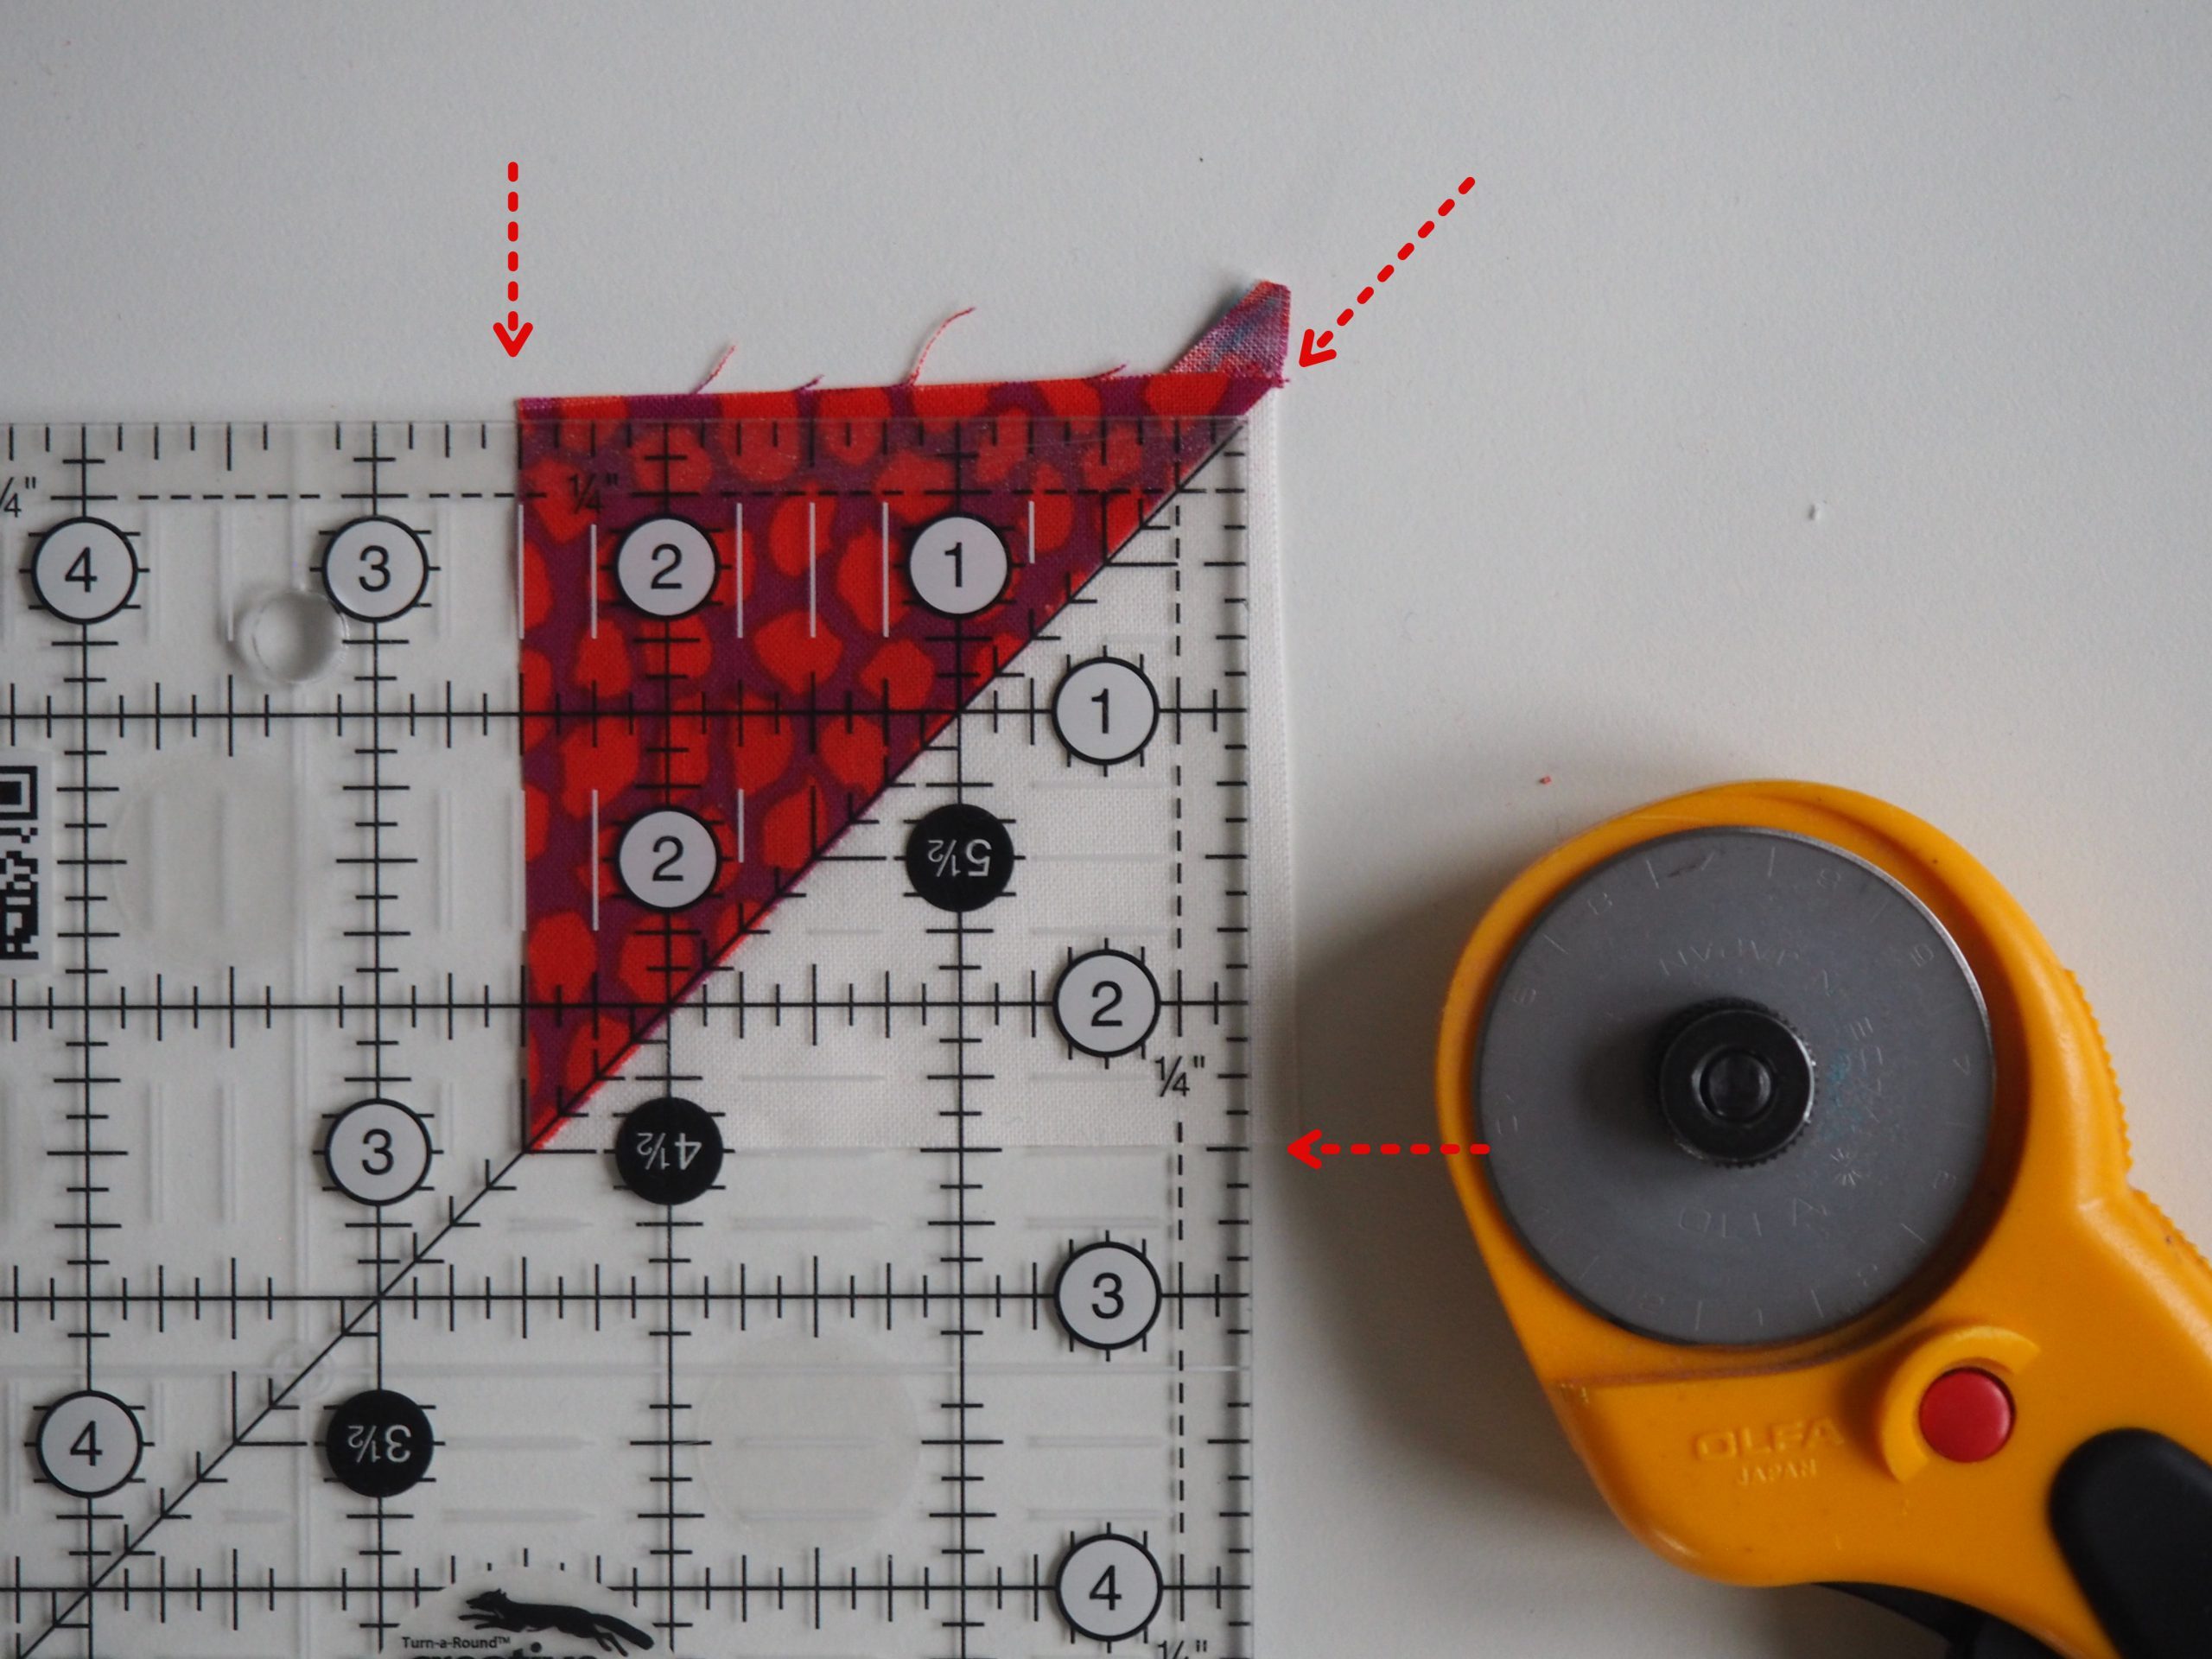
Using a ruler, I cut these HSTs to a size of 2.5″ x 2.5″ as follows.
The diagonal of the ruler is on the sewn diagonals of the fabric square. The measurement lines of 2.5″ at the top and right are within the fabric square.

To the right and top, I straighten the HST along the ruler.
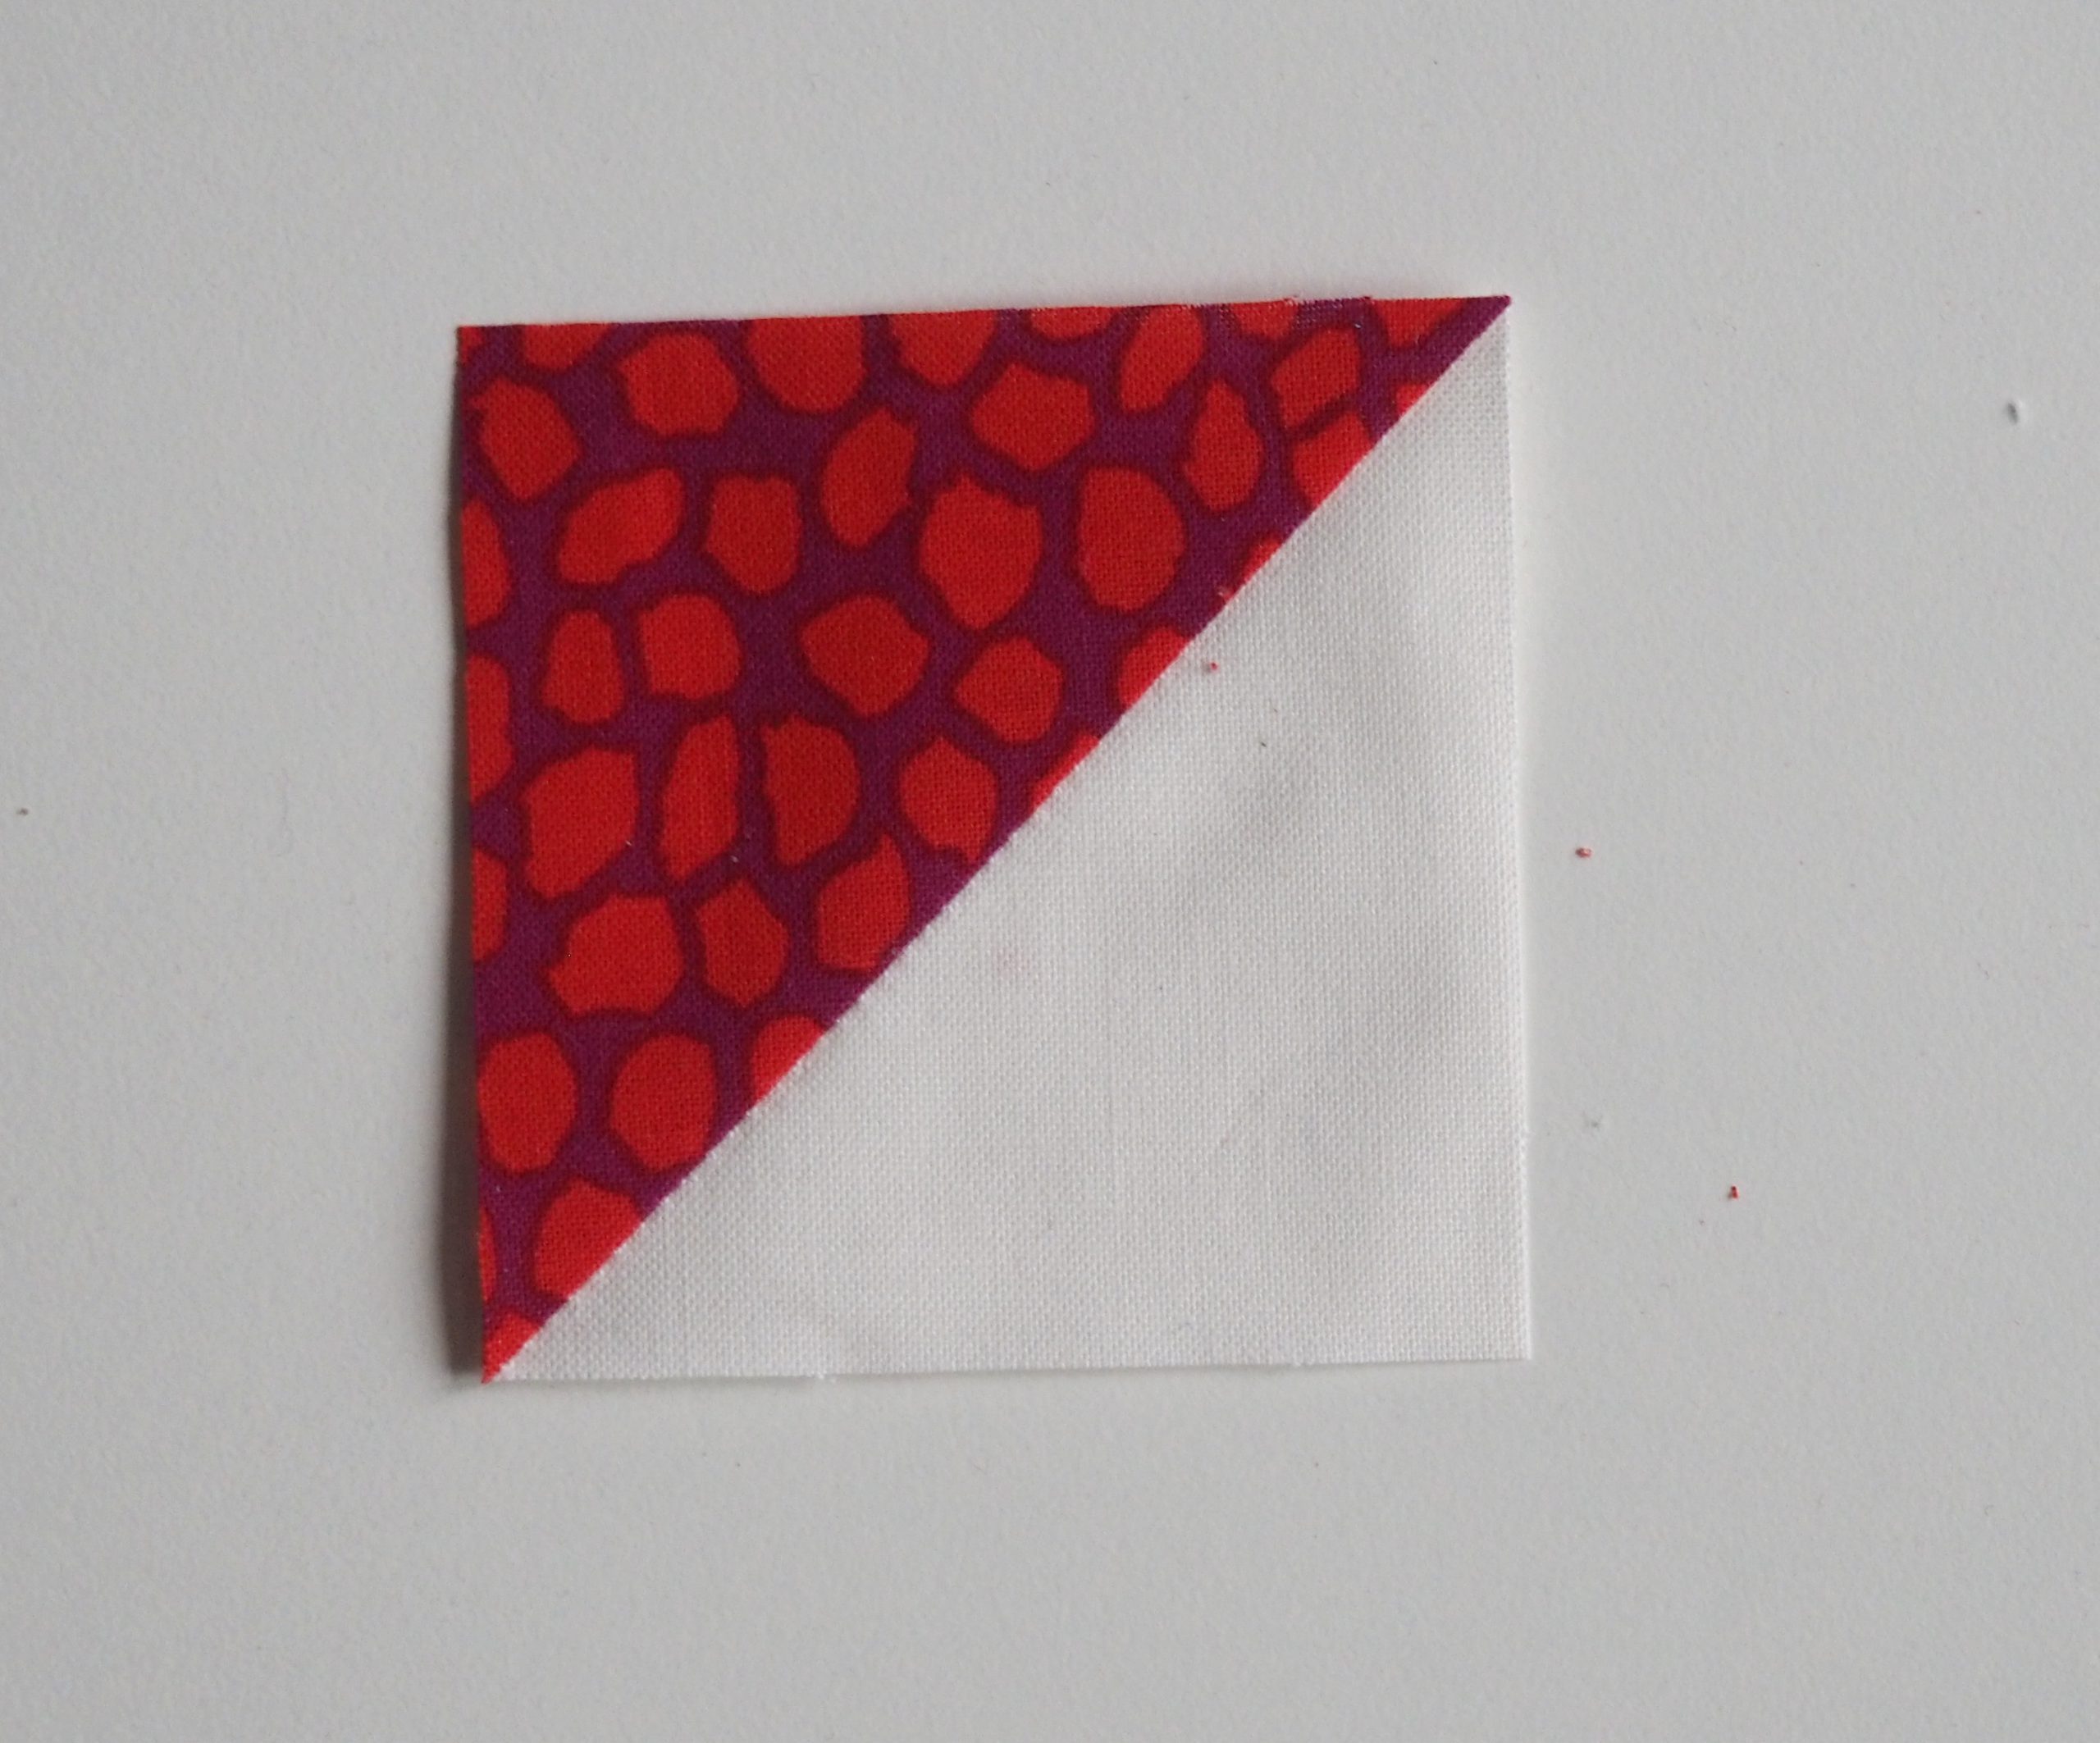
Turn the HST through 180 degrees and put the cutting ruler back on: the diagonal of the ruler is in line with the HST seam. The measurement lines of 2.5″ lie exactly along the edges that have been straightened. Again, I straighten the edges at the top and right along the cutting ruler.
The HST now measures exactly 2.5″ x 2.5″.
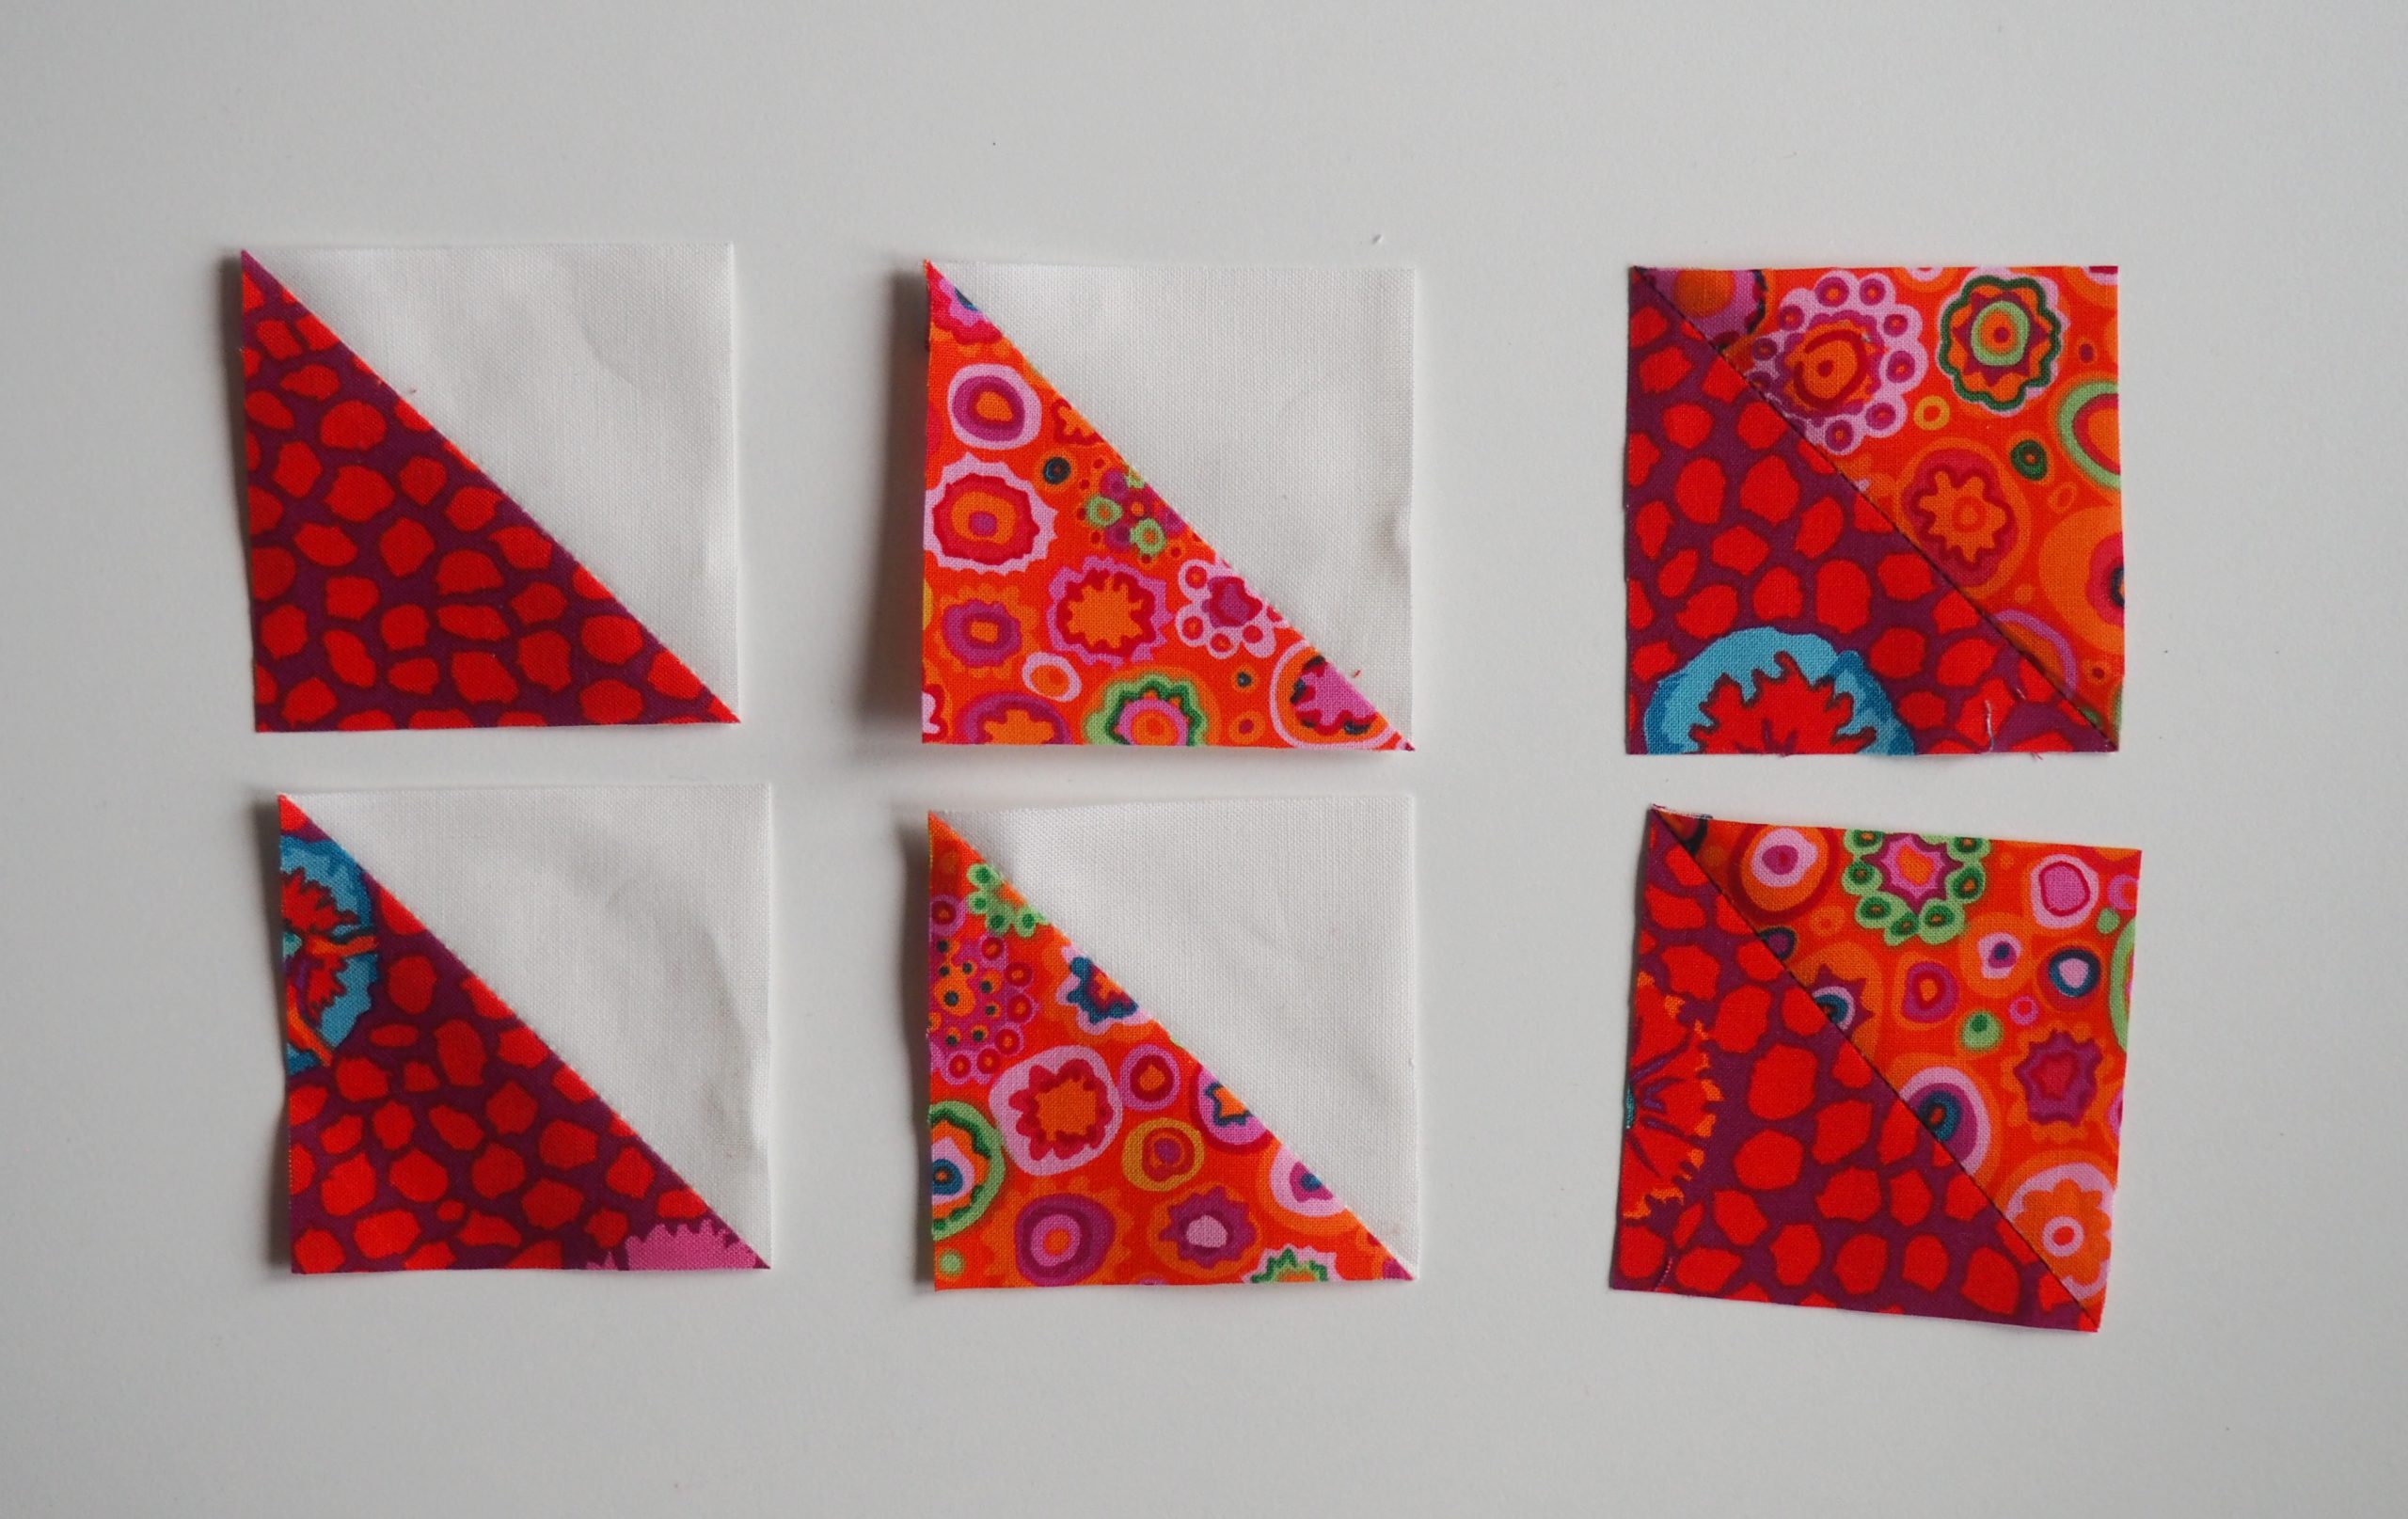
I cut all six HSTs in this way to the size of 2.5″ x 2.5 “.
Joining the individual pieces together to form an star
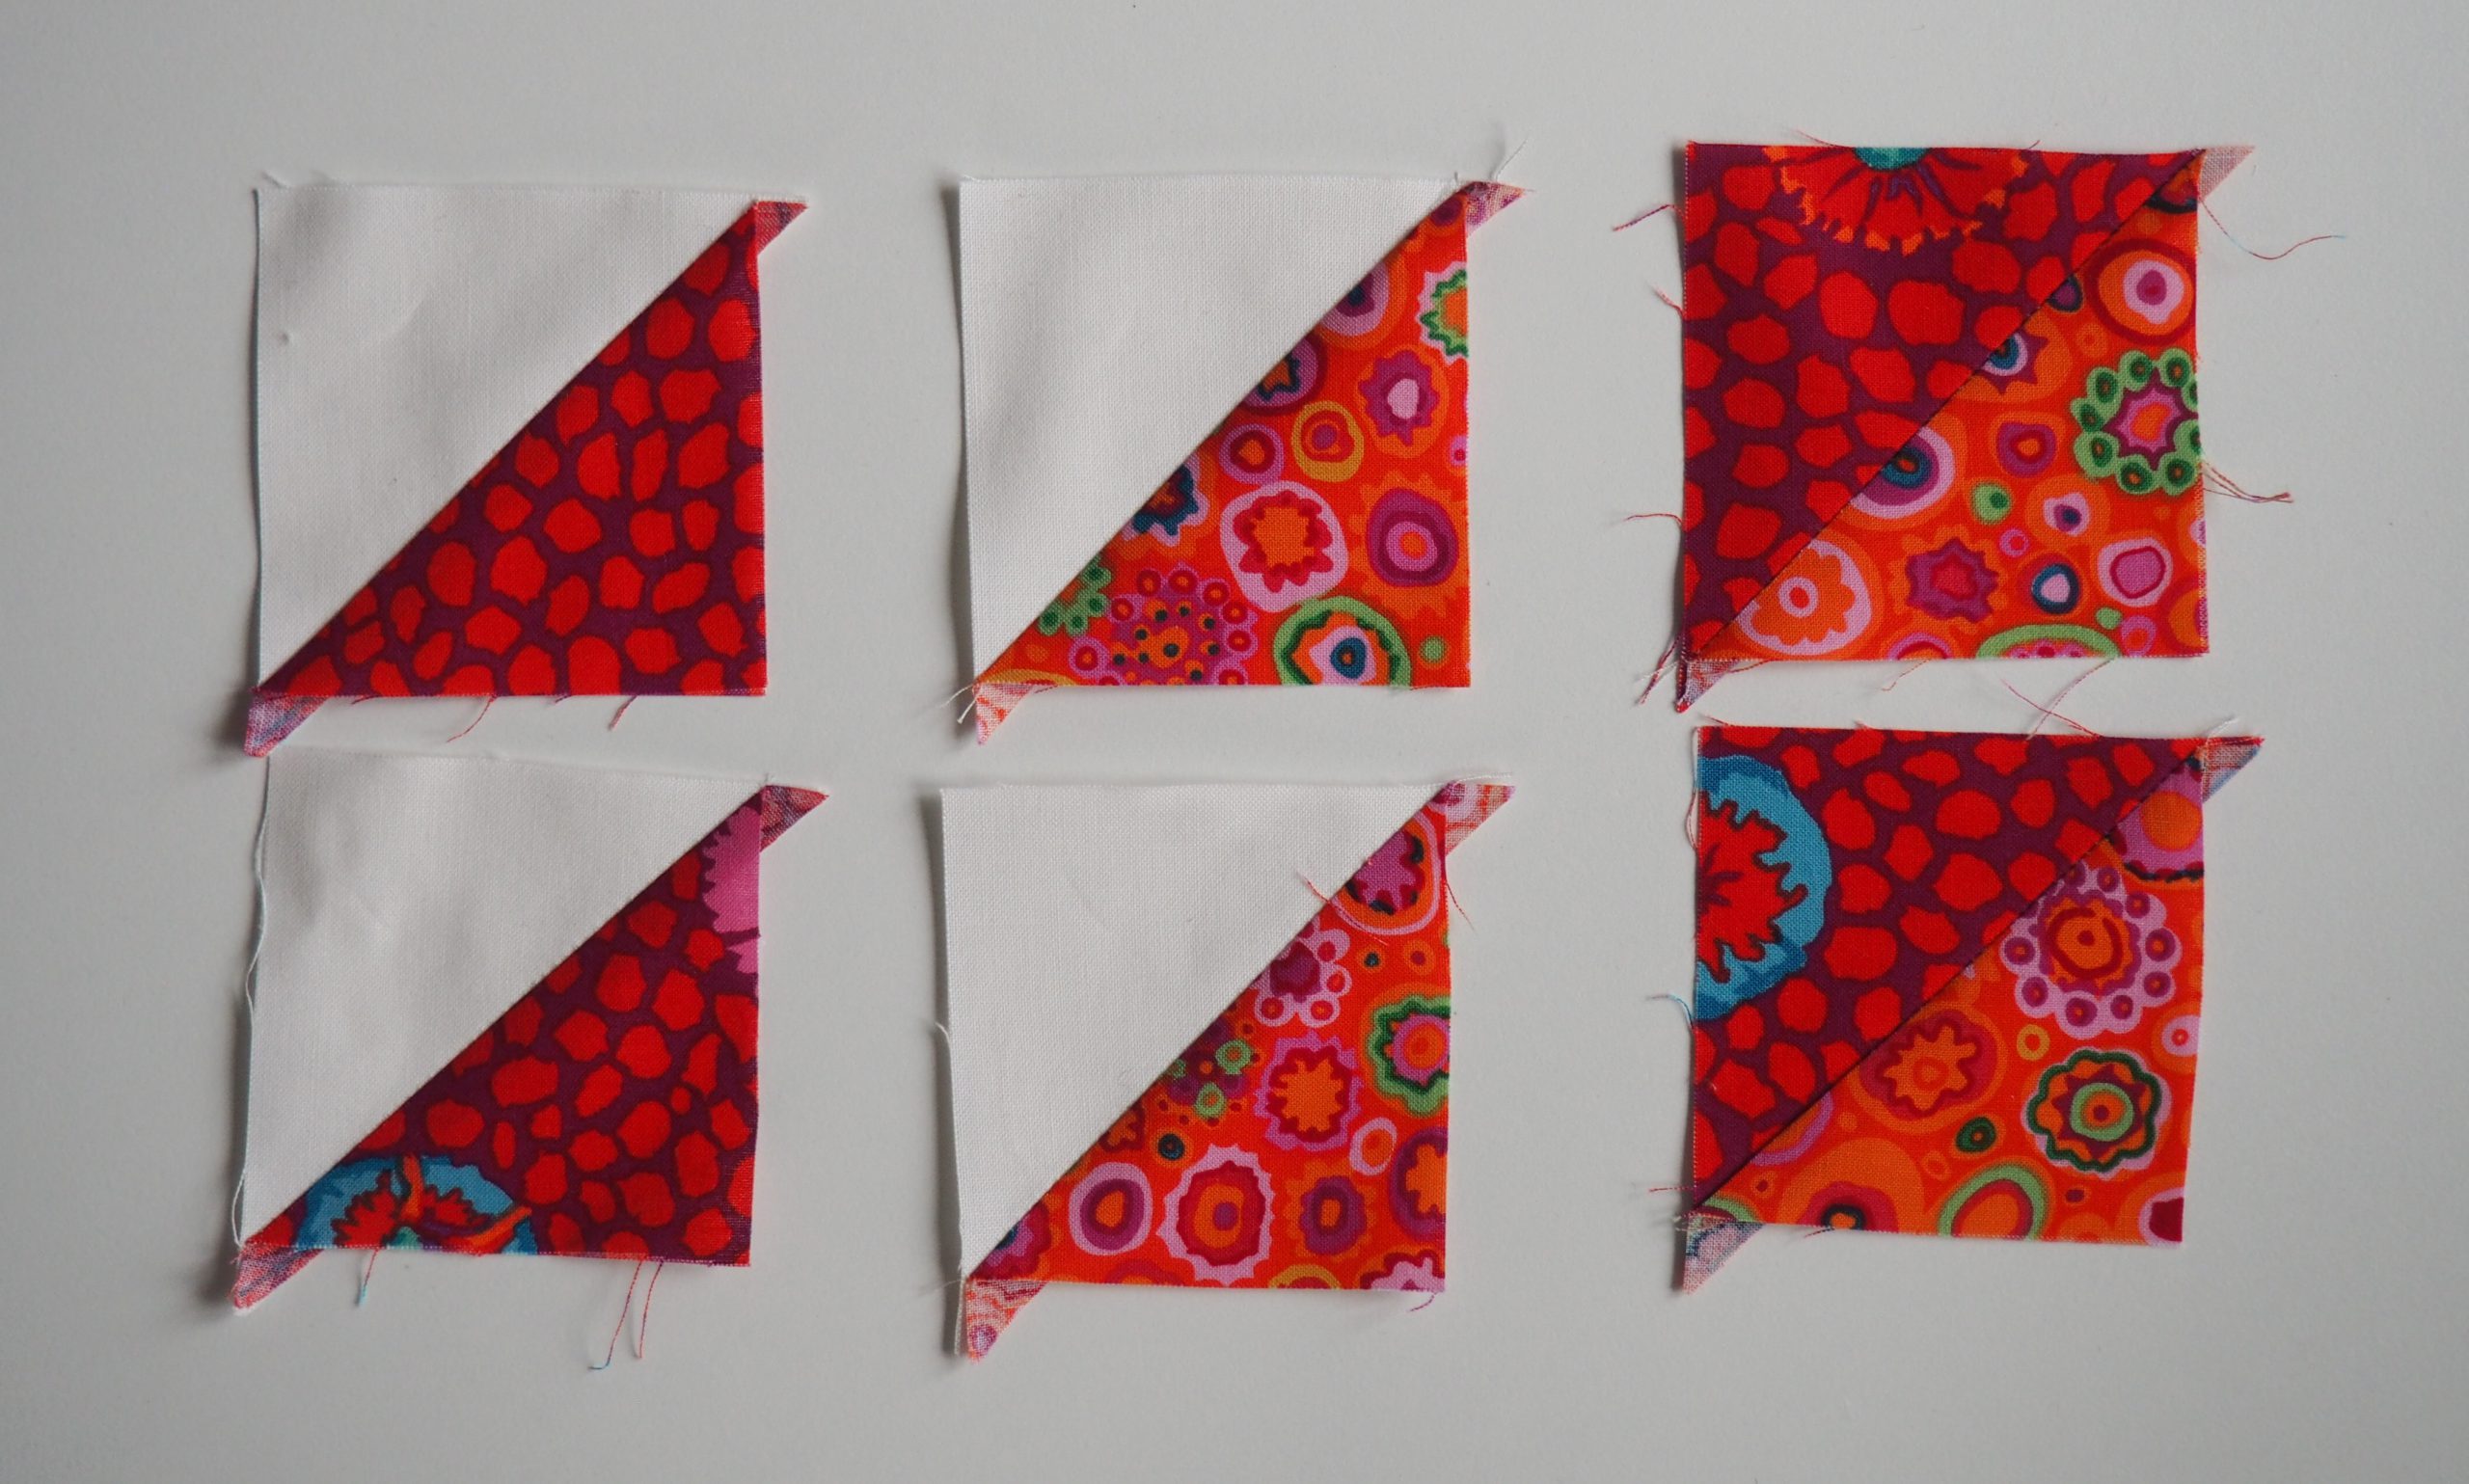
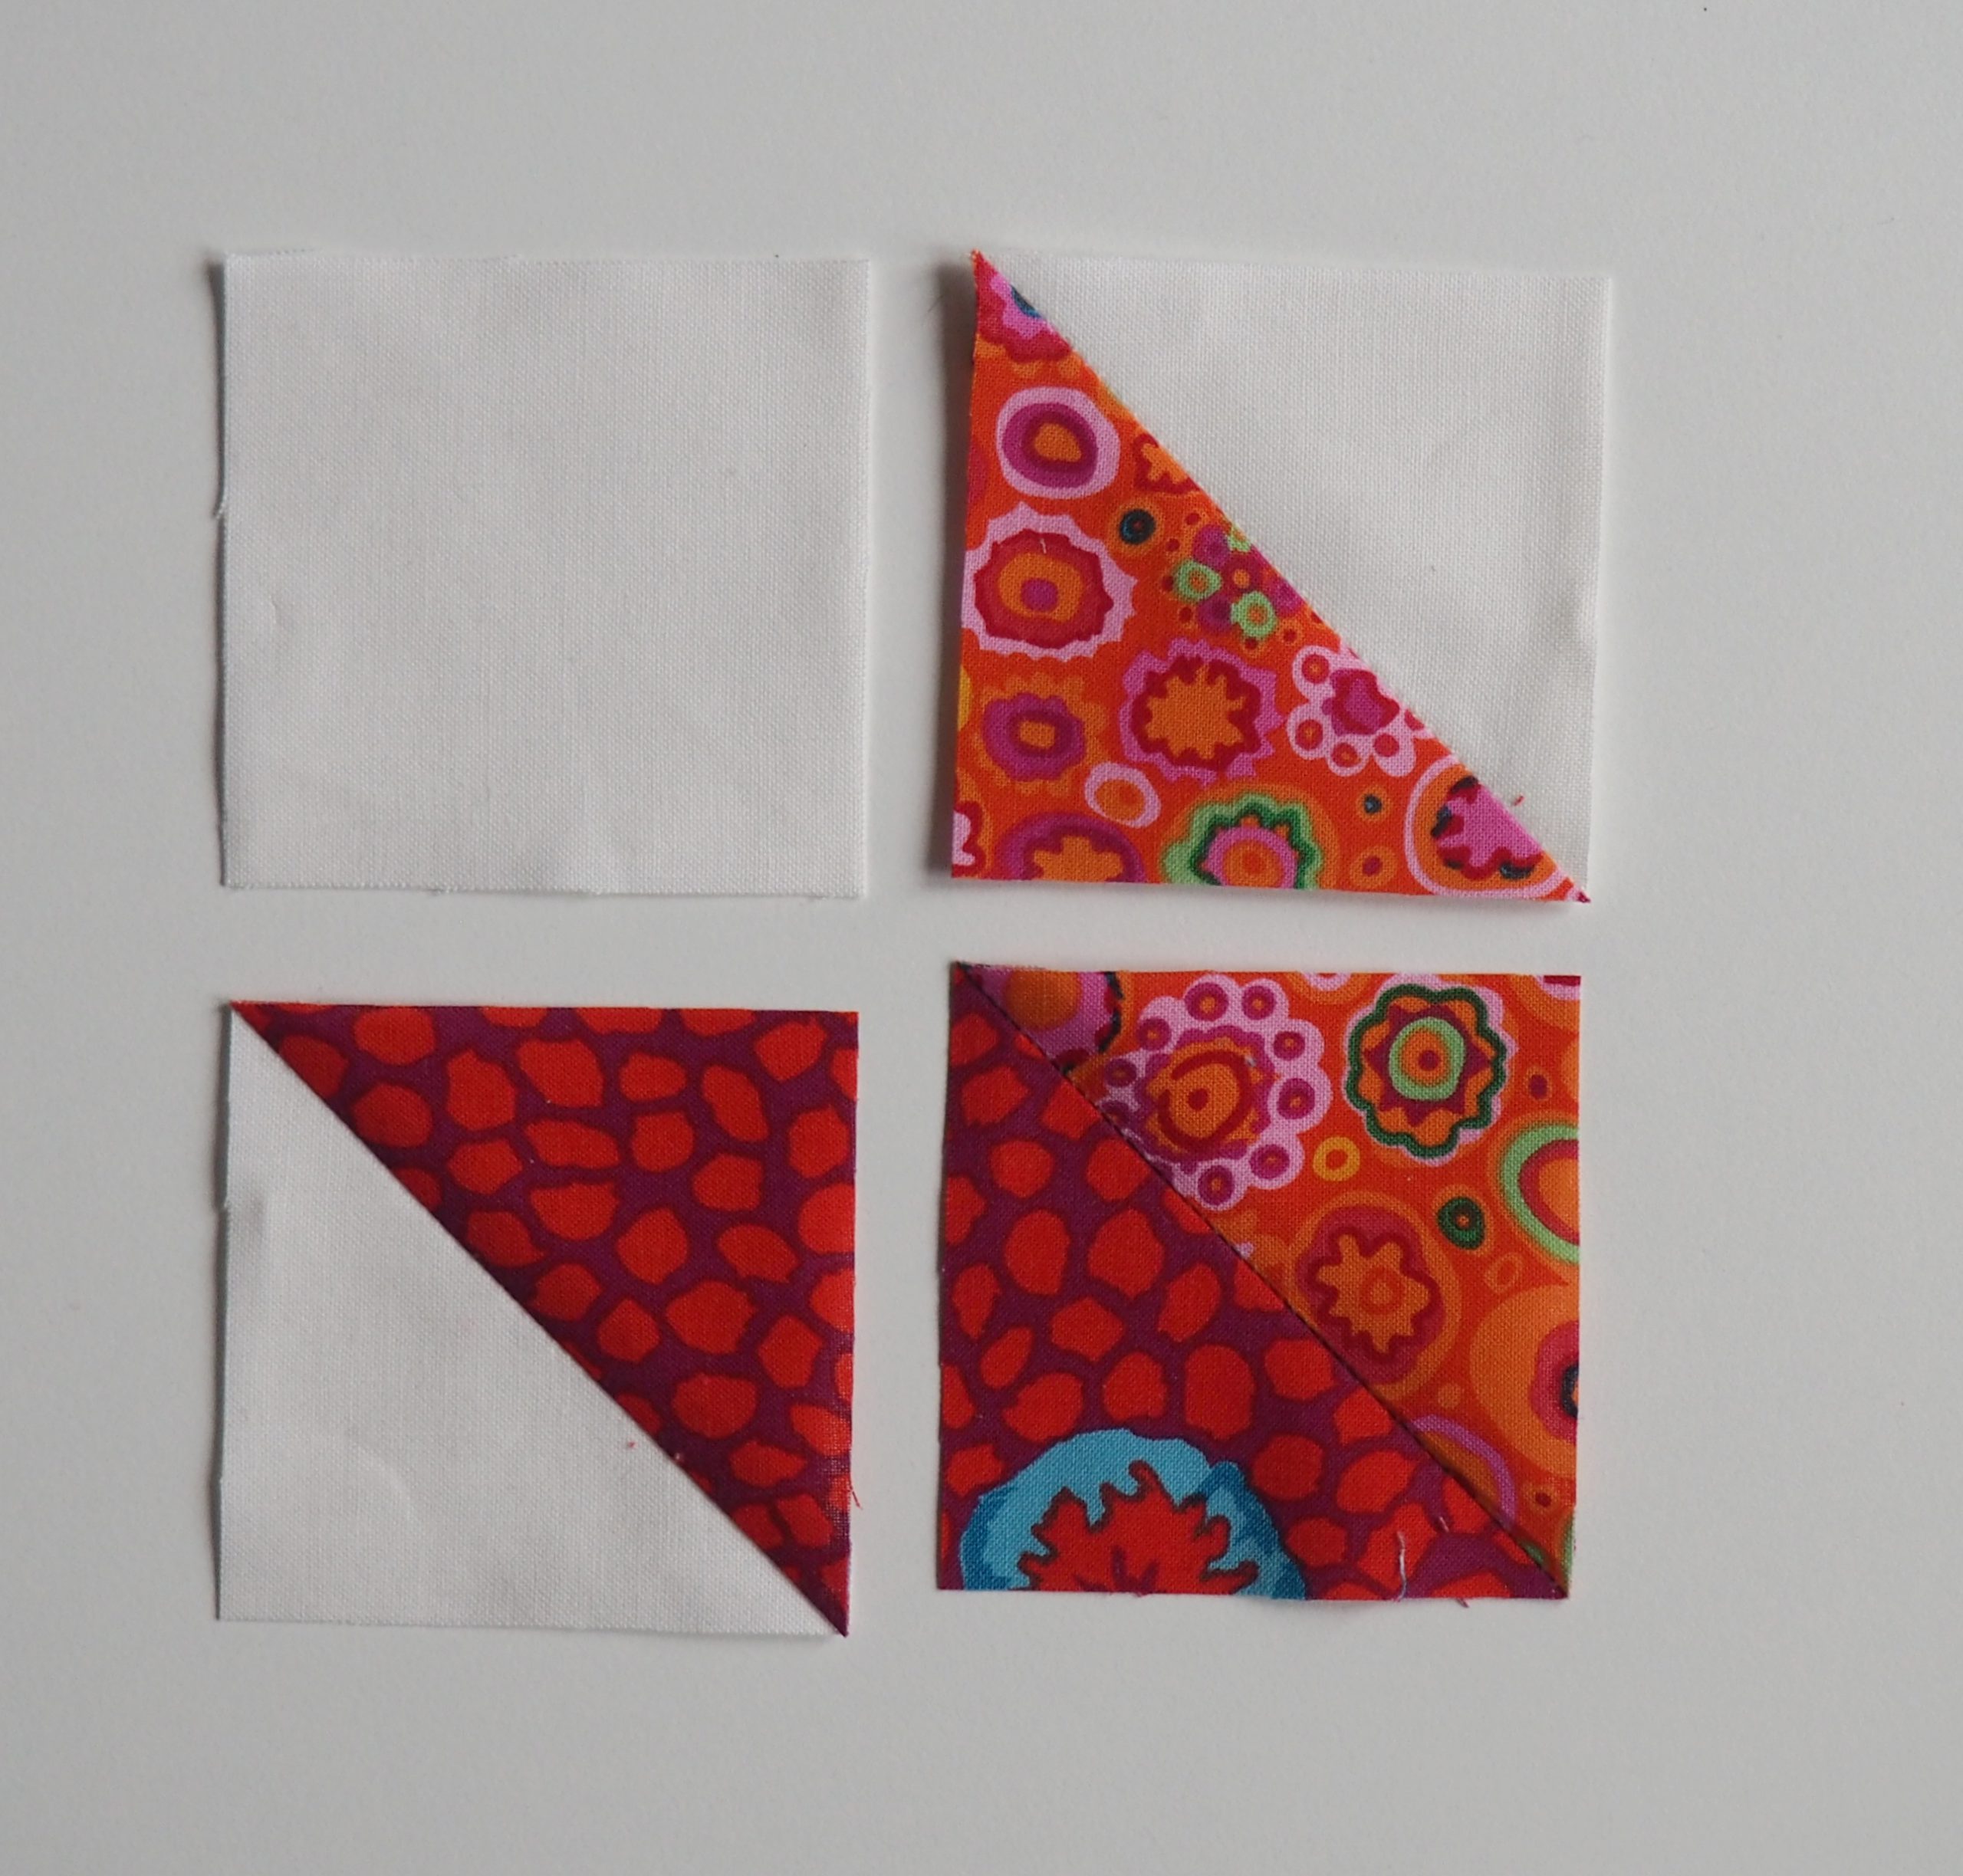
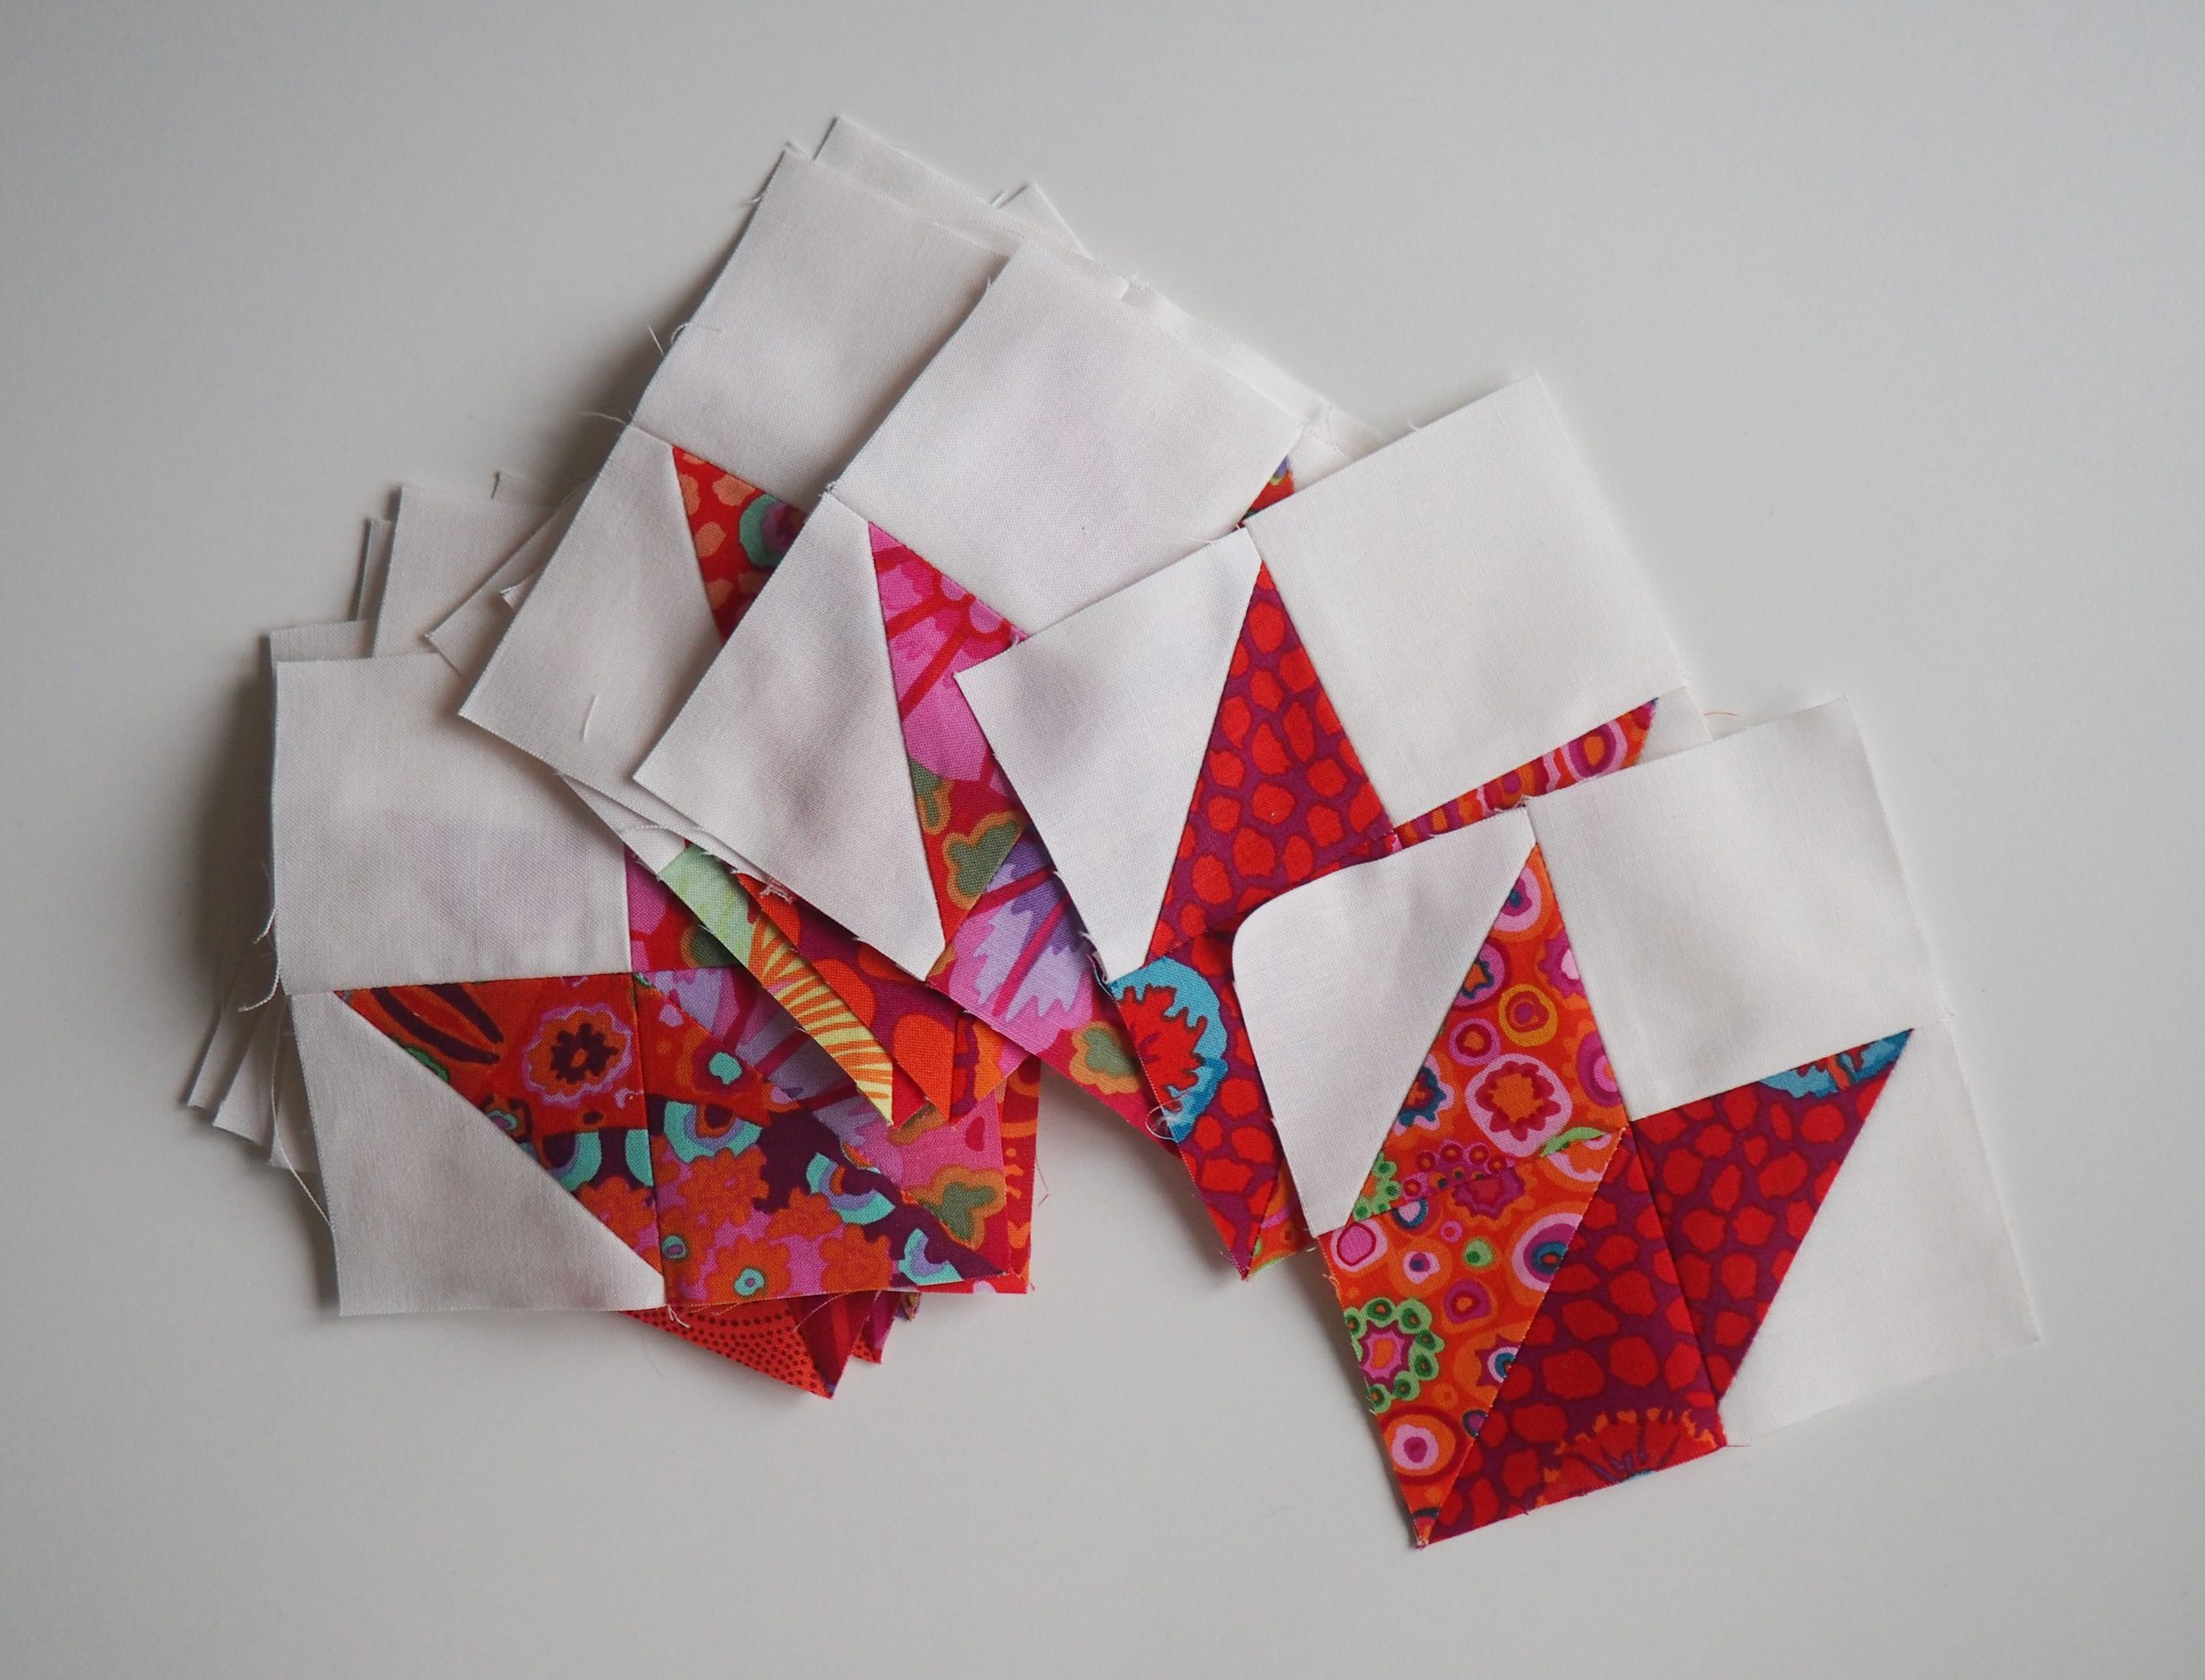
First, I sew a quarter of a star. For this, I need the small 2.5″ x 2.5″ square made of background material. One HST each with fabric A and fabric B and the HST, which is made of fabric A and fabric B.
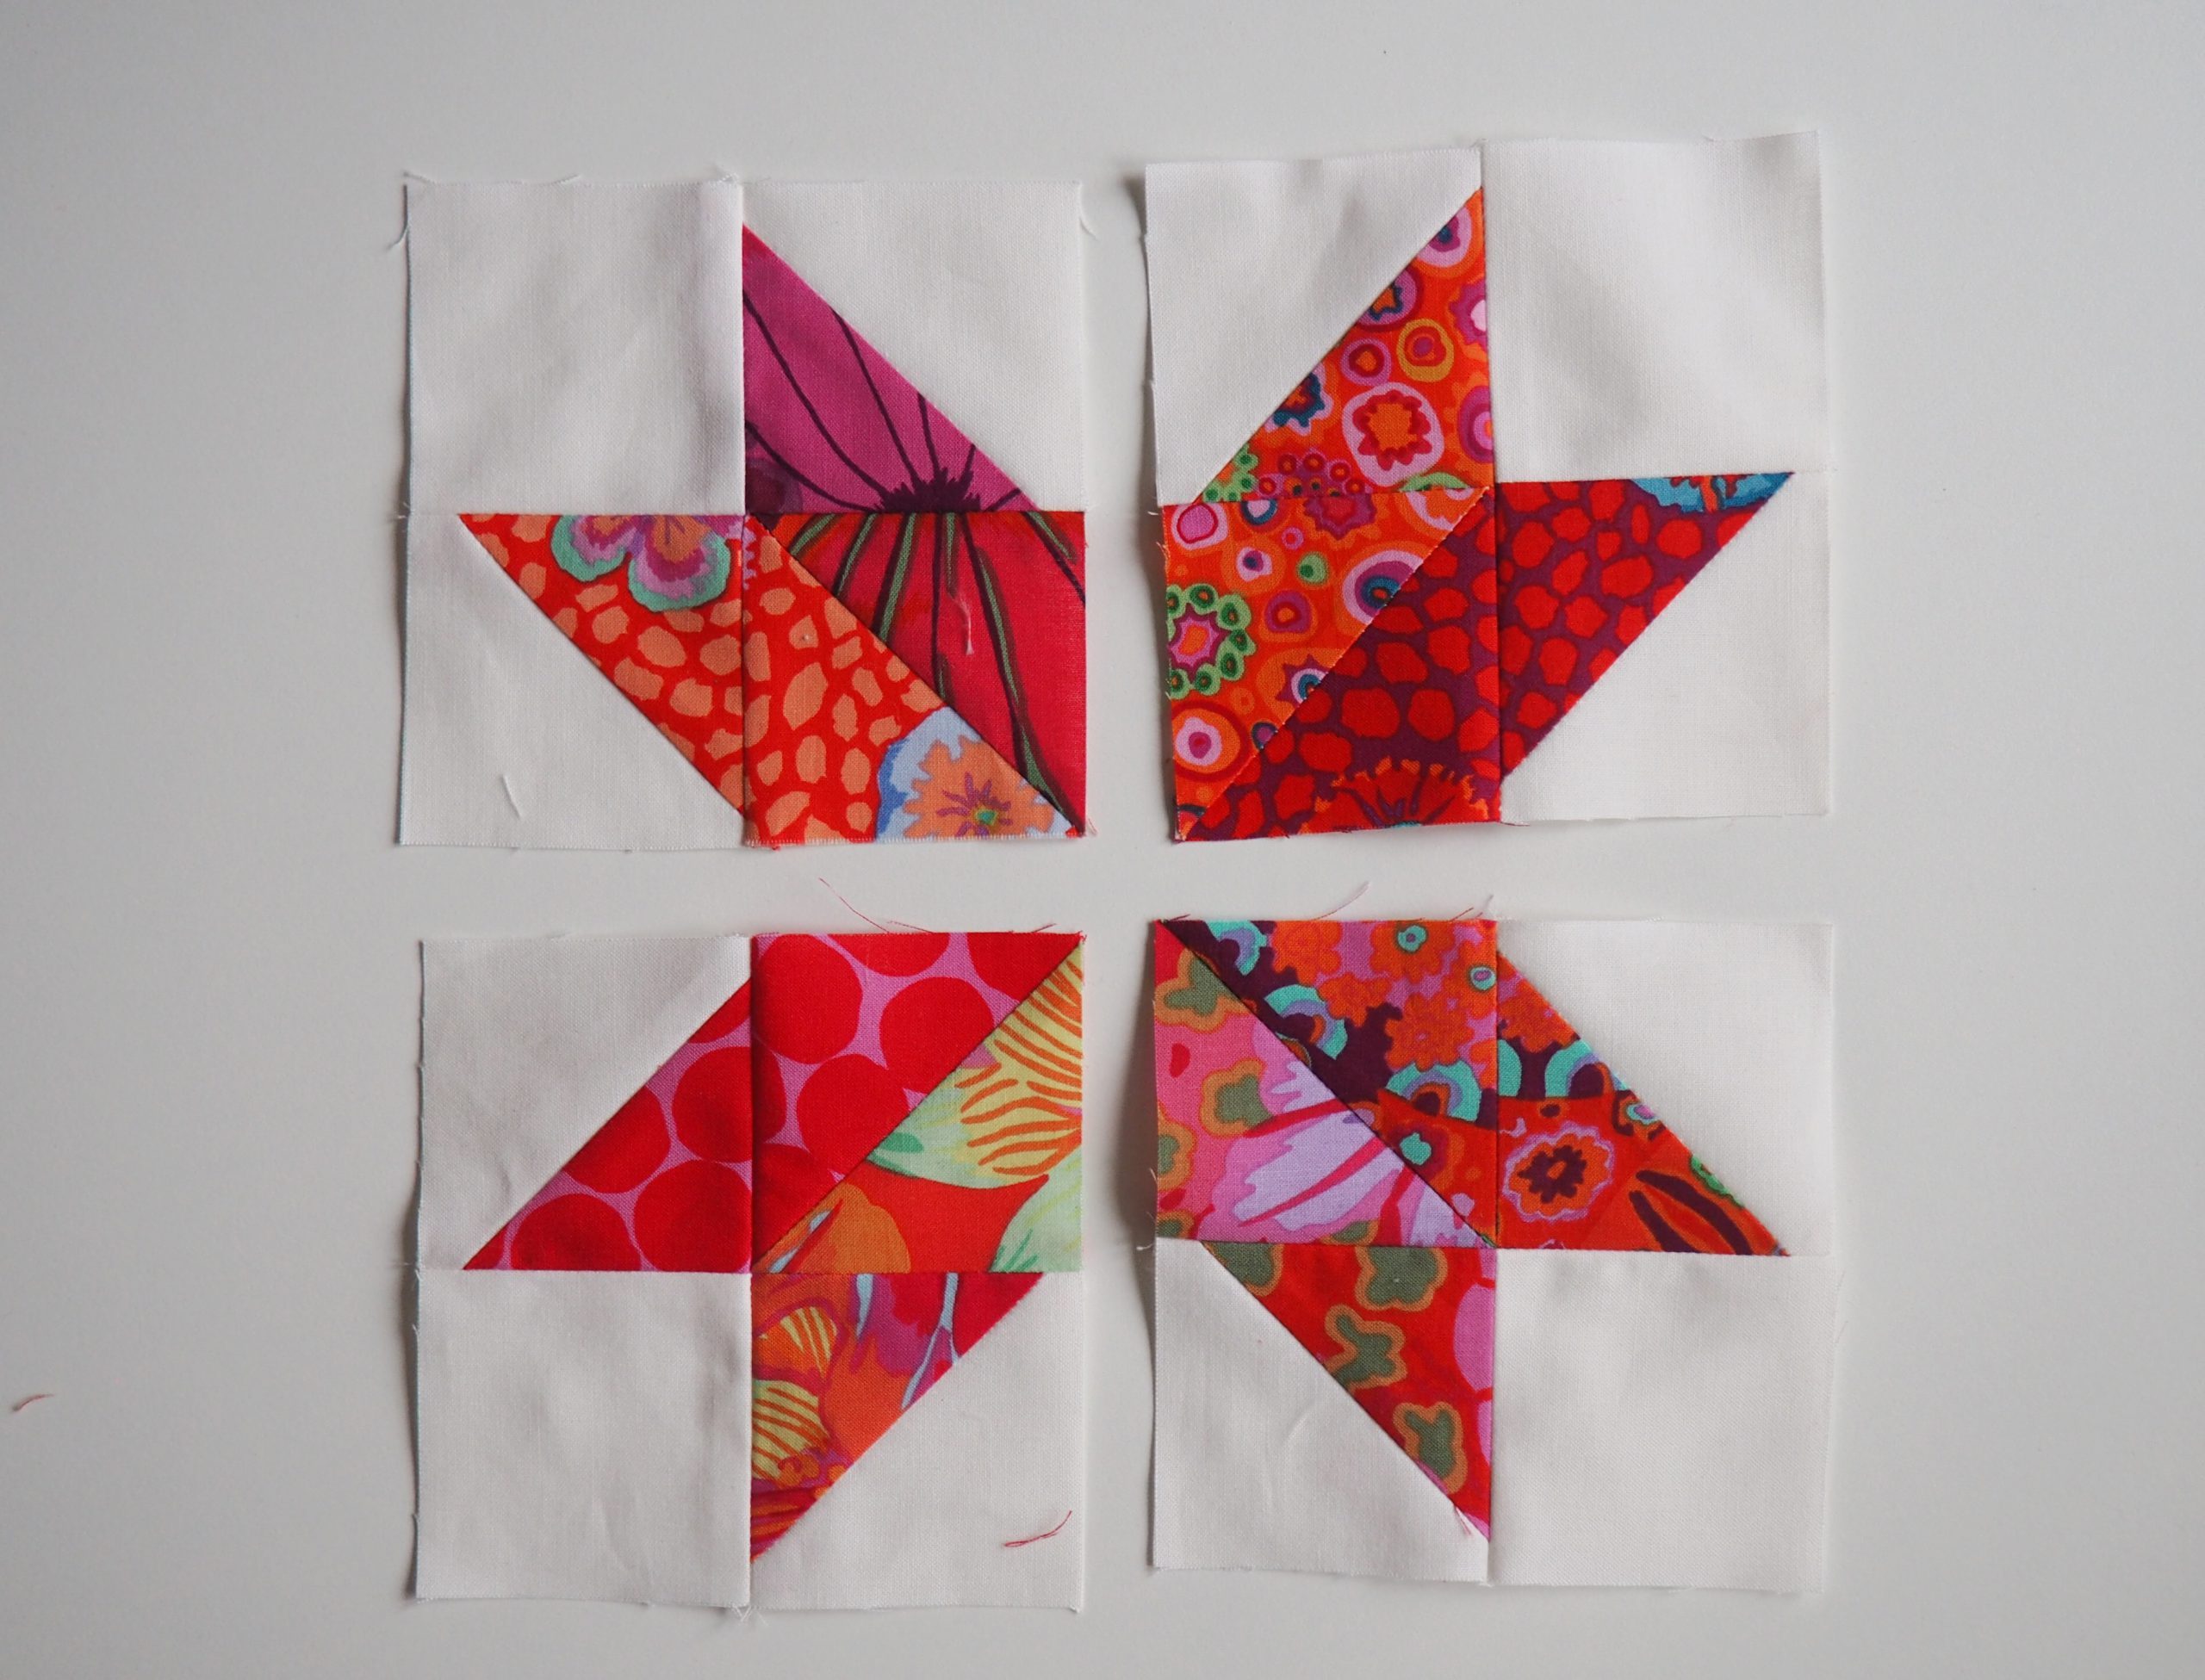
I arrange the four squares according to the following diagram and as shown in the following picture:
H | AH
___________
HB | BA
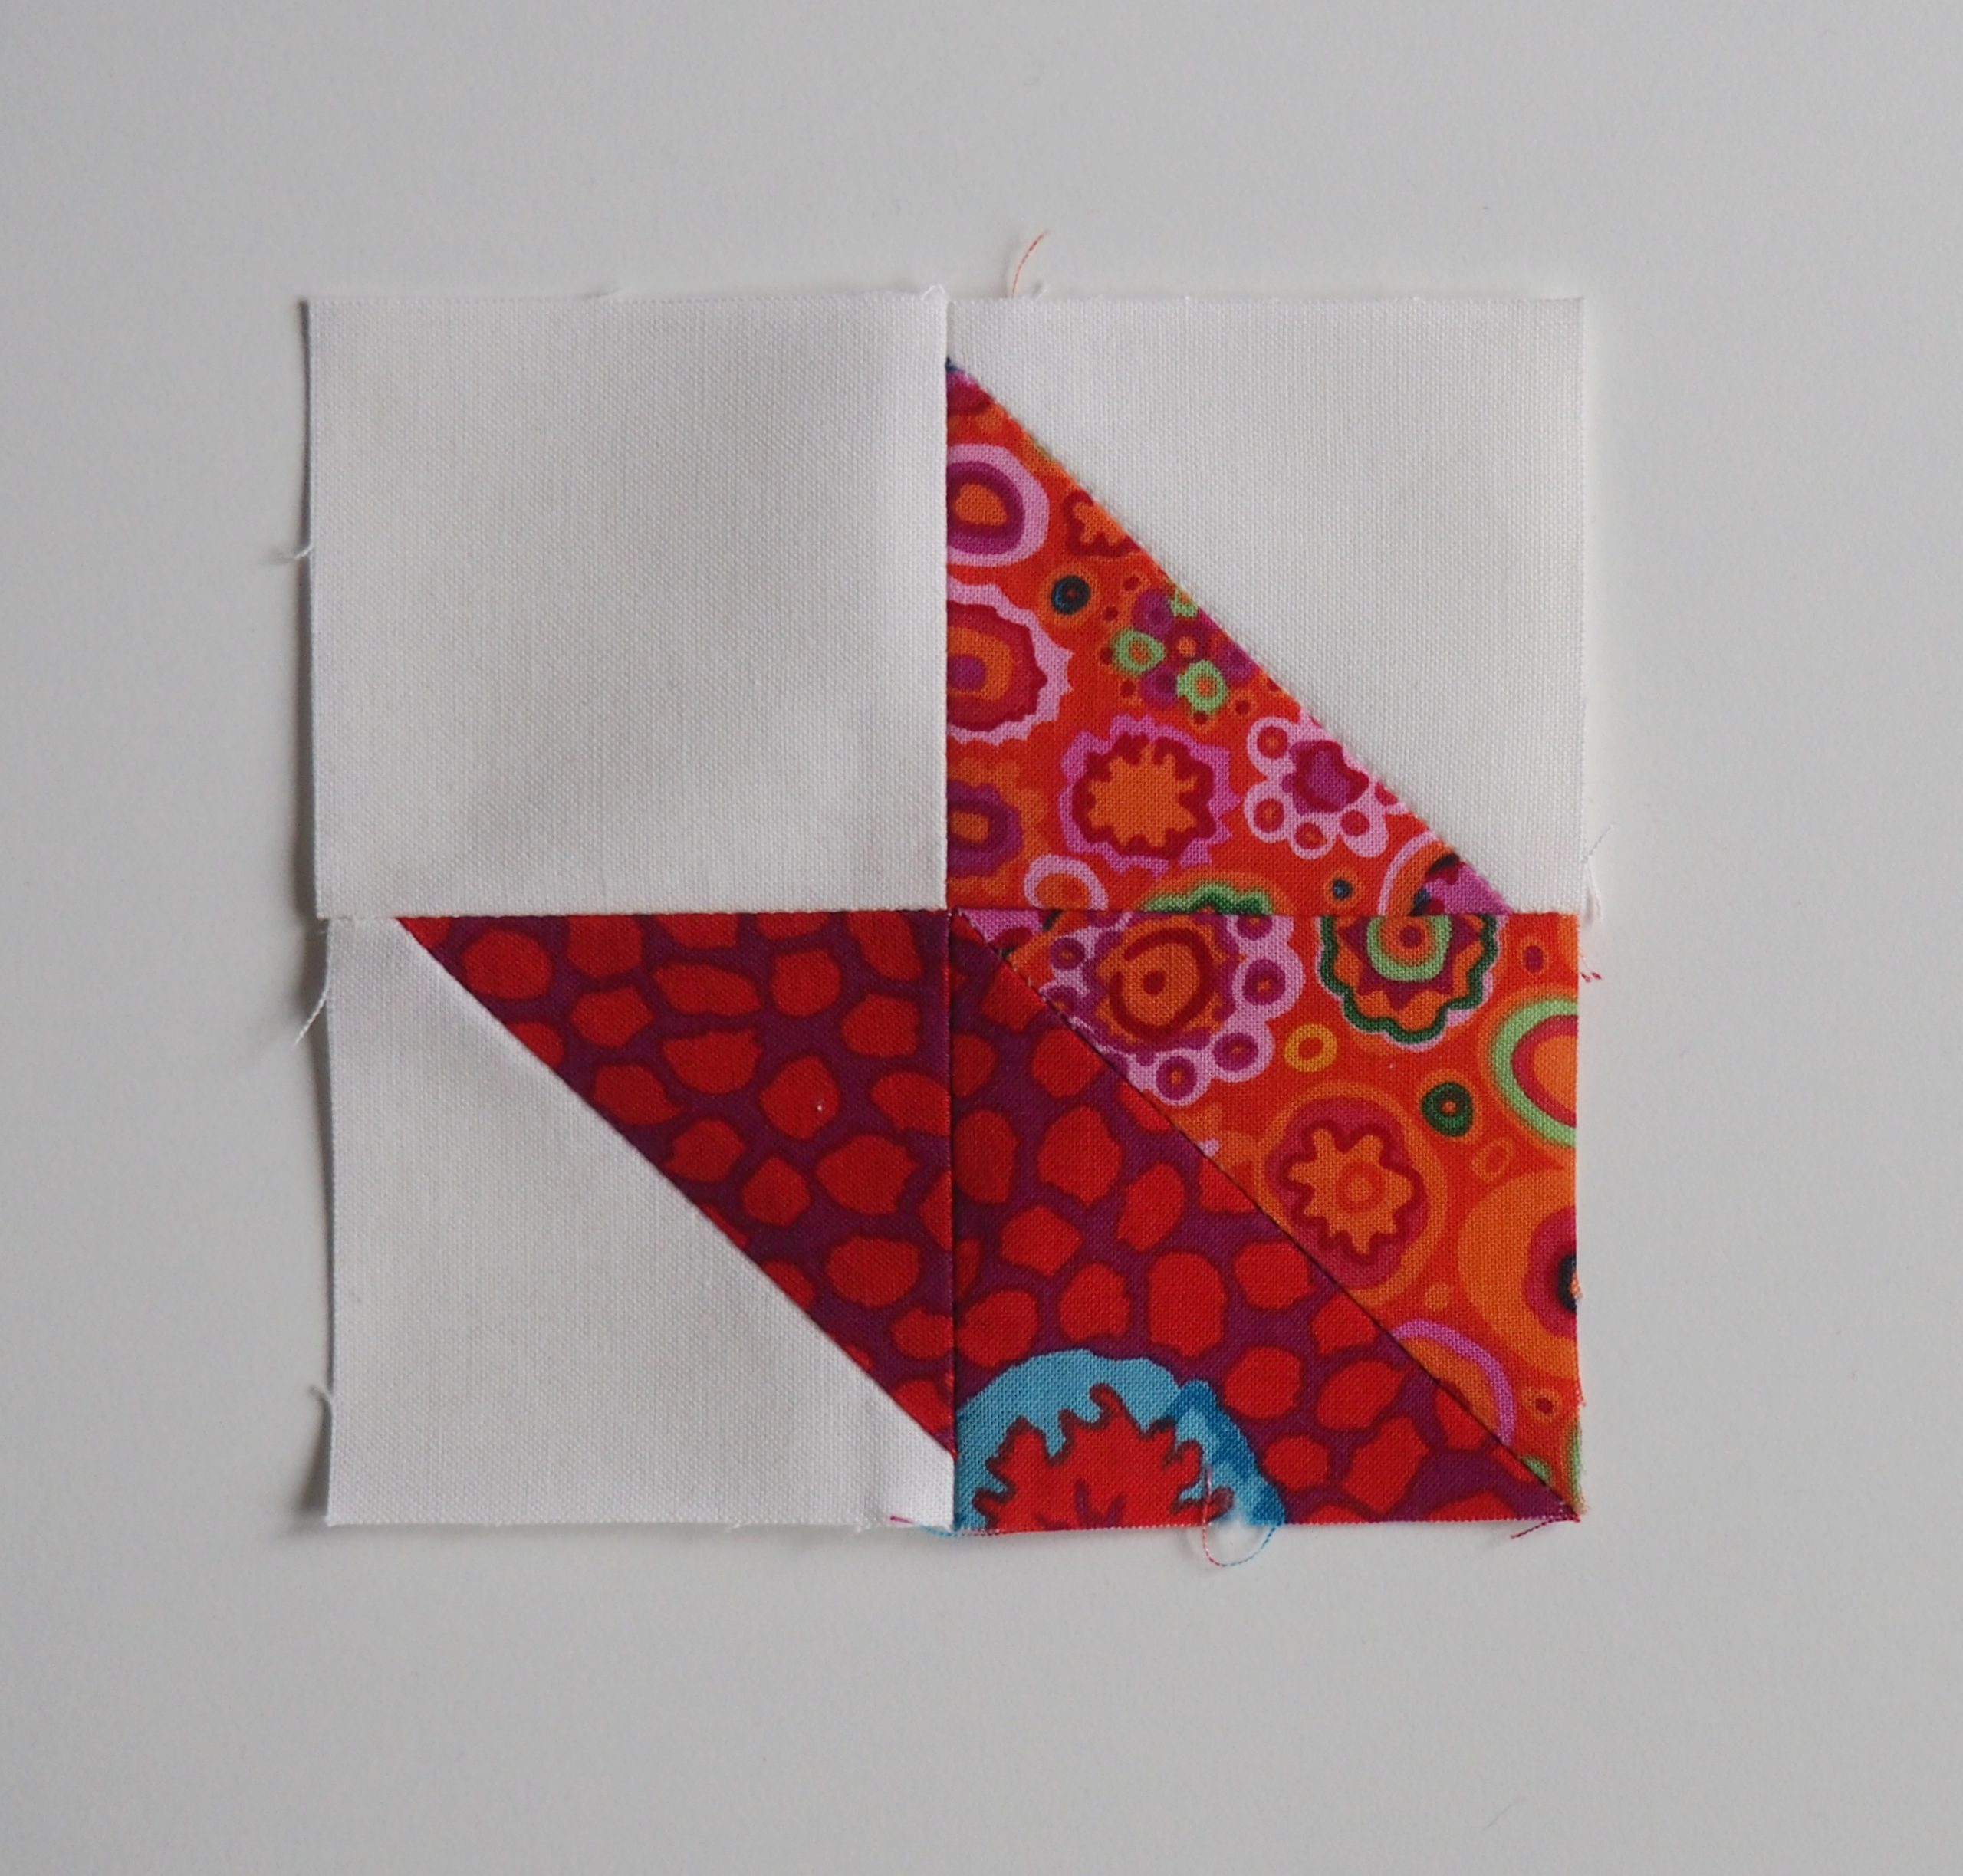
First, I sew two squares together …

… and then I sew the two two-blocks together.
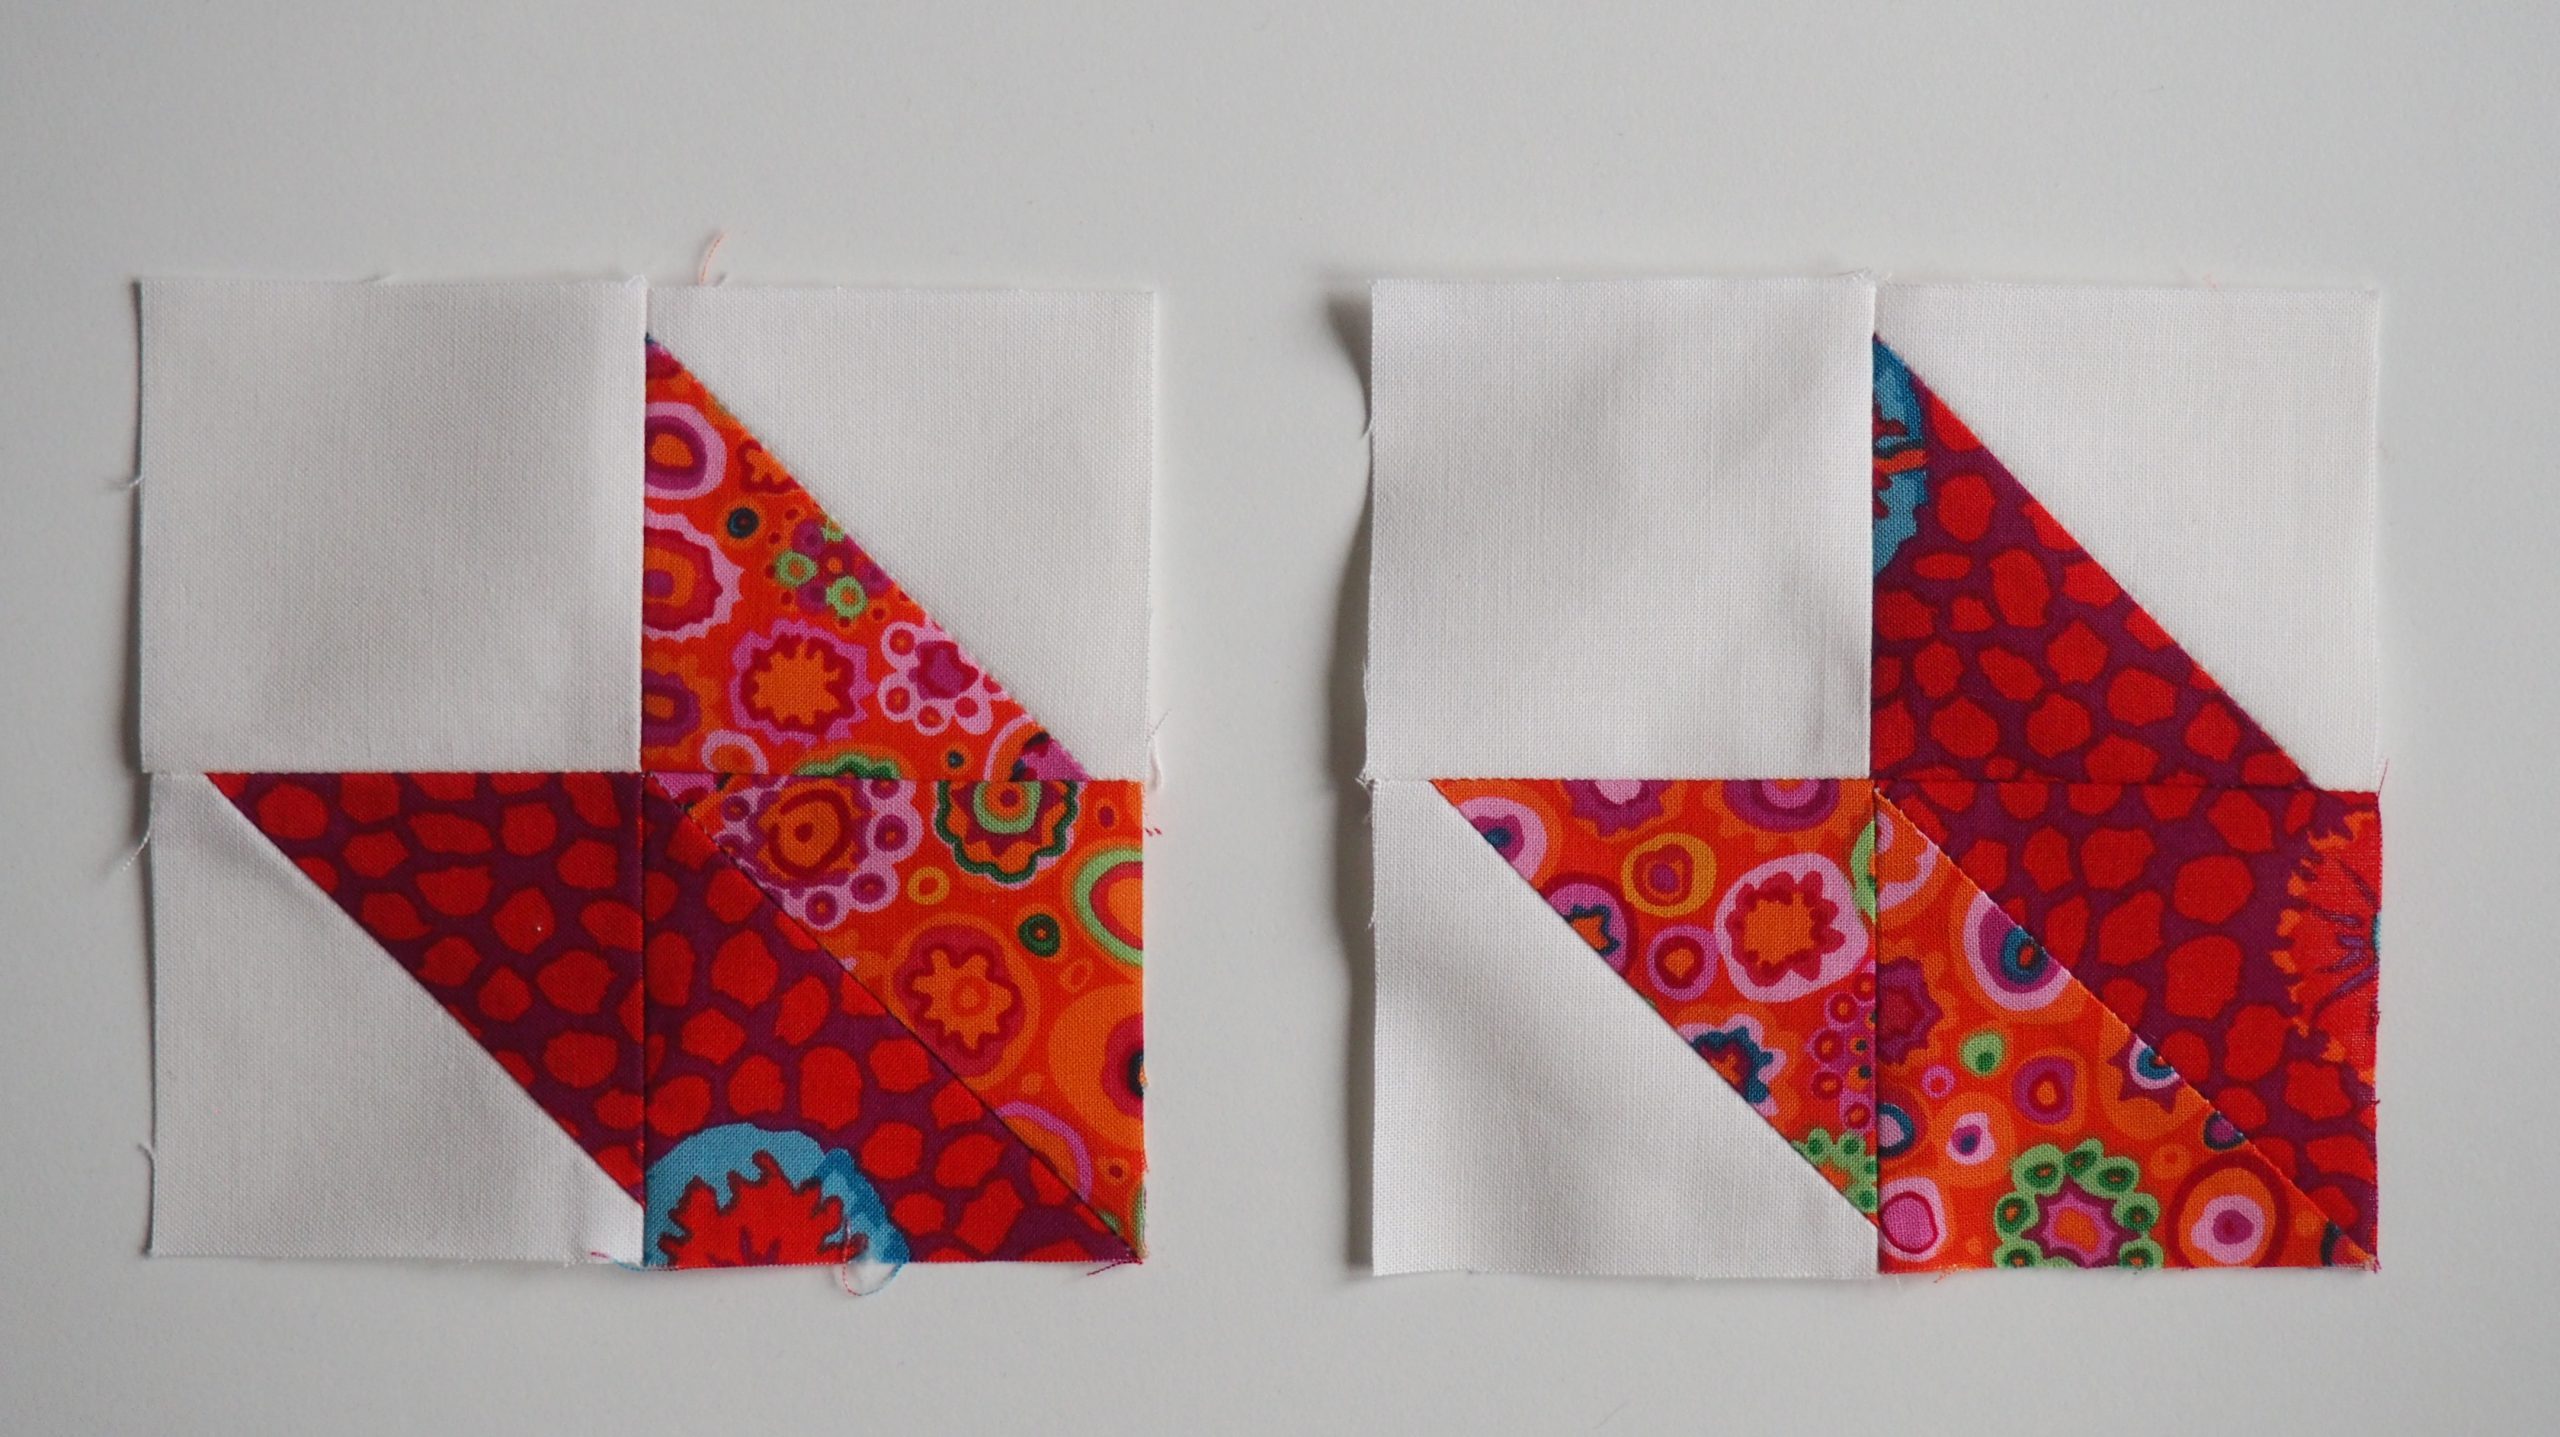
The second quarter star is sewn from the remaining pieces of fabric in the same way as described above. Here, I turn the mixed HST at the bottom right of the second quarter and exchange the HST at the bottom left and top right with the first quarter accordingly.
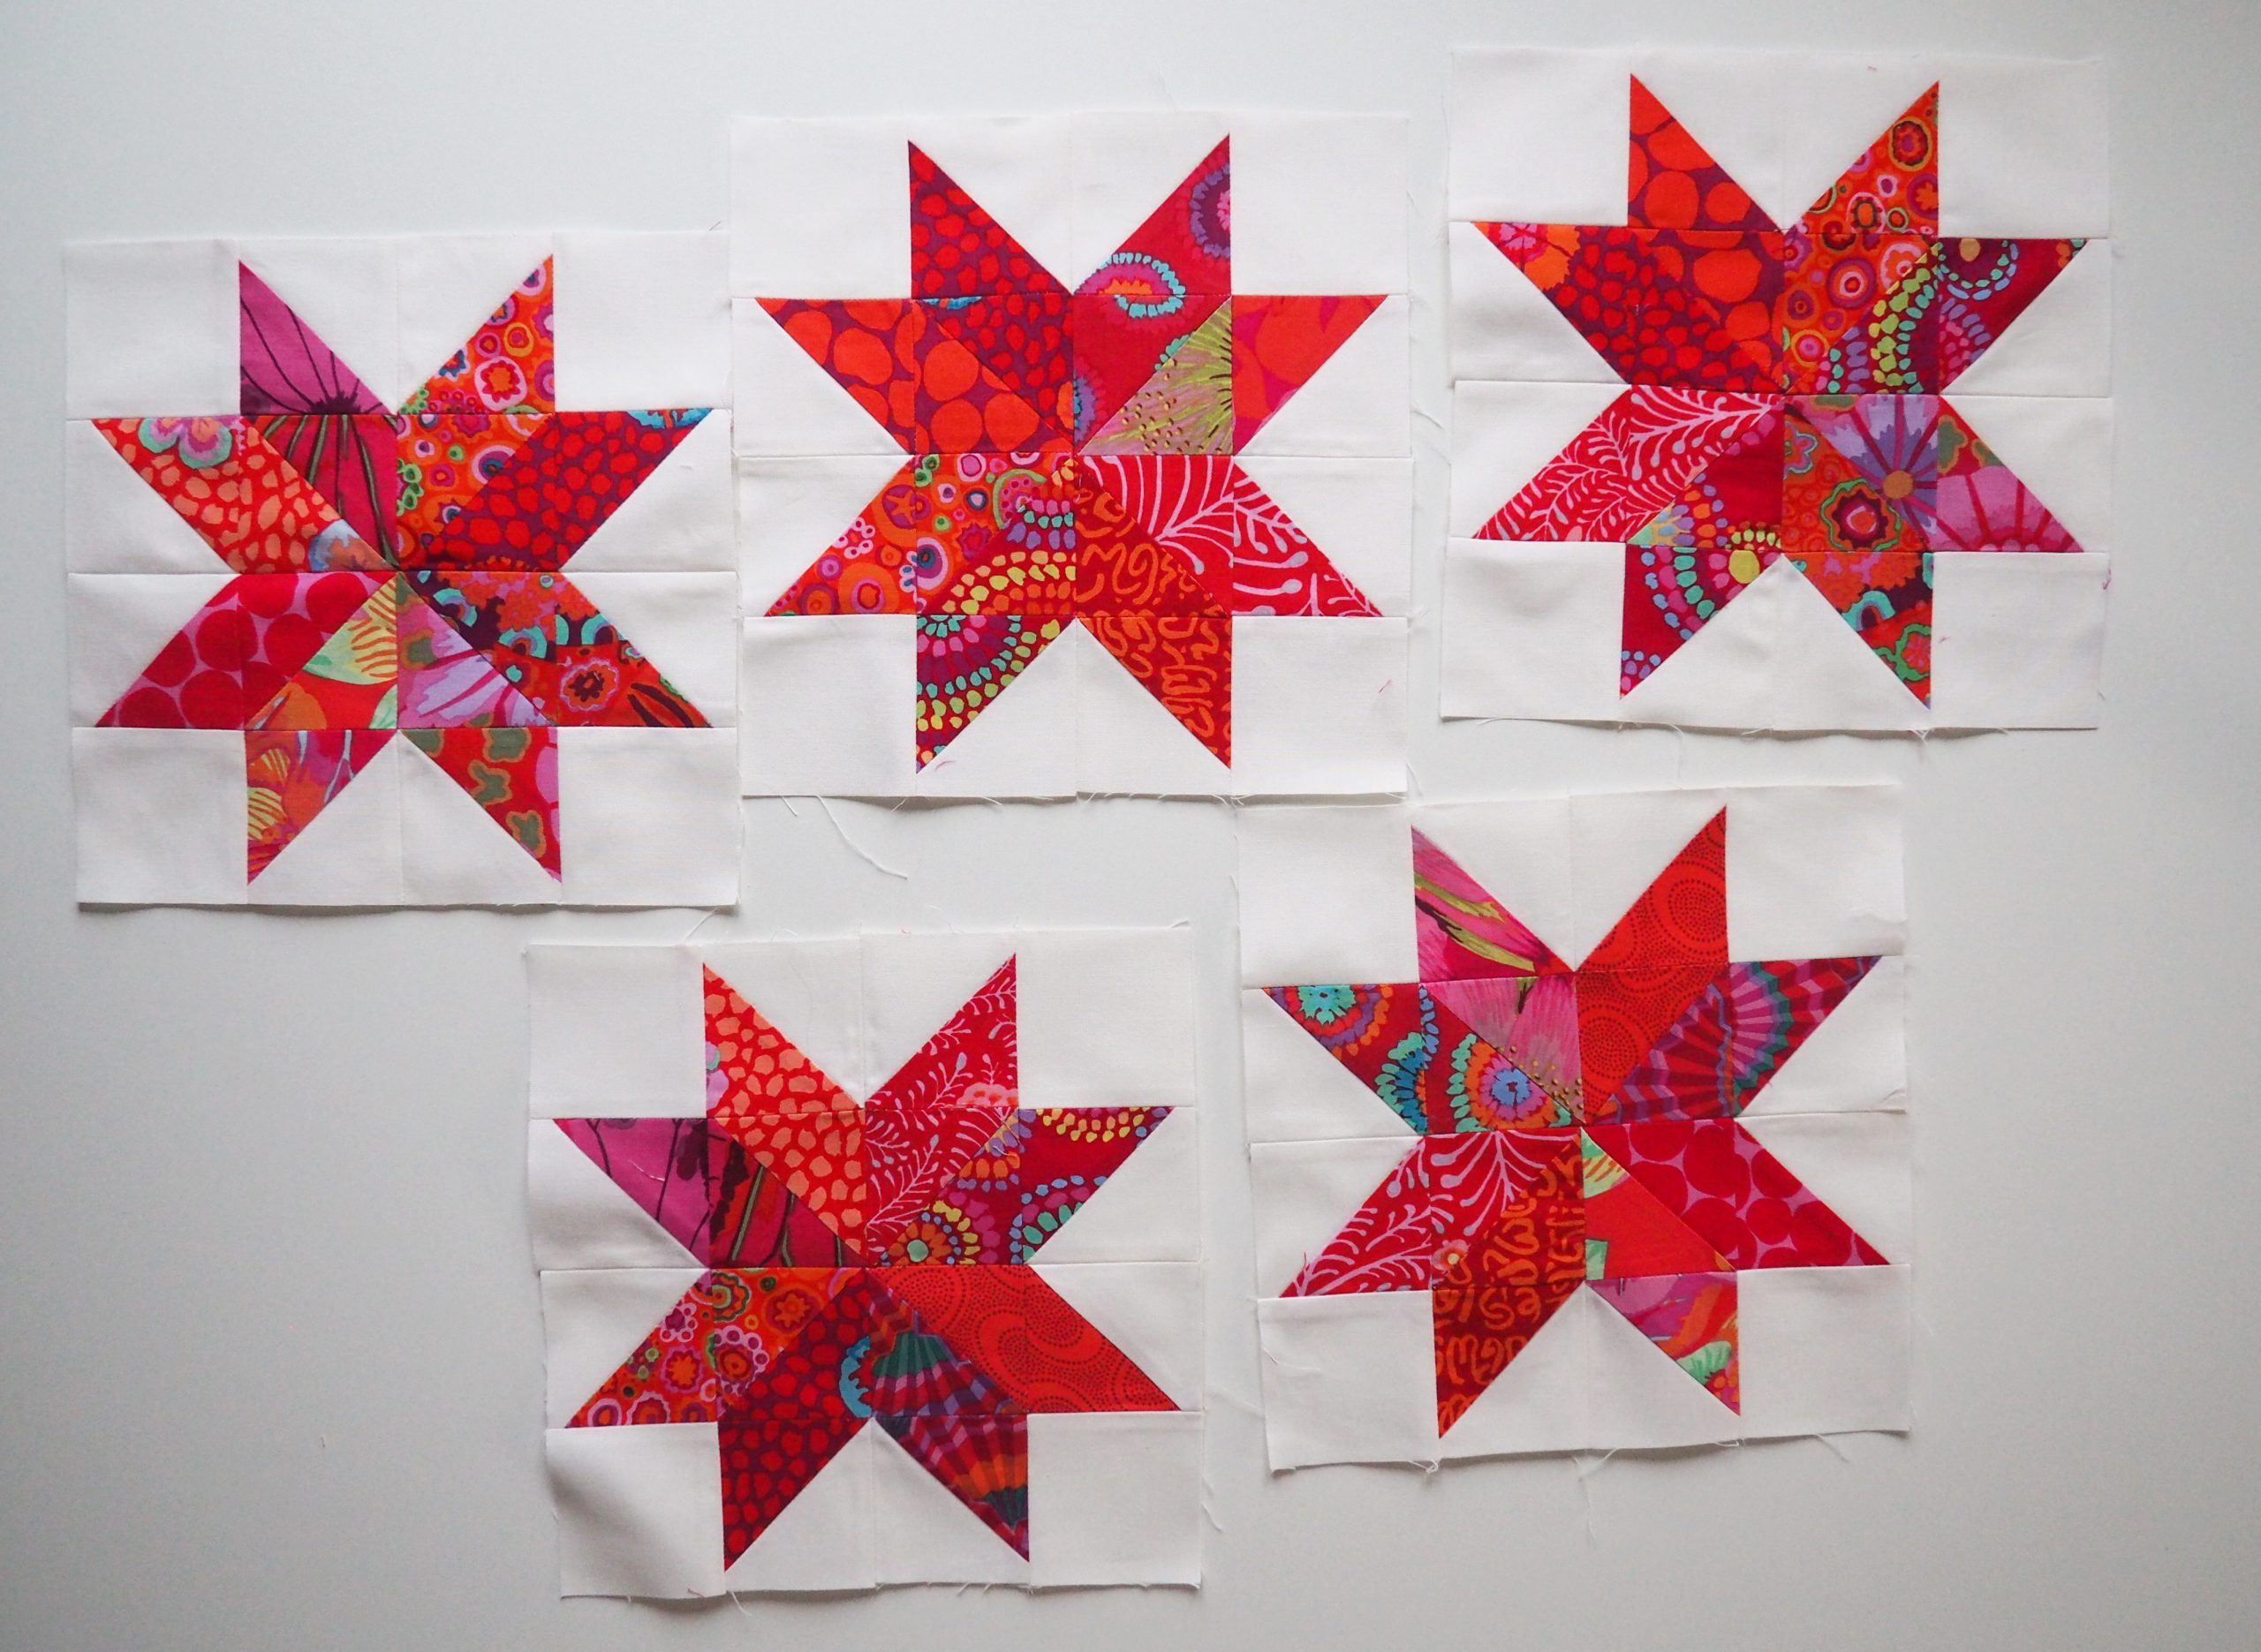
I sew lots of colorful quarters – a total of 20.
Four quarters then form a star. To make it nice and colorful, I mix the quarters in a colorful way. That’s how I make my stars nice and colorful!
Sewing the patchwork stars together
First, sew two quarters together. When doing so, make sure that the seams meet exactly.
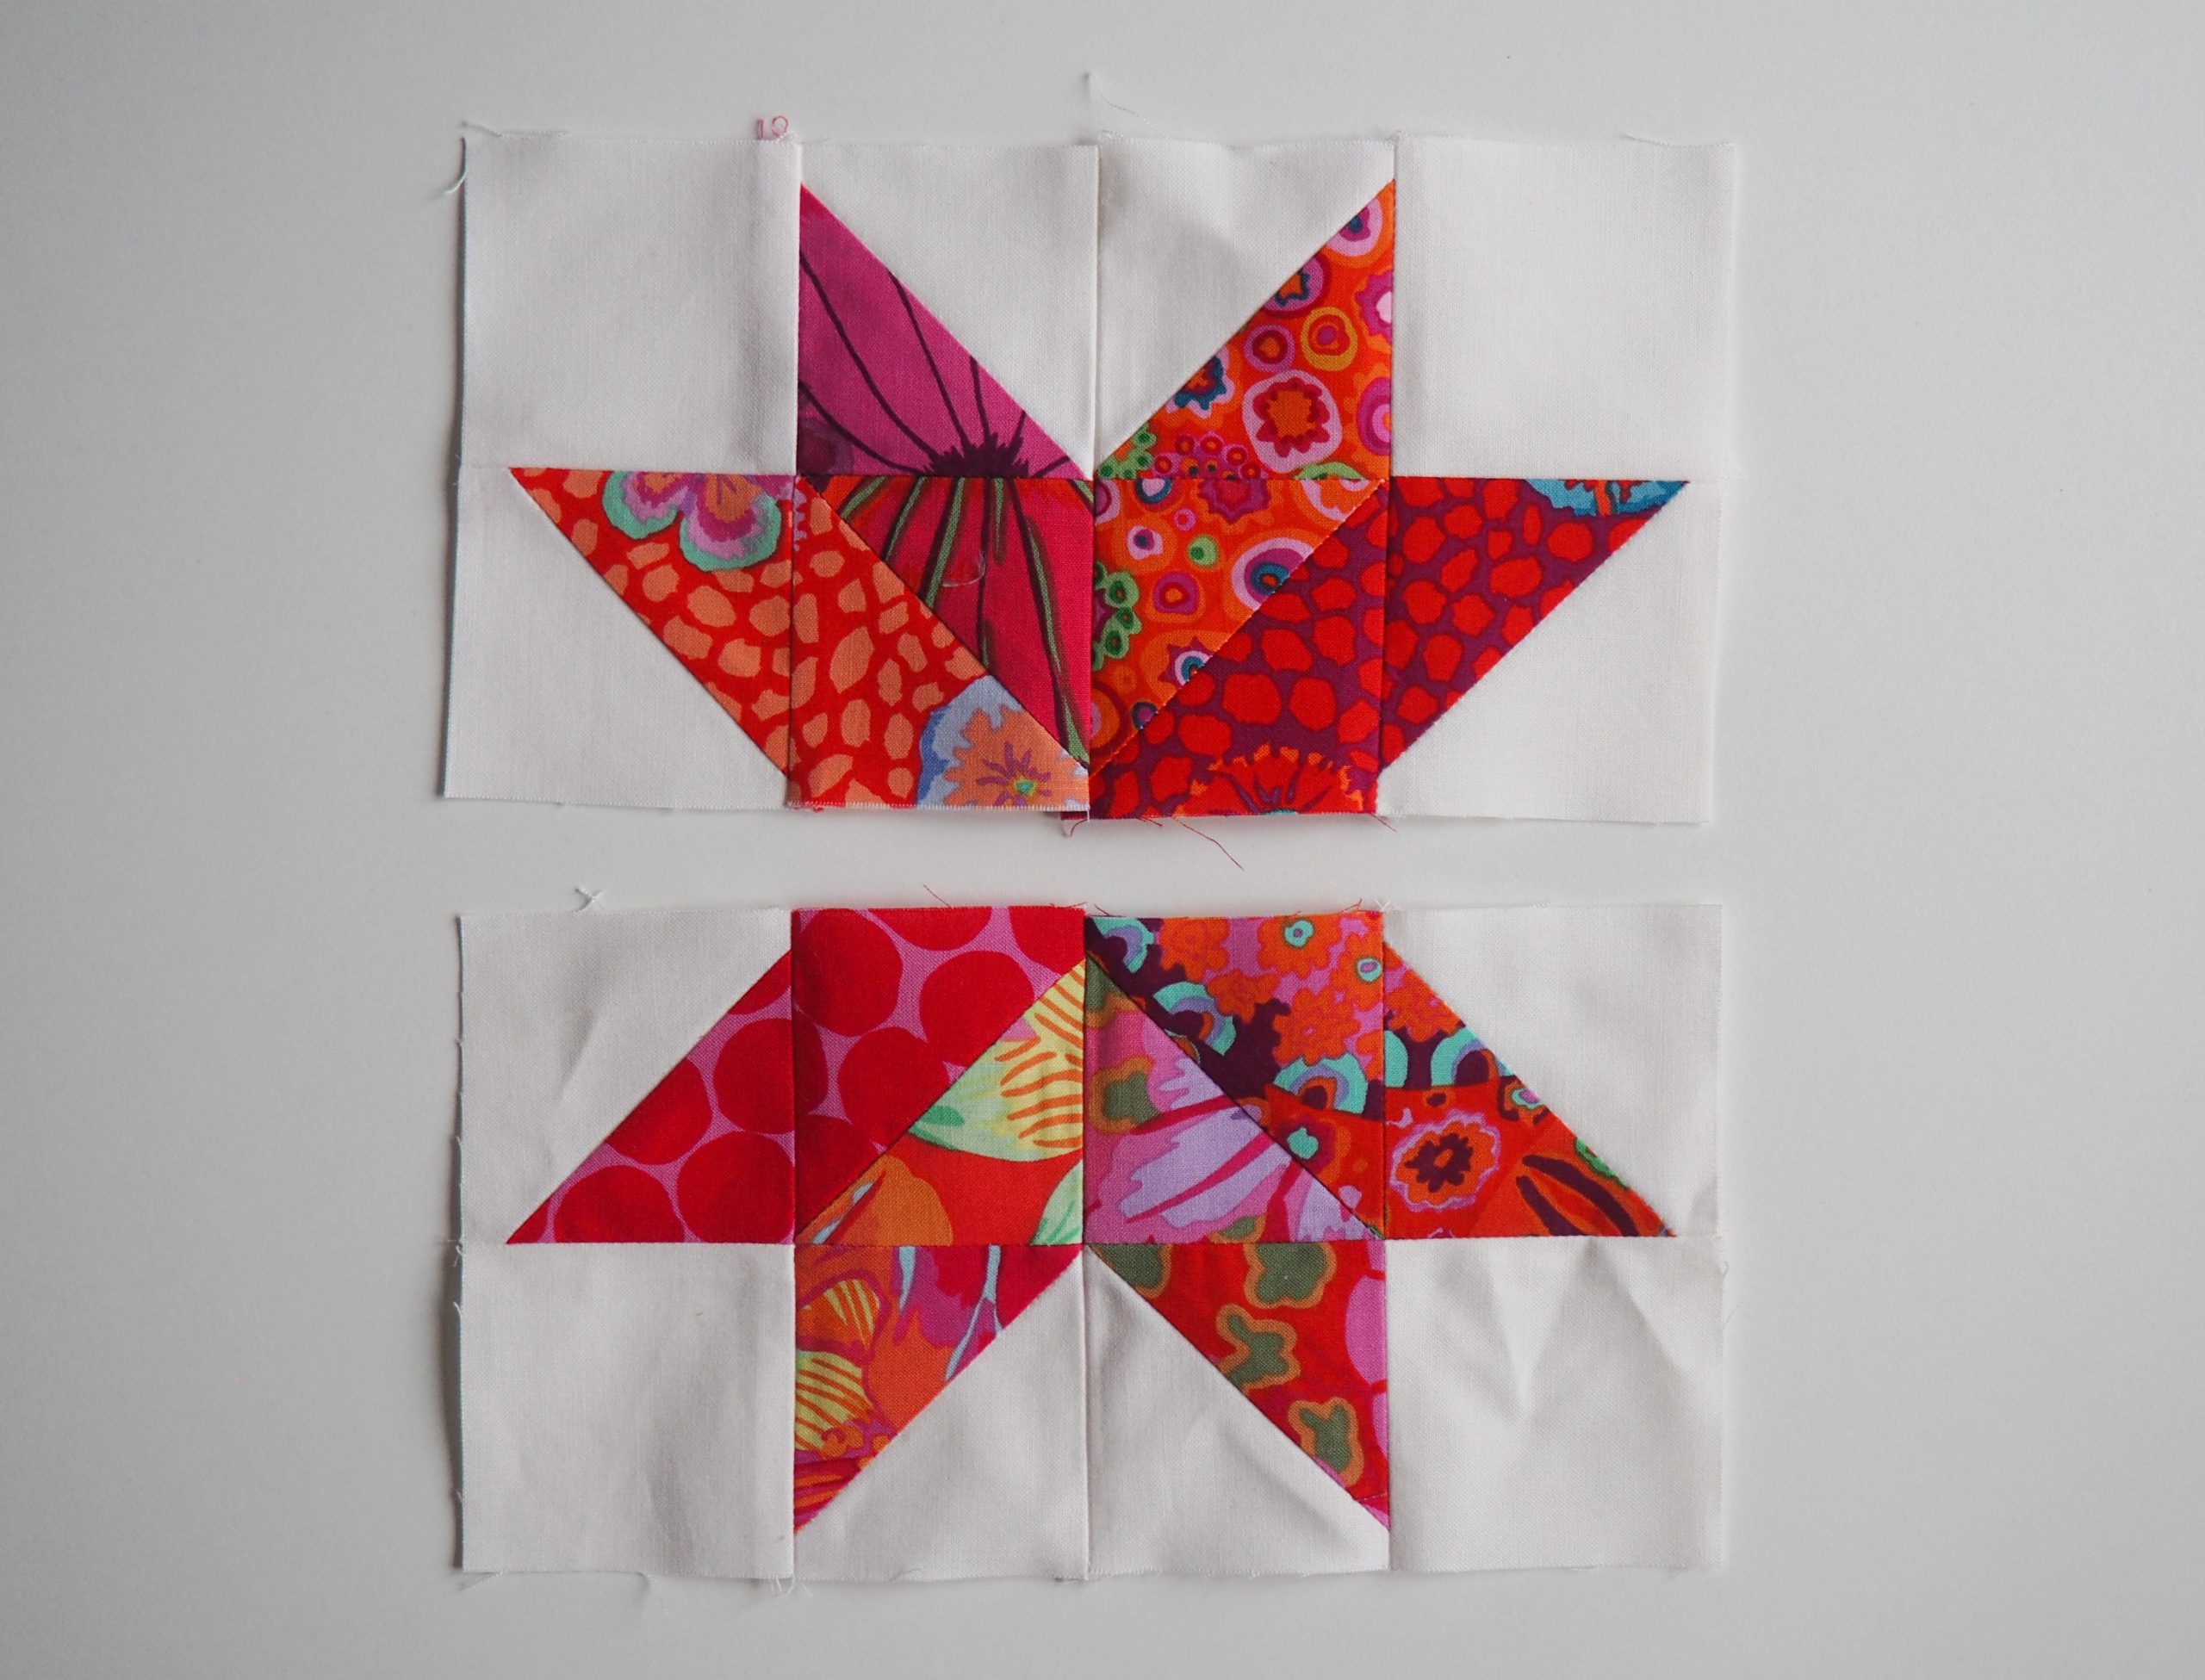
Then sew the two halves together to form a whole star.
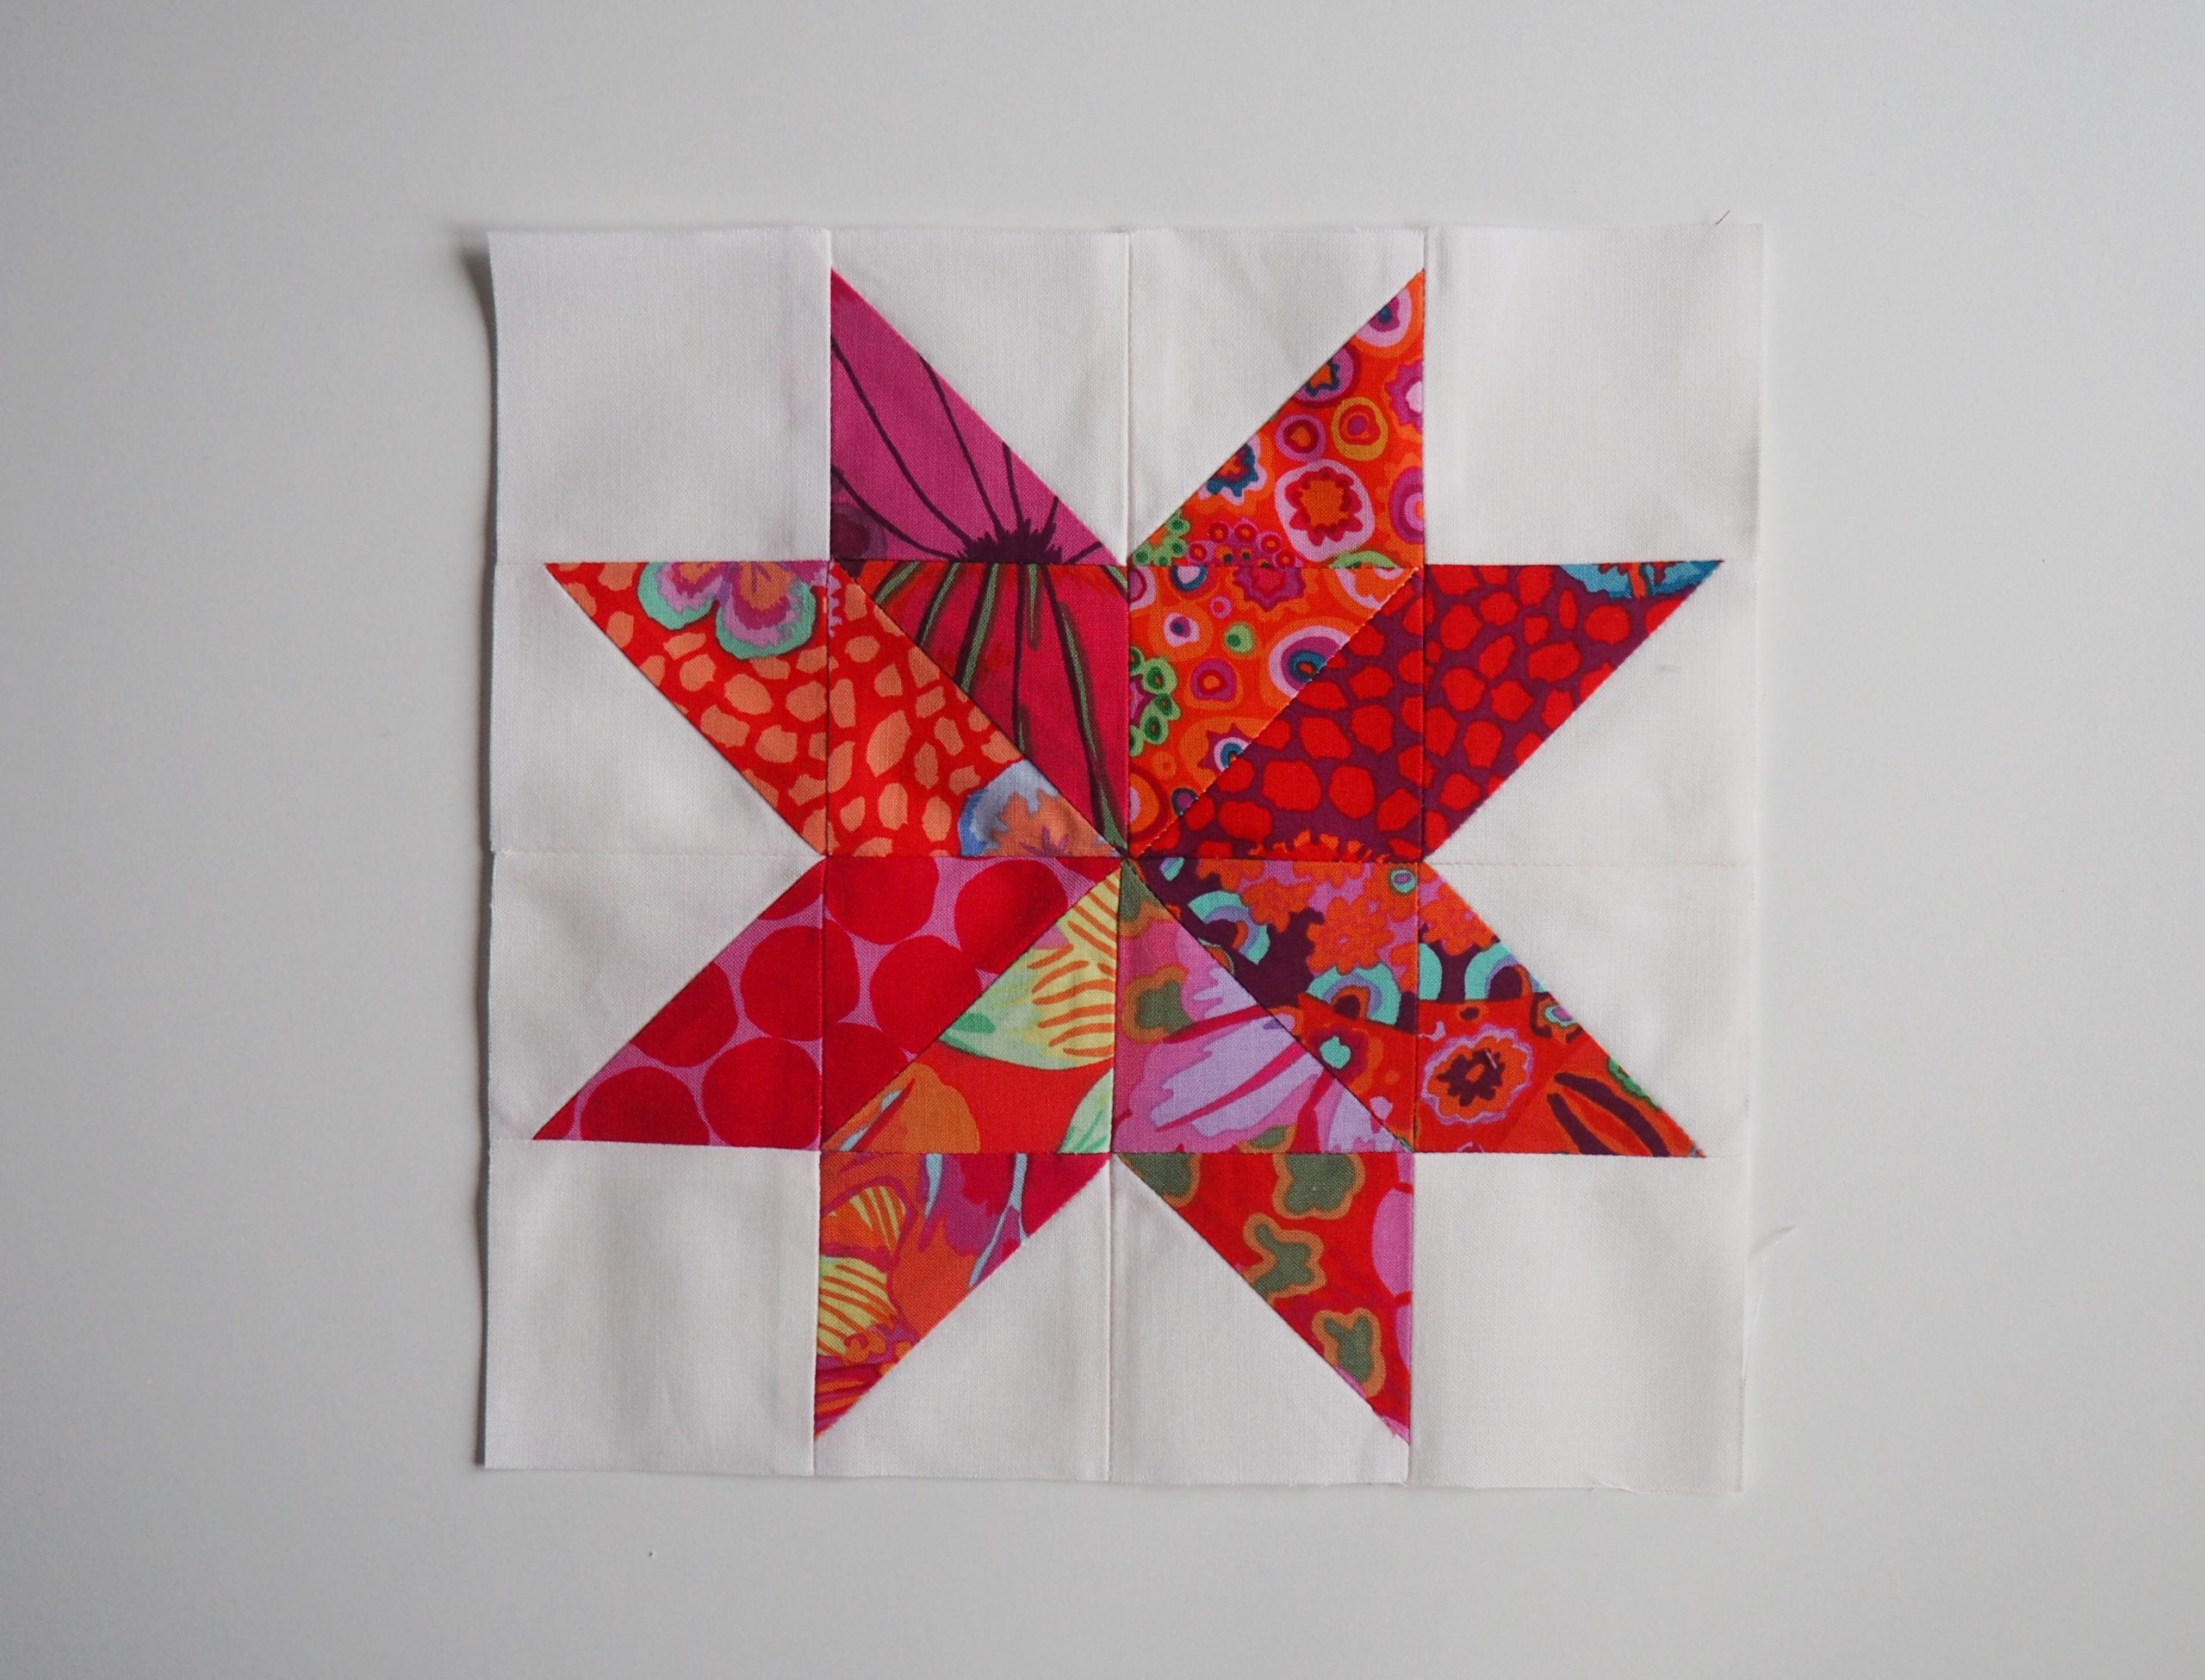
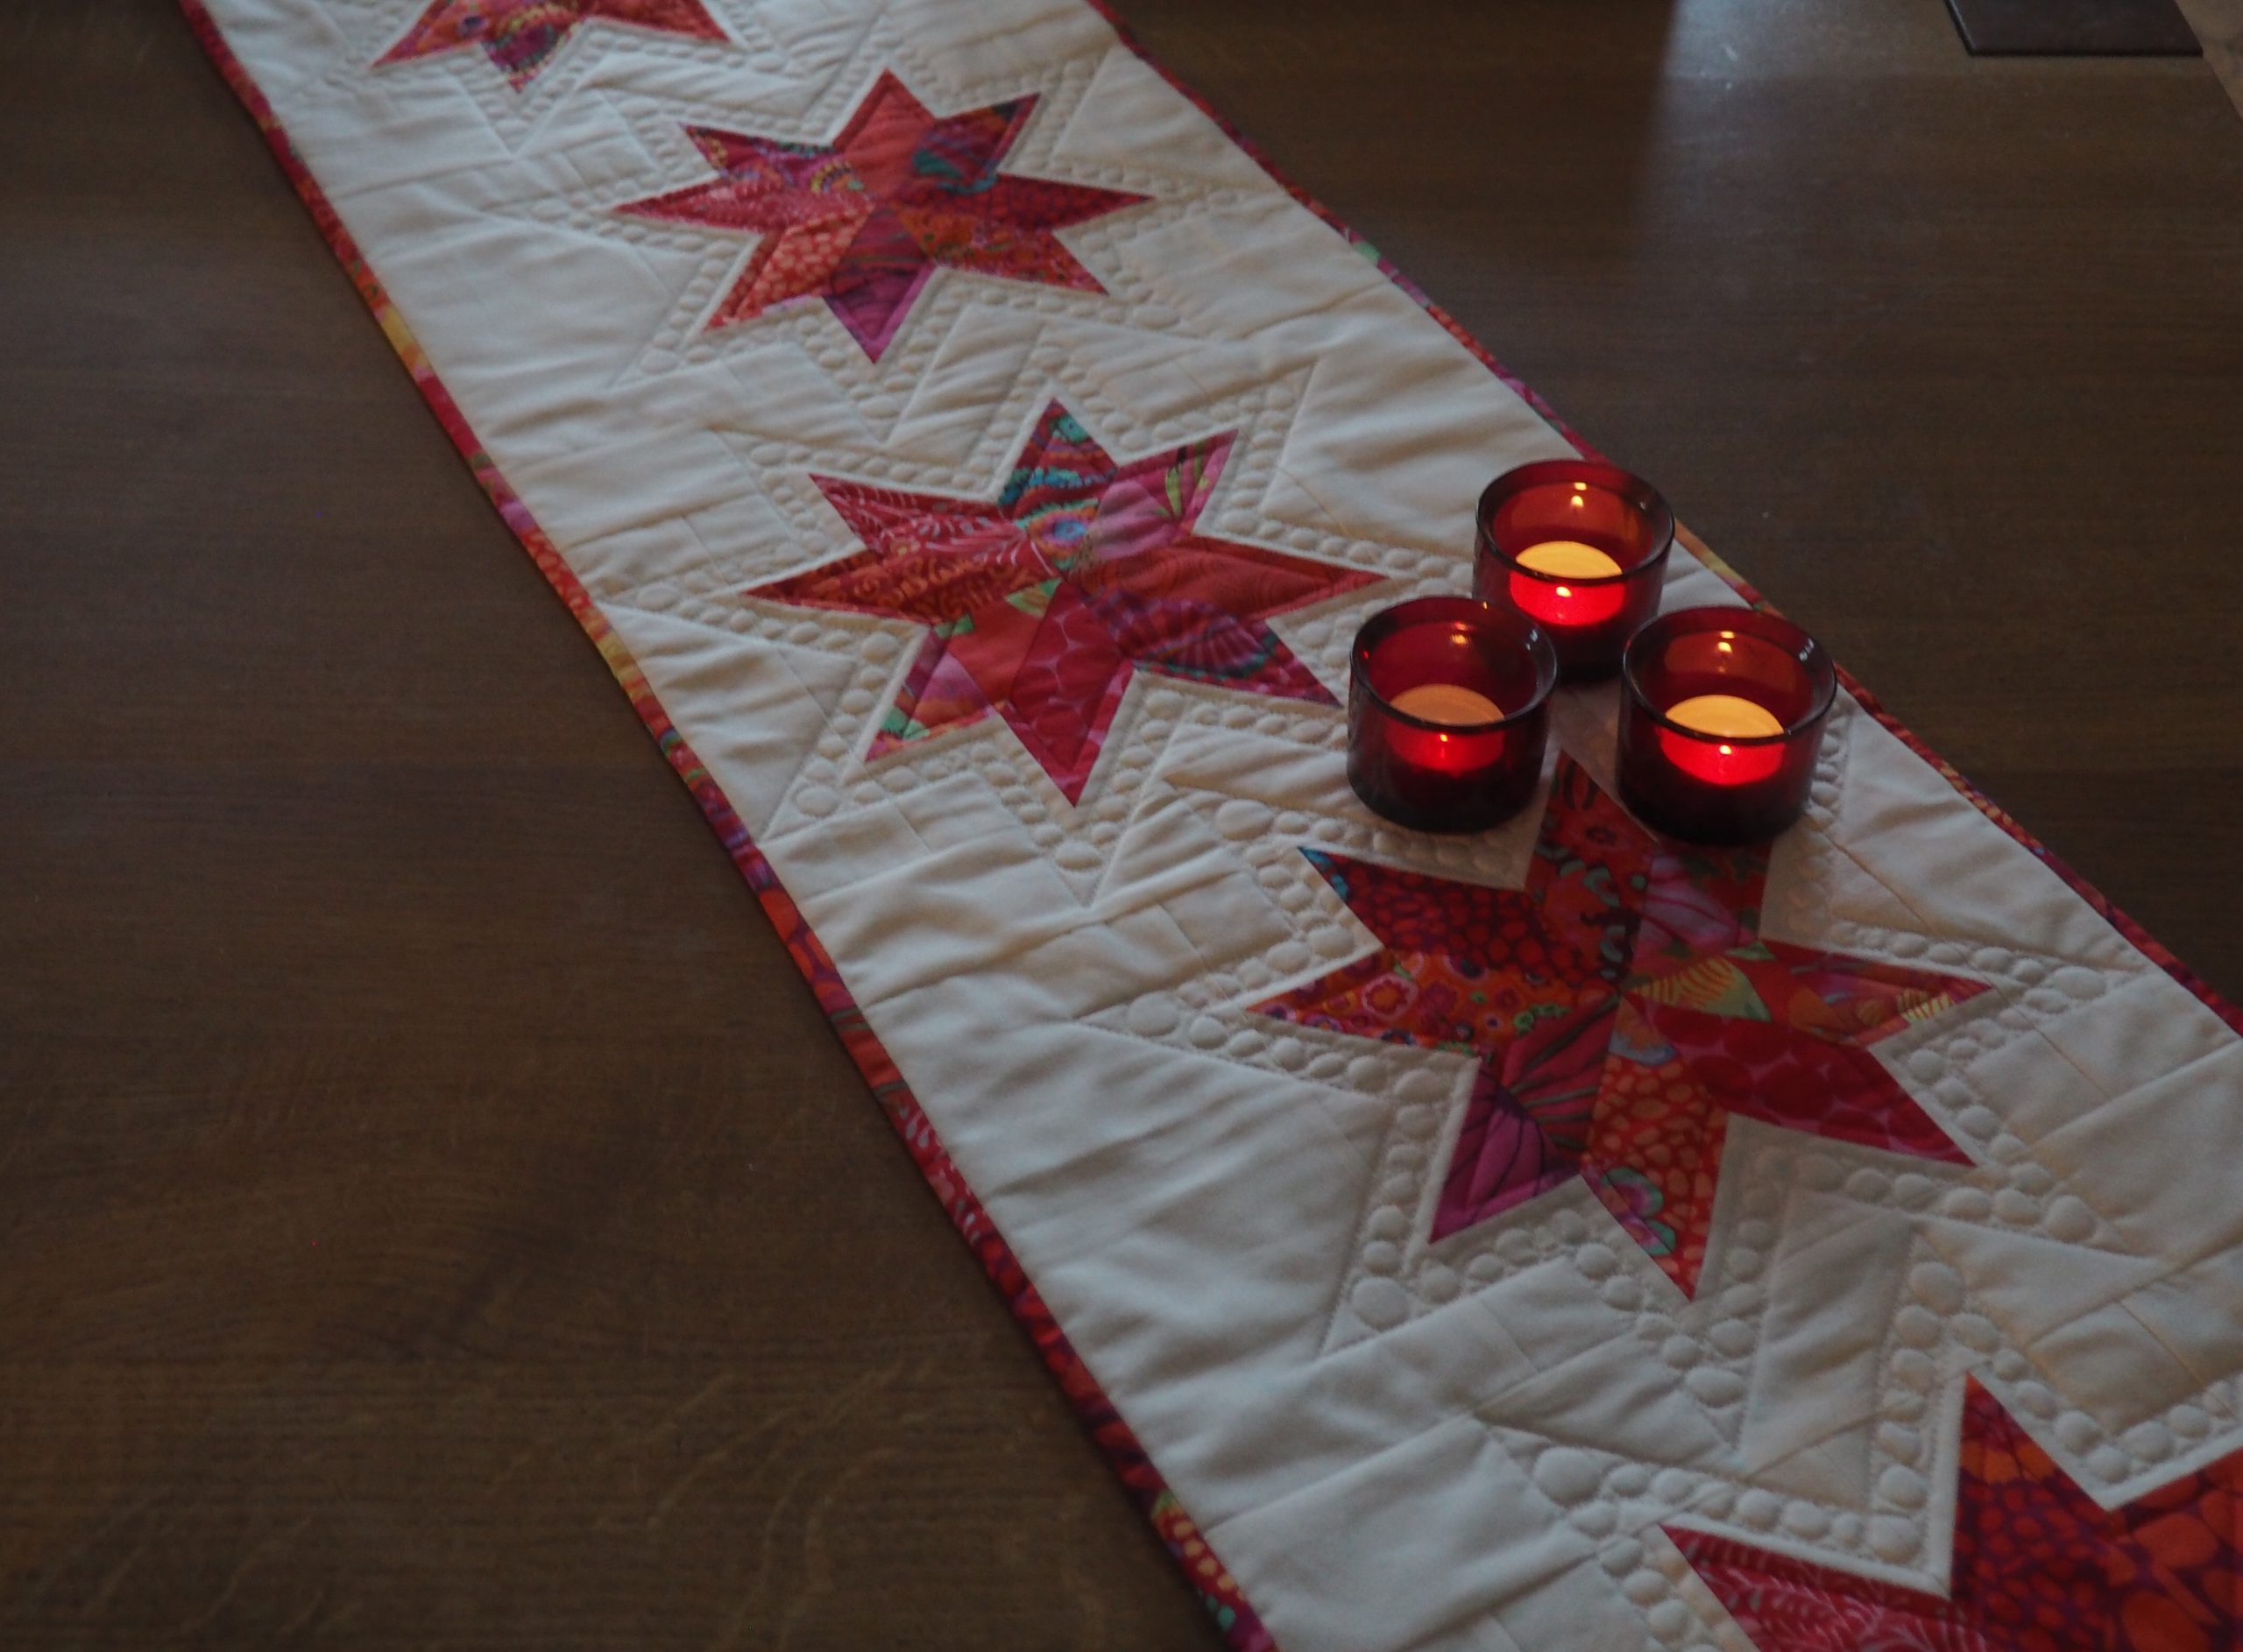
With this colorful patchwork star, you can sew numerous different Christmas decorations: cushions of different sizes, a blanket under the Christmas tree, a small Christmas wall hanger, table sets or even a Christmas quilt. I sewed a table runner for my large wooden table.
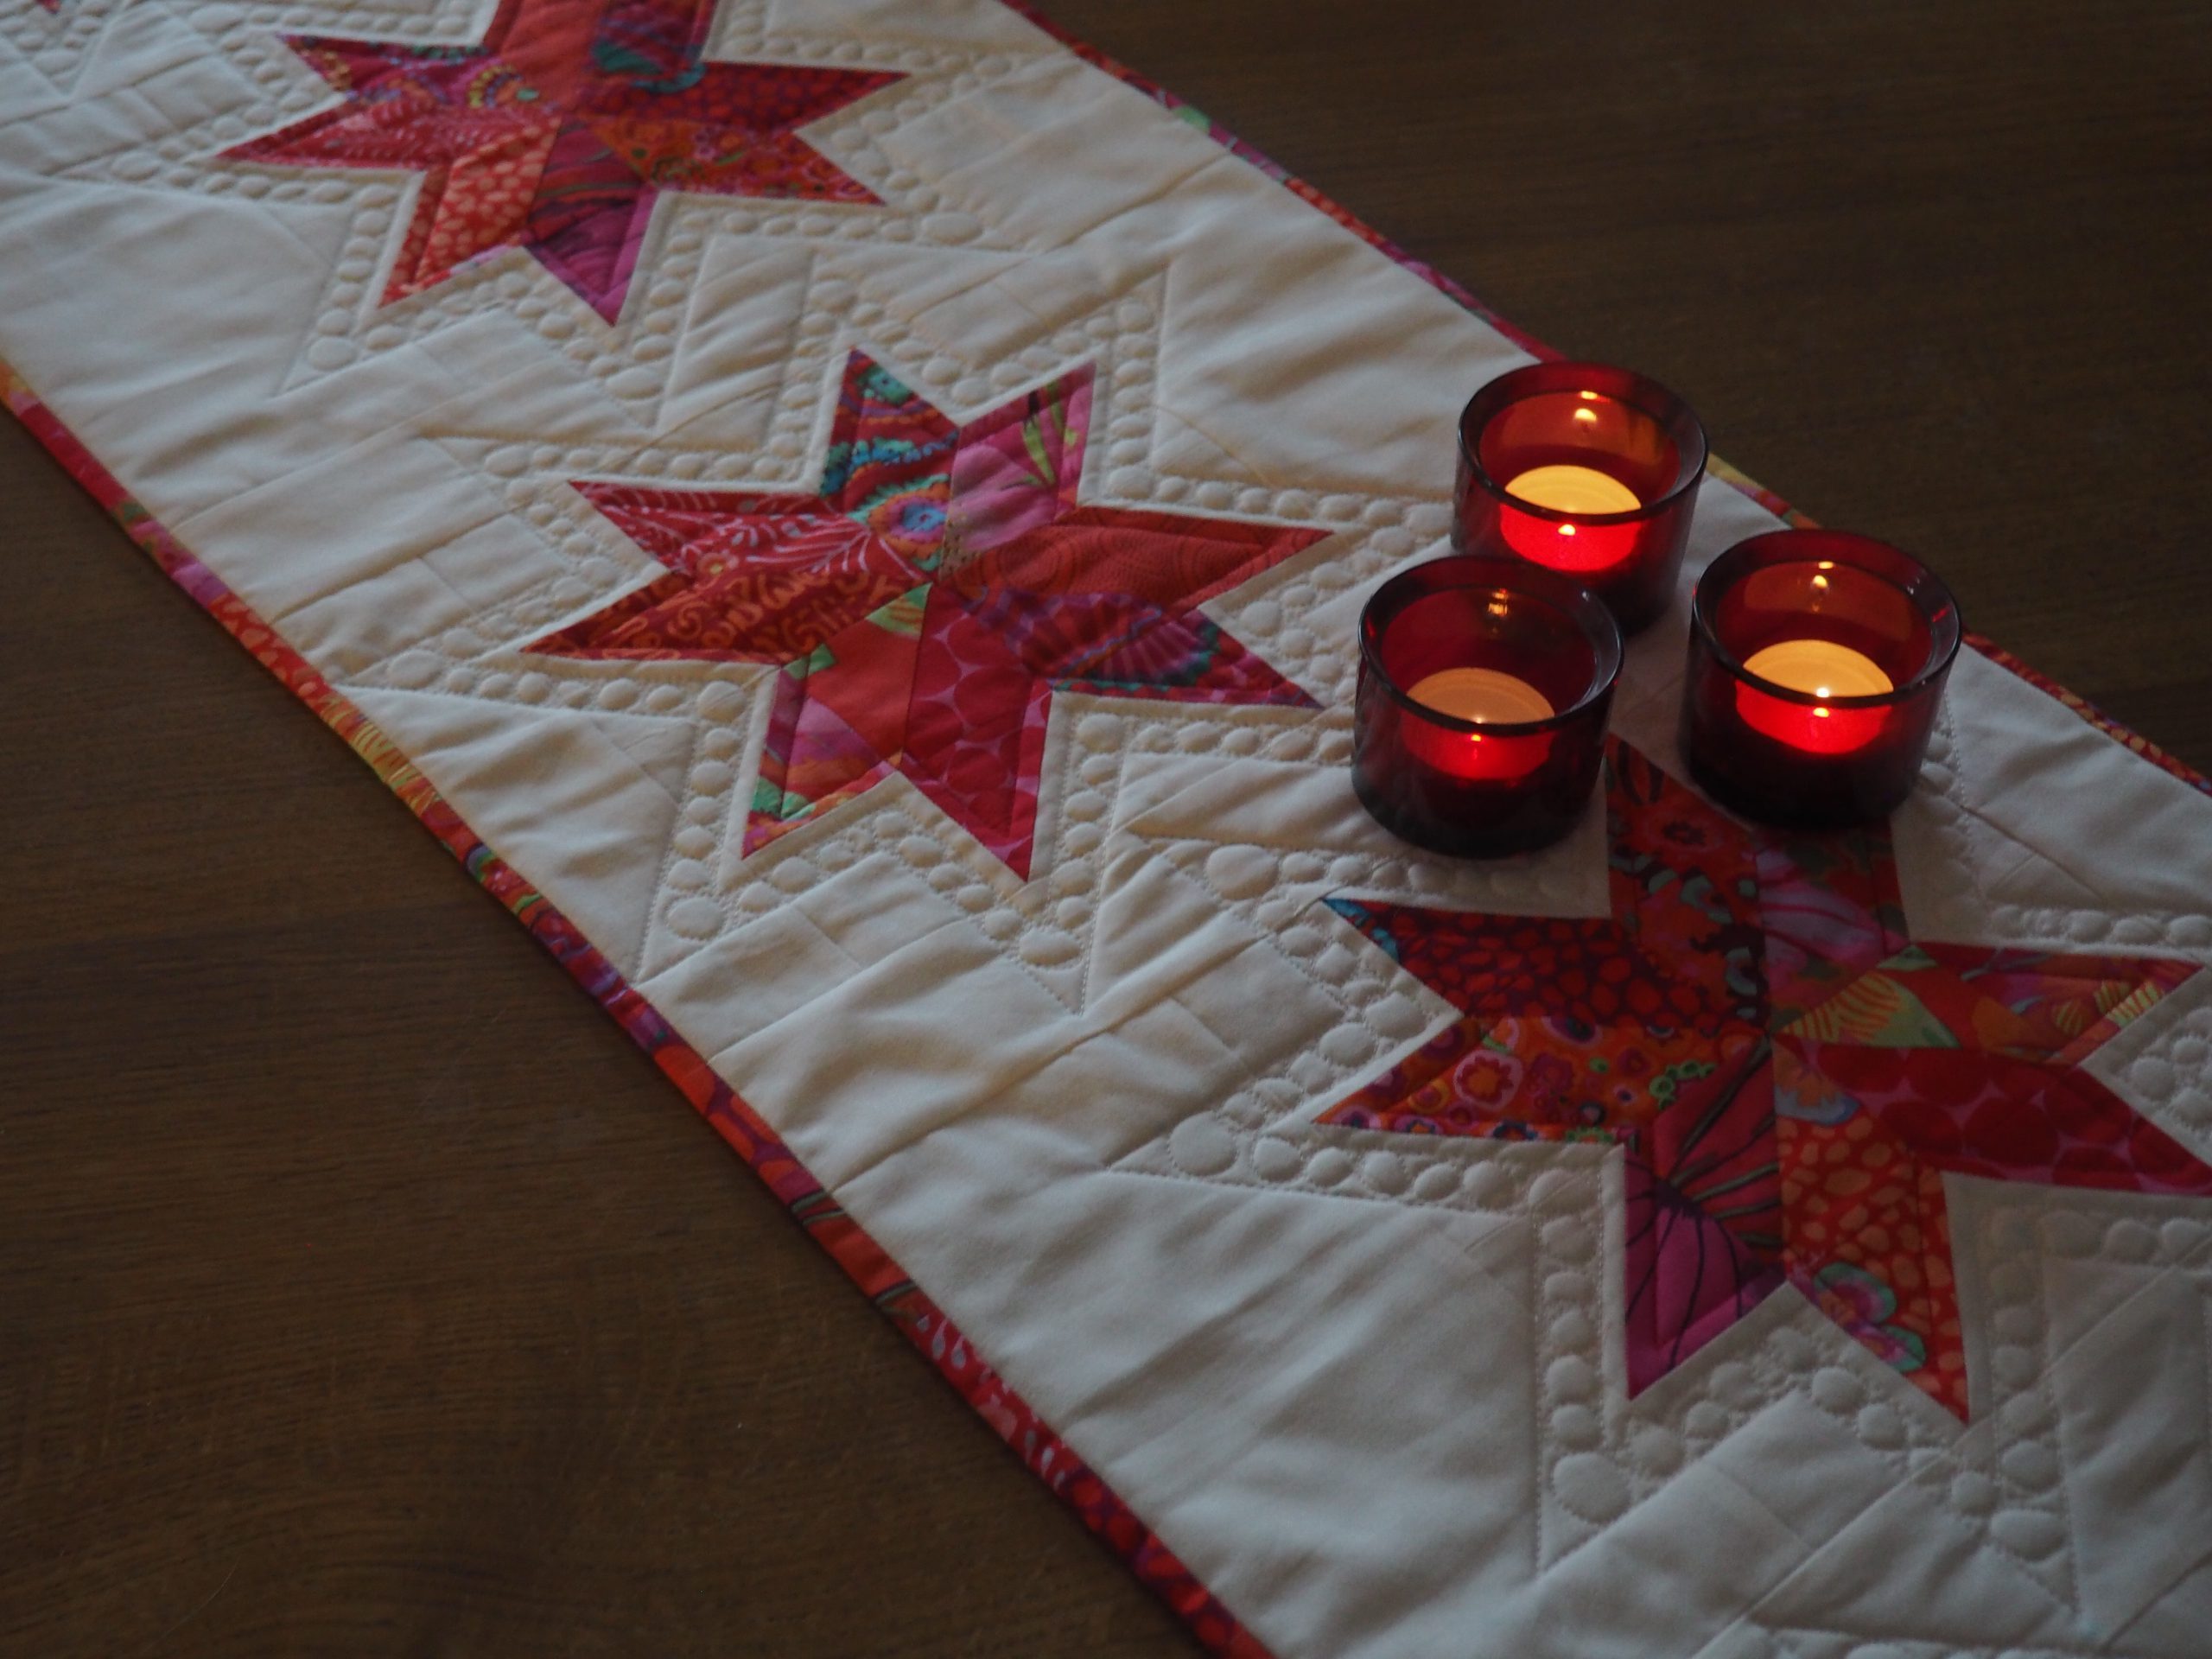
Idea for using the colorful patchwork stars: a table runner
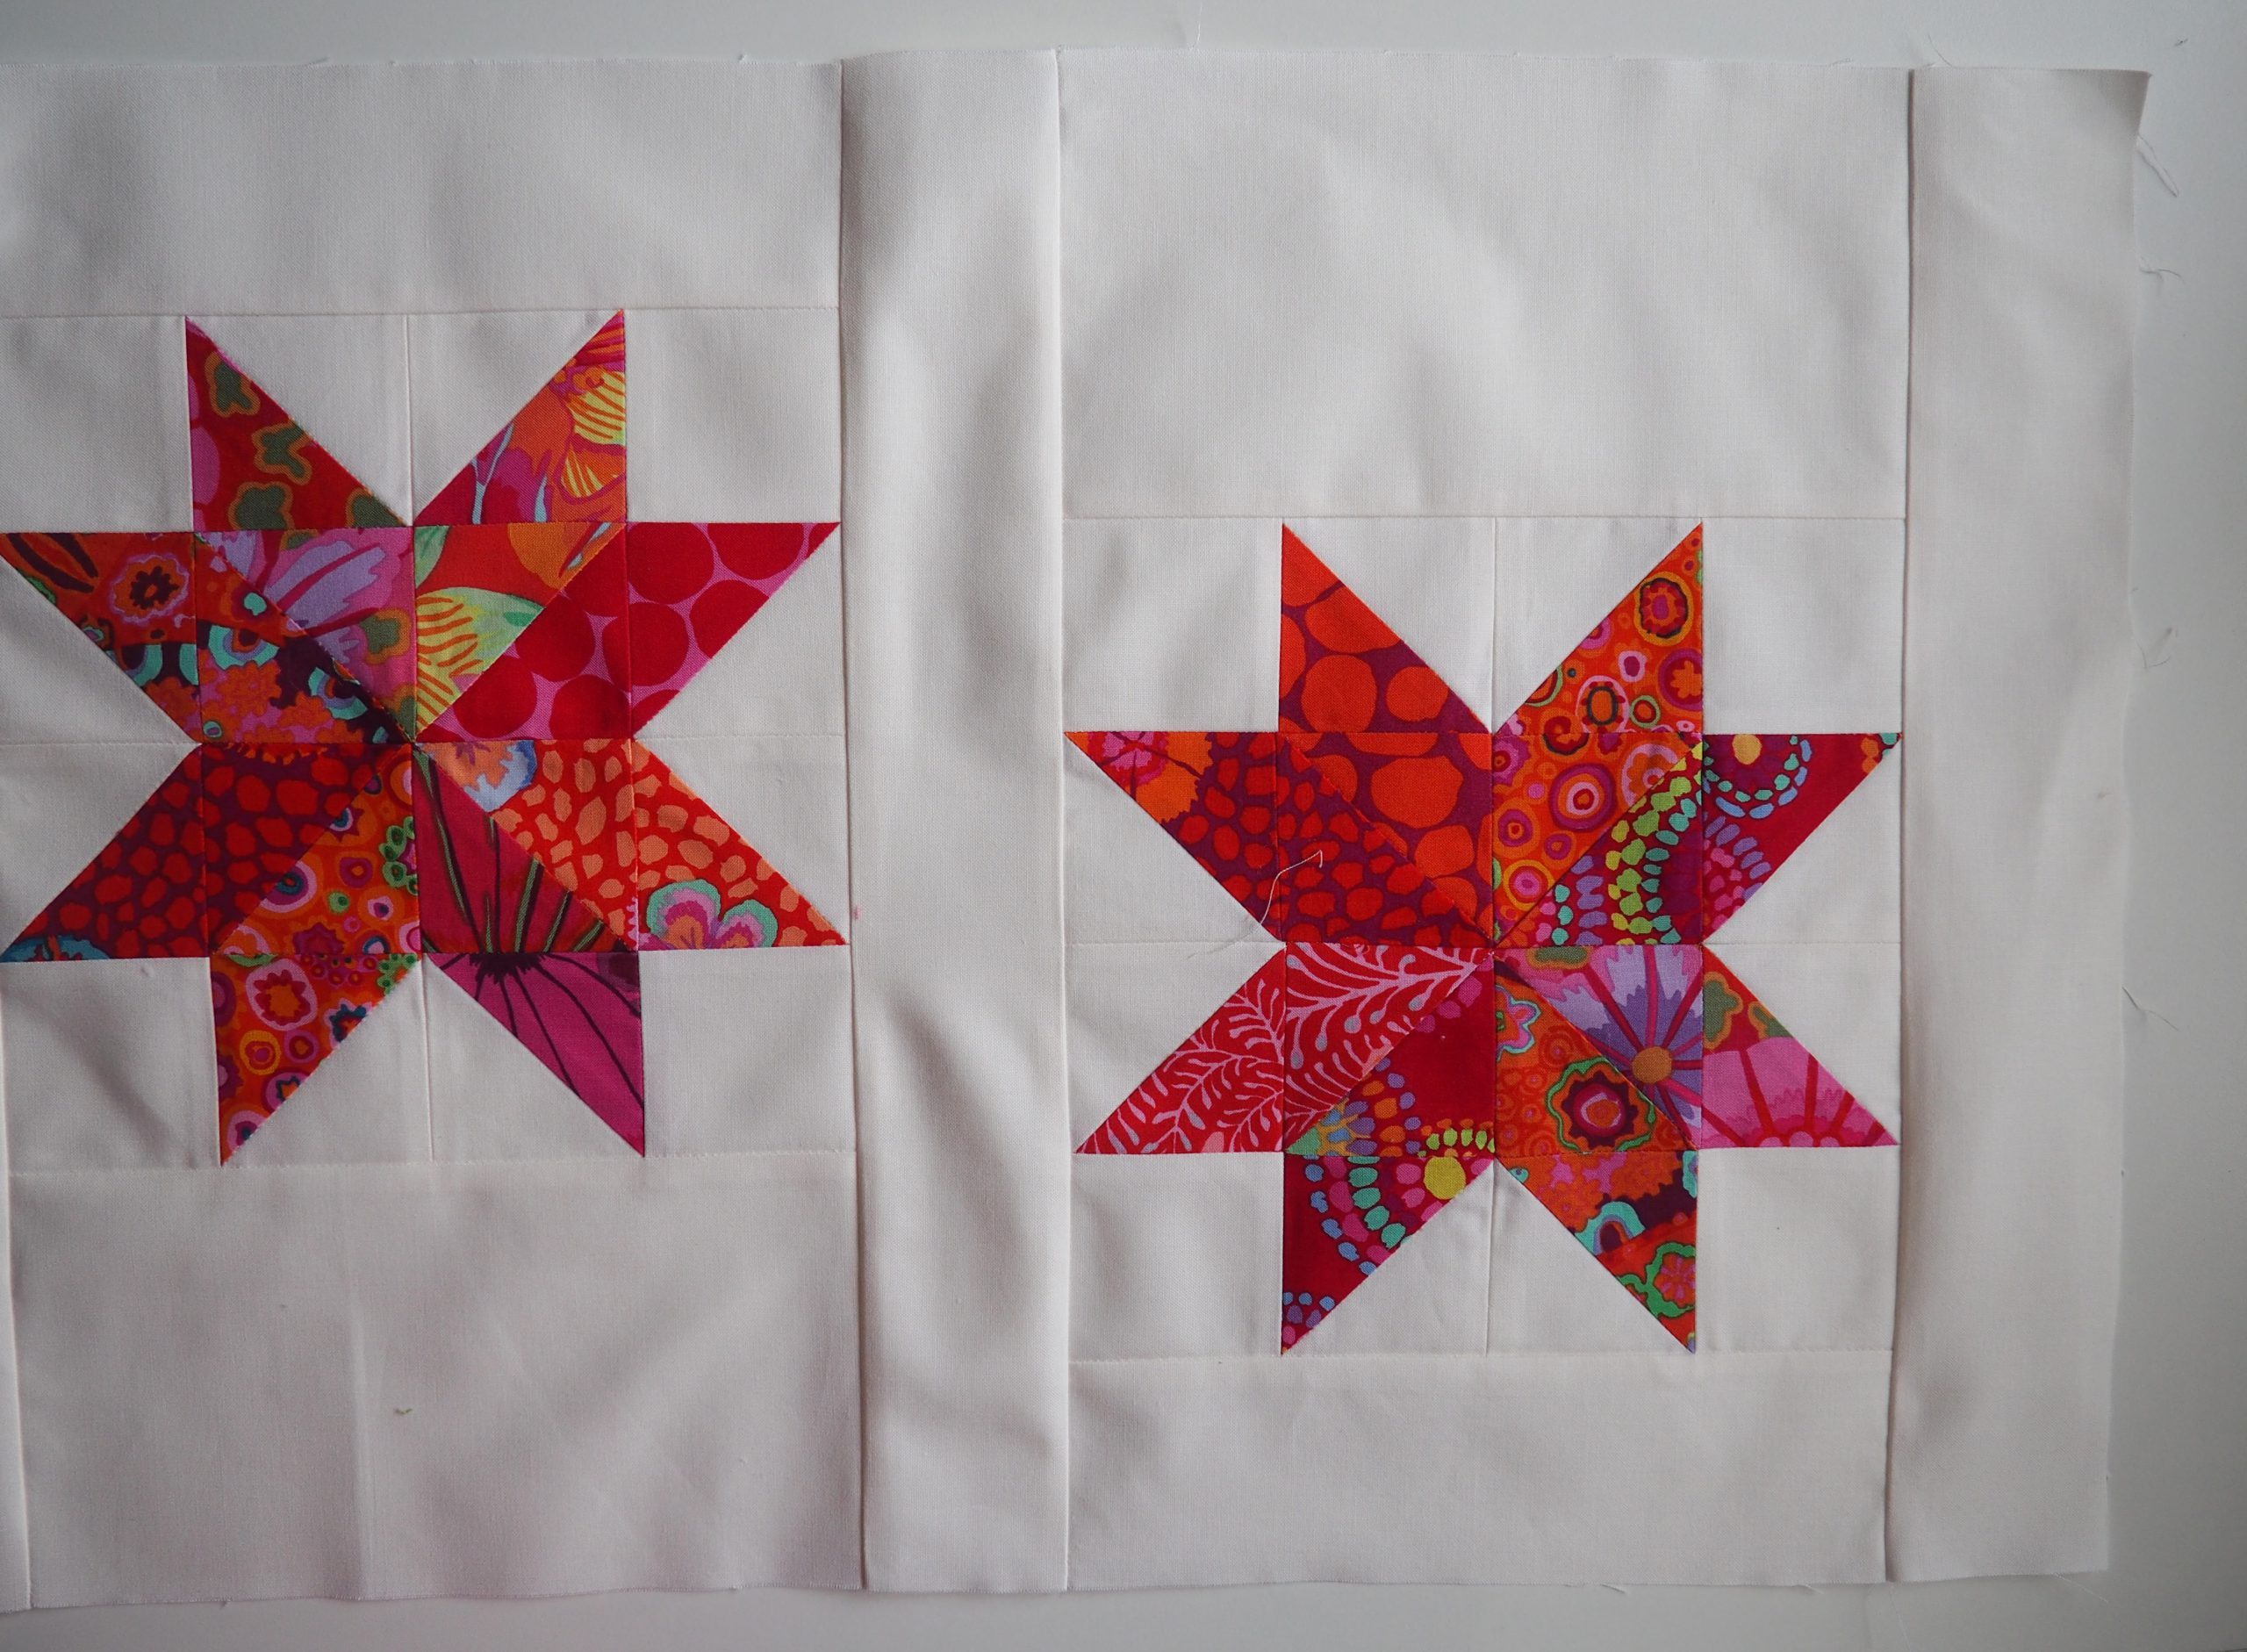
For my table runner with colorful stars, I sewed a total of five colorfully mixed stars.
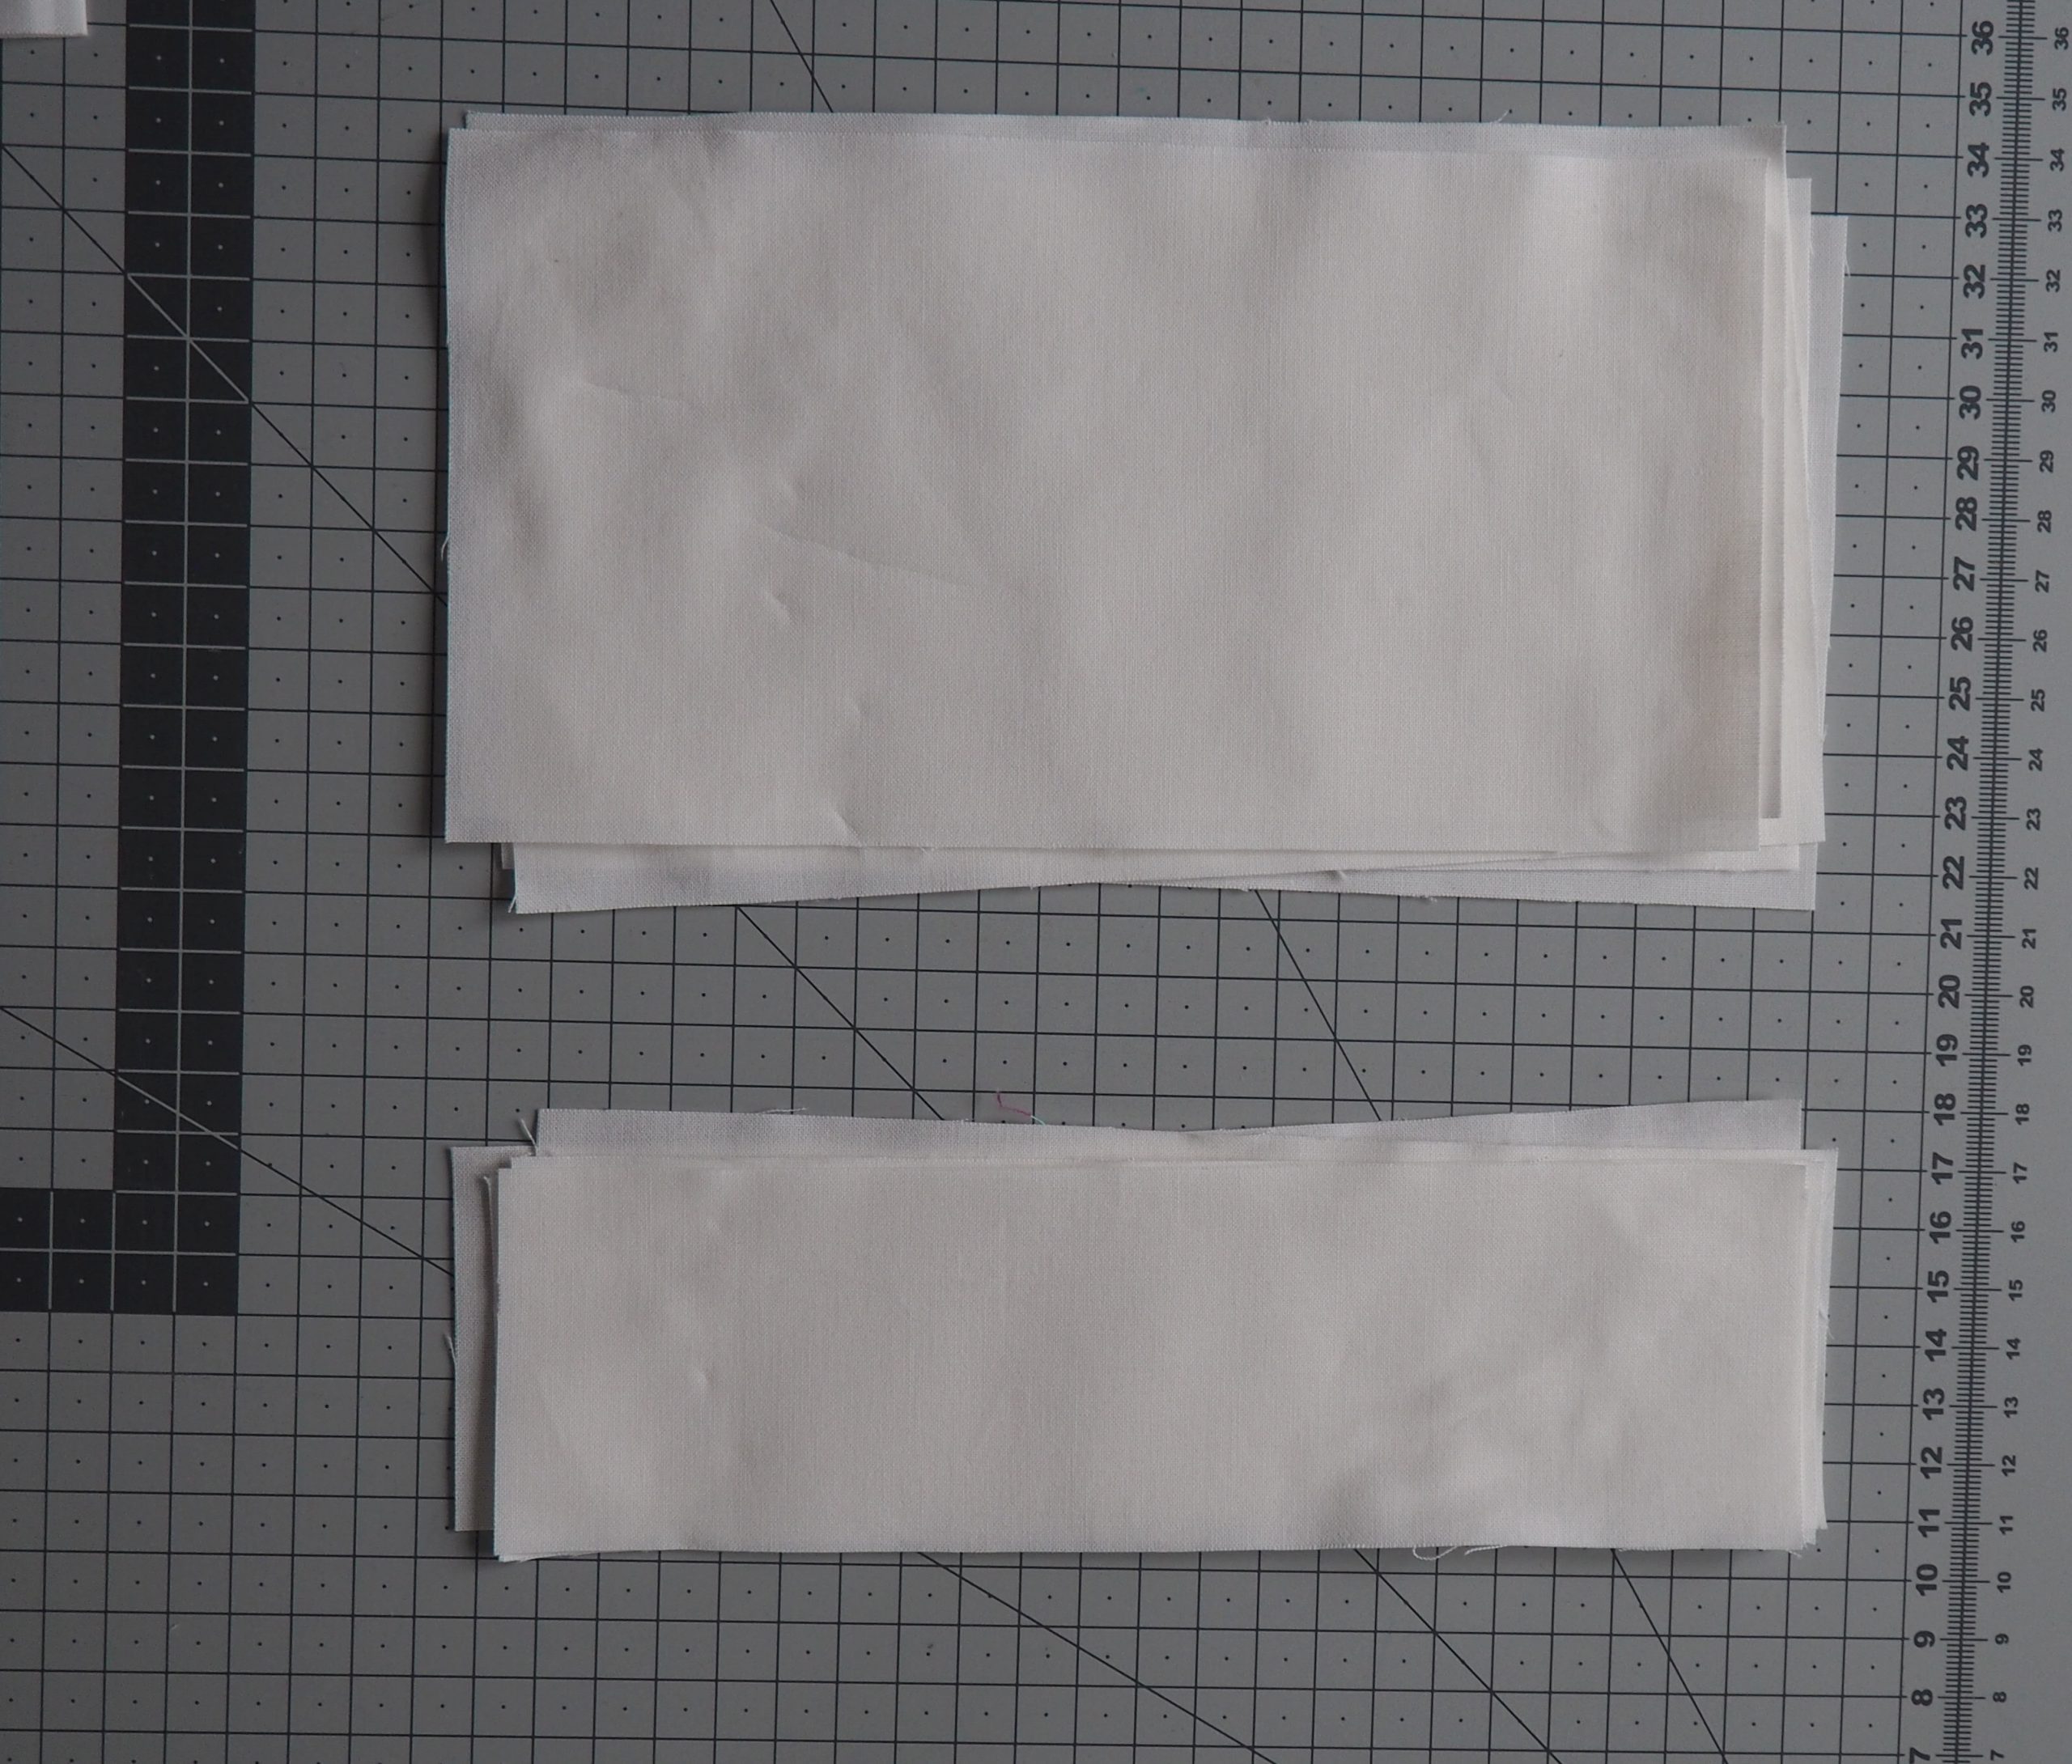
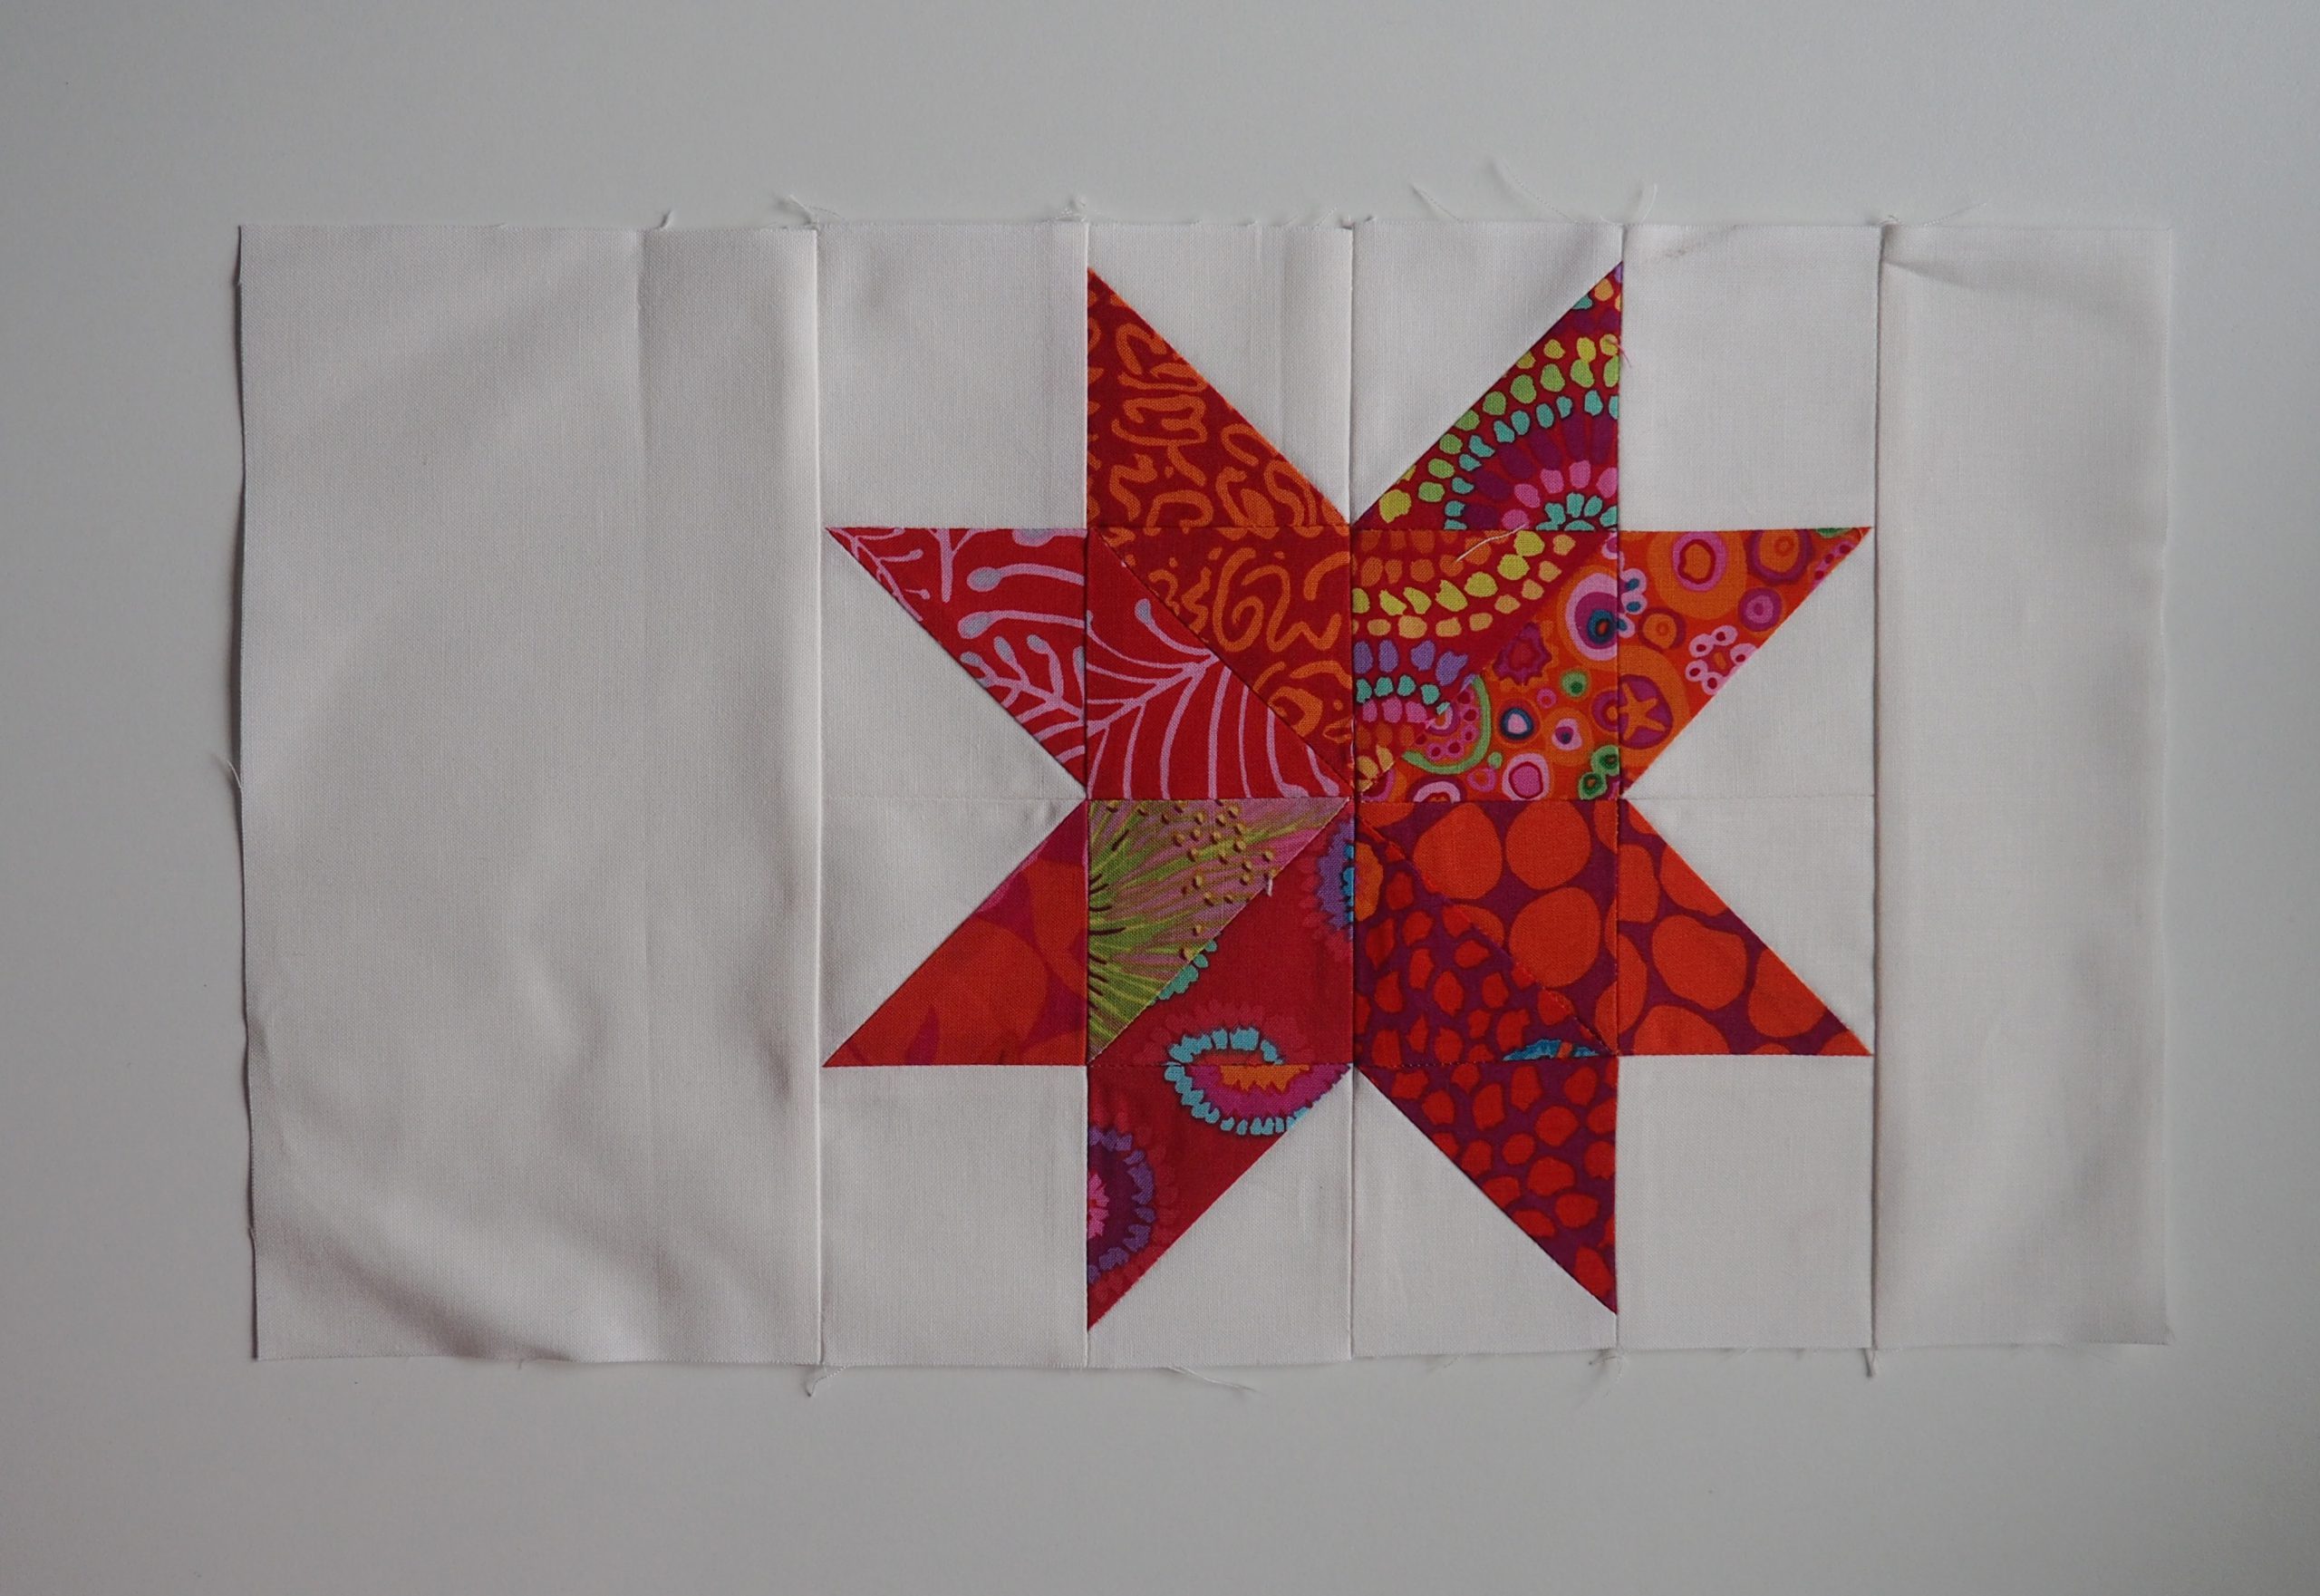
I sewed a wide and a narrow strip on each star block:
- Pattern 5 wide strips: 8.5″ x 4.5″
- Pattern 5 narrow strips: 8.5″ x 2.5″
The strips are sewn at two opposite edges of the star block.
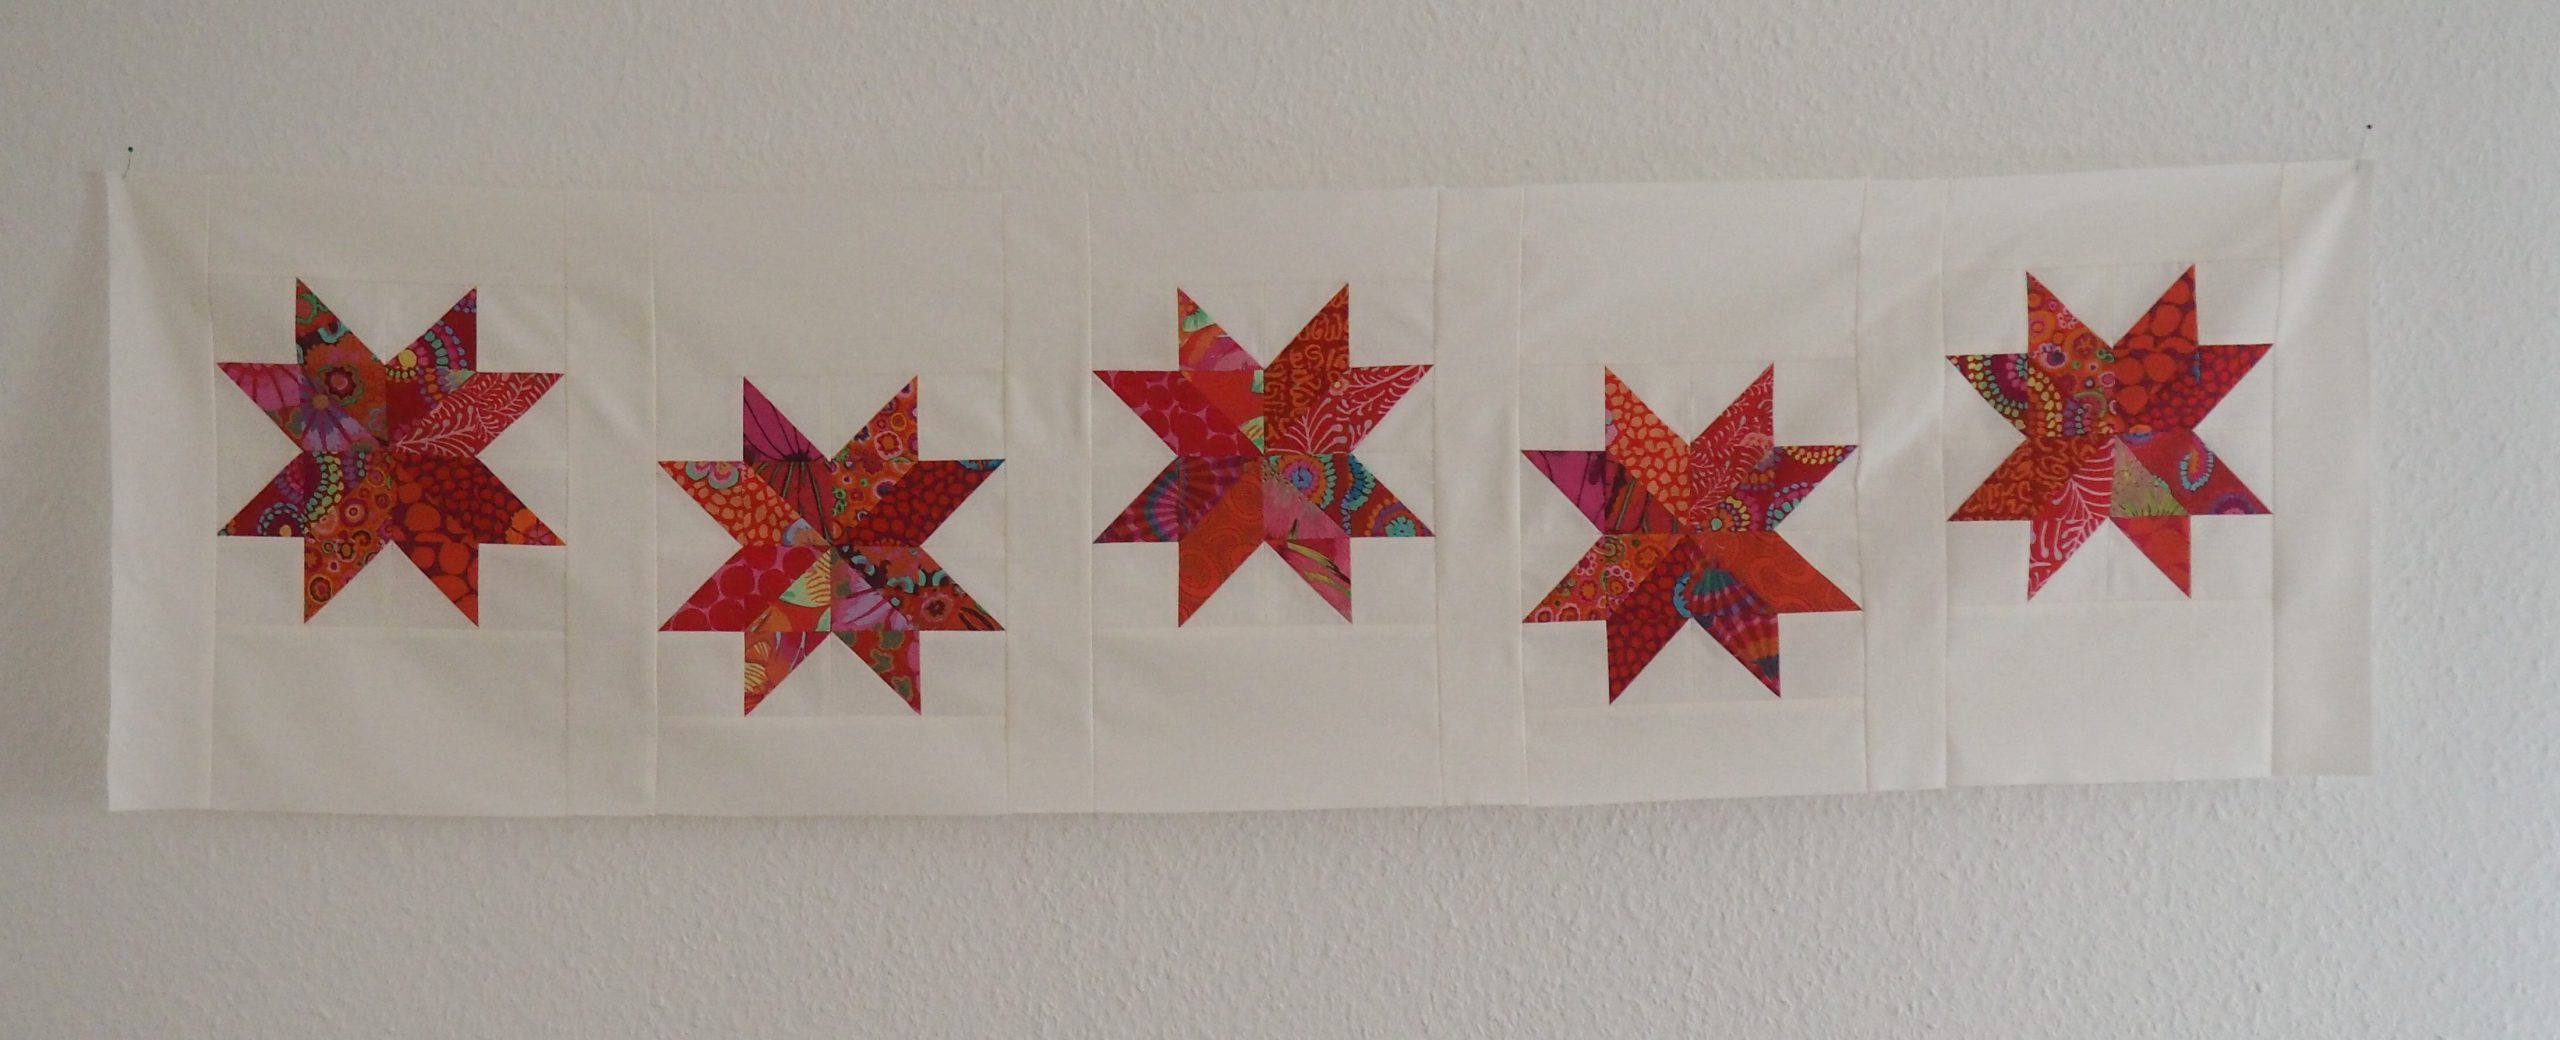
As an intermediate strip between the stars, I cut out 6 strips with a width of 2.5″ and a length of 14.5″.

This intermediate strip was sewn between the enlarged star blocks so that the wide edge of the side from the background fabric is once on the top and once on the bottom.
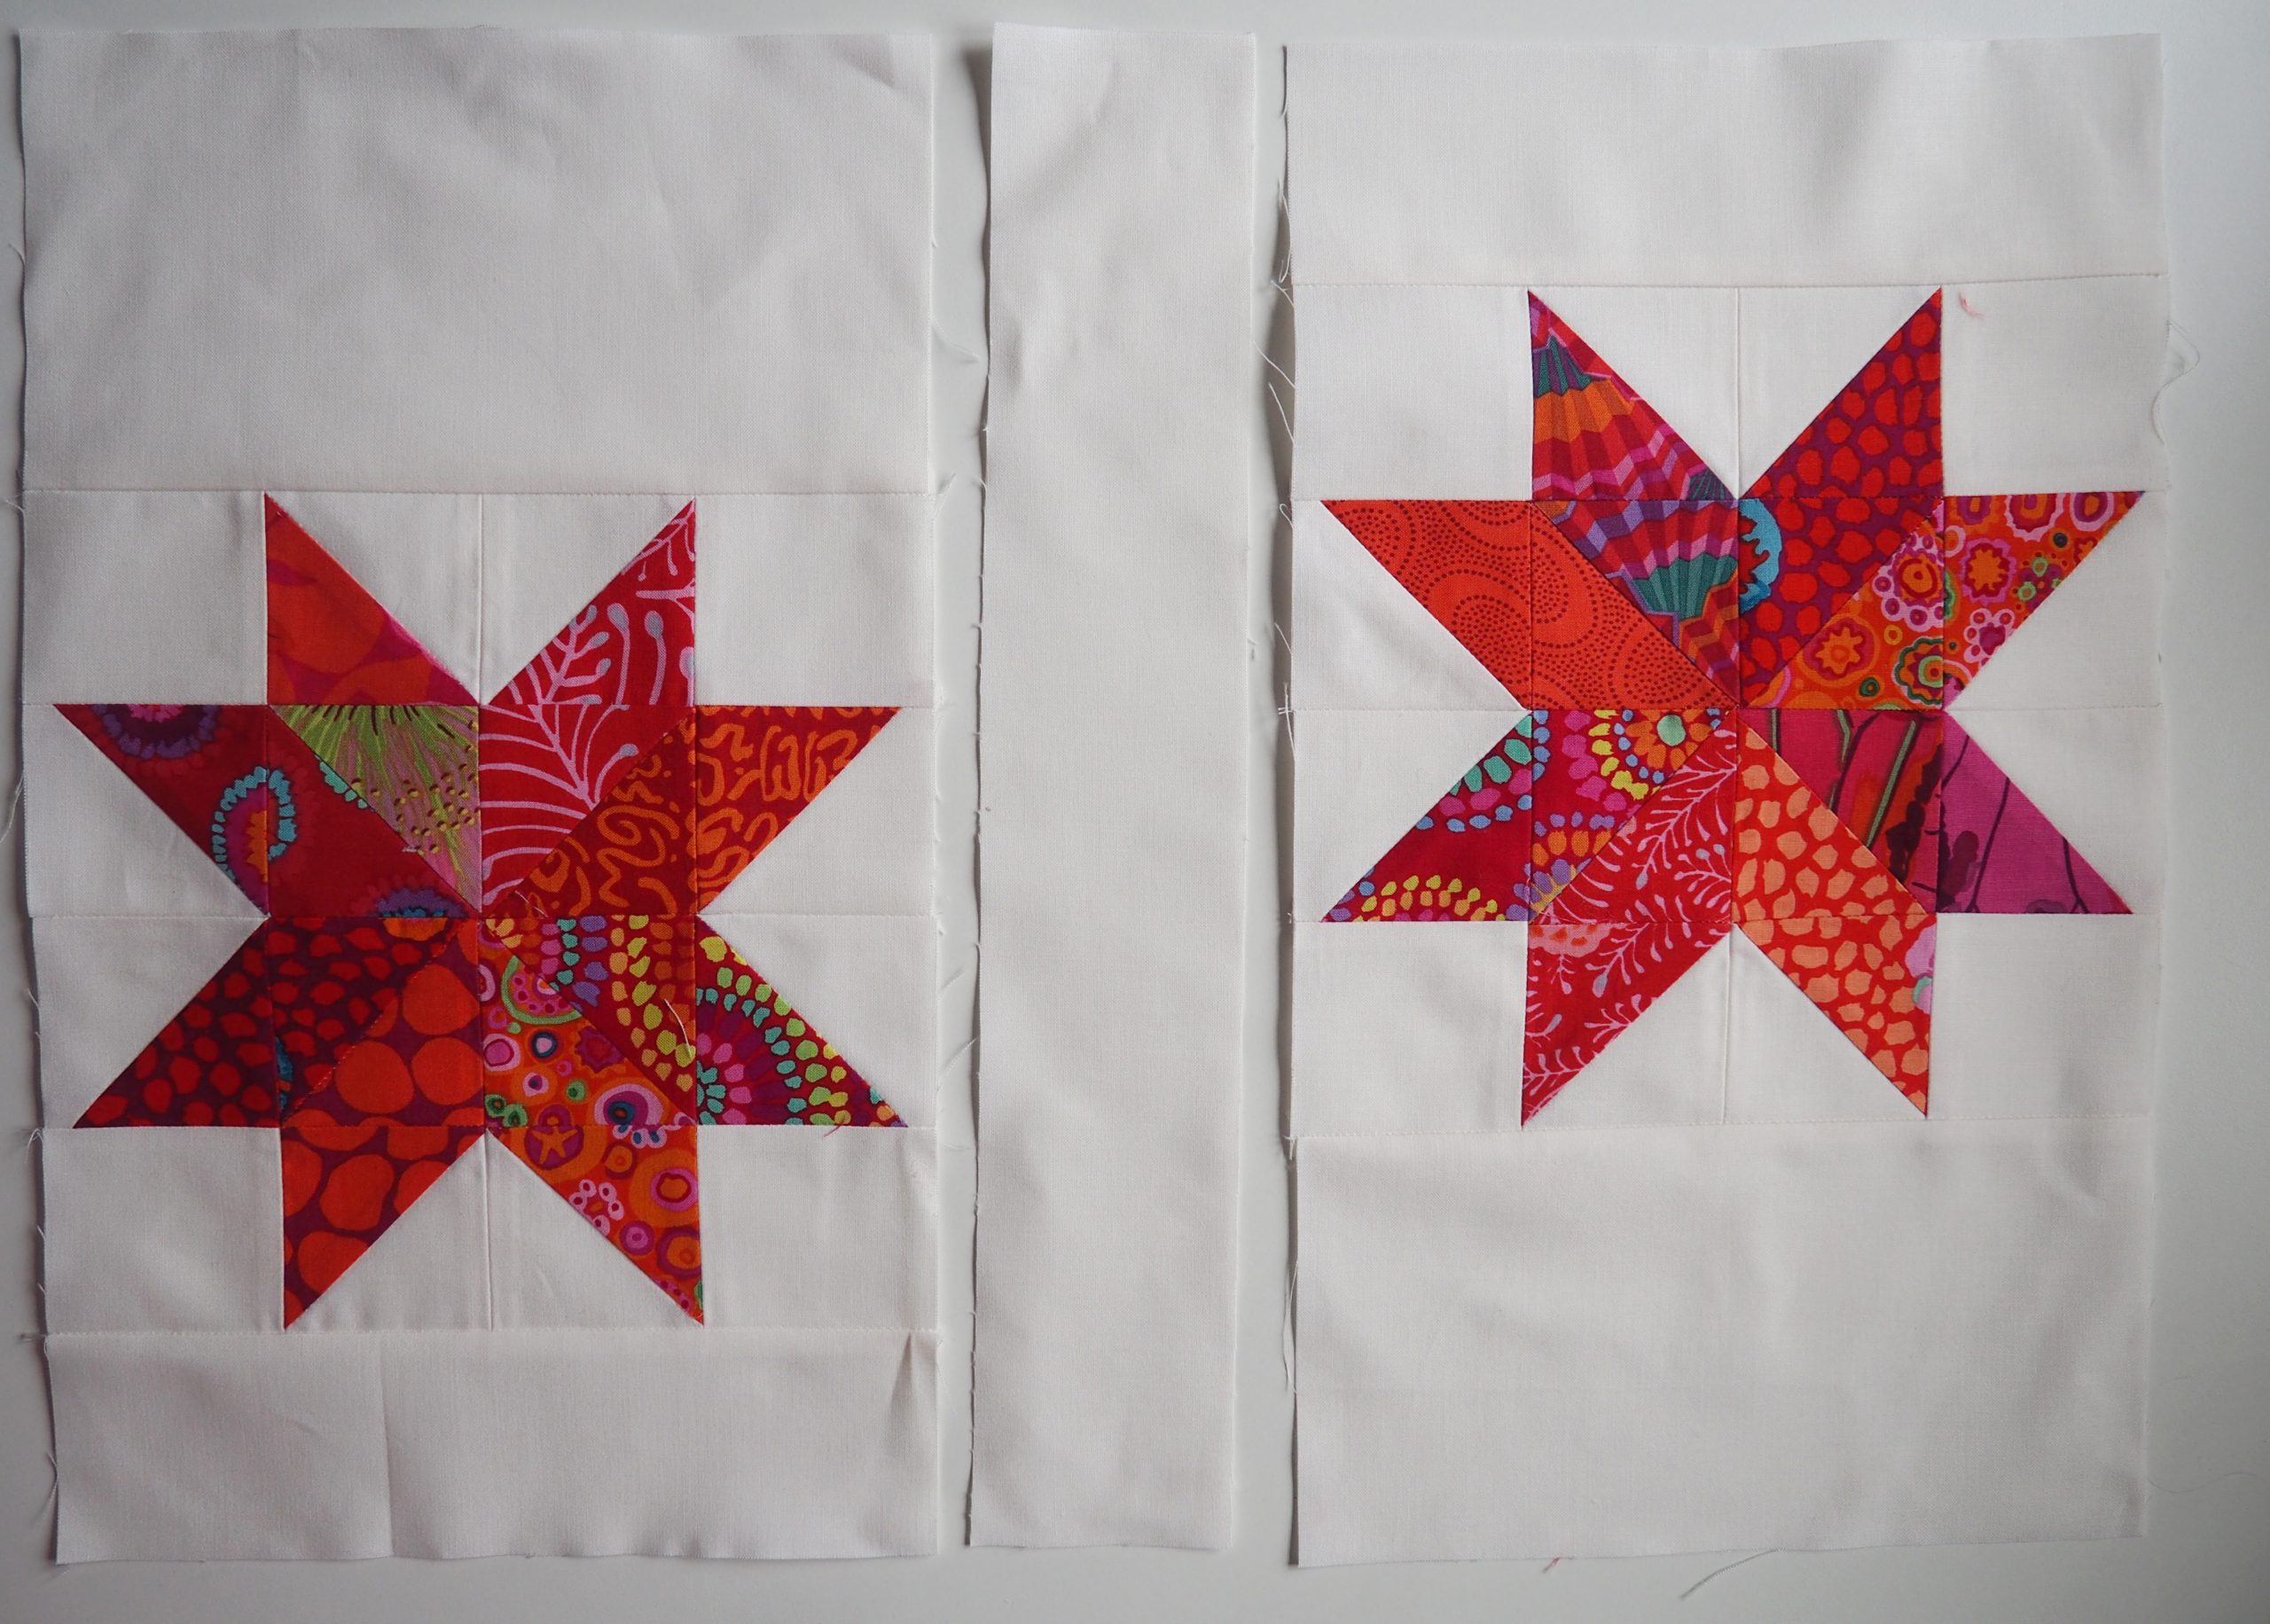
I also sewed an intermediate strip on the first and last star blocks.
This is what it looks like – as if the stars are dancing over the table runner a bit!
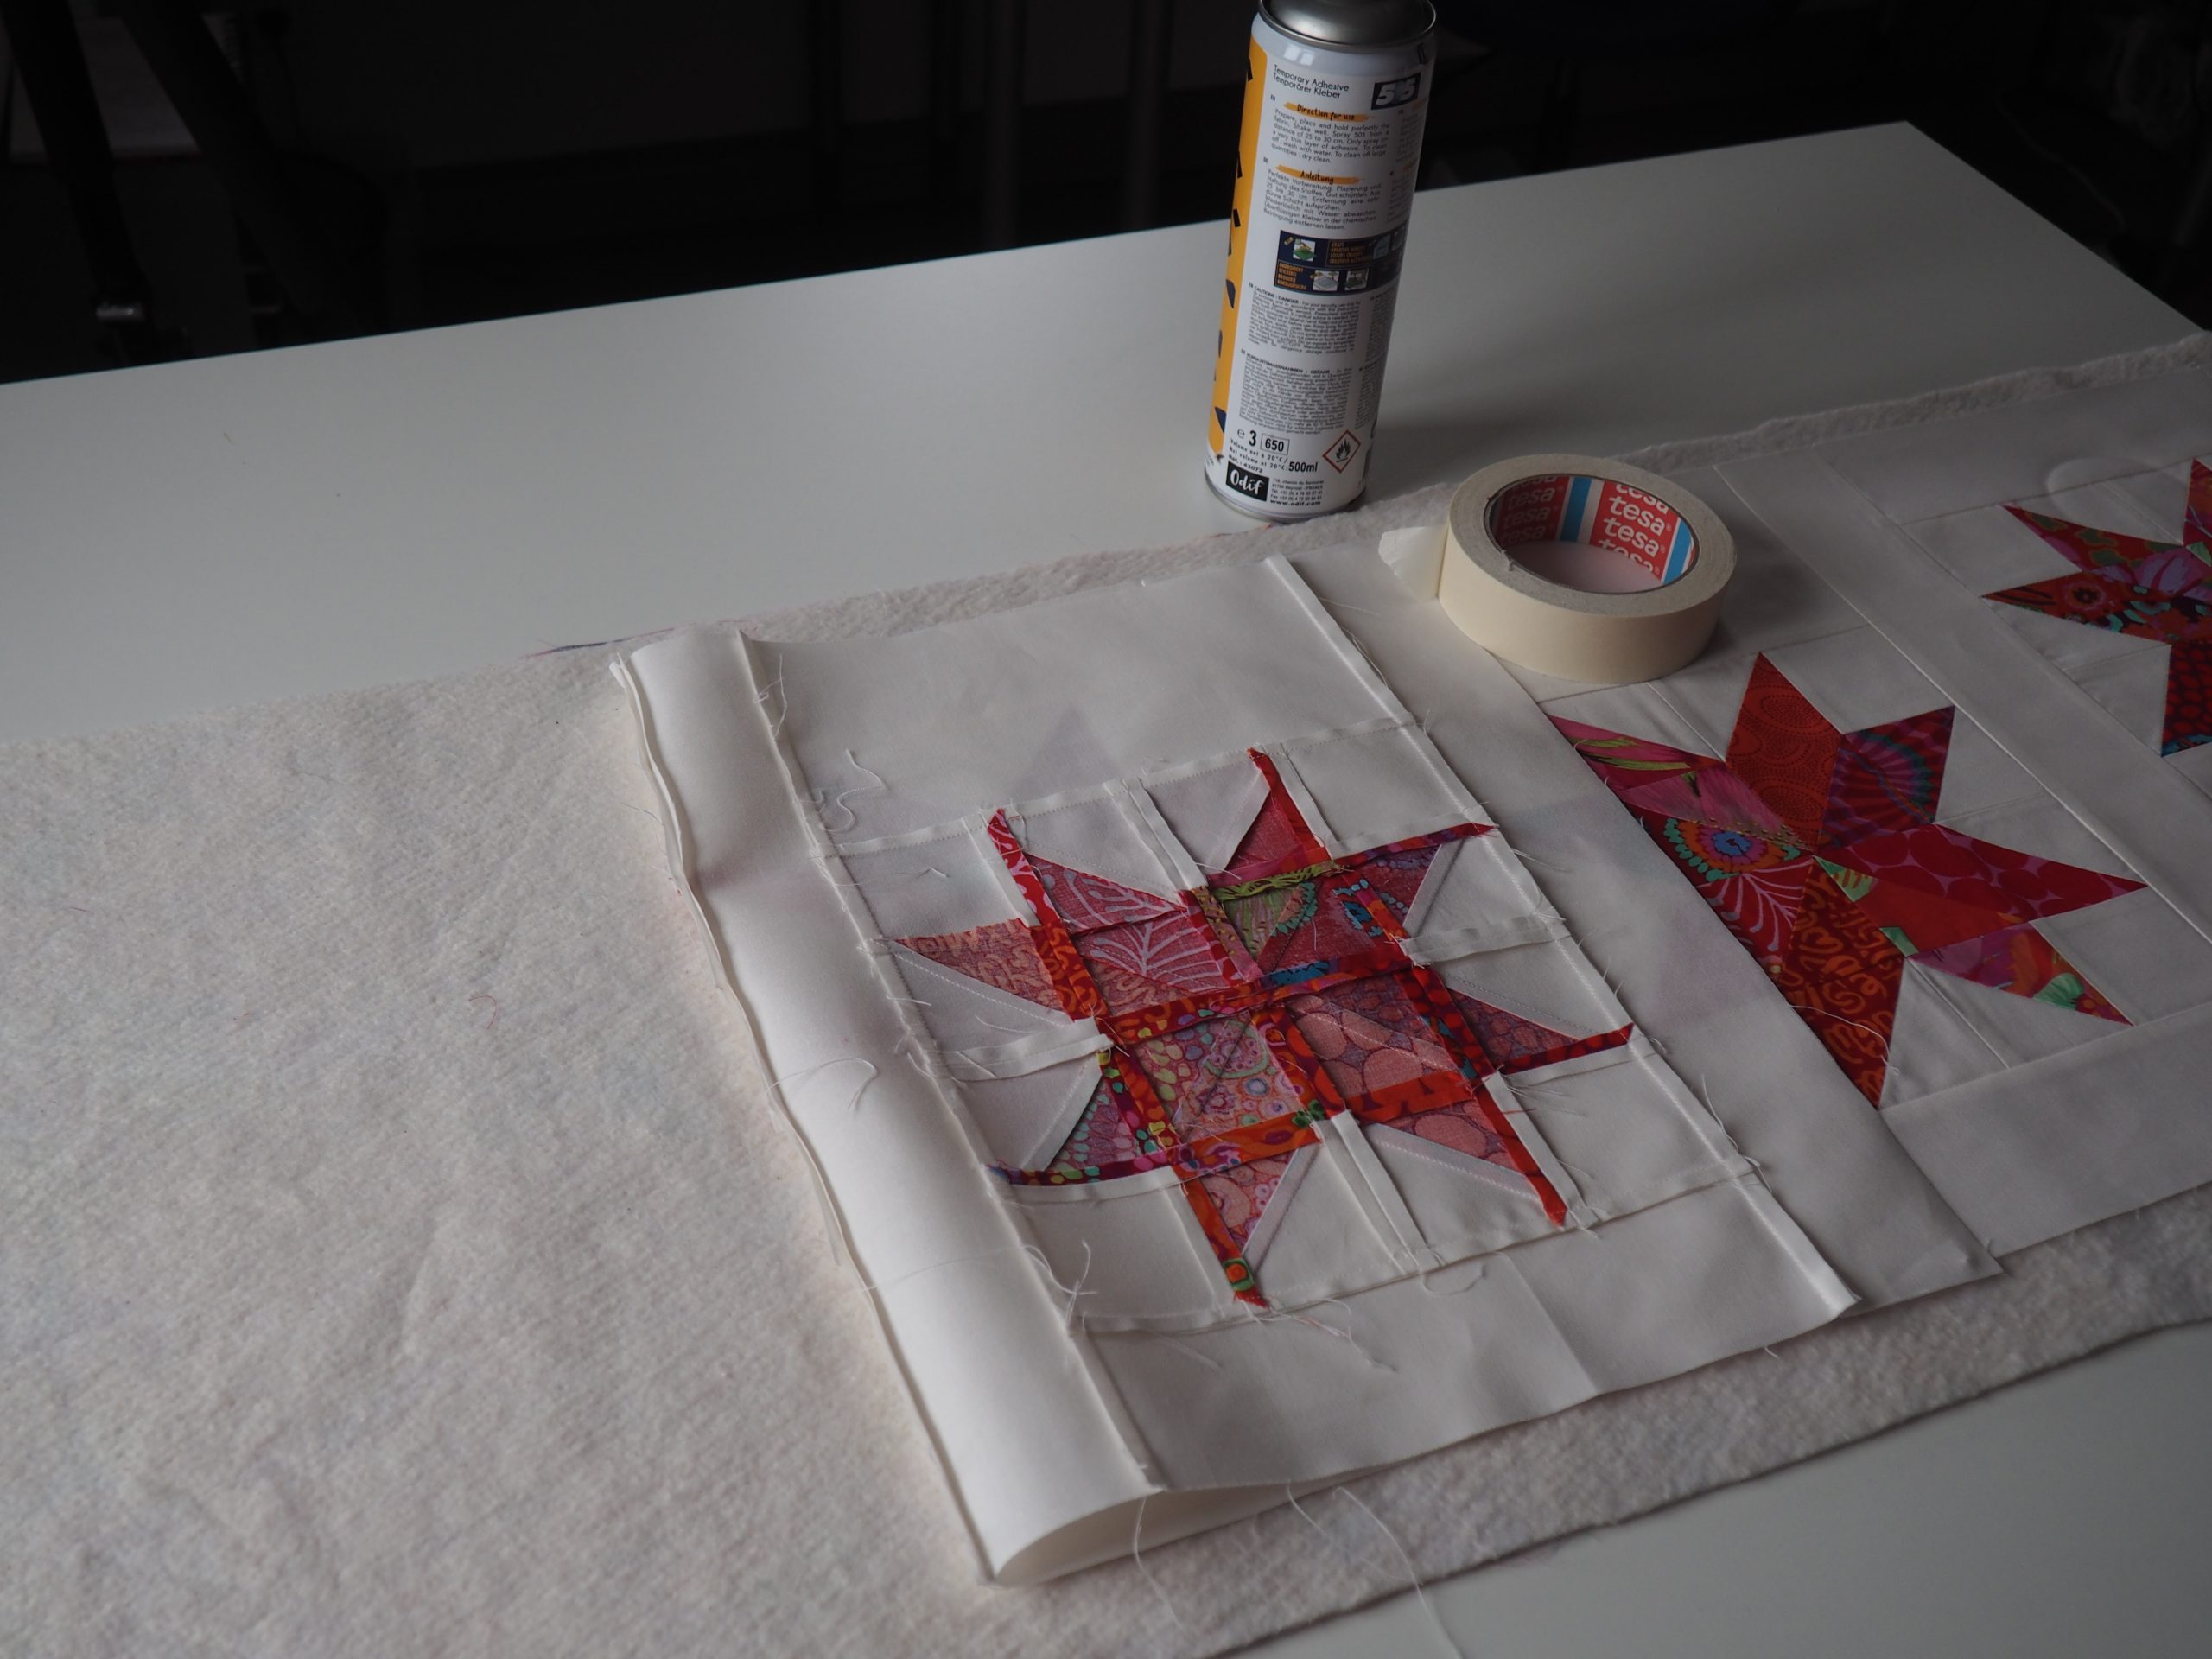
Using a spray adhesive, I glued together a quilting sandwich comprised of the top made from the stars that are sewn together, a colorful back fabric, and a bamboo mix 50/50-fleece from Vlieseline.
I quilted using the quilting thread from Mettler: Silk Finish Cotton 40 (in red) and Silk Finish Cotton 50 (in white).
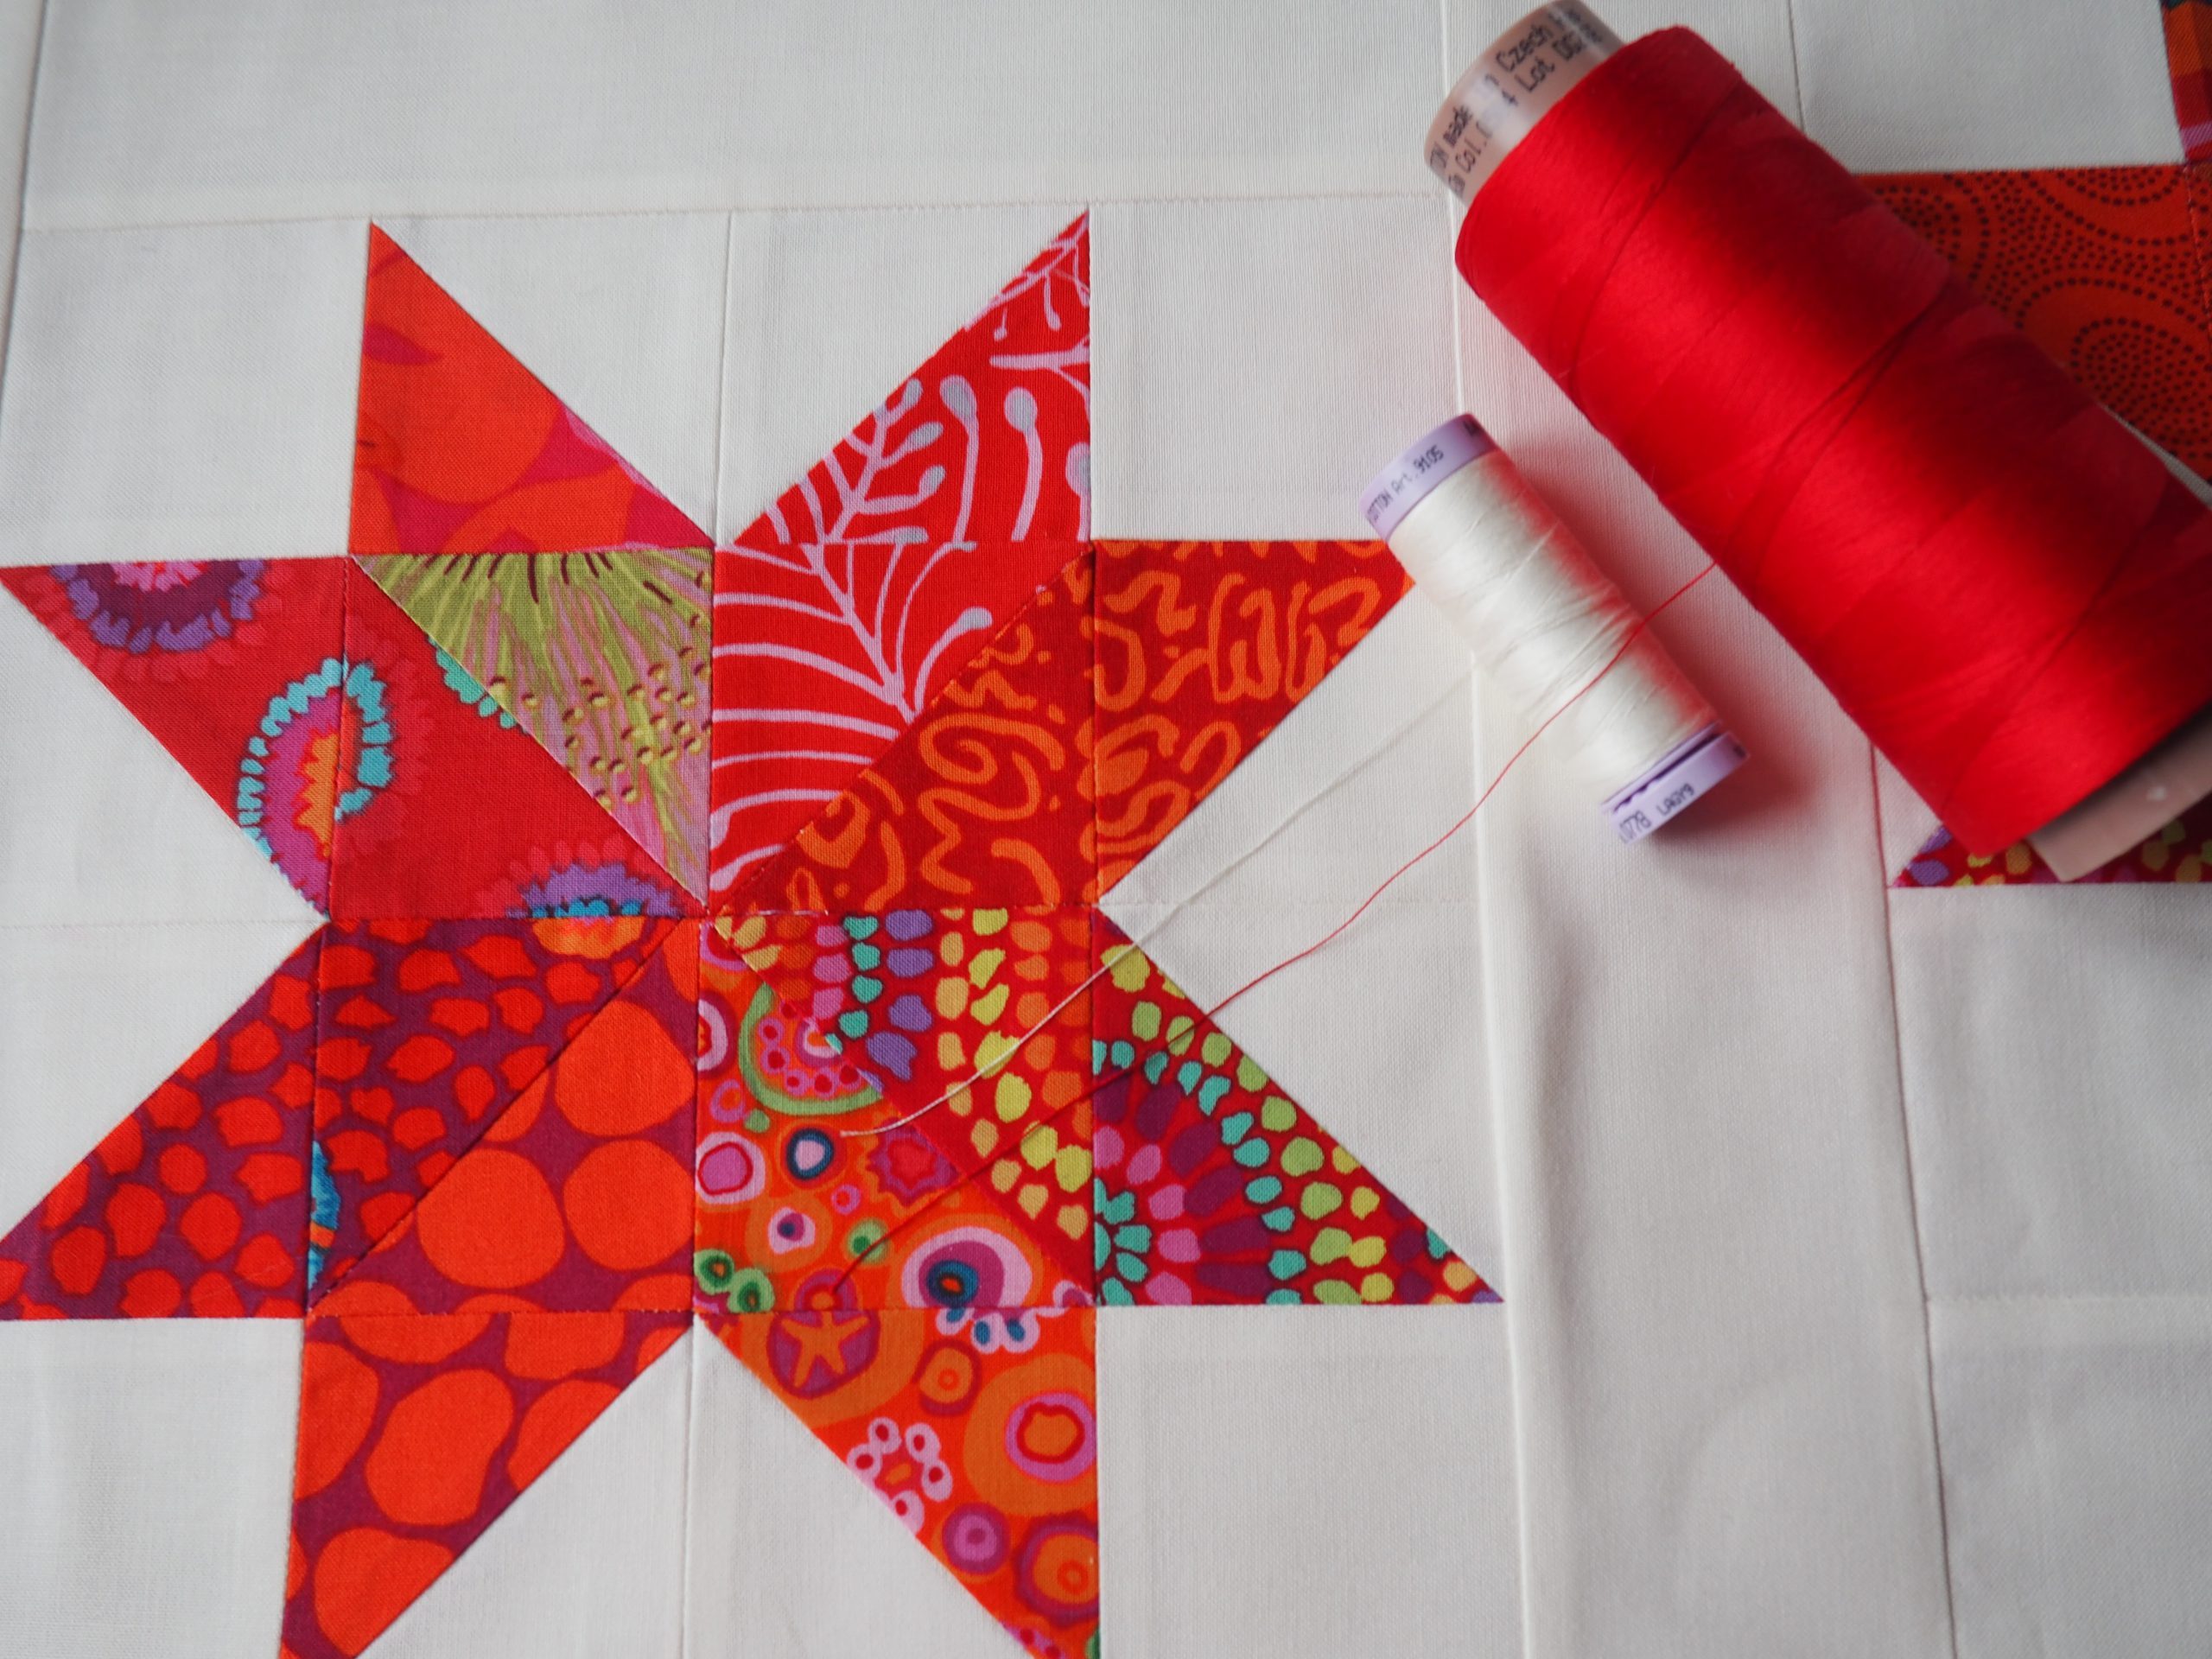
In the star, I quilted 1/4″ from the edge with red, and in white on the outside, also at a distance of 1/4″. I sewed a second white quilt line at a distance of 1/2″ from the first white quilting line . The resulting space is filled with circles.

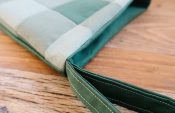
On the outside, I sewed a binding from many different leftovers and now I’m looking forward to using our colorful new Christmas blanket!
I wish you a lovely Advent season. Maybe you would like to try to create the colorful stars!
Best wishes,
Ines
0 Responses