 BERNINA Corporate Blog -
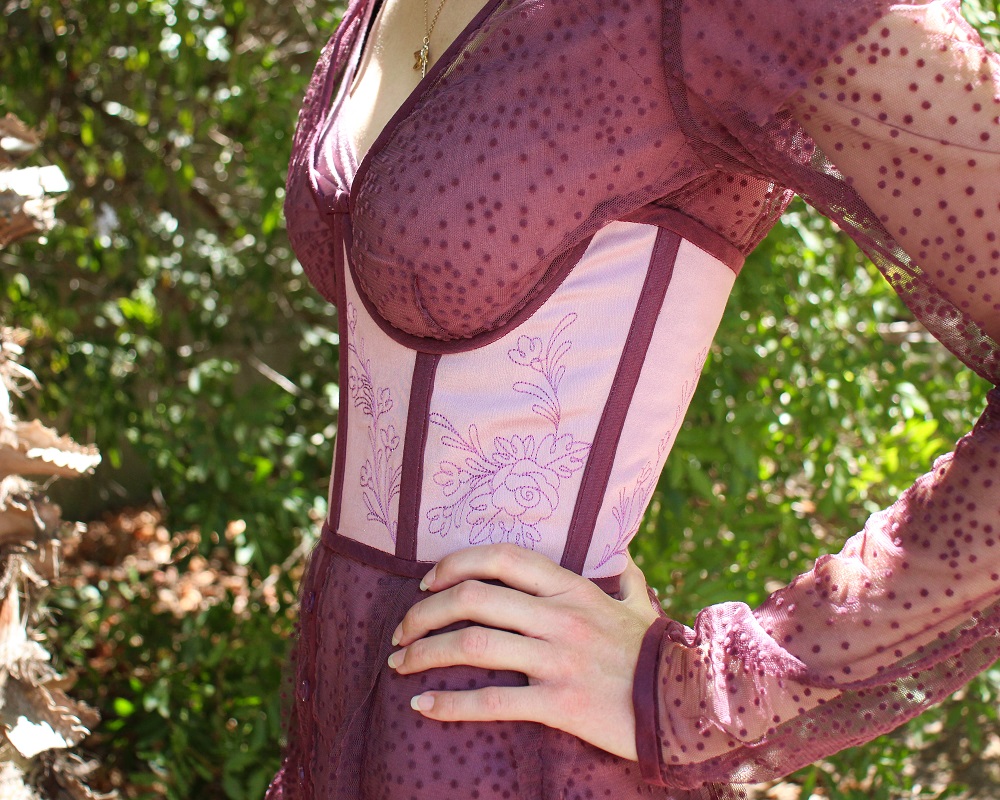
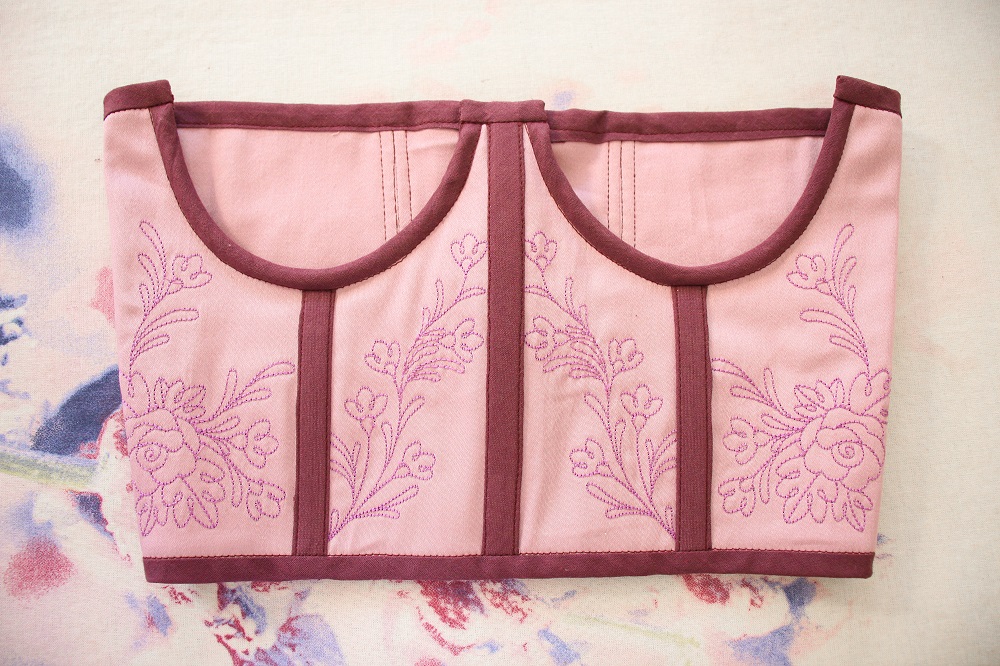
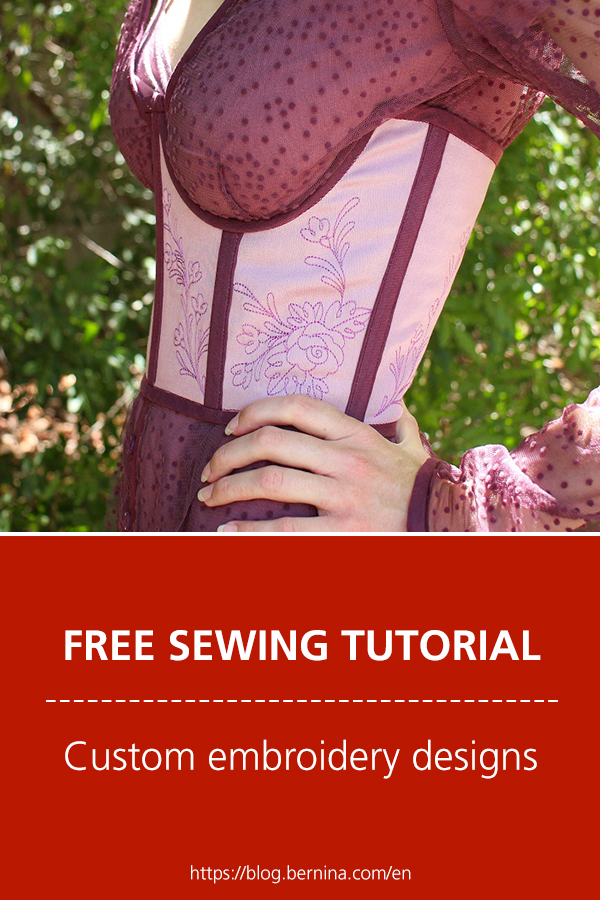
While making garments for a short film, I was inspired by the corsets and made myself one for the film premier and fashion show.
To see how I made my underbust corset and learn more about the film, check out this blog post:DIY Underbust Corset
There are some free patterns available too.
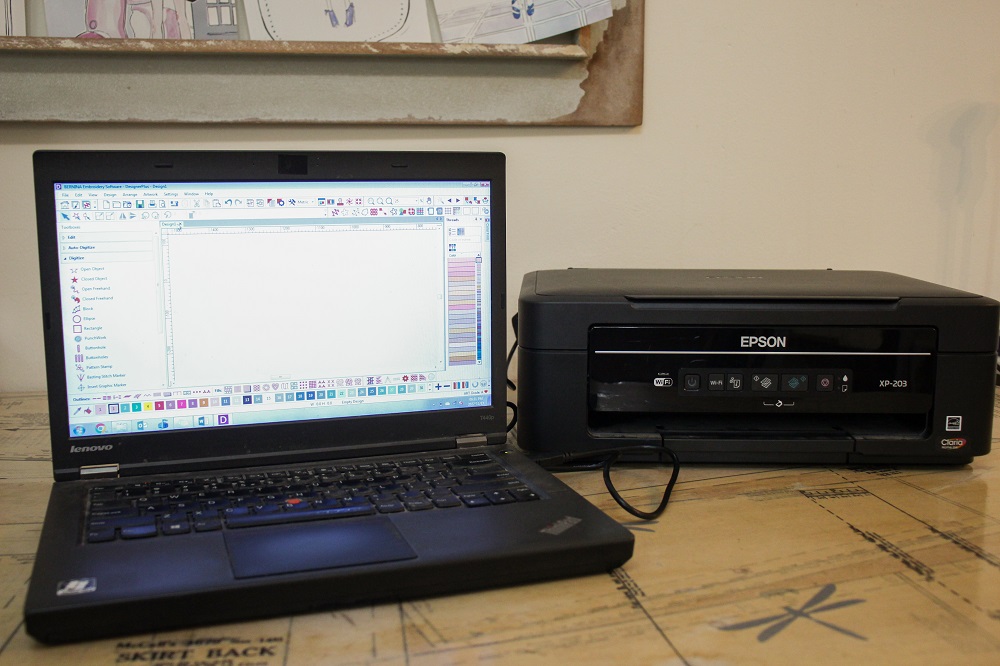
What will be needed:
- Bernina Embroidery Software 9
- Embroidery Design(s)
- Scanner/Printer with scanning abilities
- Pattern
- Sewing machine (B735)
- Embroidery Module
–Medium Hoop
–Foot #26
-Embroidery Thread
-Tear away Stabilizer
How to import a physical sewing pattern in to Bernina Embroidery Software 9
If your pattern is in a digital format (pdf) you can import it into the software. I’ve shared those steps in a previous post: Embroider your own lingerie
Please note that this technique works best with smaller pattern pieces. I.E. ones that fit in your scanner.
Bernina Embroidery Software 9 supports TWAIN compatible scanners.
I didn’t require any extra setup for my scanner to be used by the embroidery software. My scanner was already setup with my laptop so when I plugged it in to my laptop, I was able to use it in the embroidery software.
However if this isn’t the case for you, refer to pages 20 & 21 of the Quick Start Guide for help with setting up your scanner in the Embroidery Software.
If you are still unable to connect your scanner to the software, you can scan as per usual, save as an image file (jpeg, png…) and import it as an image to the software.
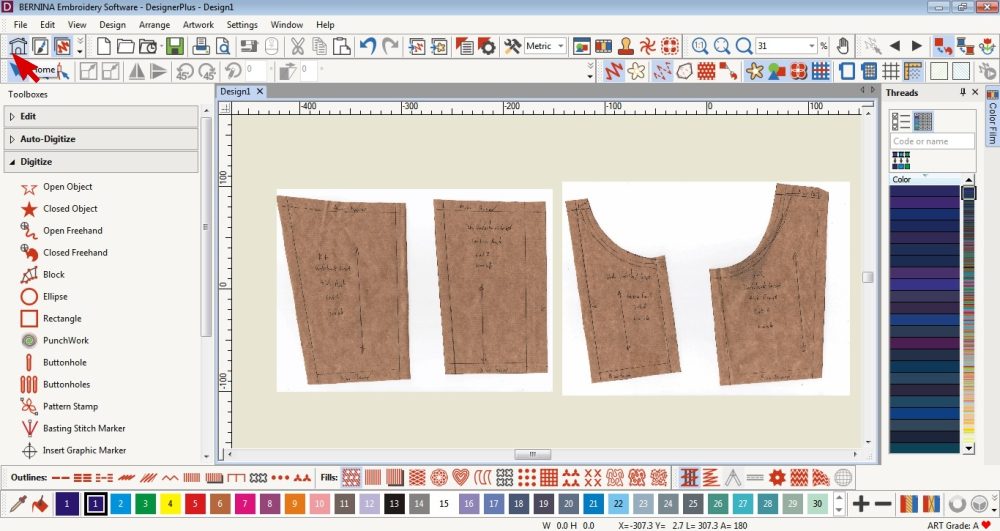
 Switch on and connect your scanner to your computer.
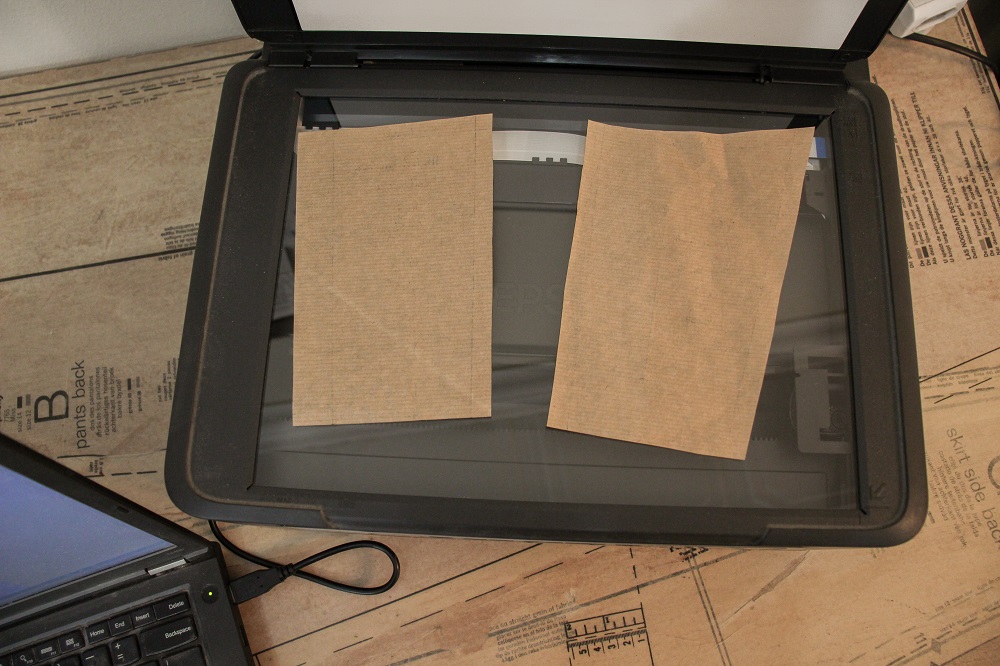 Place a pattern piece face down in the scanner
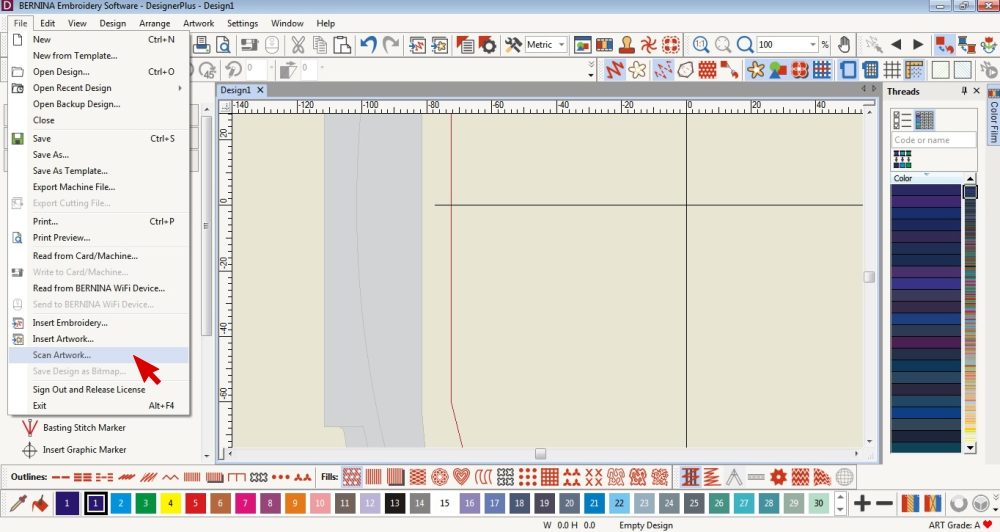 Click on File, Scan Artwork
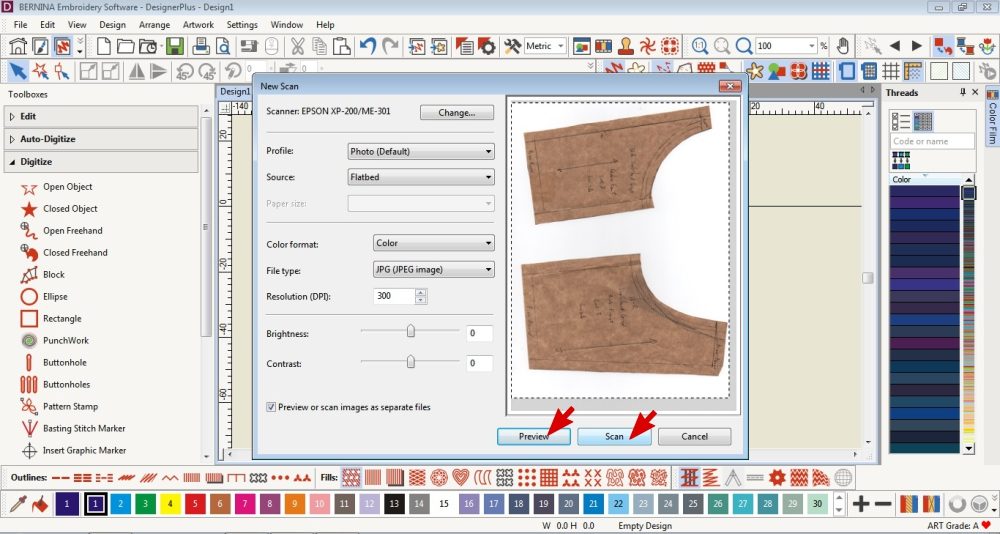 Select Preview if you want to check that your pattern piece is placed correctly.
Select Scan when you are ready.
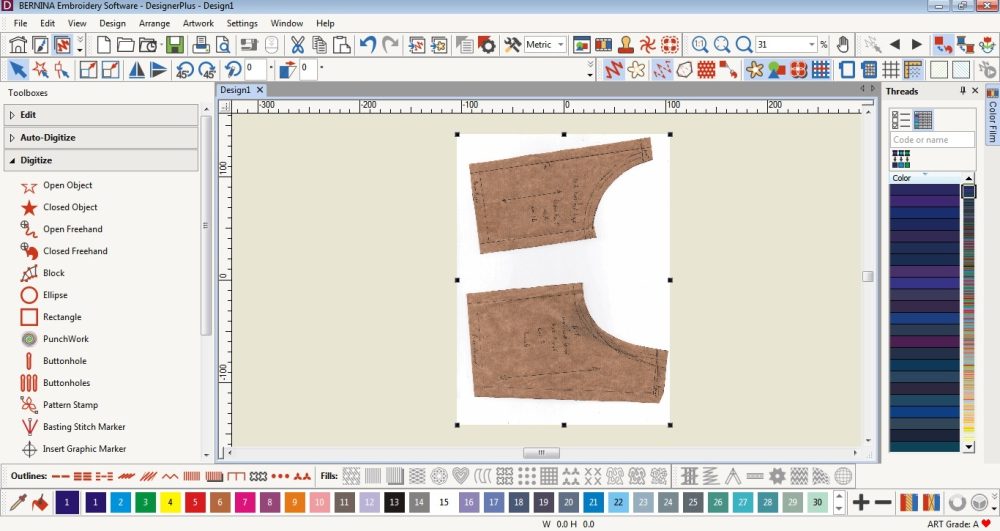 The scanned item will appear on your Embroidery Canvas.
 Repeat the process to scan in all the necessary pattern pieces.
You don’t have to open another blank page.
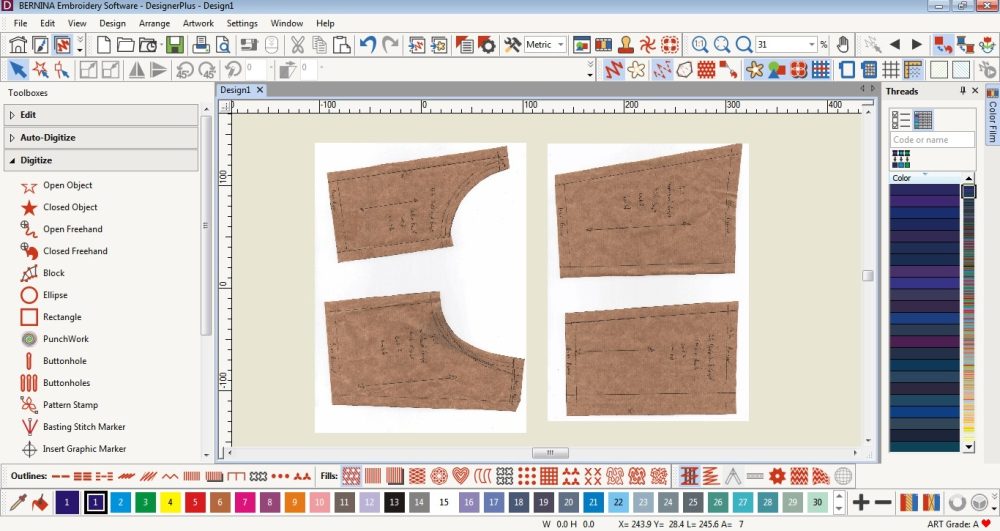
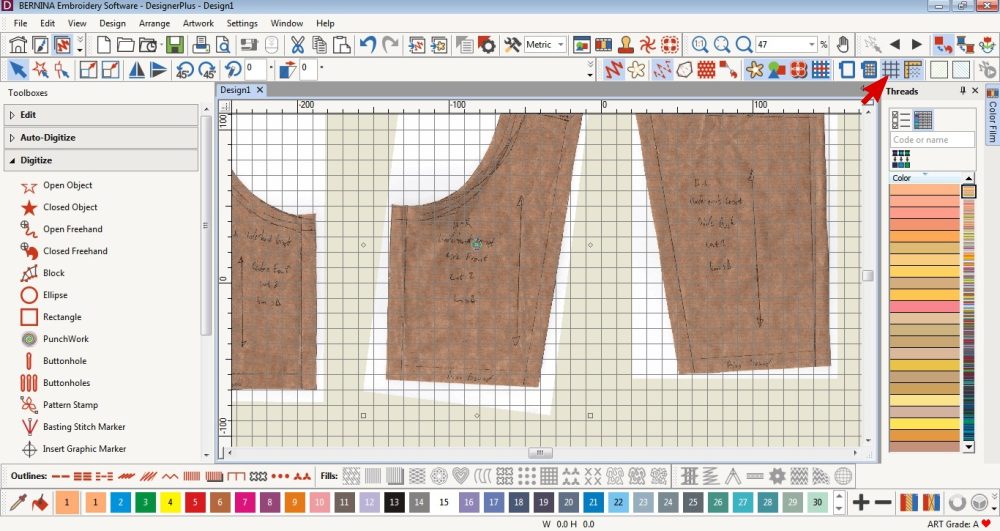 To straighten the templates, you can activate the Grid Tool in the top Toolbar.
Double click on the template and rotate it so that the grainlines are parallel to a vertical grid line.
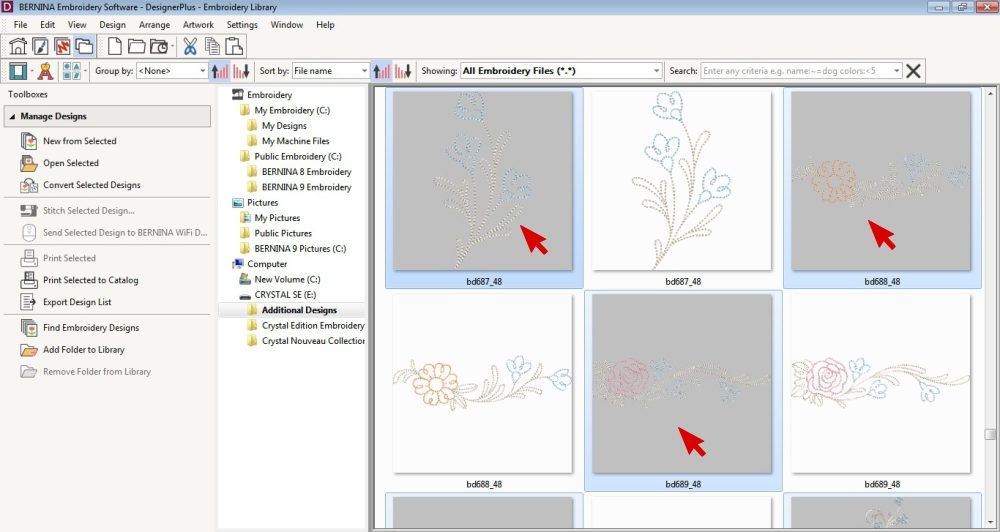
Browse your Embroidery Library
 Click on the Home Button.
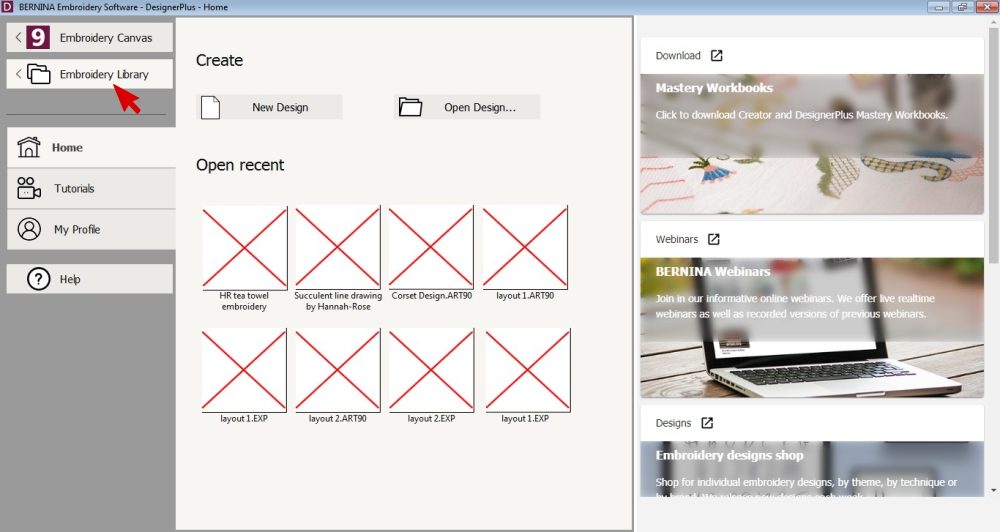 Select Embroidery Library.
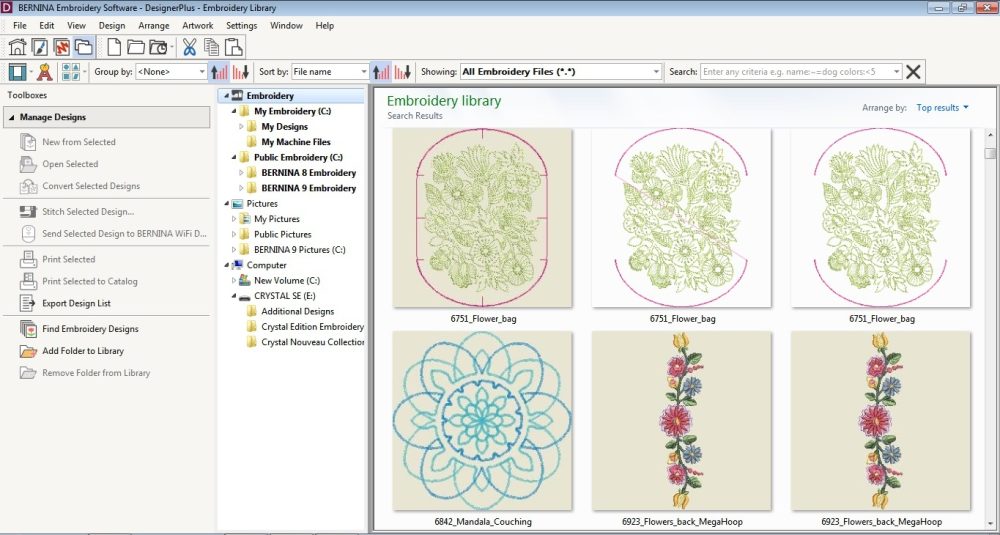 Here you can browse all the embroidery designs saved on your computer.
These are designs that came with your Bernina Embroidery Software as well as designs you have downloaded or created.
You can type in key words to help you narrow down the designs or open up the tabs and select the available categories.
If you have designs saved externally, you can find them by clicking on the plugged in hard drive/USB available under the Computer tab.
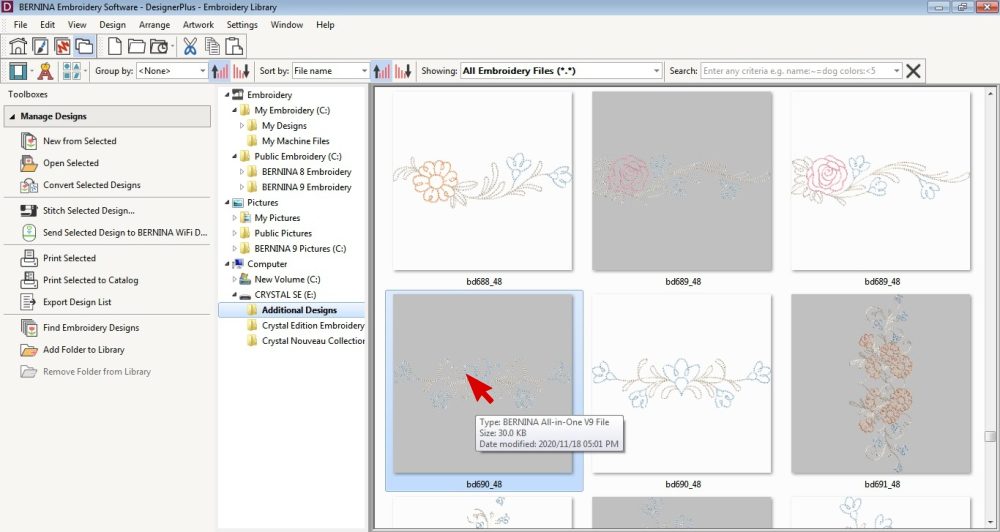 Double click on the design to open it in your software.
Keep in mind that you have not imported the design but are opening the original design. Therefore, any changes you make to the design will be permanent.
 If you want to open multiple designs at once: click on a design, hold down ctrl on your keyboard and select more designs. Click Enter and the designs will open individually in your software.
Create a unique collection of embroidery designs from existing designs

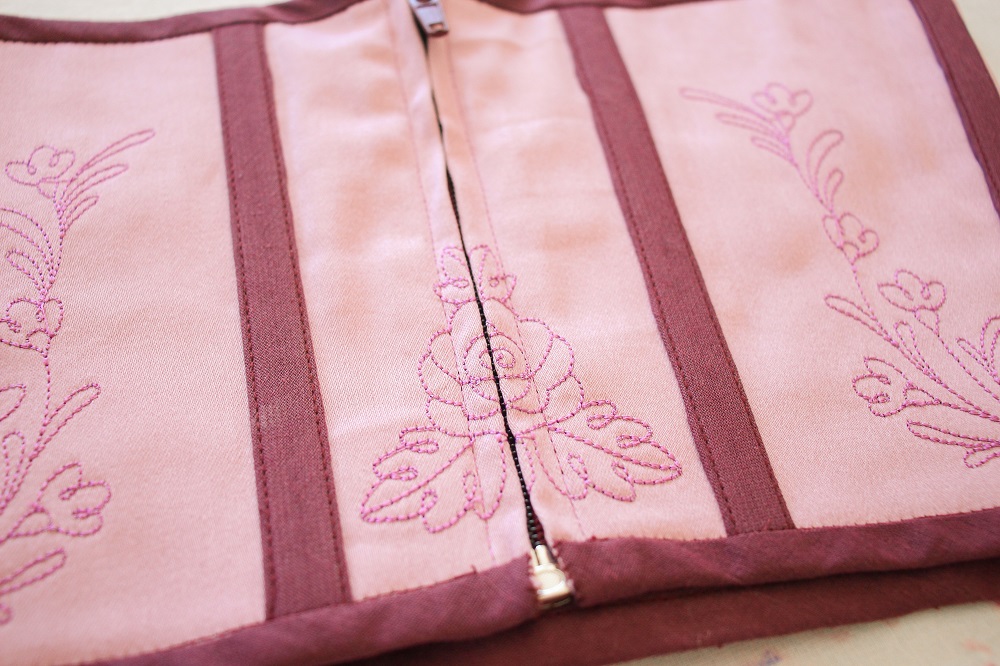
While browsing my Embroidery library, I came across designs of a similar style from the Crystal Edition Embroidery Designs Collection.
Instead of importing each design into the software, I selected the multiple designs I liked while I could see them all together and opened them in the software.
I didn’t want to alter the original designs, so I copy and pasted them to the page with my templates loaded. I then closed the original designs (without saving in case I accidentally made any alterations).
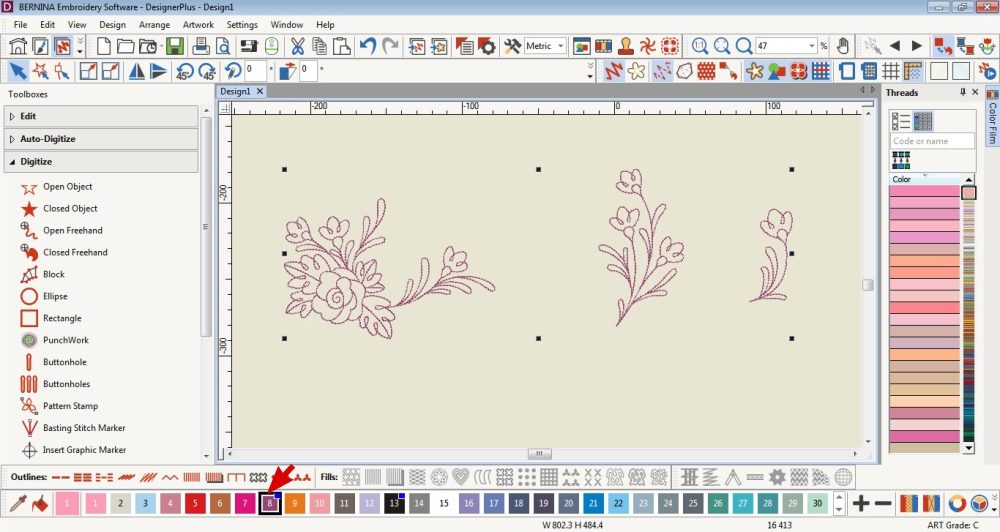
I selected all the embroidery designs and made them the same thread colour.
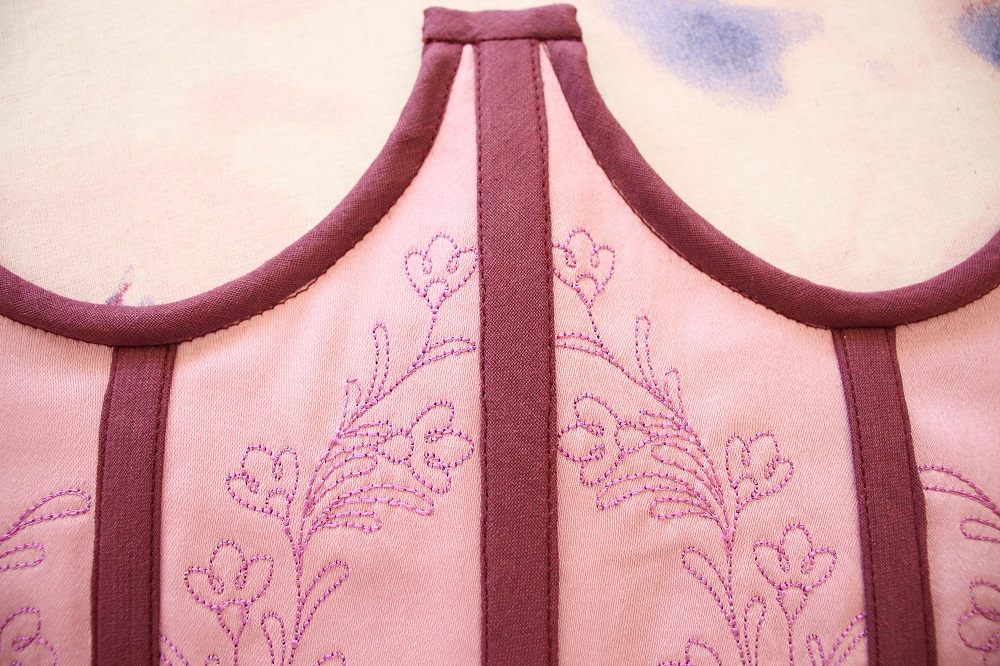
Then I edited them to make them unique.
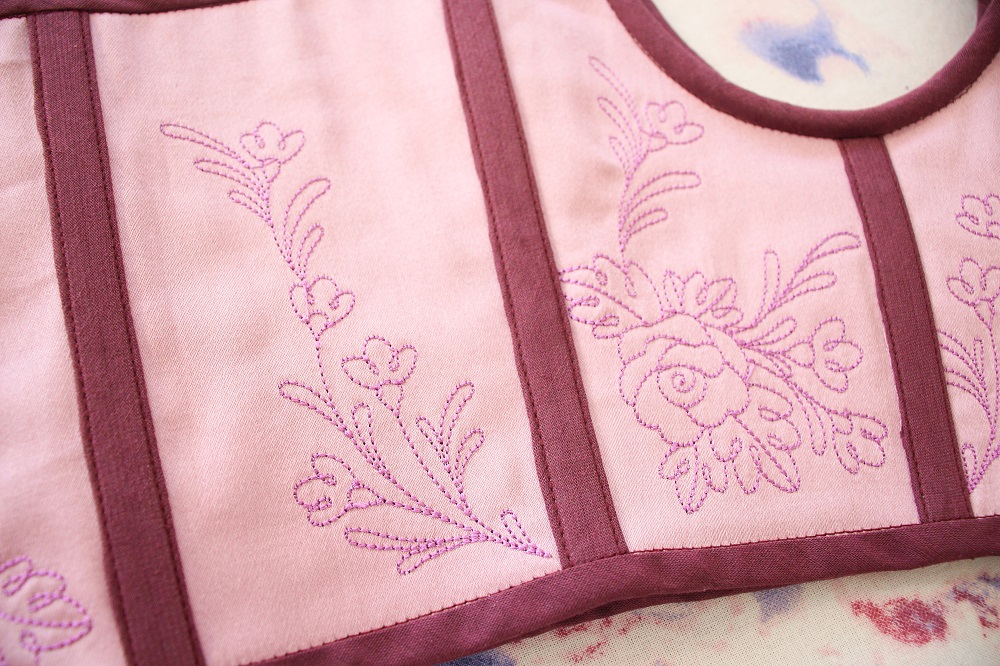
 One of them I rotated and mirrored.
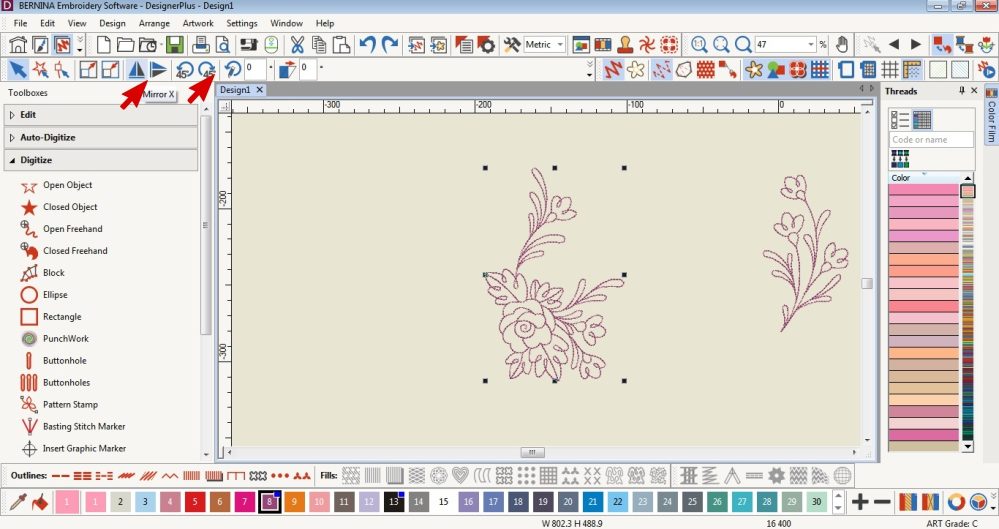
 Then I duplicated it, rotated and removed part of it with the Knife Tool.
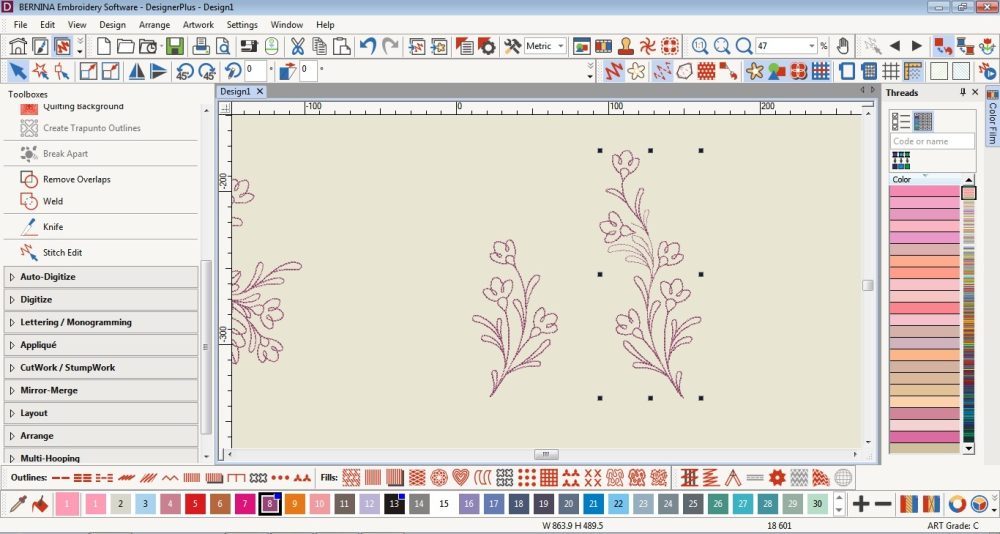 I duplicated the last design twice, mirrored one of the duplicates and combined them.
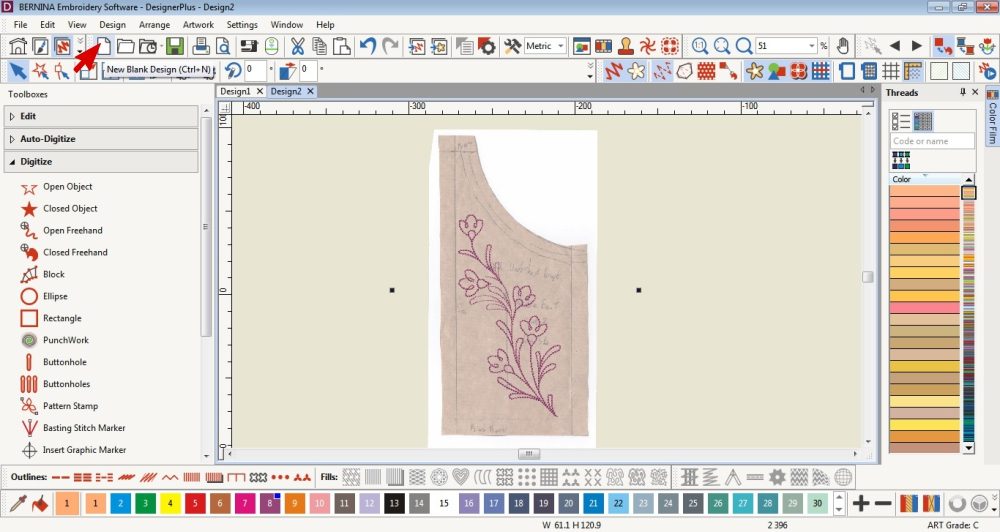
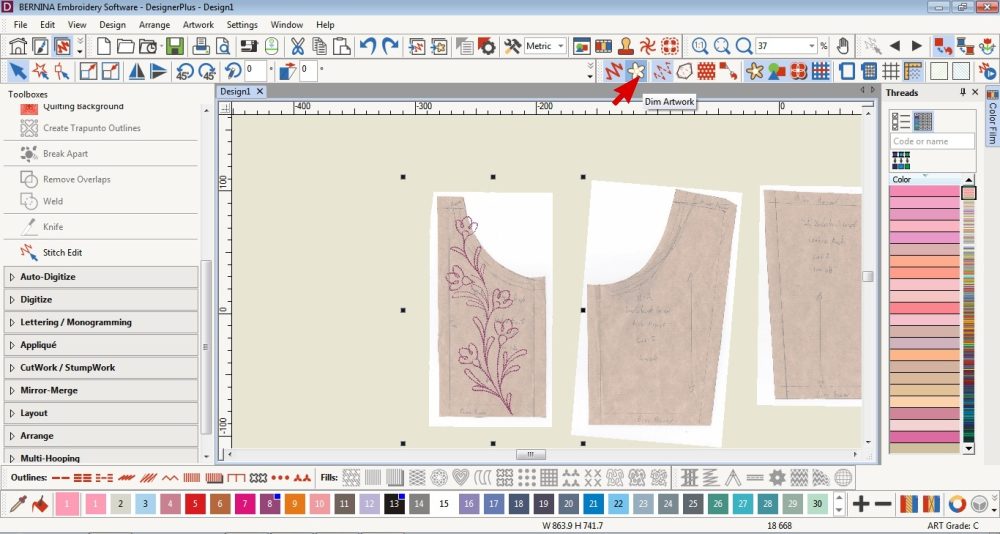 In order to see the design clearer when placed on the template, I dimmed the artwork.
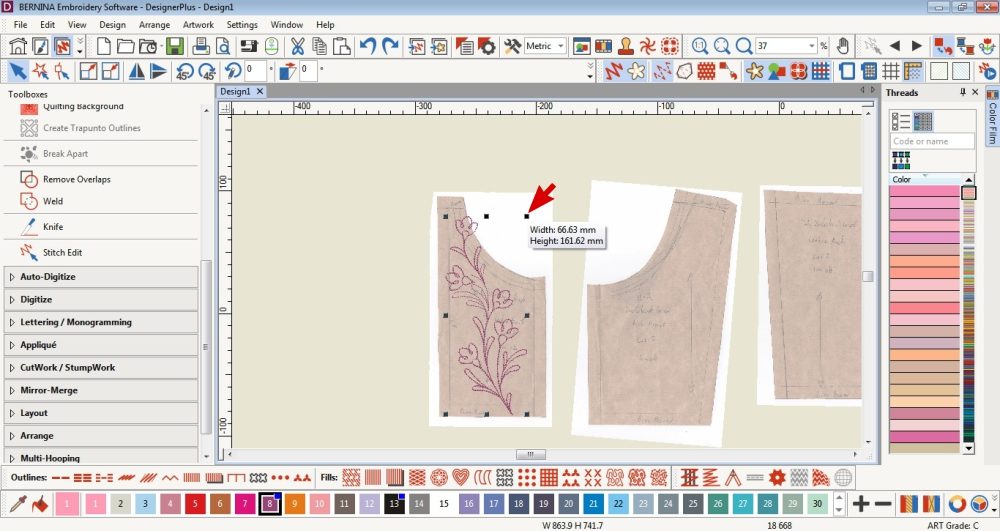 I then resized the designs to fit within the seam allowances on my template.
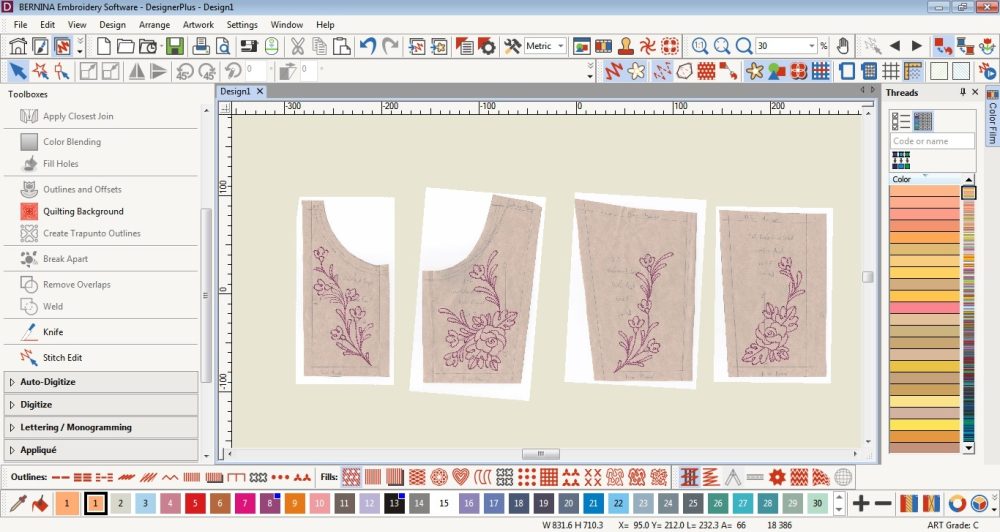 Once I had all the designs on the template, I edited some of them further until I was happy with the overall look.
Finishing Touches
 Cut (hold down ctrl and press X) and past (hold down ctrl and press V) each of the designs & templates on a separate page.
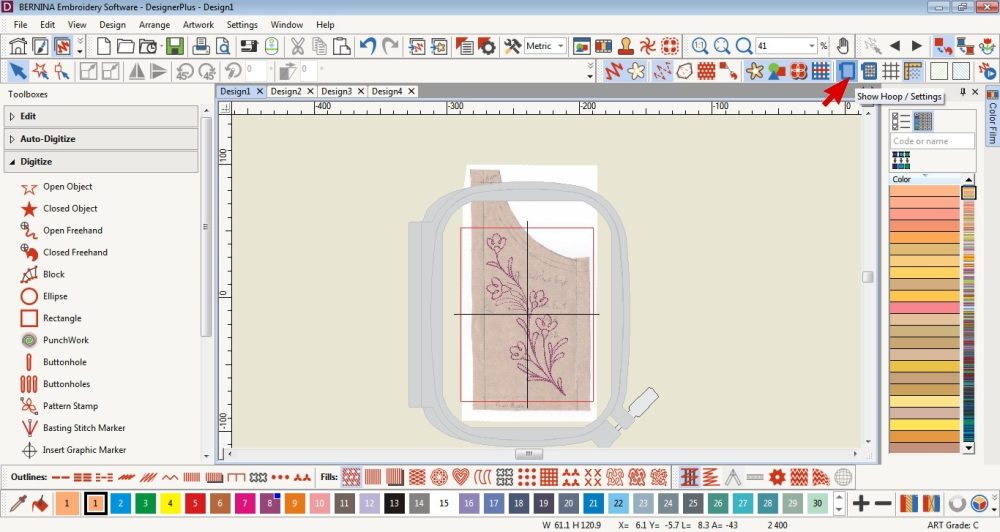 Check that the embroidery fits within your Hoop.
Edit if necessary.
 Delete the templates.
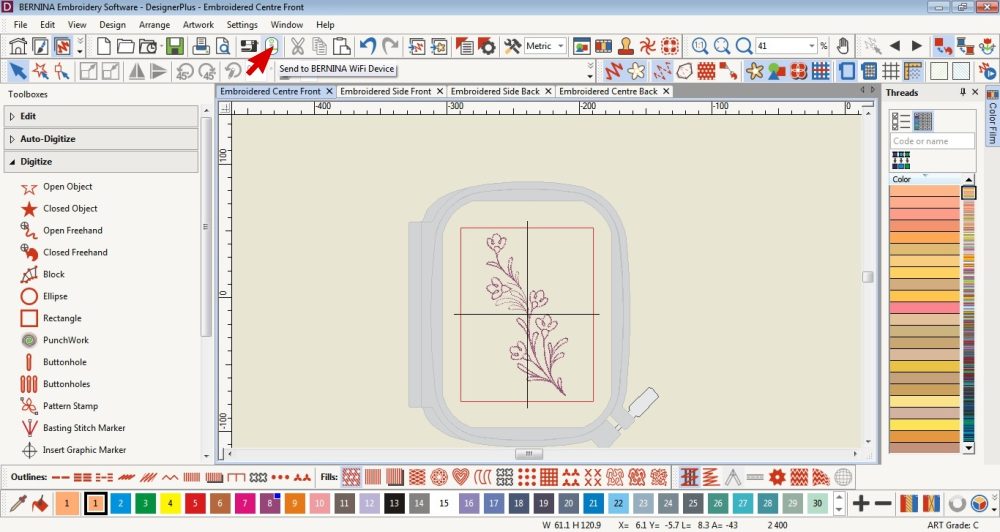 Save the designs with the pattern piece name, export or send each completed design to your Bernina machine via the WiFi Device.
Embroider
I prefer to embroider my fabric before cutting it out.
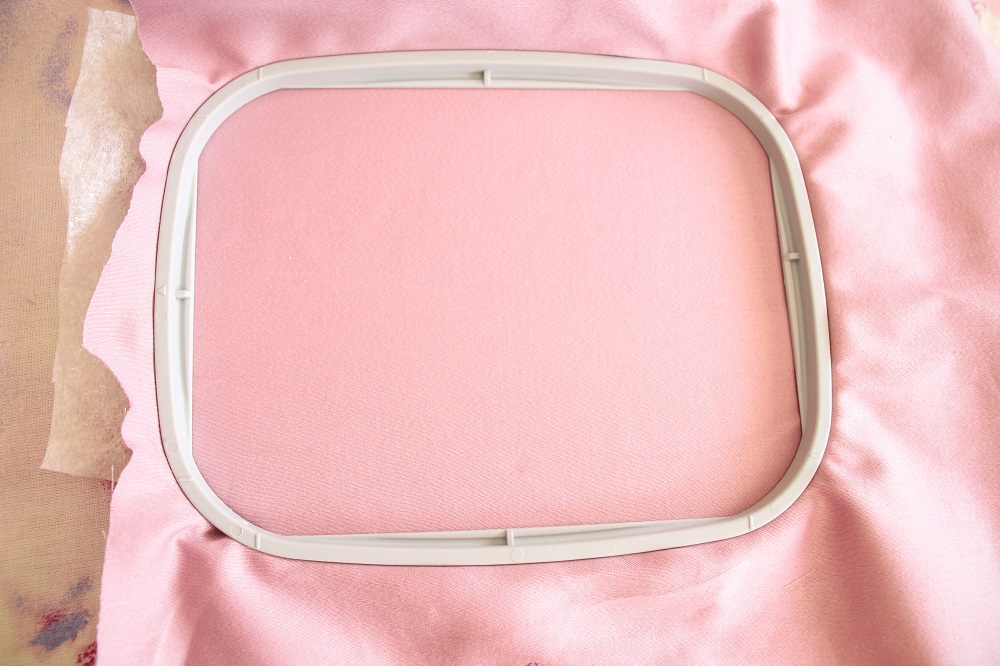 Place the fabric in the hoop with Tear-Away Stabilizer below.
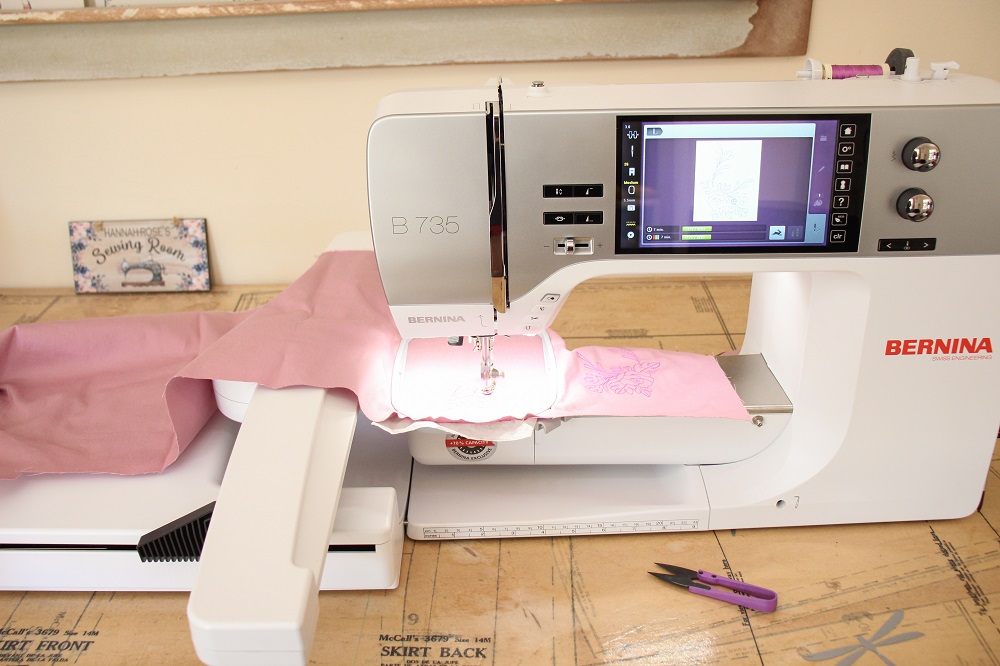 Set up your machine for embroidery (refer to this blog post for the steps under the heading Embroider) and embroider your designs.
 Once you have removed the embroidered fabric from the hoop, teared away the excess stabilizer, cut out the embroidered items.

Tips
- If you have any difficulties, you can always contact your local dealer or refer to the Bernina’s Software Help Guide.
I would love to see what you make, please feel free to share with me!
Instagram
Facebook
-Hannah-Rose
All rights of the original embroidery designs to the respective owners/creators/distributors. I have used these designs for personal use only. The designs are from the Crystal Edition Embroidery Designs Collection as part of Bernina’s Crystal Edition promotion.


I am just wondering when the firmware update for 750 will be available to use the new hoops?
Hi Shelly
I don’t have that information.
Perhaps contact your local Bernina dealership and ask 🙂
Or Ramona might reply with an answer 😉
Dear Shelly,
As Hannah-Rose guessed, I will get back to you with an answer 🙂 . I am currently waiting on the Feedback from the Firmware Team. As soon as I have any news, I will answer here or on your other comment!
Kind regards, Ramona from BERNINA International
Just great, what an inspiration!
Thank you so much Doris! 🙂