 BERNINA Corporate Blog -
For the second half of last year I was involved in the production of a fashion short film!
I was brought designs created by a local designer and the visionary behind the project. I was honoured that they asked my advice on the beautiful fabric choices and trusted me to bring their dream to life on a tight deadline.
To learn more about the film and see the garments I made, visit my website
The process wasn’t as streamlined as my usual custom clients where I work on one outfit for them at a time. Normally I draft a pattern, make a toile, fit, adapt pattern and sew the final garment. As there were over 40 garments to make and 5 models to fit, I was at times drafting patterns for some items while making toiles for others as well as finishing other garments. Oh and squeezing in fittings whenever possible!
I enjoyed the challenge and having the opportunity to dive back in to custom evening-wear after a break due to the pandemic. I also loved the variety of the types of garments from lingerie to evening-wear and flowy garments to corsetry.
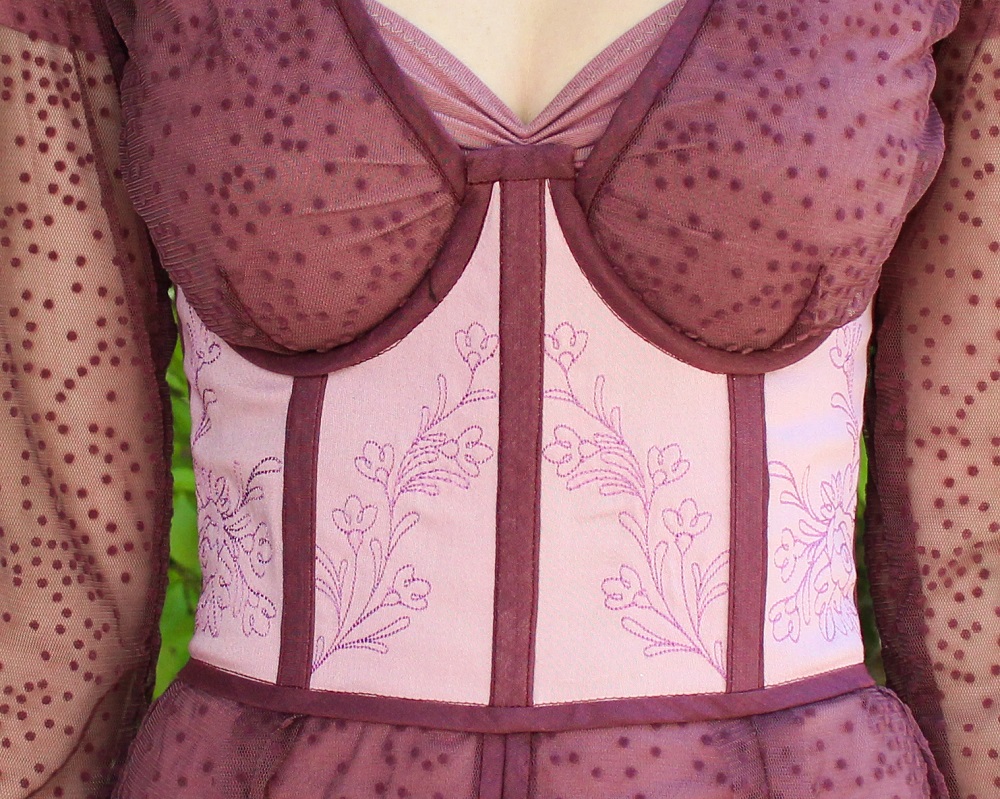
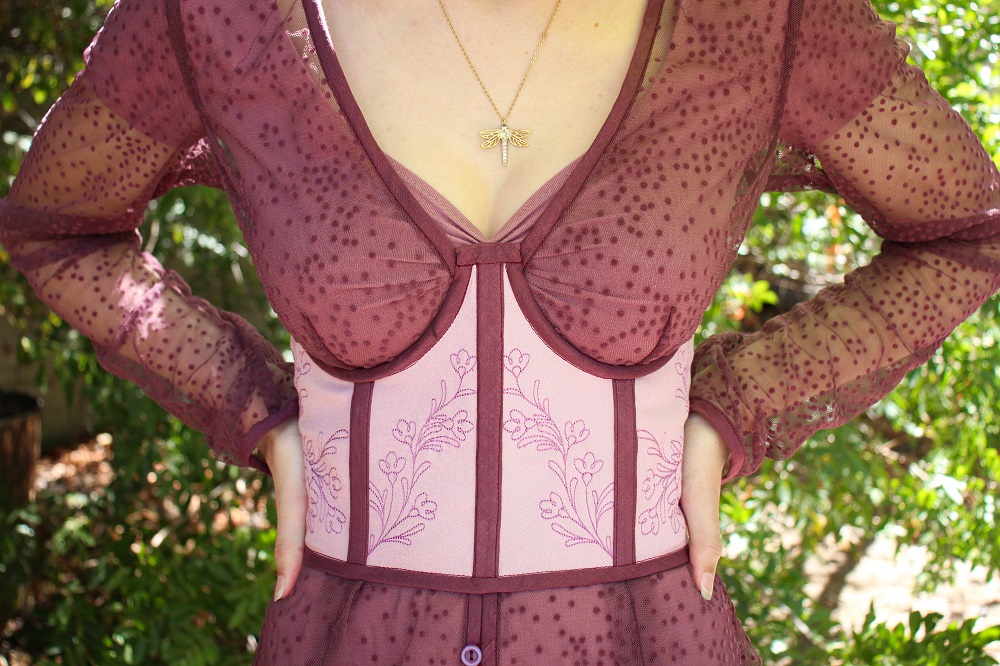
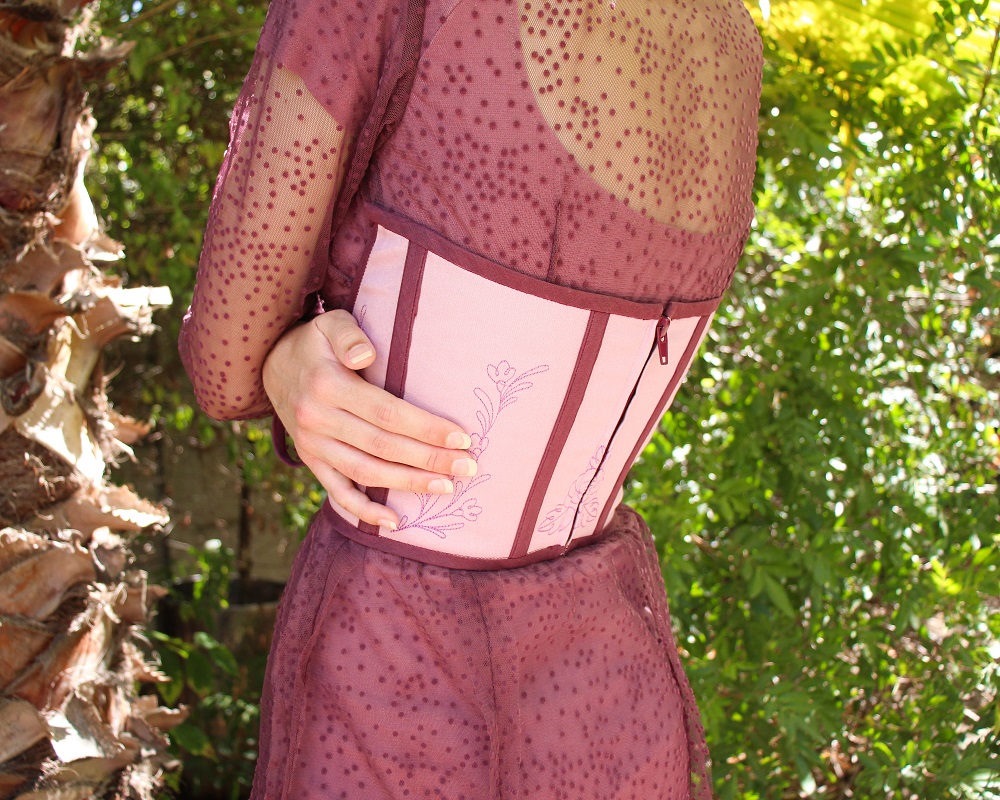
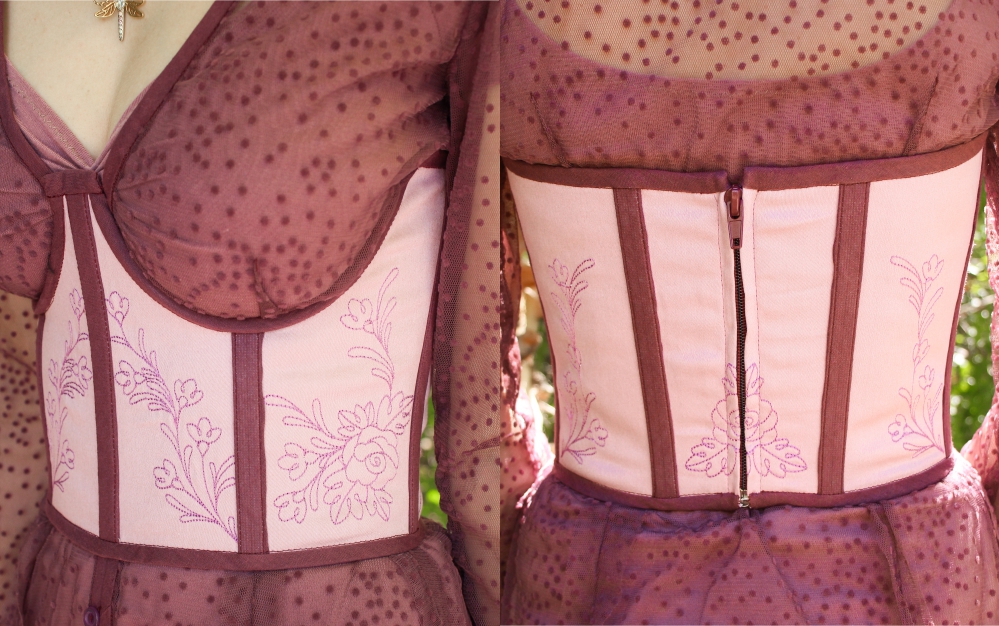
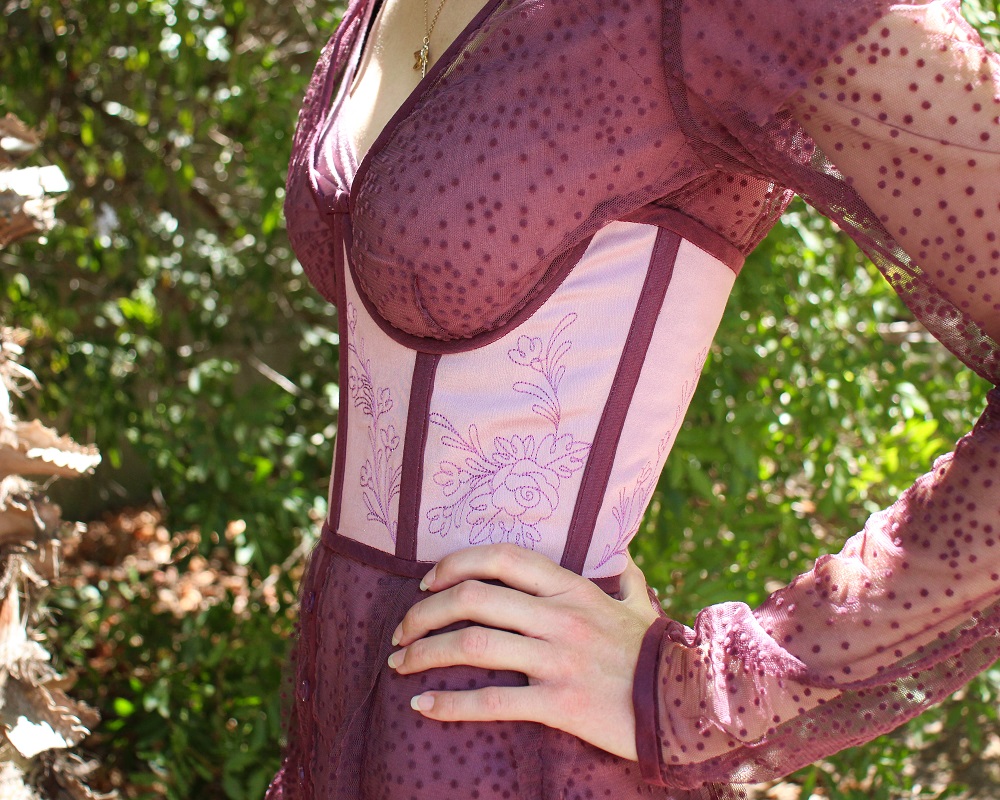
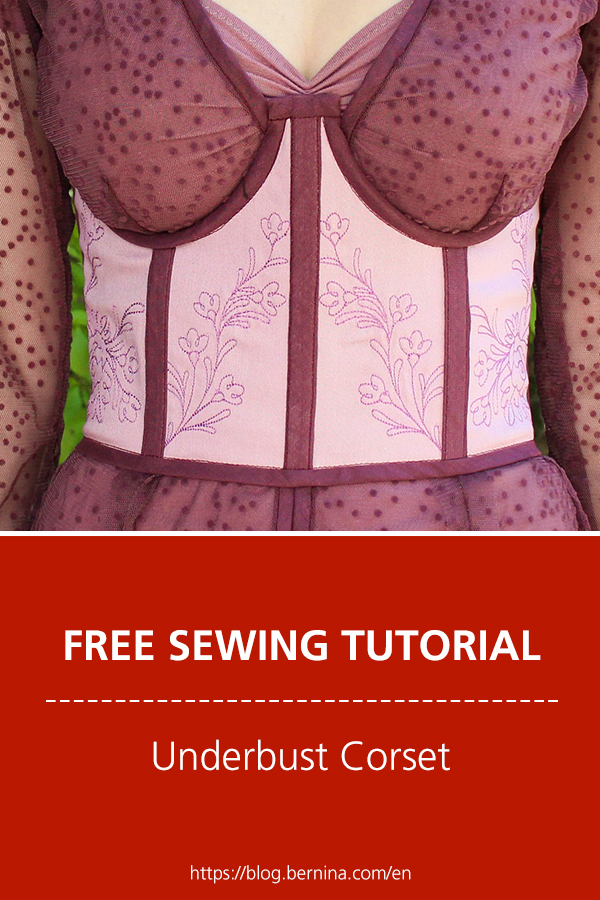
There was a premier for the short film with a fashion show and exhibition of the hard work we all put into this project. I of course made my outfit! Below I share the steps for how I made my underbust corset. To learn how I created the embroidery, check this blog post: Custom embroidery designs for an underbust corset
What will be needed:
- Sewing machine 735
- Underbust or Cupped Overbust Corset/Bustier Pattern (refer below for free patterns)
- Fabric for the corset*
- Optional lining for the corset*
- Thread to match fabric
- Pair of Underwires
- Boning*
- Bias Binding*
- Open ended Zip*
- Zip foot #4
*Quantities/lengths will depend on your patterns
Patterns
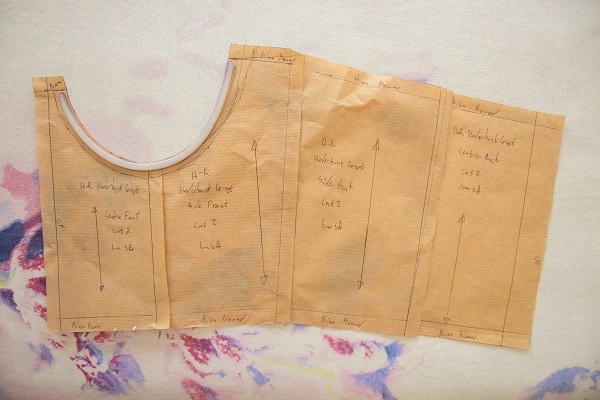 The steps I am going to share in this blog post are for an Underbust/Cupless Corset that has a centre back zip closure. I used a self-drafted corset pattern. There are many tutorials available on youtube if you want to have a go.
If you have a pattern for a Cupped Overbust Corset, you can leave out the cups to achieve the same look.
Here are some free patterns to download: Free Corset Patterns
Here is some helpful information about adapting patterns as well as fabric choices: Helpful info
Steps
Binding the seams & inserting Boning
These are the steps I followed as my pattern was self-drafted. There is no one way to sew this type of garment, this is just my preference based on practice and what I find is best for working with thick fabric.
I would recommend referring to your pattern’s instructions for seam allowances and any other pertinent information.
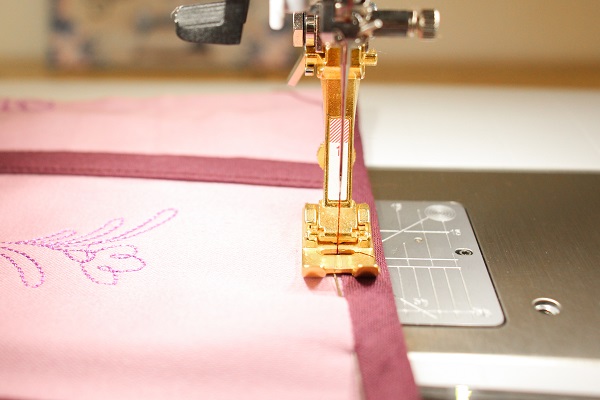
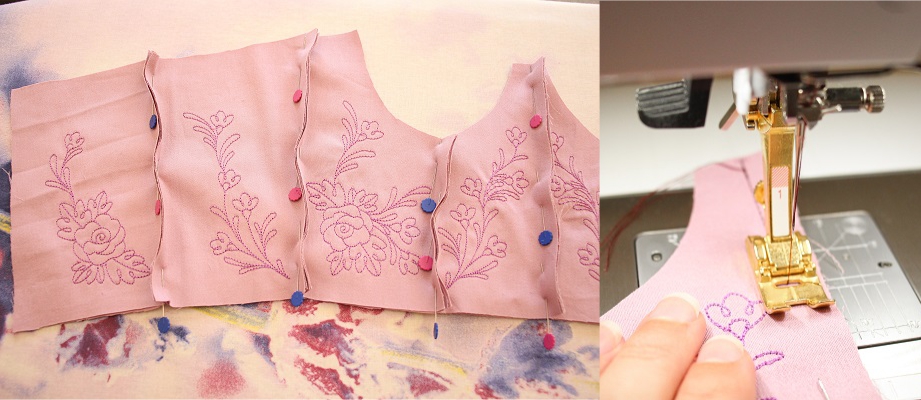 I joined all the panels with a 1cm seam allowance. I did not sew the lining separately as my seams will be bias bound to form a channel for the boning, therefore could be sewn together. The seams are also on the outside as I want the bias binding to be a feature.
 Cut the bias binding to the length of the seam.
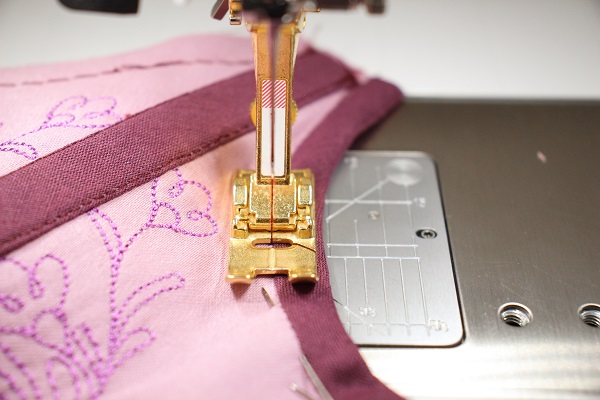
Pin the fold line along the stiches and sew along the fold line.
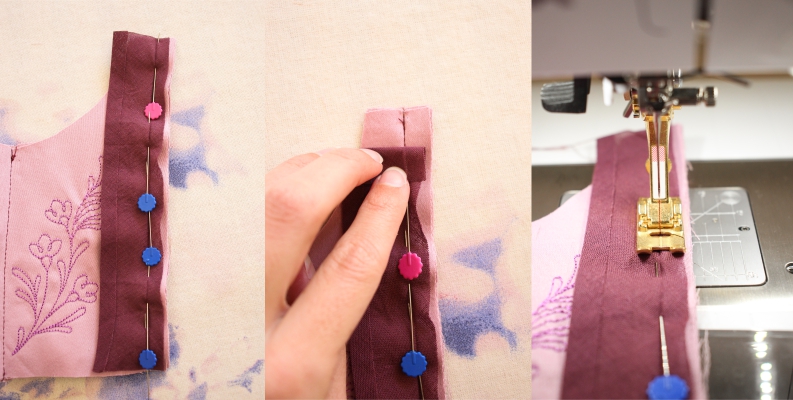
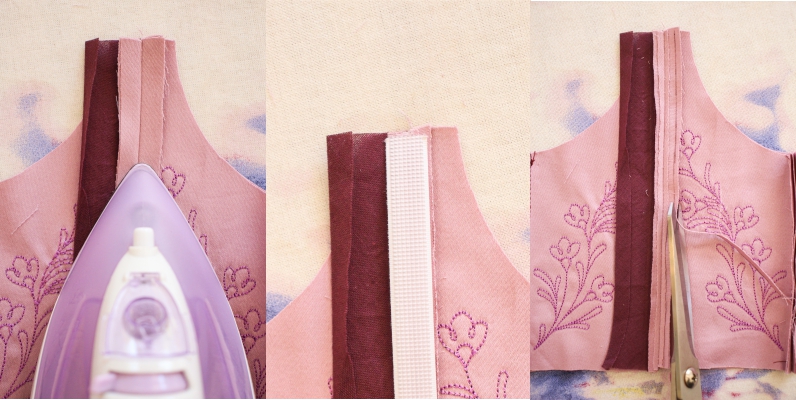 Iron the seam open and trim it down.
Make the open seam the same width as the boning.
 Cut the boning the length of the seam,
Place the boning on top of the seam, lining the edges up with the seam allowance.
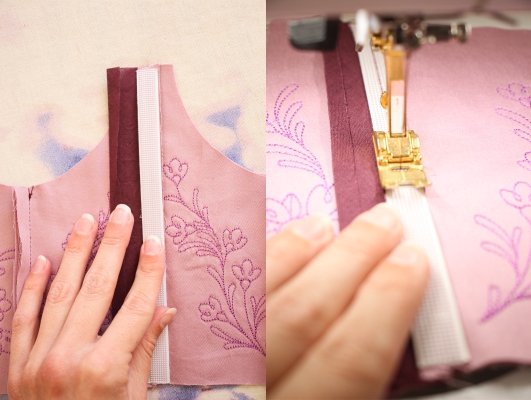
Baste along the centre. Sew carefully between the plastic pieces.
 Fold the binding over the boning and topstitch just in from the edge.
Fold the other end under the boning and seam allowance and topstitch.
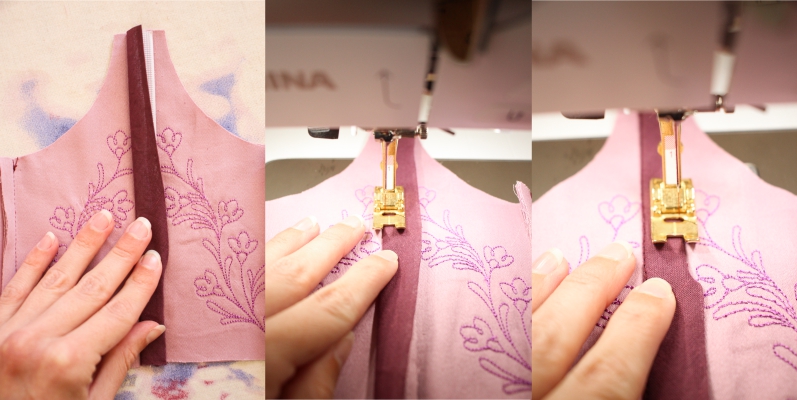
Repeat for all the boned seams.
Binding the cups
 Attach the bias binding to each cup section.
Gently pull the binding as you sew around the curve.
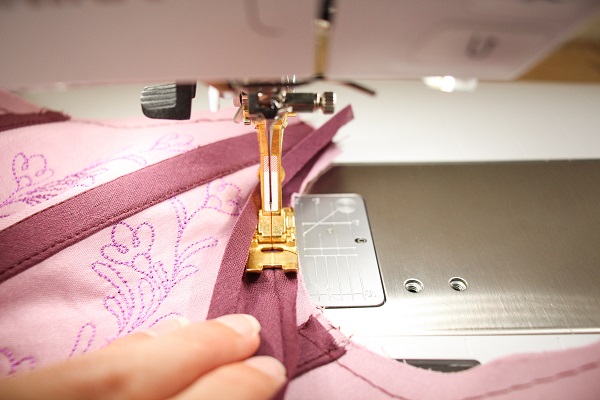
 Fold the binding over the raw edge and pin in place.
The binding must be a bit longer on the underside so that it will be caught when sewn.
 Stitch in the ditch from the right-side to secure the length of the binding.
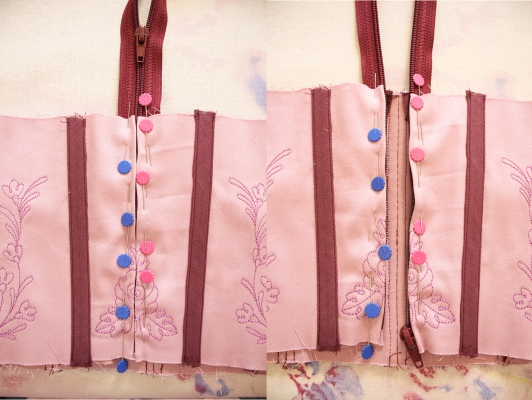
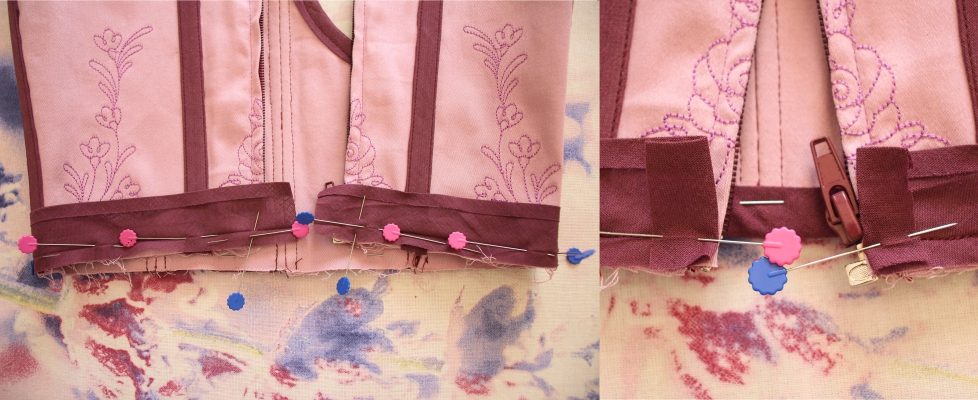
Open ended Zip Closure
I used a 1.5cm seam allowance for creating a concealed zip closure. It was perfect for the width of my zip (3cm)
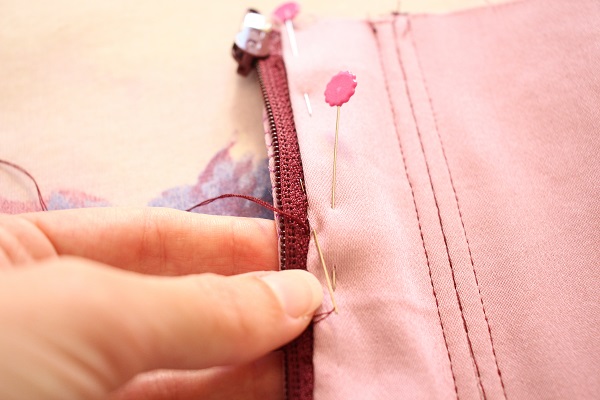
 Pin the zip to the Centre Back seam. Only pin it to the outer fabric, not the lining.
Place the zip face down and line up the base of the zip with the bottom edge of the seam.
Line up the edge of the zip tape with the raw edge of the seam.
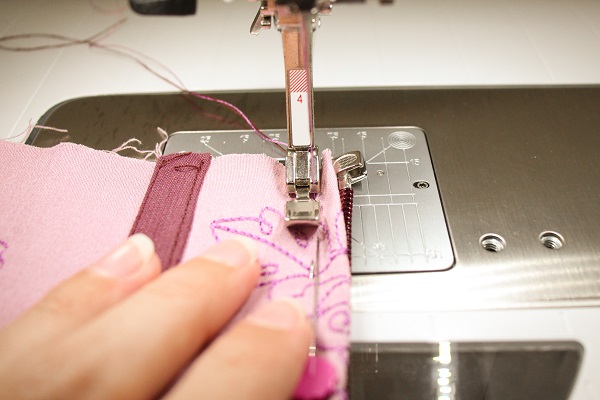
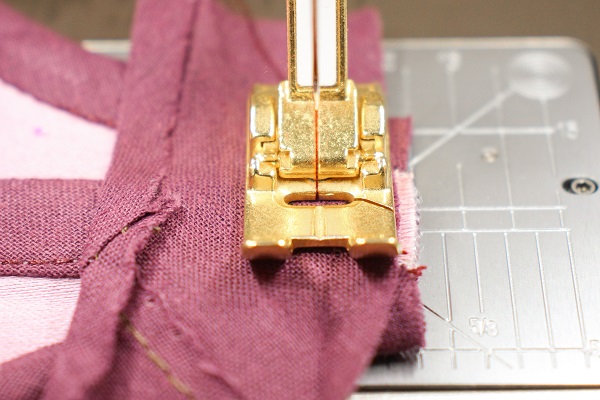
 Stitch as close as you can to the zip teeth.
I started with the zip side that has the big metal piece at the bottom. I stitched as close to it as possible and continued the same distance all the way along the zip.
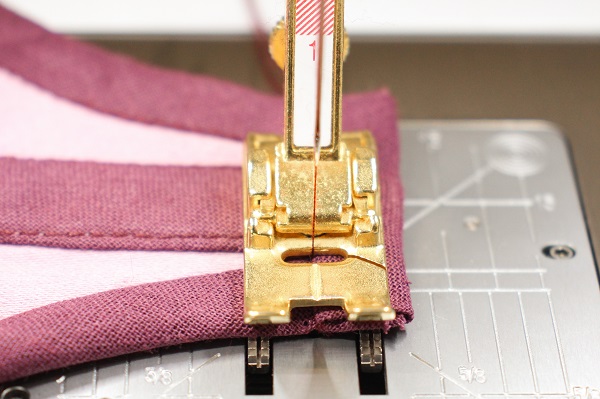
 Fold the fabric back in line with the zip teeth. The aim is to conceal the zip.
 Topstitch the fold.
 On the underside, fold in the lining’s seam allowance and pin in place.
 Slip stitch to secure the Lining to the zip tape.
Binding the edges, inserting the Underwire & shortening the Zip
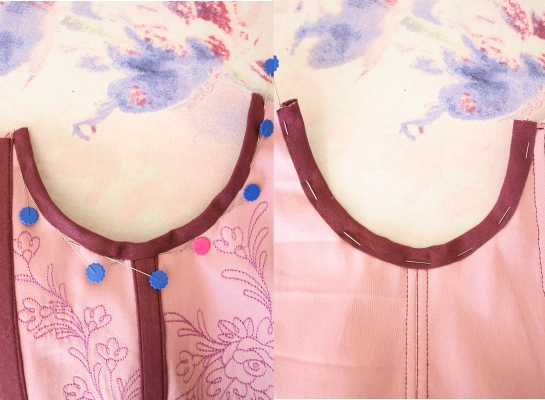
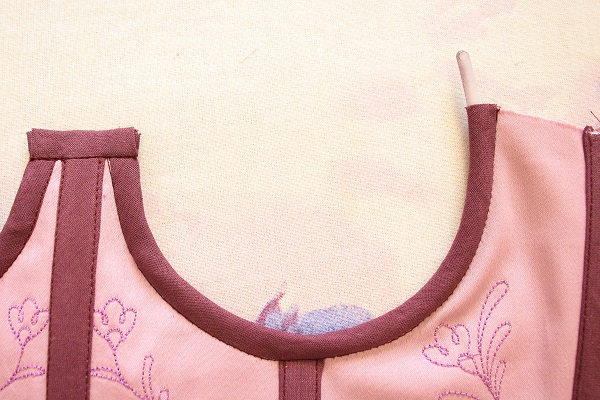
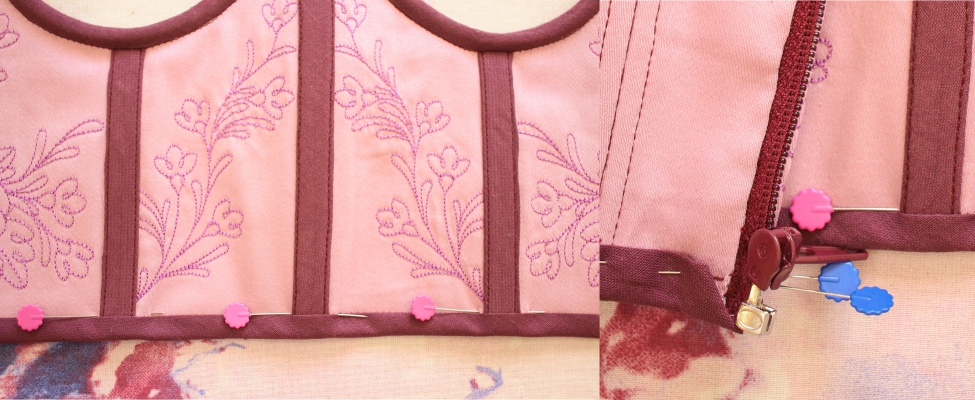
Top edge
 Pin a piece of bias binding to the part between the cups.
 Sew it in place.
 Fold the ends in and fold the binding over the raw edge.
 Stitch in the ditch to secure it.
 Insert the underwire.
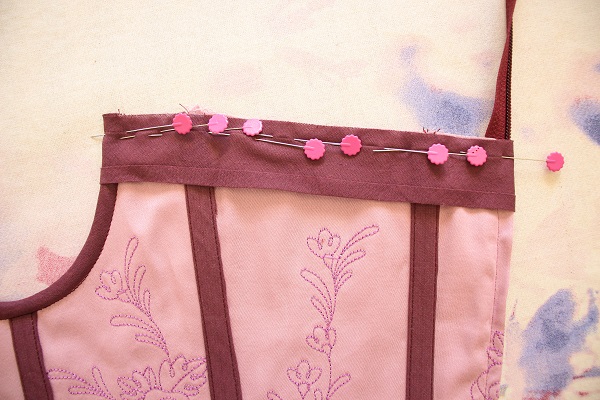 Pin the binding along the top edge of the corset.
Fold the ends over.
Ensure the underwire is out of the way by pushing it as close as possible to the corset centre.
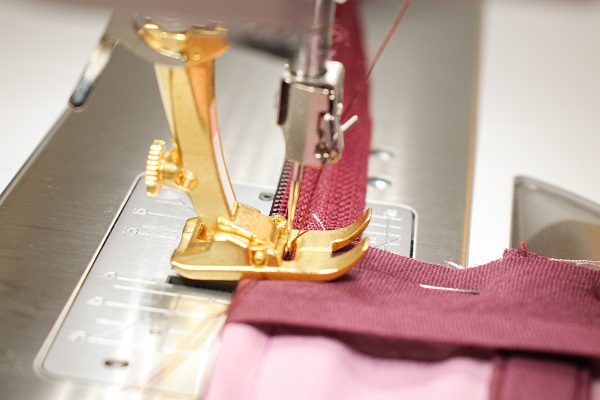 Do not sew through the zip teeth. Start stitching just in from the teeth.
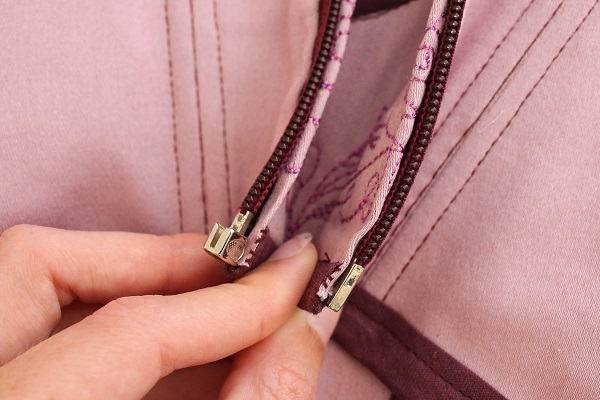
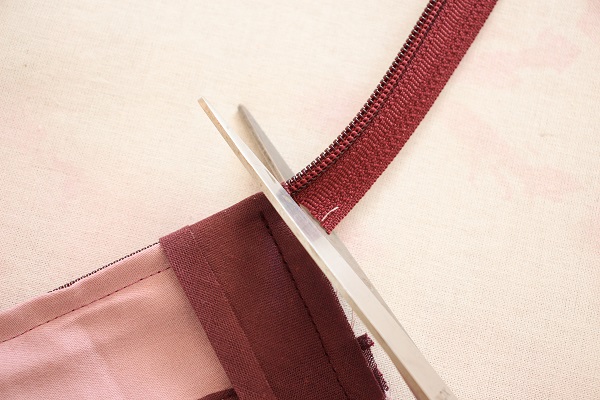 Cut the excess of the zip.
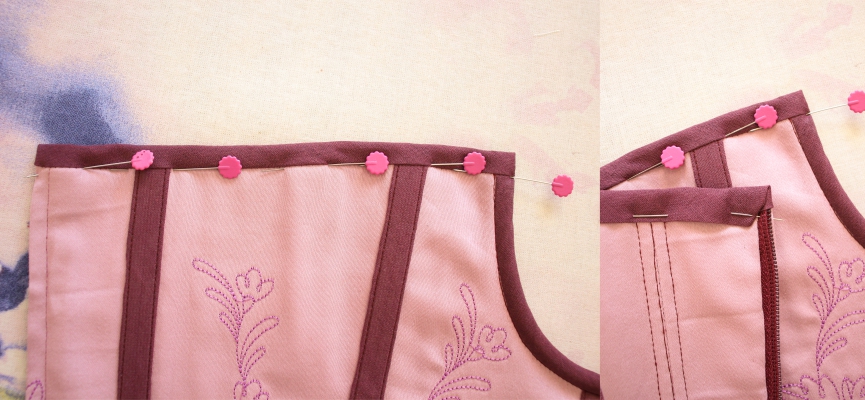 Fold the ends in and fold the binding over the raw edge.
If possible, angle the fold of the ends by the zip to prevent it from getting caught in the zip.
 Stitch in the ditch to secure it.
Once again, do not sew through the zip teeth.
Bottom edge
 Sew the binding along the bottom edge of the corset, then fold the ends in, lining them up with the fabric fold.
Do not sew through the zip teeth or metal bits. Start stitching just in from the metal bits.
 Fold the ends in and fold the binding over the raw edge.
If possible, angle the fold of the ends by the zip to prevent it from getting caught in the zip.
Stitch in the ditch to secure it. Once again, do not sew through the metal bits.
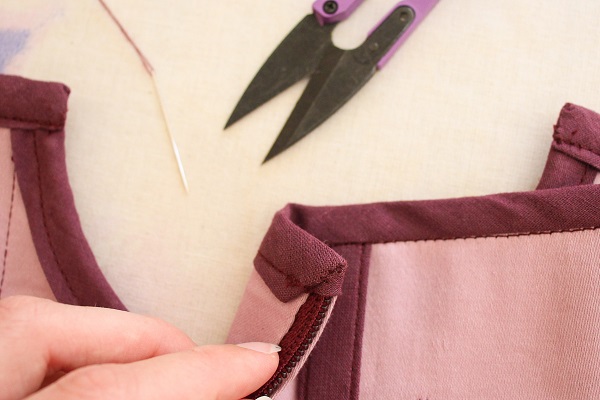 Hand stitch all ends of the bound edges closed.
 Secure the binding to the fabric at the base of the zip.
You can add some fabric glue to prevent the fabric from fraying, just don’t get any on the zip.
Tips
I would love to see what you make, please feel free to share with me!
Instagram
Facebook
-Hannah-Rose
All rights of the patterns to the respective owners/creators/distributors.


Hi HannahRose, I like all of your blog posts, but this one really stands out! A great project and very well done, but I guess you know yourself :-). It is a joy to look at your pictures and read your instructuctions.
Hi Doris
Thank you so much, your message means a lot!
I always put a lot of work in to my blog posts, so it is wonderful to hear that they are well received.