 BERNINA Corporate Blog -
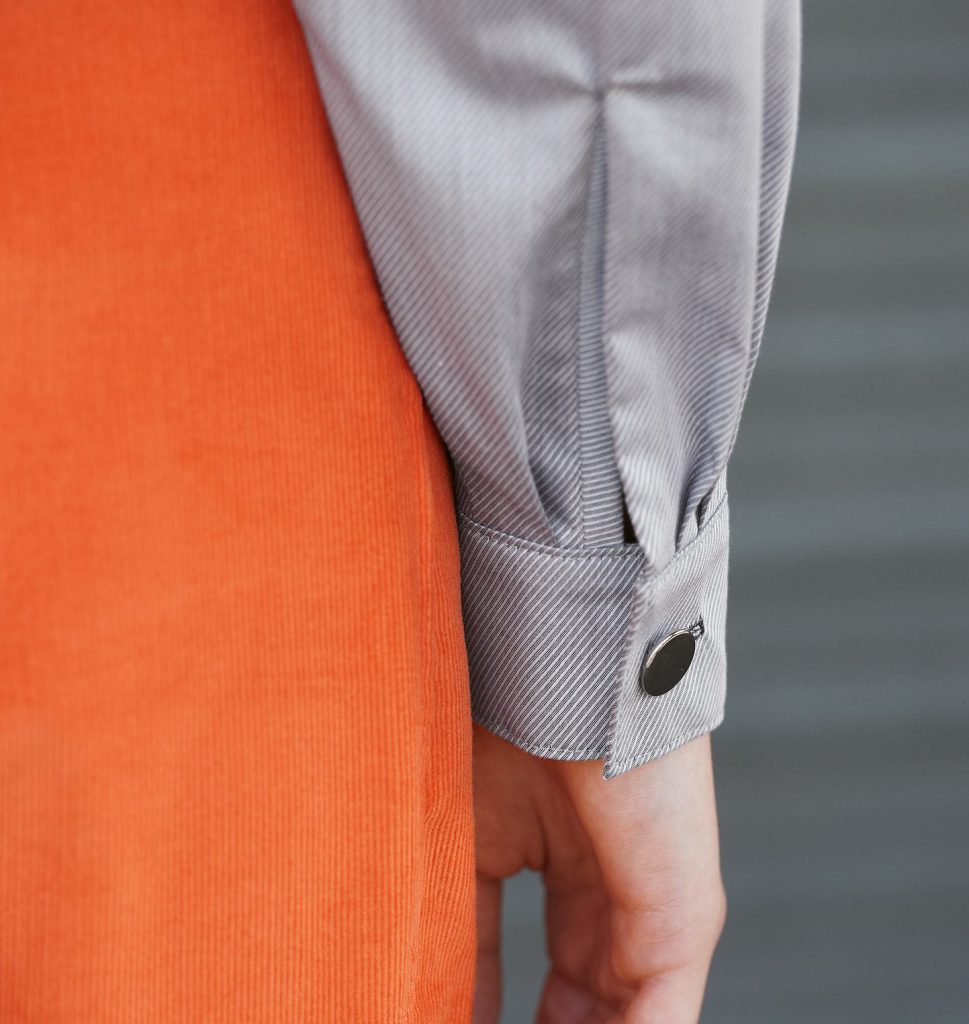
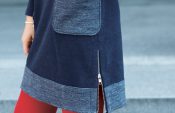
Today, we show you the easiest method of sewing a sleeve slit.
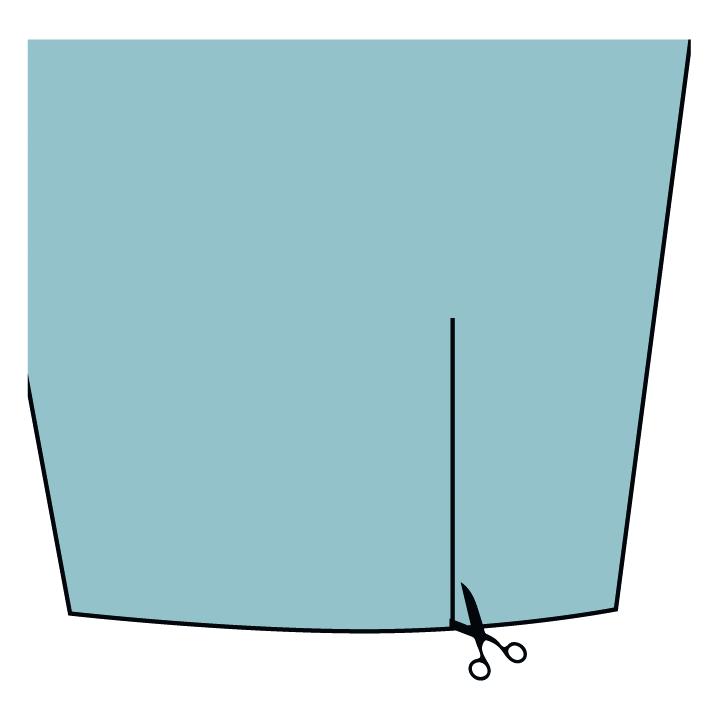
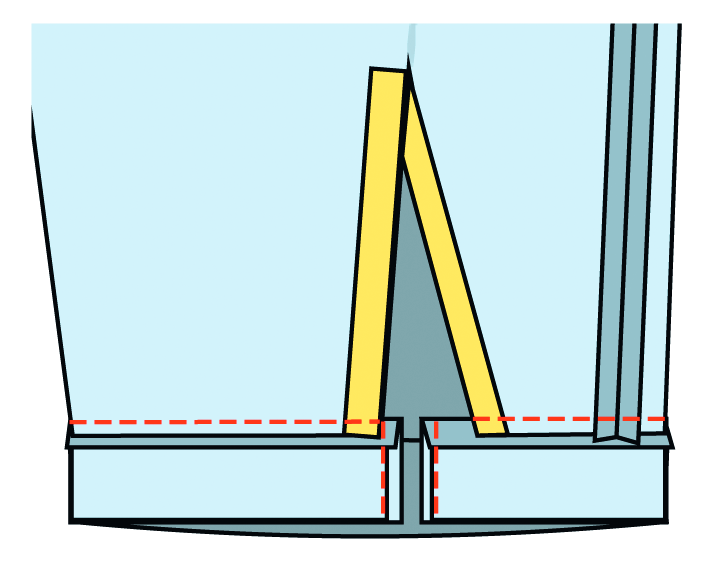
In the illustrations the darker side is the right side of the fabric.
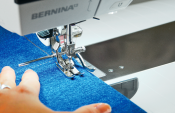
Sewing a sleeve ‒ Instructions
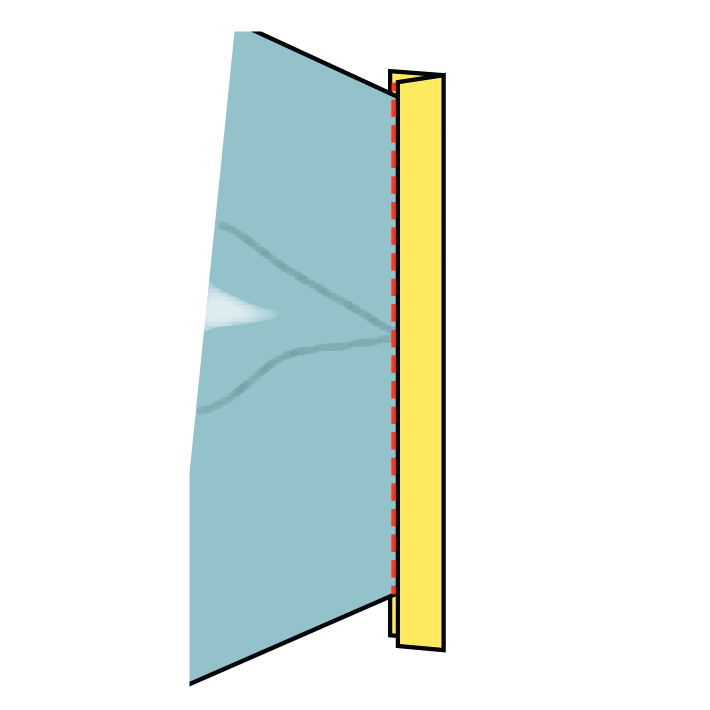
- Cut the slit open at the marking. The illustrations show the right sleeve.
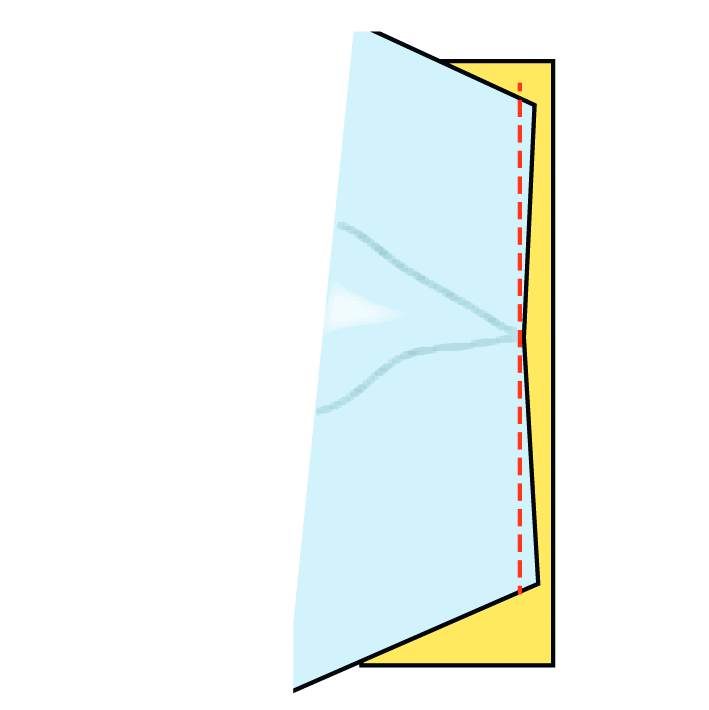
- Place a bias strip (yellow), slightly longer than twice the length of the slit, right side on right side under the turned up slit. Sew parallel to the bias strip edge, making sure that the seam at the top slit end just hits the sleeve.
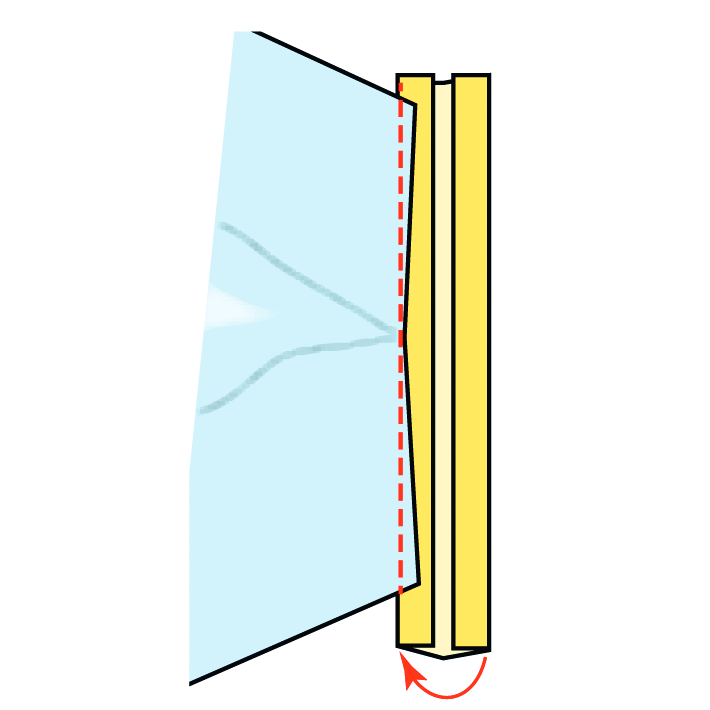
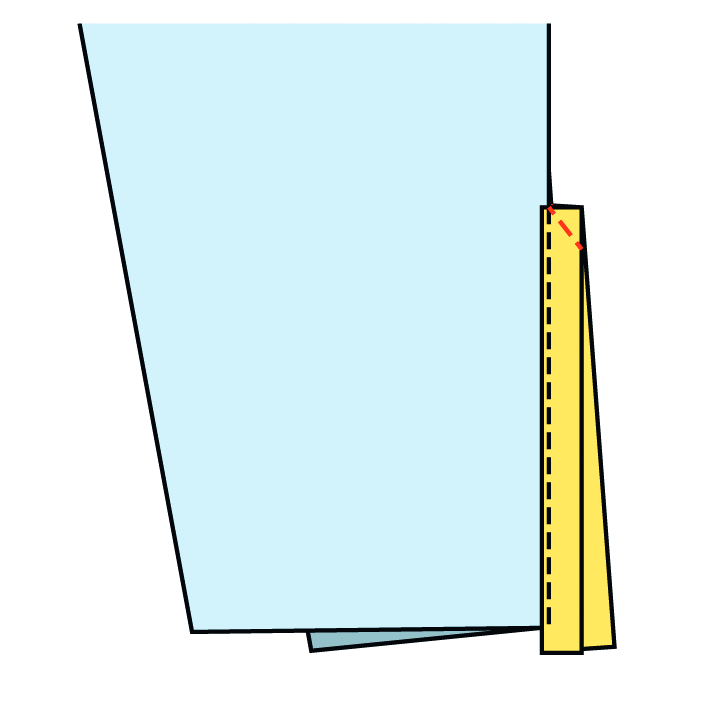
- Place the allowances in the bias strip, fold in the opposite allowance of the bias strip, then turn it up again along the fold.
- Stitch on the loose edge from the right side of the fabric in the seam shadow.
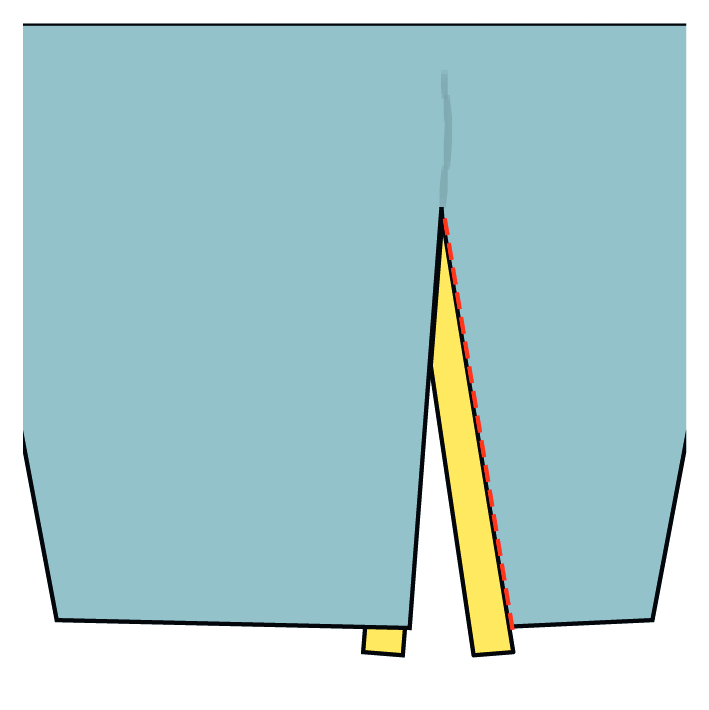
- Place the slit edges right side on right side on top of each other and topstitch the upper corner of the bias strip diagonally.
- Fold the bias strip inwards at the overlap (upper sleeve). Shorten the remaining strip. A very small pleat at the upper end of the slit is absolutely normal. Close the sleeve seam.
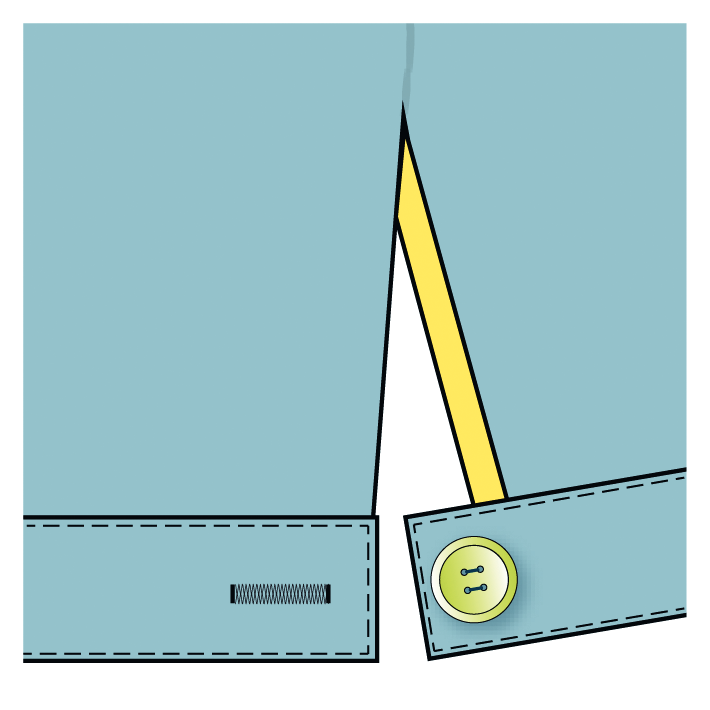
- Depending on the model, pleat or gather the lower edge of the sleeve or work it flat. Sew cuff reinforced with stabiliser right side on right side along the lower sleeve edge, so that it is flush at the overlap (in the illustration on the left side) and the extra length of the cuff runs over the underlap of the sleeve. Place the allowances in the cuff.
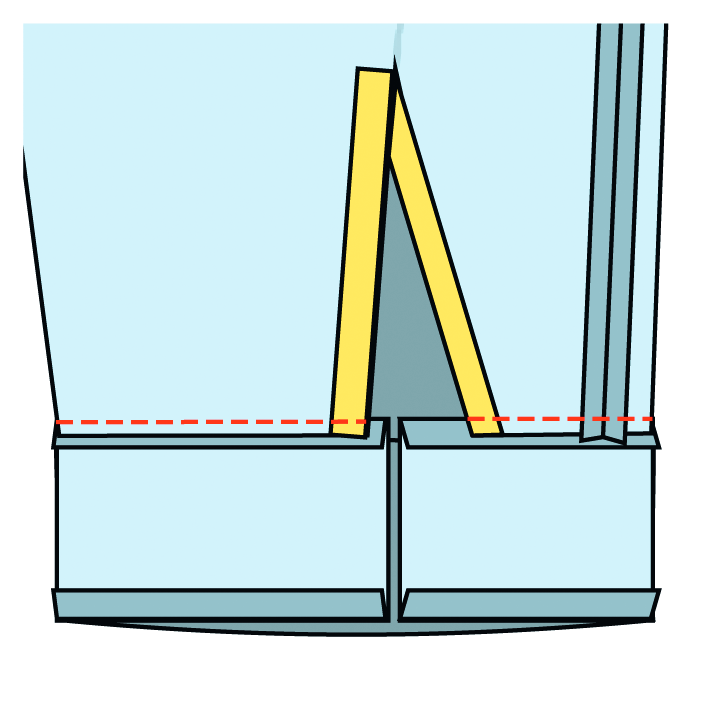
- Place the cuff along the fold right side on right side and close the narrow edges of the cuff.
- Turn the cuff over. Pin the loose cuff edge and topstitch from the right in the seam shadow or topstitch the cuff all around. Add the buttonhole and sew on the button.
Additional BERNINA tips for you
You may have noticed that we have already published a few blog posts with helpful tips. These tips are written for various BERNINA inspiration magazines.
Are you looking for a specific topic right now? You’ll find a lot of supporting content on this page. And if the topic you’re looking for isn’t listed yet, check back regularly for the latest tips.
If you have any other useful tricks, feel free to share them below in the comments. Let’s take your sewing experience to the next level! 🙂
Creative regards,
Jasmin


Exellent instrution. I am seventy years young and always read sewingtips. Thanks.
Very informative in sewing the slit for a arm sleeve opening with a button closer.