 BERNINA Corporate Blog -
Choosing the right stabilizer
With my blog post today, I want to focus on the subject of embroidery. As you know, for decades BERNINA has been developing high-quality embroidery and sewing machines, along with accessories that help us create wonderful embroidery designs in no time at all. However, truth be told: we’ve all been annoyed when an embroidery design has bunched up the fabric, when the border line has shifted or, worse still, when a hole has formed in the material. In any case, this has certainly happened to me before. Such problems often come down to the stabilizer. Therefore, in today’s article, I am addressing the question: which stabilizer for which material? In addition to a short material tutorial, this article contains the four most important tips for achieving a good embroidery result.
BERNINA has decided to label 2023 the “year of embroidery”. This article is the first in a whole series about embroidery. I start by selecting the right embroidery stabilizer, as this is crucial for a good embroidery result. In the truest sense of the word, it forms the basis that gives the fabric stability during and after embroidery, to prevent it from contracting or expanding.
Here are the 4 ultimate tips for a good embroidery result:
1. Pay attention to quality
Not all stabilizers are made equal. There are huge differences in quality, which are of course also reflected in the price. Don’t be penny-wise and pound foolish! When I embroider something, it is usually a finished garment or decorative project, which I may even have created with a great deal of care and attention, devoting a significant amount of time. In this case I like to invest in a high-quality stabilizer in order to achieve a good result.
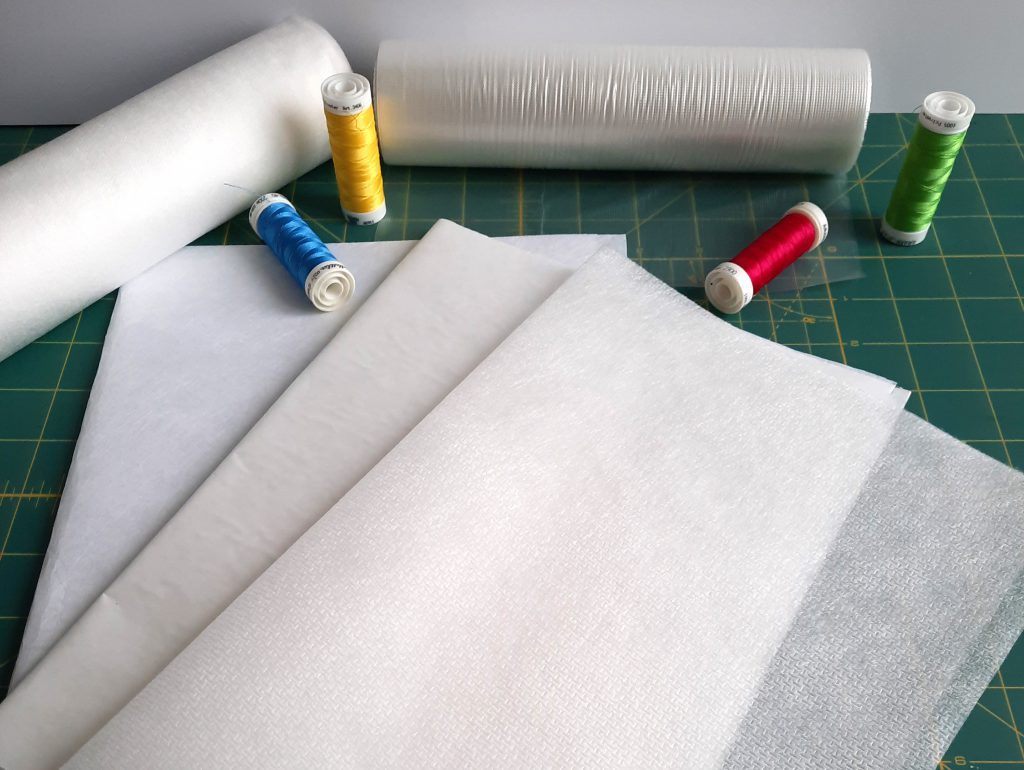
A high-quality embroidery stabilizer can be recognized by its even texture. Hold your stabilizer up to the light. Do you see irregularities? This will in turn result in irregularities in the embroidered image.
Your stabilizer should also be equally thick in all directions. For example, with a tear-away stabilizer, this means that it can be torn in all directions. It then won’t matter in which direction the stabilizer is hooped; it will not expand in any direction.
2. Which stabilizer for which purpose? Make the right choice
Available stabilizer types include tear-away, cut-away, iron-on… there are many possibilities. But which stabilizer is suitable for which purpose? Are there any ground rules? Yes, there are!
- The fabric determines the type of embroidery stabilizer to be used
- The embroidery design determines the number of layers
A distinction is made between the following three basic types of stabilizer: cut-away, tear-away, and wash-away. In addition, there are special embroidery stabilizers that support the embroidery process.
Cut-away embroidery stabilizer
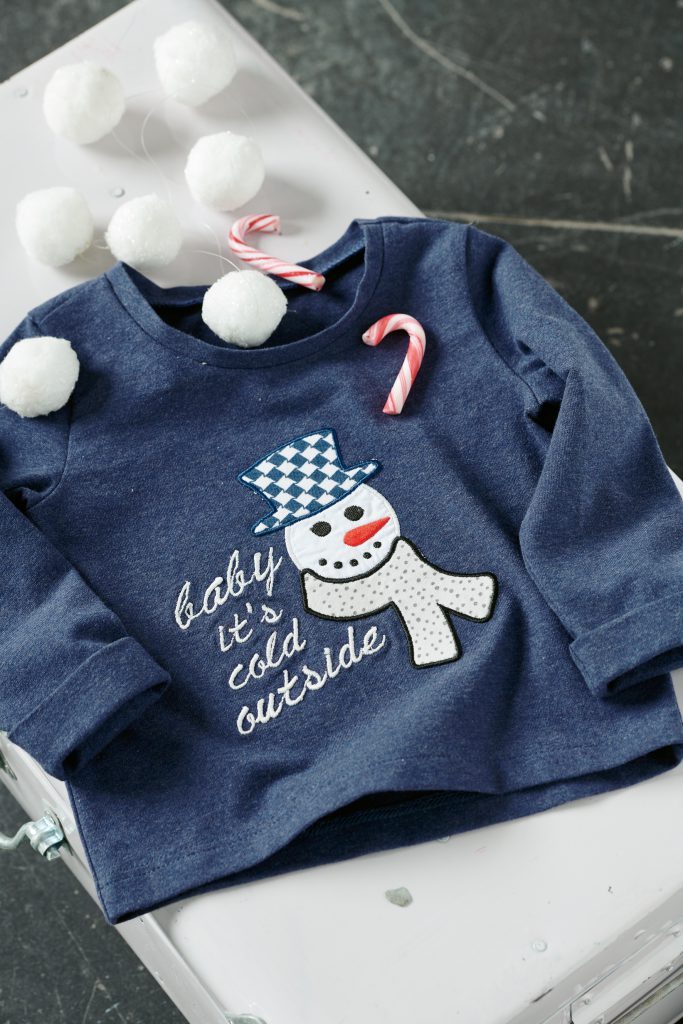
You often hear or read the question: which stabilizer is suitable for jersey? The answer is: a cut-away stabilizer!
This embroidery stabilizer can be used for any fabric, but is essential for knitted and stretchy fabrics. Because the fabric is stretchy, the embroidery design would also expand during embroidery. A cut-away stabilizer holds the stitches in place and avoids distorting the embroidery. It is very stable and thus guarantees the best stitch quality, even with a high stitch density. The more elastic the fabric, the more sturdy the stabilizer must be.
In any case, a cut-away stabilizer is considered basic equipment. Some non-woven fabric manufacturers even offer different thicknesses or colors.
After embroidering, the stabilizer is cut away around the embroidery design. Be sure not to cut into the fabric or the embroidery design. Appliqué scissors may be helpful here.
Tear-away embroidery stabilizer
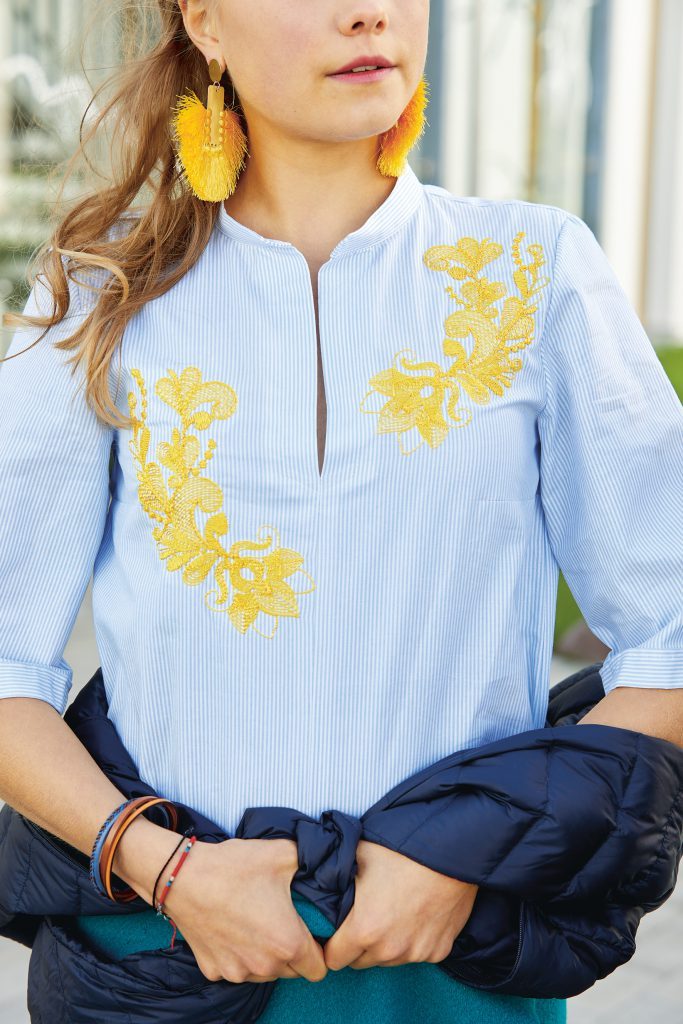
Which stabilizer is ideal for woven fabrics with no stretch or minimal stretch, which not require as much support, i.e. for fabrics such as jeans, cotton, linen, felt? The answer is: tear-away stabilizer.
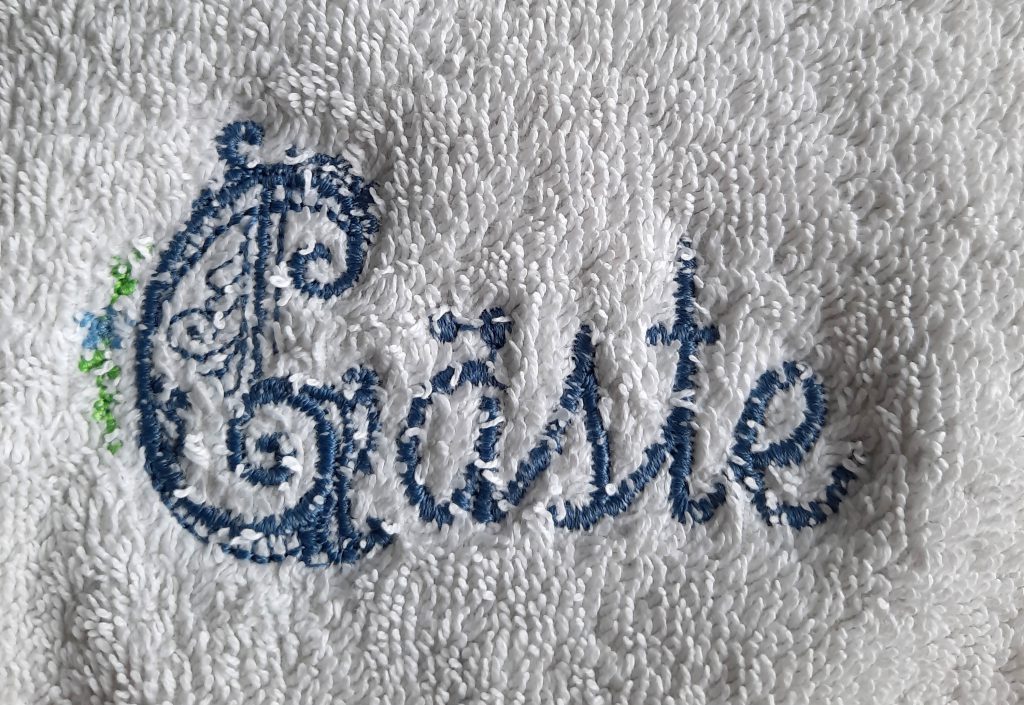
This stabilizer type can also be used successfully if the back of the fabric is visible, e.g. for towels, tablecloths, scarves. (a wash-away stabilizer can also be used, depending on the embroidery design.) I would also use a tear-away stabilizer for appliqué work with fewer stitches.
However, you may be asking: what if my fabric is stretchy? It is then important to decide whether a tear-away stabilizer is sufficient for the embroidery design. If the embroidery design does not have too many stitches, it may be sufficient. Otherwise, you should choose a more stable, cut-away stabilizer.
After the embroidery process, the stabilizer is removed. Hold the fabric with one hand and carefully tear away the stabilizer with the other. If multiple layers have been used, remove one layer at a time.

Wash-away embroidery stabilizer
Wash-away stabilizer completely dissolves in water. Of course, this means that the selected fabric must be at least hand-washable. The advantage here is that there is no visible stabilizer residue left behind. A stabilizer that can be washed away is particularly suitable for fabrics such as organza or tulle.
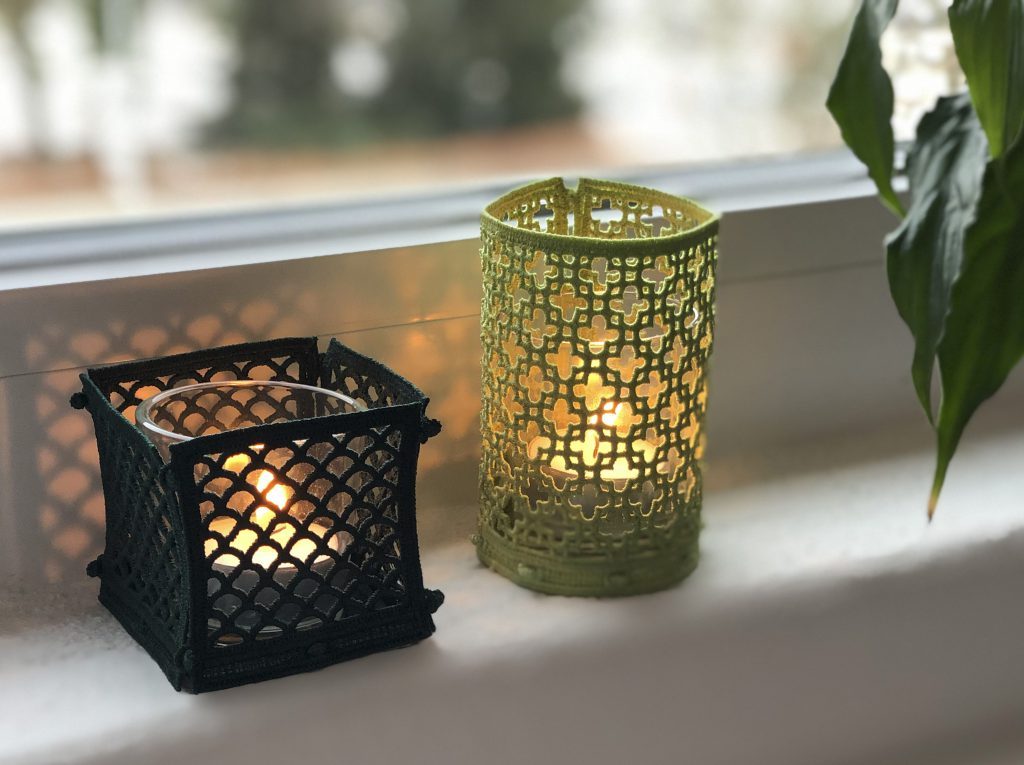
This type of stabilizer is also used to embroider freestanding designs and does not require any fabric at all, as seen here in the tea light holders:
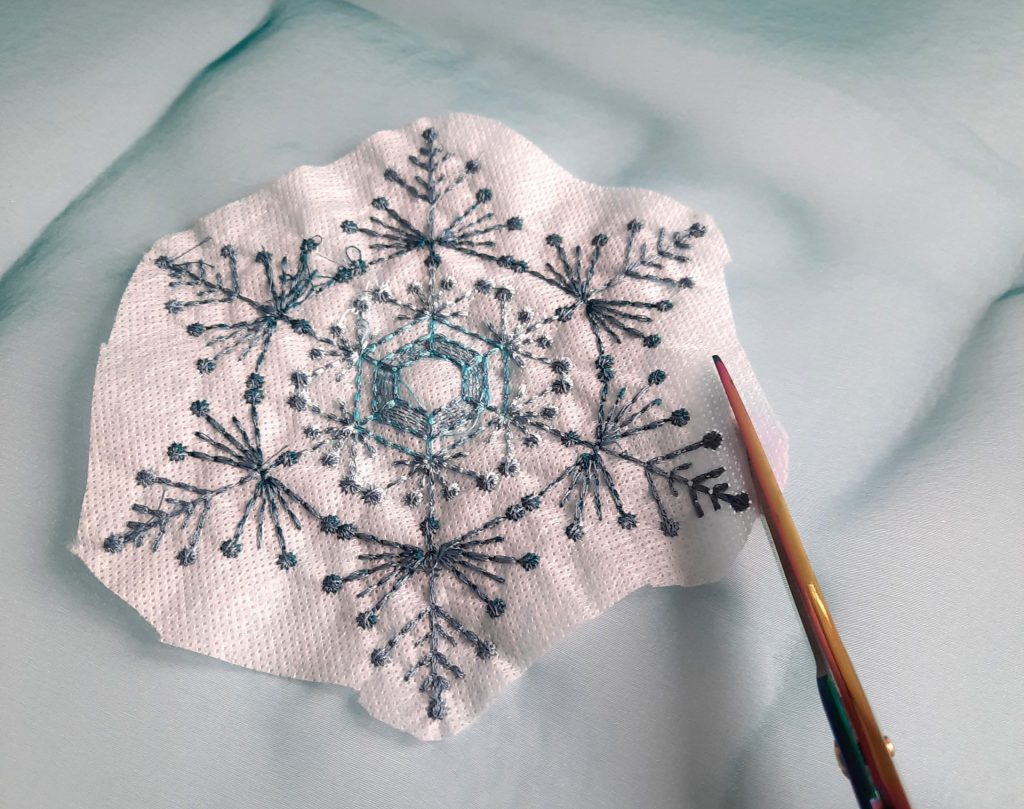
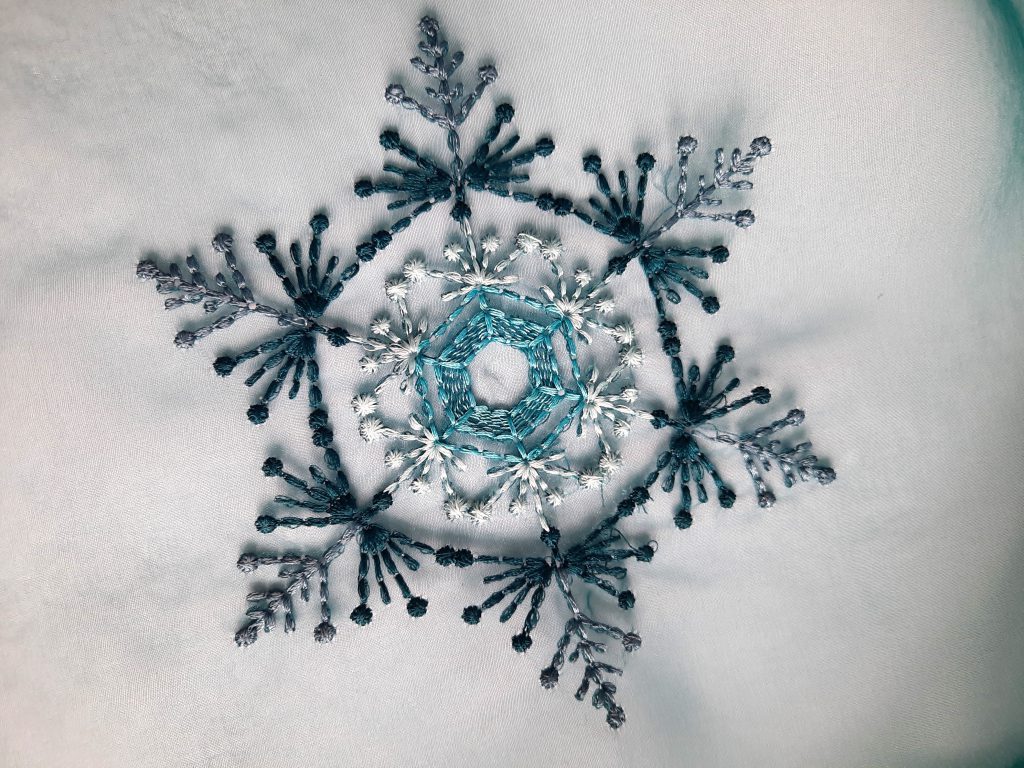
Or embroidered snowflakes on organza:
Which stabilizer should be used for terry cloth or fleece? In these cases, wash-away stabilizer is again the right choice.
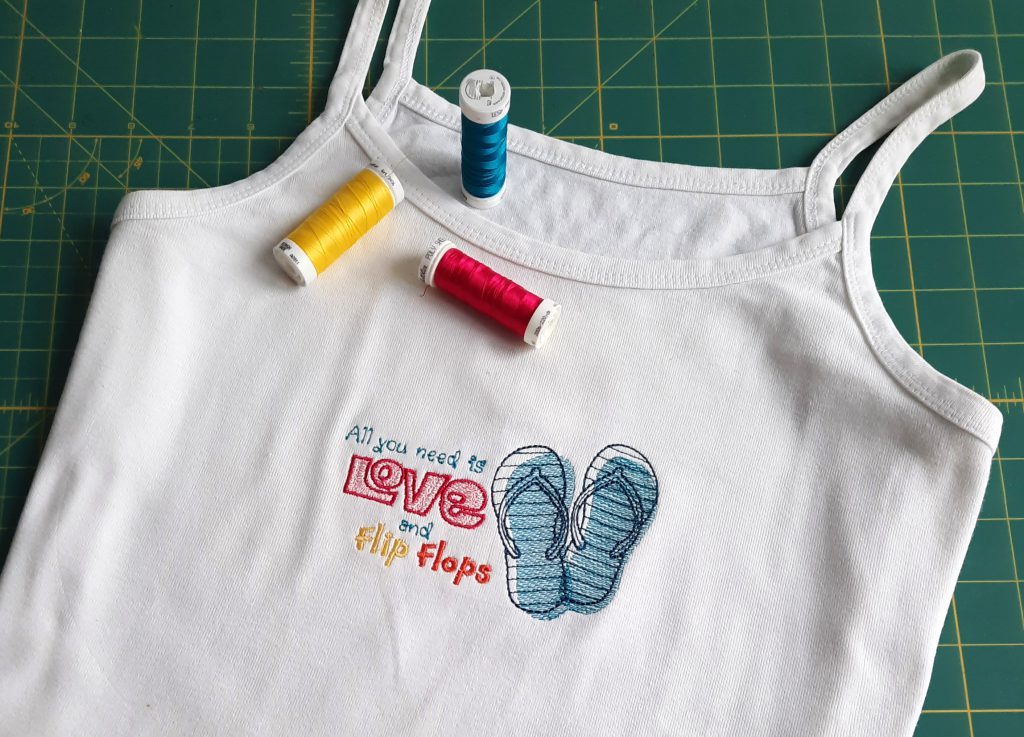
Wash-away embroidery stabilizers can be used on any fluffy, pile or textured fabrics (terry cloth, fleece, chunky knits…). They are used on top of the fabric, i.e. as a so-called topping. This prevents the stitches from sinking into the fabric. Instead, they remain smooth and even on the fabric.
Which stabilizer you use as a backing will to some extent depend on whether the bottom side of the project is also visible, for example when working with a towel: in this case I would also use a wash-away stabilizer as a base, otherwise a tear-away or cut-away stabilizer can also be used.
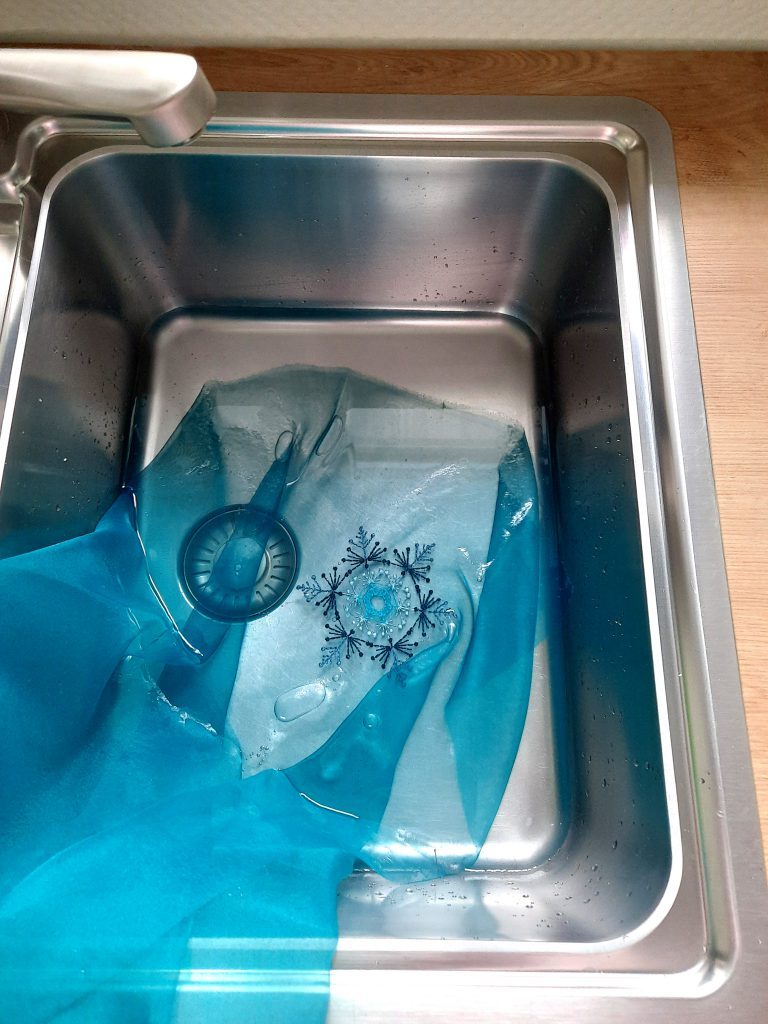
Wash-away stabilizer can be rinsed off under lukewarm water. A little tip from me: first cut away the excess stabilizer and place the project in a container of lukewarm water. This way you won’t have to rinse it as long. Then allow it to dry. If you notice that it is still too stiff after drying, repeat the washing process. With my tealight holders, I deliberately wanted to retain some strength, so I just washed them out once.
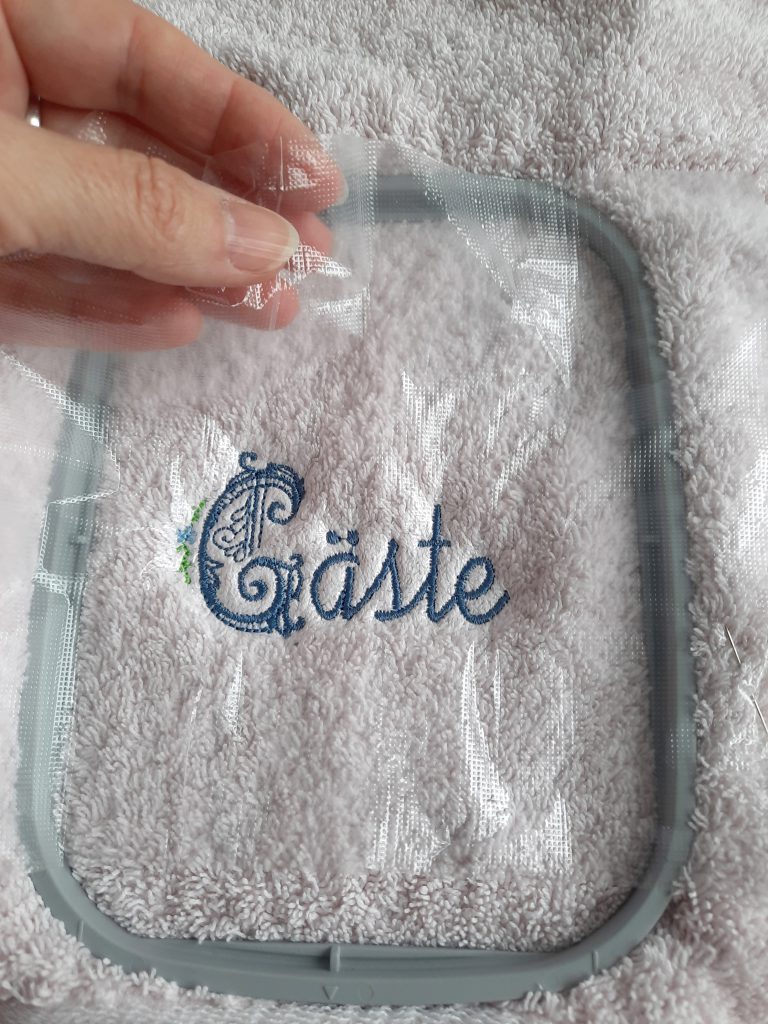
Result with topping:
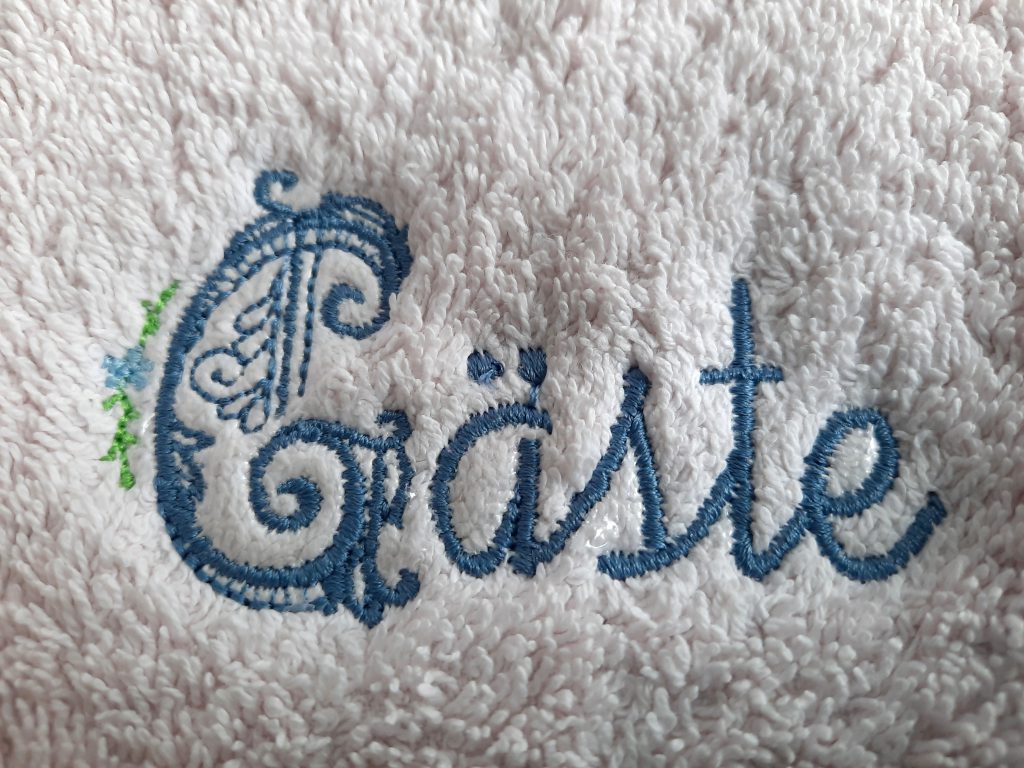
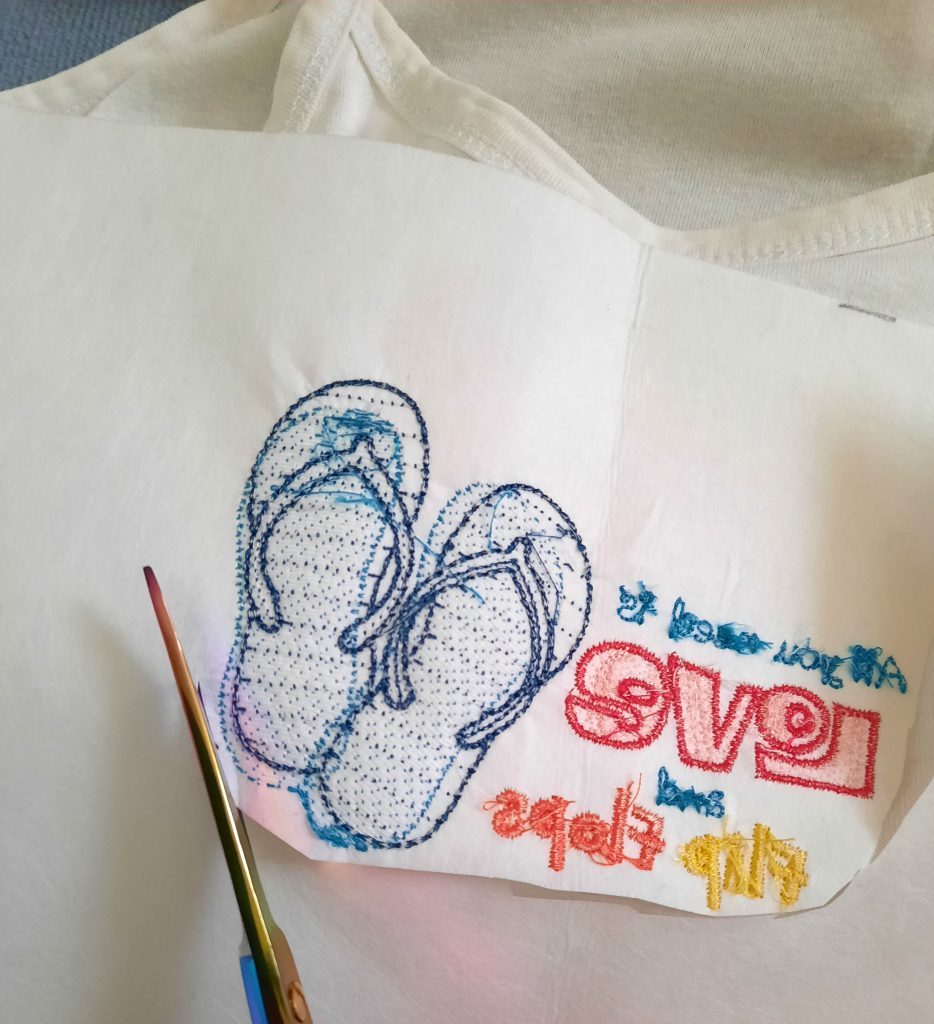
Result without topping:
Adhesive stabilizer
Who hasn’t experienced it? Simply hoop the adhesive stabilizer, remove the film, place the fabric on top and embroider.
I am not a fan of this product, for the following reasons: adhesive residue adheres to the needle due to the constant up and down motion of the needle. And, even worse, residues also end up in the hook area, which in some cases cannot be so easily cleaned. This in turn affects the embroidery result.
In addition, it is always an advantage to hoop the fabric together with the stabilizer, which gives you more stability and more precise embroidery.
But of course, that is also matter of preference. There are actually areas of application where adhesive stabilizer is of advantage, e.g. for pockets on items of clothing, etc.
Adhesive stabilizer has a paper side and is hooped without fabric. The paper side is then carefully torn and the paper is pulled off. The fabric is now placed onto the adhesive surface and pressed down. The stabilizer is therefore suitable for any item that cannot be hooped. Afterwards, the excess stabilizer is torn off, cut away, or even washed off, depending on the type.
Tip
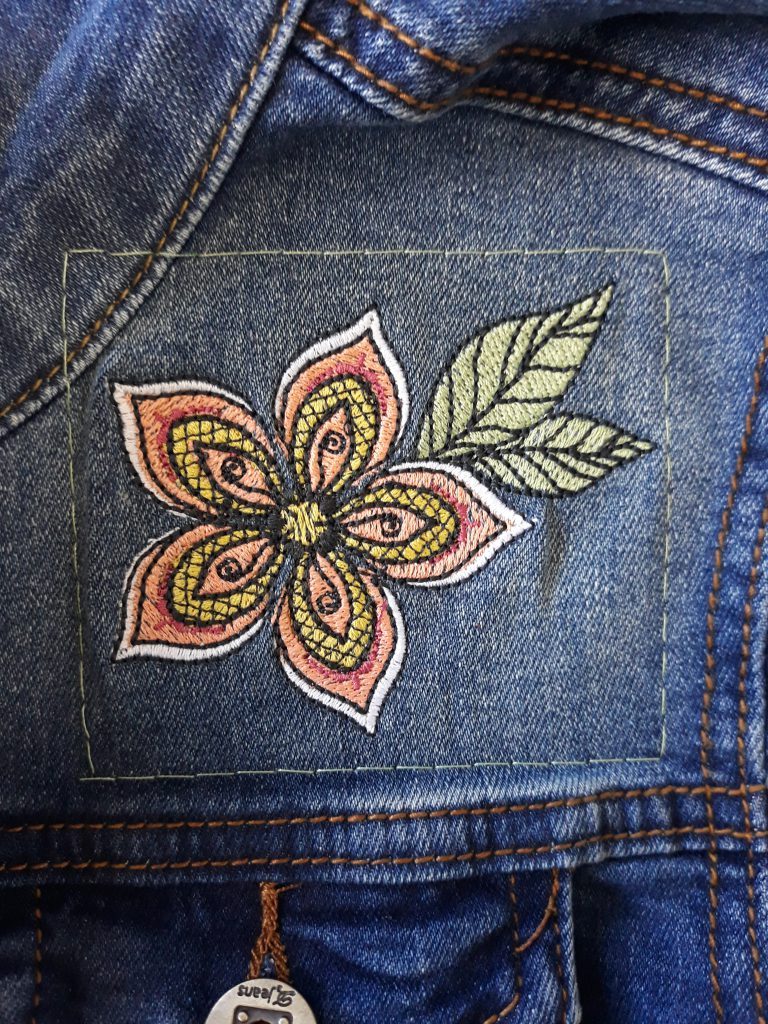
A basting stitch around the embroidery design will give it even greater stability.
Iron-on embroidery stabilizer
As the name suggests, this stabilizer is ironed directly onto the fabric. This means that the fabric must be ironable.
By ironing onto the fabric, it is secured in place and can be embroidered without slipping.
Since this stabilizer contains only a light layer of adhesive, it can be easily removed after embroidering.
Which stabilizer for which task – Overview Table
Which stabilizer for which material and application? To help you with this overview, I have summarized the information above in a table:
| Embroidery stabilizer | Area of application | Fabric / application |
| Cut-away stabilizer | Essential for: stretch fabrics Can be used for: non-stretch fabrics |
Jersey, sweat, knit, stretch fleece Appliqué with a high stitch density |
| Tear-away stabilizer | Non-stretch fabrics | Jeans, cotton, linen, felt, wool, silk Appliqué with a low stitch count |
| Wash-away stabilizer | Washable fabrics Projects where no stabilizer residue should be visible |
Organza, tulle, chiffon, free-standing embroidery designs |
| Topping | Fabrics with a textured or coarse surface |
Terry, fleece, plush, chunky knits, corduroy, boiled wool |
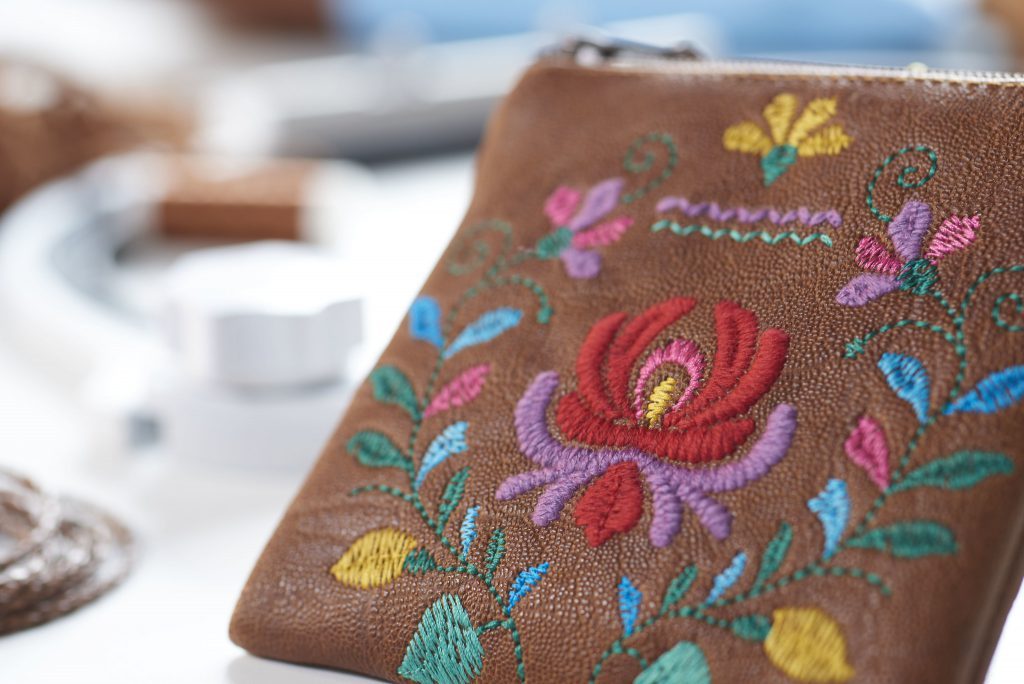
| Adhesive stabilizer | Fabrics or projects that cannot be hooped |
Leather, artificial leather, cork, velvet, velour, neoprene, fur, corduroy, collar corners, pockets, cuffs |
| Hydro embroidery stabilizer | Fabrics that can be dampened | Similar to adhesive stabilizer |
| Iron-on stabilizer | Fabrics that can be ironed | Appliqué |
3. Hoop the stabilizer – be sure to do it correctly
Simply place stabilizer beneath the fabric and hoop it in place? Best not! If possible, use a temporary spray adhesive to connect both layers together to form a single layer. This way, there will be much less shifting of the fabric. By the way, there are spray adhesives that do not contain CFCs! Always cut the stabilizer a little larger than the hoop size.
Spray only the stabilizer, never the fabric, and be economical with spray adhesive – otherwise the fabric may stain. Then stick the stabilizer underneath your fabric, being sure to avoid wrinkles. If you have several layers of stabilizer, spray them together as well. Another little tip: when spraying the stabilizer, put down a piece of packing paper, cardboard or the like, as slight residues will occur.
After embroidering, the spray adhesive will usually have evaporated and you can easily remove the stabilizer.
Work on a smooth surface, preferably on a table.
When hooping, make sure that everything is wrinkle-free and tight like the skin of a drum. This is the only way to achieve good results.
Press the inner embroidery hoop 2-3 mm lower than the outer hoop so that it doesn’t slip out due to the movement when embroidering, and so that the outer hoop doesn’t leave unsightly “dragging marks” on the freearm.

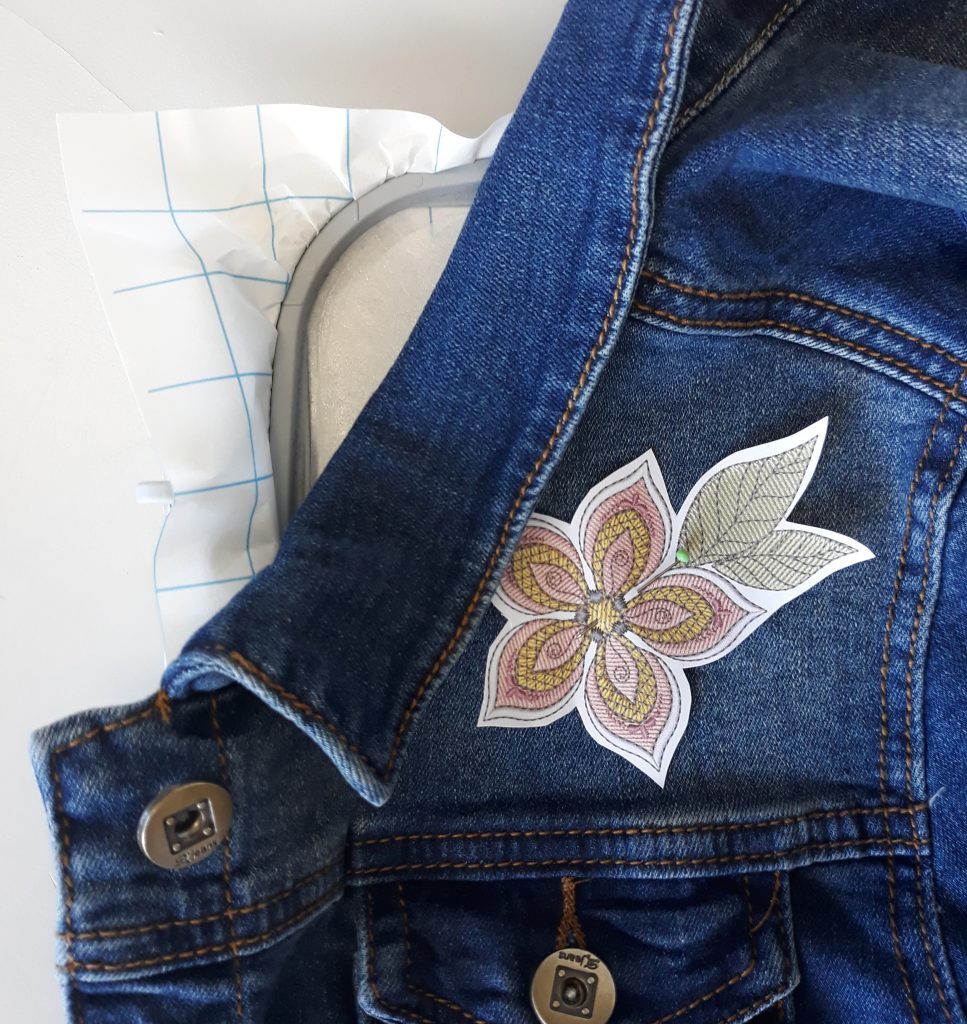
But what if the fabric can’t be hooped in? Which stabilizer do you choose for leather, artificial leather, velvet or cork? How do you work with small items, such as cuffs or shirt collars, which cannot be hooped due to their size? An adhesive stabilizer may be used in such cases. Certain manufacturers offer so-called hydro-embroidery stabilizers, the surface of which becomes sticky when moistened slightly. Or (and my colleague Doris likes to do this) you can hoop only the stabilizer, pin it temporarily, select the awesome BERNINA’s basting function to baste around the embroidery design or along the hoop (when basting, make sure that the pins are not in the way), then remove the pins and embroider the design. However, I wouldn’t use this method for overly dense embroidery designs.
If you want to embroider a cap, BERNINA offers the practical Hoop ‘n Buddyz hoop insert.
Further tips on how to hoop can also be found in this video tutorial:
4. Perform some test embroidery
To ensure that the embroidery design works well, I recommend that you test it first. This is especially true in the case of an embroidery design that you have never embroidered before.
With these simple tips, you are sure to create beautiful embroidery that will be admired by all.
During the year, you will receive additional blog posts from me, all with a focus on embroidery.
I wish you every success as you start 2023, the BERNINA year of embroidery, and I look forward to receiving photos of your embroidery projects.
Best wishes
Mirjam


Found this article very useful. I was advised to use iron on for jersey so will have to try cut away. I have seen cut away used on ready to wear uniform garments but they are usually heavily stitch filled designs. I’m lucky not to have had many disasters when embroidering but it happens from time to time 🙂
Hello. Is it possible for you to send me an email with all the info regarding the stabilizers for embroidery? This information is fantastic and as I’m new to machine embroidery I would like to keep a hard copy so I don’t have to search for it.Thank youKind RegardsJo
Hi Mirjam and all – yes, I like to hoop the stabilizer only and pin my project (denim jackets and other finished garments that need a pimp-up), on top, mostly rather stable materials. And as the lazy person I am, I even tape material onto the stabilizer, such as vegan leather or similar, to avoid pins/holes and marks from embroidery hoops. But I also watch the machine while it works for me and use a reduced stitching speed, so that I could react if something would not perform to my expectations (happens once in may be 50 times). The advantage of using the basting stitches around the embroidery first are: if the speed or a thread needs fine tuning, it does not happen to the embroidery or my finished garment. I exlude embroidering knit fabrics from above there I apply a different (but also well established proven) procedure. I actually love them to be soft even with embroidery, so I use a wash-away stabilizer and most often “outline” embroidery or designs with very little fill stitches. And if you wonder what I do, while the machine embroiders for me, no it is not PC work, it is cutting more projects to be sewn. Wish you all a great YoE!
Hi Doris,
thank you for telling us your tipps. As an experienced sewist you know how a fabric behaves. And you also know what kind of embroidery design can be embroidered on your project. That’s a very important topic when choosing the right stabilizer.
Looking forward for your next embroidery 😉
Mirjam
Dear Frances,thank you for your comment.As far as I know wash-away stabilisers are made of polyvinyl alcohol (hope, the translation is right ;-)) and this material does not leave any residues.I propose to check the brand that is available in your country and ask online.in any case, it is advisable to consider the environmental aspect and not to use water-soluble substances thoughtlessly.Best regardsMirjam
Very useful article – thank you. I do have concerns about wash-away stabilisers – do they contain micro-plastic particles or are they otherwise harmful to water systems?