 BERNINA Corporate Blog -
Welcome to “Learning to Sew for Beginners”, Part 2: The Most Important Basic Techniques!
Having covered the basic equipment, I would now like to introduce you to a few basic sewing techniques, tips and tricks. Before you start sewing, however, you should take note of the following topics.
Threading the sewing machine
In order to be able to sew correctly from the start, you should be informed about the correct threading of the upper and lower thread of your sewing machine. If the upper and lower threads are not threaded correctly, you are sure to find it difficult to sew.
The correct winding of the bobbin thread also plays an important role in producing a clean seam.

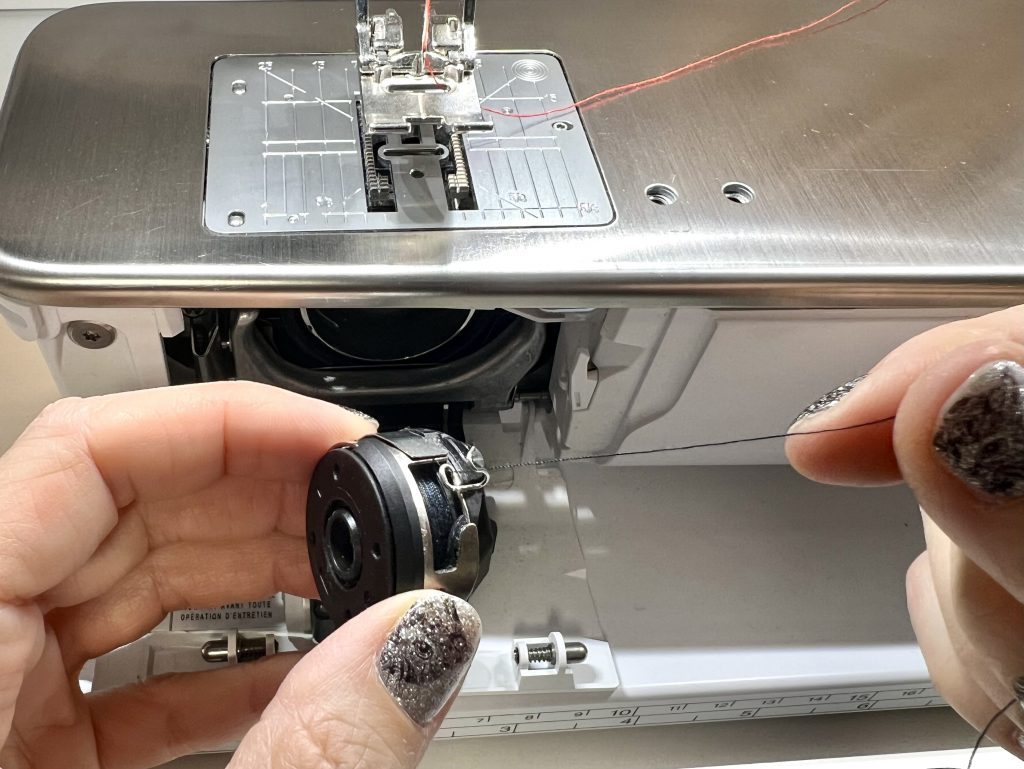
If you are not sure how to thread your machine correctly, a look at the user manual is certainly very helpful. BERNINA has manuals that are also available online as PDF files and can be searched for keywords.
You can find the PDF of the instructions for your sewing machine in the Support section on the BERNINA website.
In addition, BERNINA offers helpful Video Tutorials on the subject of threading:
Here is the tutorial on inserting the bobbin using a machine with a BERNINA hook, as an example:
The BERNINA Hook is used on all machines in the 4 and 7 Series from BERNINA, as well as on the machines in the new 5 Series (as of 2017).
Also note the series of articles with tips on how to successfully start sewing from Mirjam, here on the Blog!
Thread tension
The term “thread tension” refers to the tension between the upper and the lower thread. It is easy to check whether the thread tension is set correctly. If the ratio of the thread tension between the upper and lower thread is correct, the seam pattern looks very balanced, i.e. both sides are identical. For easier identification, I threaded red as the upper thread and dark blue thread as the bobbin thread.


If, for example, the upper thread tension is set too loose, the seam of the upper thread may look very good at first glance, however, small loops (in red here) become visible between the stitches on the bobbin thread.

If the upper thread tension is set too high, it is exactly the opposite and small loops form between the stitches of the upper thread (in dark blue here).

There is also a video from BERNINA on this subject:
A bit of material science
The selection of different types of fabric is endless, but you can always divide them into two categories, namely solid and elastic. Solid woven fabrics include, for example, cotton fabrics, linen, denim fabrics, as well as thinner materials such as satin, voile and organza.
Stretchy knitted fabric includes jersey fabrics, such as cotton jersey, sweat, modal, viscose jersey, interlock, knitted fabrics, etc.
Most fabrics have a right and a wrong side of the fabric. The right side of the fabric can be clearly seen on printed fabrics. On the other hand, you have to look at the dyed fabrics more closely. Sweat, for example, has typical loops on the wrong side of the fabric, but only the texture differs for denim fabrics.
Fabrics should always be pre-washed and ironed before sewing. However, pay attention to the care instructions. There are also fabrics that cannot be washed or ironed.
The first seam – the straight stitch
Regardless of how many stitch types and decorative stitches a sewing machine offers, the straight stitch is the ultimate basic stitch that any sewing machine can sew. It not only allows the ability to sew two fabrics together, but also creates beautiful quilted seams. You can also do wonderful smocking, darning or drawing with a straight stitch.
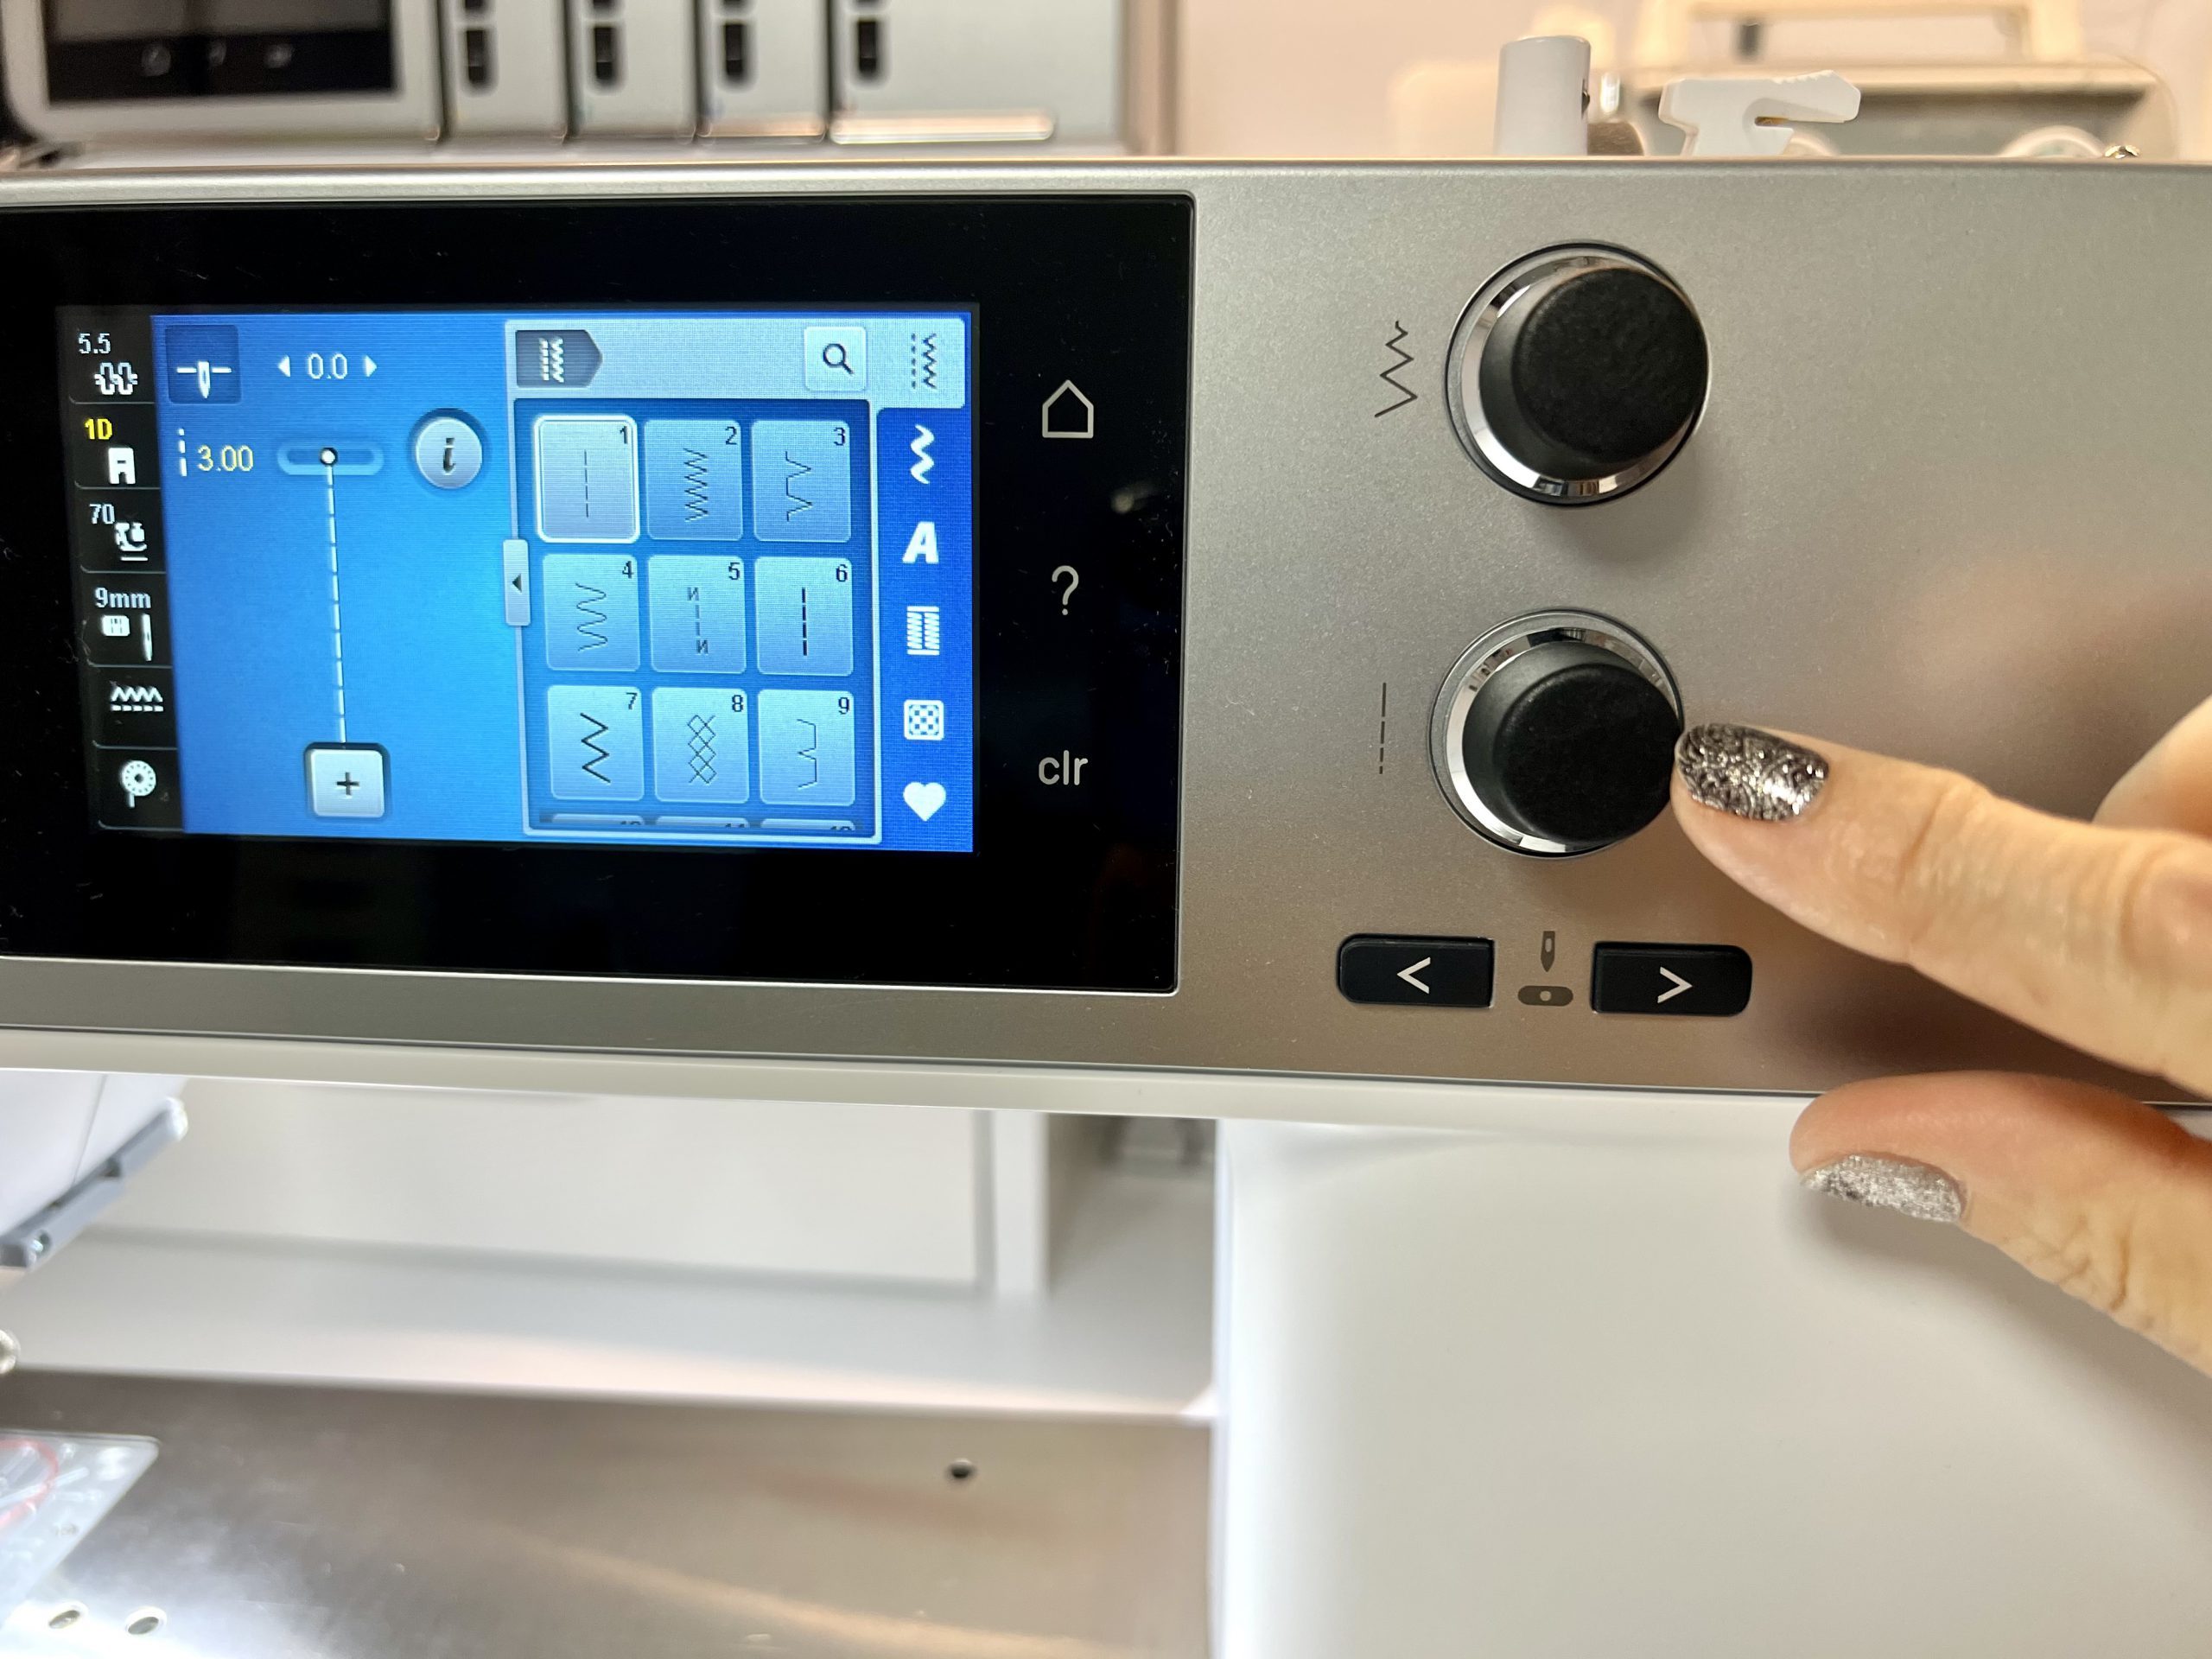
The length of the straight stitch is set via the stitch length selector on your sewing machine, whereby the values are in mm.

The stitch length required depends on the fabric to be sewn. Somewhat longer stitches (3.5 – 4) are suitable for heavy fabrics, while shorter stitches (2 – 2.5) should be used for lightweight fabrics. A particularly long stitch length (5 – 6) is used for basting stitches so that these seams can be separated easily again. This also applies to seams that you want to crimp or use to ruffle the fabric.
A stitch length of 2.5 – 3 is preset as the default value for most sewing machines.
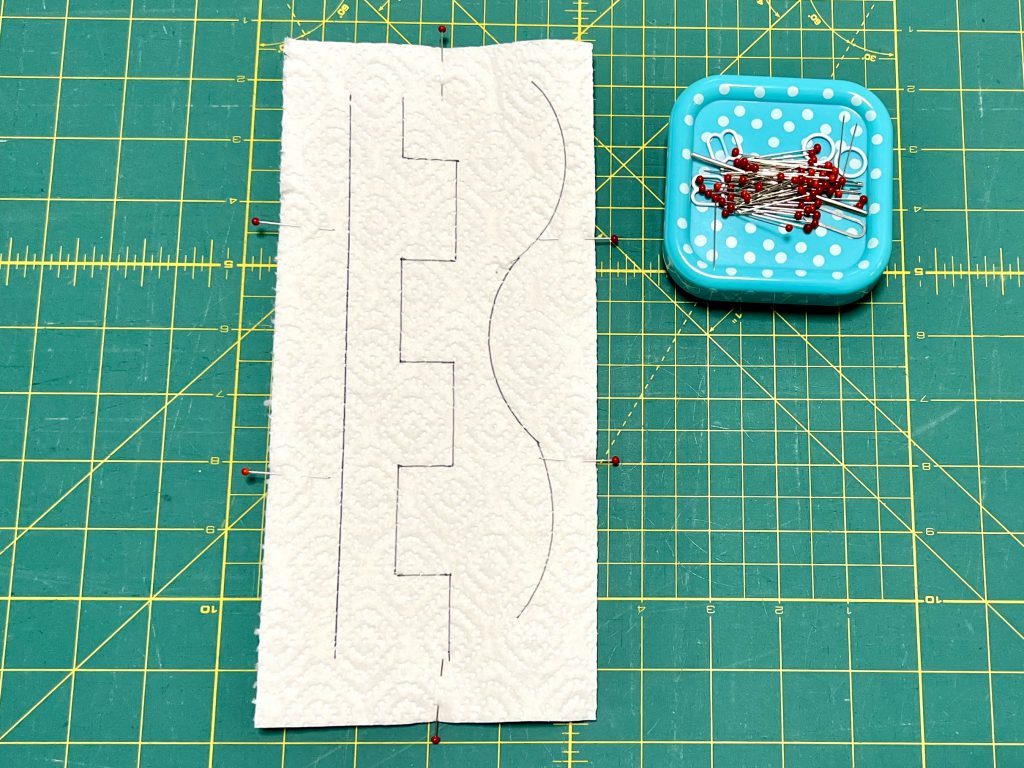
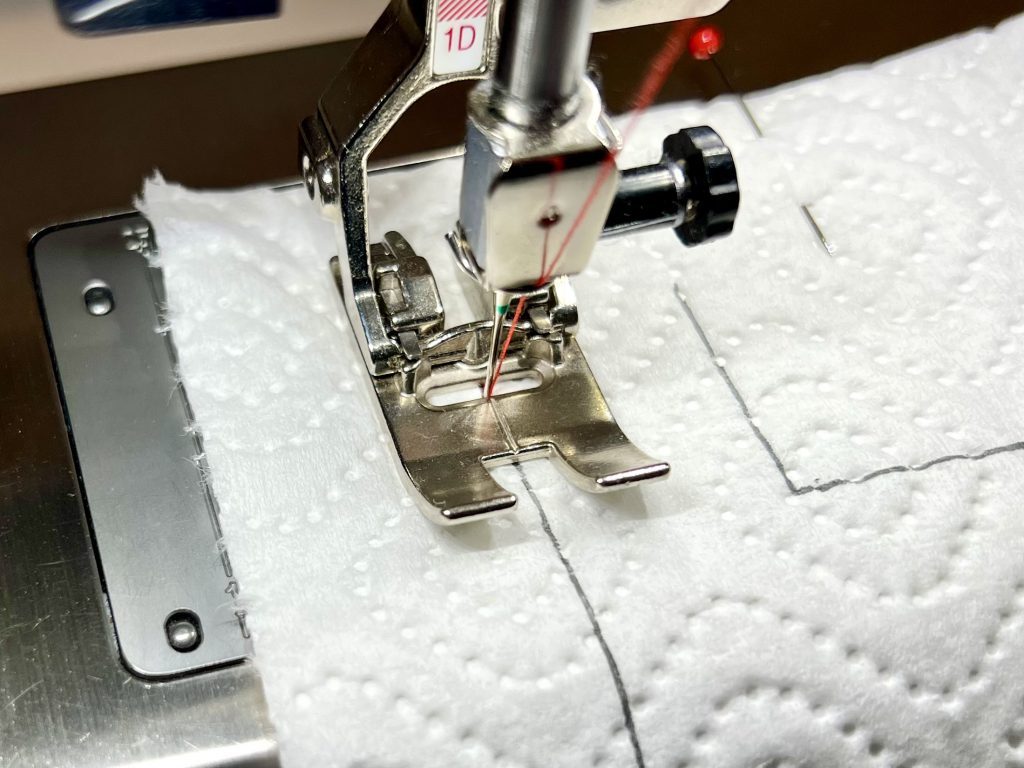
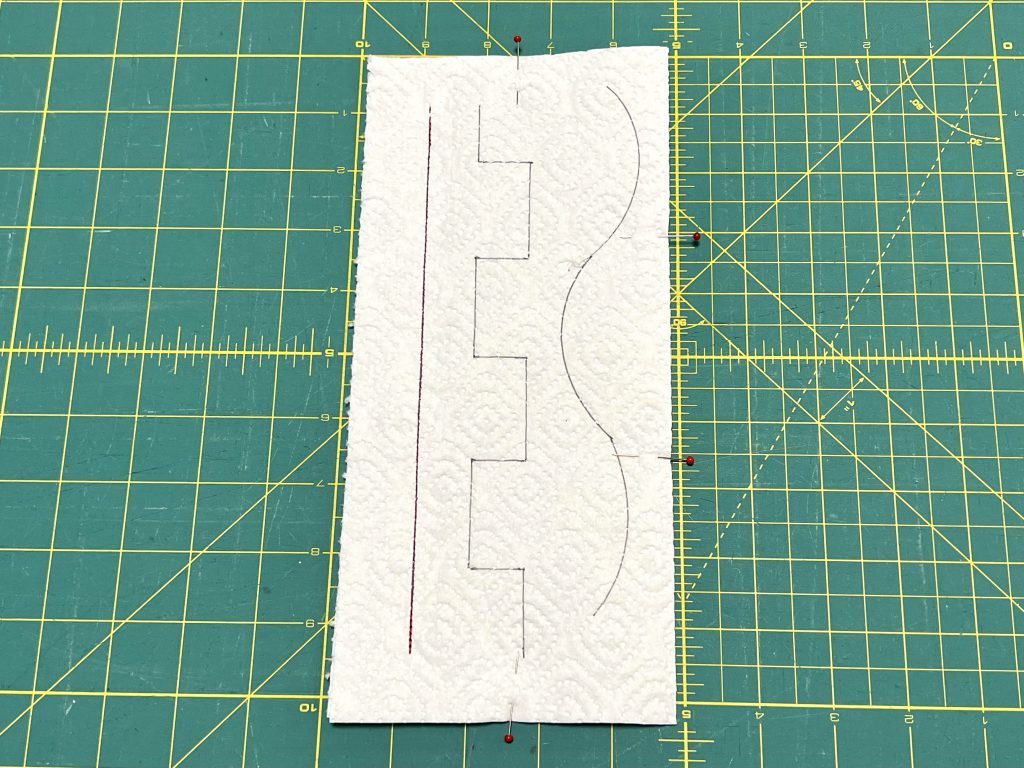
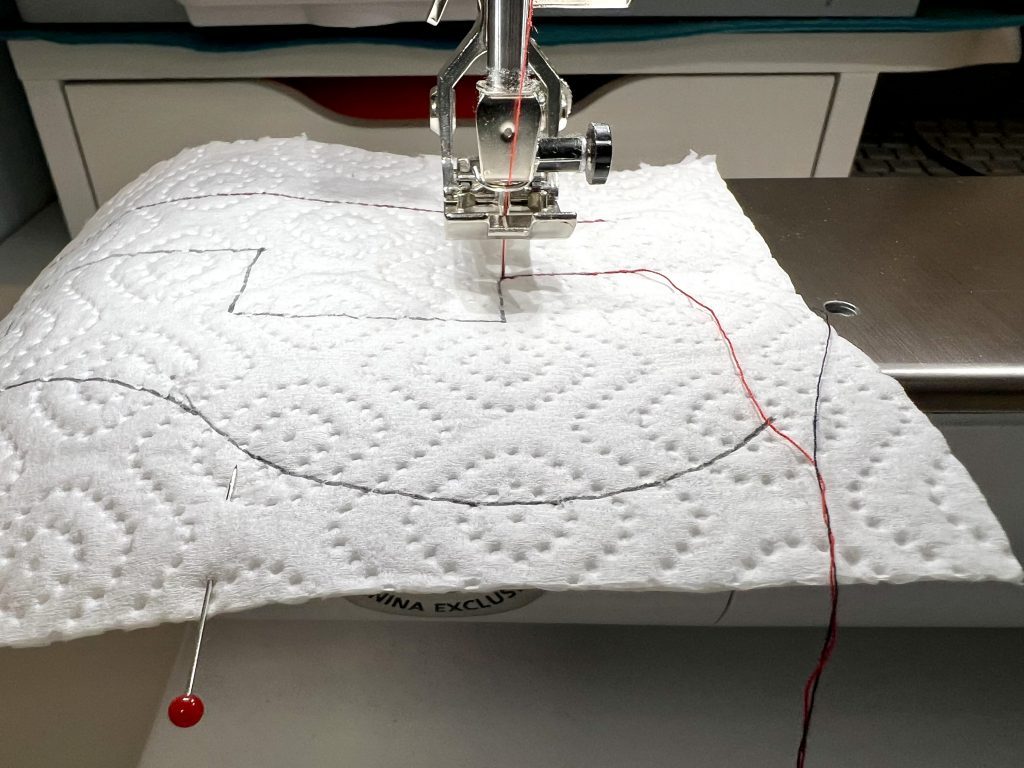
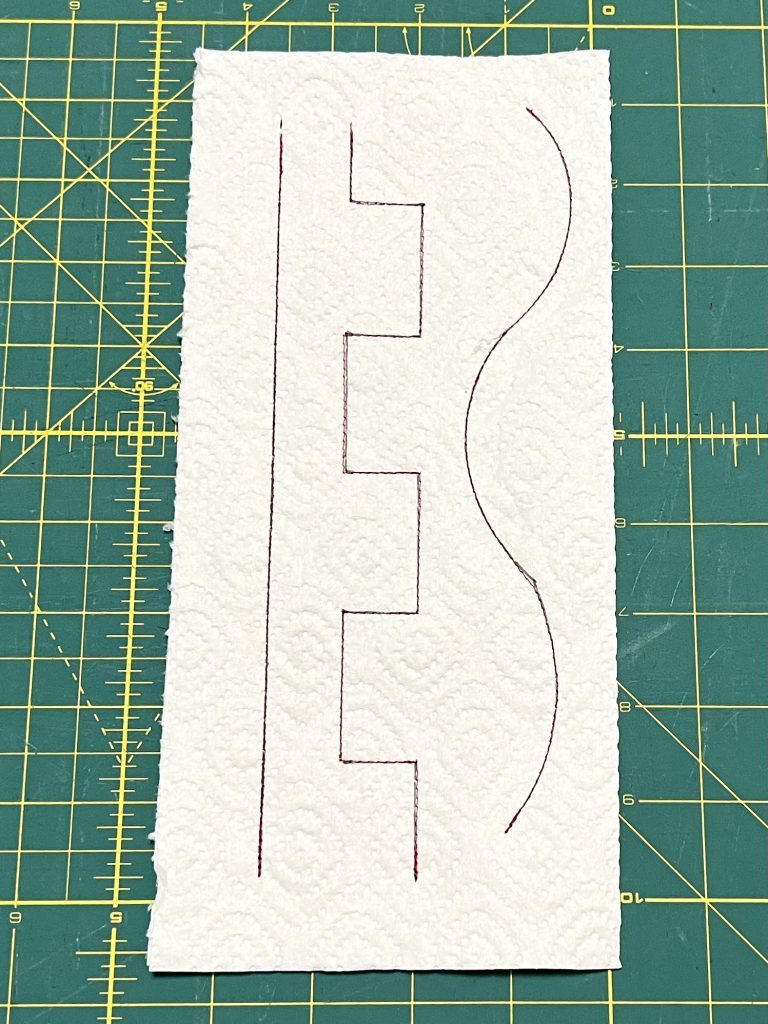
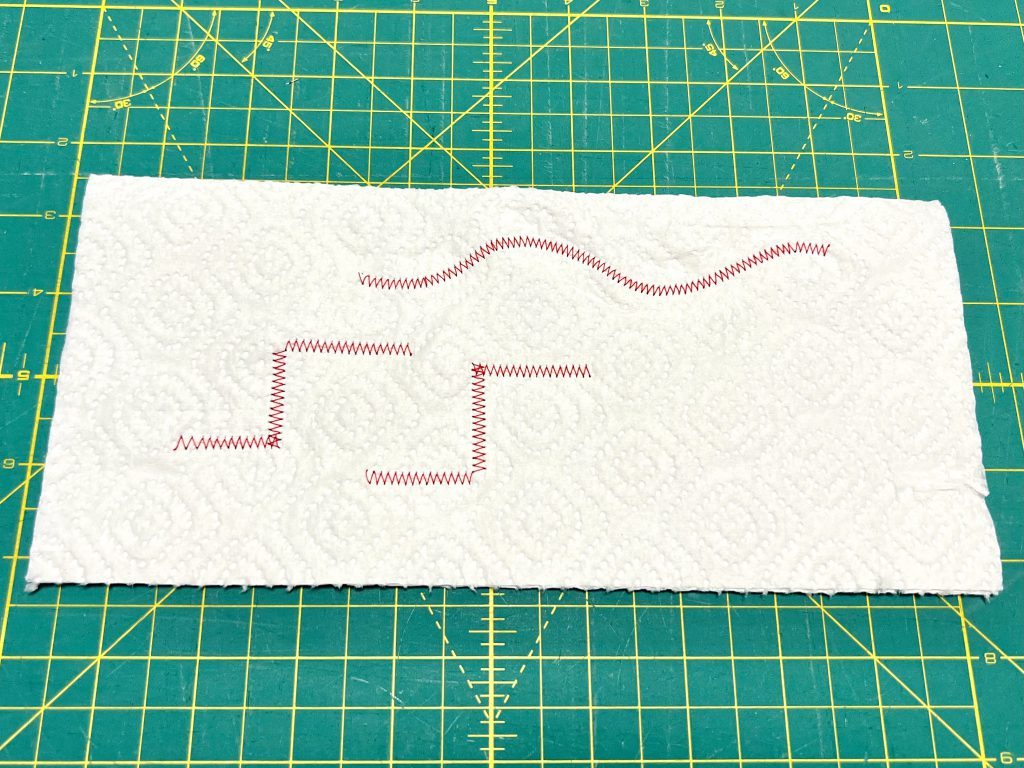
For your first attempts at sewing, it is best to grab two sheets of paper towel. Draw a straight line, a square line and a wavy line on them.

Now put the two sheets together edge to edge. If you like, you can also attach the sheets with pins or clips.
Now place everything under the presser foot, so that the needle is exactly above the line where you want to start sewing.
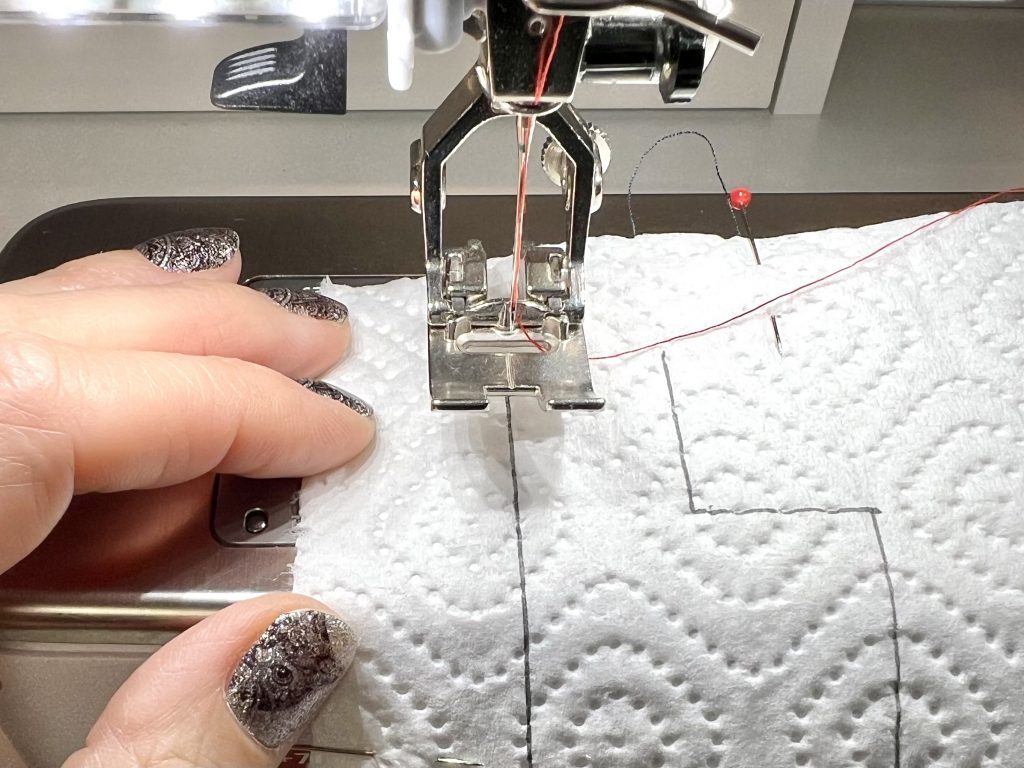
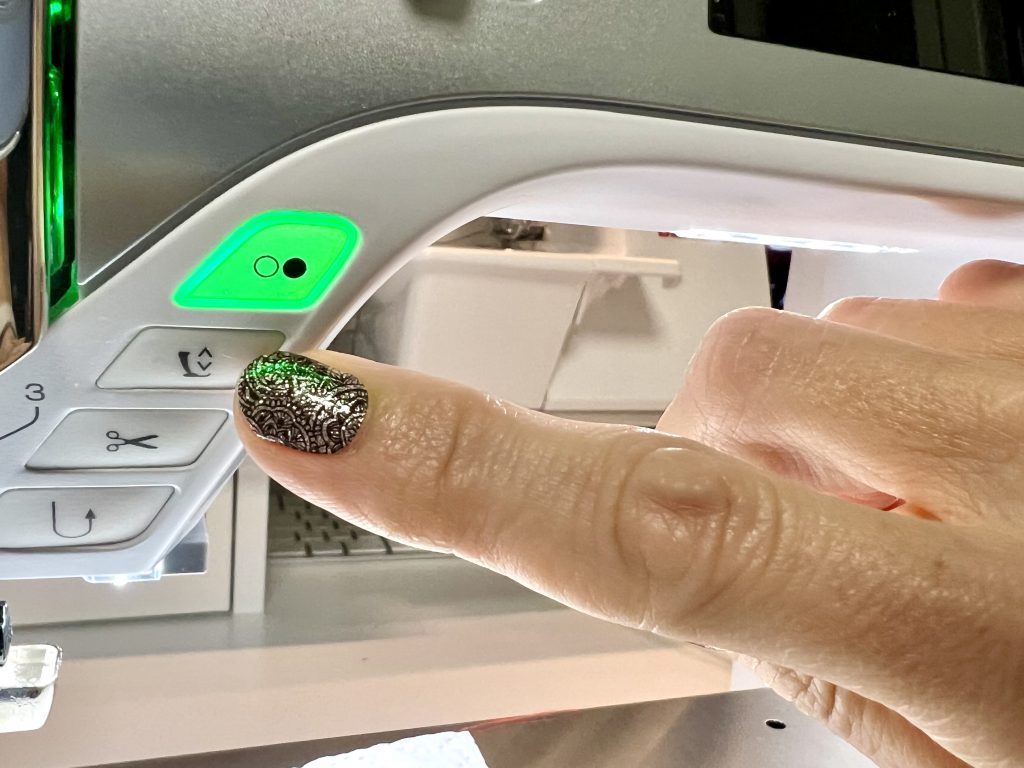
Then lower the presser foot. There are several options for lowering the presser foot, depending on the machine. Either there is a small lever for lowering and lifting behind the presser foot or, as with my machine, I can press either of the corresponding buttons…
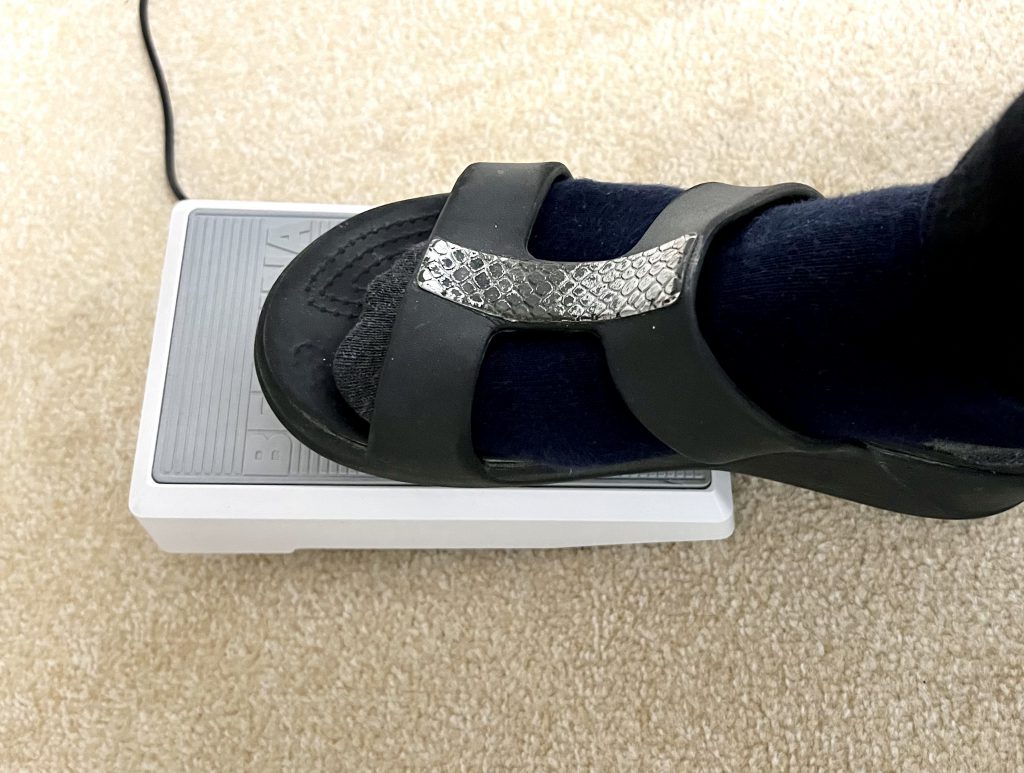
… or raise/lower the presser foot using the lever of the Free Hand System (shown in the next picture).
With light pressure on the lever with my knee, the Free Hand System raises the presser foot. With firmer pressure, it lifts the presser foot further and also lowers the feed dog underneath the fabric. When using the knee lever, both hands are free and are thus in full control while sewing.
Important: After use, remove your knee from the Free Hand System again! If you keep accidentally exerting slight pressure on the lever, the presser foot will be raised slightly, causing the upper thread tension to become uneven.

Now start your sewing machine by pressing the foot pedal, whereby the foot pedal functions like an accelerator from the car. With slight pressure, the machine sews more slowly, and with higher pressure it becomes faster.
Tip
If your sewing machine has a speed regulator, then simply reduce the sewing speed to begin with. This way, you have better control.

Now carefully step on your foot pedal and start sewing slowly.
Tip
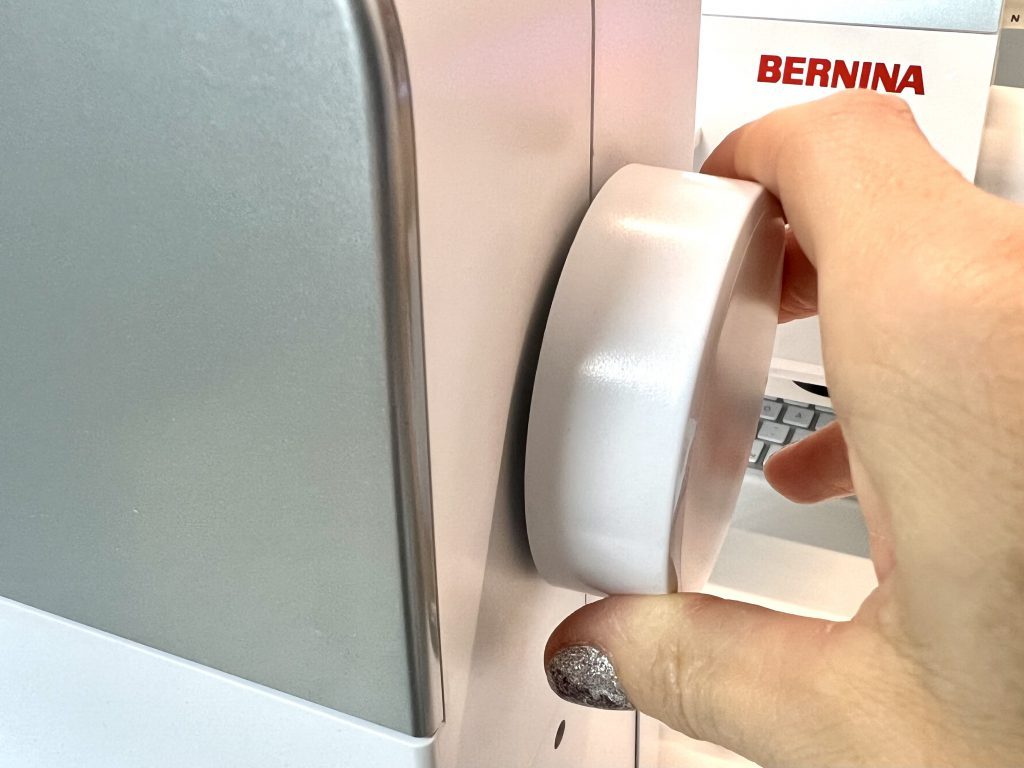
You can also use the handwheel for the first stitch. Turn the handwheel in your direction until the needle is positioned exactly at the beginning of your seam (marked line).
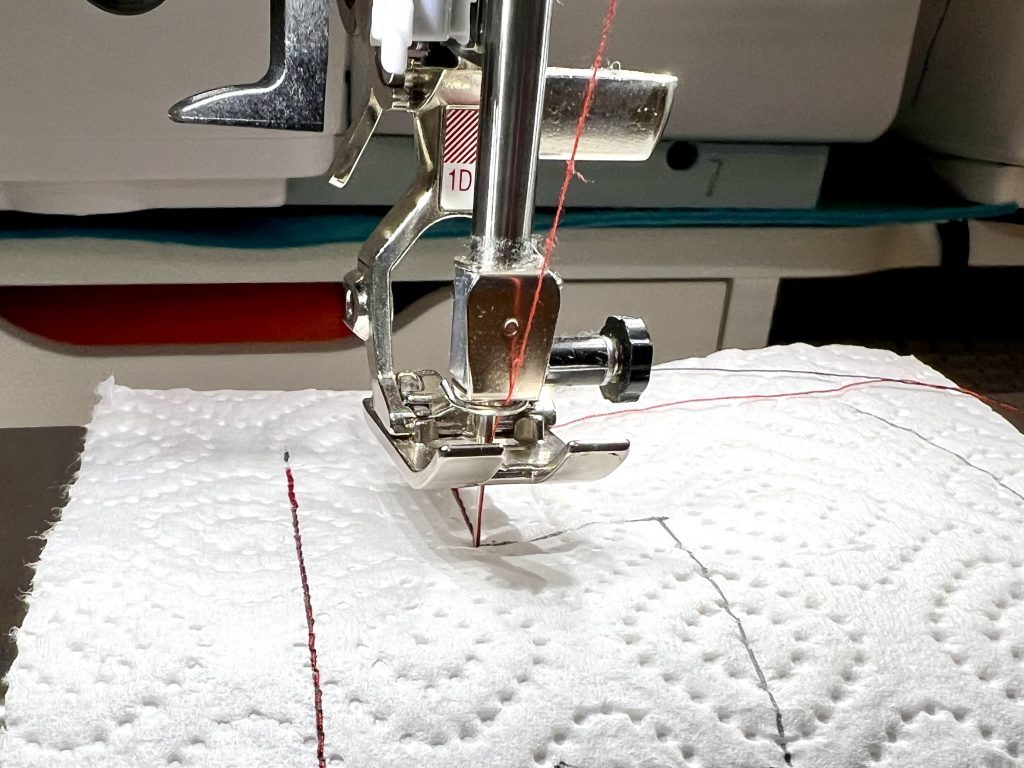
So that your seams don’t come undone, they have to be locked at the beginning and end of each seam. To do this, first sew 3 to 4 stitches forward, then the same number of stitches back and then forward again. To sew backwards, hold down the reverse button until you get back to the beginning of your seam.
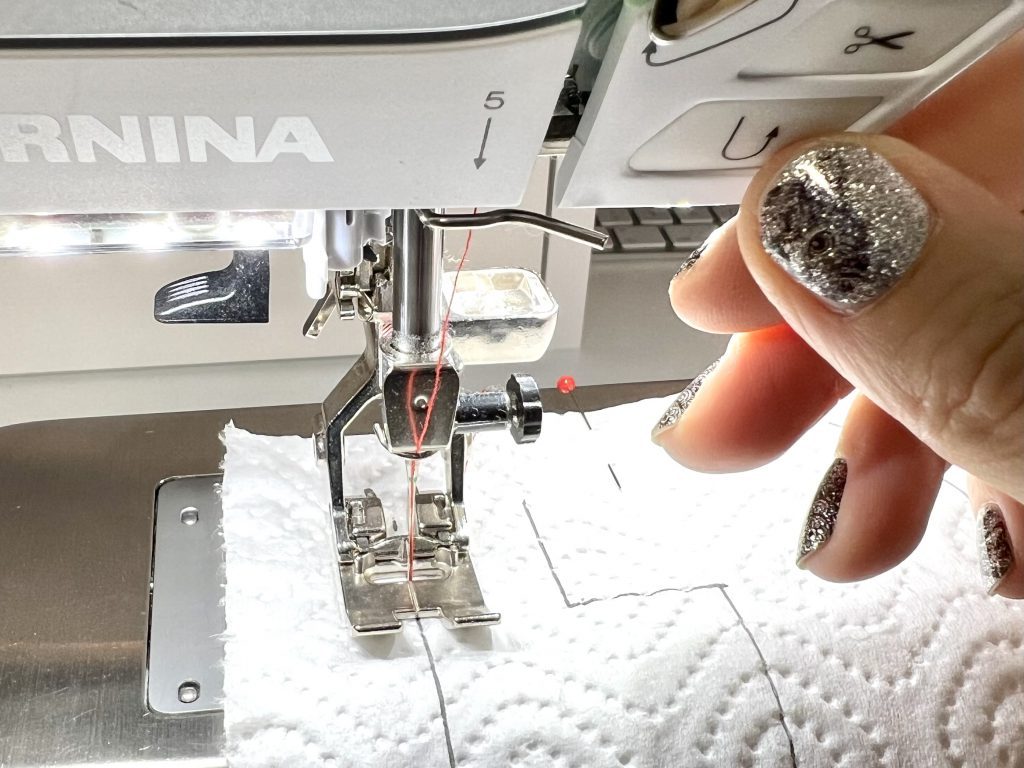
Now sew along the drawn line. When sewing, hold the fabric in place lightly and guide it with your hands placed flat. The fabric should not be pulled too tight or pushed. If the pins are in the way, simply remove them in good time.

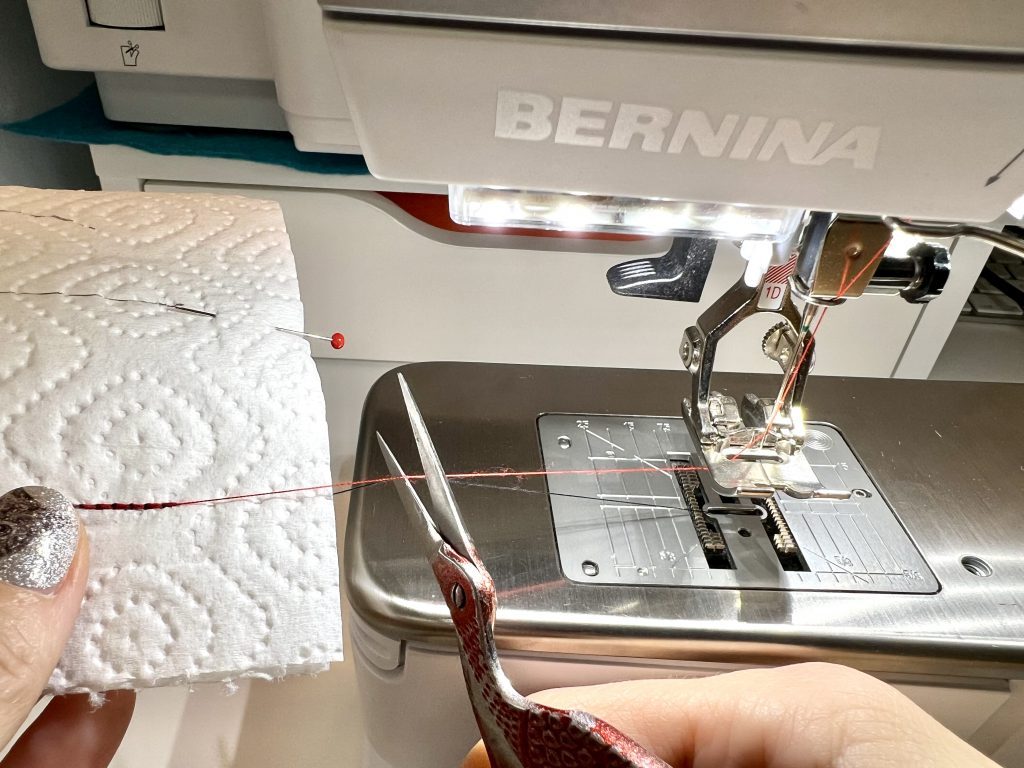
If you have arrived at the end of your line, then secure the seam again, as you did at the beginning. Now lift the presser foot and make sure to remove the needle from your fabric. Again, you can do this with the handwheel or with the corresponding button on your sewing machine. Then pull the fabric to the left and cut off the threads.
Your first seam is finished!
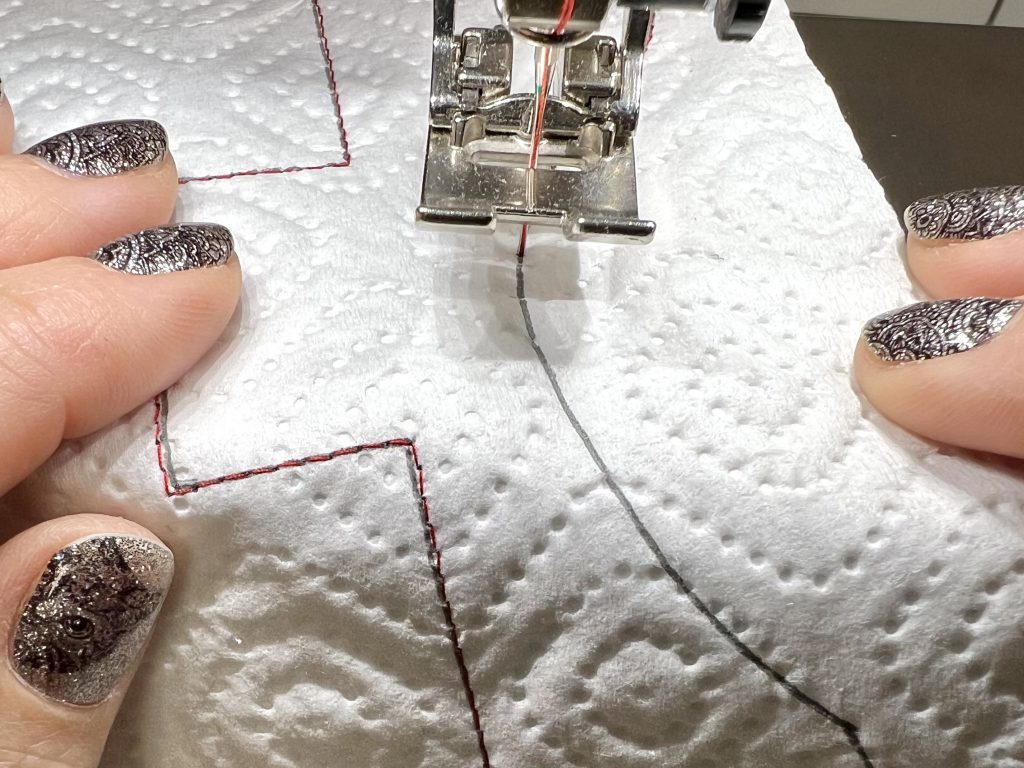
Sewing Corners
Start your seam again by securing it and sew right up to the first corner. Now lift the presser foot, but leave the needle in the fabric.
Tip
In order to precisely reach the corner point, you can turn the handwheel again shortly before you reach the exact turning point.
Now turn your fabric in the direction in which the line continues. Lower the presser foot and then sew up to the next corner again. Repeat these steps to reach the end of your turning line.
Tip
The use of a knee lever to lower and raise the presser foot here is a clear advantage, as you can leave your hands on the fabric when sewing.
And you have already mastered your first corner seams. Here you can take a look at my underside.

Sewing curves
Place your fabric under the presser foot so that you are ready to sew in the intended direction. To secure the seam, you only use 1 to 2 stitches to secure it, i.e. sew just enough stitches that you don’t go beyond your line.

For curves, you should generally sew slowly and in a controlled manner. Always sew only a few stitches on the line. As soon as you notice that the direction of the line changes, you can carefully move your fabric in the continuing direction.

If you are no longer able to cope with very tight curves using this technique, let the needle stick back into the fabric, lift the presser foot, align the fabric again, lower the presser foot and then continue sewing slowly, stitch by stitch. Try to remain as accurately as possible on the line.
Tip: for more control, you can also use the handwheel here, by turning it in your direction. The use of the knee lever also makes it much easier to sew curves (“hands free”).
And with calm and patience, you have now sewn your first curves.
The zigzag stitch
Like the straight stitch, the zigzag stitch is a basic stitch that can be found on every sewing machine. It can not only be used for serging cut edges or for sewing decorative seams, appliqués and buttonholes, but also for sewing elastic fabrics together.
Unlike the straight stitch, the zigzag stitch can be adjusted not only in terms of the stitch length, but also the stitch width. Give it a try. Take two test sheets of paper towel again and set the zigzag stitch. For me, the stitch setting is no. 2.

Place everything under your sewing machine again, sew a few centimeters with the preset setting and then adjust the length and width as you like. The narrower the stitch length, the narrower the zigzag stitch, and the wider the width, the larger it becomes. Here you can see my test zigzag stitches. With a very wide, small zigzag stitch, you can also sew stretchy fabrics together without any problems (upper stitch). A narrow stitch of medium size, on the other hand, is perfect for appliqué work.
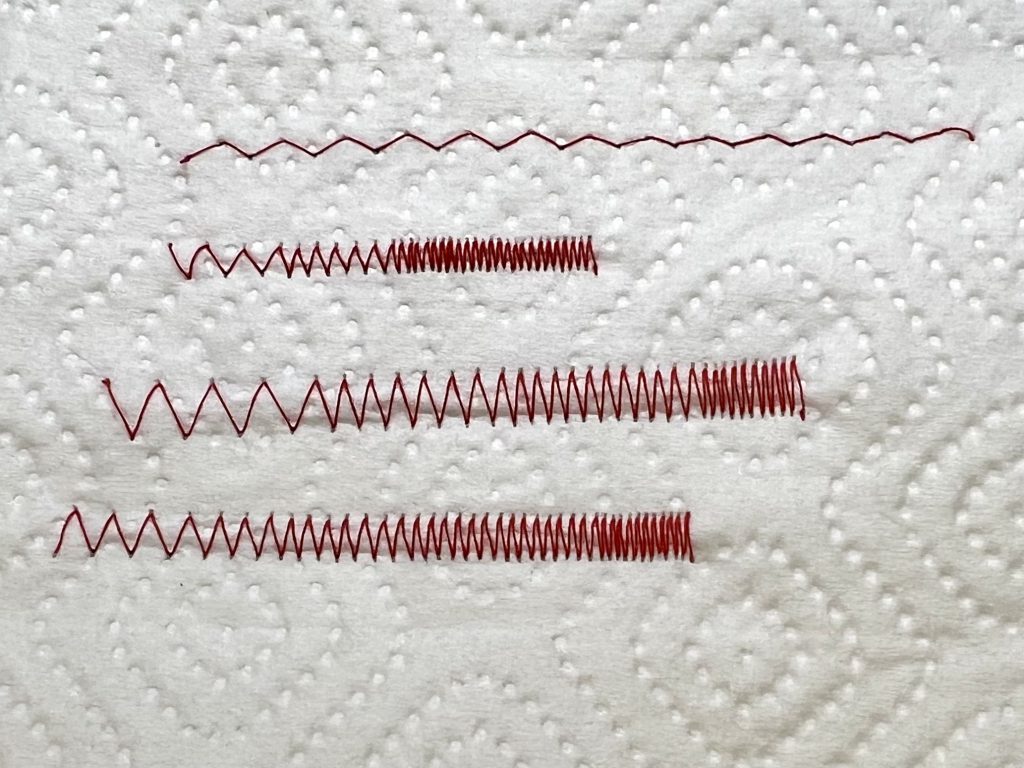
Also try to sew corners and curves using a zigzag stitch in freestyle. The technique is the same as for straight stitch. However, you will notice that, especially with the corners, it makes a difference whether the needle is in the fabric on the left or right before changing the direction.
Sewing and serging
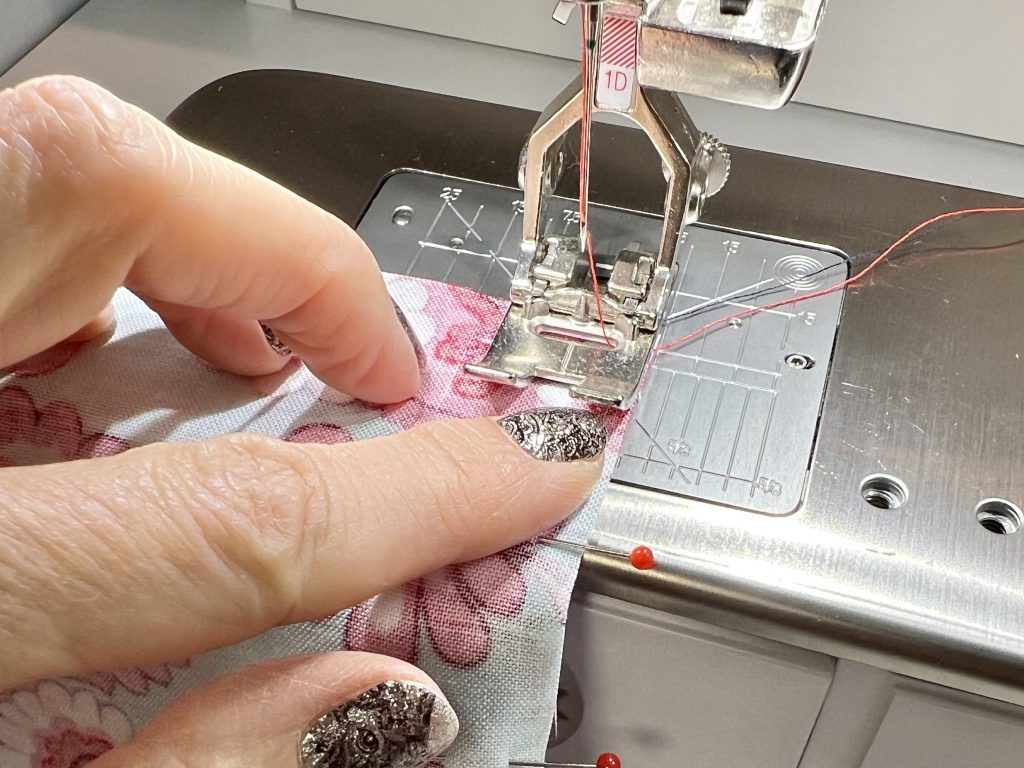
To avoid fraying of woven fabrics after sewing them together with a straight stitch, the pattern edges should be serged. You can use a middle zigzag stitch for this. To practice, take two layers of a simple cotton fabric (size approx. 15 x 15 cm) or, again, sheets of paper towel. Place the sides of the fabric together, right side to right side, i.e. the two pretty sides of the fabric facing each other. Make sure that the edges of the two pieces of fabric meet exactly.

First, sew them together with a straight stitch (length approx. 2.5 – 3) of a foot width. Foot width means that the right outer edge of your sewing piece closes exactly with the right outer edge of your presser foot.
Tip
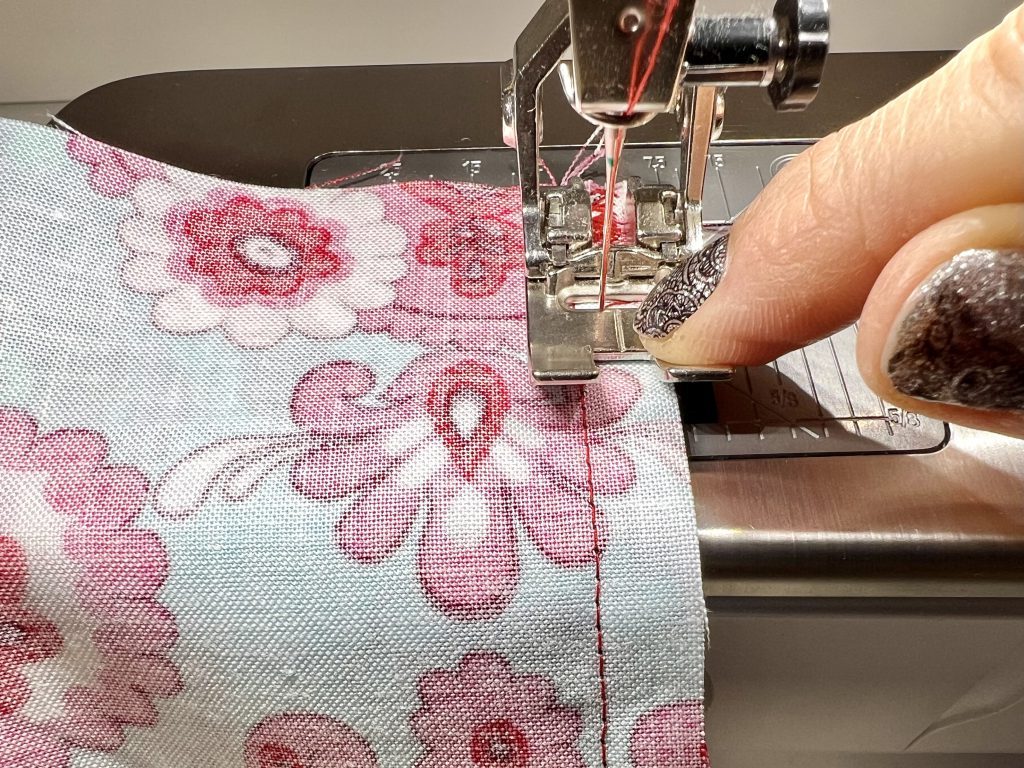
In order for the feed dog of the sewing machine to grasp the fabric better, I always start about 0.5 – 1 cm from the top edge when sewing and close this missing piece of the seam by backstitching while reverse sewing.
This is how your finished seam should look with a straight stitch.

Now set your zigzag stitch and place the fabric back at the beginning of your seam, beneath the presser foot. However, the center of the presser foot is in the middle of your seam allowance.Since the zigzag stitch also has to be locked at the beginning and end, as with the straight stitch, sew the first few stitches forwards and in reverse. Now you can serge the entire length of the cutting edge with a zigzag stitch. At the end, everything is locked again.
If you want you can cut off the excess fabric. However, make sure that you do not accidentally damage your zigzag seam.
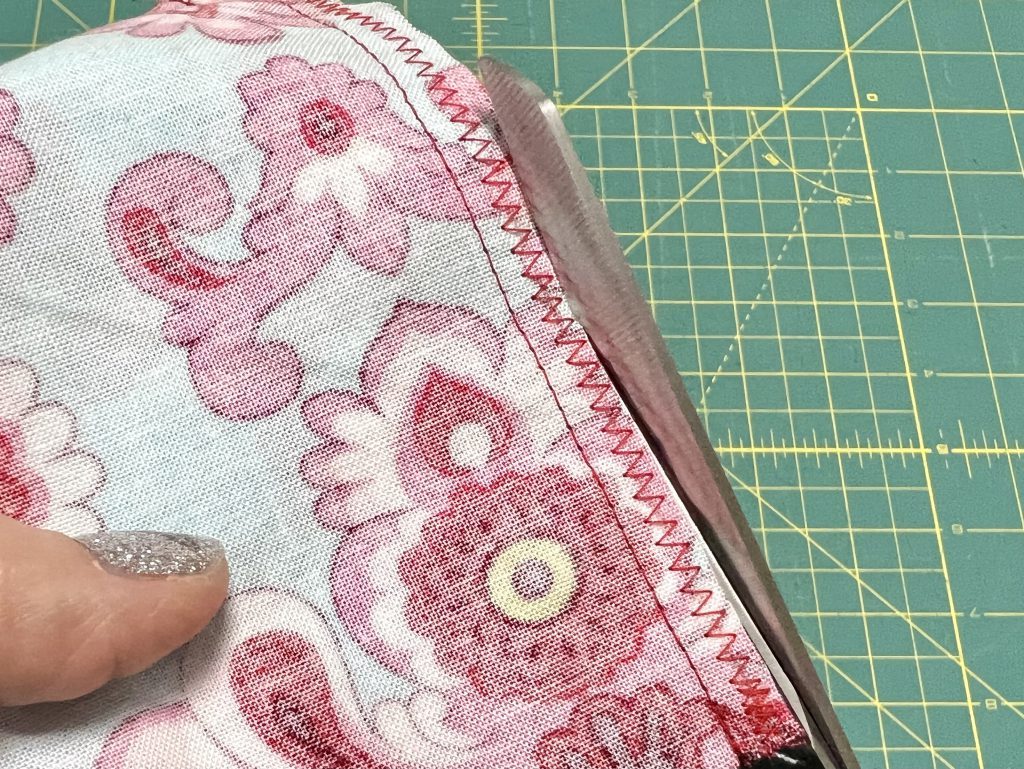
With these two stitches, you can sew and serge almost all the firm fabrics together.

Tomorrow, we will continue with basic knowledge regarding sewing needles and sewing thread. Here you can find an overview of all the “Learning to Sew for Beginners” posts.
So stay tuned and enjoy the other posts about the most beautiful hobby in the world!

Very nice you share its learning to sew mechine basic technique.