 BERNINA Corporate Blog -
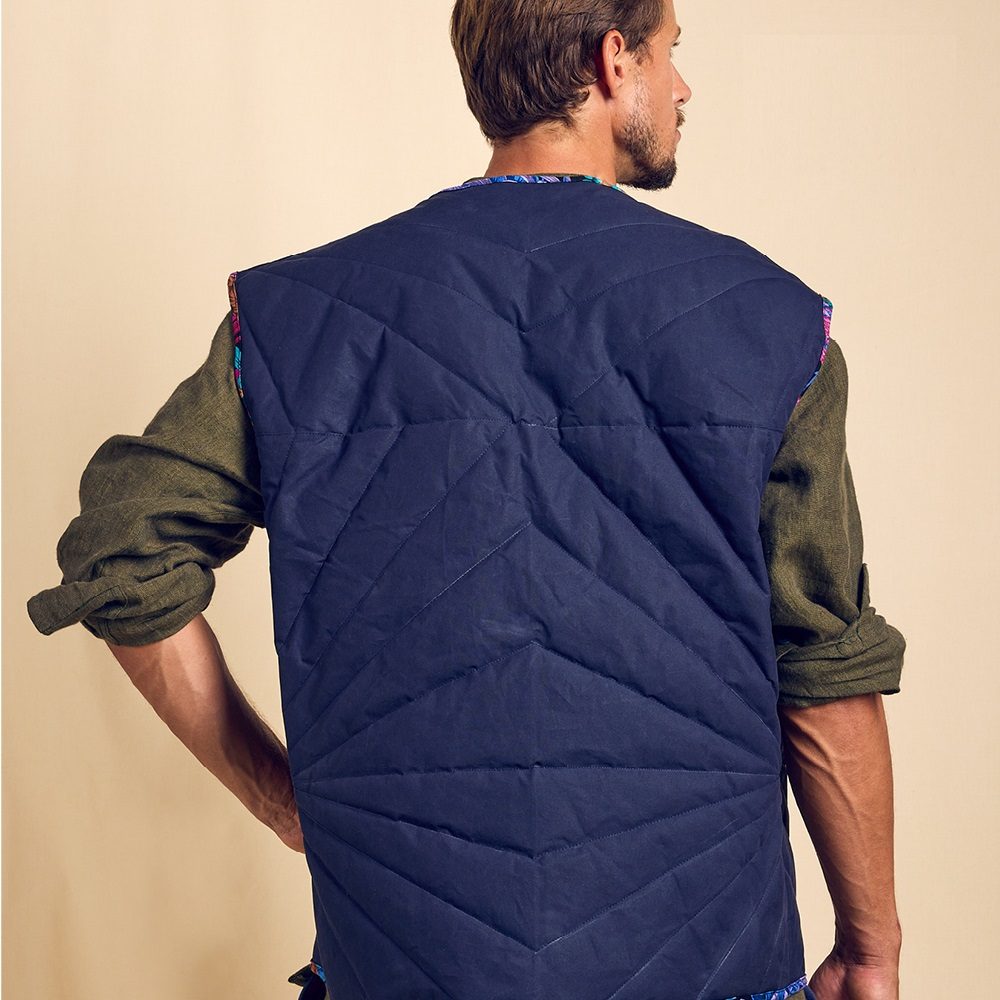
BERNINA Fashion Looks – Instructions for Anthurium men’s vest
The BERNINA Fashion Looks collection is the brainchild of Swiss designer Irène Münger and inspired by the fabrics of English textile designer Kaffe Fassett. It is the first fashion collection for sewing. One of the eye-catchers from the men’s looks is the men’s vest.
We sewed the stylish men’s vest in blue oilskin, it has eye-catching topstitching and a distinctive zipper as design highlights. The inside is fully lined with cotton fabric. The light padding makes it a good companion on cool days. It matches the wide linen shirt and drawstring canvas trousers from the Fashion Looks collection and can also be worn under or over a jacket.
The fashionable cuts from the Fashion Looks collection are available online in the inspirations shop.

To make the vest as easy to sew as possible, I’m giving you detailed instructions today. I will show you how to sew your own vest with lots of pictures.
The following material is needed for the vest:
- Walking foot no. #50
- Reverse-pattern foot #1 C/D
- Zipper foot #4 C/D
- Dry oilskin in dark blue from Merchant & Mills – 90 cm
- Cotton fabric in Chrysanthemum Green from Kaffe Fassett – 1.60 m
- 266 WOOL MIX wadding from Vlieseline – 90 cm
- Open end zipper, 50 cm
- Sewing and overlocking threads
- Tracing paper
- Tracing wheel
- Bias tape maker, 18 mm
Preparations/fabric cutting
Pattern
The pattern is part of the BERNINA Fashion Looks: To the pattern vest “Anthurium”
Here you can find an overview of all patterns.
Open the pattern PDF file and print page 1 with the setting “Original size” on DIN A4 paper. Check the control square – if it is 10×10 cm, then print the entire pattern sheet. Place all pages together as indicated and stick together at the border lines. Cut out the pattern pieces to the appropriate size.
All pattern pieces include seam allowance (second line).
Pattern pieces
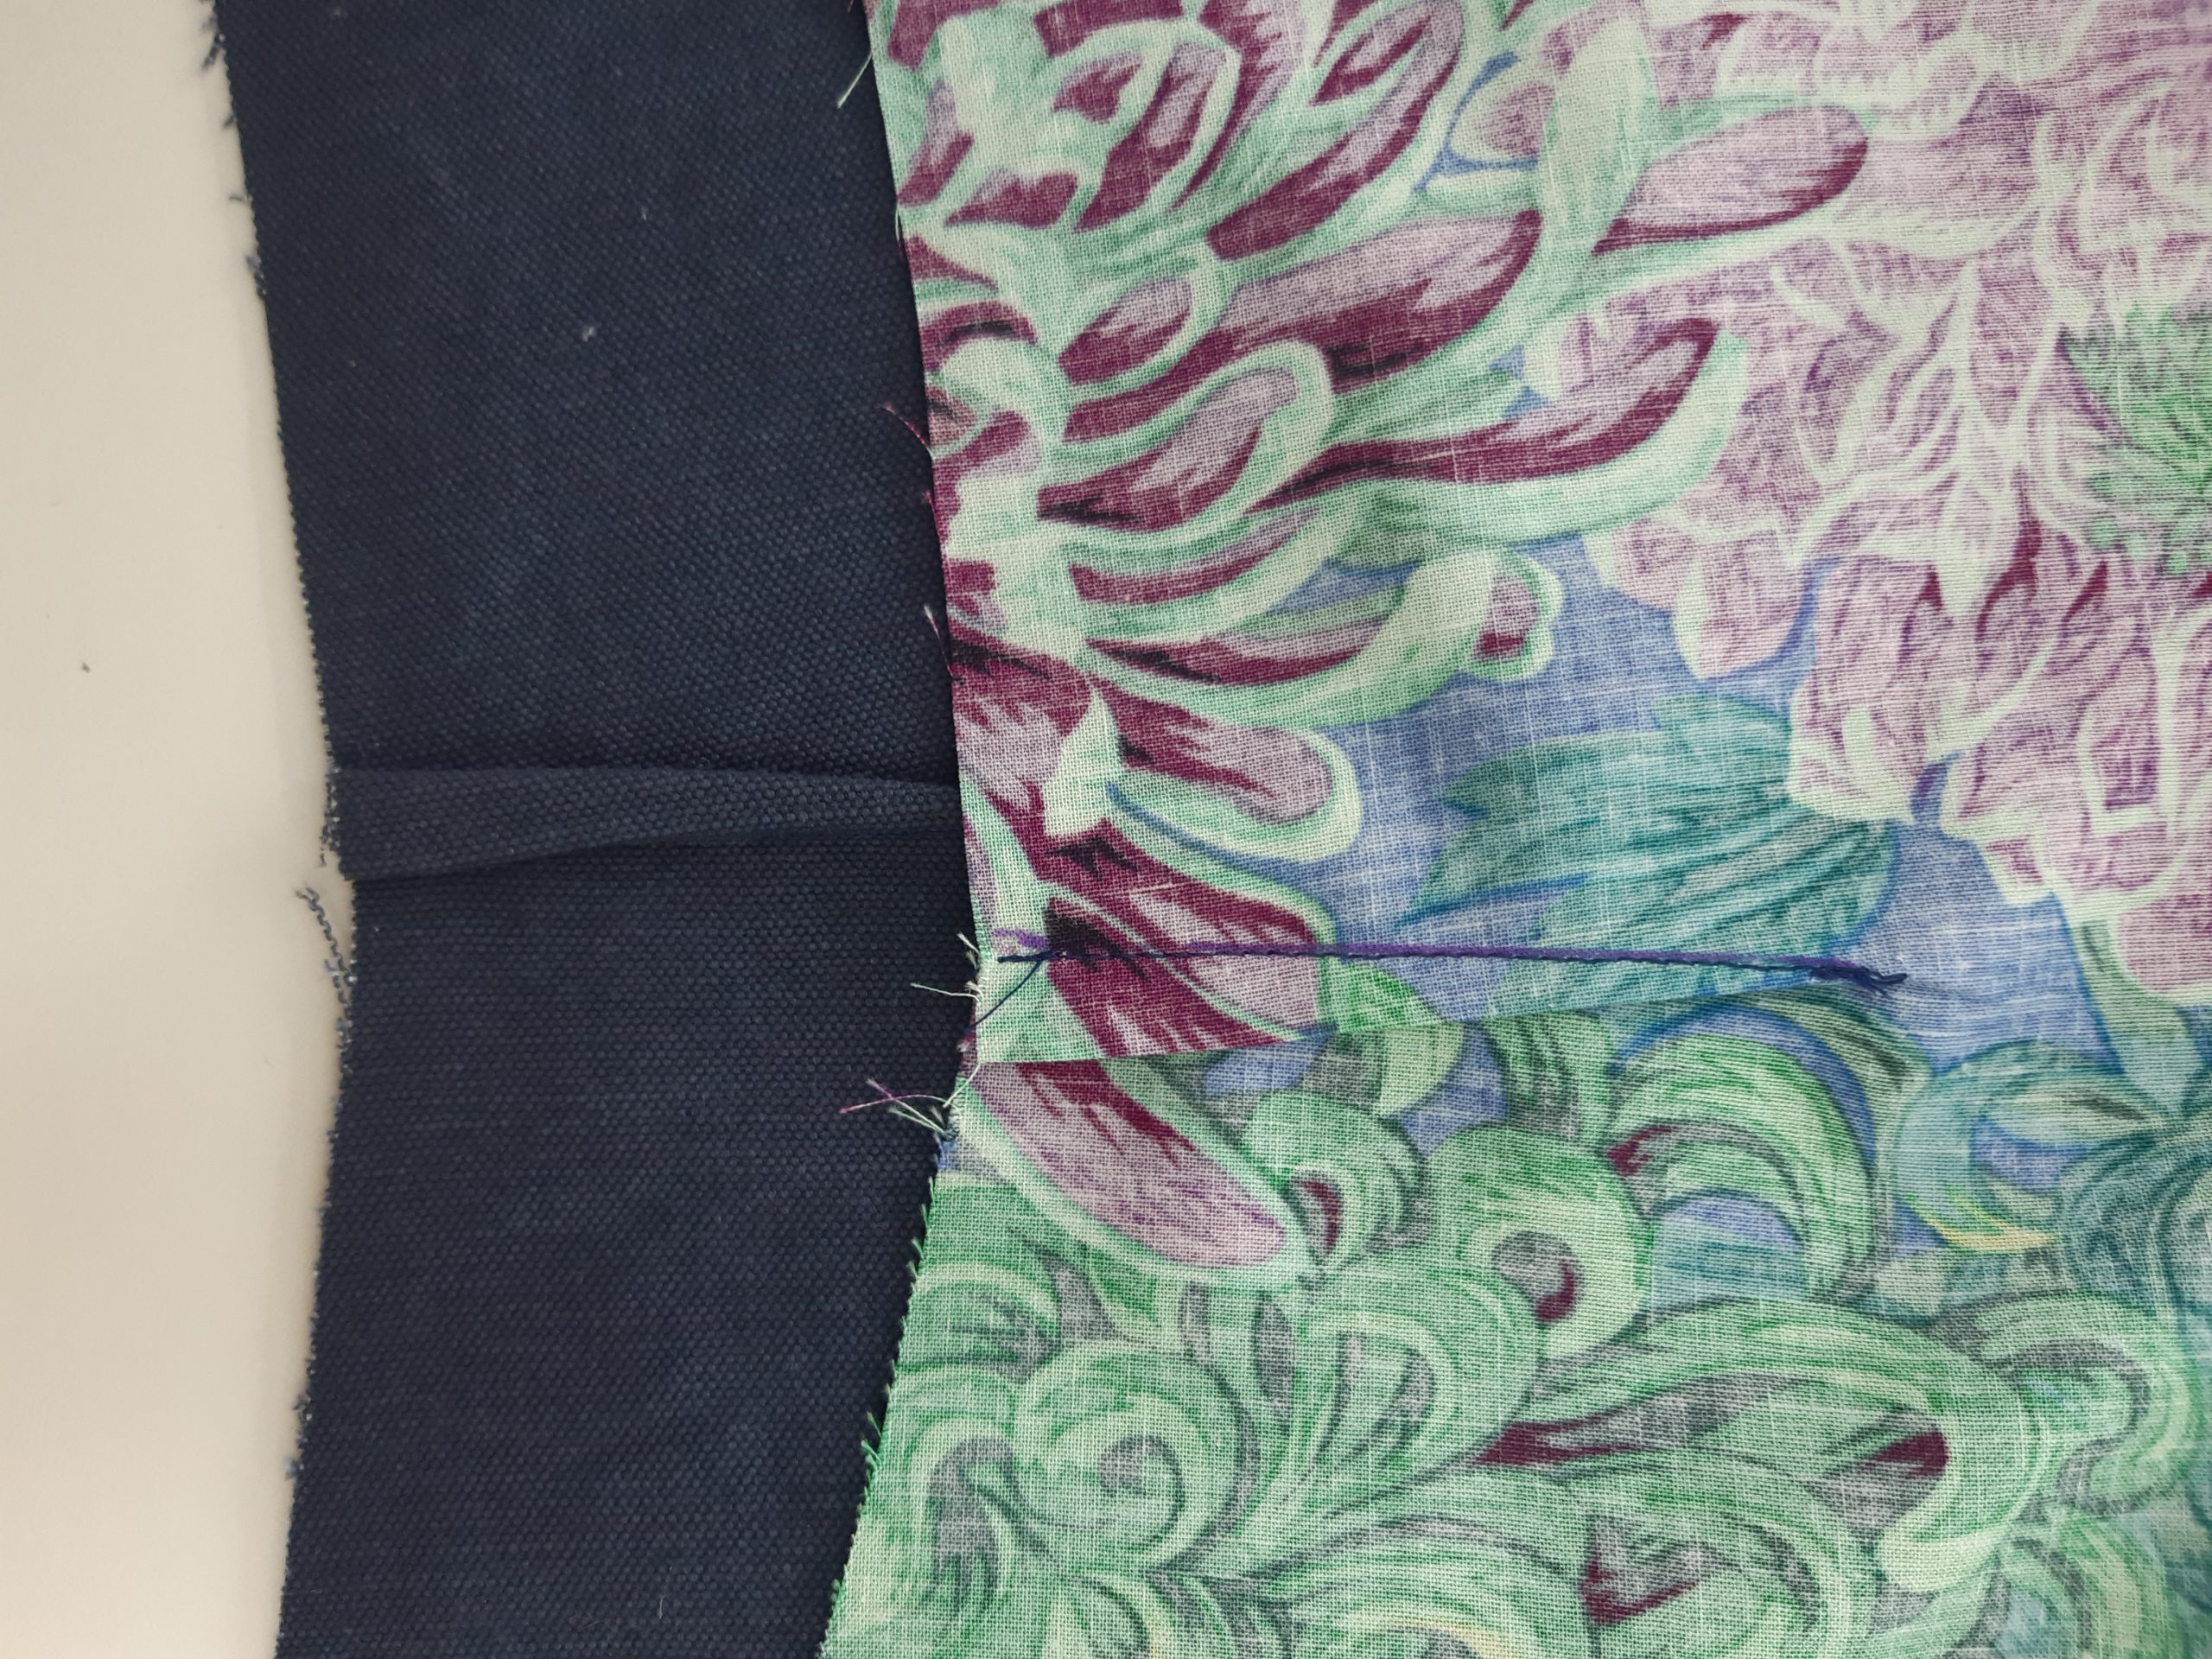
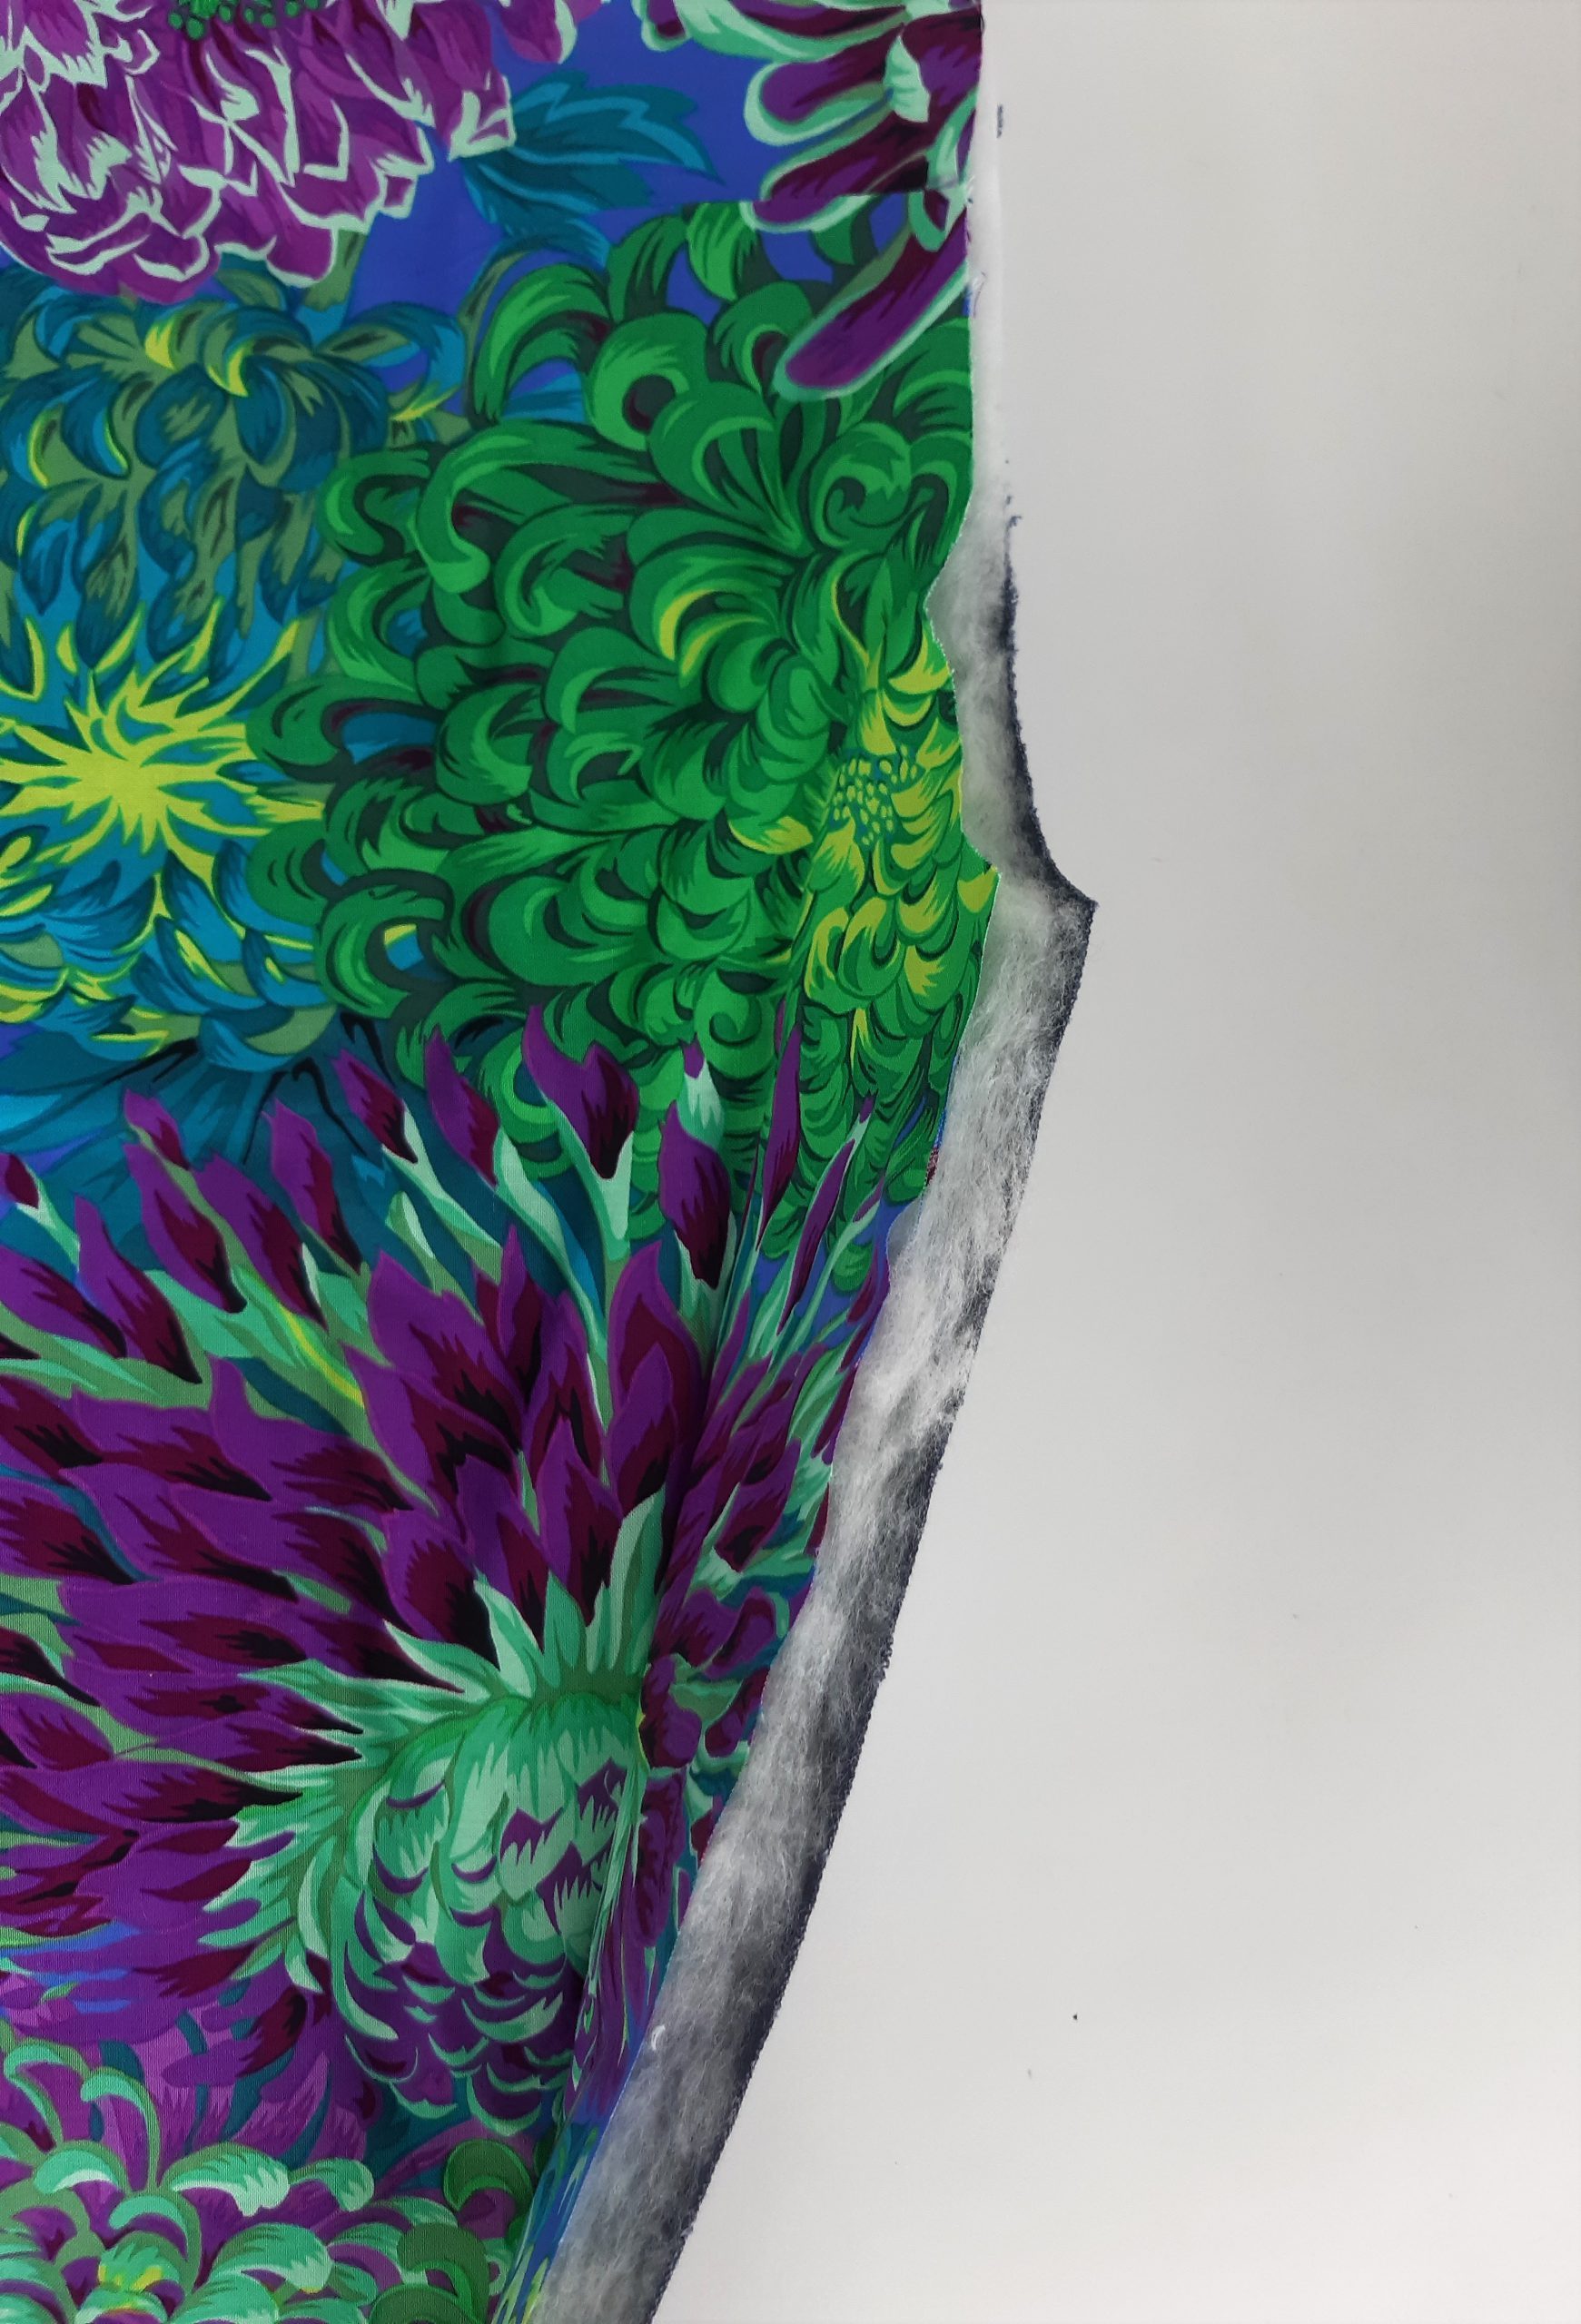
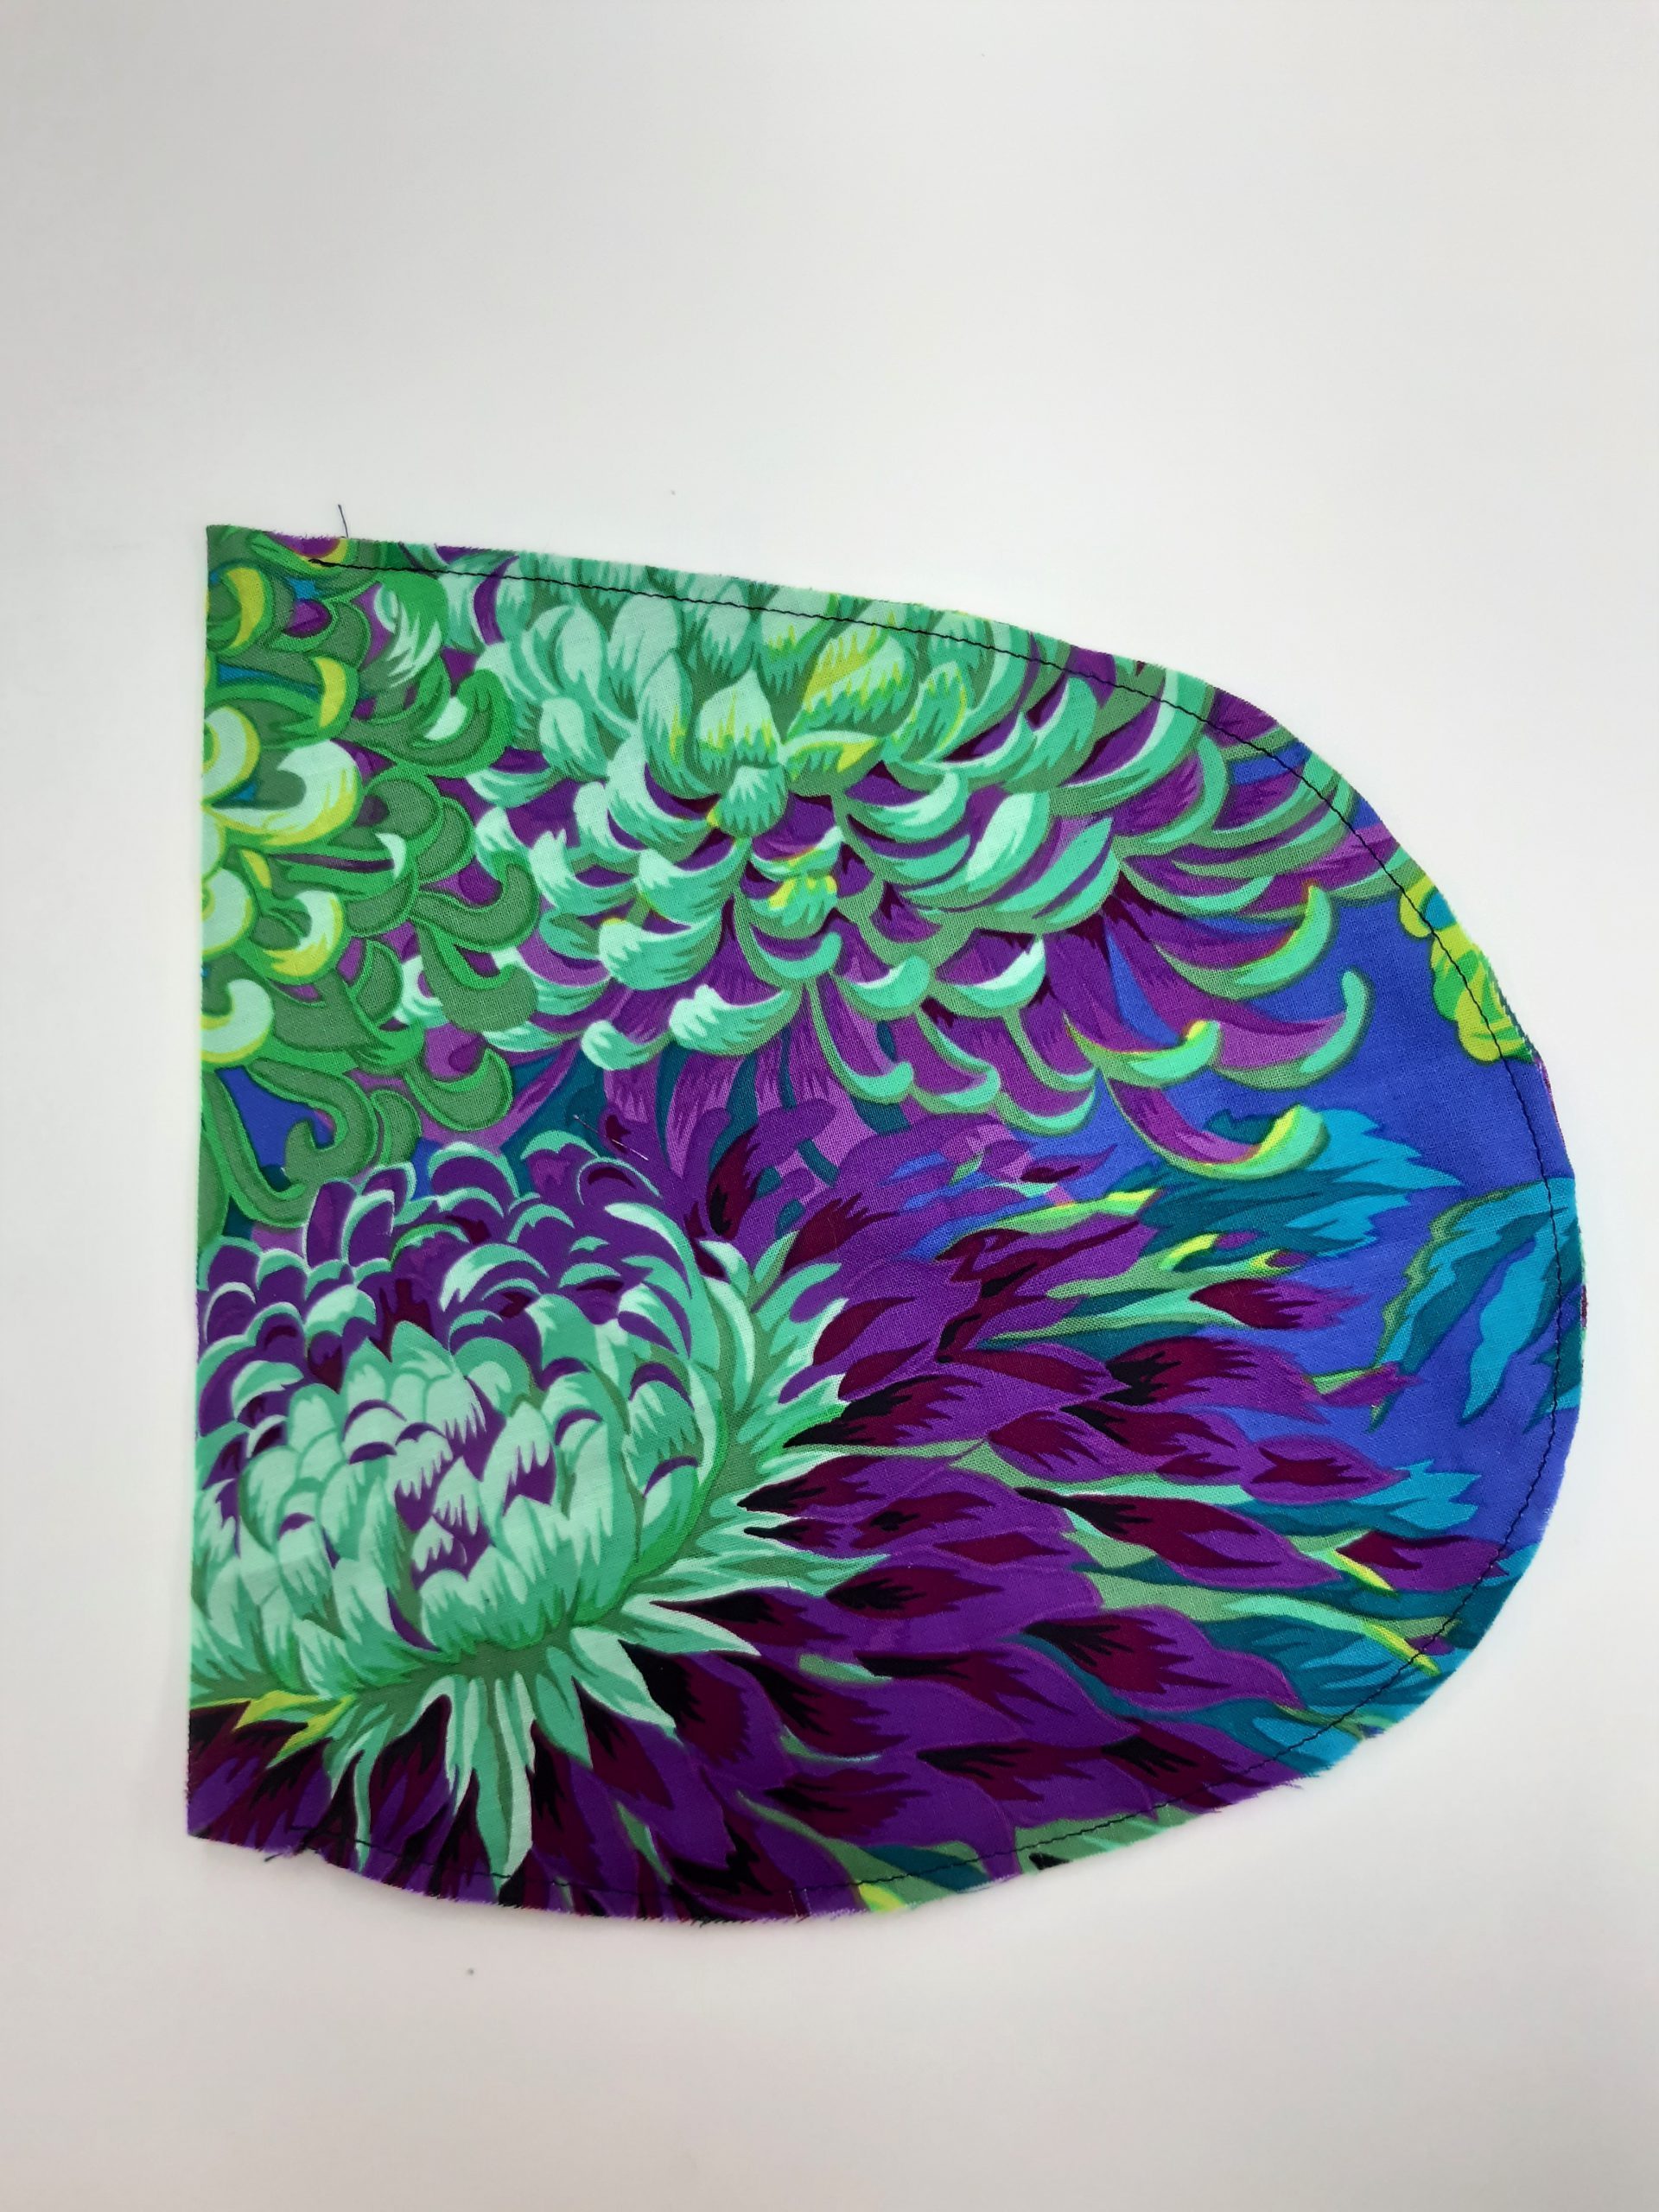
Cut one back piece and two front pieces as indicated on the pattern from the wadding, outer fabric and lining fabric. Cut four pocket pouches out of the Kaffe Fassett fabric. Cut 3.8 cm wide bias strips out of the Kaffe Fassett fabric: 2x armhole width, 1x neckline, 1x hem length and 2x as zipper facing. Iron all of the bias strips with the bias tape maker.
Sew a vest – let’s go!
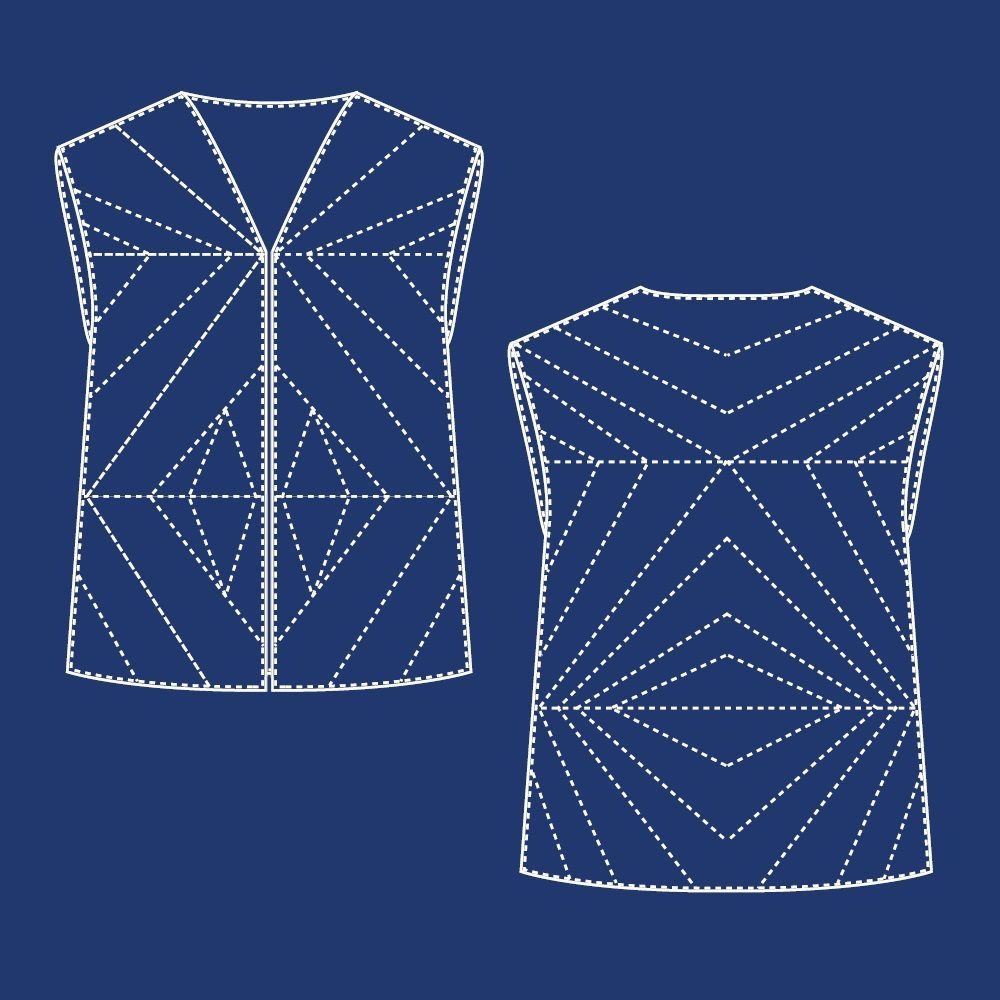
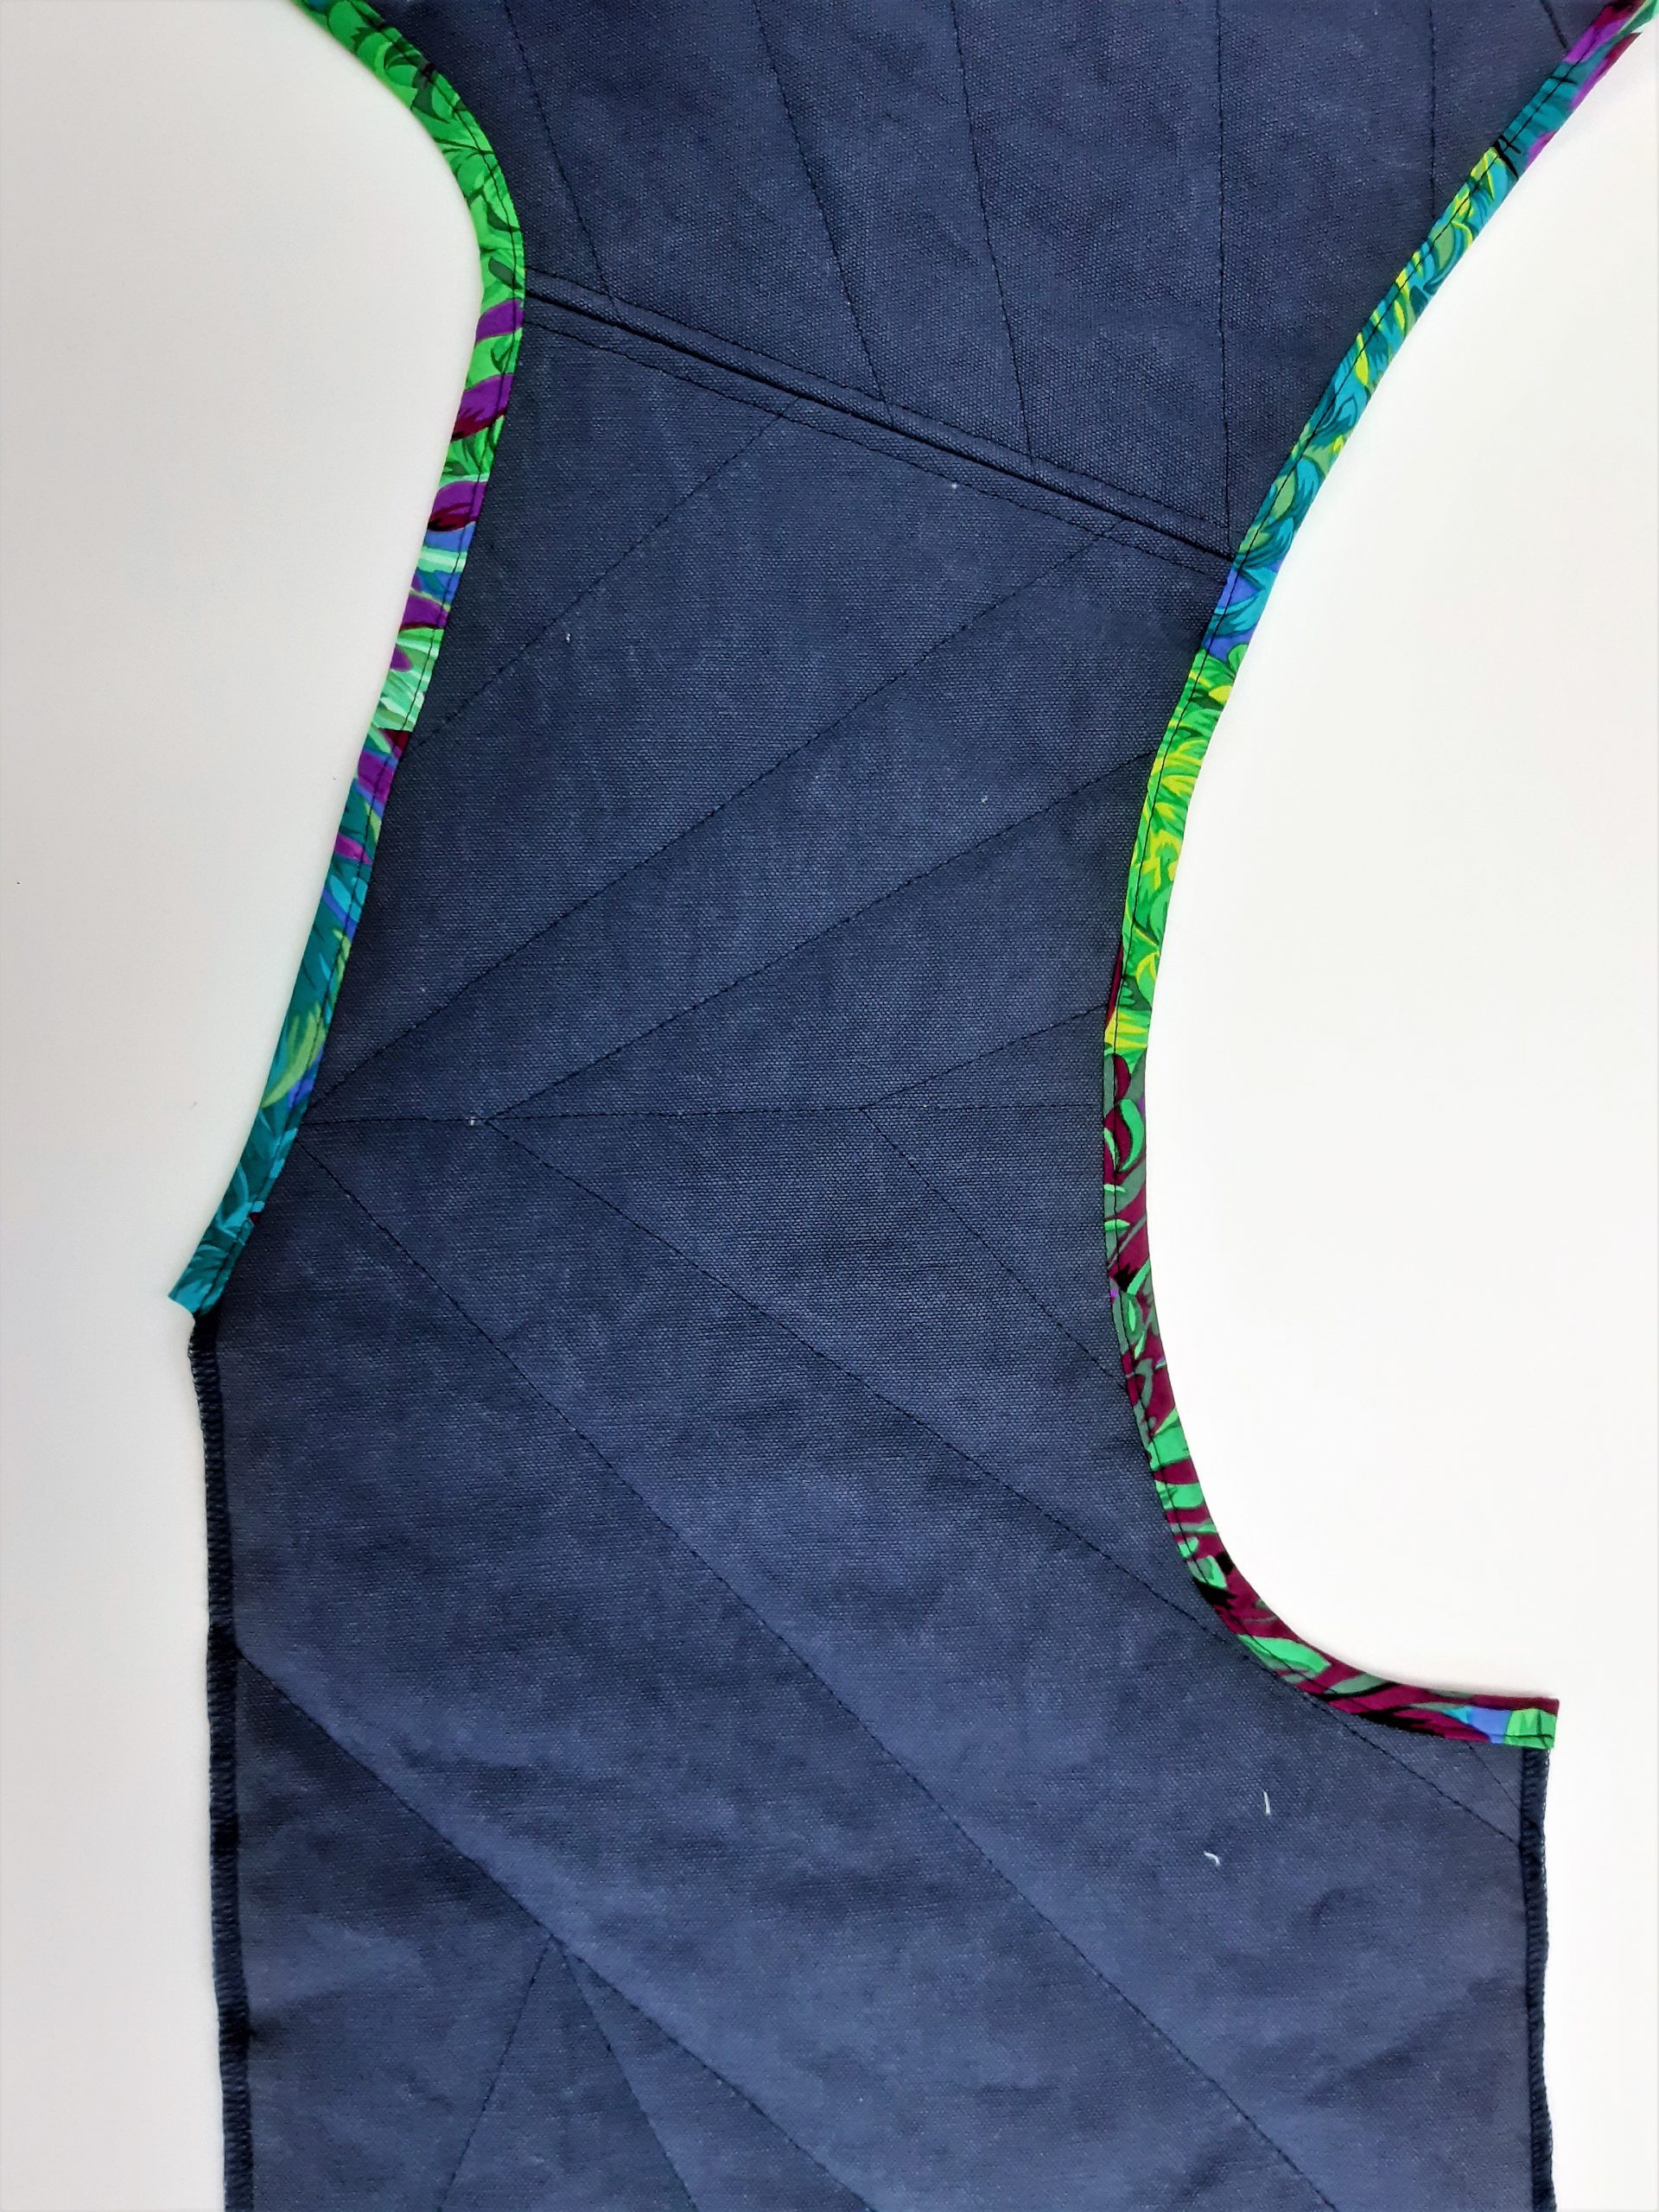
Using the tracing paper and the tracing wheel, transfer the quilting lines and the darts from the pattern to the front (front piece and back piece) of the corresponding dry oilskin pieces.

Mark darts on the lining back piece as well. Close the four darts in the lining and dry oilskin back piece.
Preparation for topstitching the back and front pieces
- Lay the dry oilskin piece front side down, spray the reverse side with spray adhesive and stick the wadding to it.
- Spray the wadding with spray adhesive again and stick the corresponding lining piece to it with the front side facing upwards(!).
- Put both front and back pieces together like a sandwich.
- At the edges, fix the layers with a few pins so that the layers do not move around.

Topstitch Vest
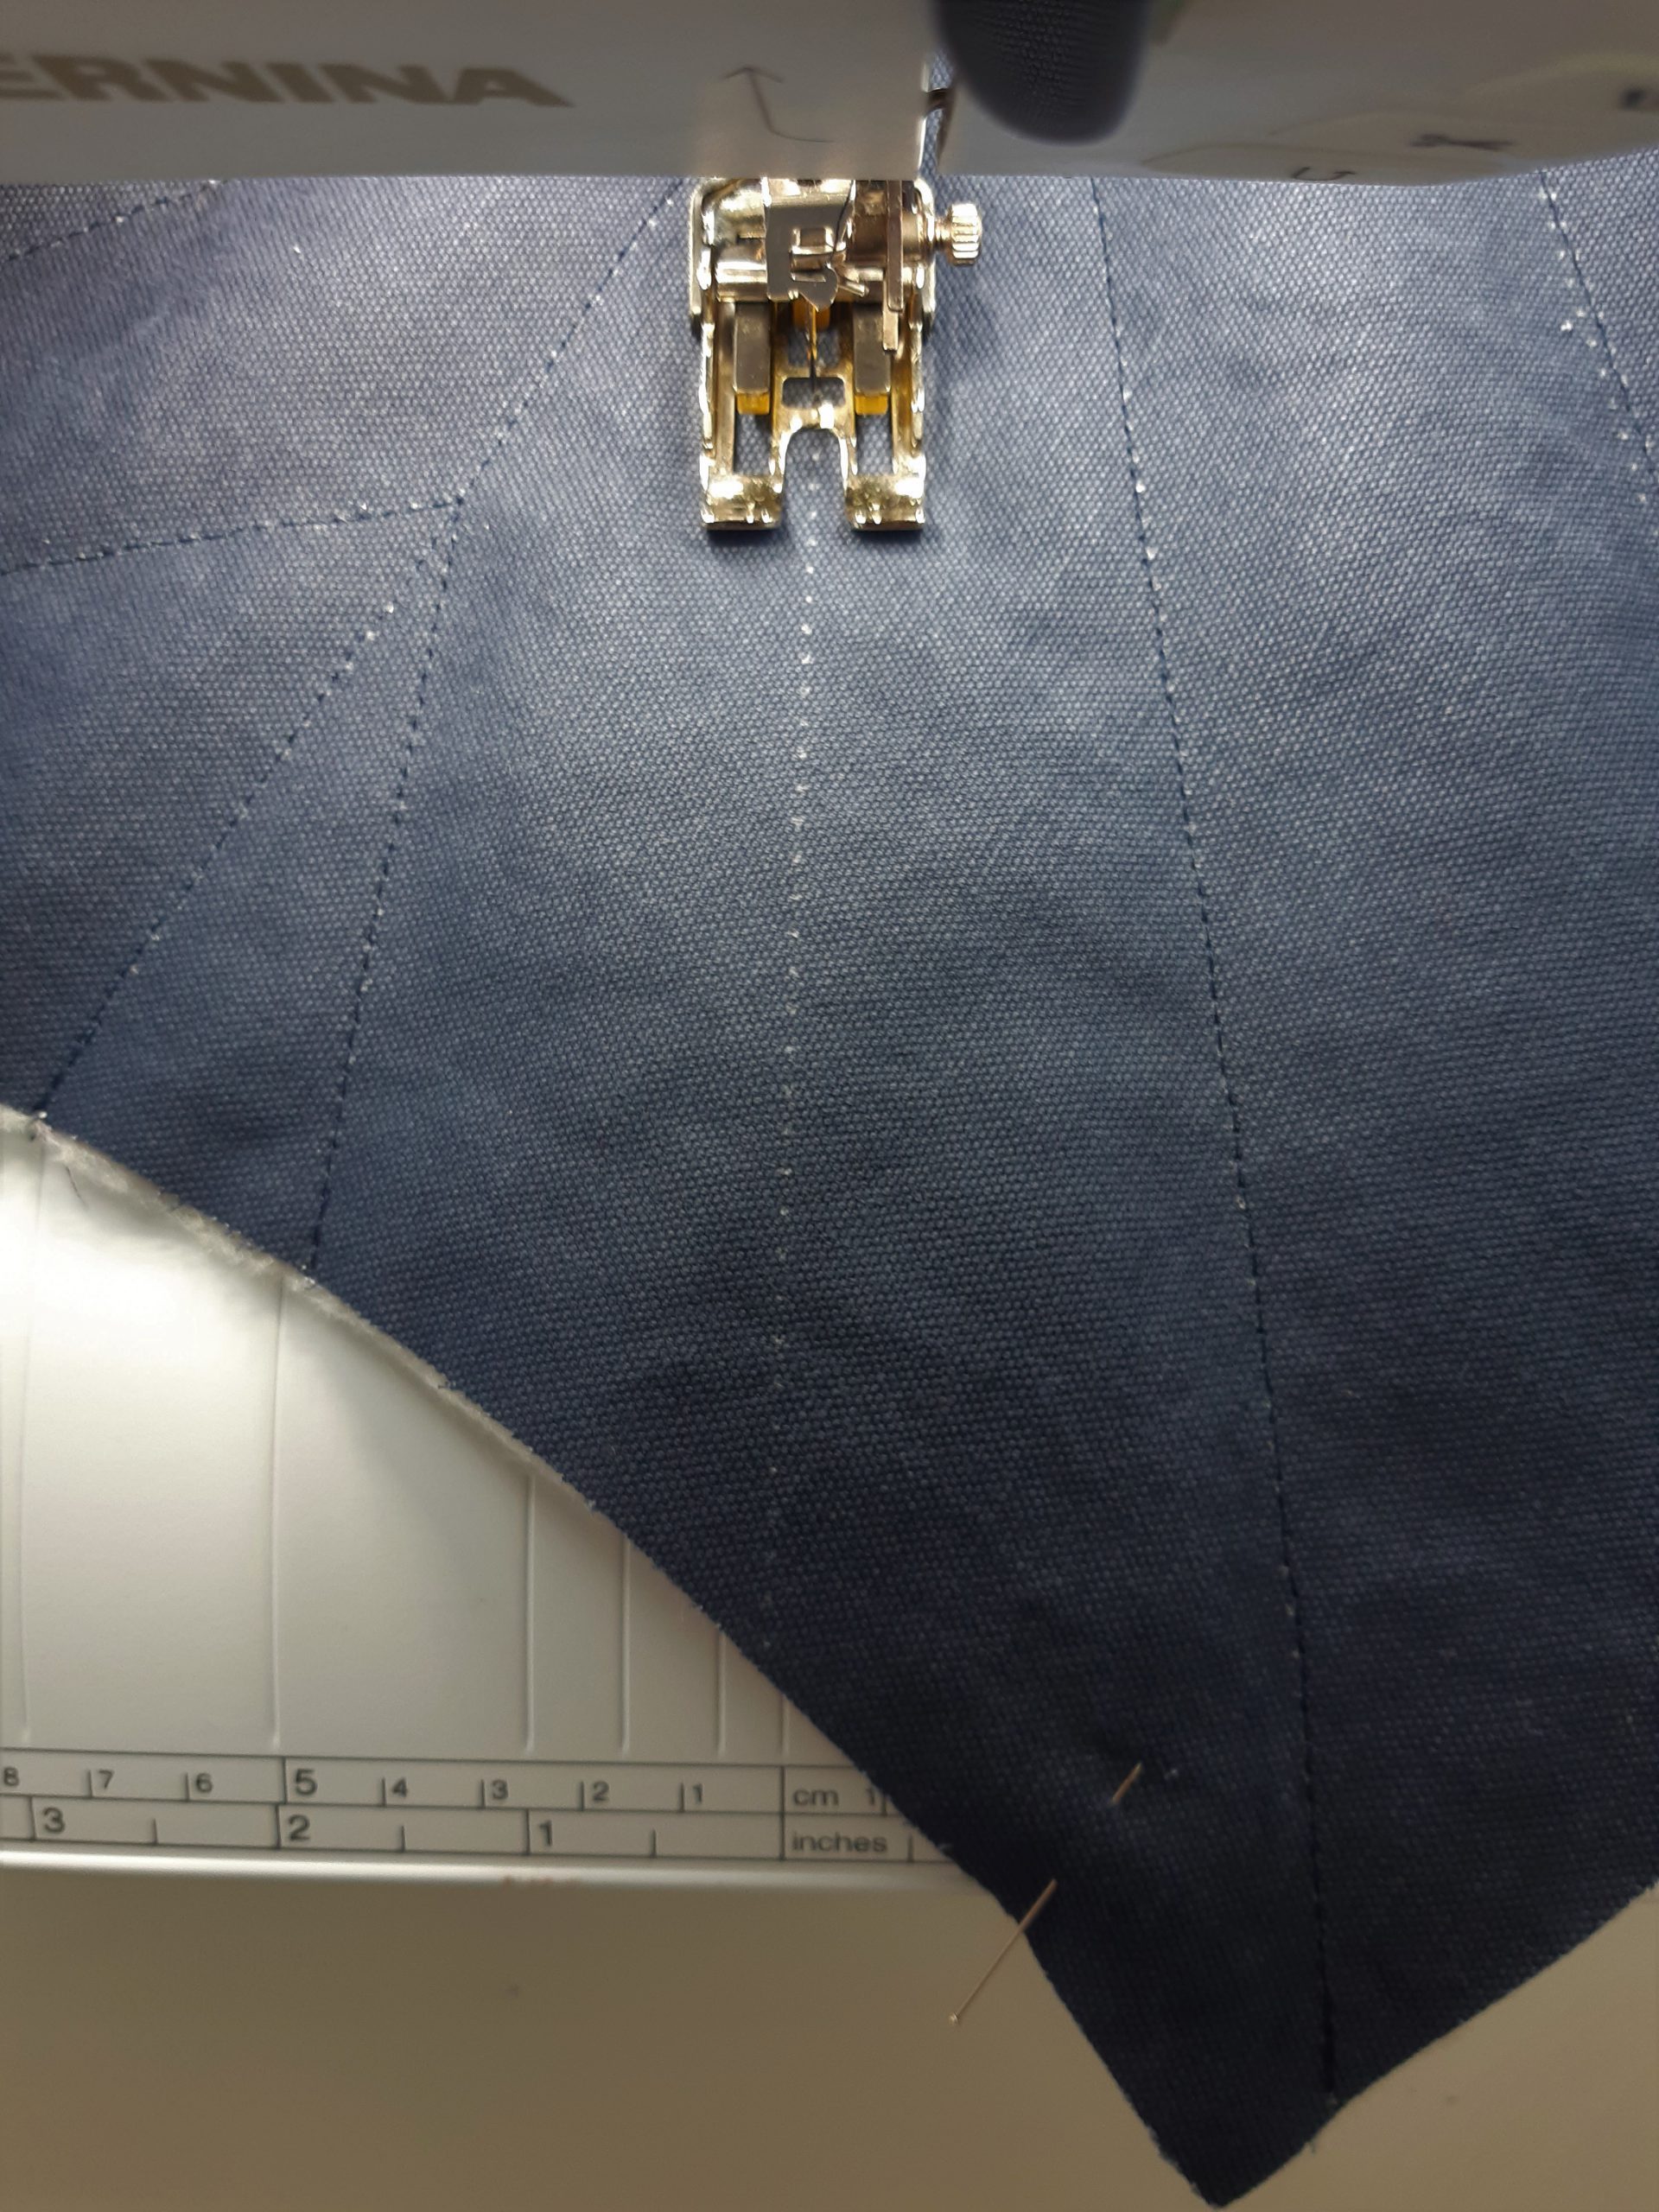
Attach the walking foot #50 to the machine and increase the stitch length of the straight stitch to 3 mm. Now from the dry oilskin side, topstitch the quilting lines transferred from the pattern through all three layers. It is best to stitch the straight cross lines first, so that the pieces are somewhat fixed.

Then serge all the pieces all around with the overlocker; this will make the edge a little flatter and easier to finish.
Sewing vest
Attach the reverse-pattern foot #1 C to the machine. Close the shoulder seams, iron the seam allowance apart and then tightly topstitch the seam allowance from the front.
Now border the armholes with bias strips:
- Pin the strips with the right side to the dry oilskin and flush with the armhole.
- Sew down the strip to the width of the foot.
- Fold the strip around the seam allowance and pin to the inside of the armhole.
- From the front side, sew down with narrow edges.
Border the neckline with bias strips in the same way.
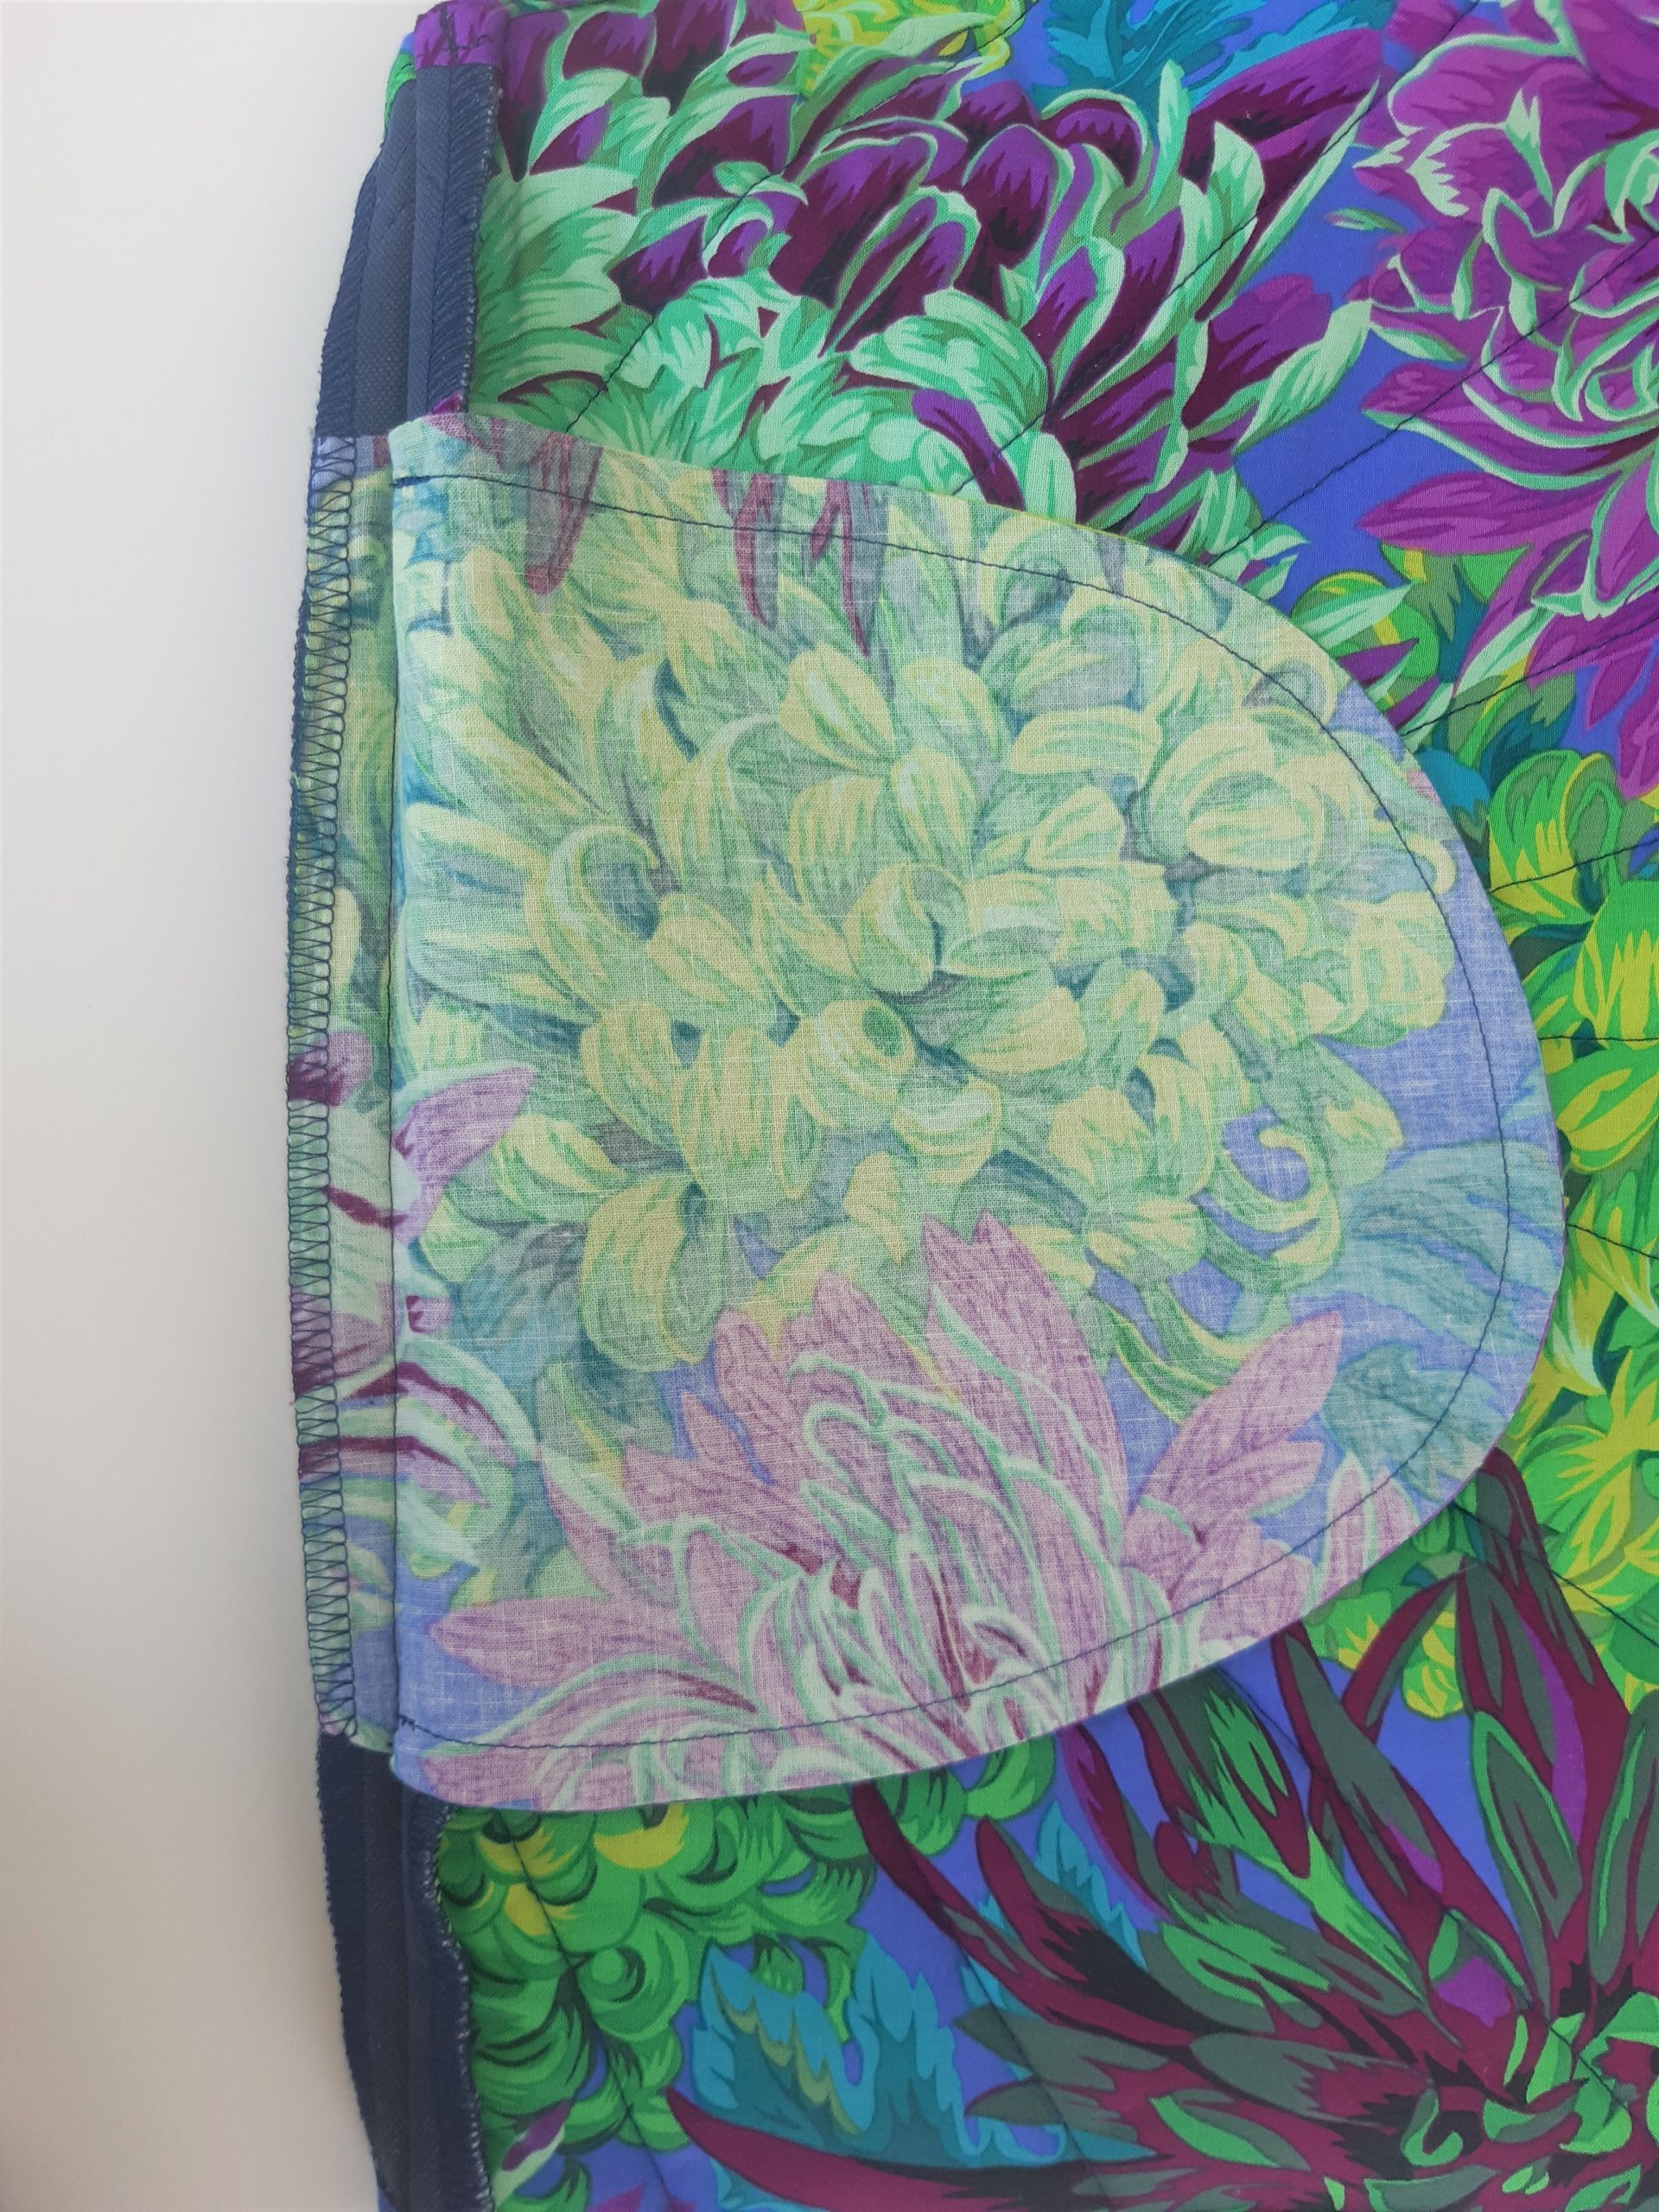
Sew in the pockets of the vest
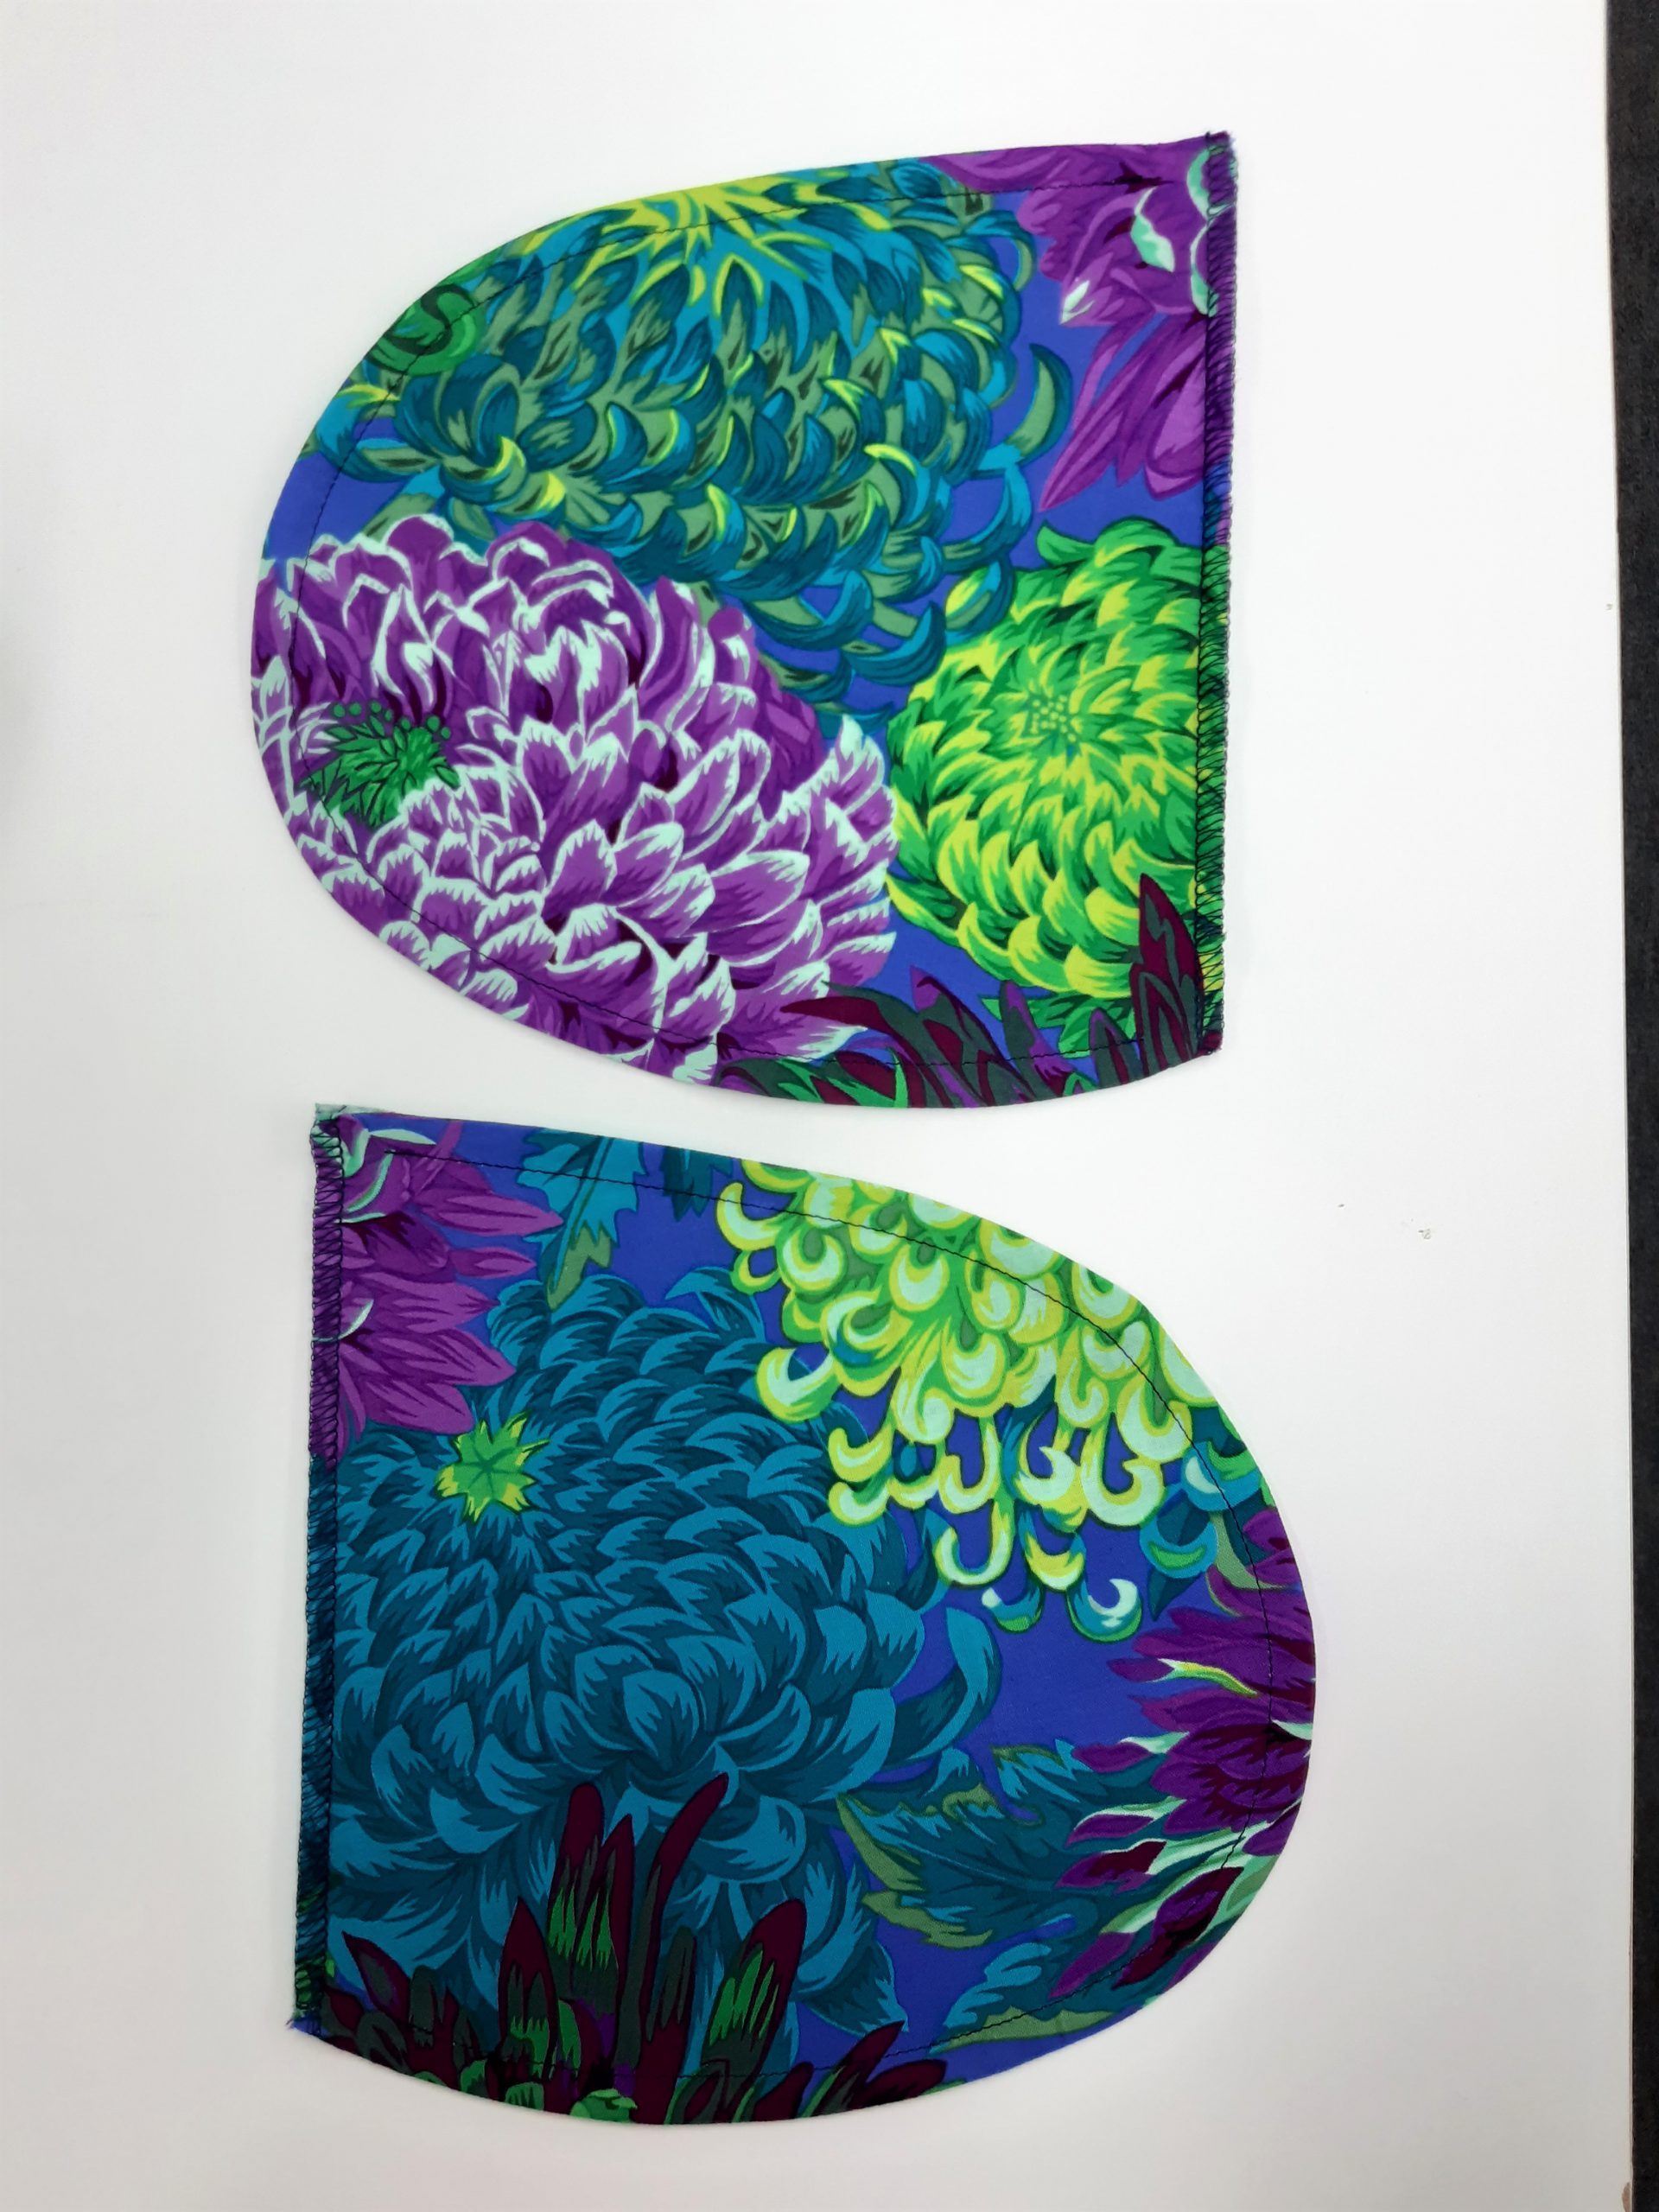
Now it’s time to sew the two pocket pouches.
- Finish all 4 straight edges with the overlocker.
- Place two pocket pouches together, both right sides facing upward.
- Sew the pocket pouches together 5 mm deep, leaving 1.5 cm open at the beginning and end.
- Turn the pocket inside out and iron the edge flat.
- From this side, topstitch the pocket pouch flush with the edge another 1 cm deep (French seam). The beginning and end are also left open here by 1.5 cm.
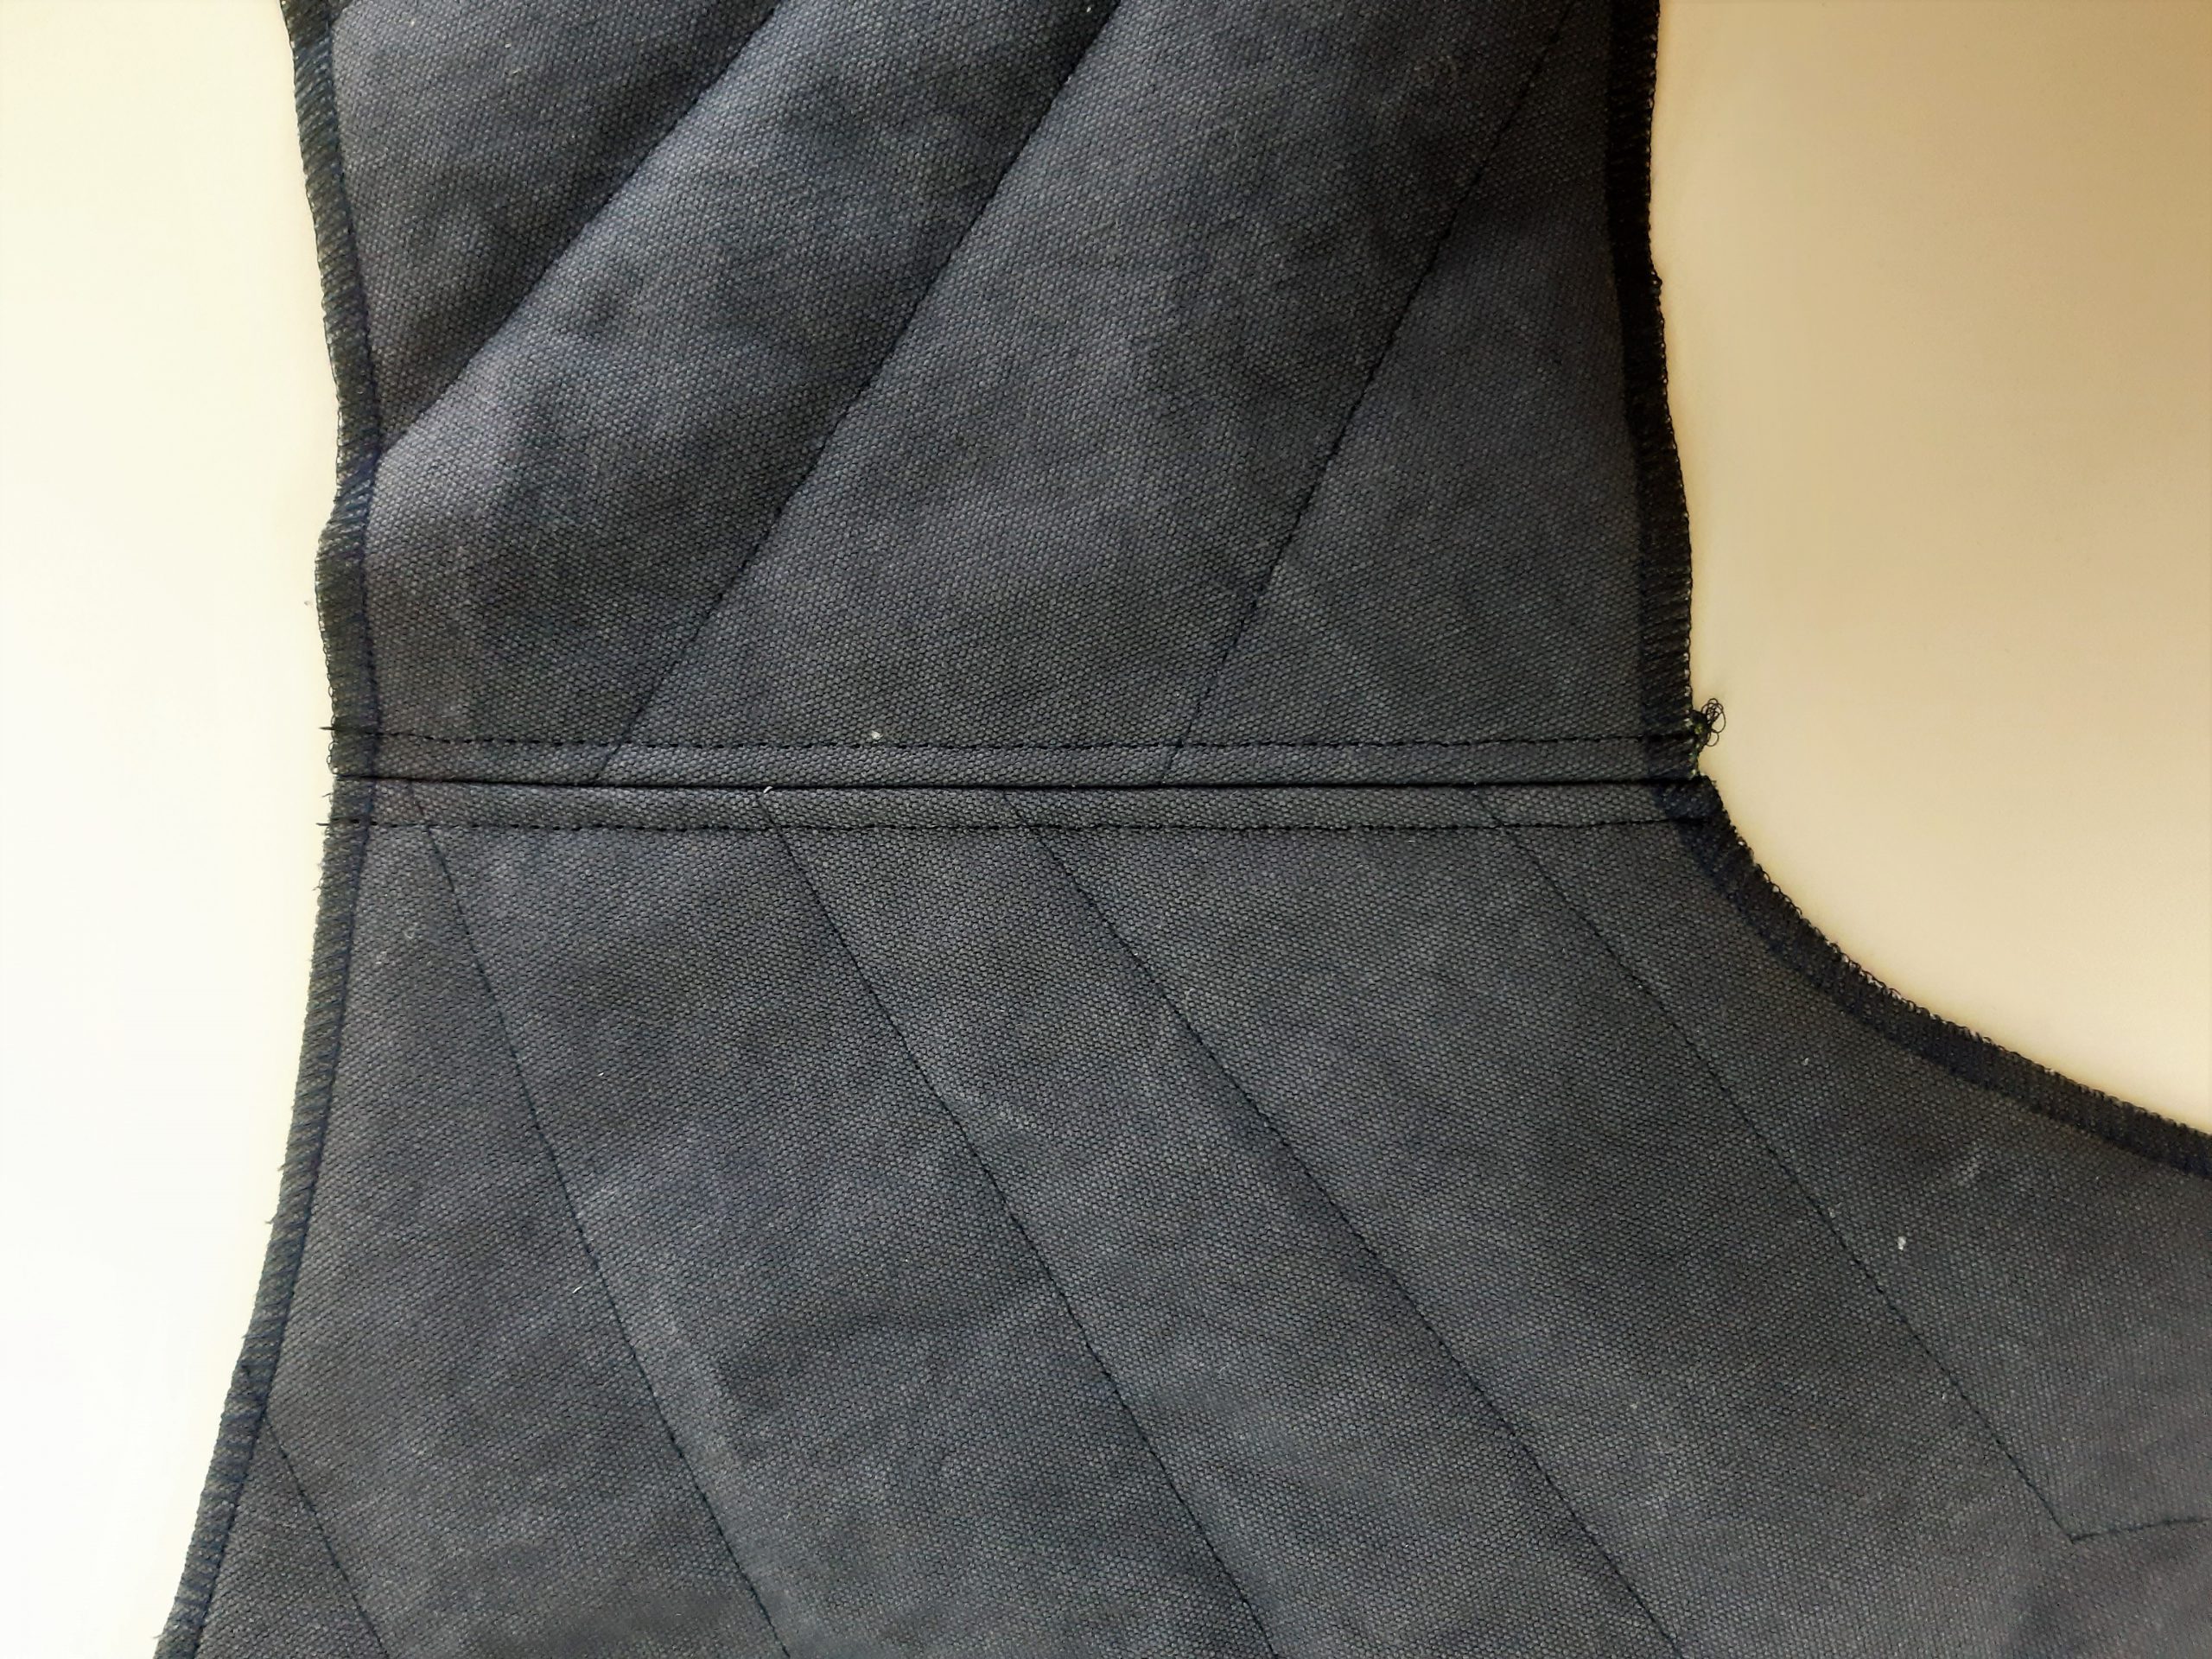
Closing the side seams: Measure 9 cm up from the hem and make a mark. From there, measure up another 15 cm (for the pocket opening) and mark it as well.
- Close the side seams except for this 15 cm pocket opening.
- Iron the seam allowance apart.

At the openings, pin the pocket pouches flush with the seam allowances of the front and back pieces.
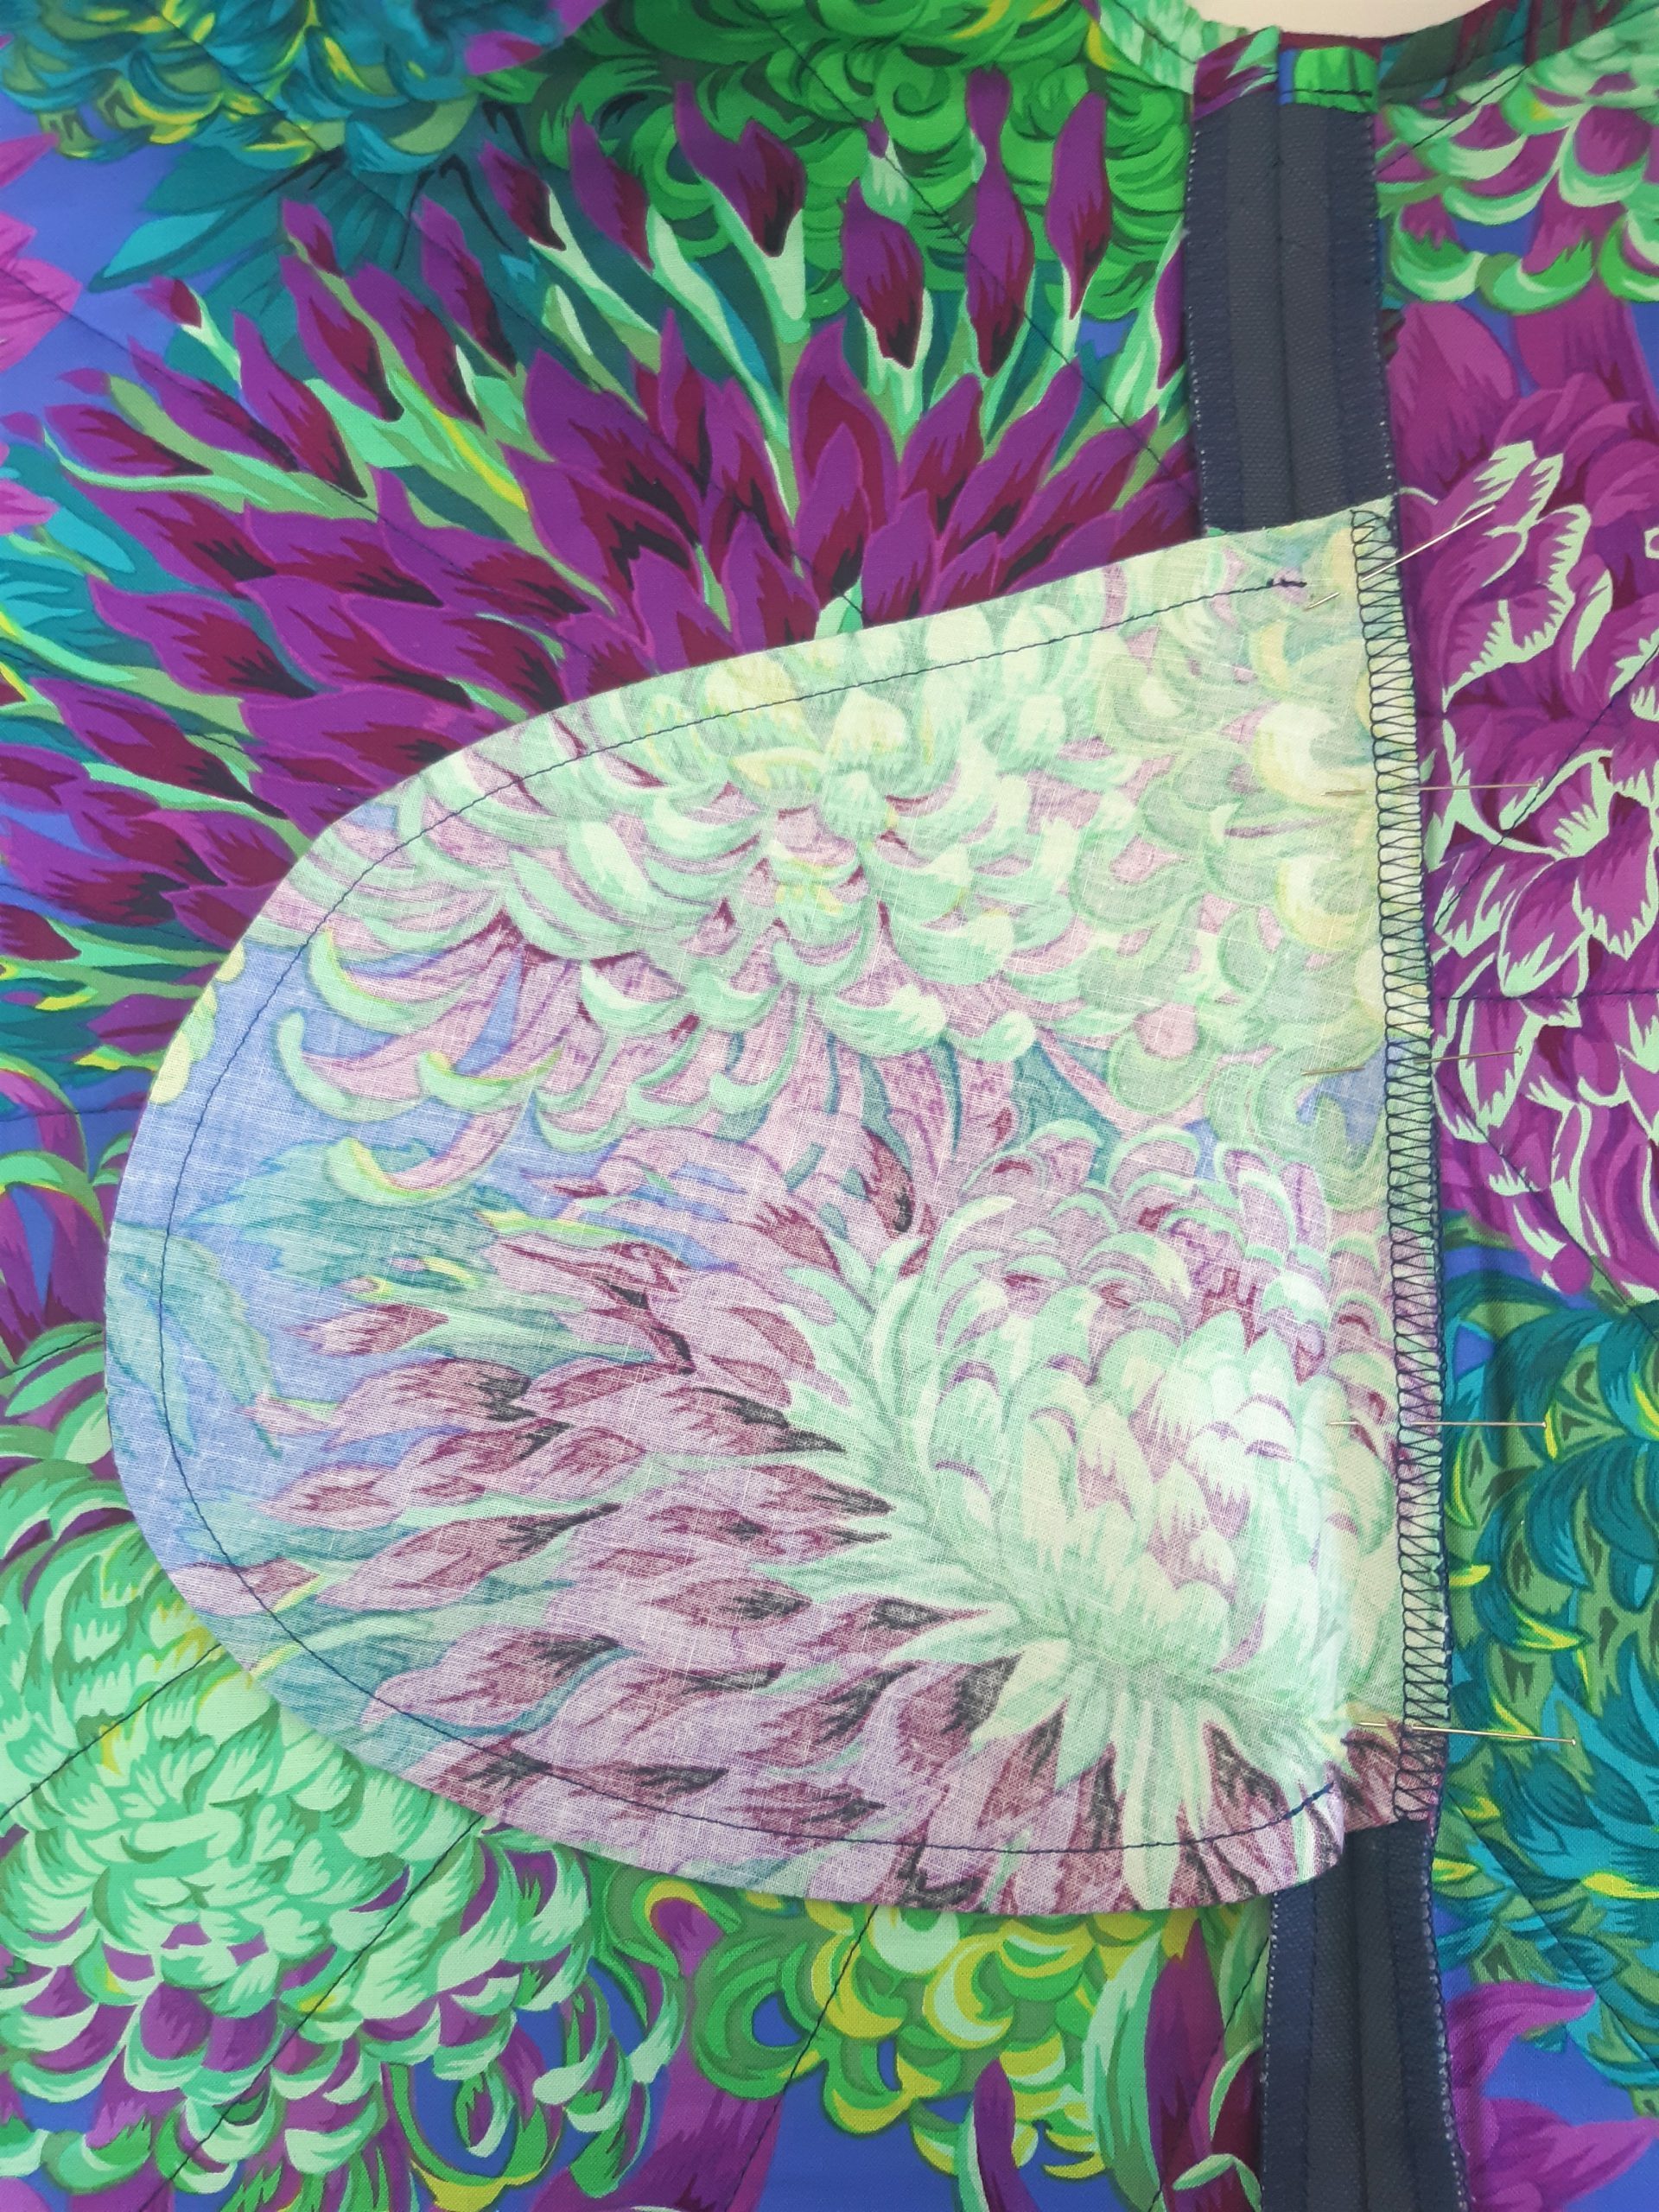
- Using the zipper foot #4 C/D, sew the pocket pouch to the seam allowances with narrow edges from both sides.
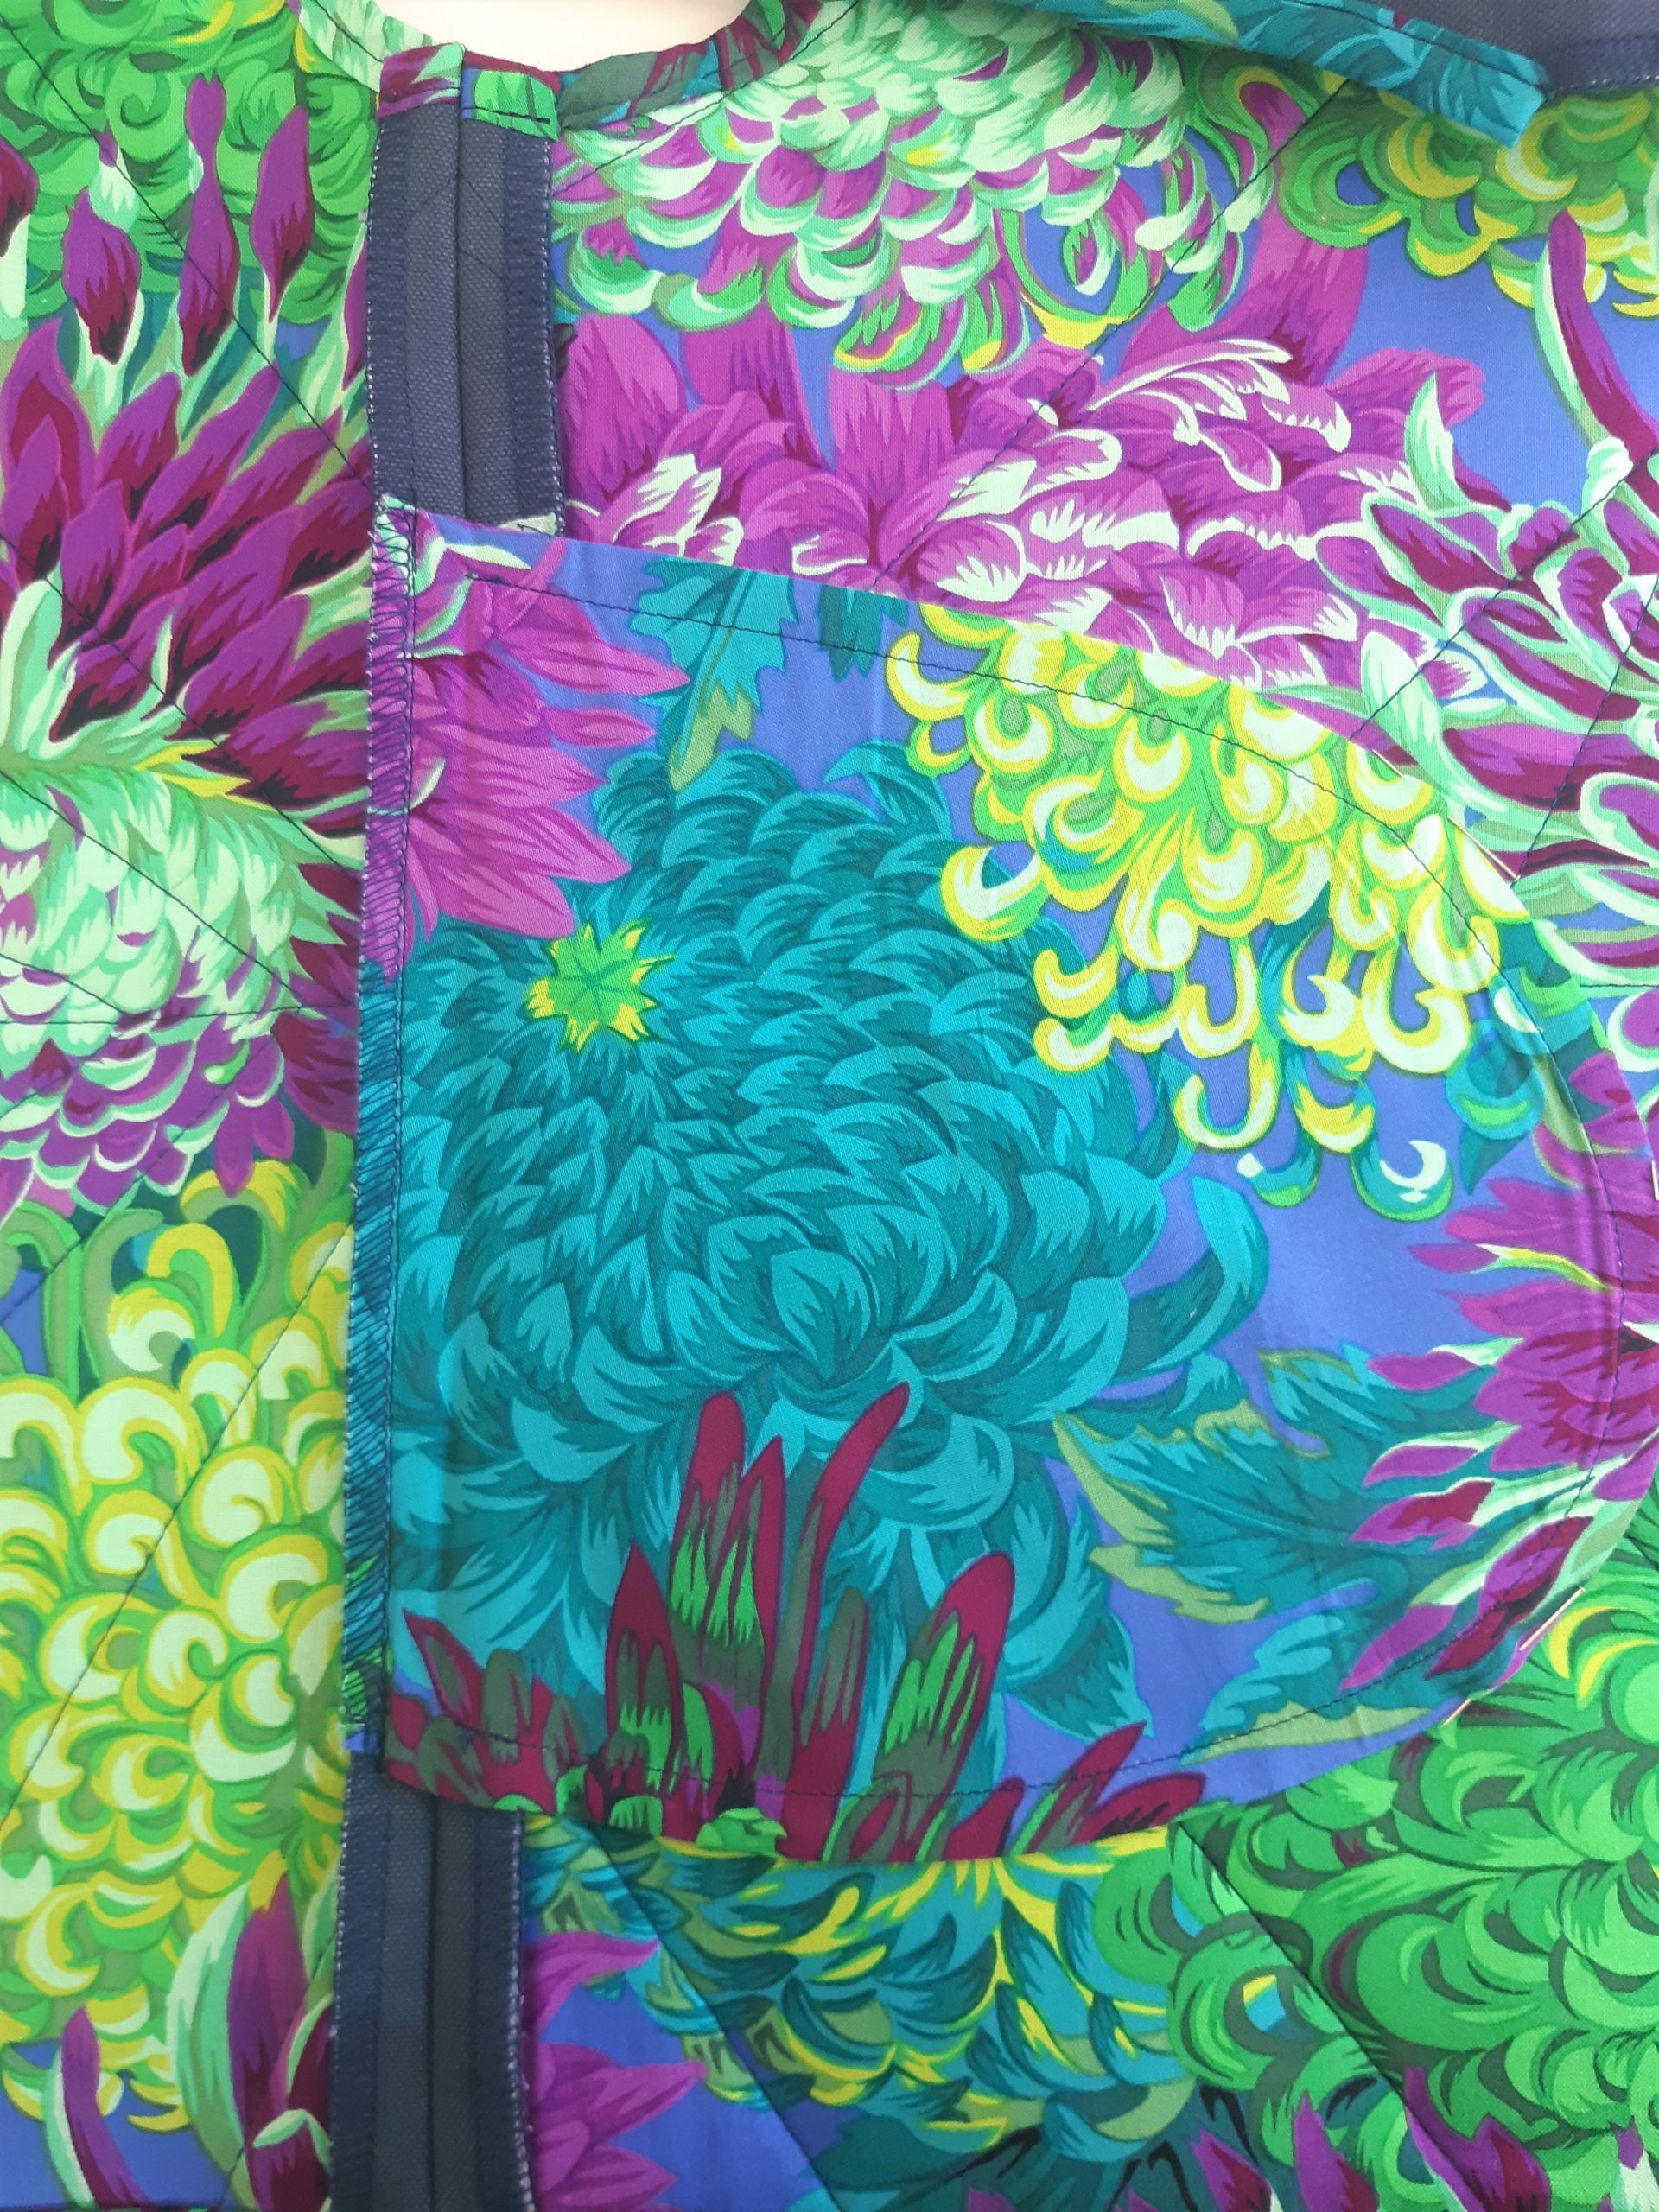
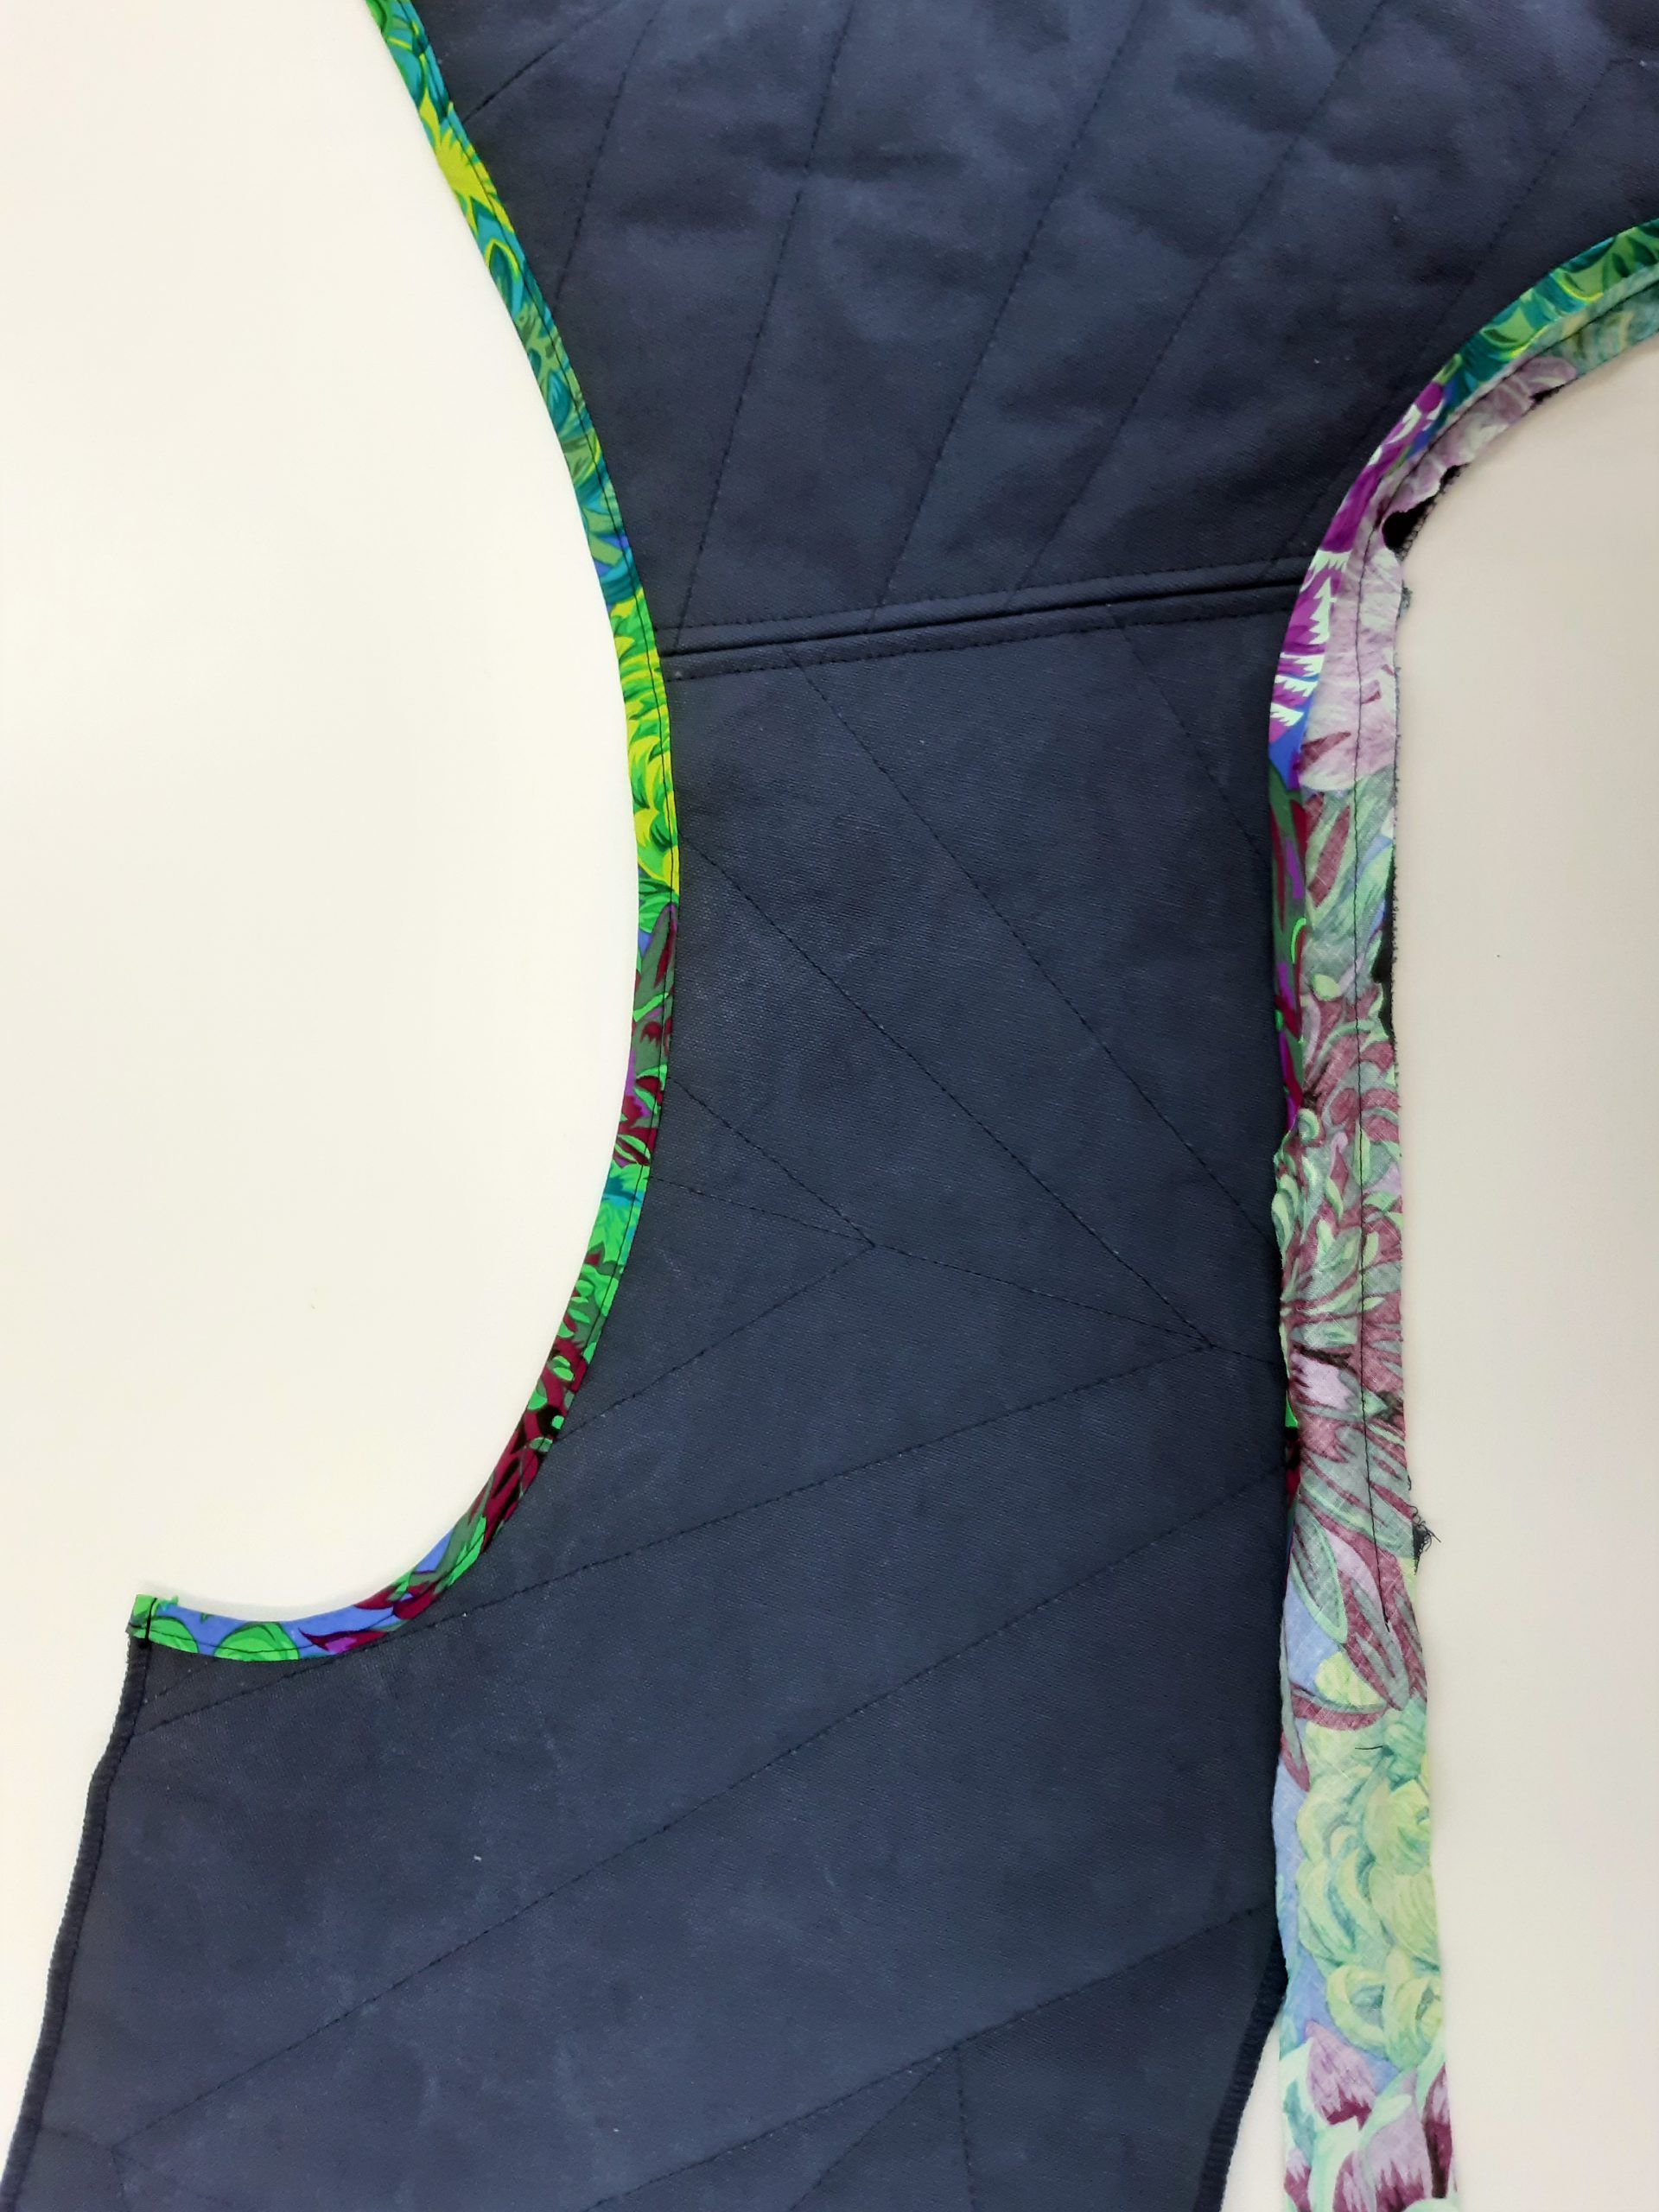
- Iron the pocket pouch flat toward the front and secure to cotton fabric at front curve with a few stitches.
- Also fix the seam allowances at the armholes with a few stitches.
In the same way, border the hem of the gilet as well as the armholes and neckline with a bias strip.
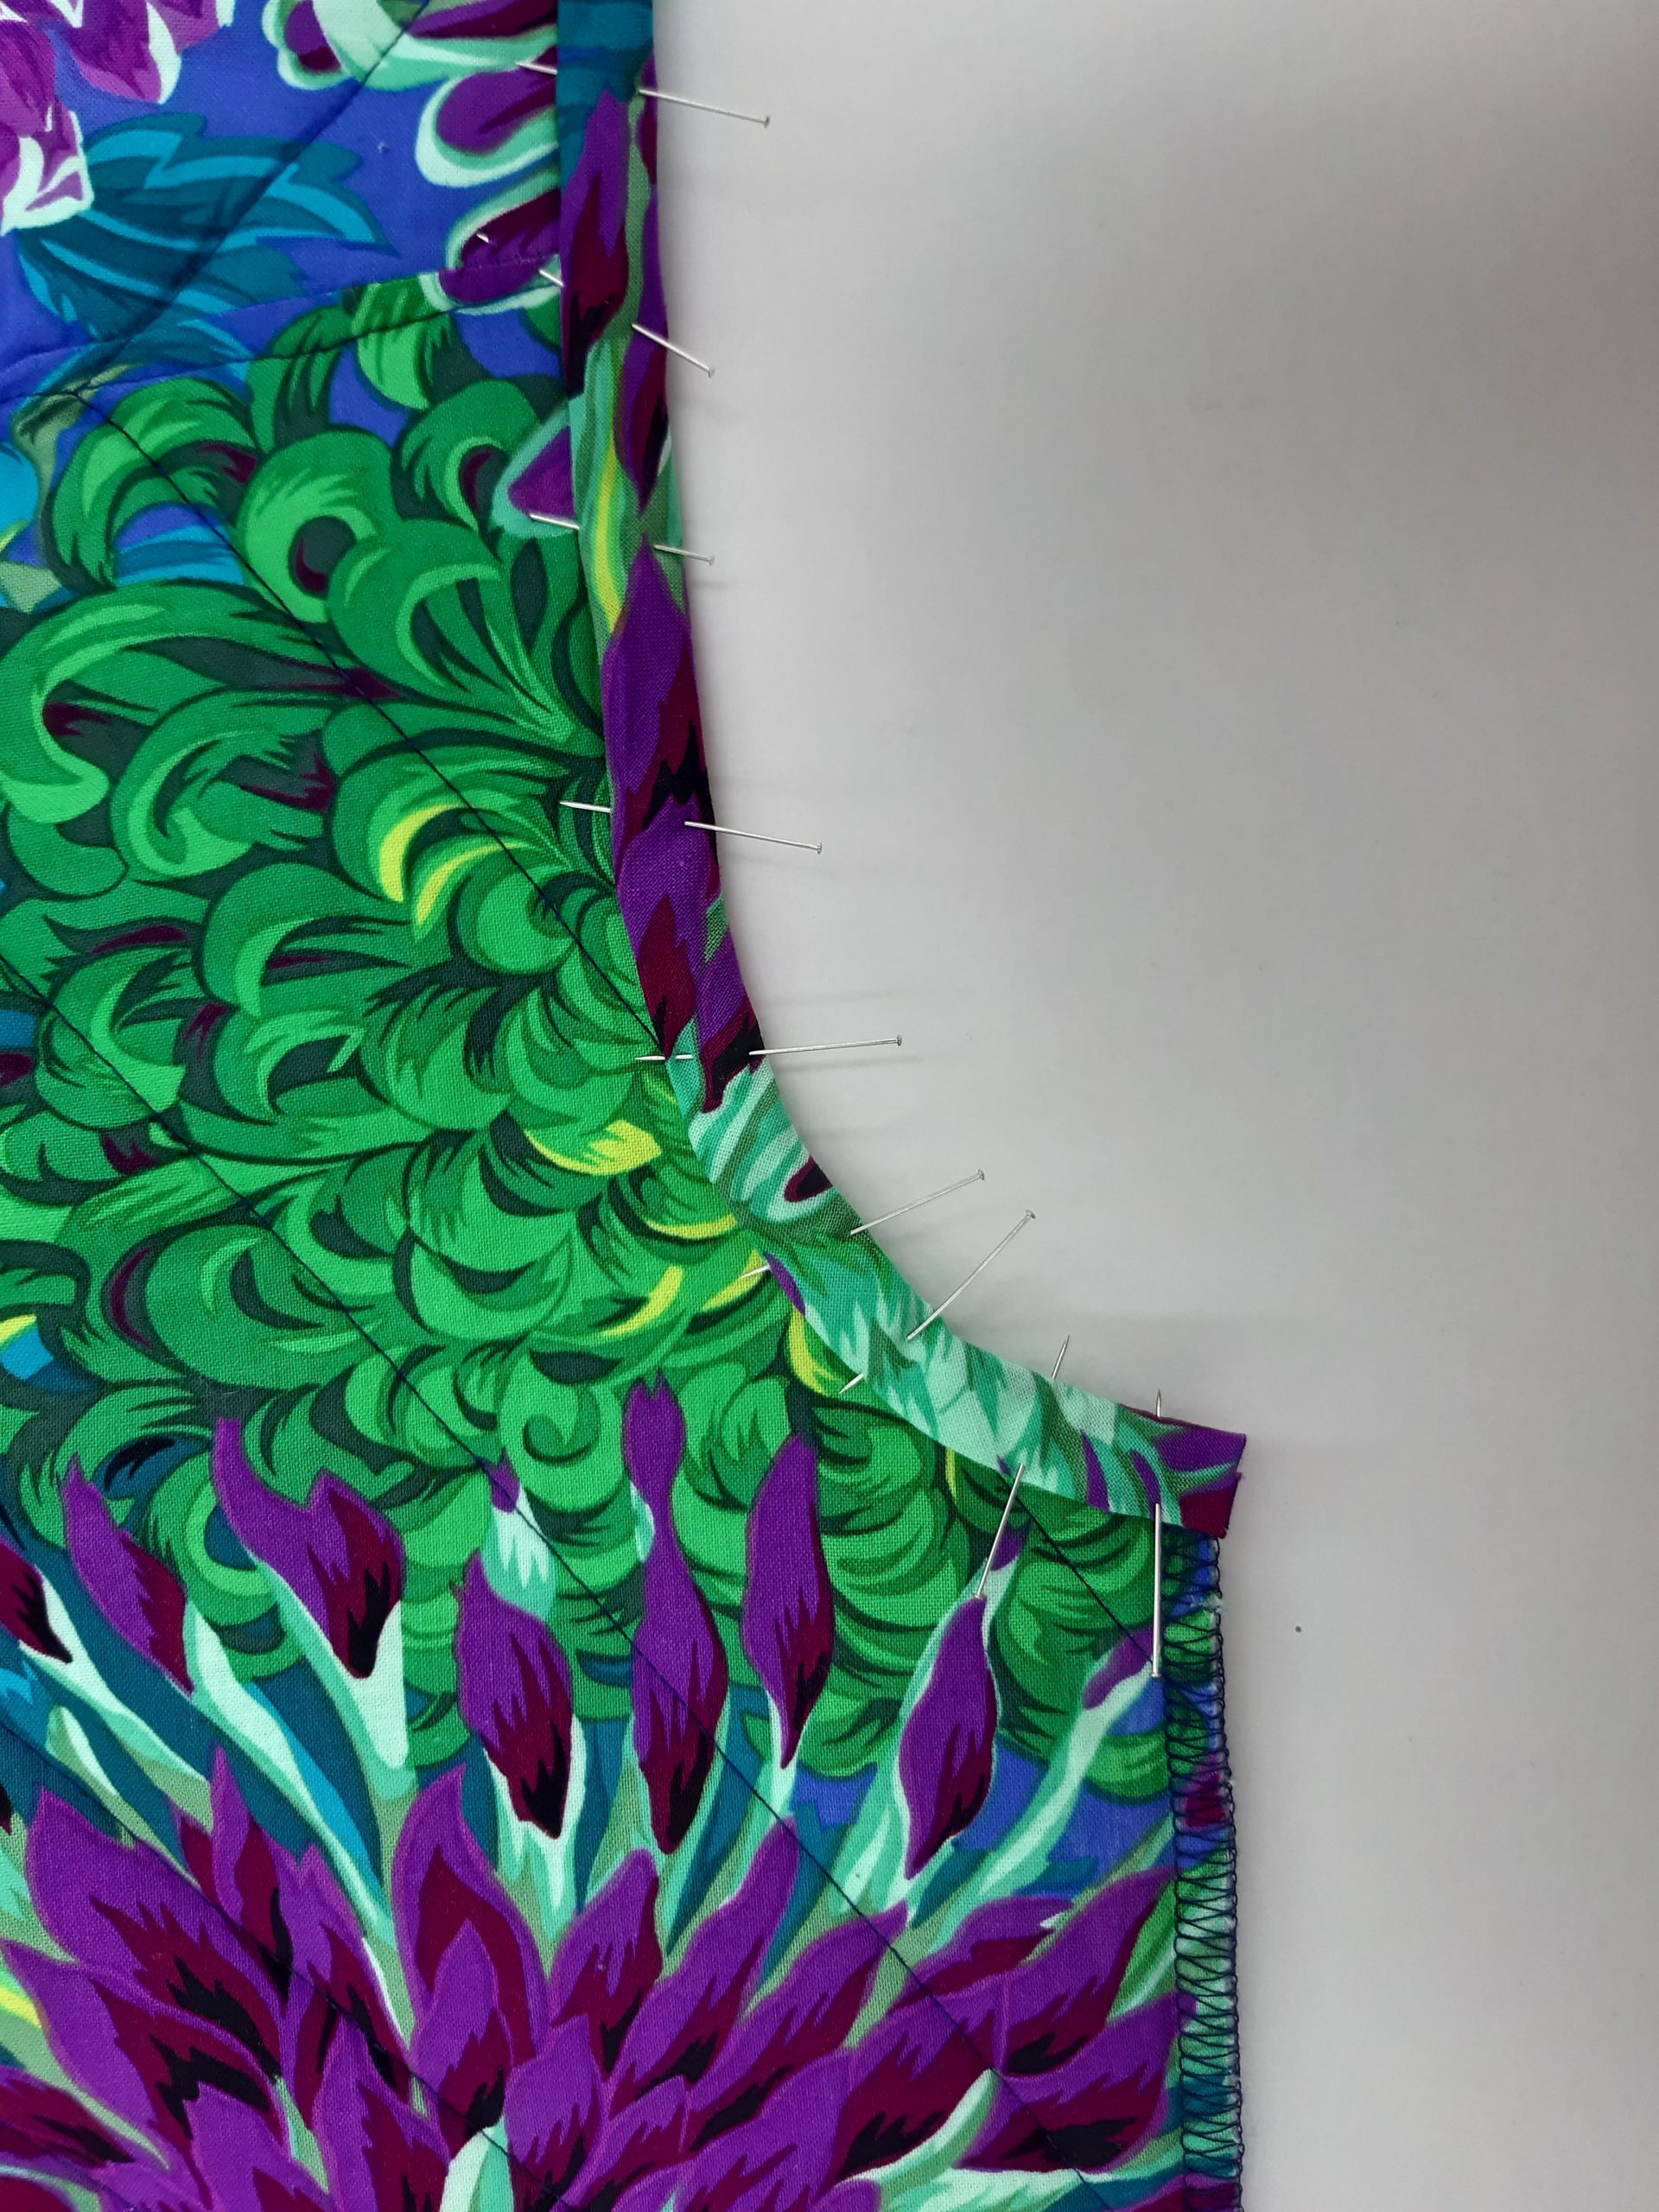
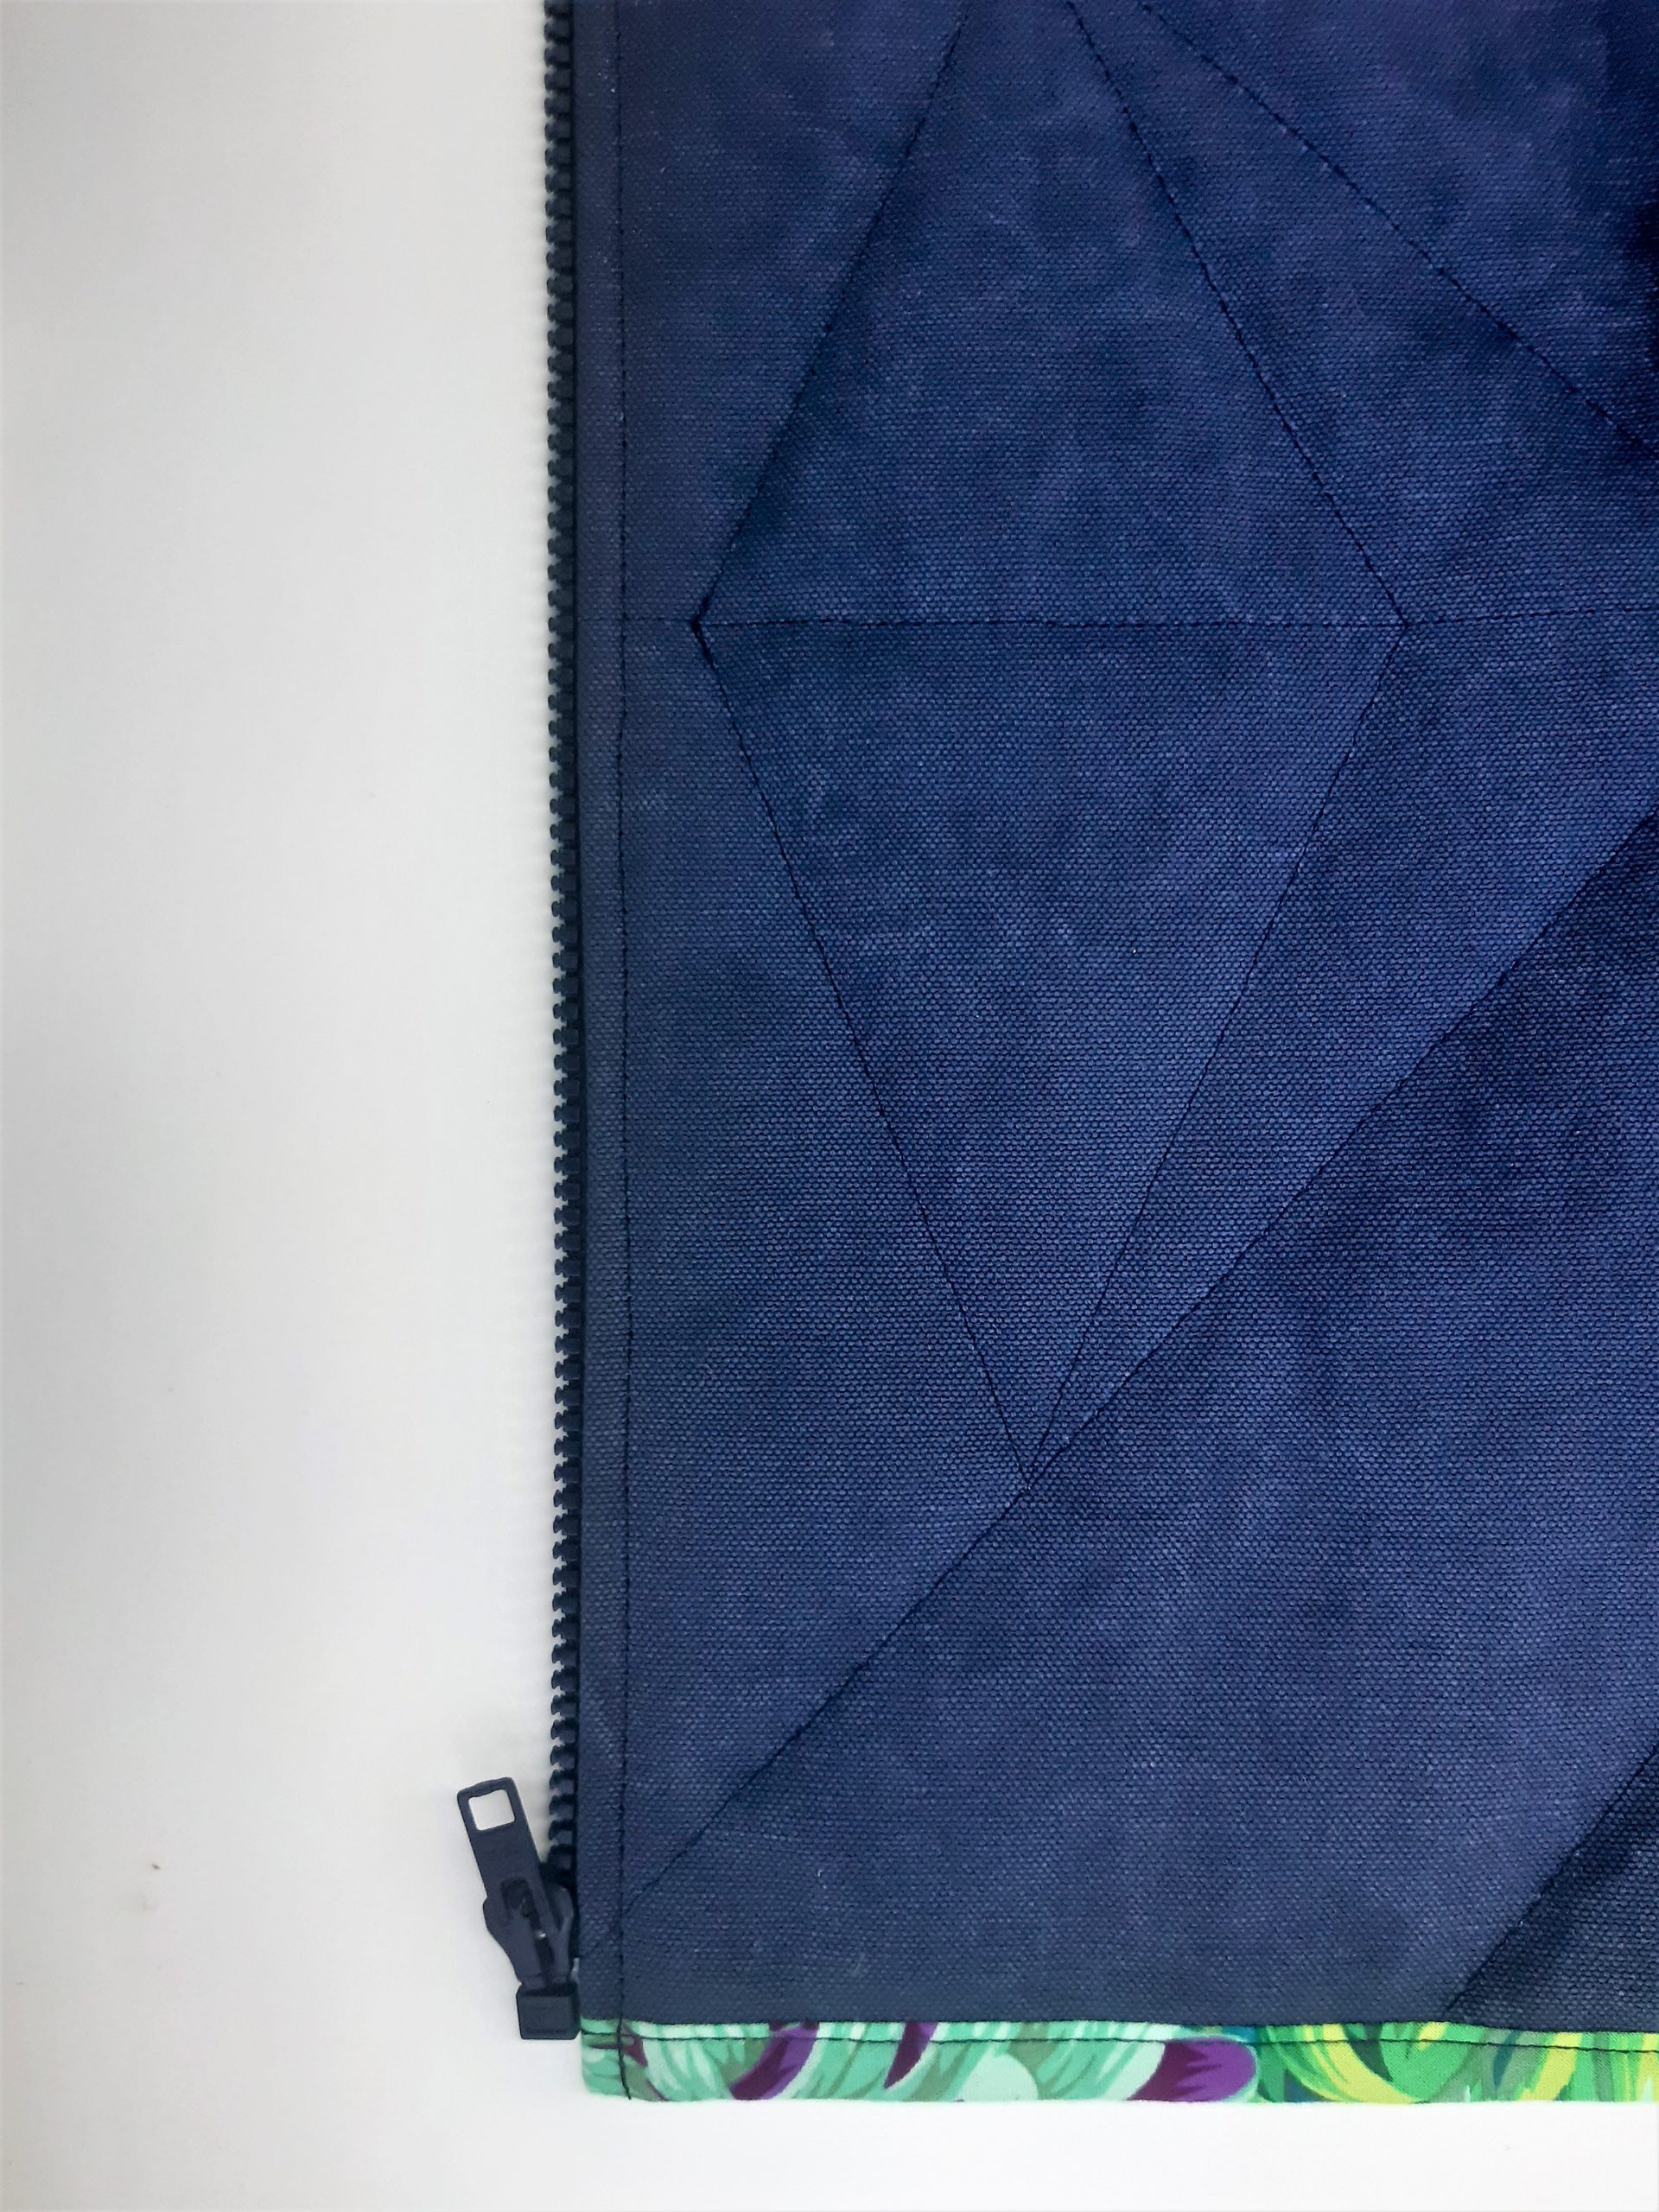
Zipper
- Pin both zipper pieces (right sides together) on the front, flush with the front edge.
- Then stitch it down using the zipper foot #4 C/D.
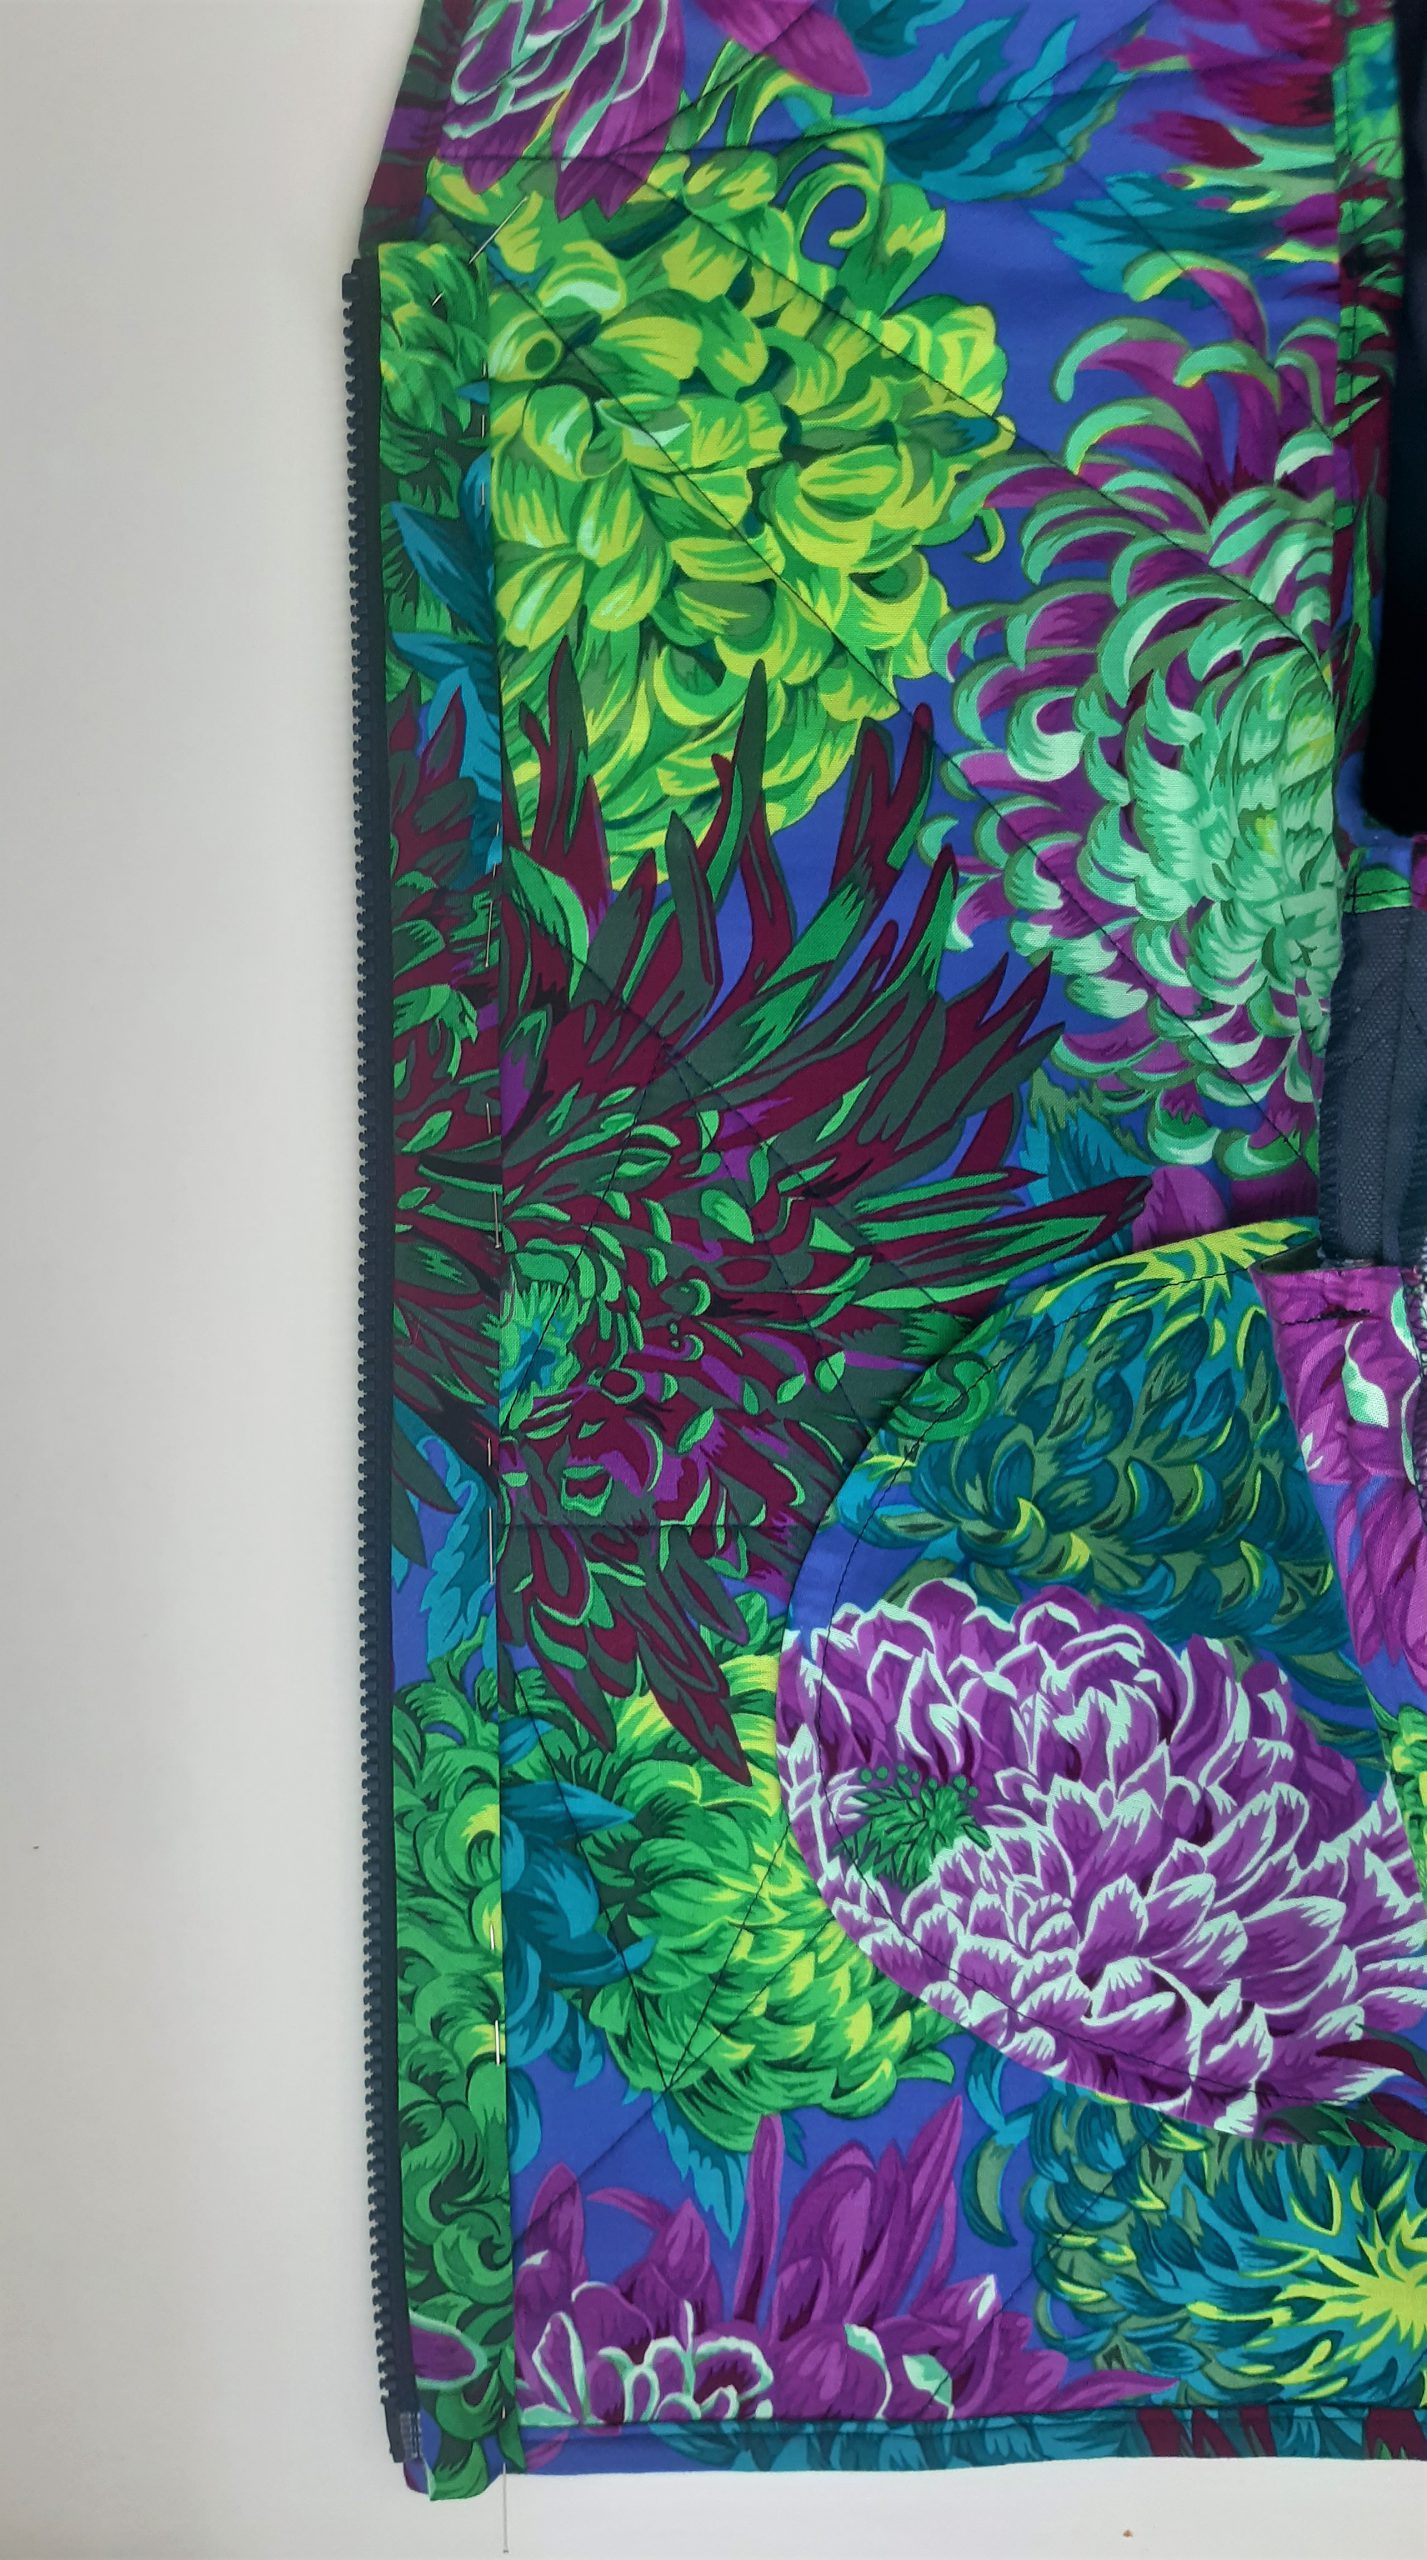
- Lay two bias strips with right sides facing the zipper and pin flush to the front edge. (The zipper is sandwiched between the bias strip and the gilet). Image 18
- Narrowly stitch bias strips in place and iron to the side.

- Fold the bias strips and seam allowance inward and press everything flat.
- Sew the zipper and seam allowance tightly from the front.
- Fold the bias strips inward from the top and bottom of the zipper and hand stitch to the open edges. Make sure that everything is nicely serged and the seam allowance is no longer visible.
Enjoy your new gilet!


0 Responses