 BERNINA Corporate Blog -
We are now in part 3 of the “Learning to Sew for Beginners” series. Do you know what I always tell my course participants and customers? A good sewing result can be achieved with the perfect combination of needles, thread and machine! If you pay attention to quality when selecting these components, then you will have lots of fun creating your projects. What’s more, you minimize sources of error in advance, which will save you time and trouble.
However, as a beginner (although even as a professional), you can often feel lost in the jungle of the names and the large selection – which needle for which project, and which thread for which machine? Today, I would like to provide you with a little insight:

The different sewing threads
There are various quality manufacturers of sewing threads. In this article, I will show you the differences and application examples based on the thread from Amann Mettler.
Amann Mettler and BERNINA can look back on a long cooperation. Every new BERNINA sewing machine is supplied with a sewing thread set from Mettler, and BERNINA machines are tested and configured in the factory using Mettler threads before they make their way into home sewing rooms.
Sewing threads differ in that they can be used for the different machine types, in terms of the raw materials used, their format and, of course, in color.
First we will figure out which is which:
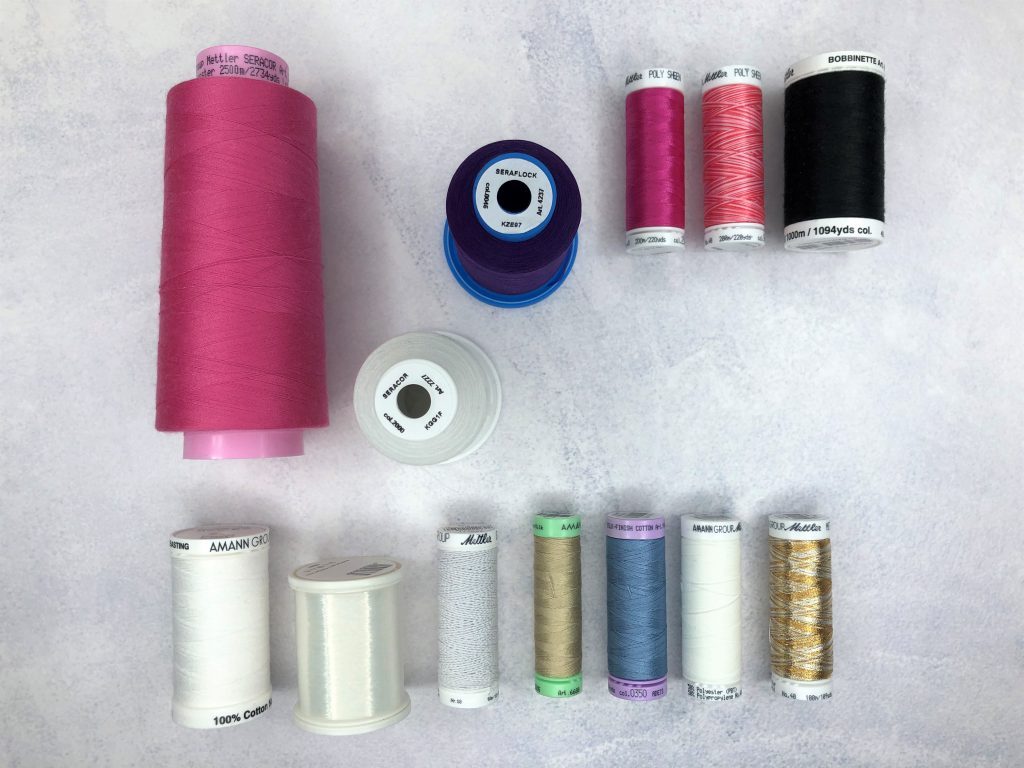
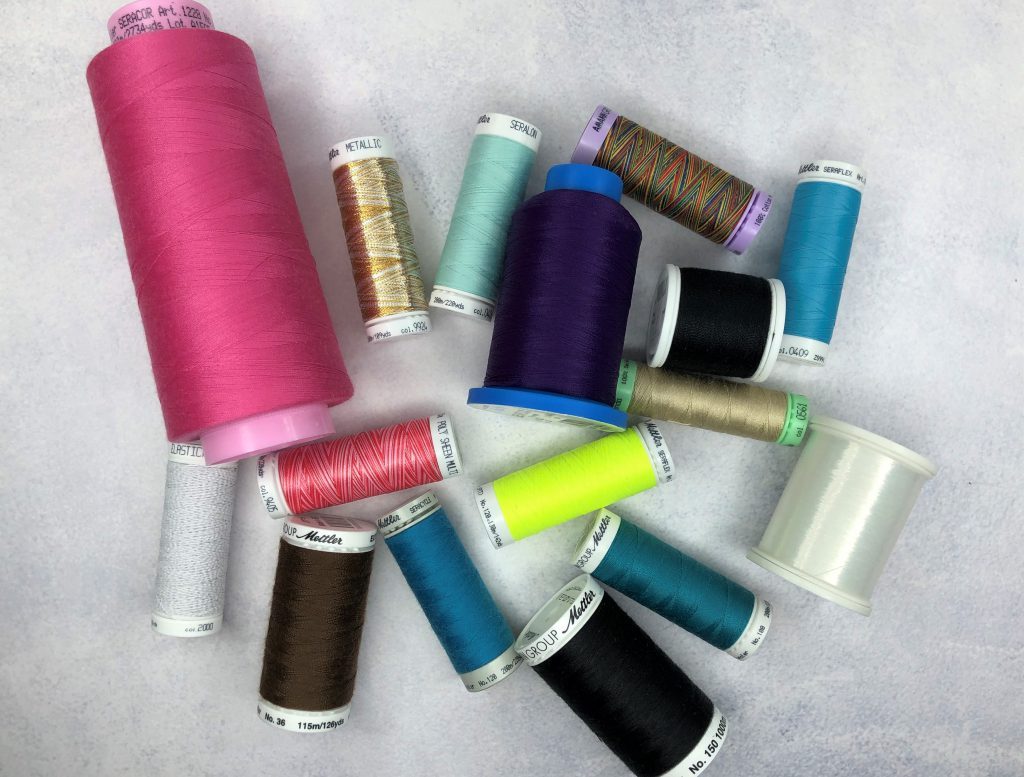
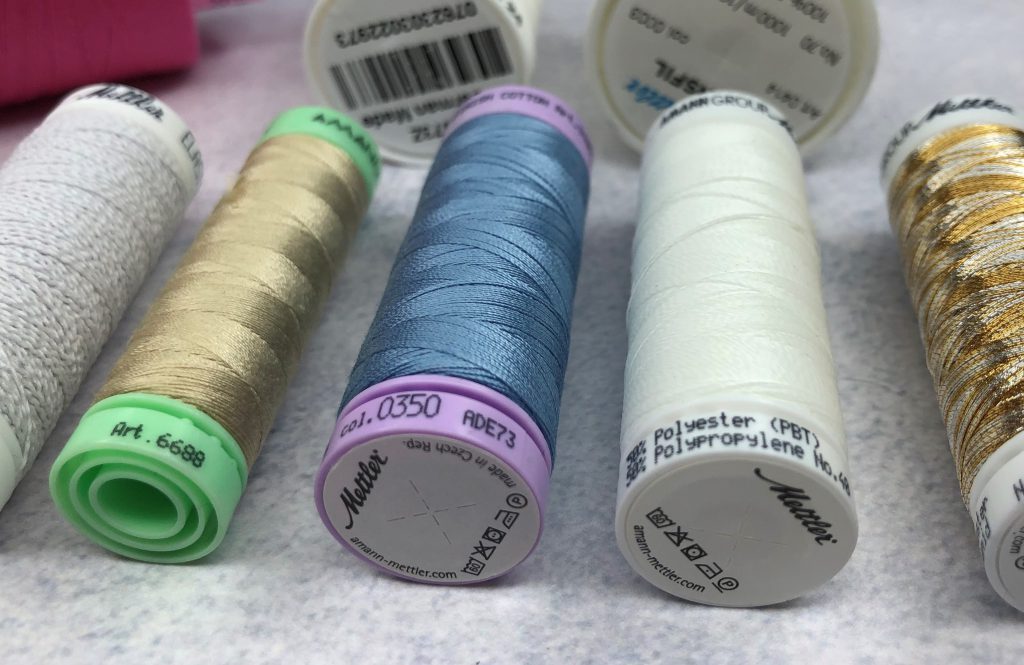
In the picture to the top left, you can see threads for the overlock machine and, on the top right, threads for the embroidery machine. In the bottom row, you will find hand sewing and sewing machine threads (from left to right):
- Staple thread
- Transparent thread
- Elastic thread
- Silk thread
- Cotton thread
- Thread that glows in the dark
- and metallic thread.
Which thread for which machine?
For the sewing machine, it is important to determine which material to use for your project: there is a universal sewing thread (Seralon) for all types of fabric and stitch. For seams that have to withstand a heavy load or are used for decorative purposes, there are stable, tear-resistant and chafing- resistant threads (Extra strong). If you want to work with stretchy fabrics on the sewing machine, it is recommended that you use an elastic sewing thread (Sera Flex).
For an overlocker, use a universal overlocker thread (Seracor) for classic projects. These threads also differ in terms of their fineness – for barely visible seams on lightweight fabrics, there are finer threads (Seralene) and a rolled hem uses woolen thread (Sera Flock) to provide the necessary vollume.
For a great result when using embroidering machines, there is an embroidery thread with high tear strength and beautiful shine (PolySheen), and for the bobbin thread, you should use an embroidery bobbin thread for (almost) all projects (bobbinette).
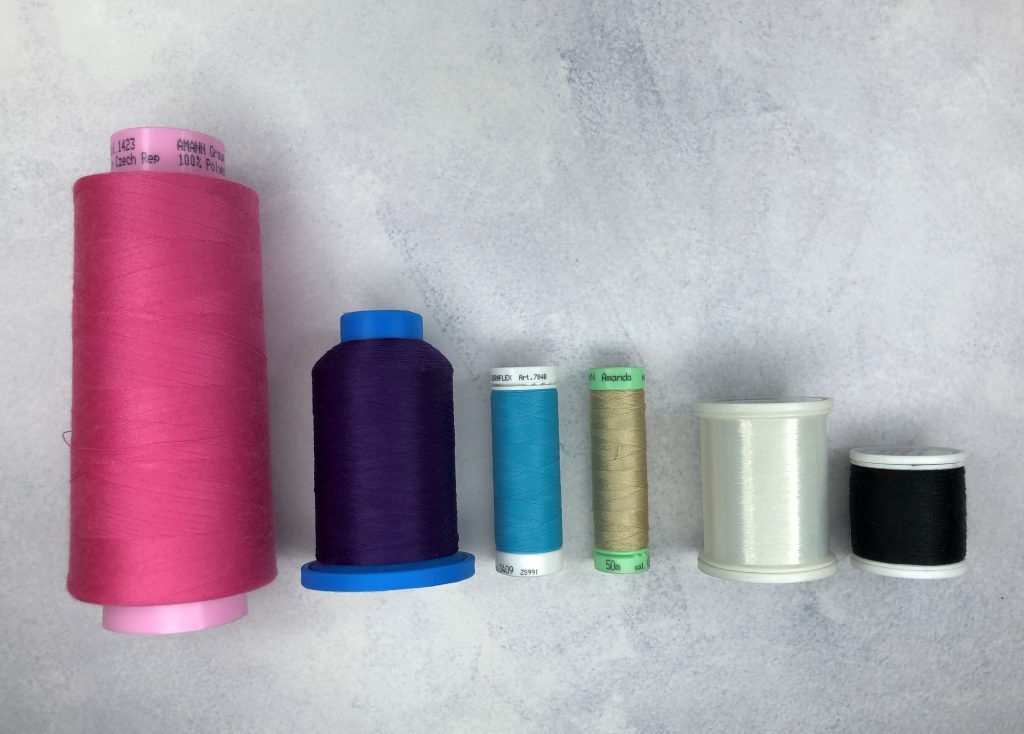
Format
Here in the example from left to right: Kone with 2500 m, Miniking coil with 1000 m, various bobbins with 125 m/50 m/1000 m and 125 m. Depending on the machine and the project, you receive the right length of thread.
On each spool of thread, you can find the most important information: Label number, such as no. 120, color, part number and name, batch, raw material, care instructions and presentation. The numbering of threads still differs to some extent from one country to another; however, the following rule of thumb applies; the lower the label number, the larger the sewing thread. You can find out the exact fineness directly from the manufacturer.
The different raw materials
Sewing thread can be made from natural fibers or from chemical fibers. This has an effect on appearance, abrasion resistance and stretch, alongside other factors. For completely resource-conscious sewing projects, for example, there are threads made from 100% recycled PET bottles. The bobbin itself also consists of 100% recycled raw material (Sera Cycle).
Consult the manufacturer directly, where you can find all the details for each thread, such as instructions for use, needle recommendations, and raw material information:
Mettler threads for sewing, embroidery, quilting and overlocking
Which needles should you use?
The quality and choice of needle has a great influence on the quality of the sewing and embroidery results. But how do I select the correct one?
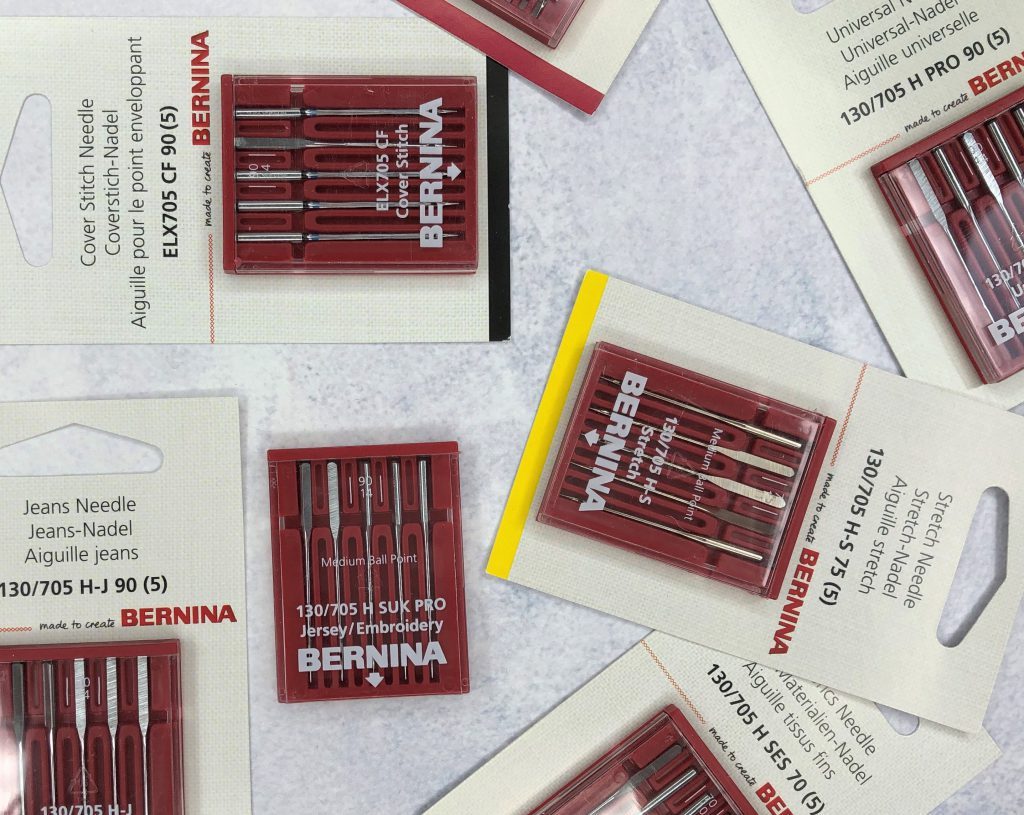
The needle system for all BERNINA household sewing machines is 130/705 H, which is the flat shank needle. These are flat on one side of the piston, meaning they can only be inserted into the needle bar in one position. For older machines, round piston needles are still required (the pack on the right in the photo).

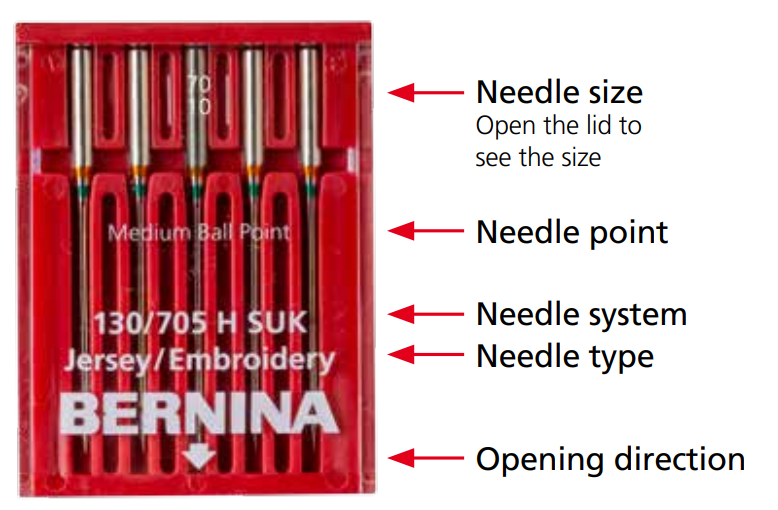
For all needles, the various information is printed on the needle box:
In order to identify the needle size and needle type, certain BERNINA needles have a color code. The first color shows the application, the second color shows the needle size. For example, Universal needles are available in needle sizes 60-120. The smaller the number, the thinner the needle.
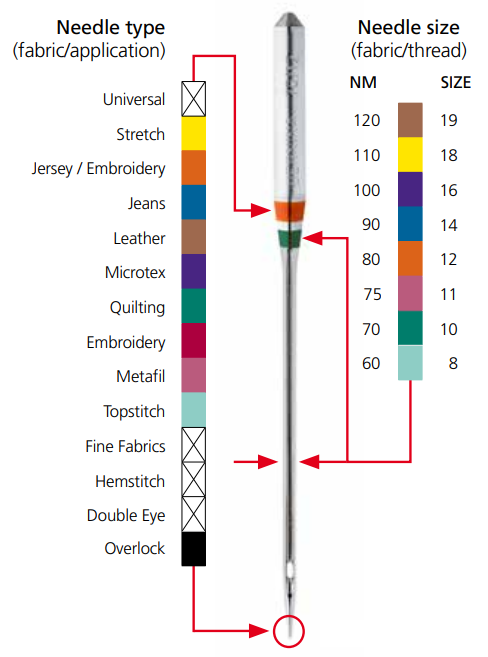
The sewing machine specification is commonly used in Europe. This corresponds to 100 times the shaft diameter. A needle with a shank diameter of 0.75 mm therefore has the needle size NM 75. The size specification (in the drawing on the top right) is used primarily in the USA and in Asian countries.
The smaller the number in the European or American size system, the finer the needle. When choosing the needle size, you can use the following rough size recommendation:
- For very fine or lightweight fabrics: use size 60/8 or 65/9
- For lightweight fabrics: size 70/10 or 75/11
- For medium-weight fabrics: size 80/12 or 90/14
- For heavy fabrics: size 90/14 or 100/16
- For very heavy fabrics: size 110/18
What about the needle/thread combination?
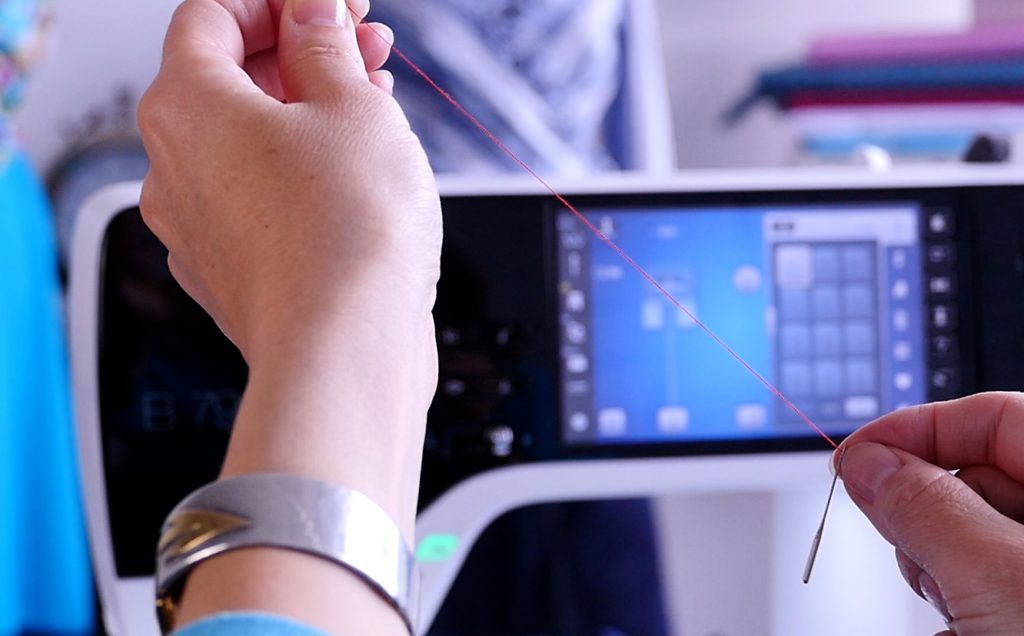
It is important that the selected thread matches the needle. It should glide easily through the eye. If the eye is too narrow, the thread is slowed down or may even rub. Seam gathering and thread breakage can occur. An eye that is too large is also not ideal. The thread is not optimally guided in the needle channel when it runs loosely through the eye. This can result in skipped stitches.
You can determine the correct needle/thread combination with a simple test: let the needle slide down on the tensioned thread, held at 45 degrees. It should slide evenly over the thread. If the needle hikes, jumps or sticks, it is too small for the selected thread. Increase the needle size by one step and repeat the test.
Why is it important to use special needles for different materials?
The overview shows the most important needle types, broken down according to needle point and eye shape. With the right needle, you can make sure that the fabric is not damaged, the needle does not break off, and you get a nice stitch pattern. For example, you use a stretch needle for a jersey fabric, i.e. a needle with a ball point, thus displacing the material and creating no holes (here, in the overview, H-S).

In the illustrations of the needle tips above, you can also see the channel that starts behind the eye. The channel runs on the front of the needle up to the eye. It provides thread protection when the needle enters the fabric and ensures that it is not damaged when travelling through the fabric. You can feel the channel when you move your fingernail over the front of the needle.
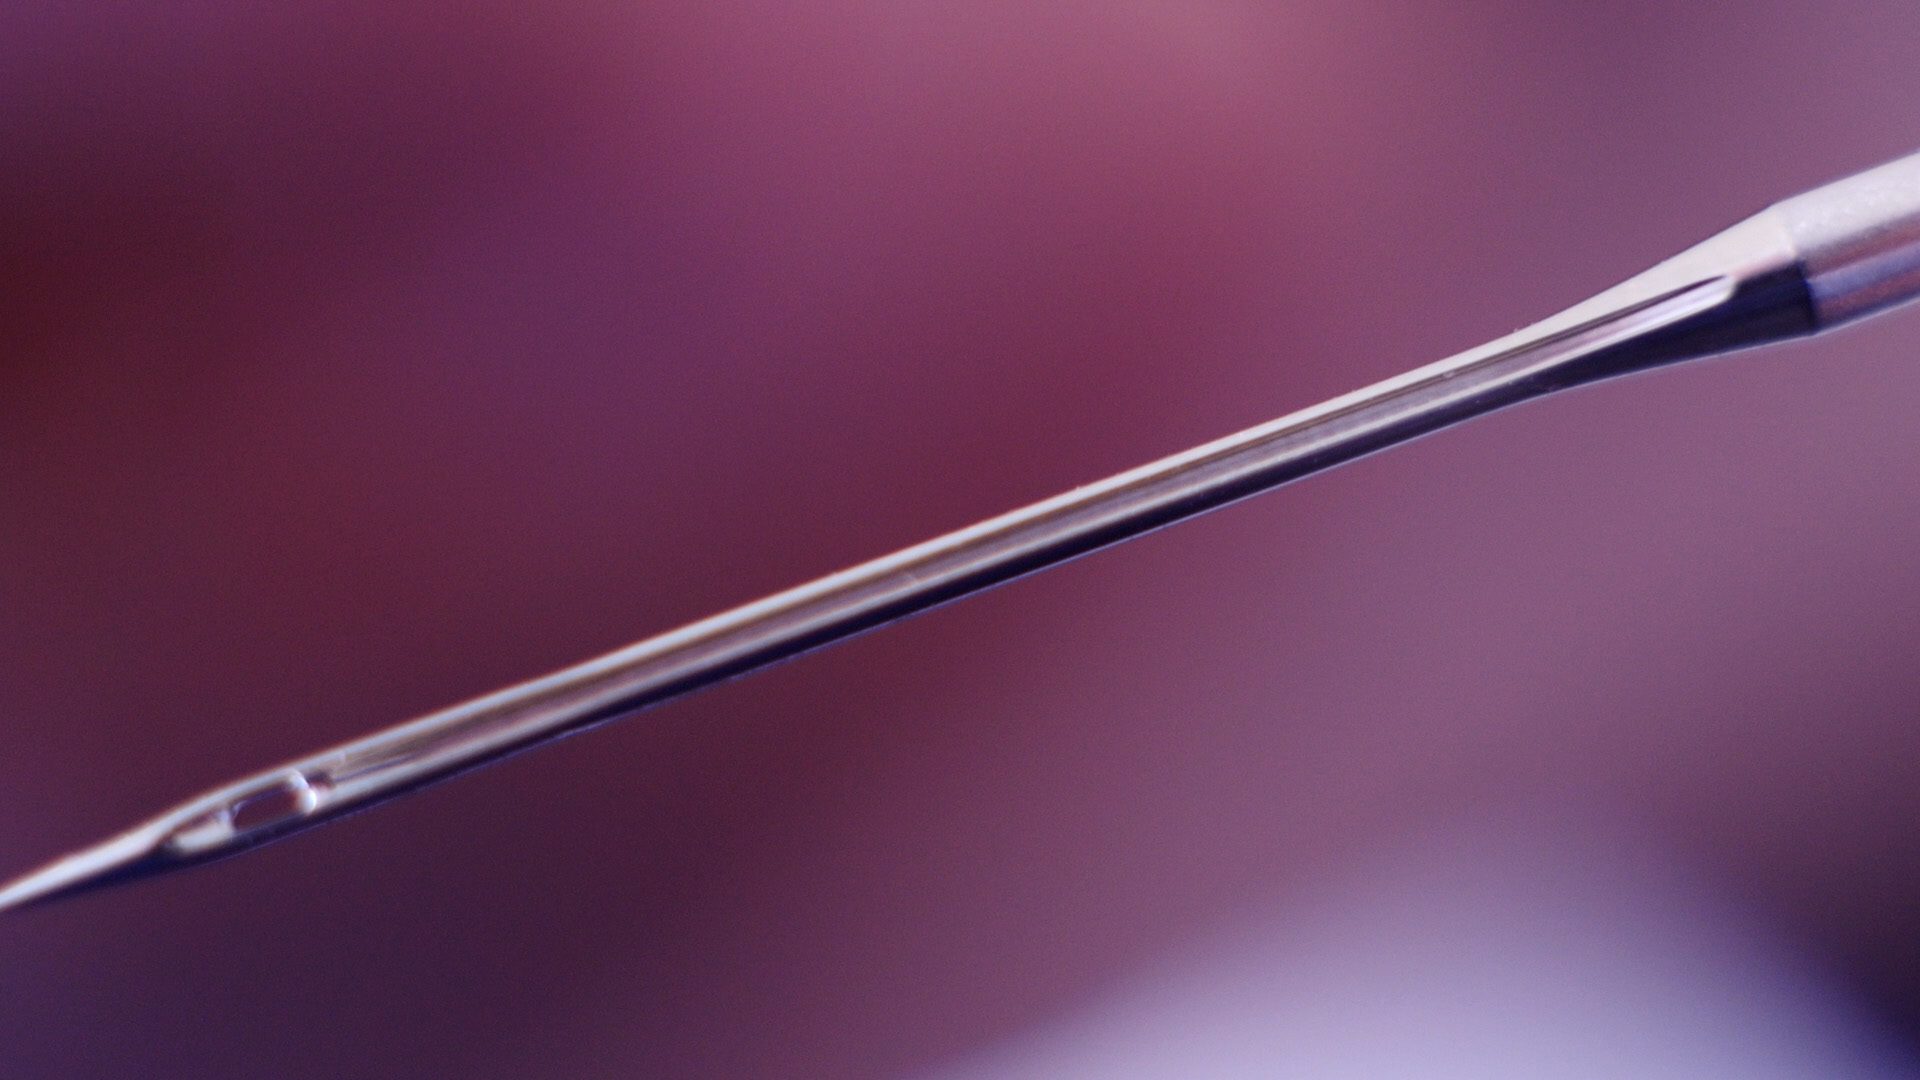
There is also an area behind the eye where the needle is flatter/thinner. This is the so-called needle scarf. It is the place where the hook of the sewing machine receives the upper thread from the needle in order to form the stitch.
Don’t forget to replace your needle regularly
Don’t skimp on needles! A blunt or damaged needle can really spoil your sewing fun. It can lead to skipped stitches, but also to the fraying or tearing of the upper thread, or to small holes or tears in the fabric.
The rule of thumb is this: after every major project, change the needle. After around four or more sewing hours, pay close attention to your needle. If skipped stitches occur when the needle is pierced into the fabric or a “plop, plop” sound is heard (some describe it as a knocking sound), it is time to insert a new needle.
Also change the needles if you have had a sewing accident, e.g. if you accidentally sewed over a thick pin or if the needle hits against the presser foot or the stitch plate. This happens to the best of us!
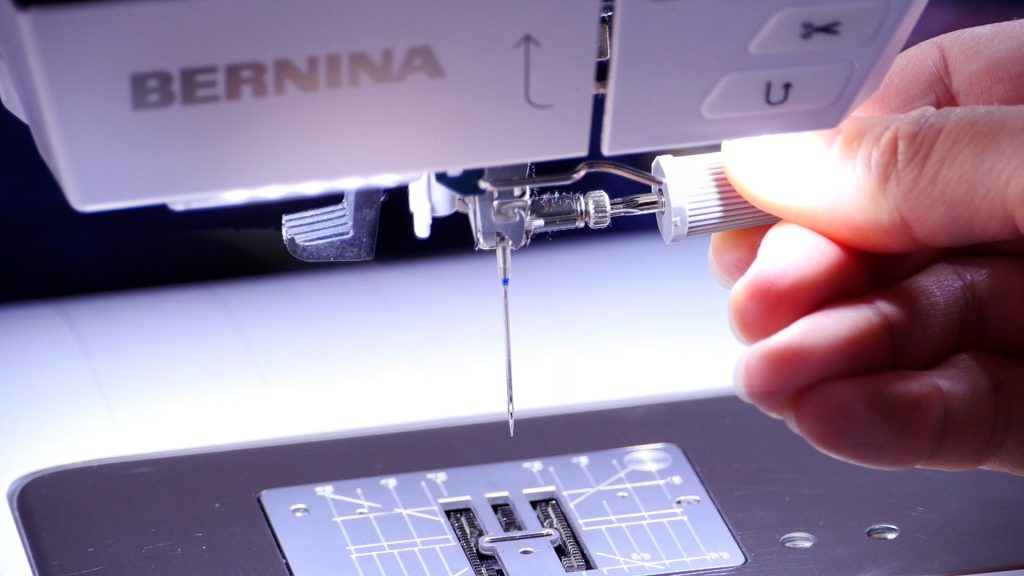
Replacing the needle
The procedure for replacing a needle is described in your sewing machine’s manual. The needle is inserted with the flat side to the back. Push all the way up and then tighten with the small screwdriver that you received with your BERNINA.
Get all the information you need!
The Internet offers a rich wealth of information on the subject of needles and thread. For example, there is a great video tutorial for the BERNINA needles:
The small needle brochure from BERNINA is also very helpful. You can download it here as a PDF.

You can also find a lot of important information, tips and tricks on the manufacturers’ pages, e.g. Mettler.
Have fun with your projects! Also check out the other Blog reports in the “Learning to Sew for Beginners” series!
“Creativity feeds the soul.”

0 Responses