 BERNINA Corporate Blog -
Dear friends, we are already on Part 8 of our “Learning to Sew for Beginners” blog series. Today I am going to give you an introduction to the subject of quilting. I am very pleased about this because I have a lot of fun quilting and I have been working with it for a few years.

The layers of the quilt
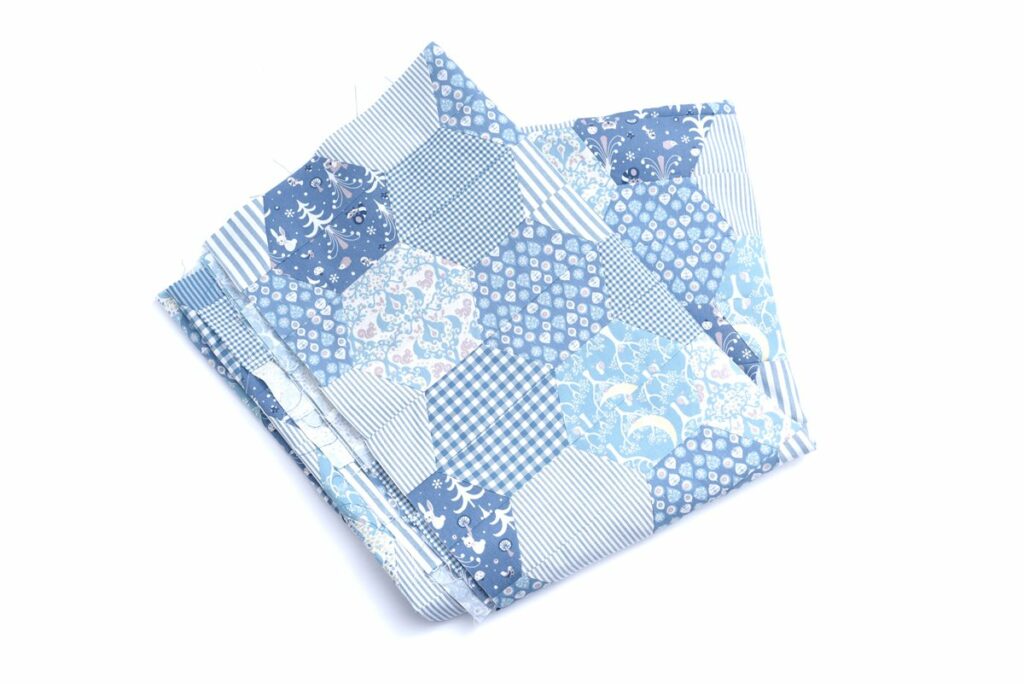
Those who hear of “quilting” here in Europe certainly think of the large patchwork blankets from the USA, which are also very much present in our sewing rooms. Patchwork and quilting are closely related. The former describes the method of dividing the top in different ways, however quilting refers to the connection of this top with a stabilizer and a back.
In most cases, the back consists of a single piece of fabric, but it can also be made up of smaller pieces that were sewn together beforehand.
With regard to the stabilizer, there are various thicknesses and materials that provide the typical quilting result. You can choose between cotton, synthetic, pure wool or silk fleece. This will depend on your chosen project.
In most cases, three layers of material are joined together, known as the “quilt sandwich”. There are various techniques for this, four of which I would like to introduce to you today. Of course, there are also other sub-groups, but I think these four give you a nice insight into the world of quilting.
Patchwork
Patchwork is a huge topic on its own, because there are a variety of ways to sew pieces of fabric together in all colors and shapes, creating an individual top piece. There are no limits when it comes to shape and colors. It is best to use cotton fabrics for this top side, as these are (barely) elastic and thus create an even result. If you want to work harmoniously with the fabrics, you can use fabric series that are already available in different sizes (“precuts”).
In any case, important tools when working in patchwork are an appropriate ruler plus a rotary cutter, an iron and a trick marker.
Here you can see, for example, how to use a series of fabrics up to the last piece …

… to create a beautiful patchwork blanket.
The Binding
Another important element in the subject of quilting is the outline, the so-called binding of the finished project. This is because, when all three layers are joined together, you have open edges of fabric that do not look clean. Depending on the effect you want to achieve, you can use a fabric from the top or a contrasting fabric to create a special framing effect and highlight the quilt. As you can see, when quilting you have to make a wide range of decisions that all determine the look and effect of the project.
Recommendations
I would also like to mention briefly that there is also the option of using a professional quilting service, which will usually have a large machine, a so-called “long-arm machine”, so that you don’t have to overwhelm your smaller household sewing machine with such a mass of material. This makes sense, especially for larger projects.
Finally, the Bernina Blog also offers a rich foundation of patchwork and quilting instructions – for example, this Beginner’s Quilt-Along from Irene.
You can quilt different projects. Blankets, as mentioned above, but also pillows, table runners, smaller coasters or bags and clothing. I thought for a long time about the quilting example I would like to show you, and finally decided on a small bag, as it can also be used after this blog post and is sure to bring great pleasure. Using this bag, I will show you four different quilting techniques.
So, now that you have spent a lot of time reading, it’s time to take action and look at four quilting methods by making our bag.
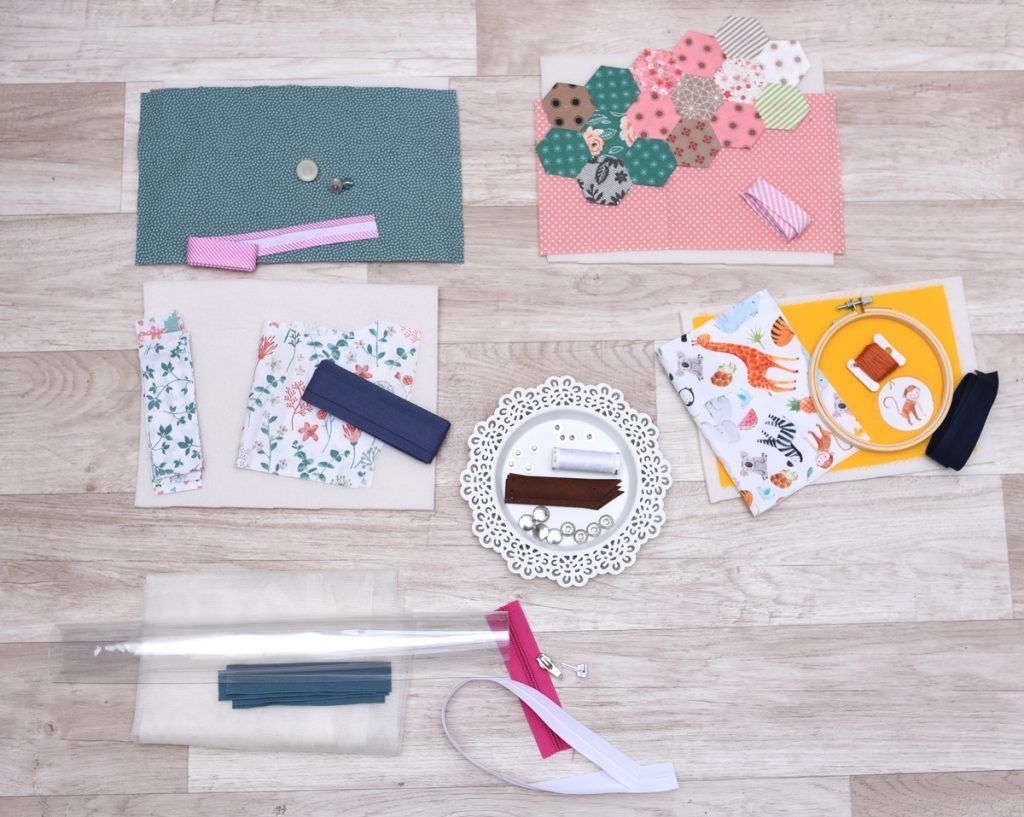
Material overview
For each bag you will need:
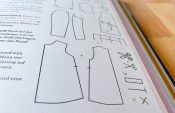
- The pattern piece, (available here as a PDF)
- Front and, as well as stabilizer and back, each about 25 cm x 12 cm
- Around 1 m bias tape
- A piece of (artificial) leather, 1.5 cm x 8 cm
- 1 press stud
- Depending on the interior, small remnants of film, an endless zipper, elastic and/or mesh (I’ll say a little more about this below)
- Thread used: Seralon by Amann Mettler
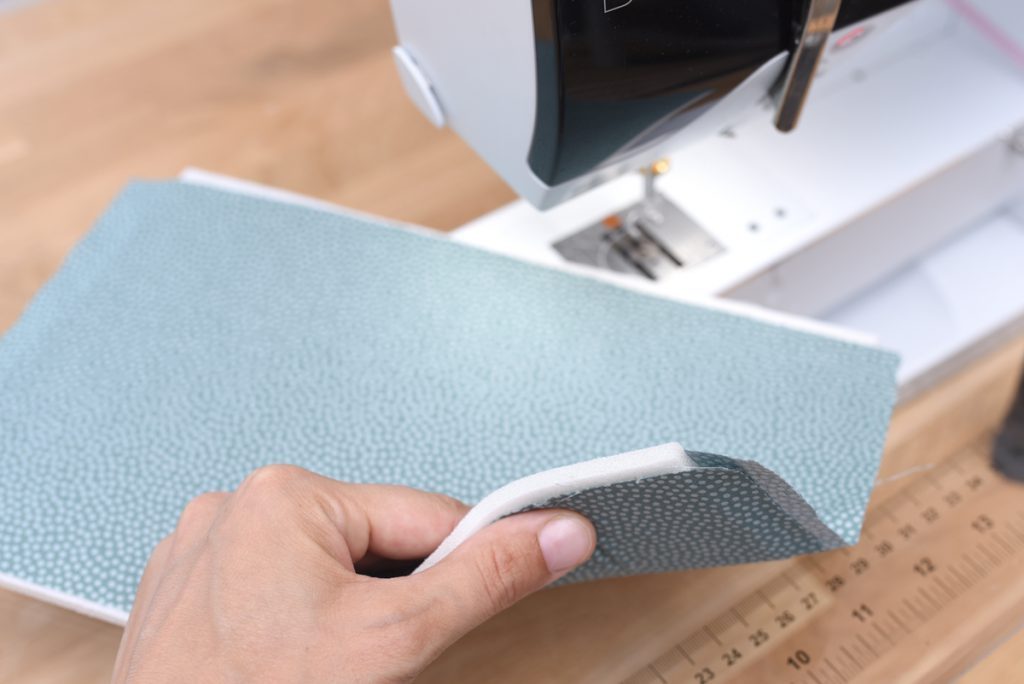
Securing the layers
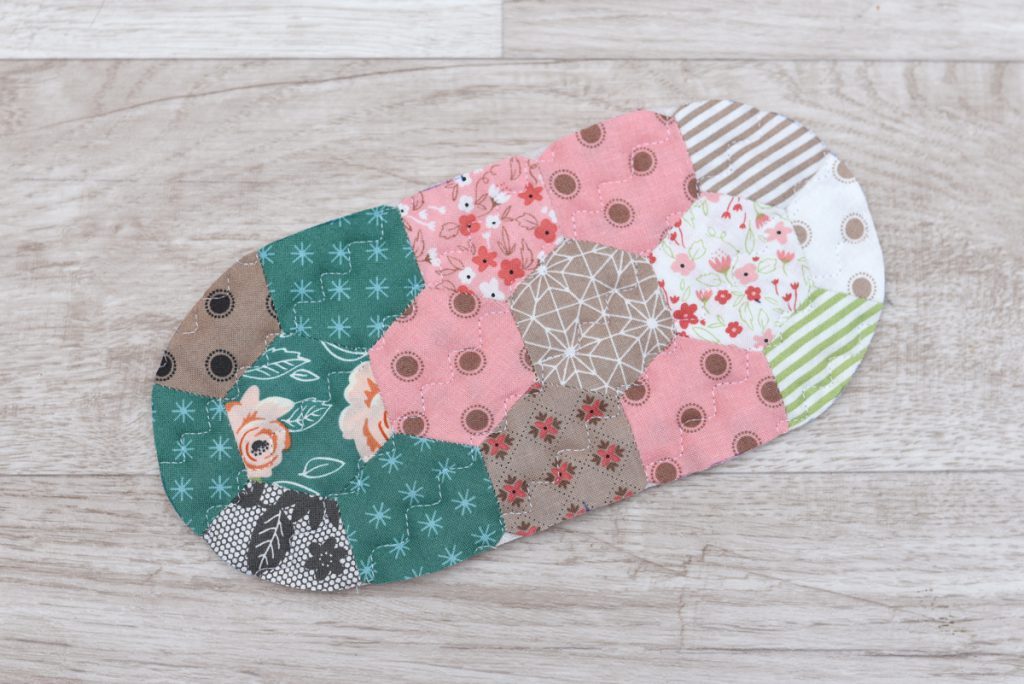
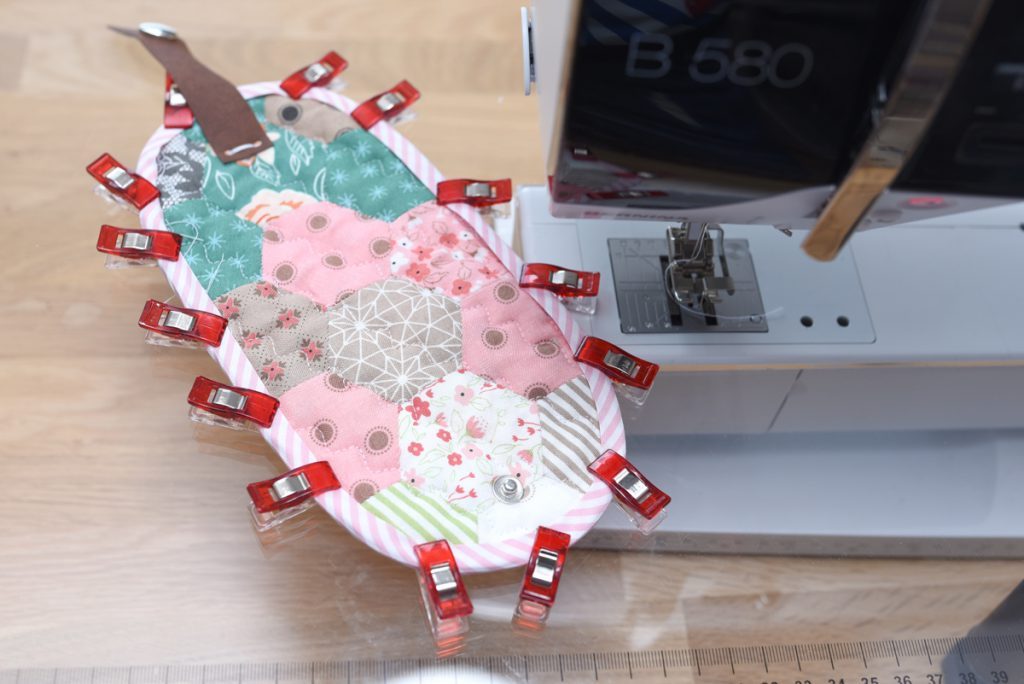
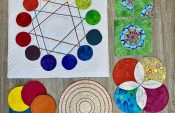
For the upper side or your “quilt top” it is up to you to decide whether this should simply be made up of a fabric or of individual pieces in advance. Here are a few examples of this. Here I sewed small Hexagons together by hand from a series of fabrics.
There are different options for attaching the three layers together so that nothing slides out of place during actual quilting. On the one hand, you can connect these layers – please iron the front and back well – together using pins or shaped quilting needles. You can also secure them by hand using basting stitches. Another option is a spray adhesive (please never spray near the sewing machine). I have a recommendation for small, fiddly projects such as this: the popular Stylevil from Vlieseline is now also available with an adhesive side for ironing.

Make sure that the two wrong sides of the fabric face towards the stabilizer and select your desired method.

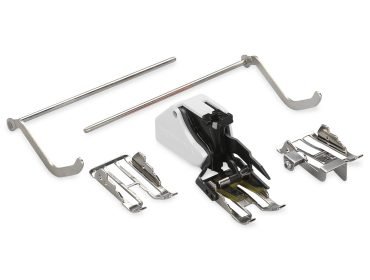
Quilting feet
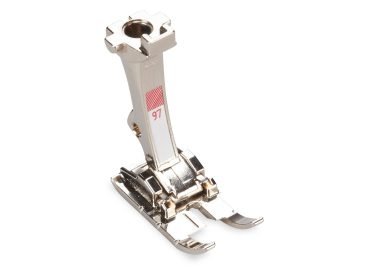
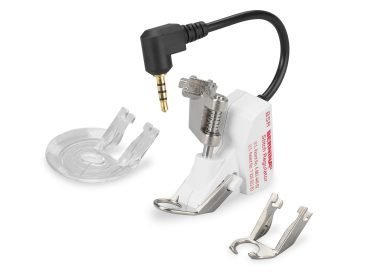
Depending on which quilting technique you choose, you can select a suitable presser foot for this purpose. My most commonly used feet are the Three-Sole Walking Foot with Seam Guide #50, the BERNINA Stitch Regulator (BSR) walking foot #50, the Patchwork Foot #97, and one of the embroidery feet. If you select a stitch where the needle remains in Position 0, I also recommend the straight stitch plate.

Quilting – the techniques
1) The decorative stitch
For my first bag with the hexagons, I use a wavy decorative stitch to join the three layers together.

I quilt diagonally along the shapes of the top. When I arrive at one end, I lift the foot up and set it down again on the next row, so I don’t have to constantly cut off the thread.
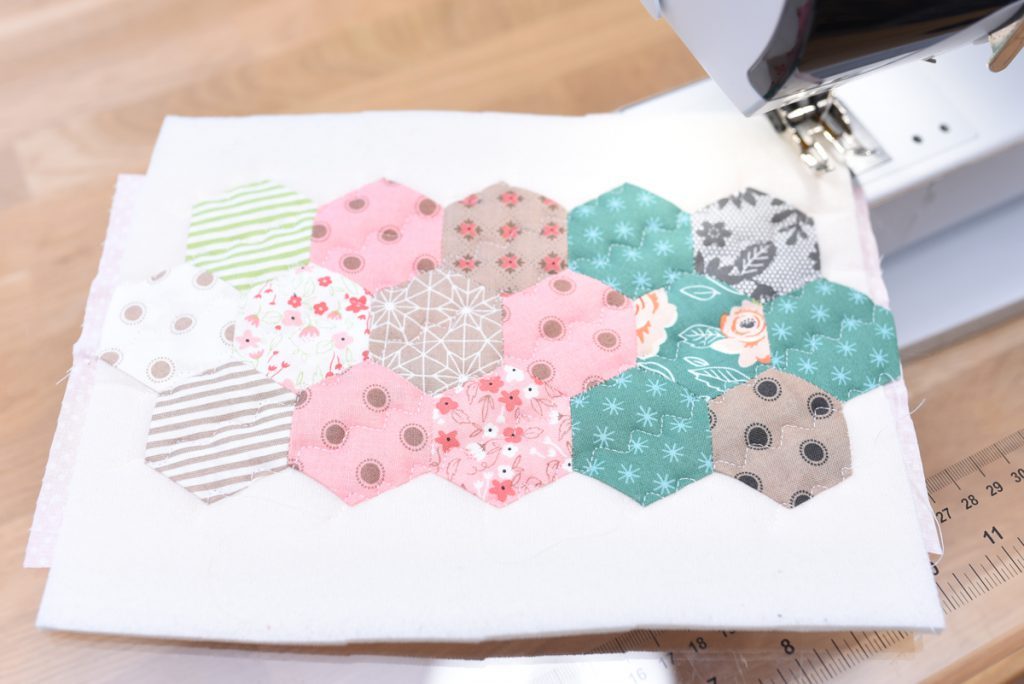
The decorative stitch also creates a nice image on the back; I really do use it often.
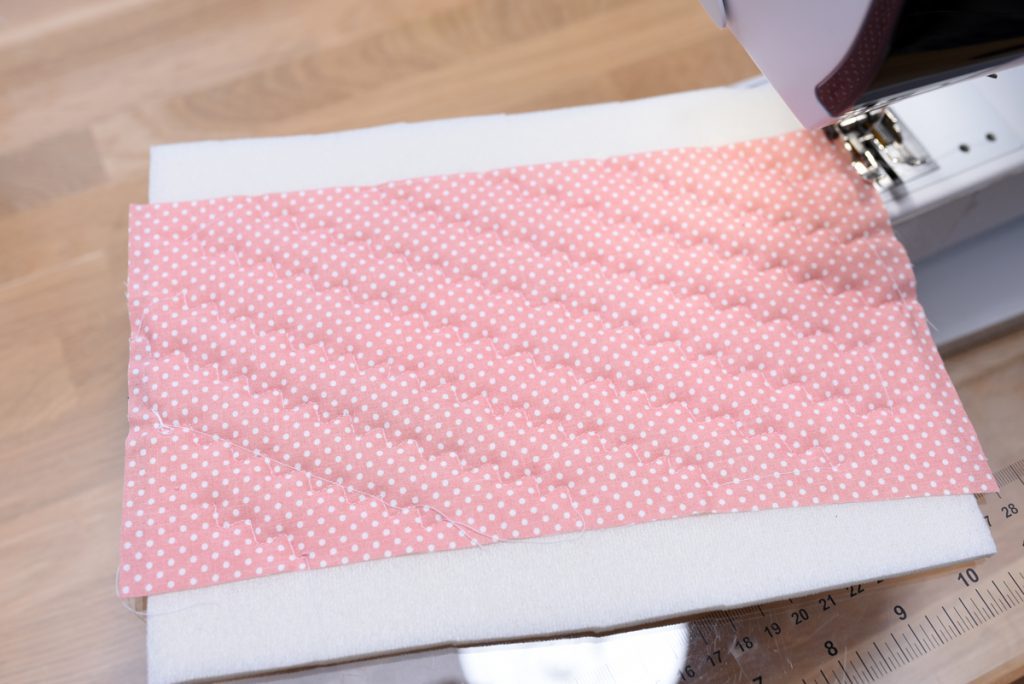
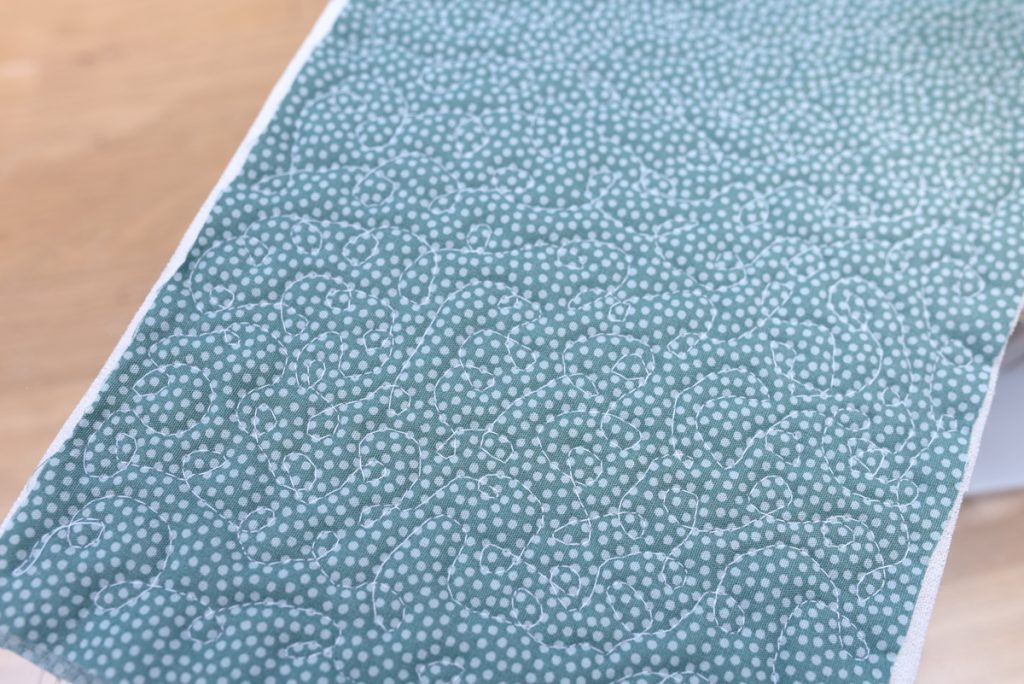
2) Free-motion quilting
For the next technique, I would like to show you free-motion quilting. Here too, I have already secured all three layers of fabric by ironing and gluing.
Insert the straight stitch plate and lower the feed dog. Now guide the fabric with both hands so that your desired pattern is created. I chose a continuous line with individual loops.
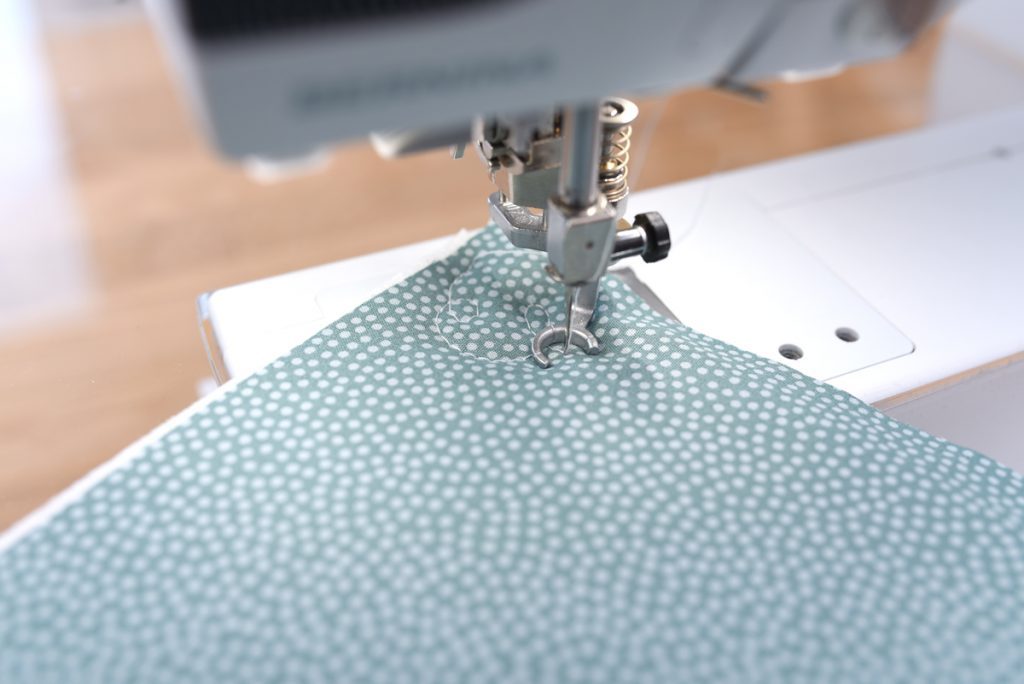
The tighter you set this, the more you compress the stabilizer together. It is not a disaster if the individual loops are quilted differently in terms of size and at different intervals. In my opinion, this is the appeal of free-motion quilting.
3) Quilt as you go
I like the third technique very much because it is ideal for upcycling fabric remnants. Here, we quilt as we sew individual strips of fabric together. So make sure you only attach the backing fabric to the stabilizer.

Then always sew a strip of fabric onto the previous one with the right sides together, fold it over and stitch it in place with several stitches.

For this, I like to use a long straight stitch so that I don’t have to switch between the individual stitches.

Repeat this until the stabilizer is full. I allowed a few extra centimeters for the height so that the shorter strips were also sufficient.

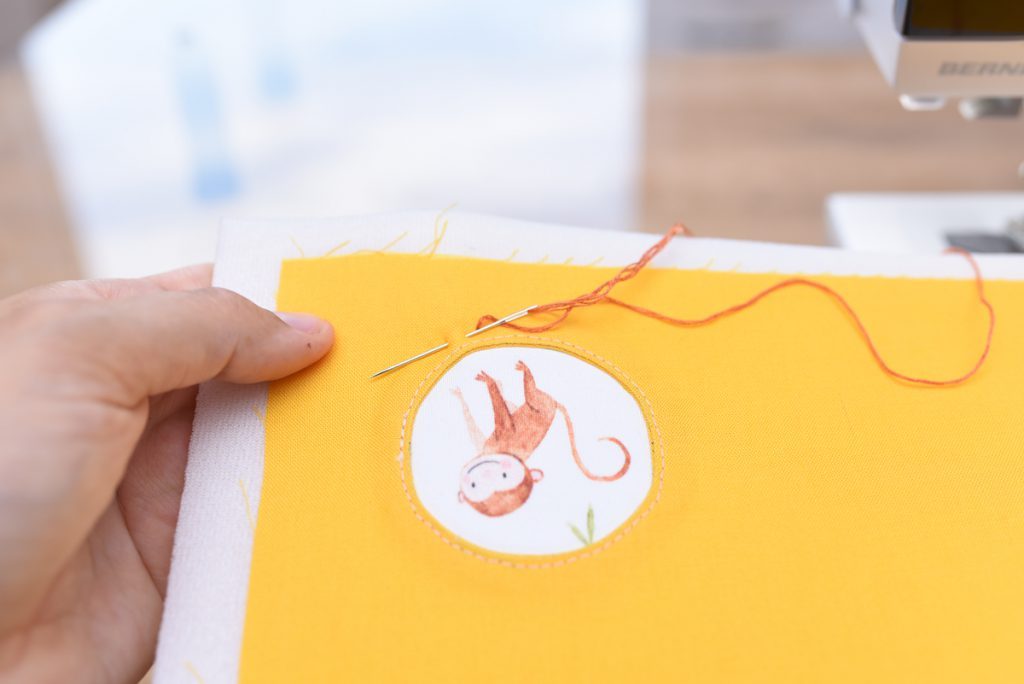
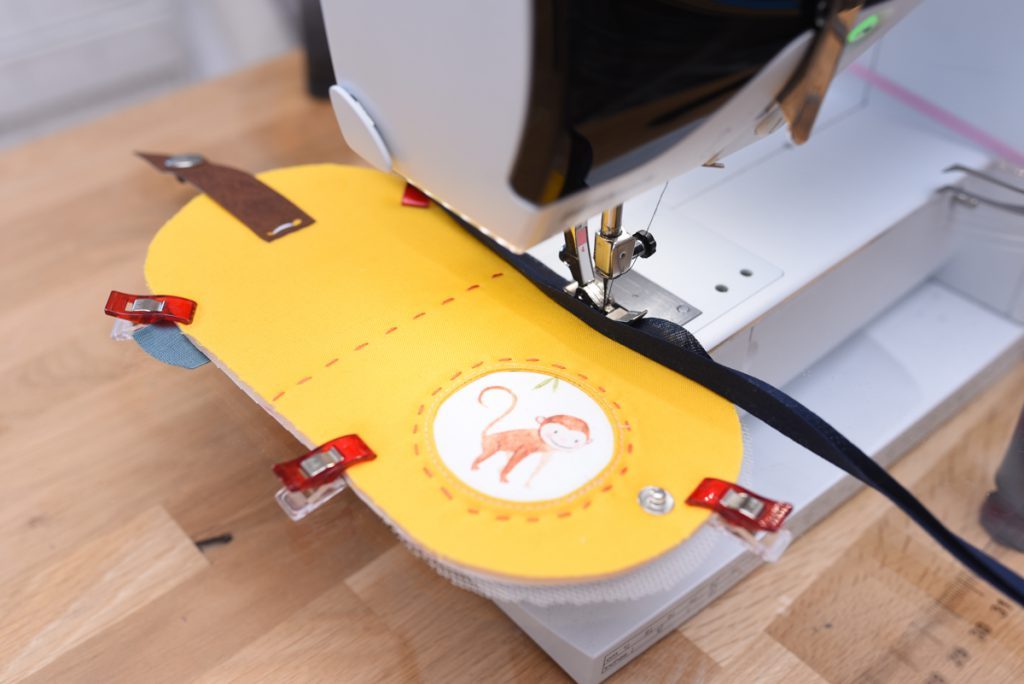
4) Quilting by hand
The last method I want to introduce to you is quilting by hand. To be honest, I rarely practice this because I simply lack the time to do so. But for this method too, practice makes perfect. If you want, you can use a small embroidery hoop for this (if you have one), but I don’t need to when using the Stylevil as a stabilizer. You can use a thicker embroidery twist if you want.
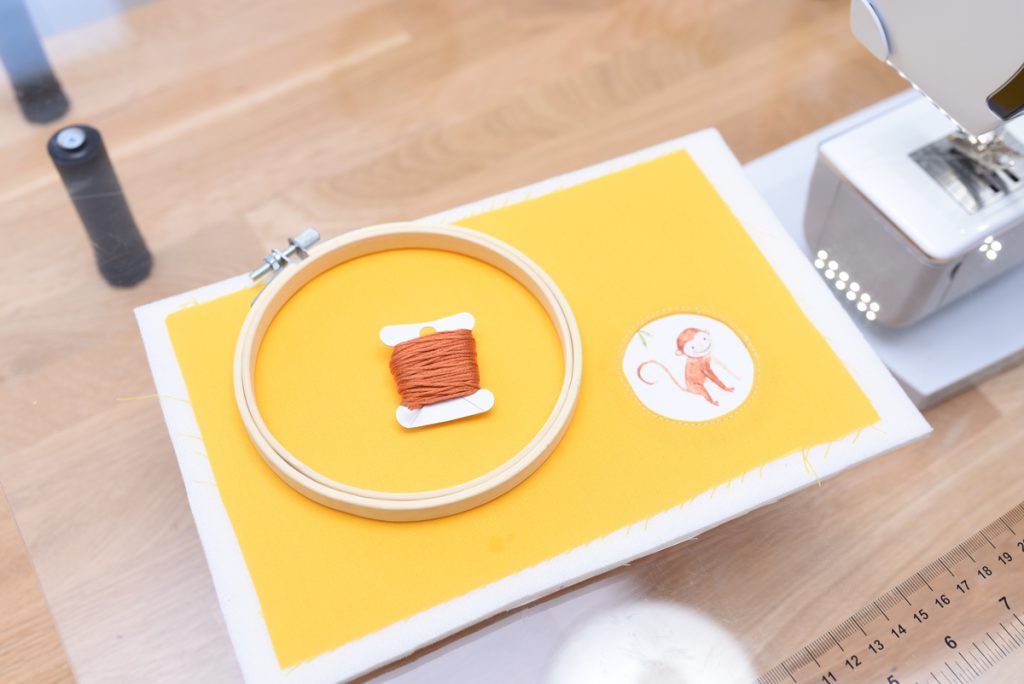
Here, I simply quilted a few continuous stitches in a circular form around the monkey, as well as a straight line along the later folded edge.
Completing the bag
Then place the pattern piece on the fold of your finished quilt sandwich and cut it out. This creates a shape like this.
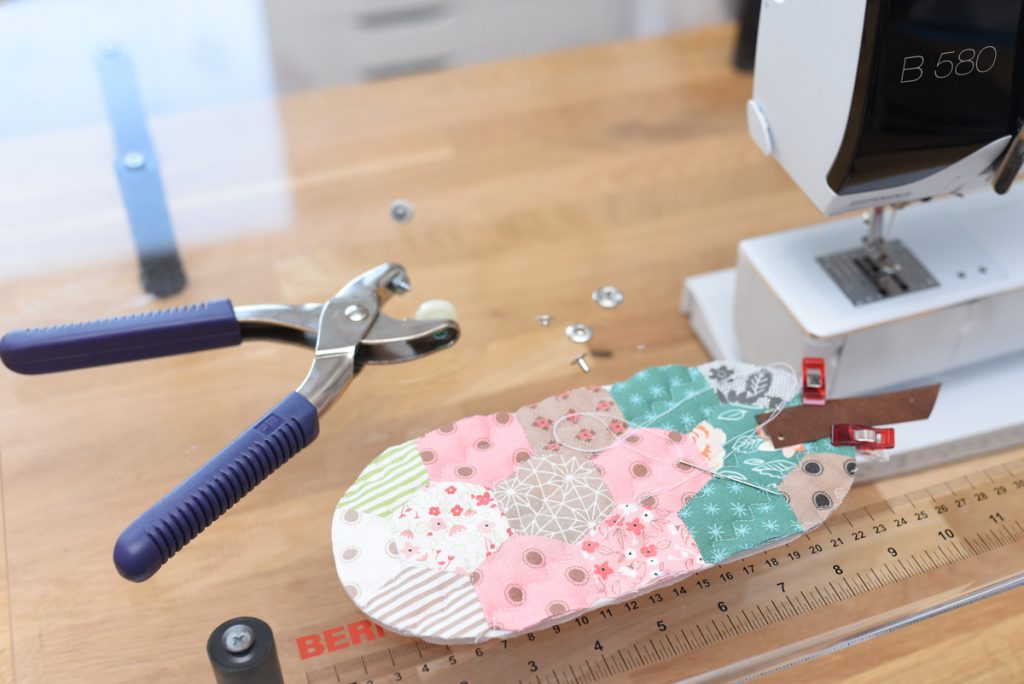
Before we move on to the interior of the bag, the flap is now attached with the press stud. To do this, use the recommended tool as well as a hole punch. I secure the straight end with a few stitches by hand using the two holes, and then attach the press stud at the front, leaving the desired spacing.
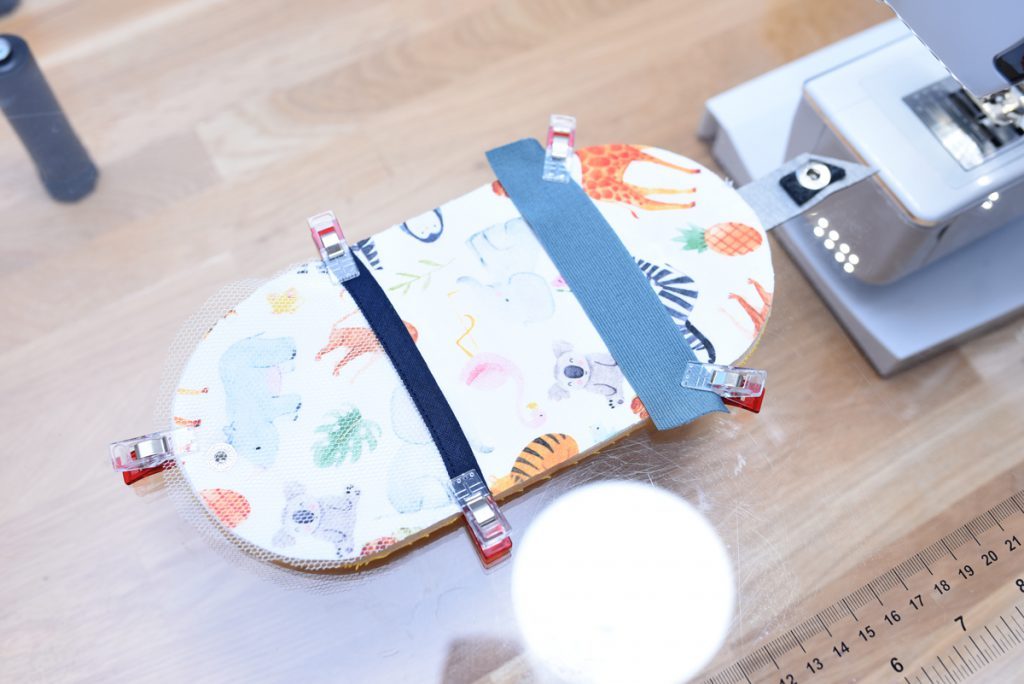
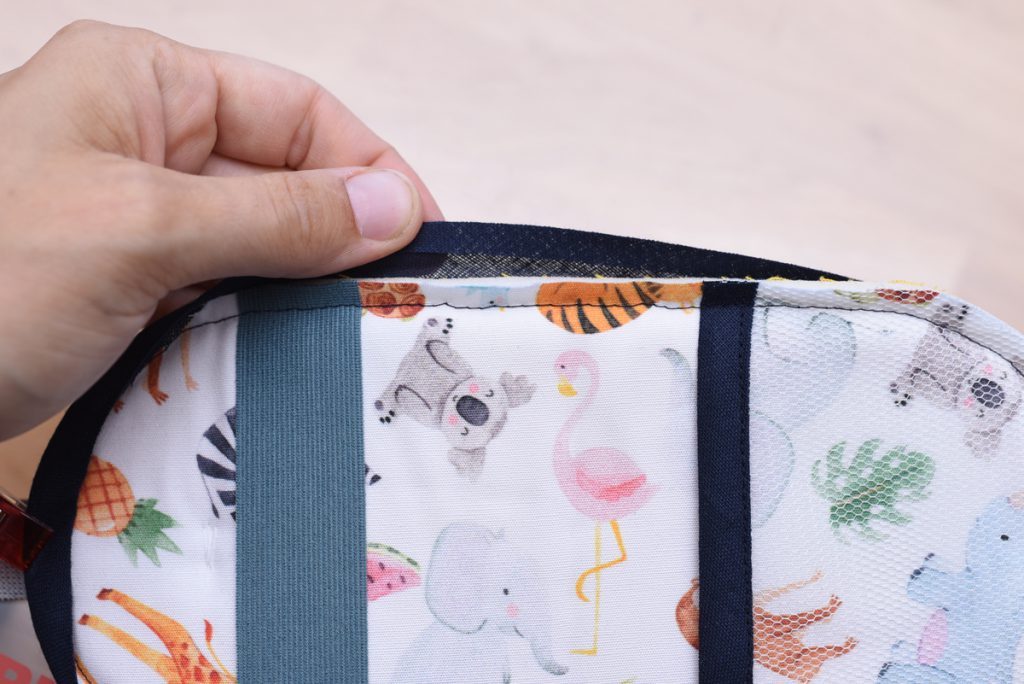
Depending on what the bag is to be used for, you can still make internal compartments (made from film with a zipper and bias tape) or mesh with bias tape, or simply a wide elastic band.

Position them on the inside of your bag and cut them.

If you want, you can also attach them with a few stitches within the seam allowance so that nothing slips out of place.
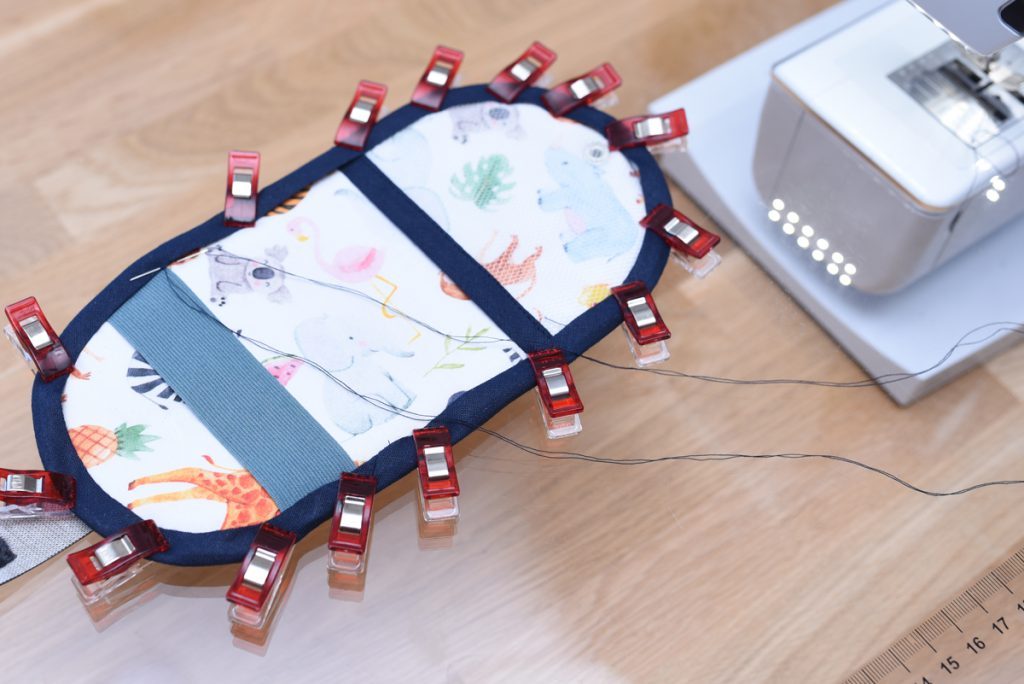
Quilting – the binding
As with a Quilt, i.e. a blanket, our bags also need a border, a binding. For such small projects, I like to use a finished bias tape. For large blankets, I cut the fabric strips along the bias. There are two different ways to sew on the binding, either with the machine or partially by hand for a virtually invisible seam.
1) With the machine
If you choose to use a sewing machine only, place your bias tape onto the inside of the bag (back of the quilt) with the right sides together and sew it along the first ironed edge.

Leave a piece of fabric at the beginning and end.
In the picture below, you can see more precisely how the two ends are sewn together. If this happens at an angle, the transition will barely be visible later. Since it requires some handling, I recommend that beginners watch a tutorial video on the web here. Then cut the triangle back until just before the seam …
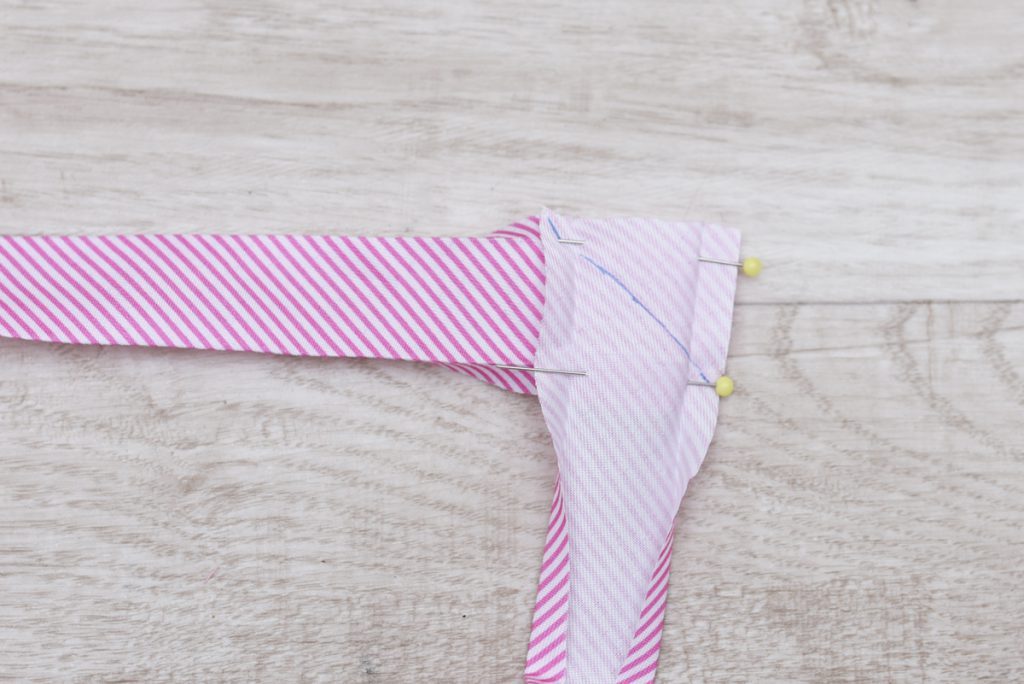
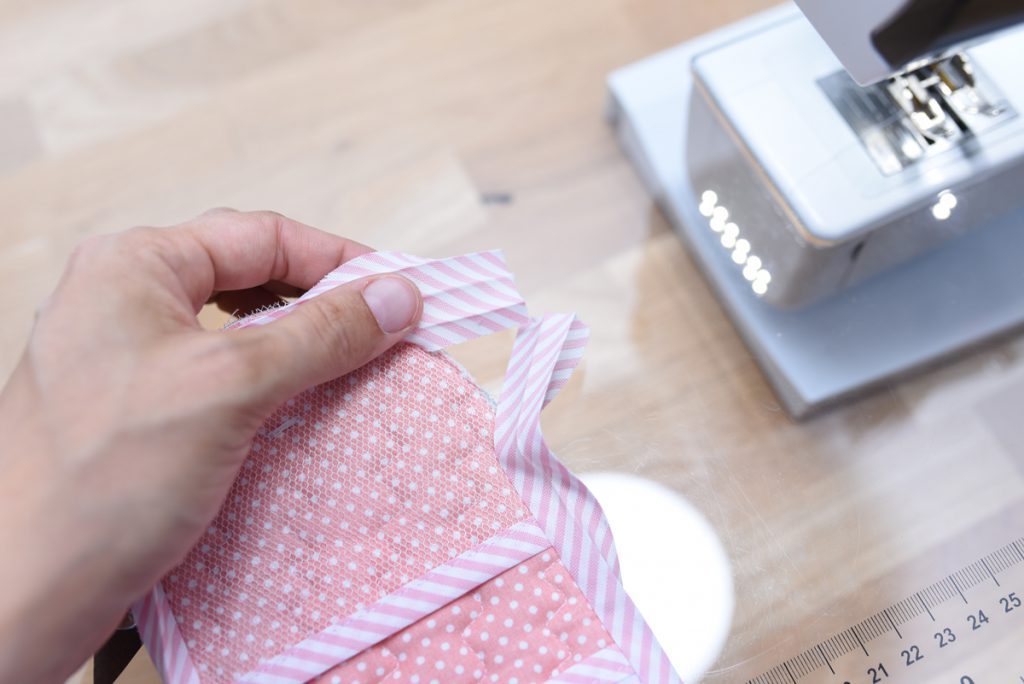
… and fold the bias tape around the open edges of the fabric, outwards onto the front.
Stitch this tightly around the edge using the Edgestitch Foot #10.


2) With the machine and by hand
If you want to sew on the second section by hand, stitch the bias tape onto the front of your bag with the right sides together.
The ends are secured as shown above and this bias tape is also folded in around the open edges, but this time inward.
Then sew it there by hand using the mattress stitch.
Congratulations, your small, delicate quilting project is finished.
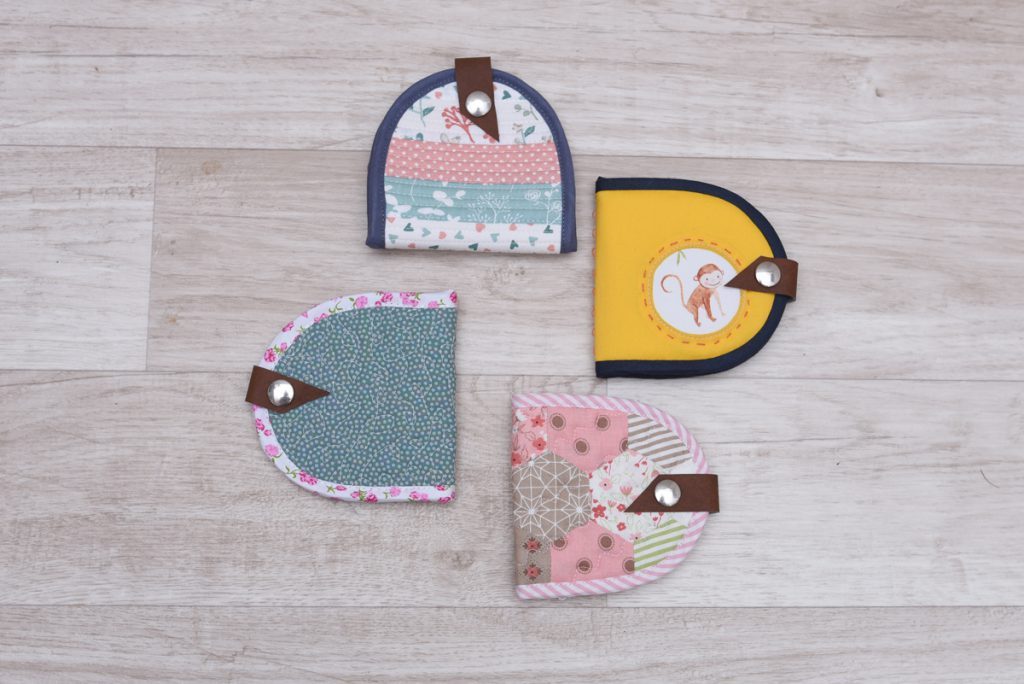
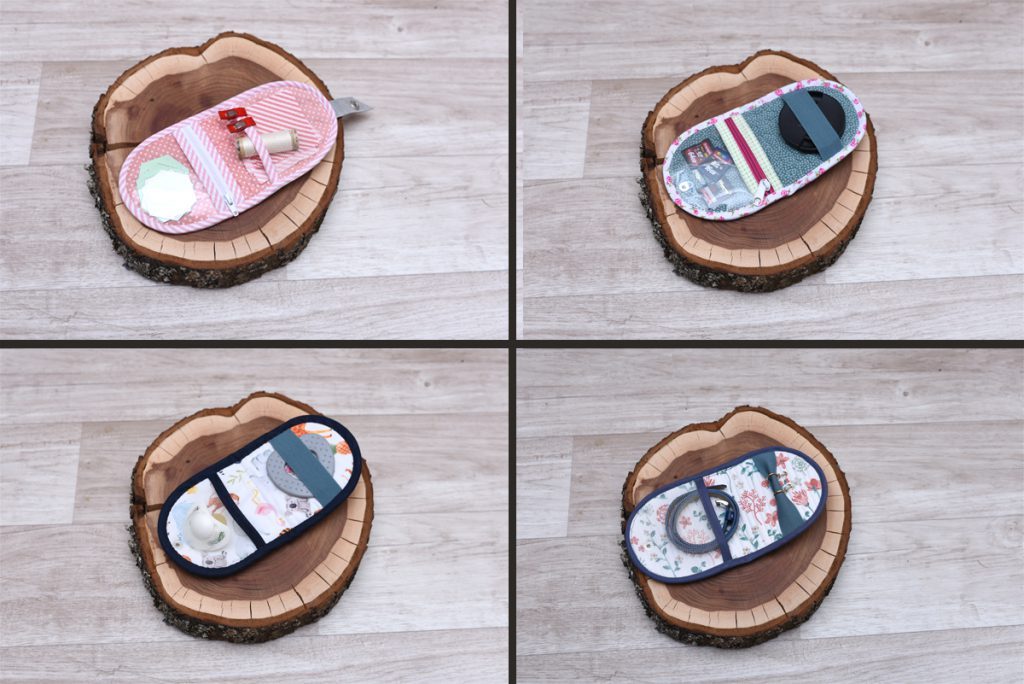
Since I sewed and quilted four bags, they all have different uses.
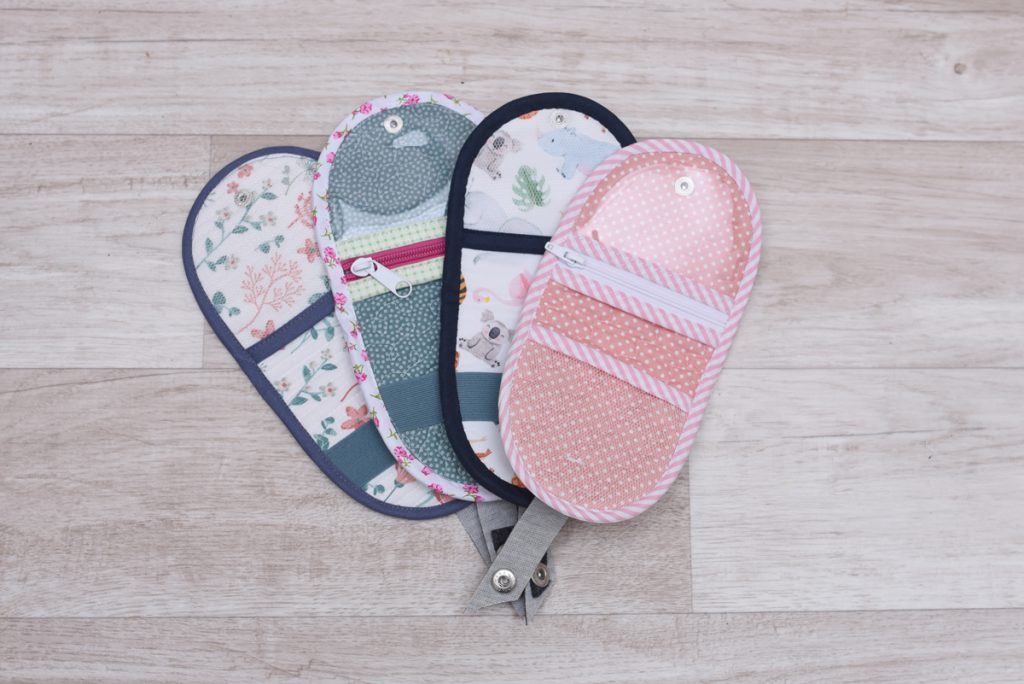
Here are a few examples: to store the hexagons for sewing by hand, for camera accessories, as a baby bag, or for jewelery. Of course, you can also give it as a wonderful gift.
As you can see, quilting is a complex subject, and I have certainly only scratched the surface here. However, I hope I have given you a nice insight and inspired you to try it for yourself. Whether it’s a small project or a large blanket, it’s just great fun!
Be sure to check out the other posts in the “Learning to Sew for Beginners” blog series!
Best wishes,
Sara


0 Responses