 BERNINA Corporate Blog -
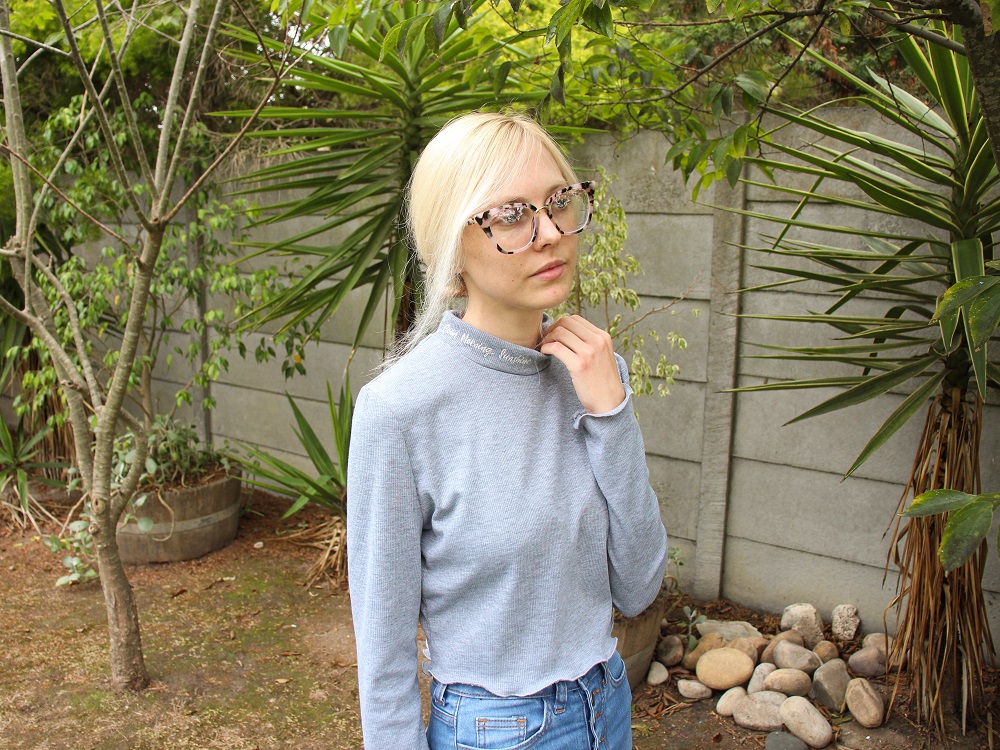
For the month of March 2023 you can download the Vio Shirt Pattern from the Inspiration Magazine for free!
The top is a great transitional garment as we start to move towards Autumn in South Africa. In Cape Town we often experience all seasons in one day so being able to layer is very important.
I also loved how quick the Top was to make. The actual sewing together of the Top took less than an hour!
What will be needed:
- Vio Shirt Pattern
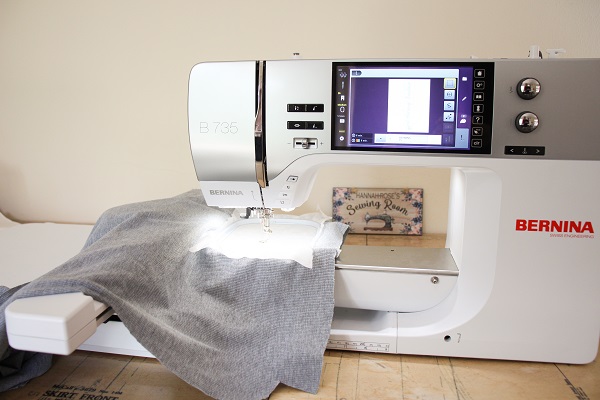
- Sewing machine (B735)
- Overlocker (L460)
- 1.1m-1.3m Knit fabric (120cm wide)
- 1-4 spools to match
- Optional for embroidery:
Embroidery design
Embroidery Module
Medium Hoop
Stabilizer (see below)
Embroidery Thread
Pattern
Download the free pattern: www.bernina.com/inspiration-freebie
For help downloading, refer to this blog post: Free sewing pattern for the Shirt “Vio” (March only)
Keep in mind that the Inspiration Magazine patterns are always without seam allowances.
I added 1cm seam and hem allowances to my pattern.
Embroidery Design
When choosing a design for a ribbed knit, a relatively dense or complex design is necessary so that it’s not lost in the texture of the knit.
The Inspiration Magazine and Bernina have provided an embroidery design to go with the Vio top.
You can find the Ray of Sunshine design here.
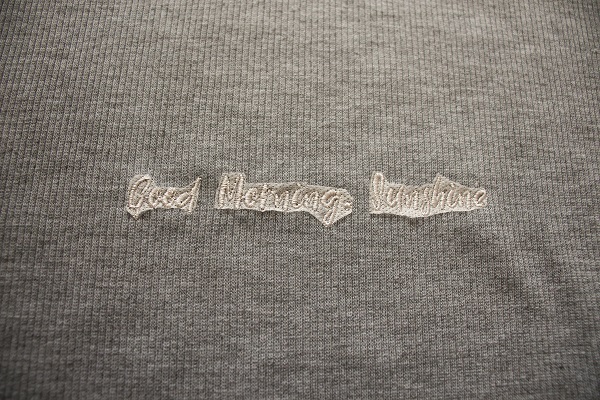
I however chose to create my own embroidery design with Bernina Embroidery Software 9.
Check out my previous blog post: Create unique wording with downloaded fonts. There I share another free embroidery design for your Vio Top.
Stabilizer & Fabric Choice
Most knit fabrics like jersey or stretch cotton would work well with this pattern. The rib knit however has a lovely texture and great stretch. It makes for a cosy top.
I chose a grey cotton feel rib knit with narrow lines. I like that it isn’t too drapey and will hold it’s shape.
Inspiration Magazine recommends a water soluble and self-adhesive embroidery stabilizer like Solufix. I think the main reason for the adhesive is to prevent the stretchy fabric from moving in the hoop during embroidery.
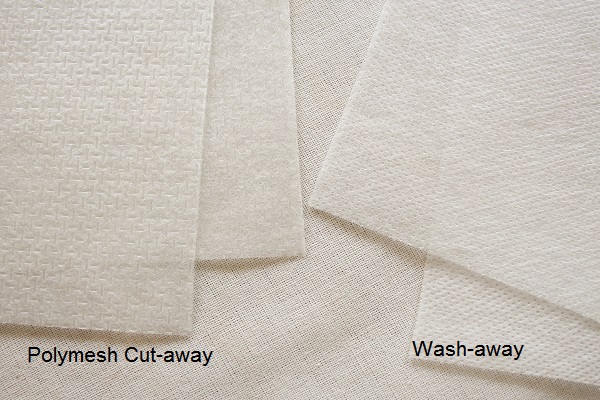 As I didn’t have that on hand, I used Polymesh Cut-away as it is thin but durable and paired it with a Wash-away Stabilizer. The cut-away will provide a sturdy base layer while the wash-away will prevent the stitches from sinking in to the fabric. Together they should help create crisp, well-defined stitches and the sandwiching technique (along with basting) will minimize movement and distortion of the fabric in the hoop.
Steps
I chose to double over my Neckband. I did this as I prefer to have the Neckband lined and didn’t want the back of the embroidery against my skin. The Cut-away Stabilizer I used is generally soft against the skin and softens after a few washes but I personally struggle with sensitive skin.
You could cut the pattern piece twice and join along the top edge to achieve the same effect.
Embroider
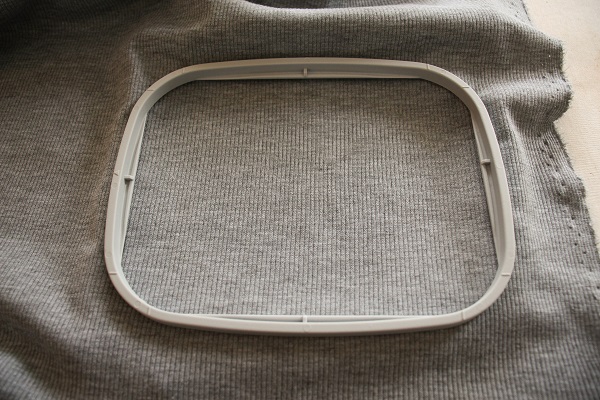 Hoop the fabric with your chosen stabilizer(s).
I prefer to embroider the fabric before cutting it out, especially when working with stretchy fabrics.
When placing the fabric in the hoop, ensure that the stripes of the rib are straight and the fabric is flat, without being stretched.
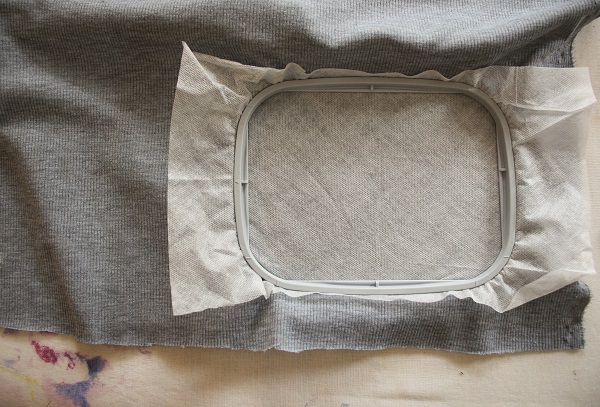 I placed the Cut-away stabilizer under my fabric and the Wash-away on top.
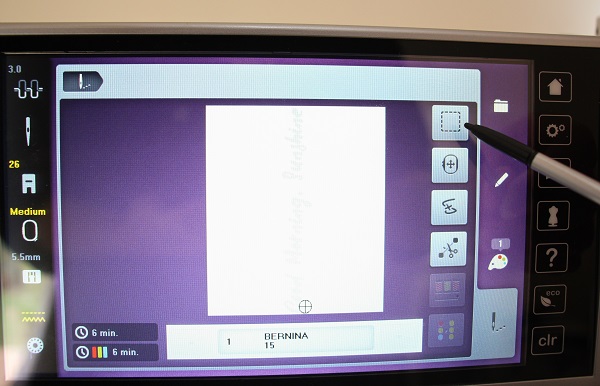 Once your design is loaded, select baste on your machine’s screen.
 Go ahead and embroider your design.
 Once you remove the fabric from the hoop, trim away the excess Wash-away Stabilizer.
 As I also used Cut-away Stabilizer, I roughly cut away the excess, then trimmed the remaining excess stabilizer very close to the stitches. I trimmed between the words as well so that the fabric could stretch. If you embroider on the chest of the Top, you don’t need to trim so specifically as the fabric doesn’t need to stretch like the Neckband.
Rinse or soak the item in water.
Refer to the instructions that came with your wash-away stabilizer to know if the water should be warm or cool.
Alternatively machine wash the top after once it is complete.
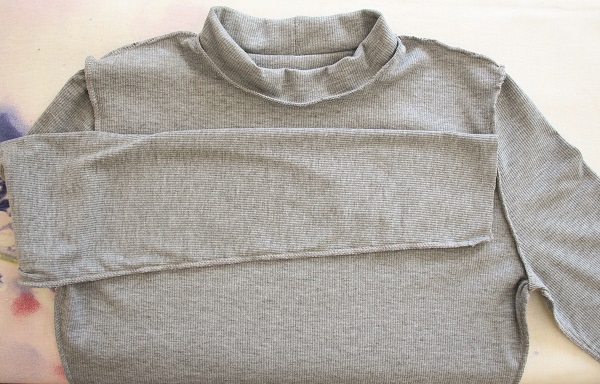
Assemble the Top
 Gather the Sleeve Heads with the Sewing Machine.
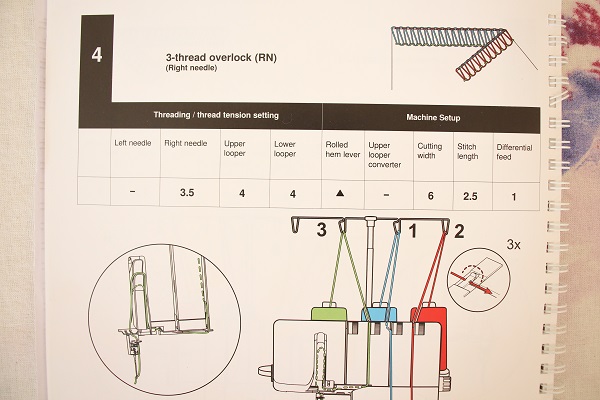
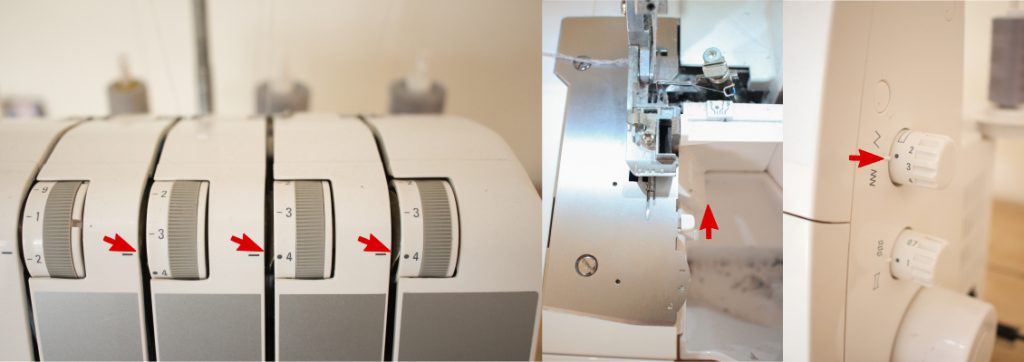 Set your Overlocker for a 3 or 4 thread overlock stitch.
I only had 3 grey threads so I used the 3 thread stitch.
 Join the Shoulder and the Side Seams.
If you are doing a doubled Neckband, join the Neckband pieces together along the top edges.
Join the back centre seam of the Neckband.
Attach the Neckband to the neckline.
Join the Sleeve seams.
Attach the Sleeves to the Bodice.
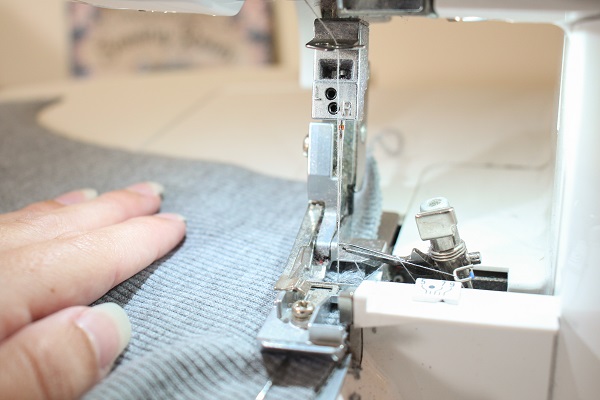
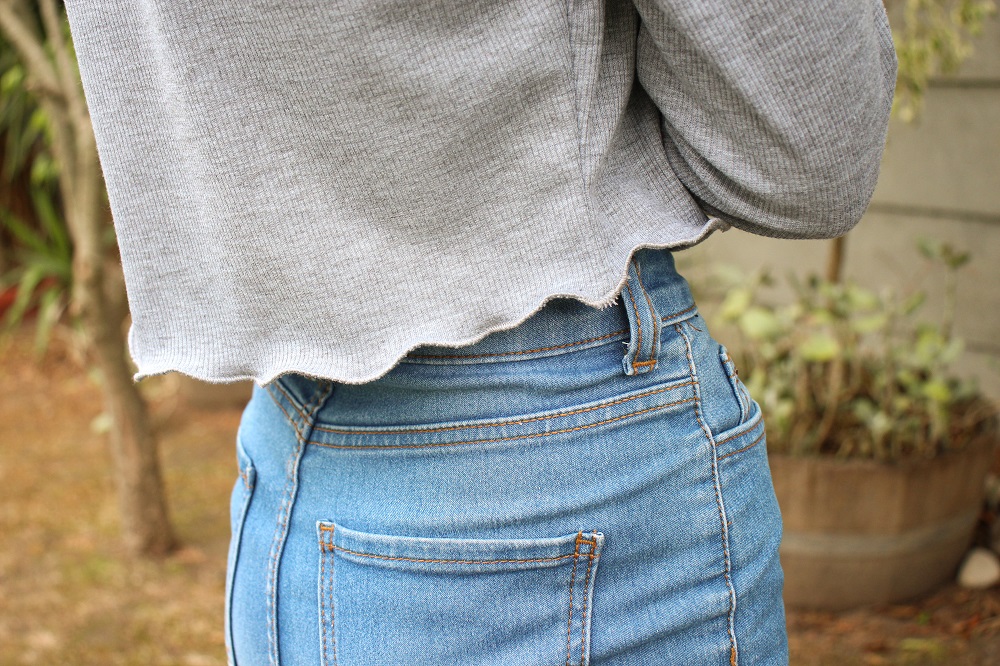
Roll Hem the raw edges
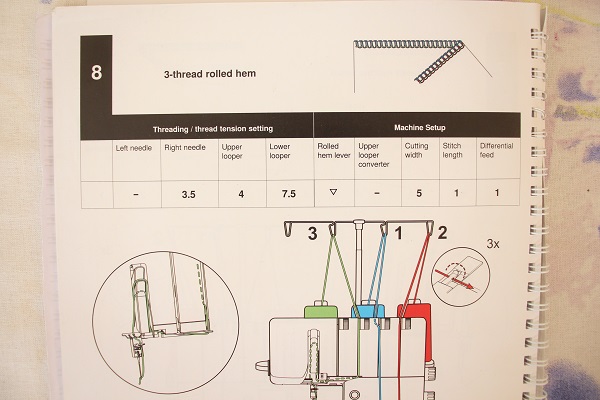
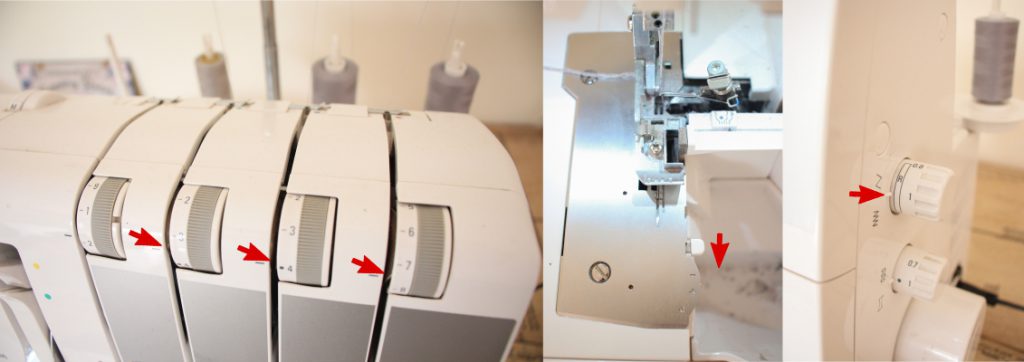 Set the overlocker for a 3-thread rolled hem.
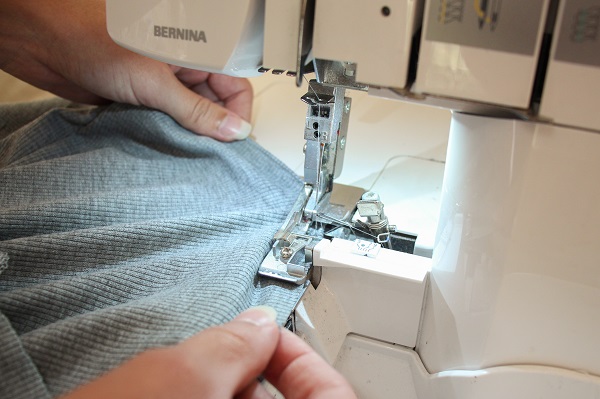 Overlock the Bodice and Sleeve Hems
If you are following the original design, overlock the upper edge of the Neckband.
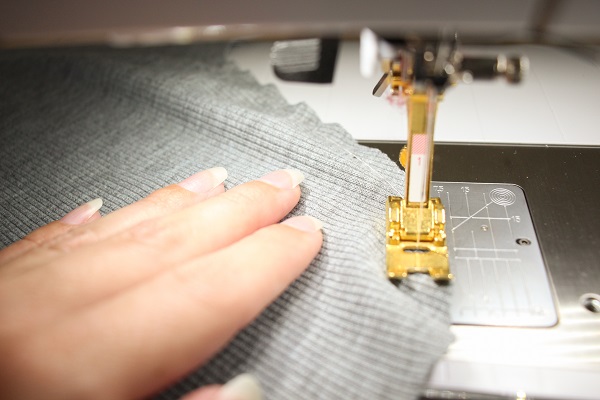
Evenly stretch the fabric when guiding it under the overlocker foot to create the wavy effect. The more you stretch, the wavier it will be.

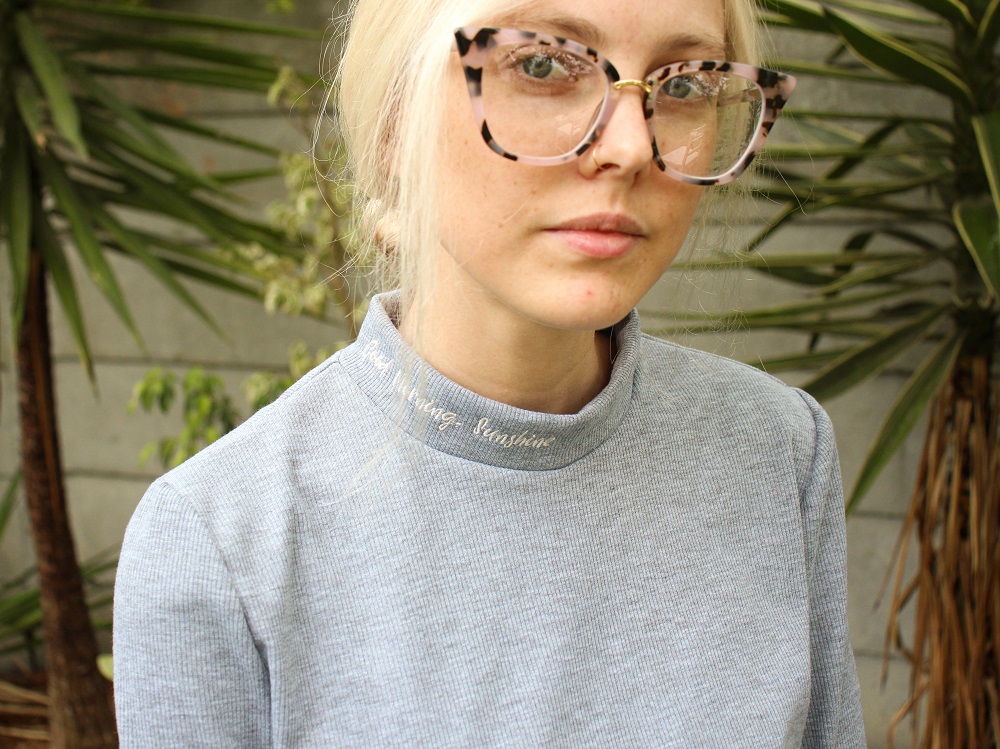
“Good Morning, Sunshine” is the name of a song that has a funny meaning to my boyfriend and myself. I’ll elaborate more in my next blog post.

Tips
- I think once I wash my Top and possibly steam the rolled hems, they will look wavier.
The fibres will return to their original state with the heat and the rolled overlocking will keep the edges stretched.
I would love to see what you make, please feel free to share with me!
Instagram
Facebook
-Hannah-Rose


0 Responses