 BERNINA Corporate Blog -
Having an embroidery machine truly does open up a huge range of possibilities when it comes to levelling up your sewing practice, but with that range of possibilities comes a daunting new list of skills and techniques to learn. Making the leap to using your machine for so-called “difficult” fabrics (like machine embroidery on cork!) will give you a lot of confidence in its capabilities as well as your own, and soon – if you’re like me – you’ll end up with more ideas than you know what to do with!
To that end, I’ve created a new little series of blog posts for you here on the BERNINA blog, with the goal of sharing all the tips and tricks I’ve learned about some of the “difficult” fabrics I’ve worked with, and hopefully convince you that there’s actually no such thing as a difficult fabric if you know how to handle it!
You may have seen my “Machine Embroidery on Tulle” post already, but if you haven’t, consider that post the unofficial start to this series and go have a read. Today though, we’re covering cork fabric!
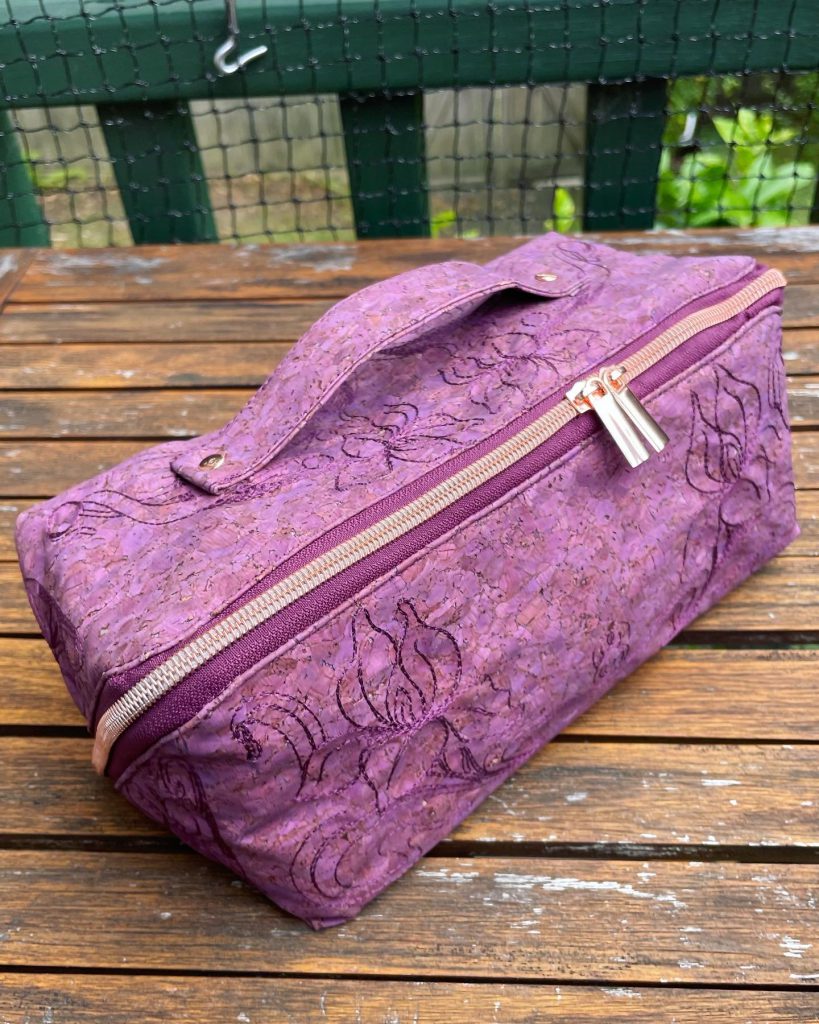
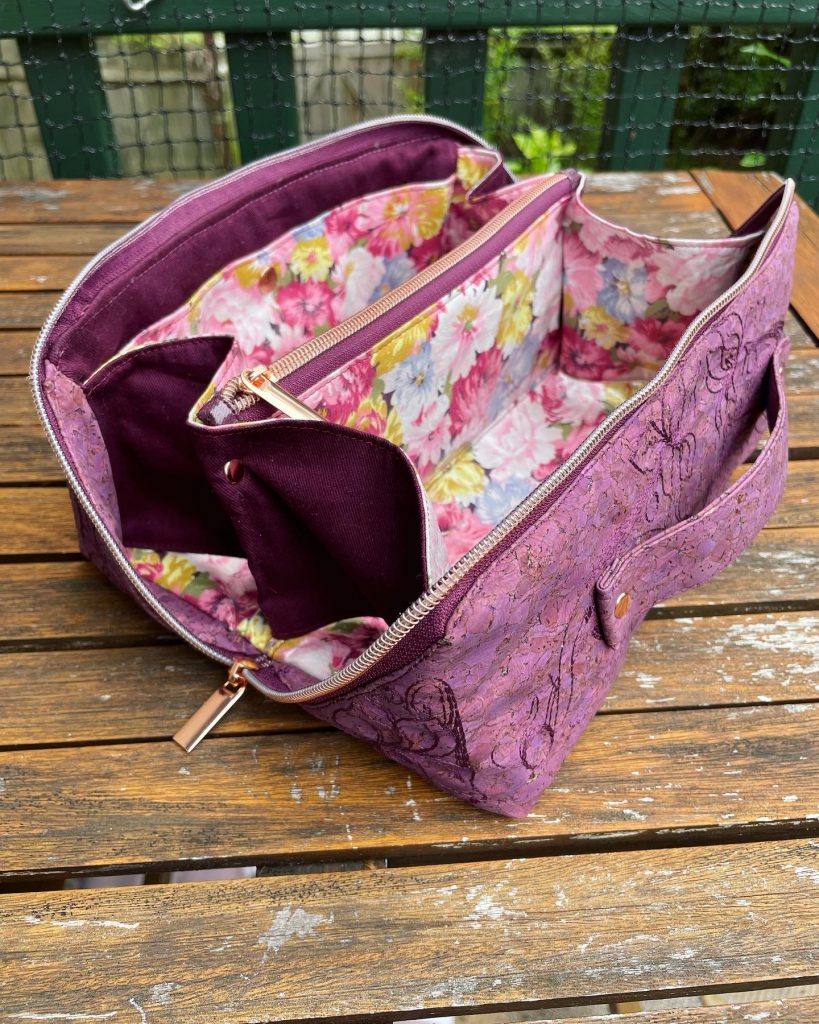
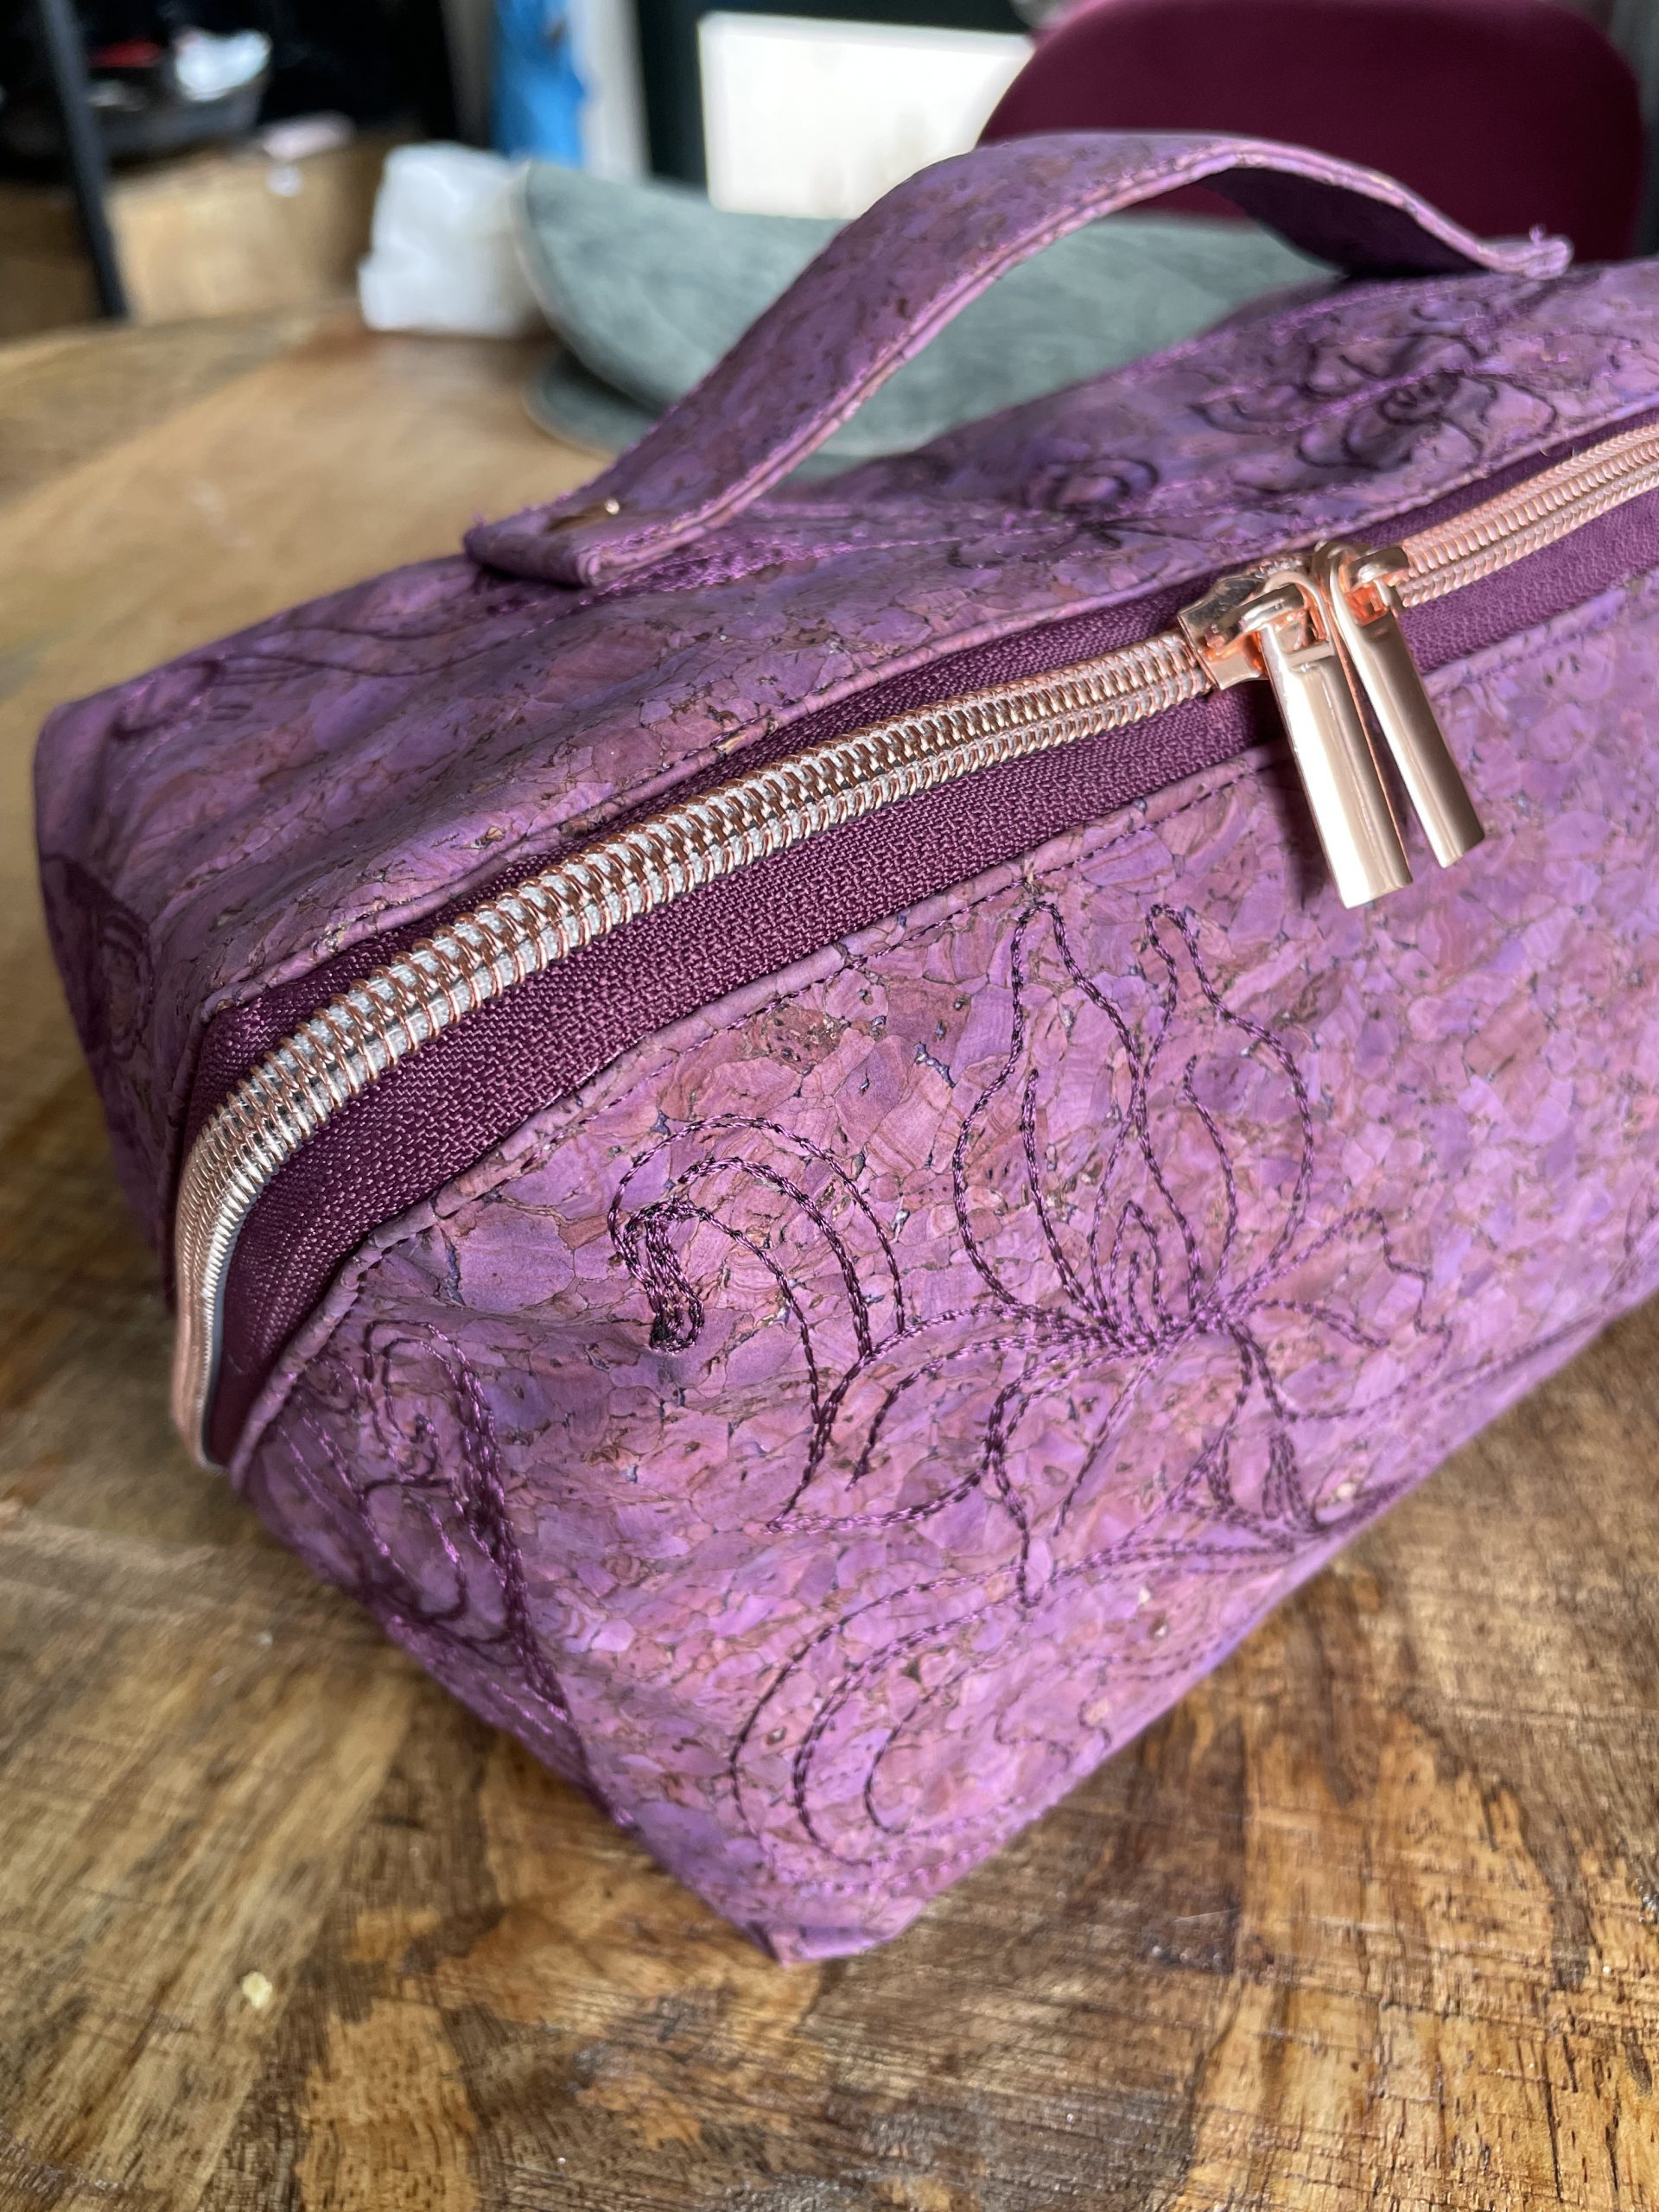
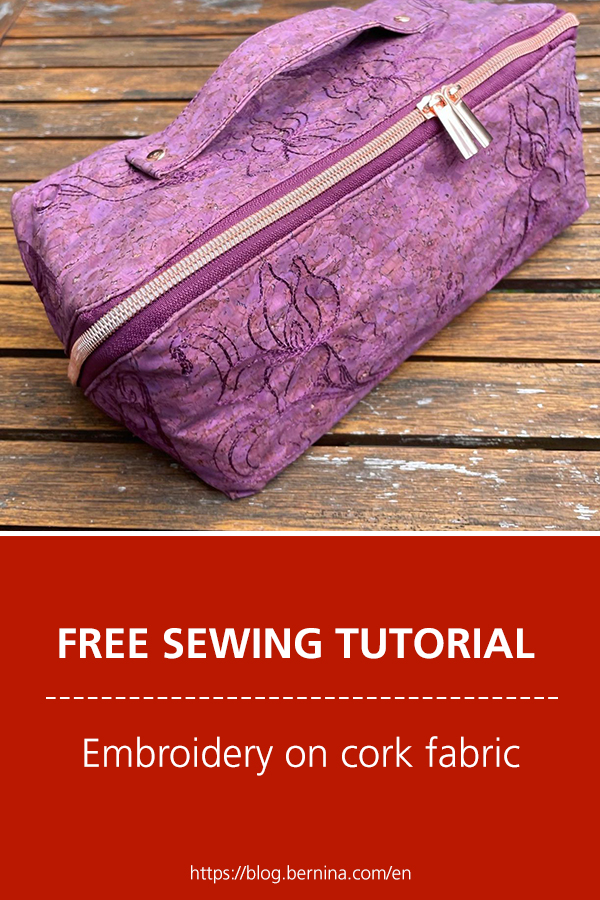
For this project, I used machine embroidered cork fabric on the outside of my new toiletry bag, which I made using the Spring Roll Pouch pattern by Love You Sew patterns. This pattern is available as a PDF for purchase, and it has a lot of pocket variations plus clear instructions and multiple tutorial videos for the visual learners among us. The inside is full of pockets which is awesome!
Cork Fabric
Cork fabric has two components. First, we have a thin layer of shaved cork on its right side which has been adhered to a backing fabric for strength and stability. The backing fabric is plain woven, and is typically cotton, polyester, or a blend. It is quite similar to what you might see on the back of faux leather. In fact, you’ll sometimes see it referred to as “Cork Leather” for this reason!
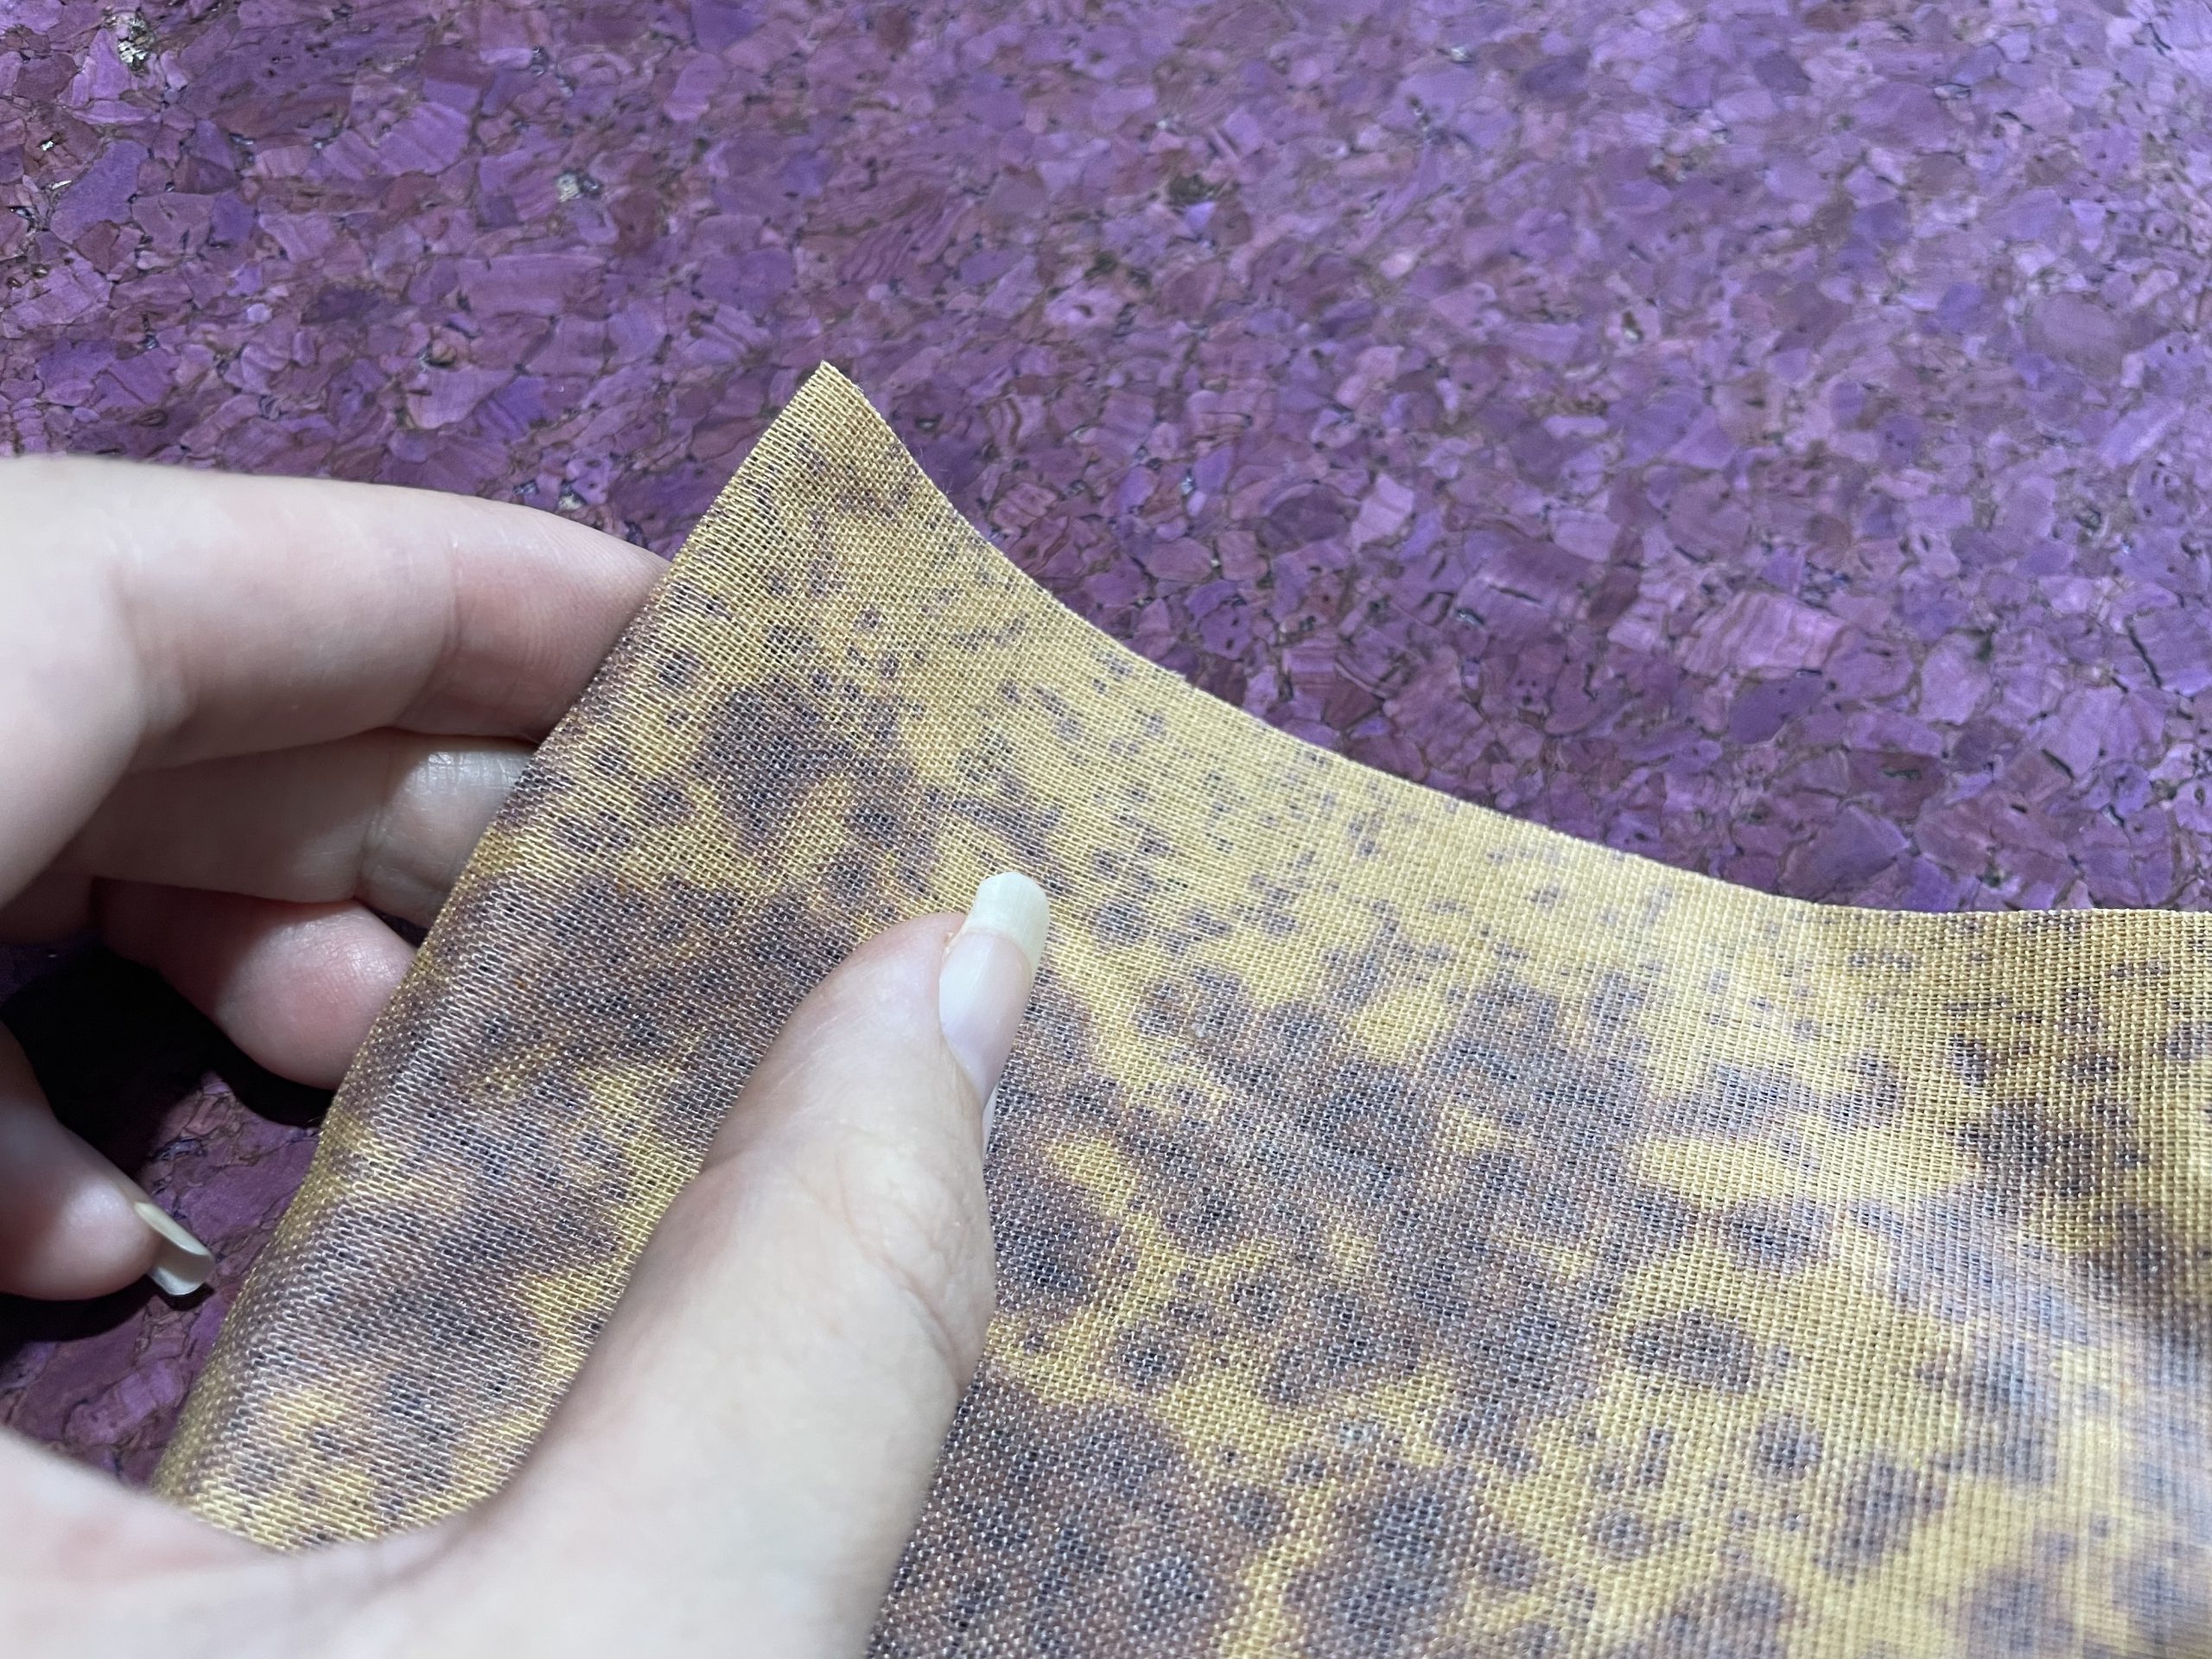
The cork material is sustainably harvested from the bark of the cork tree, but you should still check the tag on your purchase – Faux Cork Leather looks similar but is made from PVC instead of cork. I have worked with both faux and real cork fabric, and in behaviour and hand feel they are extremely similar. Both are resistant to water absorption, staining, and cracking. Real cork is lighter weight, naturally antimicrobial, and softens when steamed. Synthetic cork gets melty if exposed to high temperatures… not great for trivets! As far as how you treat them when sewing and embroidering, the two are virtually indistinguishable.
Embroidery Design Considerations for Cork
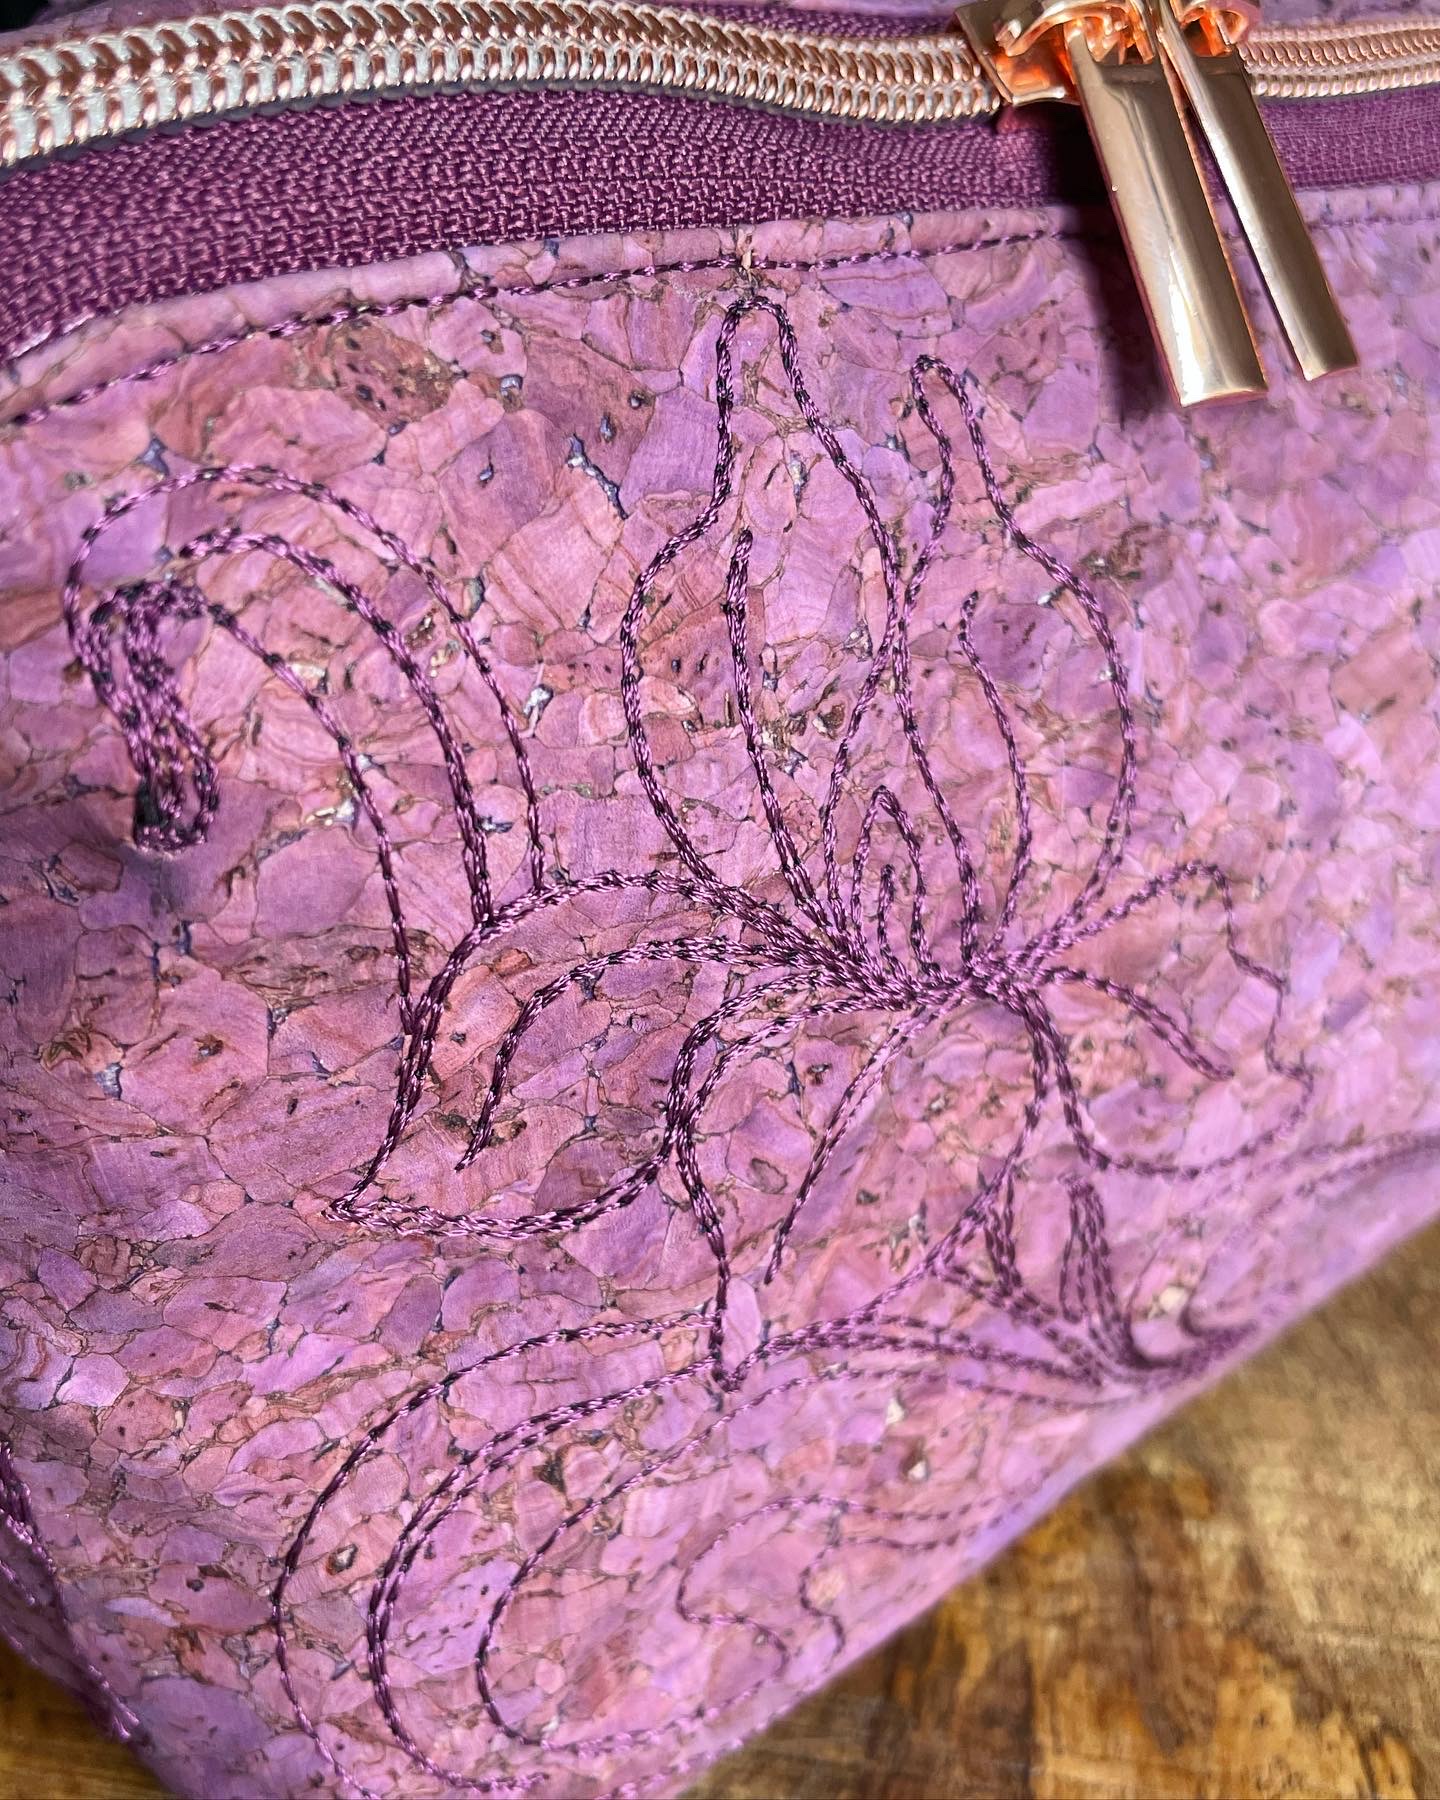 When considering a design to either digitise yourself or purchase to embroider on cork, you’ll want to err on the side of lower density designs. The cork layer is adhered to that strong woven backing fabric I showed you above, but the cork layer itself will still end up perforated if stitches are placed too close together. Basically, this means that while embroidering a high-density design won’t impact the strength or integrity of your cork fabric, it may look a little rough around the edges, especially if the finished object isn’t a completely flat item like a coaster or a stiffly interfaced bag.
It will also tend to fold more easily along a perforated edge. Here, you can see what a sample satin stitching looks like flat, held with a fold (see how it tends to fold along the edge of the embroidery?) and held up to light, showing the perforation around the edges:
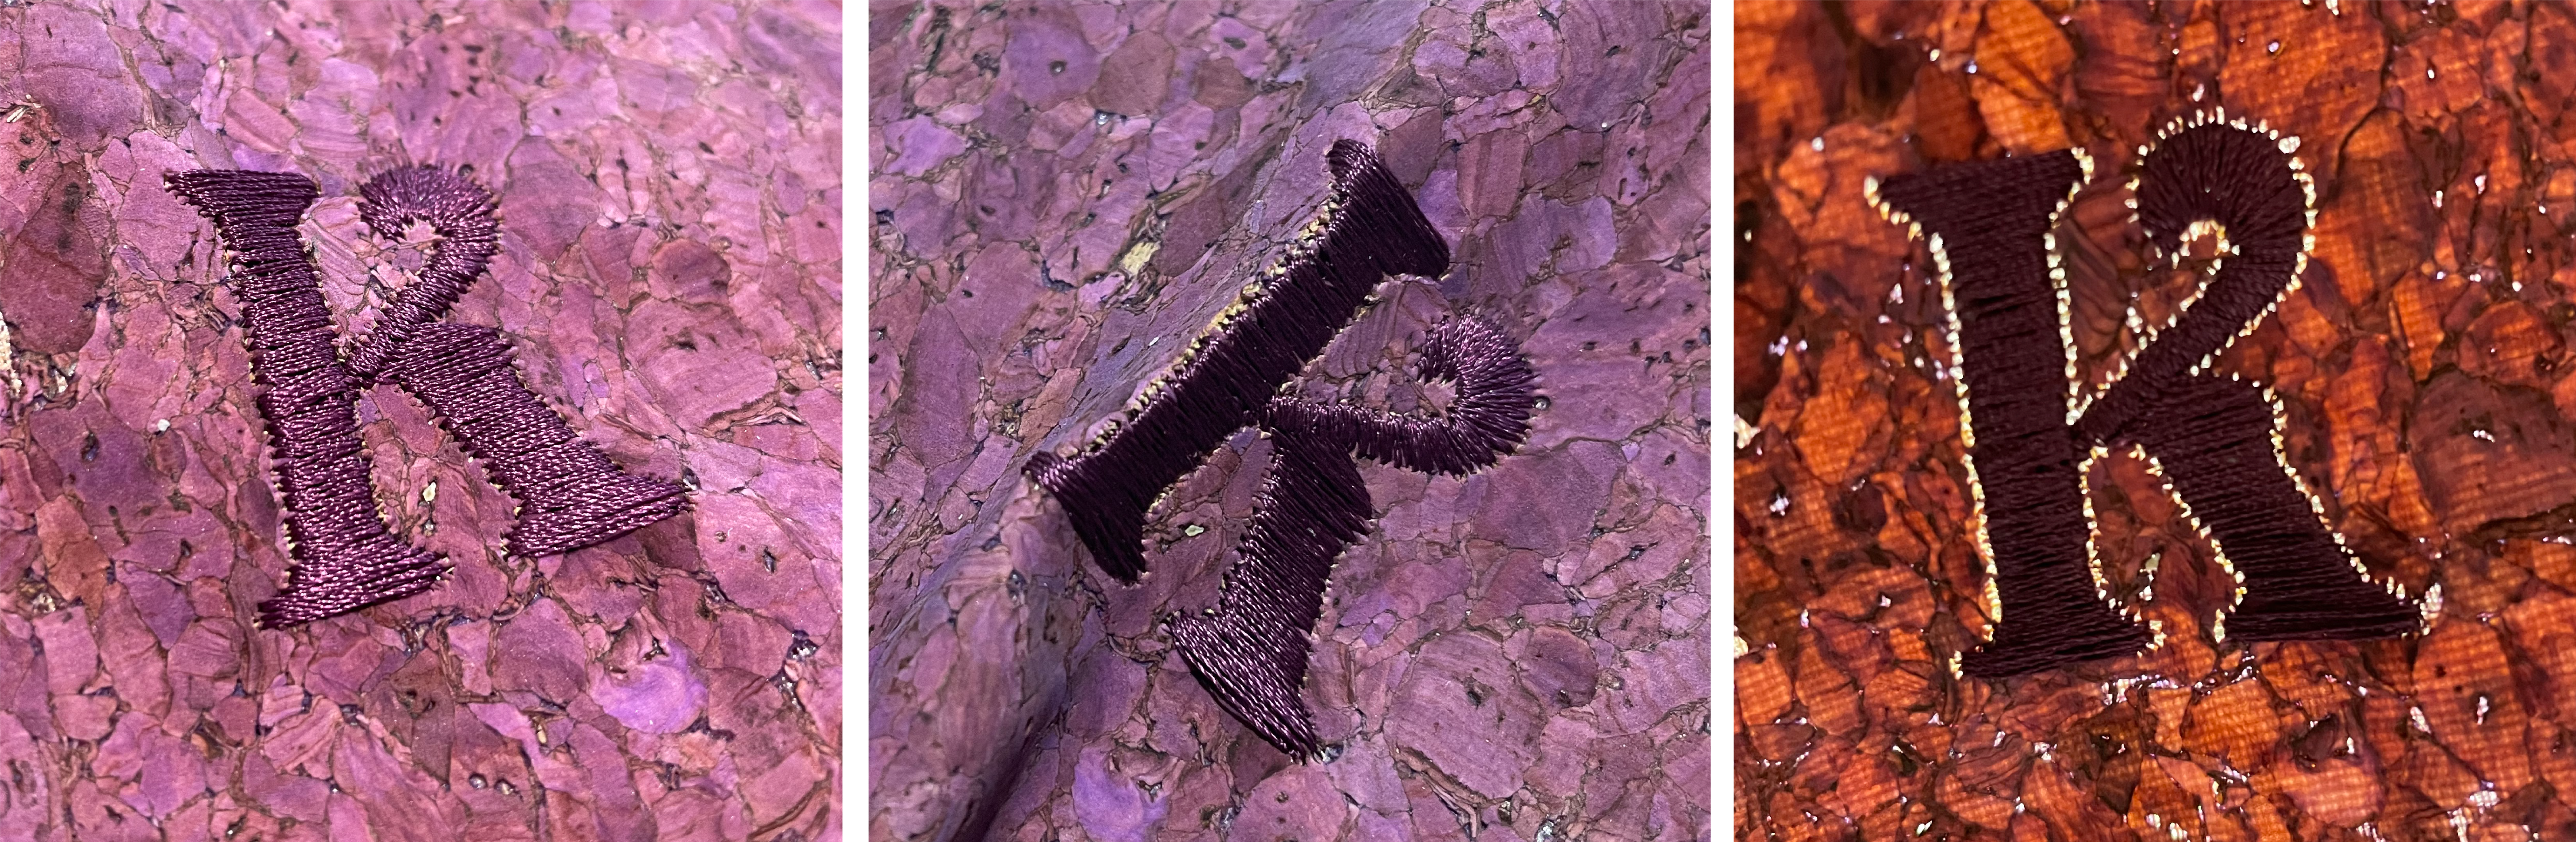
If you’re working on a project that isn’t held completely flat or supported by a stiff backing, I’d suggest working with a design that doesn’t contain any satin stitch areas. This is what I decided to do for my spring roll pouch – I designed a set of art nouveau embroidery patterns based on line art, which I digitised using two passes of running stitch. The second pass goes through the same needle holes as the first, and helps the tonal design stand out against the cork.
Like I said – your cork won’t fall apart if you embroider a dense satin stitch design on it, but pay attention to the edges of the design as these will be weak points where the cork has been perforated. This doesn’t matter at all for projects like coasters or trivets- these items will be kept flat and they’ll have a strong backing to keep everything together and stable.
Hooping requirements for Machine Embroidery on Cork
Now that your design is sorted, it’s time to move on to the machine! Cork fabric is stiff and dense – it’s not a good candidate for traditional hooping. It’s also prone to hoop burn if you do manage to get it into your hoop. We have two solid options for prepping our cork for embroidery, each with its own advantages:
First, you could opt to float your cork fabric. To do this, you’ll hoop up a piece of stabiliser (cork fabric itself is quite stable, so regular tearaway, cutaway, or washaway stabilisers will all do the trick) and then adhere your cork over the top of the hoop. You can get adhesive stabilisers that have two layers – one of which peels away like a sticker so you can adhere the cork directly to the hooped stabiliser.
You can also use a can of Odif 505 spray adhesive which works equally well. Personally, I prefer the spray adhesive because I can use it for more things – just be sure to keep the sticky spray off the hoop itself!
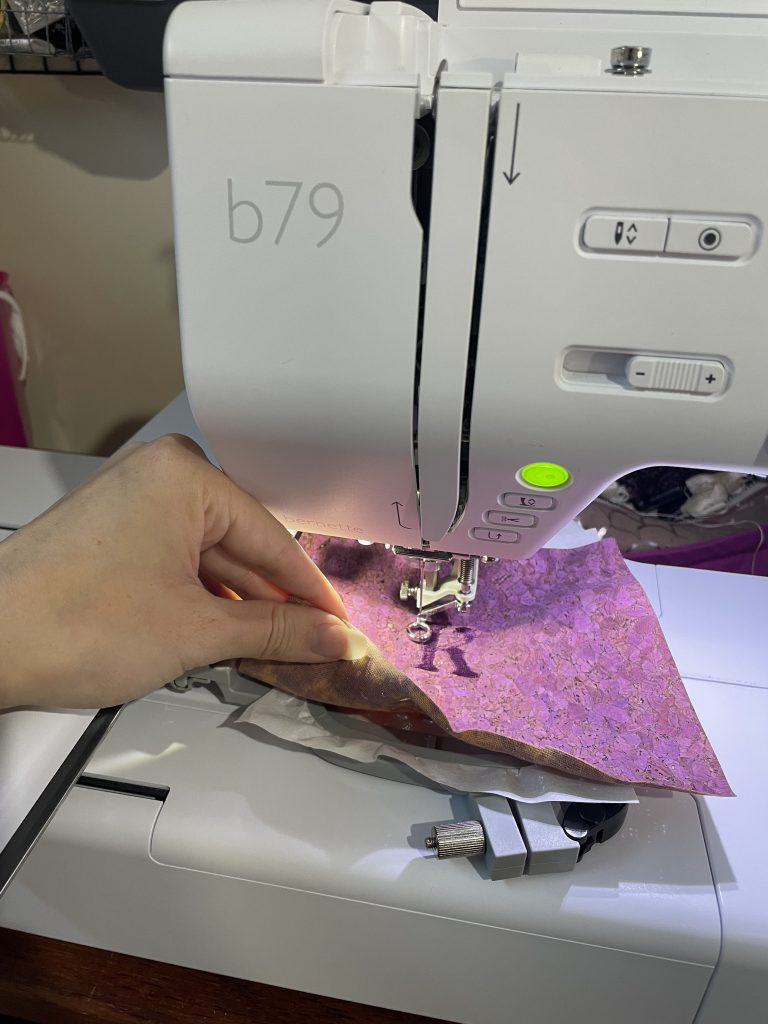
If you’re not interested in sticky business, meet the DIME Snap Hoop. These hoops are available for the bernette range (like my b79!) as well as the 5,7, and 8 series BERNINAs. I’m using the largest size – the Snap Hoop Monster. This hoop has a metal base plate and an upper piece that is plastic on the outside but is filled with high strength magnets. You can pop your cork fabric in between the two layers of the hoop and they quite literally snap into place. The hoop holds the cork completely flat between layers, there’s no risk of hoop burn, and it’s also super easy to move a larger item around to embroider on different areas. This was super handy for my project since I was covering the entire surface of my pouch in embroidery. I re-hooped eight times, all without leaving my sewing chair!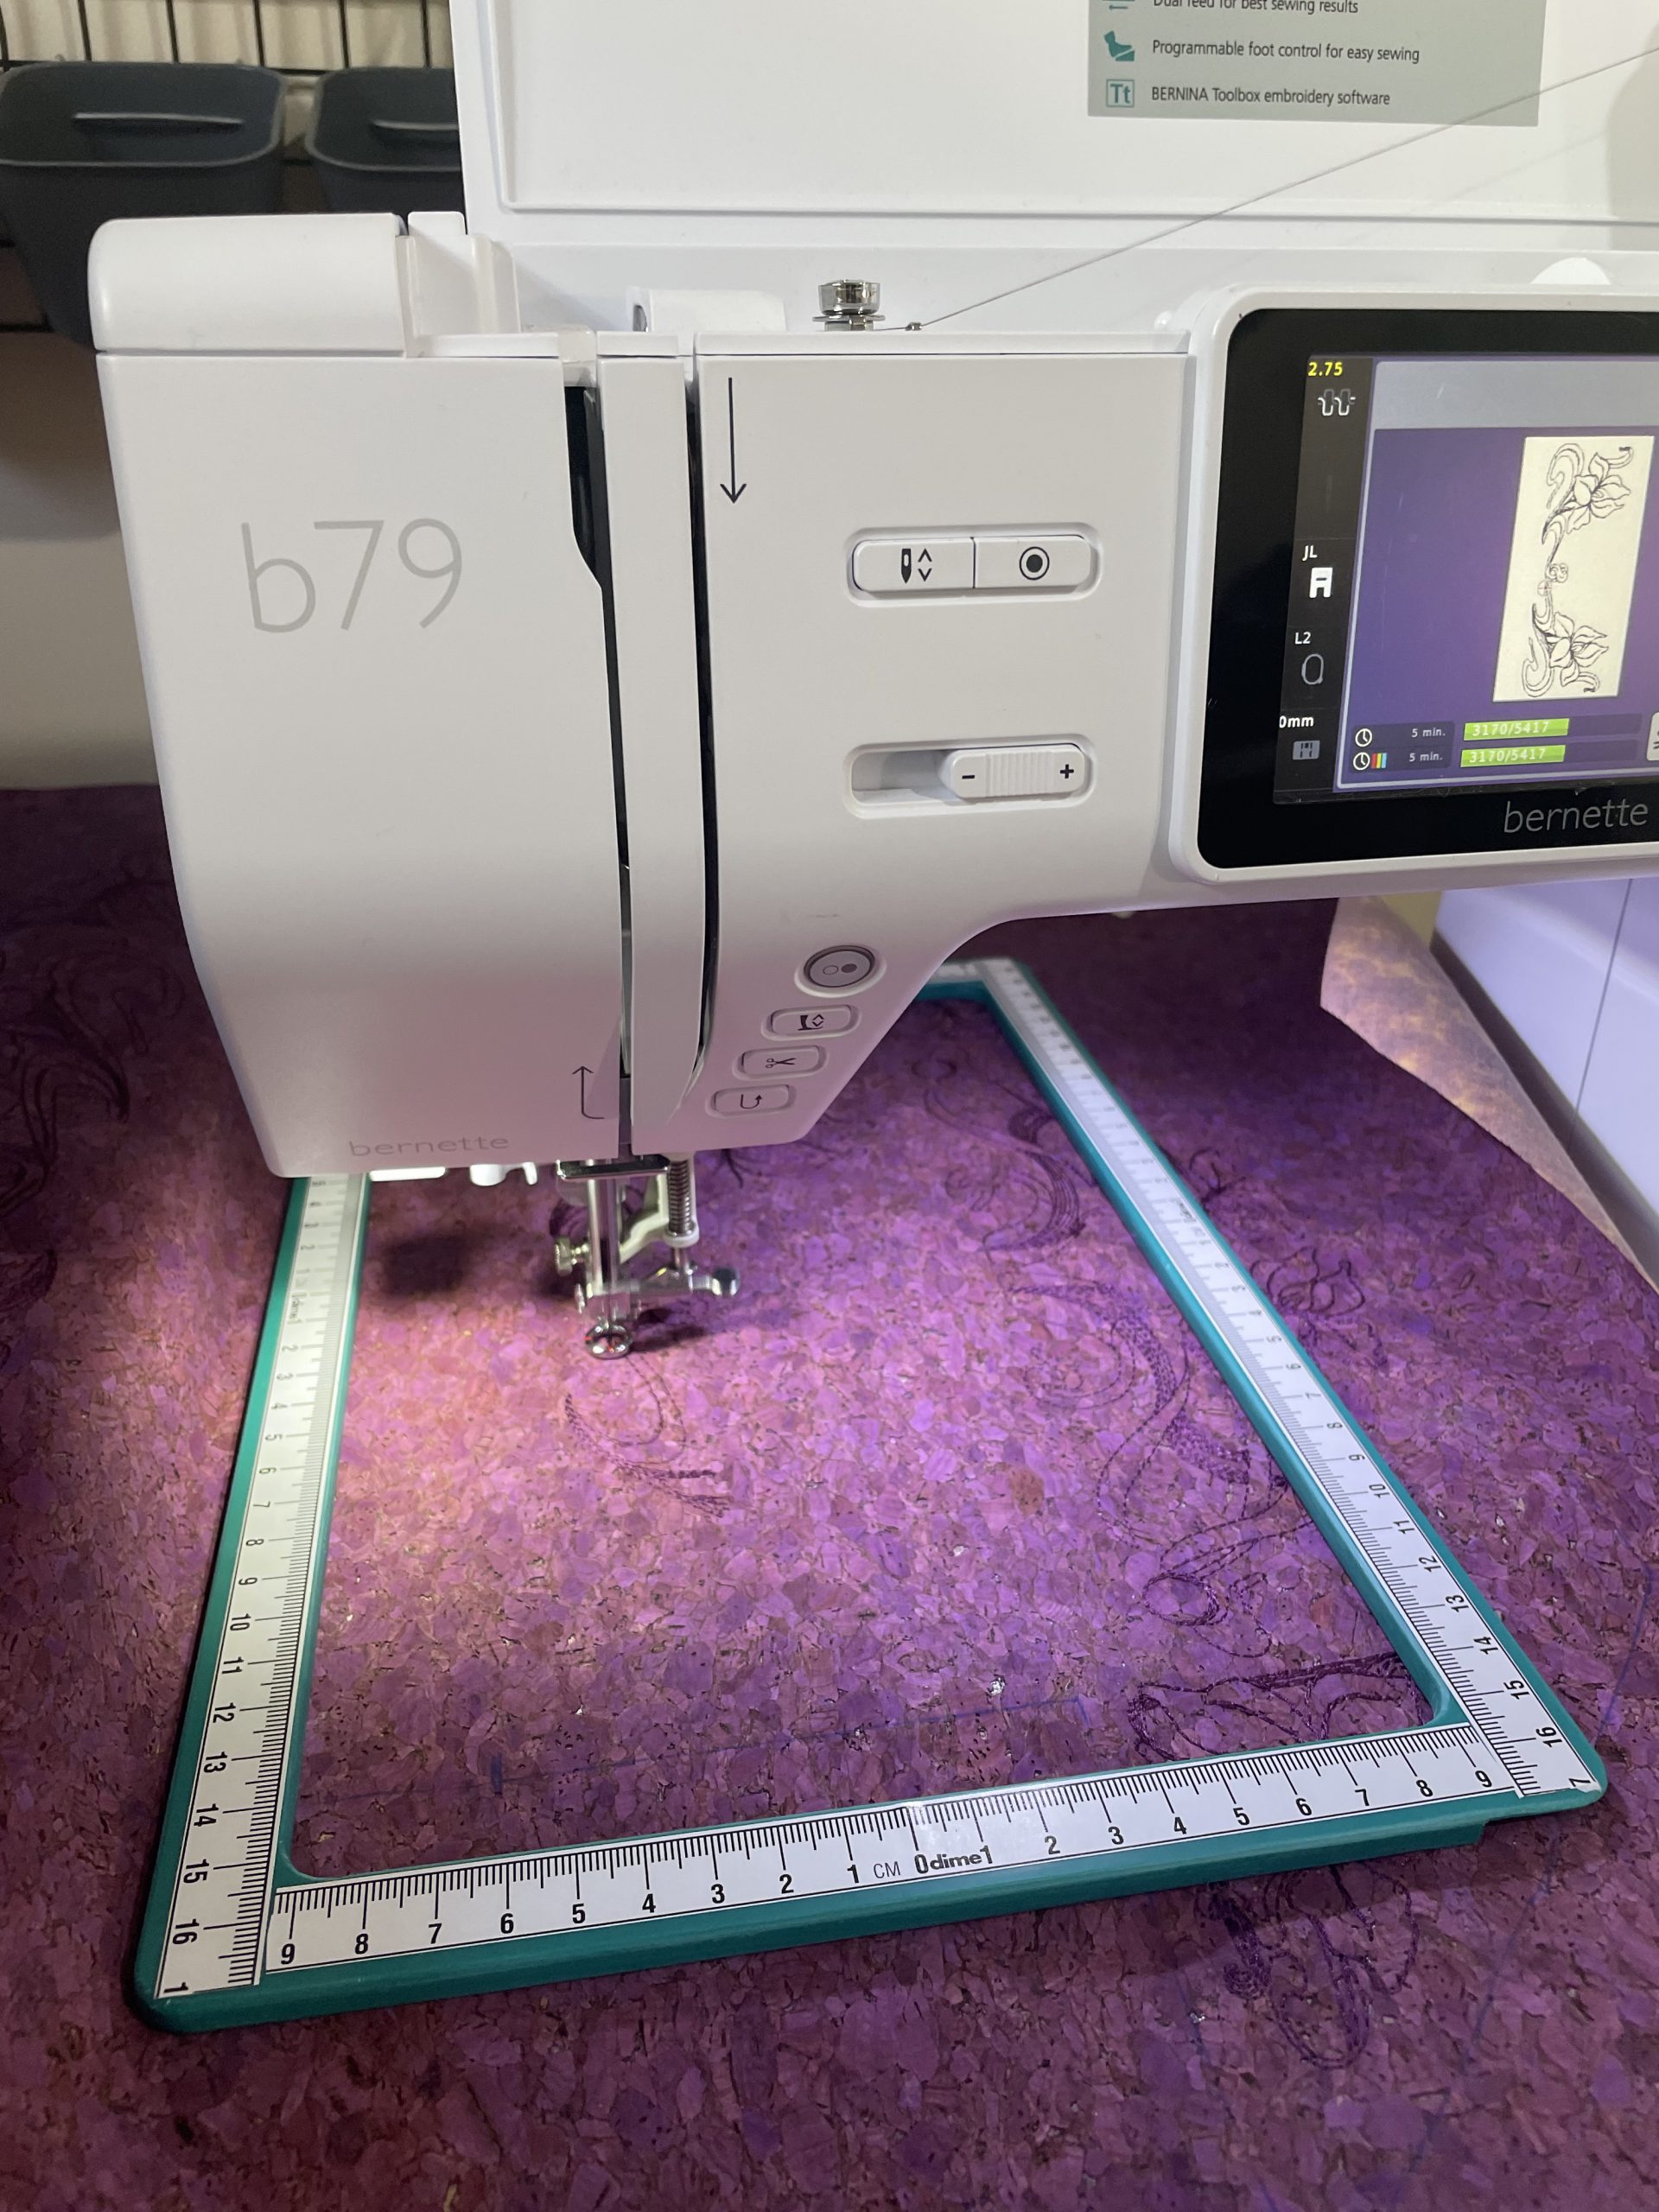
Whichever method you choose, the key here is to avoid squishing your cork fabric into the embroidery hoop. Fortunately, cork is quite stable and therefore lenient with different types of stabilisers so you can choose whichever one best suits your project. I used my favourite standard mid-weight tearaway stabiliser for the Spring Roll Pouch project.
Thread, Needles, and Machine Settings
Guess what! If you’ve made it through the first two sections, you’ve made it through the two key things that make cork “difficult” to embroider. That wasn’t so bad, was it? Just use a low stitch density and don’t pinch it in a hoop. In my experience with cork from here, it’s a breeze. That said, here are a few tips if you do run into issues while your design is stitching out: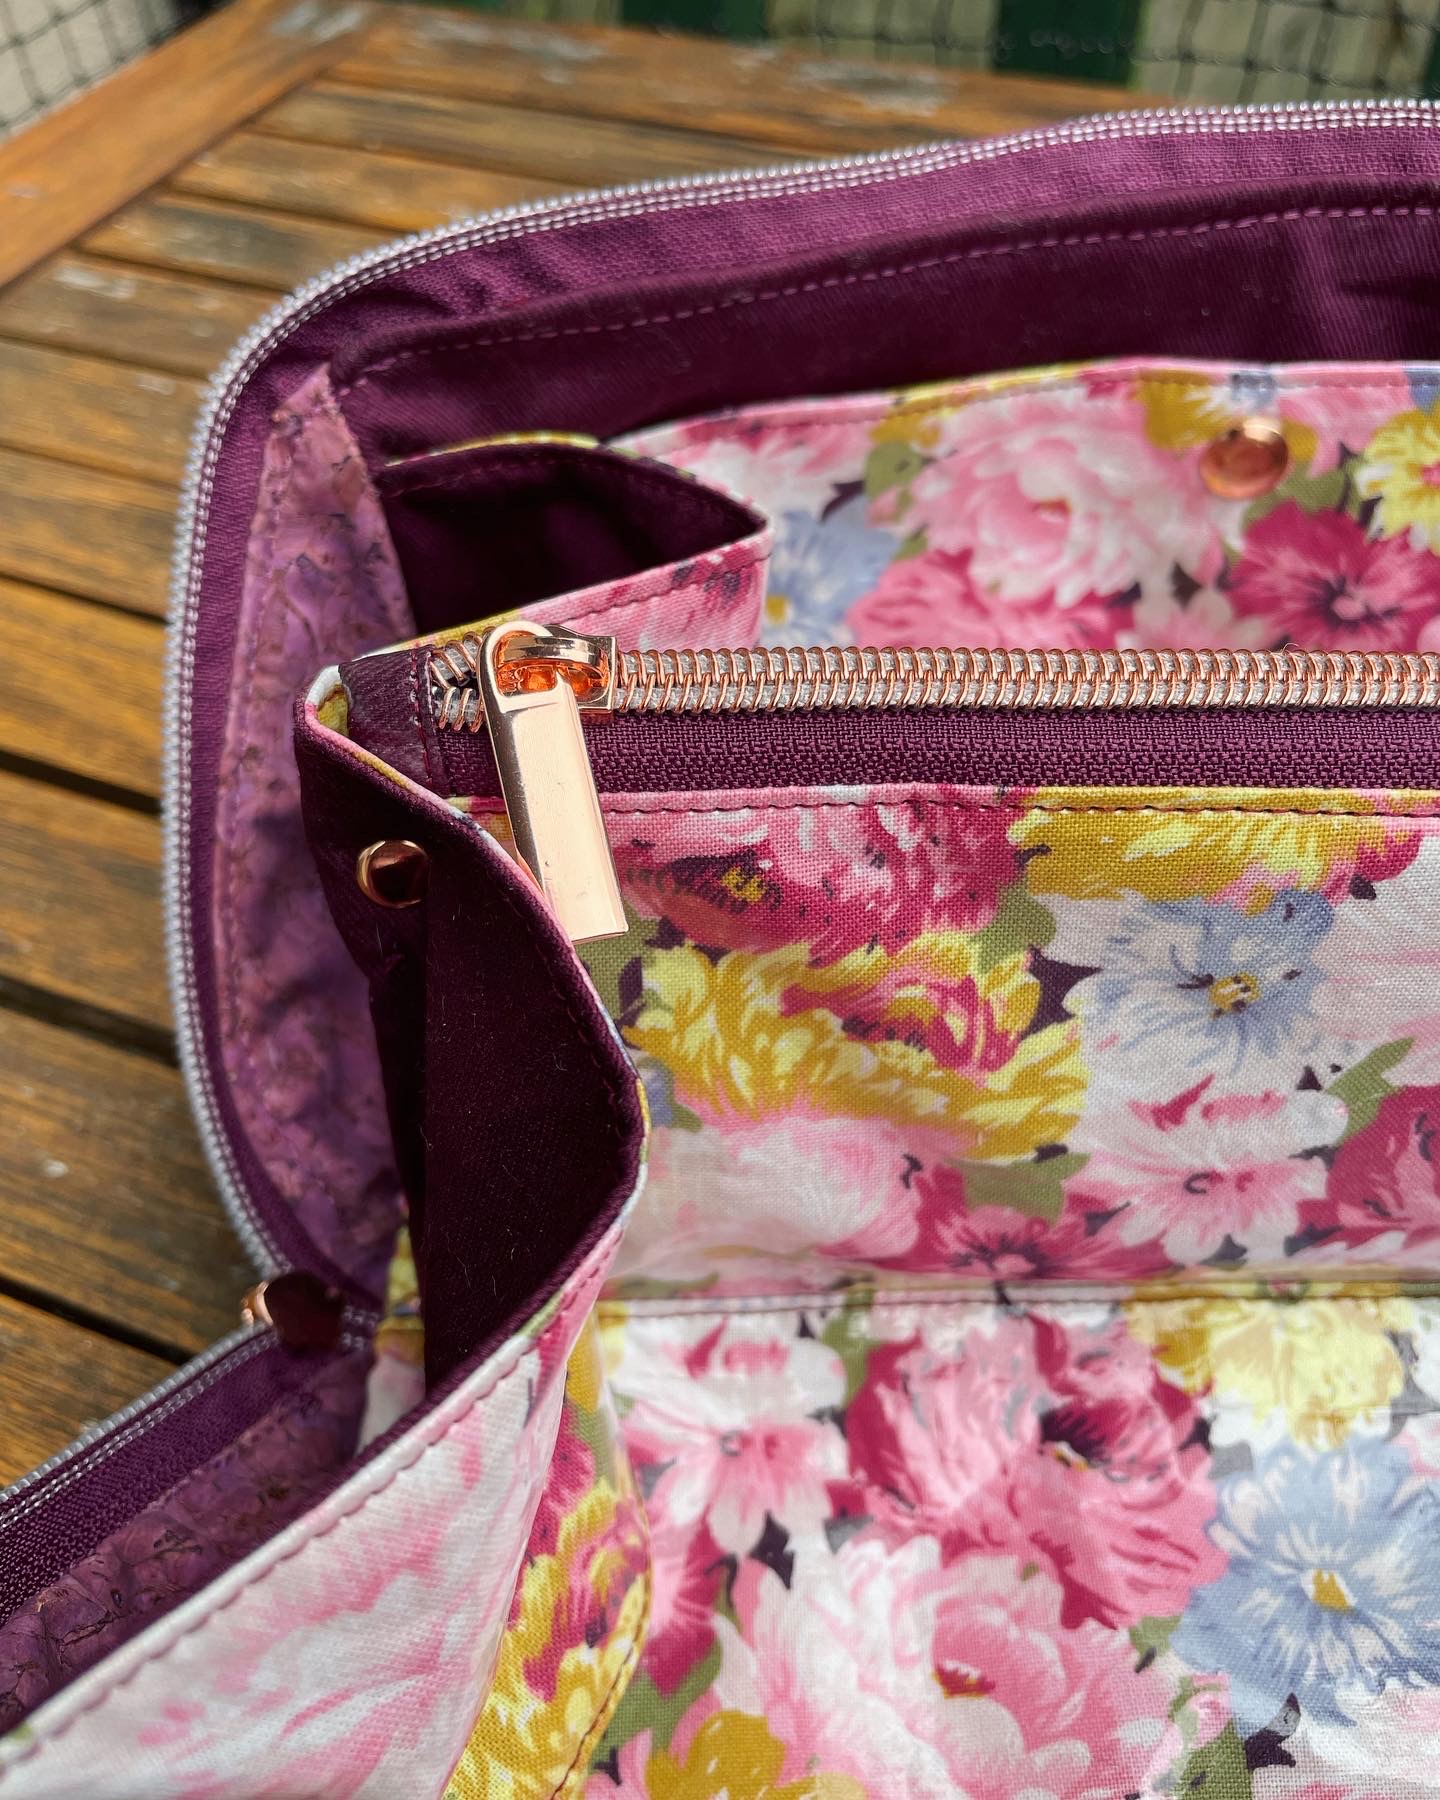
First – a mid-weight embroidery needle is the best place to start. If you experience thread breakage, first try rethreading upper and lower threads and slowing down the speed of the stitch out. If neither of these things work, try a leather needle – in my experience you won’t need it with most cork fabrics. You may also experience the fabric “bouncing” – where it appears to lift up with the needle as the needle lifts. If you see this happening, select a smaller needle size! This will help the needle pass through the fabric more easily.
Second – Thread. I use (and love) a 40wt machine embroidery thread on top and a 60wt below to reduce bulk. You may need to adjust your tension settings for the thread you’re using, but honestly no special requirements for cork here!
When sewing your project – embroidered or not – opt for a longer stitch length. You can also knot the thread to finish instead of backstitching to preserve the integrity of high-stress areas like corners. In leatherwork, it’s common to knot off threads and then place a dot of glue to secure the knot, but I’ll confess I didn’t take that extra step with this project.
Don’t forget- holes are permanent! Instead of pins, use sewing clips to align seams, or a bit of basting tape if needed.
Lastly – if you’ve opted for synthetic cork fabric, be careful when pressing! Press from the wrong side with your iron on a low heat setting, or use a pressing cloth to shield the right side. This stuff will melt if exposed to high temperatures! If you’re using natural cork, it will soften a little if you steam it which can be really handy when turning bags and pouches. Steaming will also help you set the shape of your final item if needed.
That wasn’t so bad!
See? Difficult fabrics aren’t so scary if you know how to handle them. Cork fabric is a great option for bags, pouches, coasters and trivets, and all kinds of machine embroidery applications – I’m sure you have a few ideas of your own!
 Stay tuned for the next in my series on so-called difficult fabrics to embroider, let me know in the comments if you have any questions or fabrics you’d like me to cover. If you want to see some of my other projects – come say hi on Instagram, TikTok, Youtube, or my Blog if you like!


0 Responses