 BERNINA Corporate Blog -
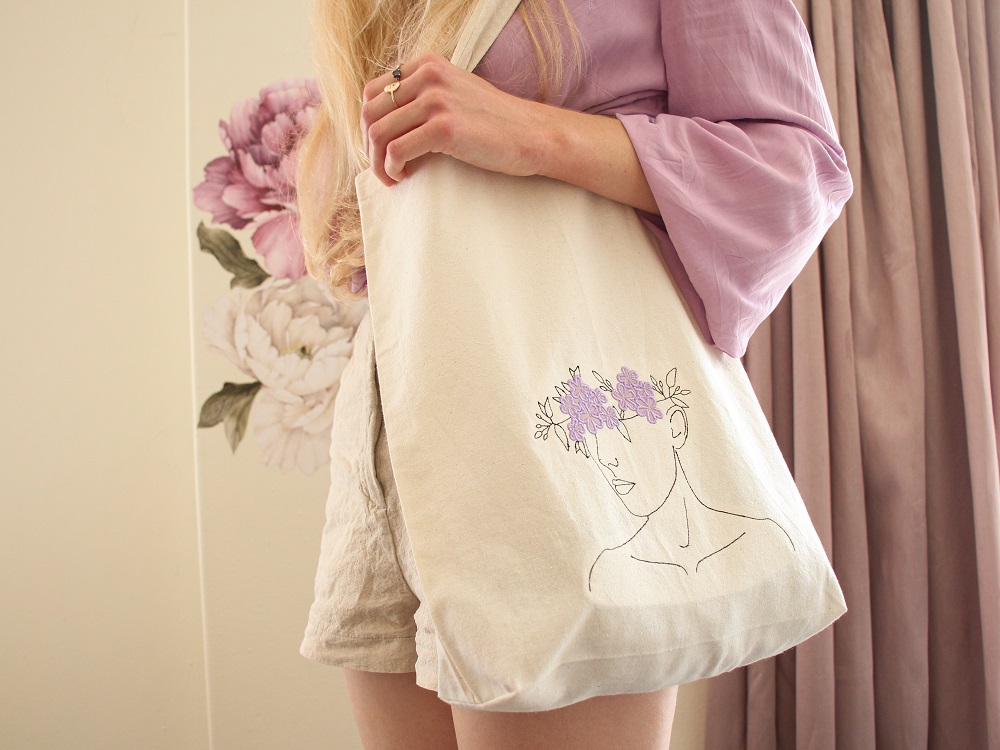
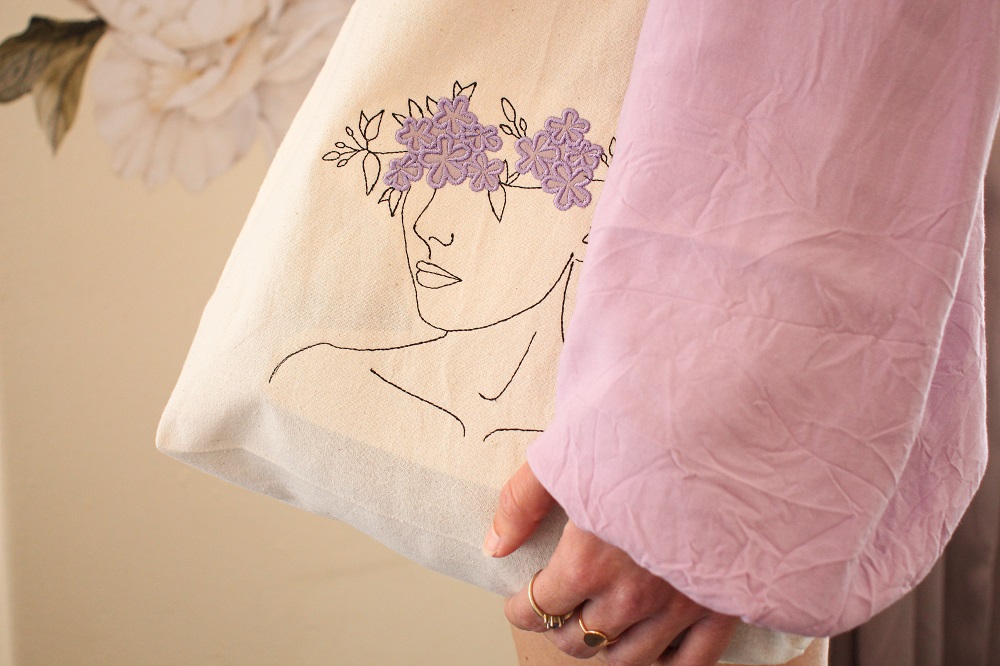
 I recently received Bernina’s new Large Freearm Embroidery Hoop and wanted to create a unique embroidery design to embroider with it on a tote bag.
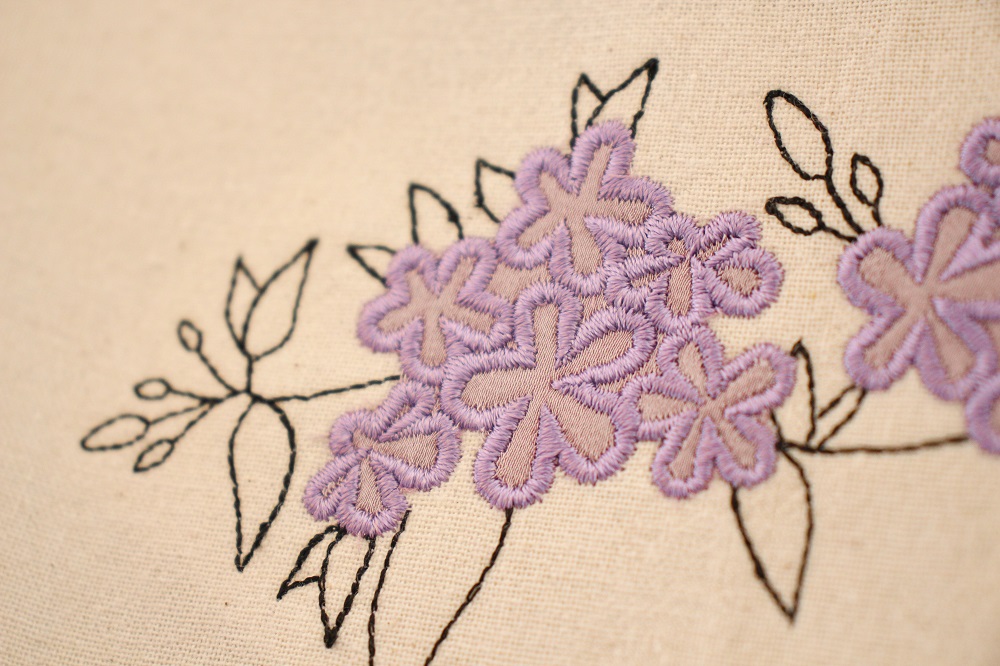
For my design, I was inspired by the sweet Plumbago flowers that bloom in front of my bedroom window. They are native to South Africa and even though they are the blue variety, the ones in my garden are a pale lilac! I love they remind me of my dog as they would stick to my his face or ears when he explored the garden. It was as though he would bring a flower in for me.
I used photos of Plumbagos to draw a flower crown which I combined with a simplified drawing I did of myself from a picture.
I love minimalistic line drawings but wanted to bring in some colour with appliqué.
Bernina have improved the Appliqué Toolbox in the Embroidery Software 9 as well as the functions in the Appliqué Object Properties. To create my artwork, I combined the improved Digitize Appliqué Tool and the Auto Digitize Tool.
You can download the embroidery design I created in this blog post over here: Create a special tote bag with the Large Freearm Embroidery Hoop
What will be needed:
- Bernina Embroidery Software 9
- Artwork/image
Digitize
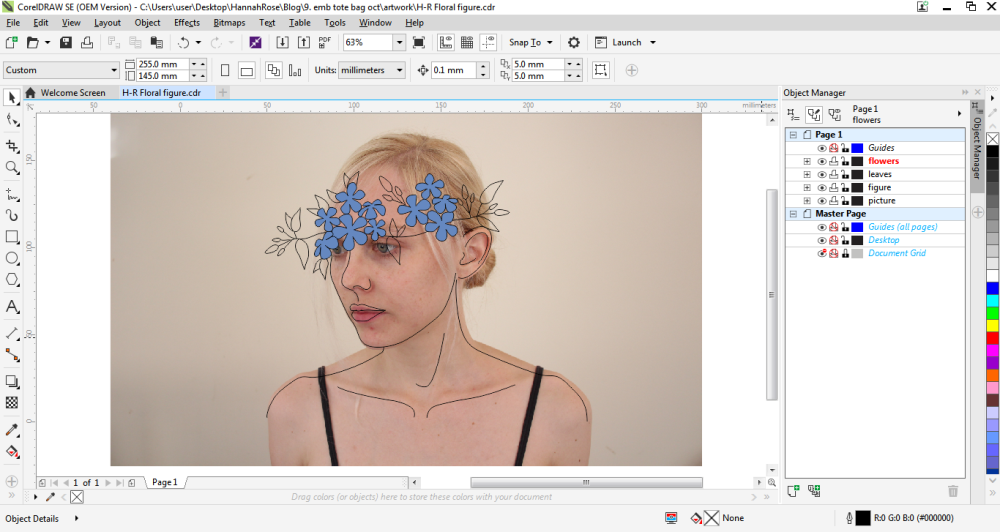 I created this artwork by drawing lines over a picture of myself. This can be achieved in Corel Draw by using the Freehand, Pen or 2 Point Line Tool.
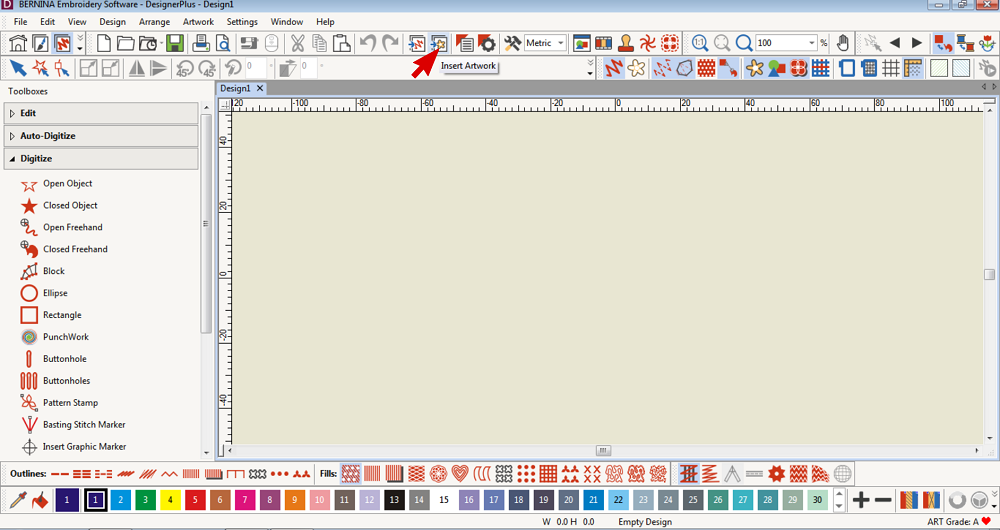 Insert artwork.
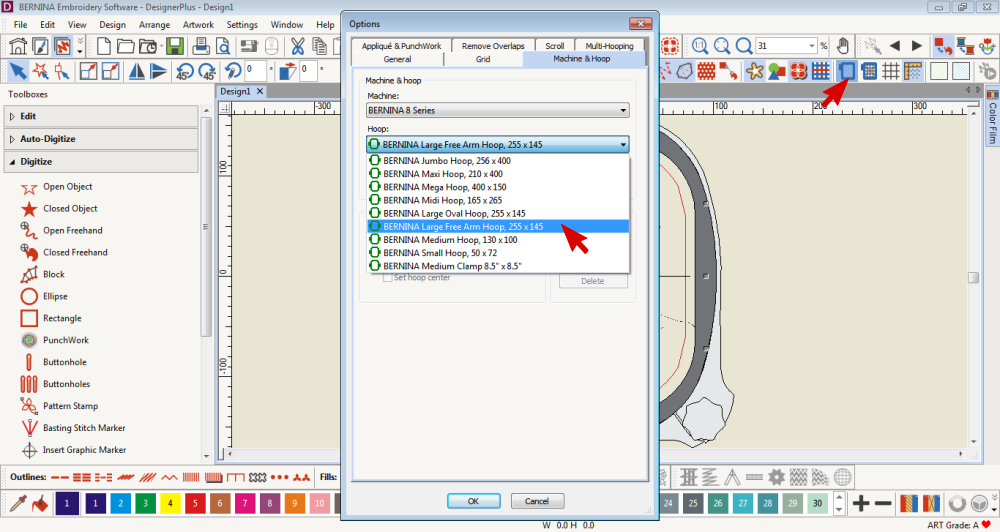 Select the Large Freearm Embroidery Hoop. Right click on the Hoop icon to open the Hoop menu.
Even though my machine is a 7 series, I found that the Large Freearm Hoop from the 8 series hoop selection to be a more accurate depiction of the hoop.
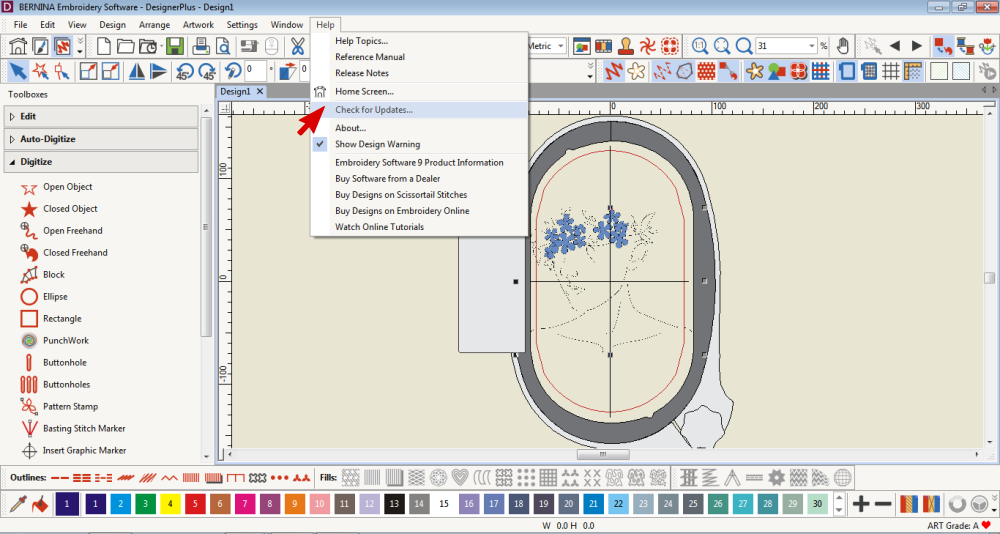
If this hoop is not available under your selection panel, you may need to update your software.
You can do this by going to the Help Tab and selecting Check for Updates.
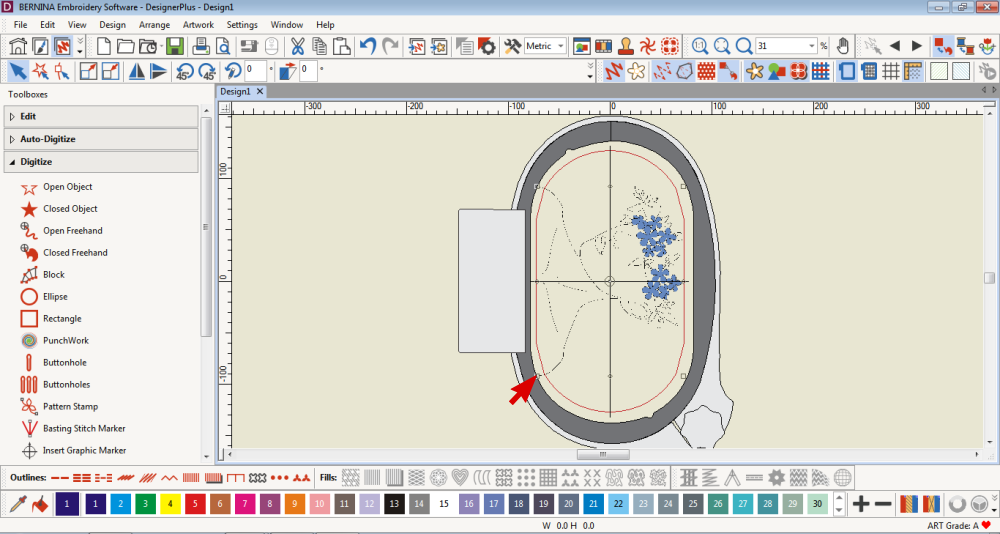 Resize/rotate the artwork to fit within the hoop.
Digitize Appliqué
These steps are to create a digitized Appliqué design by drawing lines over a template.
If you have a vector that you would like to convert to an Appliqué design, then refer to the heading Convert to Appliqué in this blog post for help:
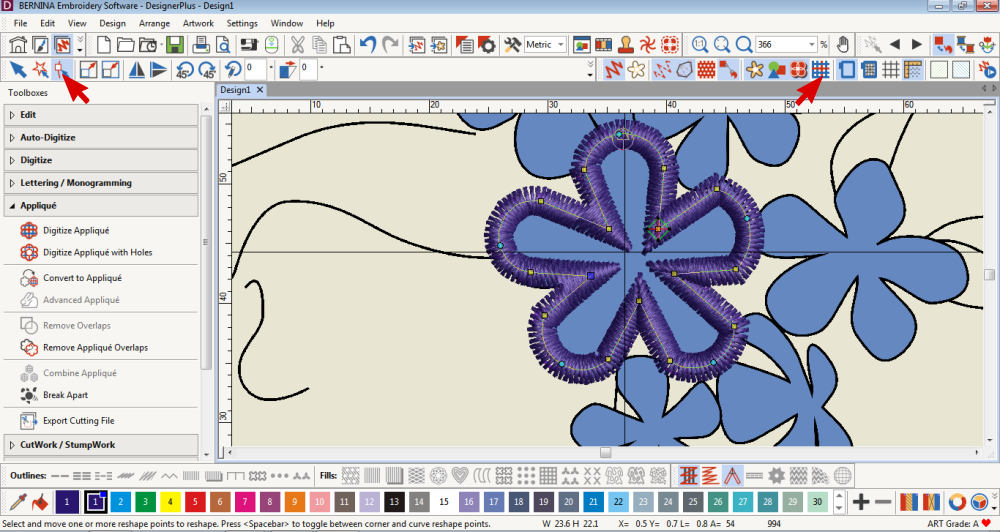
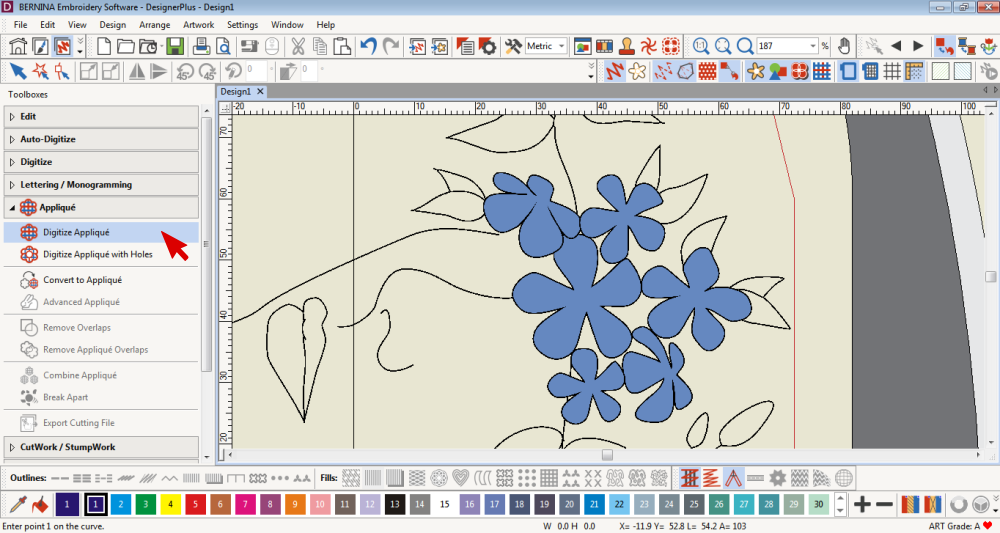 Select the Digitize Appliqué Tool.
 Create nodes by clicking with your mouse.
Right click make a curved lines and left click makes a straight line.
Press Enter on your keyboard before reaching the original click point and the software automatically closes the object.
I found it best to place a node at every concave and convex curve to create an organic shape.
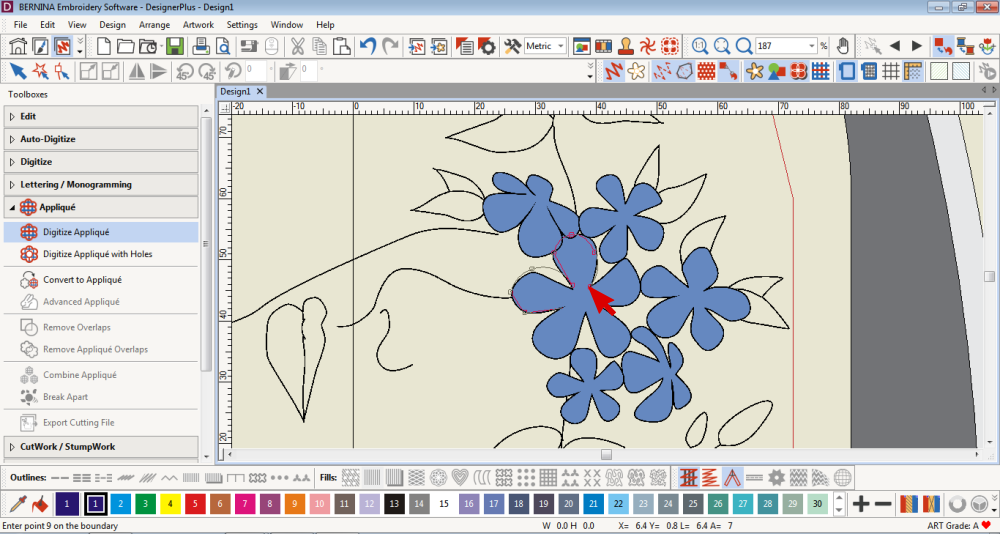
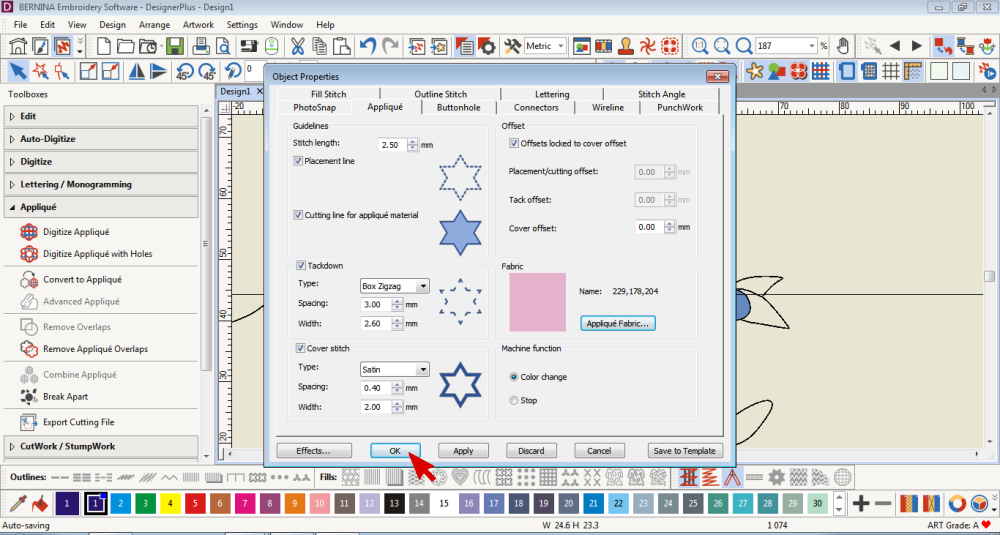 Right click on the Digitize Appliqué Tool to edit the properties.
You can choose which stitches to include in your appliqué by ticking their boxes. The type and width/length of these stitches can be edited too.
The Placement Line will be stitched to show you where to put the appliqué fabric. Once the fabric is placed the Cutting Line will secure it and show you where to cut the excess fabric (just outside of the stitching).
A Tackdown stitch secures the cut edges of the fabric to the item being embroidered
The Cover Stitch neatly stitches a border around the appliqué shape.
If you want a visual idea of what the appliquéd shape would look like, you can fill it in with a colour or print.
 Select the digitized design and click on the Reshape Tool to be able to edit the shape and move the nodes.
Click on a node to select it. You can move it, delete it or change it to a straight or curve by pressing the Space Bar.
You can also add more nodes.
Hide the appliqué fabric to make it easier for reshaping by clicking on the Show Appliqué Fabric Tool
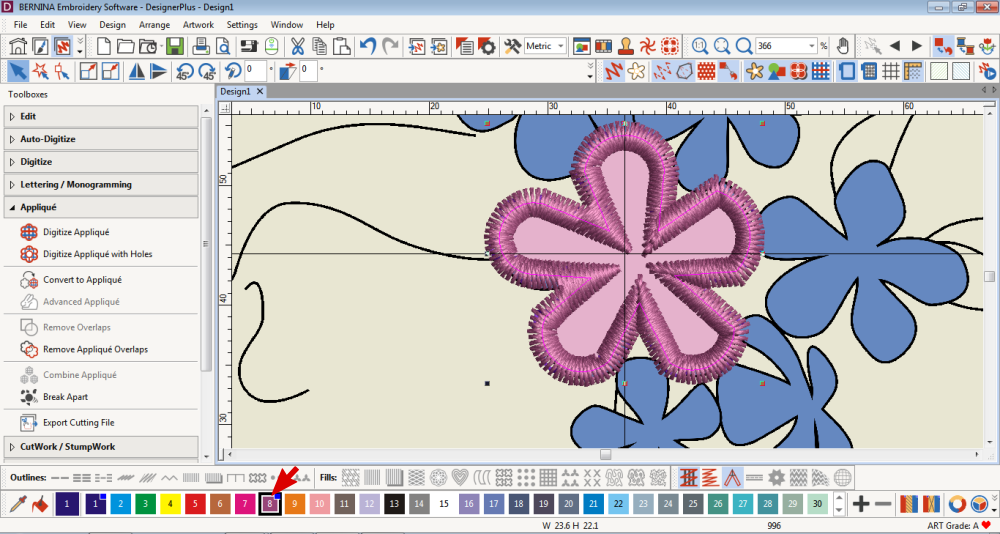 Edit the thread colour with the bottom Toolbar.
 Repeat the digitizing steps to add more appliqué shapes. The software will make the Object Properties the same as the first one. Alternatively you can copy, paste then resize and mirror.
Keep in mind that the order in which you digitize each flower will be the order in which they are stitched. Therefore it is best to digitize the flowers next to each other rather than jumping to one on the other side of the artwork. This will reduce the amount of jump stitches
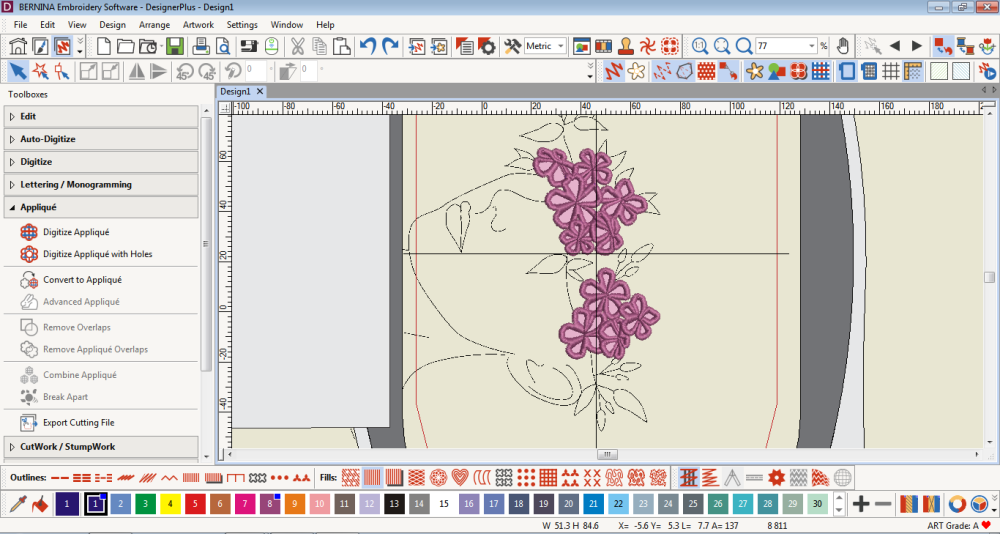
Auto Digitize
I wanted to Auto Digitize the rest of the artwork but not the same parts that were already appliqué digitized.
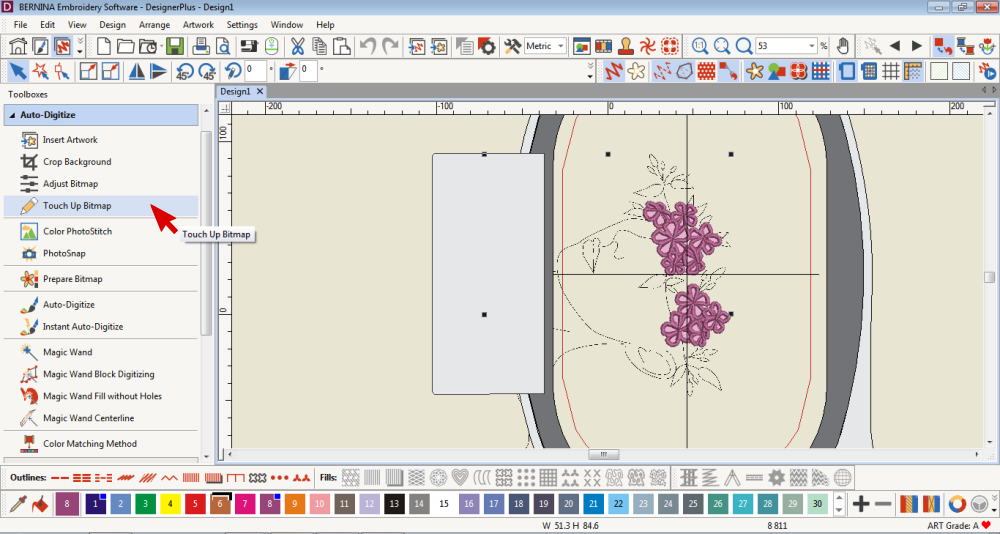 Select the Artwork and click on the Touch-up Bitmap Tool.
The artwork will open up in Corel Photo-Paint unless your default software is something else. You can change this by right clicking on the Touch-up Bitmap Tool.
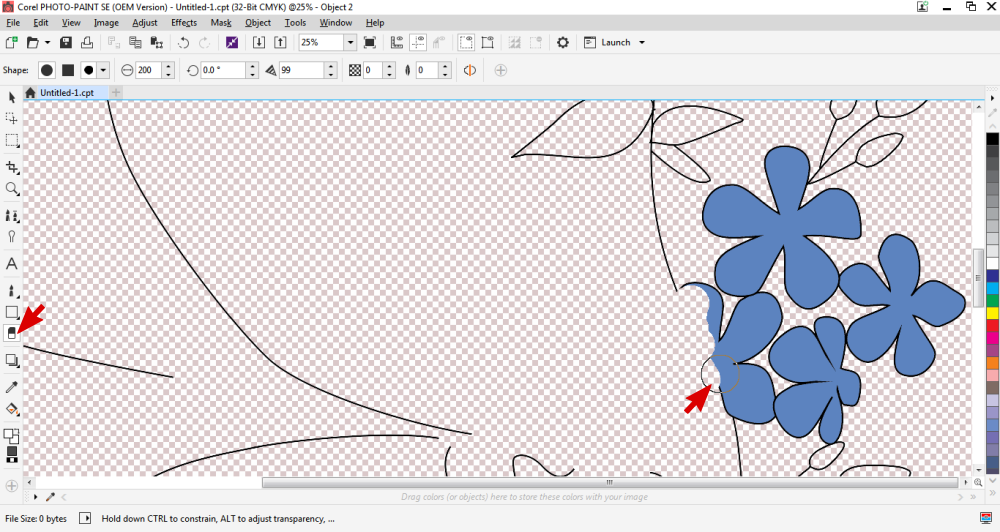 Select the Eraser Tool and remove the parts of the artwork that you digitized for appliqué.
You can change the size and shape of the Eraser Tool. To erase: click, hold and drag.
Once you are done, click on the x in the top right.
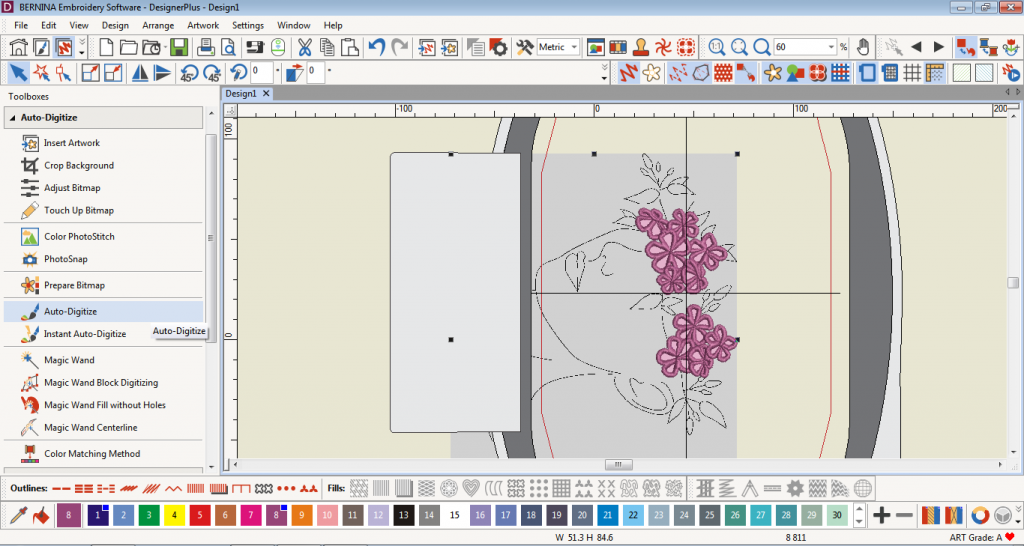 While the artwork is selected, click on the Auto-digitize tool.
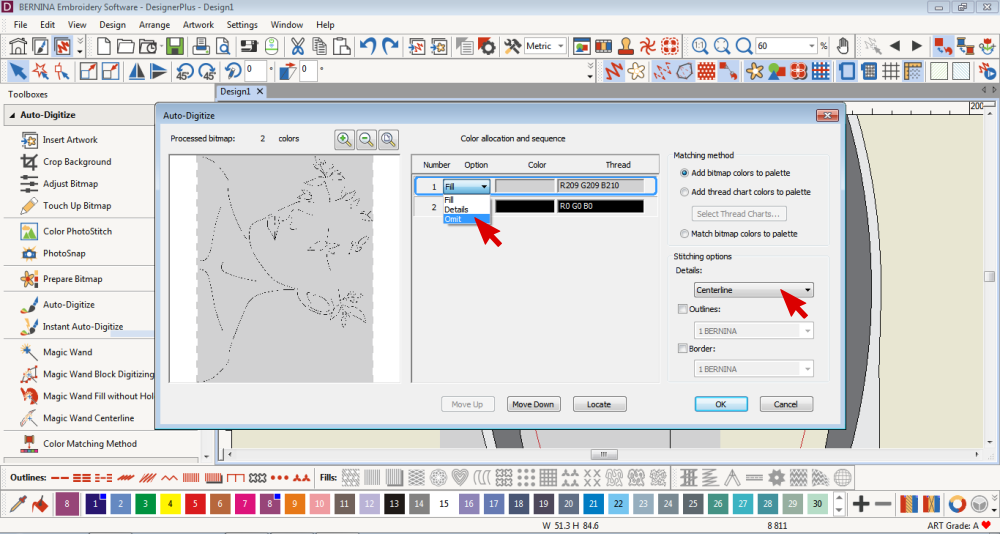 Choose what colours to omit.
I didn’t want the grey background to be converted to embroidery so I omitted it.
Select the Centre Line Stitching Option for the Details.
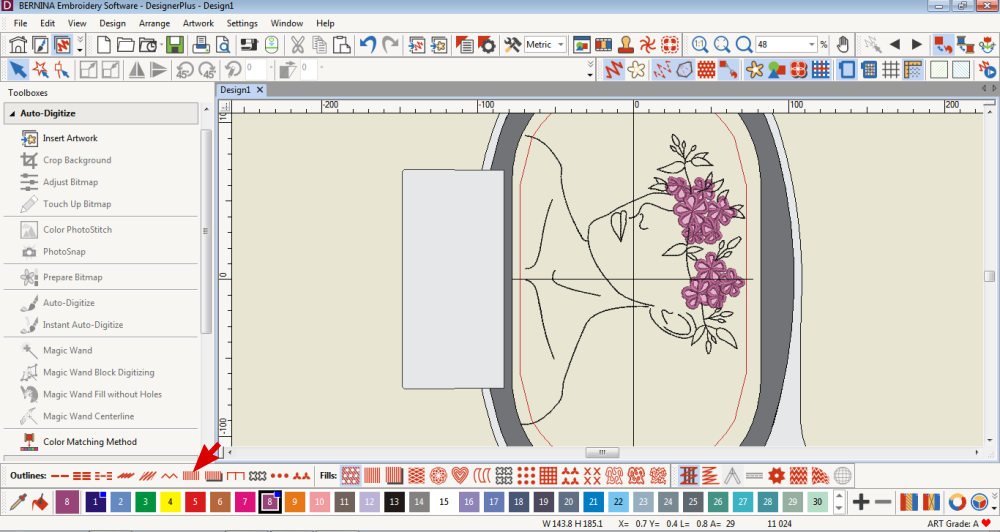 Delete the artwork and reshape the digitized object or edit its properties if necessary.
You can change the stitch type of the figure to Satin if you prefer.
Finishing Off
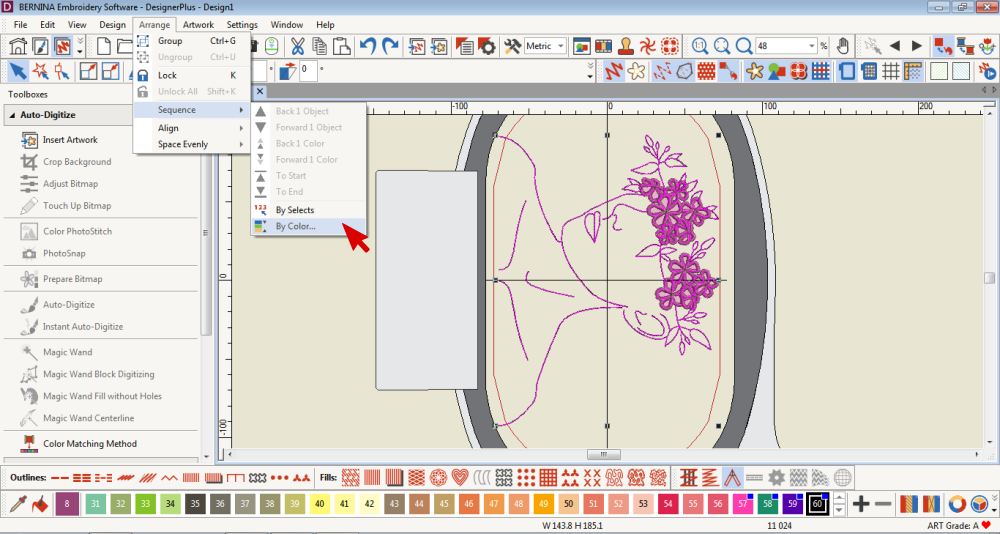 Select all the objects and sequence them.
I find it easiest to sequence by colour.
 I want the black stitches to be first and then the appliqués.
Select the colour you want to change the sequence of and select Move up or Move Down button.
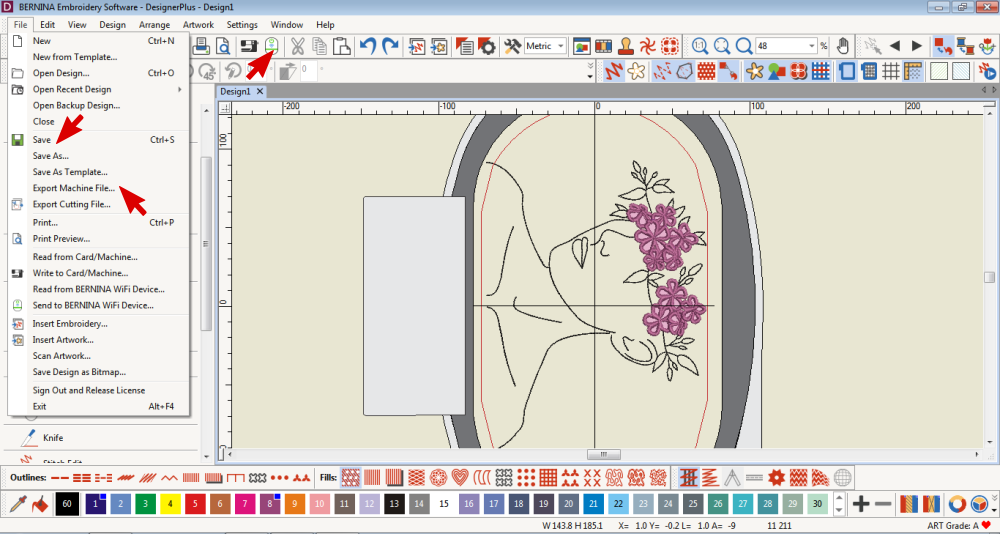 Save, export or send to your Bernina machine via the WiFi Device.
Tips
- When it comes time to embroider on your machine:
Select the Colour Sequence icon. This icon will reduce the number of thread colour changes, meaning it will group together many of the same thread colours.
This is helpful for the appliqué like the one we digitized above. There are many flowers and this icon will help save some steps as you will be able to stich each stitch type (placement/cutting line/tackdown/coverstitch) as a group rather than needing to appliqué each individual flower.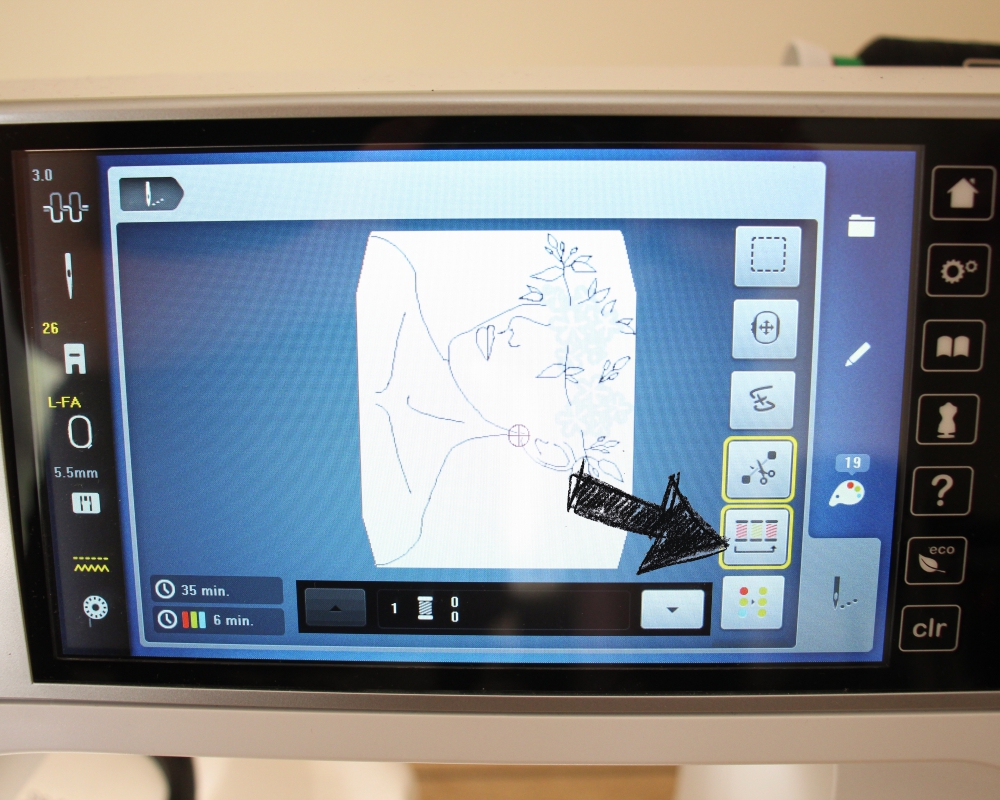
I would love to see what you make, please feel free to share with me!
Instagram
Facebook
-Hannah-Rose

Looks like so much fun to try!!!