 BERNINA Corporate Blog -
Description
Did you know?
The Australian National Flag is the only flag to fly over an entire continent. The Australian Flag was the first national flag chosen in an open public competition.
To celebrate Australia Day I would love to show you how easy and amazing this software really is and no better way today than with the Australian Flag.
I am going to take you on a journey to show how you use some of the features of digitizing with the
Bernina V8 Digitizing Software using closed objects, cutting holes and moving nodes.

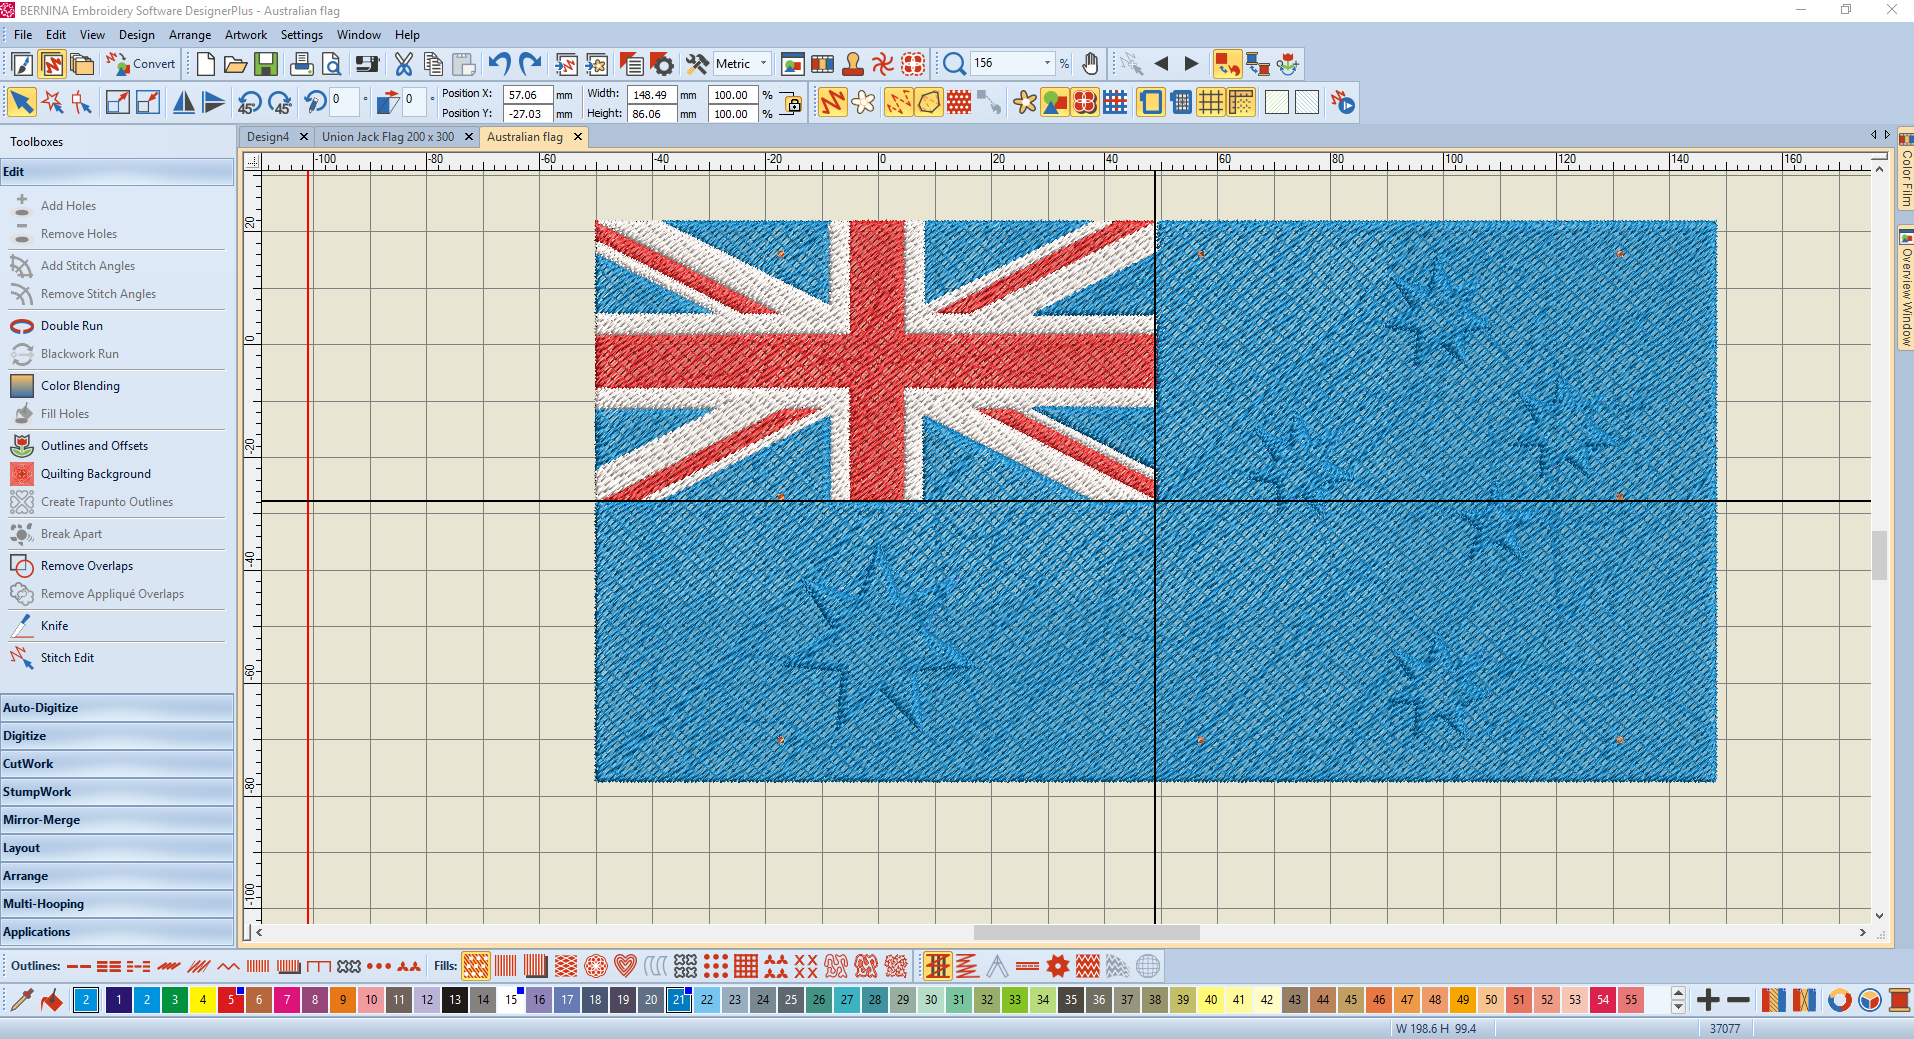
As I have already created a basic union jack flag using the closed object feature with a step fill we are
going to edit this into an Australia flag.
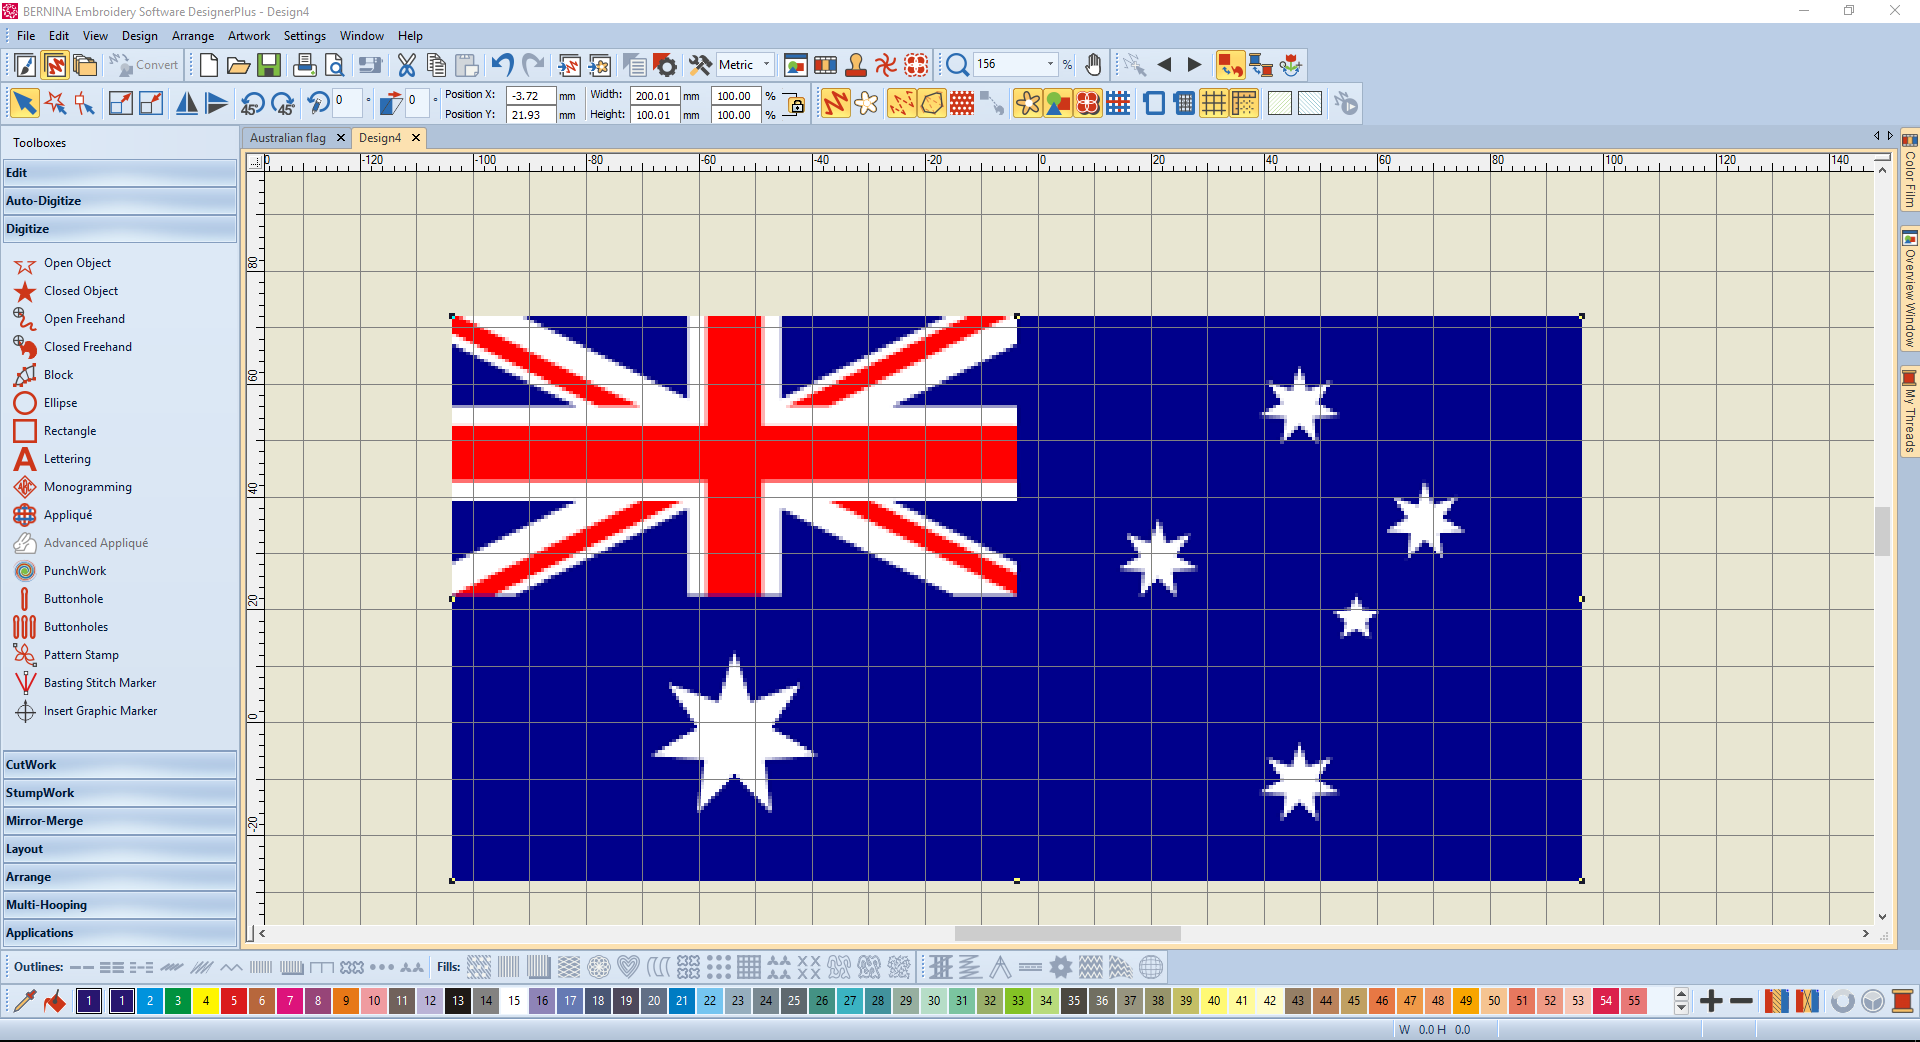
I have inserted and resized the artwork (Australian Flag) to 200 x 100mm. Then right clicked the artwork and selected “LOCK”
I Used the digitize tab to select the “RECTANGLE” option, I filled the whole flag area in blue. As these were all straight edges the rectangle fill tool was the only option needed.
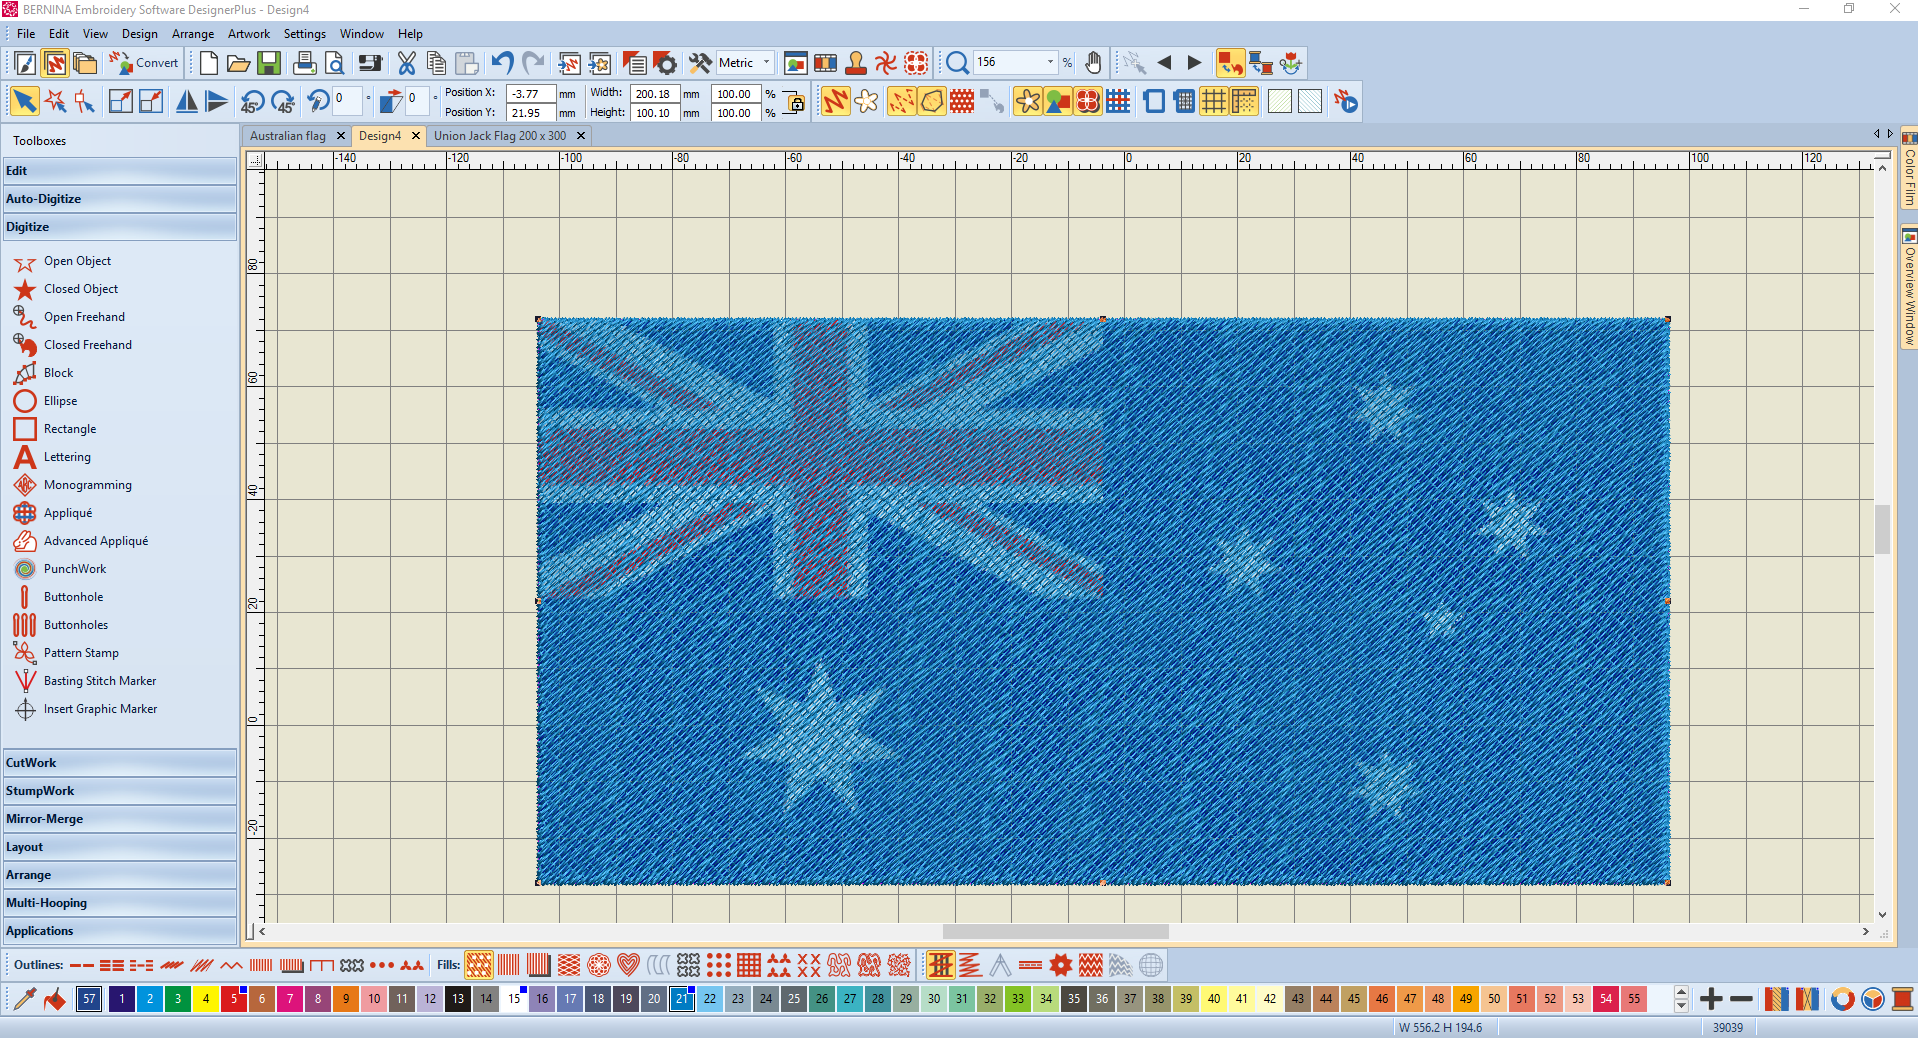
I then used the “add holes” option to cut a rectangle section from the filled area I had previously created. Once I was ready to insert my union jack design I selected the “INSERT EMBROIDERY” option and
selected the design. I resized it to the required size then moved it into the area of which it needed to be.
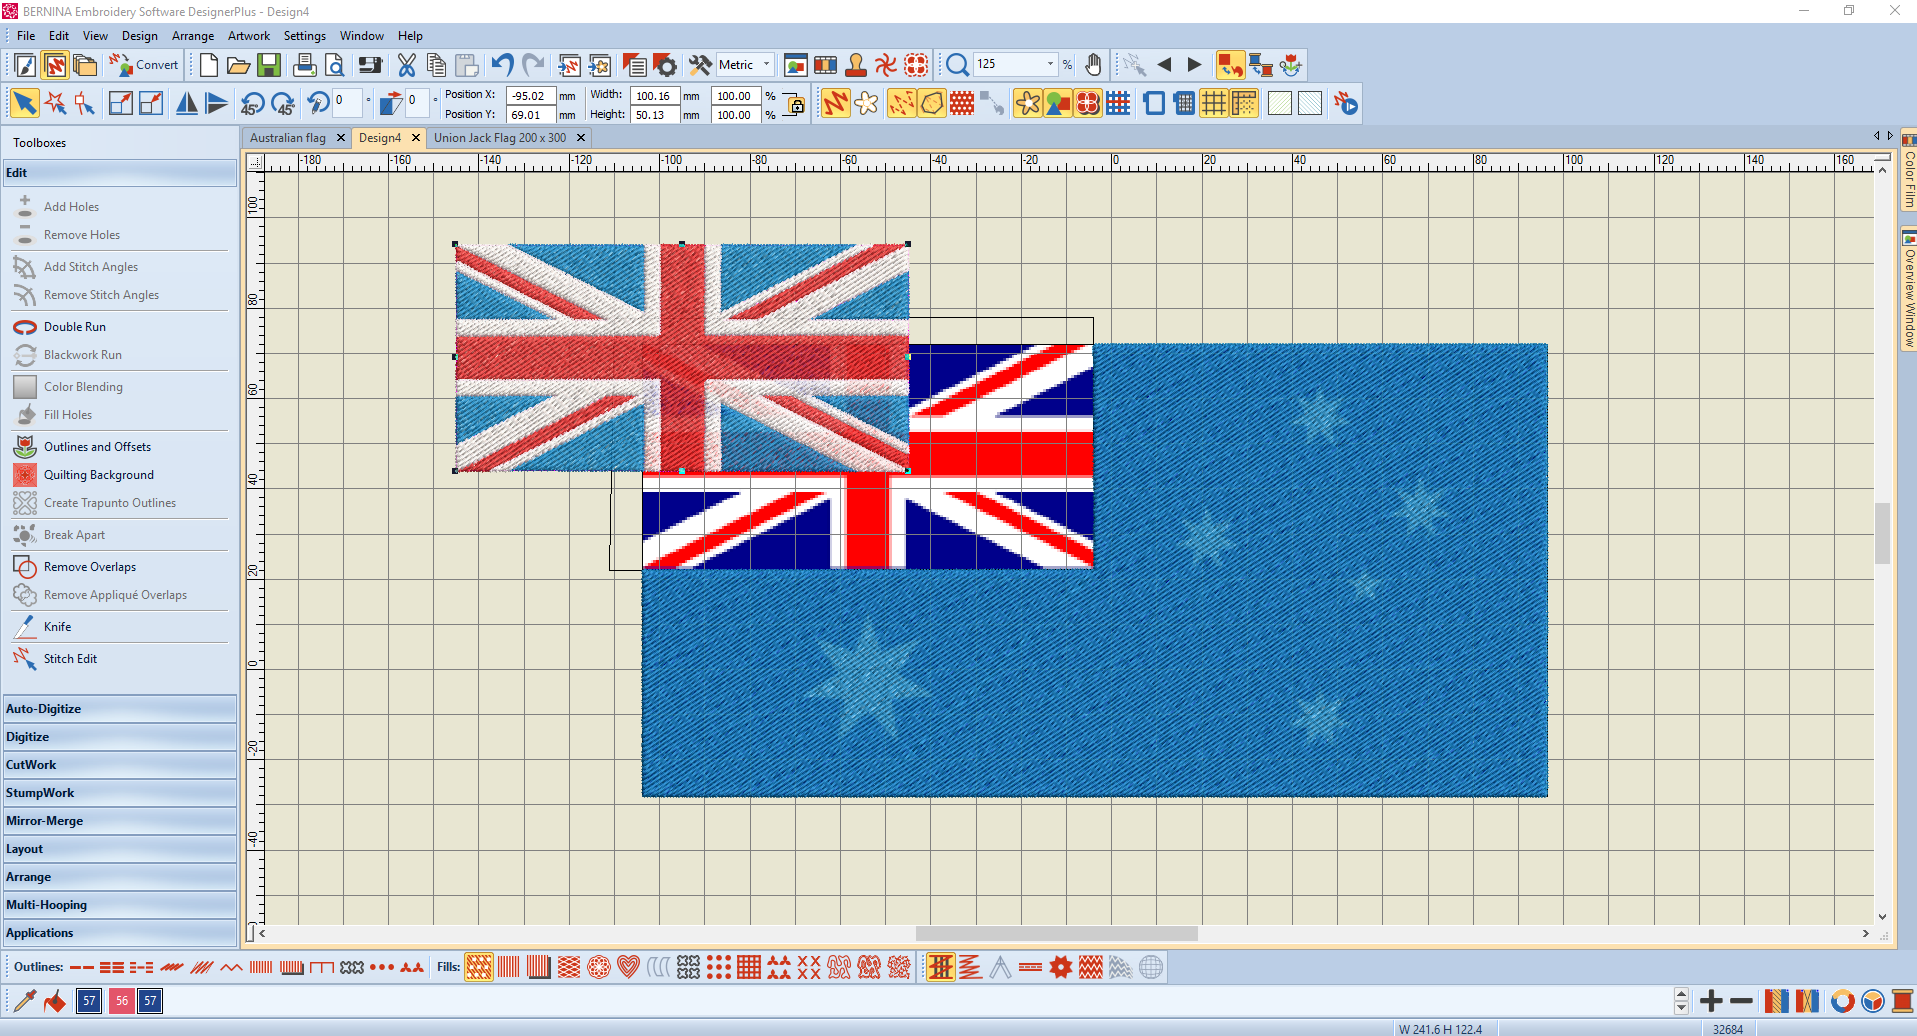
Now this is where it starts to get interesting!
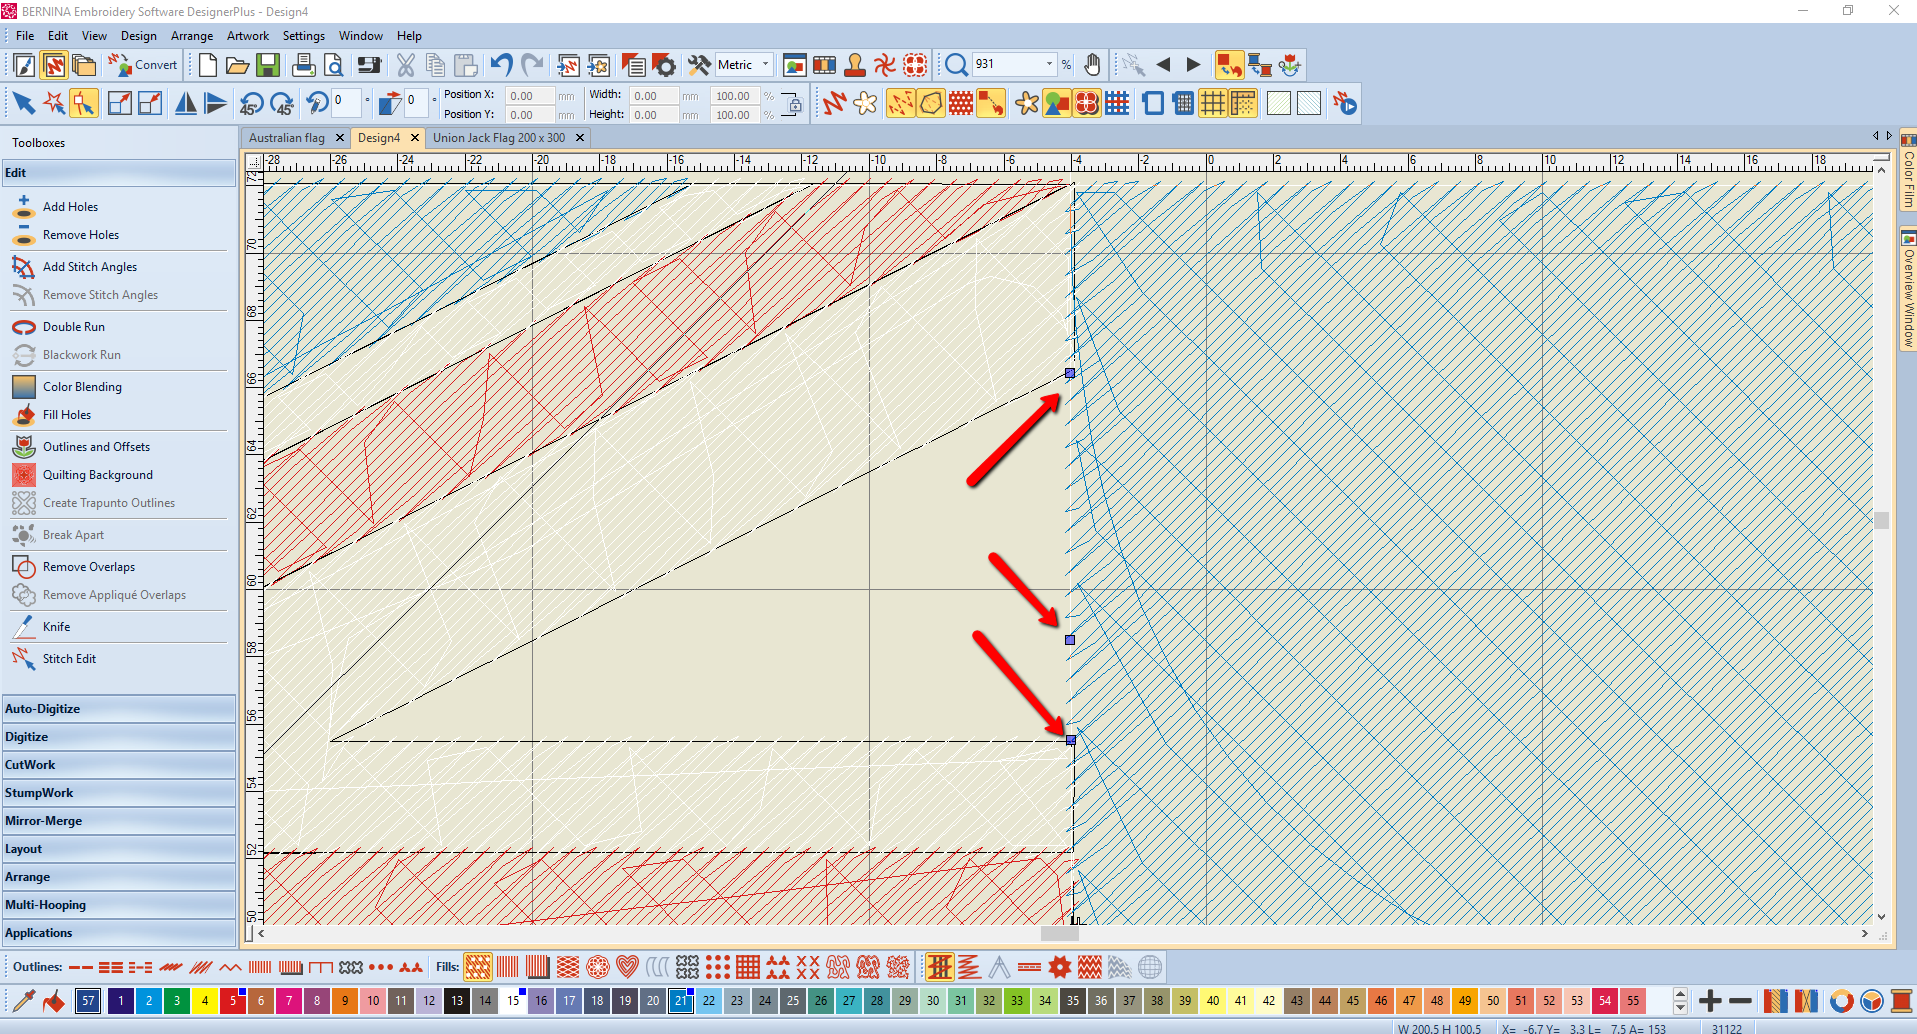
Its time to merge the two designs so it looks like they were created as one. I started by selecting and
deleting the filled objects highlighted above.
This is important as leaving these as separate objects will result in stitch angle changes.

After I deleted the selected filled objects I used the “RESHAPE” tool on the large blue area.
When reshaping the “NODES” will appear, these are the parts I moved to change the shape and direction of the filled objects.
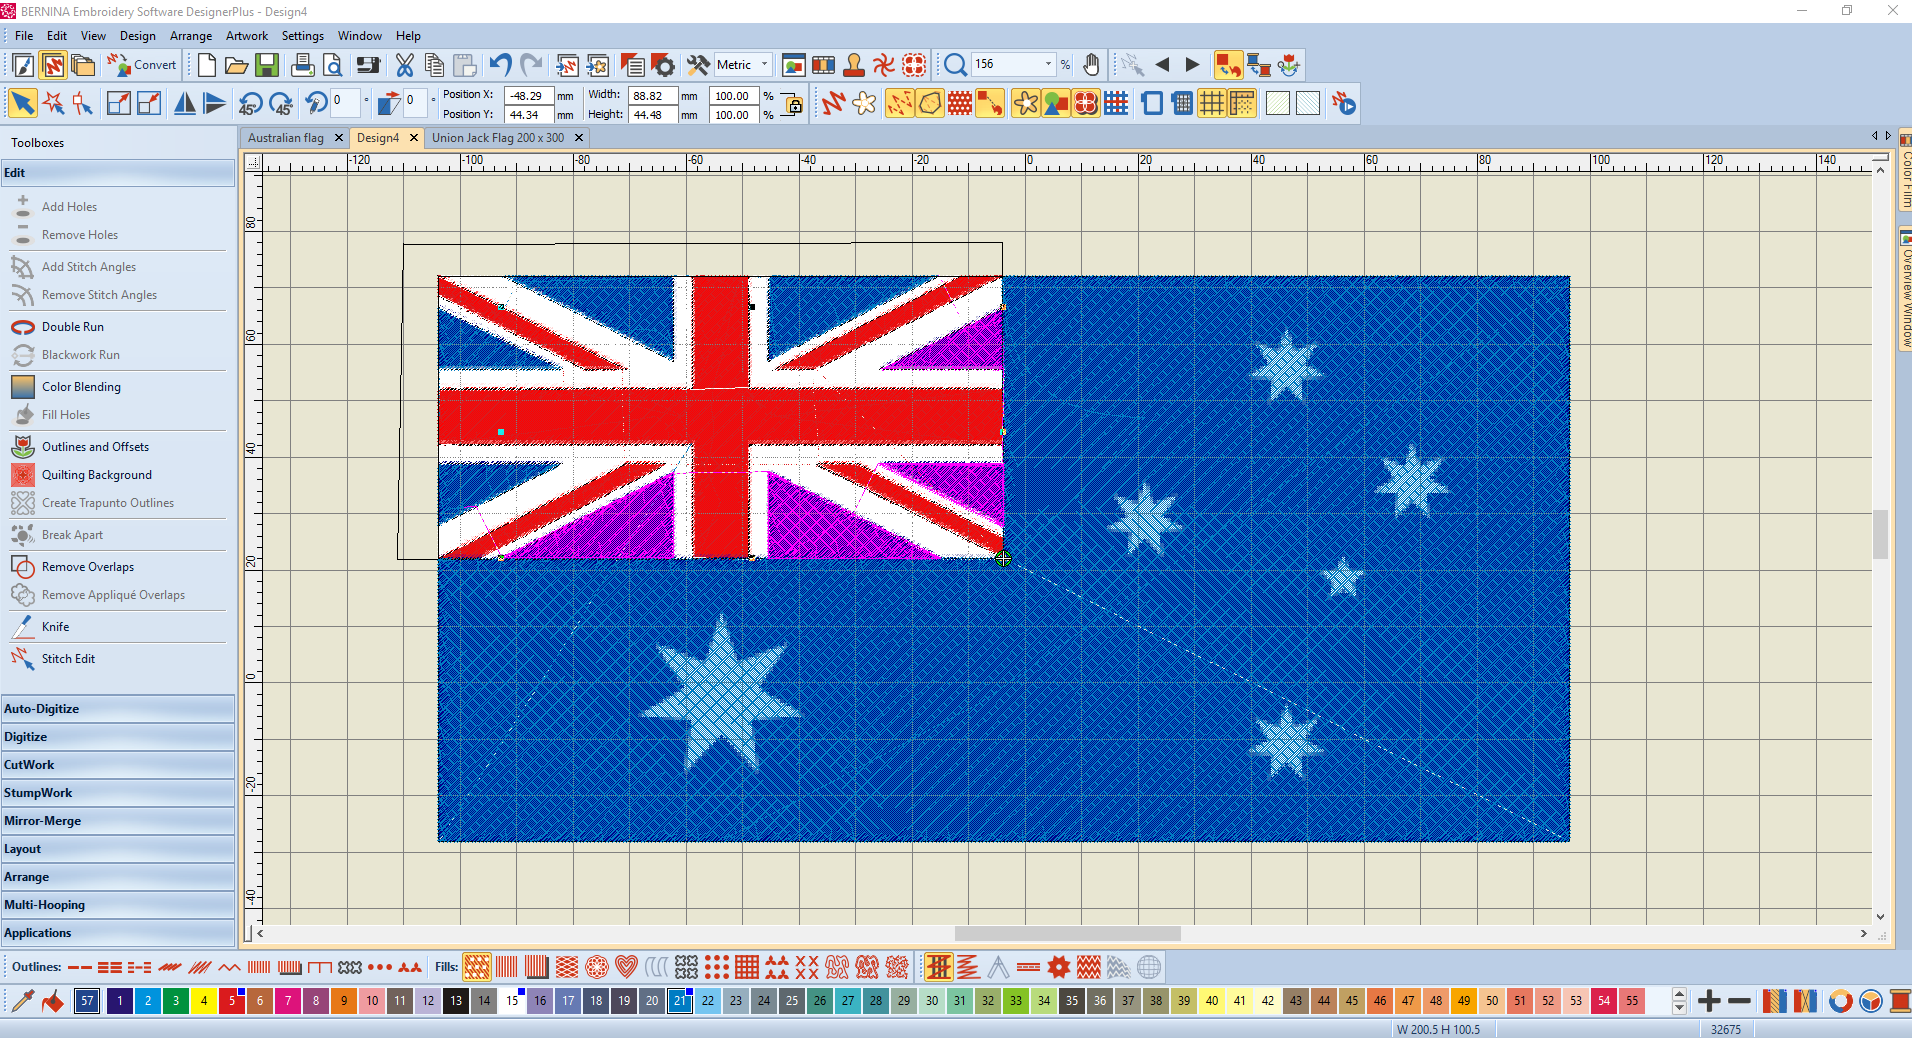
Ok so now I’m ready to insert the additional 3 nodes needed to refill the triangle sections I removed. This will make it look like its one design. For a straight edge node I used the LEFT click mouse button on the line I would like to edit. (Left click straight nodes should be square). I started by adding the nodes from top to bottom making sure they are corners to keep the original filled area to the edges.
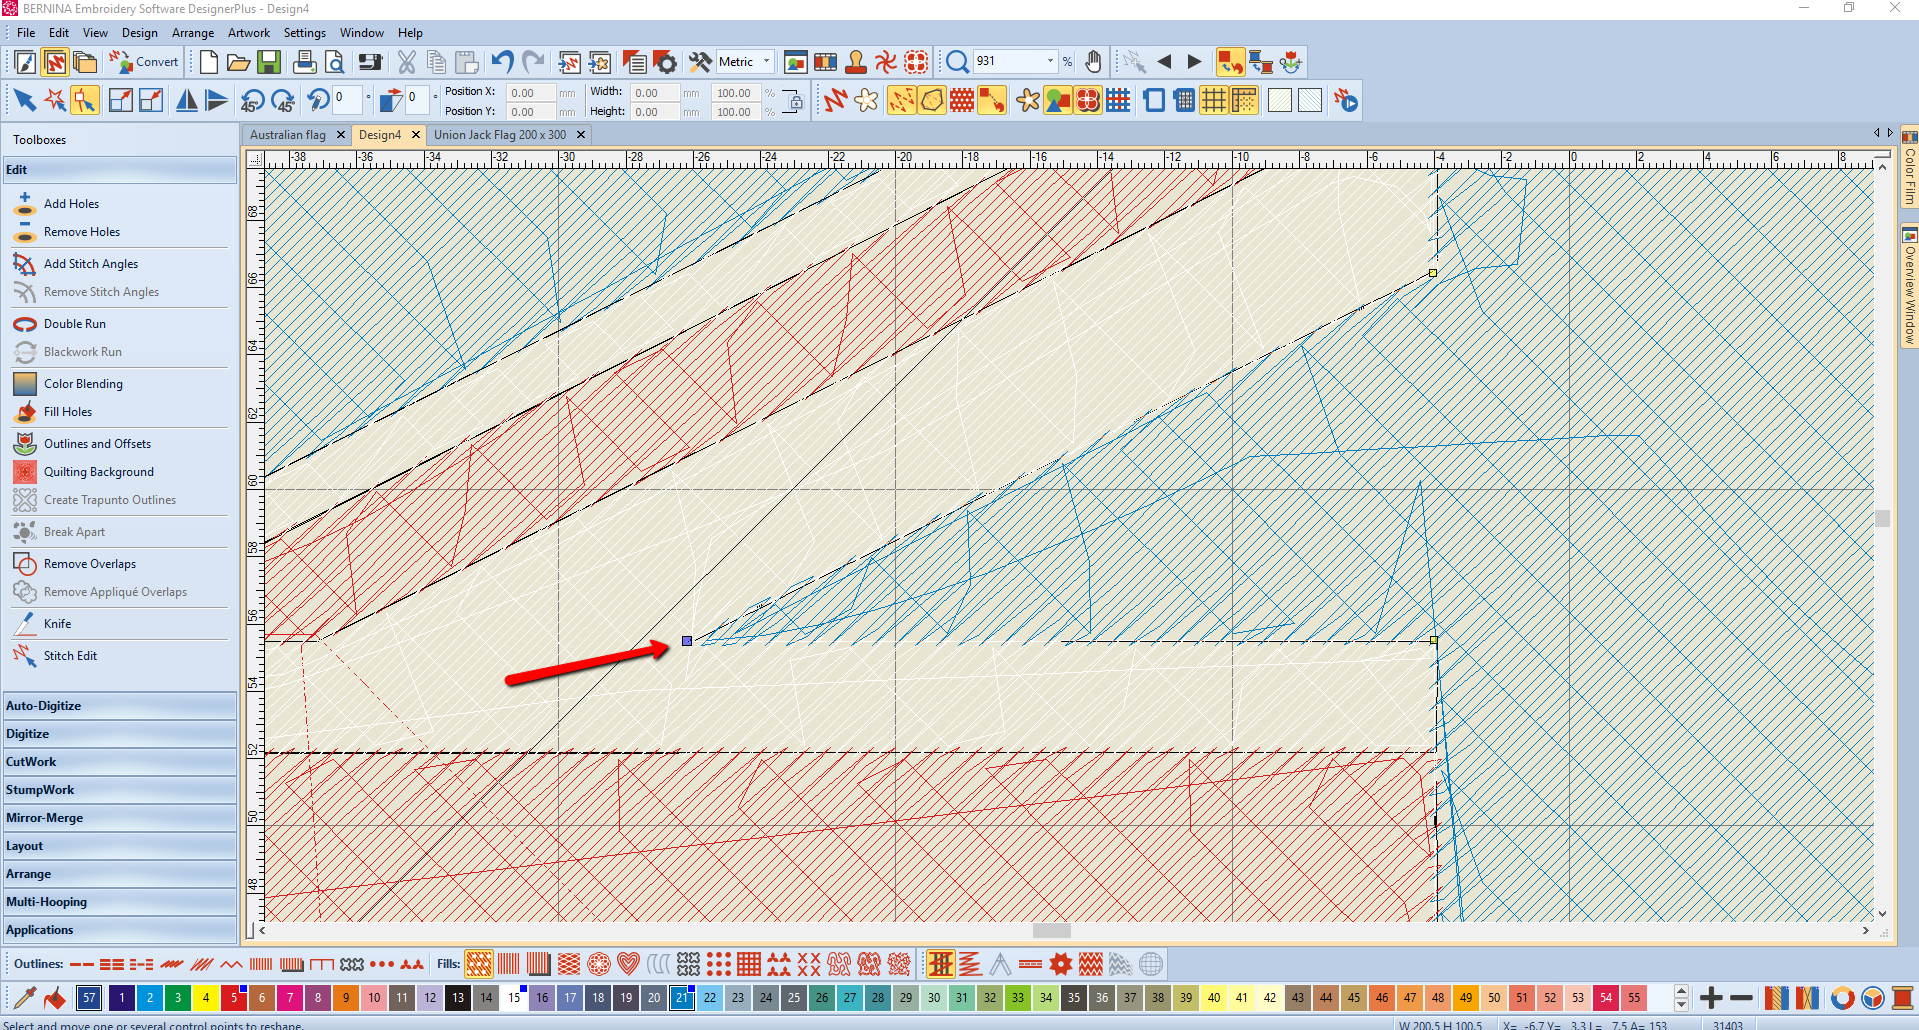
I dragged the middle node to the inside corner of the union jack to be the same closed object.
Then just simply continue this for the next few sections.
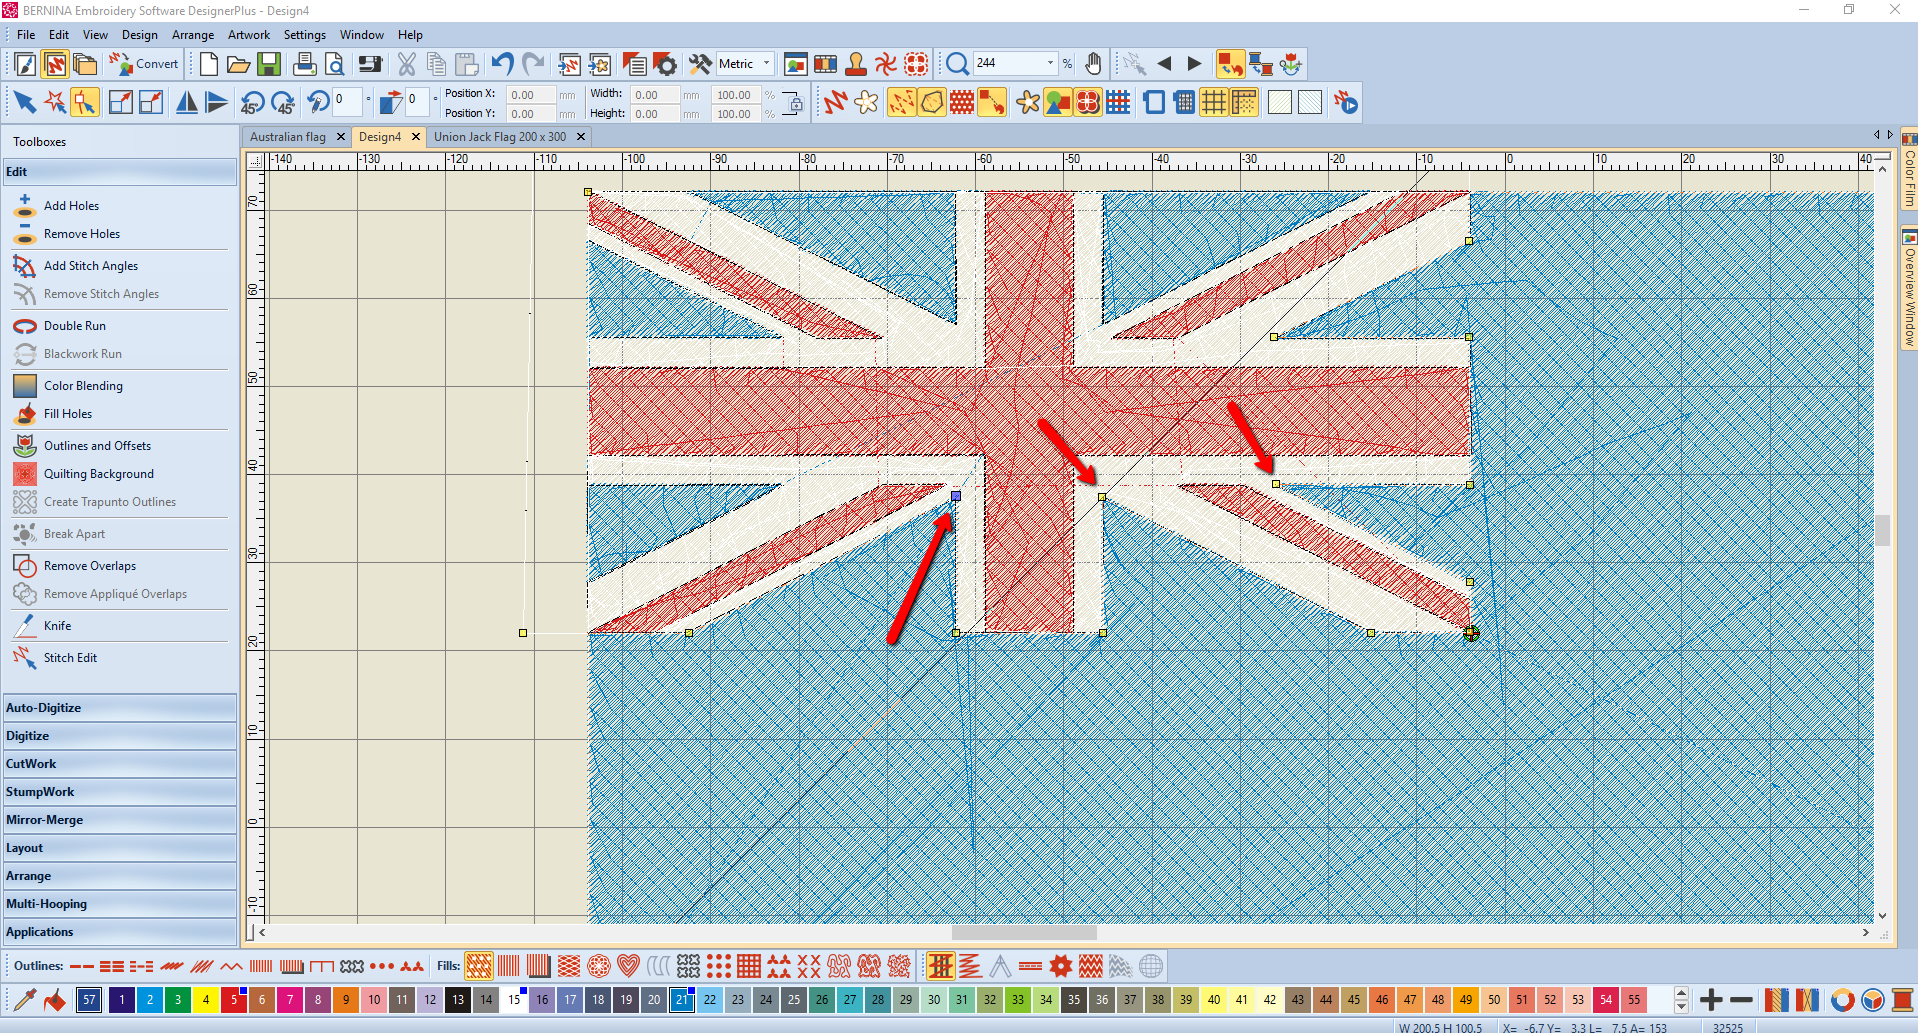
I selected all the filled blue areas by holding CTL and left click each section, then right click and select object properties, stitch angle then I have set them to 45 degrees. You can go to “ARRANGE” and group these objects to keep them secure together (lifesaver).

I then removed the stars by selecting the blue object and choosing, “EDIT”,”ADD HOLES”, left click corner to corner for each star section.
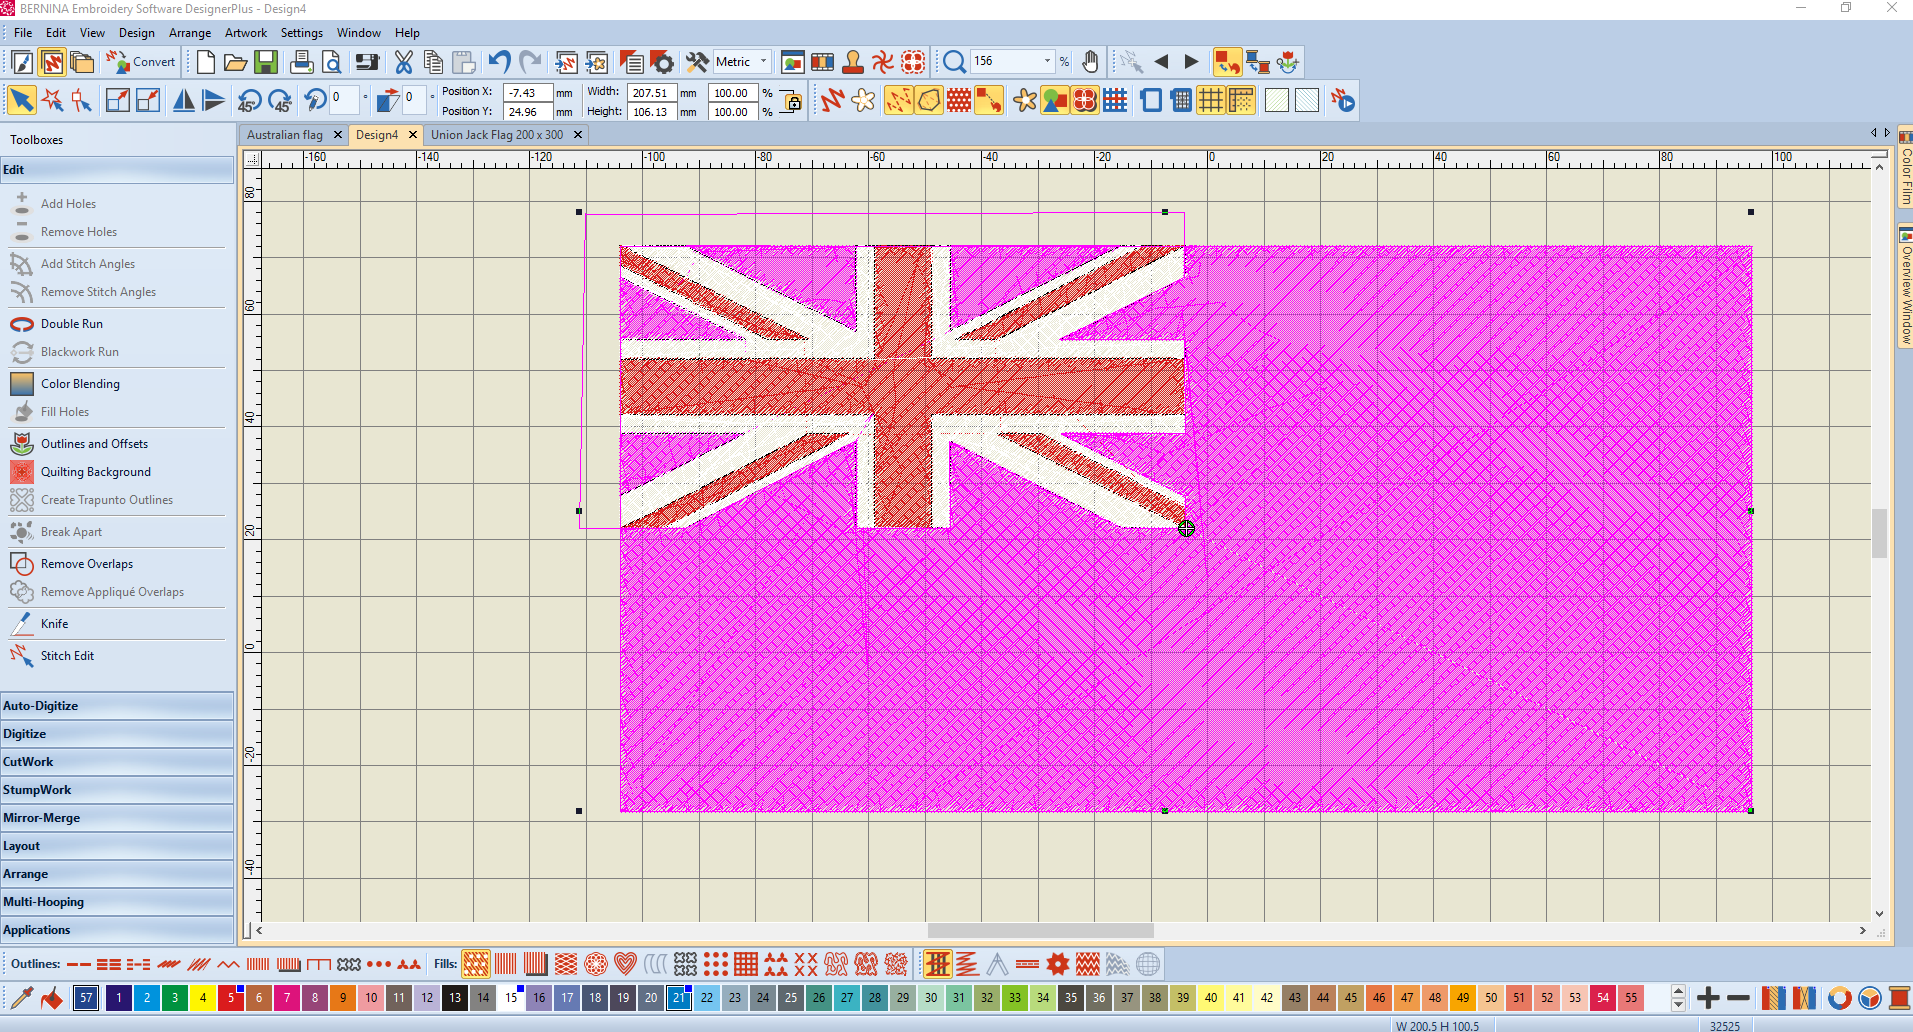
I selected the objects and then selected the “FILL HOLES” option. This refilled the areas as separate objects so when I changed the colour to white the stars appeared. Now I have the Australian national flag. To finish off I needed the edge to be tidy and be ready for badge appliqué, I used a satin stitch border around the outside to overlap the edge.
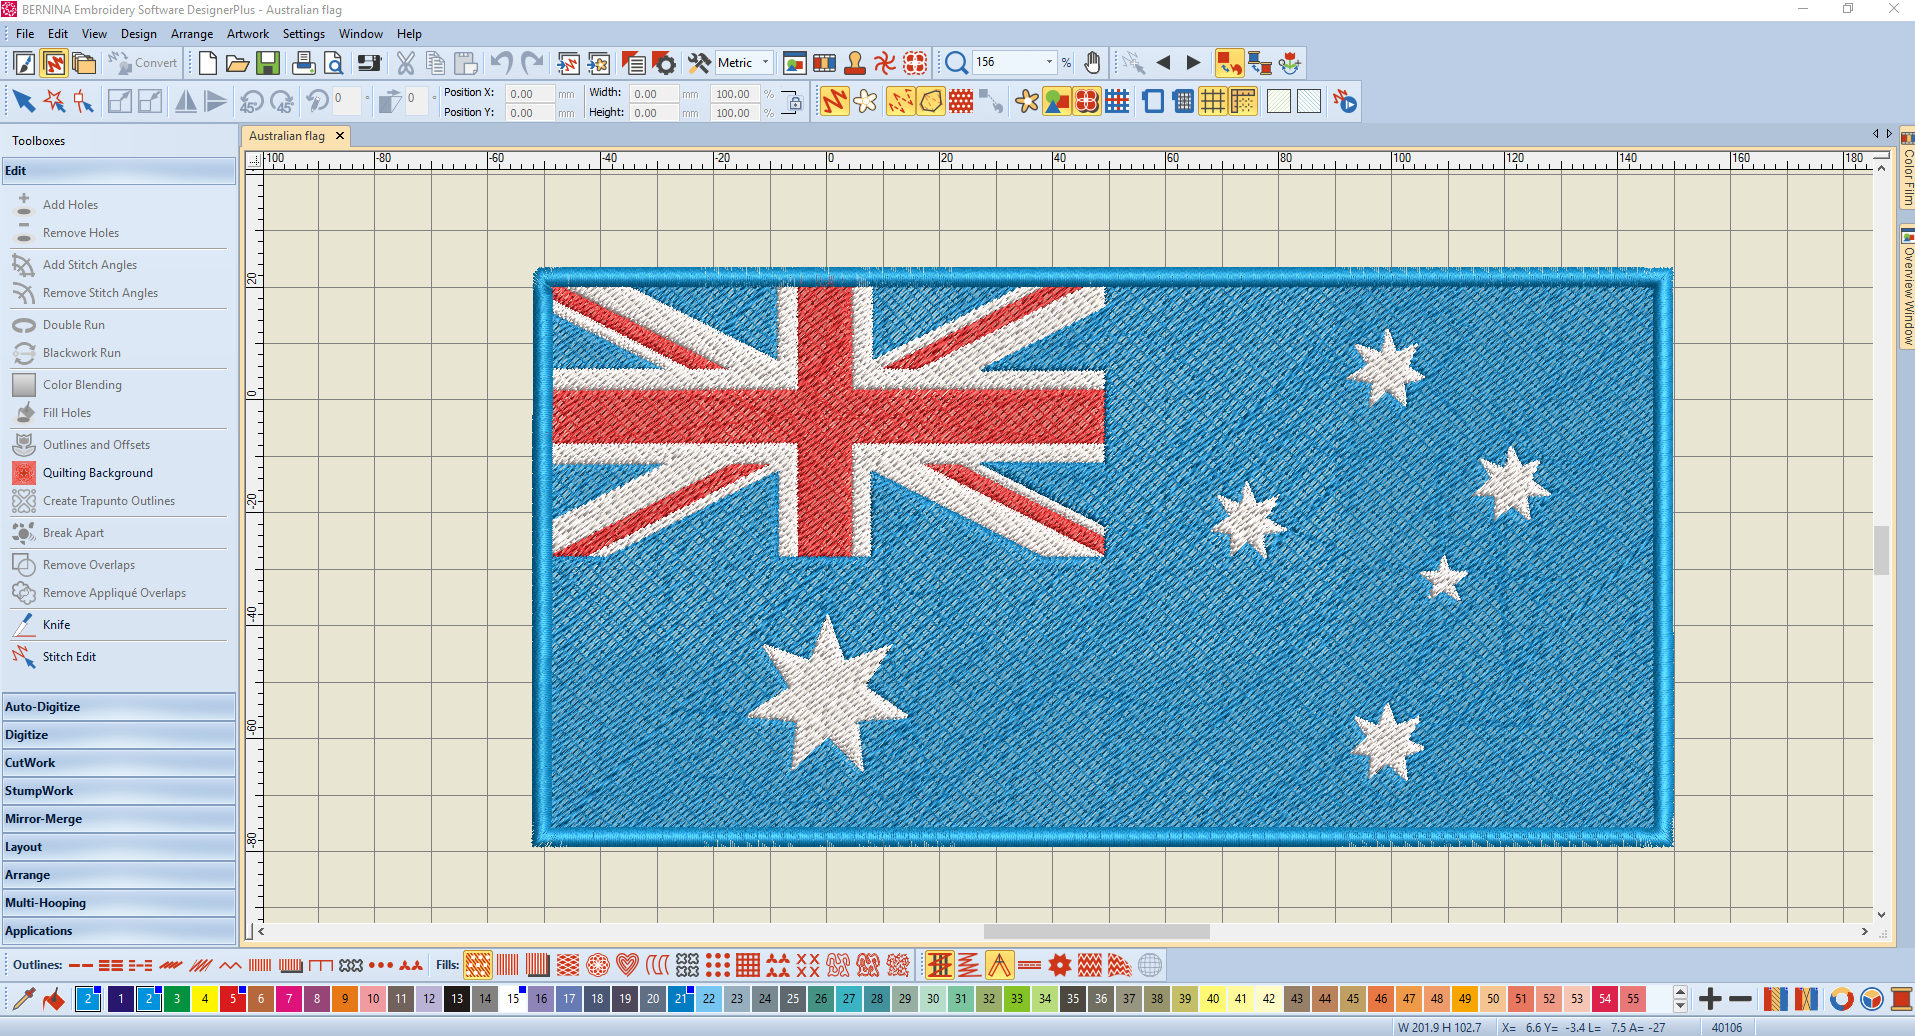
Here is the finished design with no overstitched layers to waste embroidery threads or make the design really dense on the fabric.
I hope you have found today’s blog helpful and thank you for reading.
Happy Australia Day Everyone!
Please show your support by leaving a comment below and sharing to a friend.
Check out my first Bernina blog post.
Please feel free to follow me on Facebook and Instagram for day to day activities using this great Bernina software.
WOW Lou, you so clever. Well done.
wow, what a wonderful flag. Your work is fantastic.
that is so amazing lou your doing a great job 🙂
Well done, you are getting very clever with your embroidery. You are good with designs
Keep up the good work
Wow, this is amazing. Another great job by Lou, congratulations Bernina on having this talented woman on your team. Looking forward to seeing more creative work. ?
thanks for the lesson
Love this piece of work by Lou, she is doing an amazing job with this wonderful software. Would love to see more pieces digitized by Lou. Lou is an awesome digitizer and does beautiful work, I have seen some gorgeous pieces of work by Lou, using this software.