 BERNINA Corporate Blog -
Description
If you’ve just found a fabulous vintage jacket with a torn lining – or you simply have a favourite jacket in your wardrobe with a worn-out lining, here’s how to make a new one. What do you do if you have loved a particular jacket so well, and worn it so often, that the lining is in shreds? Or how about if you find a fabulous vintage buy, but there are rips and tears in the lining? This is what to do:
1. Carefully unpick the old lining and save all the pieces. (Cutting it out will not do. You have to get your un-picker out, or a sharp pair of pointed embroidery scissors and patiently undo all the seams.) Divide the lining into all the separate parts. You should find you have a back, two fronts and two sleeves. Any of these parts may have more than one piece of fabric, for example each sleeve may have two fabric sections. Note how the old lining hangs (it might be worth taking a photograph). Often a little extra fabric is allowed, there may be a tuck or pleat, so you need to know where this comes so you can reproduce it. As you un-pick write a label on masking tape to identify it, e.g. ‘right sleeve’. Label as if you were wearing the jacket, so this would go on the lining that covered your right arm.
2. Choose a new lining material. For this chestnut-coloured suede bomber jacket, a fabulous paisley weave fabric in a chartreuse-green was chosen. The amount you will need depends on the width of the new fabric and the length of the original jacket. (If you are unsure, make a note of the width of the lining fabric you like, carry out step 3 on a table top and measure out with a tape measure how much you will need, then go back to the shop.)
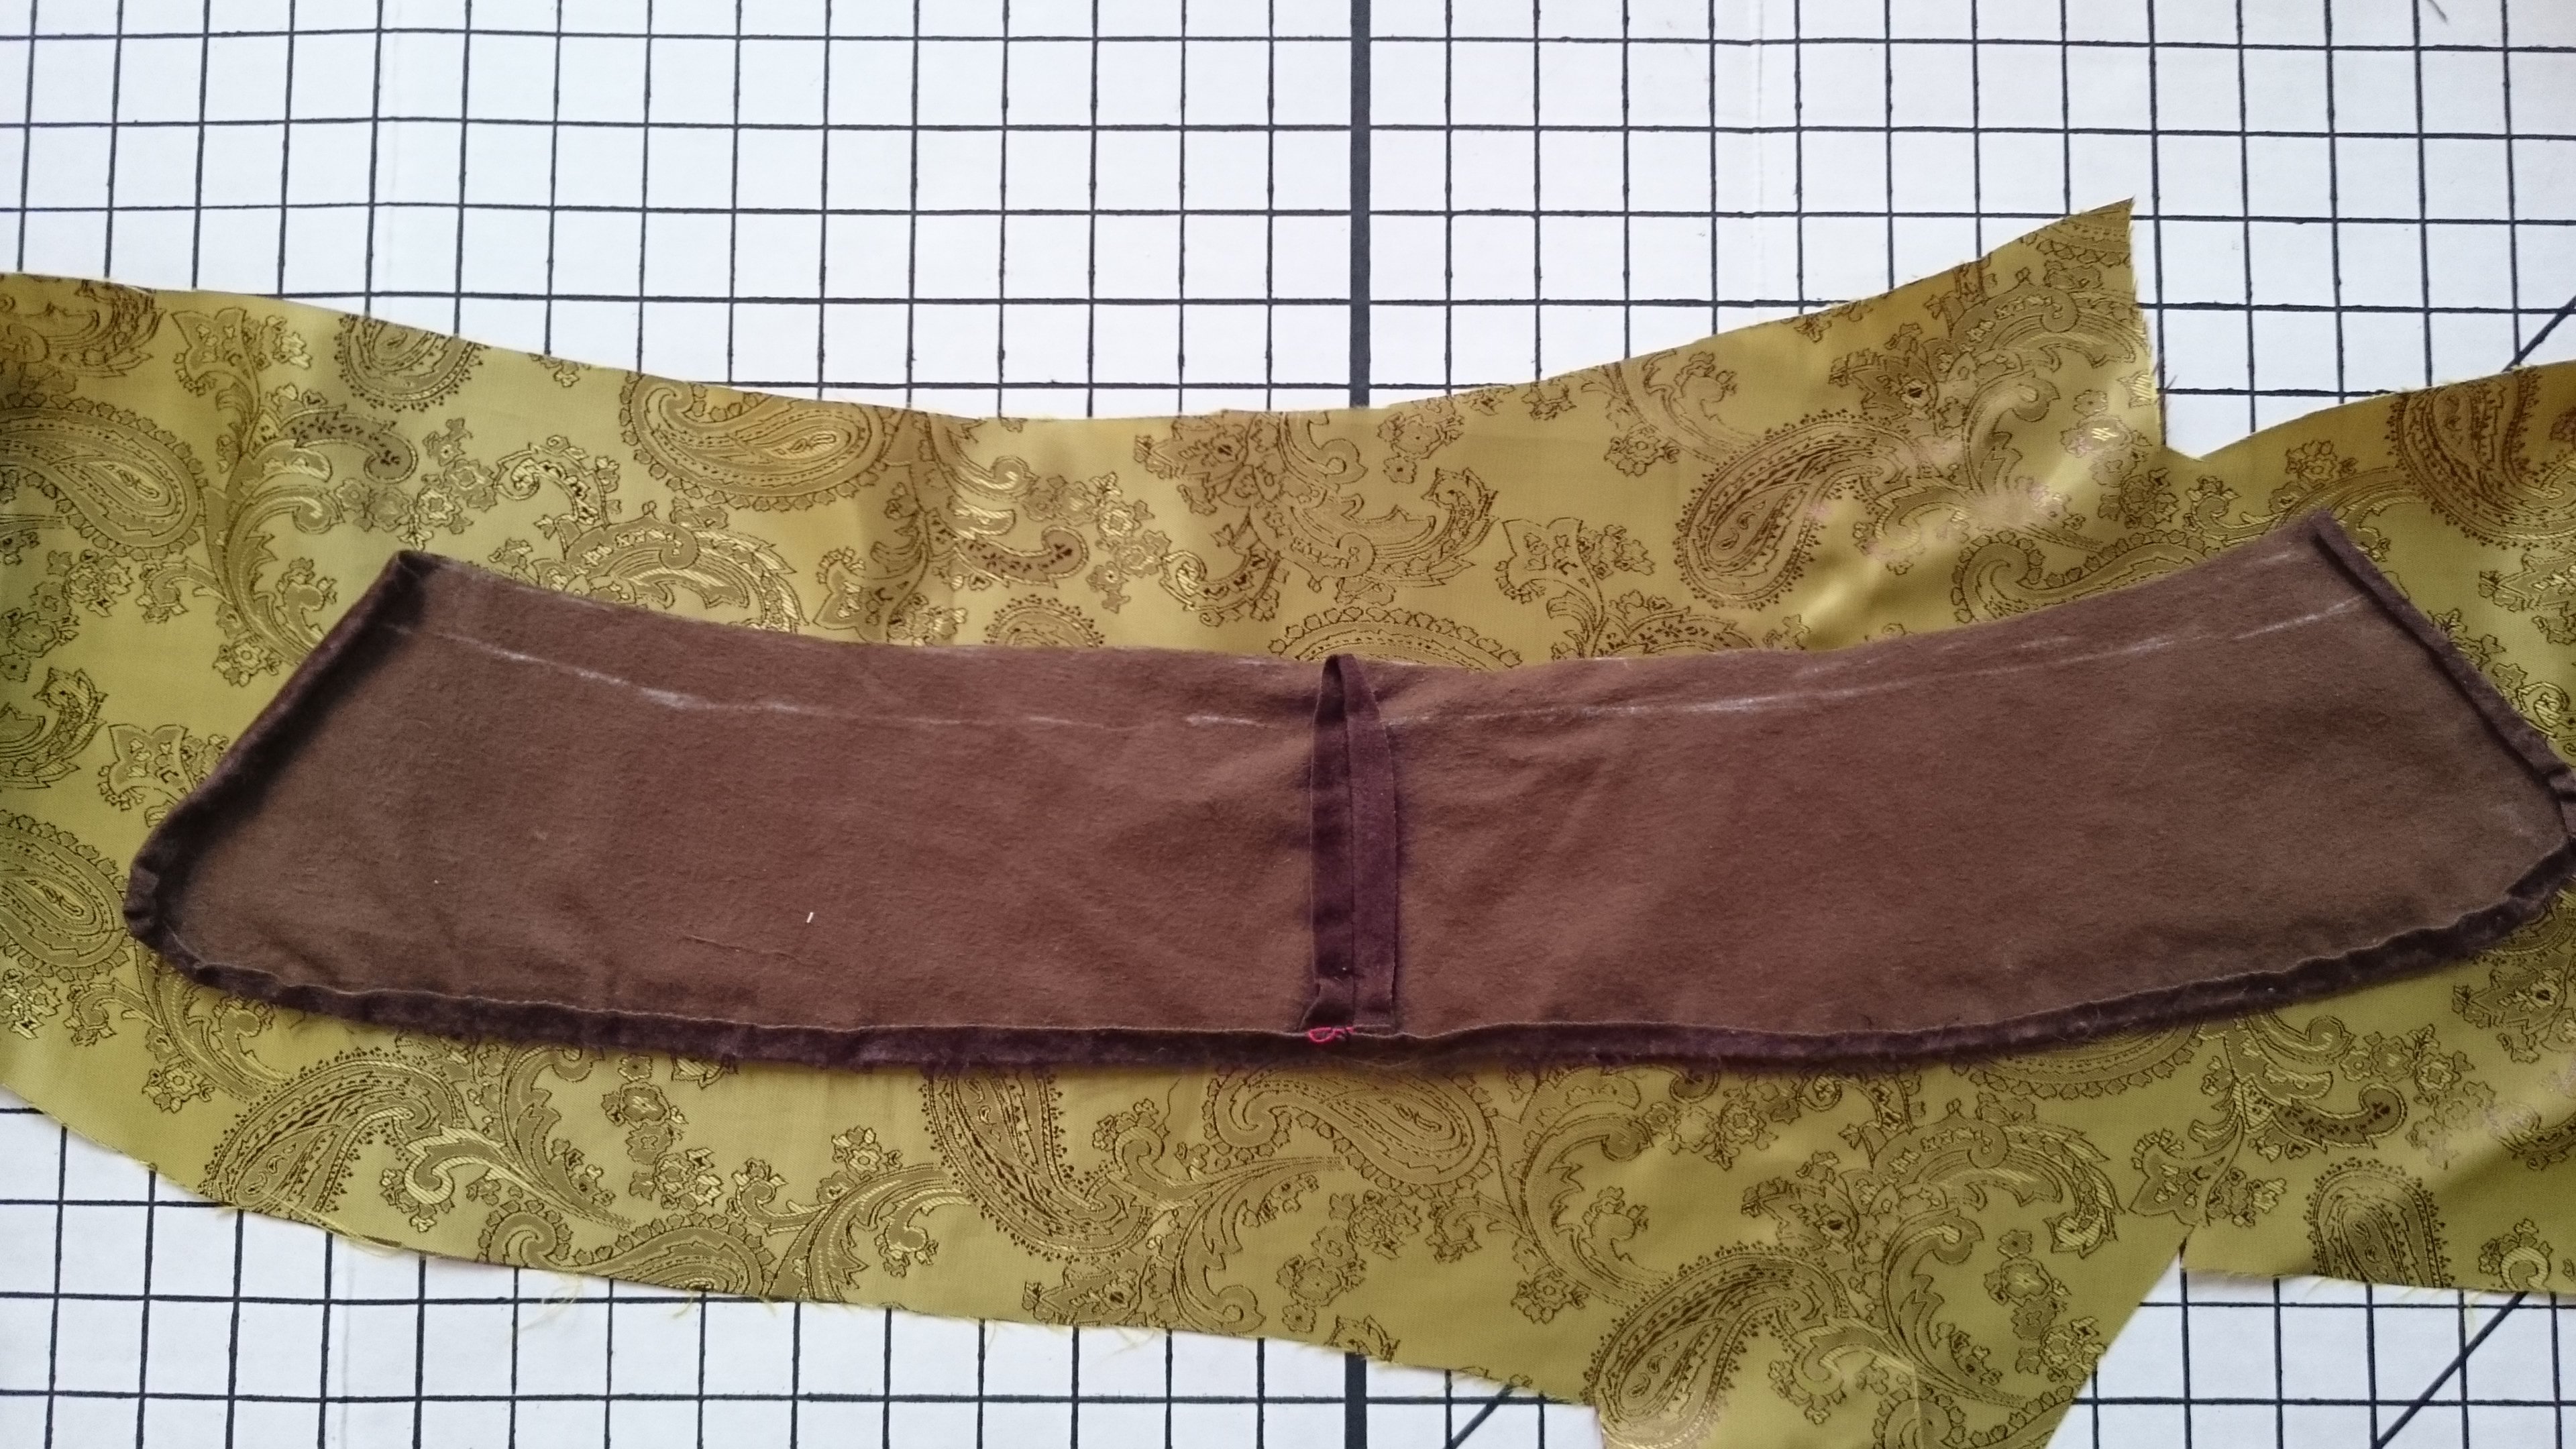
3. Fold the lining fabric in half along the length and lay it out on a flat surface, like a table top. Fold the back lining piece from the original jacket in half and place this on the fold of the new lining fabric. Pin in place. Now place one old front on and pin onto the doubled length of fabric. Finally place one (or one set) of old sleeve lining pieces, again onto the doubled length. Look at the old lining for the threads in the weave that show you the straight grain of the fabric and place a pin to indicate the straight grain. Try to line up these pattern pieces with the straight grain of the new material. This will help your new lining to hang right, without twisting. If the right side and the wrong side (the back) of the new fabric look quite similar, use masking tape to mark the right side on each piece. This will help to make sure that you get two sleeves that are different to each other, which is what you want! You can write the name of the lining piece (e.g. right sleeve) on the same bit of tape.
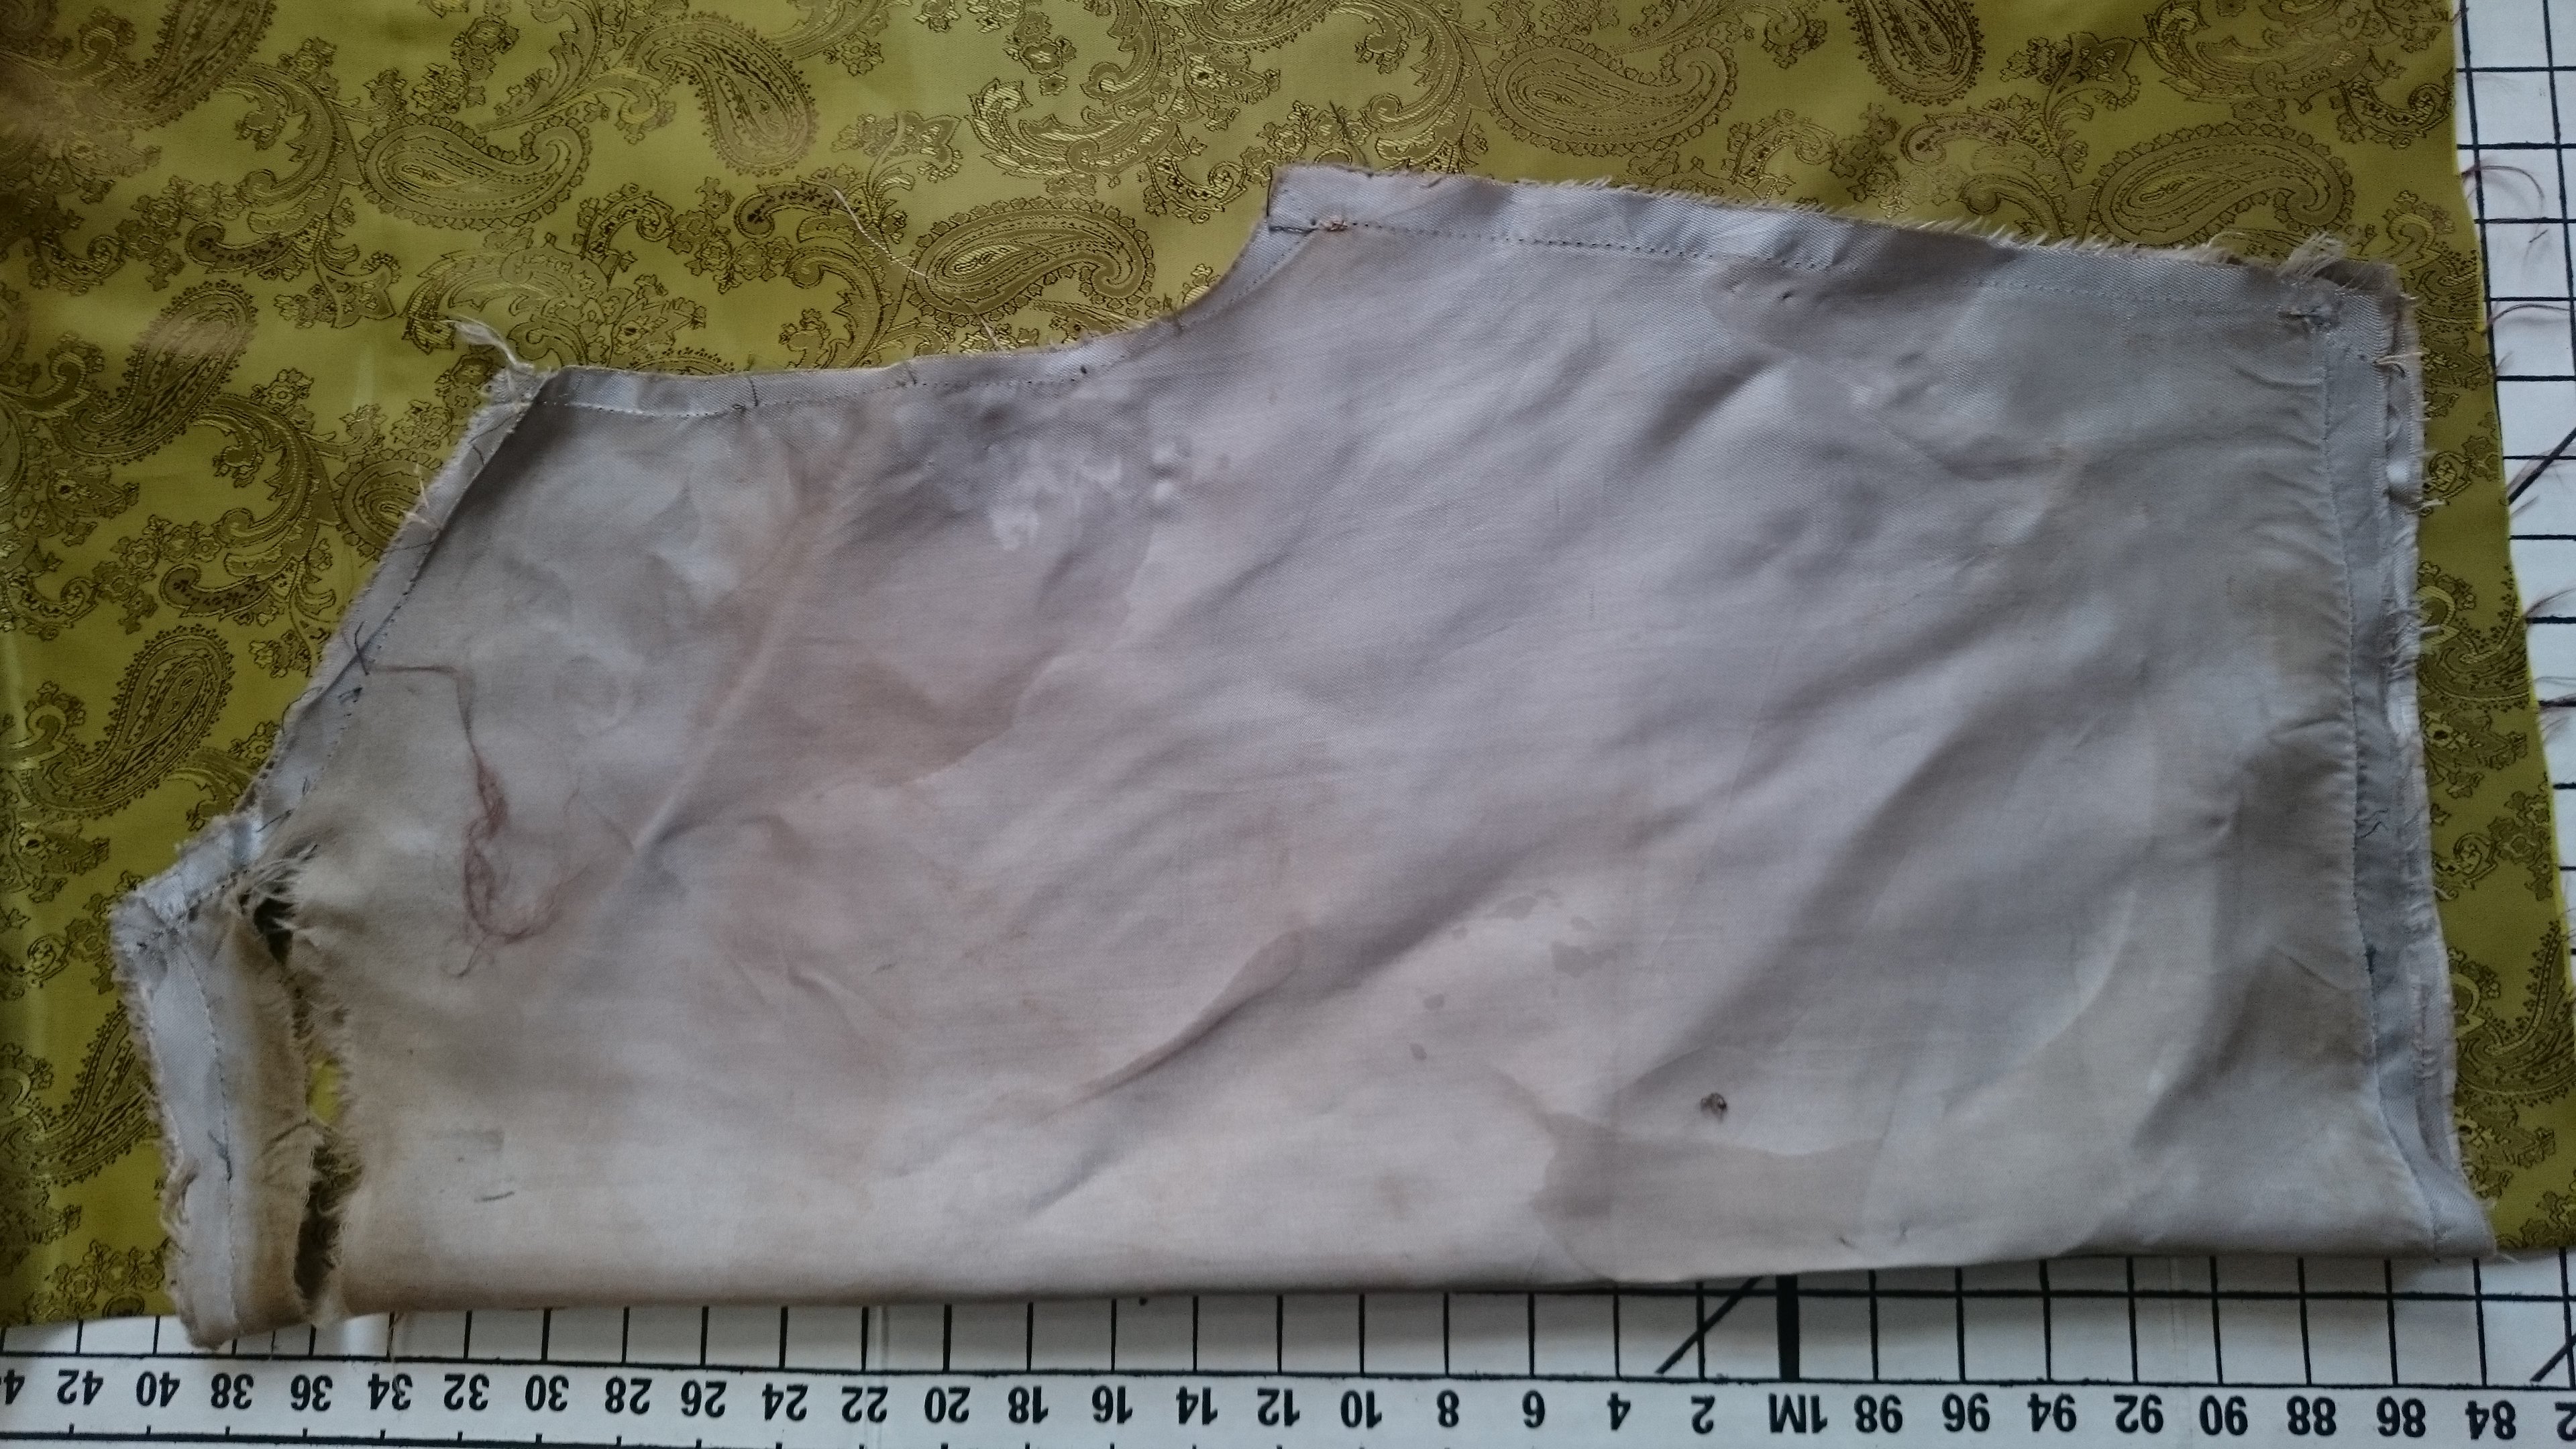
Using the old lining as a pattern to cut out the new one (step 3)
4. Carefully cut out the new lining. N.B. the standard seam allowance is ⅝” (16mm), but you may find that the old lining has been trimmed back after stitching. If you cut out using the standard seam allowance measured out from the stitching line on the old lining, all will be well.
5. Join the shoulder seams (the two fronts to the back) by placing right sides together and machine stitching with a ⅝” (16mm). Finish off the threads.
6. Stitch the side seams (front to back) as before.
7. Join any sleeve pieces if necessary and stitch the underarm seam as before.
8. Starting at the top of the sleeve, take the new right sleeve and pin it in to the armhole at the shoulder seam, with the right sides together. Then work down either side of the armhole easing the sleeve into the armhole. Remember that it needs to fit, not on the edge of the fabrics, but ⅝” (16mm) in from the edge. Stitch a second row of stitching ¼” (6mm) from the first row, but further towards the edge. This is to make the stitching more robust.
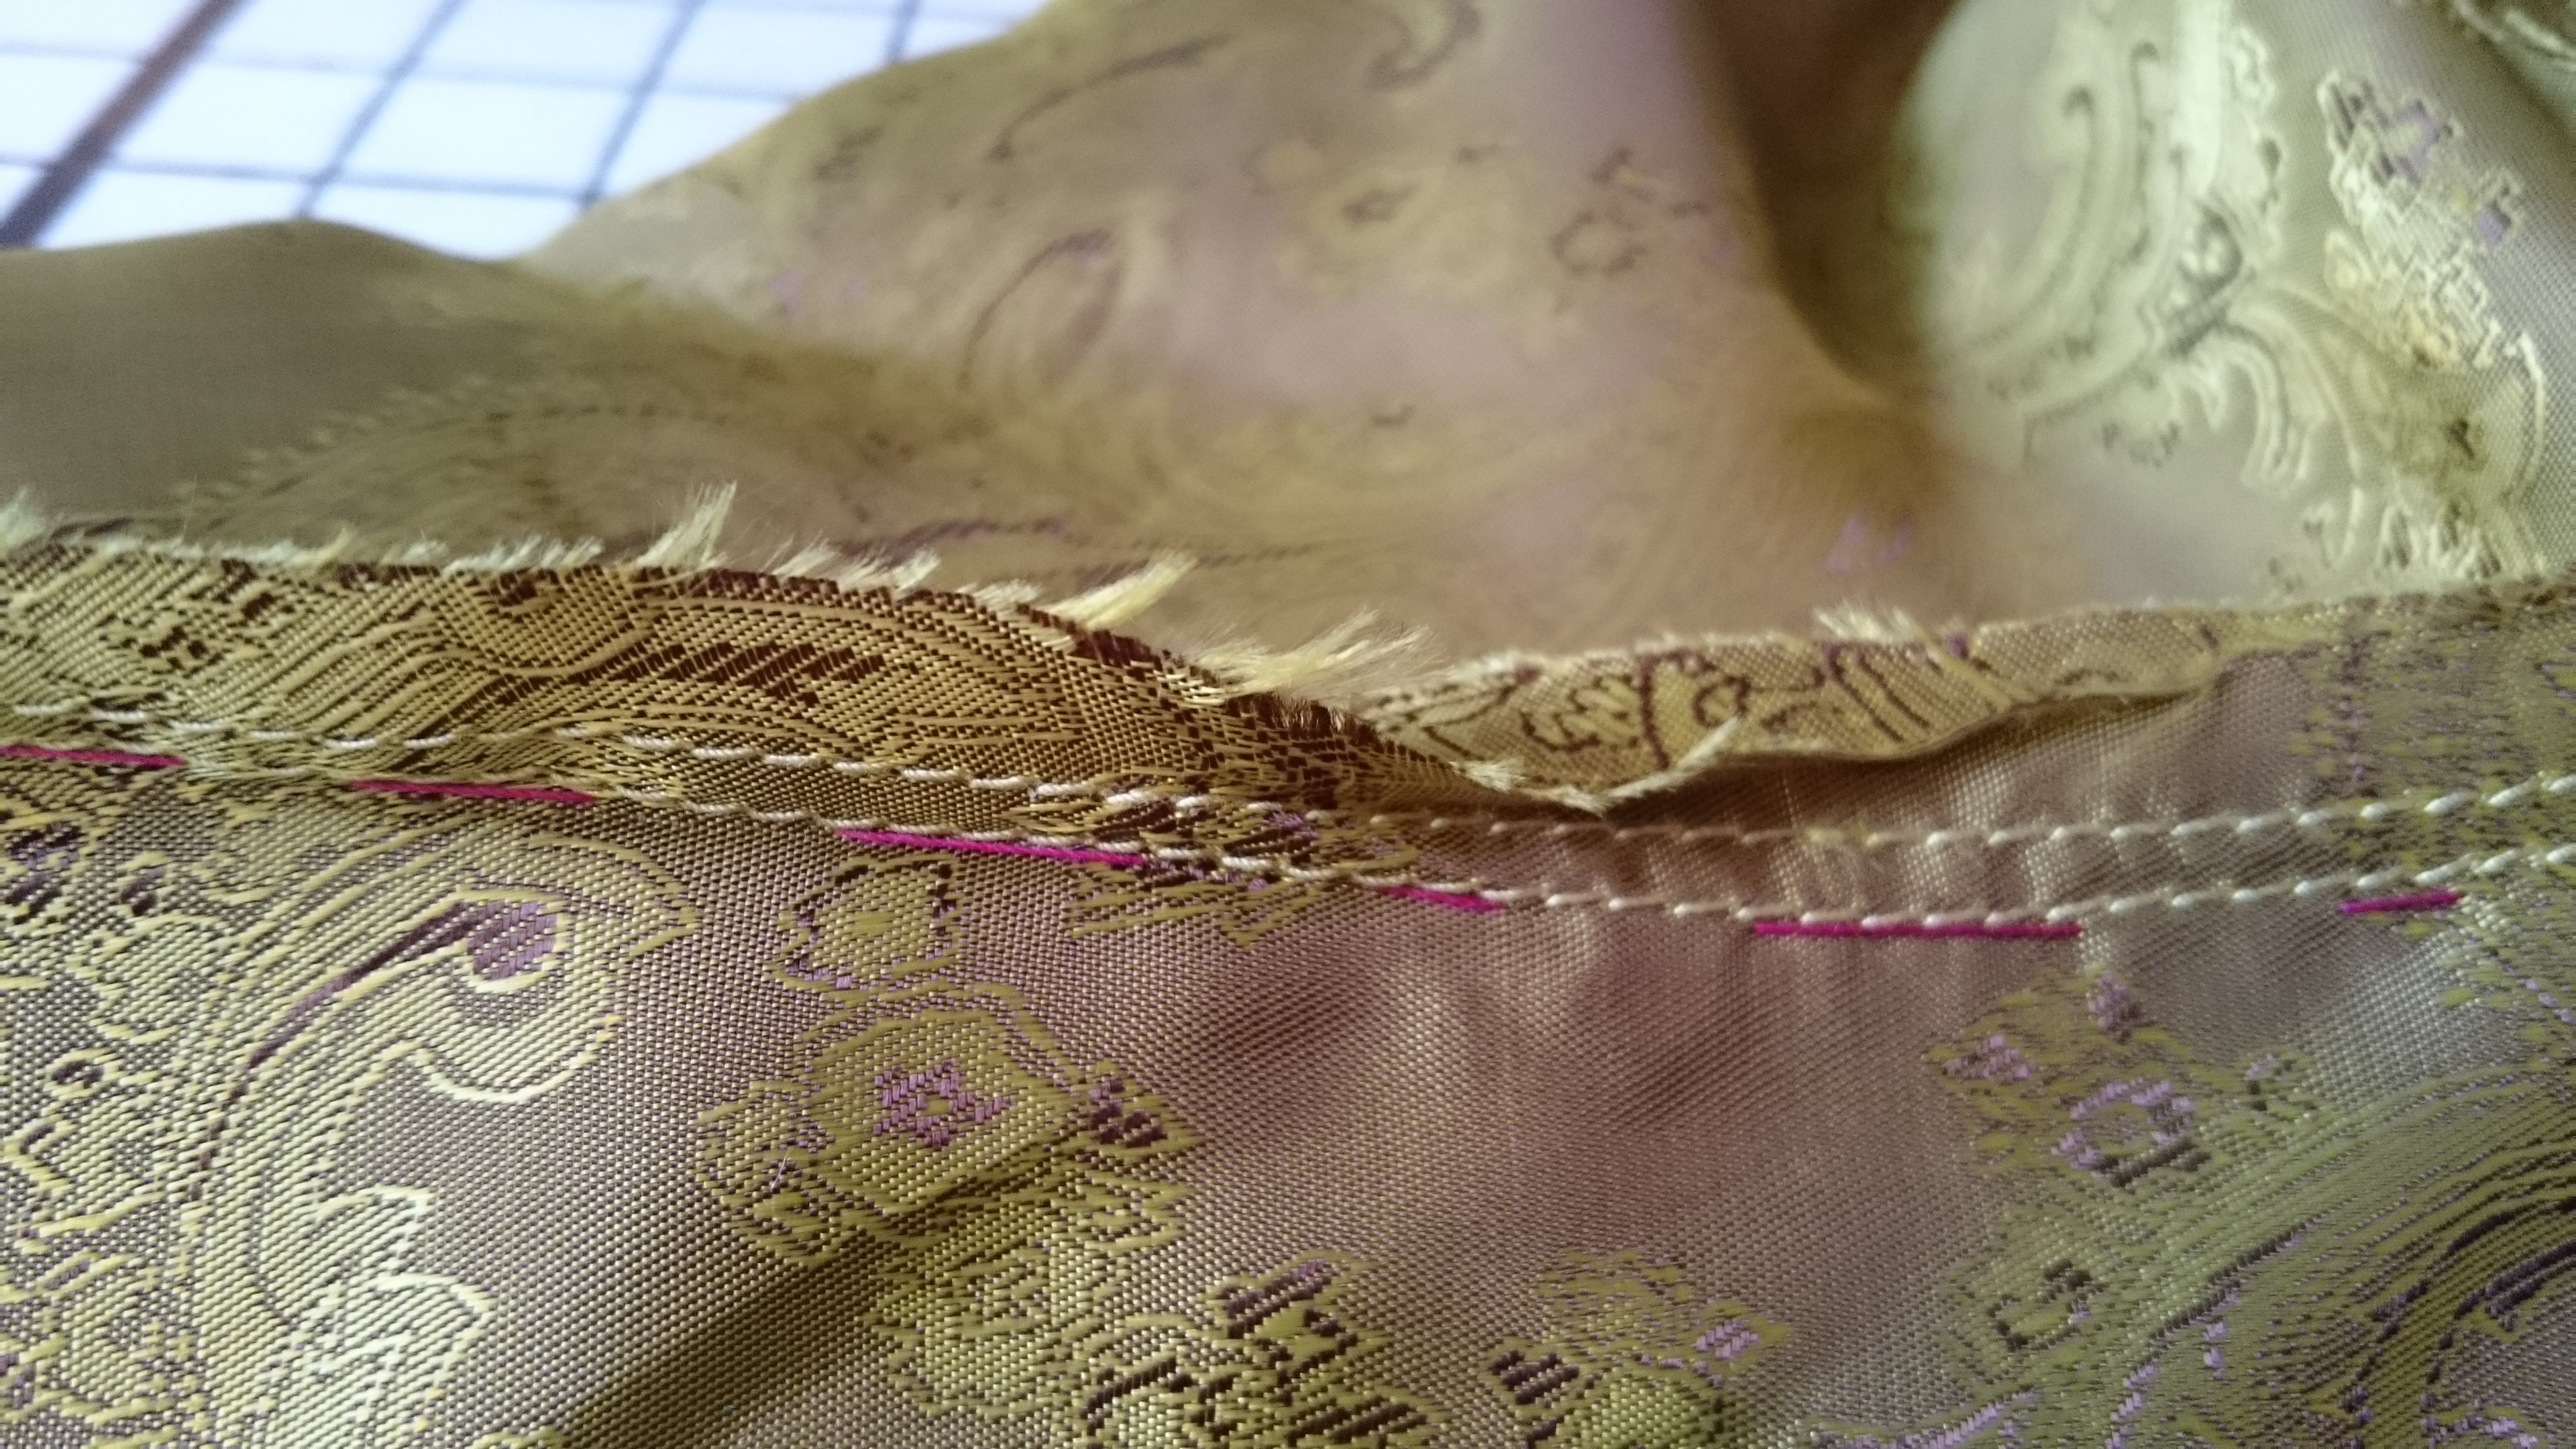
Double row of stitching around the arm-hole (step 8)
9. Now repeat step 8 with the left sleeve. Check that the two sides match. Then take the time to tack in the seam before machine stitching.
10. Try the lining with the right side of the fabric facing inwards and put the jacket on top. Put a safety pin securely through the lining and the jacket sleeve. Take both off and carefully pull on the lining sleeve until the jacket sleeve appears. With right sides together, stitch the bottom of the lining sleeve to the bottom of the jacket sleeve. Do this for the second sleeve.
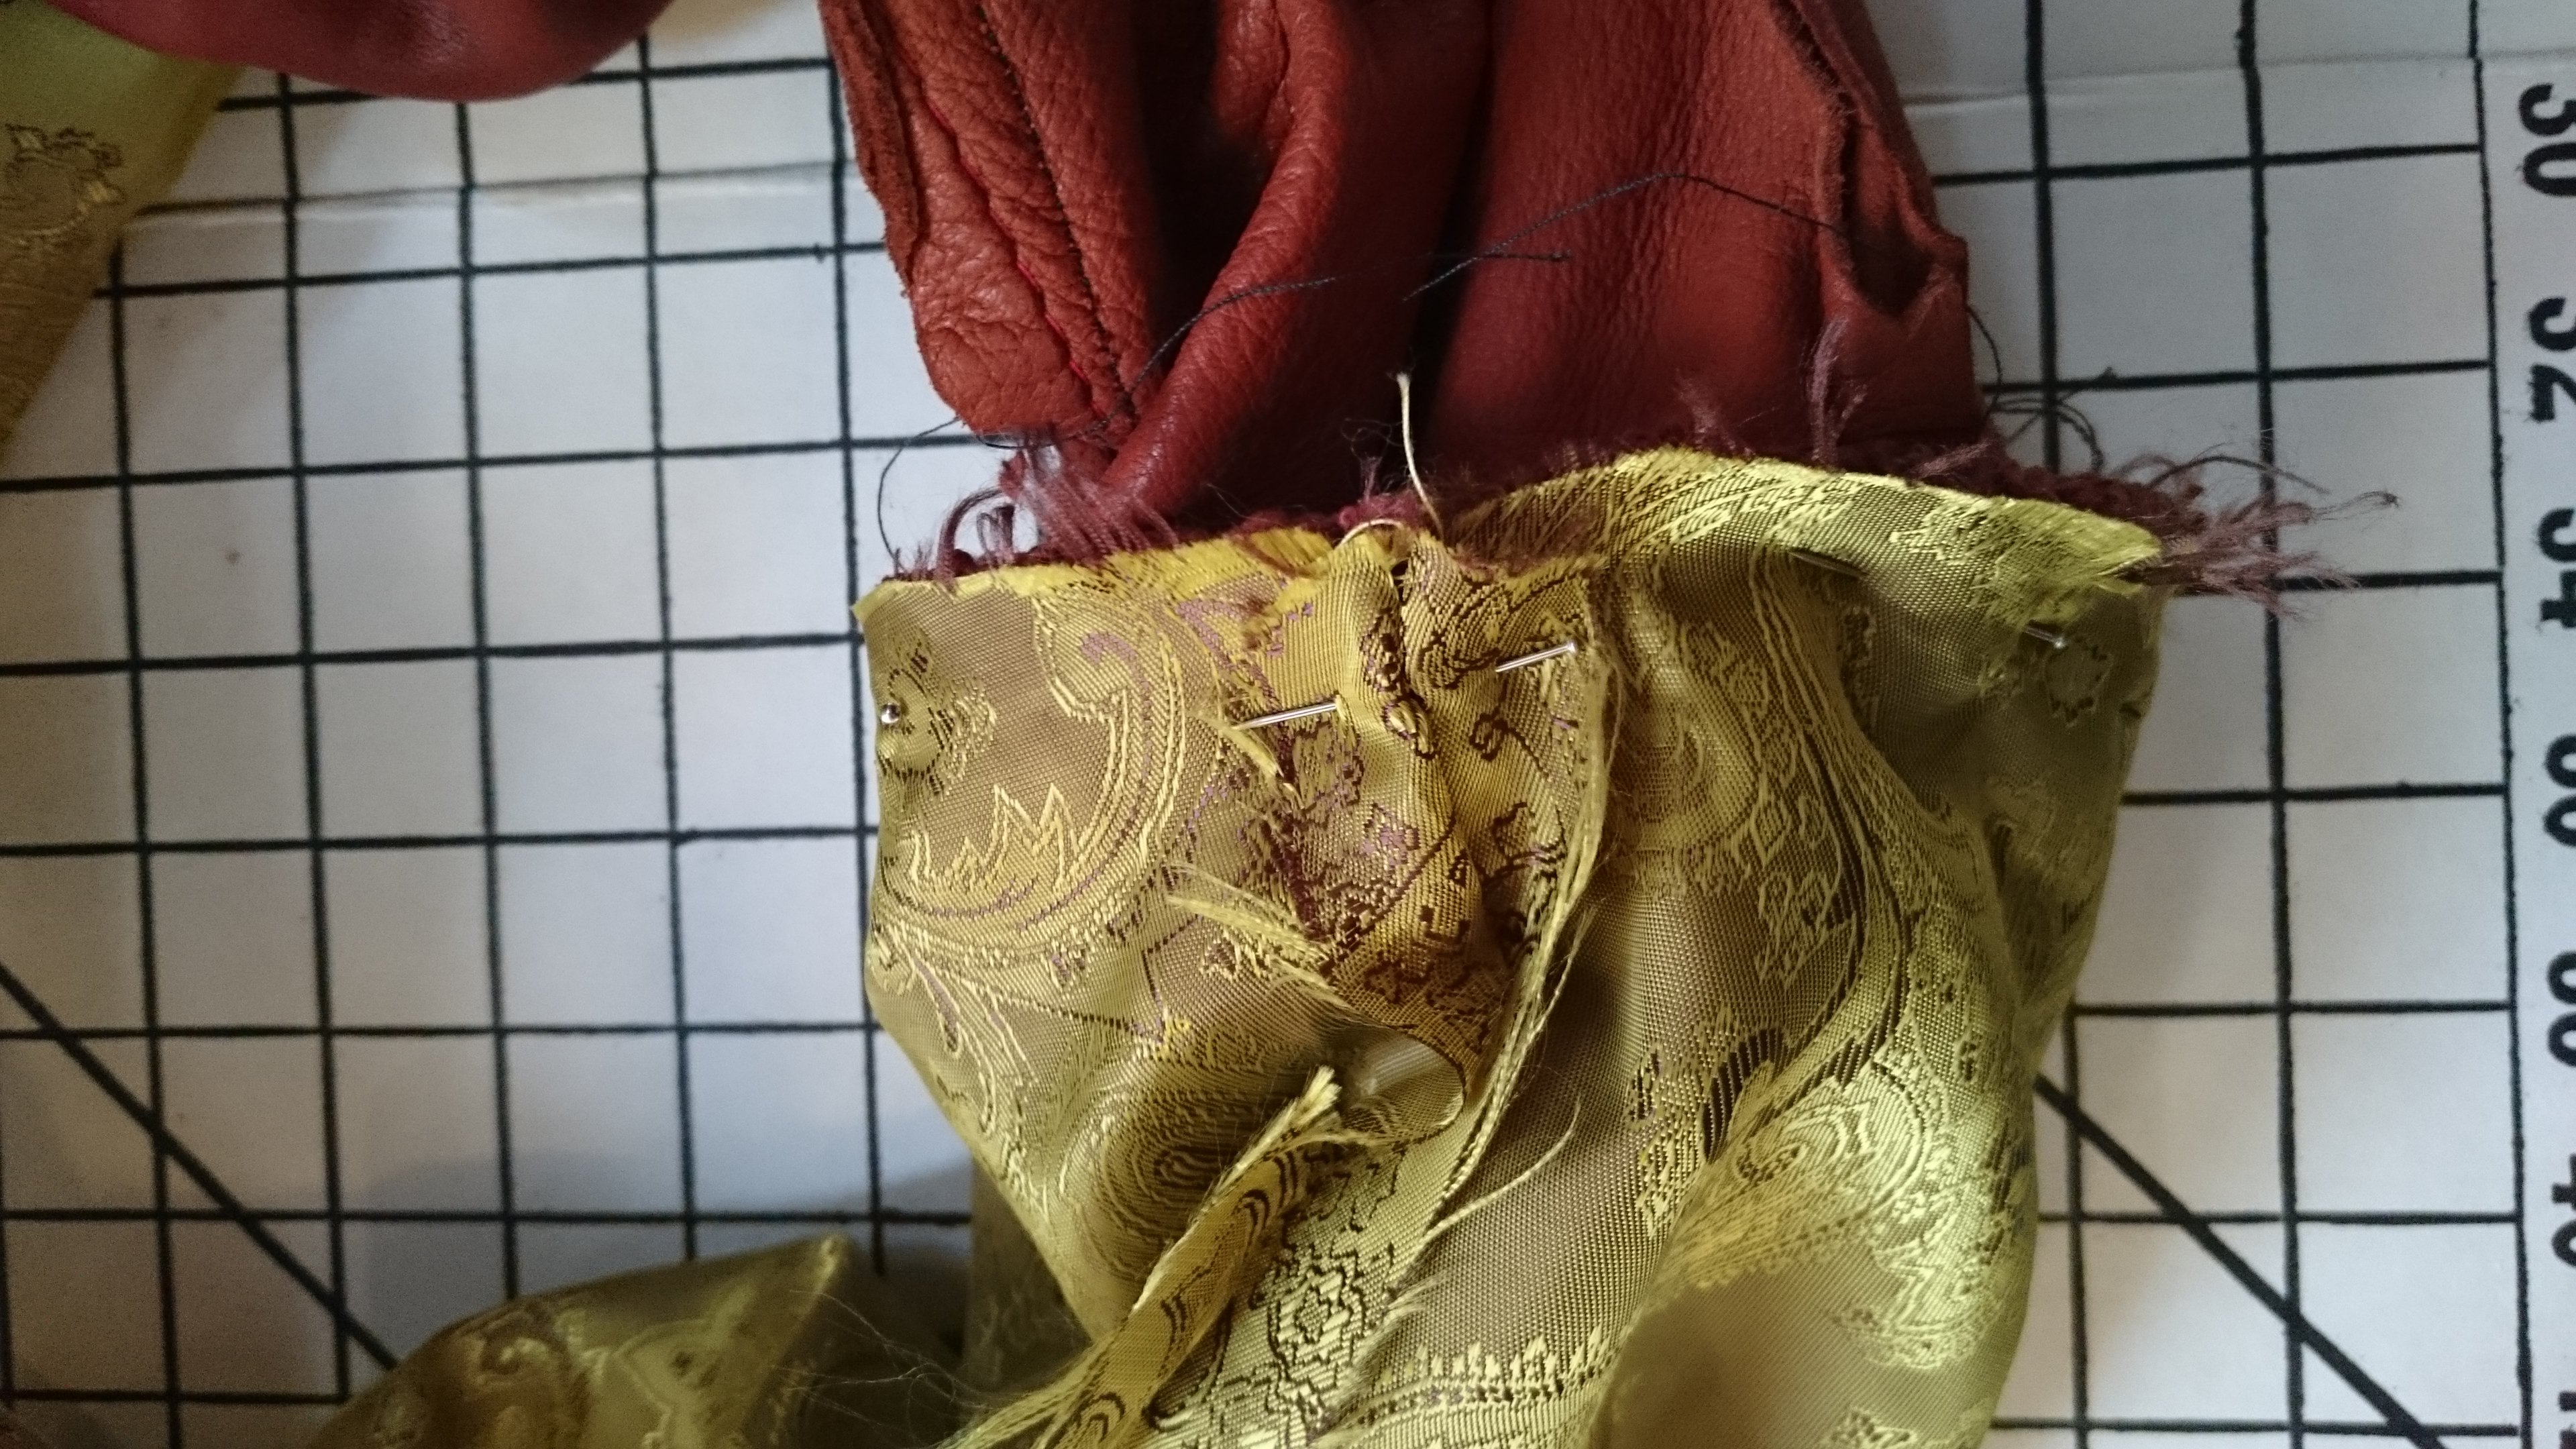
Pinning the lining and jacket sleeve ends together (step 10)
11. Now lay the jacket out on the table with the lining facing you. Cross over and fold the sleeves so they rest in the centre of the jacket back between the right side of the jacket and the right side of the lining. Pin the lining right sides together up one side round the neck, down the other side and most of the way along the bottom – just leaving a gap of about 6” (15cm) in the centre. Machine stitch all round, taking the pins out as you go.
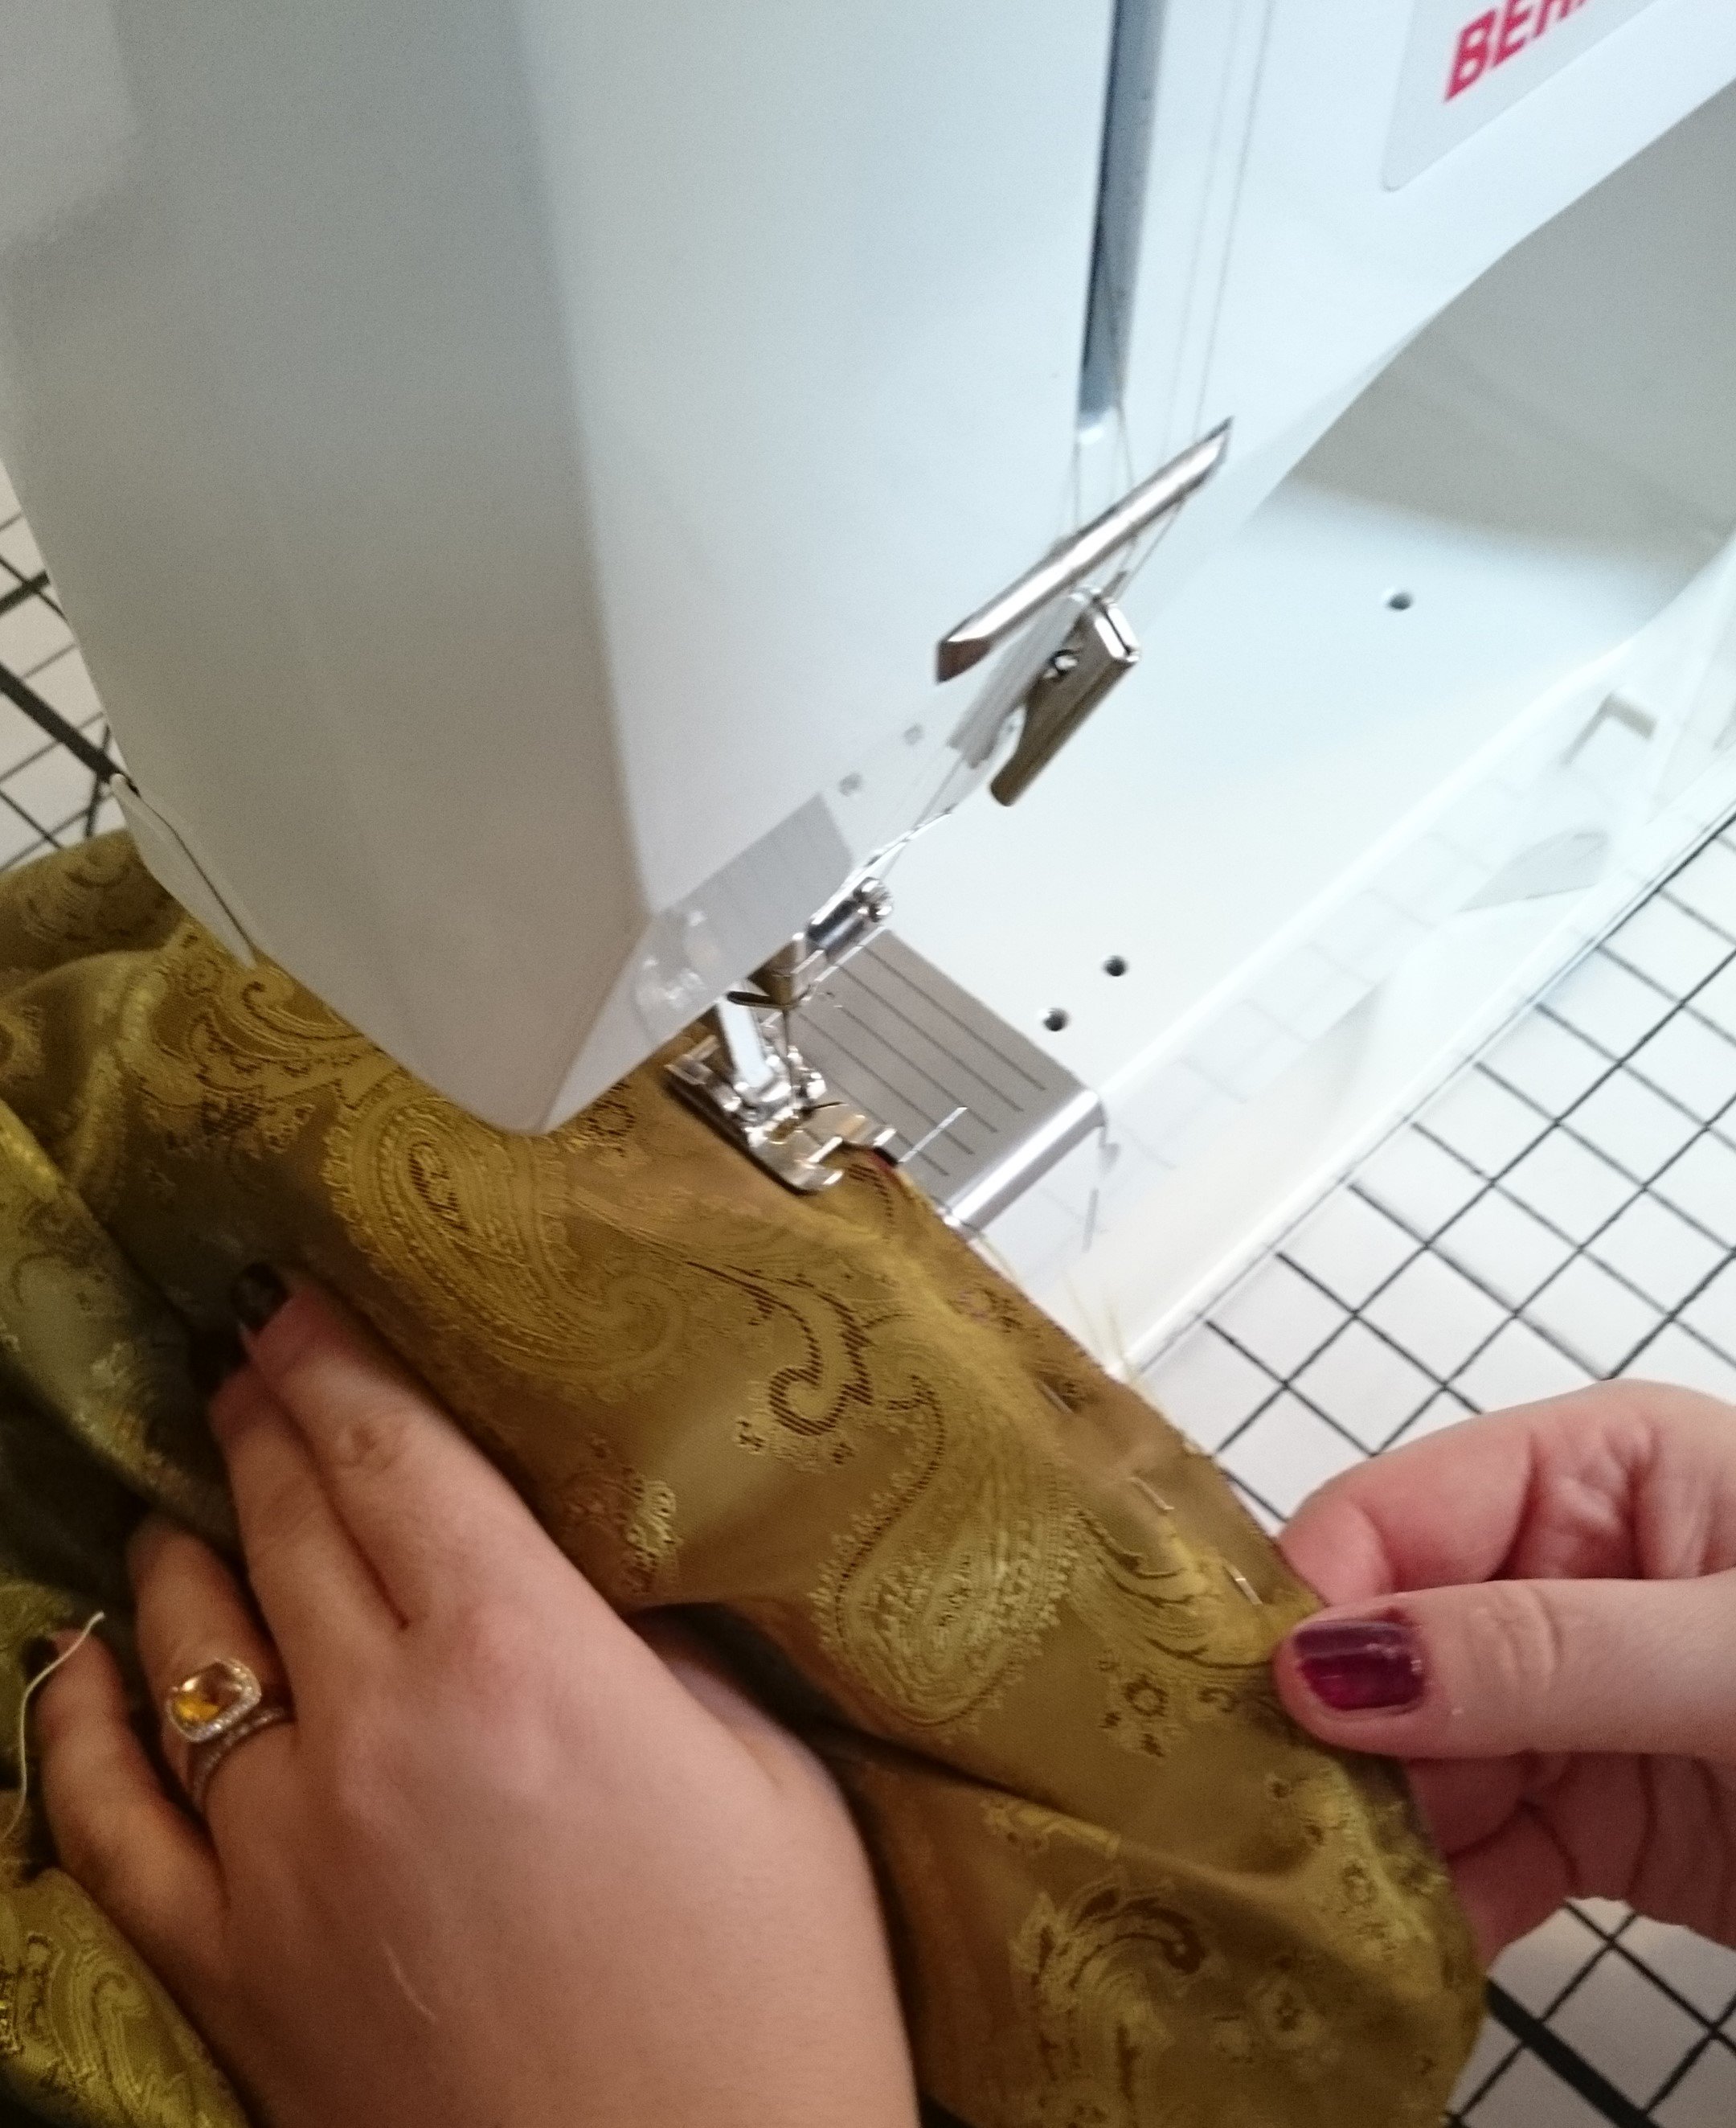
Stitching around the outside of the lining and jacket (step 11)
12. Gently draw the jacket out through the gap you left at the bottom. Then push the sleeves out to their correct position. Hand-stitch the gap closed.
For this jacket, we also re-lined the back of the collar. A lining piece was cut out. The two collar pieces were placed right sides together and machine stitched round the outside, leaving the neck edge open. The seams were trimmed and the collar turned to the right side. The collar was then inserted between the jacket and the lining, with all the raw edges aligned, just before completing step 11.
Laying the collar onto the lining material to cut out a new collar lining.

Pinning the neck area, with the new collar inserted between jacket and lining

Thank you. I’m glad it was useful.
Amanda
I am replacing the lining in a 40 year old leather jacket. Your article confirmed what I was doing but when I removed the original lining, it has an inner lining of very warn thin batting like used in quilting. Is it necessary to replace and where can that light weight of batting material be found?
You are fortunate enough to have an interlining in your jacket, which will make the jacket warmer. If this layer is not worn out and is detachable, you could perhaps just hand-wash it and replace it, then add your new lining over the top
Amanda
Thanks for your question, Karen. I think you could have a go at making a paper pattern for the lining. Use each piece of the jacket as a template (back, front, sleeve and add a seam allowance of 1.5cm extra round each one. Don’t forget to cut the sleeve and the front out of a double layer of fabric, so you get two pieces which are mirror images of each other. Don’t makes the lining too small, a bit of extra give when the jacket is put on is useful. If you have found some really nice lining material to use, it might be wise to try making up a lining from scrap material, to see how well your paper pattern works first.
I saved a 130+ year old jacket from the trash and the lining is pretty much gone. Any tips for trying to recreate the lining from scratch, without being able to use the original as a pattern? Thanks!!
Thanks for your comment. Glad it was useful.
Amanda
I saw that you were sewing in the lining with sewing machine. Do you have to be careful about creating more holes on the same seam line. I’m afraid of getting a performation effect that would make the leather tear like a performation line on a piece of paper. I haven’t much experience with leather and a friend wants her favorite coat relined. Would it be better with a smooth leather if I sewed the lining back in by hand?
Dear Irene,
That’s a very good question. I would prefer to sew the lining in by machine to make it more robust. You should be able to carefully line your sewing machine needle in an existing hole, then carefully use the handwheel to almost make the first stitch. You should be able to adjust your stitch length on the machine until it matches the stitch length (the gap between the holes) on the original seam line of the jacket. Use a robust needle (like a jeans needle). Stitching leather by hand is very hard on the fingers!
Amanda
I hope it’s useful for your business. Thanks for the comment.
Incredible! Thank you sooo much! I’m a new sewists and was pretty intimidated by this process! You’re given me a boost of confidence! I’m gonna get to work ASAP!
Thank you so much for taking the time to comment. I’m glad it was useful. Amanda
Great article.Amazing thoughts about the jackets and the varieties which is publish by you helped us alot.Thanks for sharing the blog with different pictures. P
Thank you for taking time to leave a positive comment – much appreciated!
Thank you for your kind comment, Pamela. So pleased this was useful!
Amanda
Brilliant article! Just what I needed to know. My fav pink leather jacket is over 10 years old and has been dry cleaned but needs a new lining. I will use old lining as a pattern just as you have suggested.
Thanks for the positive feedback, Jennifer. Much appreciated!
Amanda
Awesome tutorial ! I am feeling very great after exploring your post.
Helpful tips to replacing a leather jacket lining.
I am pleased it was useful. Thanks for the comment. Amanda
good guiding about leather jackets
Thank you for your comment. I love my own leather jackets!
Amanda
This article is very informative. I like
Really wonderful Article! Getting a hot and modish look is a dream of every man of any age. It’s the time to flaunt your inner personality matching with a genuine sizzling outfit, to lit the fire of fashion wherever you go.
Thank you for your comment. I love my own leather jackets!
Amanda
I have one of your leather jackets, so can i follow your content its favorable your content its for this jackets ???
If you have a jacket with an existing lining (however damaged) you can follow the instructions to make a new lining. Take care with sewing leather: you may find it better to use clips rather than pins to hold the fabrics together and you will need to use a strong needle (intended for leather) on your sewing machine. Take it slowly.
Hi. I’m grateful for this post but, as a novice seamster (can’t call myself a tailor), it’s still a bit difficult for me to process from just the words and the photos you’ve provided. I have a leather jacket that needs a new lining. I’ve bought a nice black and silver jacquard paisley for it, but I don’t have the chops to actually install it.
The original lining was falling apart. I wasn’t able to remove it at the seams without the fabric tearing away near the seams, so I had no choice but to cut it out. As a result, I don’t have the most accurate basis for a pattern for the replacement lining. However, the original lining was a bit slipshod, anyway, so I don’t want to reproduce it exactly; it was too tight at the armpits and the sleeve linings were too long to the point that the lining billowed from the jacket cuffs.
There is a peculiarity, too, with the sleeves; they are two pieces each, but they don’t resemble any two piece patterns for sleeves that I’ve looked up. But, then, I basically know nothing; I’m a complete novice. All of my sewing has, thus far, amounted to putting patches in my jeans. Although I did learn a nifty way to make a flat-felled seam.
Anyway, all of this is to ask if there were any way a video could be made to accompany this post. Of course, I realize it wouldn’t be for the specific jacket about which you wrote, but perhaps it could be shot while putting a lining in another leather jacket. What I really wish is that I could apprentice with an experienced tailor / seamstress, but that kind of arrangement doesn’t exist anymore.
Dear Steffen,
Sorry, no. I do have some videos on You Tube (my channel is Amanda Jane Textiles) but not for replacing a jacket lining. You might be able to find someone who does clothing alterations who would do the work for you, but it is quite satisfying to do it yourself. You need to make yourself a new pattern for the lining and I suggest that you use some scrap material (such as an old sheet) to cut out your pattern pieces. Every place where you have had to cut some fabric off, you need to add it back on to your pattern. Try shortening the sleeves a little, but not too much: your sleeve linings need to ‘give’ a little in wear. Then stitch up your practice lining and try it on to see if it works – you may find that your two-part sleeve makes sense when you stitch it together. You can experiment with making the armhole bigger, but don’t forget that what you take out of the body, you need to add to the sleeve, so the sleeve fits the larger armhole you have created.