 BERNINA Corporate Blog -
During my bespoke tailor apprenticeship, hand sewing played a big part. Sewing invisible hems was one of the first things I learned. While I am proud of my hand sewing skills, sometimes, you just want to seam to be sewn quickly so you can finally wear the garment you made.
When I got my bernette 38, one of the first things I did was to hem a pair of Marlene trousers with the blind hem foot. And was pleasantly surprised how neat the seam looked. If done right, you don’t notice it.
So today, I’m sharing a tutorial with you on how to achieve neat, invisible seams.
How to sew invisible seams with the blind hem foot
Before you start sewing, you have to prepare your hem: press hem according to your allowance and serge the edge or use a zigzag stitch to stop it from fraying.
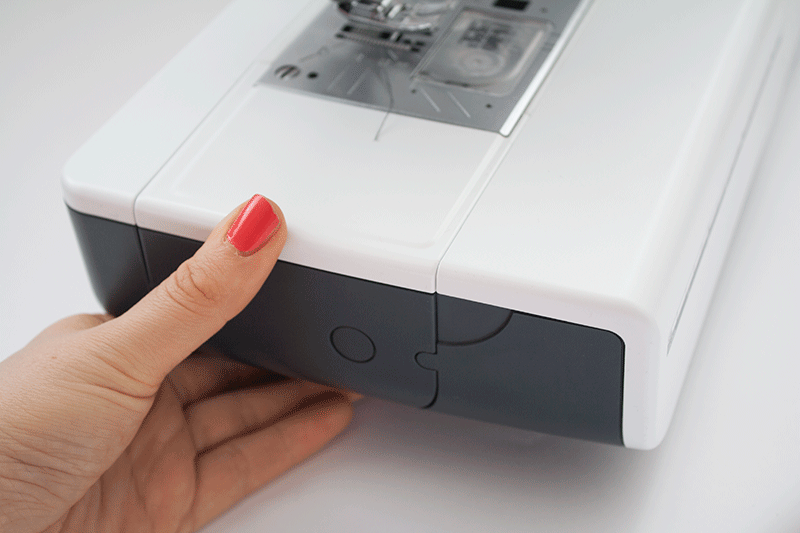
In this example, I’m hemming a pair of trousers. Depending on what you are hemming, you might want to remove the table from the sewing machine like below, so you can work better if your opening is narrow.

Select the blind hem stitch. On my bernette 38, it’s stitch no. 9. It looks like a zigzag stitch with straight stitches in between, as you can see on the display.
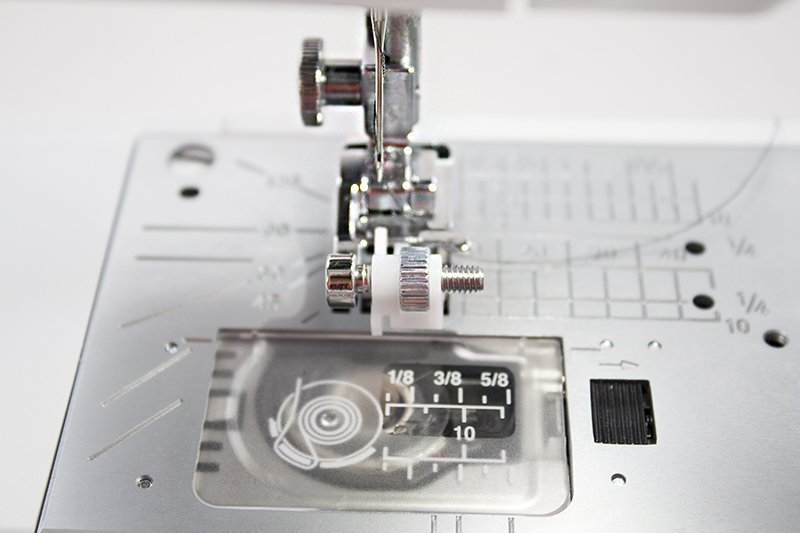
Apply your blind hem foot to your sewing machine. You can recognize it by the guide – on my bernette, it’s the white part of the foot you can see above. I’ve also seen blind hem feet that have a “divider” between the two feet.
We’re sewing the hem on the wrong side, so you might want to turn your garment inside out.
Lay your hem onto the sewing table like this, right side on the table, wrong side facing up.
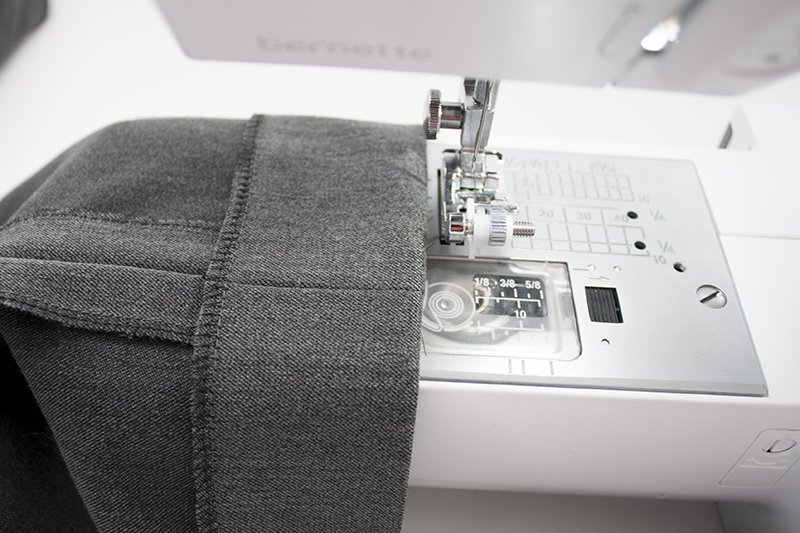
Now fold the pressed hem under, so that the allowance of the hem lays on the table with about 0.5 cm / 0.19″ visible, like below.
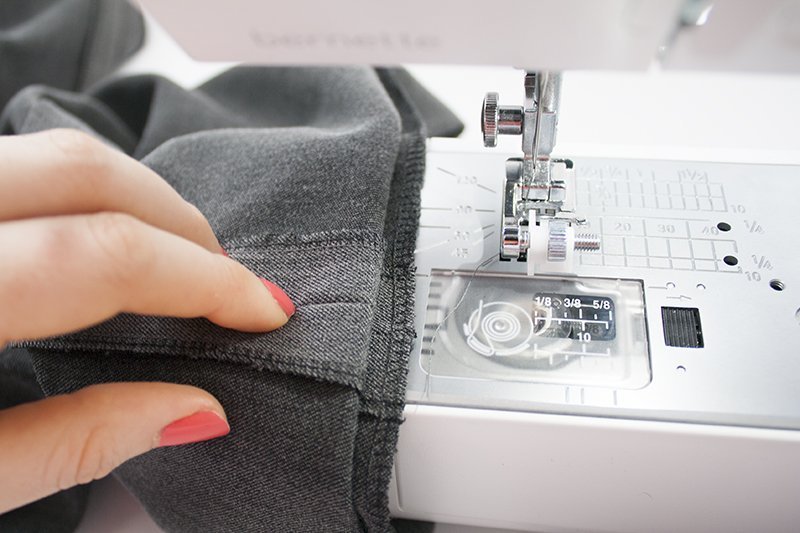
Make sure that the layers lay flat and smooth. You don’t want the layers to shift, this won’t look good when finished.
I personally find it easy to keep the layers smooth, but depending on your skills and fabric, you might want to secure the layers with a few pins first (be careful not to sew over them, though!).
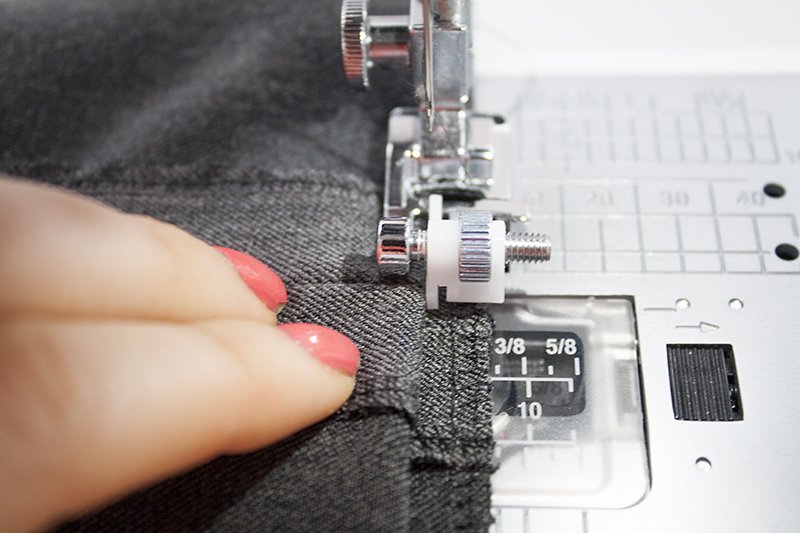
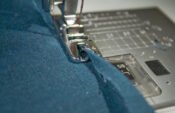
Time to sew! While sewing, guide the folded edge along the blind hem guide.
As you might remember, the blind hem stitch consists of zigzag stitches with straight stitches in between. The straight stitches will be sewn on the allowance of the hem that is visible next to the folded edge. The zigzag stitches will jump to the fold, piercing the fabric of the fold just enough to keep it in place.
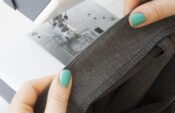
When done, you can turn your hem and look at your result.
Adjusting the blind hem foot

The guide on the bernette foot is adjustable. This way, it is possible that more or less fabric can be pierced by the zigzag stitches.
As you can see above, the stitches can be more or less visible, depending on how you adjust the foot. I’d recommend to practice on a piece of scrap fabric first, because different fabrics demand a different adjustment.
On the right side of my practice scrap, you can see that the stitches are quite large and therefore more visible. This can of course be used to your advantage and added as a design feature, as the stitches can be quite decorative if shown intentionally. Play around with the adjustments to achieve this look.
But if you want a truly invisible hem, you want something more like the stitches on the right. Tiny tacks of thread that won’t be visible if you’re using a thread that matches the colour of the fabric.
Here’s a close-up of the blind hem stitch, keeping my hem in place:
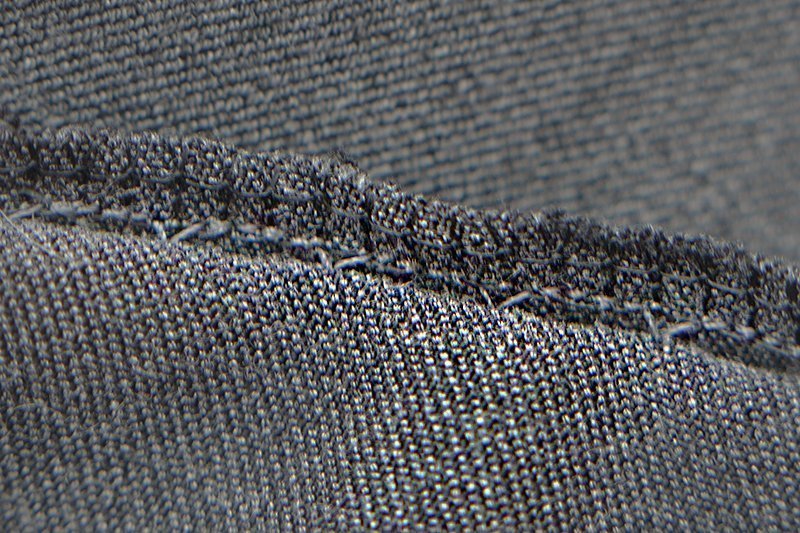
As you can see, the zigzag stitch pierces the fabric where the fold was just so.
Another thing to adjust for the blind hem is the thread tension. Loosen it up for this stitch. You don’t want the layers to cling to each other tightly, and the stitches can form little dents in the outer fabric if the thread is pulled too tight.
As with many things sewing, there isn’t an adjustment that goes for every fabric – so take the time and try different adjustments on a scrap piece to get that invisible seam. 🙂


Thank you this was great