 BERNINA Corporate Blog -
Welcome to part two of the Zip it Up! series, where we give you tips for sewing various kinds of zips. Part 1 explained how to install an invisible zipper, but zips can be a decorative element and do not need to be hidden. On the front, on the back, on pockets or a side seam zipper: They all offer an athletic or elegant look depending on their color, material and combination with your fabric. Contrasting zippers are particularly eye-catching and can offer a pop of color! Take a peek at this inspiring gallery of various combinations – All outfits are from the inspiration Magazine.

Trousers “Pam”, Bluse “Megan 
Bold front zipper 
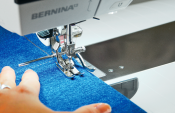
Knitted dress “Vanessa”, Handbag “Rosalie” 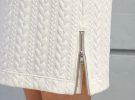
Metallic side seam zip 
Jacket “Sina”, skirt “Daisy” 
Soft white and silver zipper 
Blouson “Bernd” 
Black & silver metal zippers 
Coat “Delia” 
Same colored zipper 
Windbreaker “Kaja”, Leggins “Seda” 
Bold white and silver zipper 
Coat “Mette” 
Same colored zipper 
Coat, issue 69 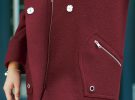
Silver zippers 
Coat, issue 58 
Silver in silver zipper 
Wraparound skirt, shirt and handbag, issue 69 
Black in black metallic zipper
How to sew a prominent side seam zip
A side seam zip at the hem of a skirt is not just a decorative element, but just like a back slit it can offer you more mobility when it’s opened. And the best part: You can add this to any pattern you want!

Knitted dress “Vanessa”, Handbag “Rosalie”
To protect tights from the metal teeth of the zip when wearing this knitted dress, an underlap is added. I’ll show you step by step how to create such a side seam zip.
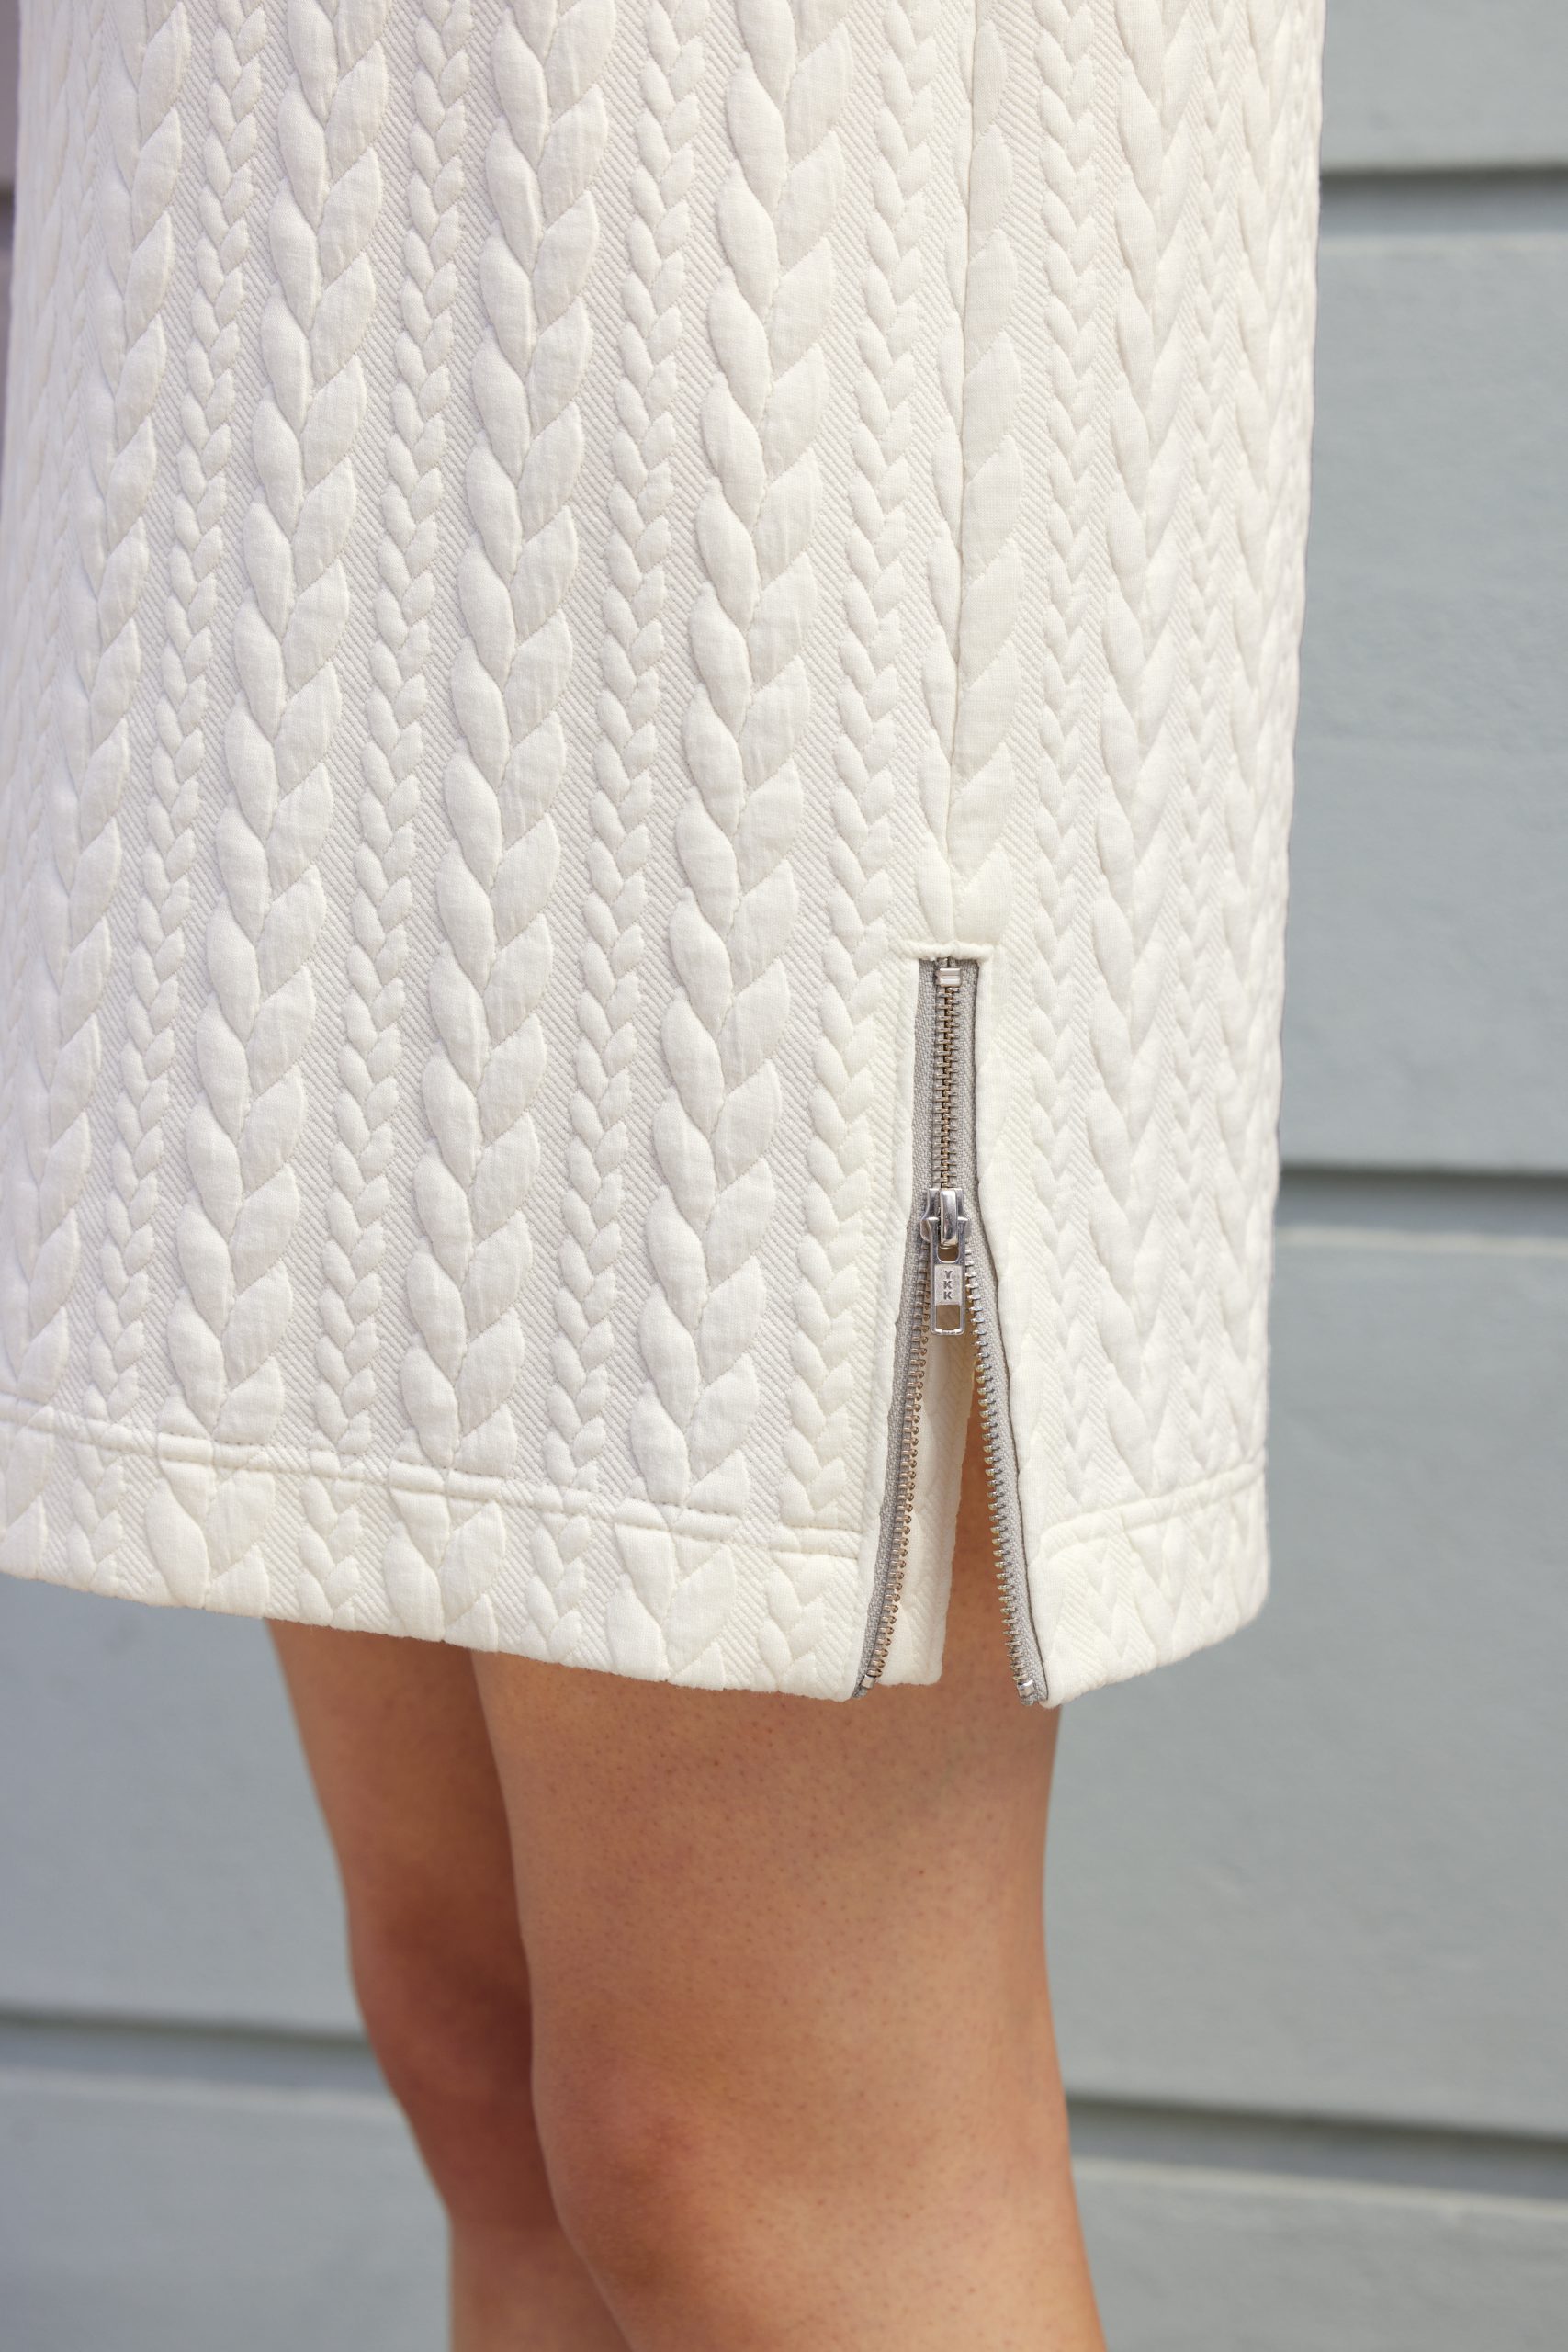
Metallic side seam zip
Step-by-step instructions
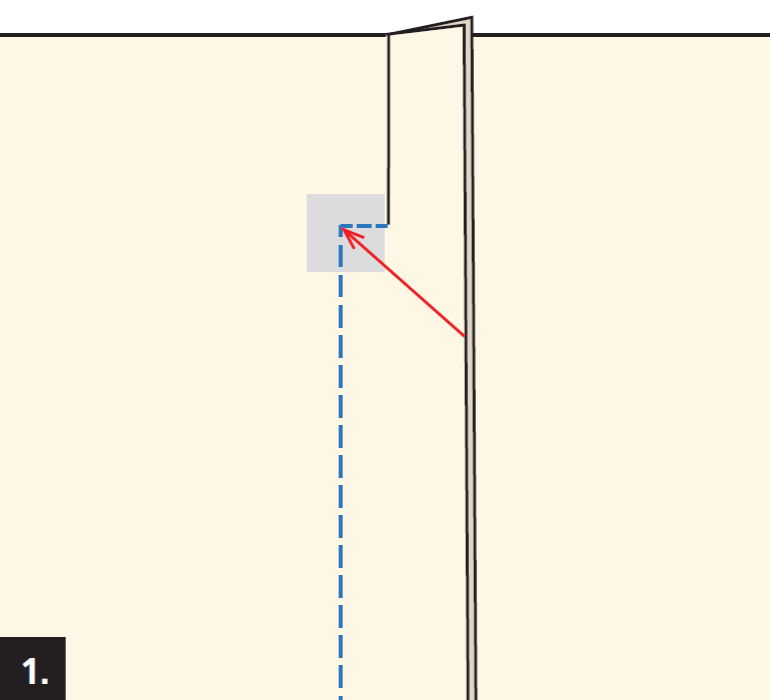
Please note: The right side of the fabric is shown lighter in the illustrations than the wrong side.
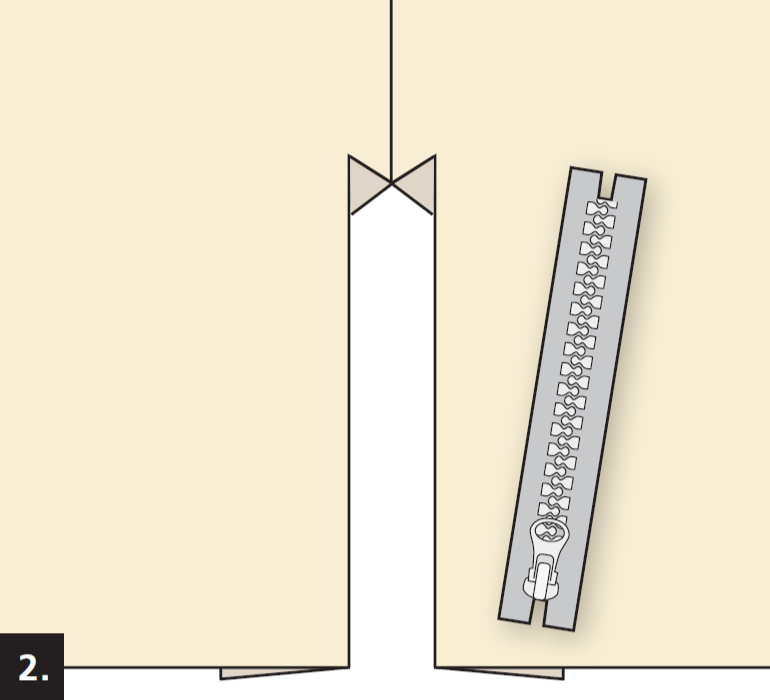
Close the side seam up to the slit marking. Iron the allowances apart and finish them. Draw a parallel line on both sides at a distance of 1 cm from the seam and mark the corner at the top vertically to the seam ( blue dotted line ). Depending on the fabric, the corner should be reinforced with a piece of fabric lining to stabilise it ( grey ). Clip the allowances diagonally to the seam down to the corner ( red arrow ).
Fold the long edges of the slit inwards. The pull of the zip is at the bottom when closed.
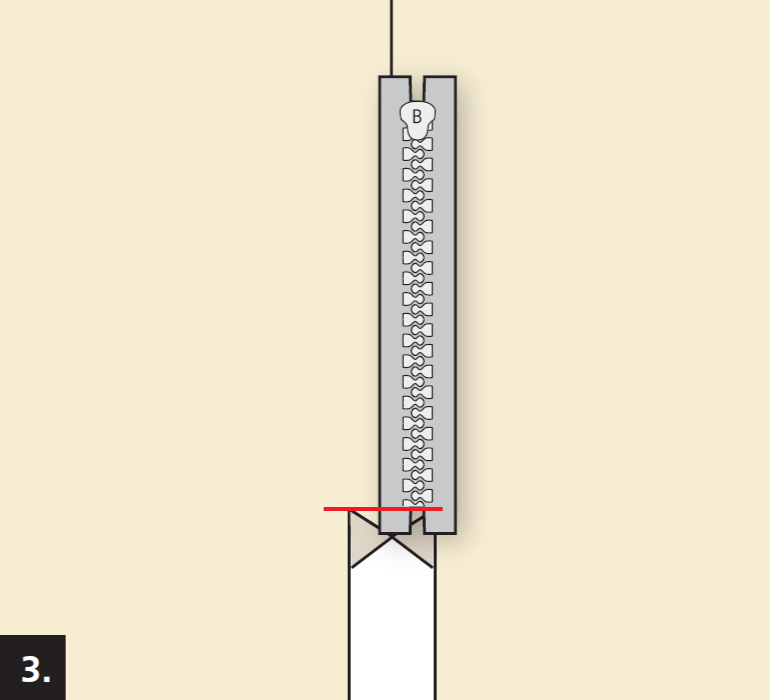
Pin the upper end of the zip right side on right side over the centre of the side seam ( for better understanding, it is not placed in the centre yet in the illustration ). From the inside, sew the zip across the top of the cut exactly from corner to corner ( height of red line ).
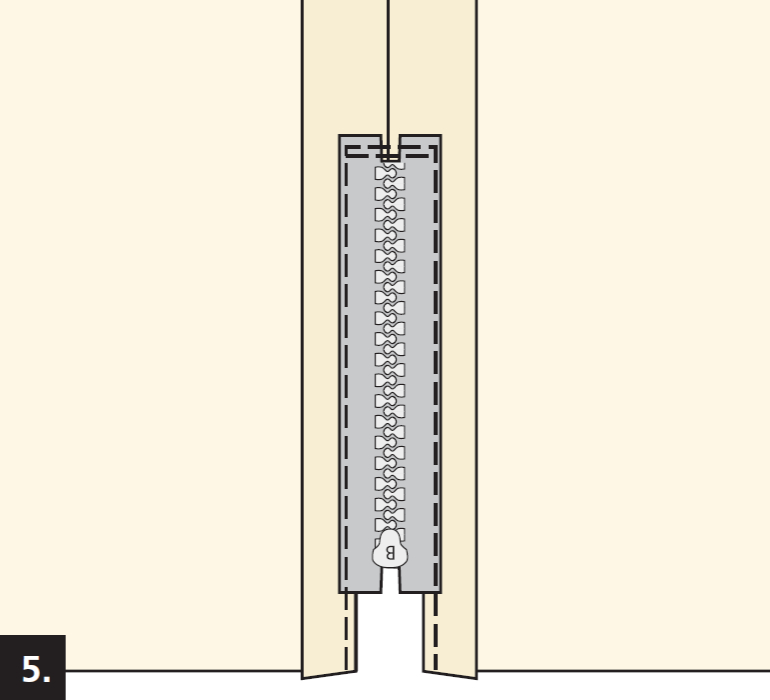
Align the zip along the inside downwards. Cut back the allowances of the long edges, fold them in and topstitch them from the right on the zip tapes ( illustrations 4 and 5 ).

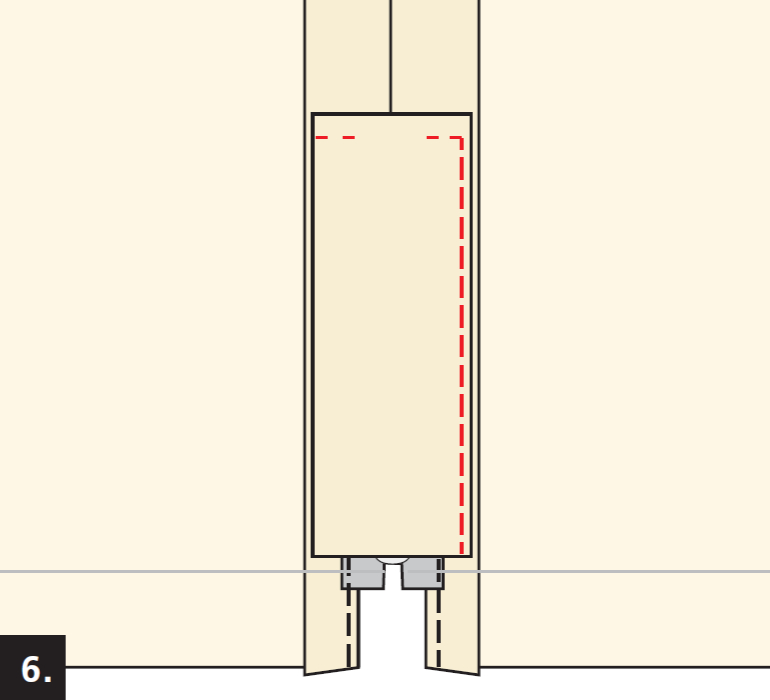
 The underlap is created and sewn lengthwise and crosswise along the front seam allowance on the inside of the zip slit ( red lines ). Depending on the fabric thickness, the underlap should be just a little shorter than the closed zip, but in any case end just above the hem fold line ( grey line ). Tip: With the knitted dress, it is advisable to cut and sew in the slit facing with a folded edge at the bottom. Also sew on the slit facing across the top at the allowance of the back part ( red line at the top of the left half of the picture ).
Looking for more tips and tricks?
We have carefully collected exciting tips and tricks from various inspiration magazines and published them on the blog. This tip is taken from inspiration issue 3-22.
- You can find all zipper tips here: “Zip it Up! The series”
- If you want to read more helpful tutorials, you can find an overview here: “Tips and Tricks”.
It’s worth checking back regularly or subscribing to the newsletter to make sure you can learn our experts’ tricks for your sewing work.


Hi TeamCan you help with sewing buttonholes on a collar stand please?My 540 machine chews up the bulky fabric no matter what I try. Even on layers of cotton fabric it really doesn’t like the lack of fabric around it. I’ve tried compensation plates, using a scrap of fabric under the sensor and they only work if done manually!!It’s so frustrating as I bought this machine because it has the automatic buttonhole foot and button measurer!!!Help please!? Lindsey x
Hy Lindsey,
I just recently had the same issue. I believe the main problem was that the seam allowances left and right were so thick, that the buttonhole foot did not lay flat on the fabric, so the fabric transport does not have a chance to grip it and therefore does not transport it correctly. Since the machine is sewing but the sensor does not register the fabric being transported accordingly, I guess it gets confused and the automated buttonhole does not work. I kinda made it work by pushing and pulling the fabric on my own. But I only had that issue with the collar, never with the button panel.
I only had to sew one hole, so I was fine with this and did not search for other solutions. I will ask our education team on Monday if they have any suggestions for you.