 BERNINA Corporate Blog -
Having started the Bernina Quilt-Along with very simple Block 1 , Block 2 and Block 3, we are now taking things up a notch. We are going to sew the next set of blocks on paper. This is because it is an easy way to create accurately sewn blocks that would be difficult to achieve using a different method.
So for the next set of blocks, we will be using the foundation paper piecing method (to beginners, this sounds rather fancy, but it is actually really easy). I wondered whether I should group the blocks by technique (sewing all the blocks that use the same technique one after another, then moving on to the next) or alternate the technique each time. I decided to do the former. I think that when you have just tried out a technique, this allows you to stick with it and gradually improve. It is easier to remember the previous blocks and how you made them than if you constantly alternate between different types.
So today, we come to
Triangle No. 4
I jokingly call the new block “stripe rings”.
This time, for Block 4, we are going to use foundation paper piecing (FPP for short). It is also called sewing on paper. The old hands at patchwork will probably say why does this block need it, I can just sew a few strips together and then cut out a triangle using the template.
And you would be quite right! Now comes my “But…”
The finished size of our triangle in the quilt is 4.25″ in height. This cannot be divided by a whole number, not by 4 or by 5. And that means that we would have to cut out the strips using a very tricky measurement of 1.35″ per strip. This is one of the reasons why we are sewing on paper, as it means that you do not need to follow a ruler measurement, just the drawing on the paper pattern.
Another reason is that paper enables you to create stripes that are exactly the same width and always parallel and that is exactly what we want for a final result. That is why I am using this technique today, and if it is new to you, you will learn an important new skill.
First, please print out two pages of the attached paper pattern (when printing PDFs, always make sure that the “actual size” option is selected in the print settings).
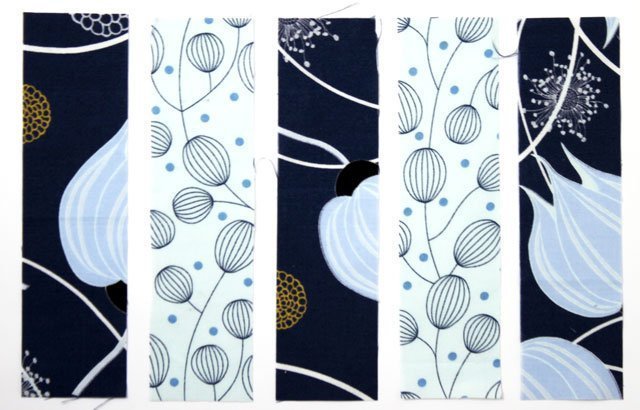
Two blocks, made from the same fabrics, are sewn at the same time. For this, choose two contrasting fabrics. And cut out
3 strips measuring 2″ x 7 ½” (fabric A)
2 strips measuring 2″ x 7 ½” (fabric B).
The FPP technique basically involves sewing onto the printed side of the paper with the fabric on the blank side (back) of the paper.
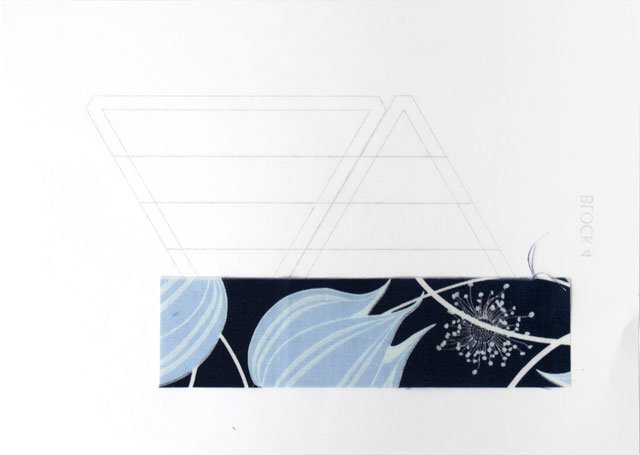
You start by placing a strip of fabric A with the right side on the blank side of the paper so that it completely covers the bottom row of the design, including the seam allowances (see photo). The easiest way to check this is by holding the paper up to the light.
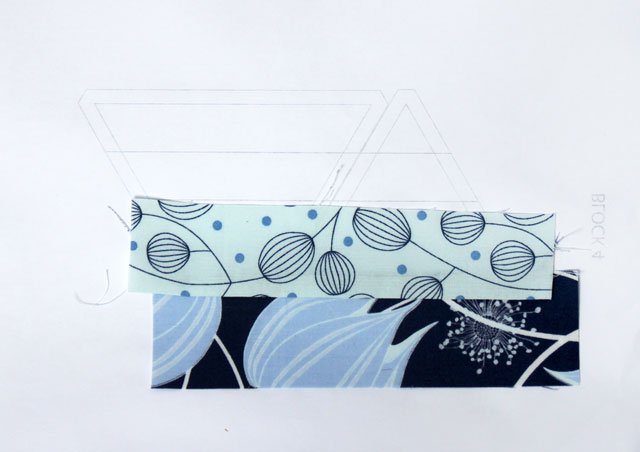
If the strip is correctly placed, place a strip of fabric B onto it with the right sides together. You have to imagine that this strip will be folded up after being sewn on and should then completely cover the two sloping sides of the pattern. You should therefore position it slightly offset to the side (see photo).

Pin it together securely (insert the pins perpendicular to the seam so that the needle does not break when you sew over them). Then sew on the printed side of the paper. I recommend a stitch length of 1.5 because the paper has to be torn off later and a fine perforation is an advantage.
Then fold the fabric B strip up and press.
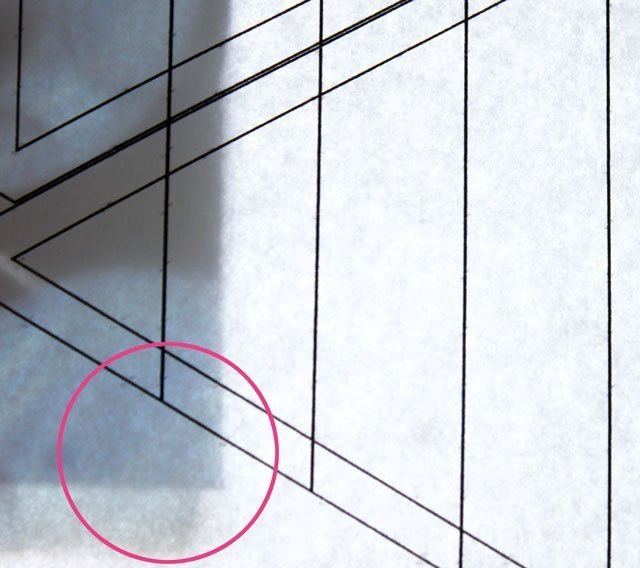
The paper is now folded back along the marked line (see photo), and the excess seam allowance is cut to ¼”.
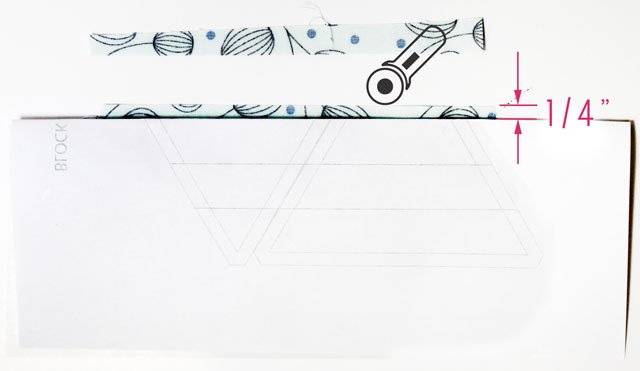
You can then lay the paper back down normally and the precisely cut edge of fabric B gives you an exact guideline of where to place the next strip A, with the right sides together, edges matching, and slightly offset to the side as described for the second strip.
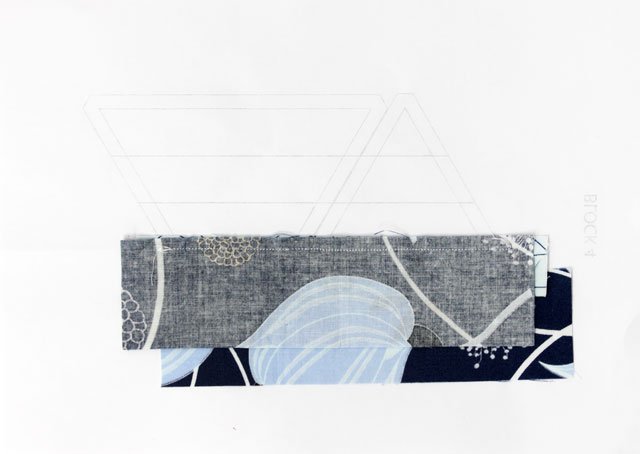
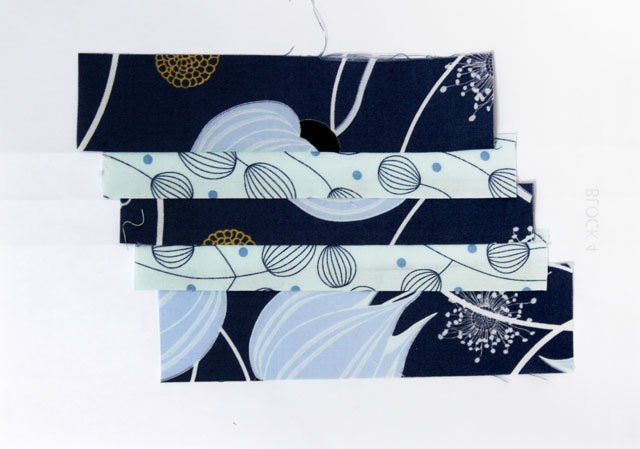
Pin the next strip securely, sew on from the printed side, fold, press, cut the seam allowances, etc. until you have sewn all 5 strips.
You then cut out the triangle shapes precisely (with shortened corners), tear the paper off, and you have the first two finished triangles.
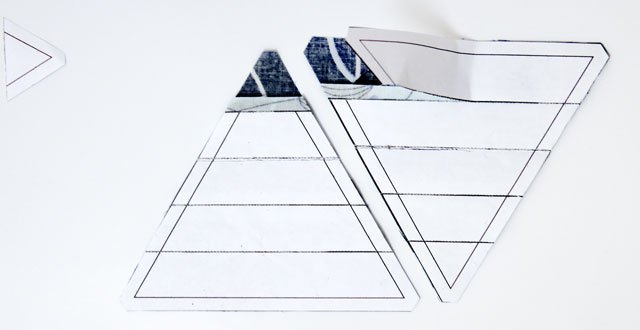
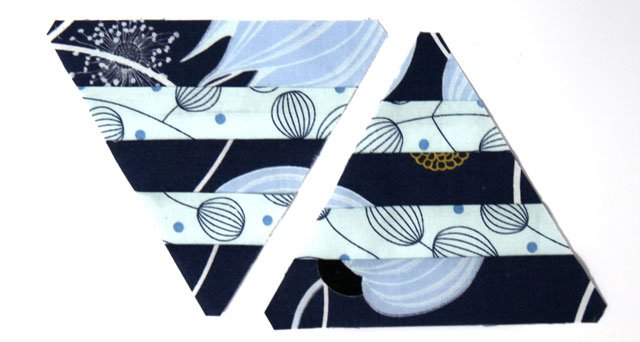
We need a total of 4 of these triangles.
I am already looking forward to seeing your blocks in the community or on Instagram.


0 Responses