 BERNINA Corporate Blog -
It amazes me to see all the wonderful Crazy Blocks you are making: creative and always surprising. Either with a lot of decorative stitches, or just a couple of rows, using the clues and directions of the block itself, or making your own plan, everything looks great – because you are making something unique. You don’t need to work with batiks to make your work slightly different from someone elses, we don’t all use the same machine, but that’s the idea behind it all!
With this months block – number 6 already! – you will work with something special: piping ribbon – either ready-made and bought in a store, or made by yourself (there will be directions for both), so this block will be different from the otheres too.
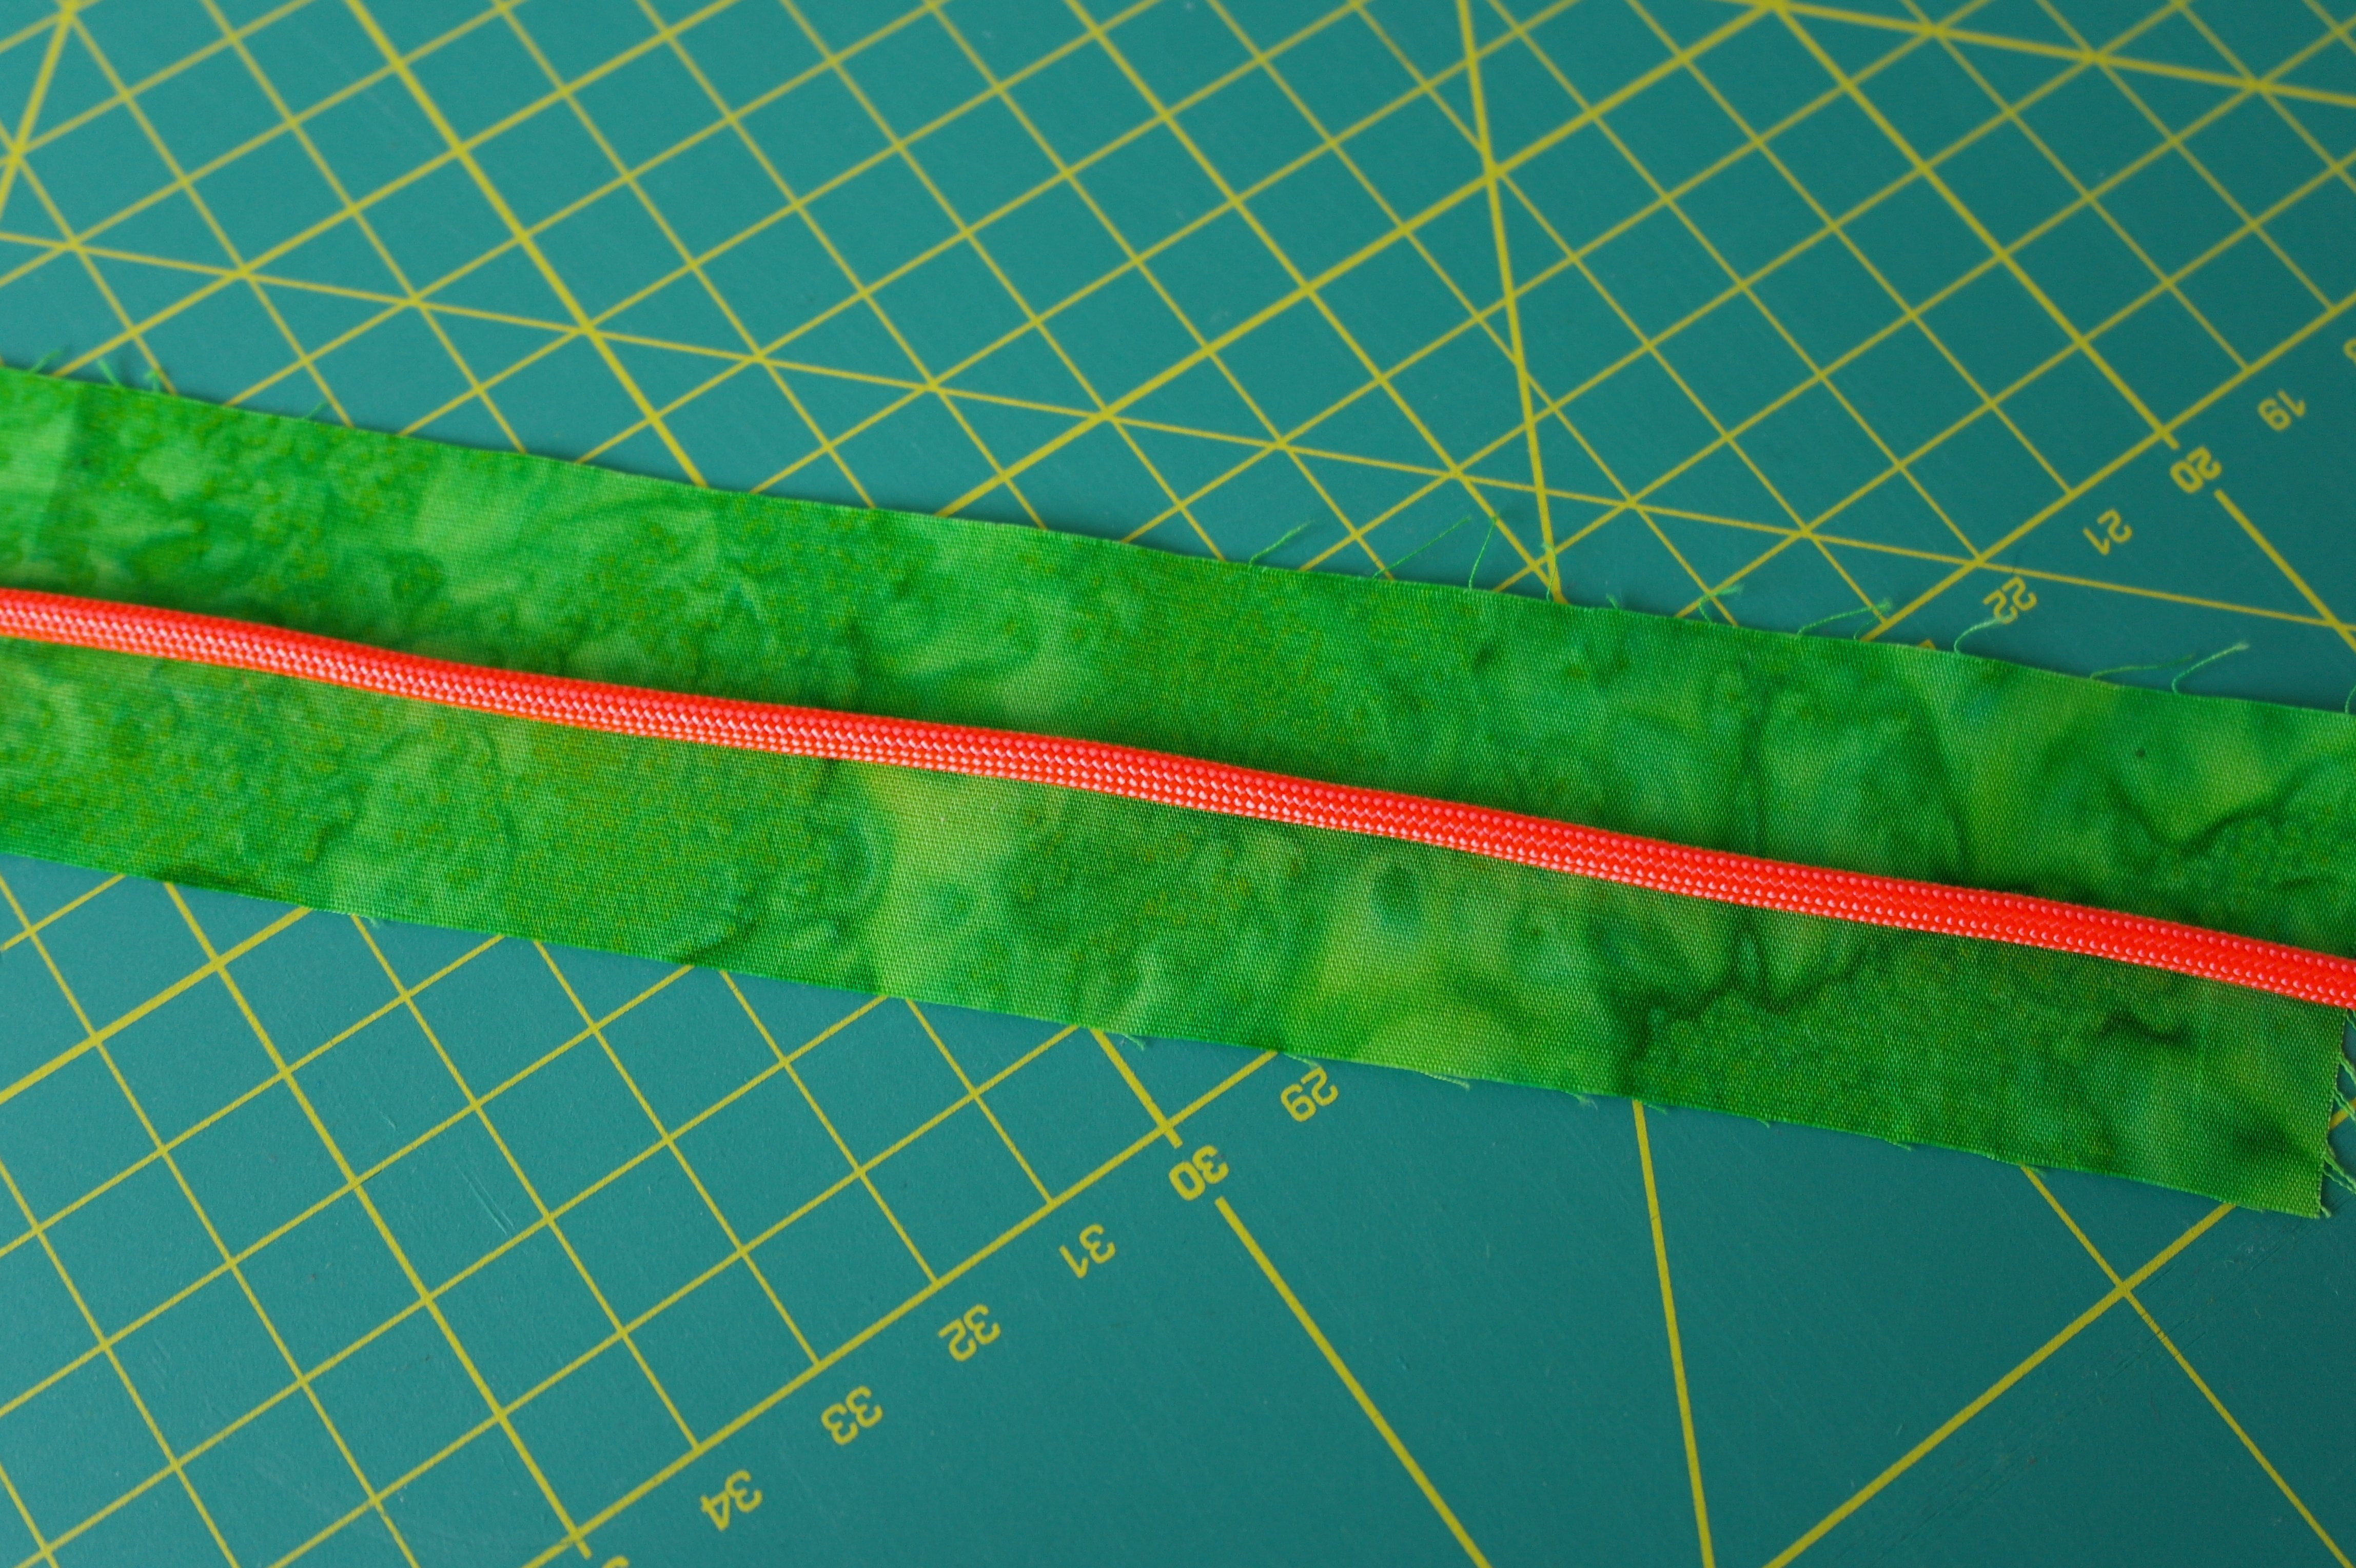
Piping ribbon is a strip of fabric, folded over a cord. The thickness of the cord will be visible after sewing the ribbon between the fabrics of this Crazy project. Piping ribbon is available in many colors: I have bought neon piping ribbon with two diagonal colors on top, and love the appearence of these bright colors.
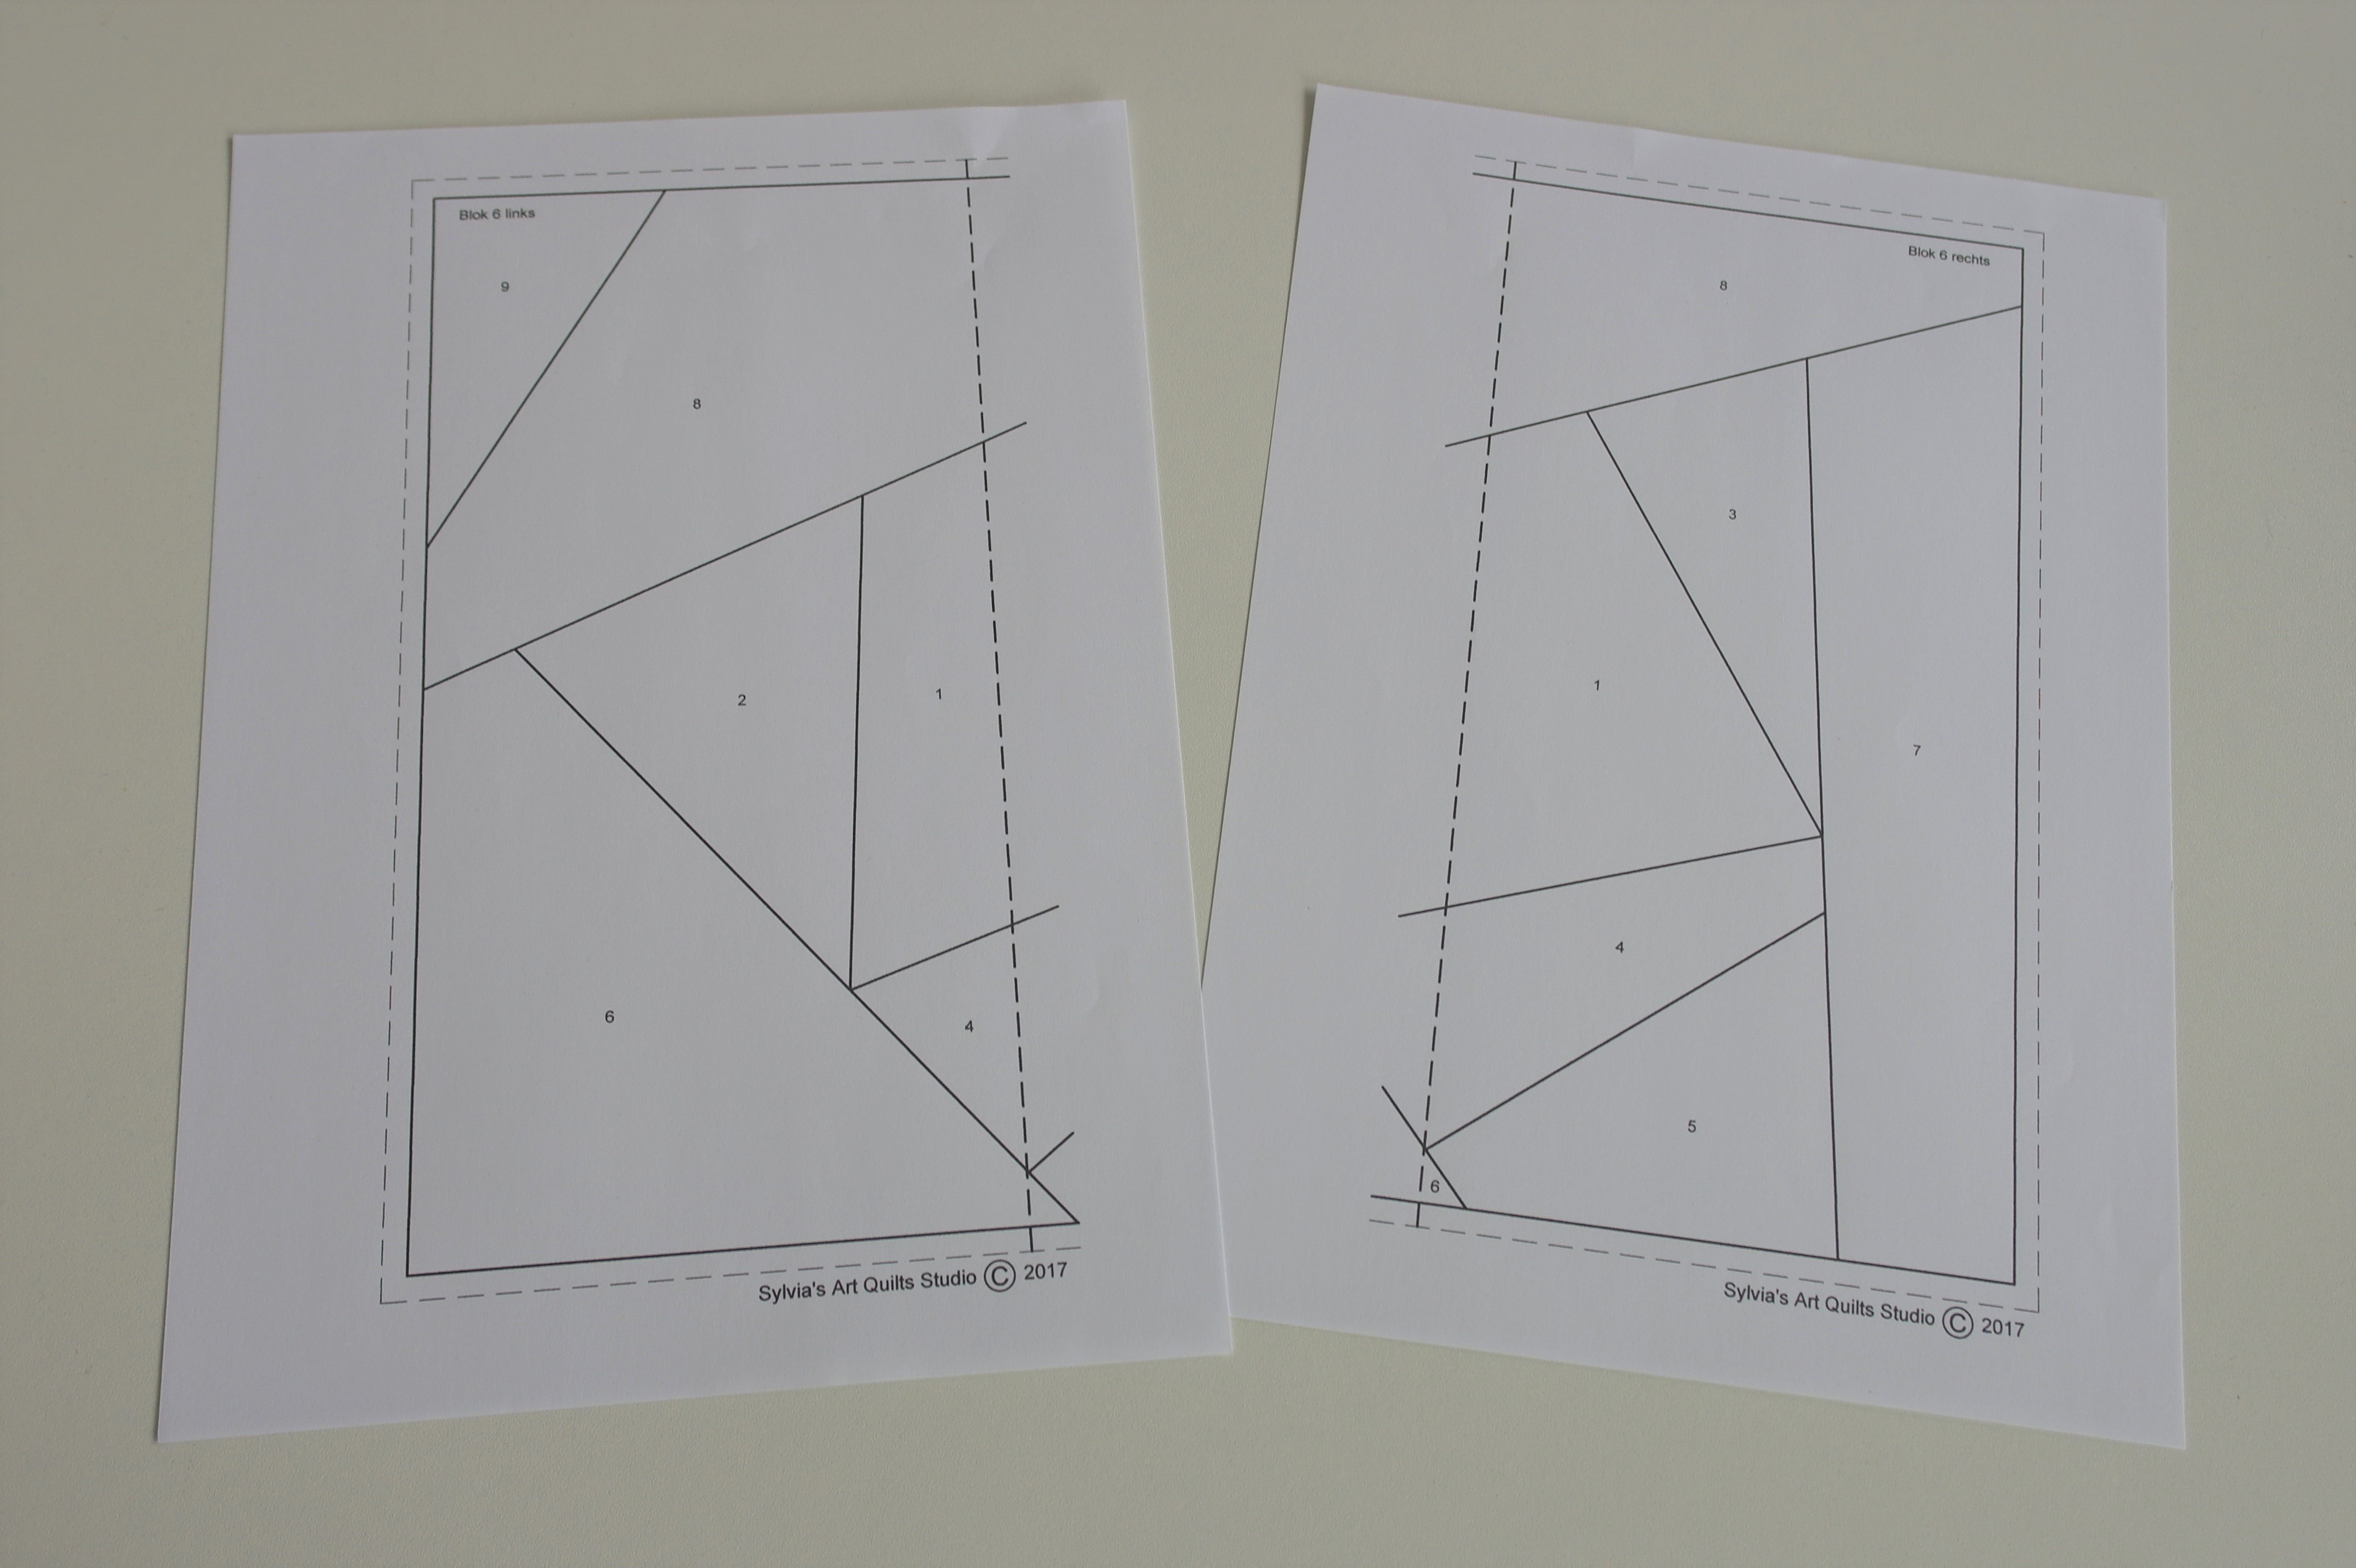
But first you can download the patterns for block no. 6 in two parts: HERE is the left part of the pattern, and HERE is the right part of the pattern. Cut one part on the dotted line, and tape them together to make one full pattern for block 6.
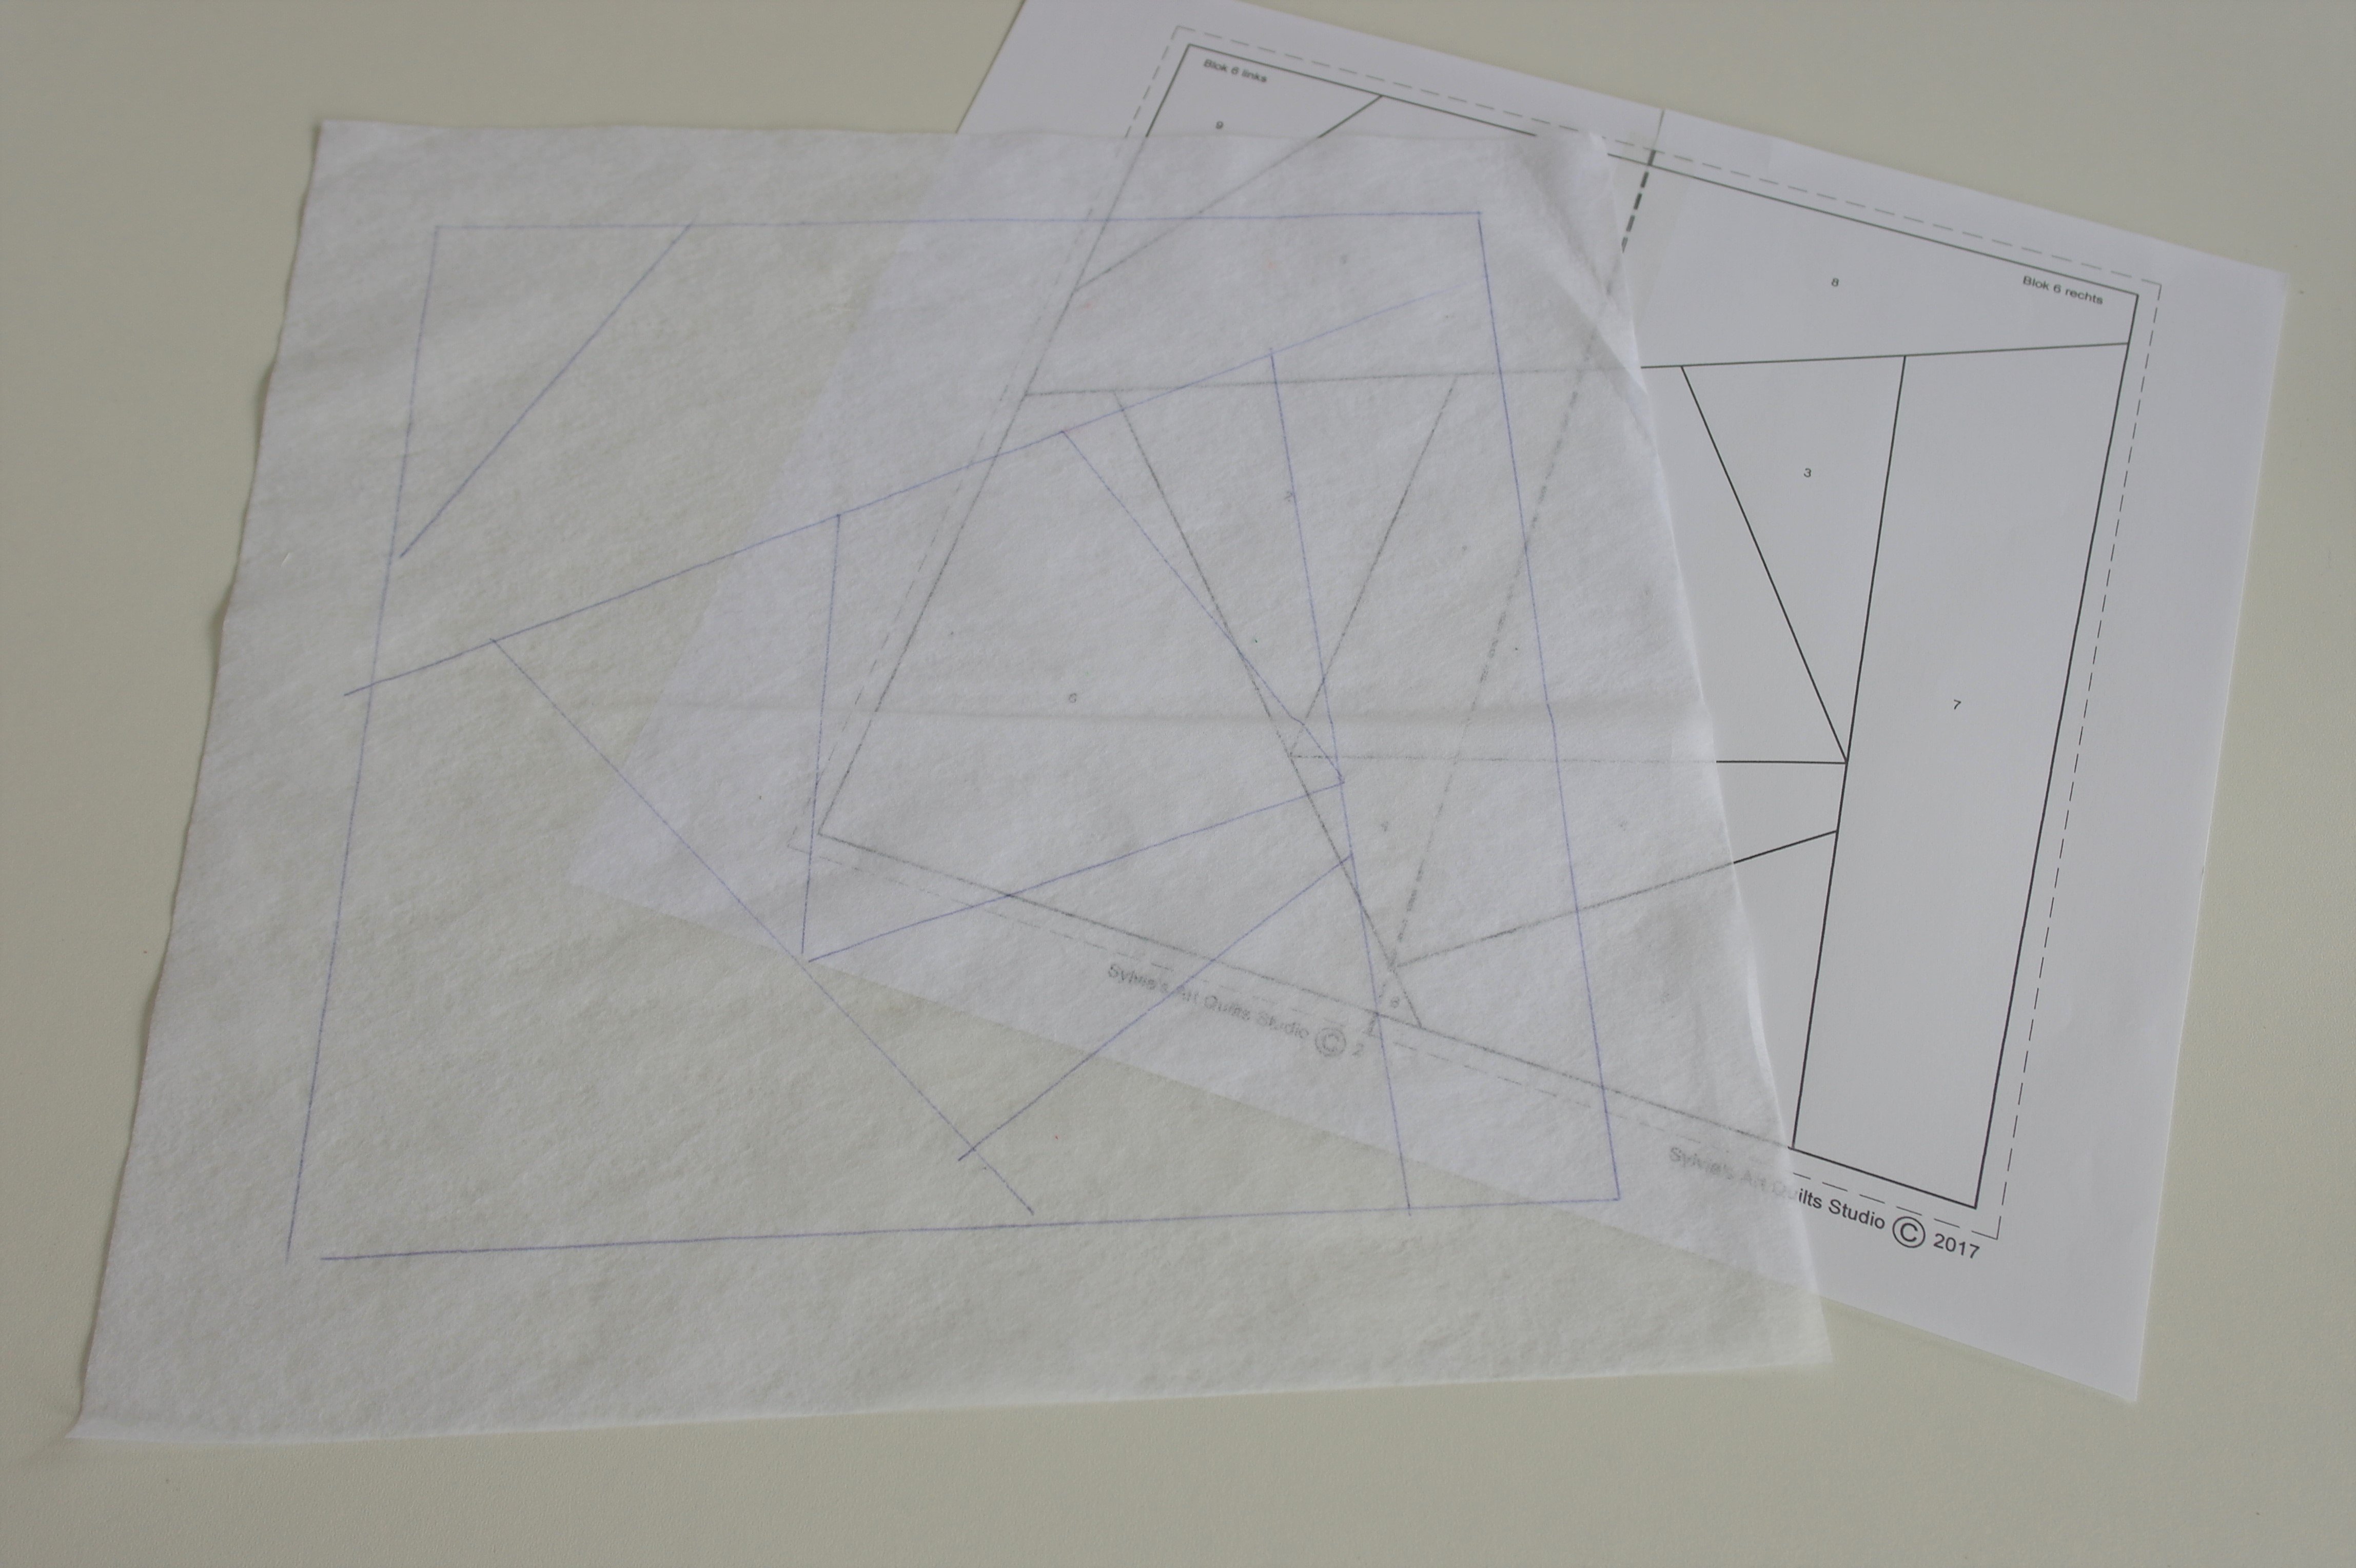
Place the Vlieseline L11 (32x32cm) on top of the full pattern. Draw the outside lines of the square and all the lines of the sections inside the square, like you have done with the other blocks.
Make the sandwich, using off-white backing, batting and the Vlieseline L11, pin it down with Flower Pins. As you can see there are 9 fabrics to be used on top this time: because I have 8 fabrics, I will repeat one color.

The first fabric is pinned down – a red batik this time. I will look at my previous blocks to see what fabric colors I have started these, and take a different color for the next block, to change the appearence of color. I don’t want to have the same sequence of colors every time, but that is entirely up to you.
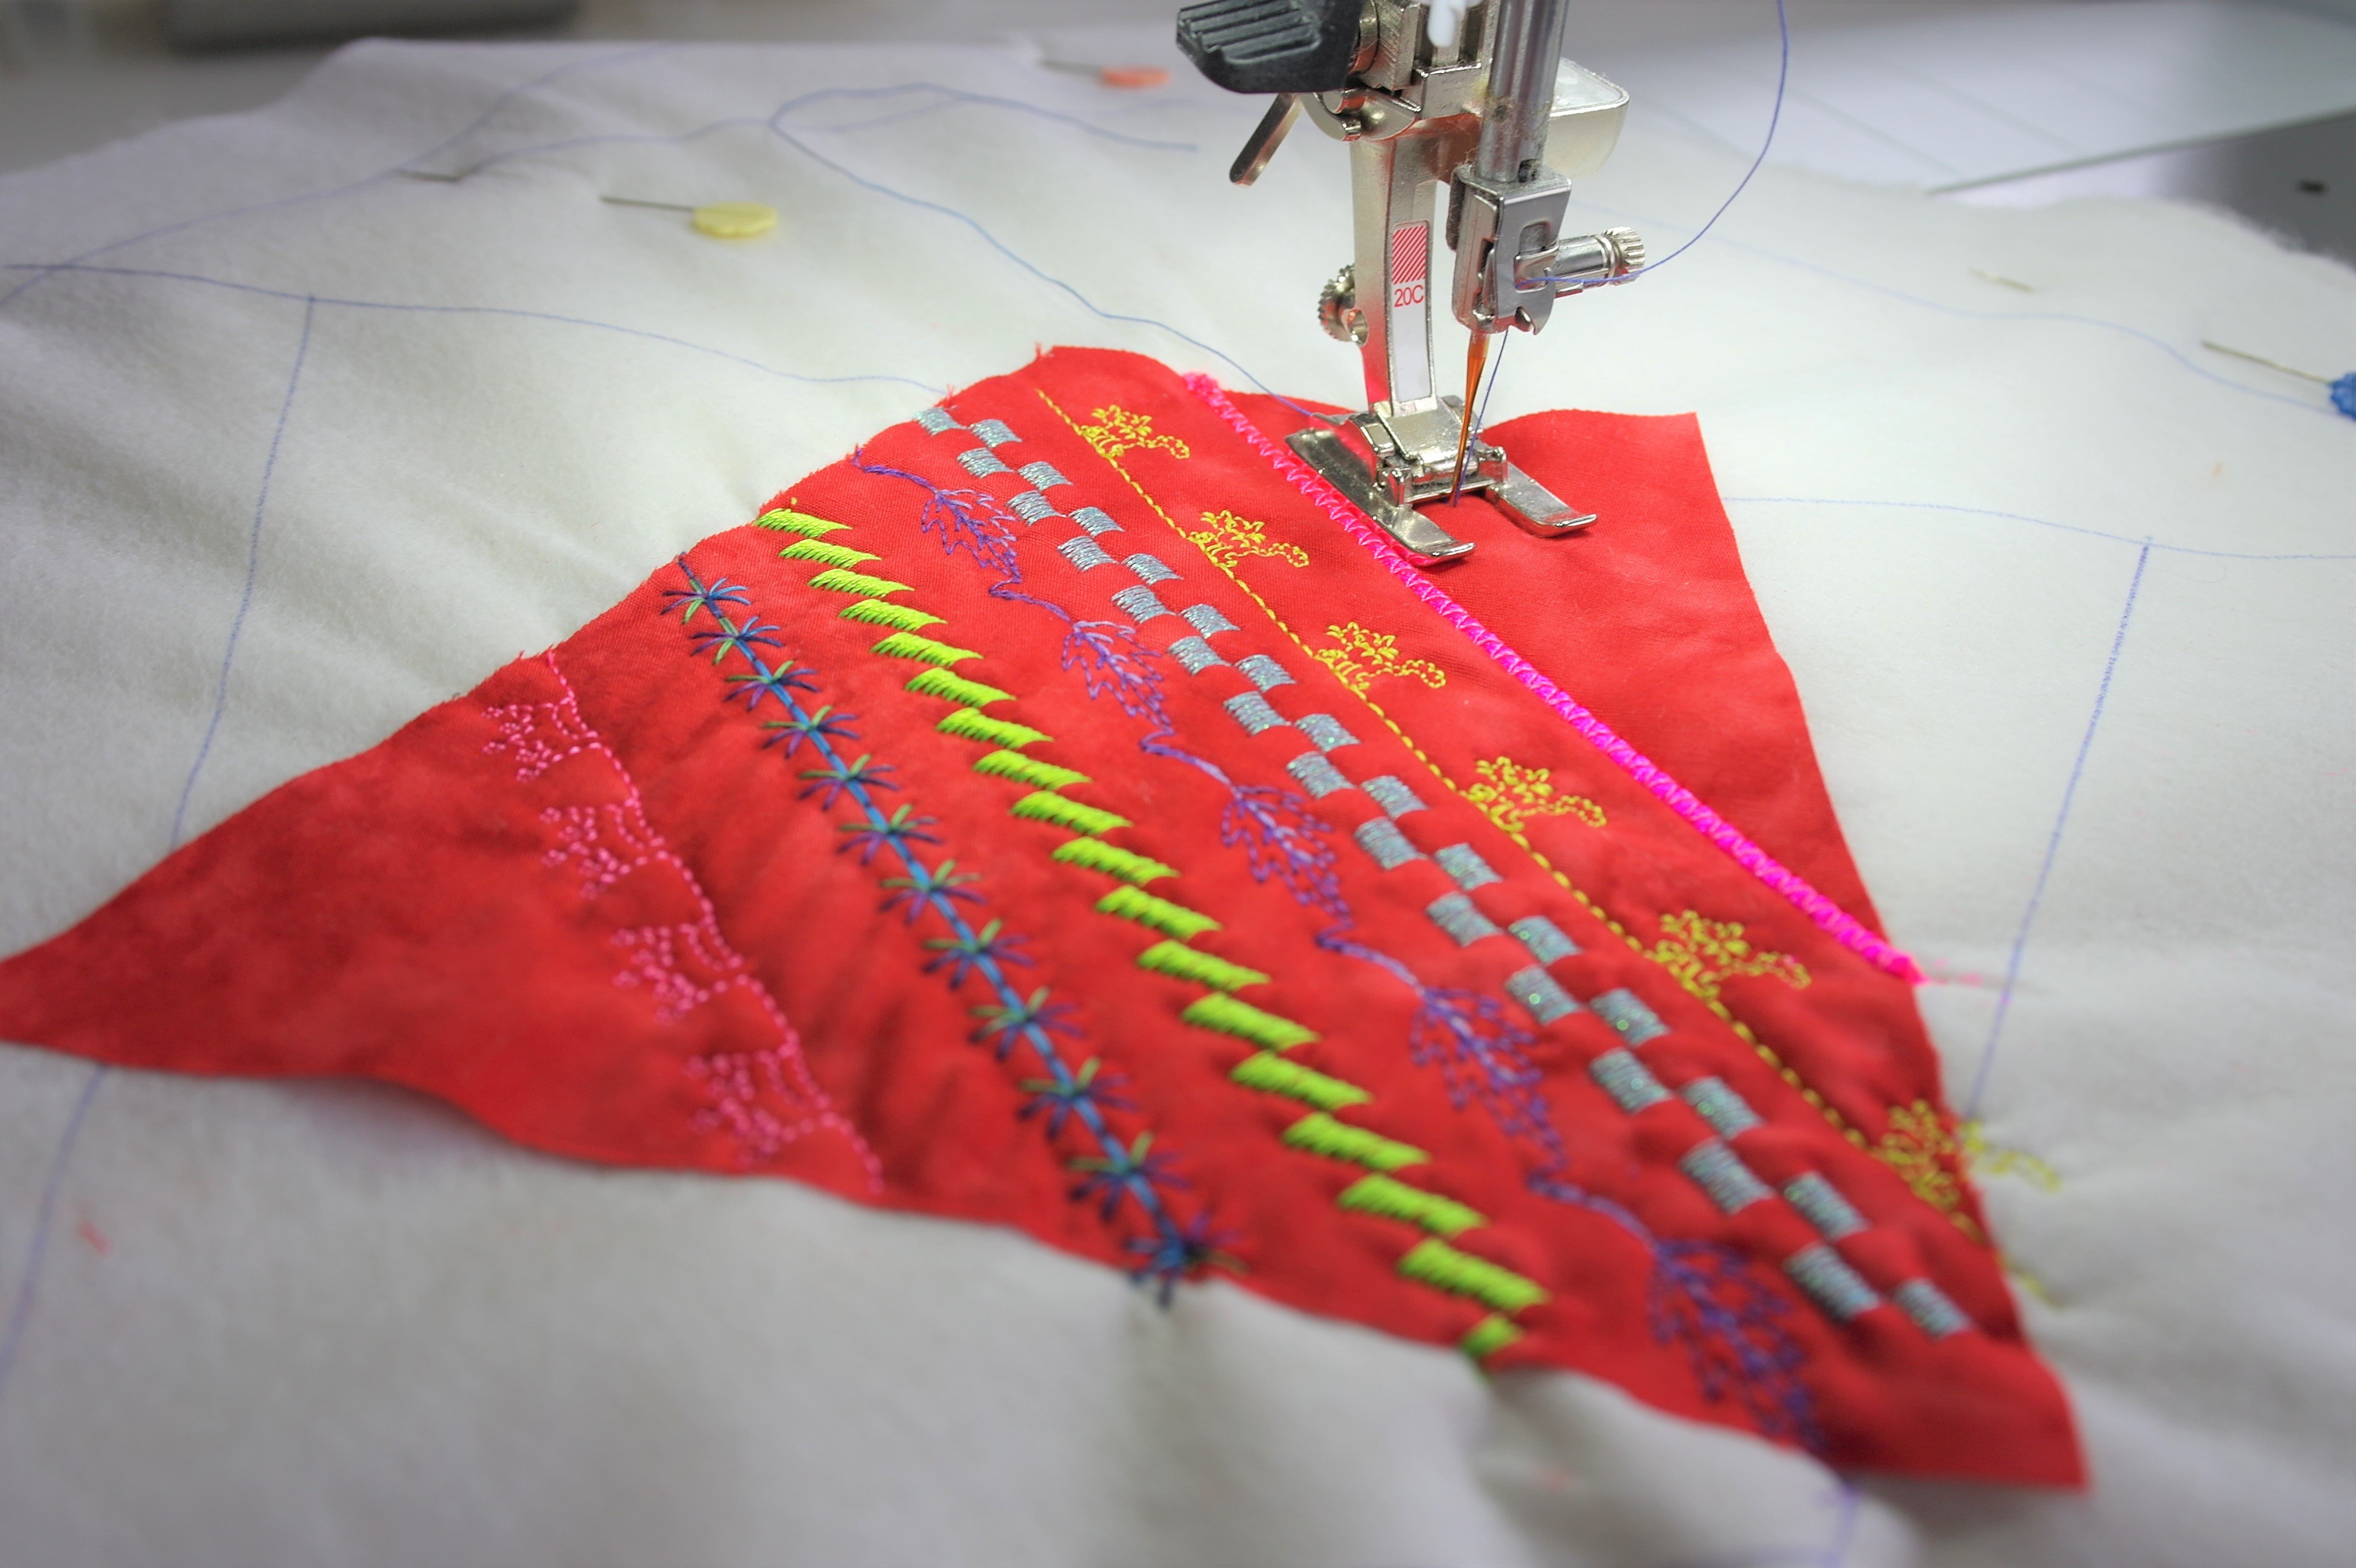
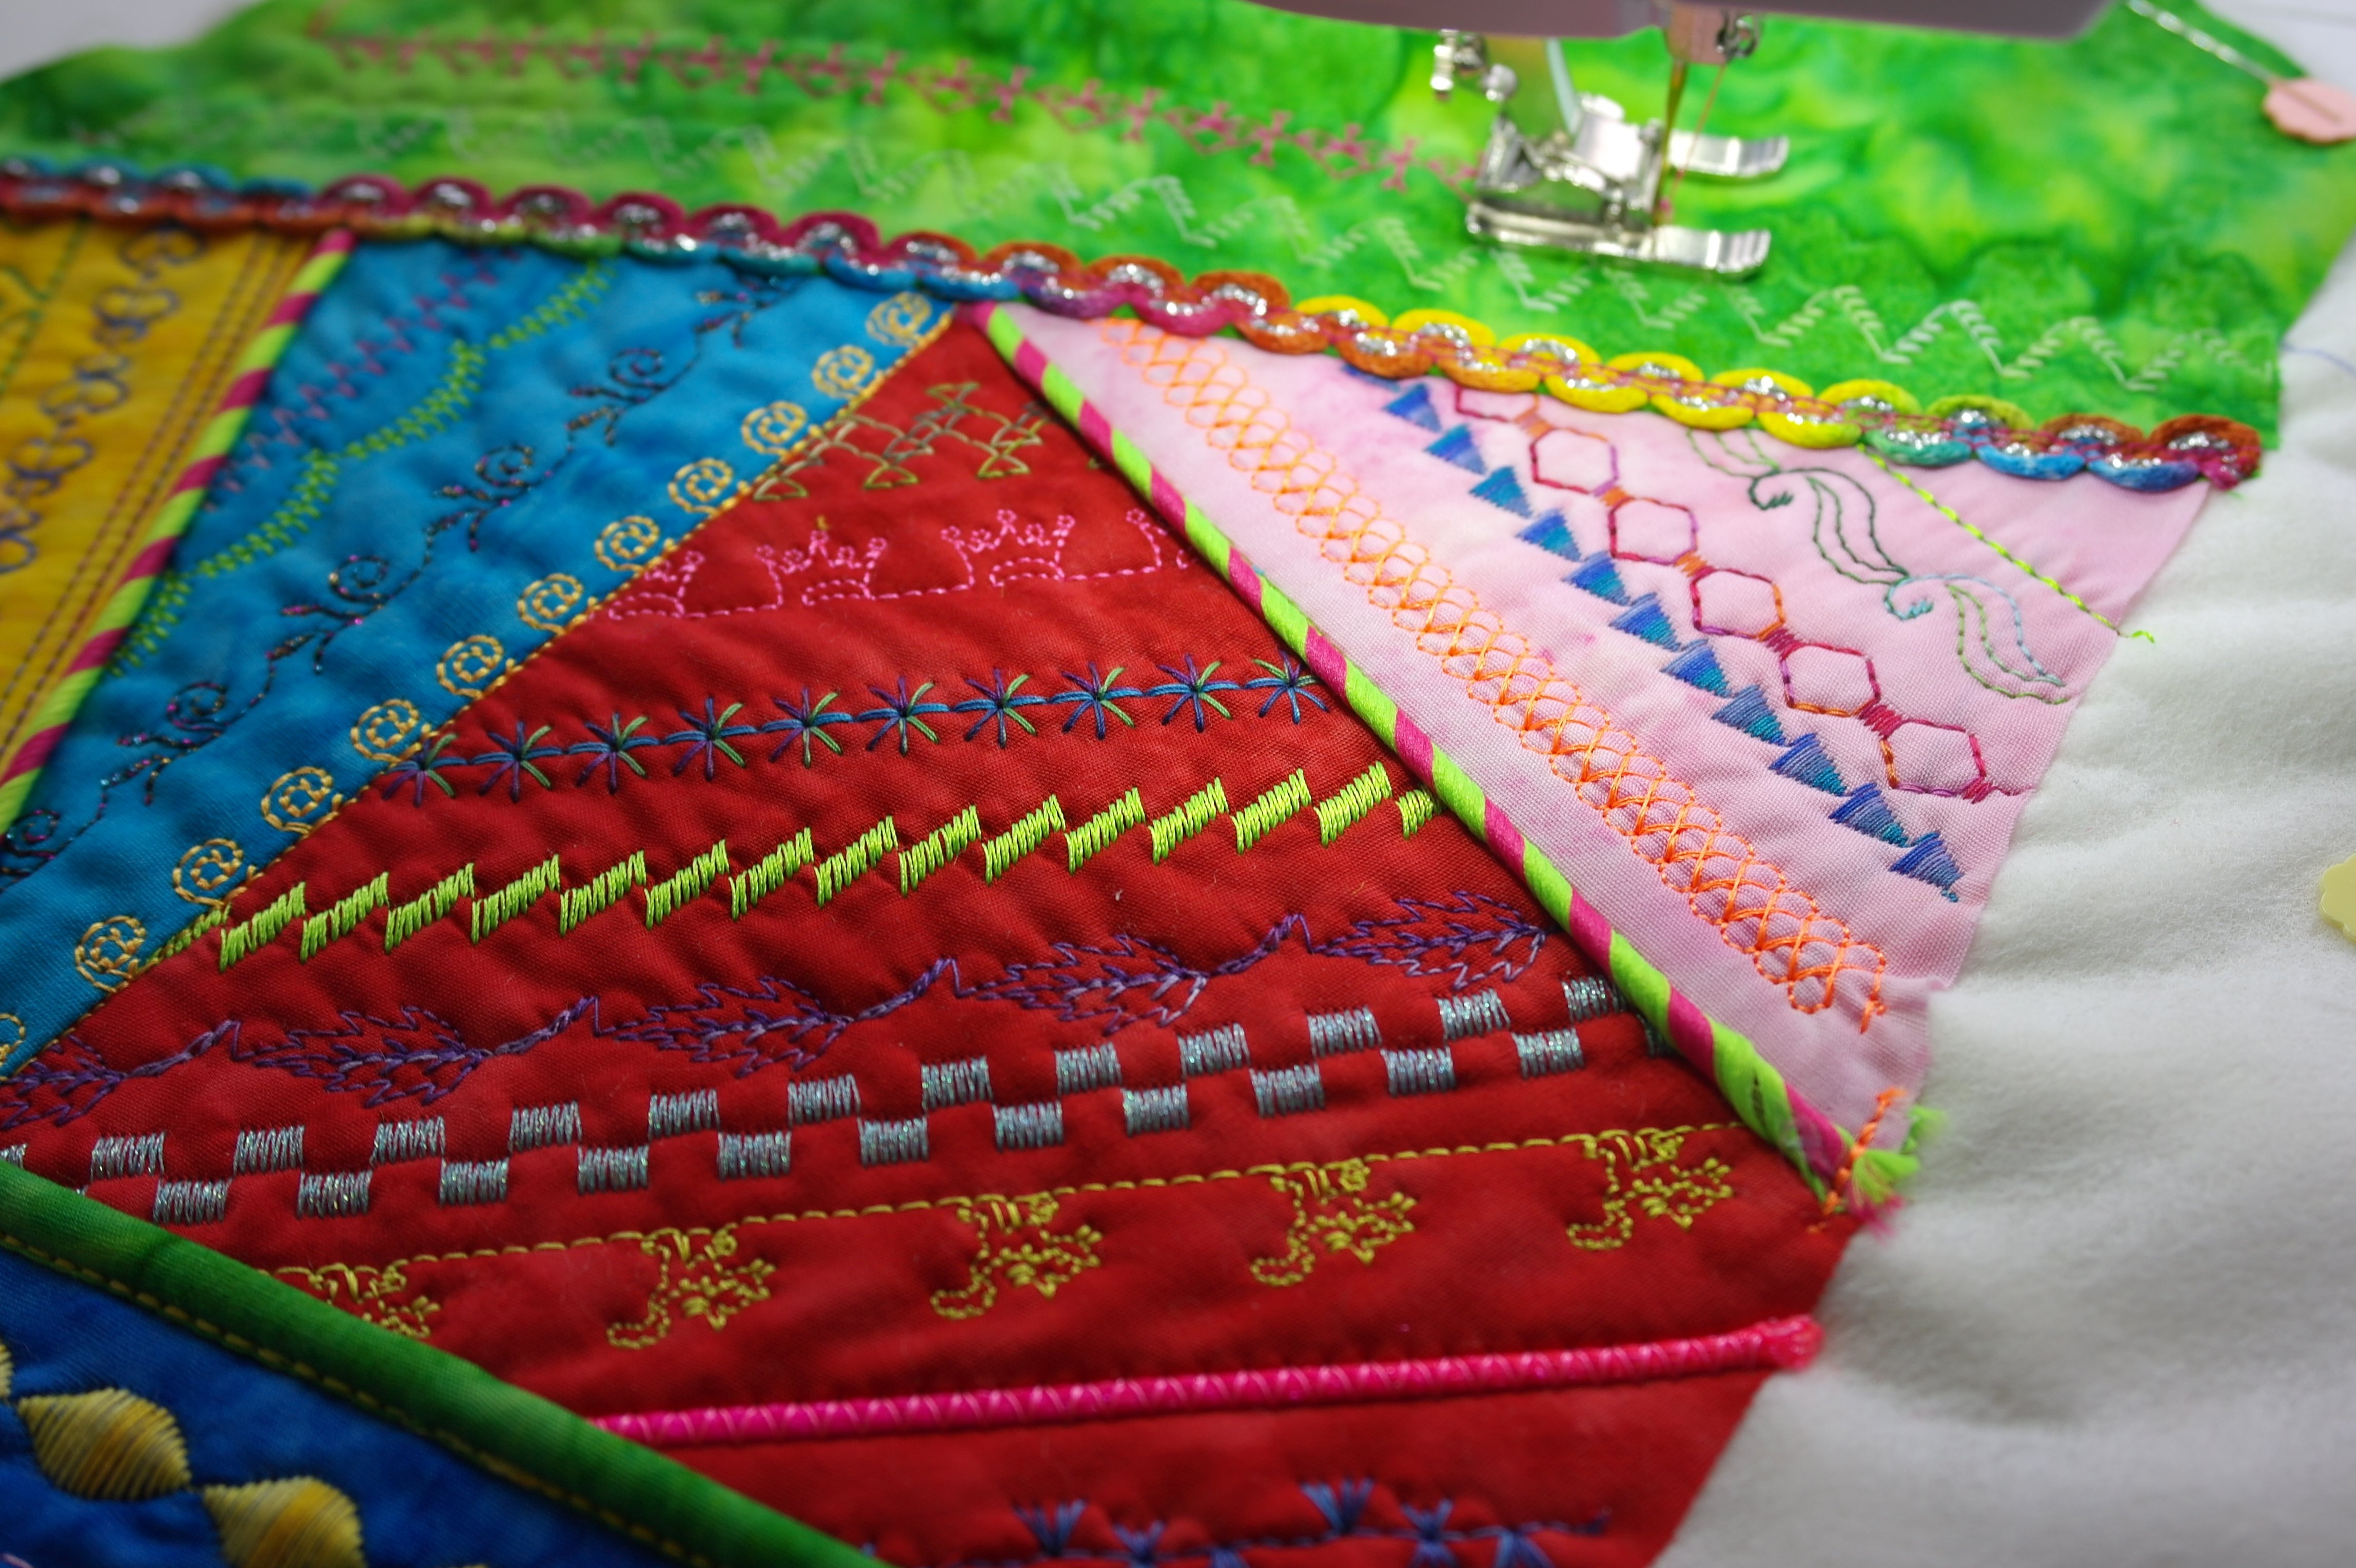
It is important to place the rows of decorative stitches diagonal on this first batik/fabric: this way you will have long rows. It is also to make the appearance interesting. If all rows of the next fabrics were placed in the same direction, the effect would not be as bold. I’ve made the decorative stitches with the Open embroidery foot #20C and the small cord with Braiding foot #21.

And then the special effect of piping ribbon: at first I will work with ready-made piping ribbon – I have used Zipper foot #4D with dual transport .
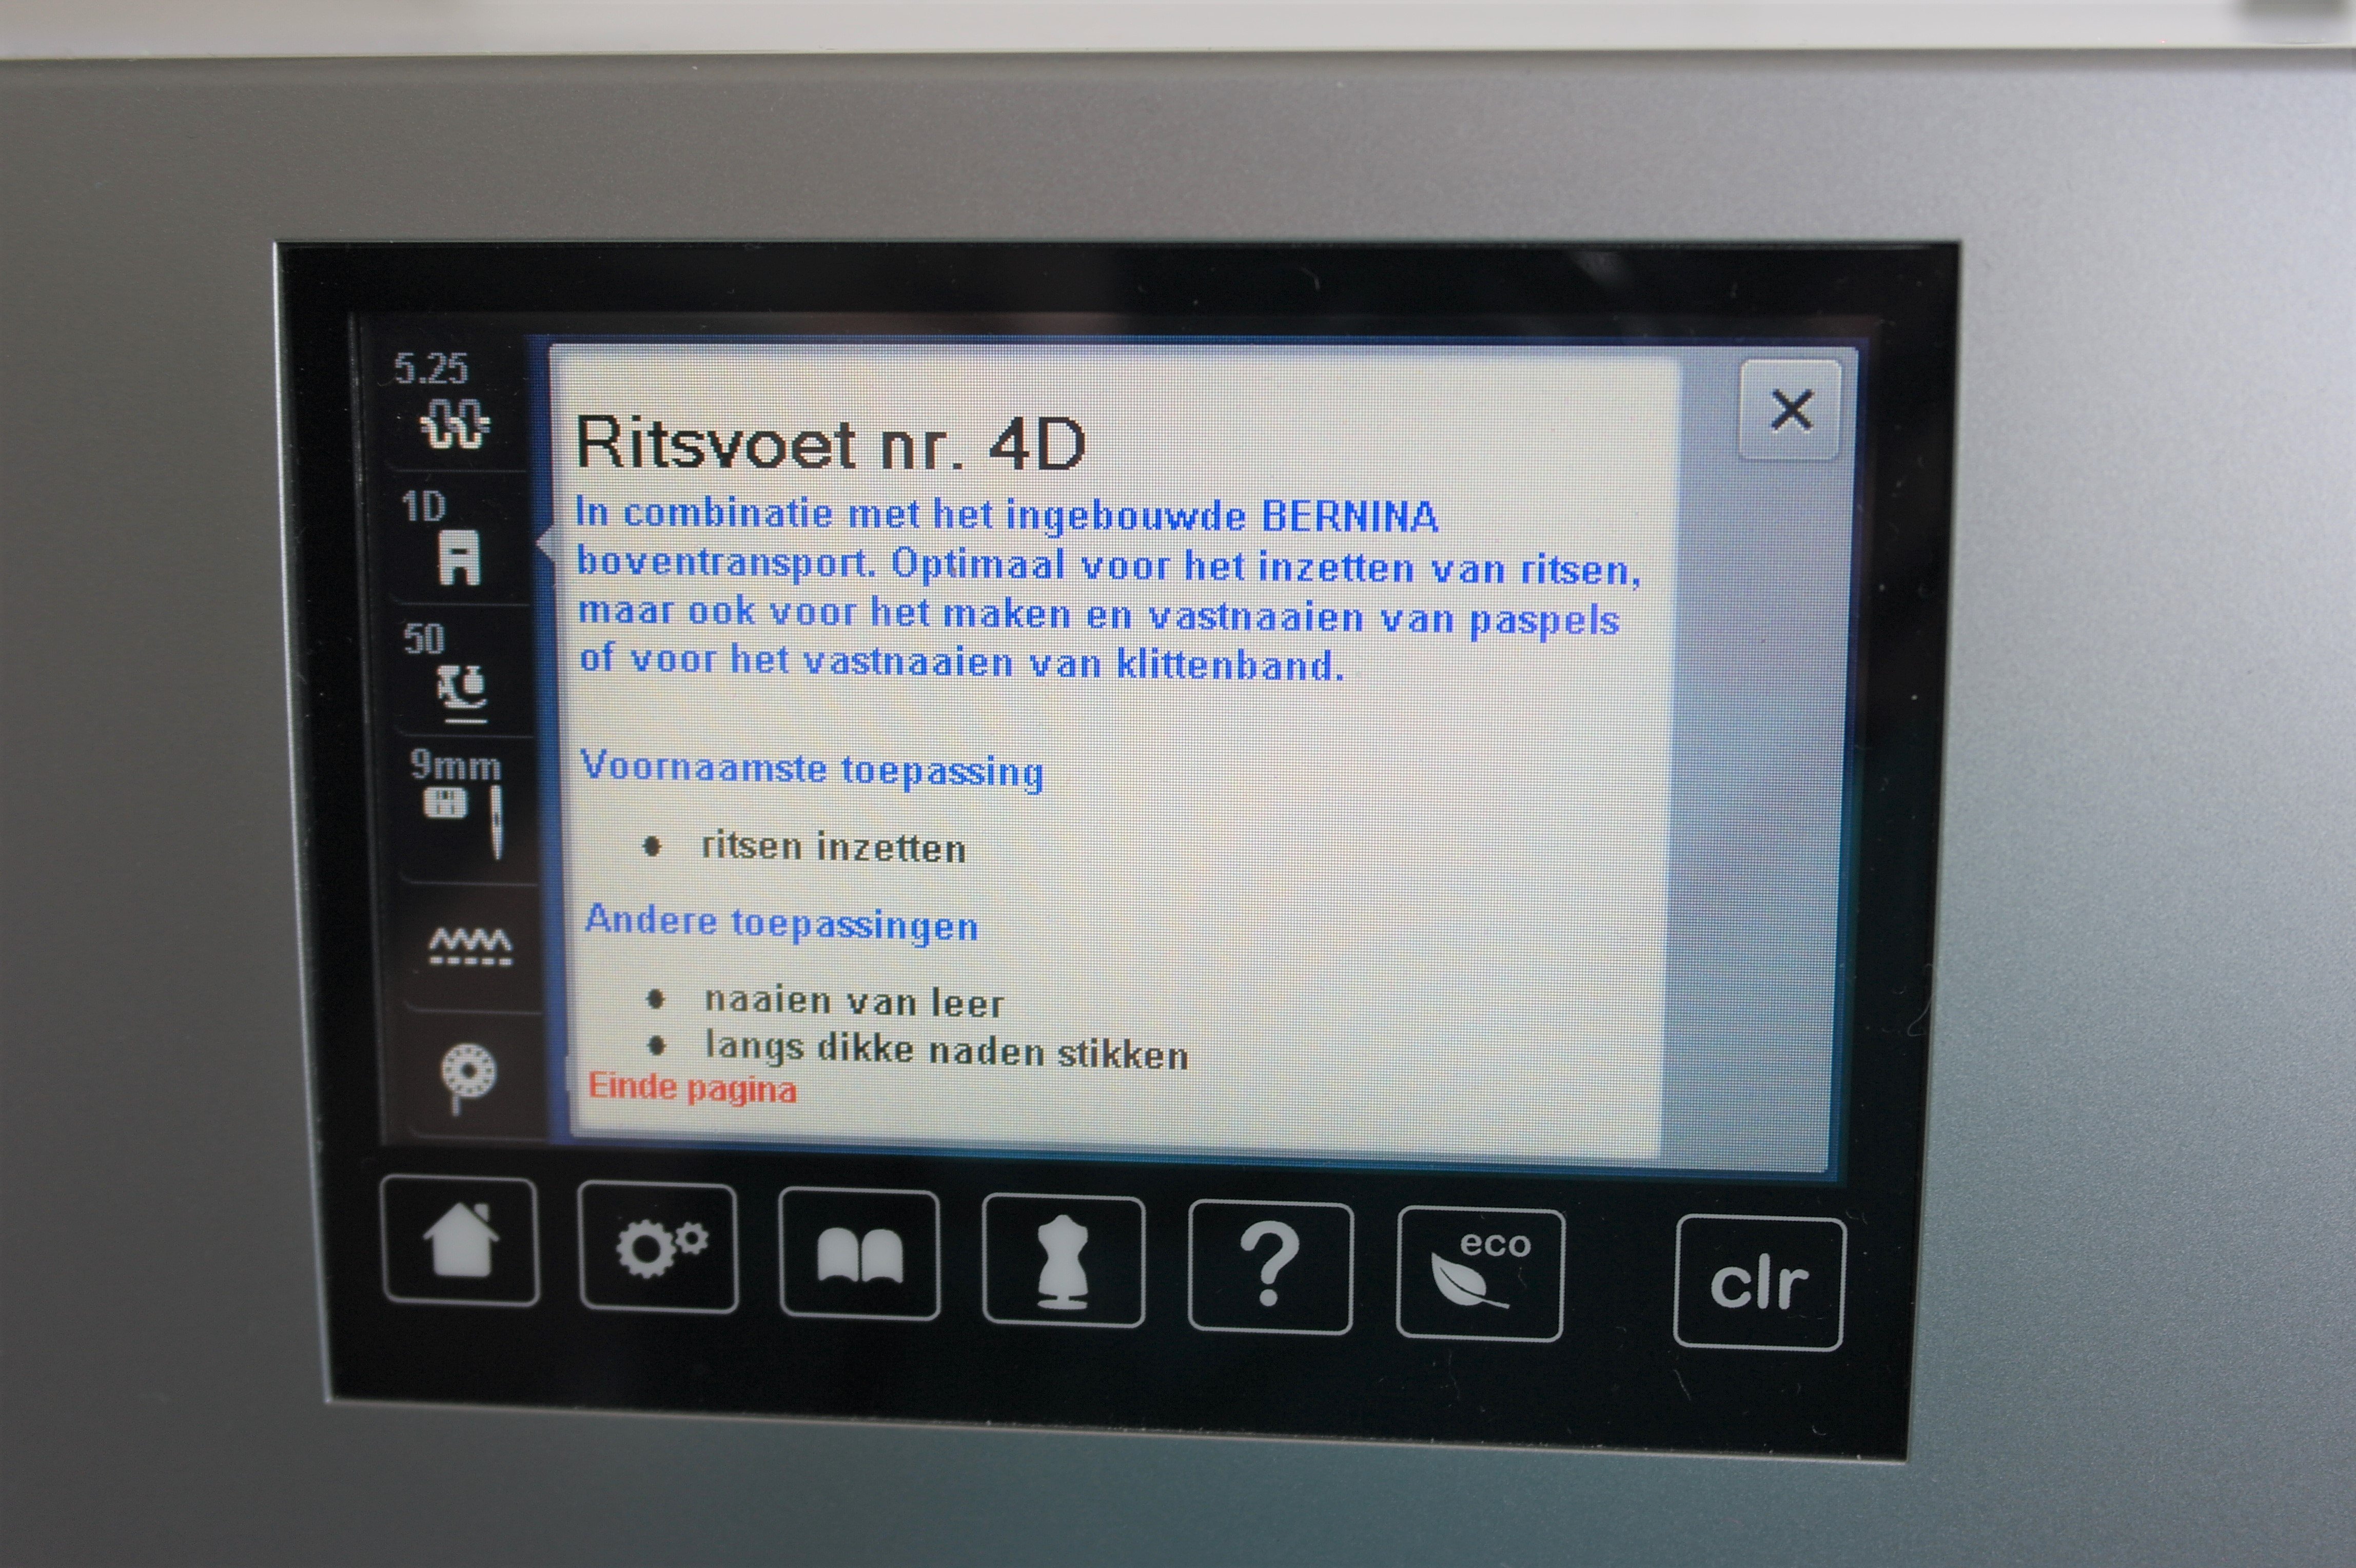
I’ve clicked on the presser foot on the left of my screen of the 770QE, but the only thing that happened was getting information about the foot itself. With this machine I cannot select such a presser foot (but with some machines you cán, and the new presser foot will appear on your screen). Always try if a special presser foot can be selected.
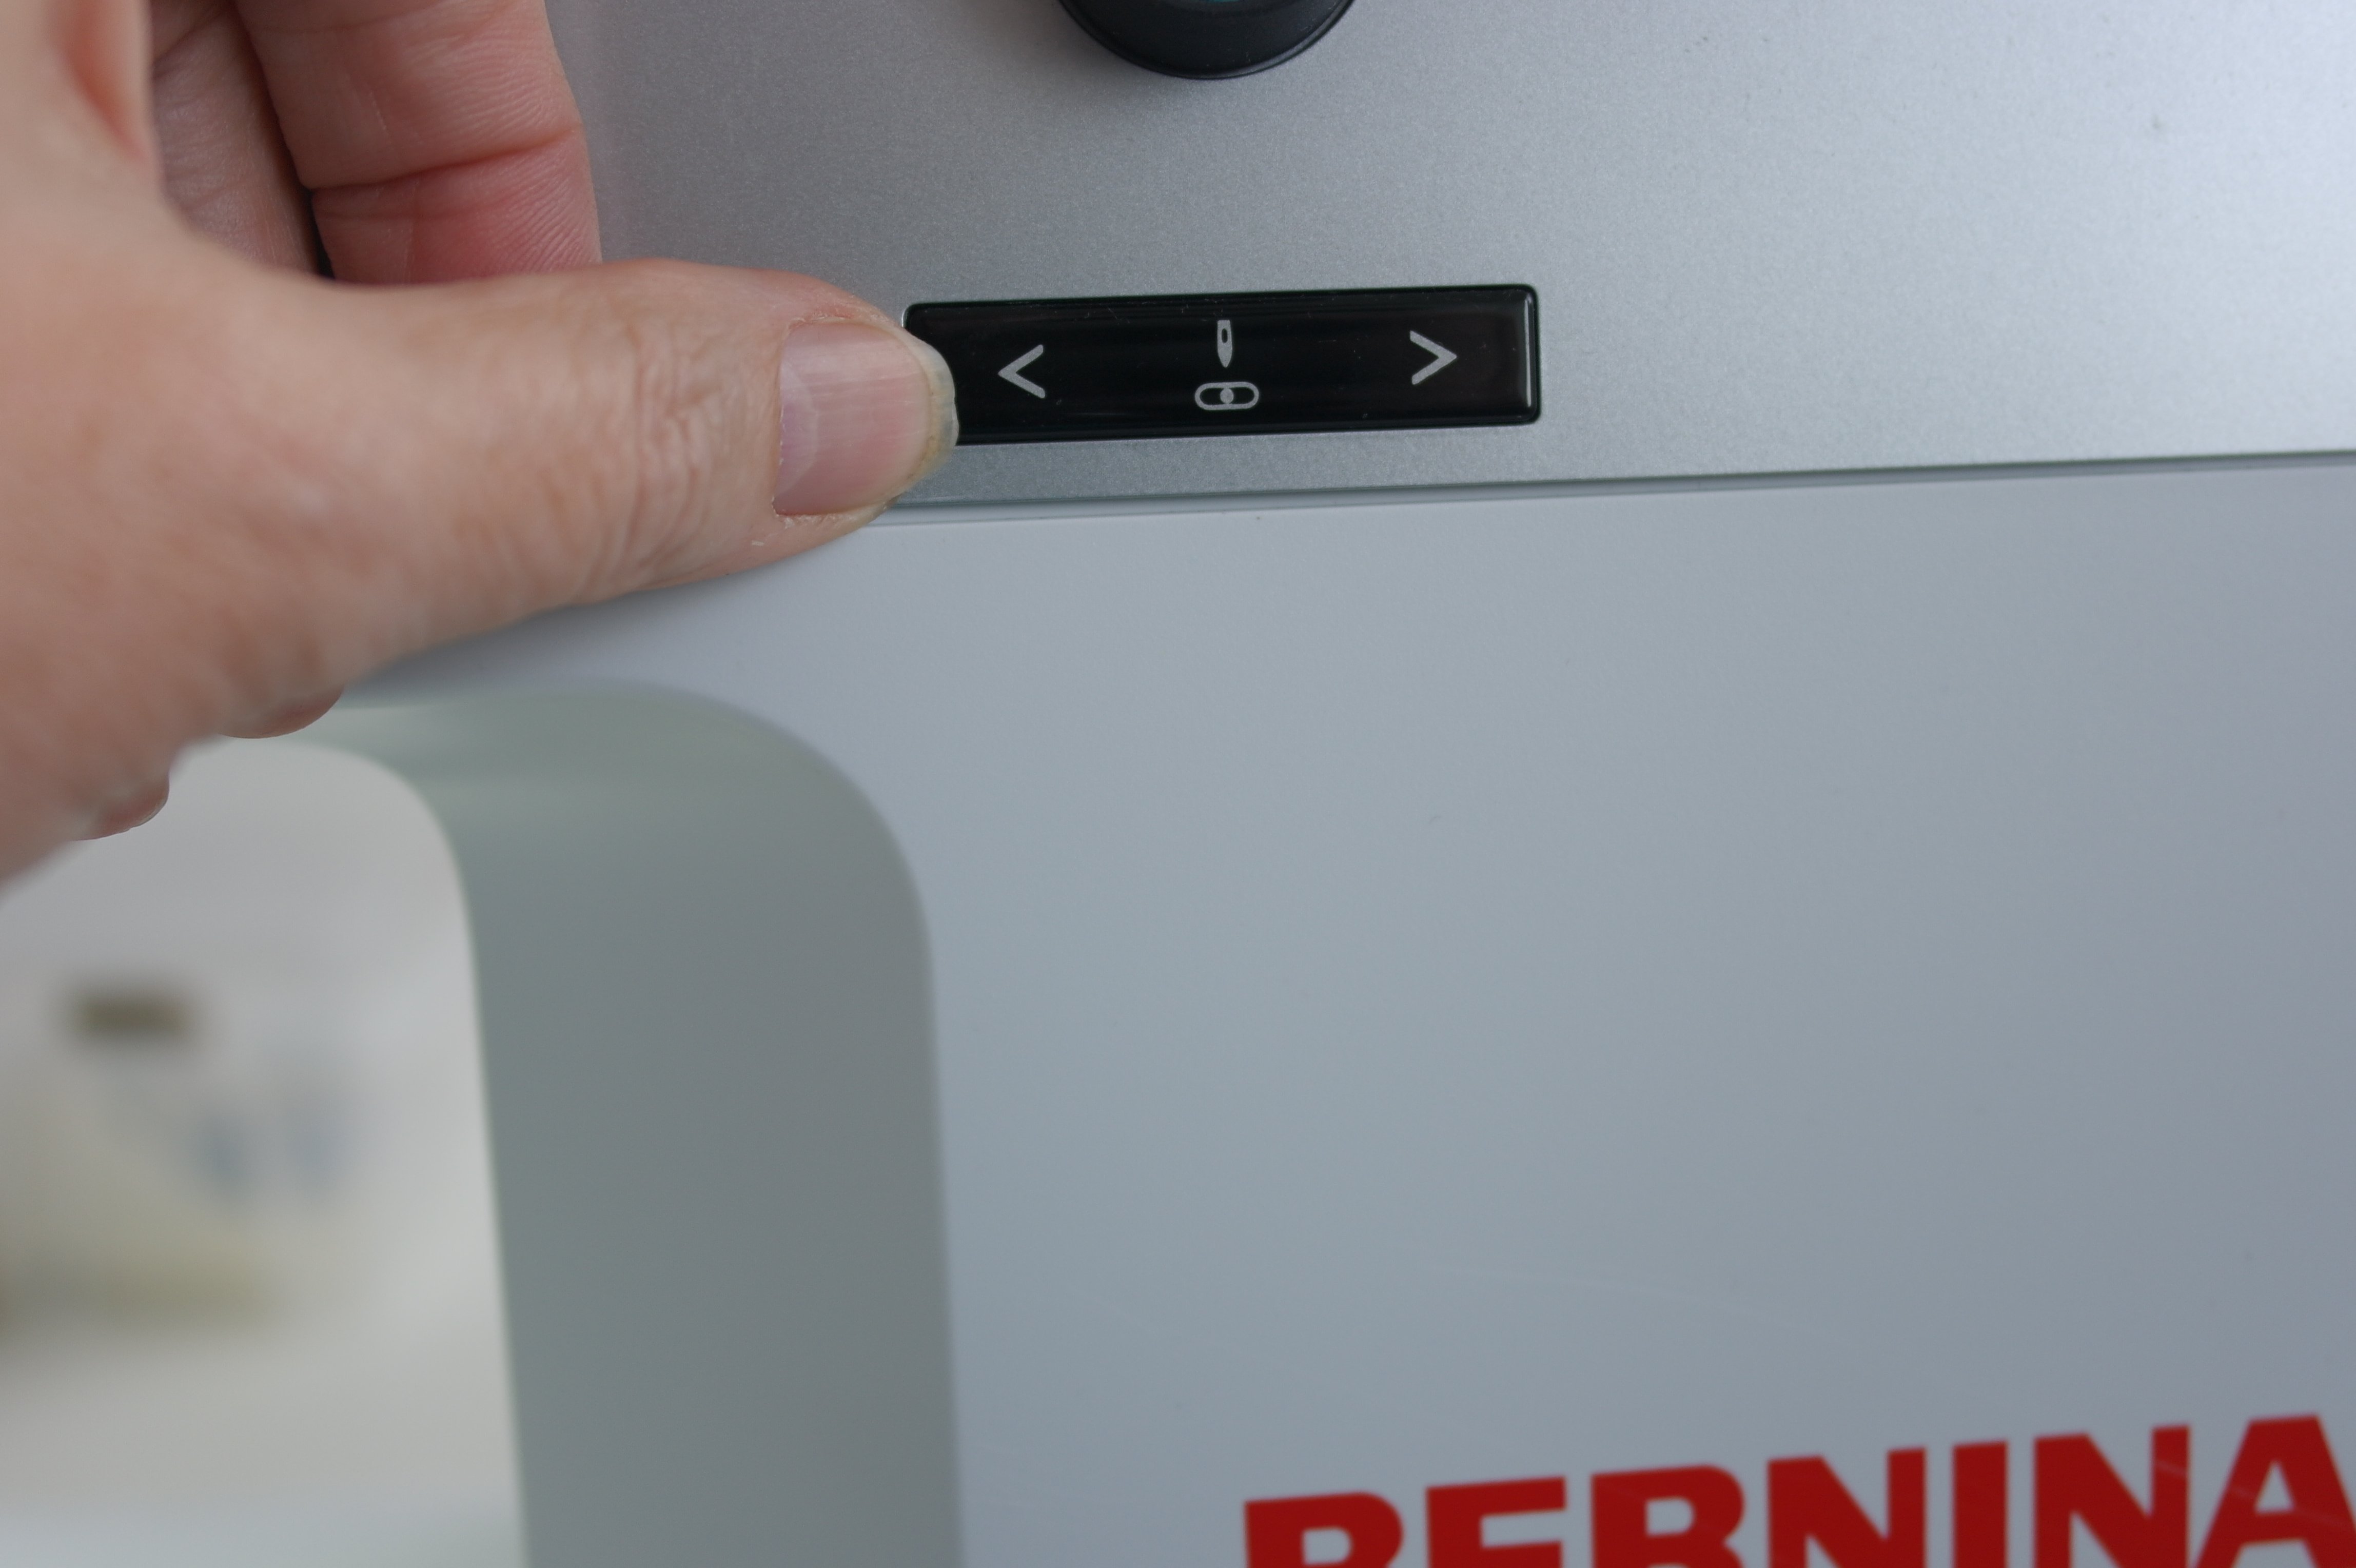
After that I have placed the needle position to the far LEFT (the button can be found on the right side of the machine), to make sure the needle comes up and goes down via the left opening of the zipper foot. If you don’t place the needle position to the left, the needle will break in the middle of the foot. Some machines will warn you before that will happen, buy not all.. so pay attention! If you like to work on the other side, place the needle to the far RIGHT.
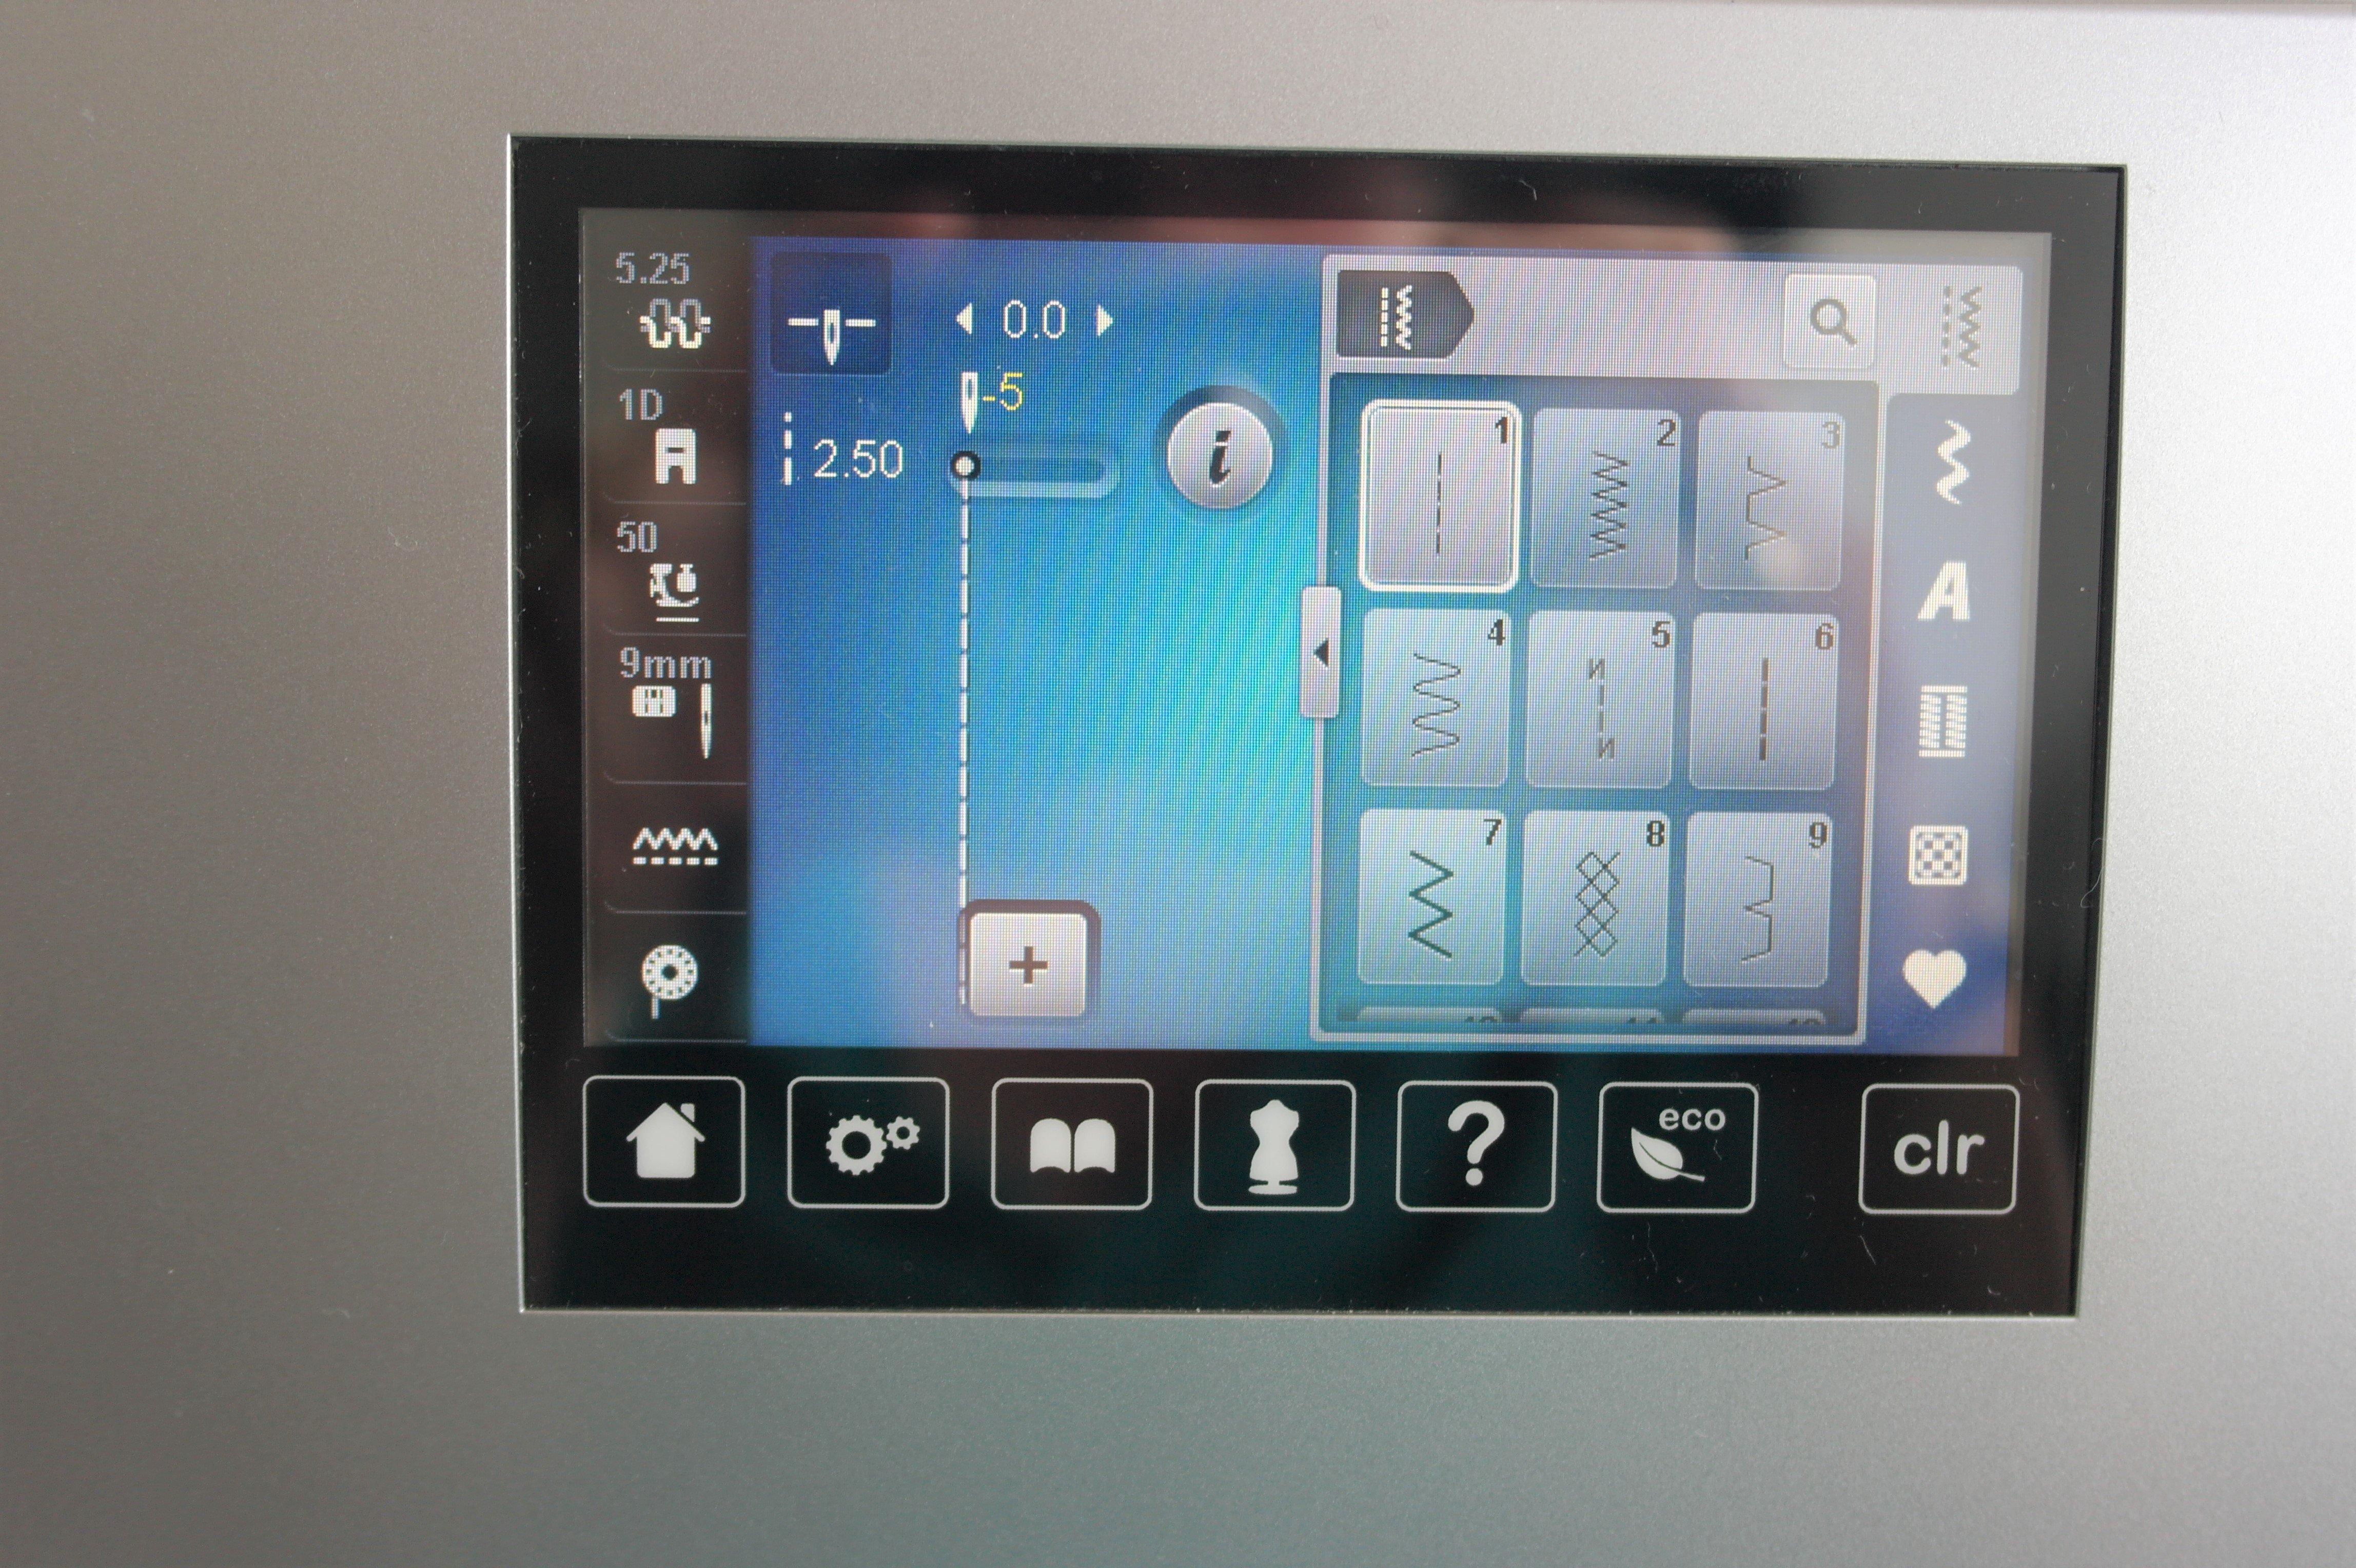
I had to push the botton multiple times, untill the needle position was far left, and the number on my screen says ‘-5’. This is the furthest position of the needle.
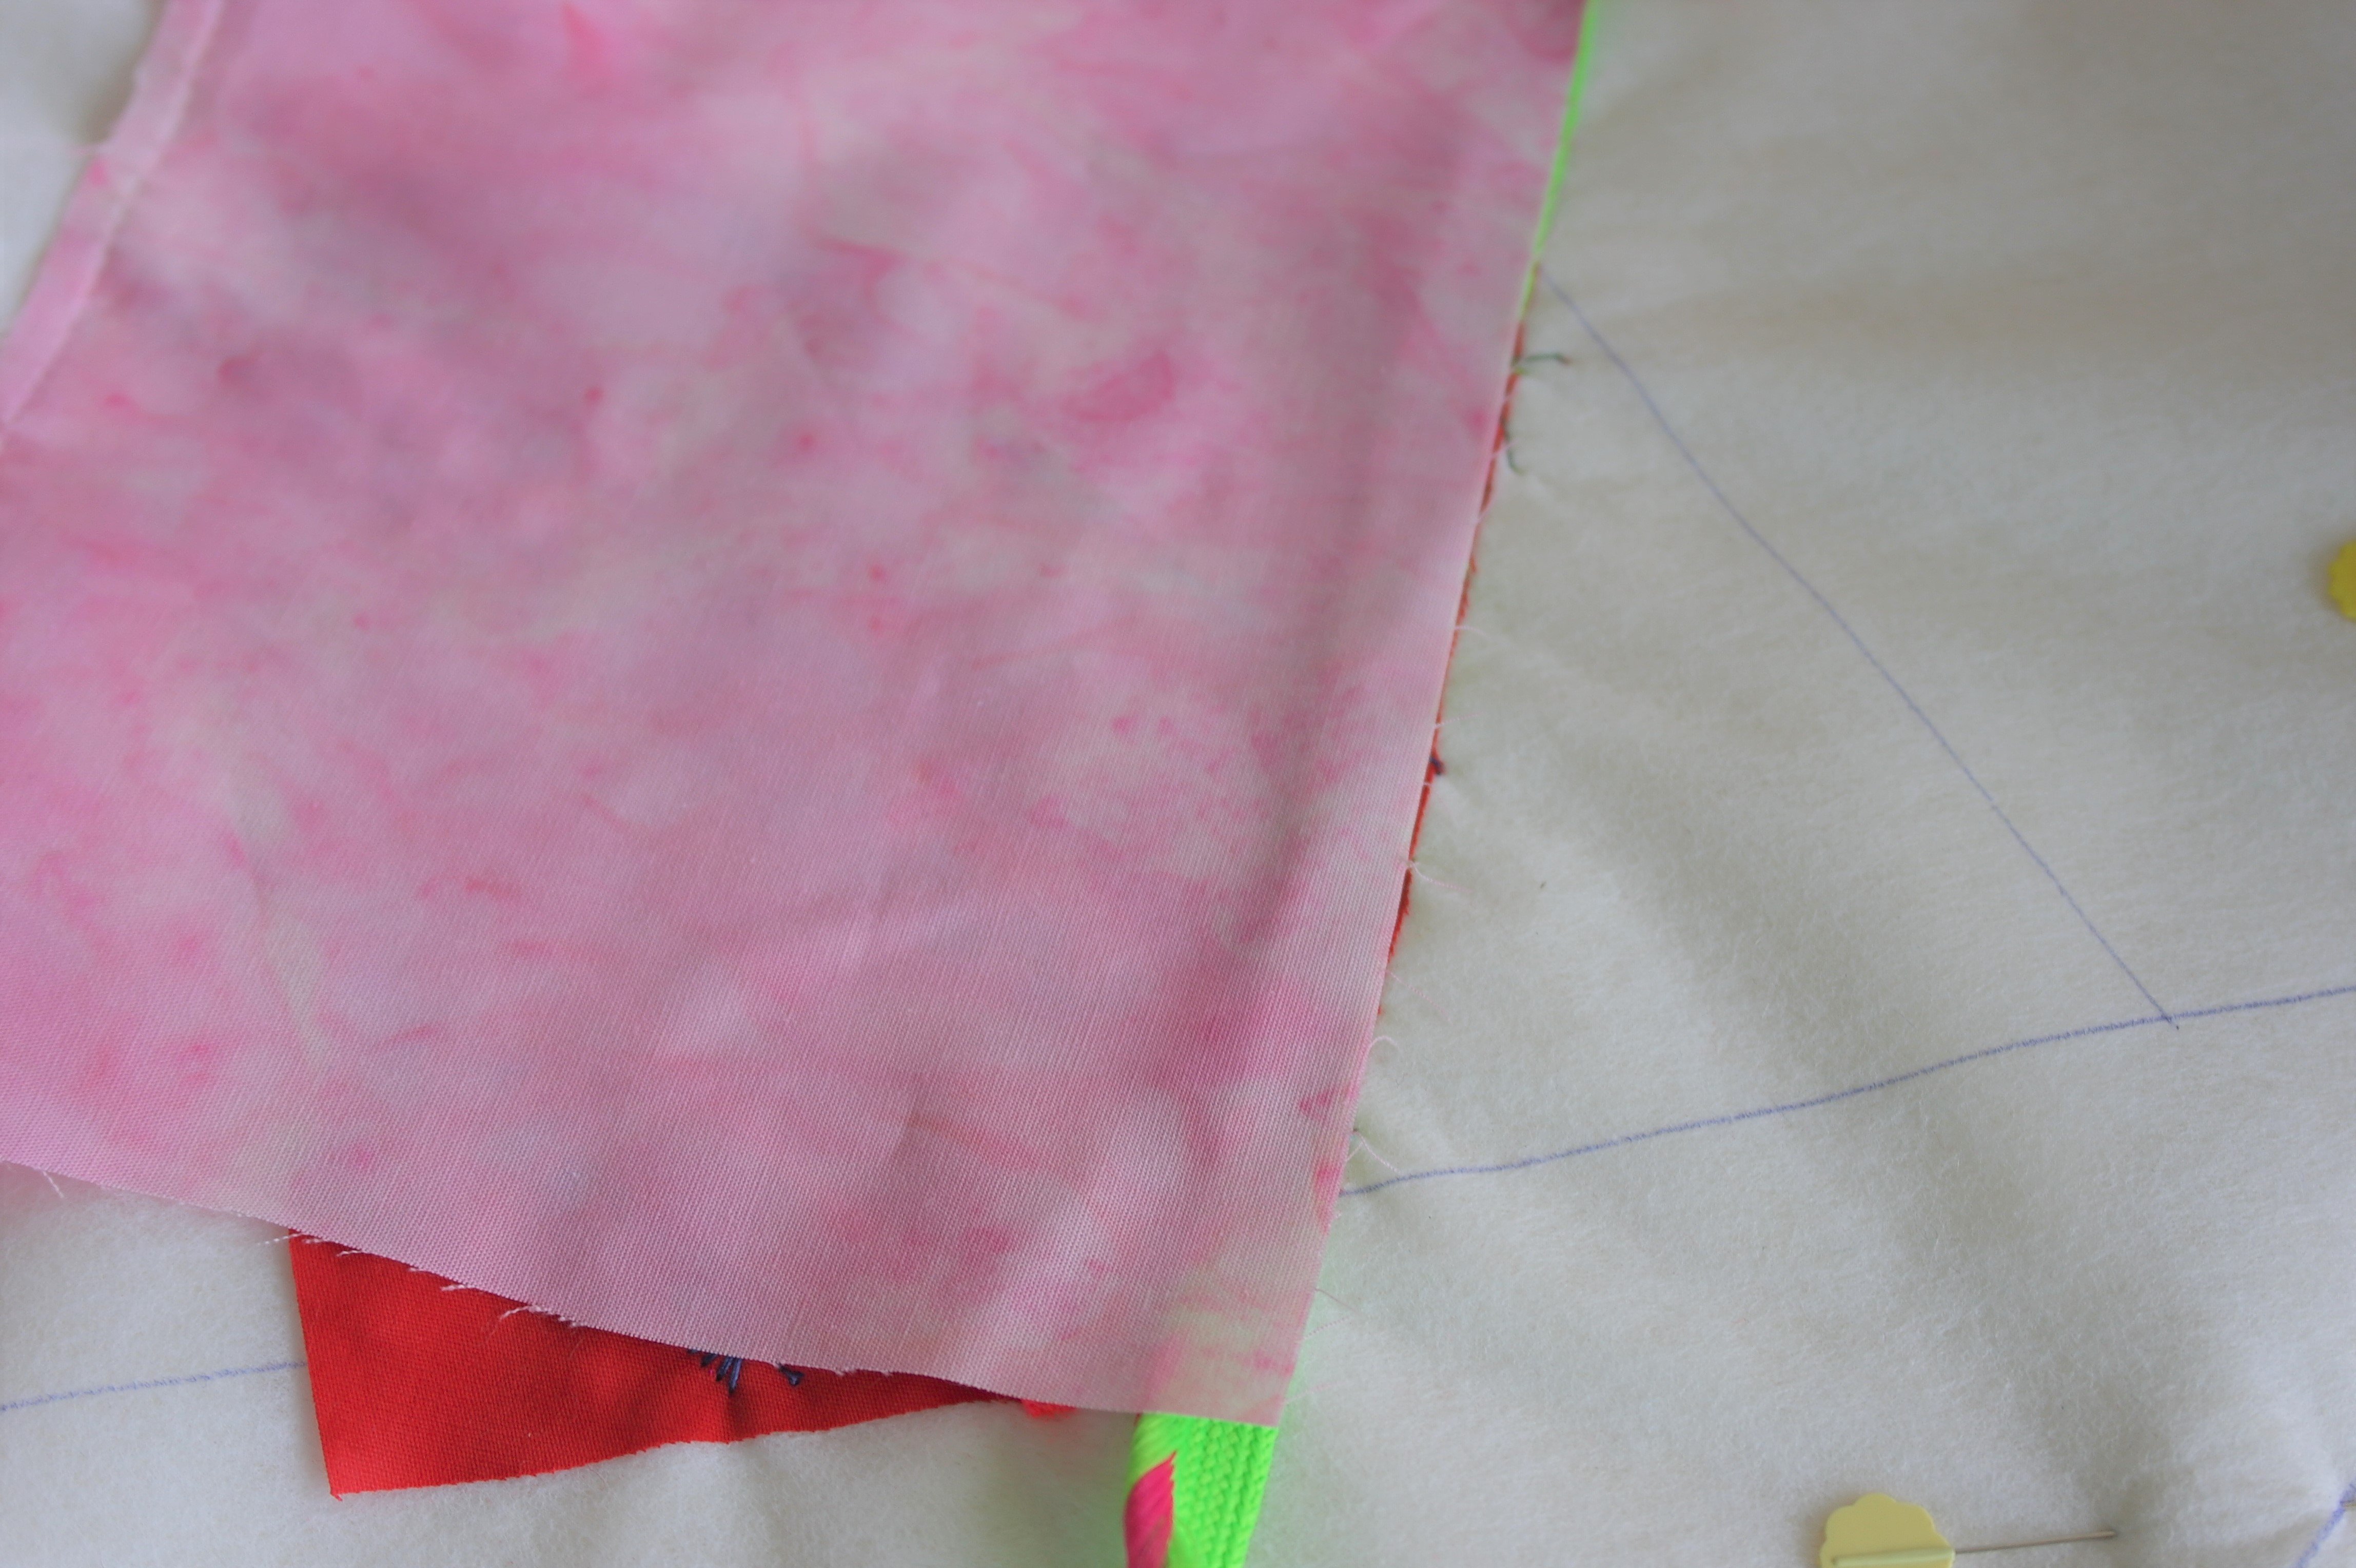
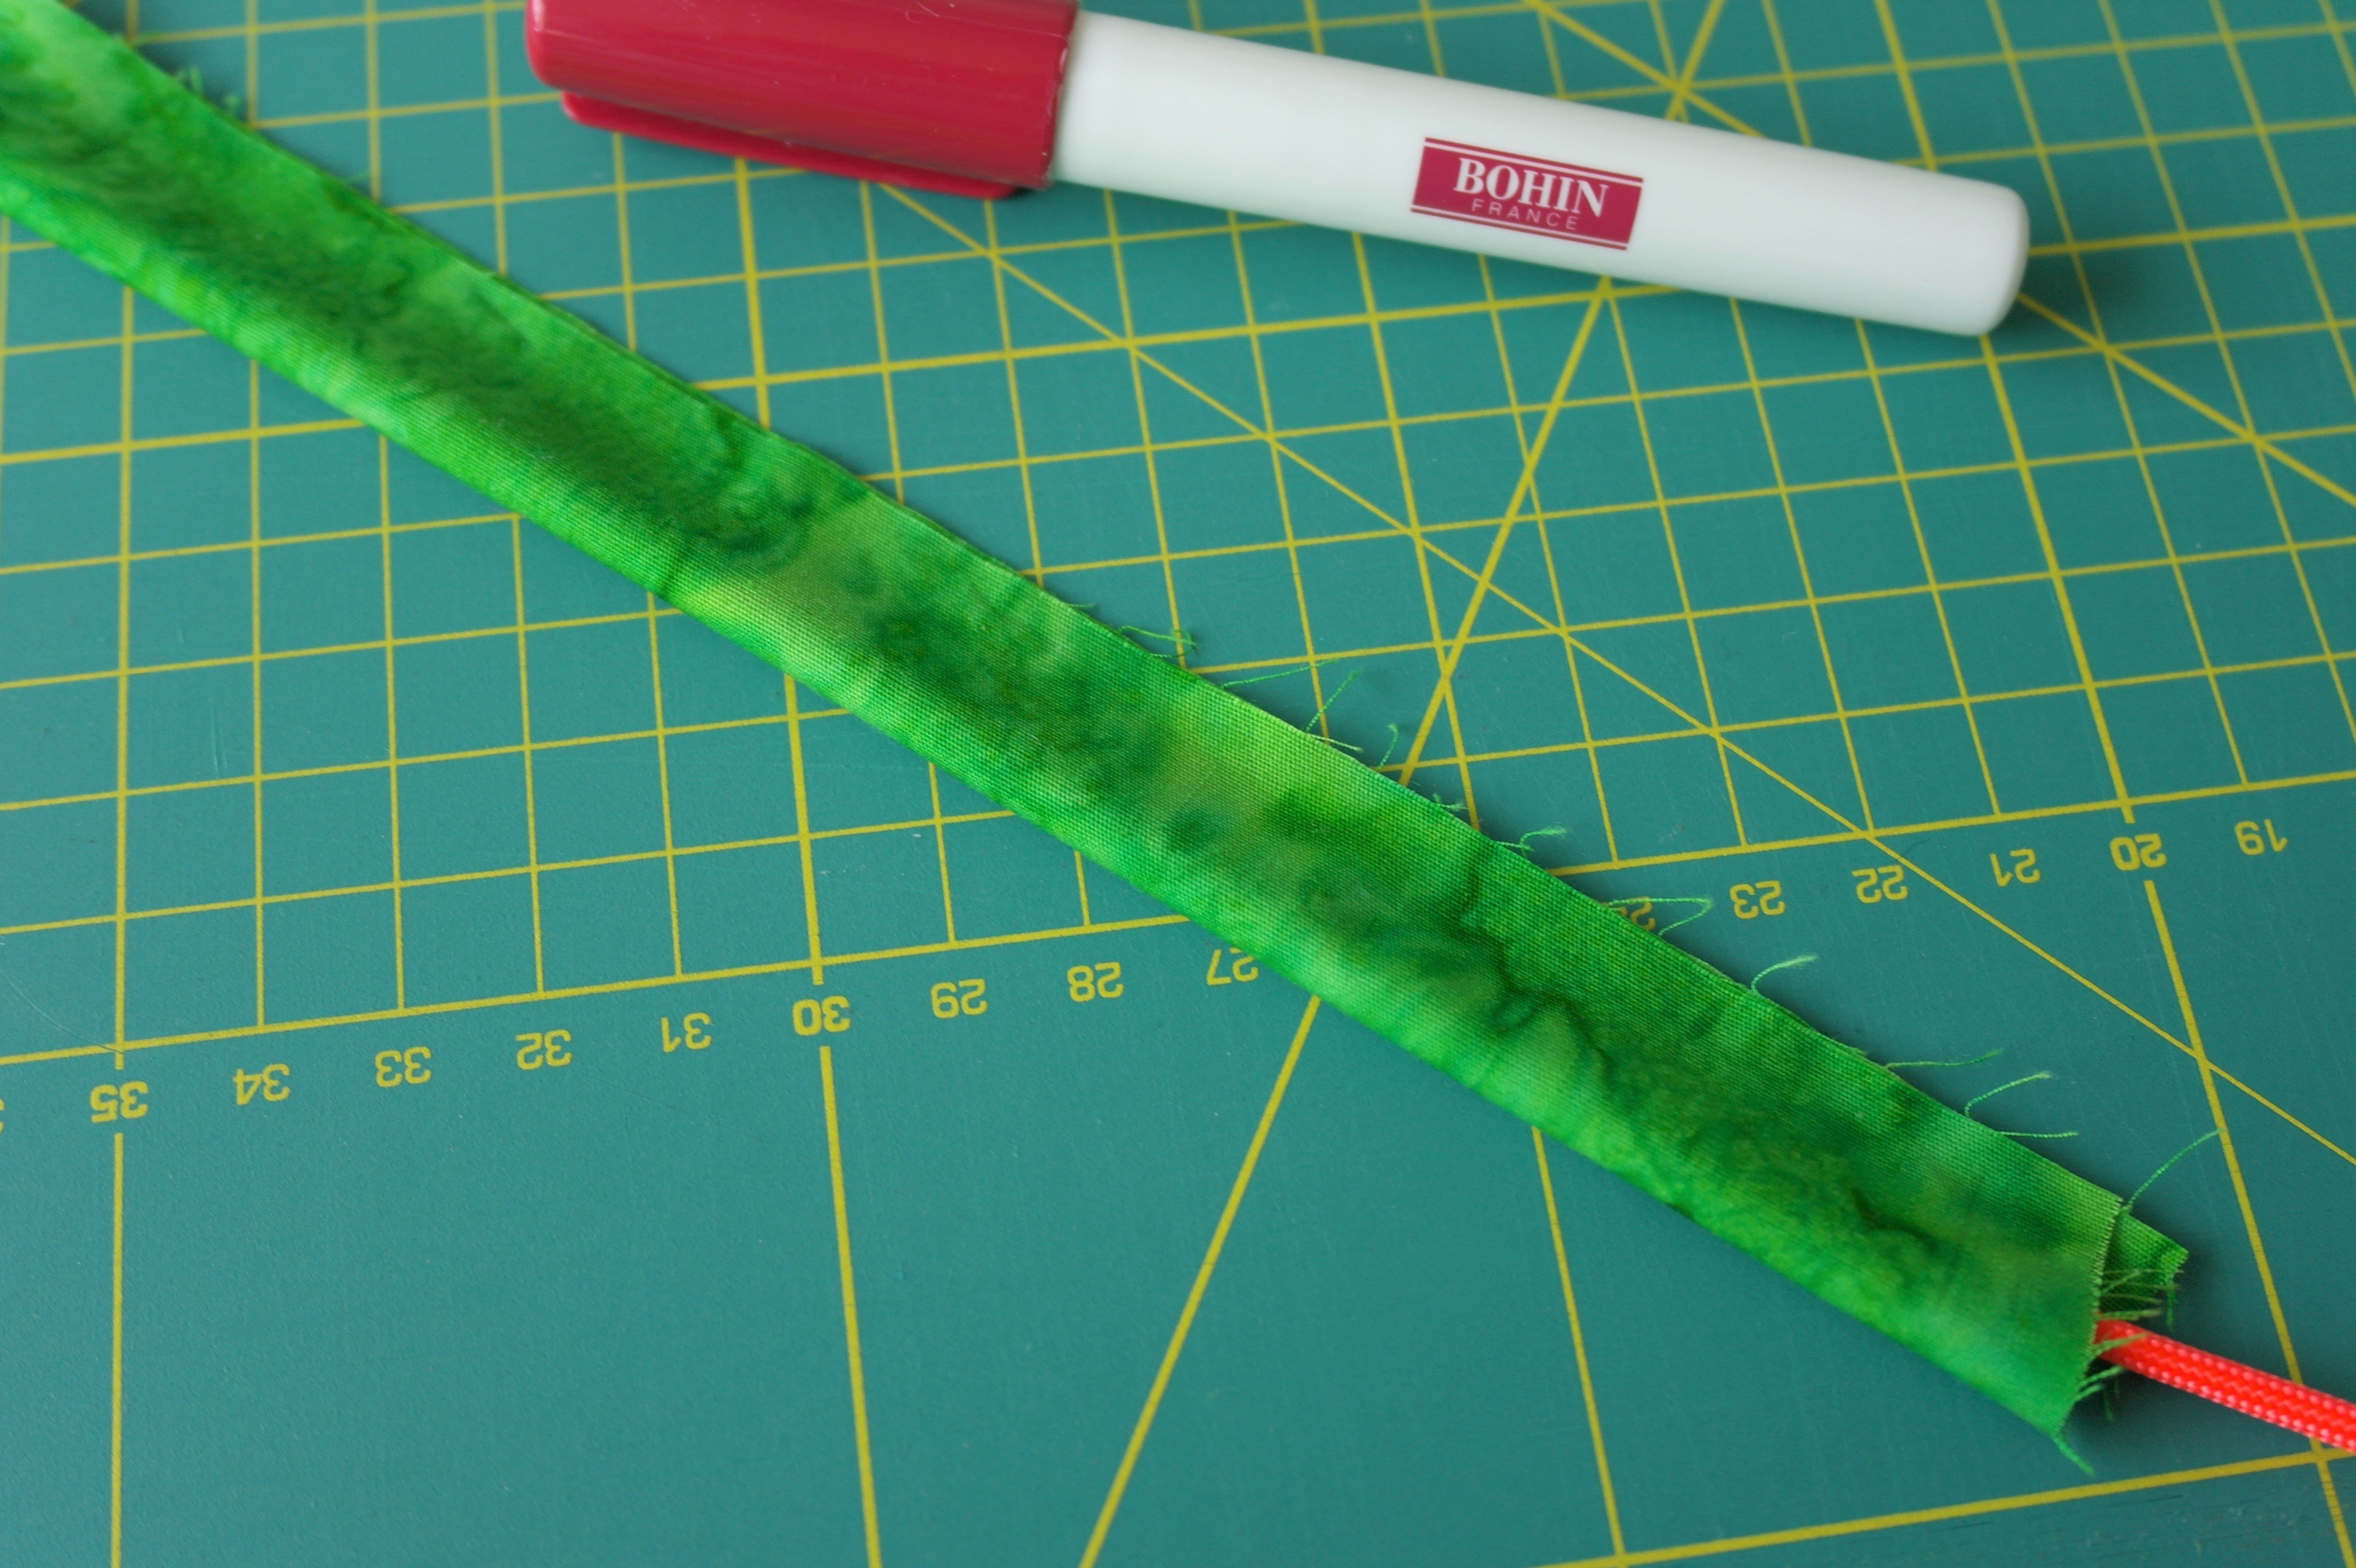
My ready-made piping ribbon is synthetic and slightly elastic – I had to be careful not to stretch this, otherwise it will pull at the sandwich afterwards. I have cut a piece of piping ribbon and made sure it protruded aprox. 3 cm at both sides, because the ends were fraying, I had to be sure to have the ends protruding more.
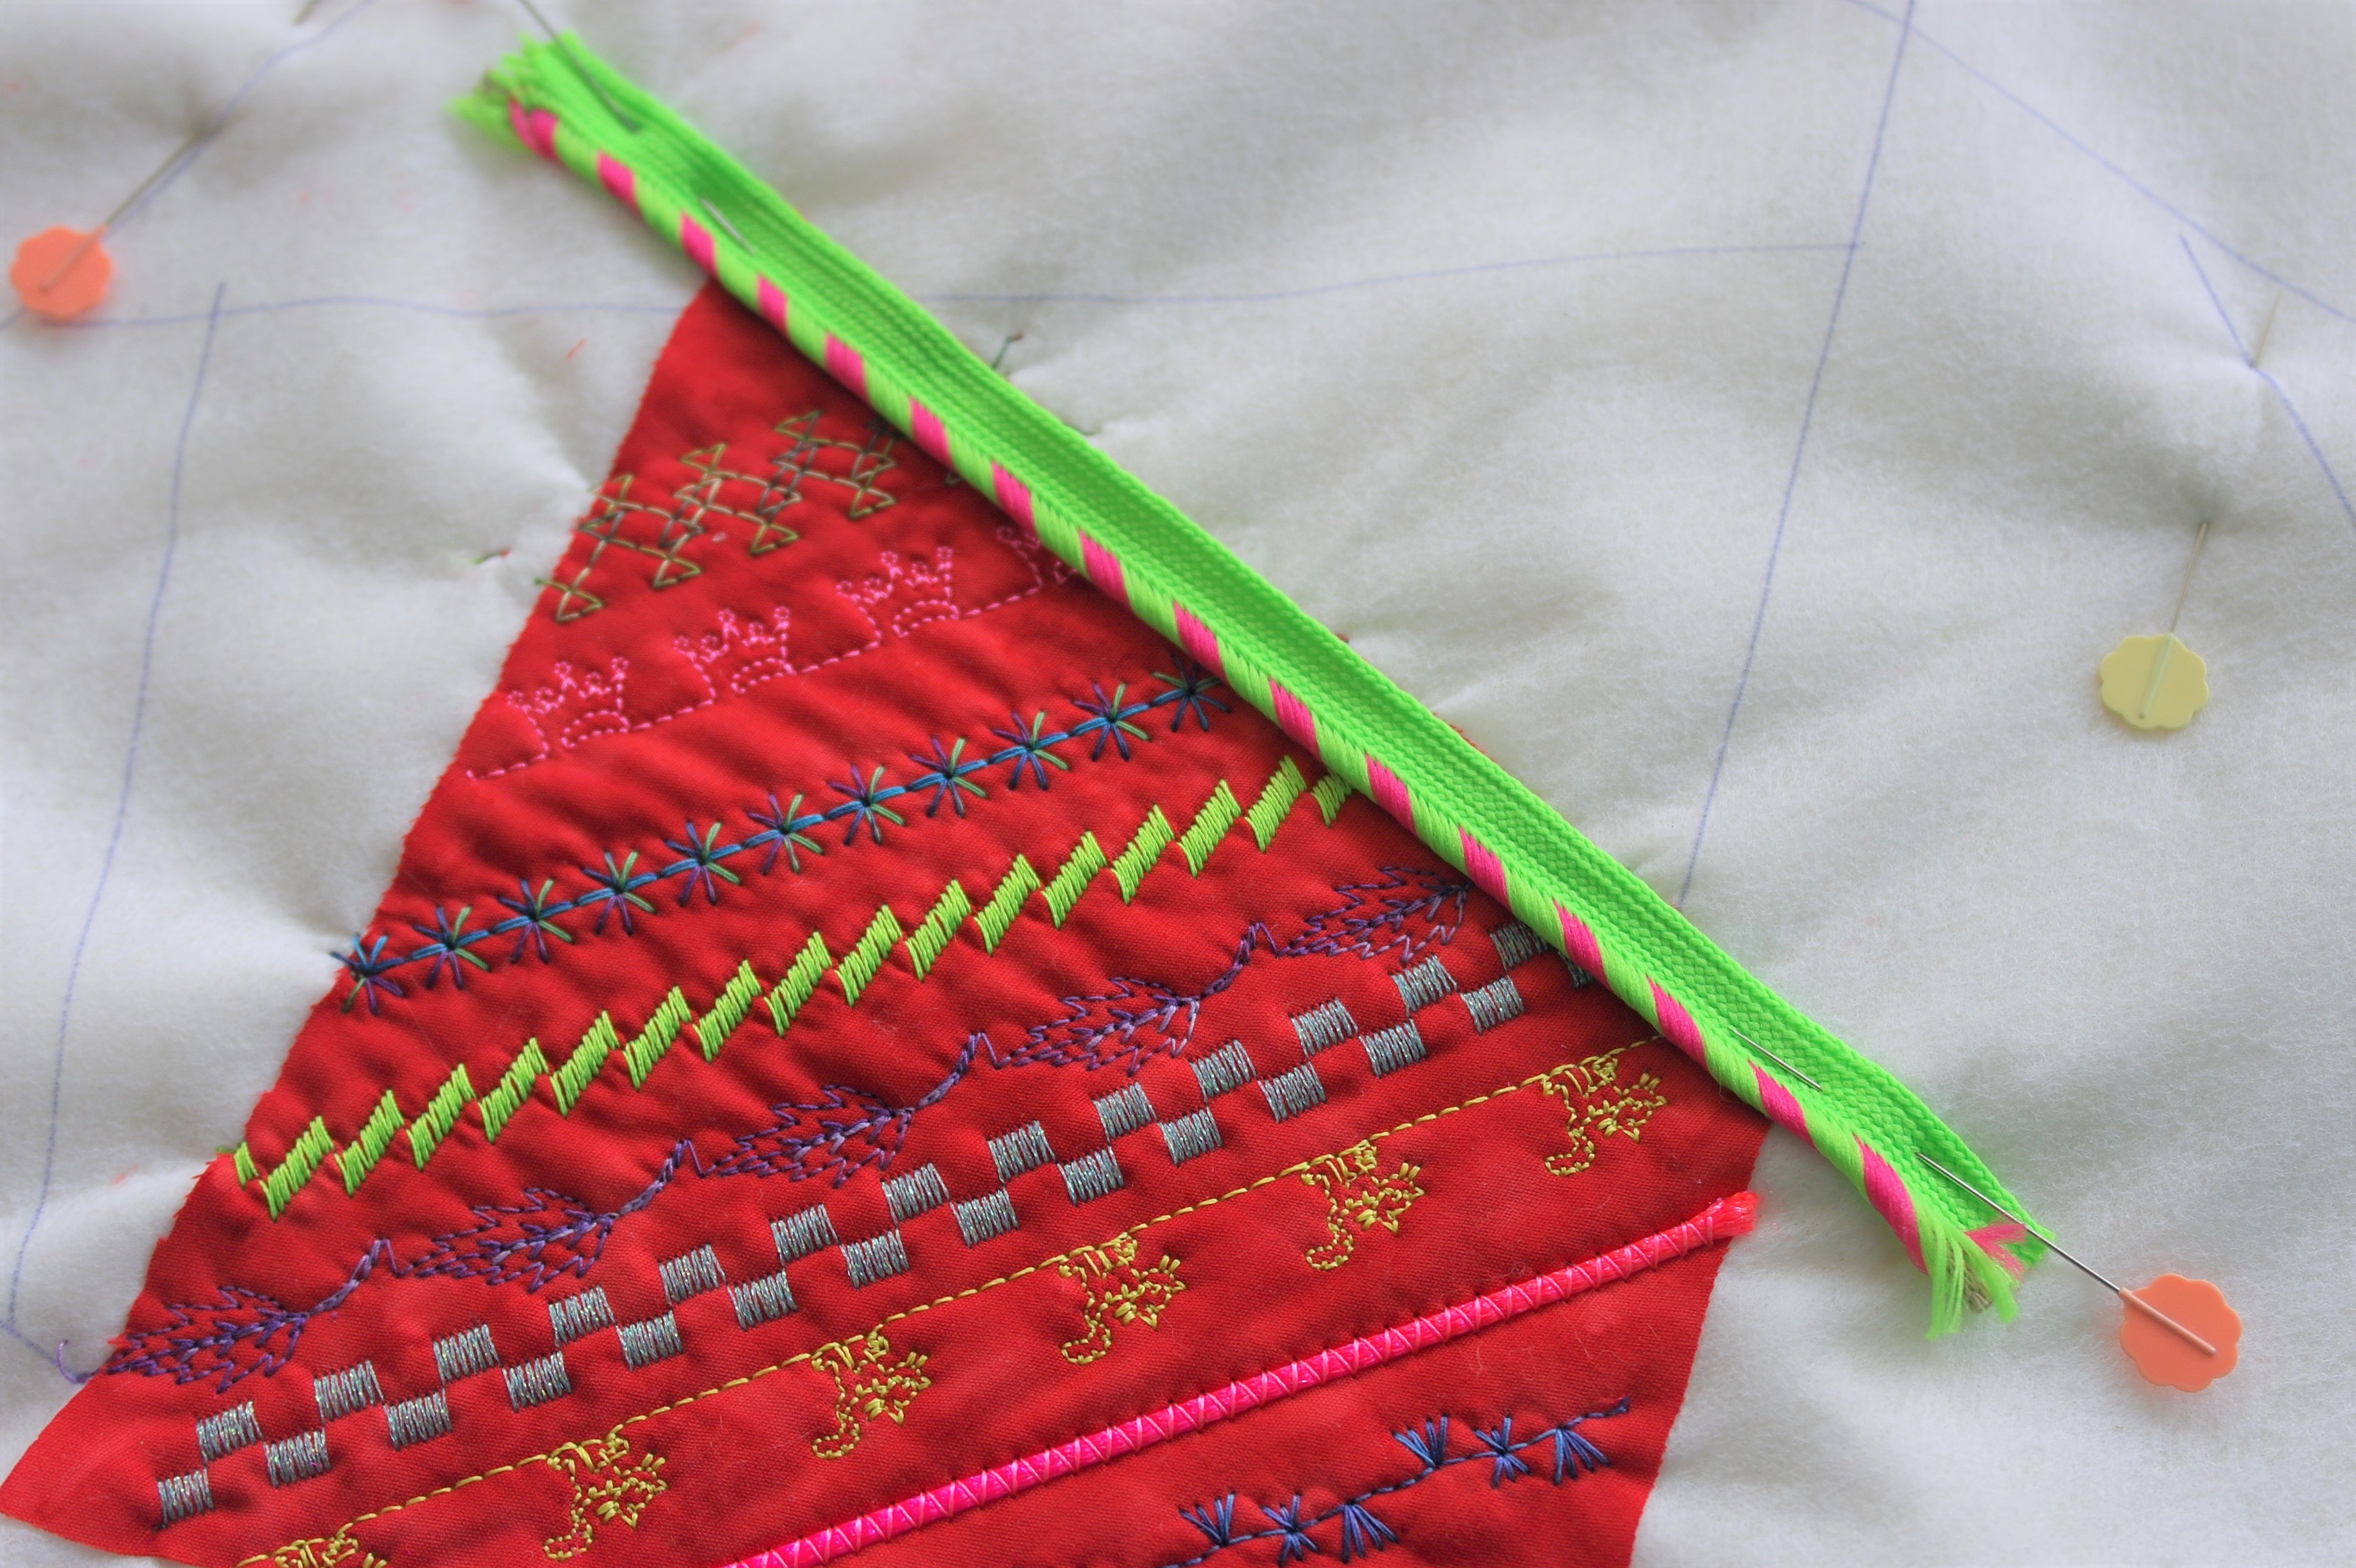
I have lined up the long side of the piping ribbon with the batik fabric, on the line between 1 and 2. The decorative part of the piping ribbon with the cording is on the other side.
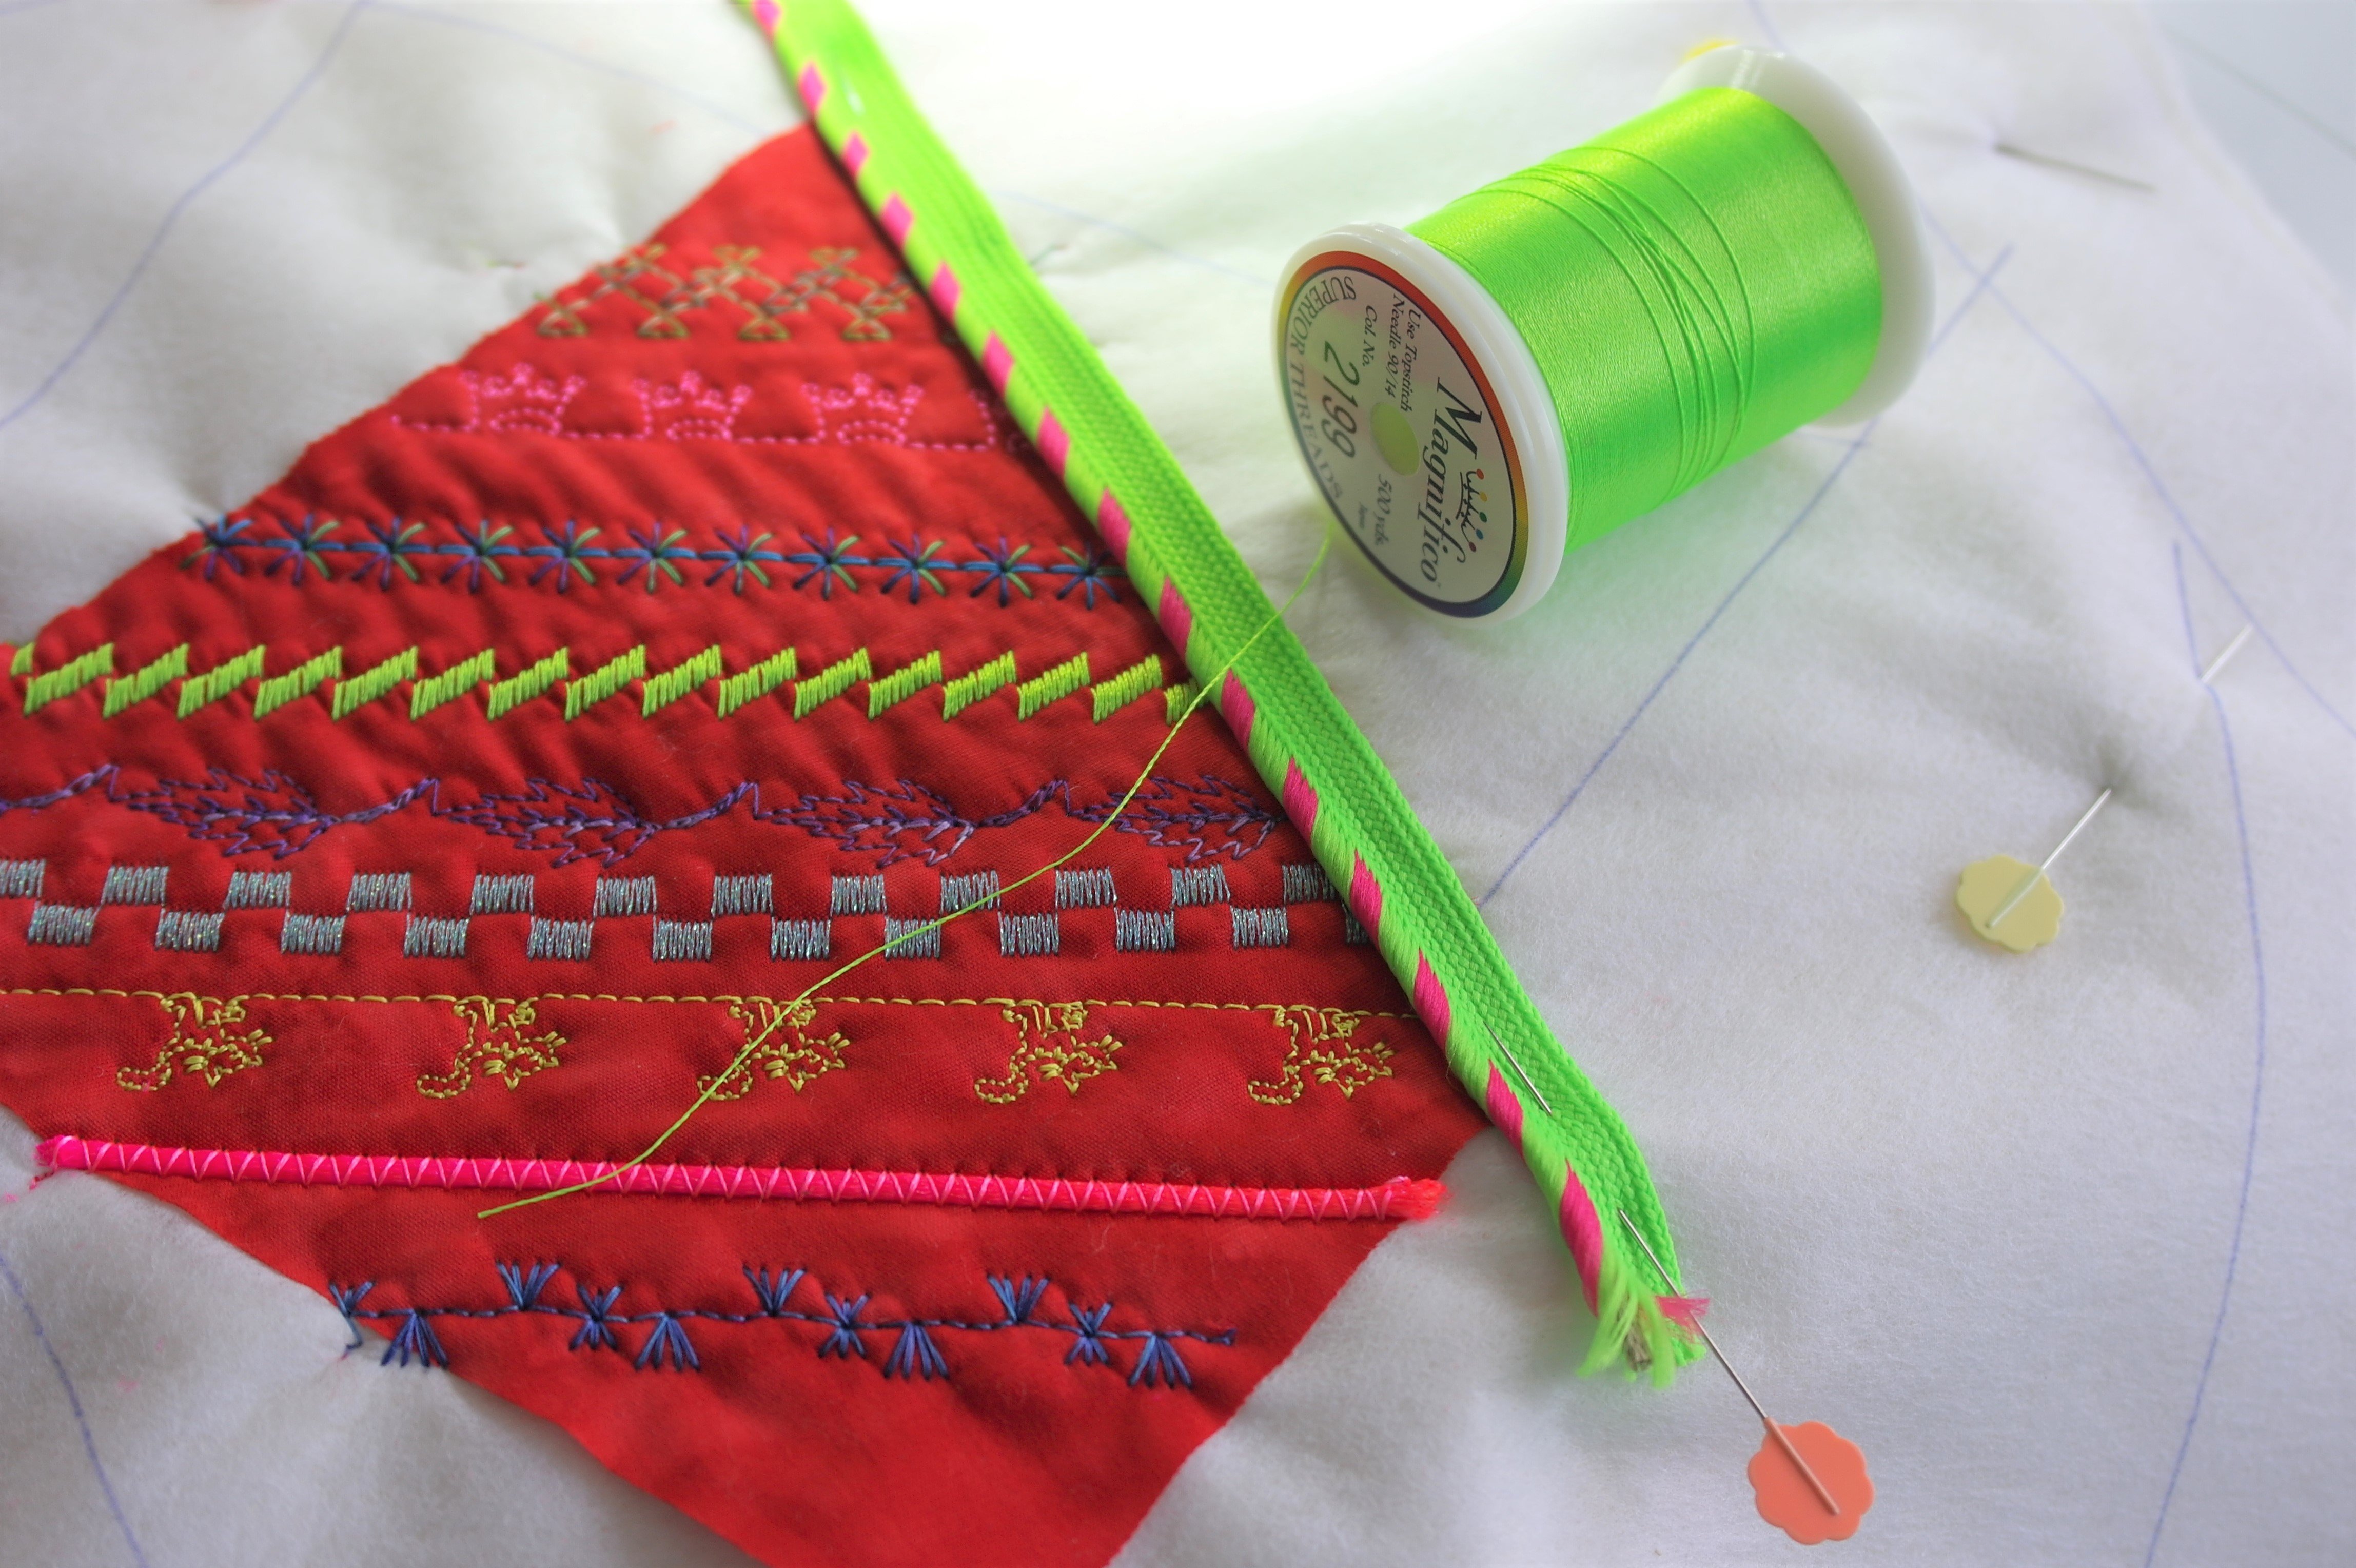
I have used machine thread matching the main color of the piping ribbon, in this case neon green/yellow. If the stitches will show after sewing, it is better if they match up with the piping instead of the fabrics – so you won’t notice them that much. So don’t use a thread color that matches one of the fabrics…
Using Bohin Glue pen for glueing the piping on the background/batik fabric, to prevent it from sliding during sewing. I have used a couple of Flower Pins just to hold the ends of the piping down. I don’t like to use pins to hold the entire piping, because the sandwich will not lay flat. I like to use glue: it is water erasable and works about 30 to 60 seconds, just enough time to stitch the piping onto the background.
It is important to place the straight stitches close to the cording of the piping ribbon: work slow and make sure the zipper foot keeps runnig close to the cord.
As soon as the piping ribbon is sewn on, place (batik) fabrik no. 2 on top of that, right side down: I have glued this too.
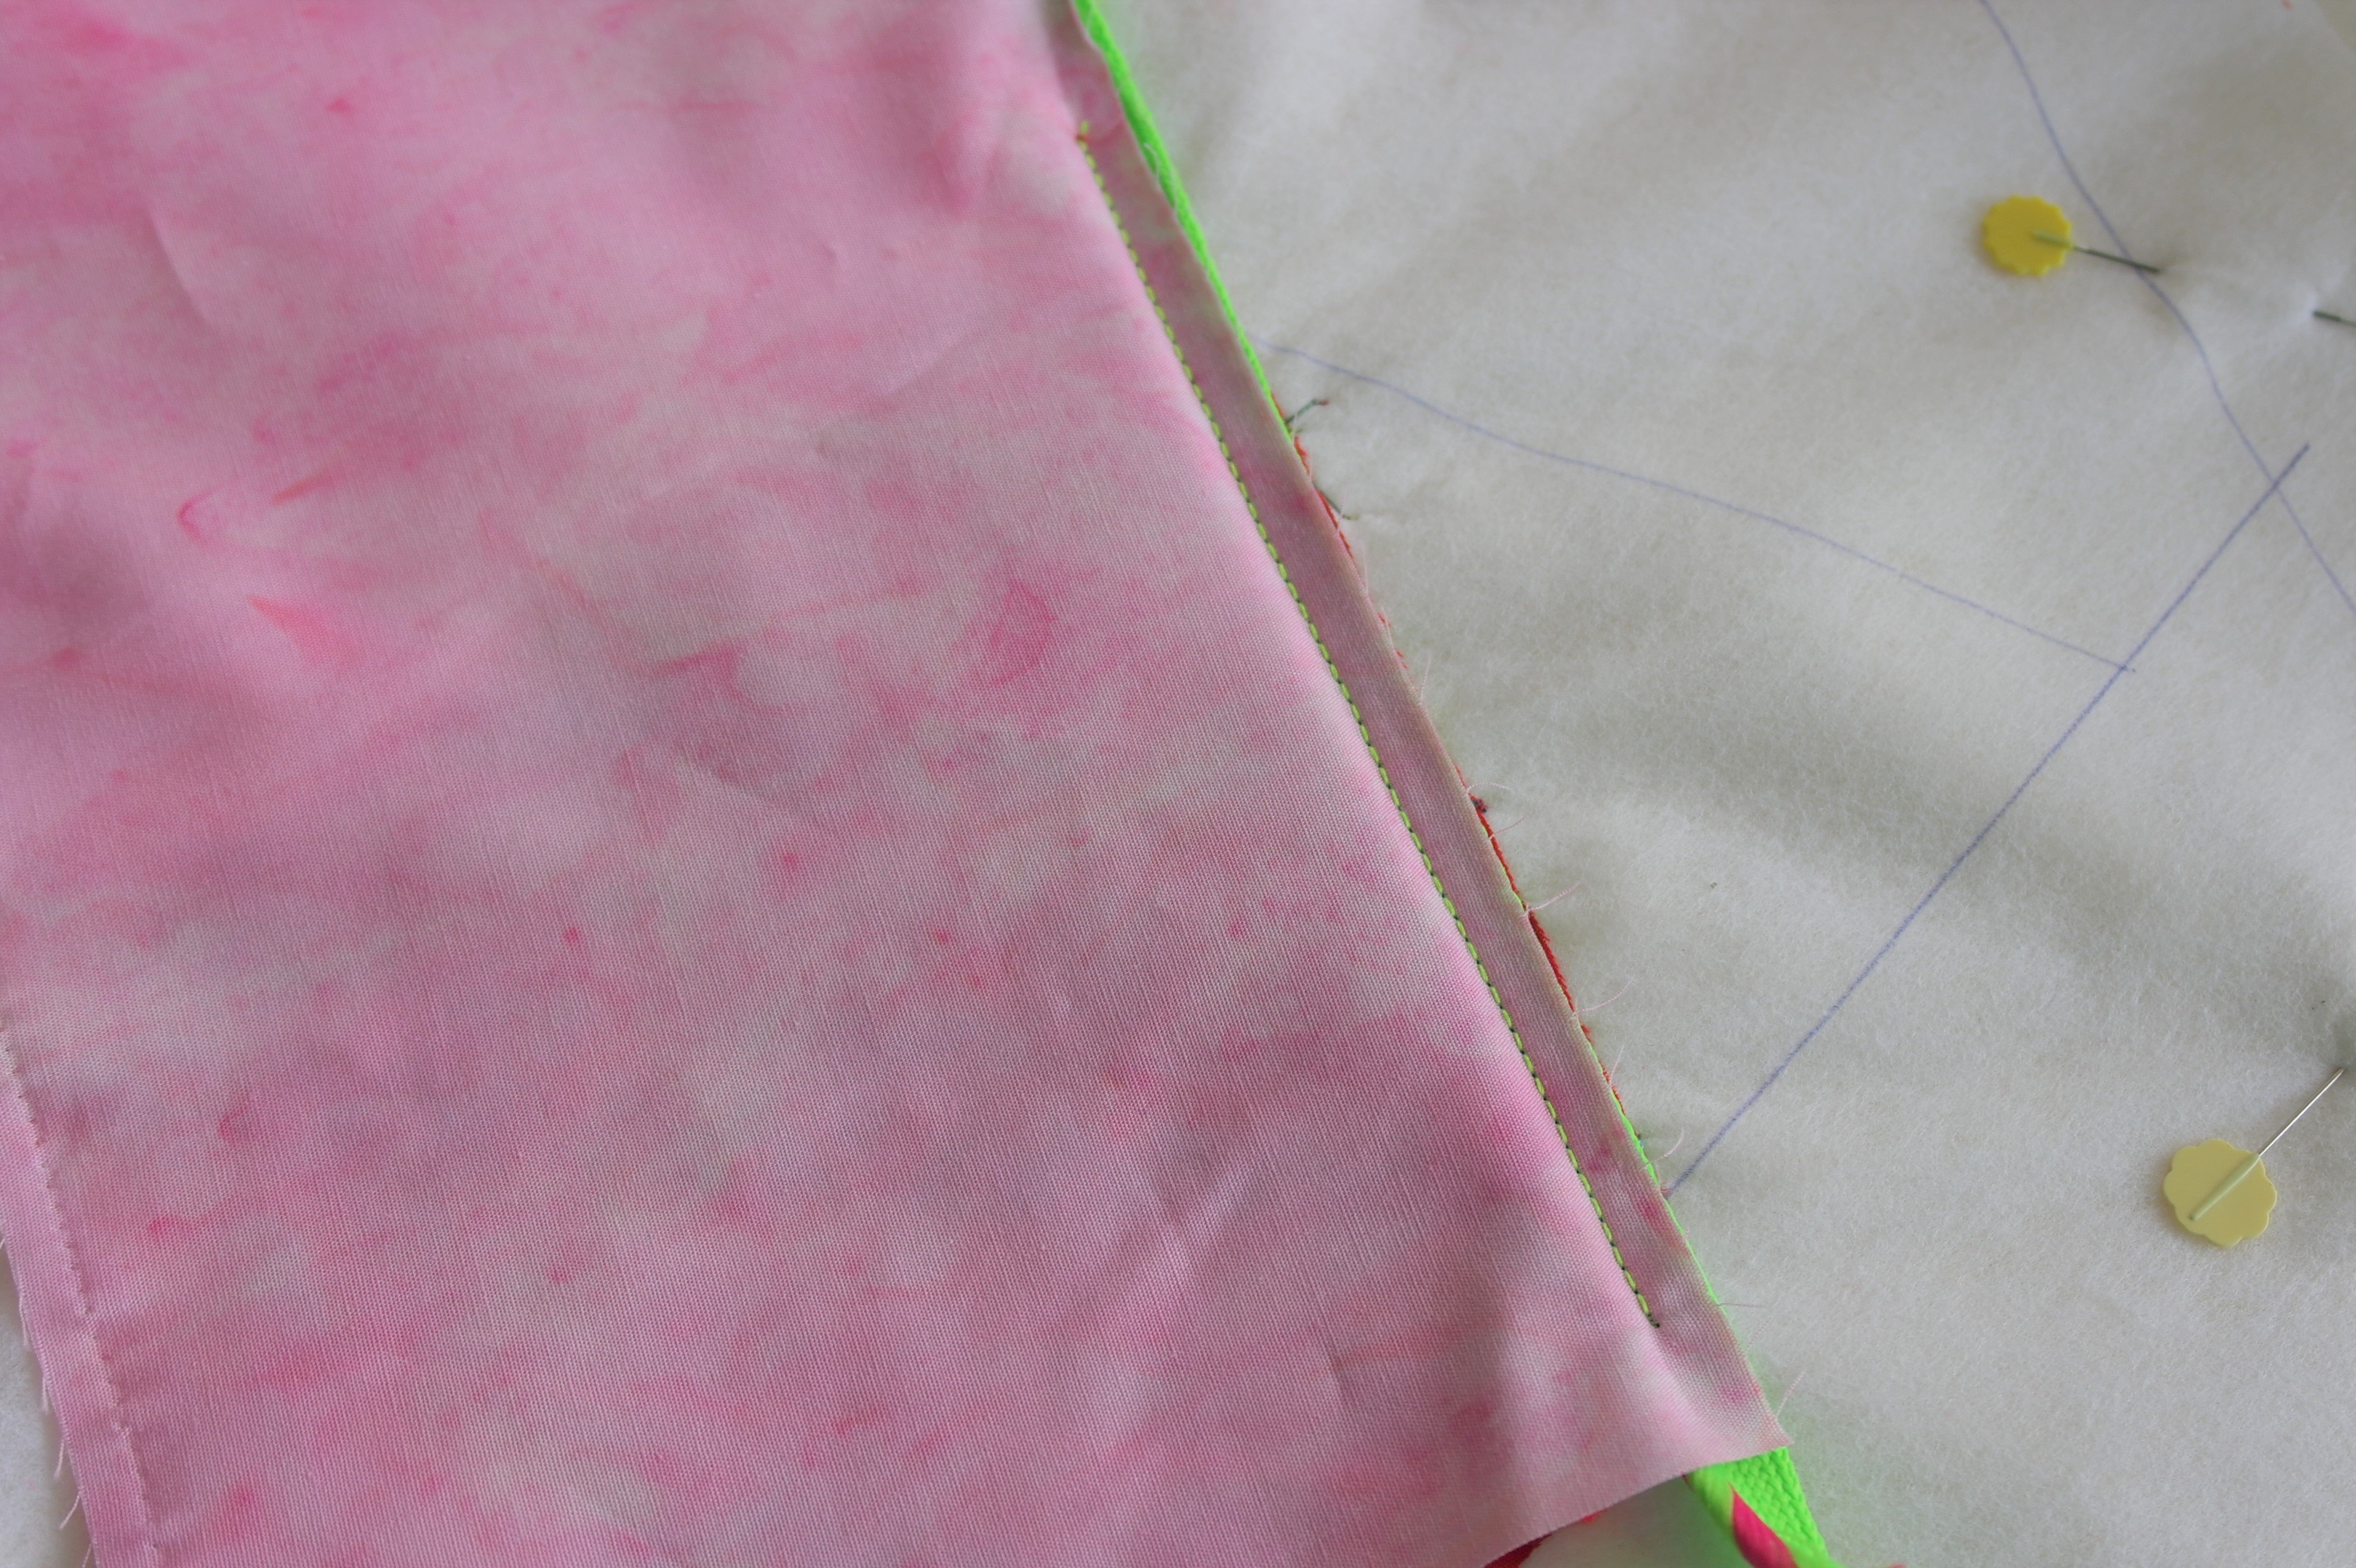
Make straight stitches, again close to the cording of the piping ribbon. If you are working with piping ribbon which has a thick cord, you can even see it, otherwise you will have to feel where the cording is. Don’t sew on the cording itself, just next to it.
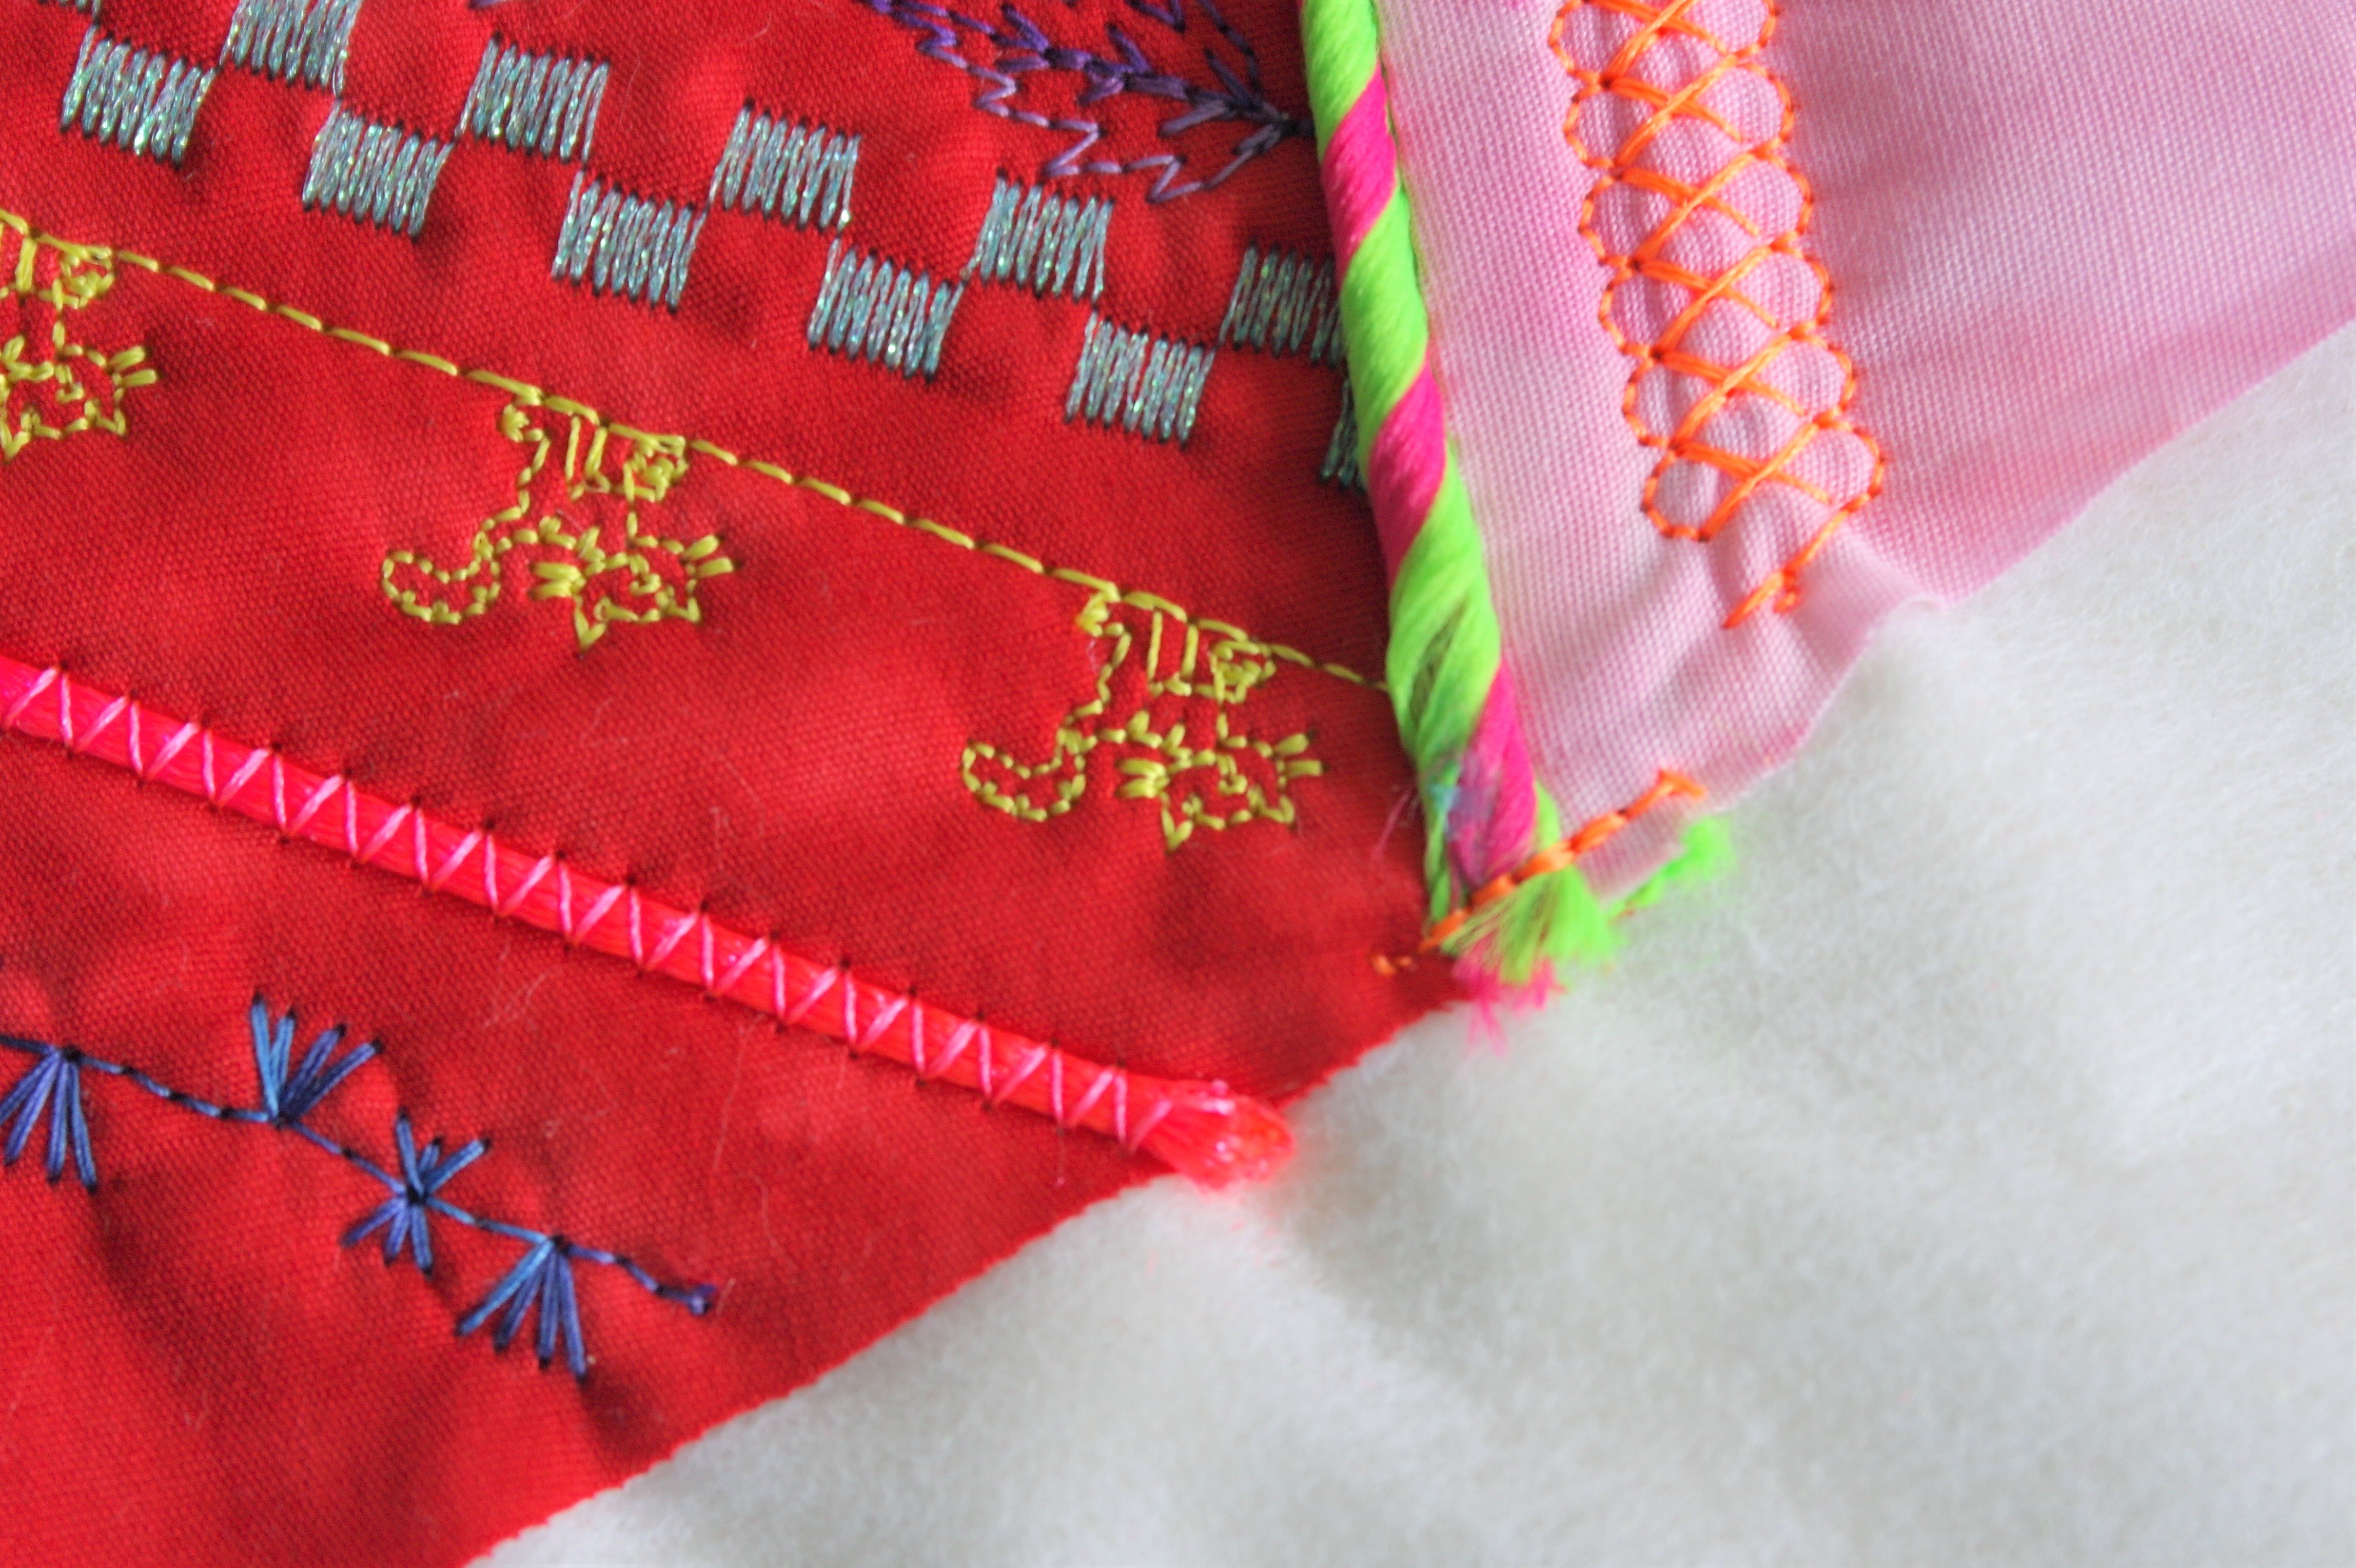
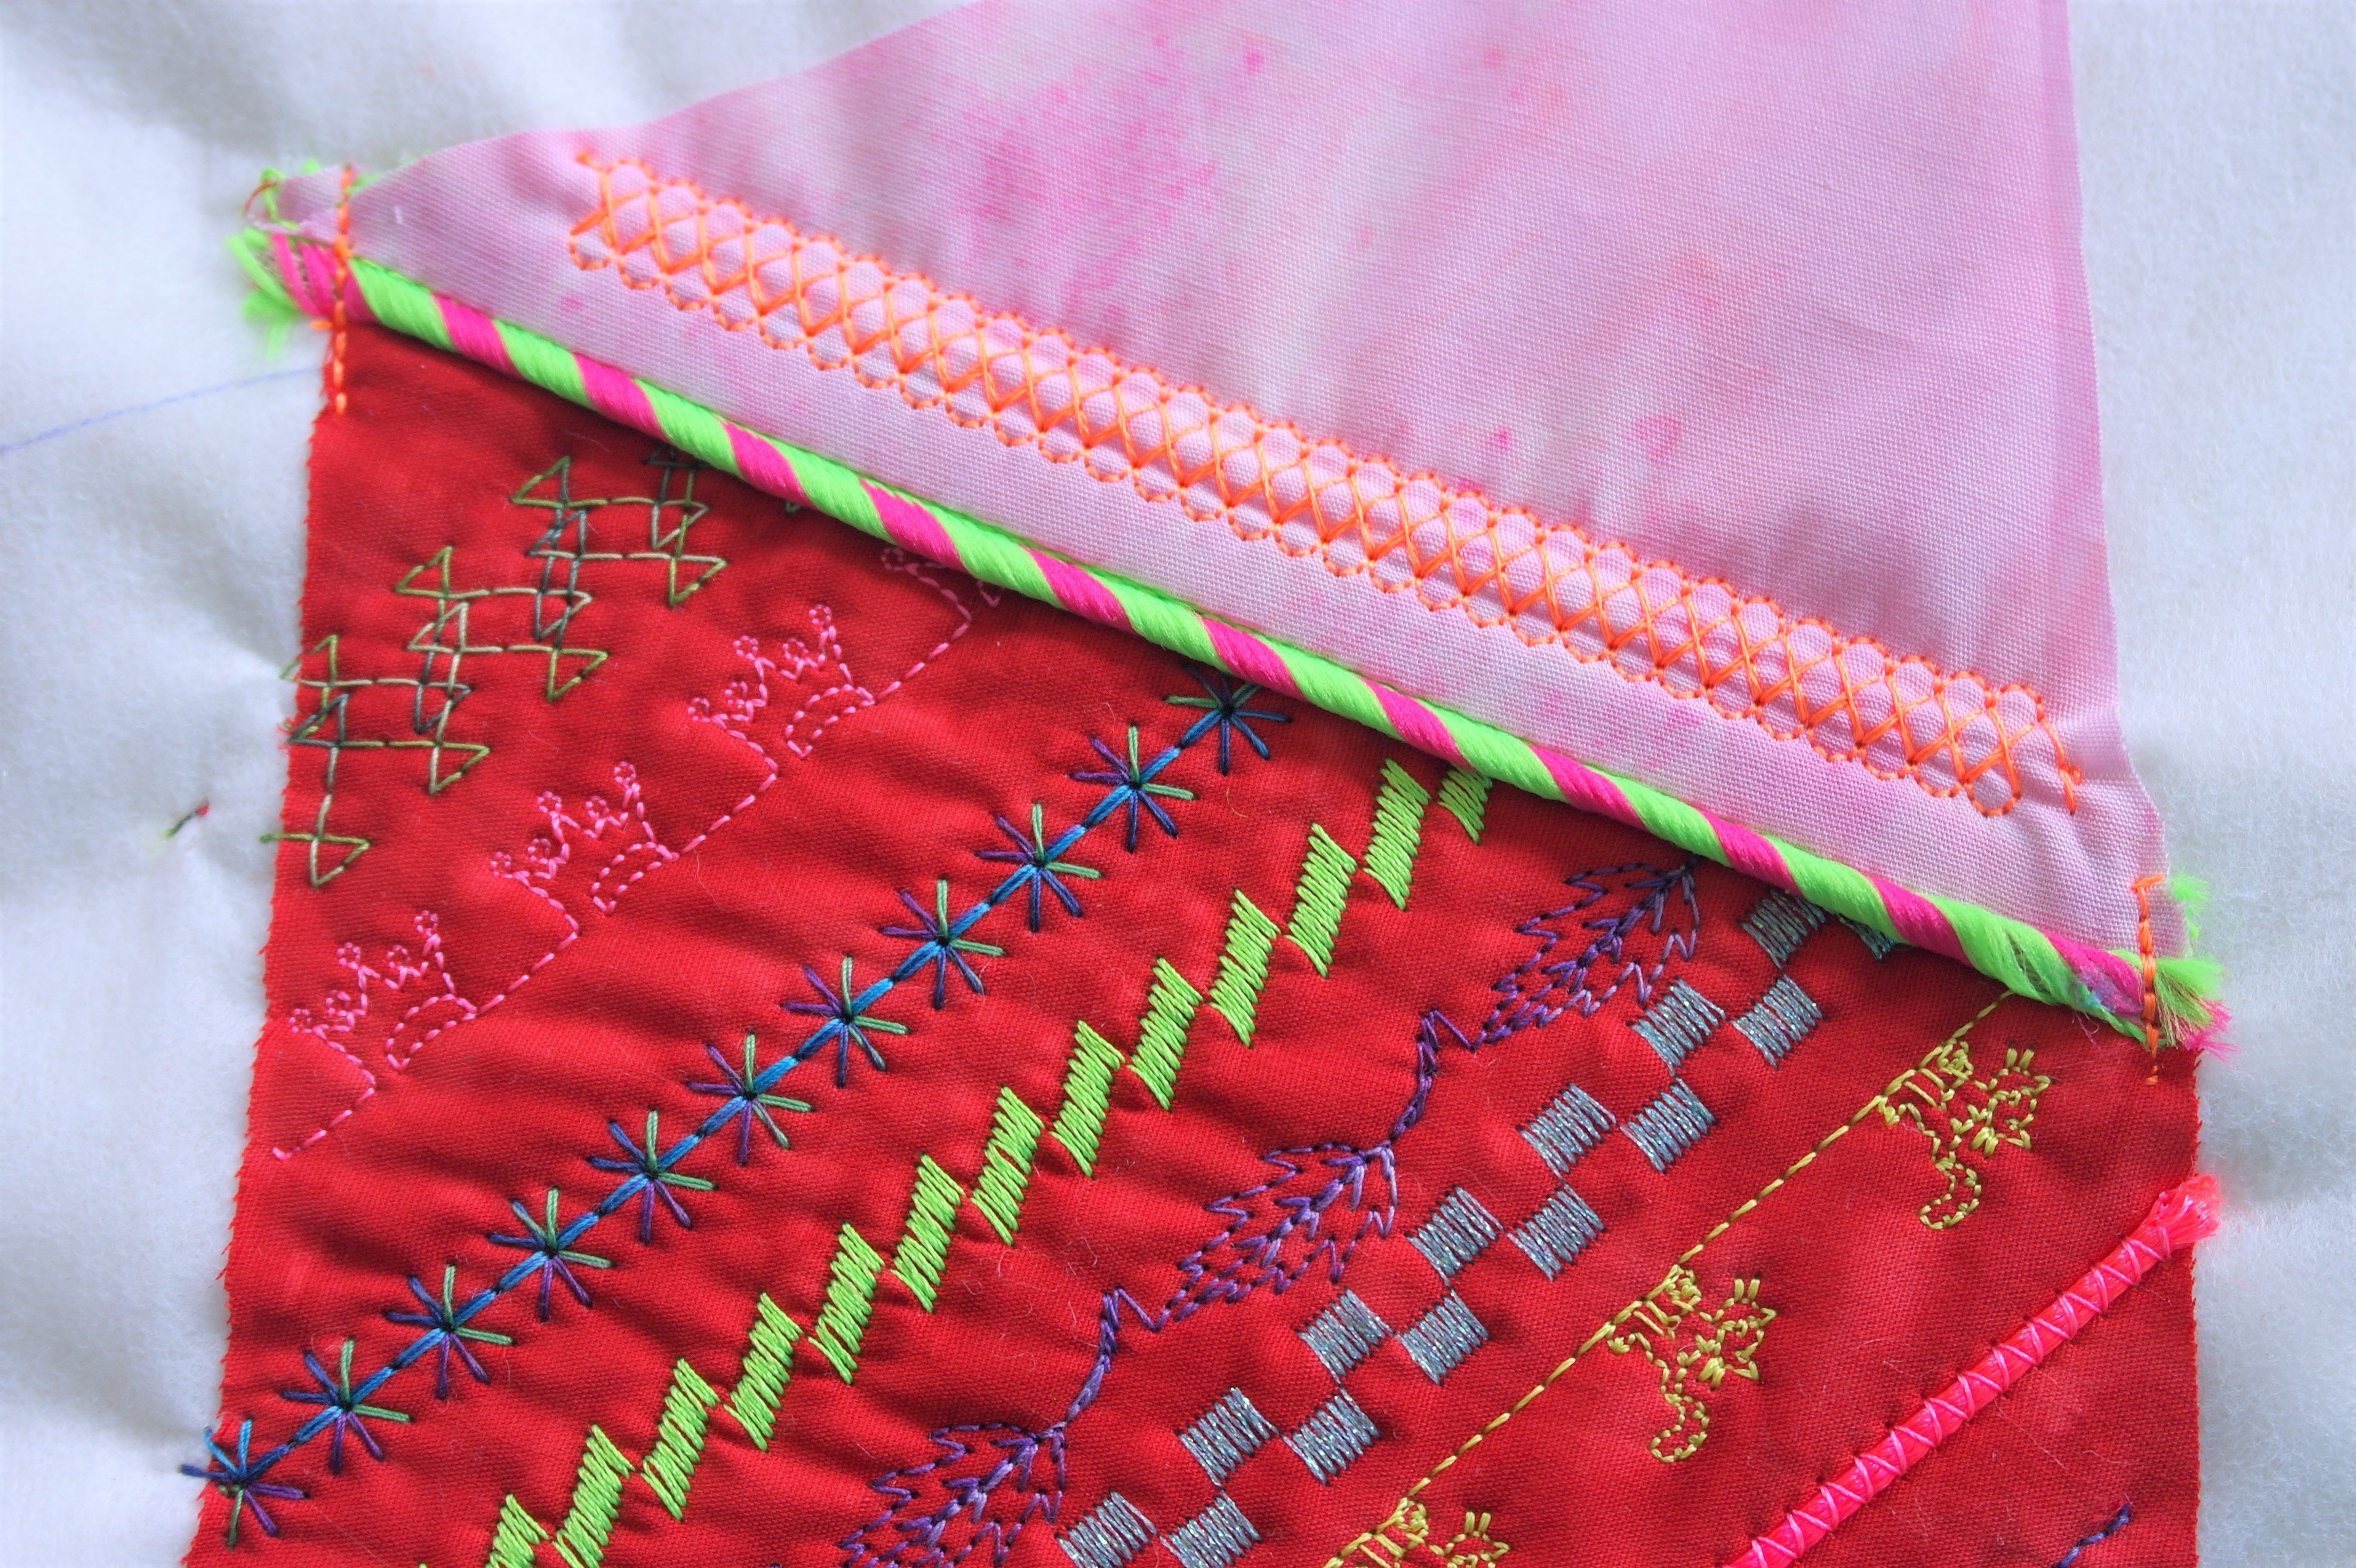
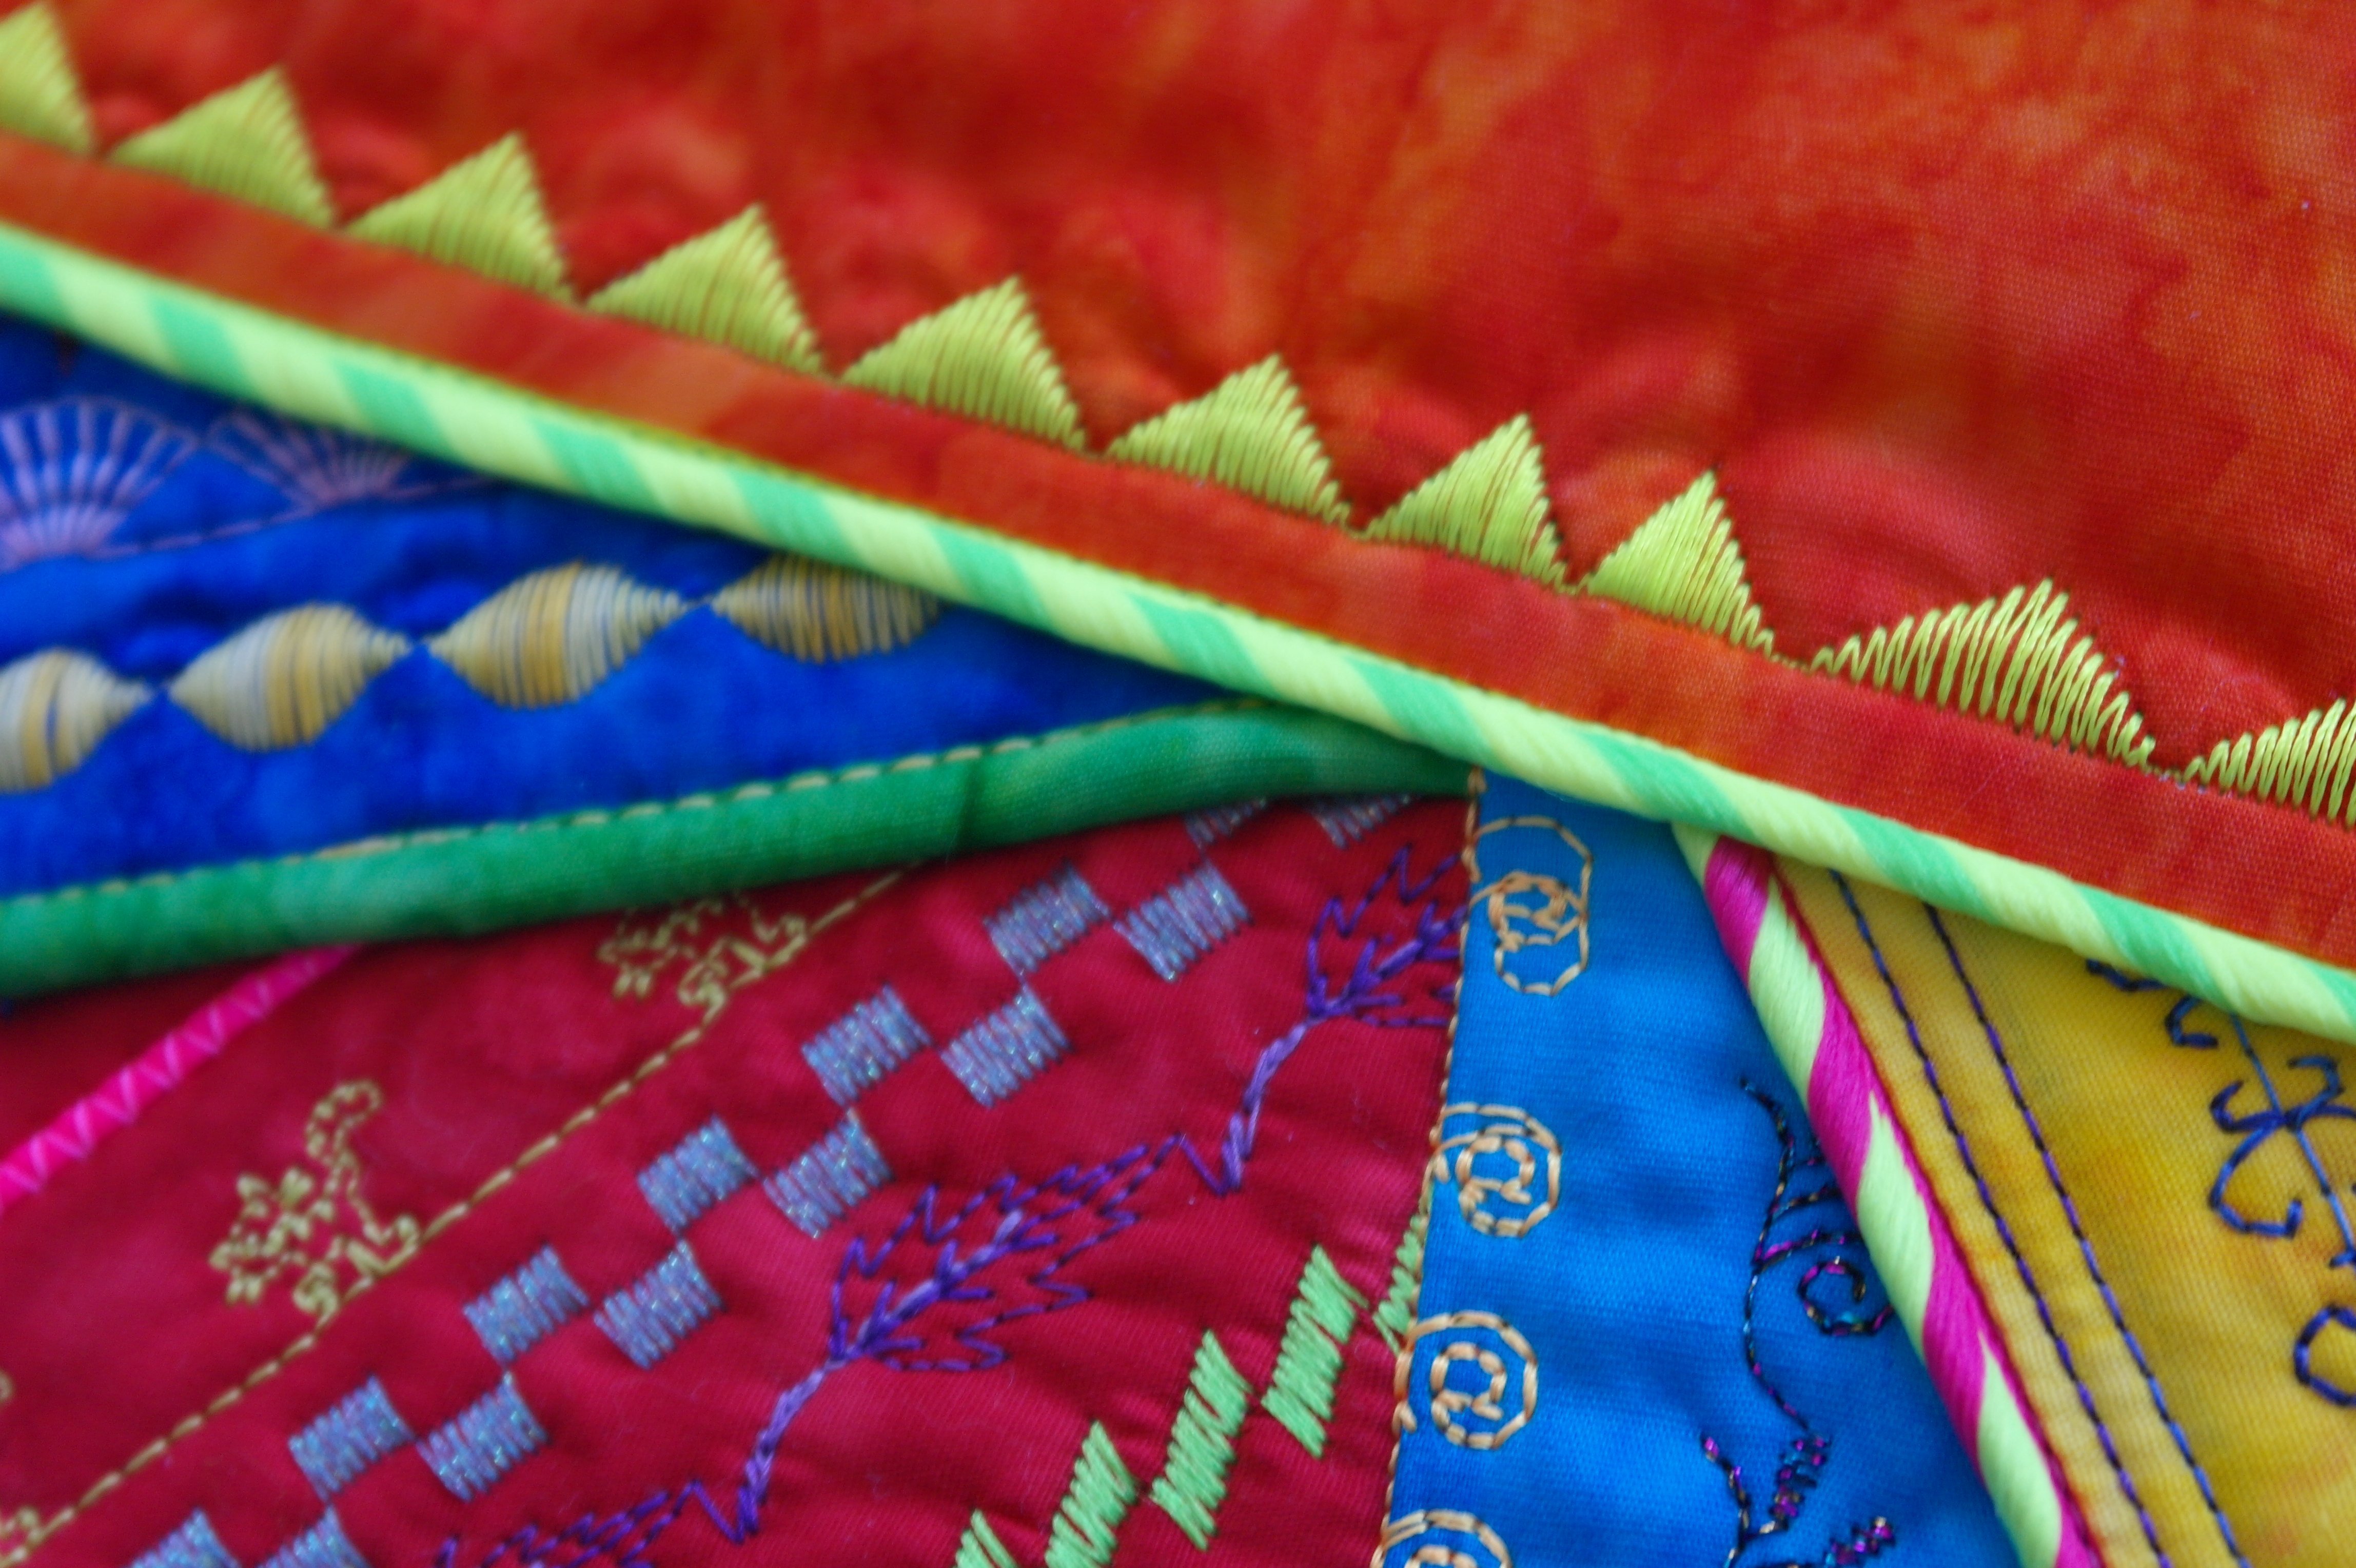
Fold fabric no. 2 to the right side, and you will see the piping as a really fun effect. Doesn’t this looks great?
You can cut the protruding ends of the piping at this time but be careful: mine frayed easilly, and I have cut it too soon. Therefore I have sewn it down at aprox. 2mm from the side, with straight stitches to prevent more frayinig. Better to cut the ends after you have sewn the ‘next’ fabric on.
After this I have used presser foot 20C again and changed the needle position to ‘0’ – be sure to do that! And than it is back to making decorative stitches.

After this I’ve made my own piping ribbon – this is how you do that:
Cut a strip of fabric, width aprox. 4 cm. If you want to use piping ribbon for decorative effects with a pillow, you will have to cut strips diagonally, at 45°. But here that is not the case, so I’ve just cut them from left overs without checking the grain.
Fold the fabric lengthwise (a piece of 20 to 25 cm or longer, if you want to use that color more than once)….
and place a thick (knitting)yarn or cord in the middle.
Fold the strip in half, lengthwise, sandwiching the cording right down the middle and the edges of the fabric together. Glue them together to make sure nothing shifts.
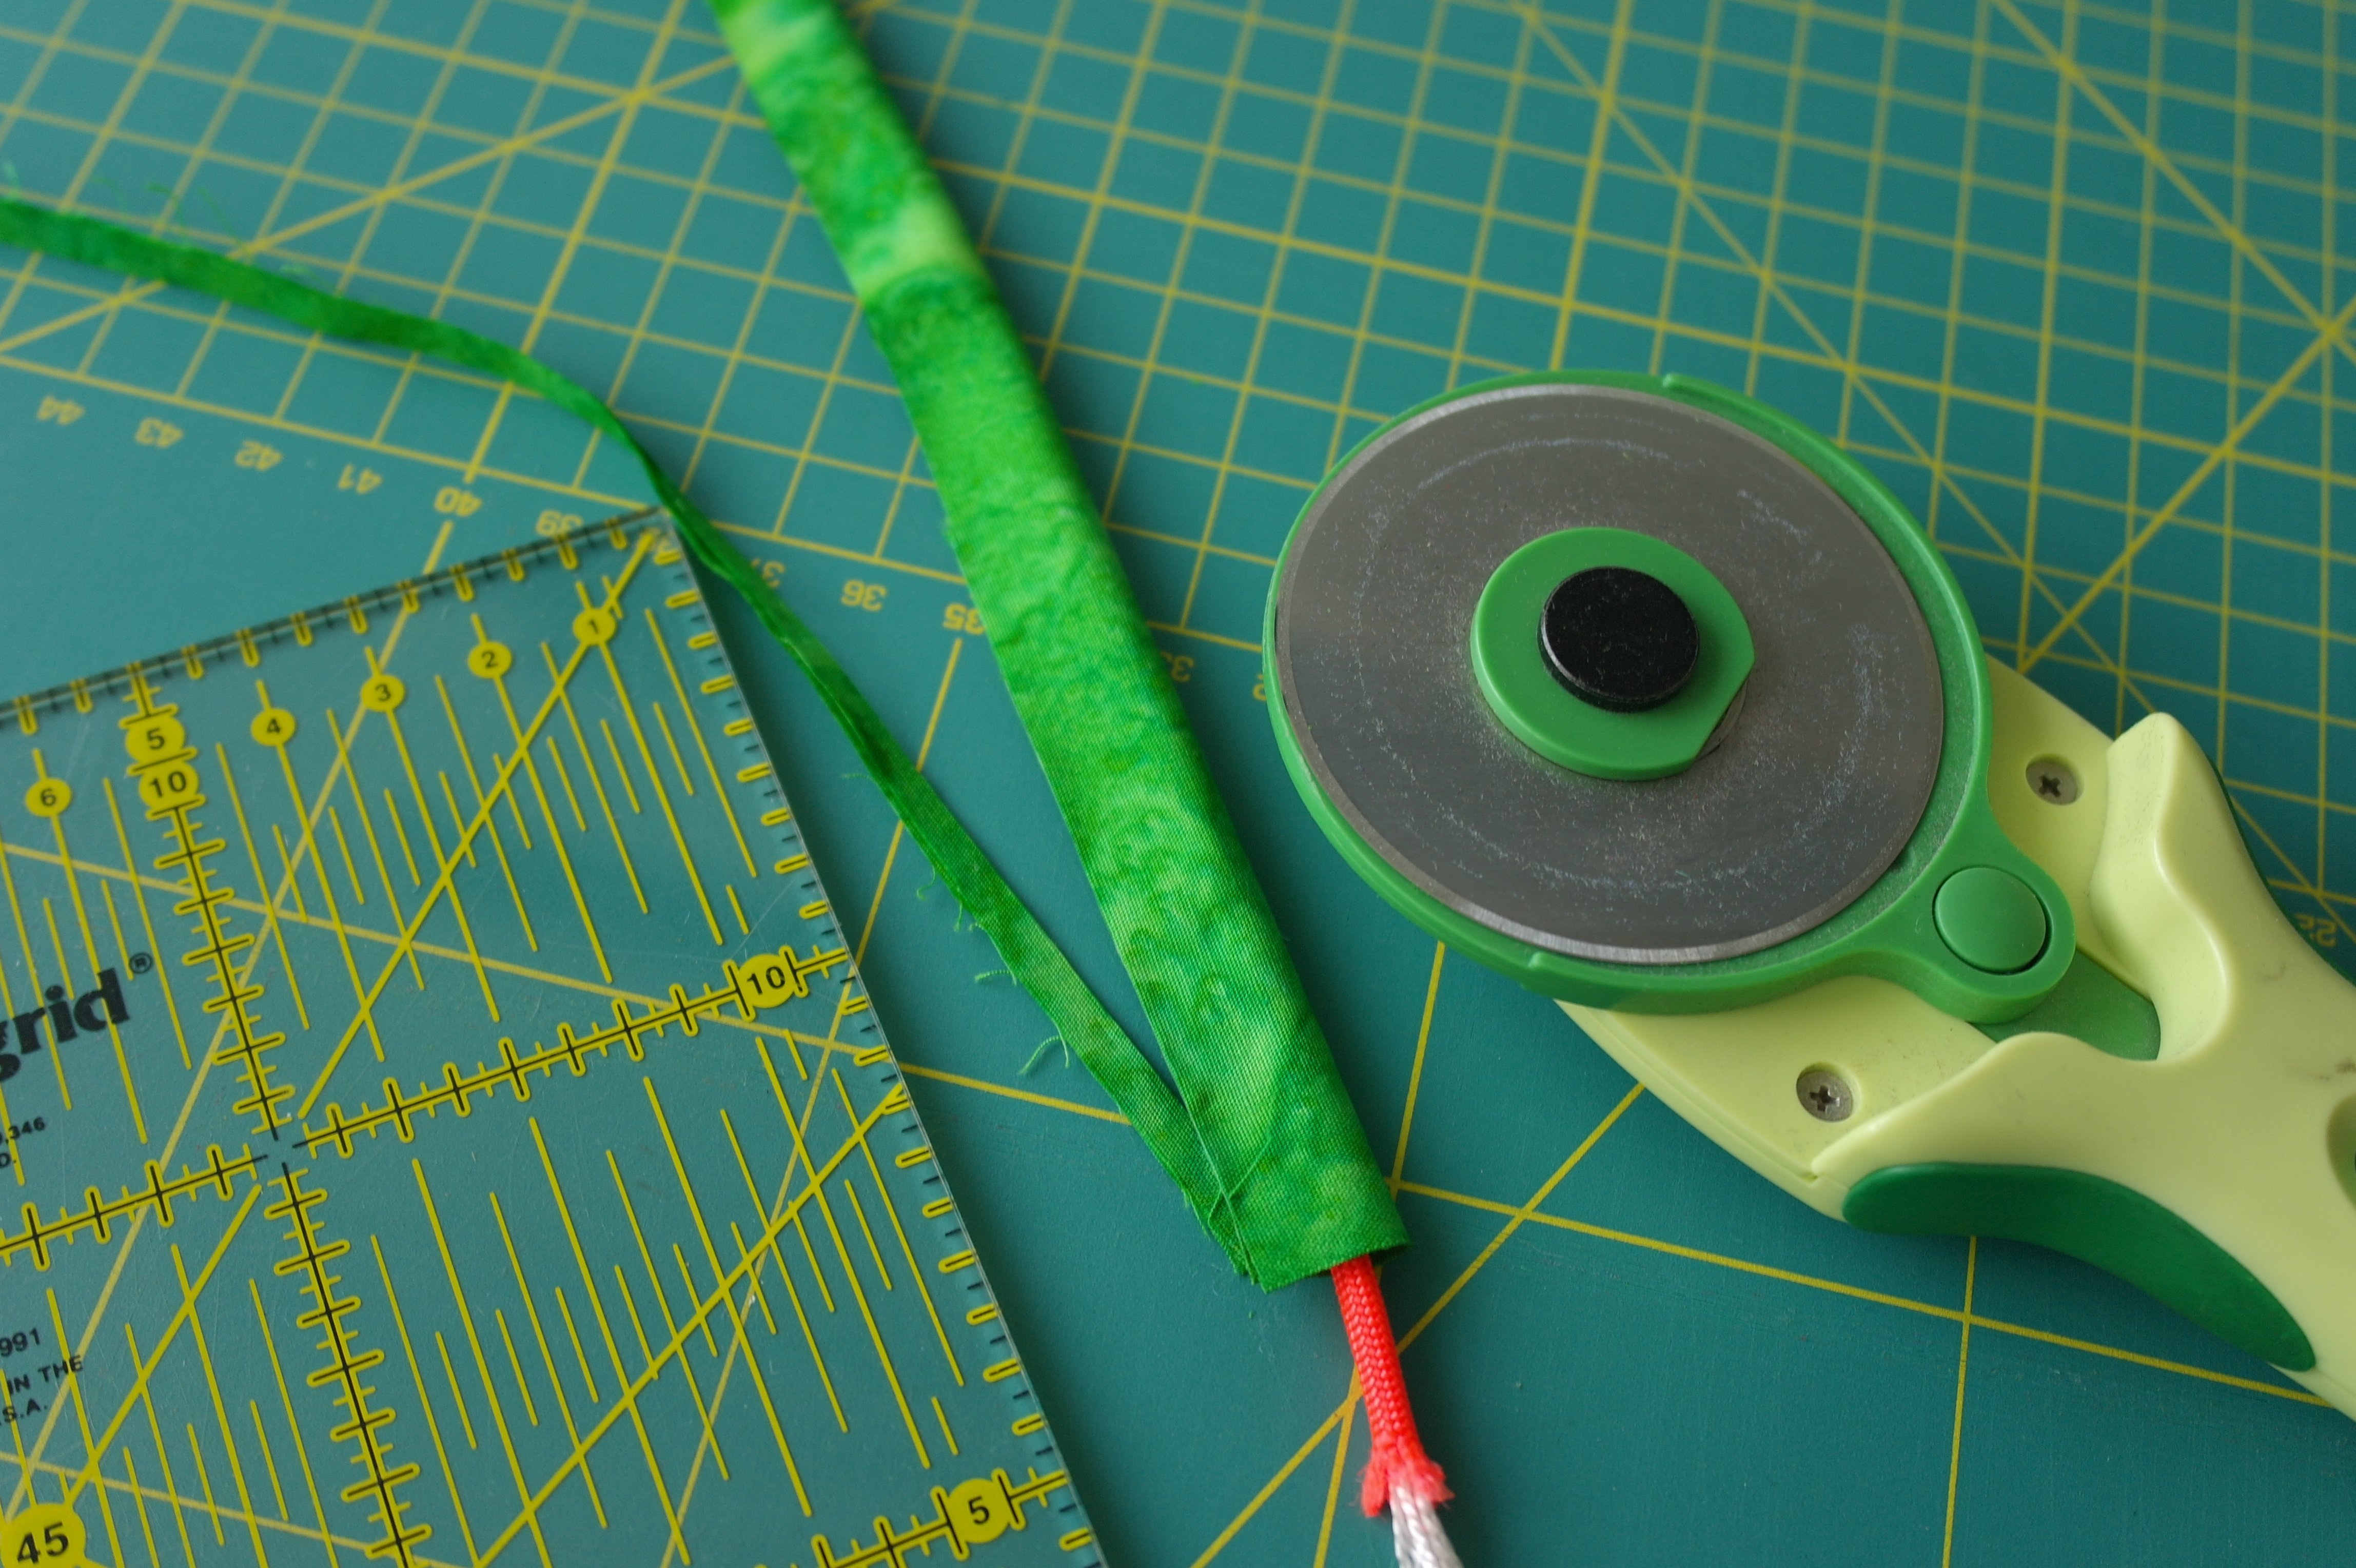
Is the flat part of the piping to wide? Just cut a piece off – I have cut 0.5cm off, because I didn’t want to sew it with such a wide seam allowance to the fabric/sandwich.

Use Zipper Foot #4D (you can watch a video at the bottom of this post) – this presser foot was included with my BERNINA 770QE. I’ve changed the needle position to the left again. I’ve noticed that I have used very thick cording – not a problem, it will stand out more this way. But I had to be careful when sewing the ‘next’ fabric to the sandwich and work slowly.
The zipper foot has to be close to the cording again. I’ve used a matching thread color for sewing the piping to the sandwich.
Fabric no. 3 is sewn the same way as fabric no. 2 – I’ve used the Bohin Glue pen again. After this I’ve folded the fabric to the right side, and used presser foot #20C again, placed the needle position back to ‘0’- don’t forget to do so!
I didn’t use piping ribbon with every seam: just now and then for special effect. If you want to use it with every seam, please do so. But beware of the tickness of the cording in the piping, when crossing each other. Also beware that the cording in the piping should lay falt in a certain direction (away from the seam), and it doesn’t fold back when sewing over it.
And again making a lot of decorative stitches all over the fabrics. I’ve also used thet multicolor zigzag ribbon with silver: this looks great wherever you will use it.
Remember to work slow where piping ends meet: they protrude in the seam allowance! If they cross each other, that part will be very thick, depending on the thickness of the cording you’ve used in the piping ribbon. Be sure to use decorative stitches that won’t distort when sewing over such a thick part of the sandwich….
Check this: my decorative stitches didn’t even out – two of them were denser than the other ones, the ‘next’ was too loose, when they crossed multiple piping ribbons. No problem: I don’t mind… perhaps I will add sequins and beads afterwards, just to make this part stand out…. (If you don’t like this, you can rip the stitches out, and start all over, with a different decorative stitch that is more open – be sure to work slowly on the thick part).
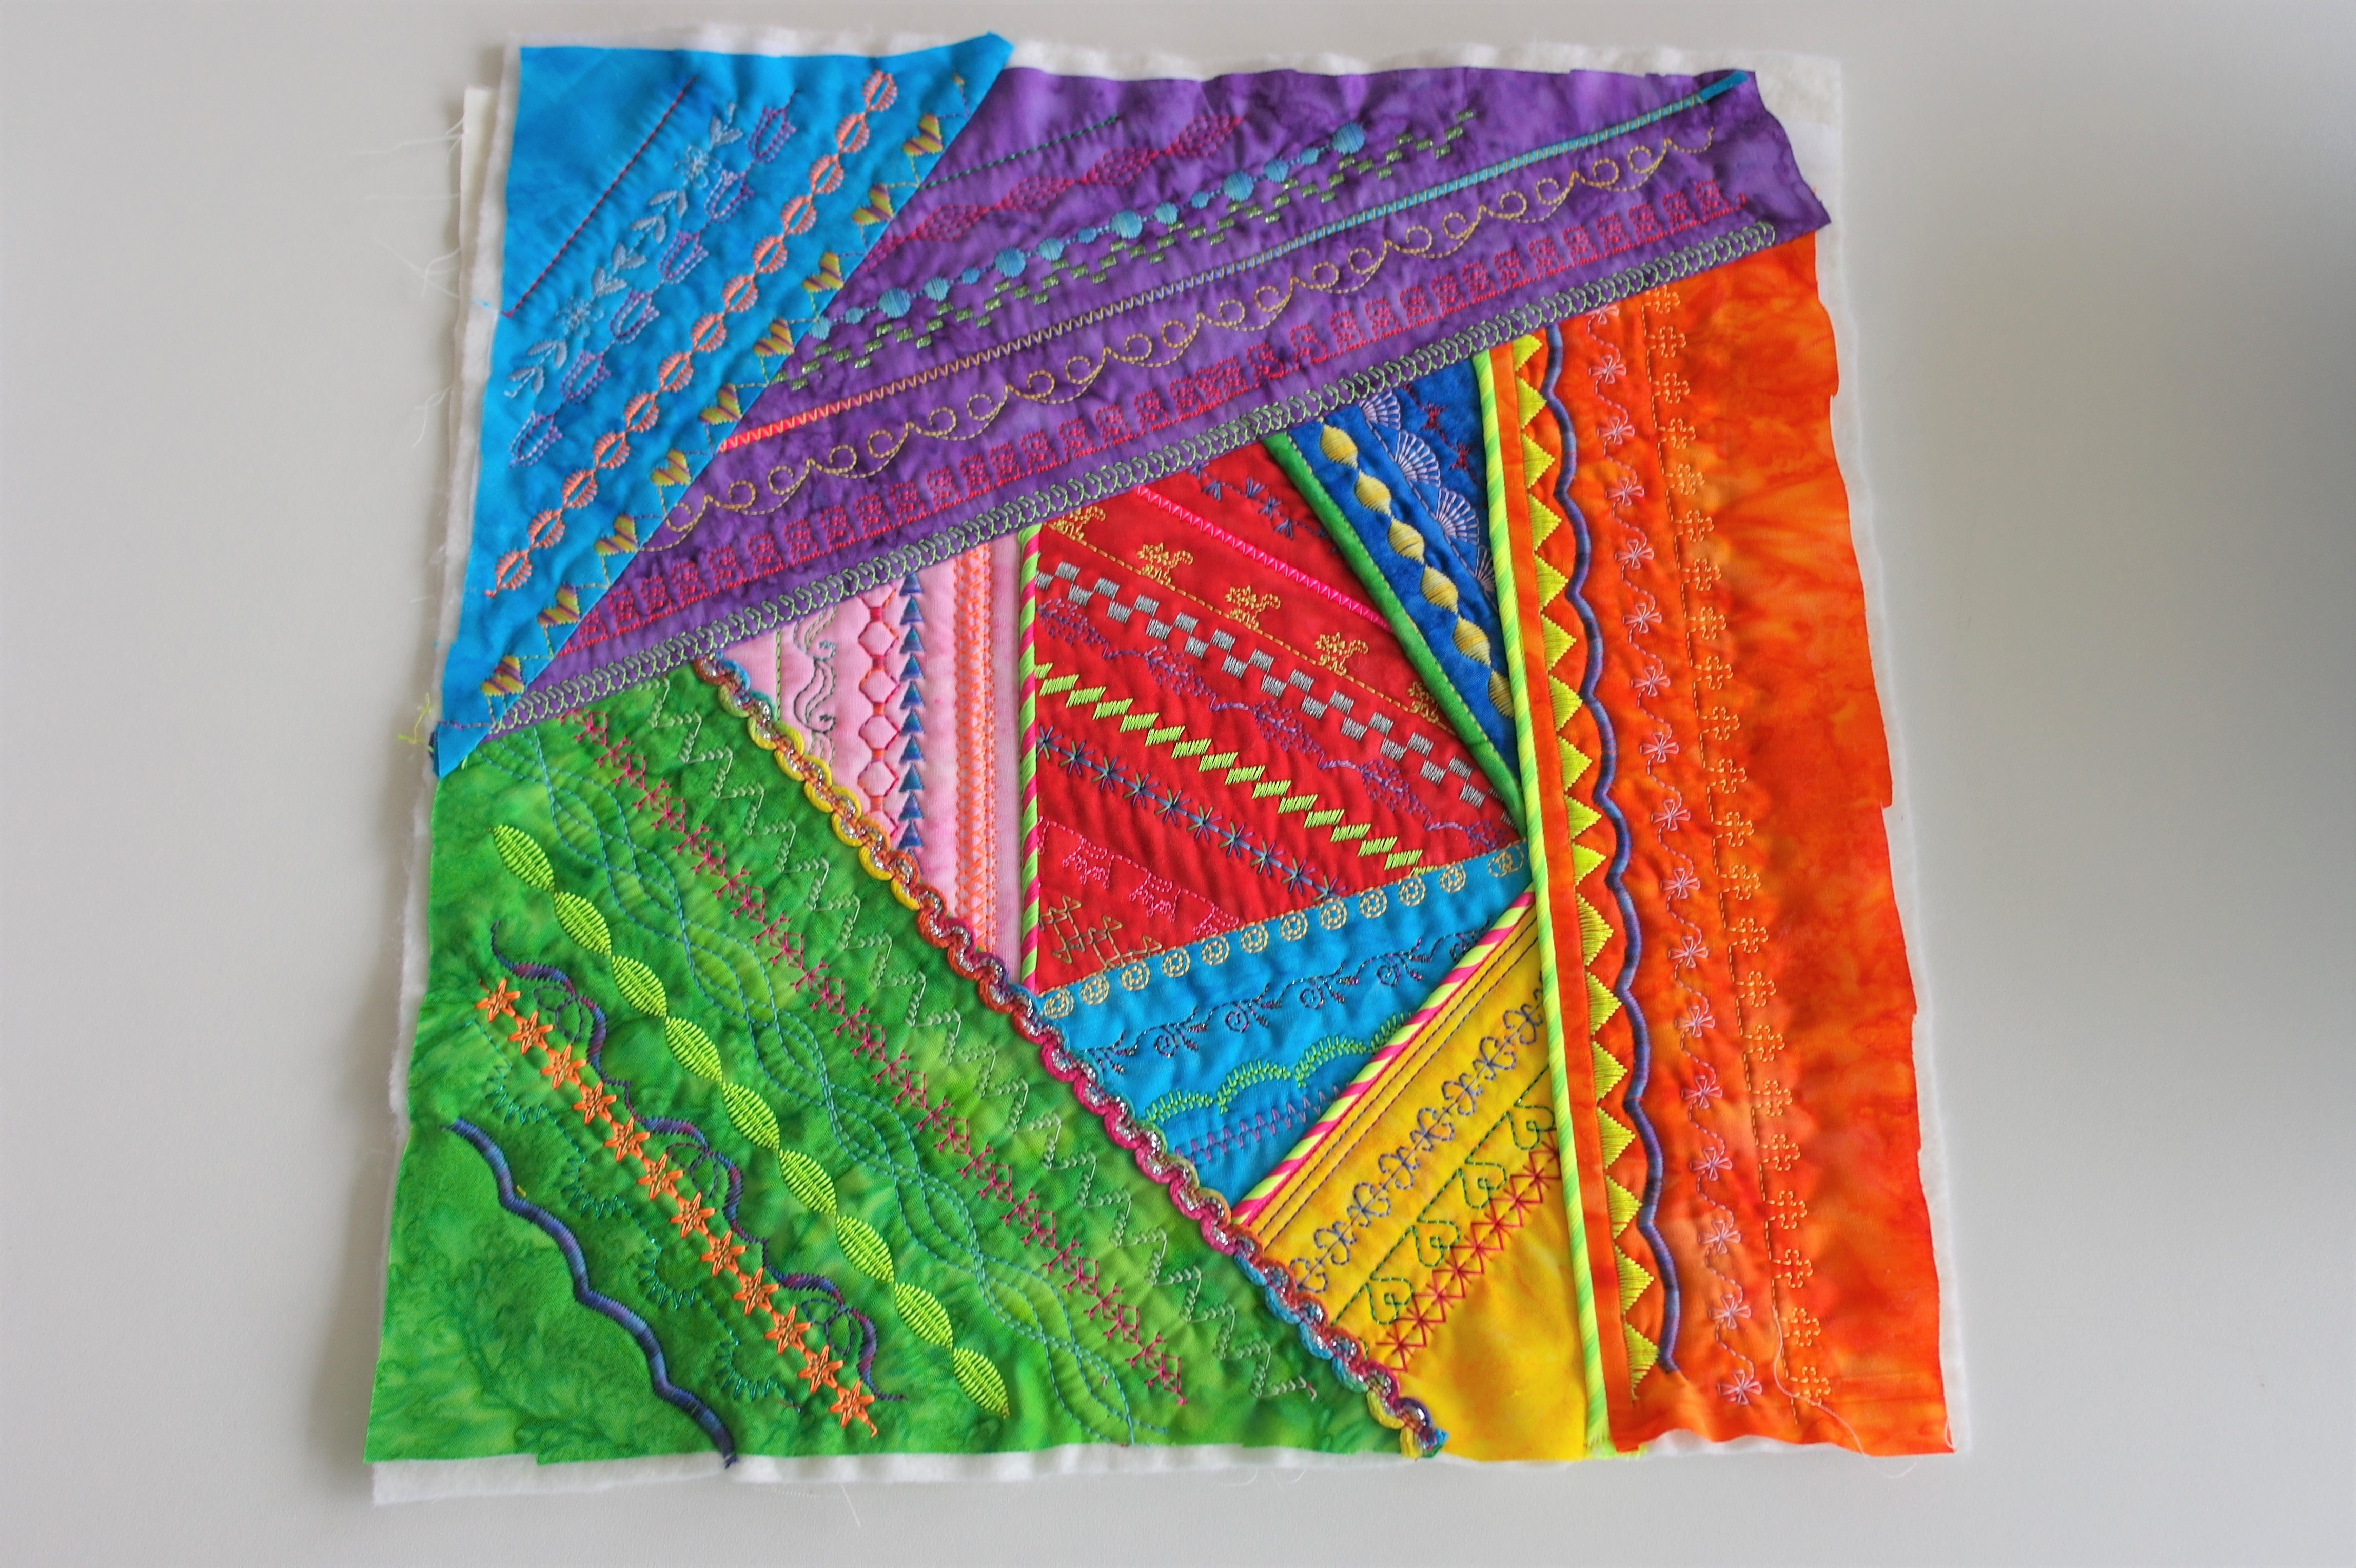
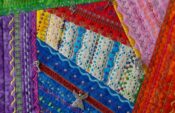
My block is finished: I have used piping ribbon at some seams, decorative ribbon too, and a lot of decorative stitches with beautiful machine threads. Another block done, about halfway through the project….?

A detail to show the fun 3D effect of the piping ribbon… ready-made and bought, and made by myself….
Now it is up to you again: have fun making this block no,. 6 and see you next month!
Happy quilting!
Sylvia Kaptein
Sylvia’s Art Quilts Studio
IMPORTANT: when your sandwich/block is finished, check if the size is aprox. 32 x 32 cm. It can be shrunken a bit because of the stitches you have made, and the freehand quilting. BUT DO NUT CUT THE SANDWICH, not even to make it tidy!!! Leave it like it is, and put it aside until month 12.


0 Responses