 BERNINA Corporate Blog -
It was a lot of work: 25 embroidered pieces. My eldest sister loves cross stitch, but doesn’t want it all to be framed. And that’s where I come in: I have promised to make quilts and pillows of all her embroidery, not matter how small or large. I’ve done it before: making pillows or small quilts. This time it will be a large quilt, where the frame of each cross stitch will be a Pineapple block: Octagon in shape.
I have designed a Unit (Pineapple Octagon), large enough for each embroidery to fit. Almost half of them were a bit smaller, so I adapted the center of the Unit(s), making two different sizes. The actual Octagons are the same, but the center squares are different. In the end all 25 will be sewn into blocks, the blocks into rows, triangles will be added with the corners to square them up, borders added and machine quilting will finish it all. But it is still far from that!

A while ago we’ve placed them on her floor, to get the right setup. Larger and smaller alternating. I’ve numbered each piece in the upper left corner, and took them home.
Blocking the cross stitch pieces.
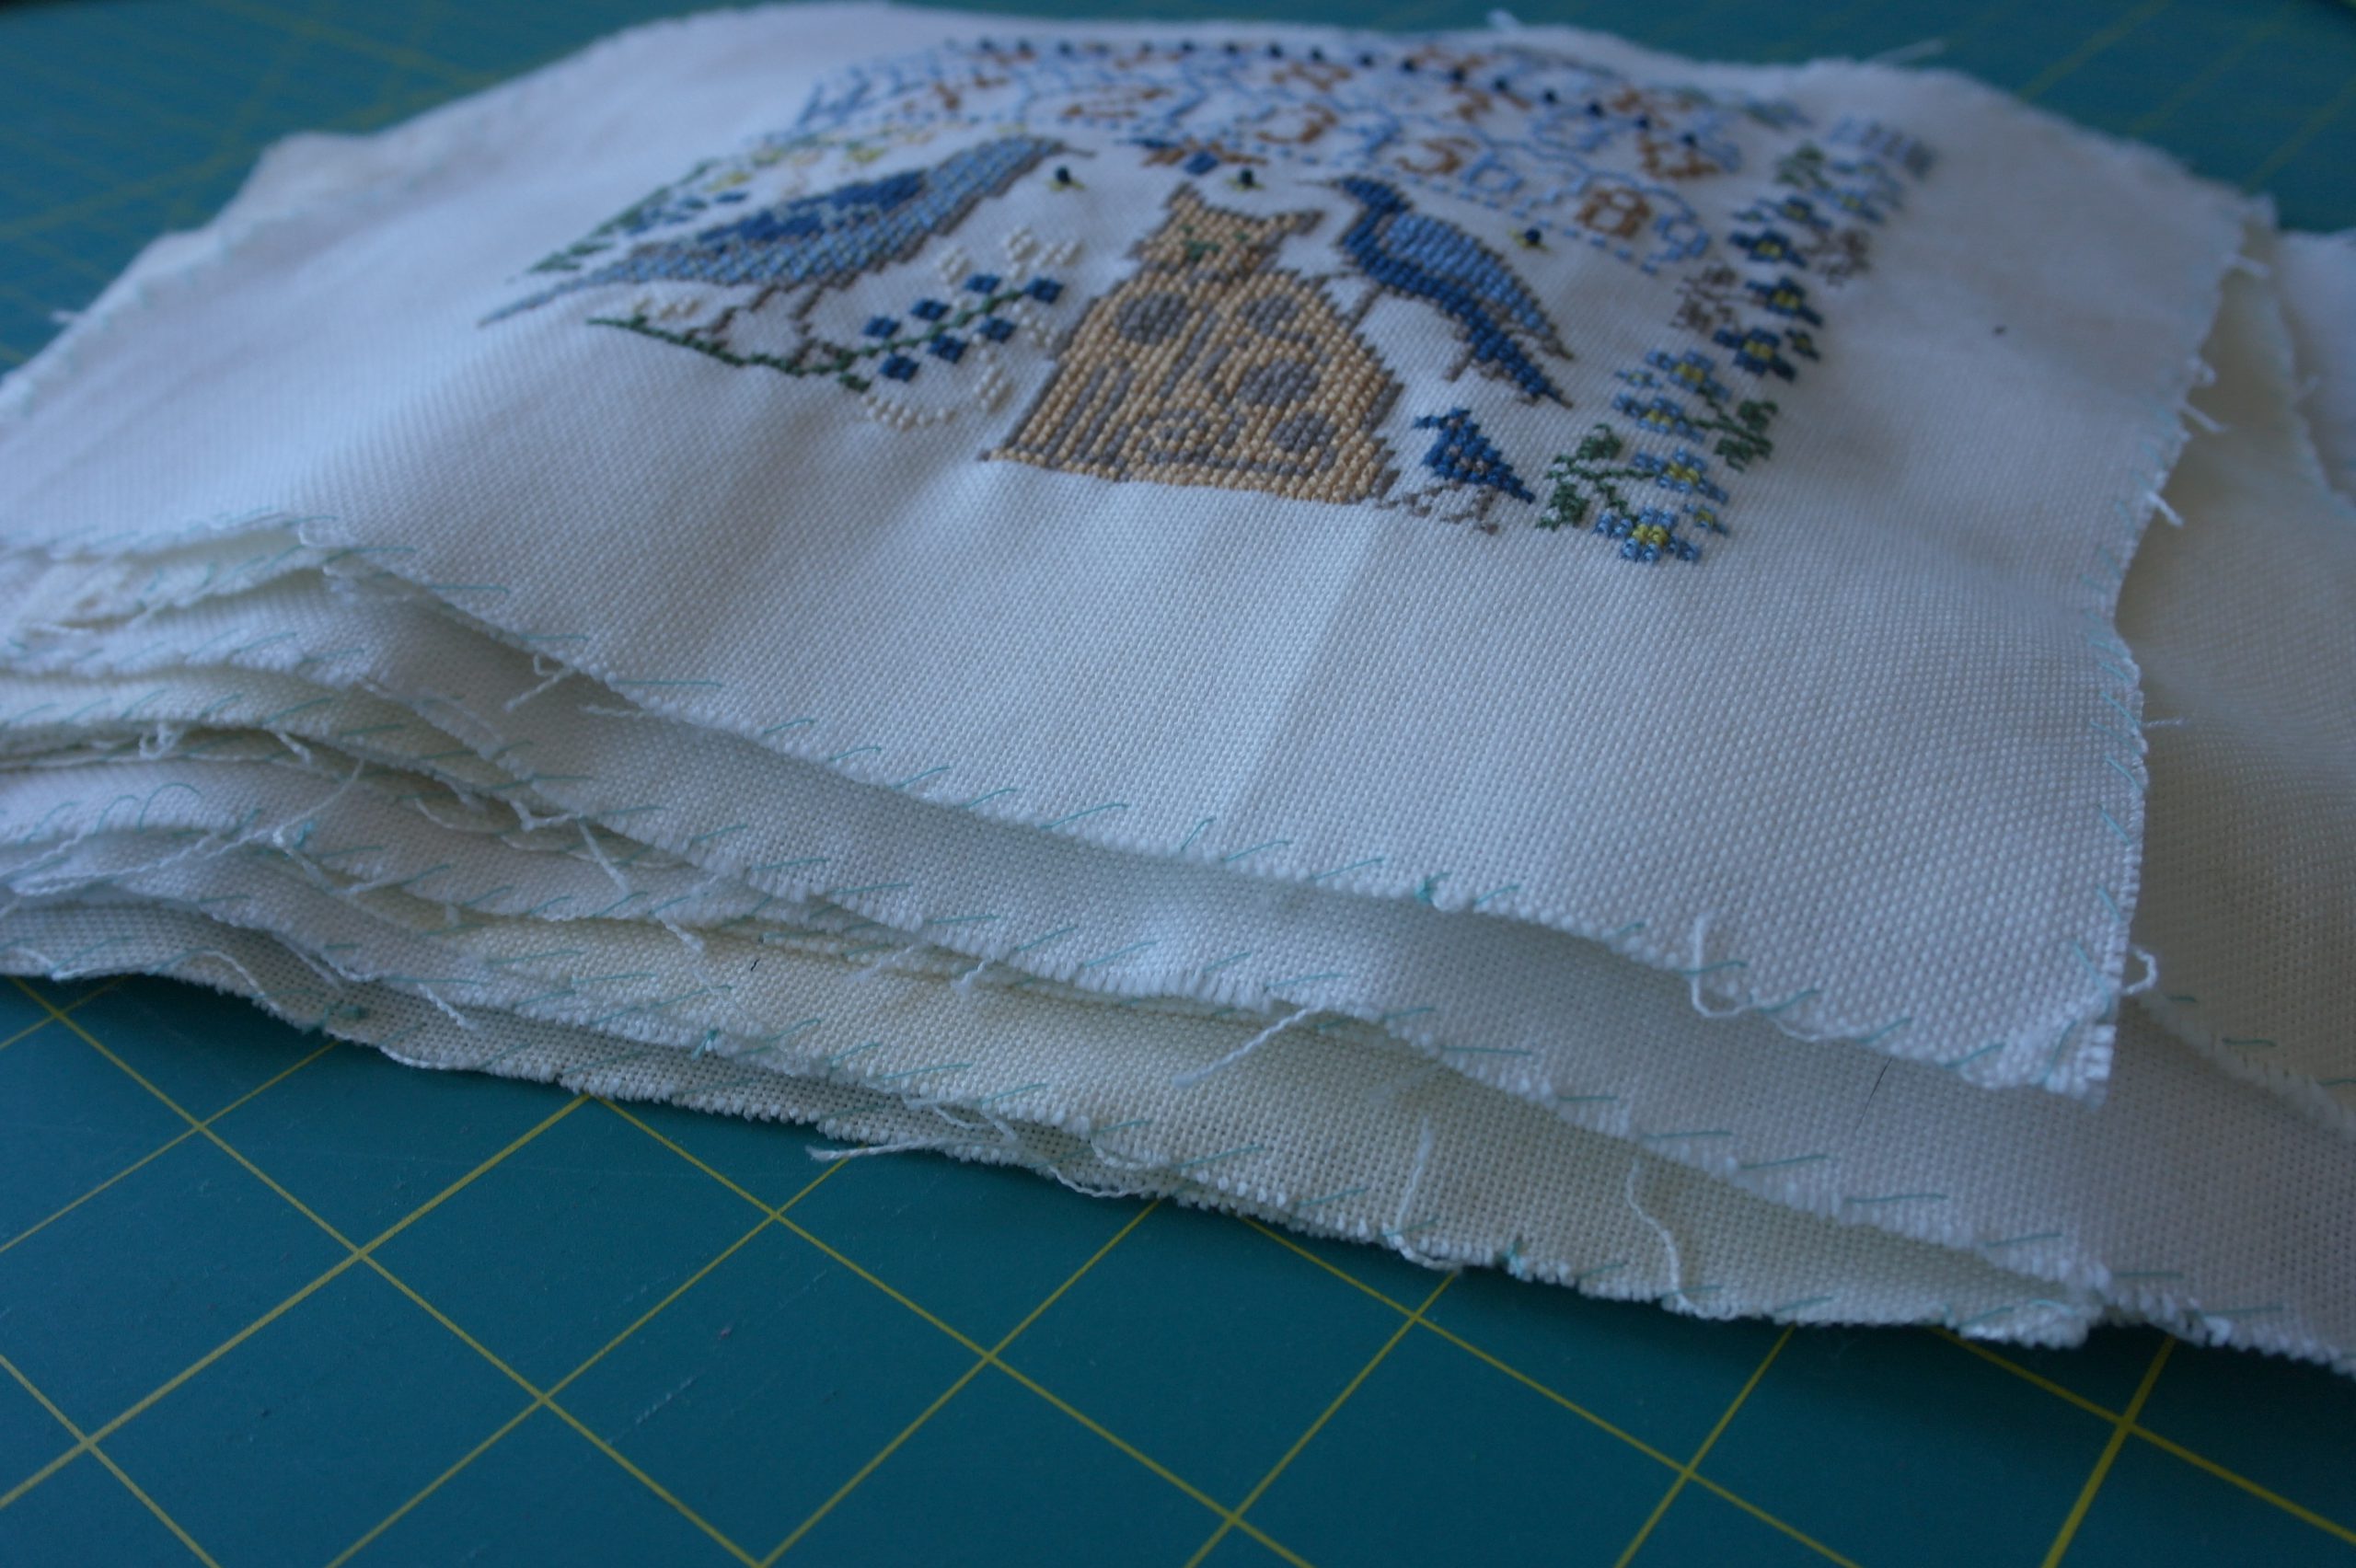
I’ve blocked each cross stitch piece: pinned them on a ironing mat, while stretching them, to be sure creases and distortion would disappear. Because my sister has added beads, I cannot iron them. Now the stack is ready for use.
Preparing the Units.
I’ve designed two different Pineapple Units: one with a smaller center square and one with a larger center square, to match the cross stitch pieces. The final measurements are the same. Both will be printed on Papers for Foundation Piecing each in 4 parts, taped together.
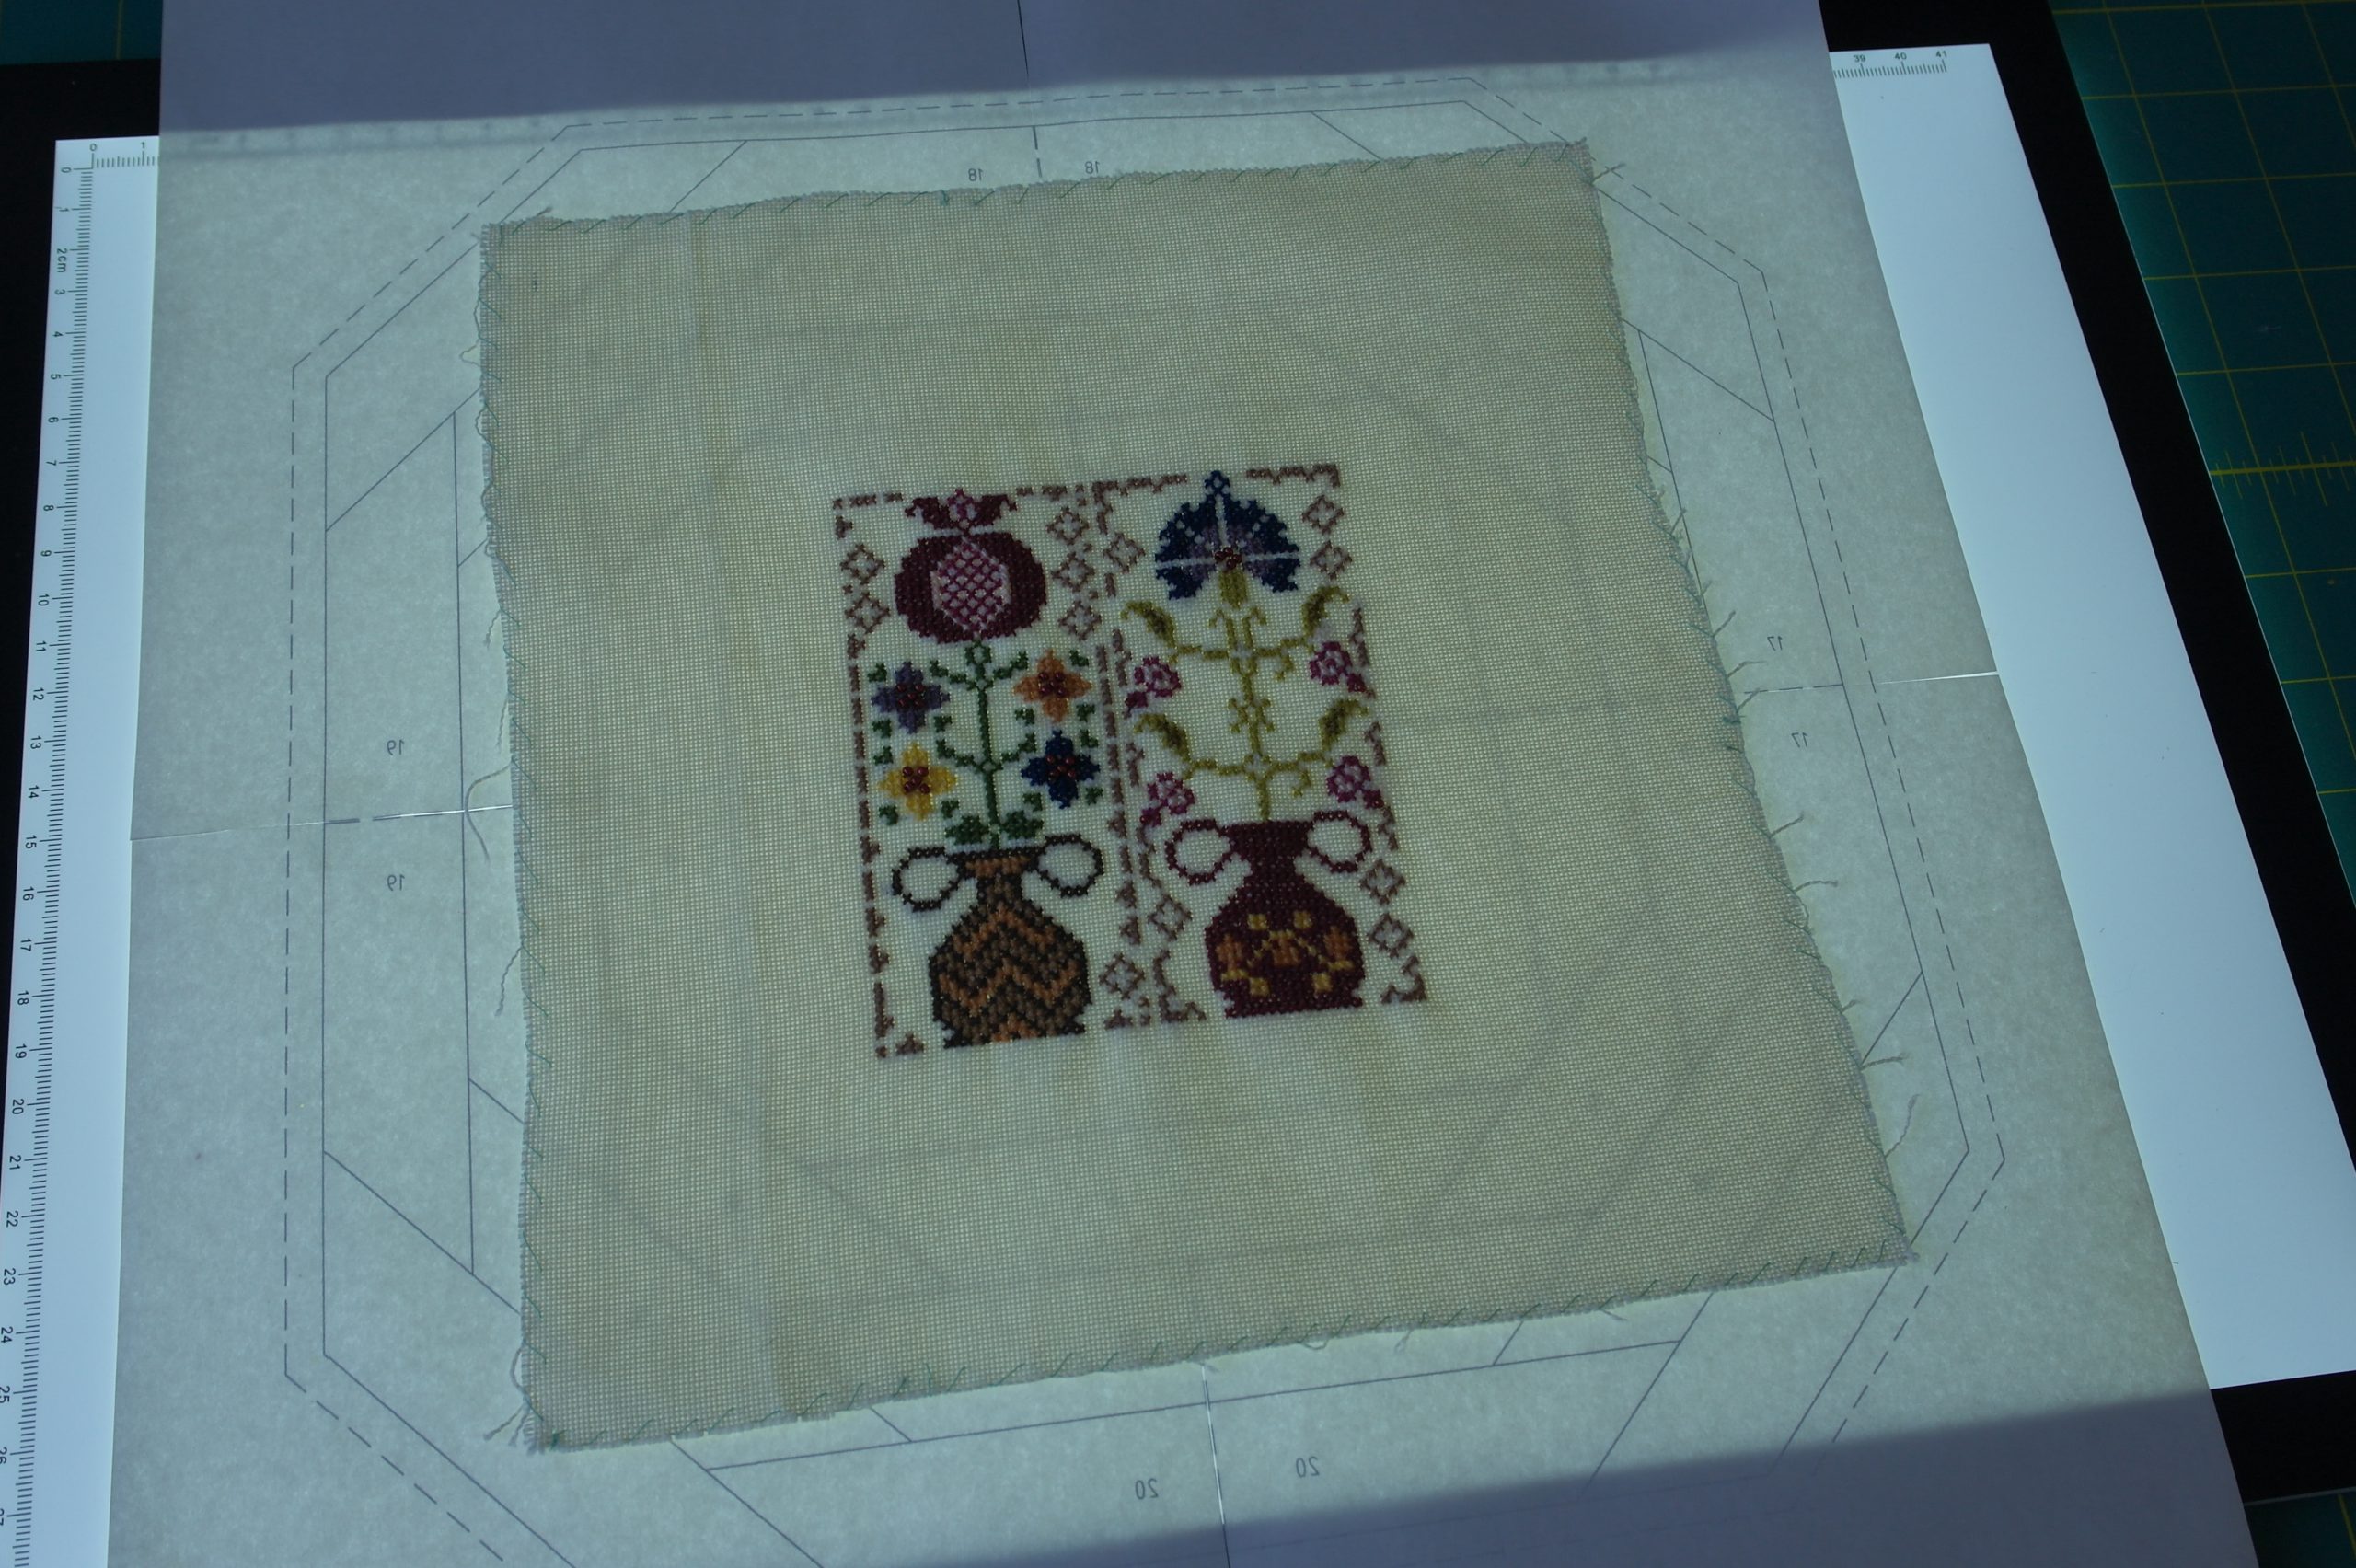
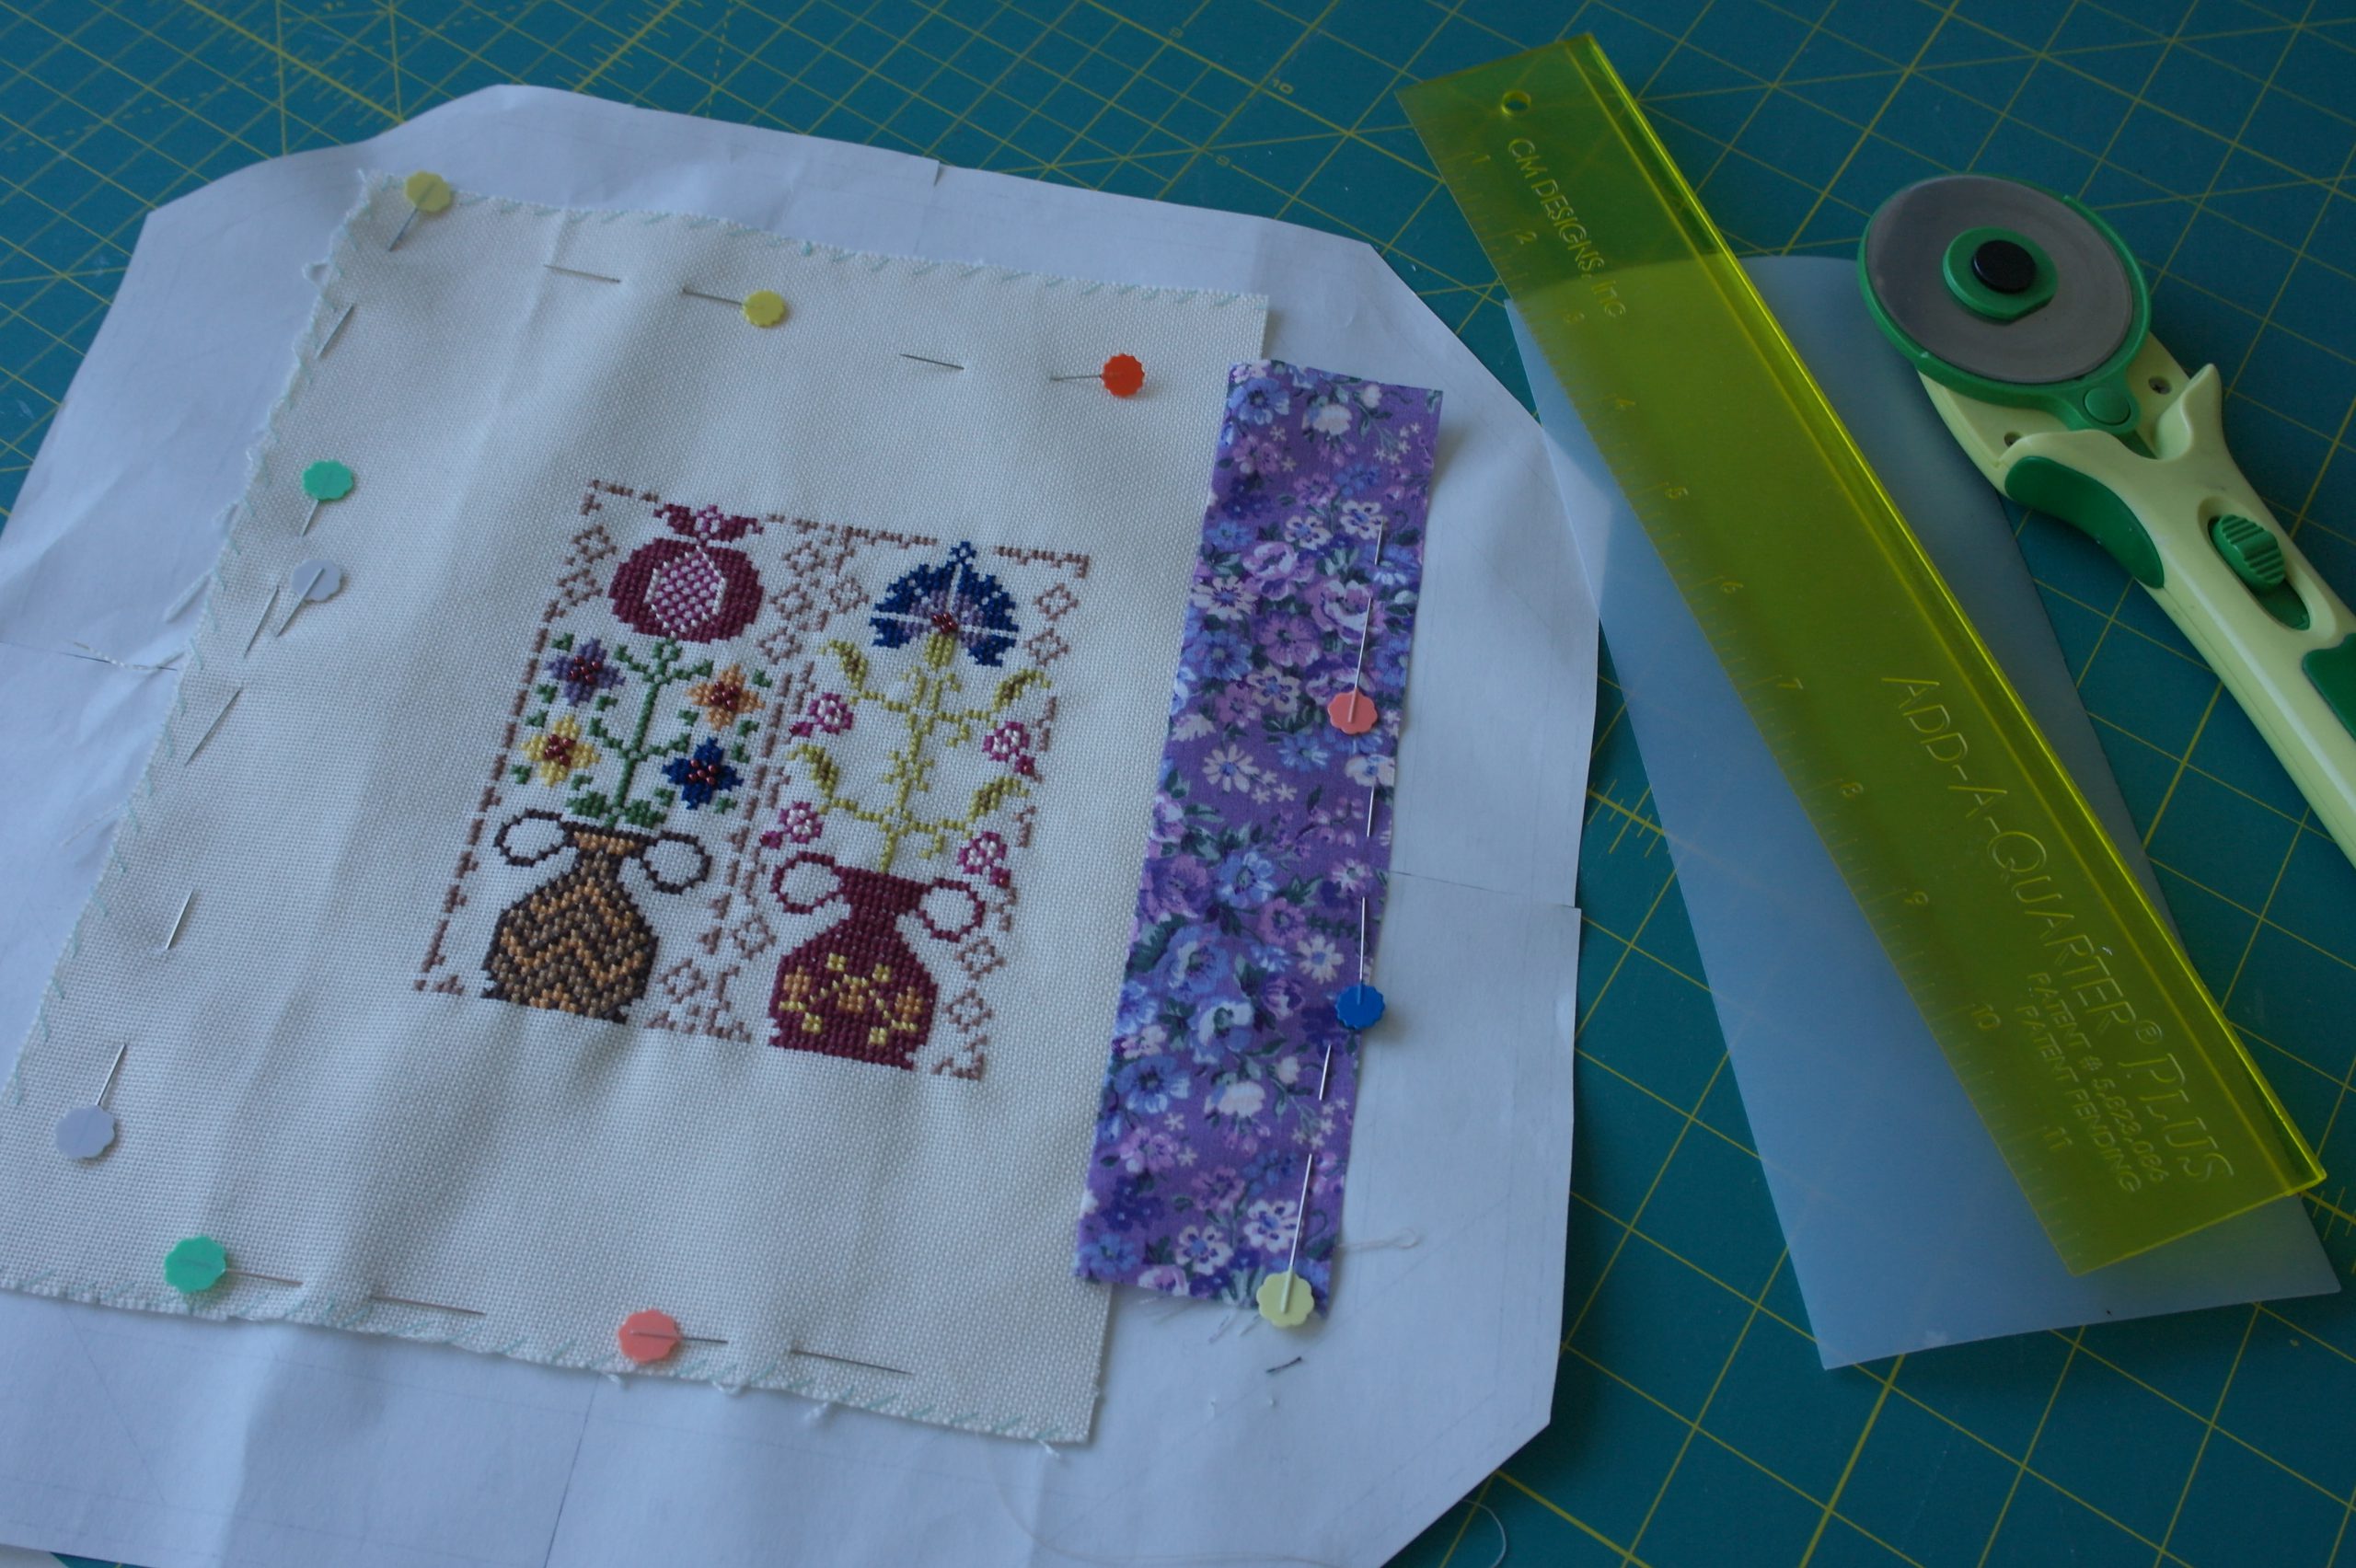
To make sure the cross stitch piece is centered, I have used my large light box, placing the paper piecing Unit upside down, with the cross stitch piece on top.
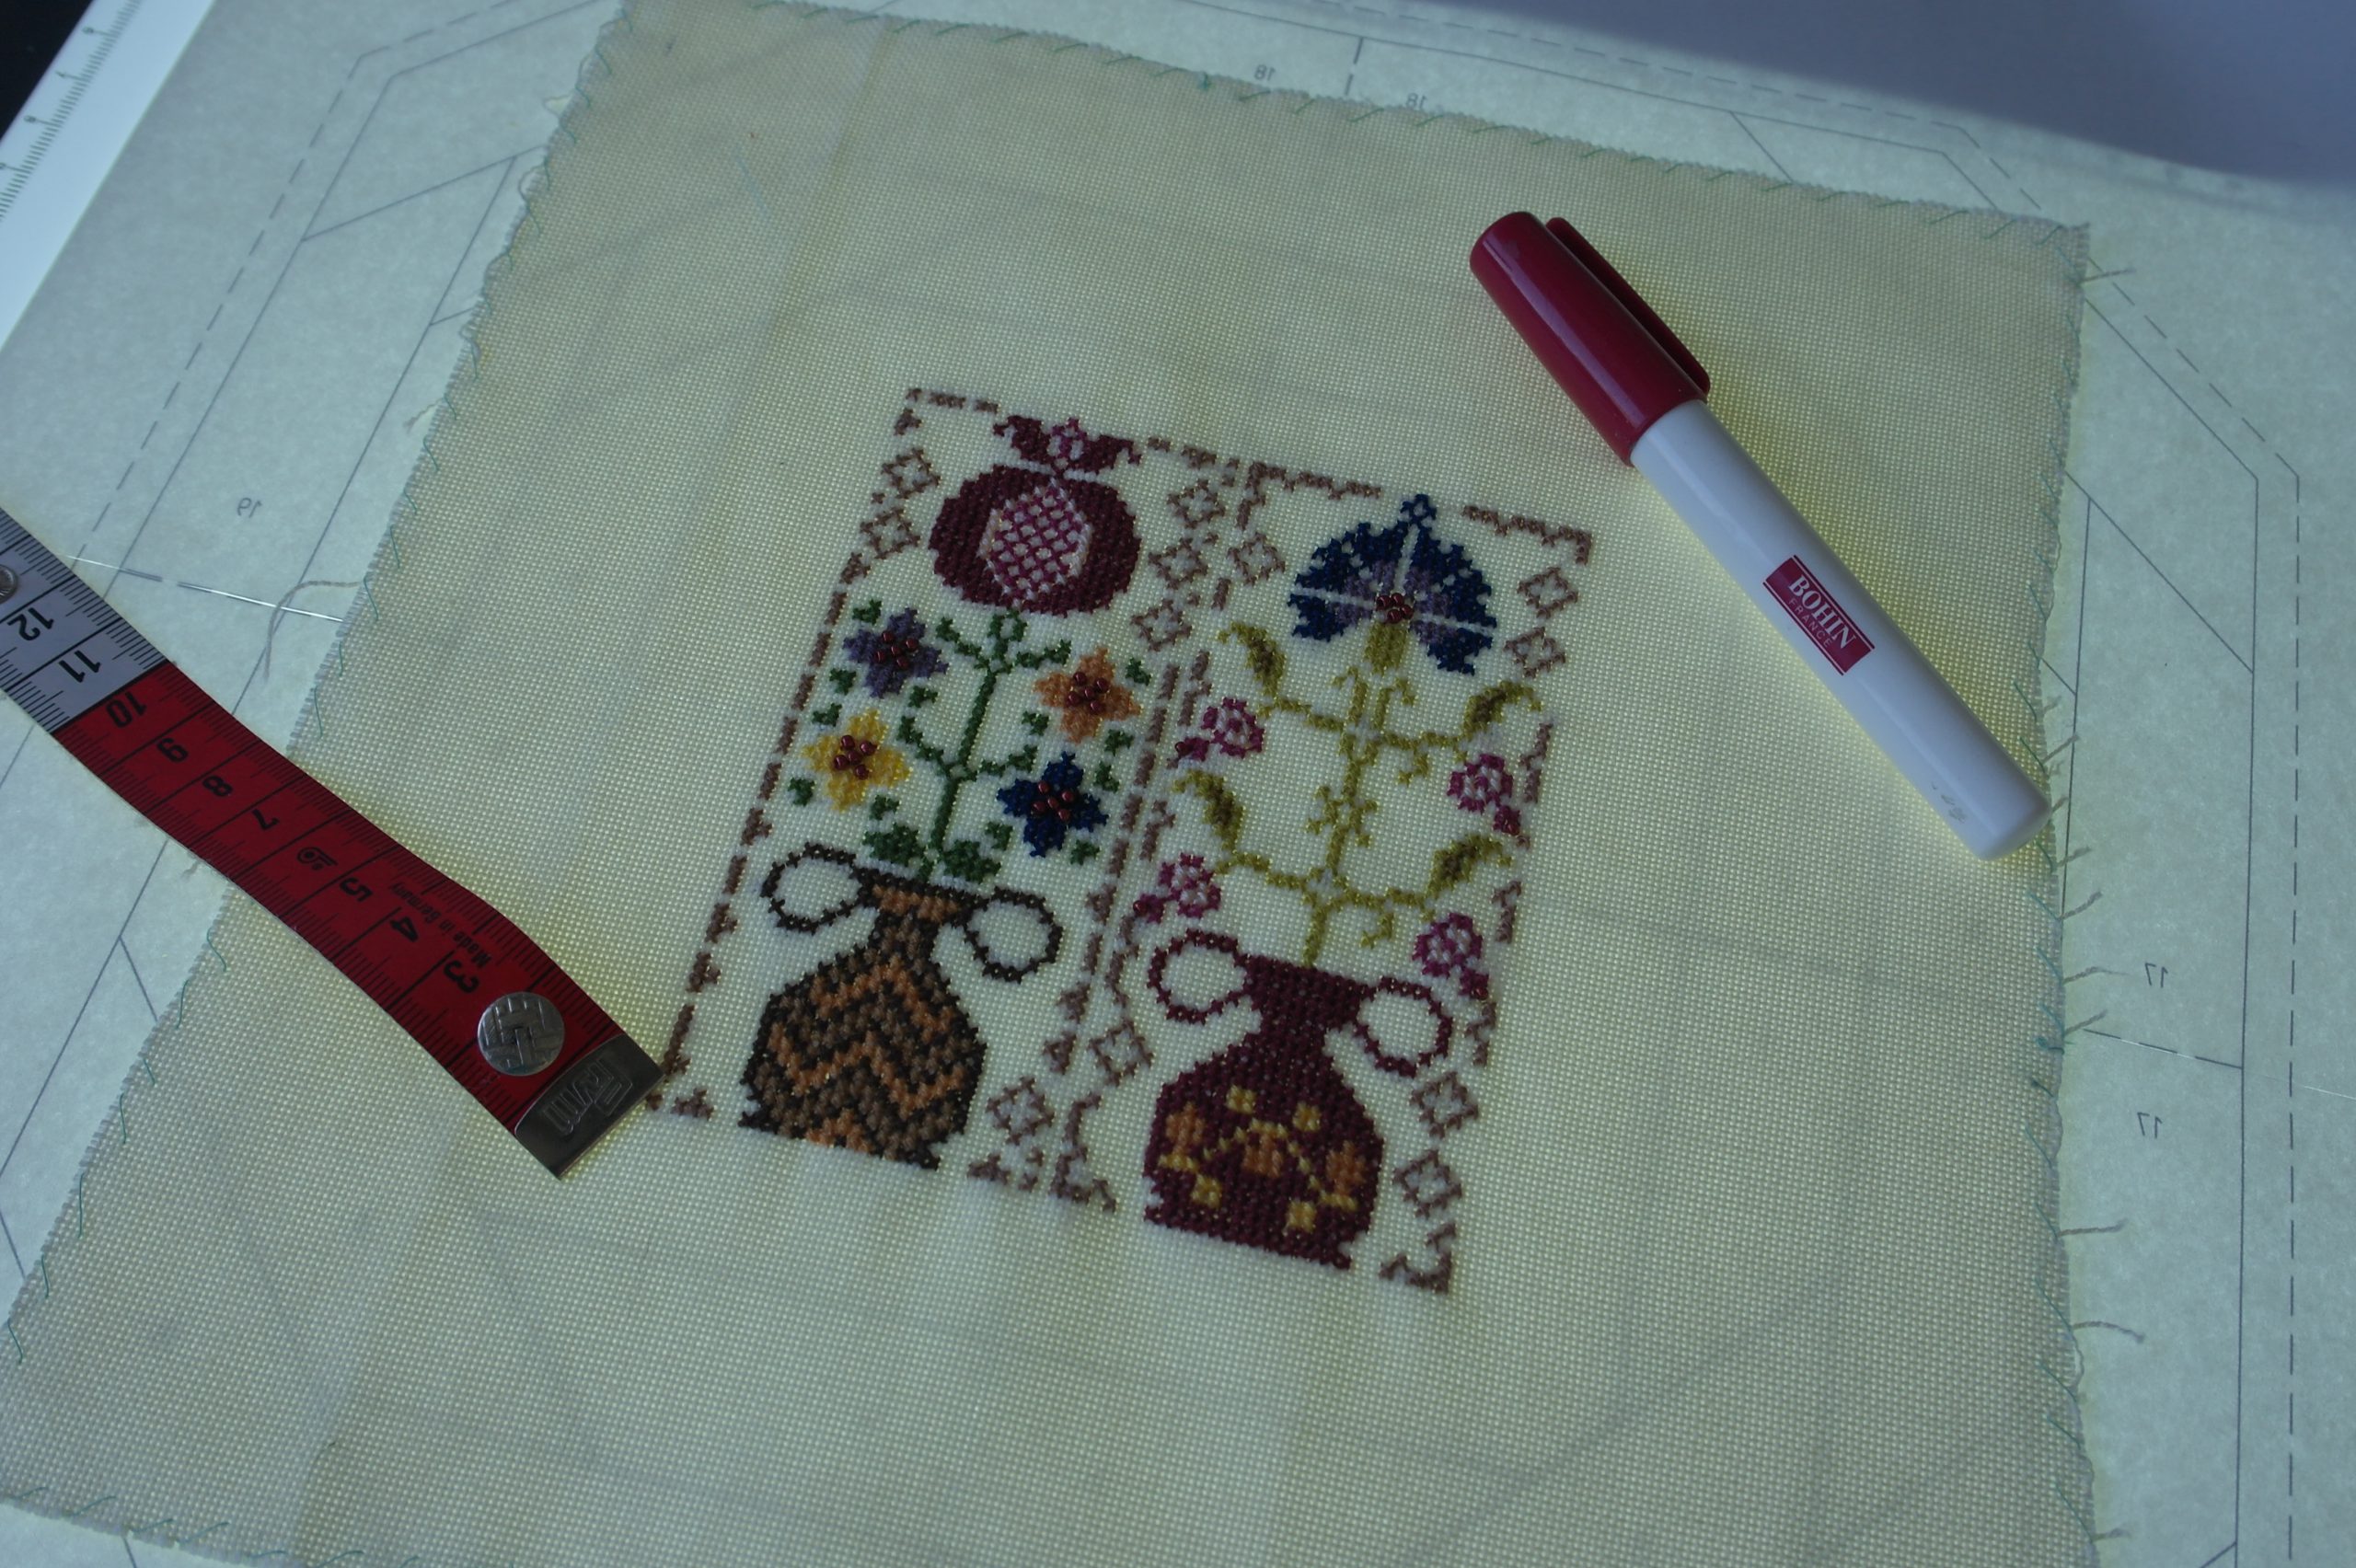
using my Bohin Glue Pen to add glue underneath the embroidery, and on the sides of the embroidery fabric, I am sure nothing shifts while adding strips of quilting fabric. I have measured it all, centering as best as I could. It is ok if that’s a a bit off: it is made by hand, so a light distortion can be expected, even after blocking.

I have measured it all, centering as best as I could. It is ok if that’s a a bit off: it is made by hand, so a light distortion can be expected, even after blocking.
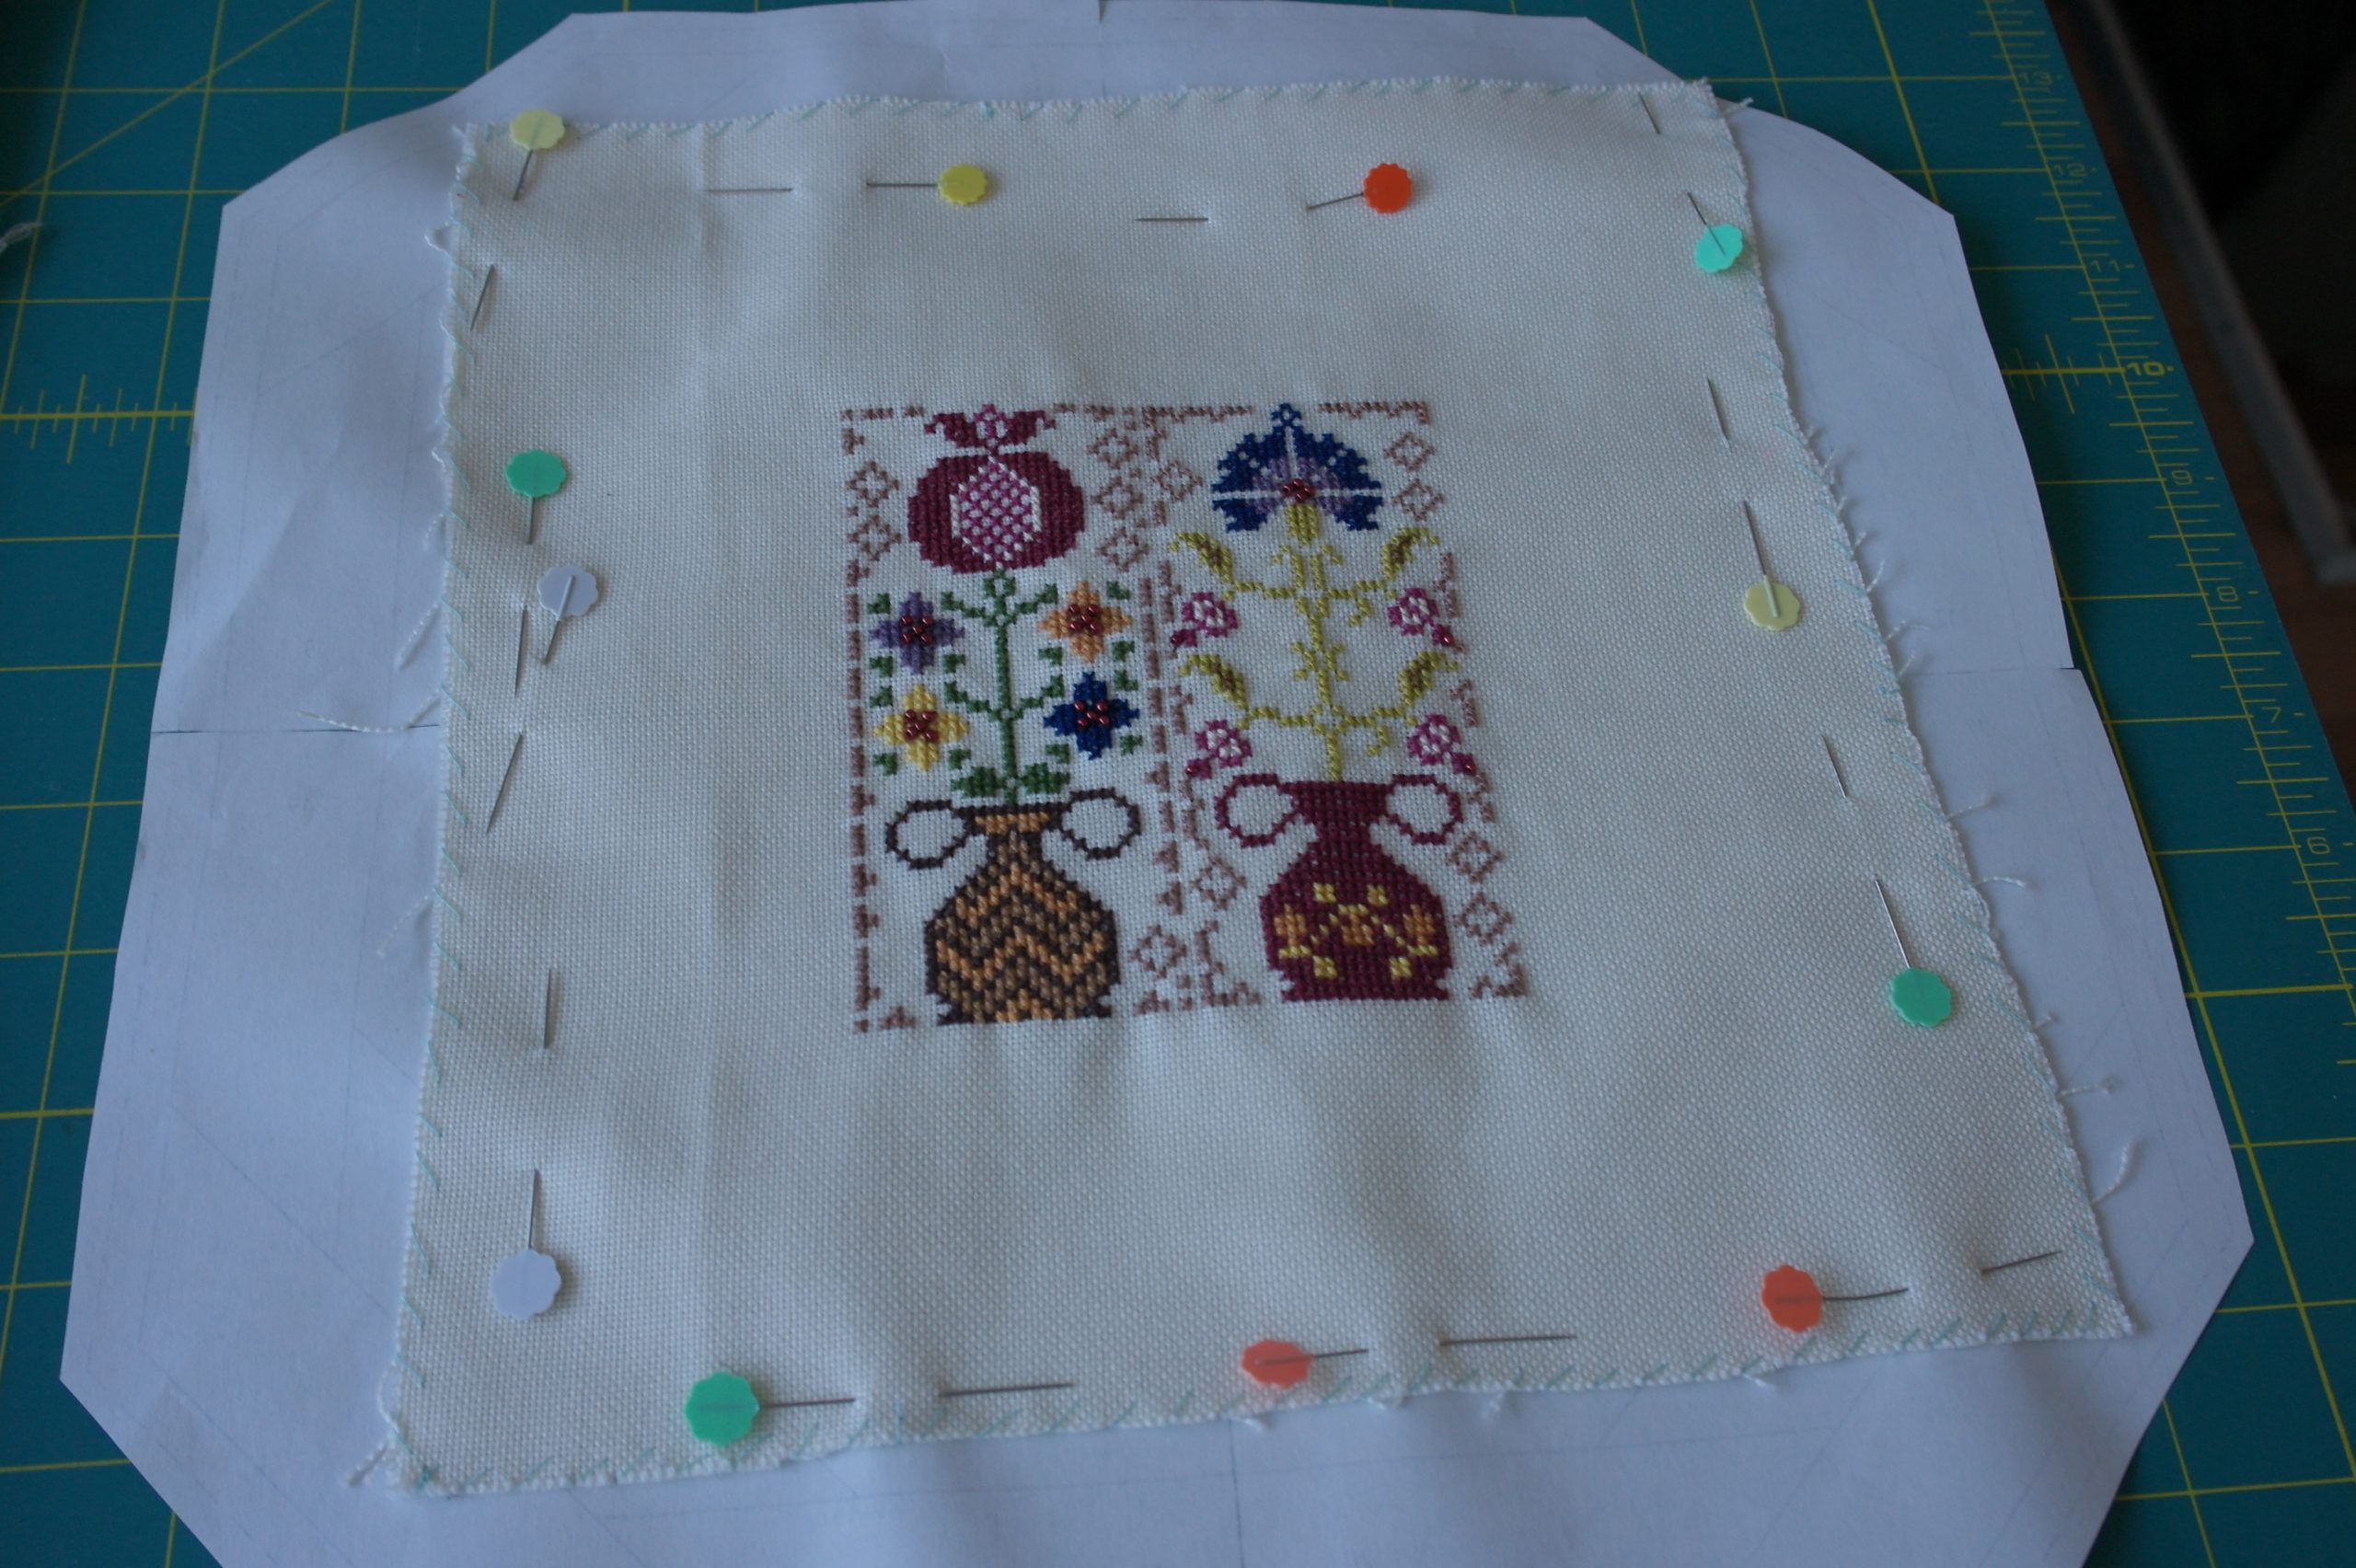
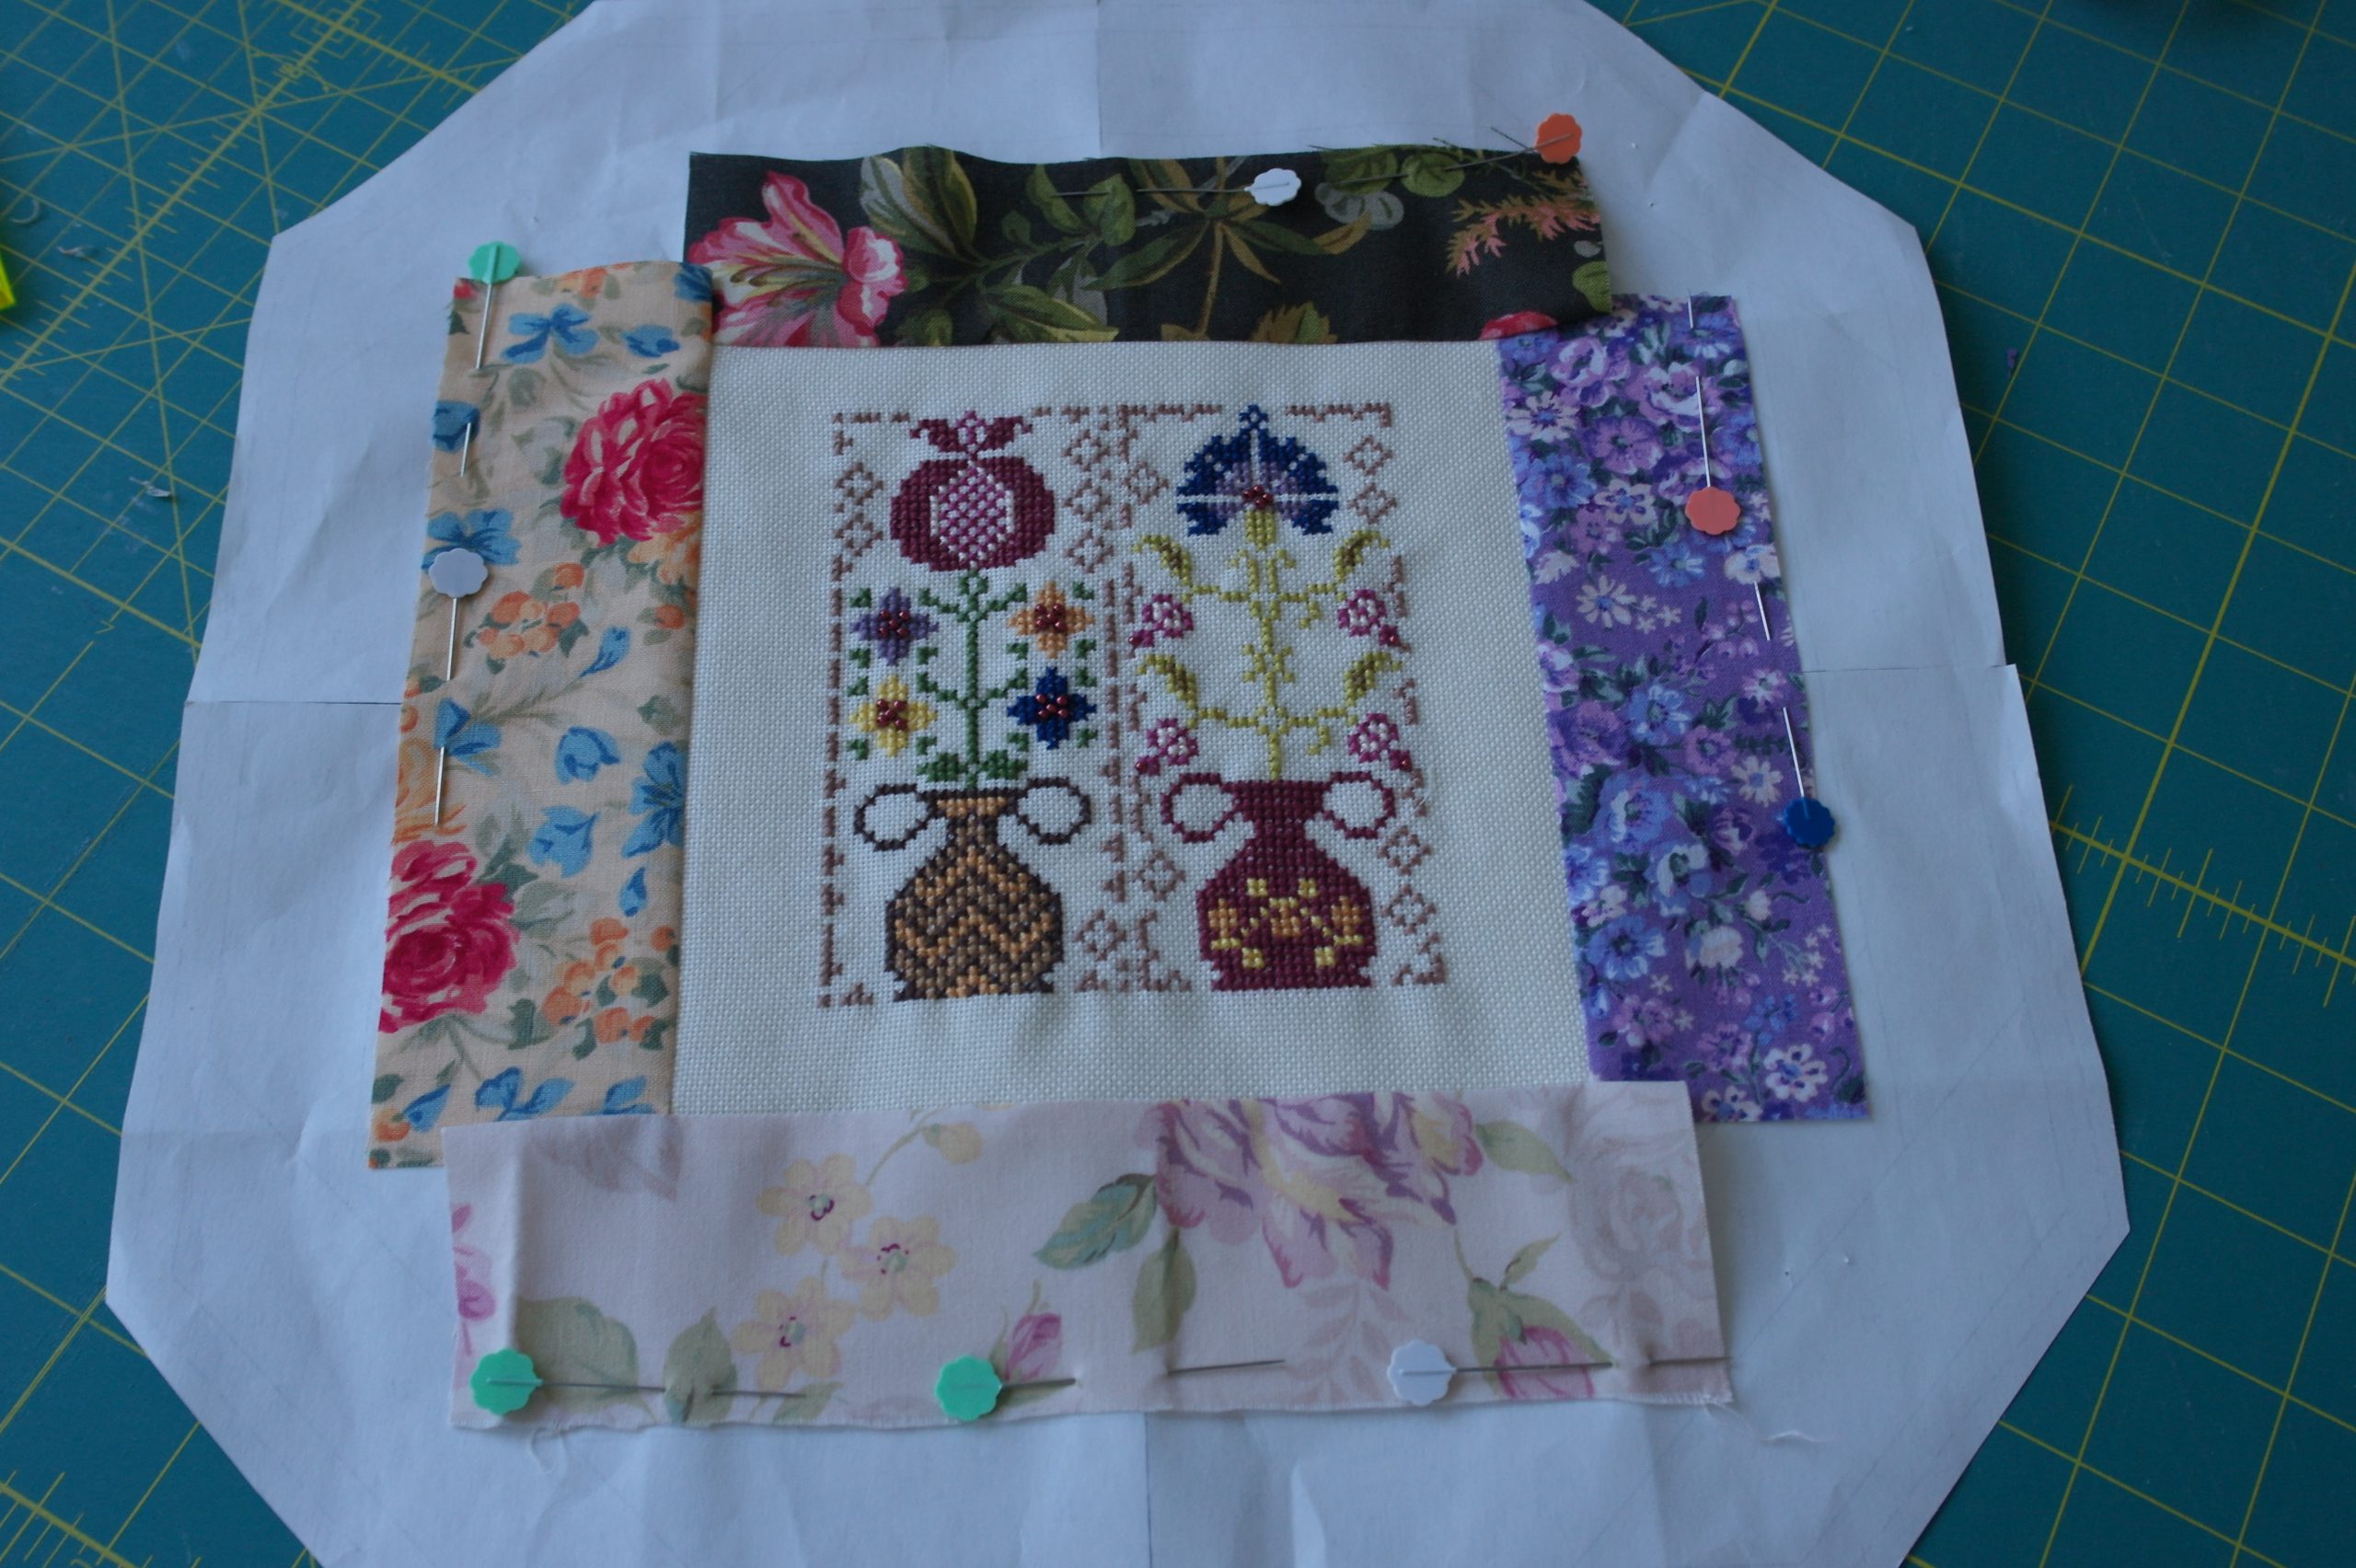
Pinned the edges of the embroidery fabric to the Unit, to be sure all will be secured while sewing the strips. After adding the first four strips, the excess embroidery fabric will be trimmed.
Preparing the quilt fabrics.

I had to iron each fat quarter and other measurements, because they have been stacked in a box for a while. All creases and fabric folds had to be removed. A lot of work, but I don’t want distortion with the strips I have to cut.
A warm job: steam and the heat of the iron was not comfortable, but it had to be done. A large stack of pressed fabrics was the result. I will add more fabrics when required, during sewing.

Strips are cut – each 2 inches (approx. 5 cm) wide with my rotary cutter.
Sewing the strips.
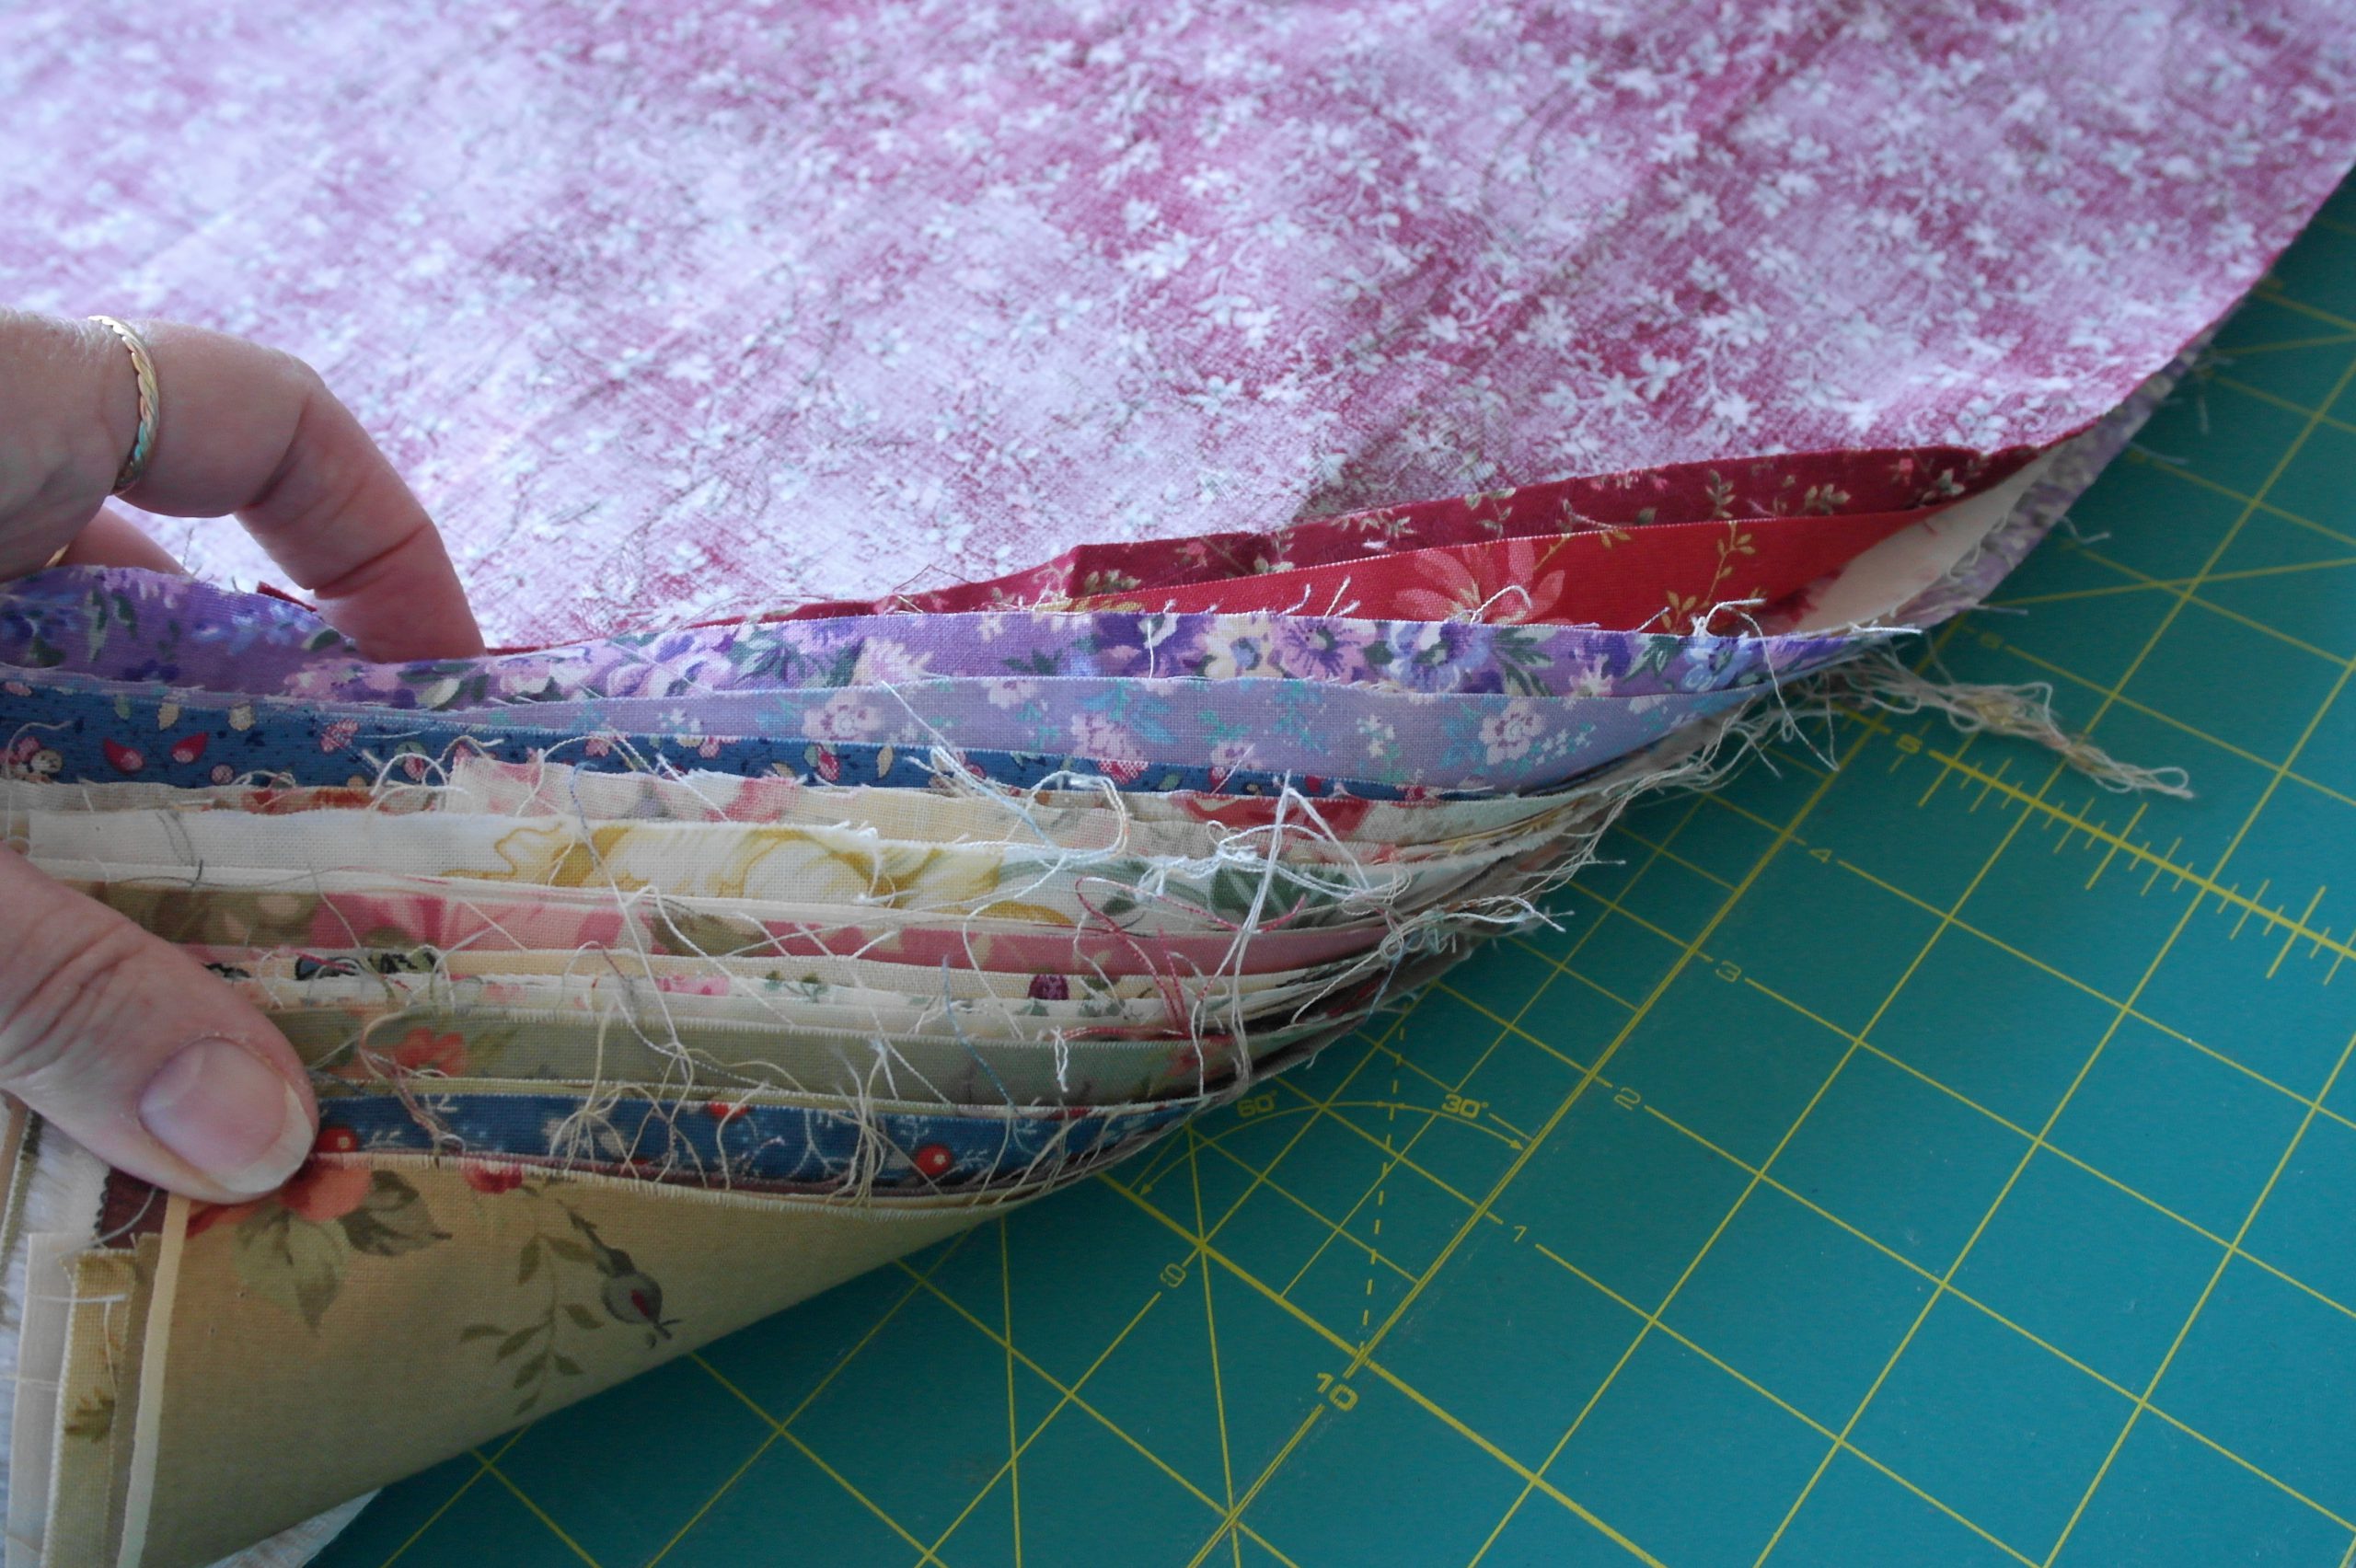
The first strip is sewn, seam allowances trimmed with the Add-a-Quarter liniaal and a folding template. I am not pressing with an Iron – because of the beads in the cross stitch section – but using my folding or a special tool.
Variation in color and prints is important: not too much darks or lights together, but alternating. I am only using the pins to keep fabrics in place.
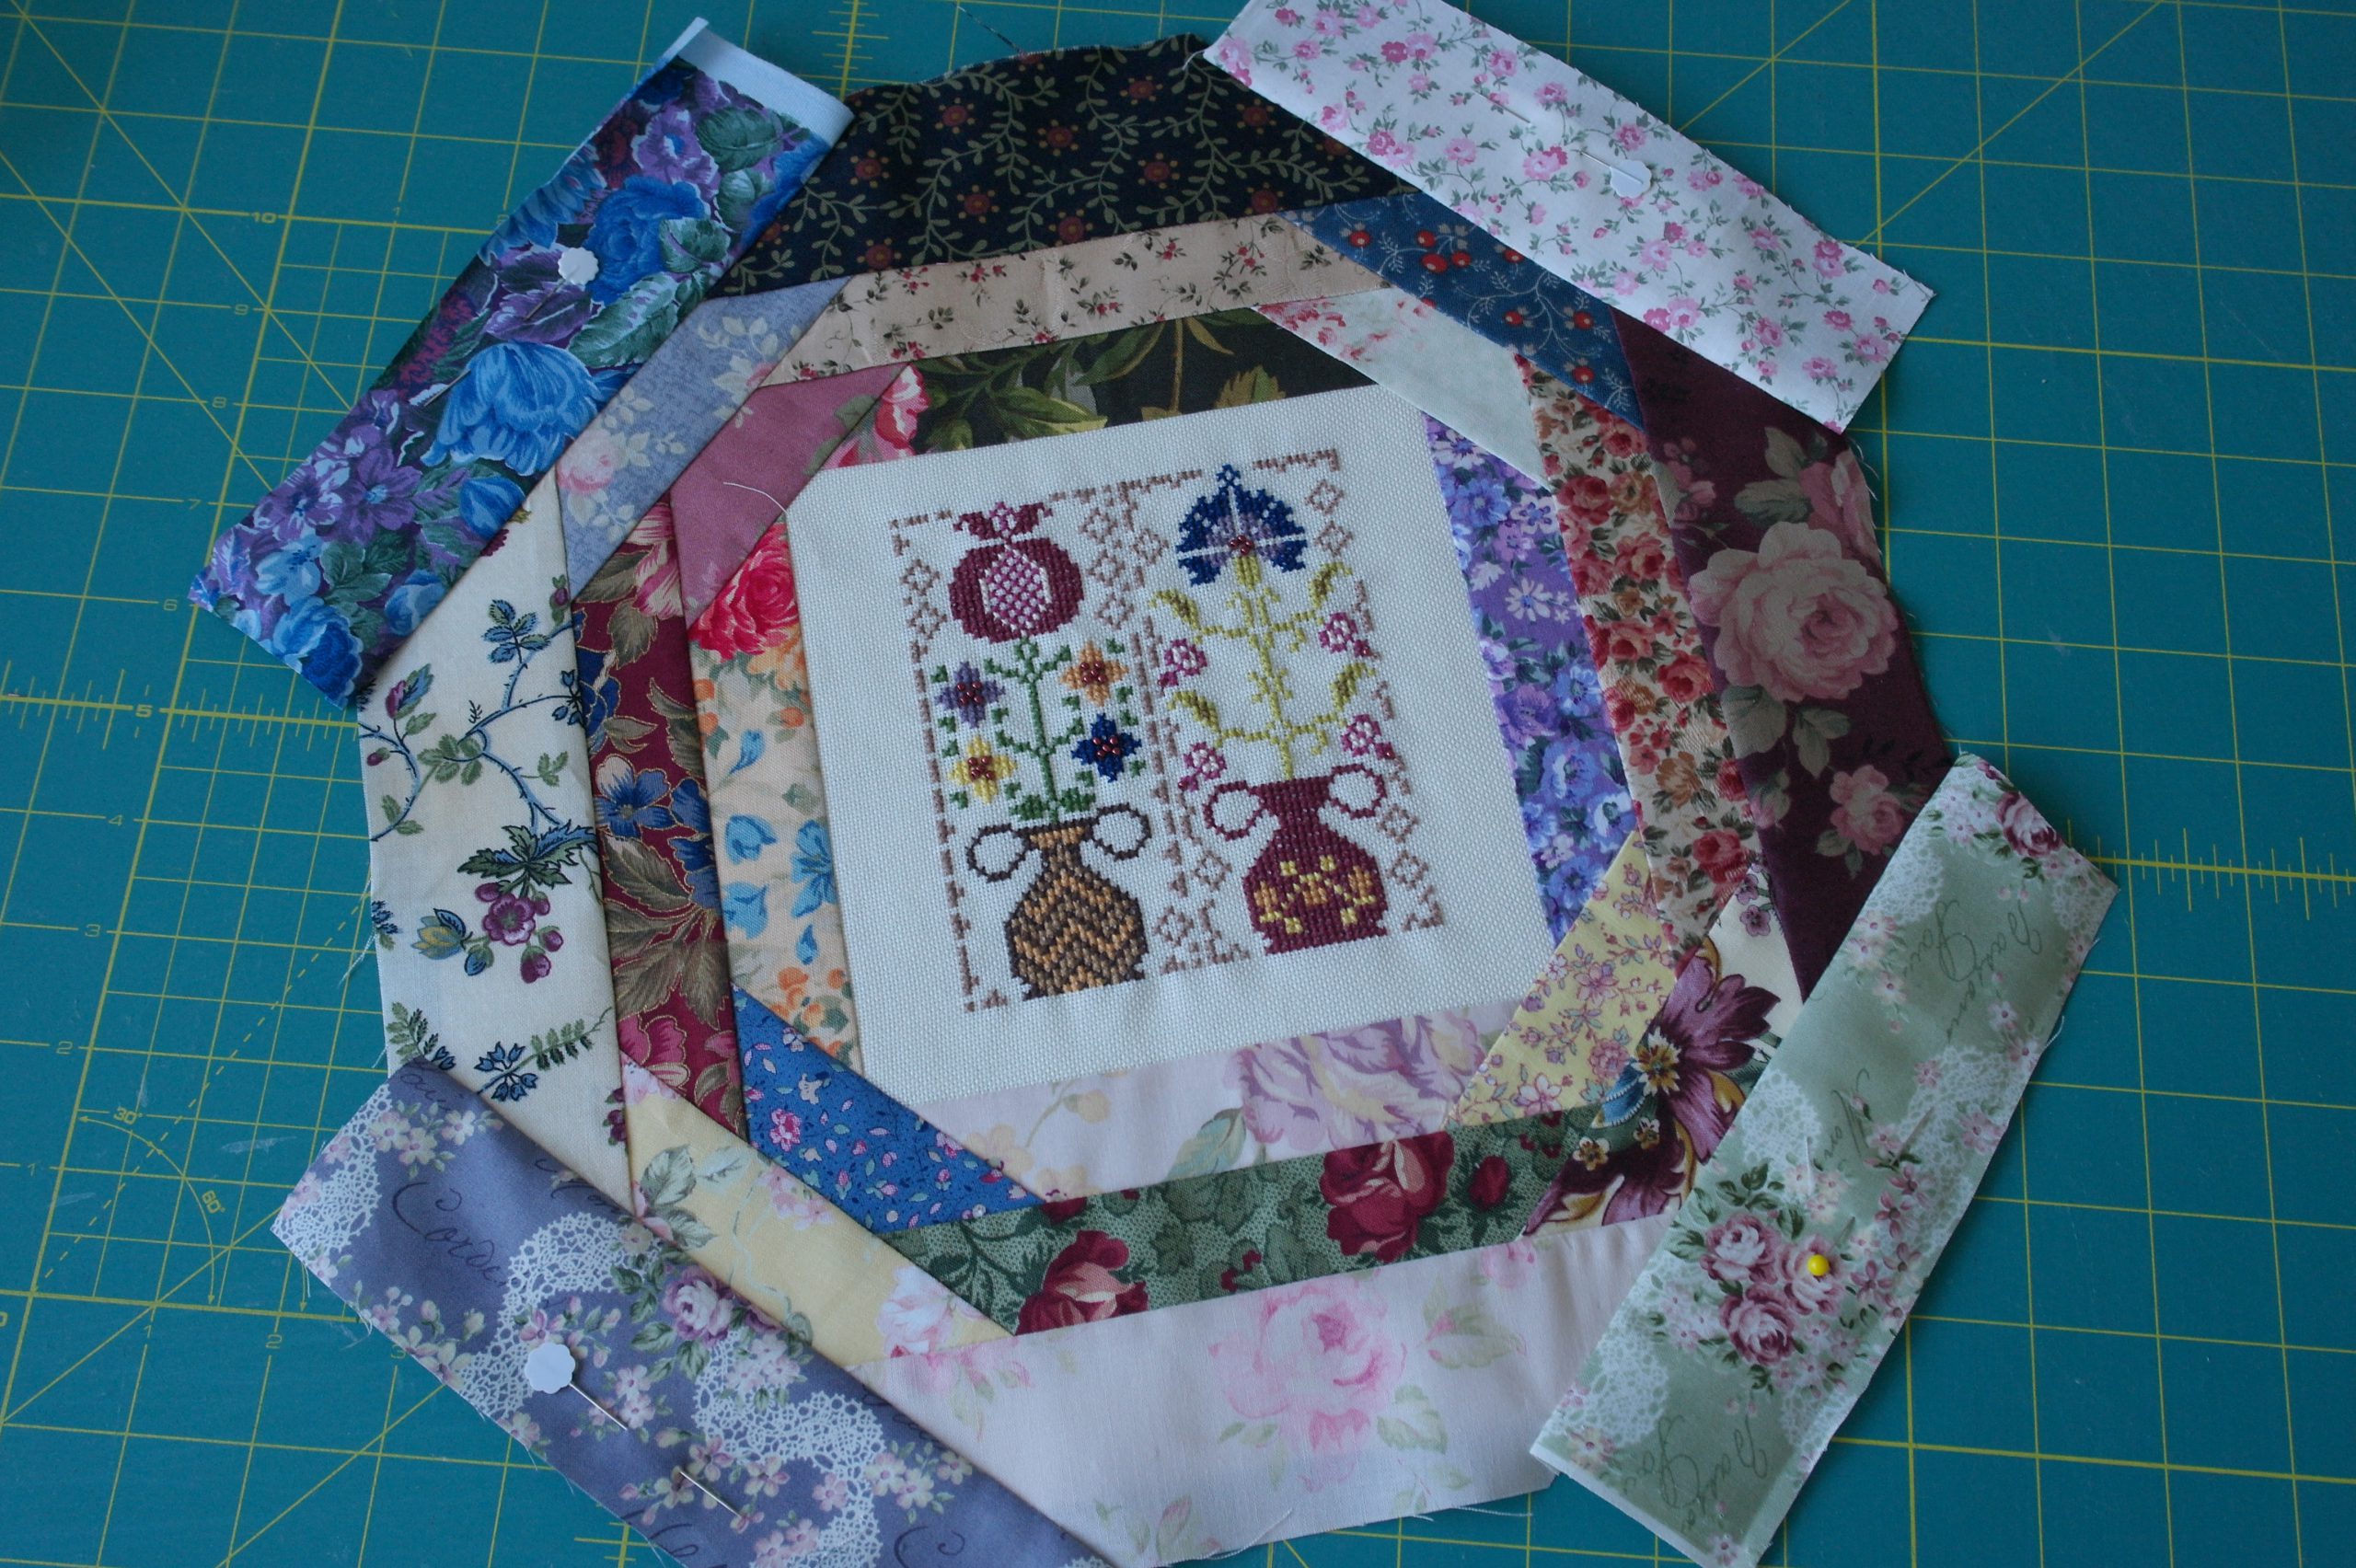
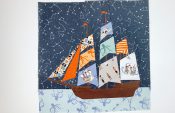
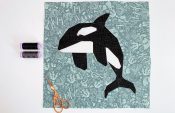
This is the first block: uncut. Fabrics with roses and small flowers, and a bright center with cross stitch. 24 More to go… I will let you know how things are evolving. See you next time!
Happy Stitching
Sylvia Kaptein
Sylvia’s Art Quilts Studio


Is it still possible to get the Papers for Foundation Piecing please? i have only recently become aware of this site.
What is software v8? is it a free download or is it software that needs to be purchased? will it work on a Bernina 730?
It is a Machine Embroidery Software pack from BERNINA, Marsha. You can order it via your local BERNINA dealer.