 BERNINA Corporate Blog -
After I showed you how to sew the perfect yoke and how to sew the perfect shirt collar, I bring you more blouse themed tutorials. Today is all about the pussy bow blouse.
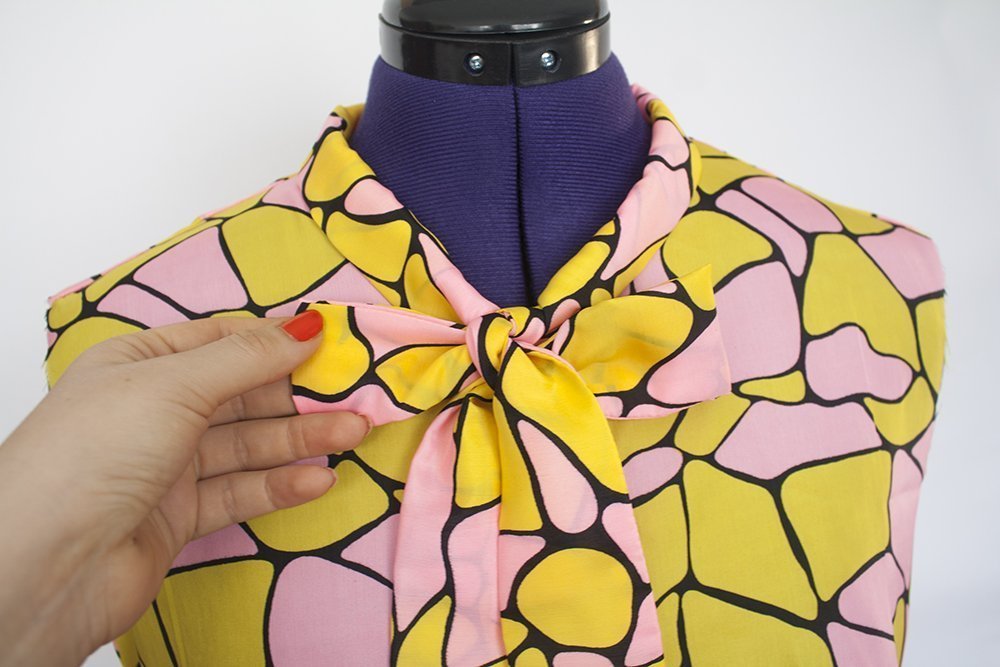
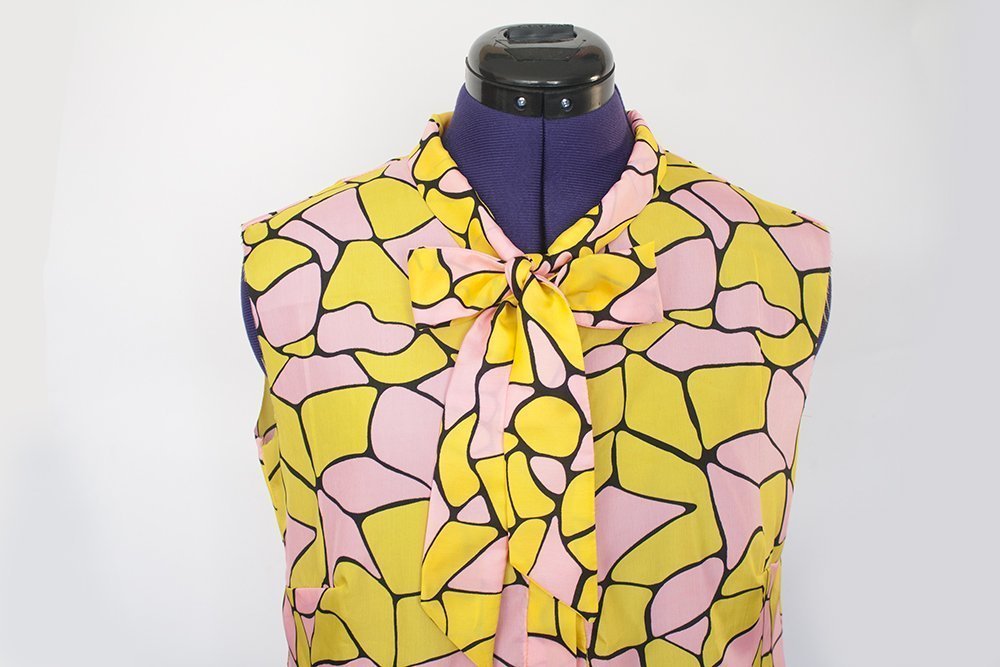
What makes a pussy bow blouse a pussy bow blouse is the tie. It can be tied in a bow or left hanging loose with just a knot for a more casual style. It brings a retro feeling to any outfit.
The tie is quite easy to sew. I used my basic shirt pattern and omitted the collar. Instead, I cut a large rectangular piece for the tie.
In this tutorial I will show you how I added it to the blouse.
If you are using a pattern for a pussy bow blouse, you can follow along. You might have to adjust some steps according to your pattern, but all in all, the method can be used for any pattern.
Tutorial: How to sew a tie for a pussy bow blouse
My tie is sewn onto the neckline until the beginning of the button placket. In your pattern, the seam might end sooner, like halfway between shoulder seam and button placket. The point where the seam ends is marked in the pattern on the neckline and on the tie.
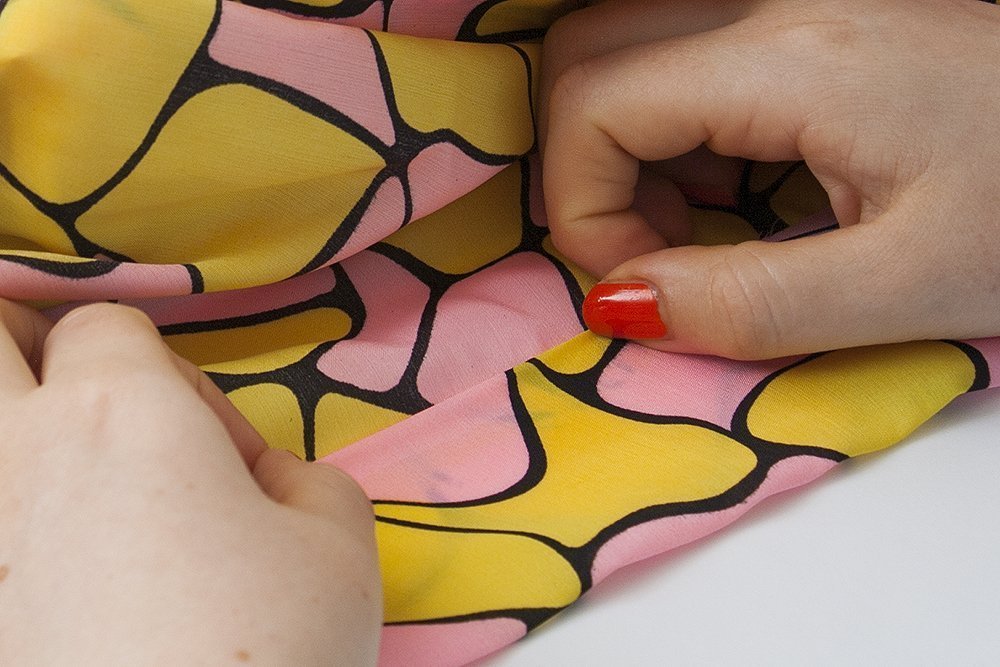
Mark these points on your cut pattern pieces. I like to clip the fabric; you can also use a fabric marker. Also, don’t forget to mark the center back of the bodice and the tie.
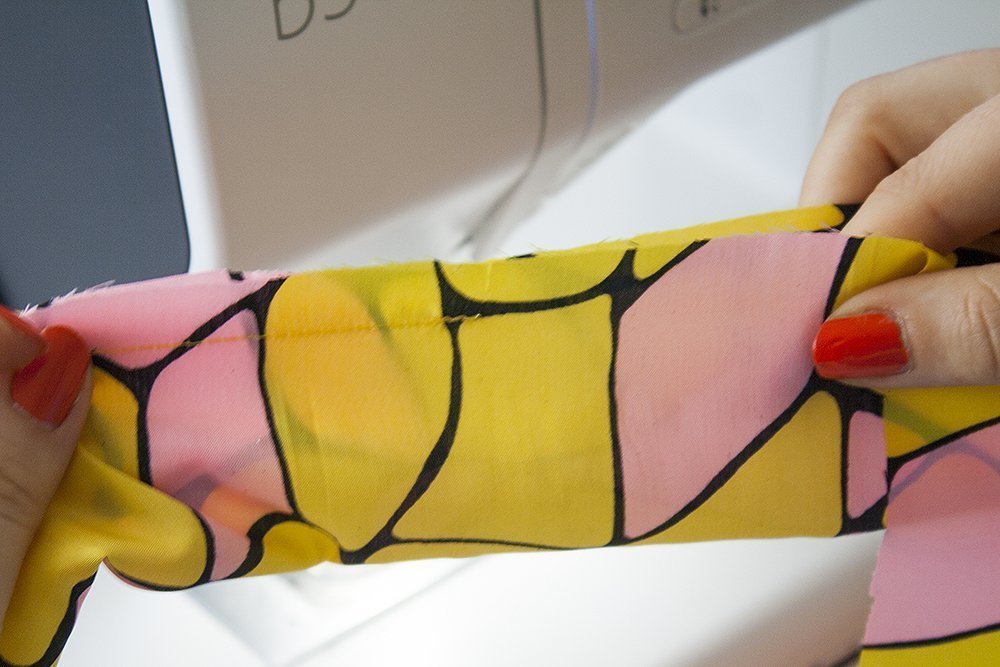
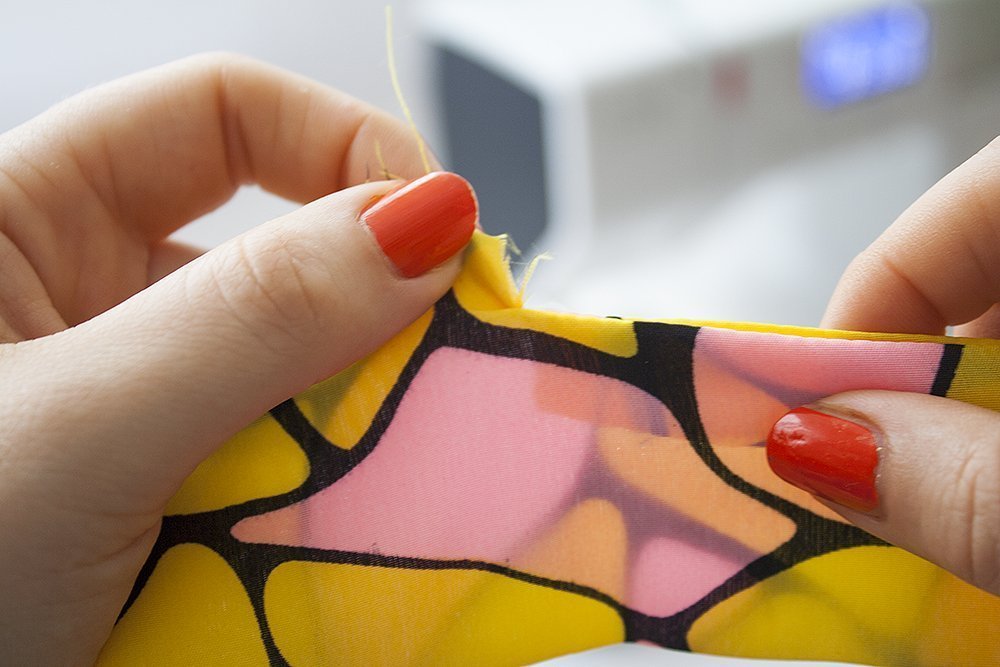
To be able to sew the tie to the neckline, you have to clip the seam allowances at the marked points. I cut them as deep as until the first stitch of the seam which I used to close the tie.
On the neckline, I cut into the seam allowance at my marked point until I reach the seam line.
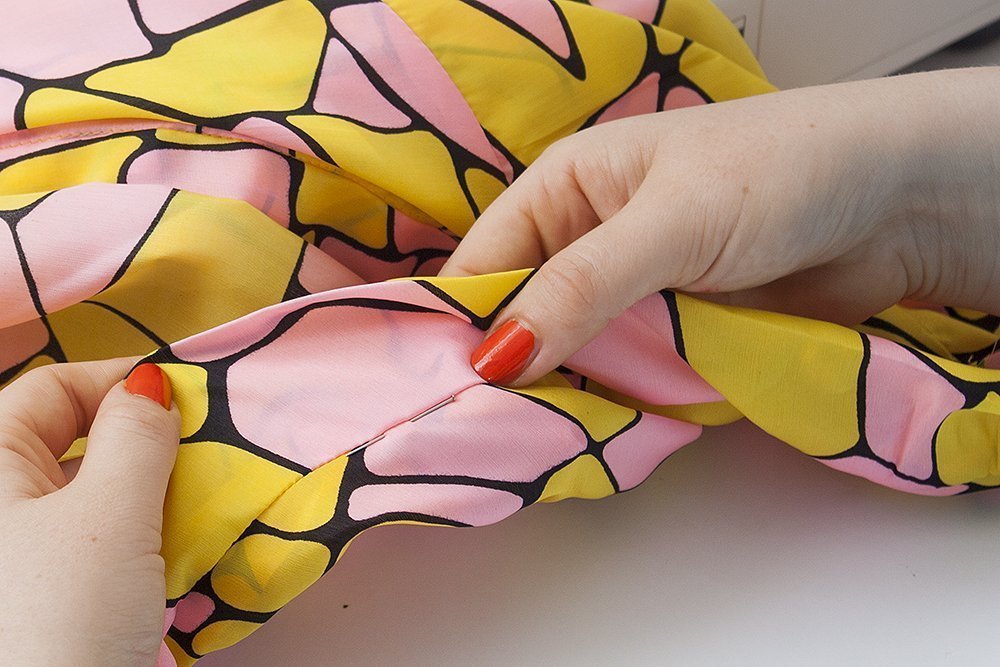
Next step: pinning the tie to the neckline. Start with the marked points: center back of the tie to the center back of the bodice and the starting points to starting points. The open section of the tie should be as long as the space between the marks on the neckline.
I didn’t use a facing. I only pinned the outer layer of the tie to the neckline. If your pattern has a facing, I’d recommend basting the layers at the open section of the tie together and pinning them to the neckline.
Sew from mark to mark.

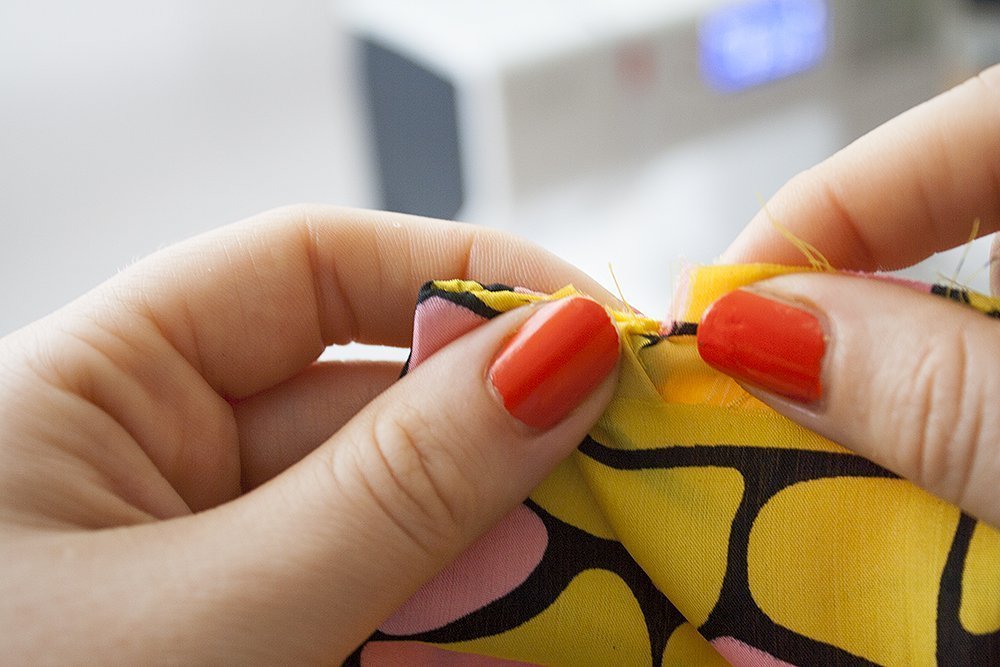
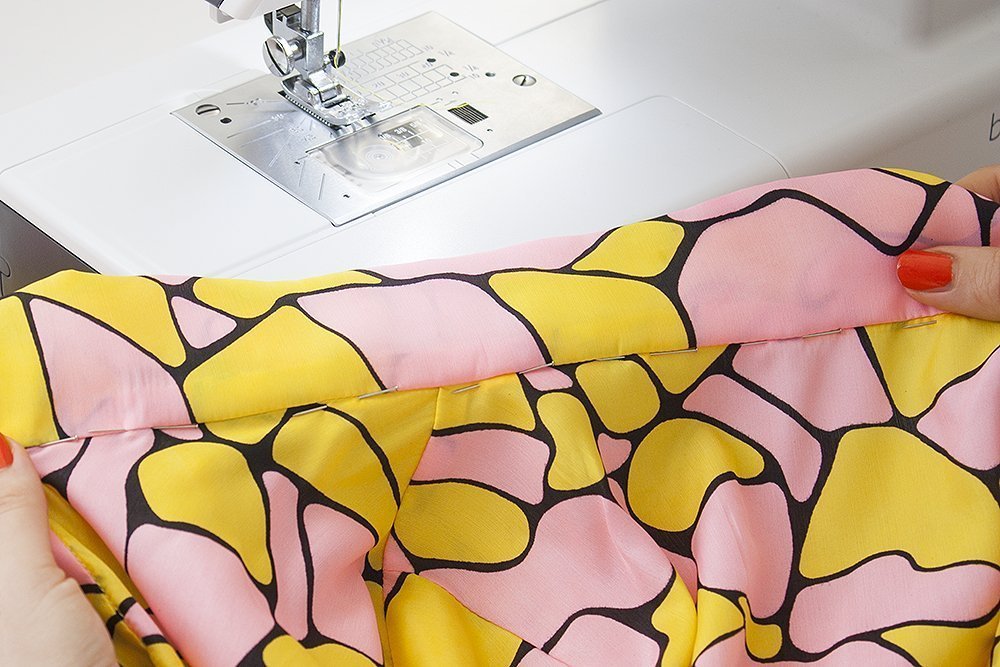
Above you can see the clipped seam allowances of tie and neckline. My seam that connects the pieces starts at the marked spot. On the right is the part of the tie that is loose and can be tied into a bow.
If your pattern has a facing, now is the time to sew int to the neckline.
As I mentioned before, I didn’t have a facing, so I enclosed the seams differently:
First, I press the seam allowances up, into the tie. Then, I folded the raw edge of the inside of the tie over, so that the edge pointed into the tie. I folded it so that the seam that connects tie and neckline was hidden and the folded part would be caught be the seam (see next step).
I pinned the folded part in place from the outer side/right side. Make sure to pin as close to the tie as possible, because you will sew in the ditch to secure the folded part. This means that the seam should sit right on the seam that connects the tie and neckline. You can see my tutorial on how to sew a collar for more details about this.
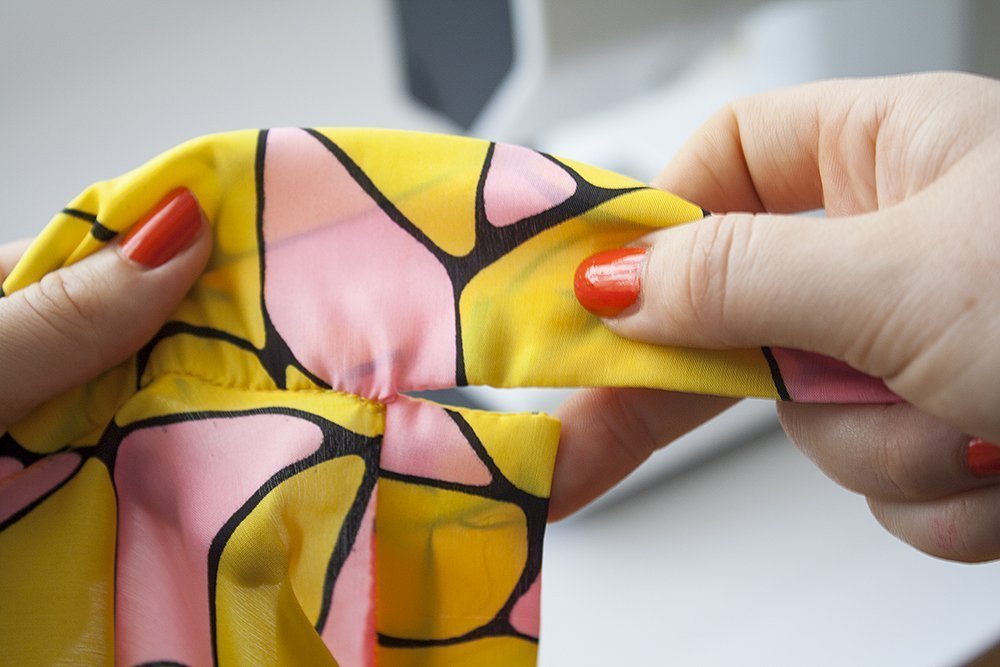
All done! Press and iron your work. Above you can see the point where the loose part of the tie begins.

I like to fold the tie over, like a collar. I love the look with just a knot, but the bow is pretty chic too and so retro.


Hello. Would you be able to make this tutorial into a video? I’m finding it really hard to follow these steps and they might be because the fabric is too busy. I’m not sure. I would really like to understand how to do this and I think a video would be easier. Thanks