 BERNINA Corporate Blog -
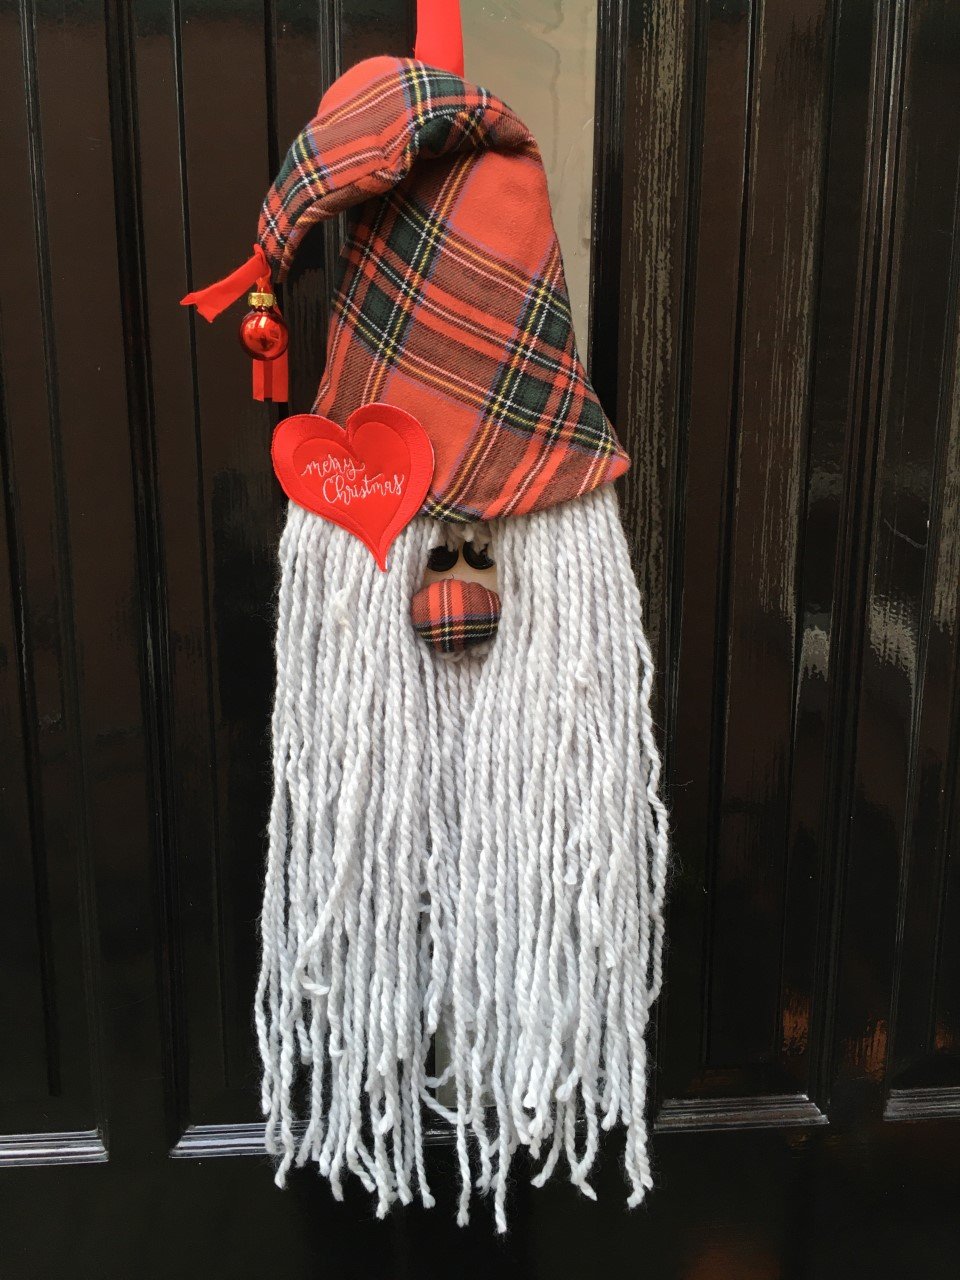
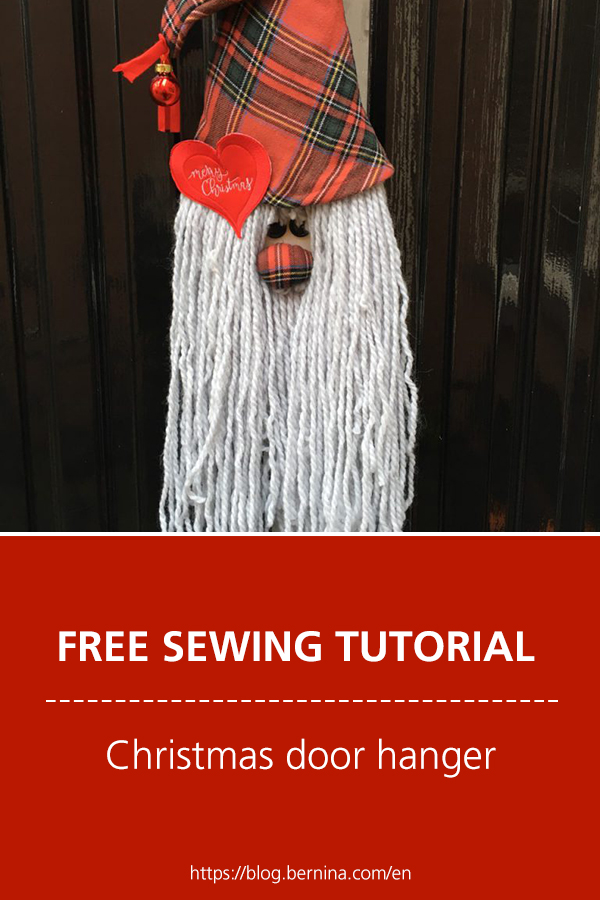
Christmas is just around the corner, and anyone who knows me well knows that I think Christmas is one of the cosiest and most enjoyable times of the year. The fun, all the lights, Christmas movies… and the carols! Especially now after such an eventful year, we should pay a little more attention to each other 🙂 So why not start a new project NOW?! ? Today I’m going to show you how it’s simple to make a vintage-inspired DIY Santa door hanger… with an old shirt that has a lumberjack motif! (Thanks, son ?). It’s a great way to let your guests know they are welcome.
Ideas and tutorials for your next sewing adventure
Subscribe to the BERNINA Blog Newsletter
If you love to sew you don’t want to miss the chance to receive the latest content from our authors directly into your mailbox.
Sign up for the blog newsletter
Sewing door hangers for Christmas
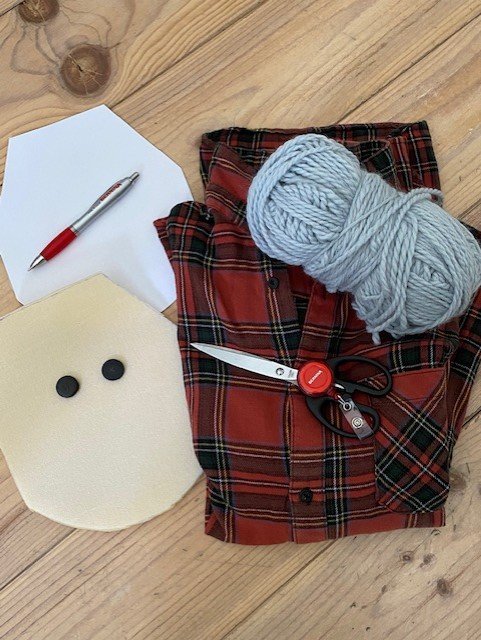
Let’s start with what you’ll need:
- BERNINA sewing machine
- Sewing thread
- An old blouse, or any nice fabric ?
- Foam rubber or a piece of cardboard.
- A printer to print out the pattern
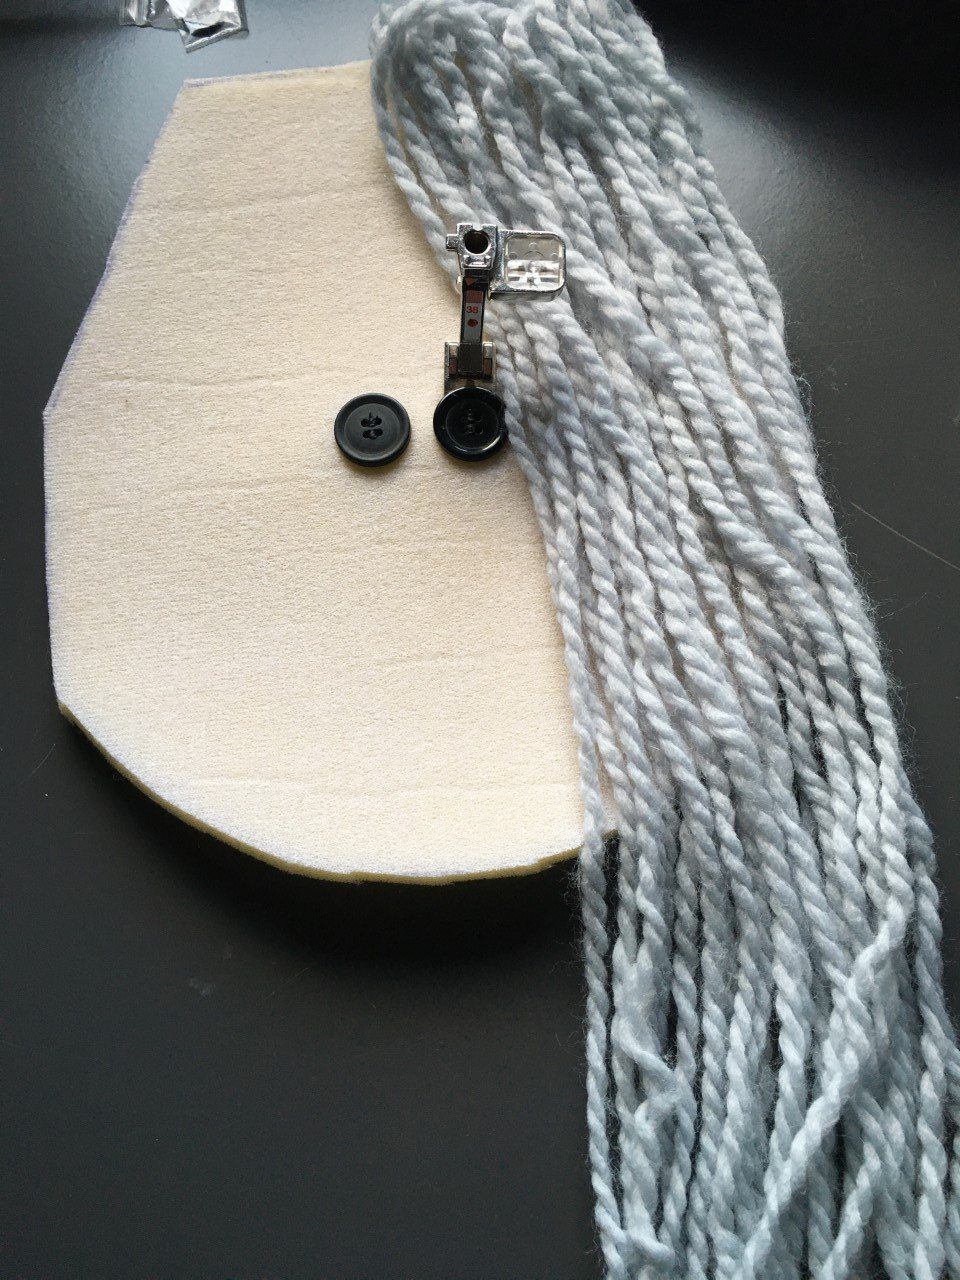
- Wool of your choice
- 2 buttons
- Scissors
Method for sewing door hangers for Christmas
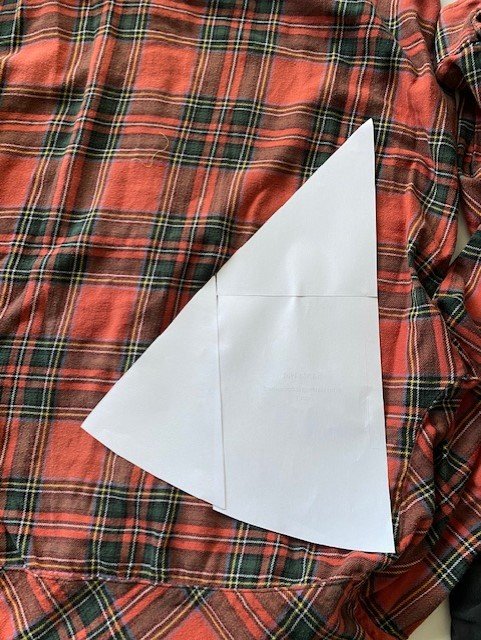
I made a pattern for the head and hat. You can download the pattern pieces as PDF here:
You can print it out and cut it out as indicated.
Place the sections of the pattern for the hat on the fabric and cut it out twice. It’s possible to have a seam allowance, but I didn’t take that into account here. You need to take careful note of the size of the face over which the hat will be placed. Do the same with the pattern for the head. You can use foam rubber, but it’s also possible to use a piece of cardboard over which you just place some light fabric.
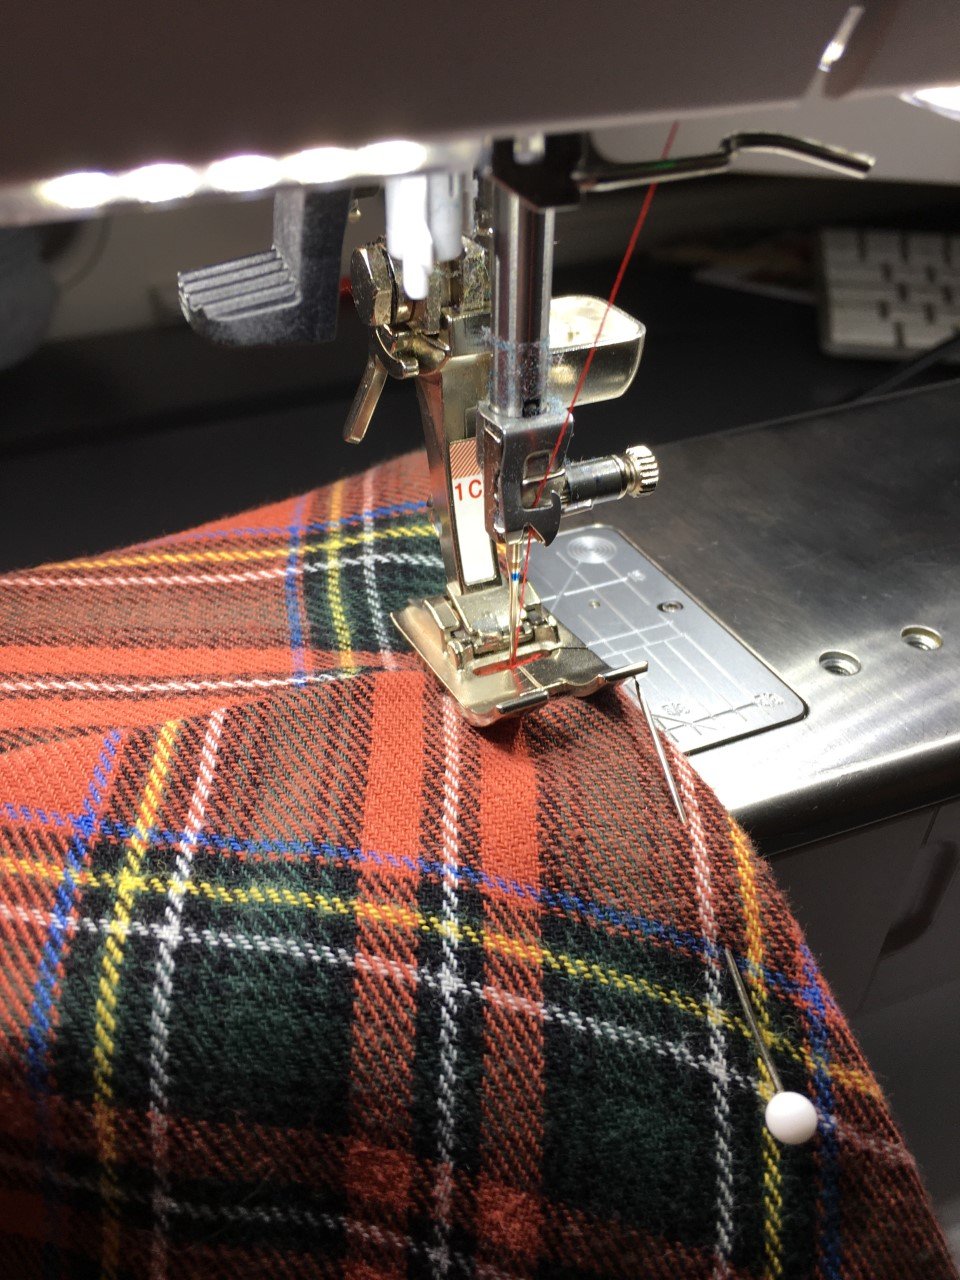
Have you cut everything out? Then you can start by sewing together the hat for the christmas door hanger – just make sure you leave a small seam.
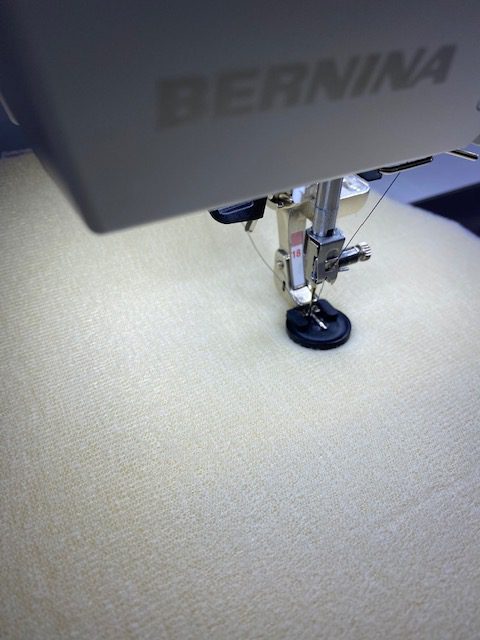
Then use the button-sew-on foot # 18 to attach the buttons that we’re using for the eyes on the christmas door hanger.

Now create some large strips using the wool – these will be used for the “full” beard on the christmas door hanger.

The strips of wool can now be sewn to the top of the face. I used the piping foot # 38 for this. The piping foot has two different high sides to the foot. That’s how it moves evenly through layers of fabric that are of different thicknesses. Use lots of wool! That way you can make sure your DIY Santa door hanger has a nice full beard.
We’re almost done…
You can now use a leftover piece of fabric to make the nose, which I sewed to the face by hand. Then place the hat over the head and your DIY Santa door hanger is ready! You could always decorate the hat with some nice mistletoe or a flower. I picked out a nice heart-shaped embroidery pattern from the BERNINA V8 Software and embroidered it on an old red T-shirt – a total RE-design!

Have you got any spare Christmas baubles? Hang one on the tip of the hat for an extra finishing touch!

Simply cut the beard into the desired shape and you’re done!
Merry Christmas!
Creative greetings,
Diane


0 Responses