Hello all,
In this tutorial, I would like to show you how to make a 3D poinsettia with the BERNINA Embroidery Software 8. We will be working with Stumpwork and Cutwork. Stumpwork was introcuded with version 7 of the embroidery software. I didn’t use it then and only know it from version 8, hence I can’t guarantee that you will be able to follow this tutorial if your using version 7. My recommendation is to download the 30 days free trial version of BERNINA Embroidery Software 8. There are so many great new features! It is definitely worth a try.
This tutorial has been originally published on the German BERNINA blog. Therefore, all printscreens below show the german user interface. In the tutorial below I will be using both the English and German terms (e.g. “Colorm film / Farbfilm”). This will hopefully make it possible for English readers to follow.
The tutorial has two parts.
Part 1: Software instruction
Part 2: Making-up and finish
- For this, you will need: approximately half a yard of your favorite colored cotton (for example white, red or bright pink, alternatively you can use thin felt)
- embroidery yarn in matching colours ( I used Brildor, colour 1552)
- wash-away stabilizer
- silver wire with copper core, ø 0,30 mm, 50 m
- Fray check
- 1 bottle of metallic glitter glue
- dark green florist tape
- green hobby wire, 10 inches
- Material for the flower stamp (I explain in part 2) and
- other decor materials for the arrangement: bowl, dry foam brick, pine branches, candle holder
part 1 – software instruction
Download the folder weihnachtsstern_neu
Save and unzip it.
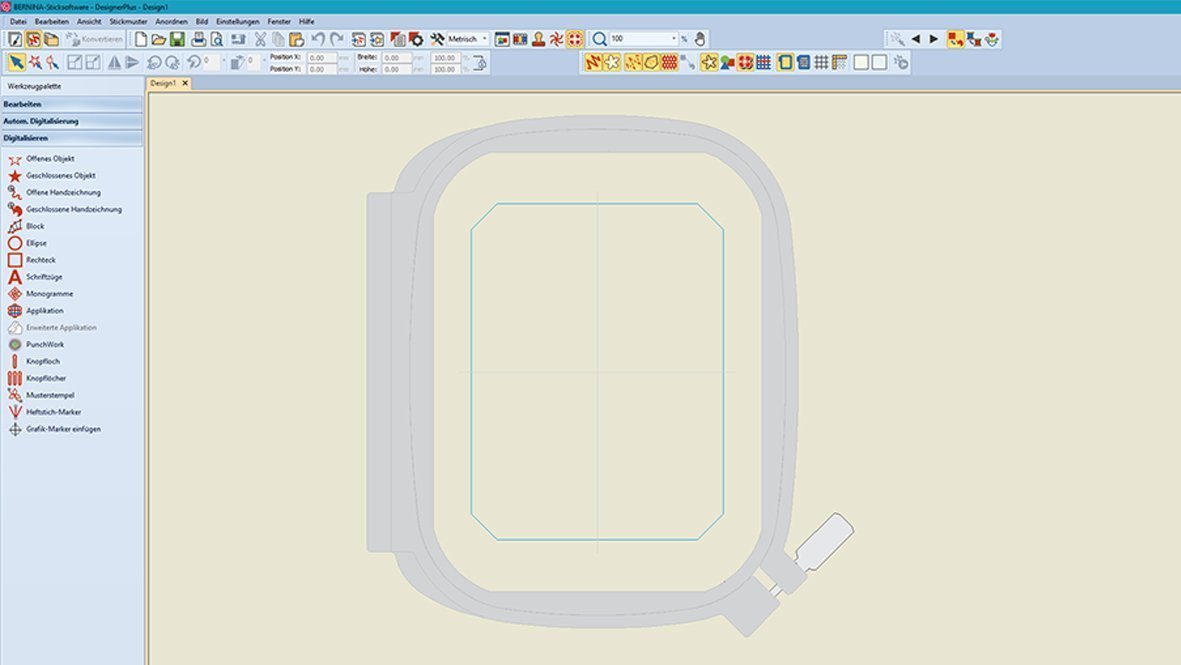
Double click on the BERNINA V8 icon to open the program. We are seeing the „Embroidery Canvas / Stickerei-Arbeitsfläche“.
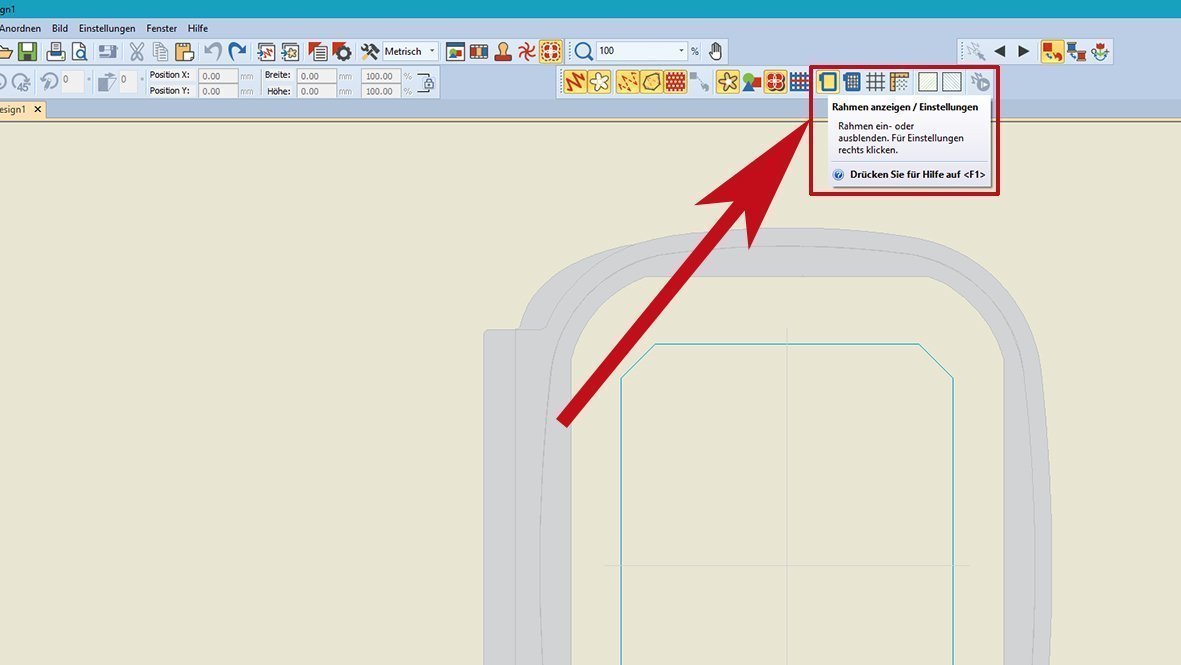
First, select the appropriate embroidery frame. Go to the symbol „Show Hoop – Settings / Rahmen zeigen – Einstellungen“ and click with the right mouse button
For the first motif, we need the middle frame. We select the cutwork foot 44c with and confirm with ok.
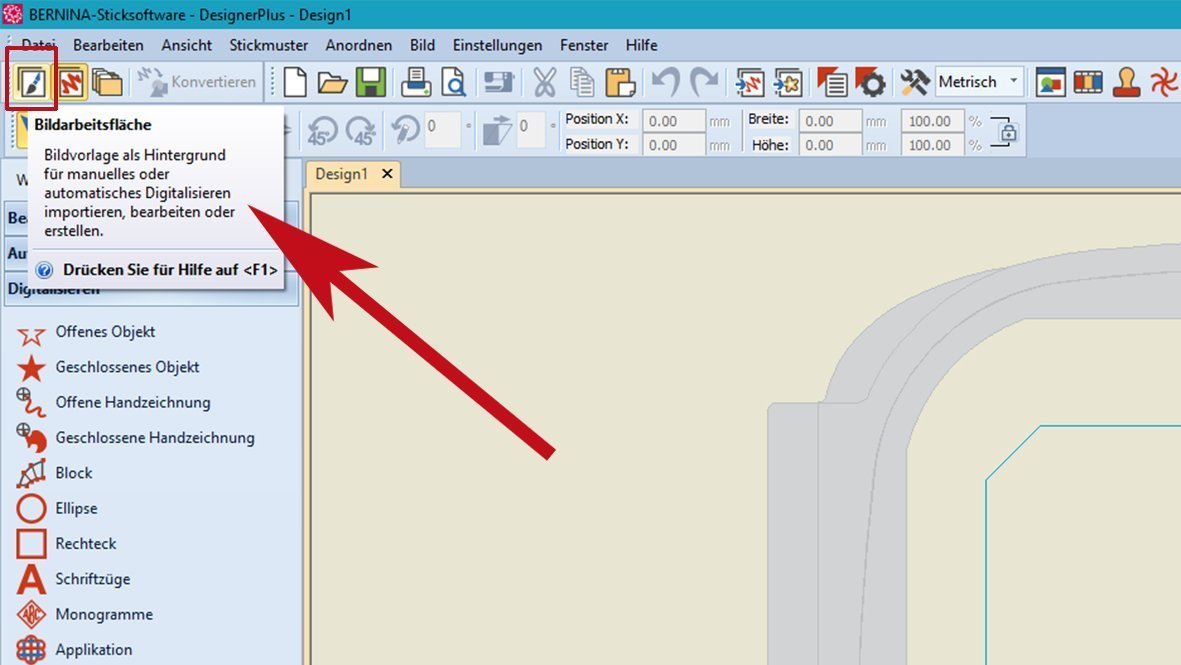
In the upper left corner of the menu bar, you will find the symbol for switching to the „Artwork Canvas / Bildarbeitsfläche“.
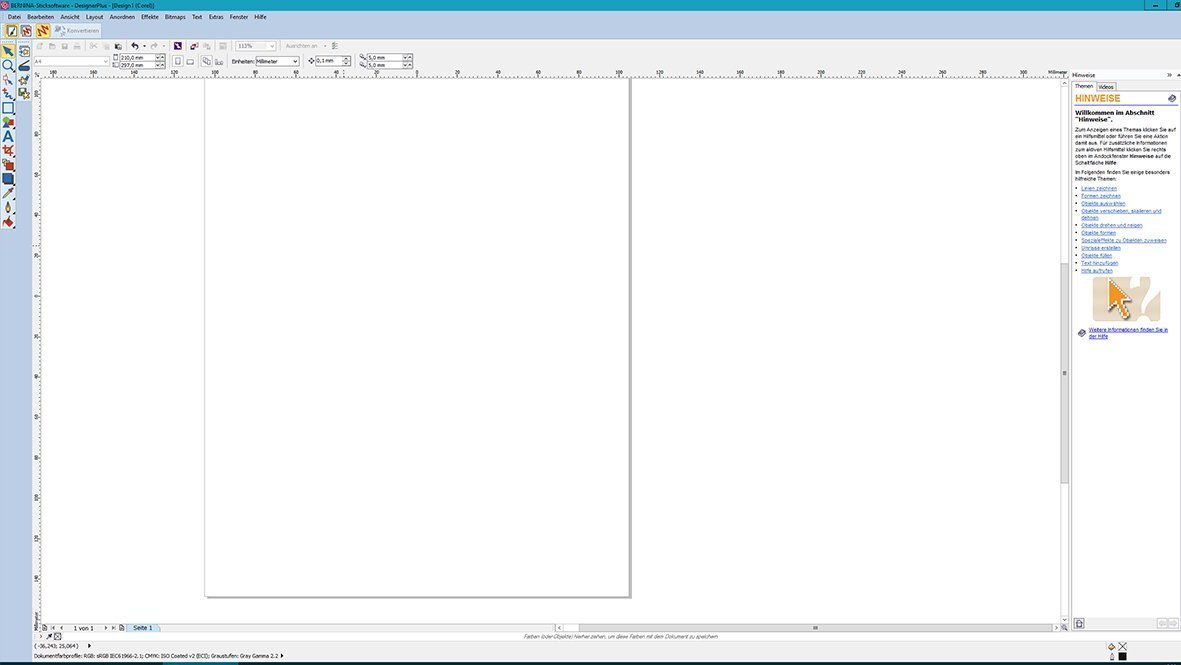
Select it and change to „Artwork Canvas / Bildarbeitsfläche“.
Select the icon with the flower and click on „Insert Artwork / Bild einfügen“
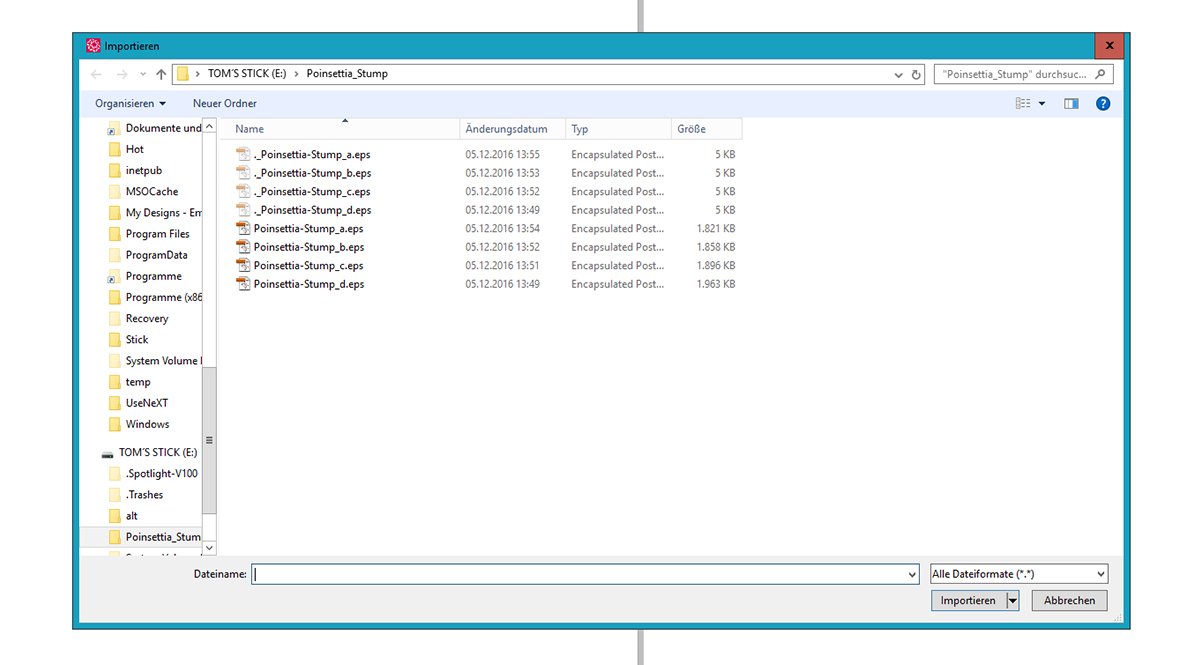
Now the „Import / Importieren“ dialogue box opens.
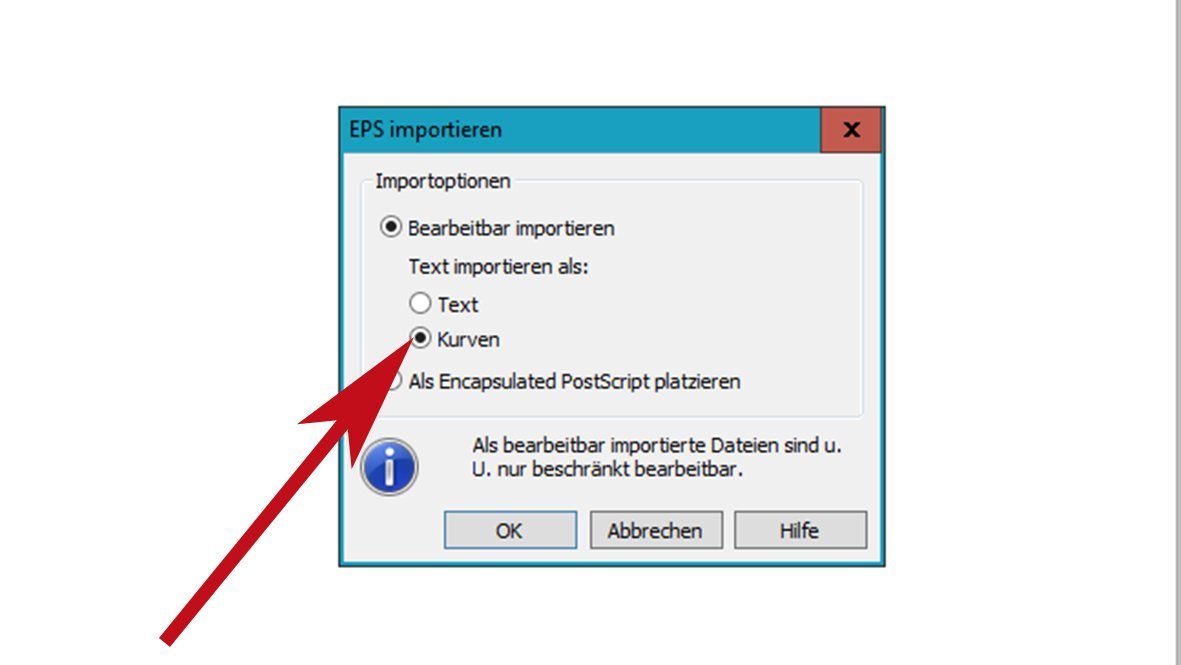
We import the first template „Poinsettia-Stump_d.eps“. Select the folder with the poinsettia templates that you have previously saved on your hard drive. Choose the option „All File Formats (*.*) / Alle Dateiformate (*.*)“. Click „Import / importieren“. The dialogue box „Import EPS / EPS importieren“ opens.
 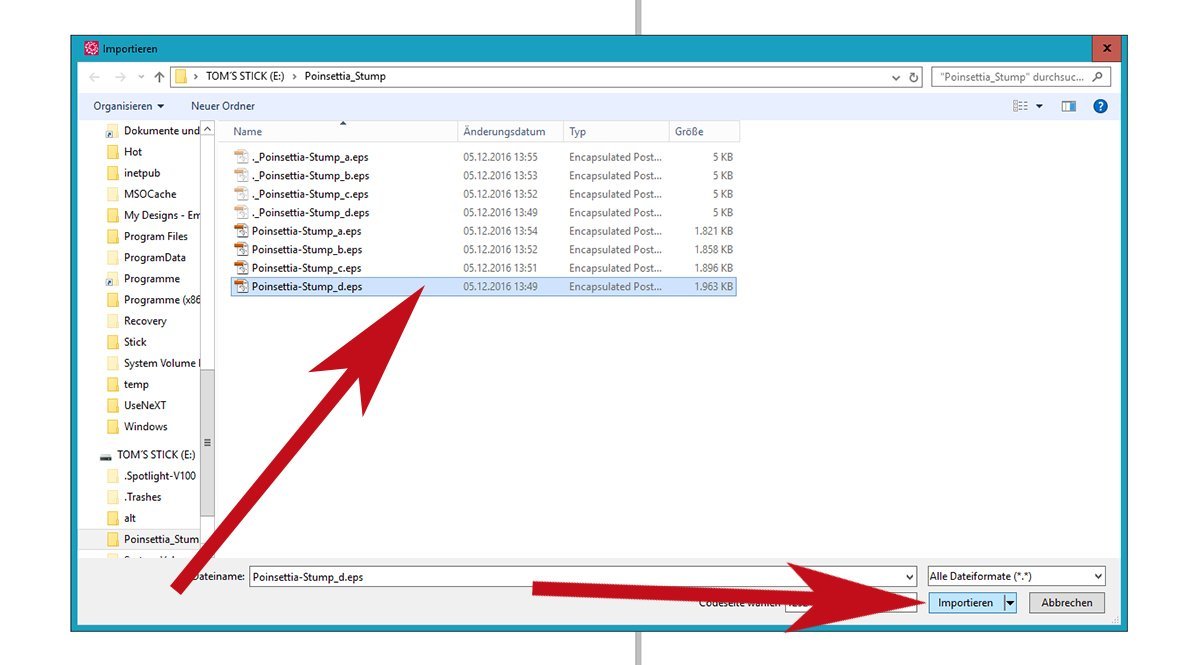 Choose the option „Import as editable – curves / Bearbeitbar importieren – Kurve“ and click „ok“.
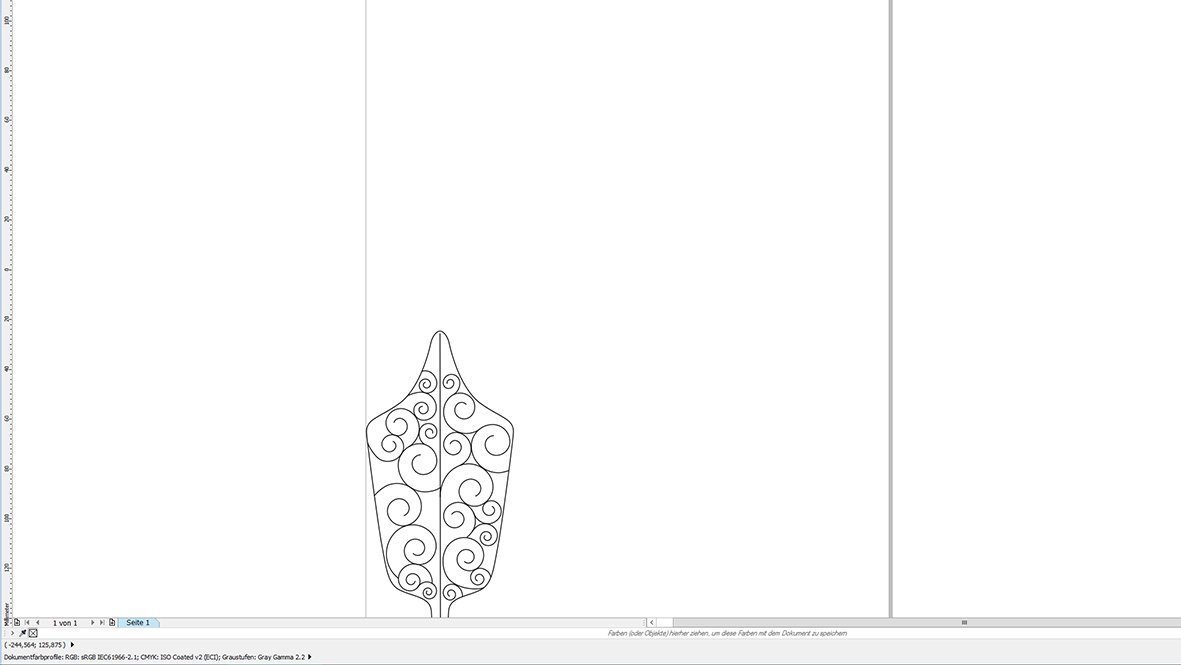
You can now see the template.
Press the left mouse button, an L-shaped hook appears
Click again with the left mouse button and position our leaf on the work surface.
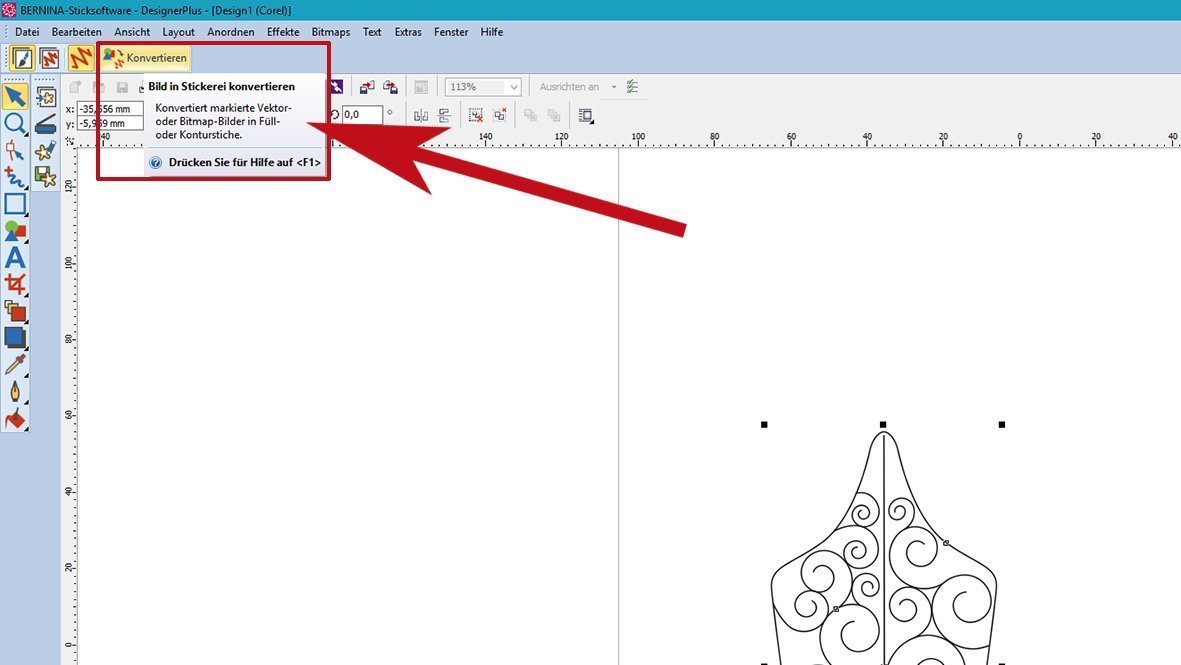
The leaf is activated (see the black box) and select the command „Convert Artwork to Embroidery / Bild in Stickerei konvertieren“
Return to the „Embroidery Canvas / Stickerei-Arbeitsfläche“ and the vector file is converted into embroidery.
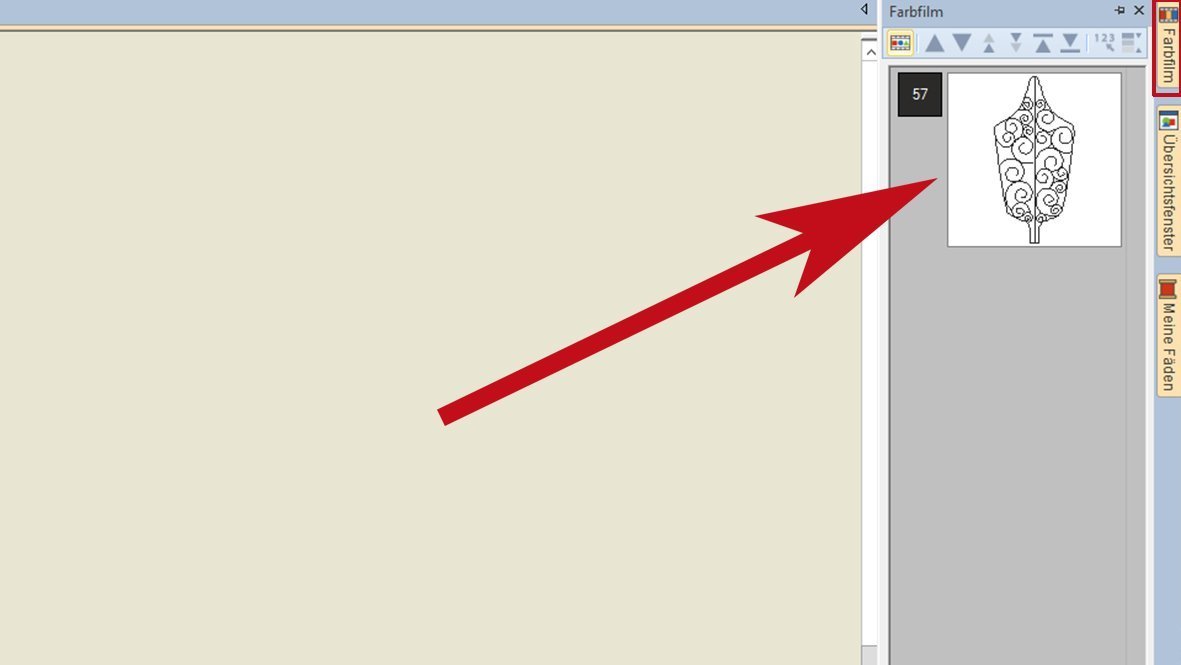
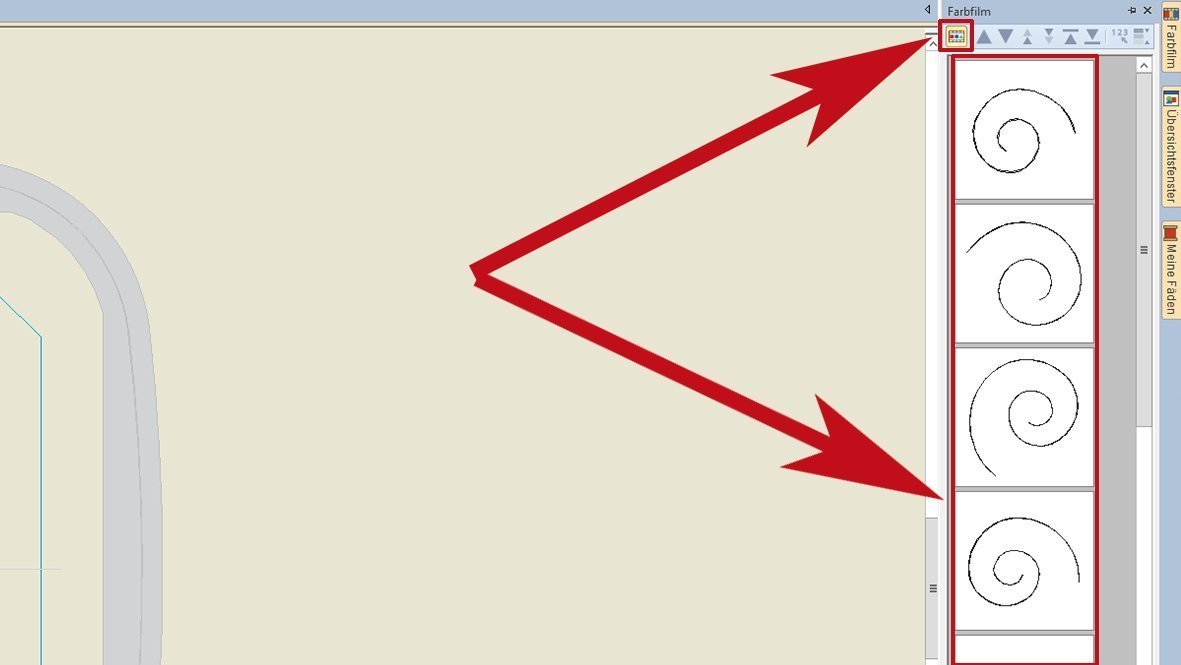
Choose „Color Fim / Farbfilm“ at the right side
… and click on the icon „Show Objects / Objekte anzeigen“. You can now see the individual elements.
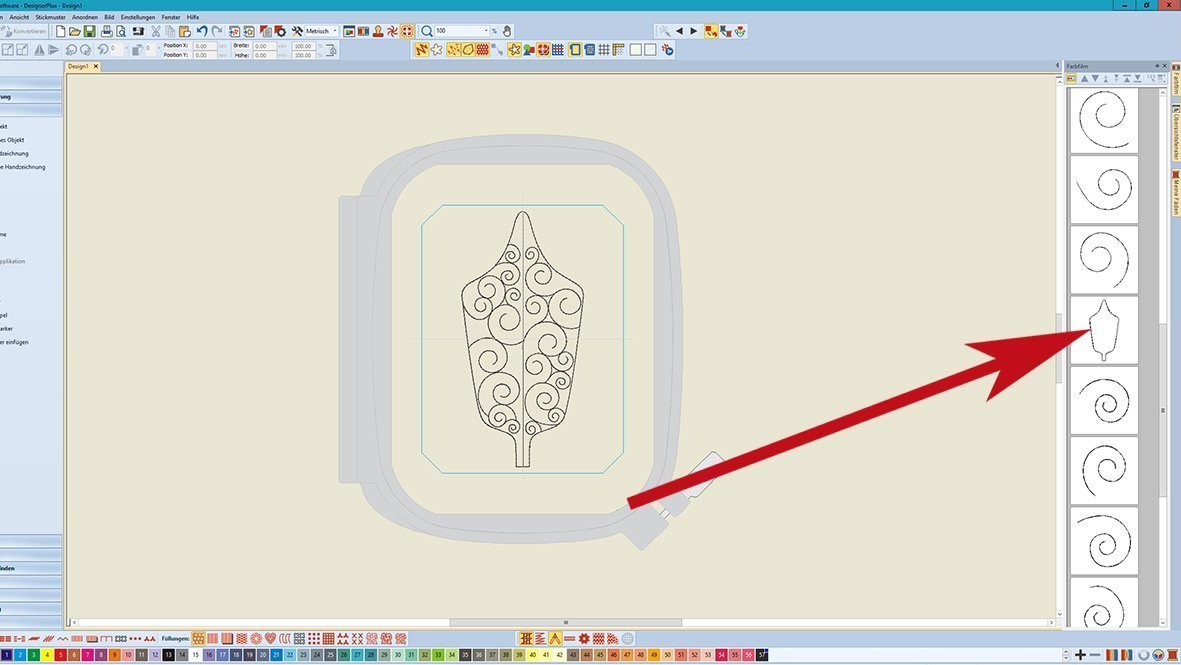
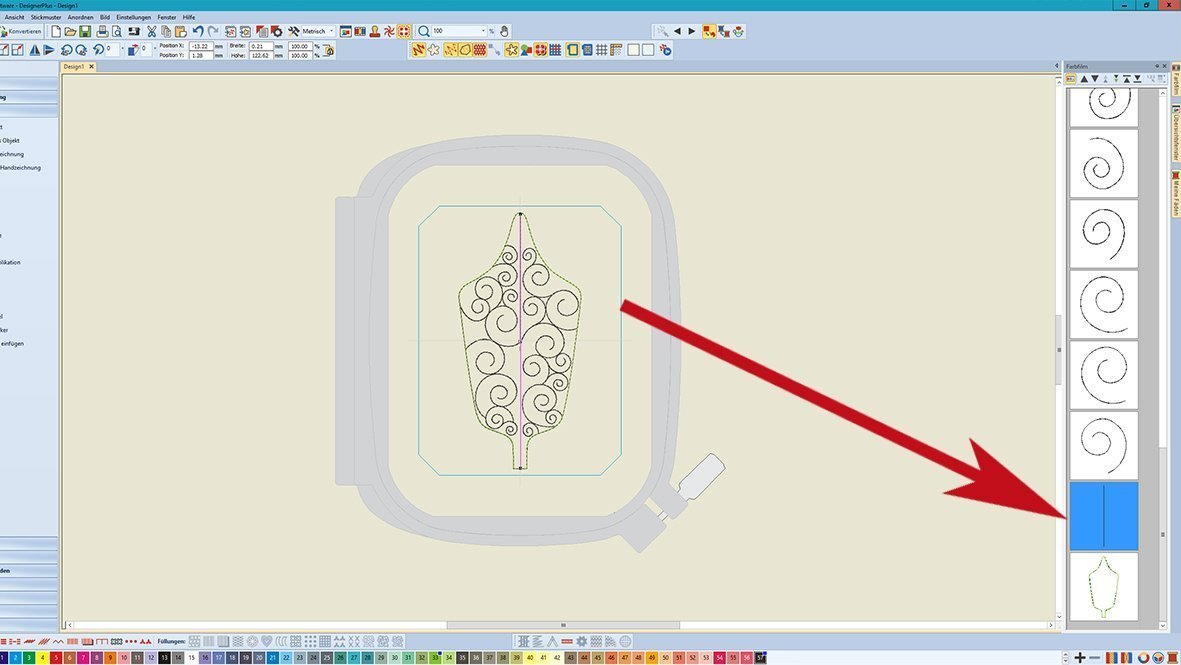
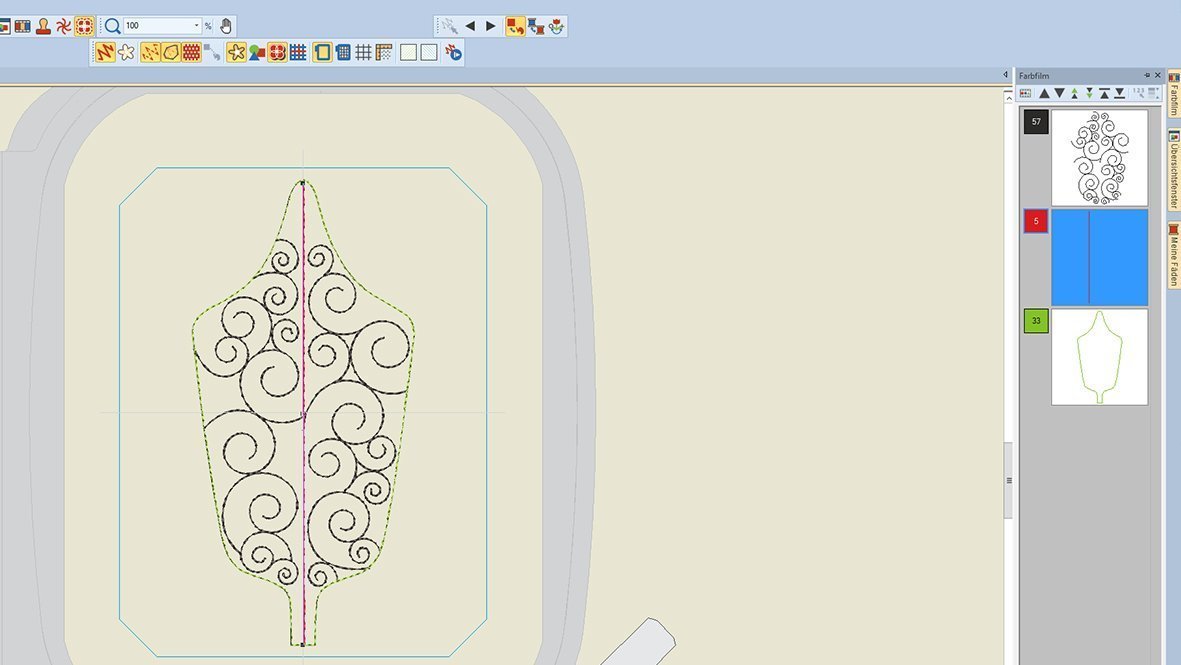
Scroll down until you see the leaf contour. Choose this, give it a different color (any).
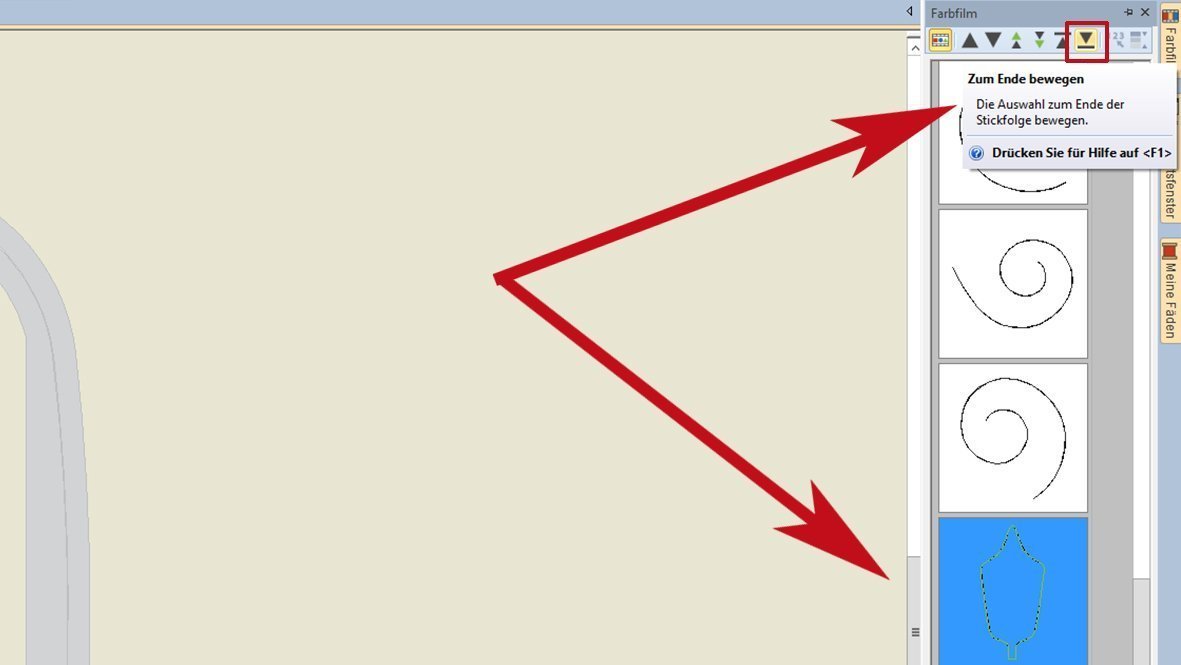
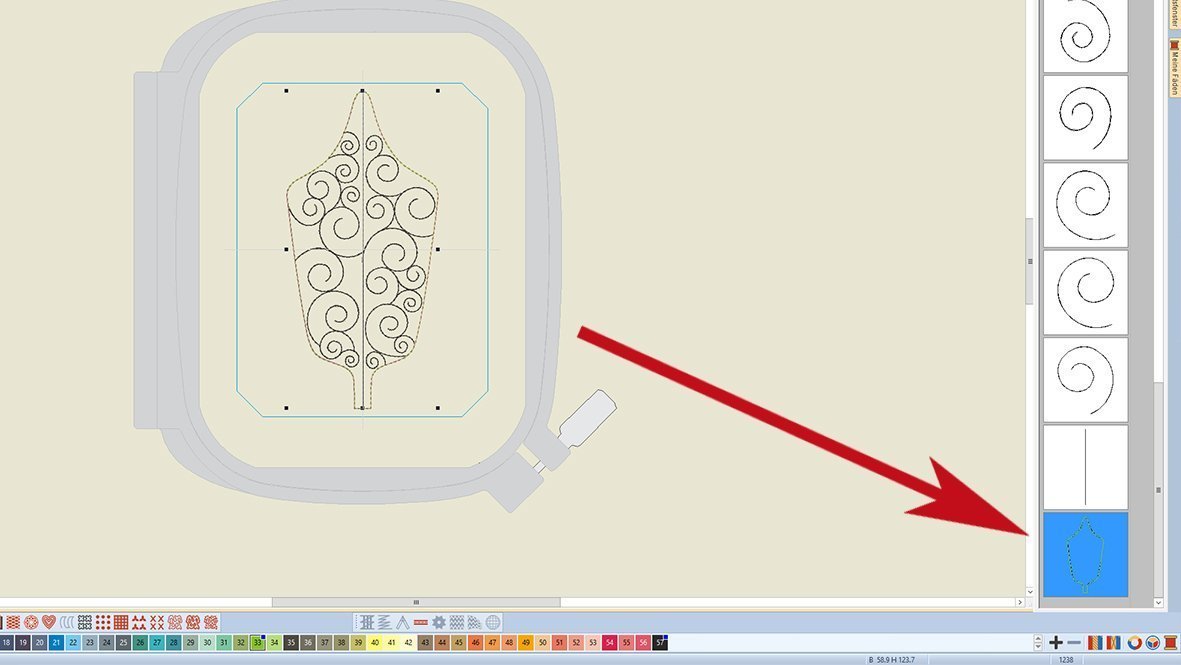
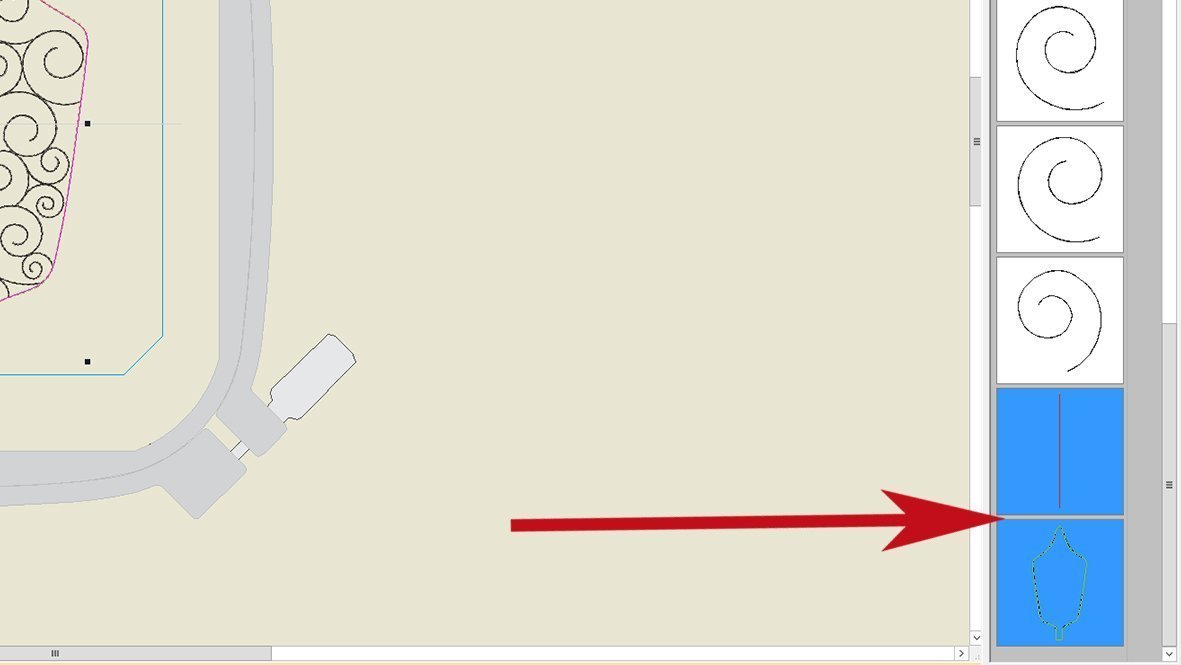
Change the stitch sequence by clicking on the symbol with the „down arrow and the bar / Pfeil nach unten und dem Balken“.
The center line should be above. If not, move to the penultimate position.
Give the center line a different color.
Now choose all the squiggles. Select the leaf contour and the center line first. Just click on the individual fields and hold down the shift key.
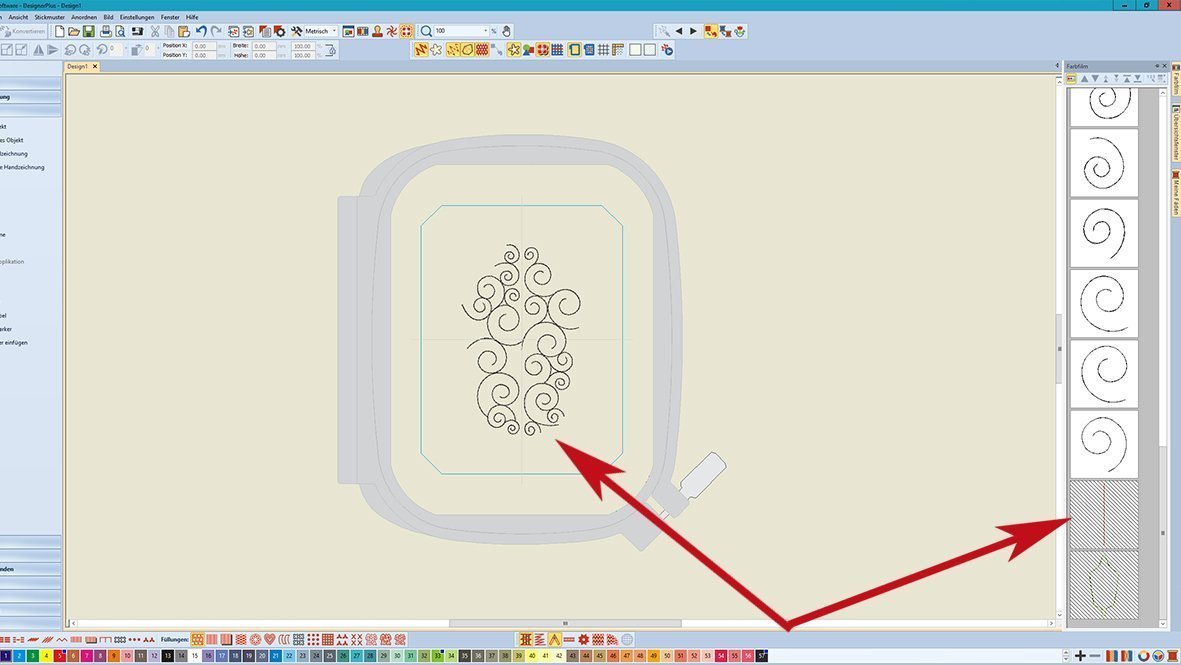
Press the right mouse button, a window opens and select the command „Hide / Ausblenden“.
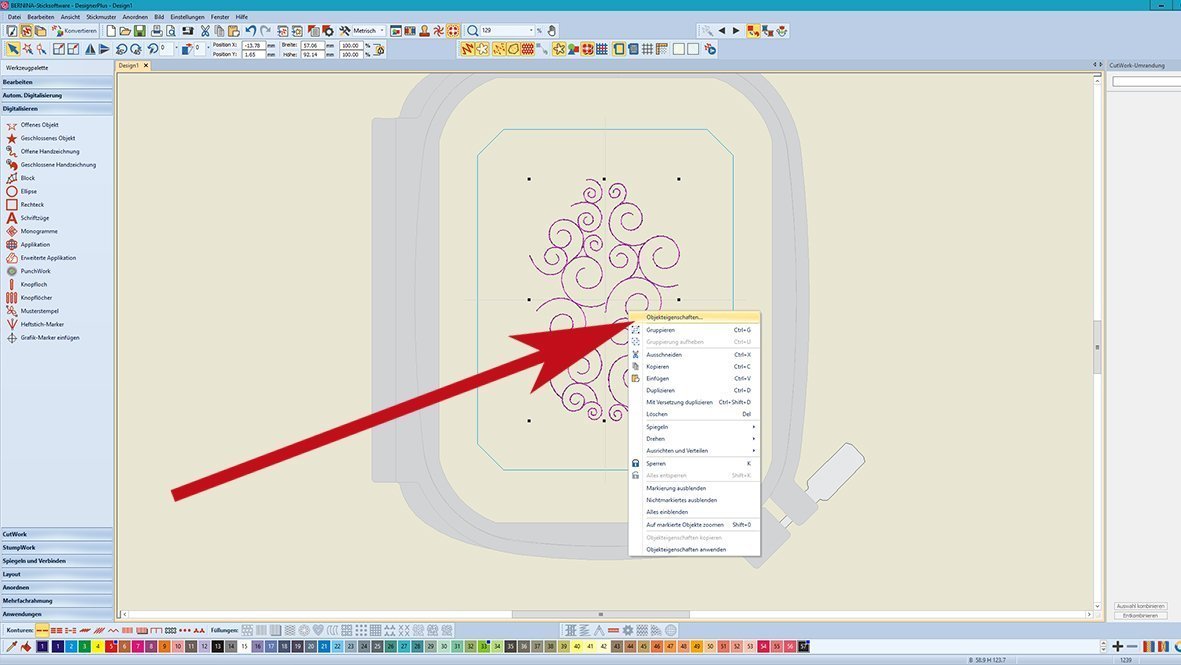
In the Color Film, the two last layers are dashed. In the frame you only see the squiggles. Activate all squiggles – press the left mouse button downwards from the upper left to the lower right. Now press the right mouse button.
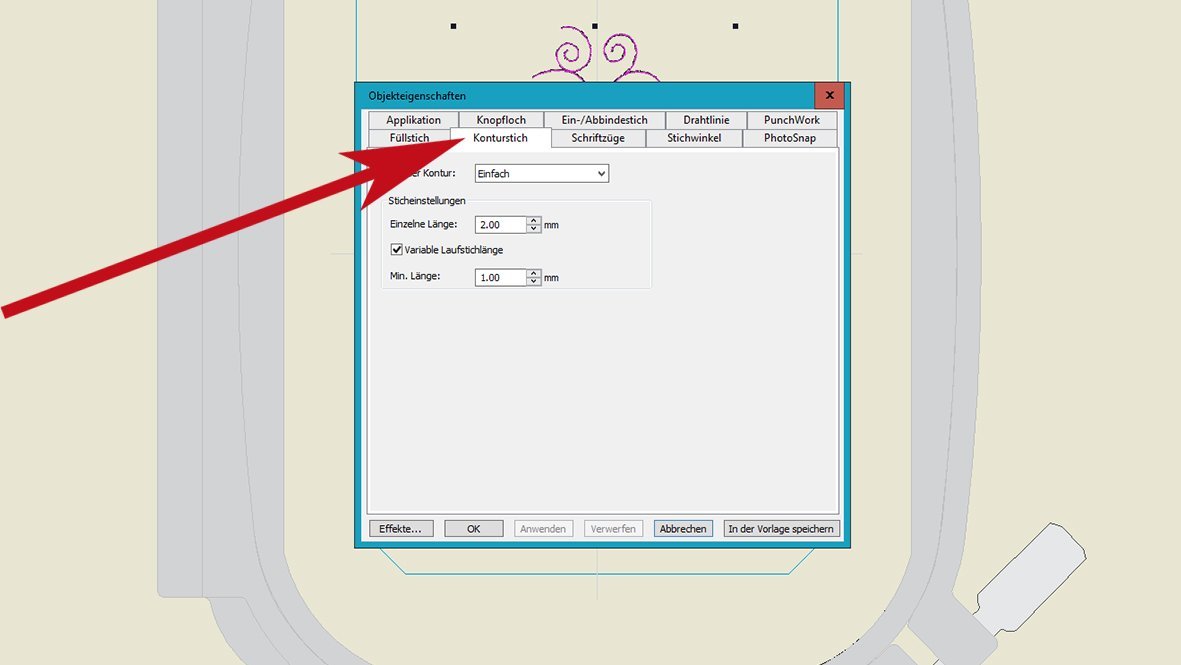
Select and open „Object Properties / Objekteigenschaften“. Select the tab „Outline Stitch / Konturstich“ (if it is not already selected)
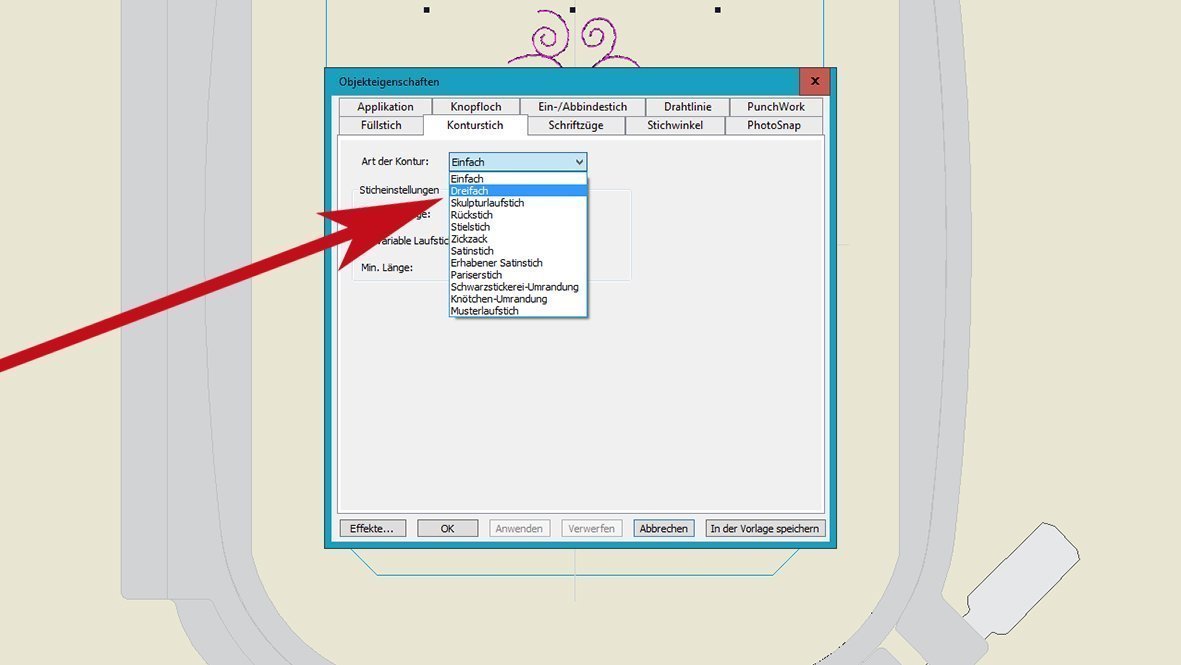
Change the outline from „Single / Einfach“ to „Triple /Dreifach“.
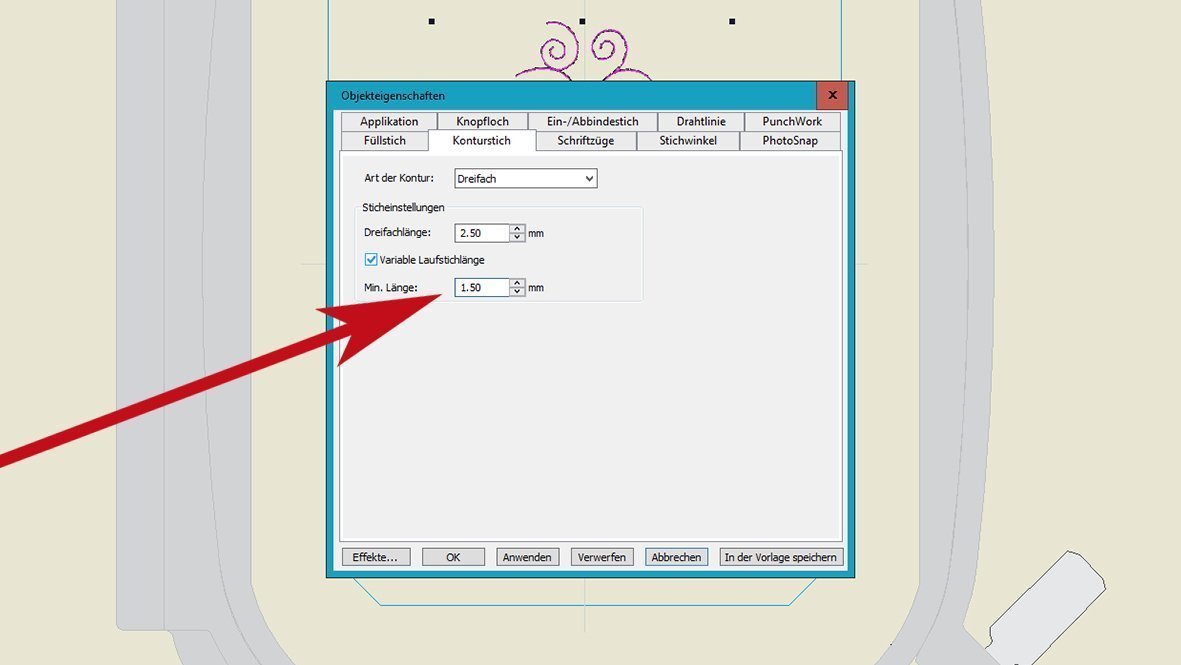
Allow the „variable runlength / Variable Laufstichlänge“ to be selected and increase the „Min. length / Min. Länge” from 1.00 to 1.50.
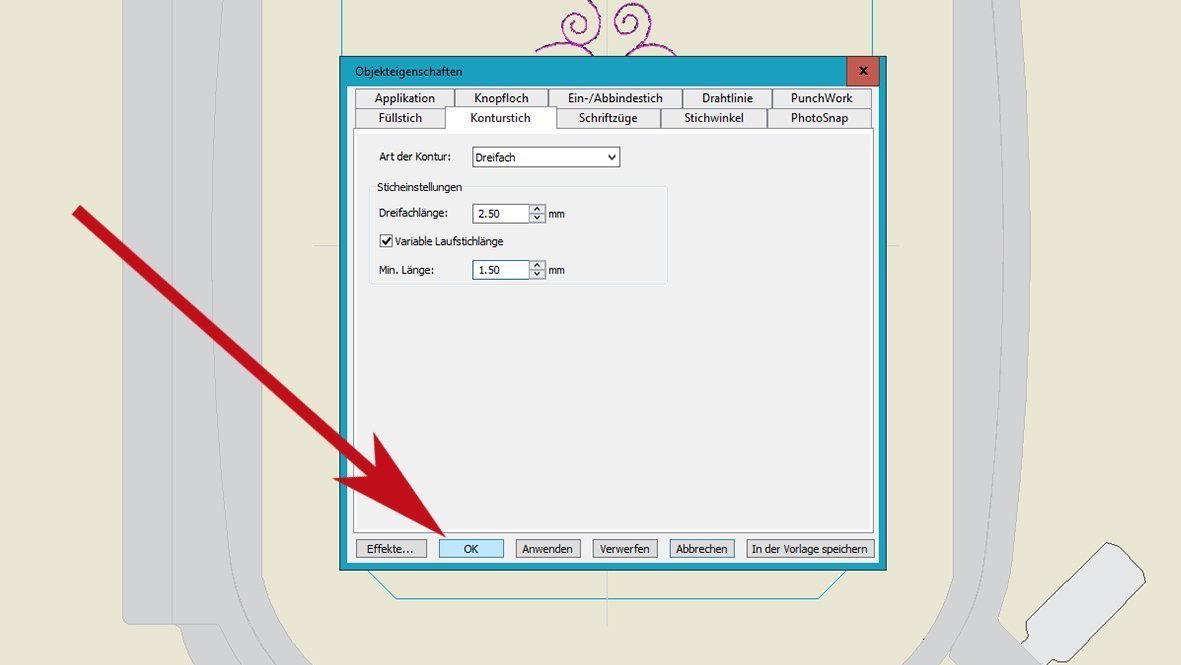
Click „ok“.
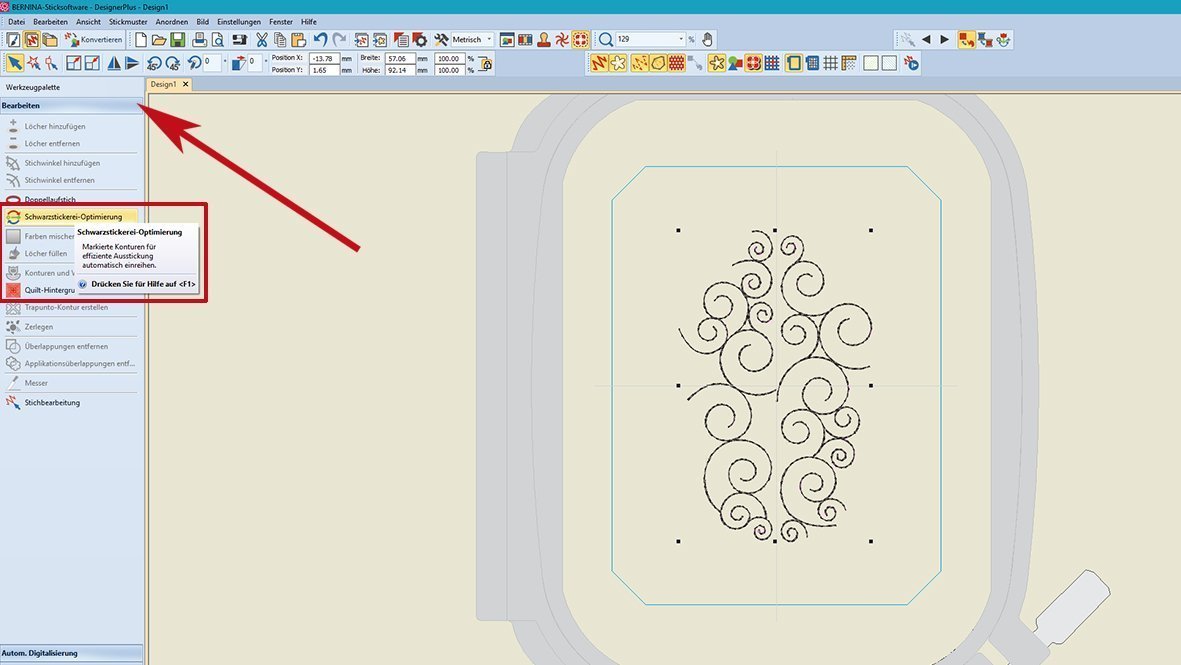
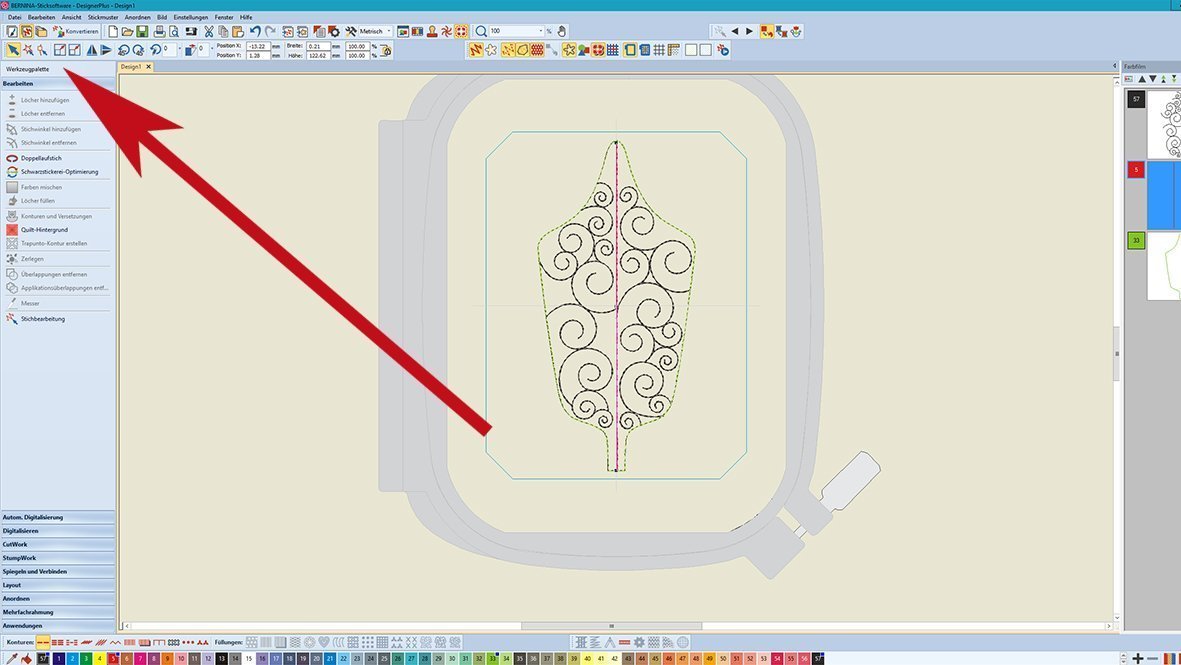
Return to embroidery and leave everything activated. Click on the „Edit / Bearbeiten“ menu under the „Tool boxes / Werkzeugpalette“ and select the command „Blackwork Run / Schwarzstickerei-Optimierung“.
To confirm, press the “Enter” key.
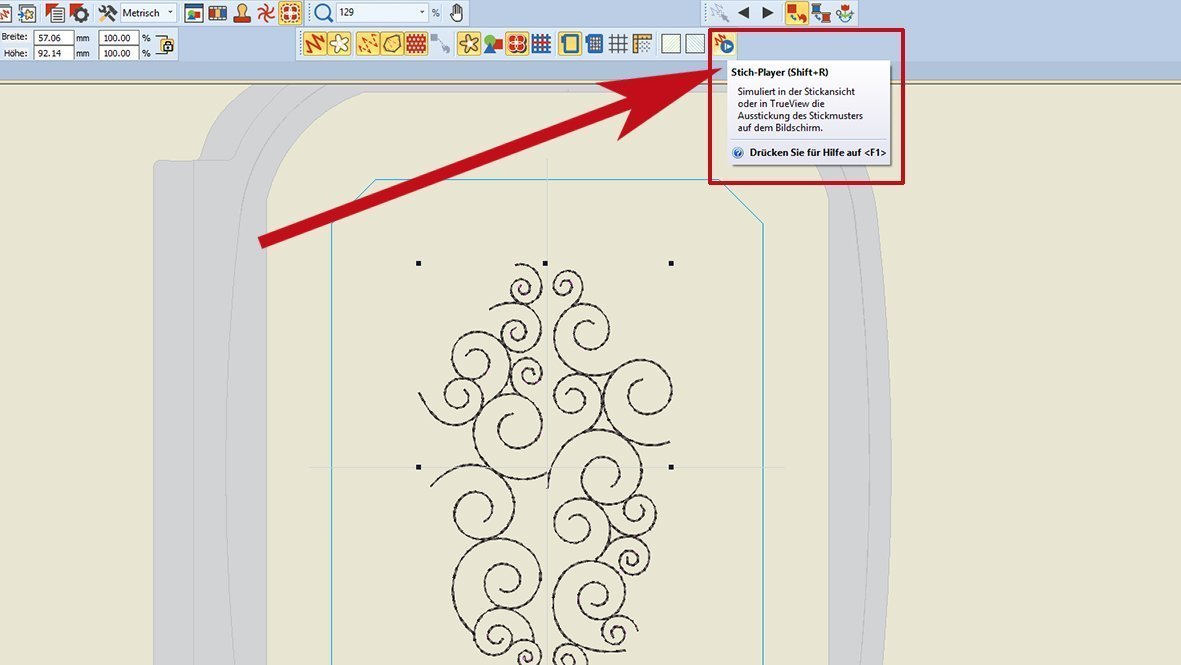
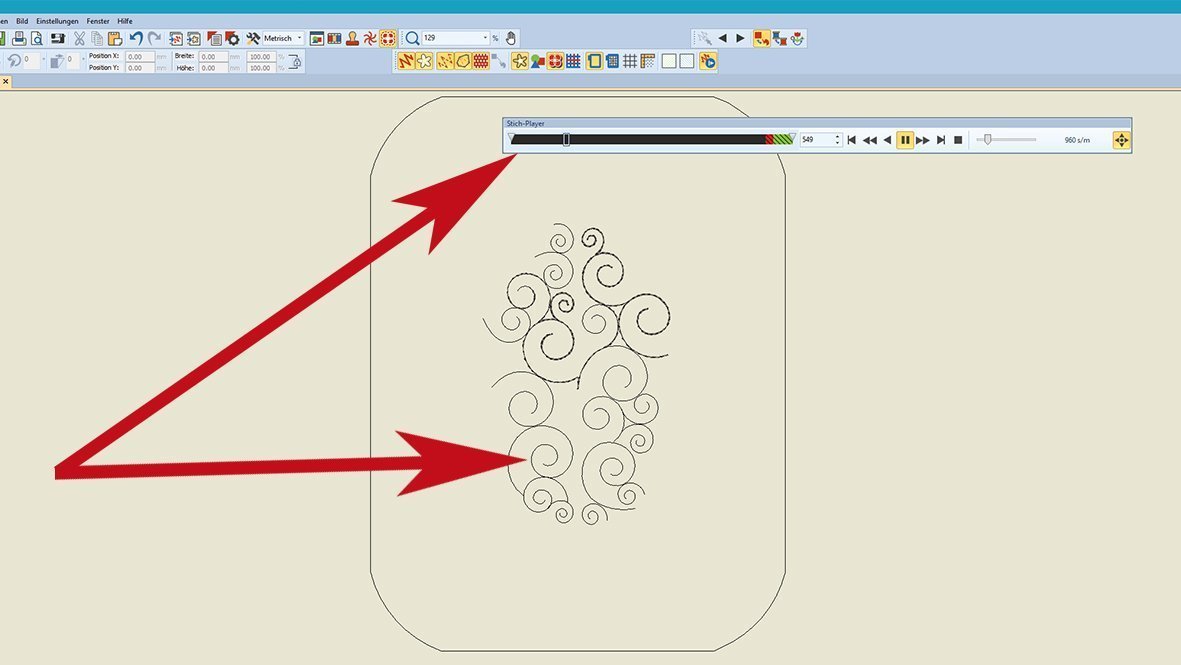
Go to the „Stitch Player / Stichplayer“ and view the preview. The squiggles embroider in one pass without tensioning.
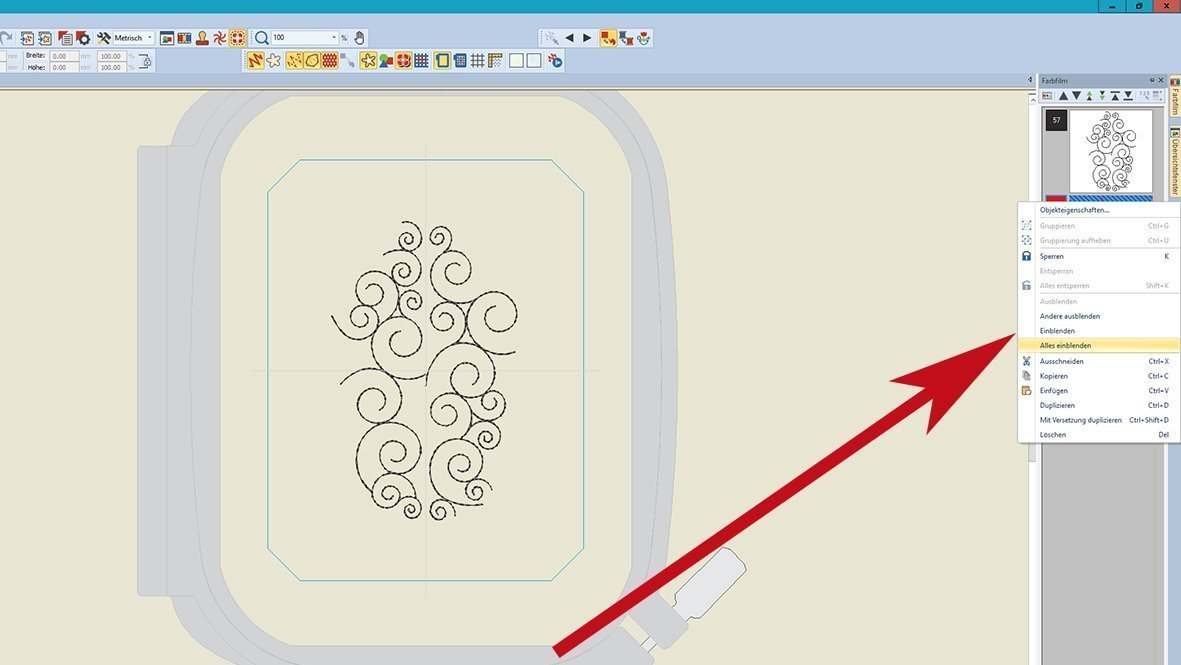
Click the icon „Stitch Player / Stichplayer“ and close it. Go to „Color Film / Farbfilm“ and click the icon „Show Objects / Objekte anzeigen“. You should have only three levels.
Click one level with the right mouse button and choose the command „ Unhide All / Alles einblenden”.
Now you can see the whole embroidery.
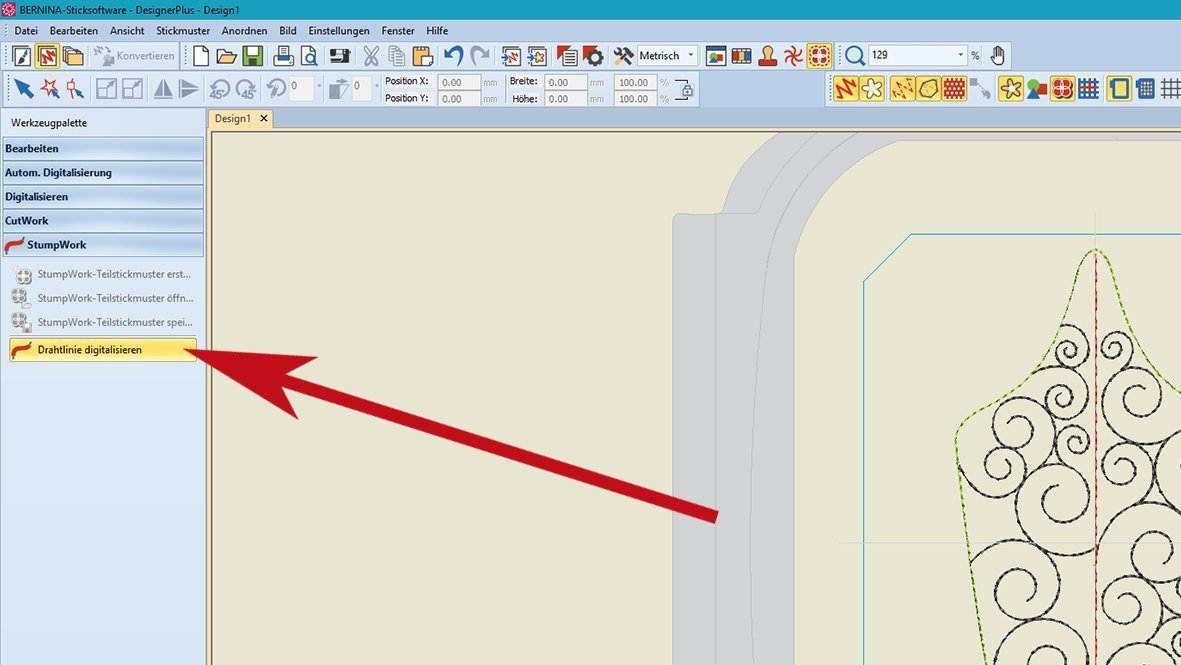
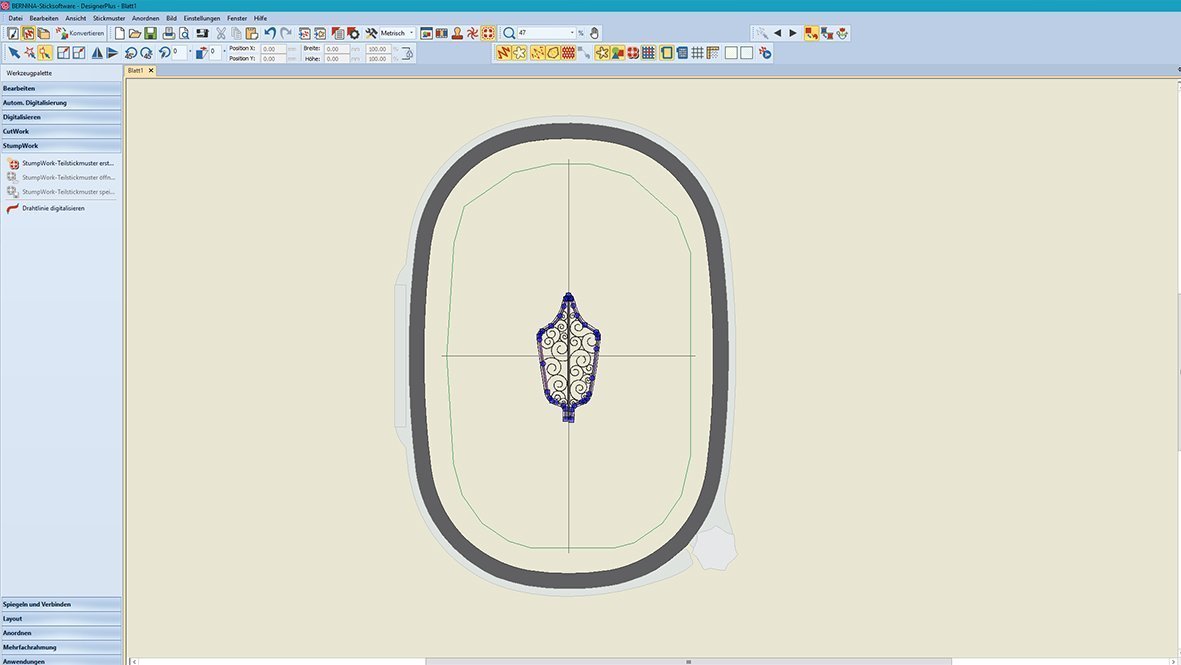
Go to „Toolboxes / Werkzeugpalette“ and choose the „StumpWork” tab.
Choose „Digitize Wireline / Drahtlinie digitalisieren“.
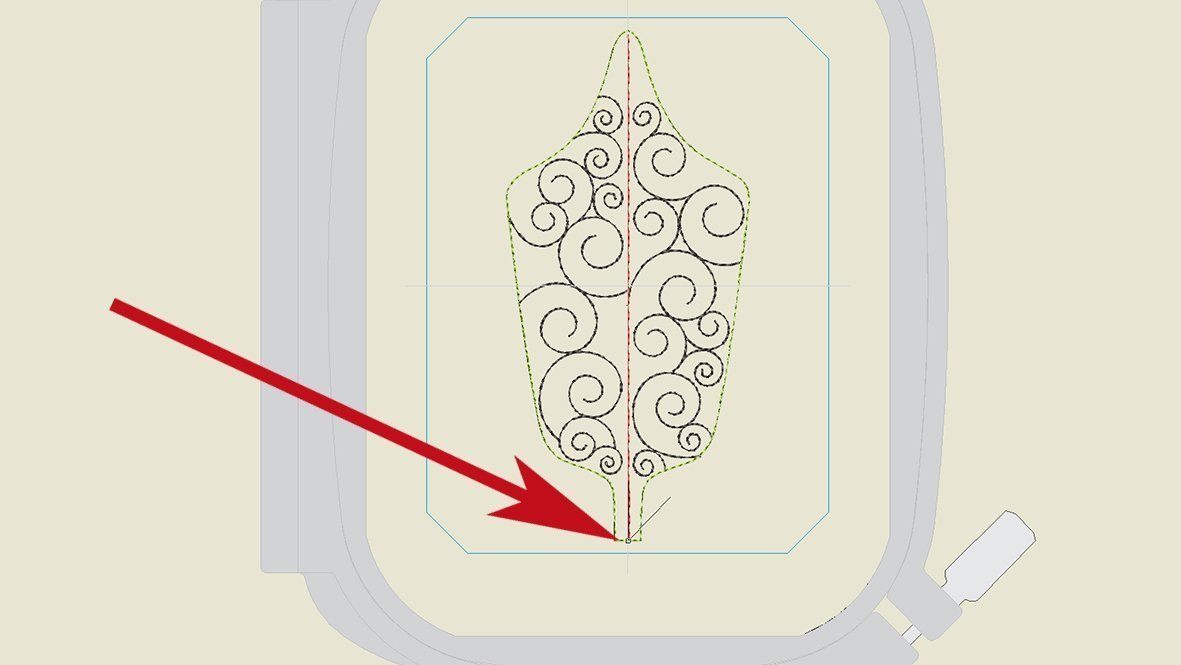
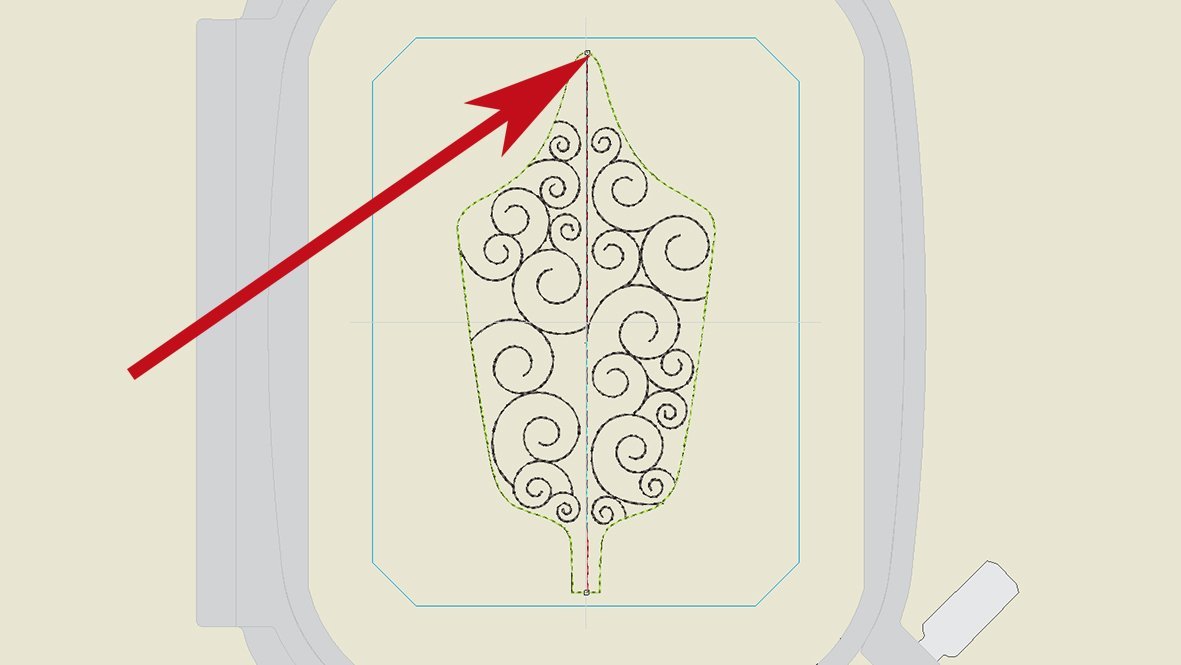
Create the center line. Put the first point on the stem.
And the last vertical to the upper contour.
To confirm the command, press the “Enter” key.
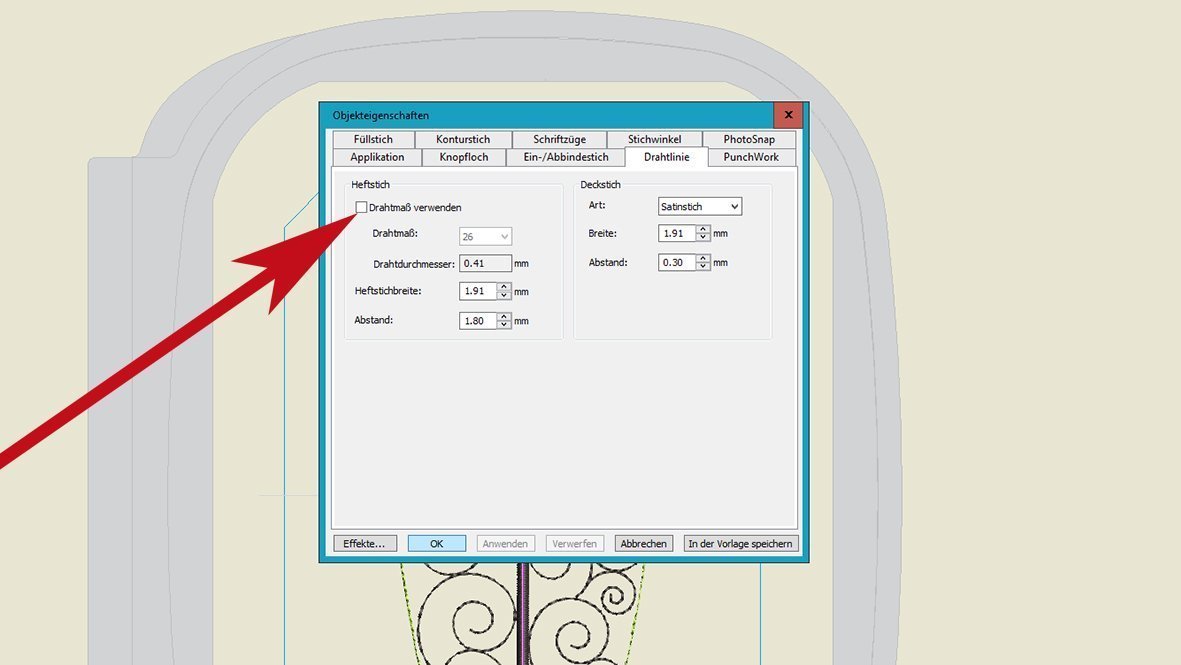
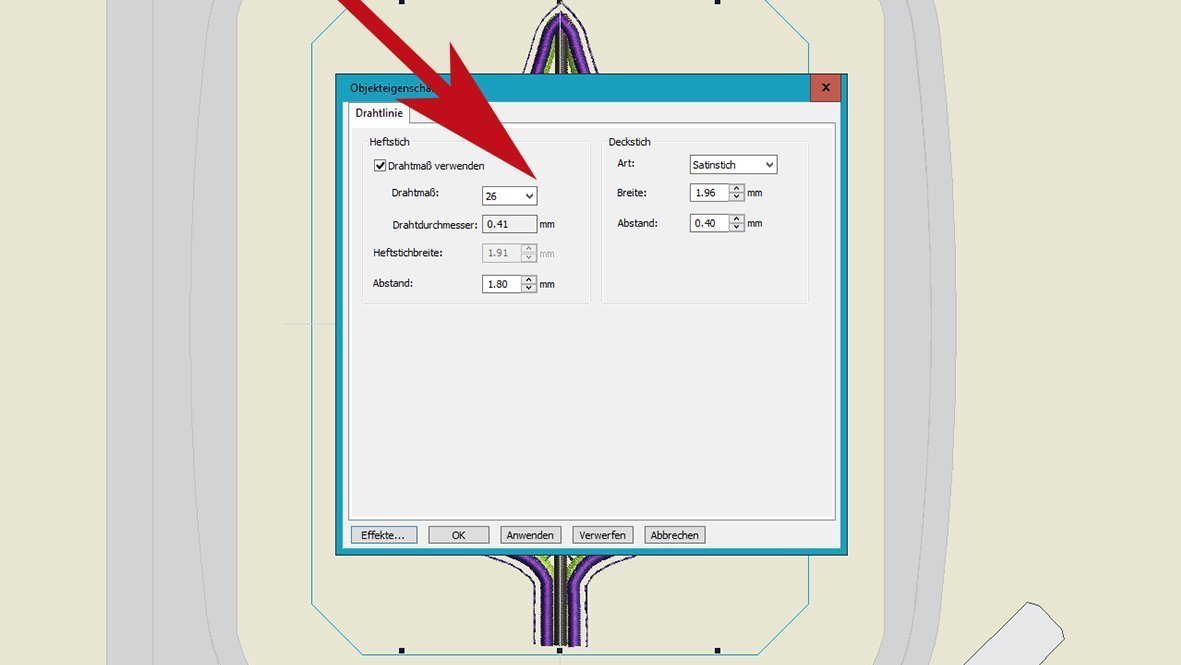
Activate the wire line, press the right mouse button and open „Object Properties / Objekteigenschaften“. You see the tab „Wireline / Drahtlinie“. It is now possible to change the „Wire gauge / Drahtmaß“ and the „Width / Breite“ of the „Cover stitch / Deckstich“.
Leave the width at 1.91 and remove the check mark “Use wire gauge / Drahtmaß verwenden”. Why? When embroidering the motif I was always annoyed that after the zigzag a straight contour and a further fastening stitch were stitched. Since the wire was already sewn in, the needle once hit the wire and almost moved it into the hook area. I have searched for a long time until I found the solution. Believe me, the wire willhold perfectly well without additional fastening stitches.
Go right and choose again „Color Film / Farbfilm“.
Delete the center line with the „Del.-Key“.
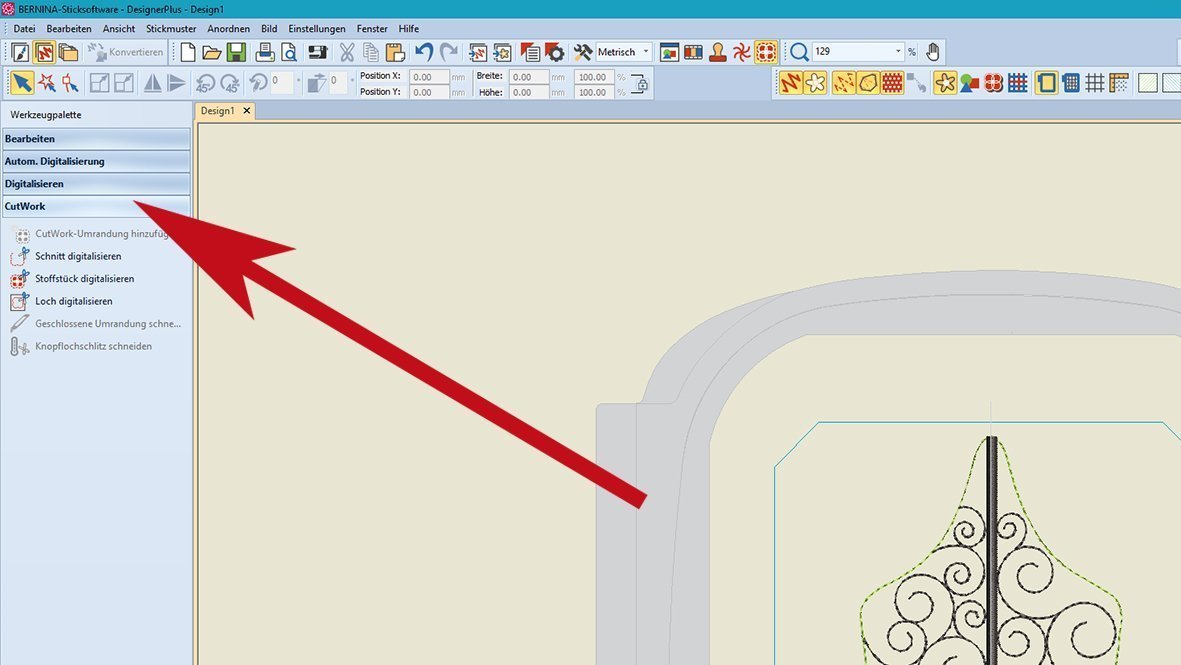
Go to the „Toolboxes / Werkzeugpalette“ and choose „CutWork / CutWork“.
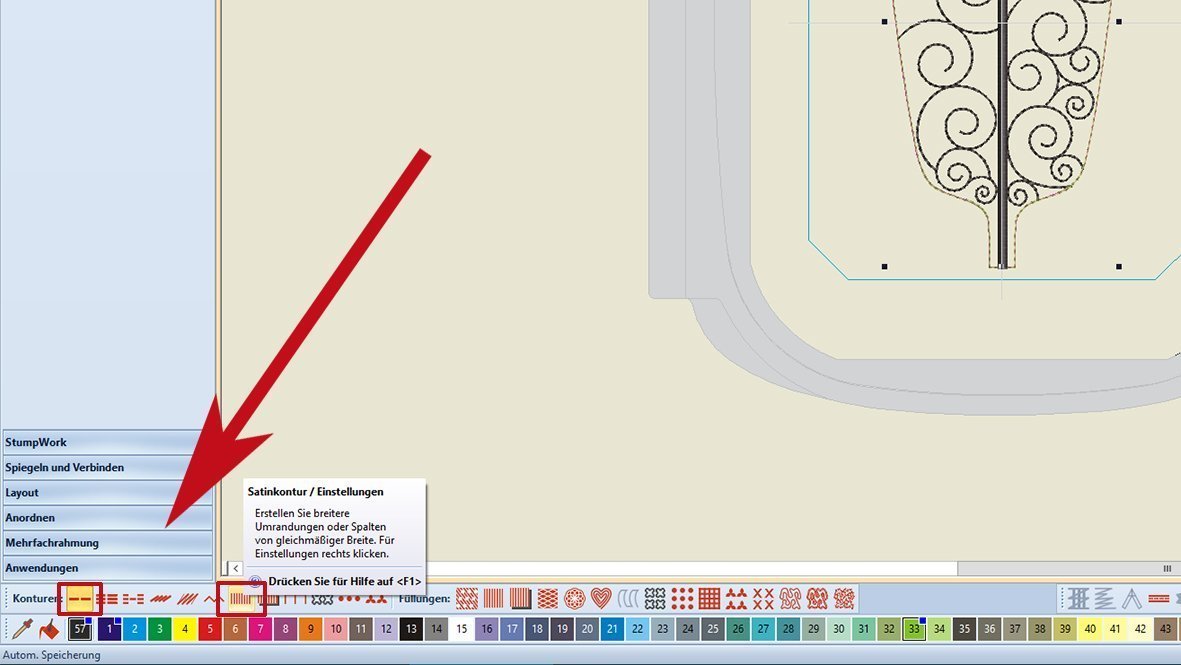
Now you want to create a stumpwork contour from the leaf contour. For this, activate the leaf contour and change the „Outlines / Konturen“ from „Single Outline /Einzelkontur“ to „Satin-Outline / Satinkontur“.
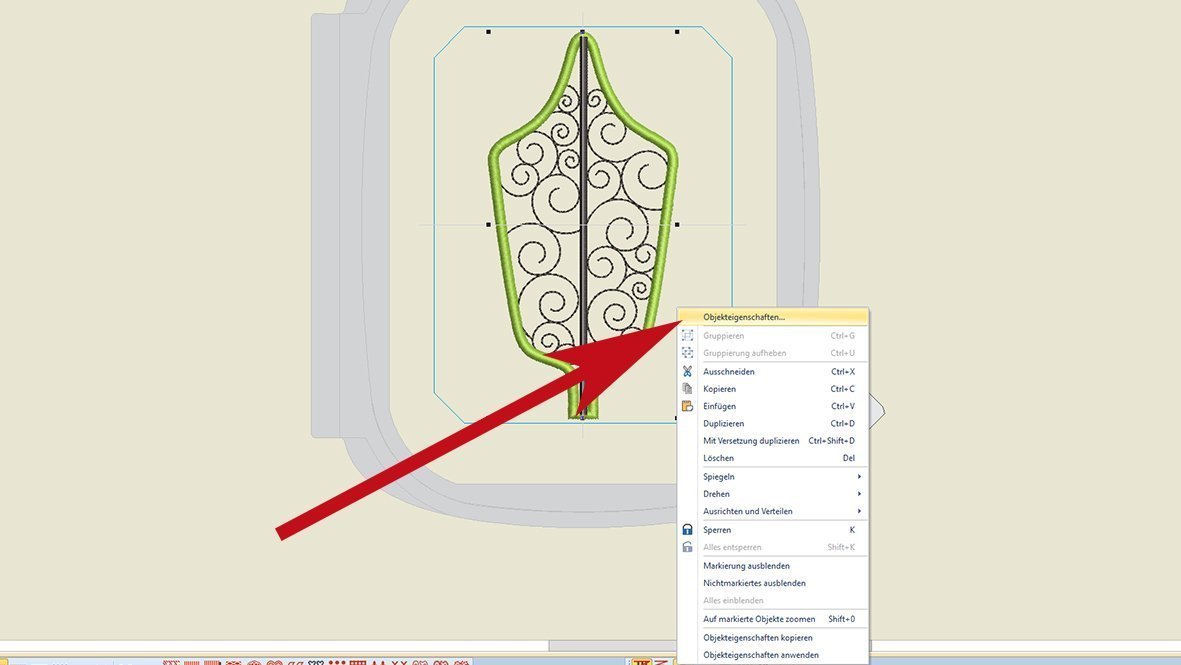
Click the right mouse button and choose „Object Properties / Objekteigenschaften“.
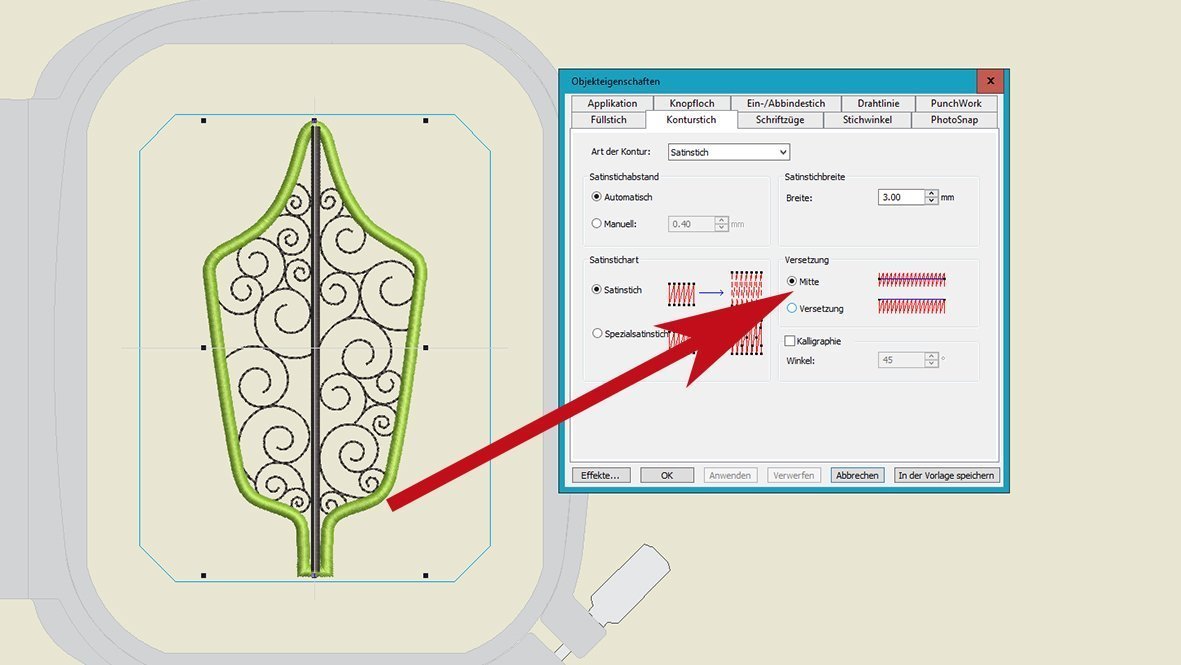
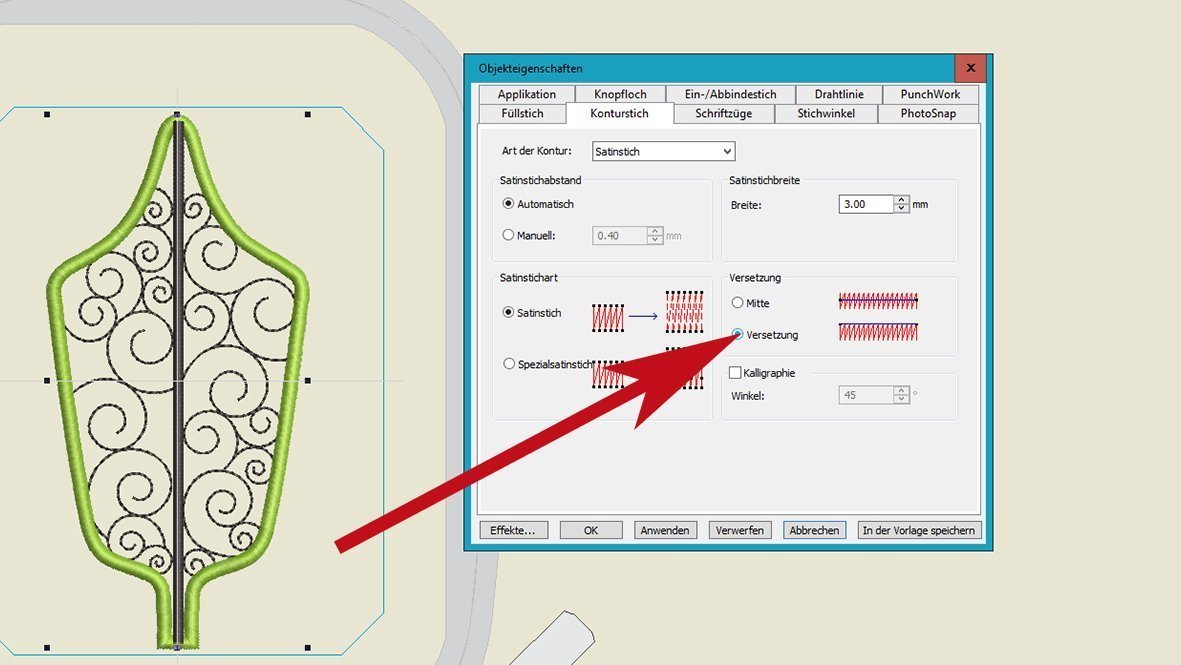
You see the tab „Outline Stitch / Konturstich“, remove the check mark from „Offset Center / Versetzung Mitte“ …
… to „Offset / Versetzung“
Click „ok“
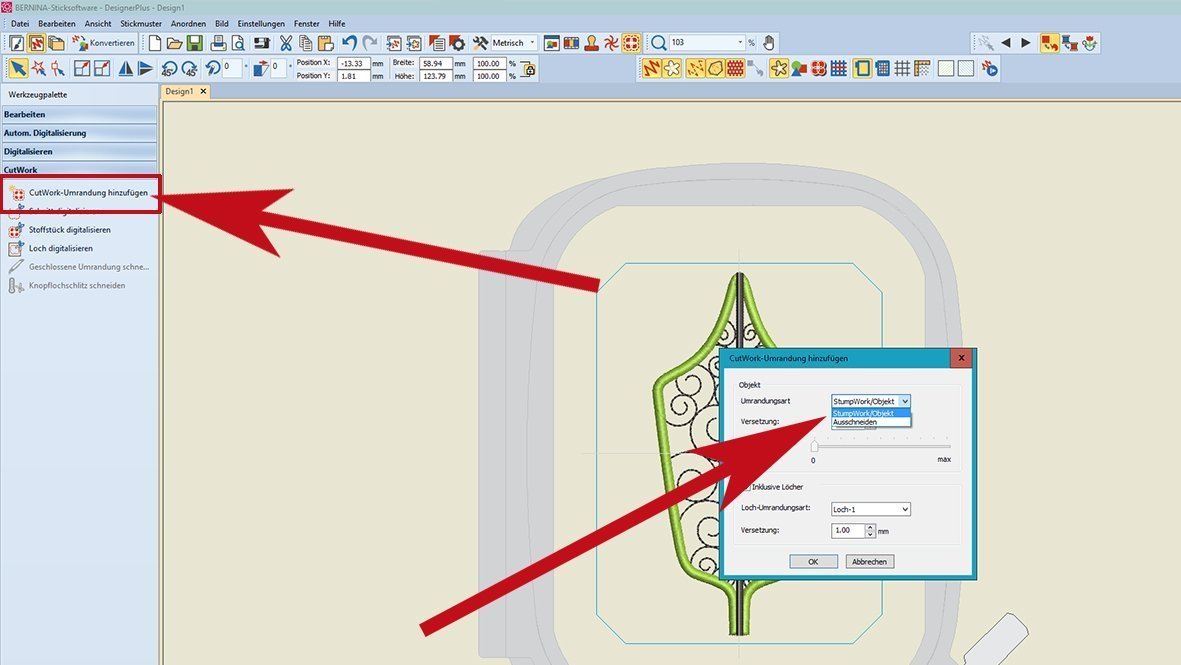
Now, under „CutWork“ the command „Add CutWork Border / CutWork-Umrandung hinzufügen“ is active. Select „Add CutWork-Outline“ and a window opens. Select „StumpWork | Piece / StumpWork | Object“
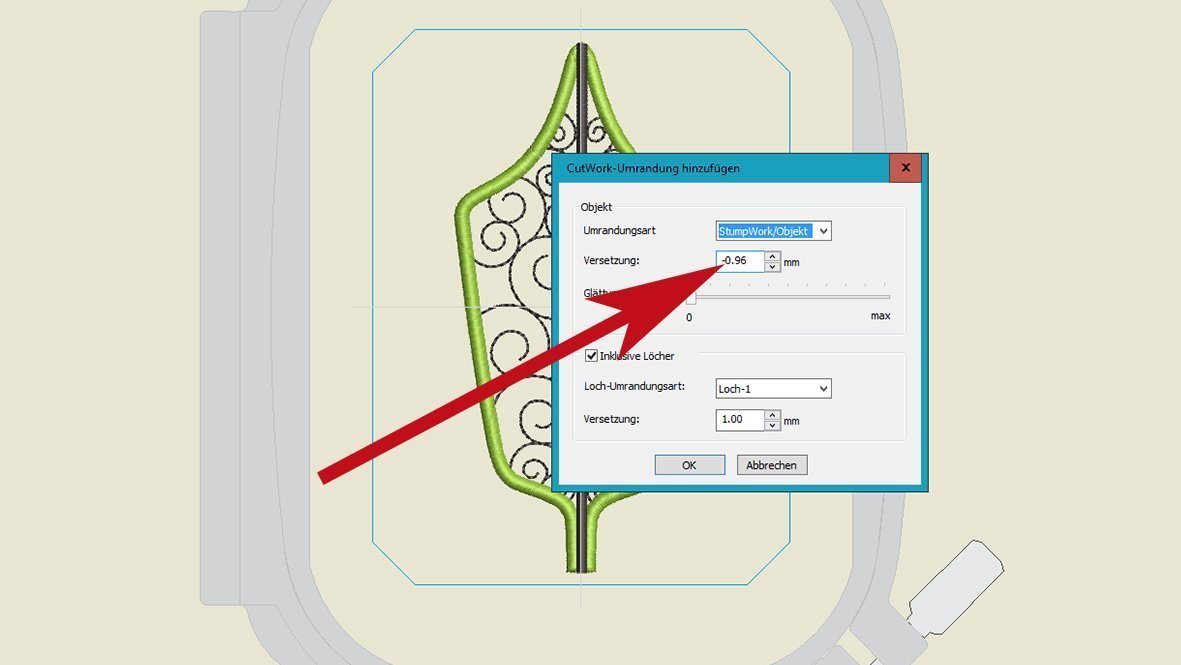
Leave „Offset | Versetzung“ -0,96 mm
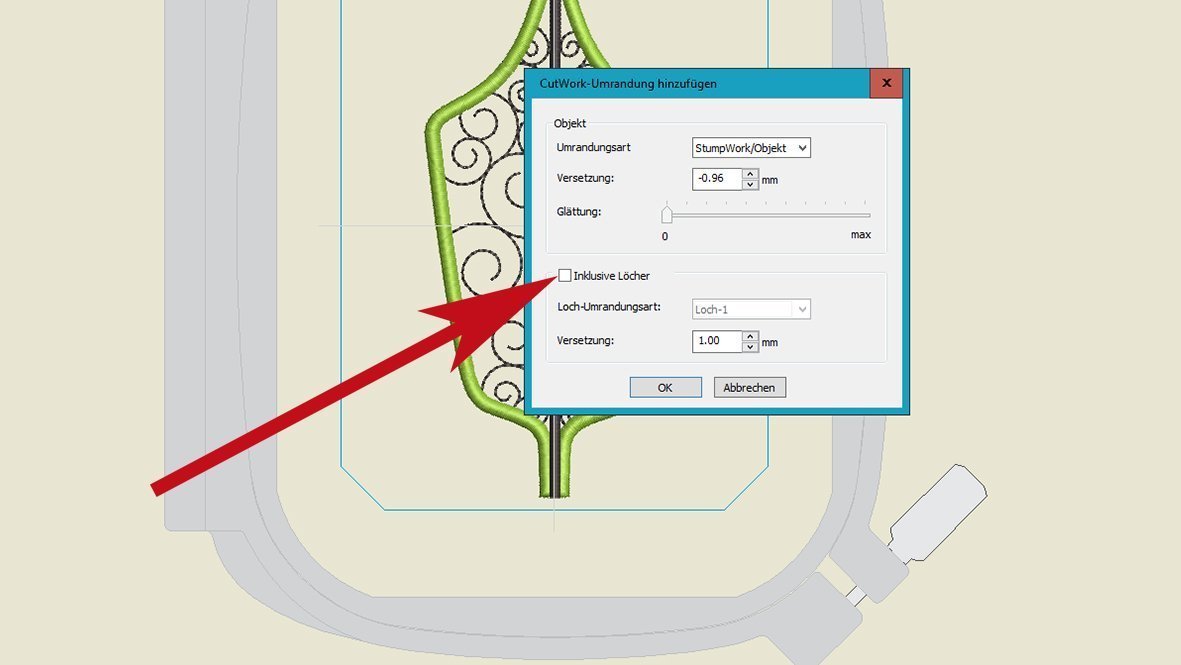
Remove the check mark „Include holes | Inklusive Löcher“.
Click „Ok“.
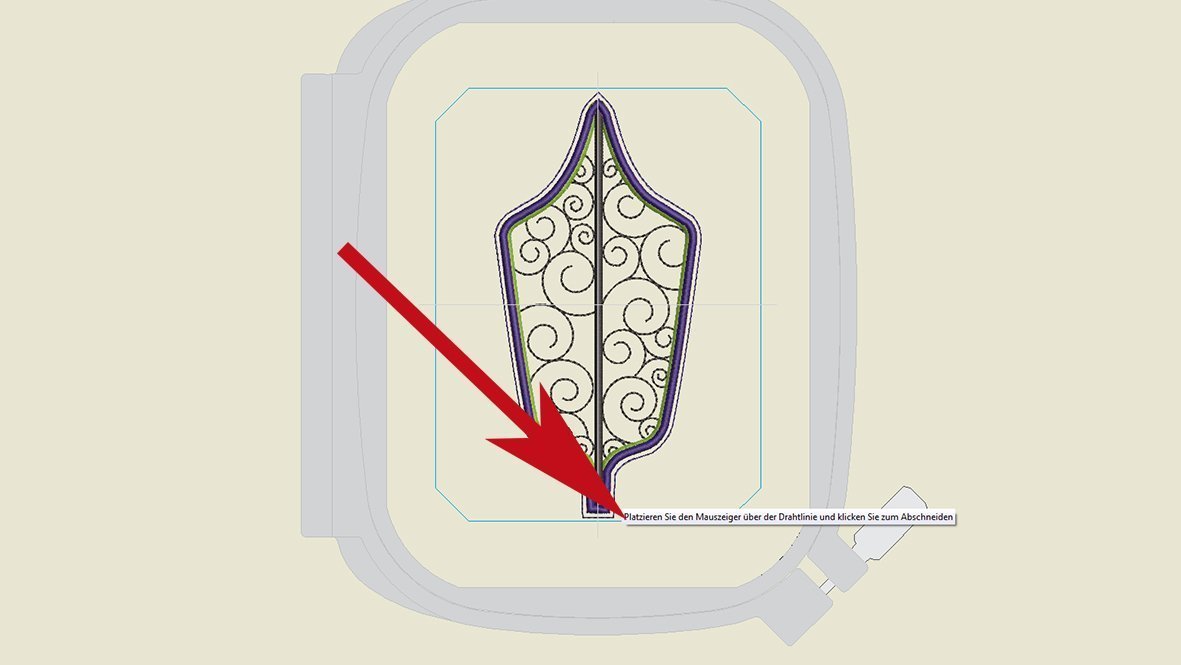
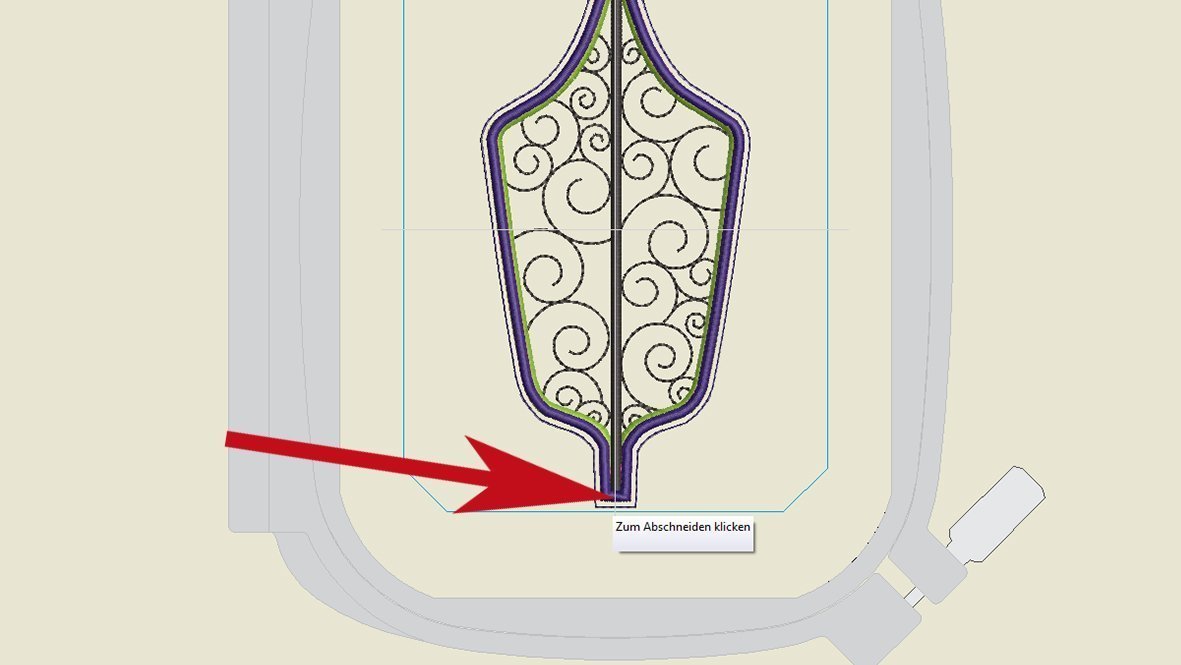
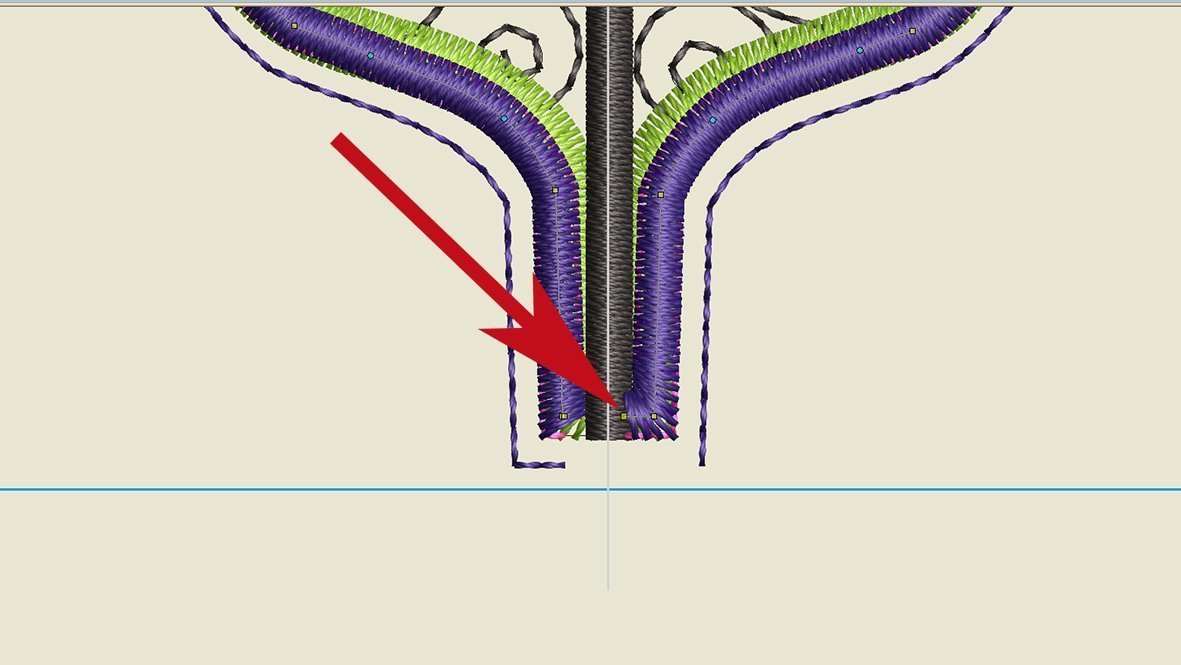
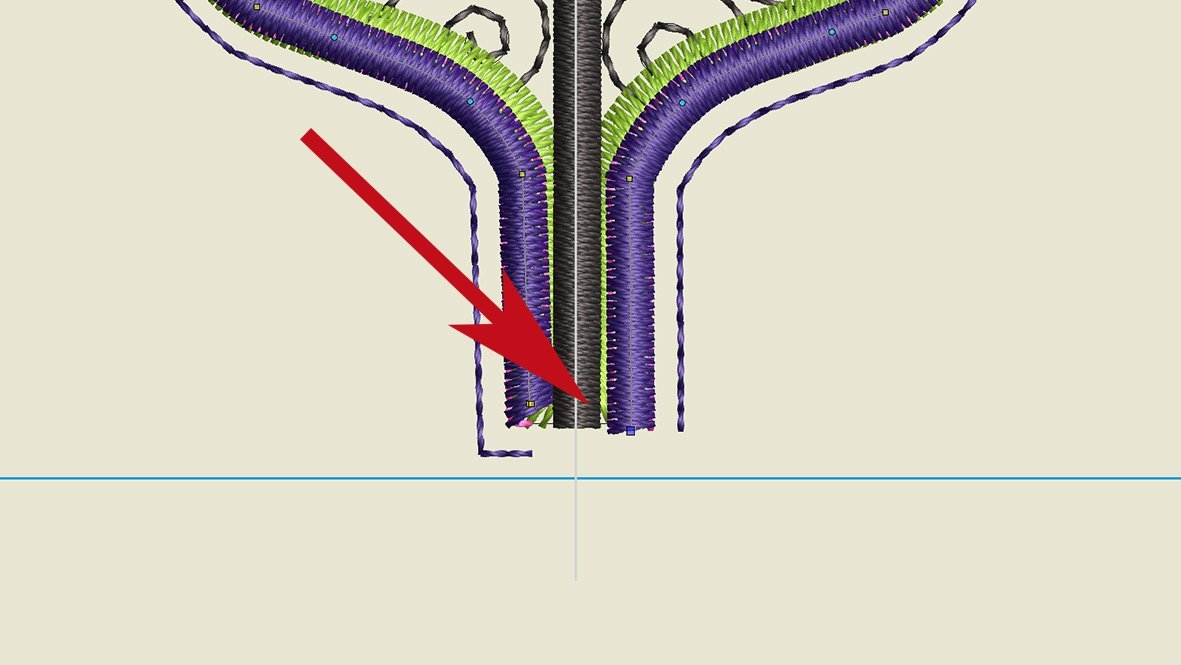
Now we have a „StumpWork/Piece with Cutting Line. To have an opening for the wire, place the mouse pointer at the location where the opening should be. Namely at the stem end.
Click to cut.
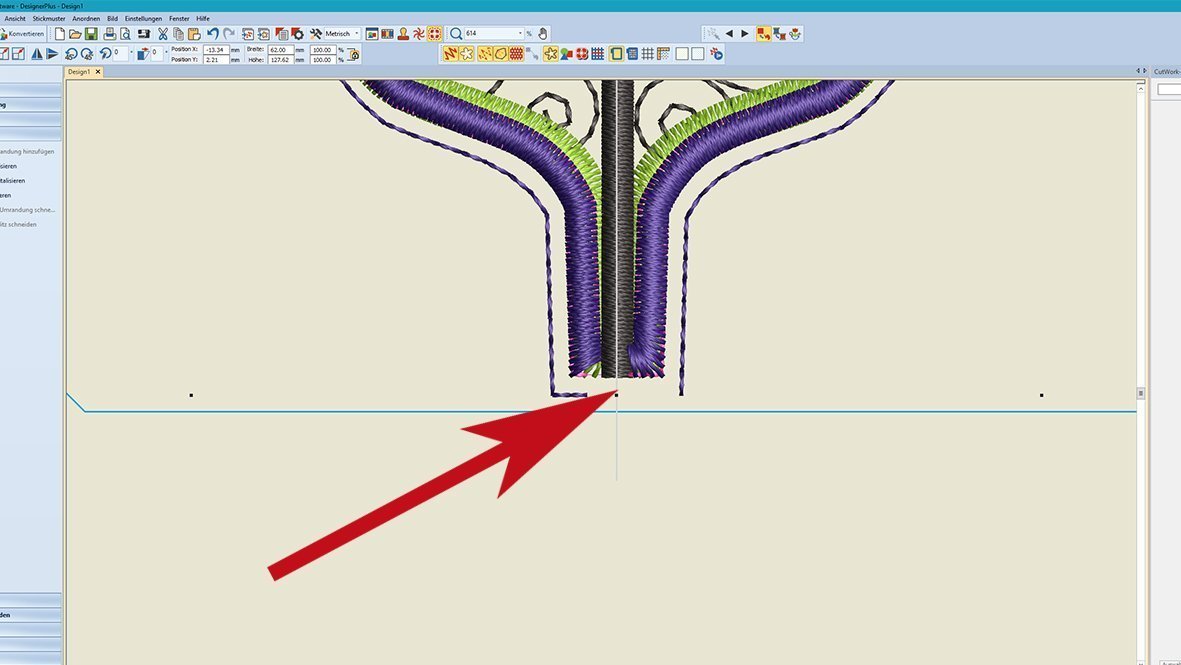
Zoom with the mouse’s scroll wheel and see the opening.
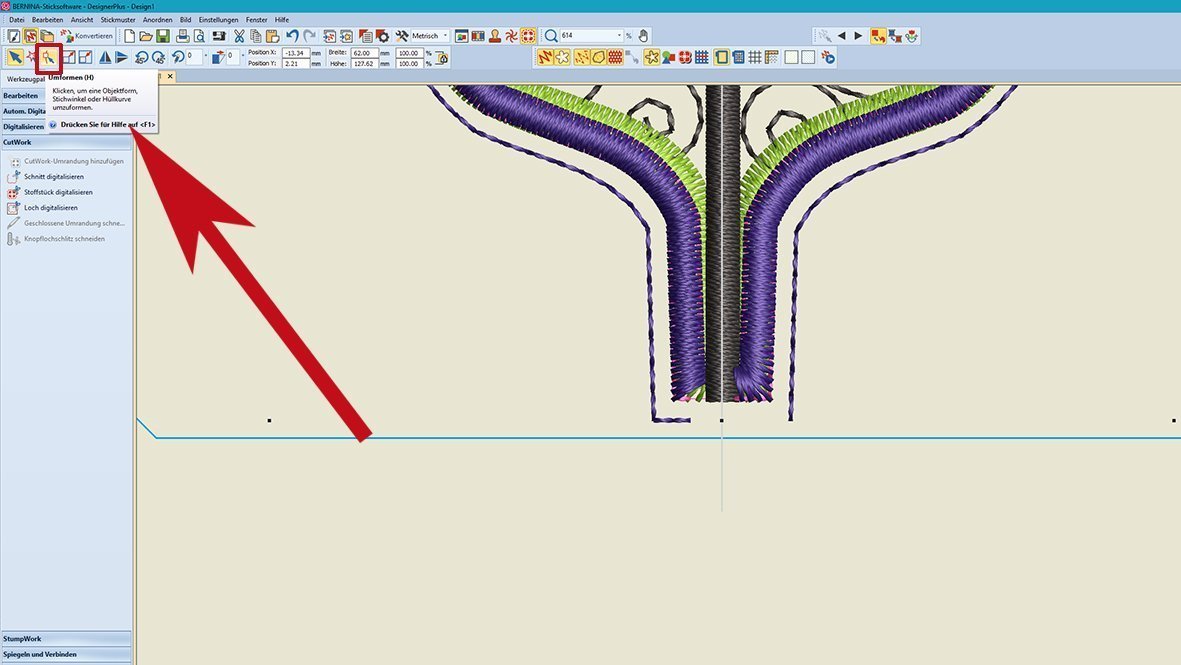
Activate the new contour and choose at the top „Reshape / Umformen“.
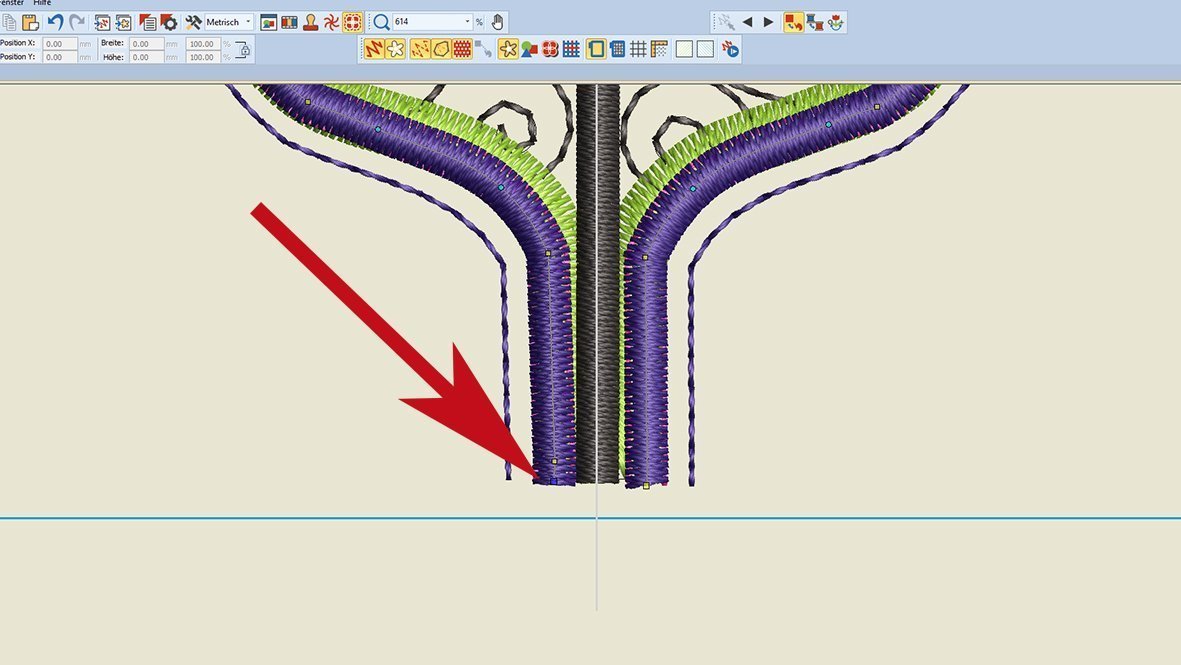
Now choose the little point and delete it. Press the „Del.-Key“.
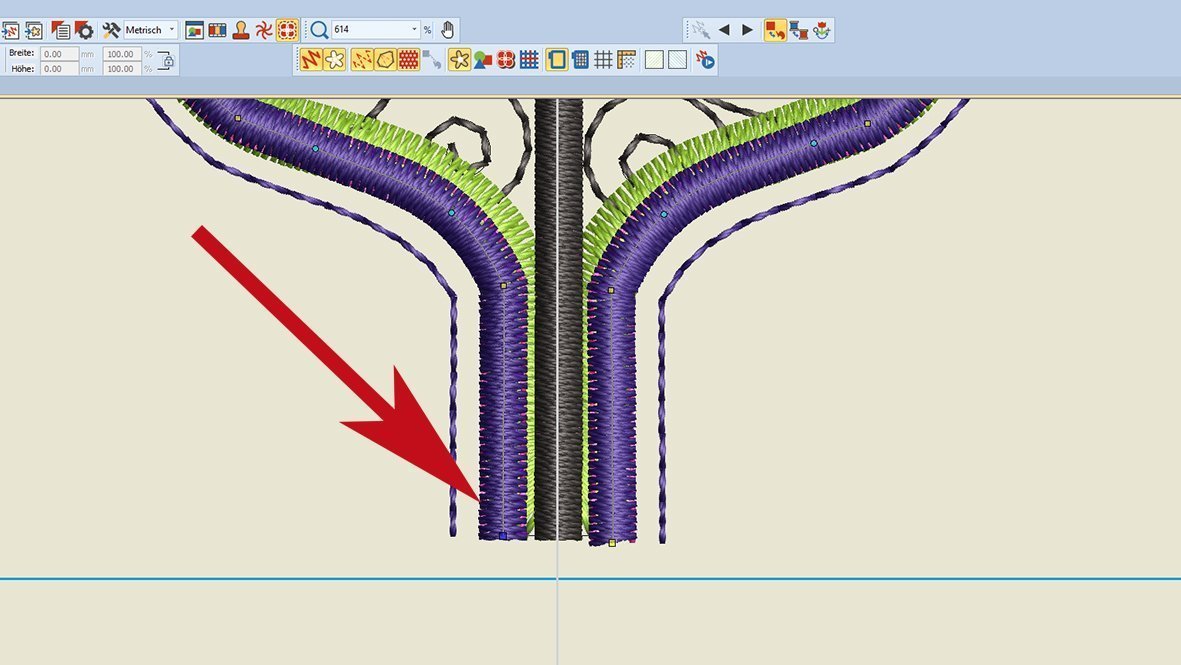
Pull further down. There is also an offset at the left point. Take this point, drag it down and delete it.
Then we can move the other point flush down. In general, you should shorten the design somewhat, so that nothing happens in the frame. The CutWork foot 44c needs more space in the frame. Please keep this in mind!
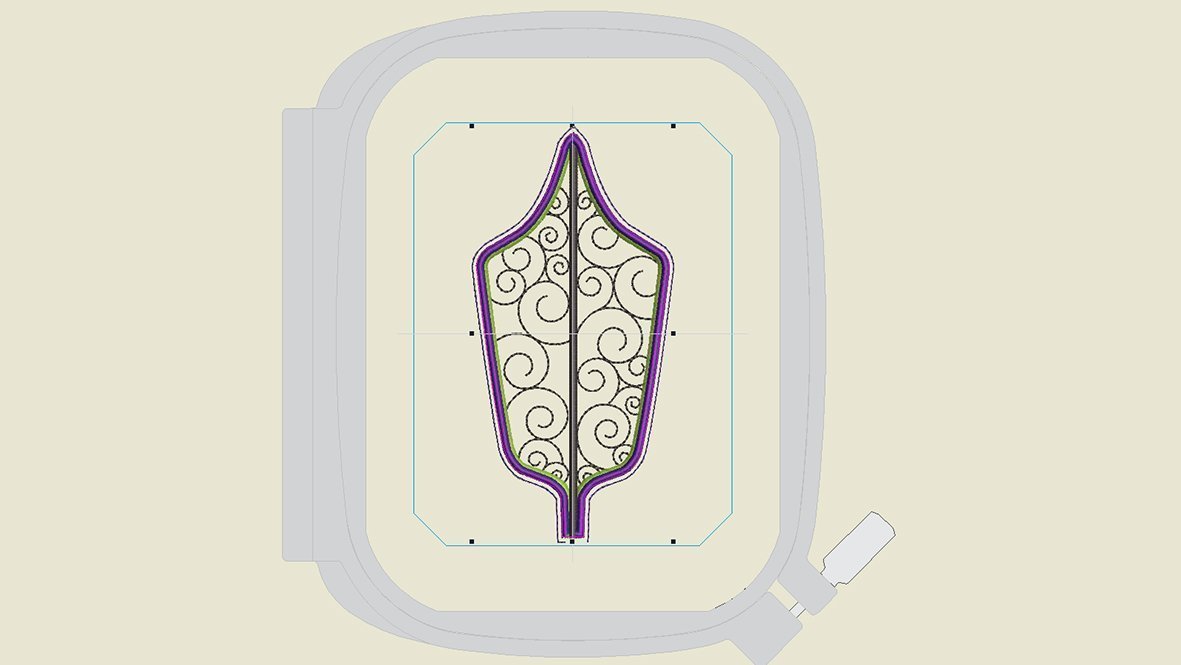
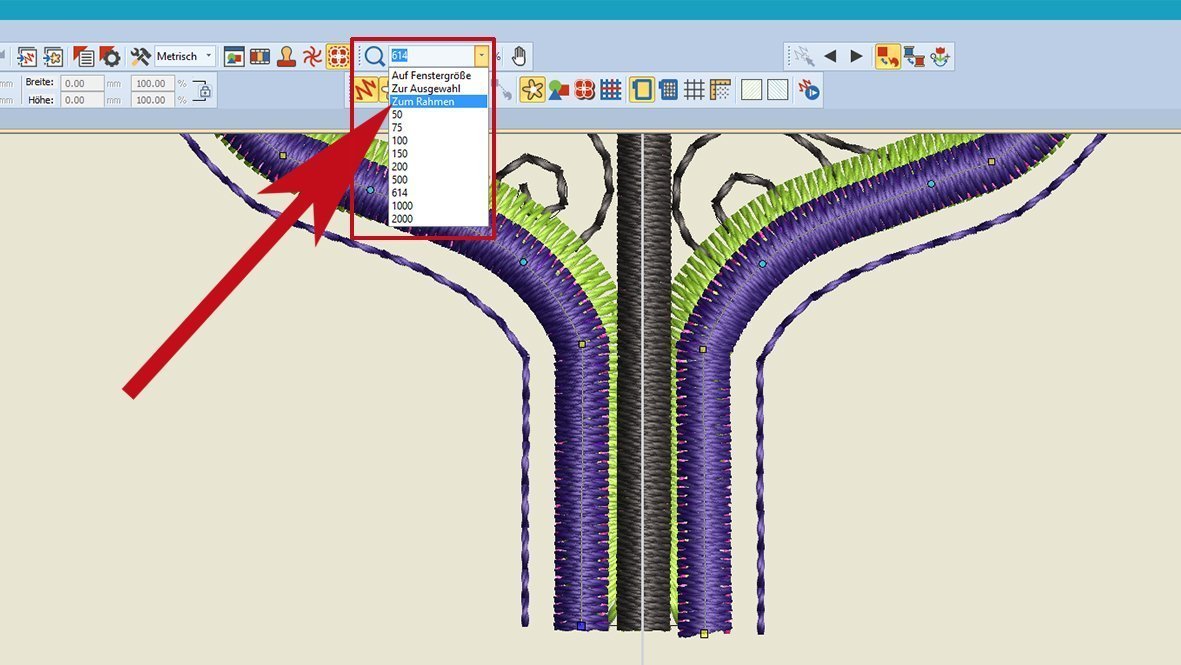
Go to „Zoom“ and change to „To Hoop | Zum Rahmen“.
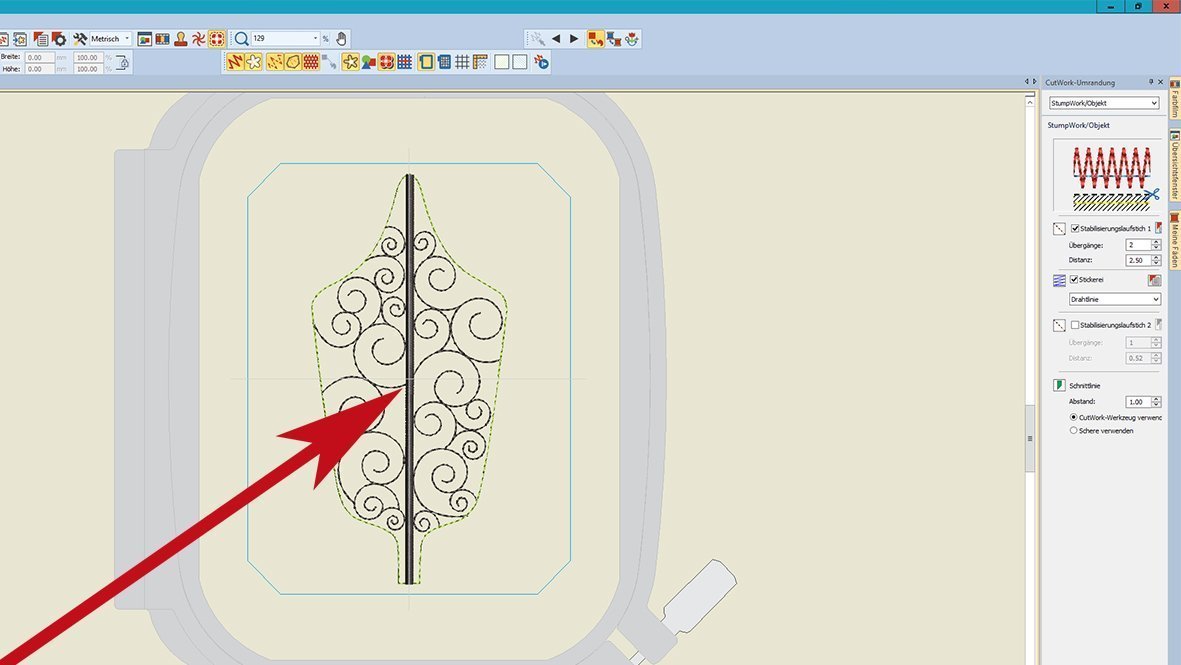
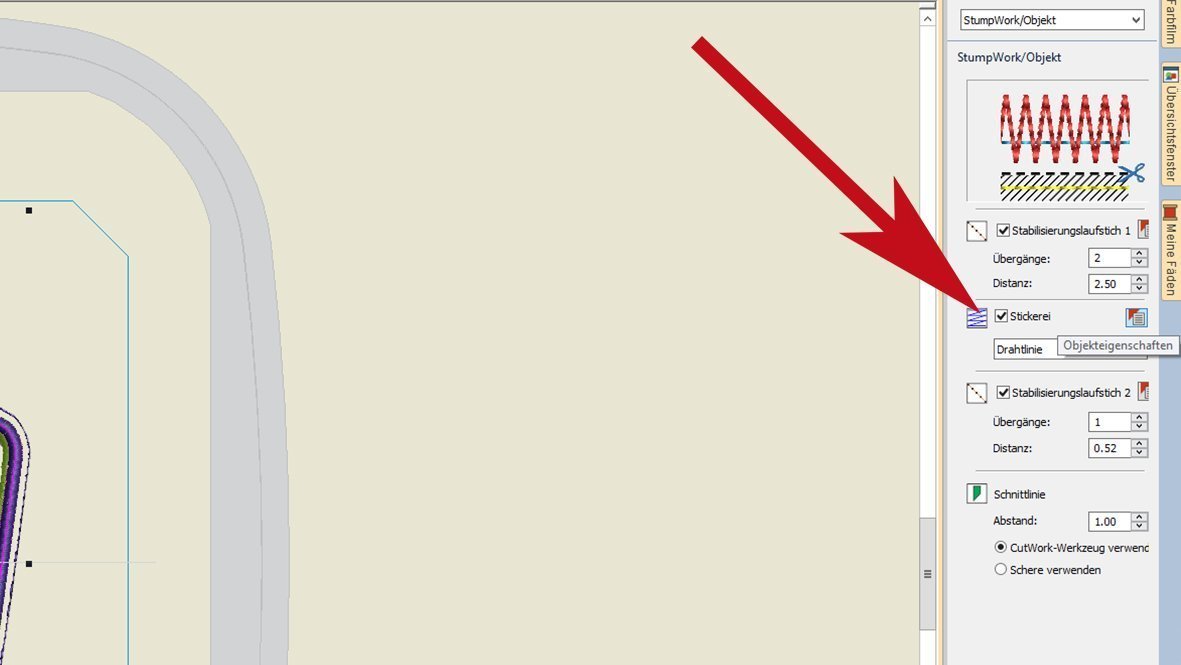
You can now see the complete leaf. On the right side you see the settings for the „StumpWork/Piece / StumpWork Objekt“.
There should be check marks on „Stabilization run 1 and 2 / Stabilisierungslaufstich 1 und 2“. In „Embroidery / Stickerei“ you should select „Wireline/Drahtlinie“ and in „Cutting Line / Schnittlinie“ you can decide whether you want to cut or cut out with the hand
For the individual points, you can change the parameters under „Object properties / Objekteigenschaften“. Open under „embroidery” the object properties. You can see that the wire gauges can be adjusted here (“Drahtmass”). I have mine at 26 (including the mm measure) left. The higher the number, the lower the Ø. My wire had a ø of 30, but I still left it at 26. The satin stitch width can also be changed here. I have left 1.96. I did not want my outline so wide.
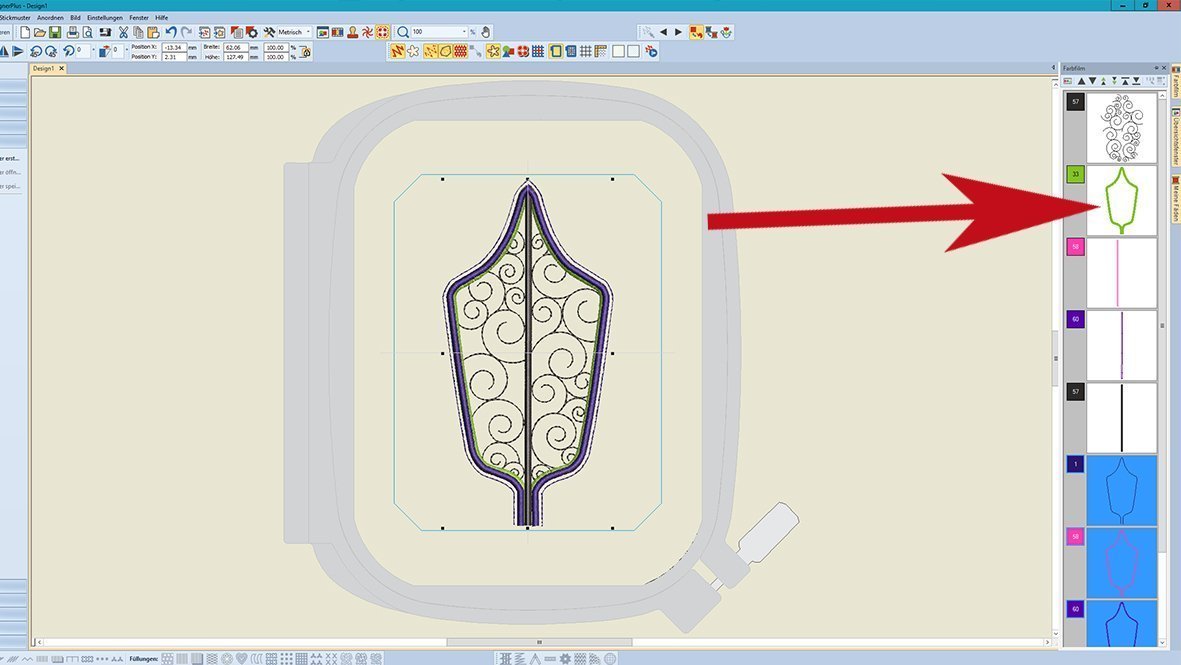
Click „ok“. Now look at the „Color Film | Farbfilm“. Delete the leaf contour with the „Del.-Key“.
The inner pattern should be embroidered first, then the center line and finally the leaf contour.
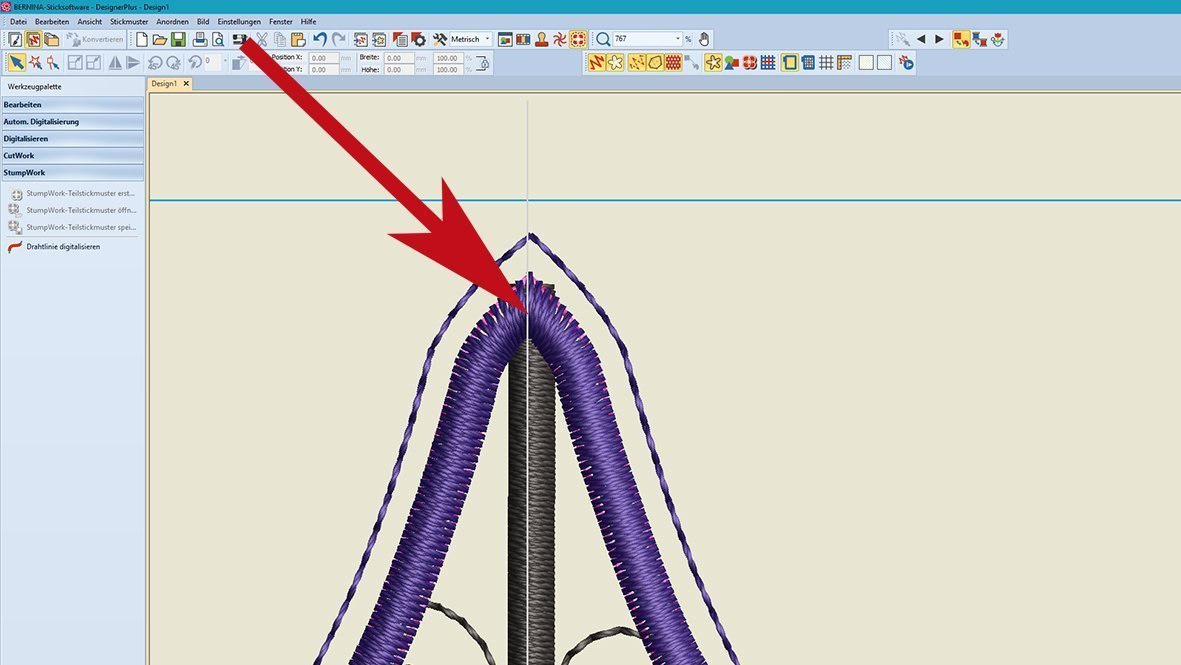
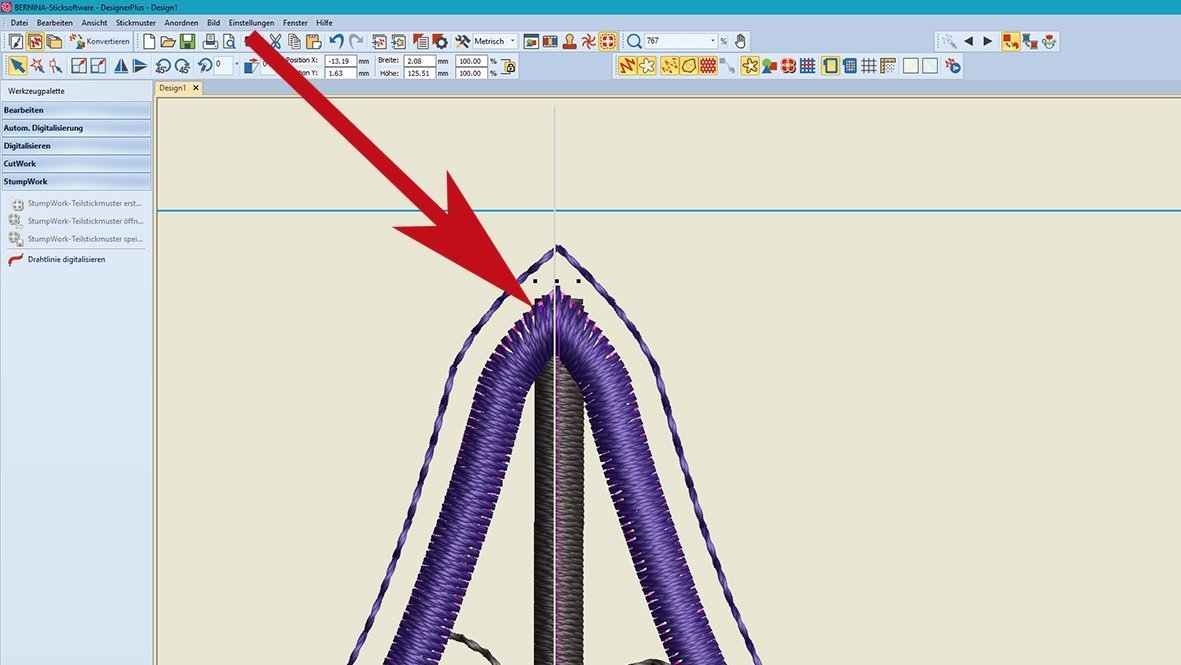
Zoom to the upper leaf contour. The middle leaf seems to be protruding.
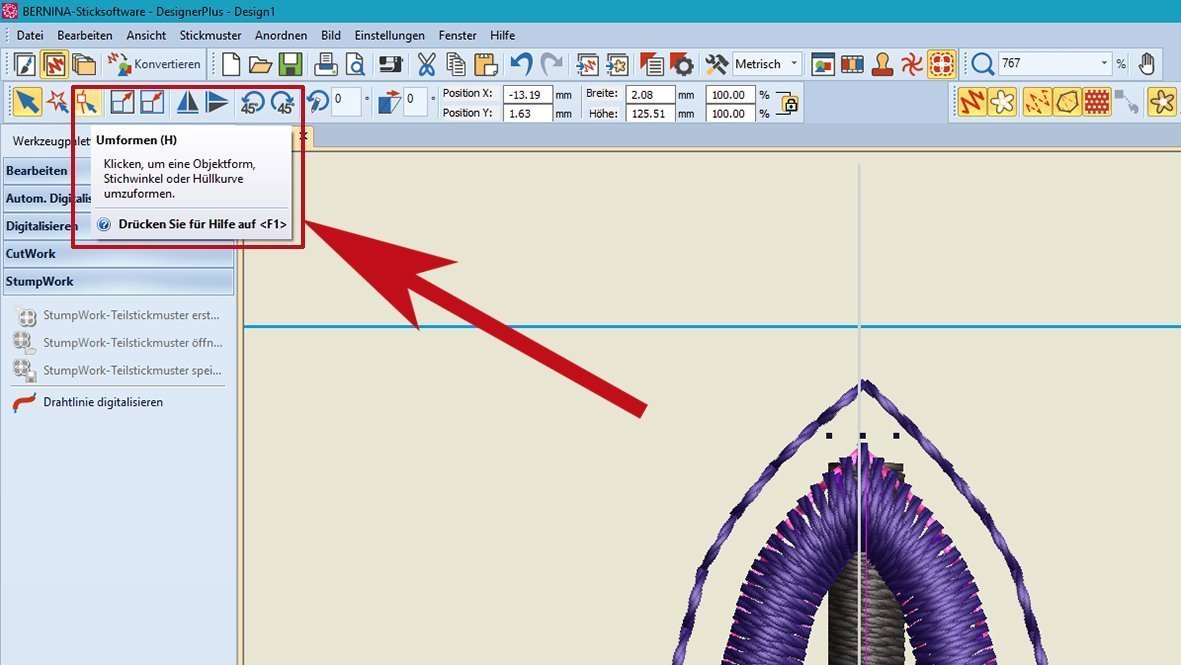
Activate the center line and choose „Reshape / Umformen“.
Move the point further down, because you do not want the needle stitching over the wire afther the wire has already been attached.
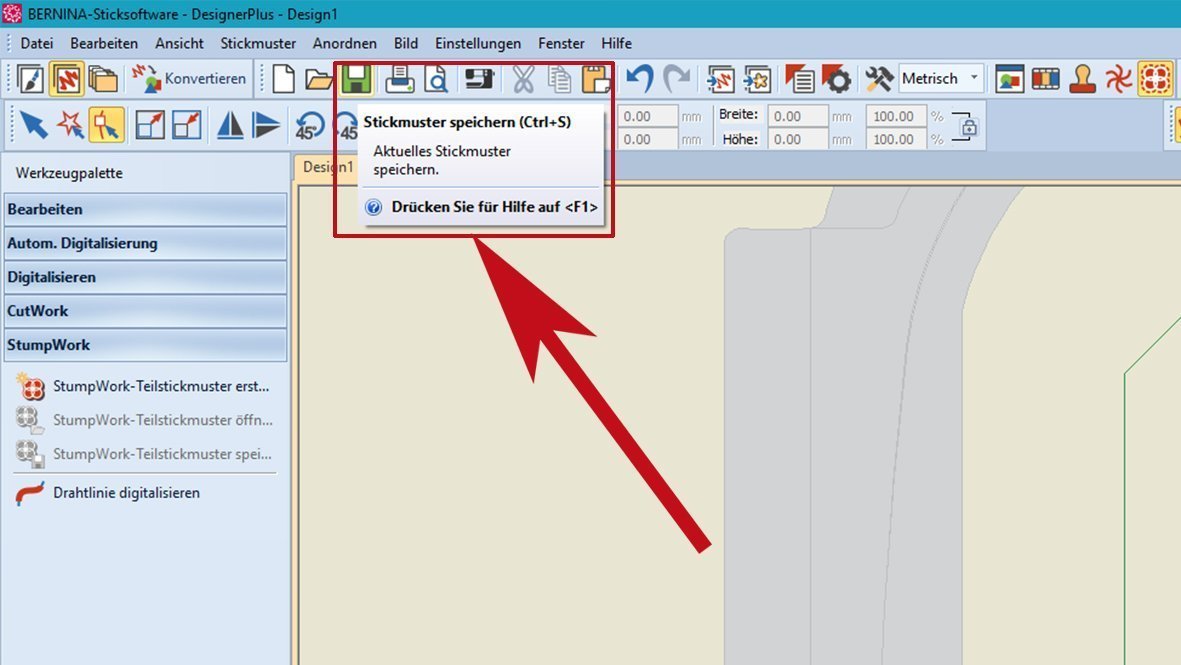
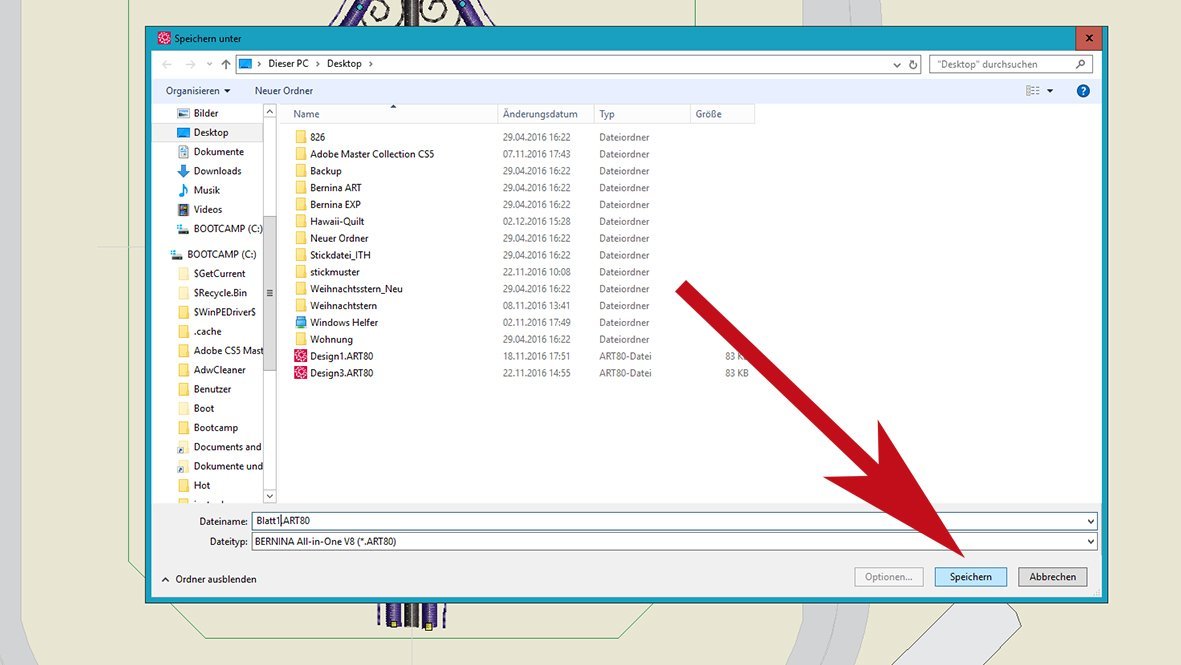
Now you can save the design. Go to „Save the Design / Stickmuster speichern ”
Name the file and save it.
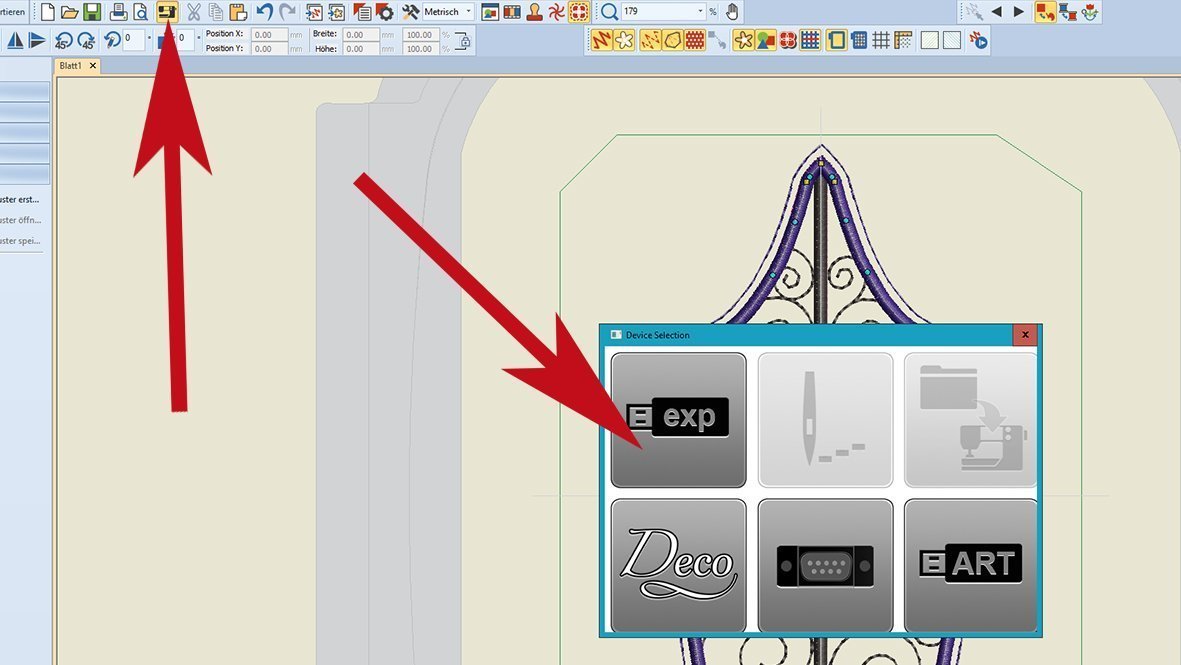
After that, choose the icon „Write to card / zur Maschine schreiben“ and export the design.
I still have a little tip. If you own a Jumbo Hoop, select it. Make sure that the CutWork foot is selected.
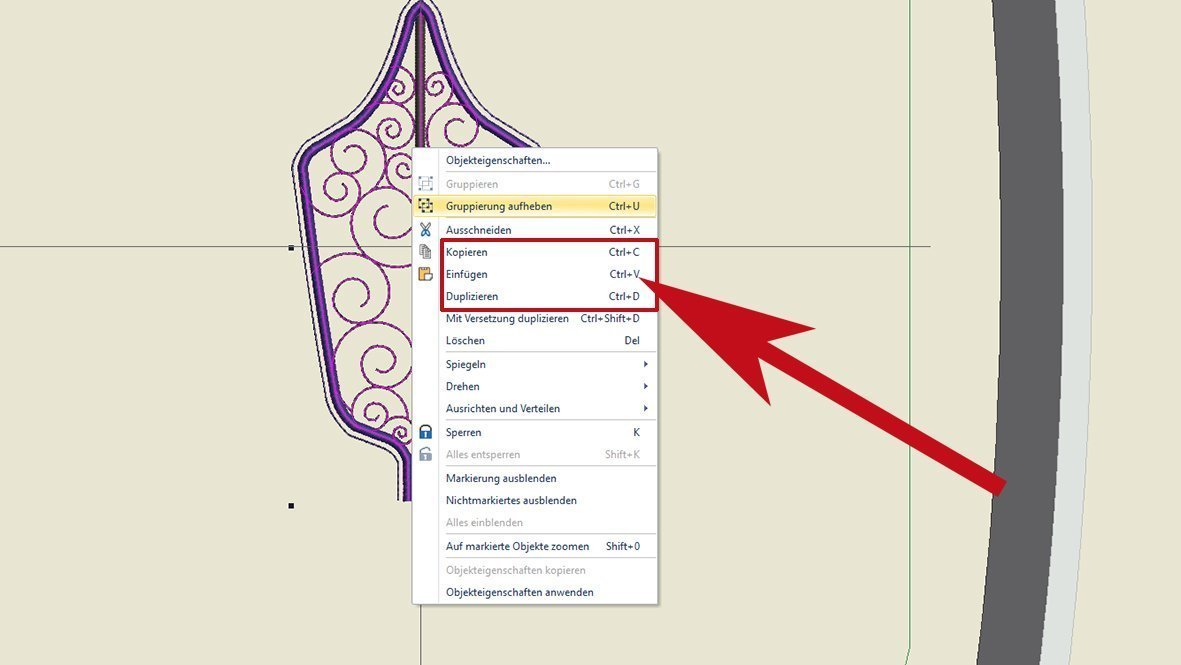
Group the leaf. Select „Arrange/ Anordnen“ in the „Toolboxes /Werkzeugpalette“ and click „Group /Gruppieren“.
Press the right mouse button and choose „Duplicate / Duplizieren“ or „Copy / Kopieren“ and then „Paste / Einfügen“.
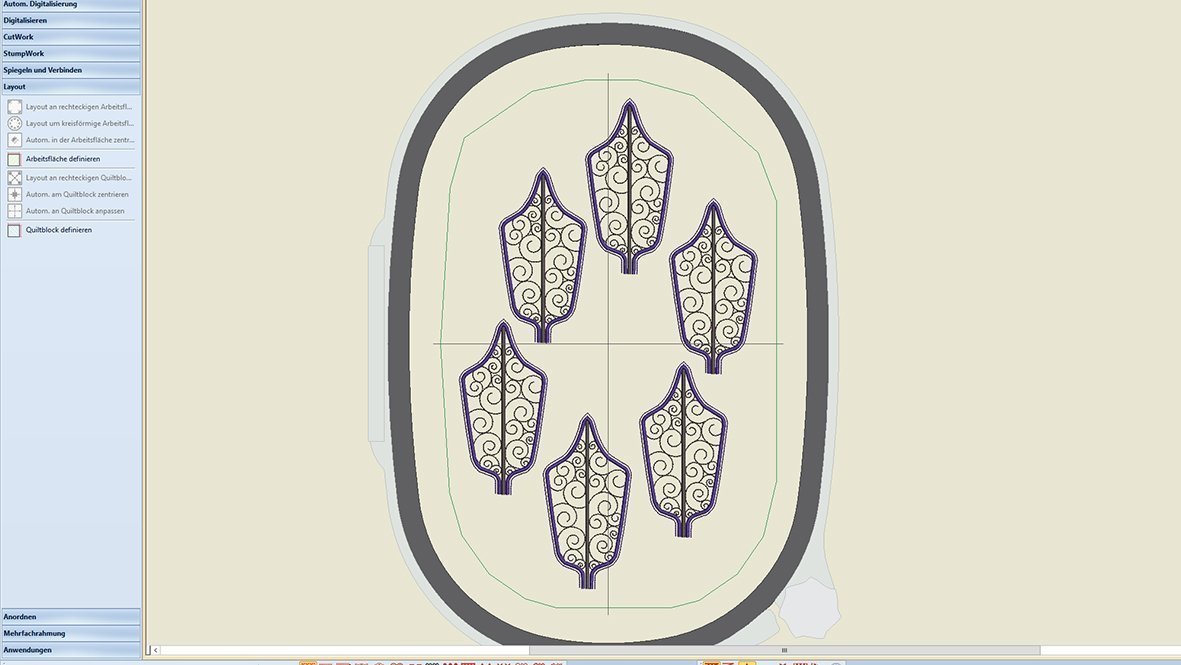
You need 6 leaves, copy the leaf 5x and arrange it in the hoop.
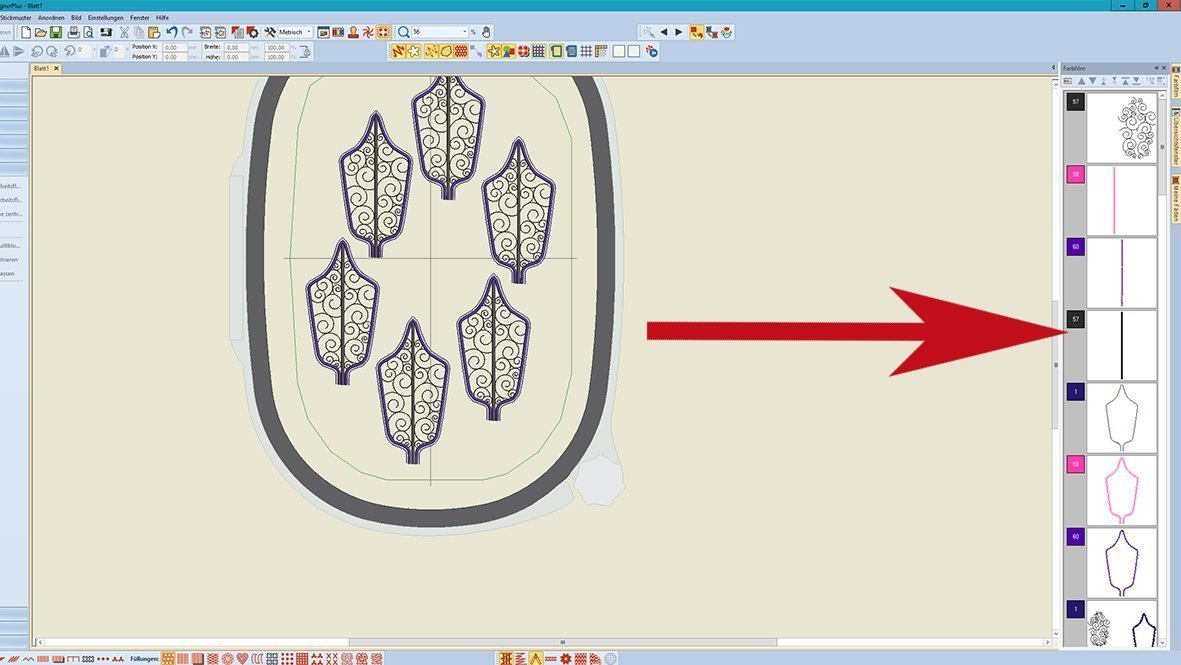
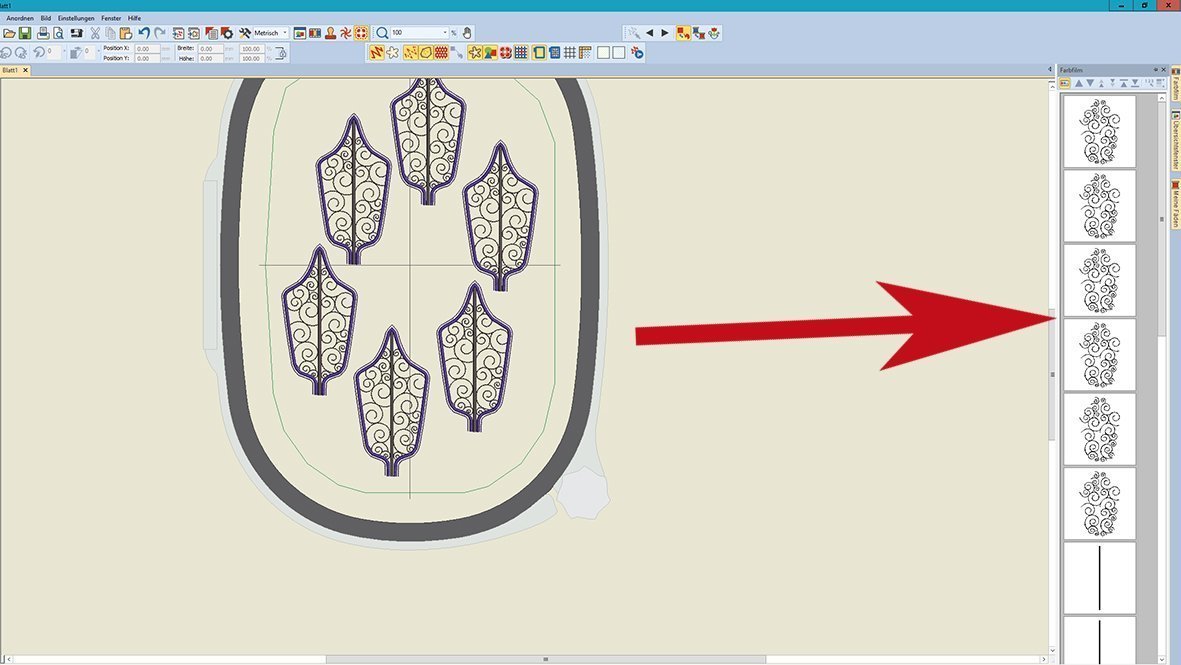
Then select all, press the right mouse button and „Ungroup / Gruppierung aufheben“. Now select the „Color Film / Farbfilm“ and sort the individual layers. Squiggles should be embroidered first.
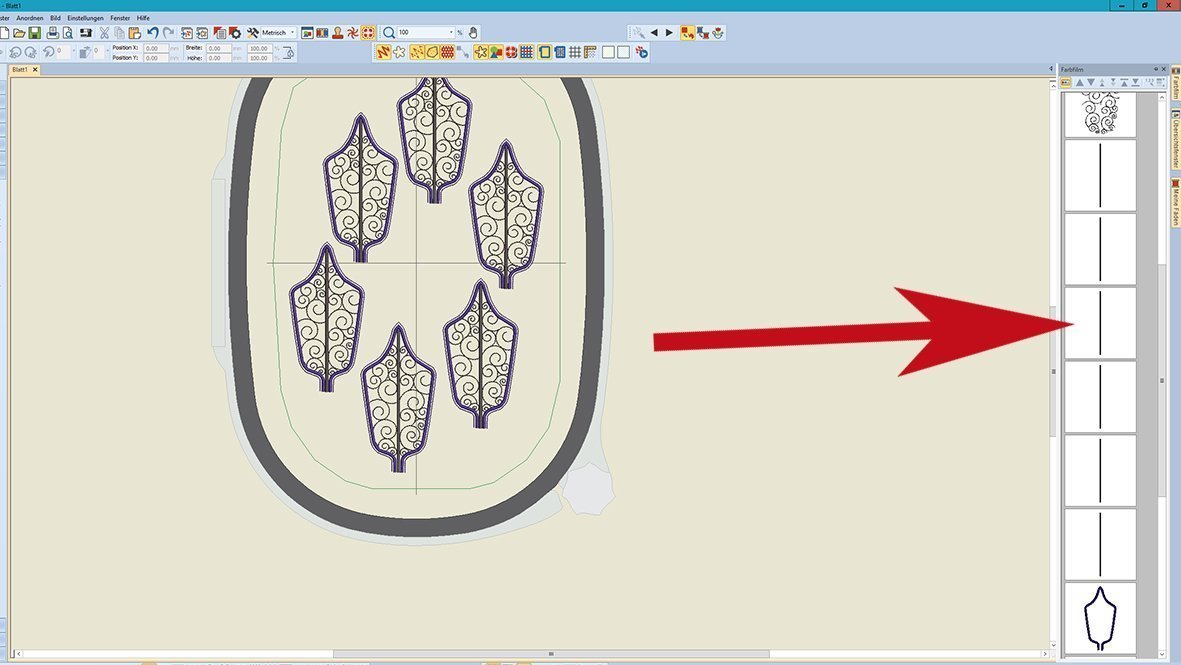
… then all center lines and finally the outlines and the CutWork.
With CutWork, you have to jump back and forth on the machine, so you don’t have to change so often.
Digitize the other leaves in the same way. Of the individual elements:
Poinsettia-Stump_a.eps, 3 leaves, Poinsettia-Stump_b.eps and Poinsettia-Stump_c.eps are required 5 leaves each. If you would like to put this again in a big frame.
So much for today. Part two of the tutorial will cover with the completion on the BERNINA embroidery machine.
Bye for now
Andrea
 BERNINA Corporate Blog -


















[email protected]
Thank you for this. The zip file though only contains .ai files. They will require lots of editing to be able use.
Hallo Donna,
the new folder is online, Sorry!
Thanks so much. I really am looking forward to making this. It is really beautiful!
Thank you SO much for writing this and taking the time to translate it into English. I can’t wait to start working on mine.