 BERNINA Corporate Blog -
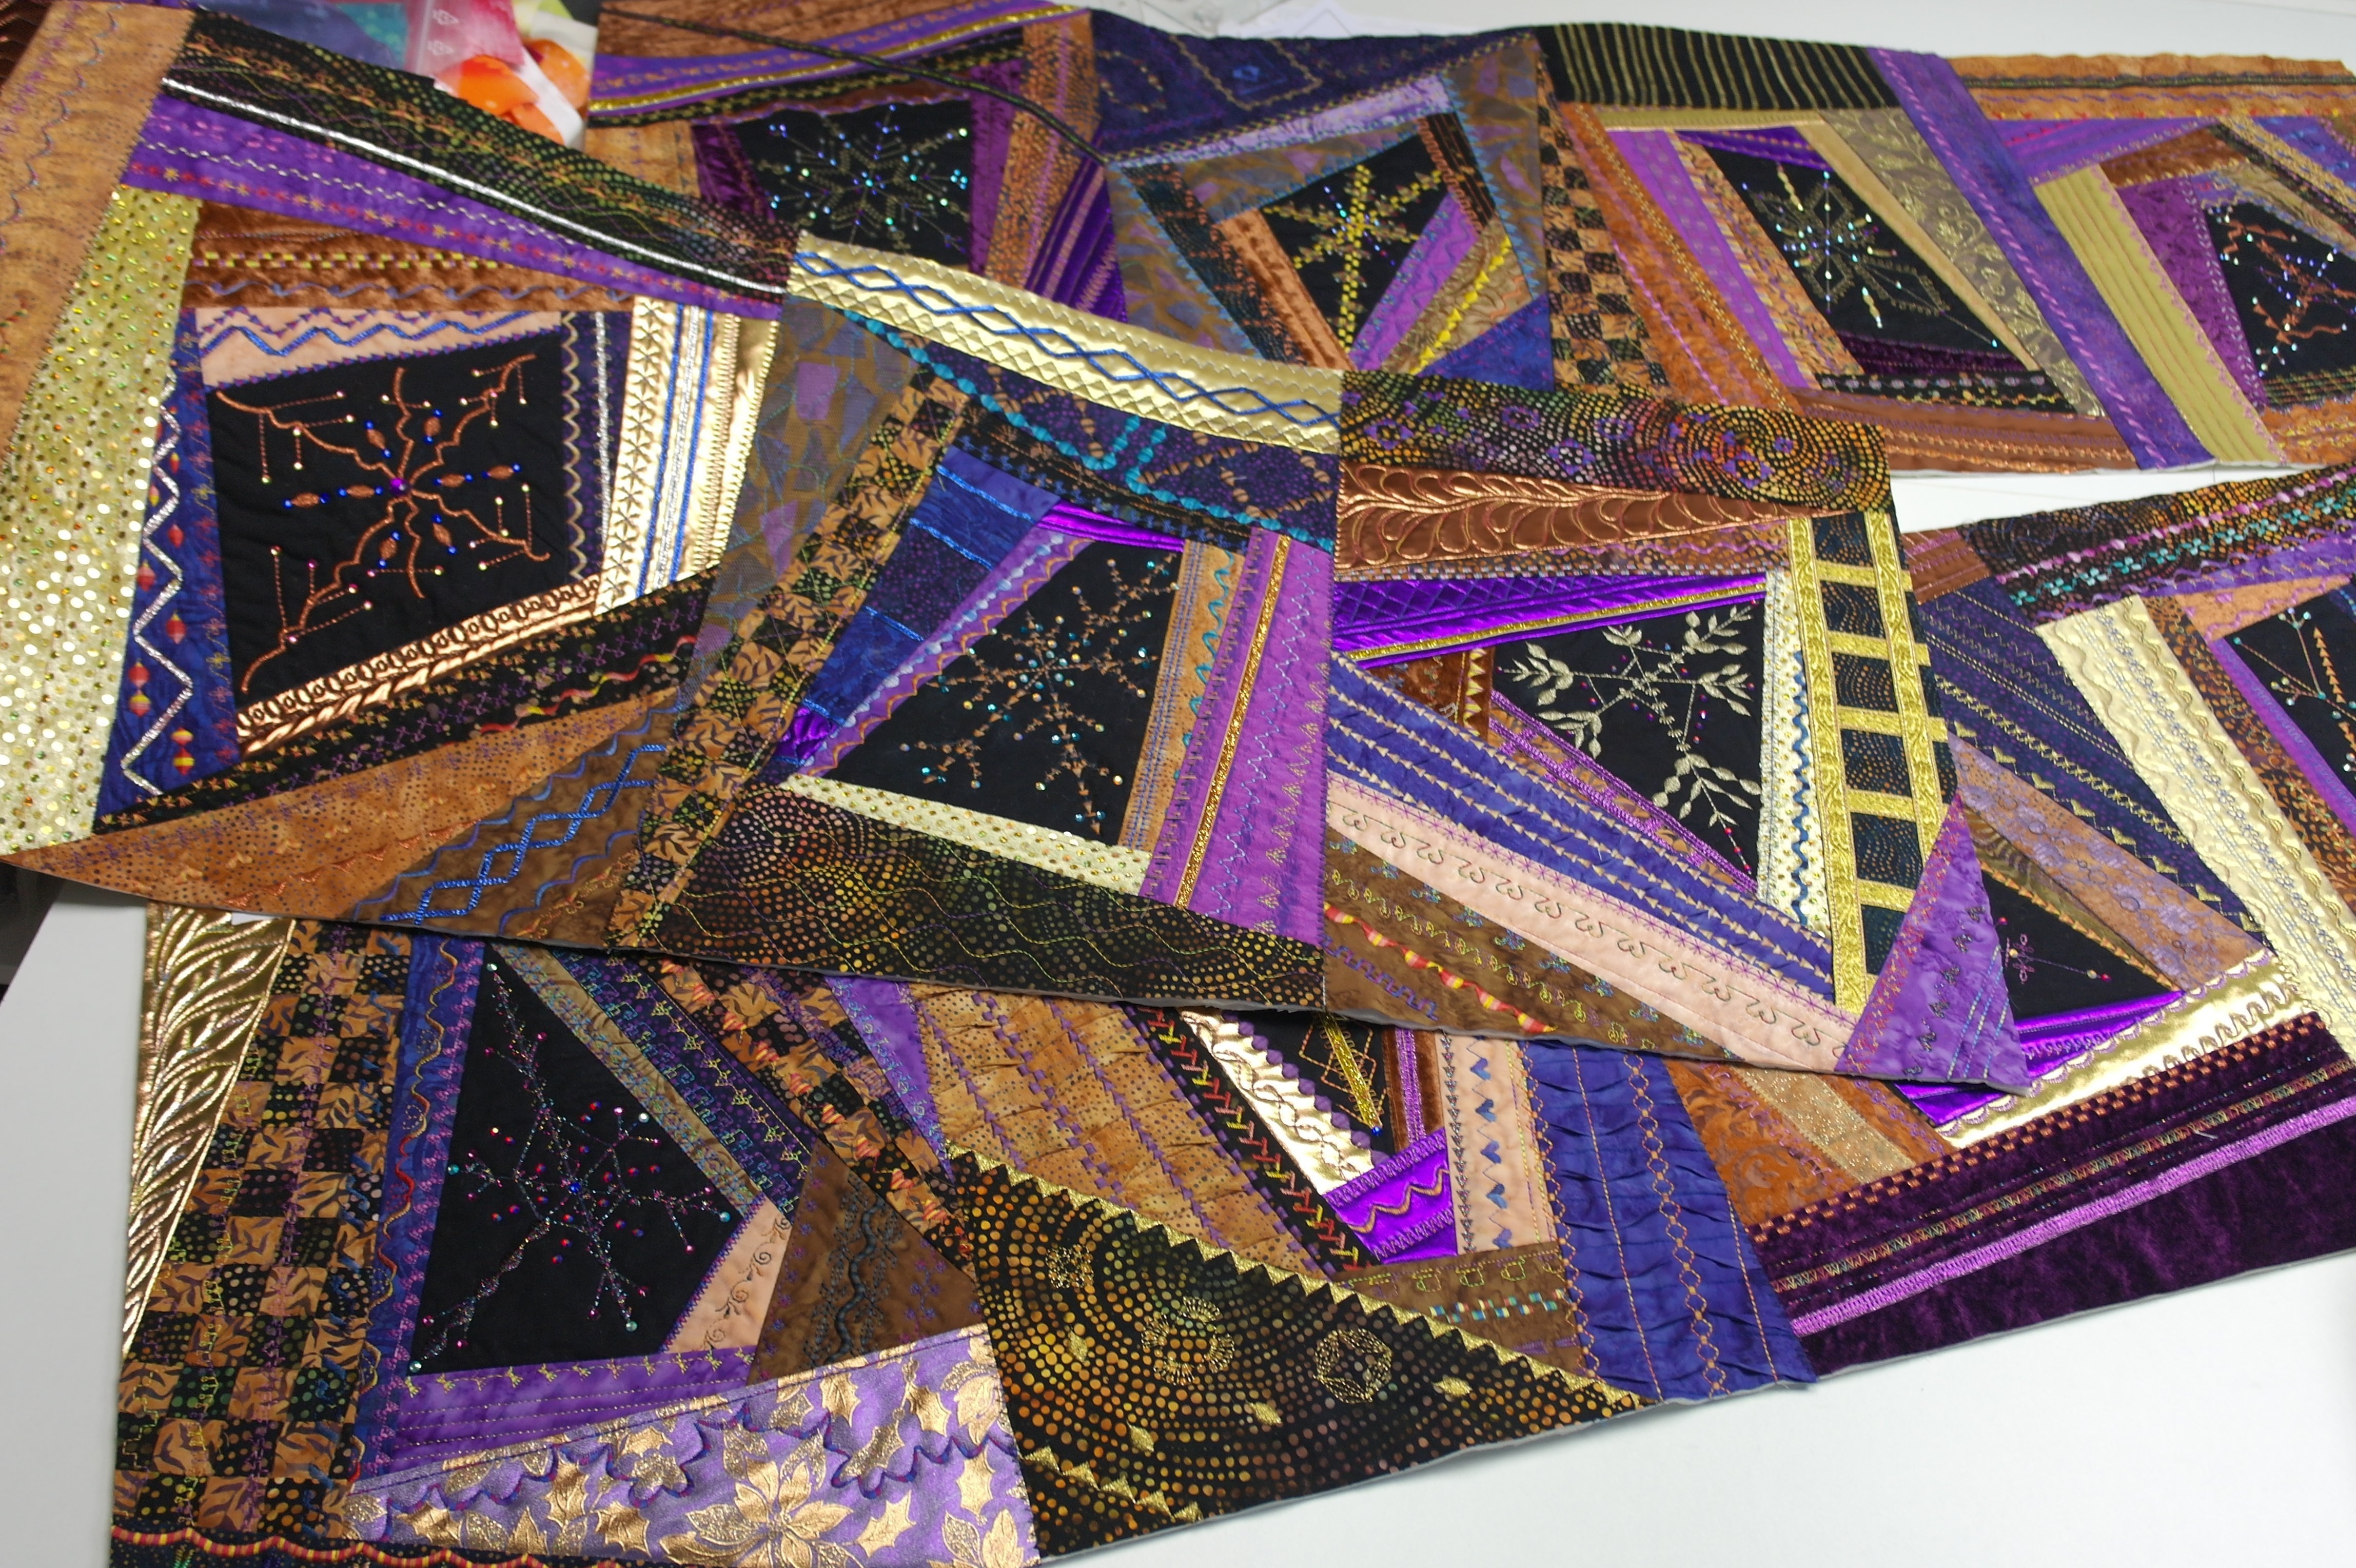
The final part of this project. If all your blocks are ready, you can assemble the Crazy Crystals Mystery Project 2018. Thepile of blocks is a treasure of fabrics, stitches, Hotfix stones etc.

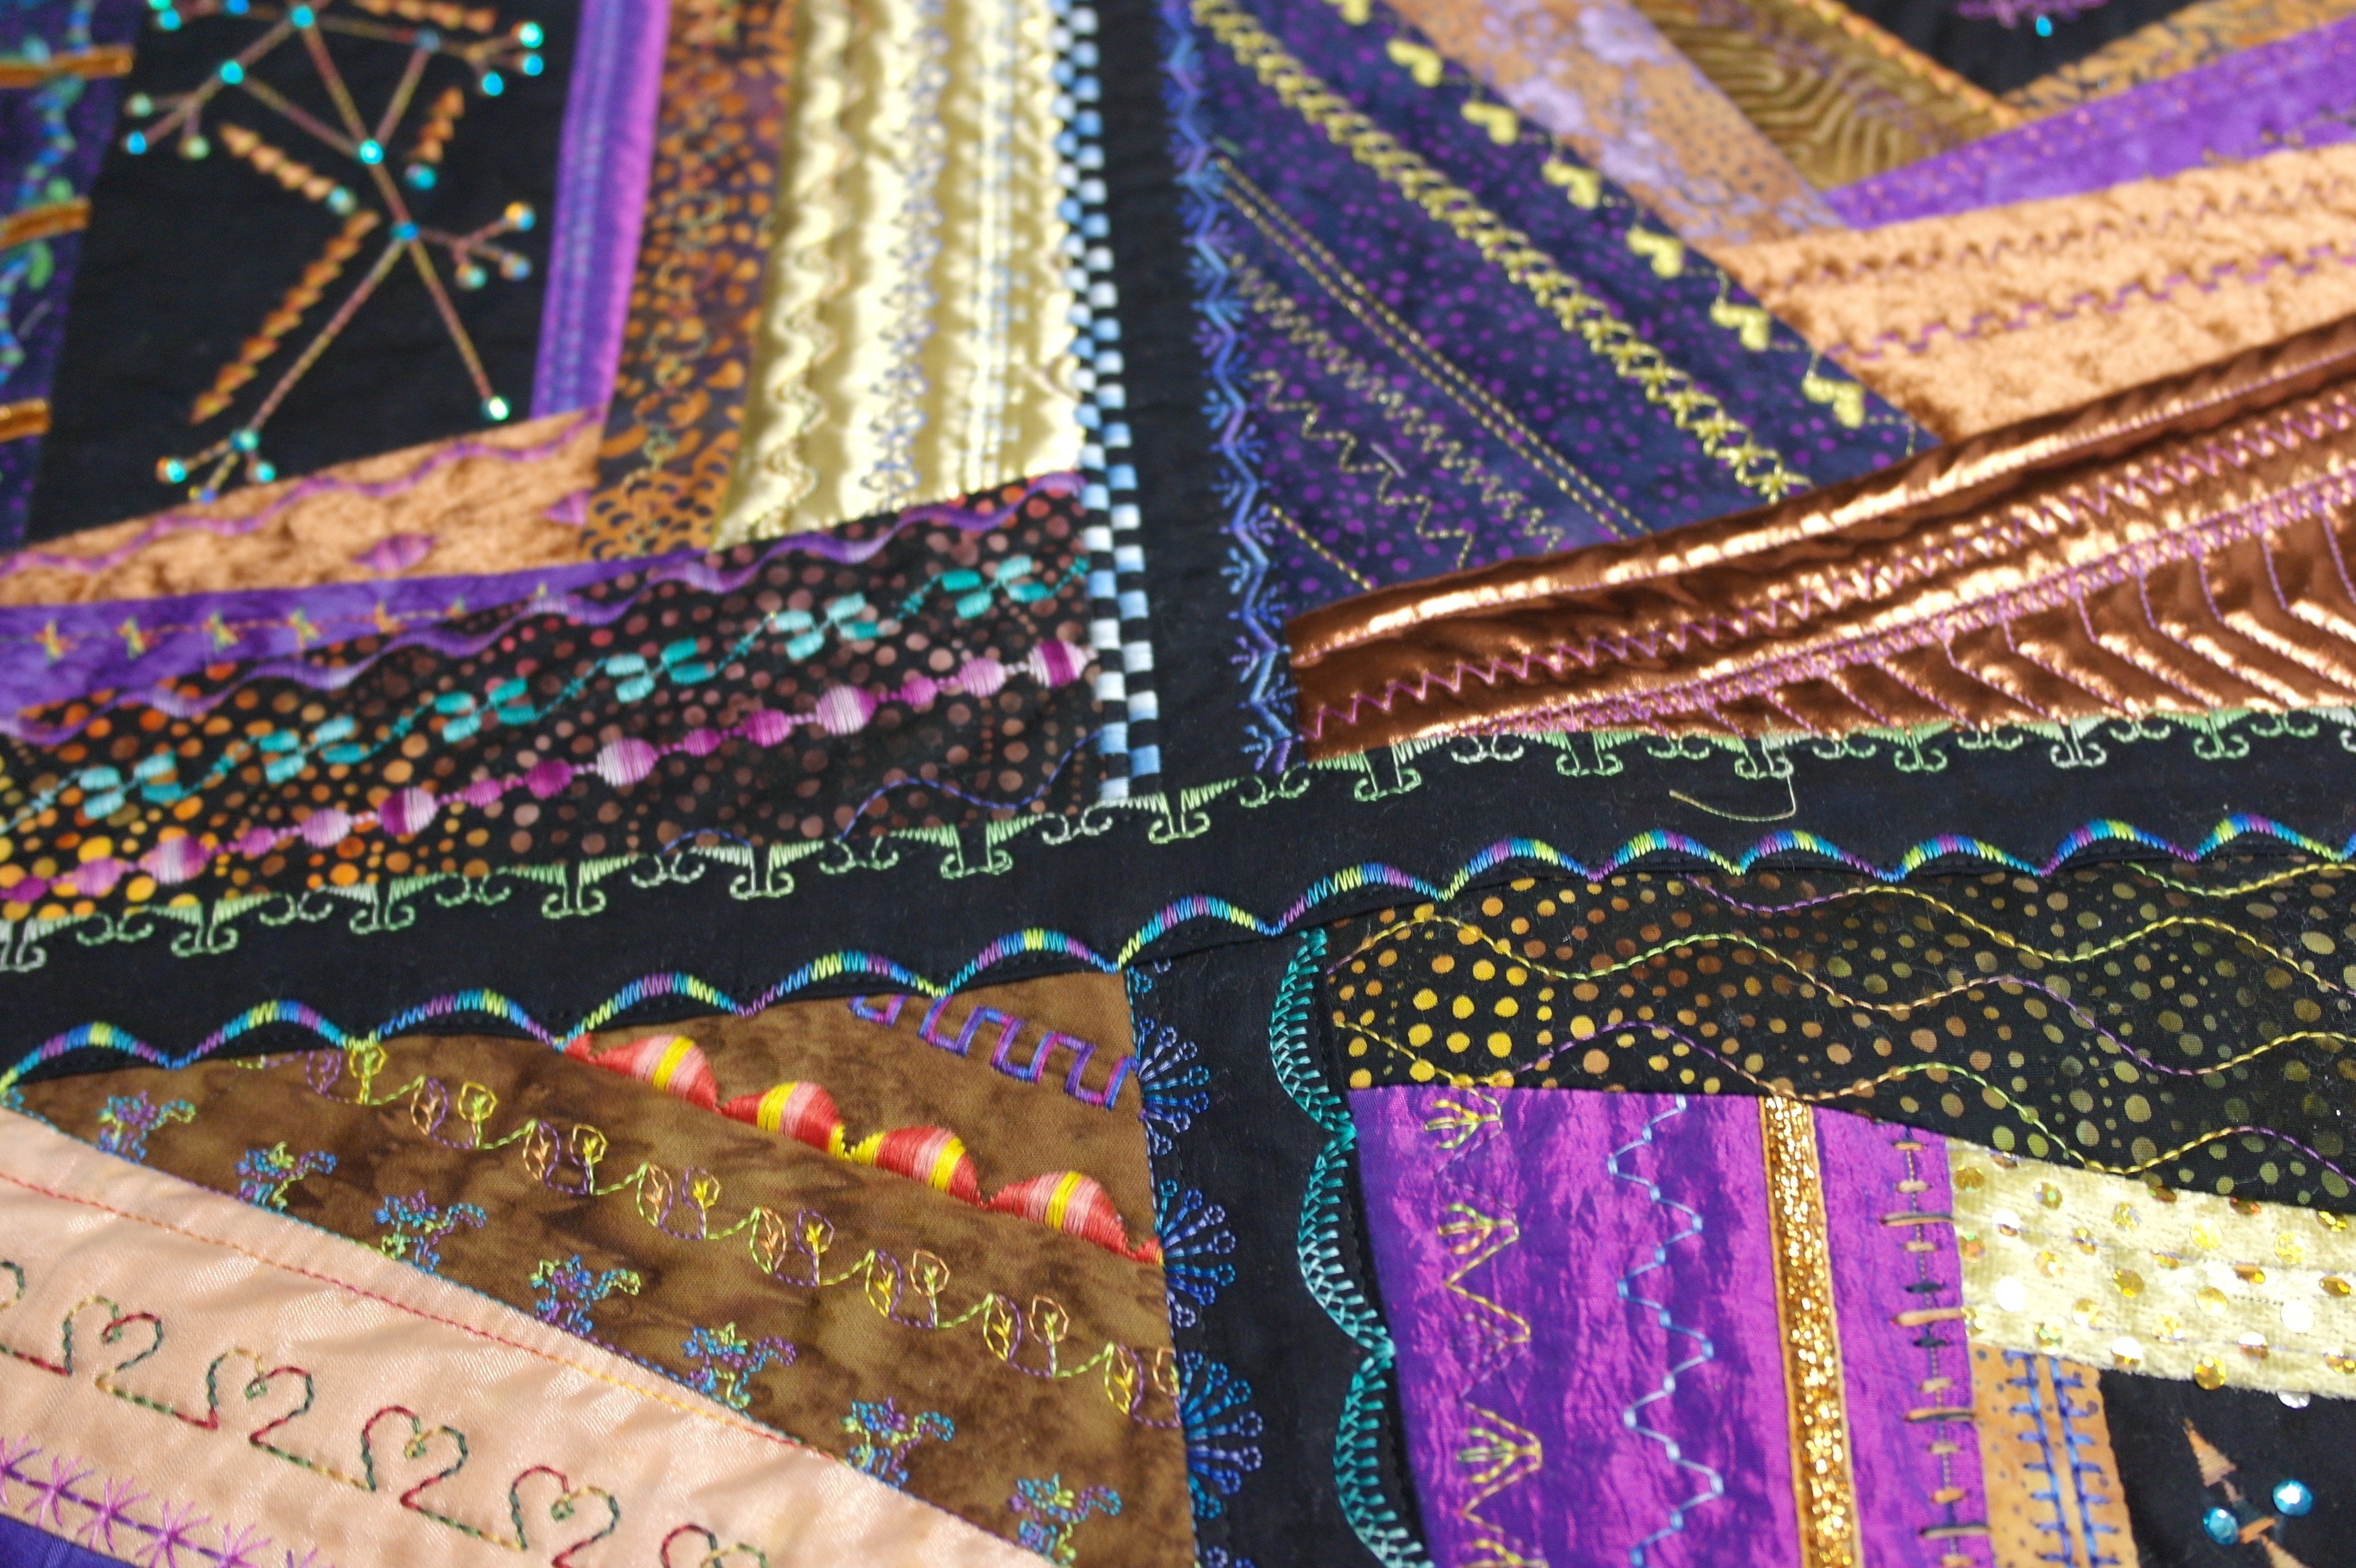
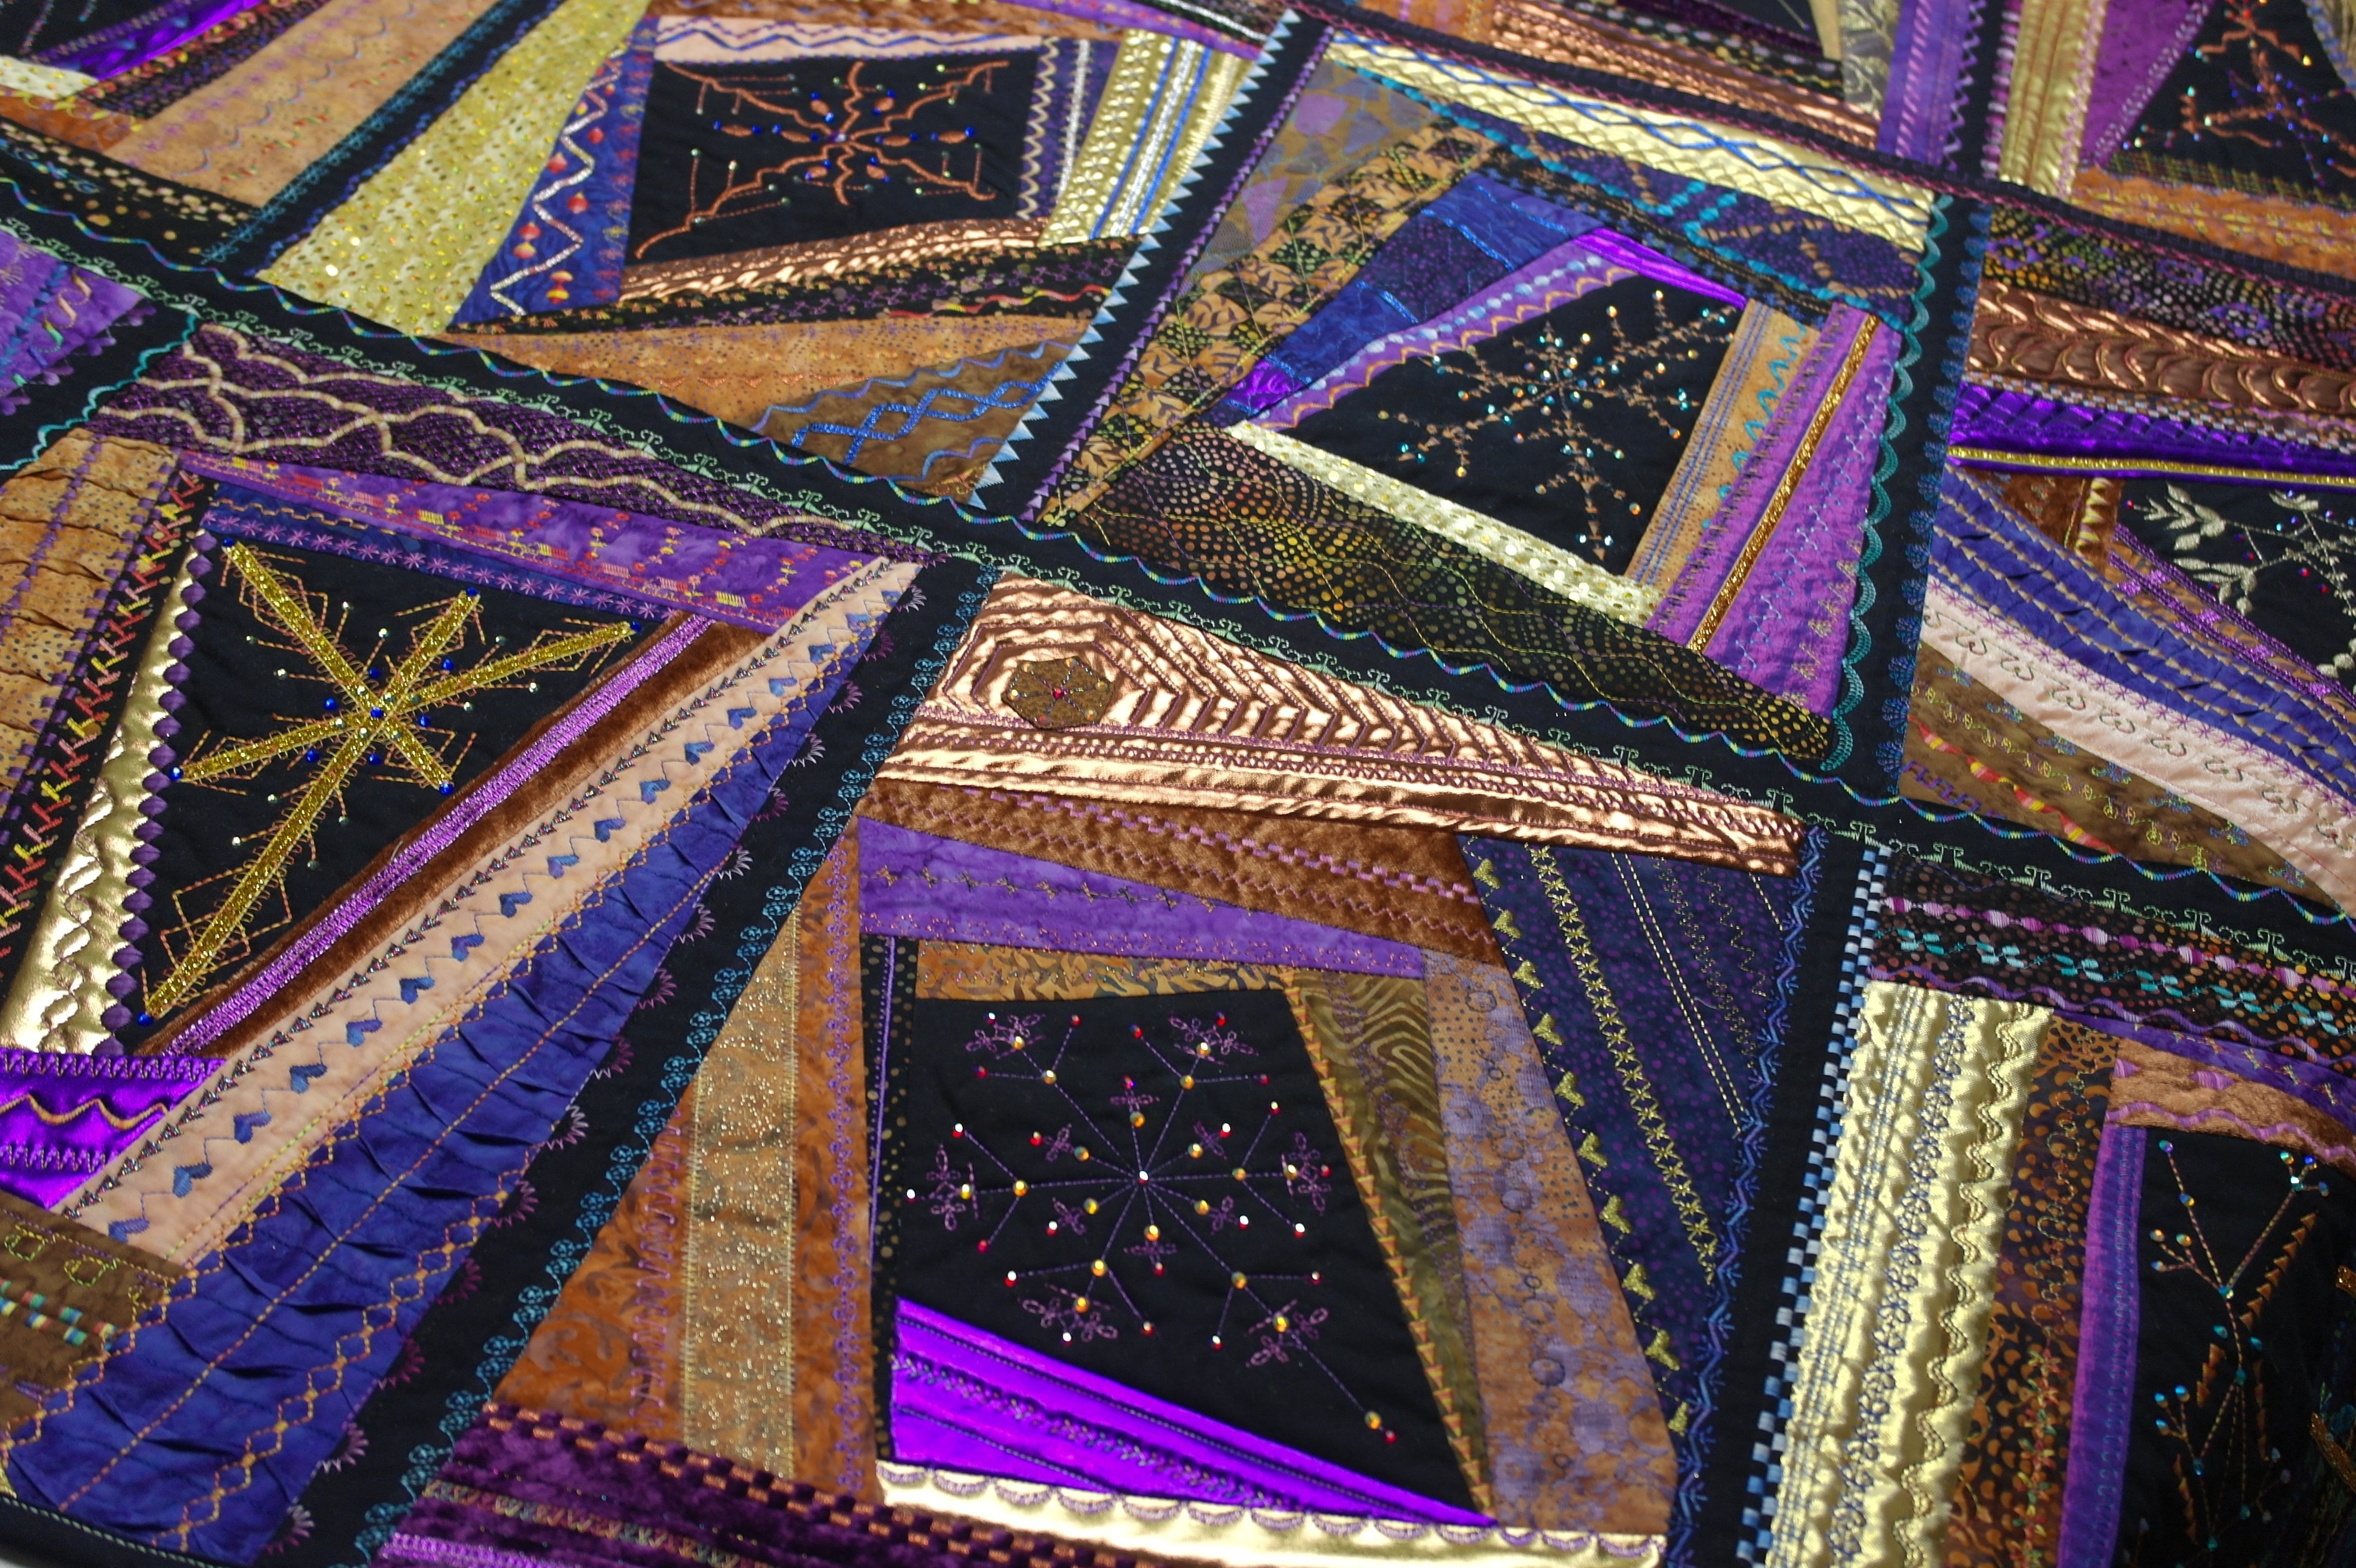
Special effects are made via different fabrics and materials. They are beautiful, no matter what colors you have choosen, but they have to be assembled first to make an even more beautiful quilt.

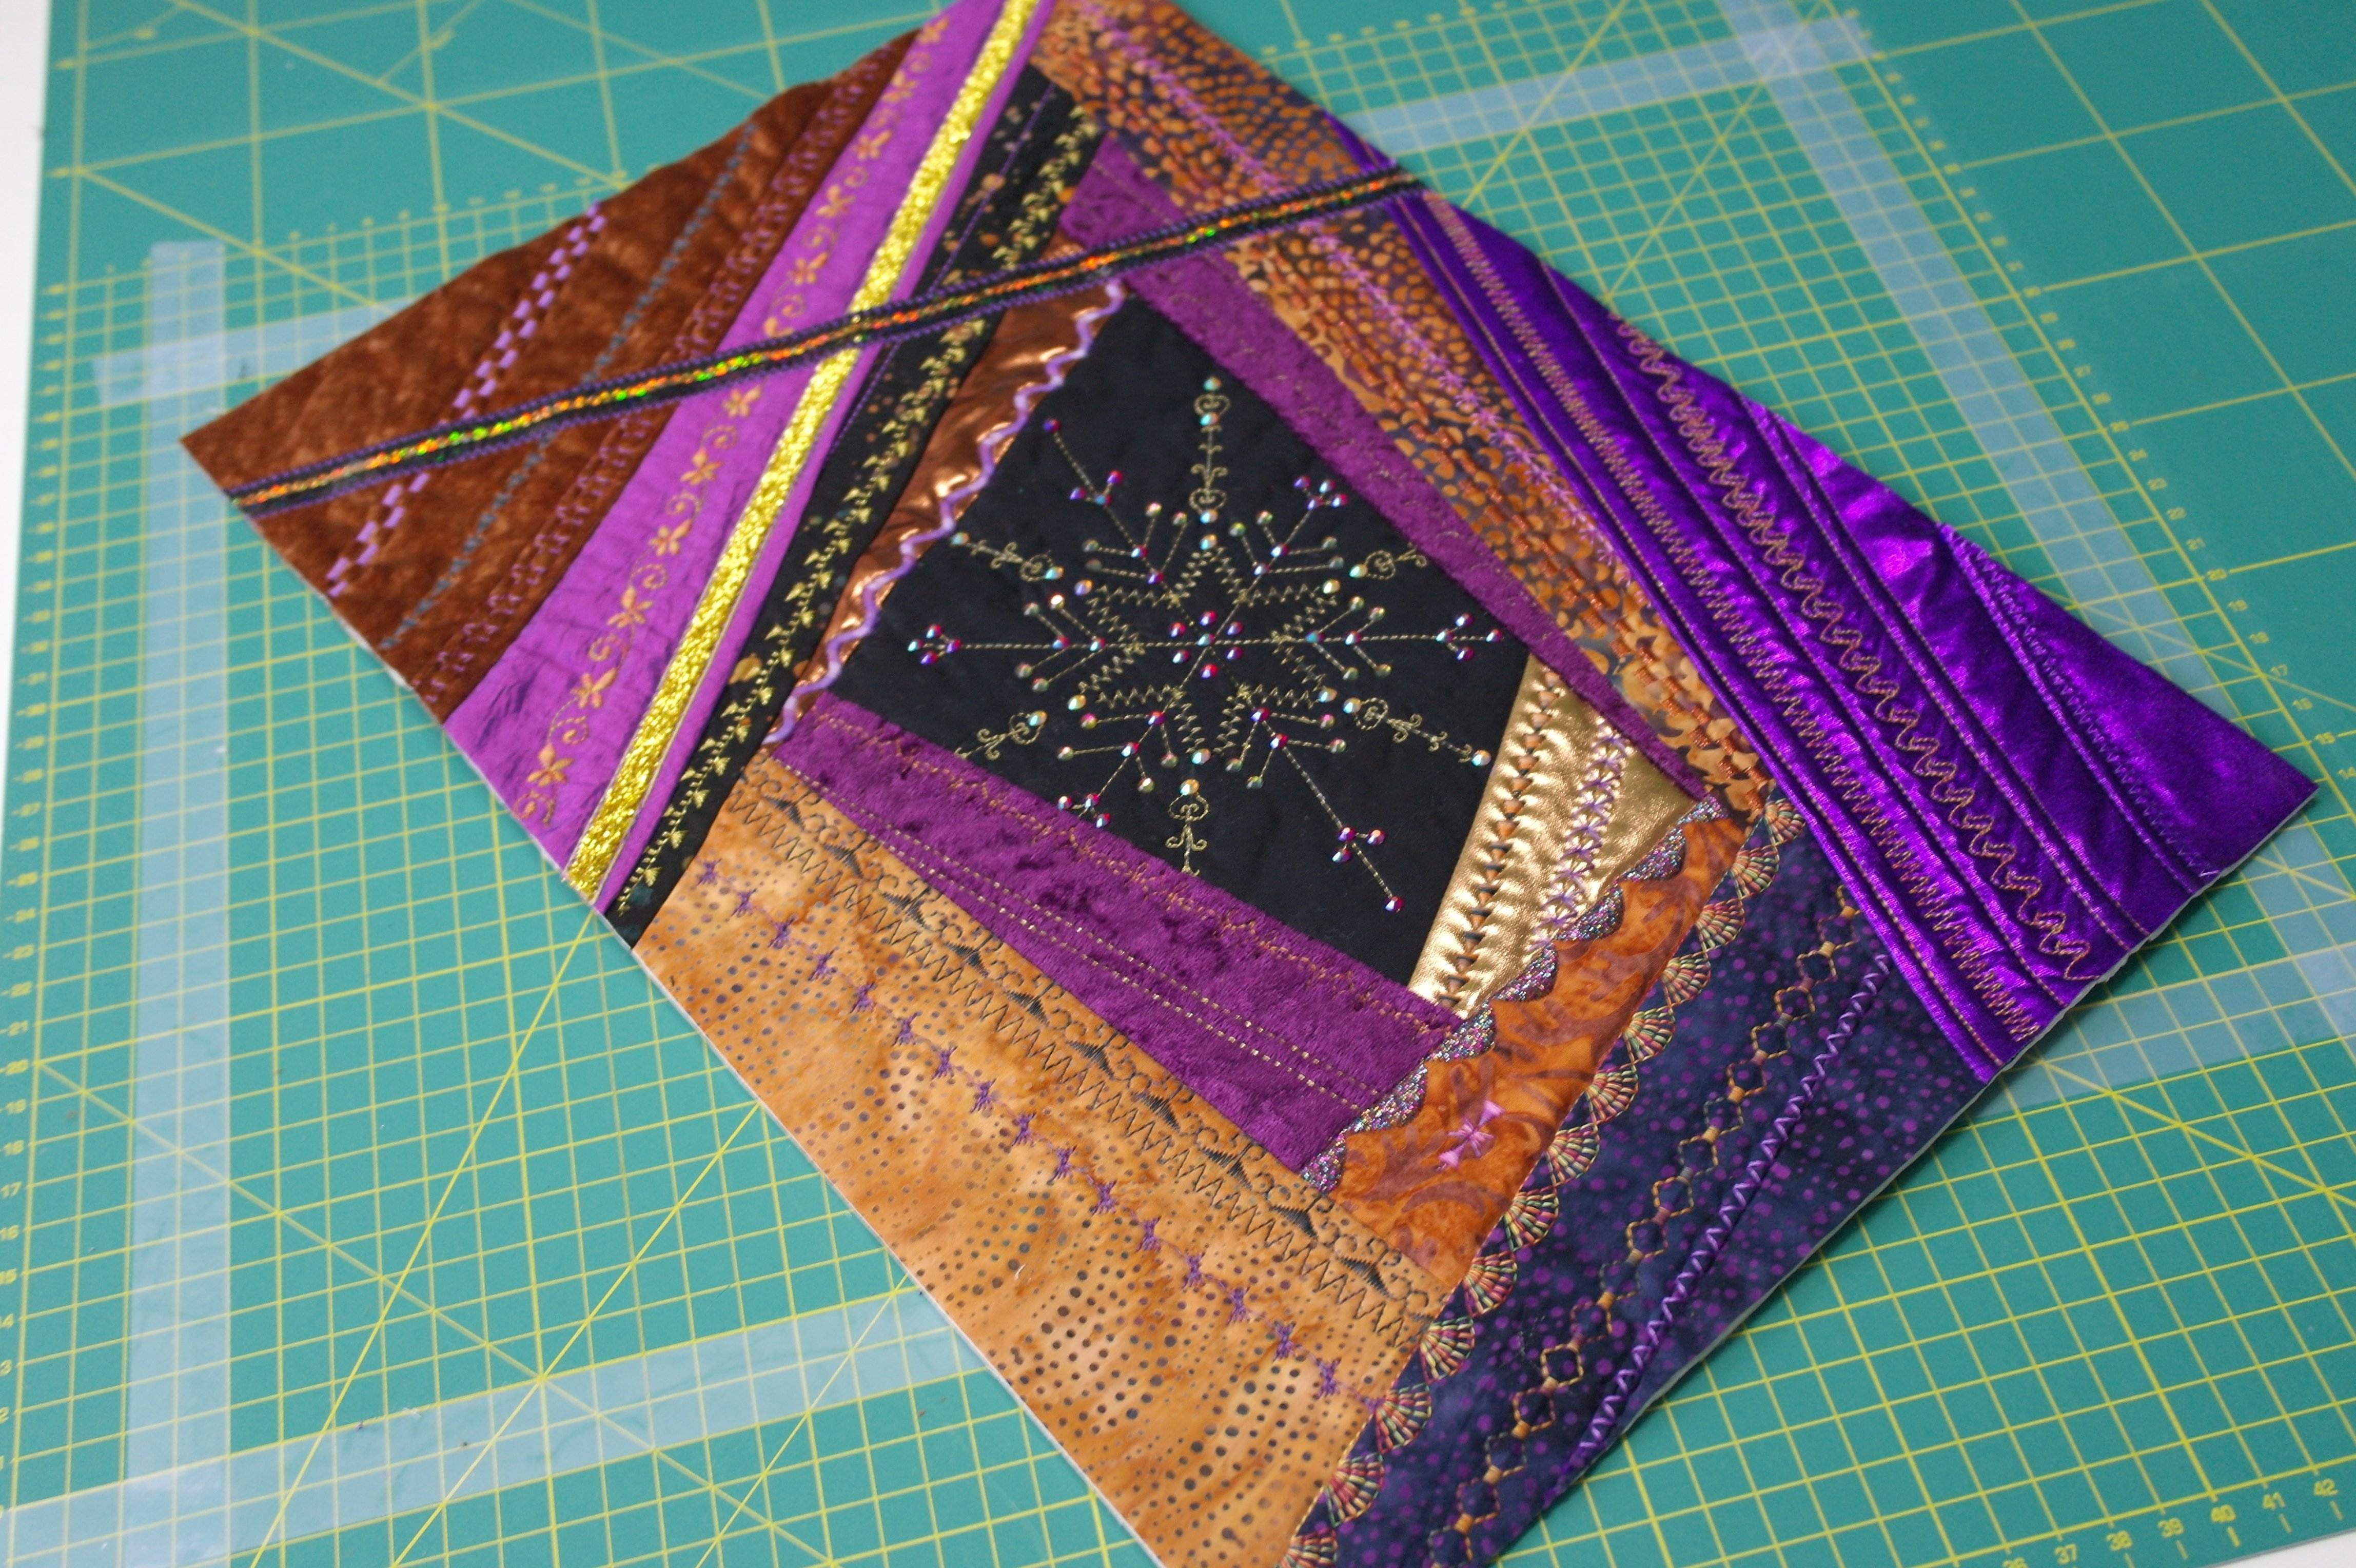
Place all 12 blocks on a flat surface: 3 rows of 4 blocks each. This is the best way to get an overview: I have placed block no. 1 first, 2nd next to it, 3rd and 4th to complete the top row. Block 5 to 8 on the second row and block 9 to 12 on the bottom row. This is how they look in the order they are made: but I want to change the way they are placed next to each other, for too many simular fabrics/effects are placed close together this way.
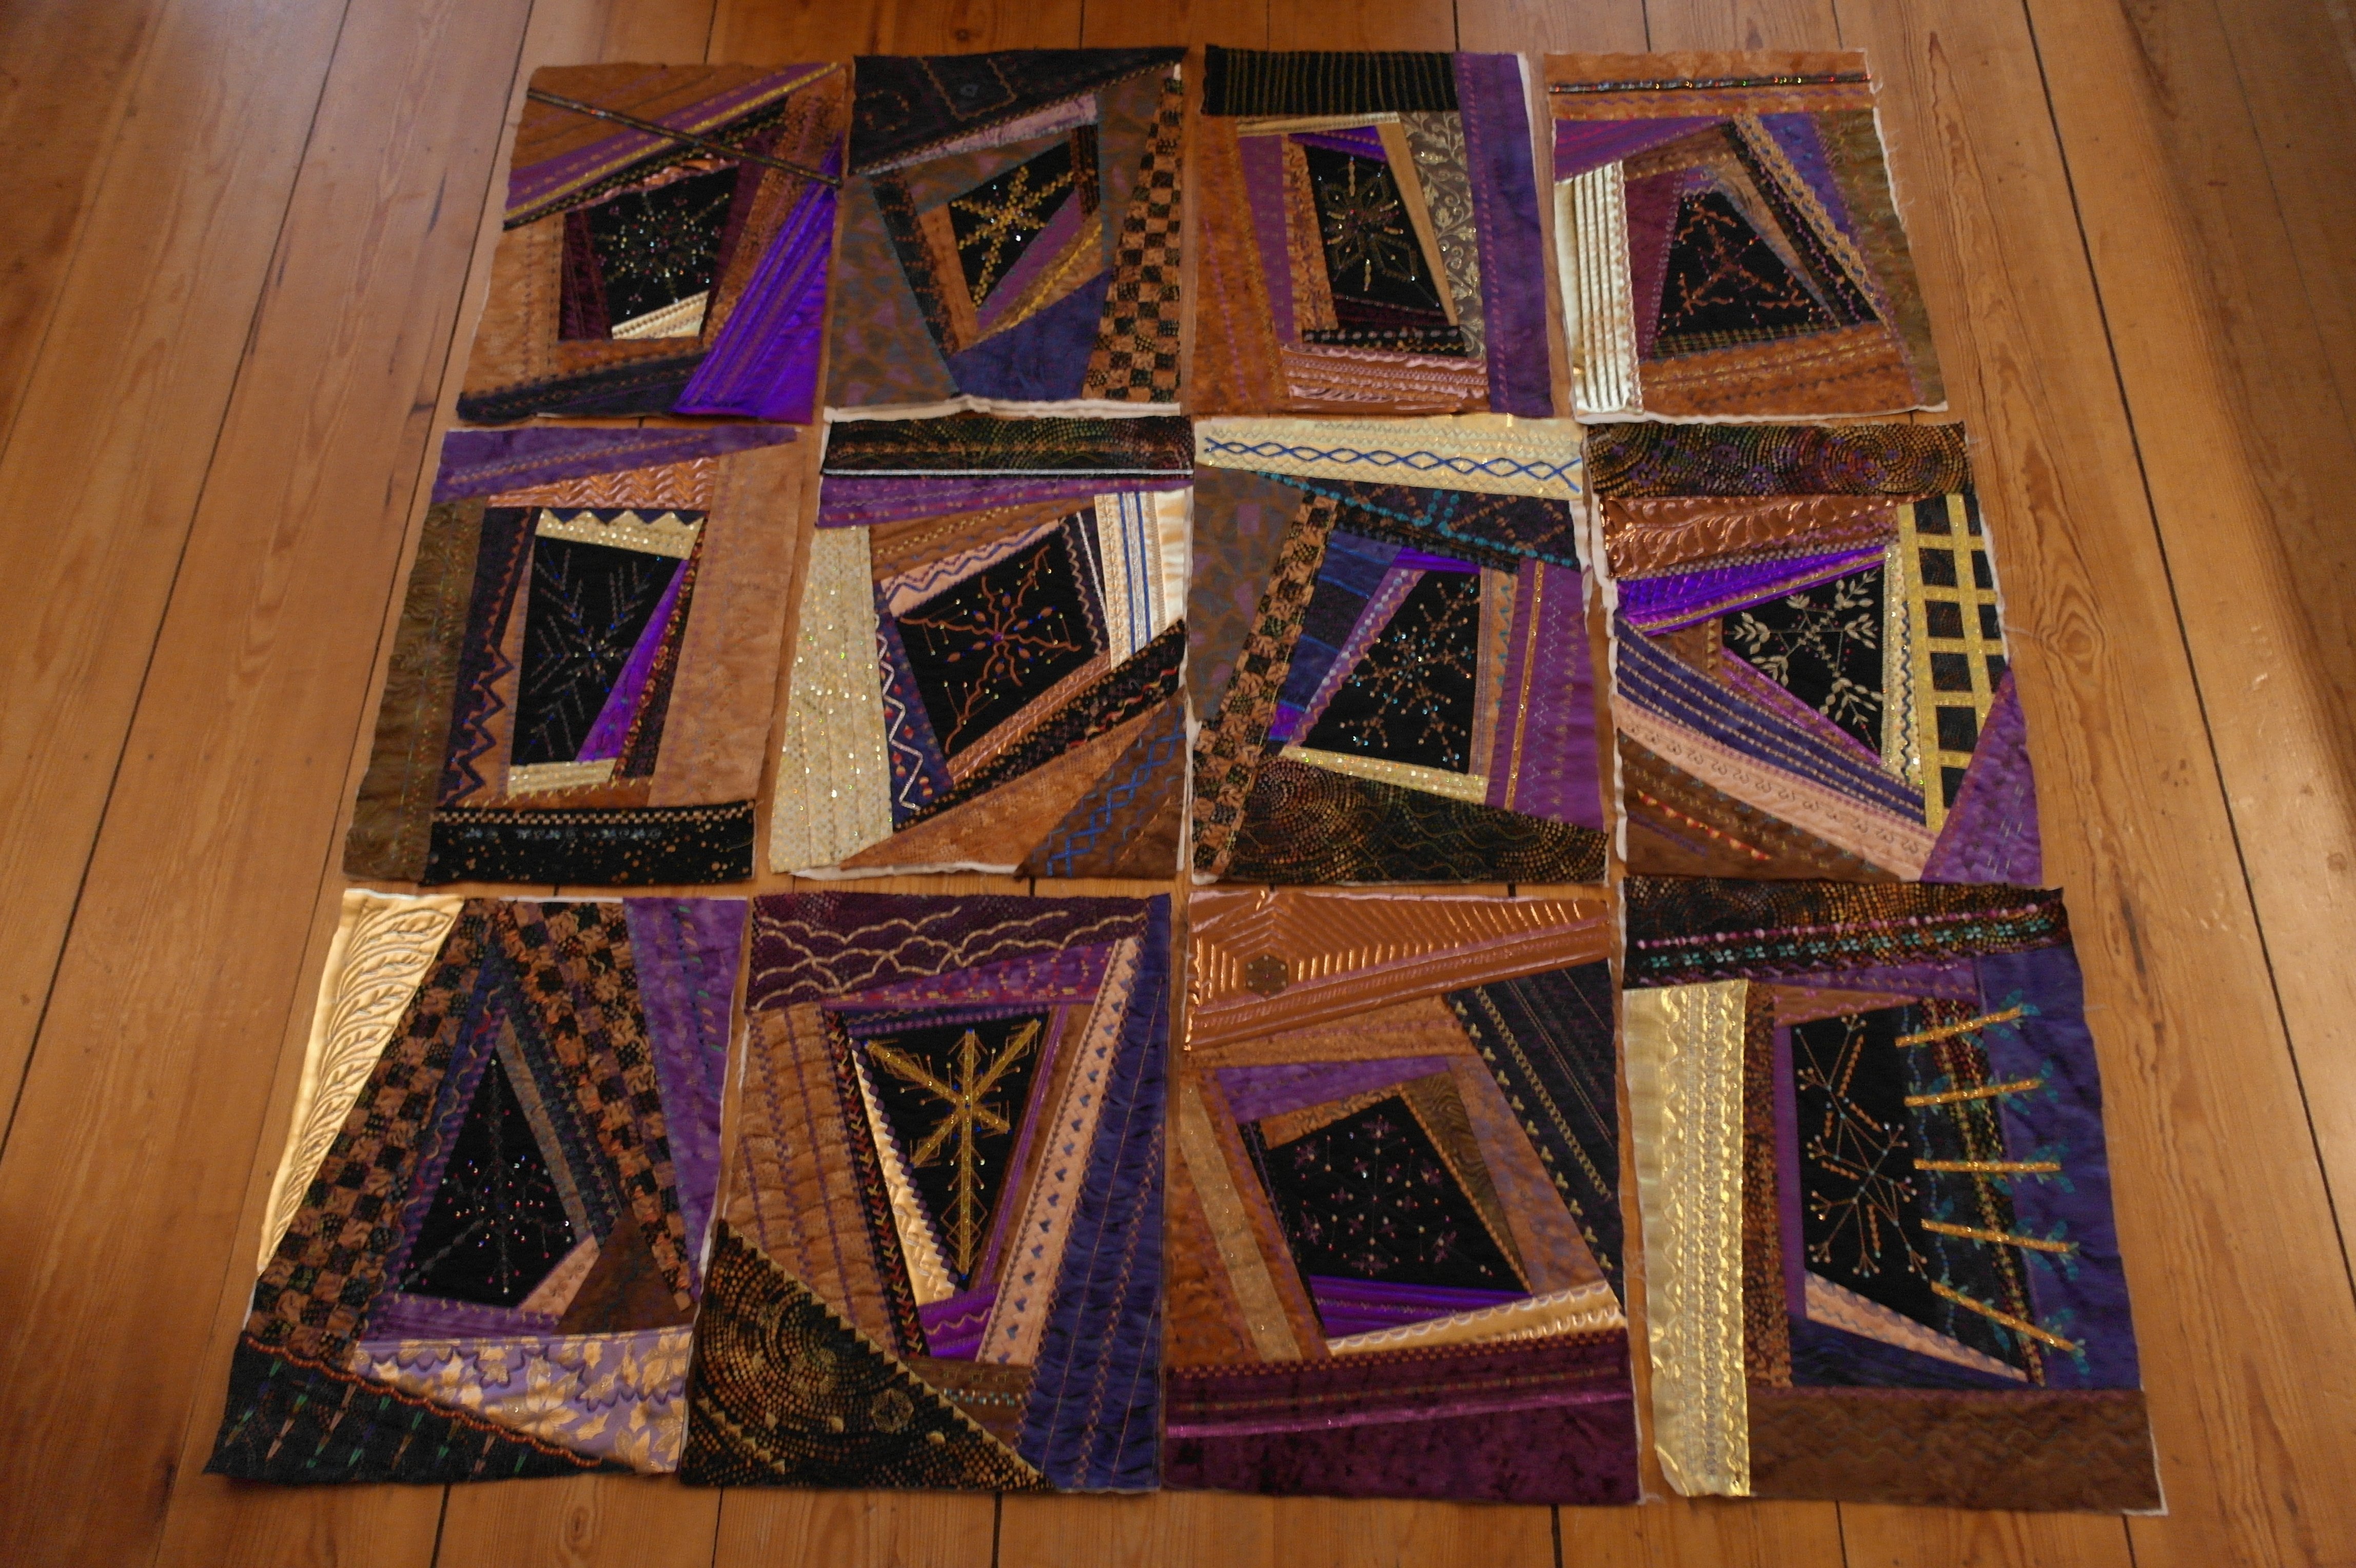
I have changed the order, even placed some blocks upside down. Now I am satisfied with the way they look next to each other. This is how I will sew them together. If you want to, you can pin pieces of paper on each left/top corner, with the number of the block incidating the placement, to keep order of assembly.
TIP: Take pictures with your phone, to check when assembling. If you change the way each block is placed by accident, look at the picture to place them the right way.
………………………………………………………………………………………………………………………..
First cut the blocks to a certain measurement. Normally the size is indicated on your paperpatterns: solid line + dotted line = cut size, but if you have made your sandwiches/blocks larger, you can use that measurement, but be sure all stitches/rows are made to the sides of the blocks.
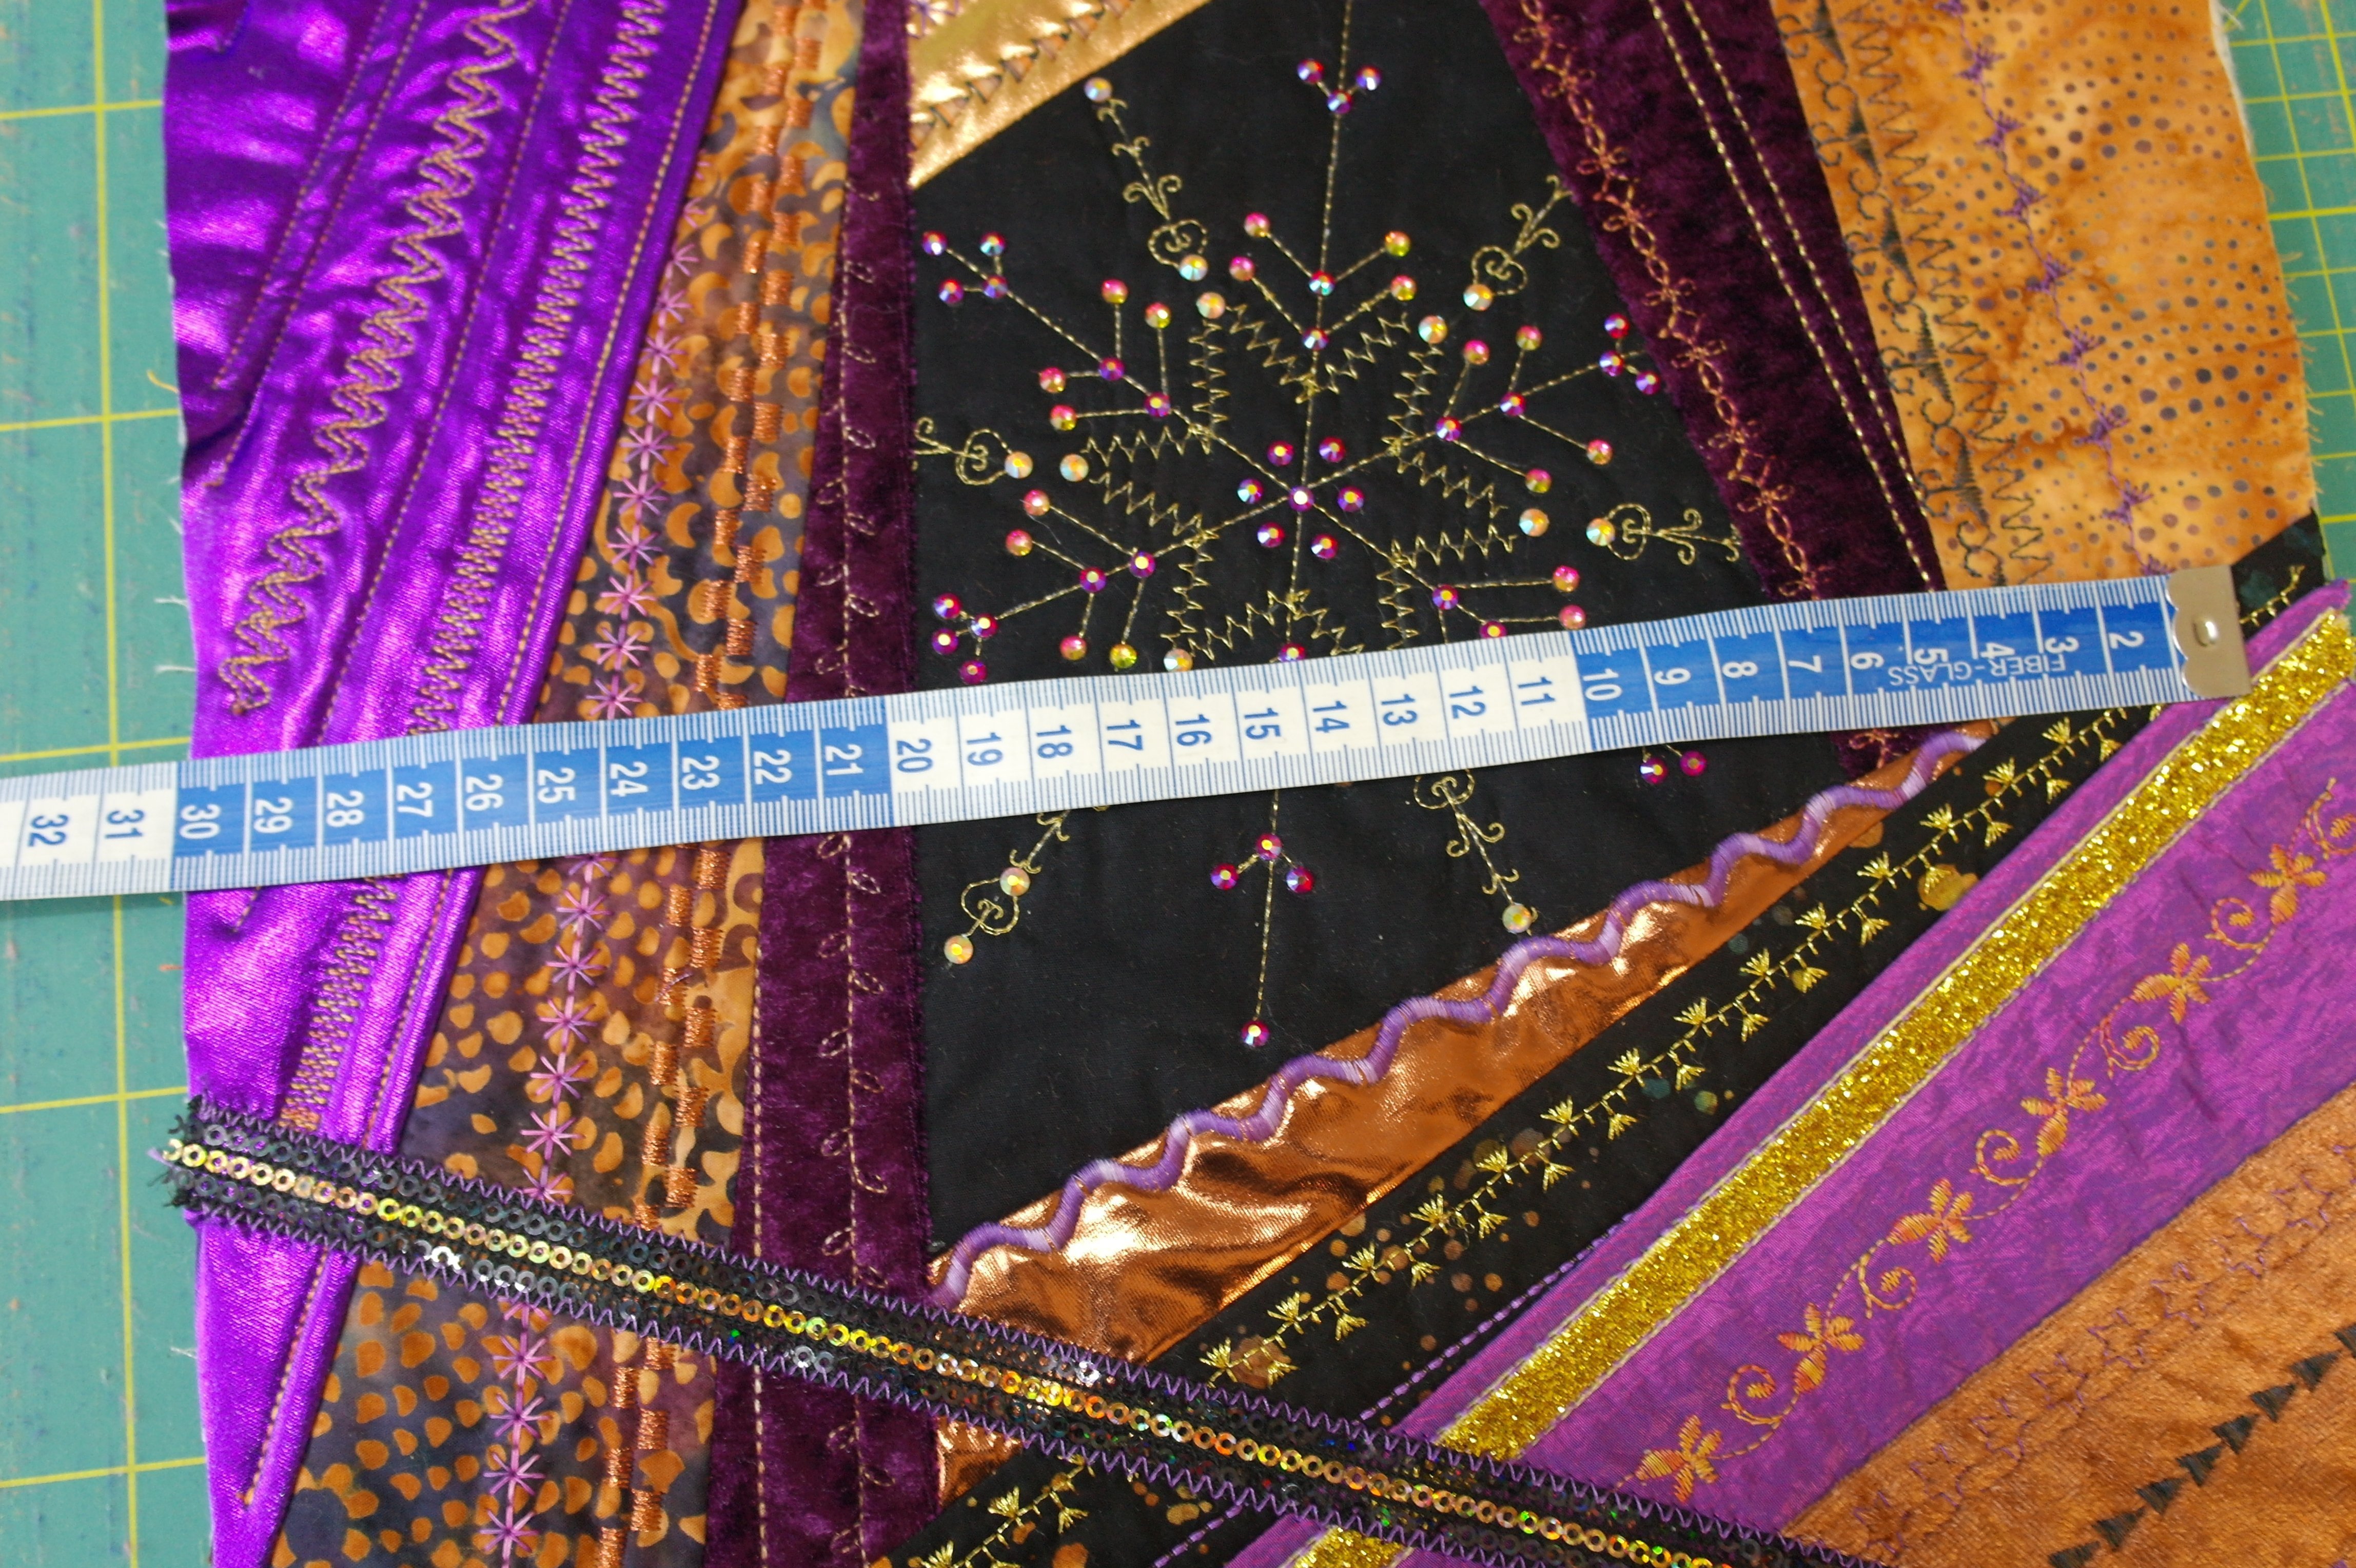
Use the scheme of the quilt: Click HERE to download, to assemble the quilt (you will find that the blocks are placed from nr. 1 to nr. 12, but you can change that). The visible part of each block will be 25 x 38 cm. BUT PAY ATTENTION: the sashings will be 3 cm wide finished size. Half of that between two blocks belongs to the measurement of a block, so each block needs to be 1 1/2 cm wider on all sides than the visible part. Get it? So each block should be cut to 28 x 41 cm if you follow the scheme. This way the quilt will be aprox. 112×123 cm.
You dont HAVE to use these measurements: my blocks were cut slightly larger (2cm), because they were bigger. Sometimes the effect on the sides is so special, you don’t want to cut them away. It is entirely up to you if you want to cut the blocks at a larger size, but make sure they are not TOO big in the end!
I have made sure there will be enough black (batik) fabric strips to be sewn on: the strips for the horizontal sashings and for the binding will be sewn together before sewing them onto the quilt. Also the strips that will be placed vertical on you quilt, are cut longer than required, to give you an extra: so if your blocks were cut at 27 x 40 cm, or even bigger, you will have enough length with your fabricstrips to do so.
For extra support you can find the assembly of the Crazy Colors Mystery Quilt 2017 HERE: the assembly is comparable with this project. Click on the link above, red lines, and you can check the techniques that were used for that project. Read carefully and use what you want to for assembly the blocks/quilt for this CCMP2018: the advantage with this latest project is that all blocks are equal in size.
After measuring my blocks to see what size I can cut them (they were not all of the same size), I have placed Scotch Tape on my cutting mat, as I have done with the Crazy project of 2017, to use the INNER side of the tape for exact cutting. My own blocks are cut back tot 30 x 43 cm, 2 cm wider and higher than the original size, because I want to keep as much of the effects and decorative stitches as possible. My quilt will be aprox. 120x131cm.
A block is placed on the Scotch Tape, with all sides protruding the inner measurements. DON’T CUT UNTIL YOU ARE SURE EVERYTHING IS ALLRIGHT – ONCE CUT THERE IS NO WAY BACK.

Placing the quilt ruler on the inner side of the Scotch Tape, I can cut it all the right size.
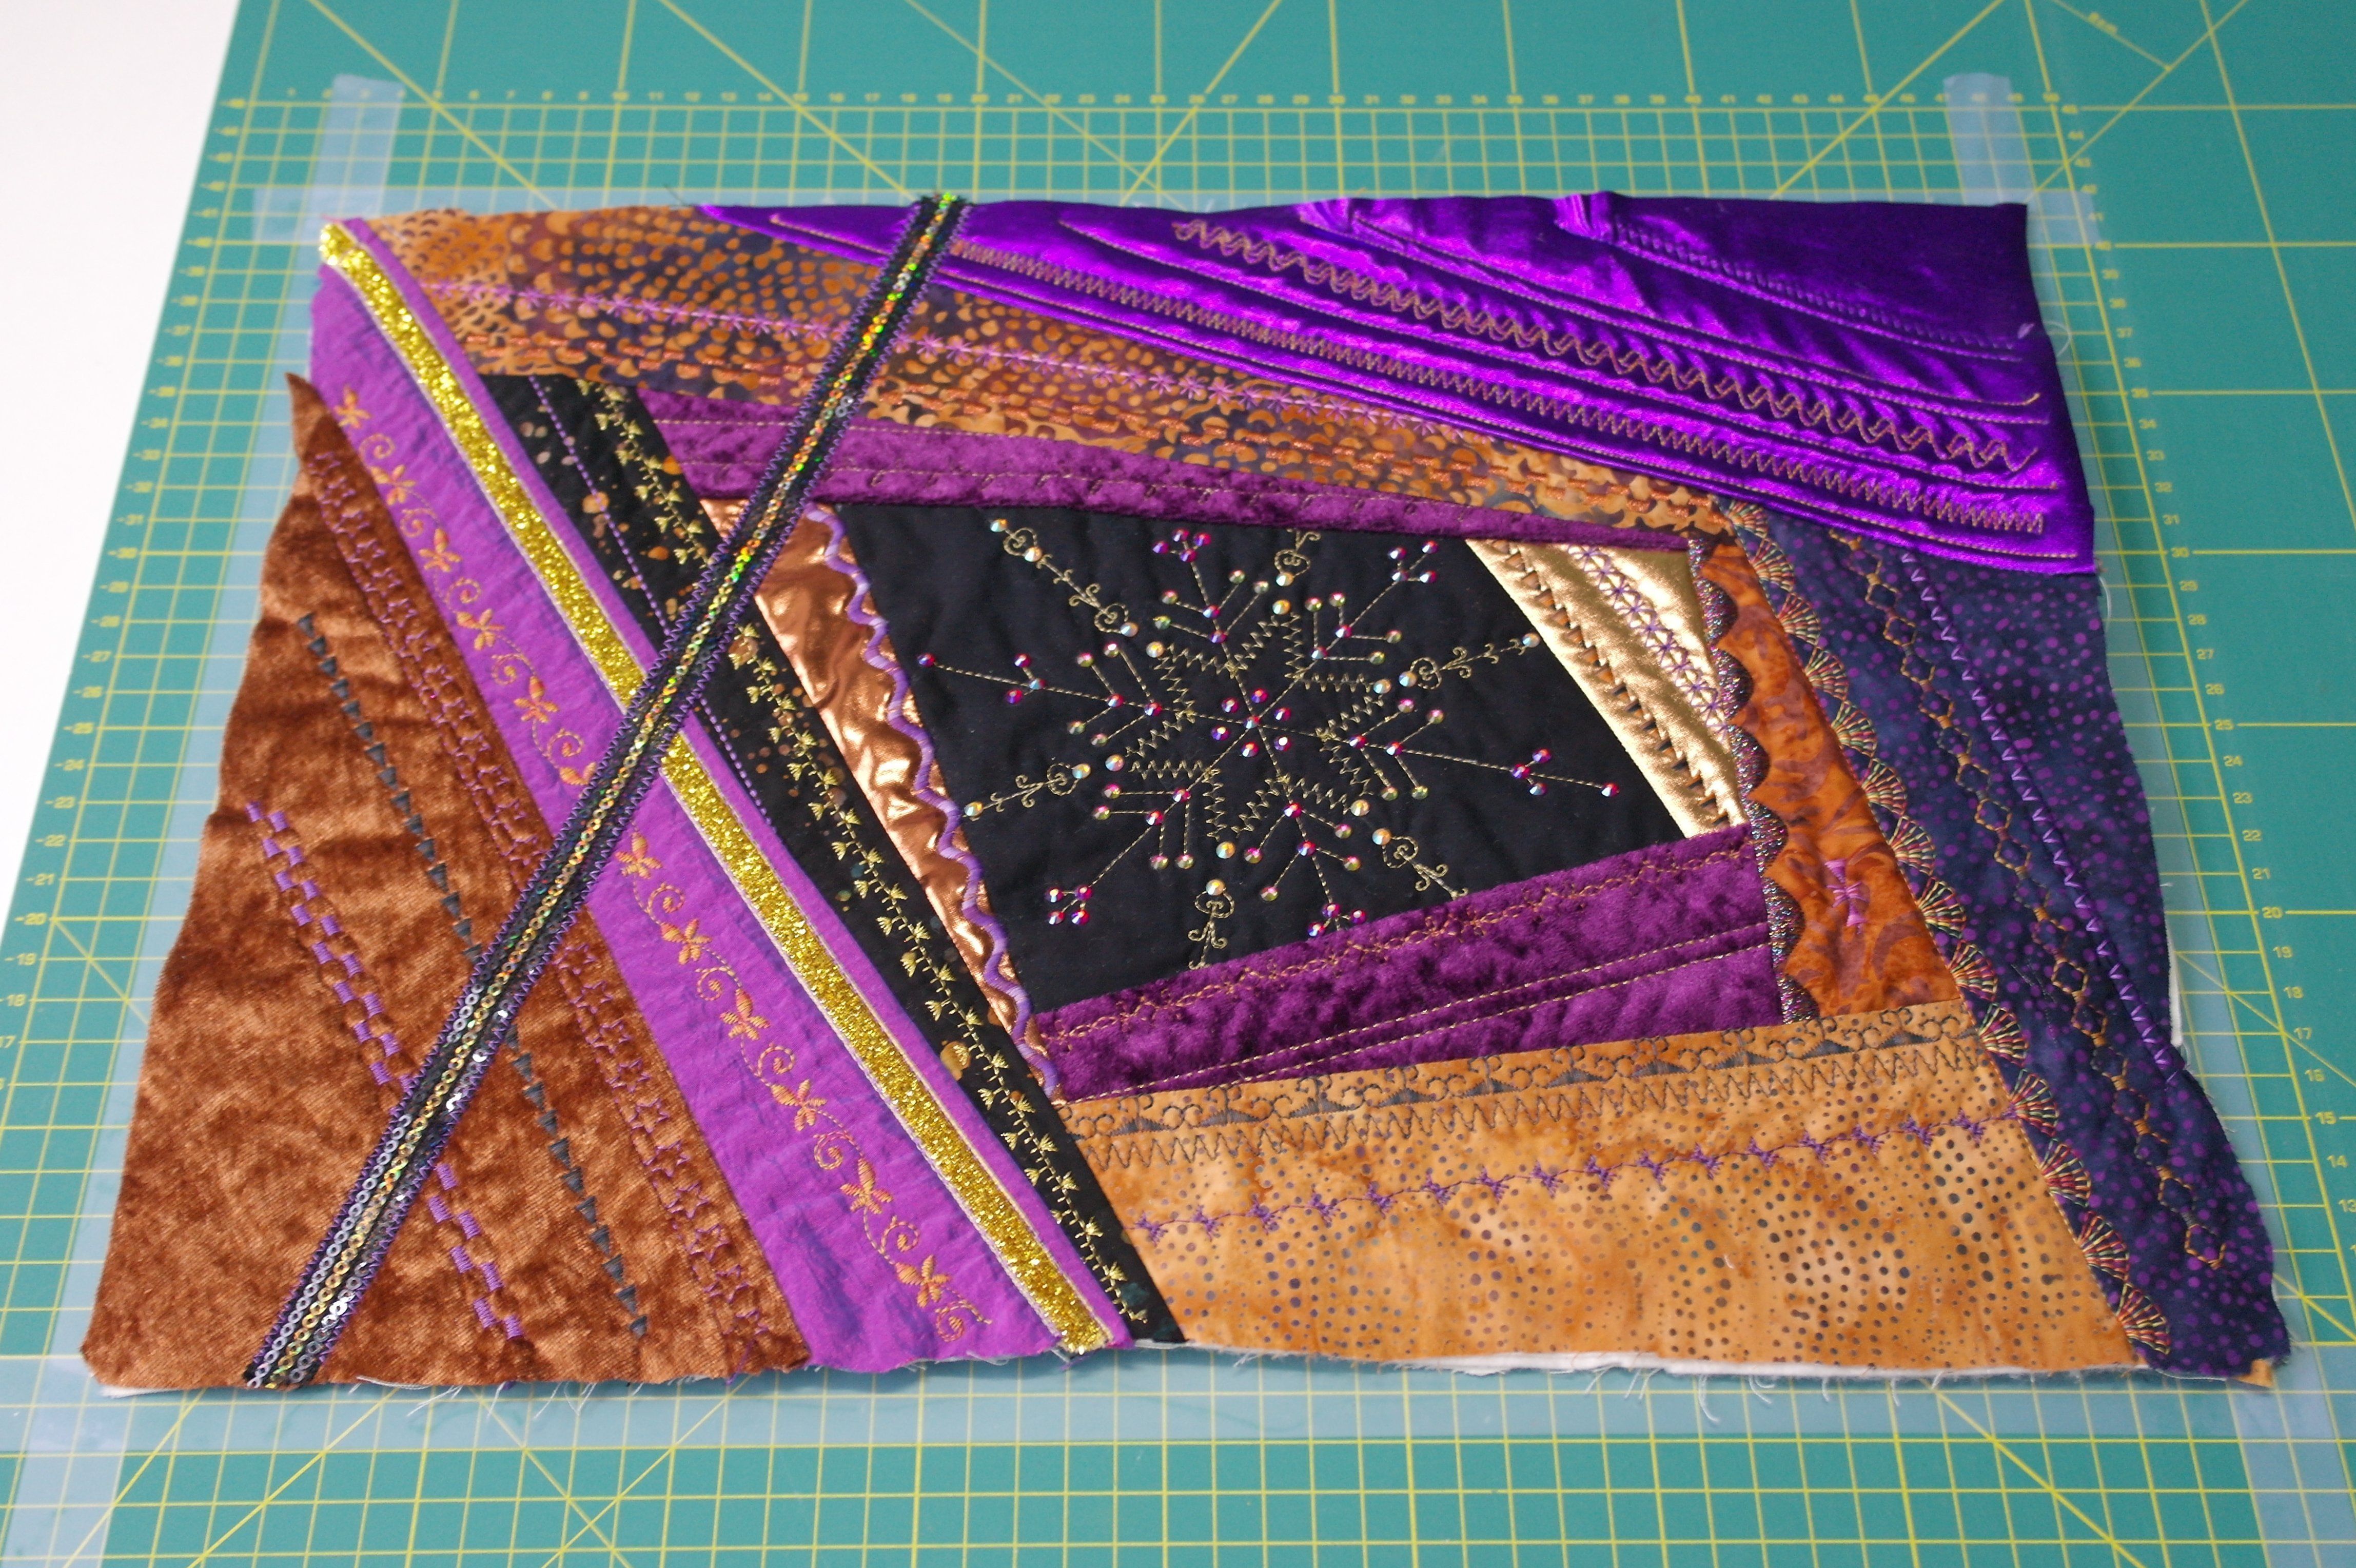
The first block is cut.
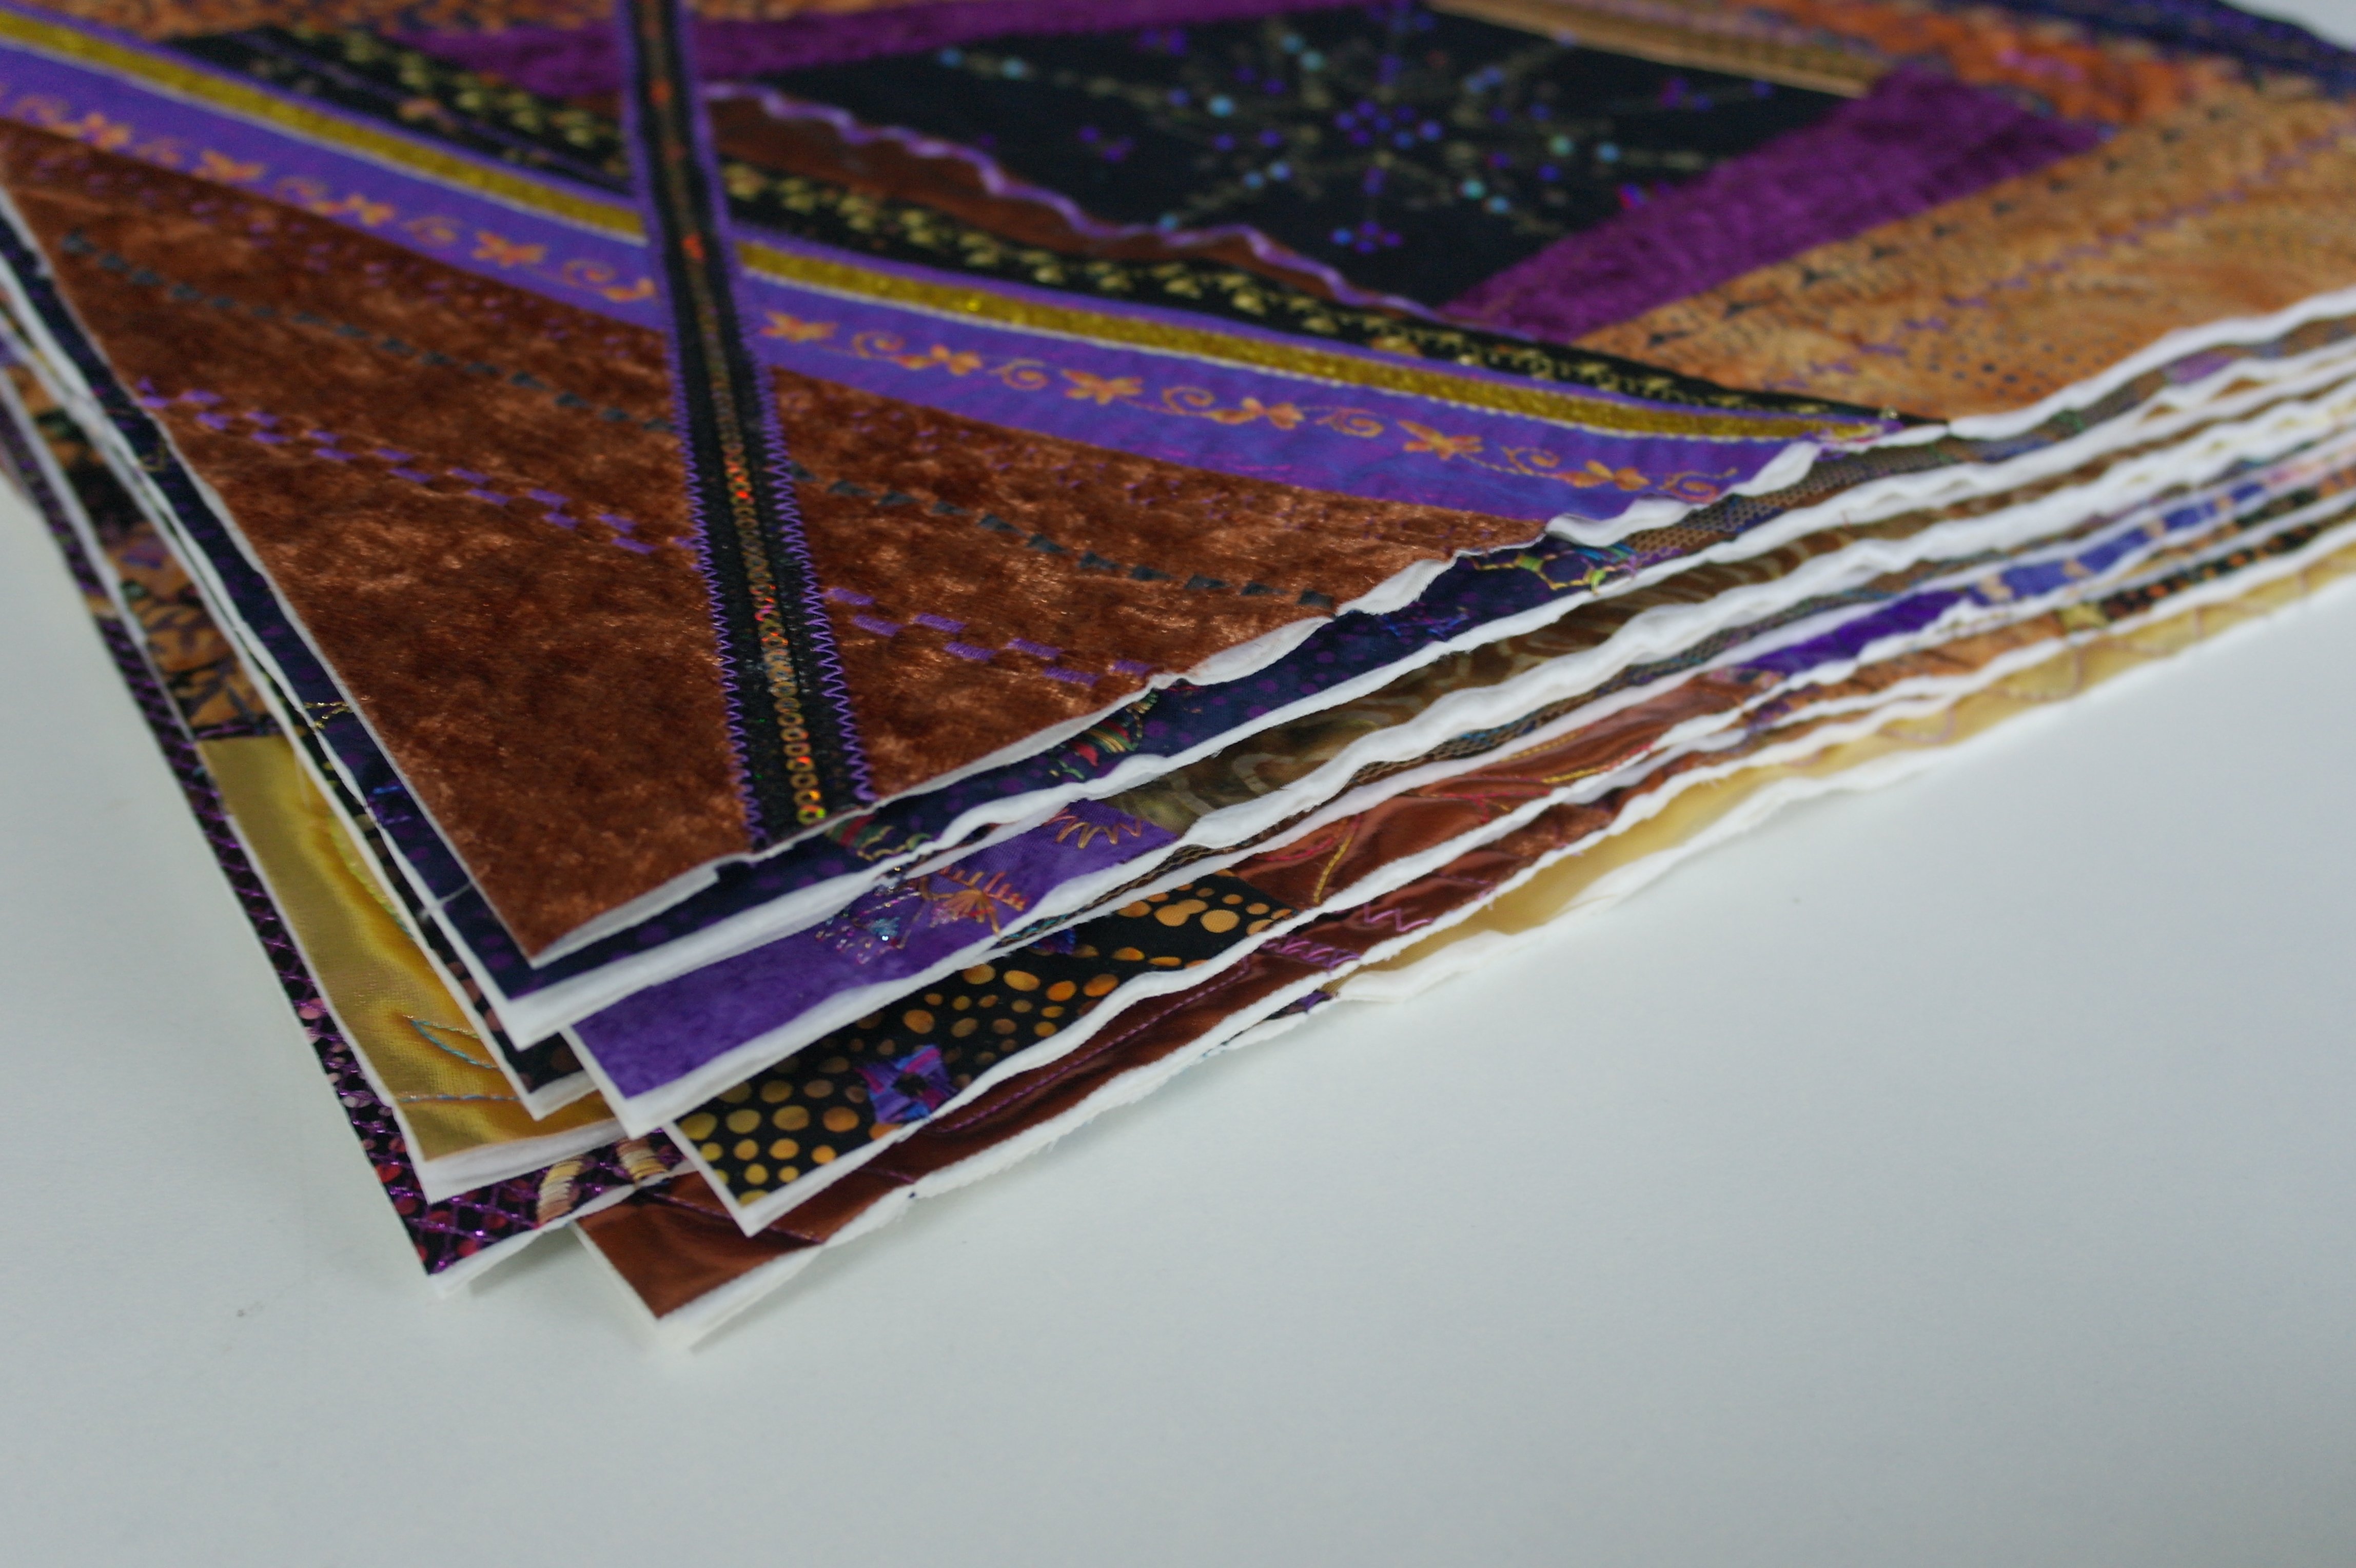
After cutting them all, they are all of the same size (check this). I will use the picture of my placement to assemble.
………………………………………………………………………………………………………………………..
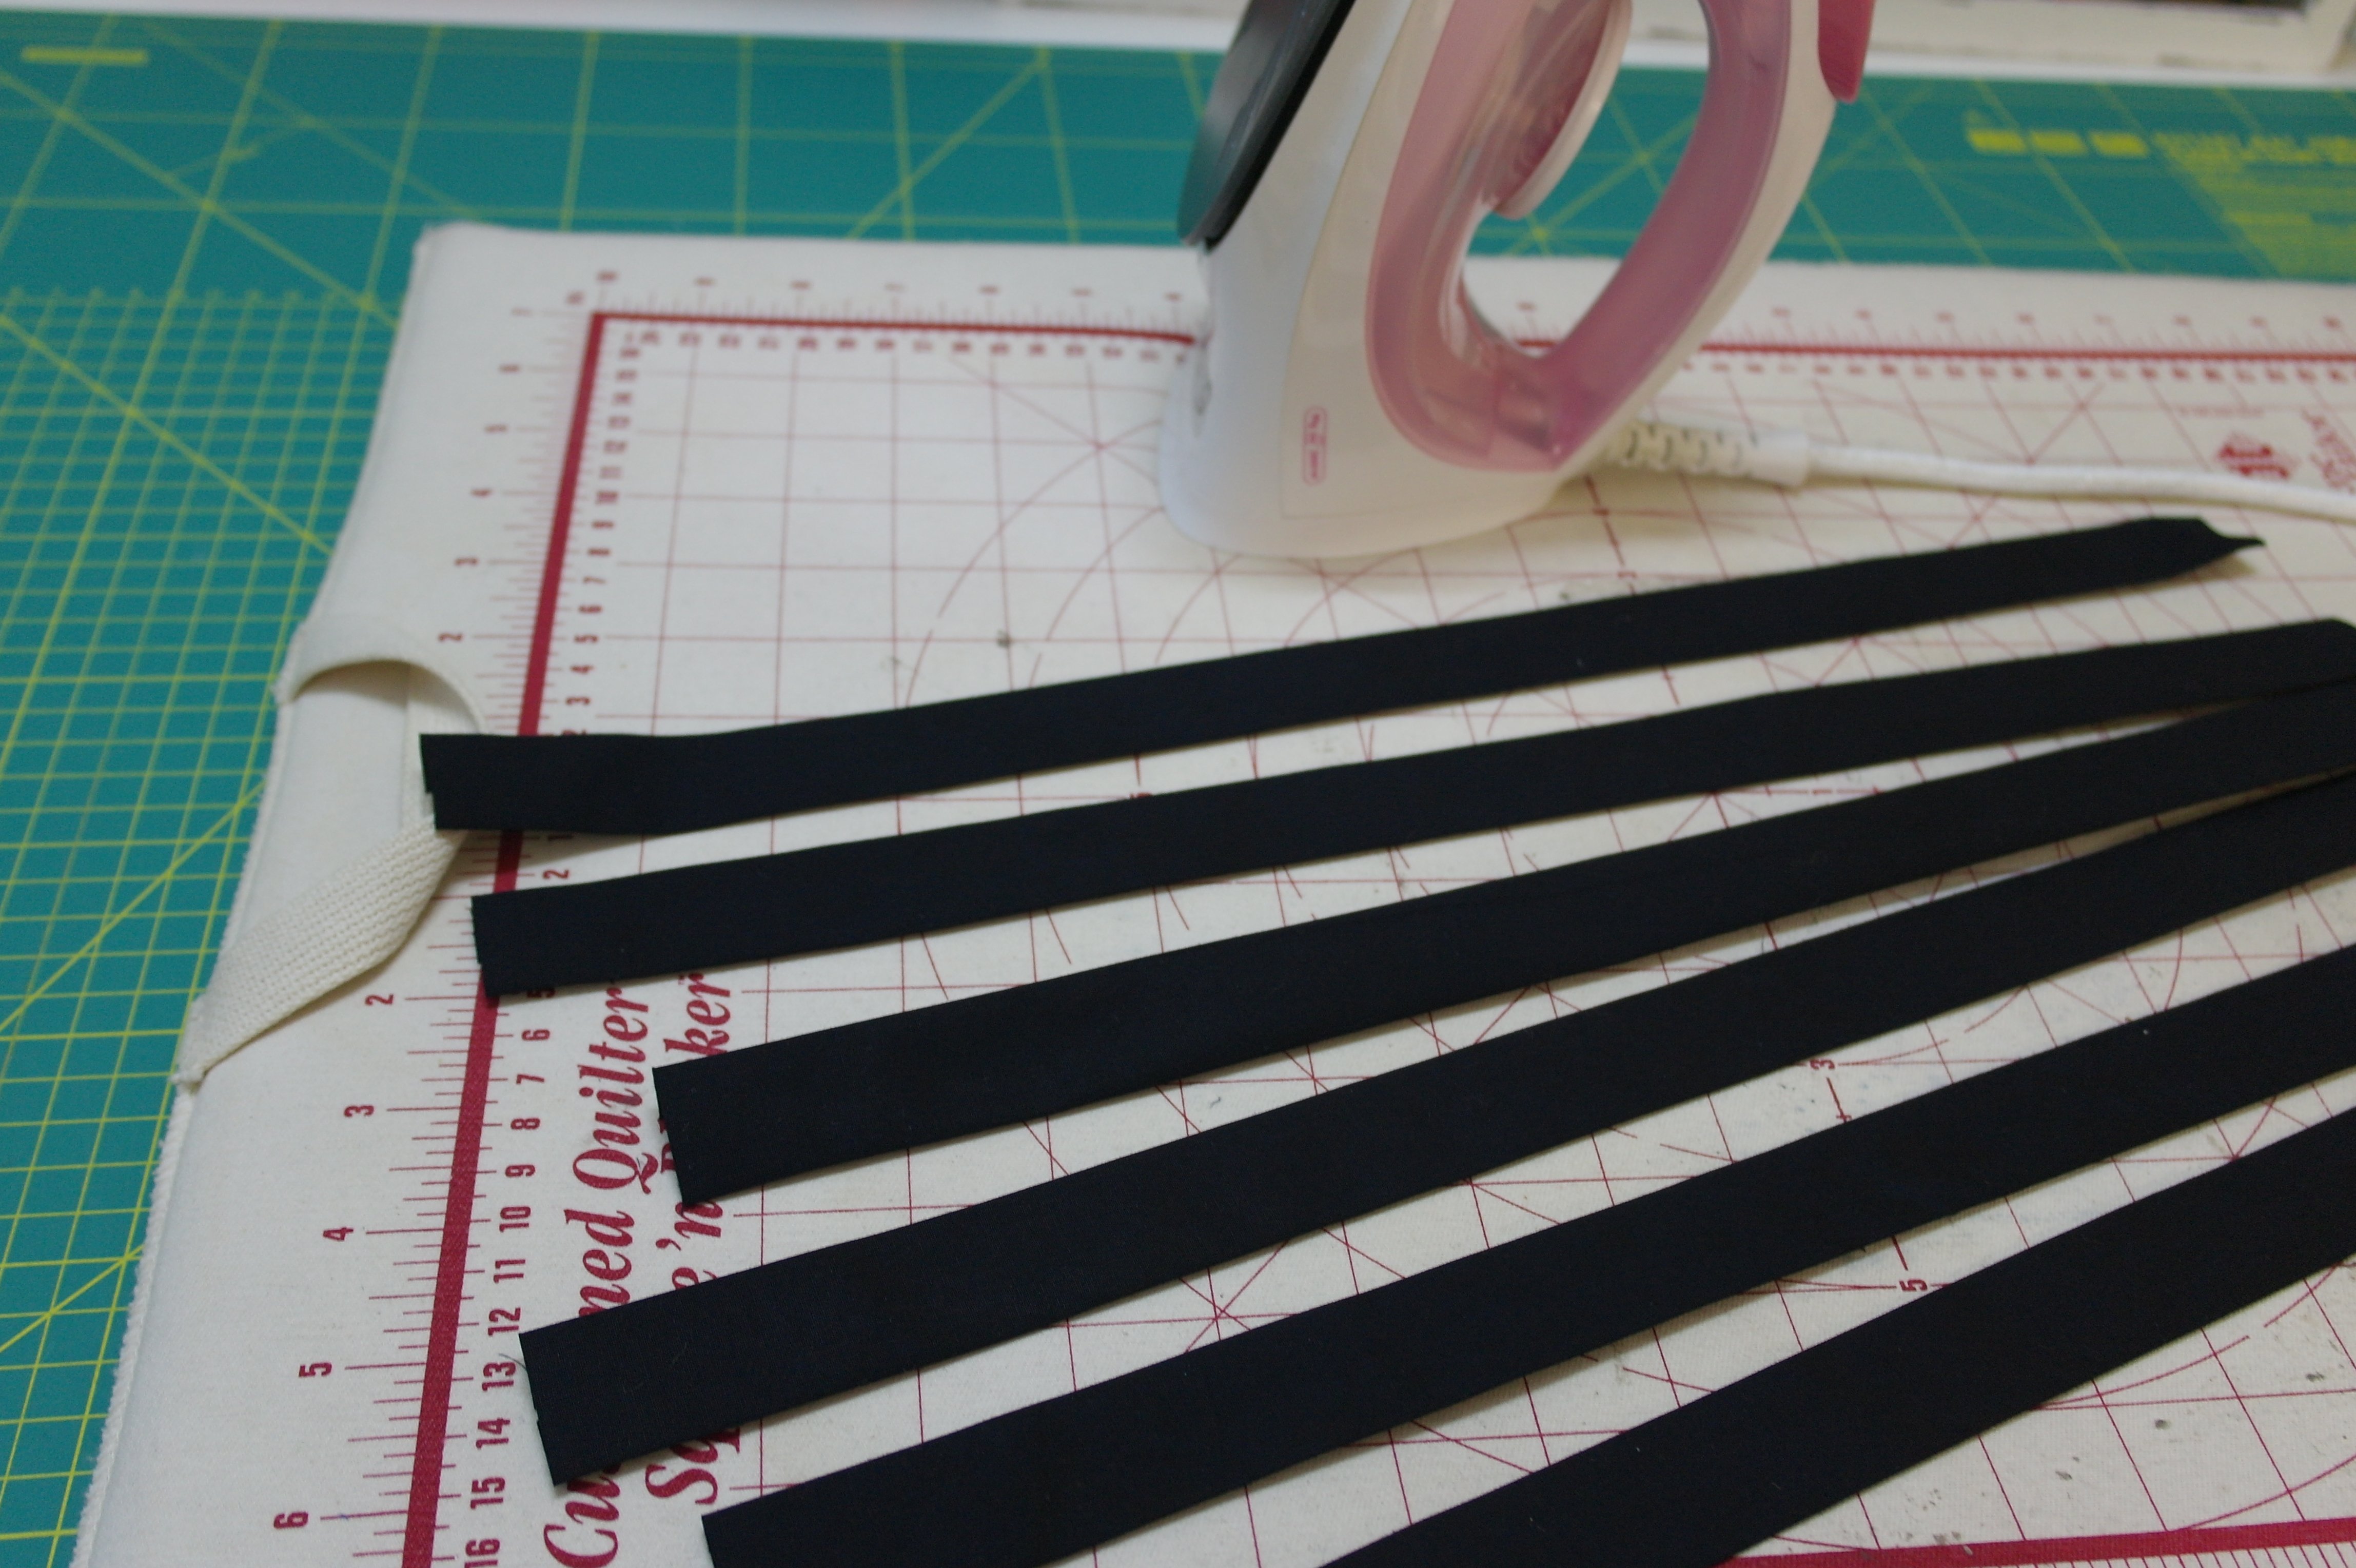
The sashings (fabric strips between the blocks) and the binding is cut from the black (batik) fabric, which you have perhaps already done with te preperations of this project.

The scheme (above) and the clues for sashings and binding can be found in the BERNINA Blog where preperations of this project are shown. If you have already cut everything: just follow the directions below.
If you still have to cut the sashings and binding: follow the directions of the preperations/the scheme above. You will need 9 strips of 5 x 45 cm, cut lengthwise for the vertical sashings between the blocks. Also 3 strips of 5 x 110cm (= out of the width of the fabric) for the horizontal sashings and 5 strips of 9 x 110cm (= out of the width of the fabric) for binding.
Iron the black fabric before cutting: creases etc. can distort the strips you are about to cut.
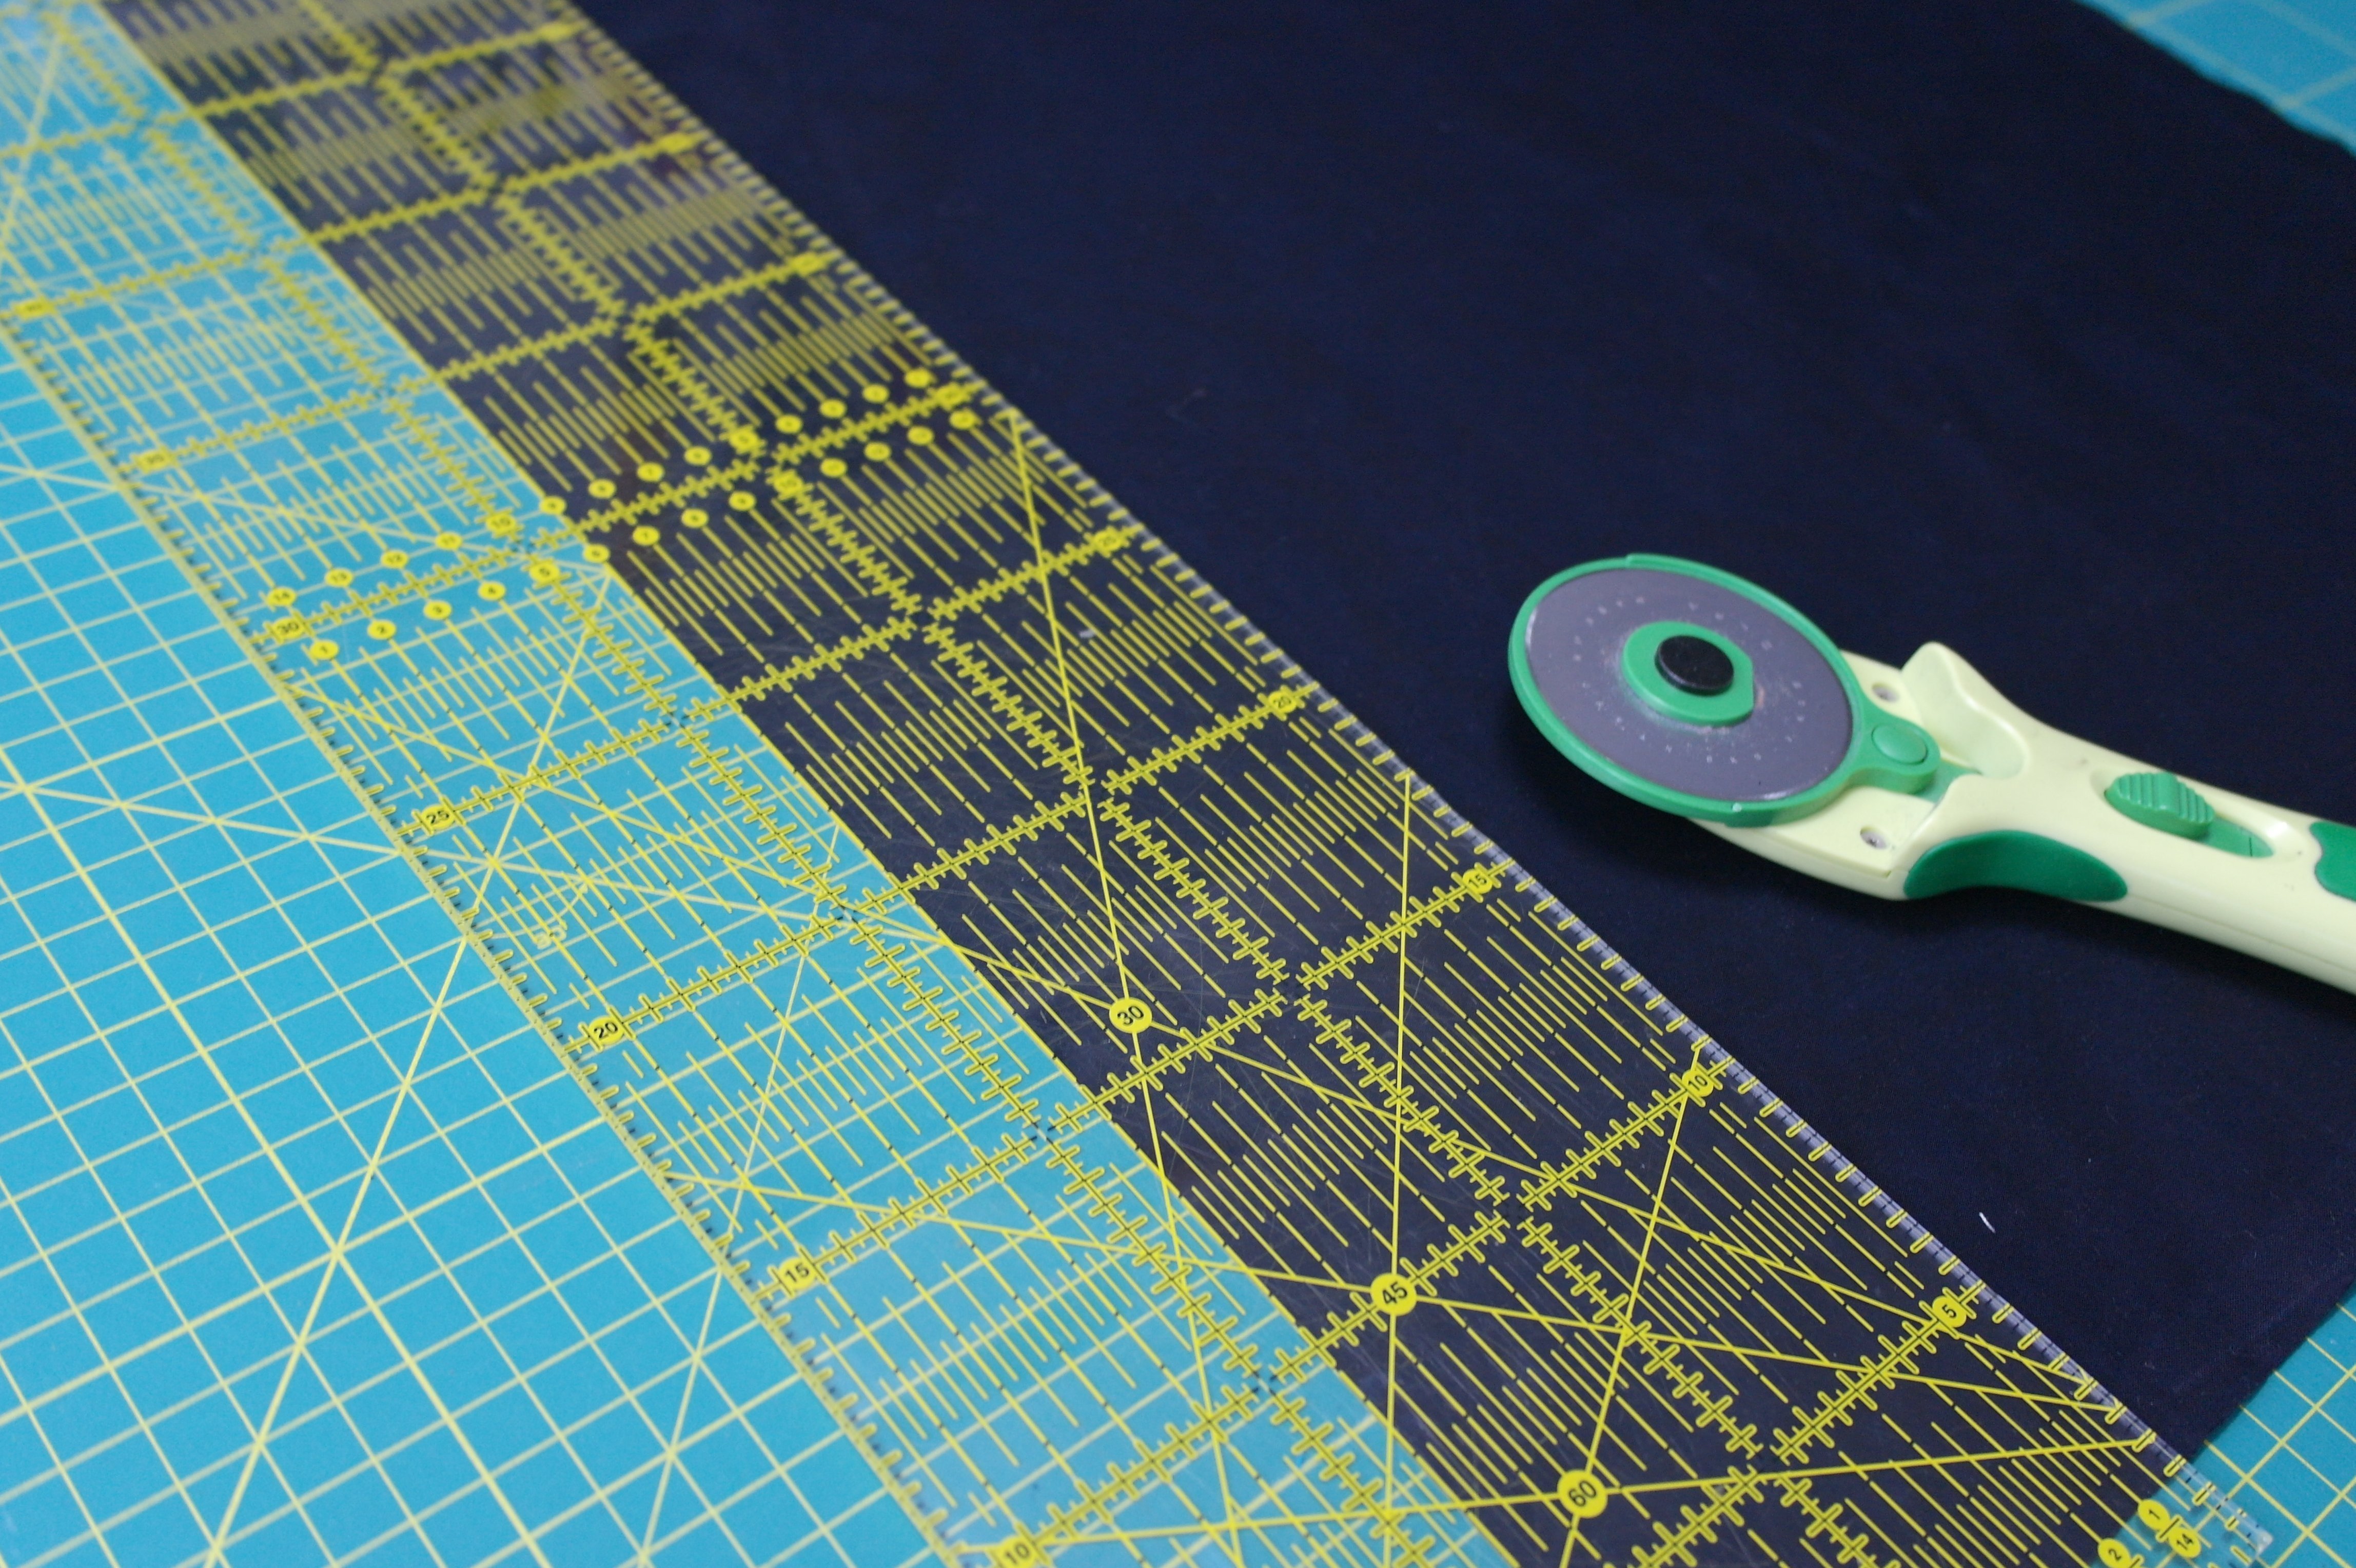
The picture above shows how to cut the 9 cm wide strips: place the quilt ruler over the fabric, check if the measurements are ok and cut.

In the end I have cut 9 strips of 5 x 45 cm, 3 strips of 5 x 110cm and 5 strips of 9 x 110cm.
The 3 stroken of 5 x 110cm for the horizontal sashings will be sewn together to make one long strip. You will need 2 strips over the width of the quilt = between the horizontal rows. The actual width of the fabric is 110cm, and because you will need a larger strip, sewing 3 strips together and cut this in half gives you 2 larger strips. There will be a seam, but it doesn’t show on your sashing.  For the binding: sew all 5 strips of 9x110cm together to make one large strip. When sewing the binding onto the quilt, sew the strip and cut after sewing per side. I have ironed the strip in half lengthwise, to make a double binding.
………………………………………………………………………………………………………………………..
The blocks will be sewn per row, 4 horizontal. Use a regular zigzag stitch, wider and longer than default. First join two blocks of the first row, then the other two blocks and last join them 2 x 2 to make a row of 4.
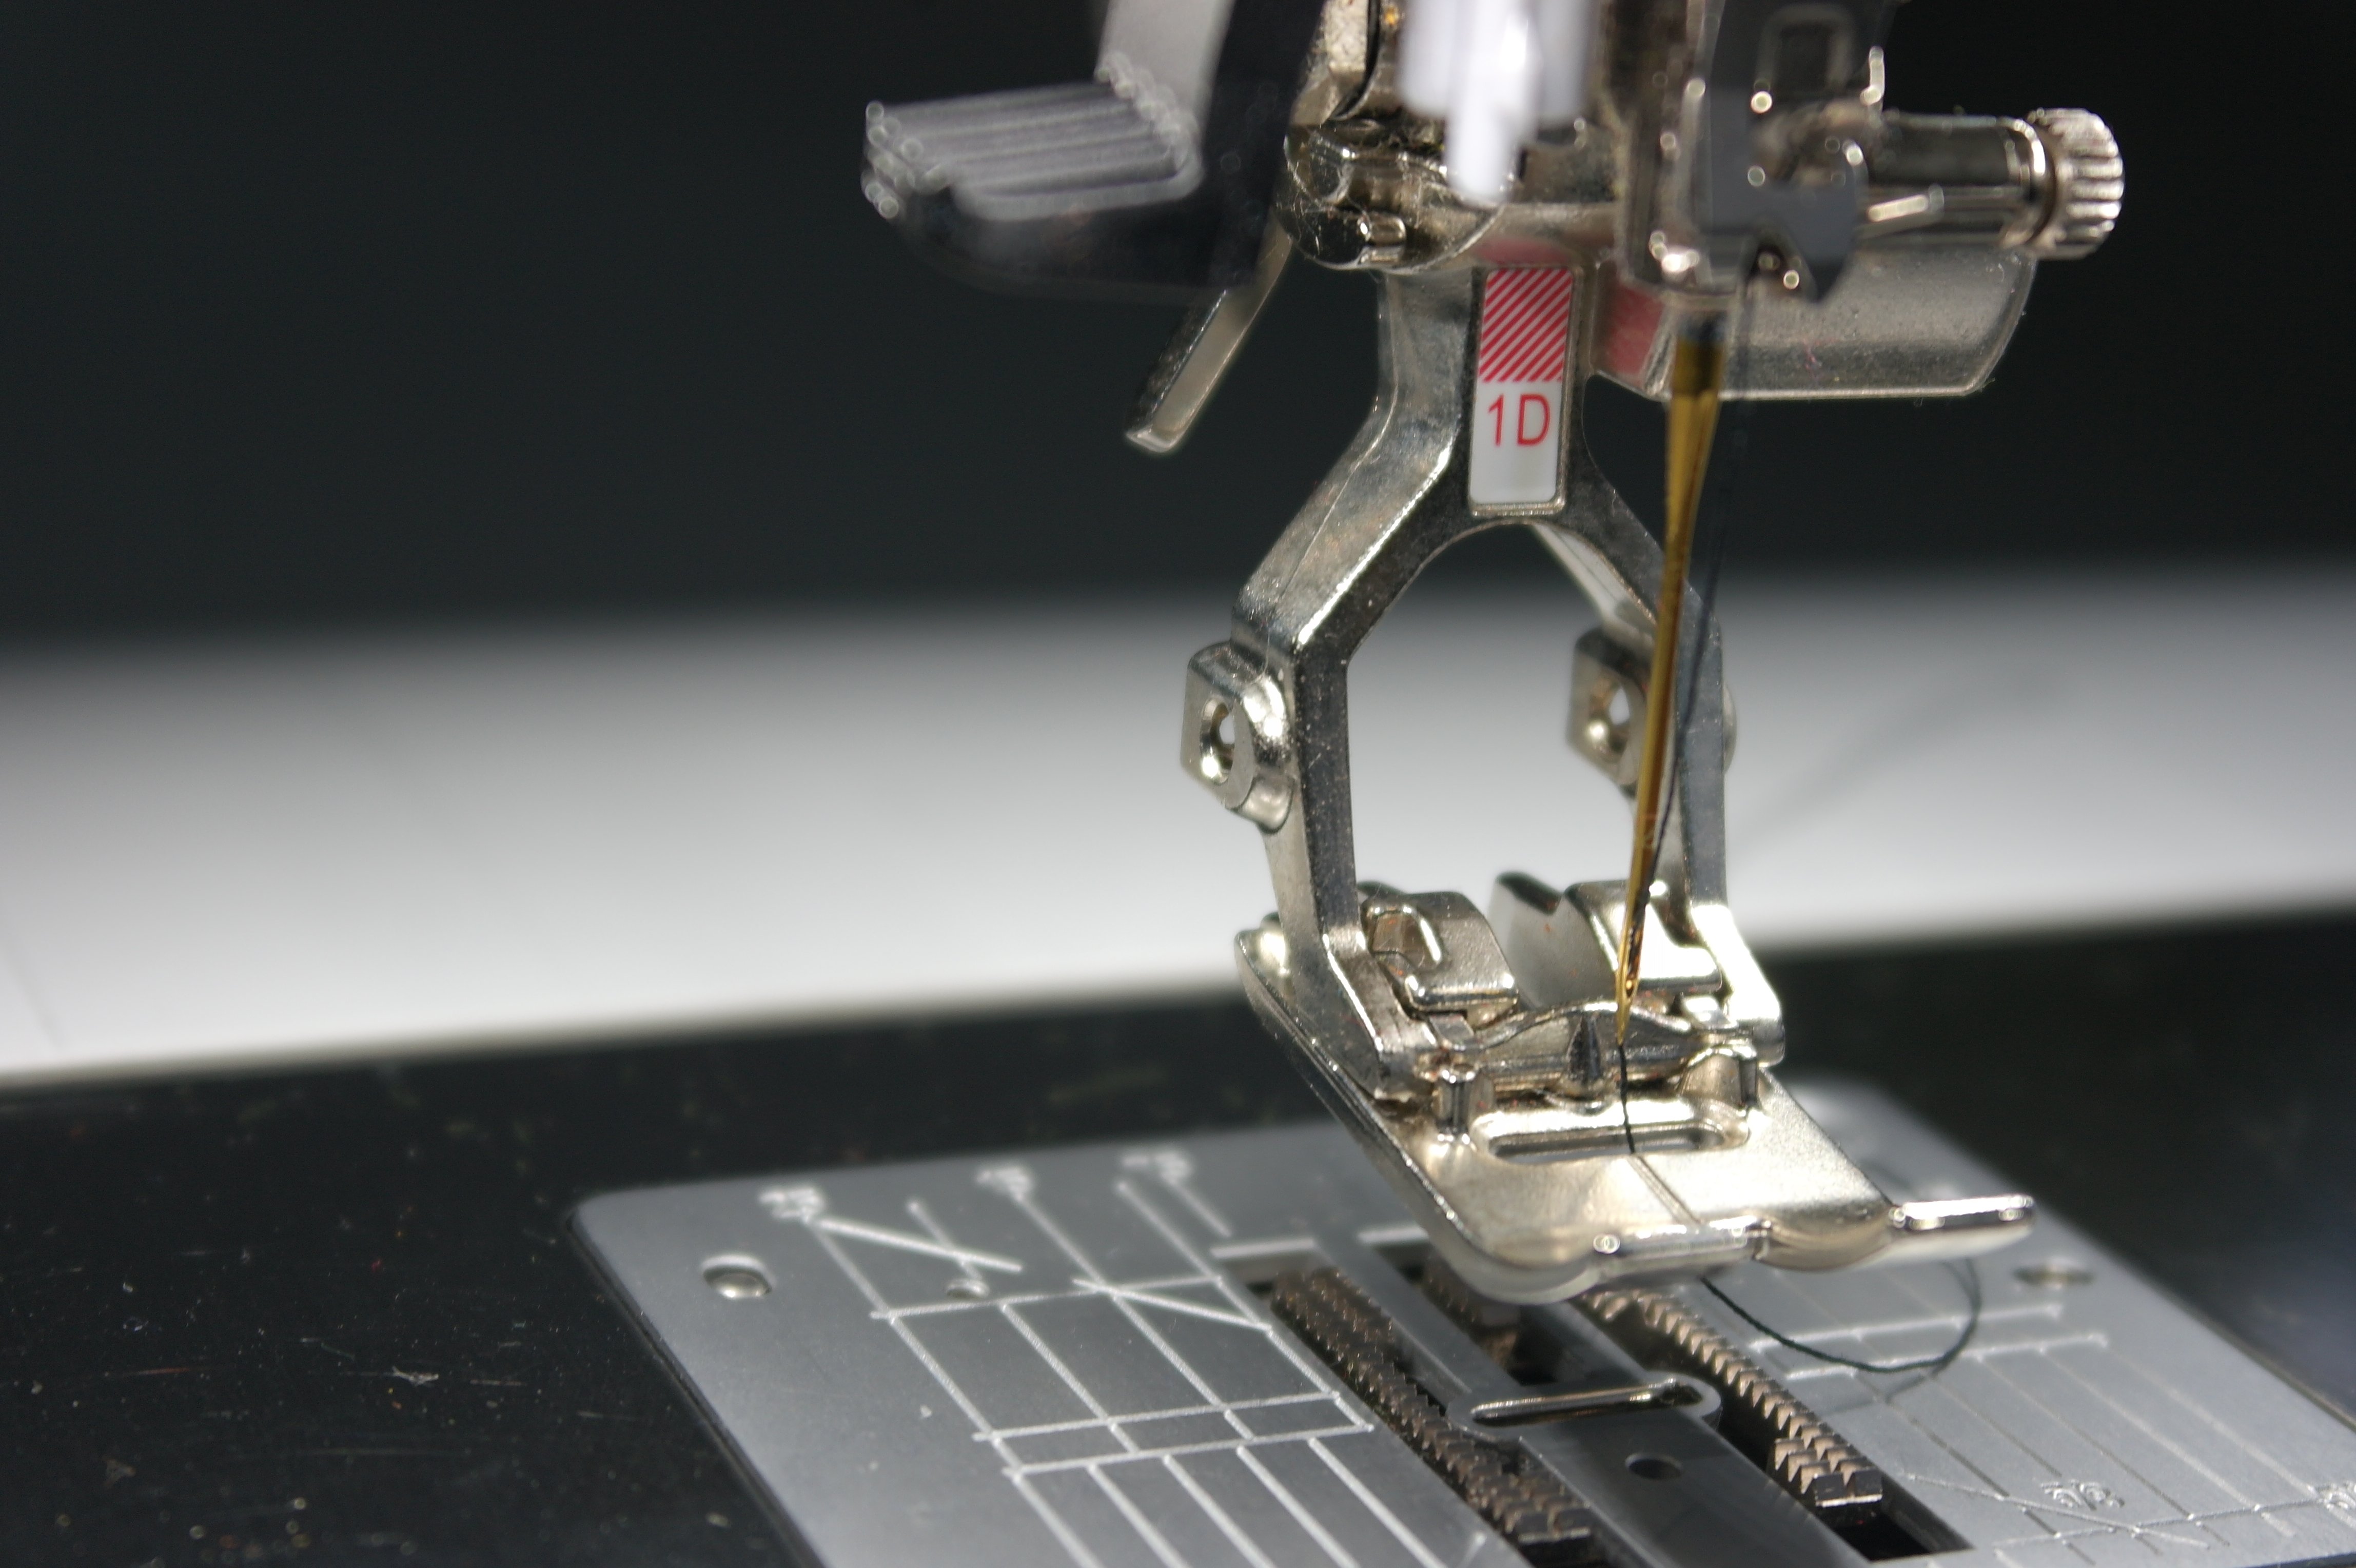
I am using presser foot #1D, because I can also use the Dual Feed: it works a bit like a Walking Foot. Also this presser foot has a groove in the middle, which I can point exactly between two blocks when joining them.
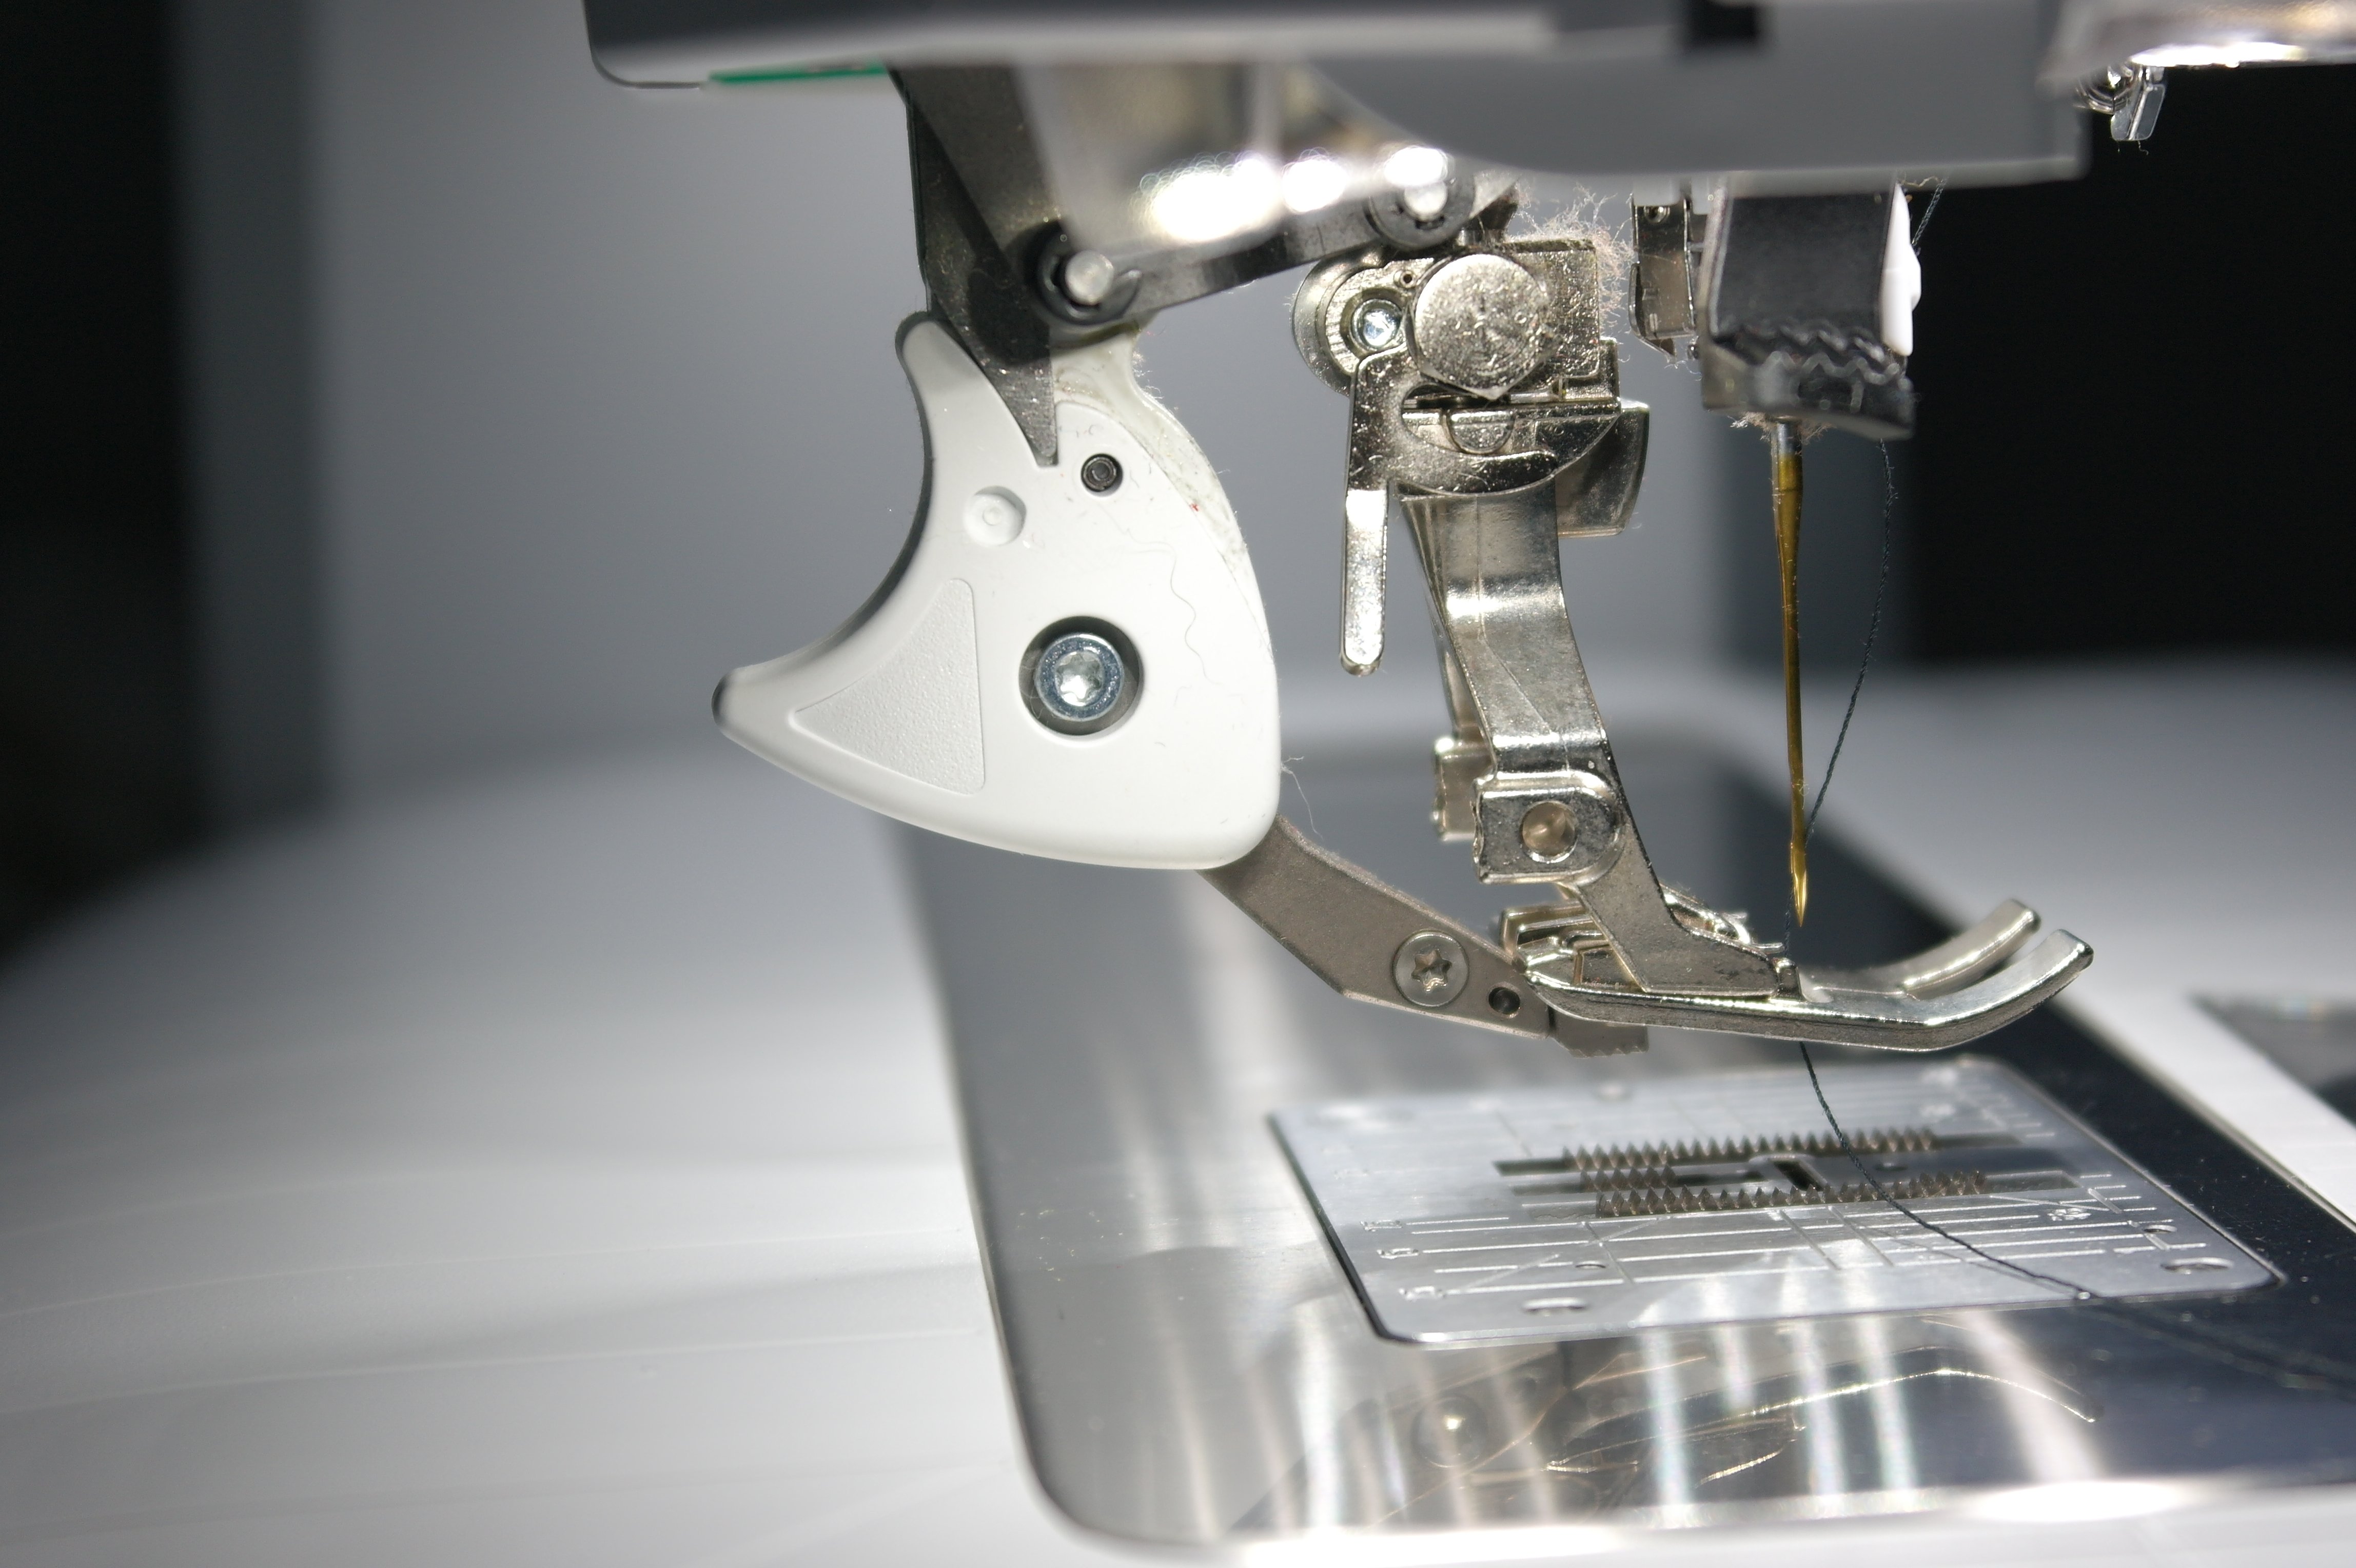
Here the Dual Feed shows at the back of presser foot #1D. If you look closer, you can see the ribbing underneath the part that is placed under the presser foot: this makes your material ‘walk’ easier.

A regular zigzag stitch will join the blocks: I have changed the settings on my B770QE: it shows yellow on my screen. I have increased the width of the stitches to 5.0, and the length to 2.50.
Be sure to feed the blocks evenly underneath the presser foot: don’t pull or push too much, so there will be no distortion.
At the end of your zigzag stitching, the blocks should end ‘together’, like you can see on the picture above.
Three rows, each of 4 blocks, are joined.
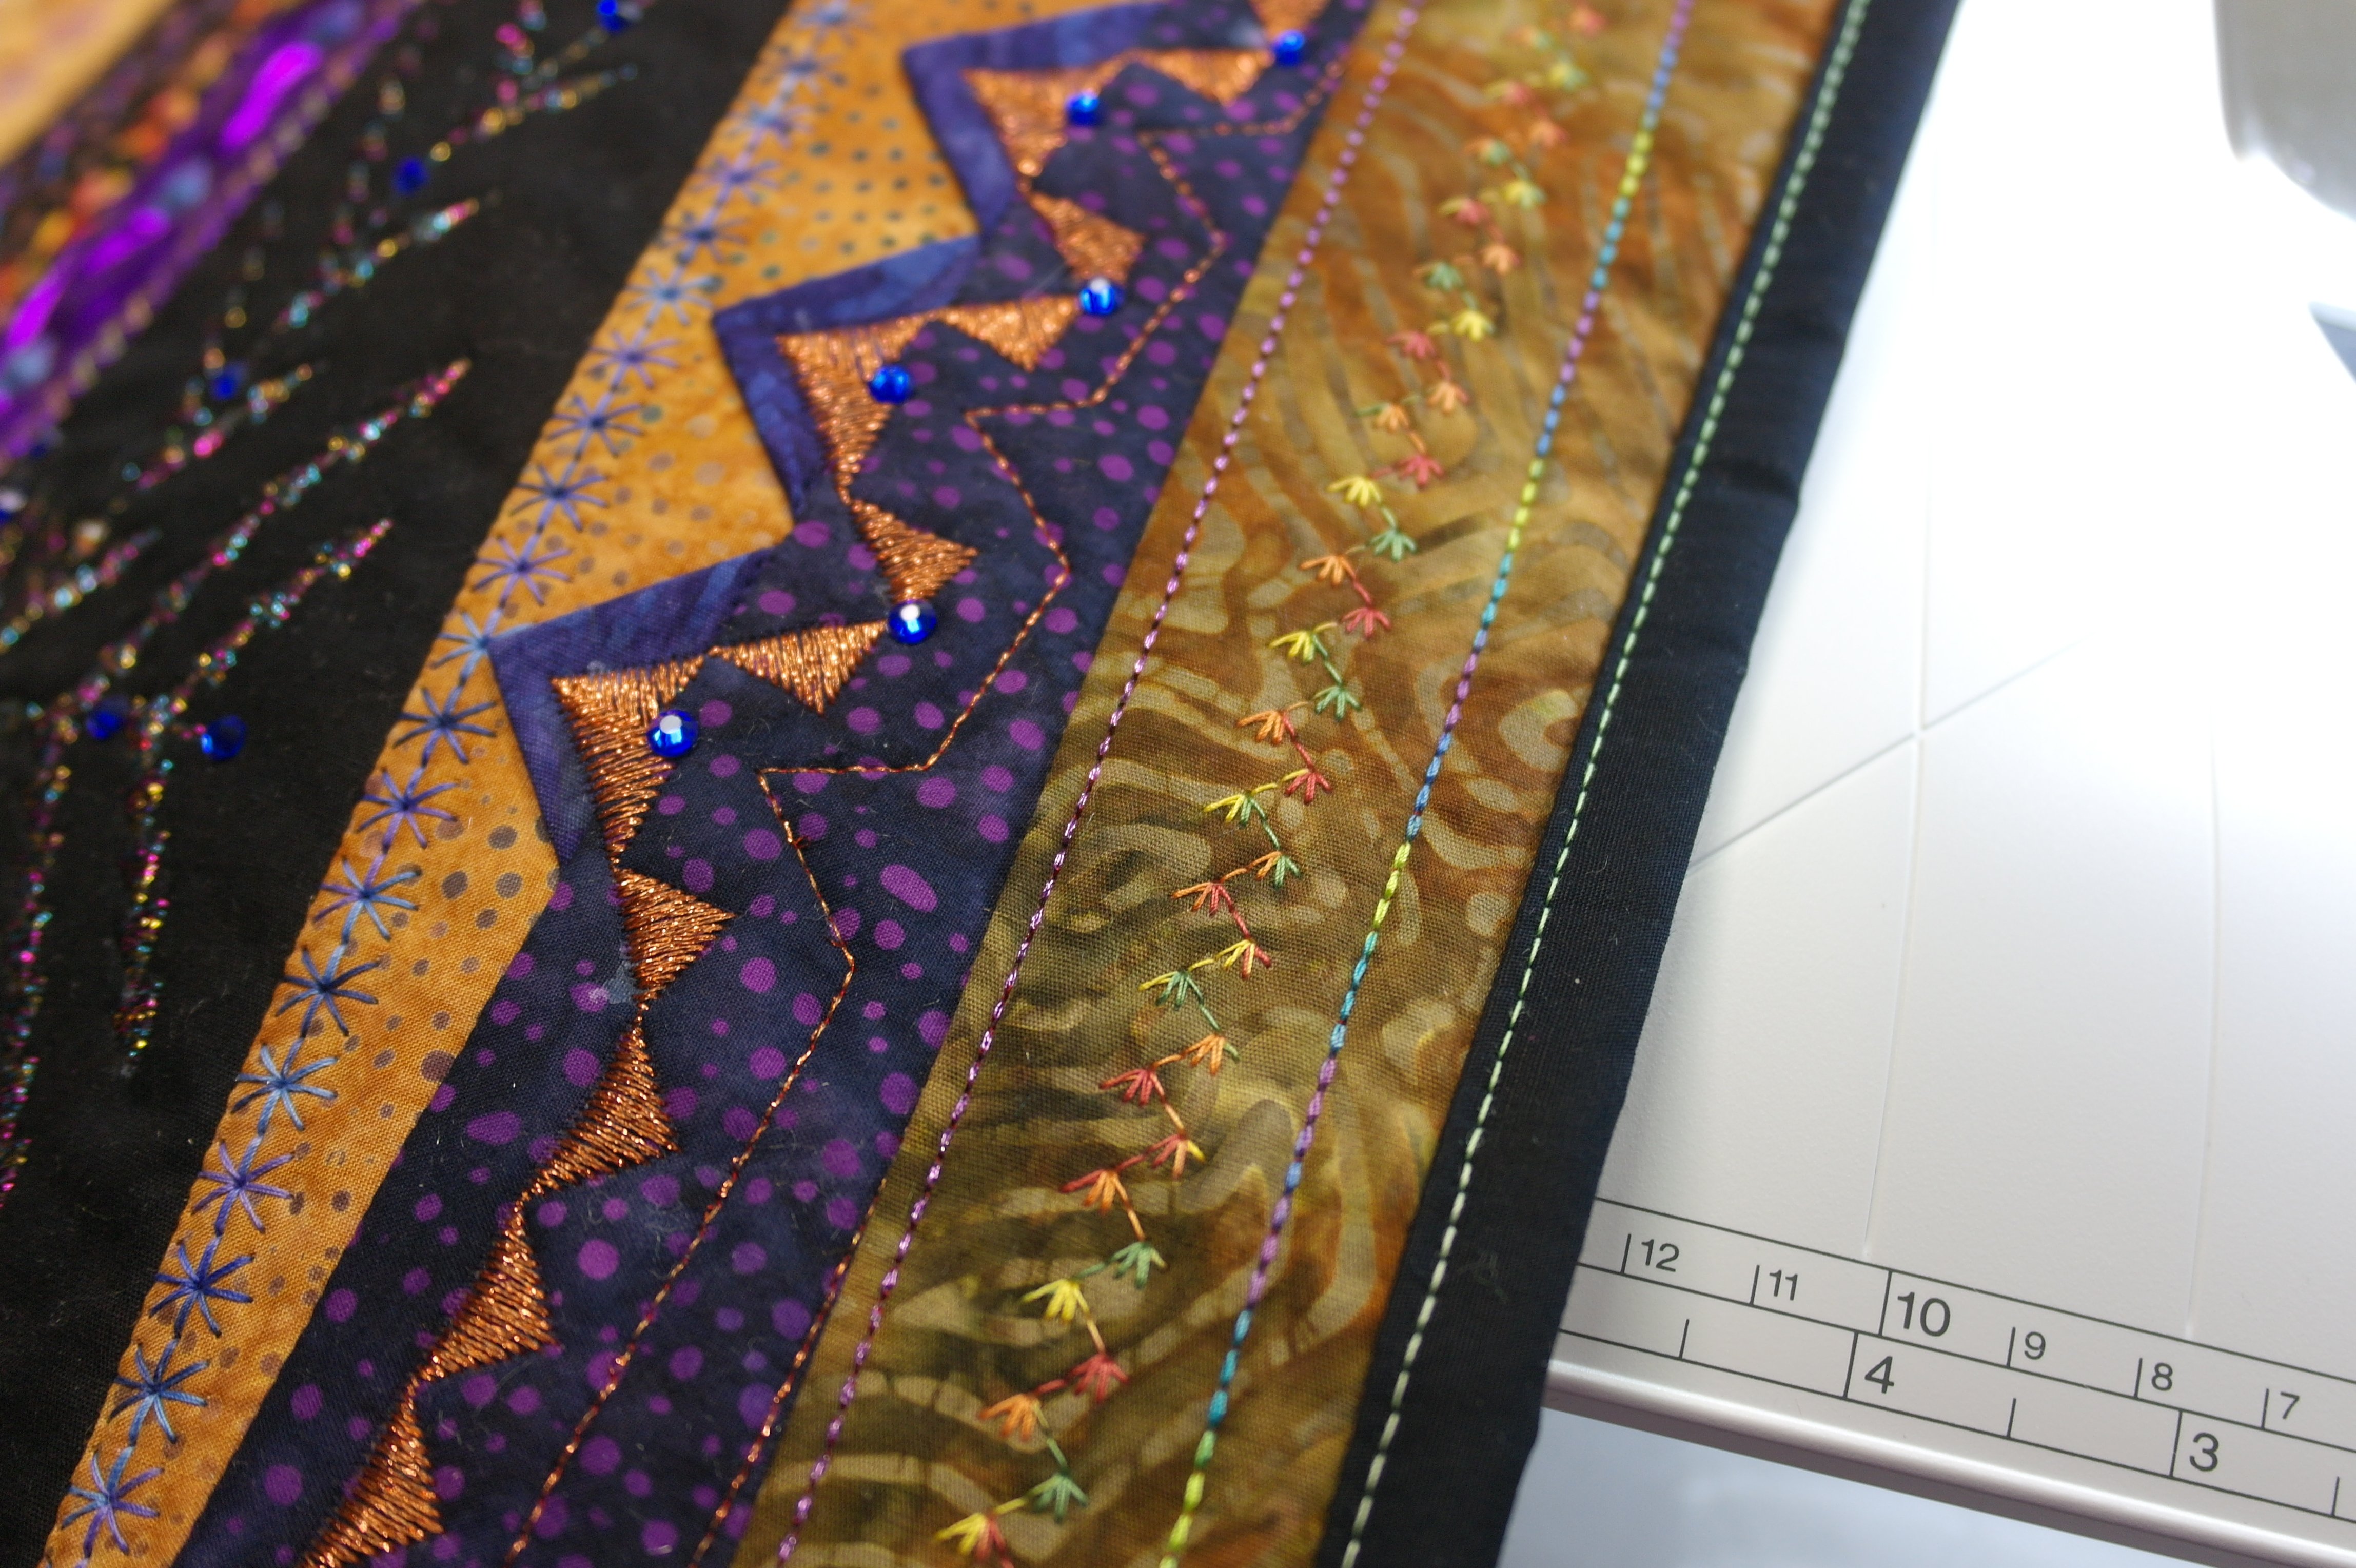
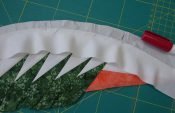
The vertical sashings are prepared: place a strip with the right side down on you iron board/mat and fold 1 cm in length down, on each side. Iron to make sure the folds will hold.
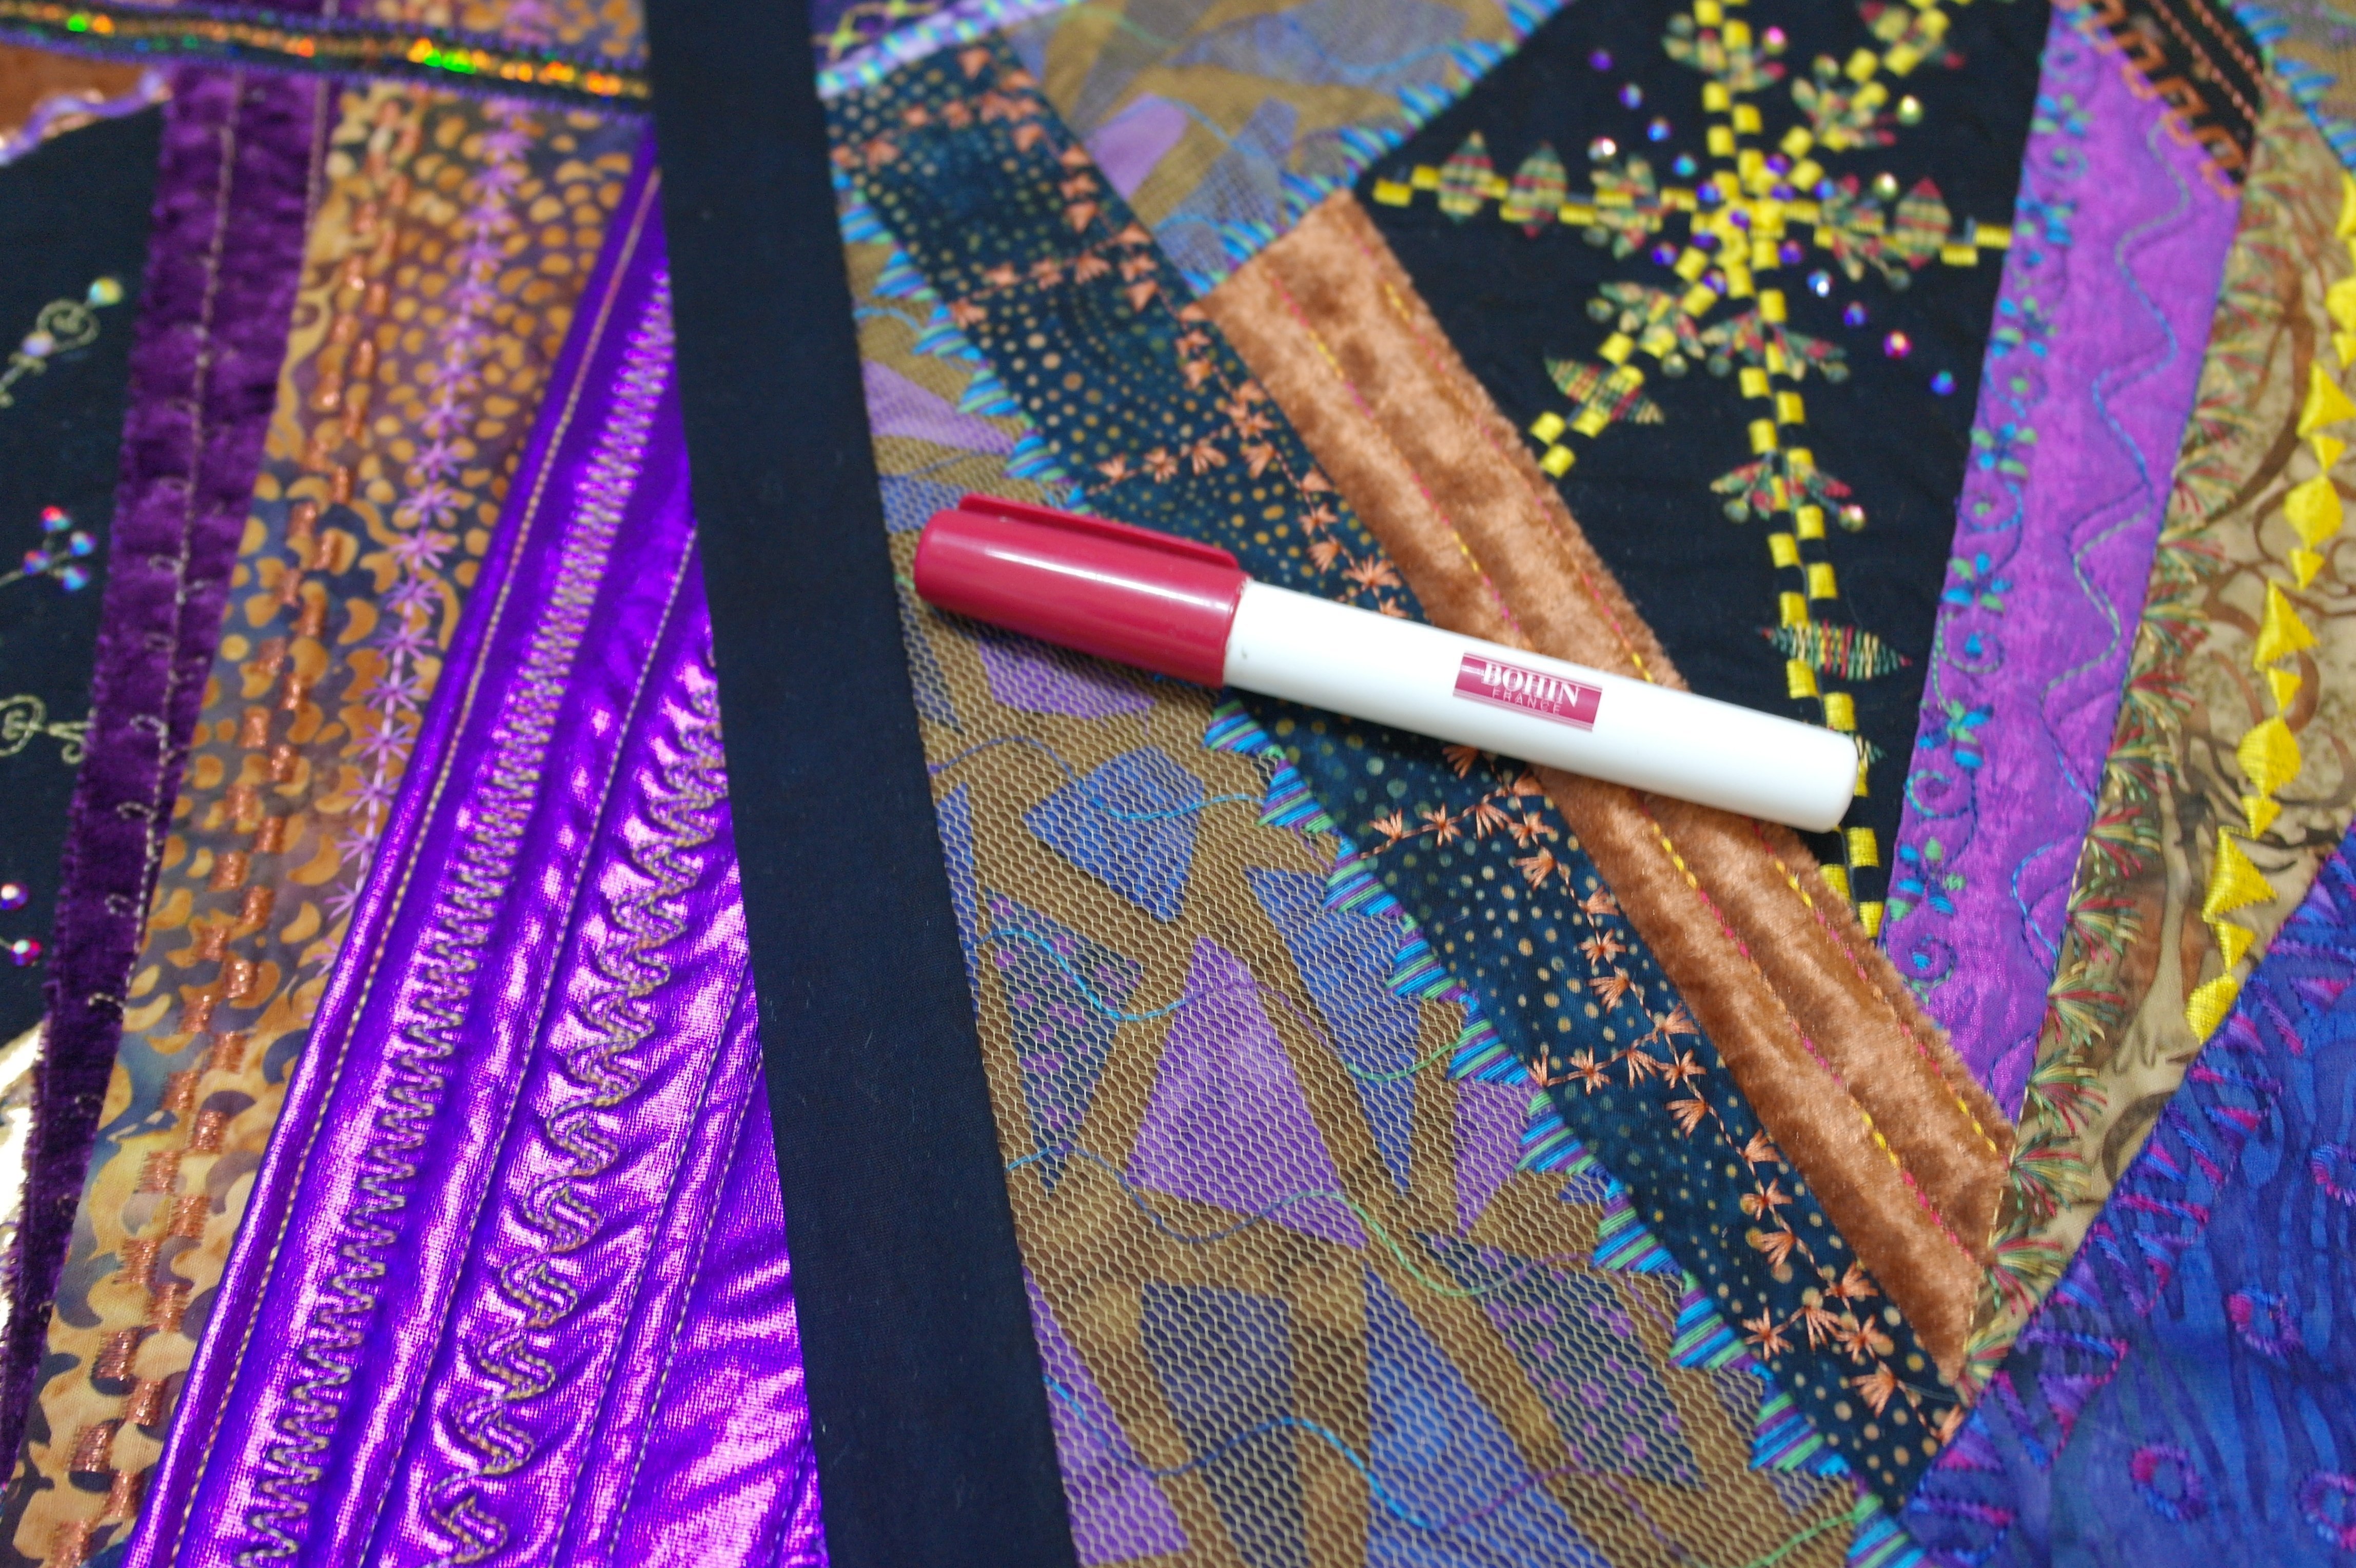
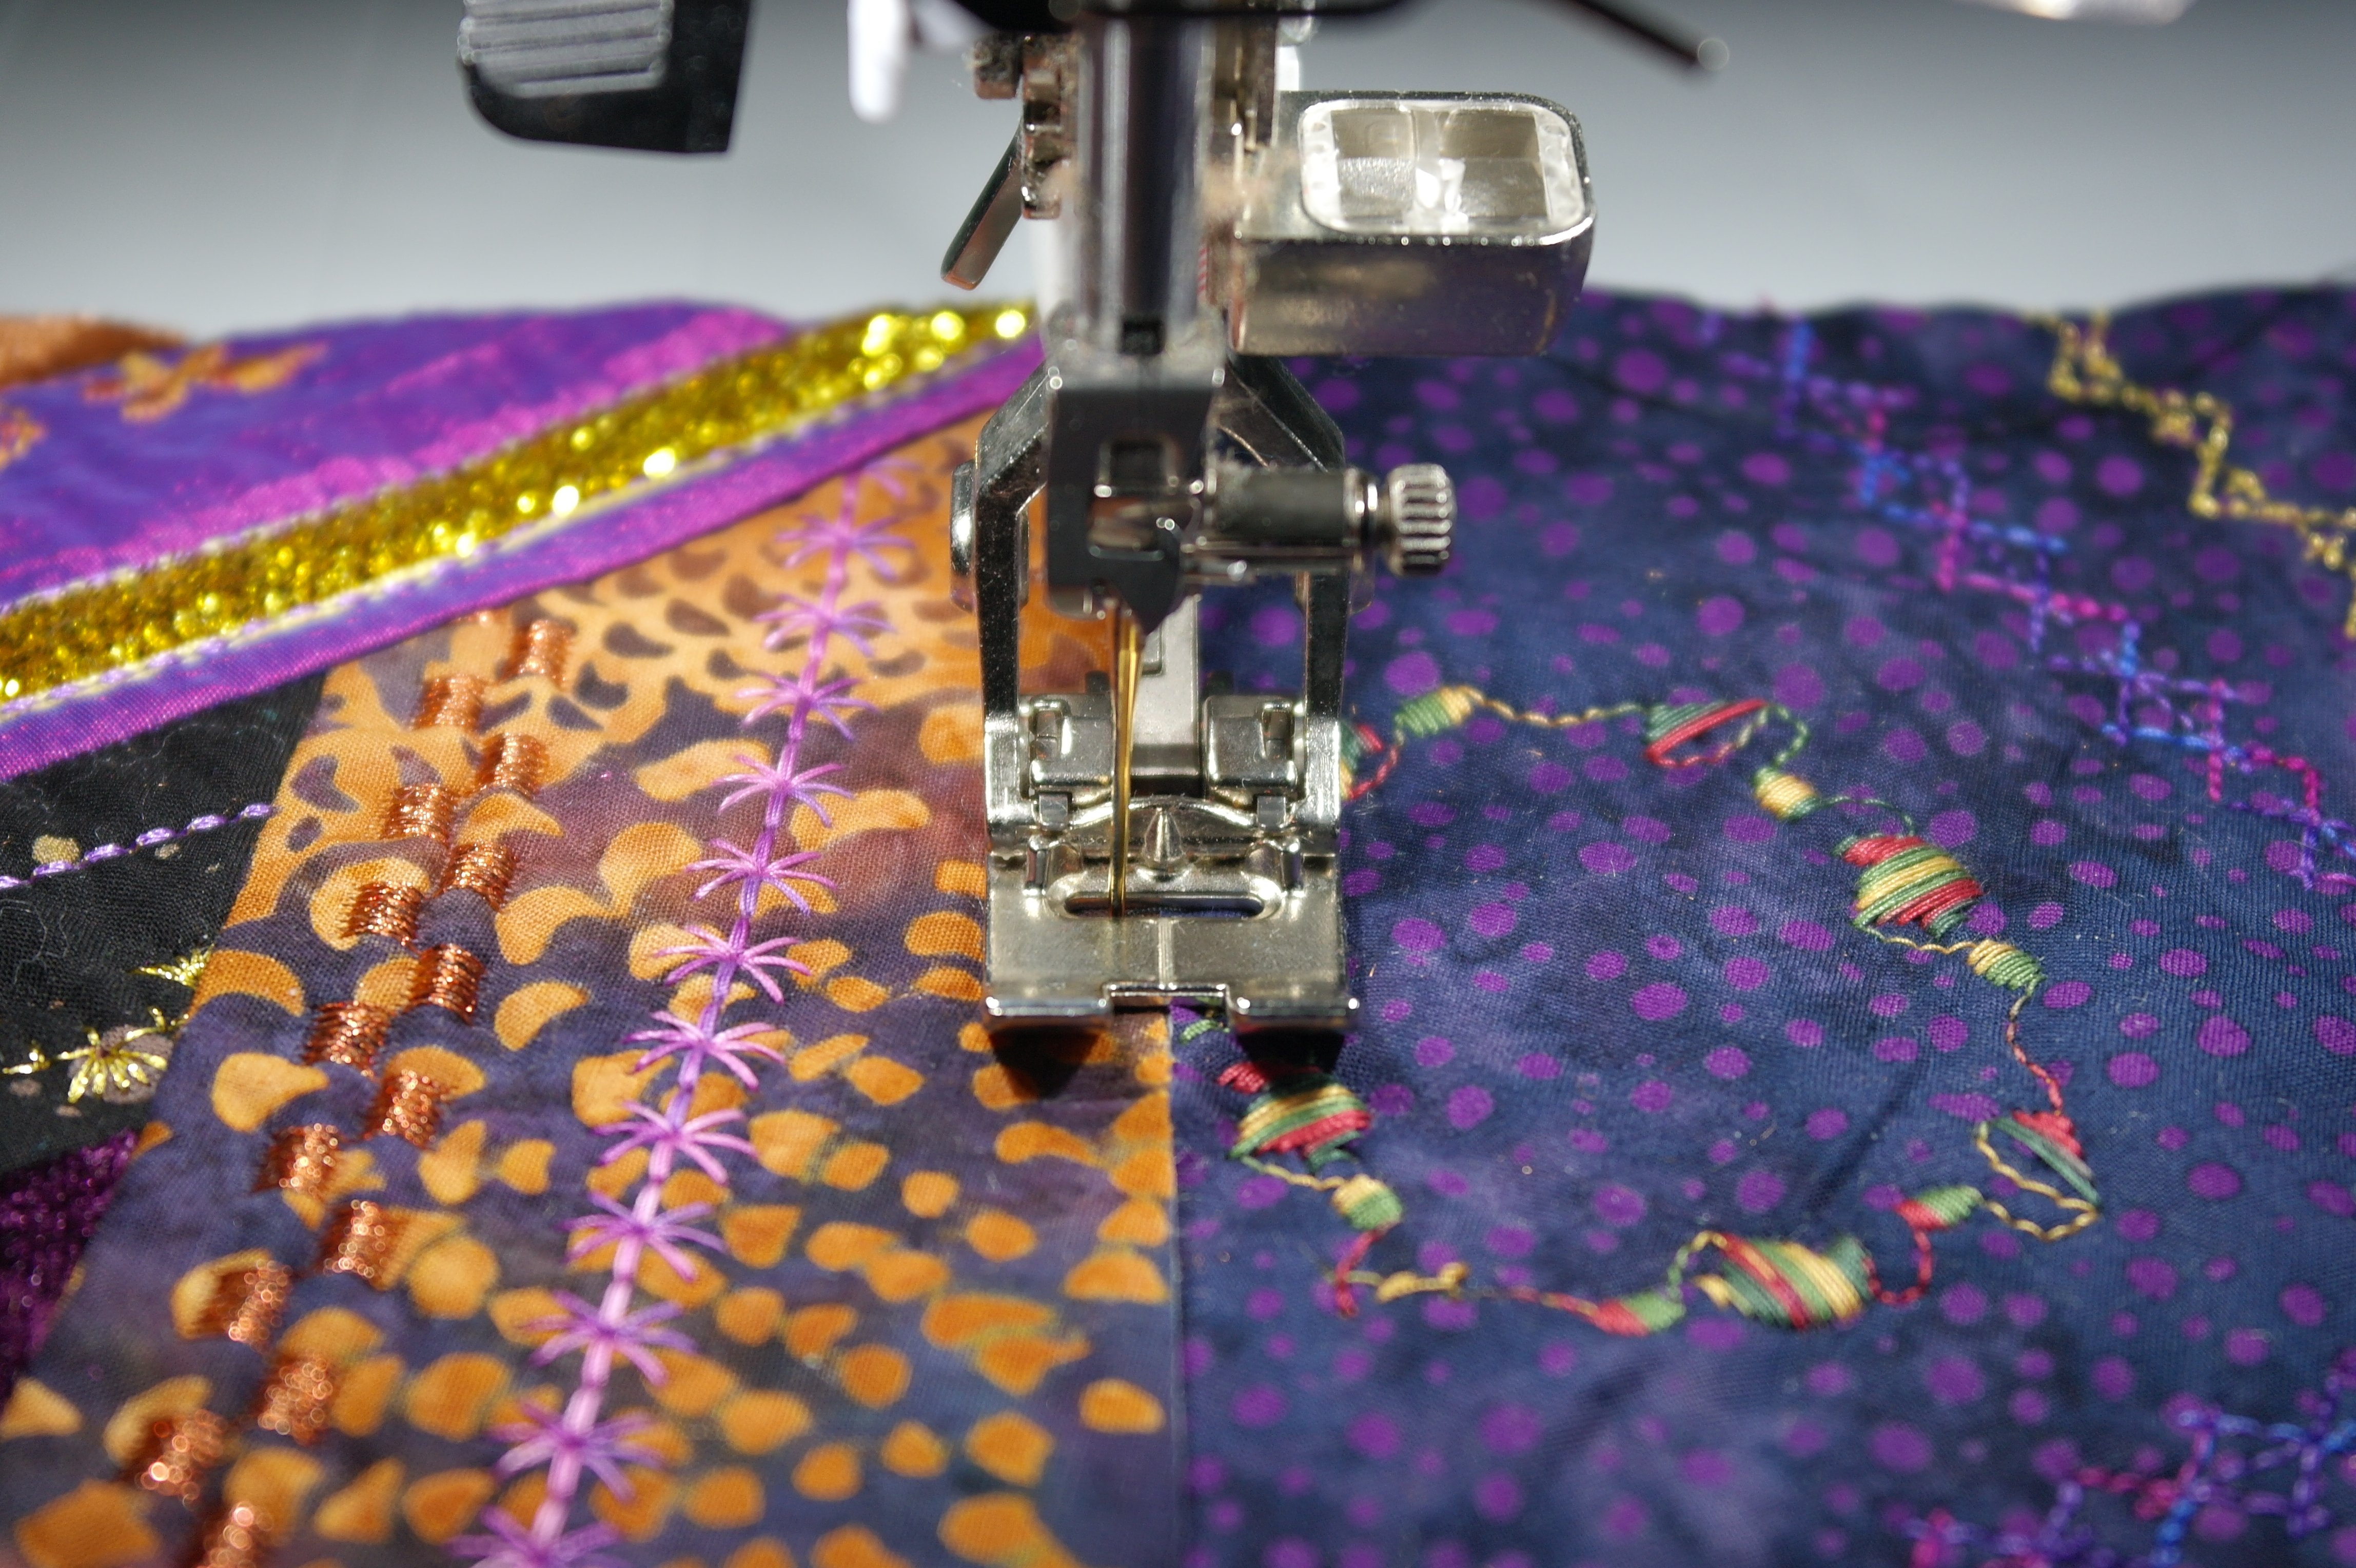
Center a strip between two blocks, right side up ans sew it down along the lenth of the strip, at each side. Use matching thread (black). Be sure they are sewn straight: to do so, use a Bohin Glue pen to secure the position of the strip. This is water soluble glue, which will not stick to your needle.
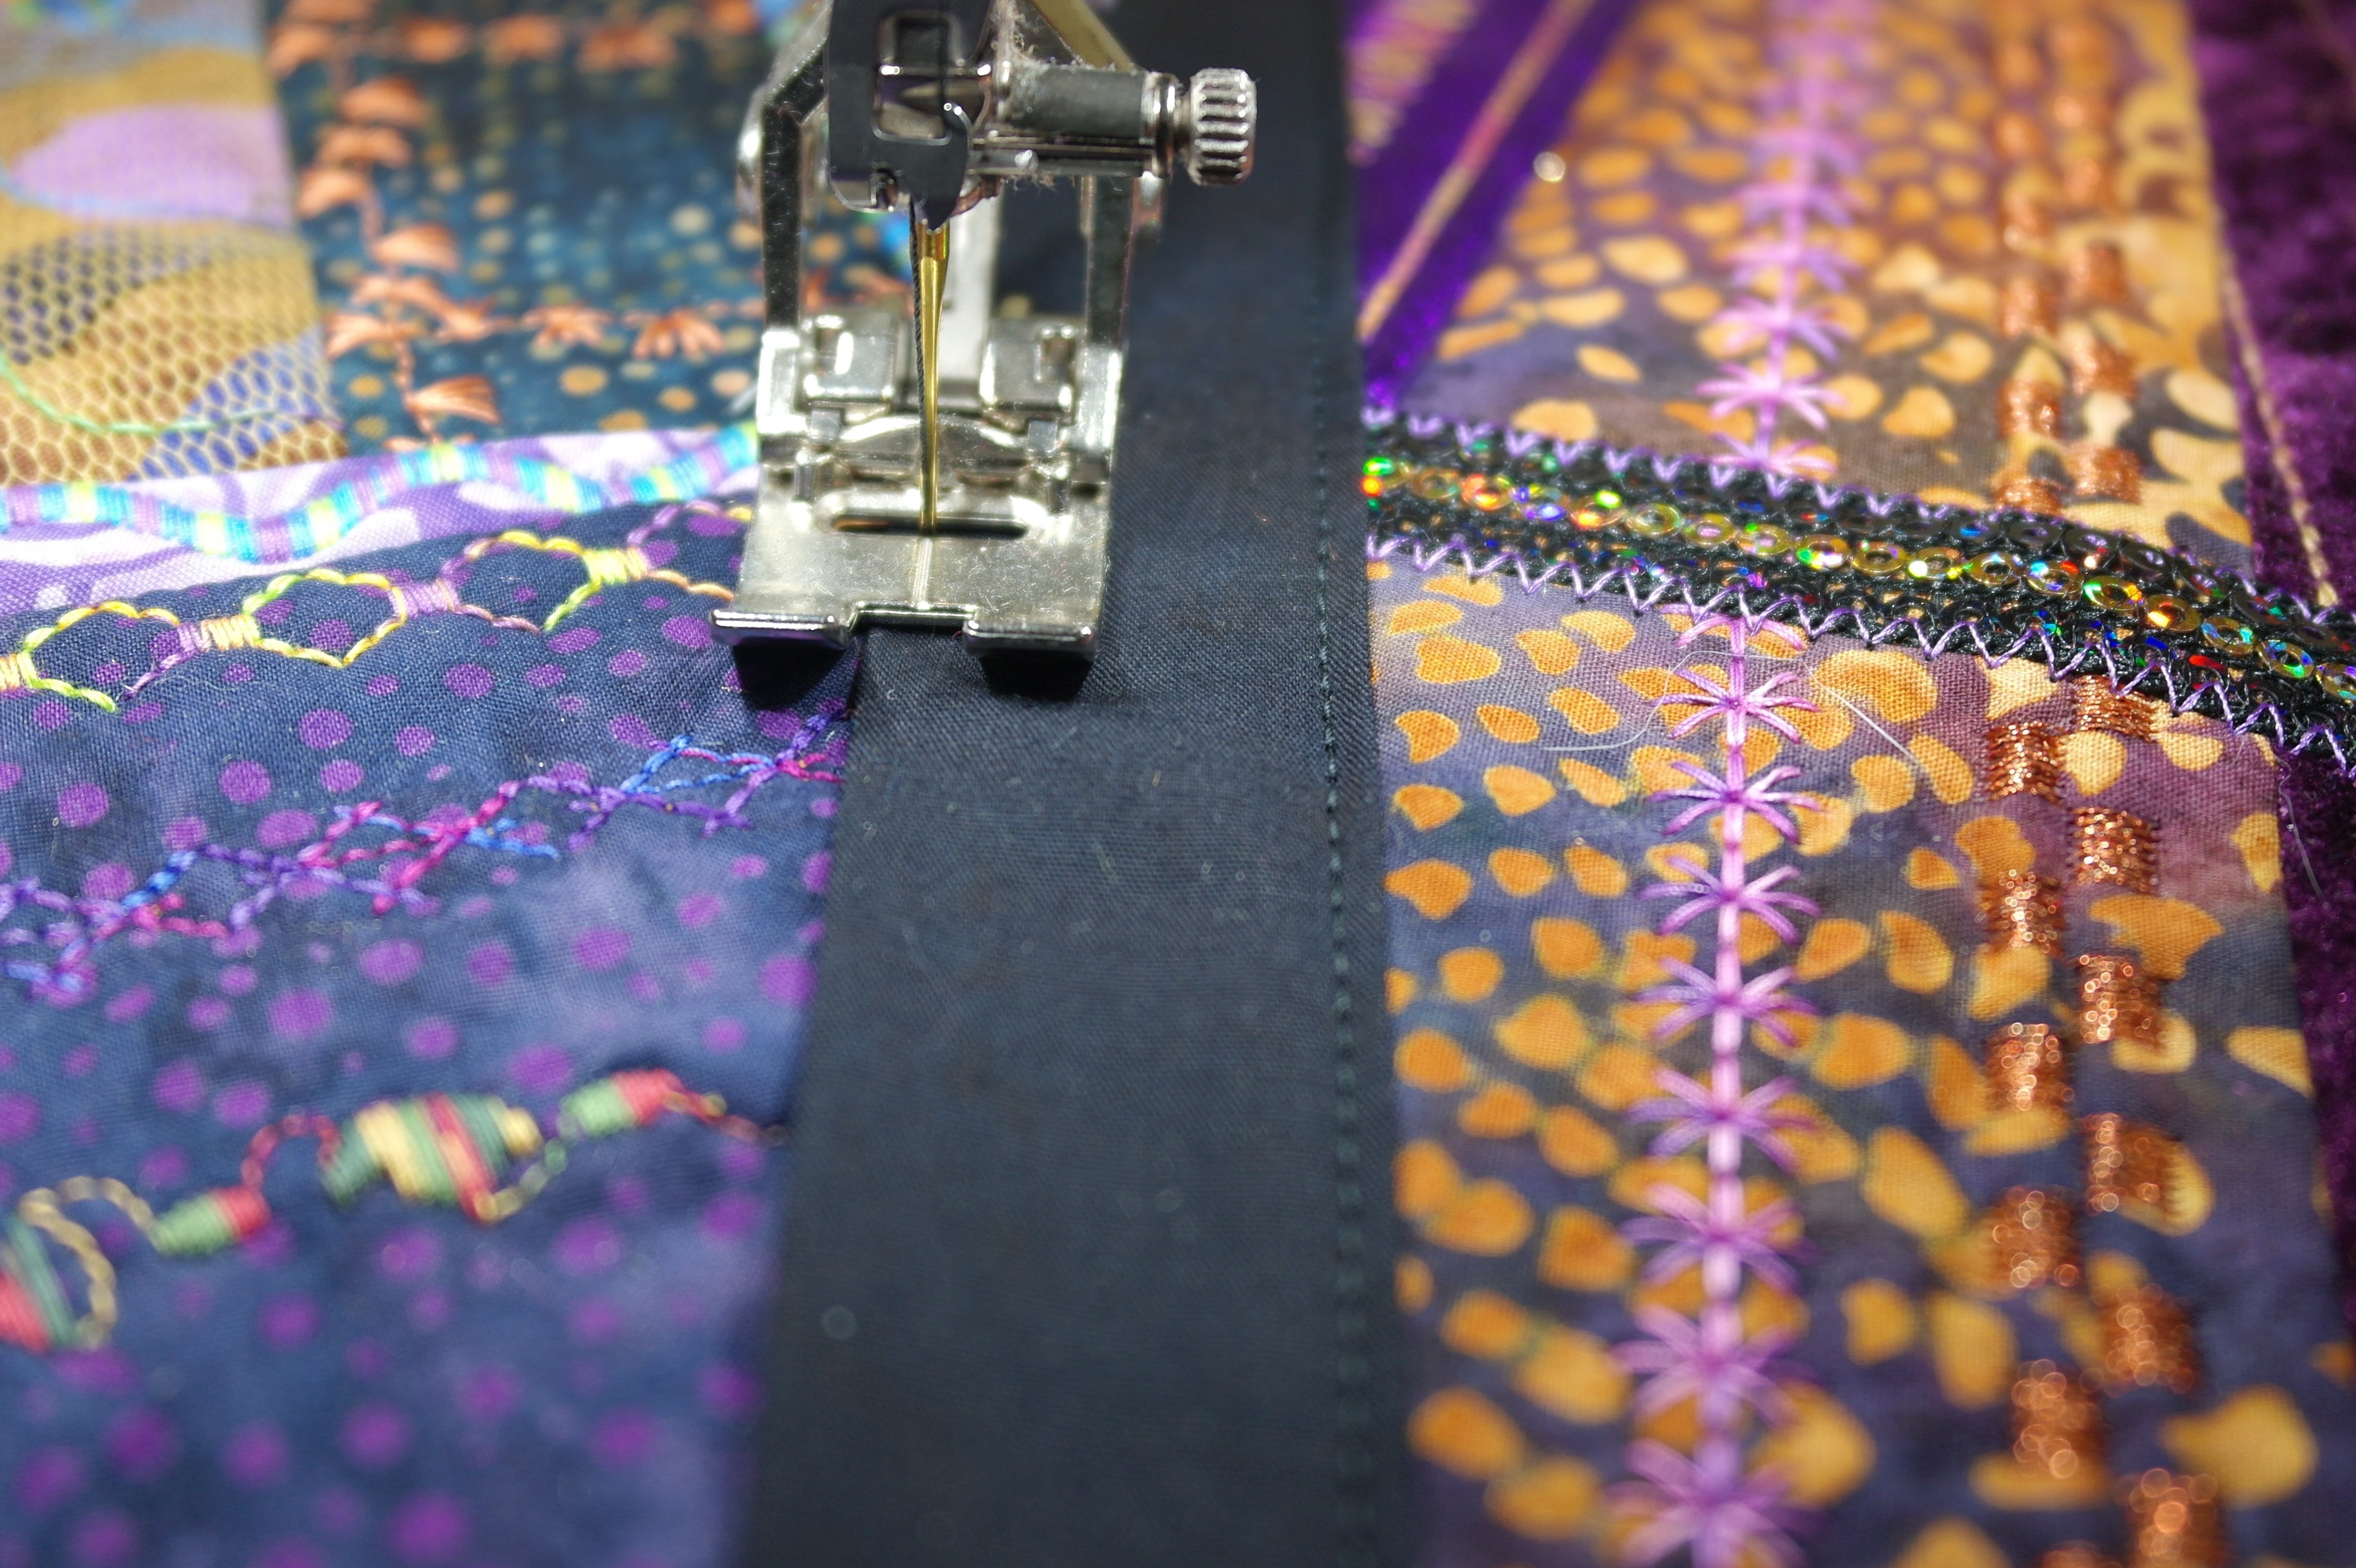
My stitches are close to the sides of the strip, but not too close: the decorative stitches I will make will cover them later.

Sew 3 strips/sashings onto 4 blocks, for each row. Cut the ends to the same size as the blocks. Make sure the space between the sashings is equal with all blocks!

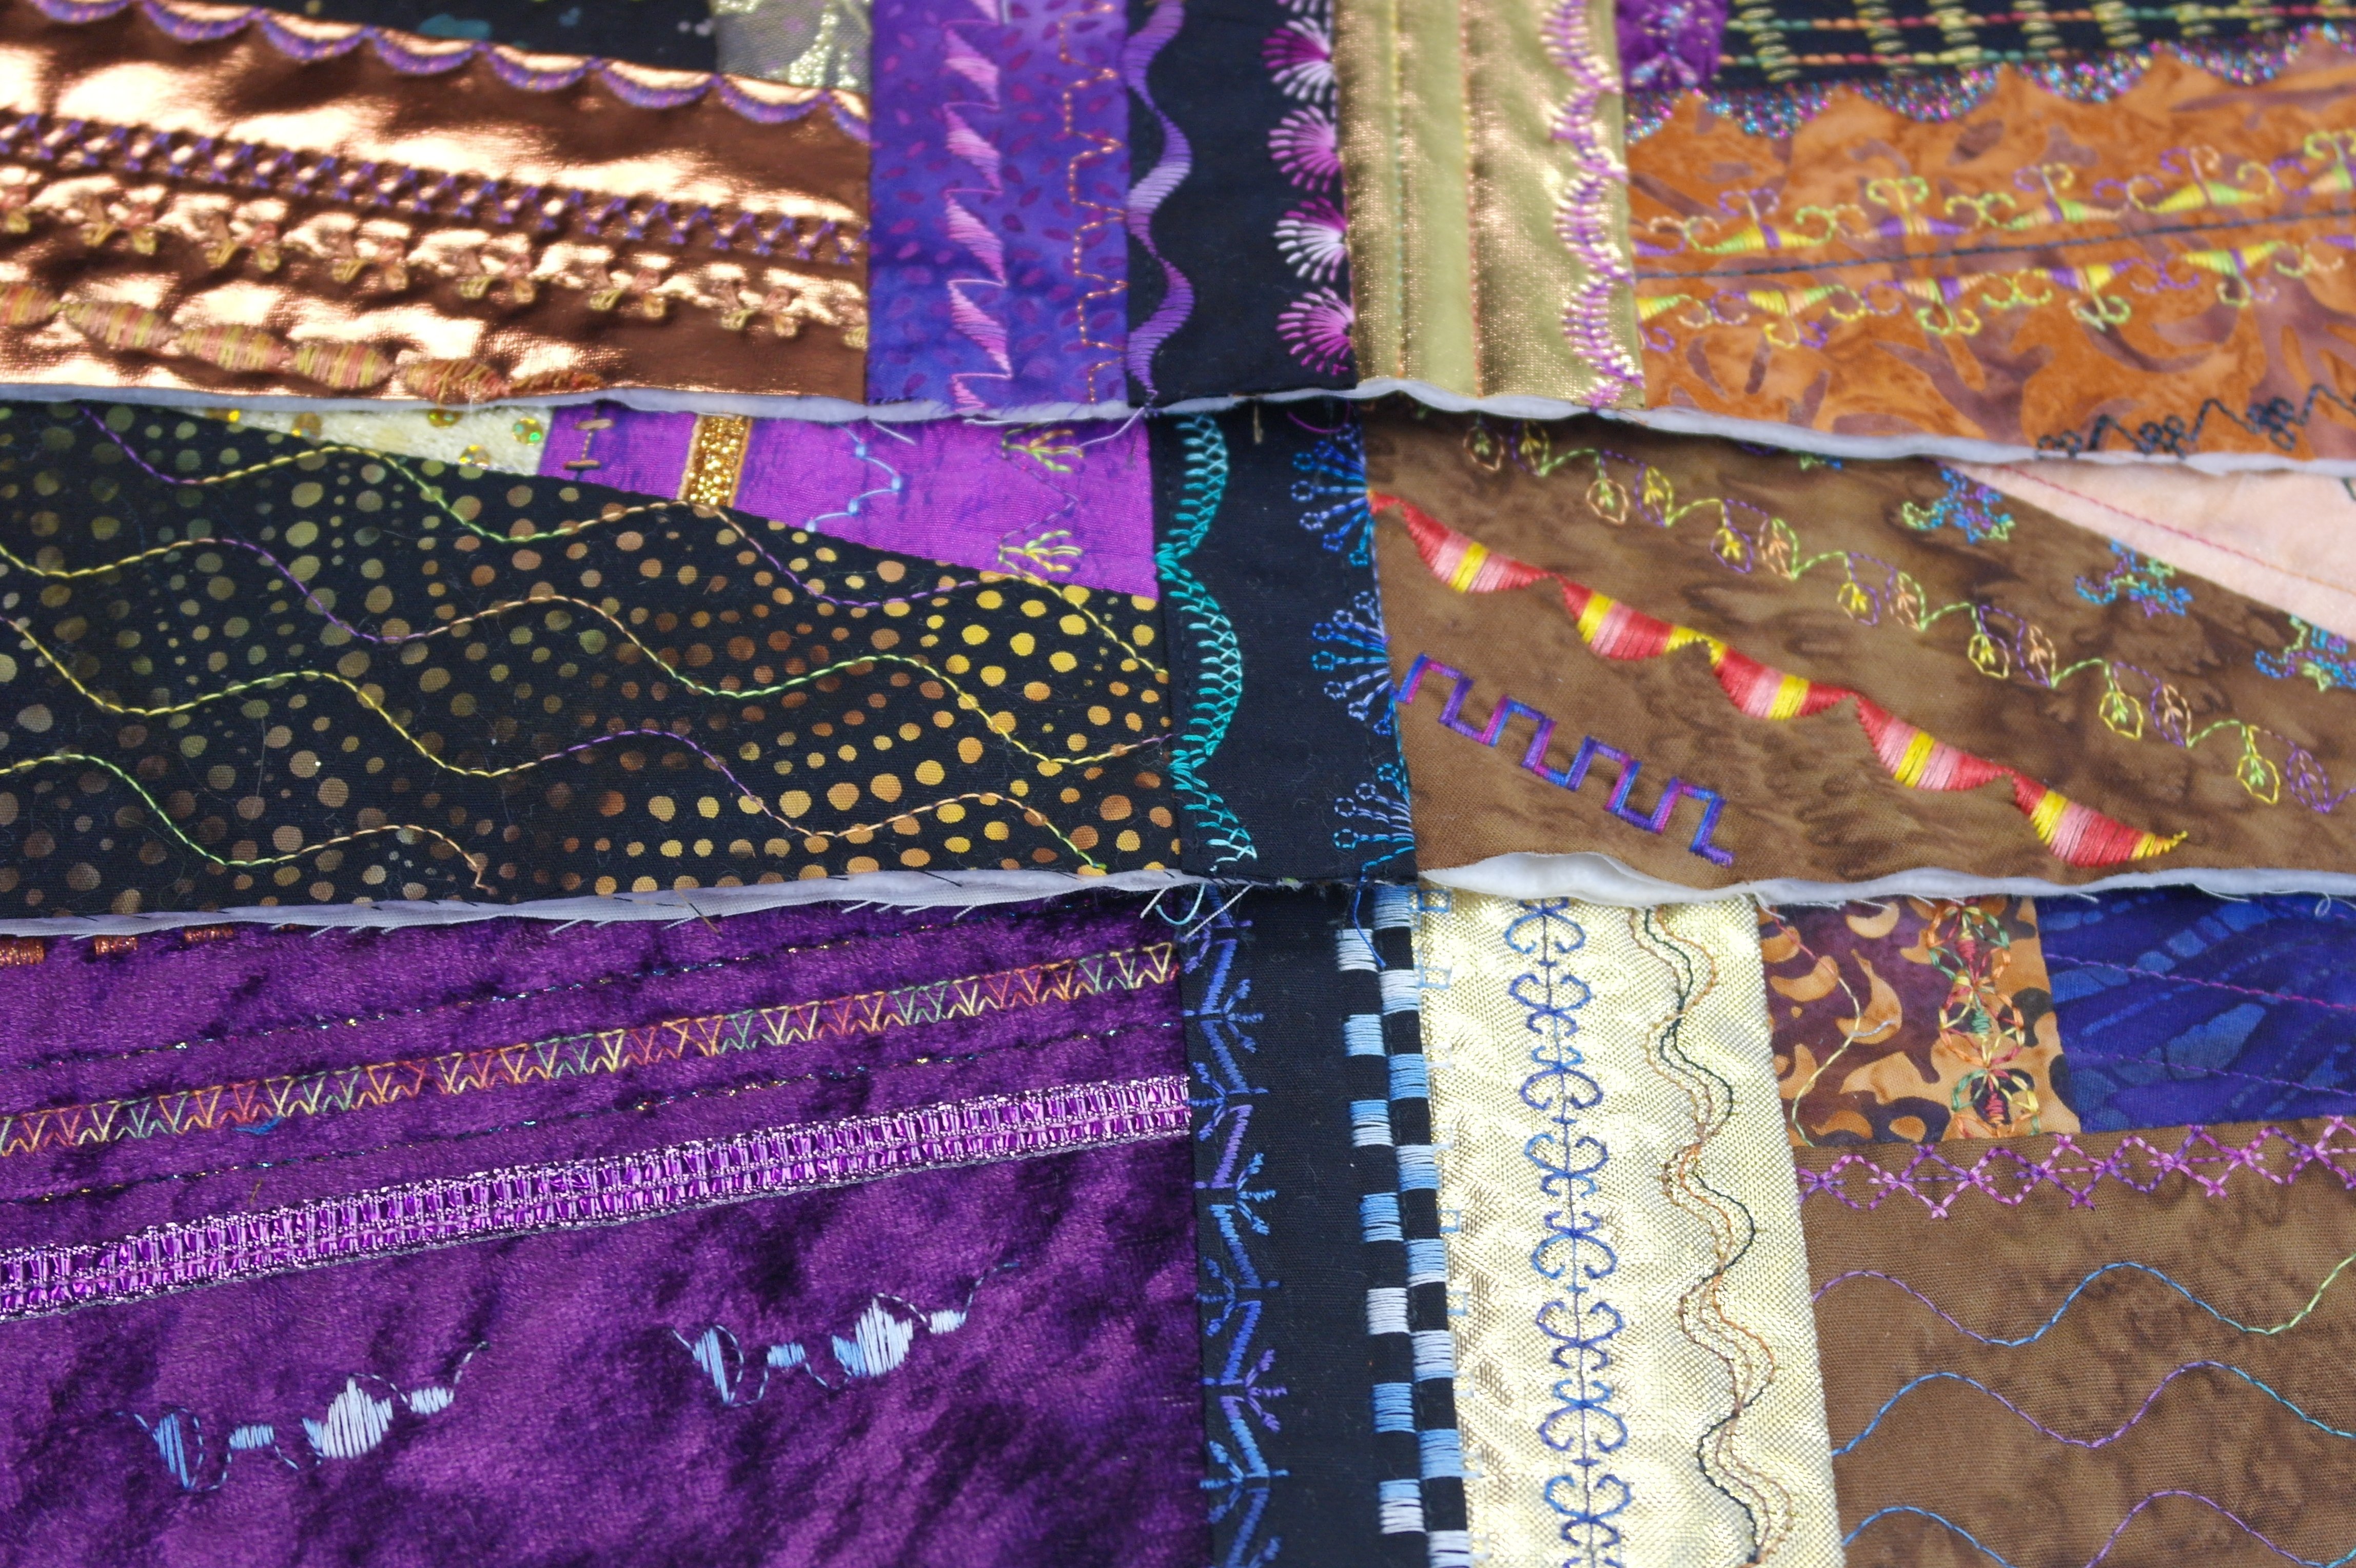
Choose different decorative stitches and varietaged threads, working on both sides of the sashings. I have used the presser foot #1D with Dual Feed with making these stitches because of the thickness of the material.
To check if the sashings are sewn on the right way, place the three rows on top of each other: they have to looks as one uninterrupted line. Mine are ok.

For the horizontal sashings: iron them the same way as the short sashings, sew them onto the blocks. Be sure the intersections meet. If you are using one long uncut strip, sew it onto the blocks, cut the strip along the side of the quilt after sewing, and use the left over part for the second sashing for the other blocks.
Place decorative stitches along the sides of the sashings, the same way as with the vertical sashings.
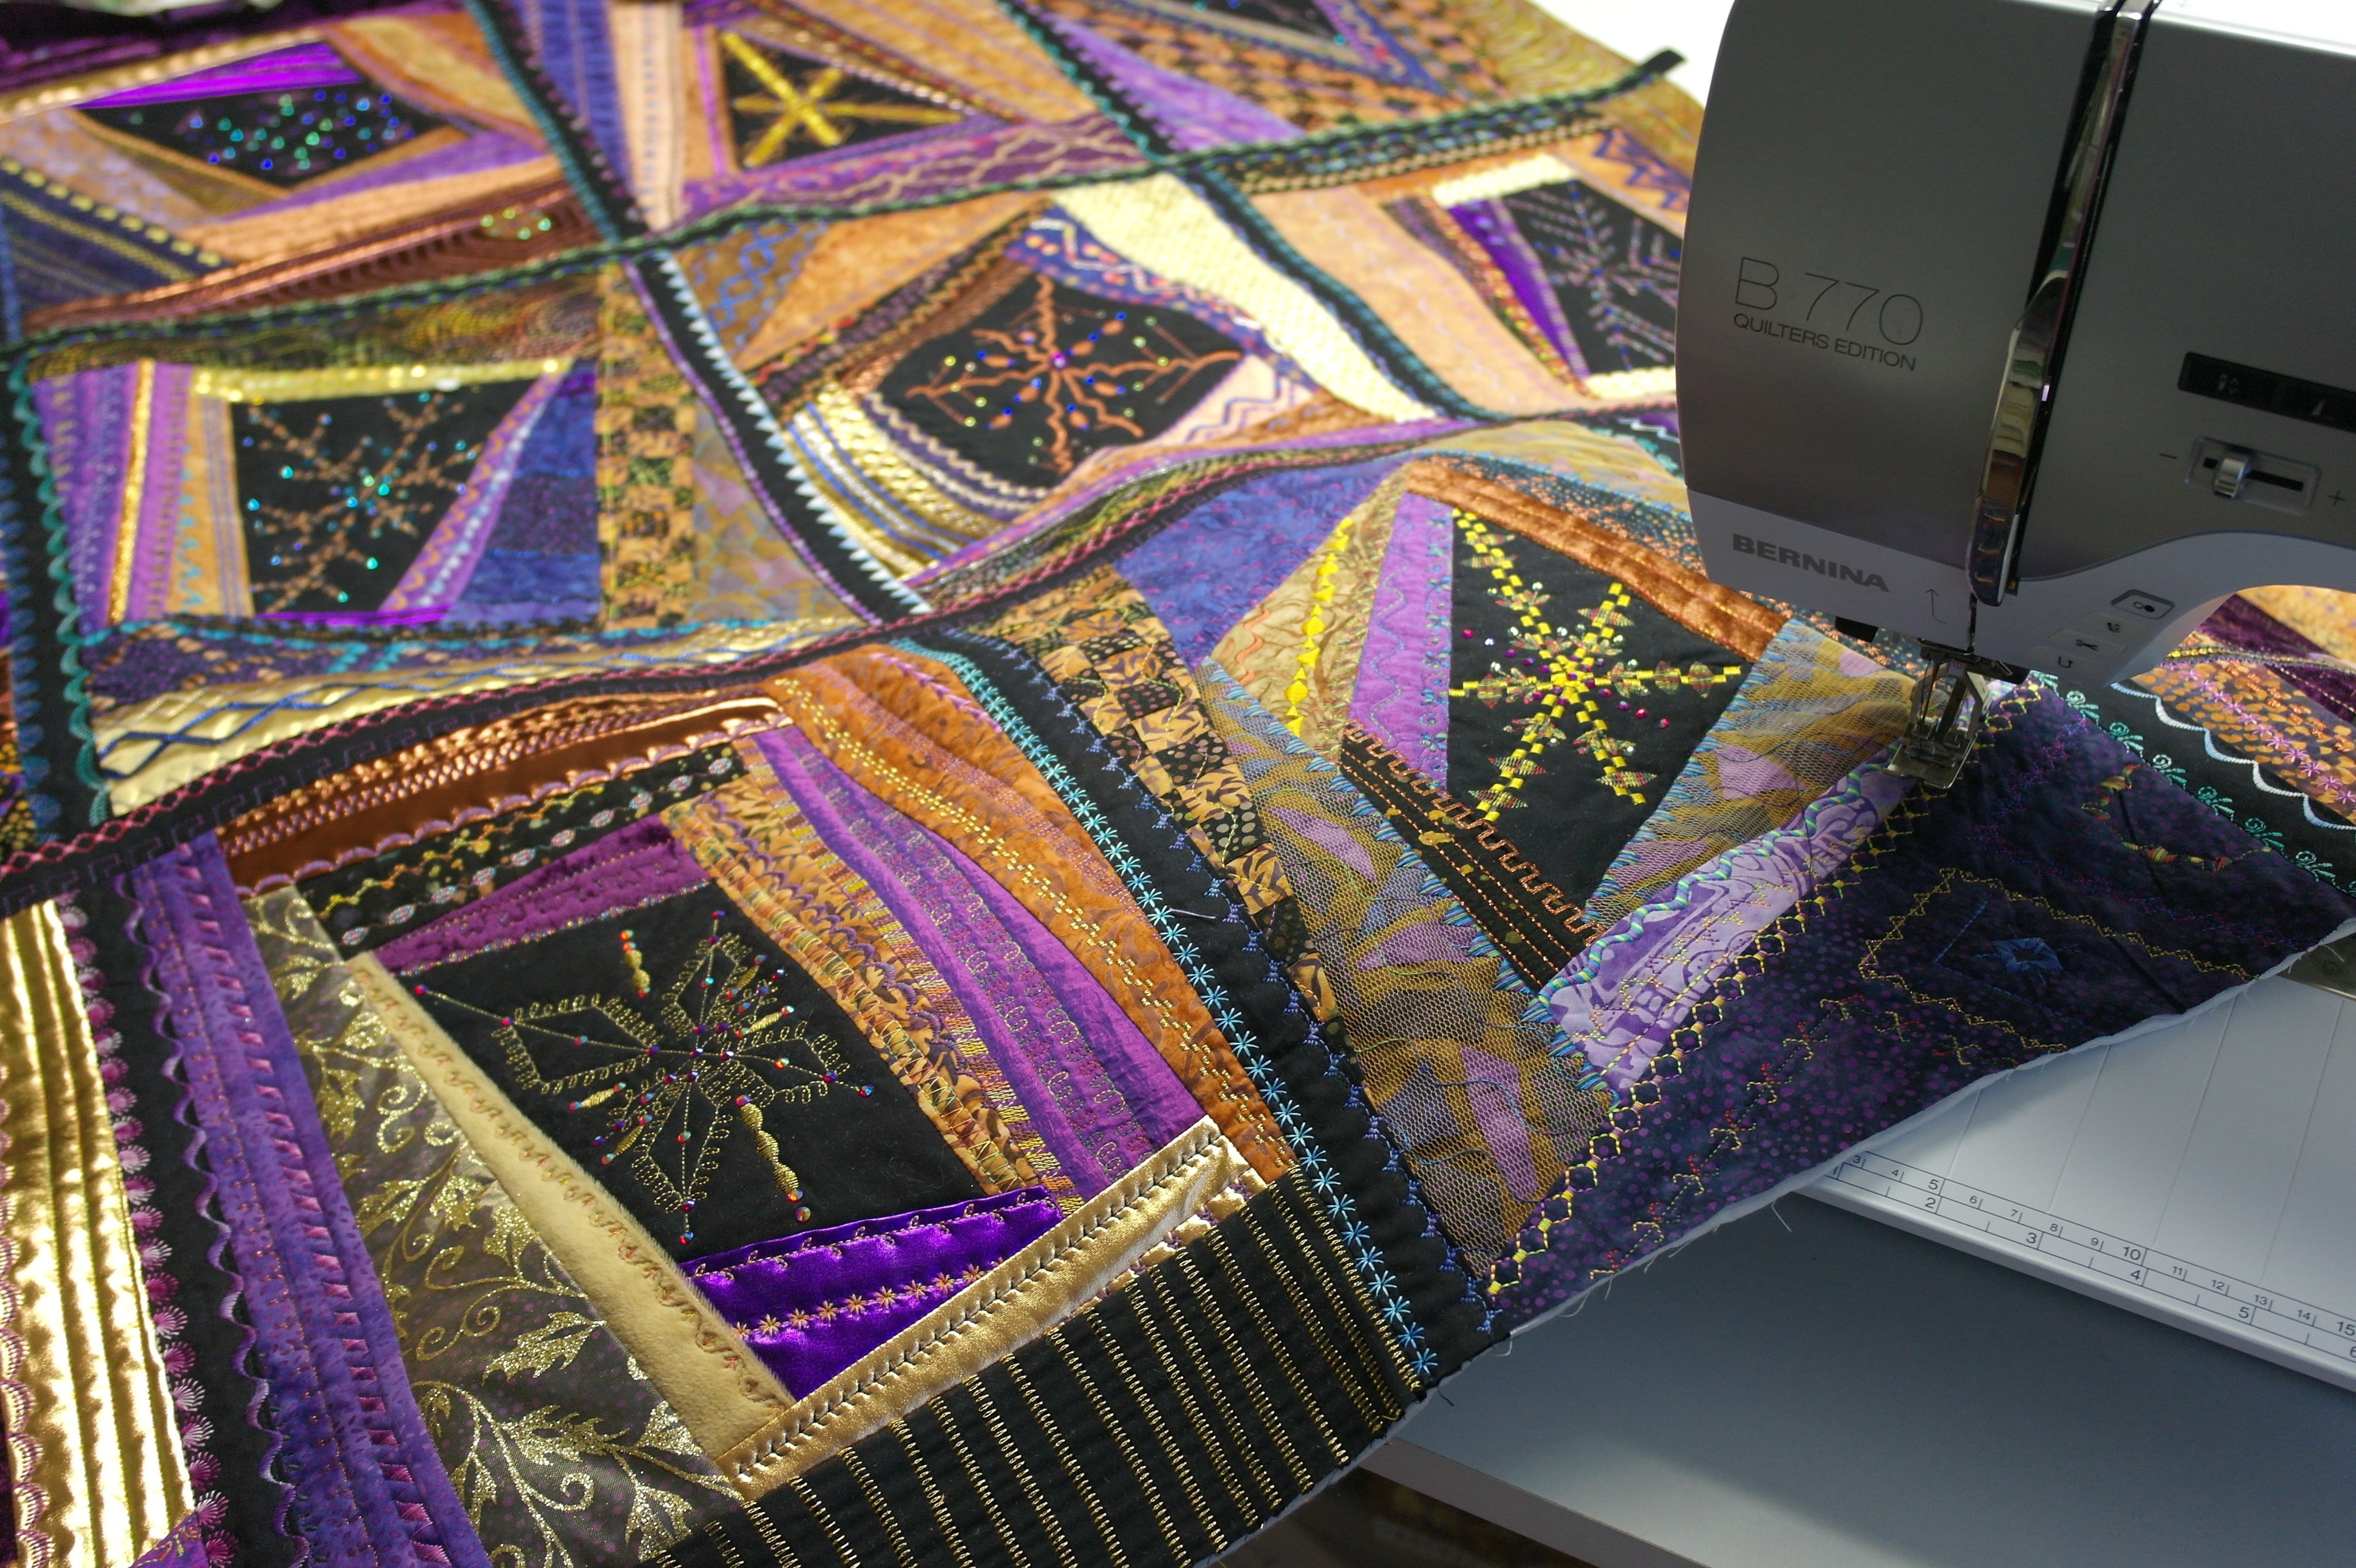
My quilt in progress: doesn’t it looks great already?
………………………………………………………………………………………………………………………..
For finishing the quilt you can choose to place an extra backing, covering the back of the blocks. Some quilters were asking me if the quilt won’t be too heavy after adding another fabric, but that is no problem. If you don’t want to see all the start-and-finish ends of threads/decorative stitches, this is the best way to cover them.
Because the quilt will be too wide for the regular width of quilt fabrics (110cm), you can join pieces of fabric, fi. 9 fat quarters, to make one large piece of fabric as backing, or use an extra wide fabric. Pin the fabric to the back and cut it the same size as the quilt.
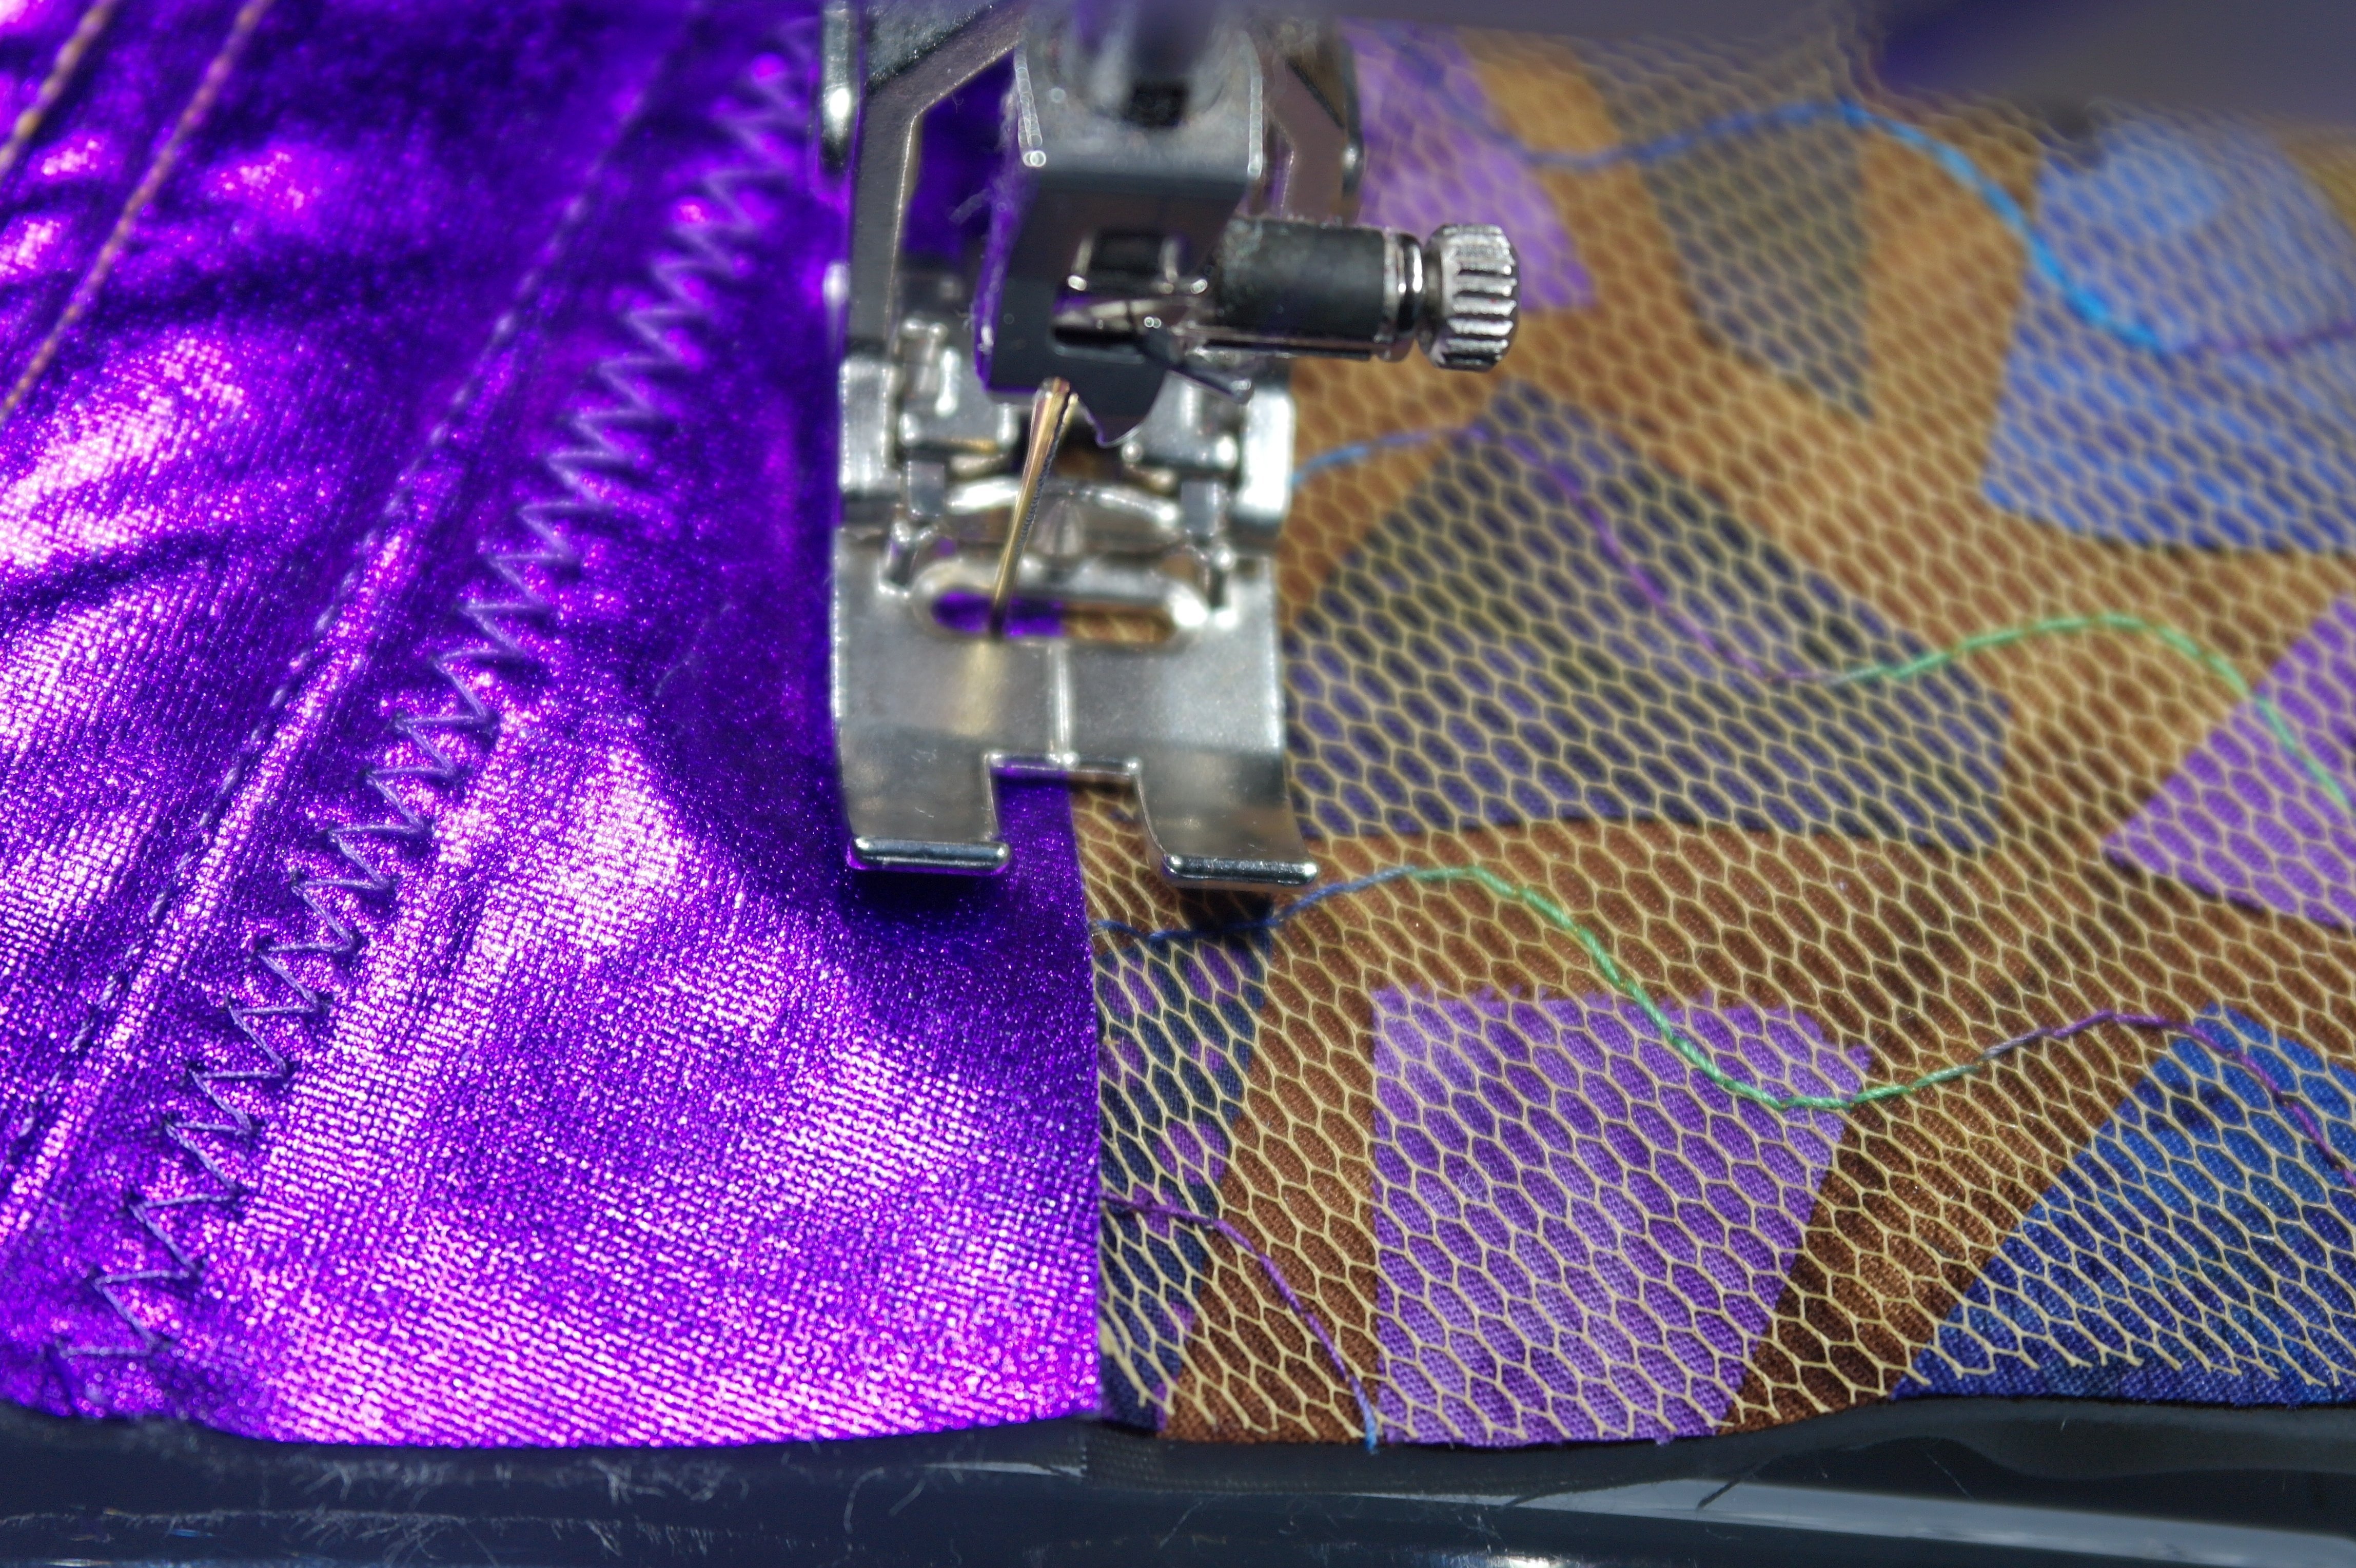
For binding: fold the long strip lengthwise, and sew them onto the quilt in your own way. Some quilters like to sew a piece of binding onto the front, fold it to the back and sew it in place by hand. I like to sew my (double) binding onto the back, fold it to the front and sew it in place by machine.
It does’nt matter which way you choose, as long as the binding shows aprox. 1 1/2 cm at the front (or smaller if that is your choice).
I have used variegated thread when securing/stitching the binding at the front. No decorative stitches, because the binding is extra thick.

Be sure the corners are neat: I have sewn these by hand, becore securing the length of the binding.
Now you can add more Hotfix stones if you want to, for special effect.
Sew a tunnel at the back/upper side of the quilt for hanging the quilt to a wall.
My Crazy Crystals Mystery Project 2018 is ready: many techniques, effects and stitches are used, until the last piece/sashing is done. That makes this quilt really crazy!
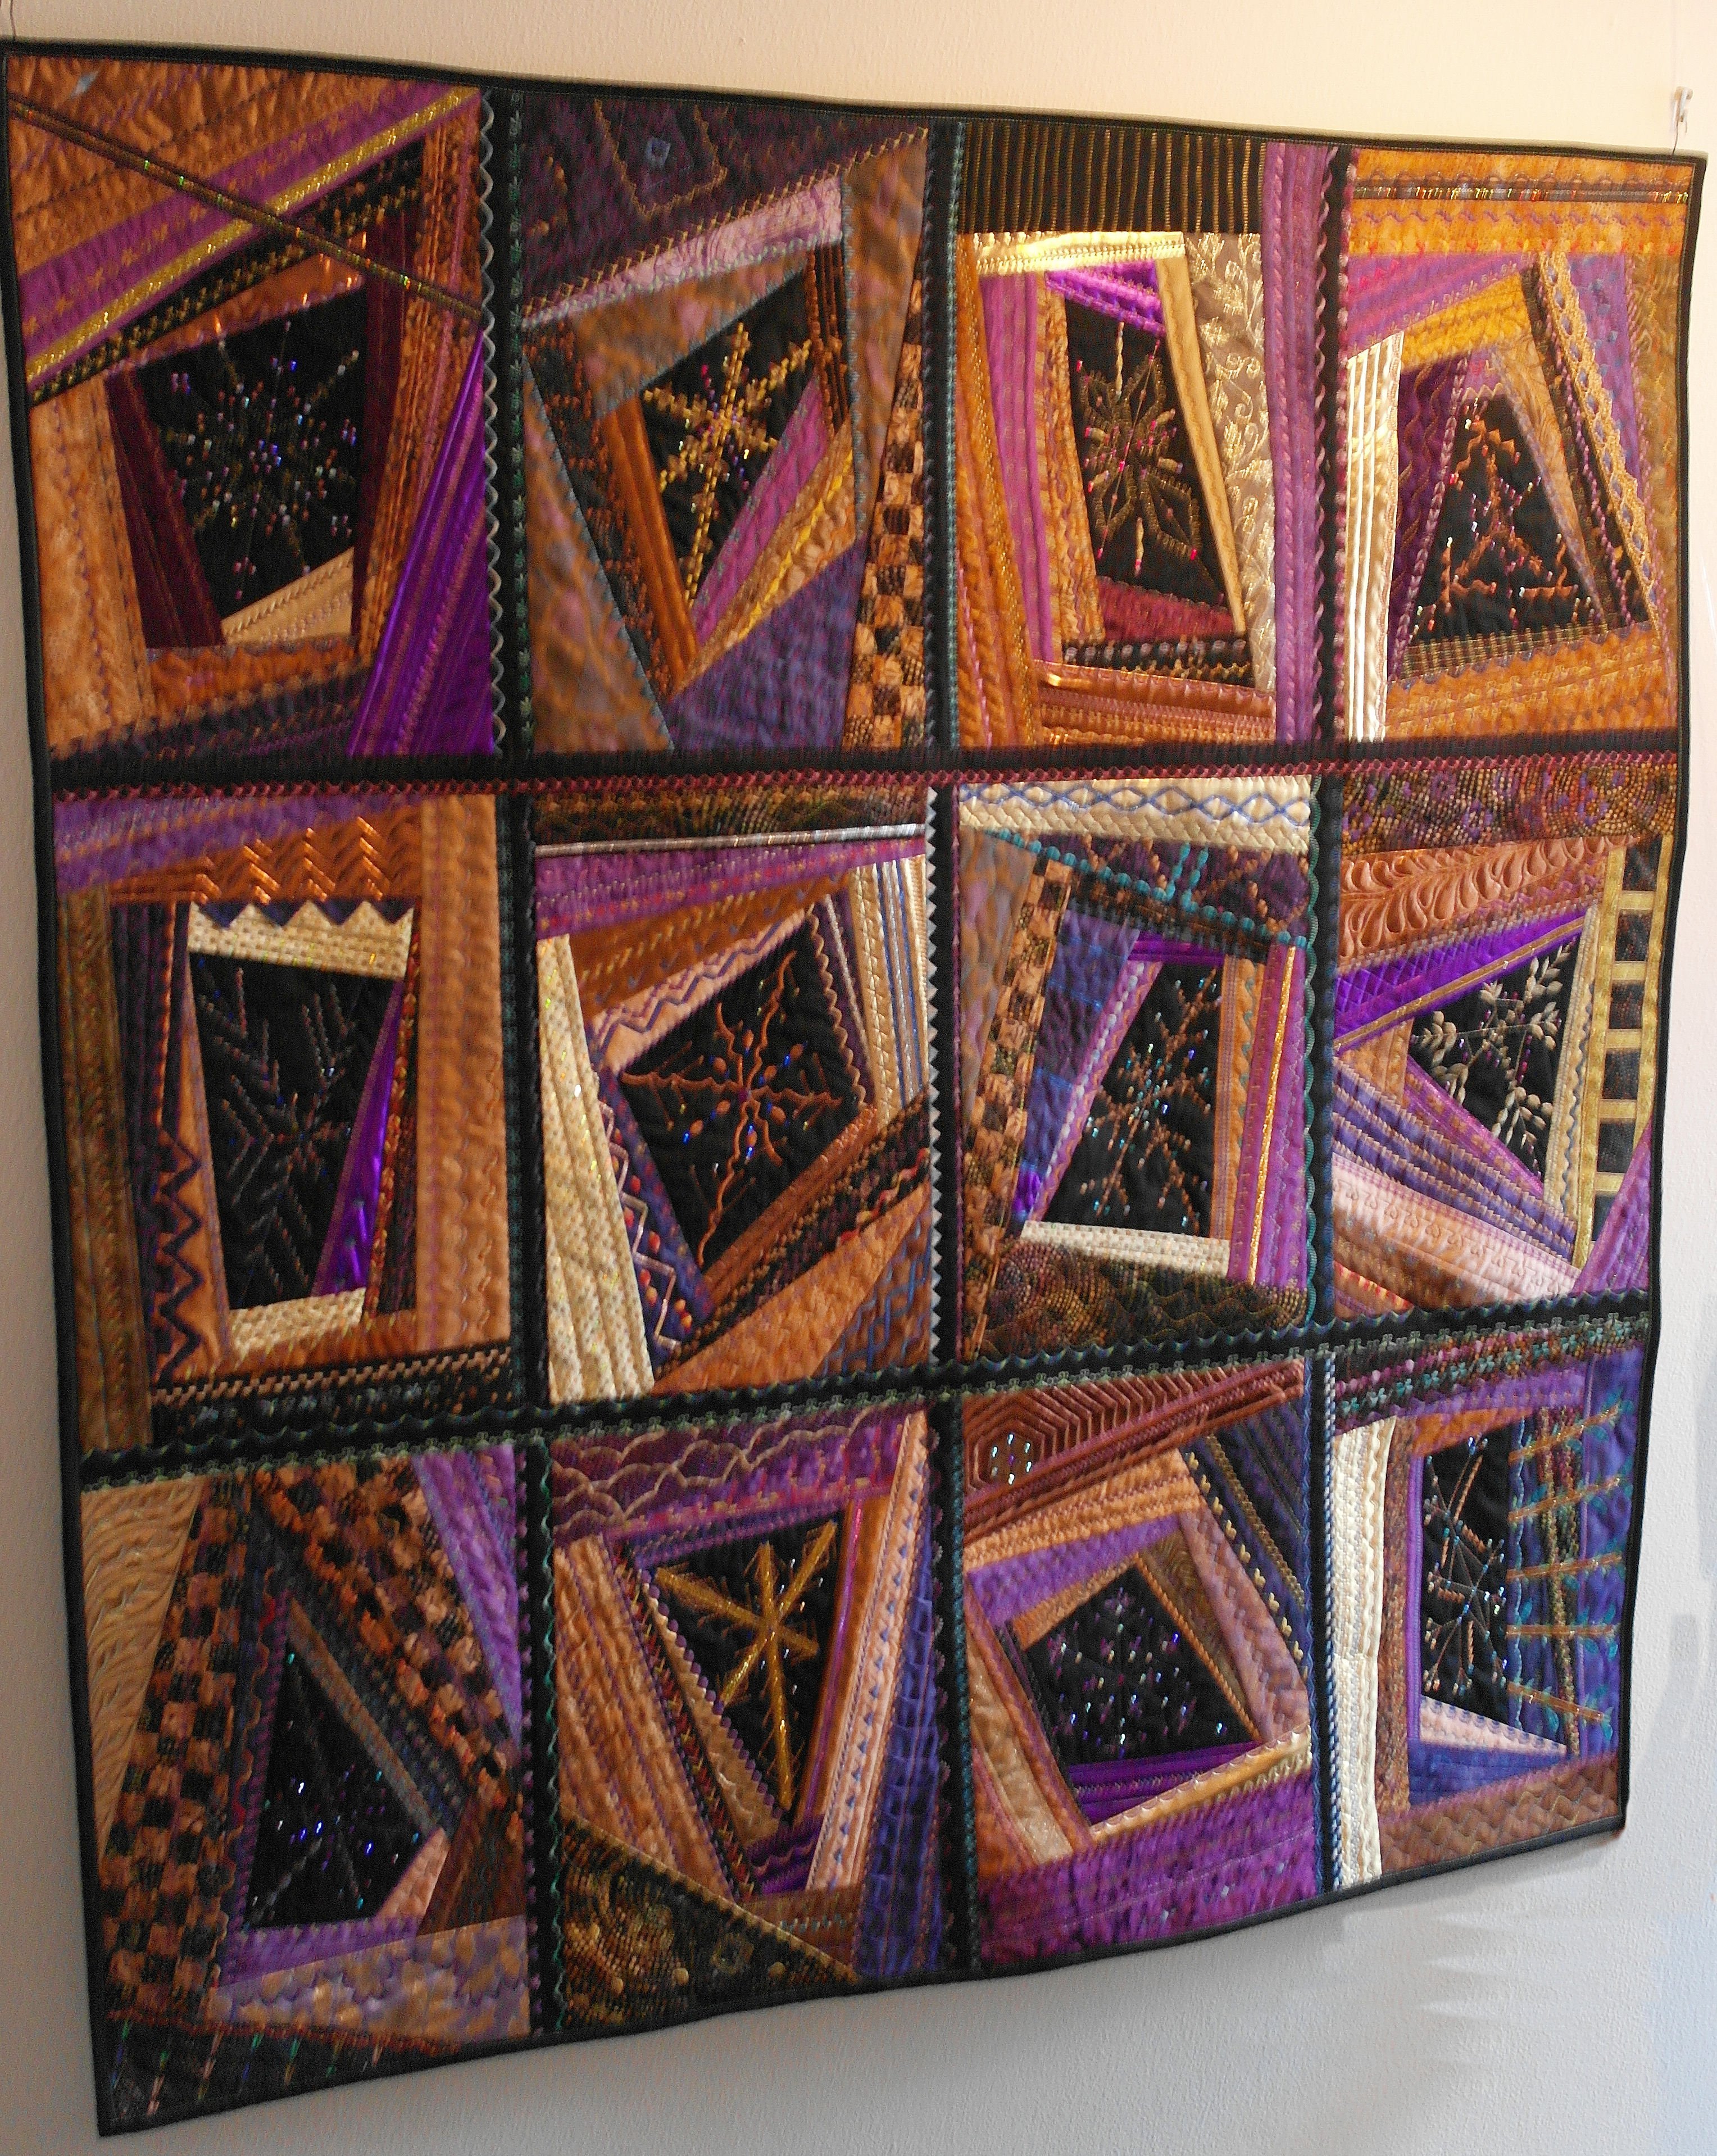
I have hung the quilt on a wall in our hall: the hall is very narrow, so I couldn’t make a picture standing in front of it. I climbed the stairs, and shot the picture, a bit to the side. This was the only way you to show the entire quilt at once. Light of the sun and lamps makes the Hotfix stones spartke!
I hope you have enjoyded making this Crazy quilt. Thank you for your enthusiasm. Please share your pictures in the Community of this Blog.
Until next time!
Sylvia Kaptein
Sylvia’s Art Quilts Studio


I hope you’re still answering questions on this post. I can’t seem to find any articles about either antique or new crazy quilts that talk about the backing. You came closest in mentioning adding the backing fabric. How is it attached? How much “quilting” would you do to attach it and make sure it doesn’t interfere with your fancy stitching? Thanks! Barb
Dear Barbara,
I am not a quilter myself, but I have followed some Quilt-Alongs on the BERNINA Blog and saw that most like to use spray adhesive to attach the different layers together, and some also do basting by hand or with the machine.
In regards to quilting, with these blocks I would use the stitch in the ditch technique – stitching just in between 2 patchwork pieces so the stitch is almost invisible. Or, if that is already enough quilting for you, stitch in the ditch of the black sashings. That will probably be the easiest place to stich in the ditch, since there are only horizontal and vertical lines.
Hope this helps!
Ramona from BERNINA International
Thanks Moni Lak, glad you enjoyed it. It is fun to make such crazy quilts! And the BERNINA Blog posts are still all available, so you can check everything whenever you want.
Sylvia
The final effects are phenomenal. A great collection of information! I like such guides when everything is well described. Congratulations on a great job.
Regards, CTNBEE