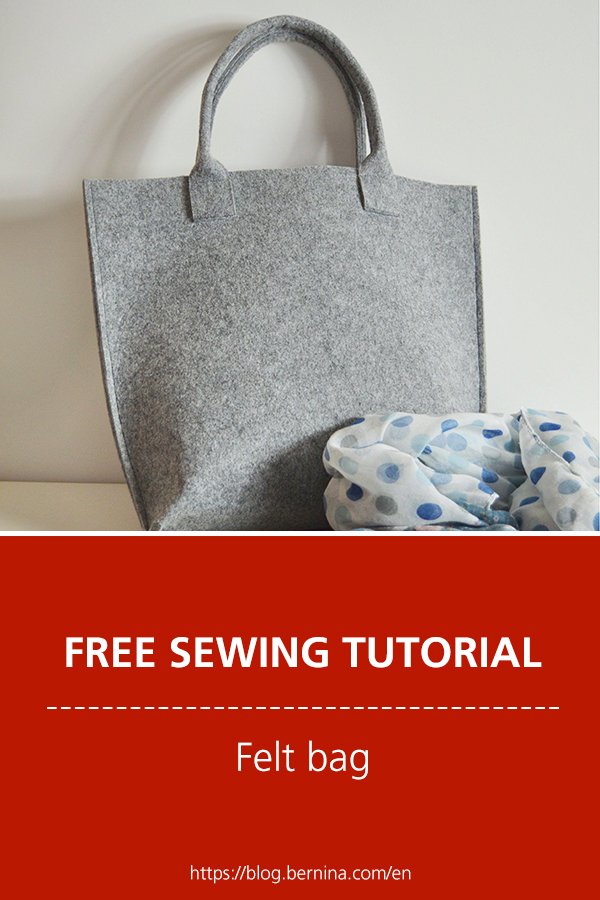
 BERNINA Corporate Blog -
Felt bags and accessories are widespread and popular. They can be found in various models and designs.
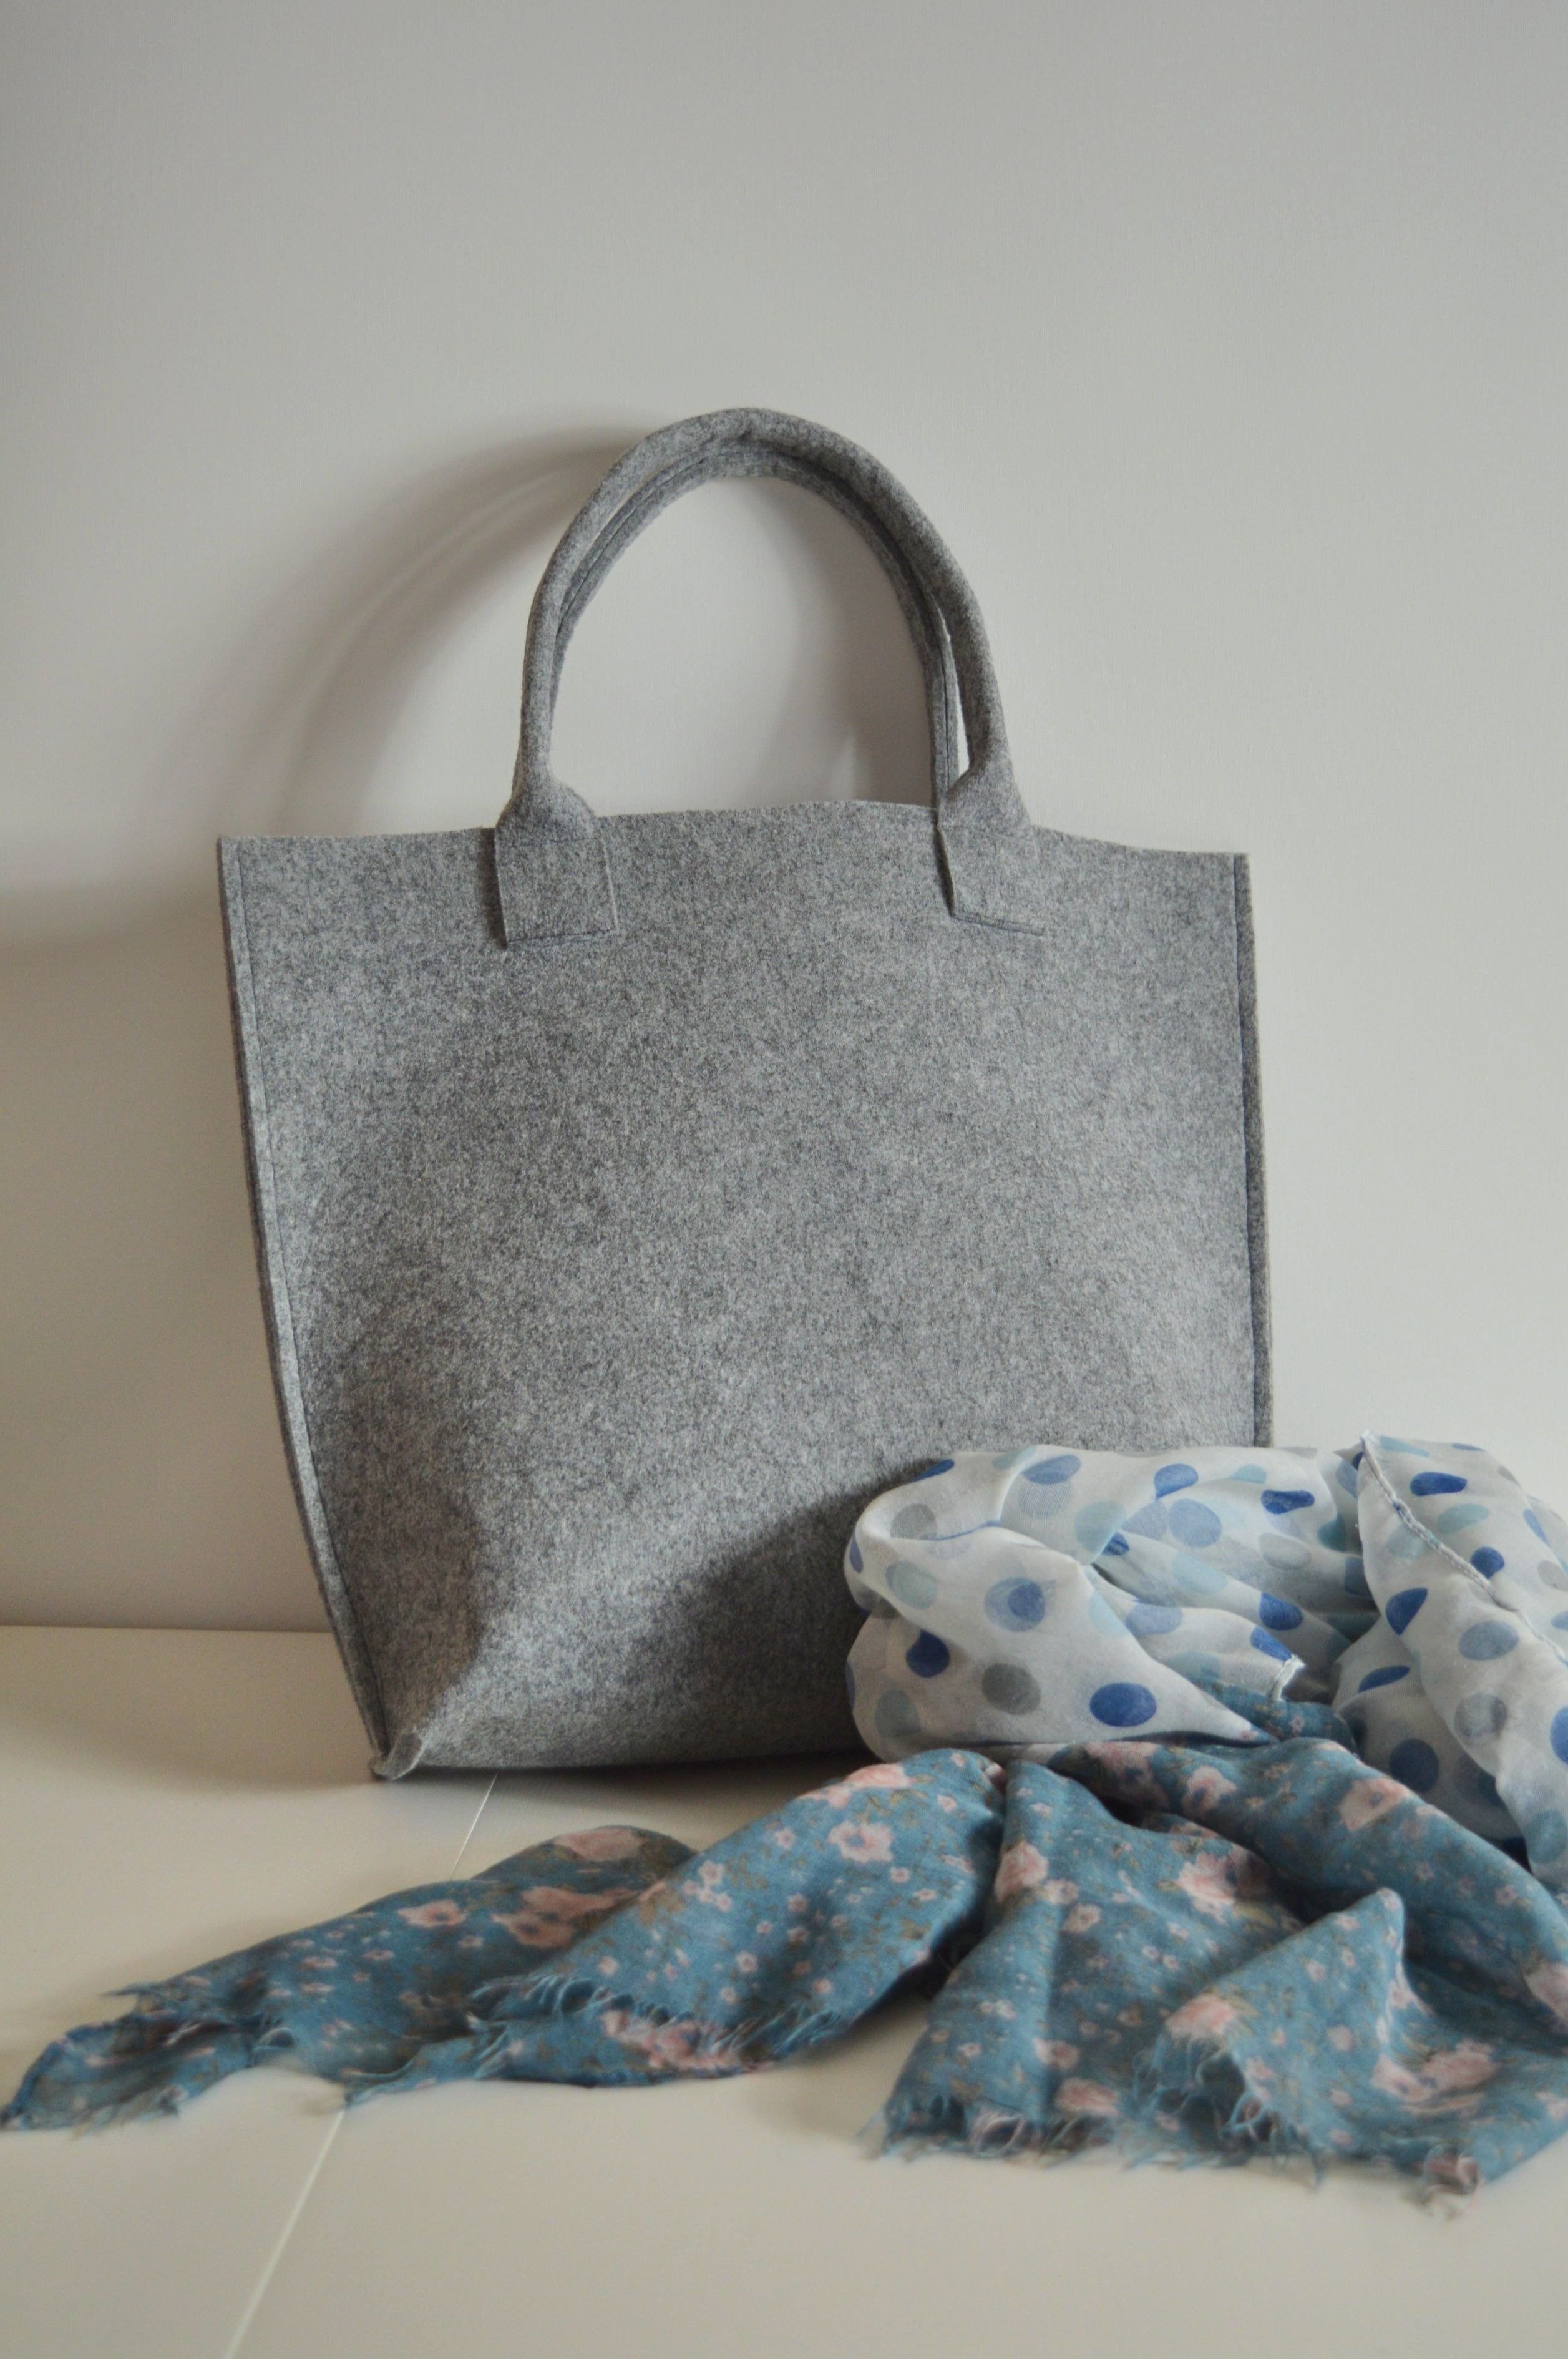
I had an idea about a cool felt bag, simple design, practical and for different occasions.
If you like the bag in the picture below, you can make it too.
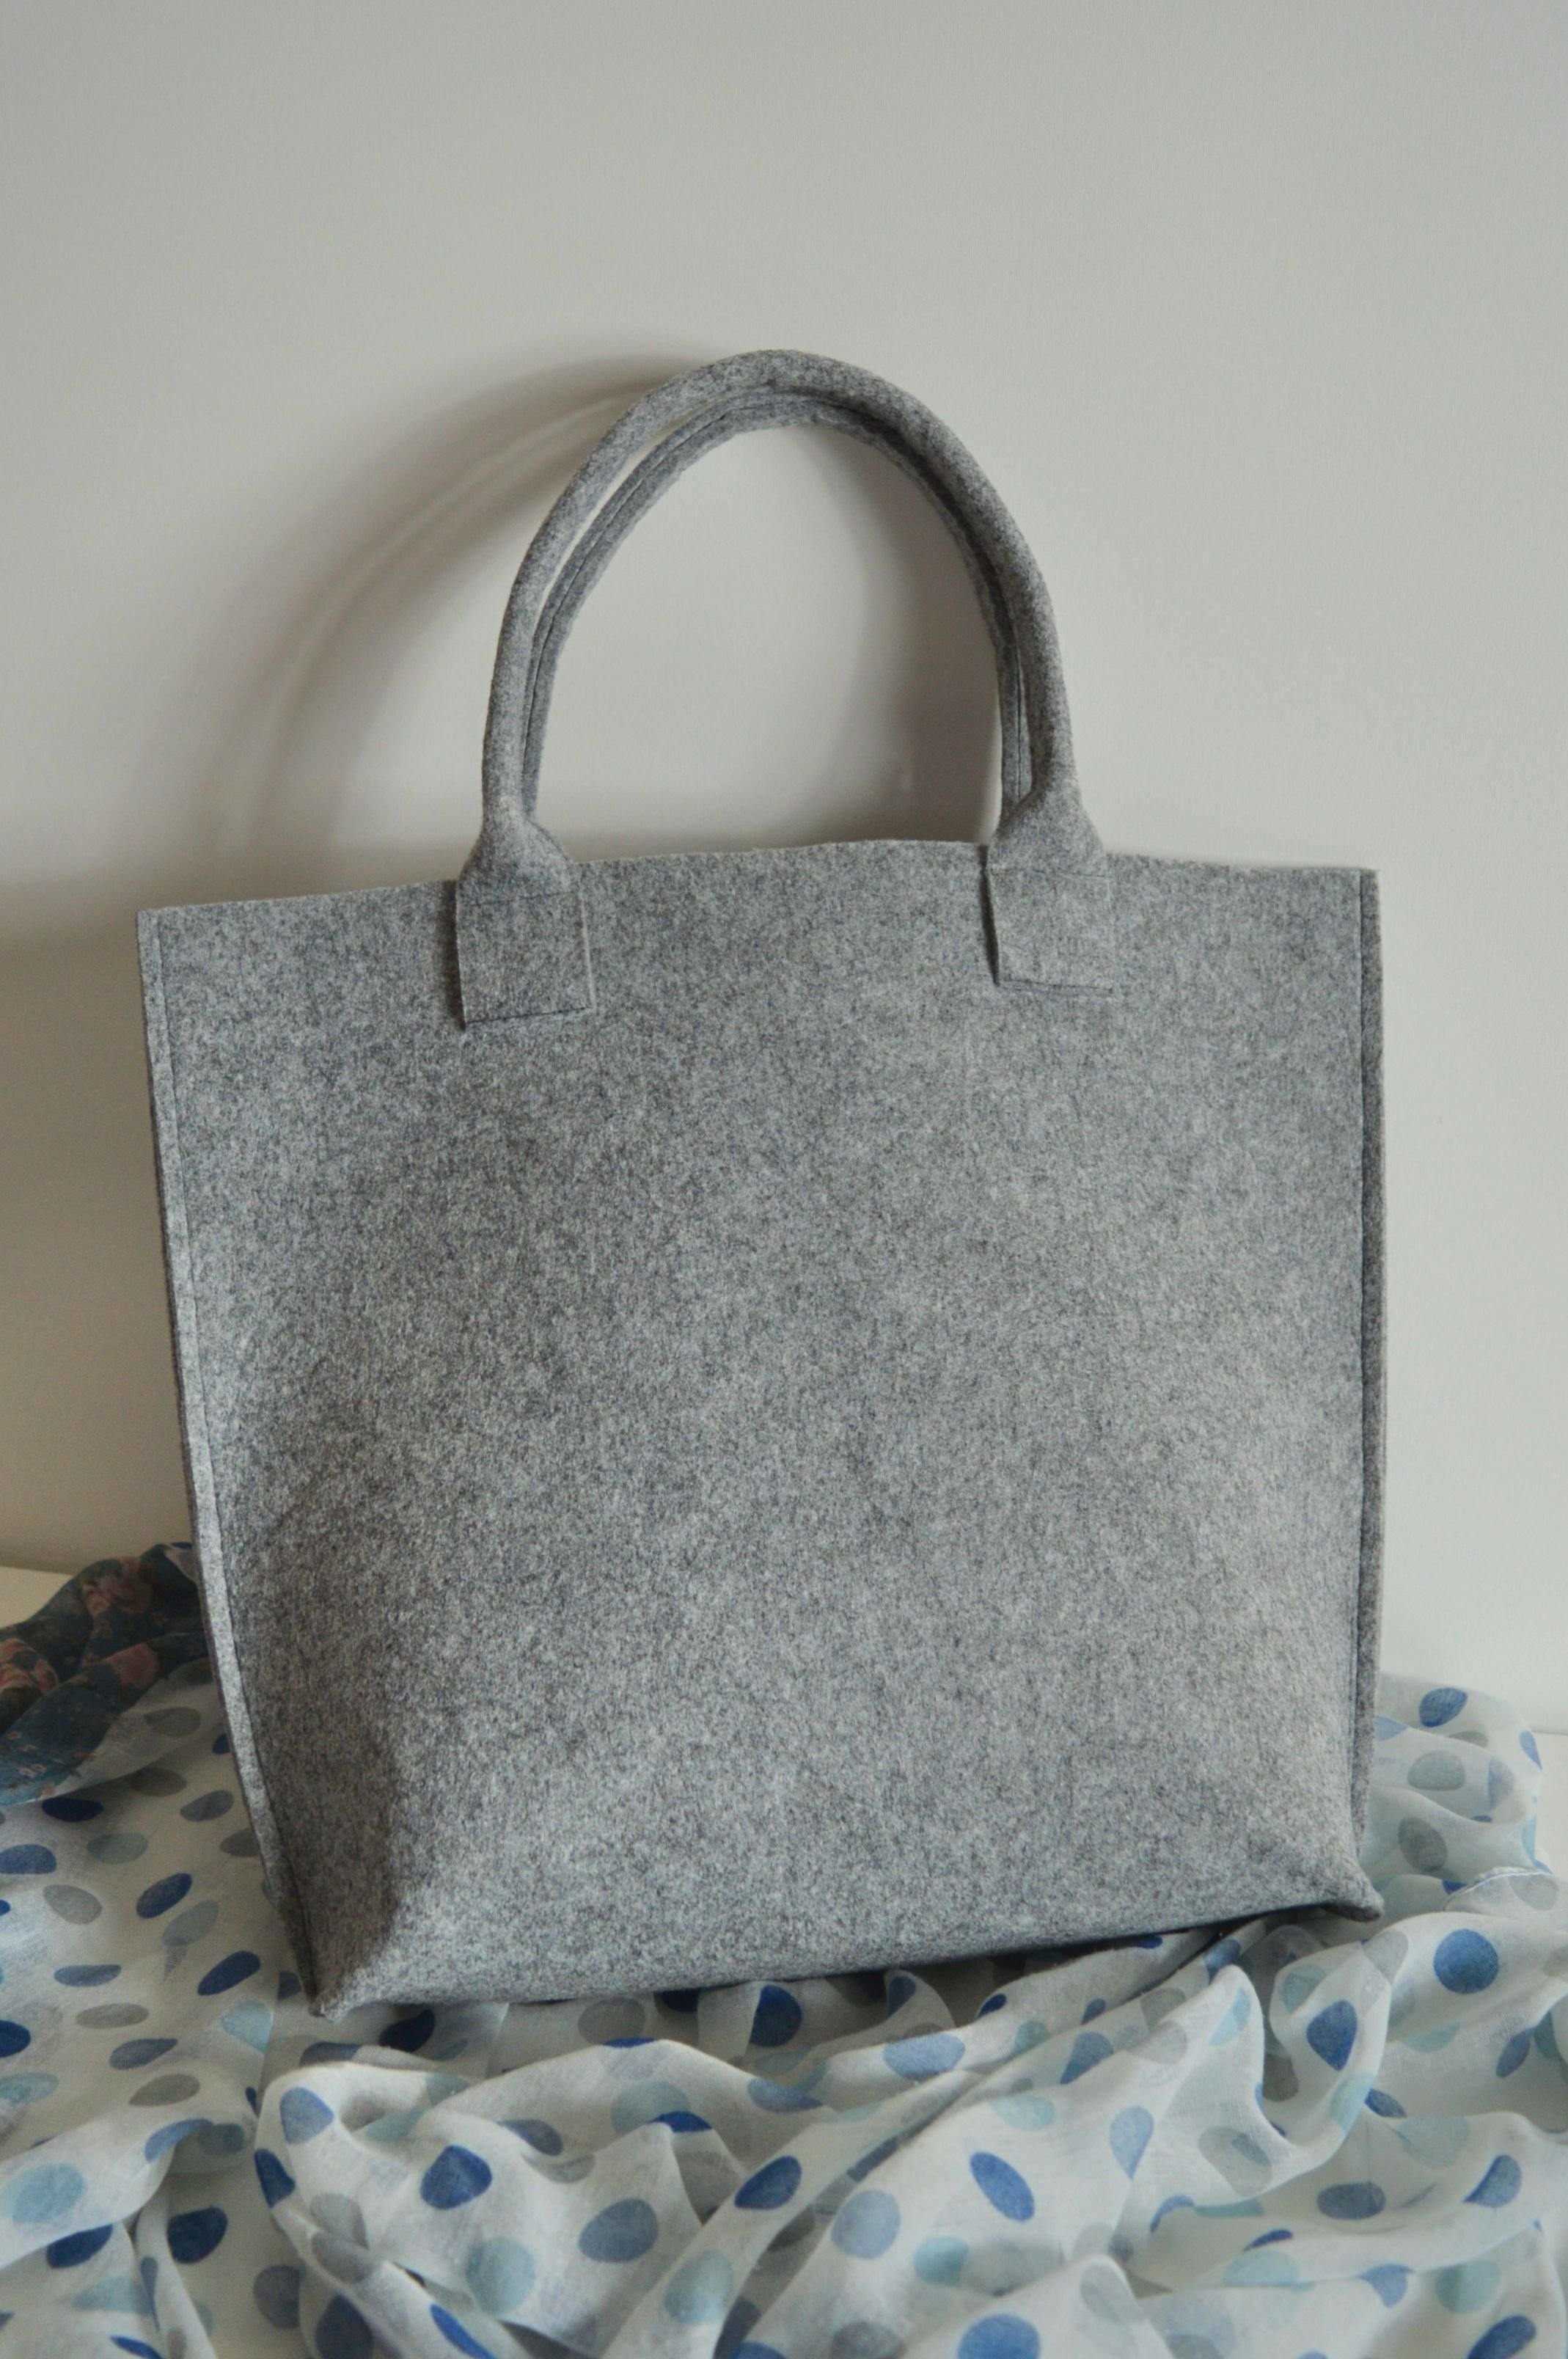
Felt Bag
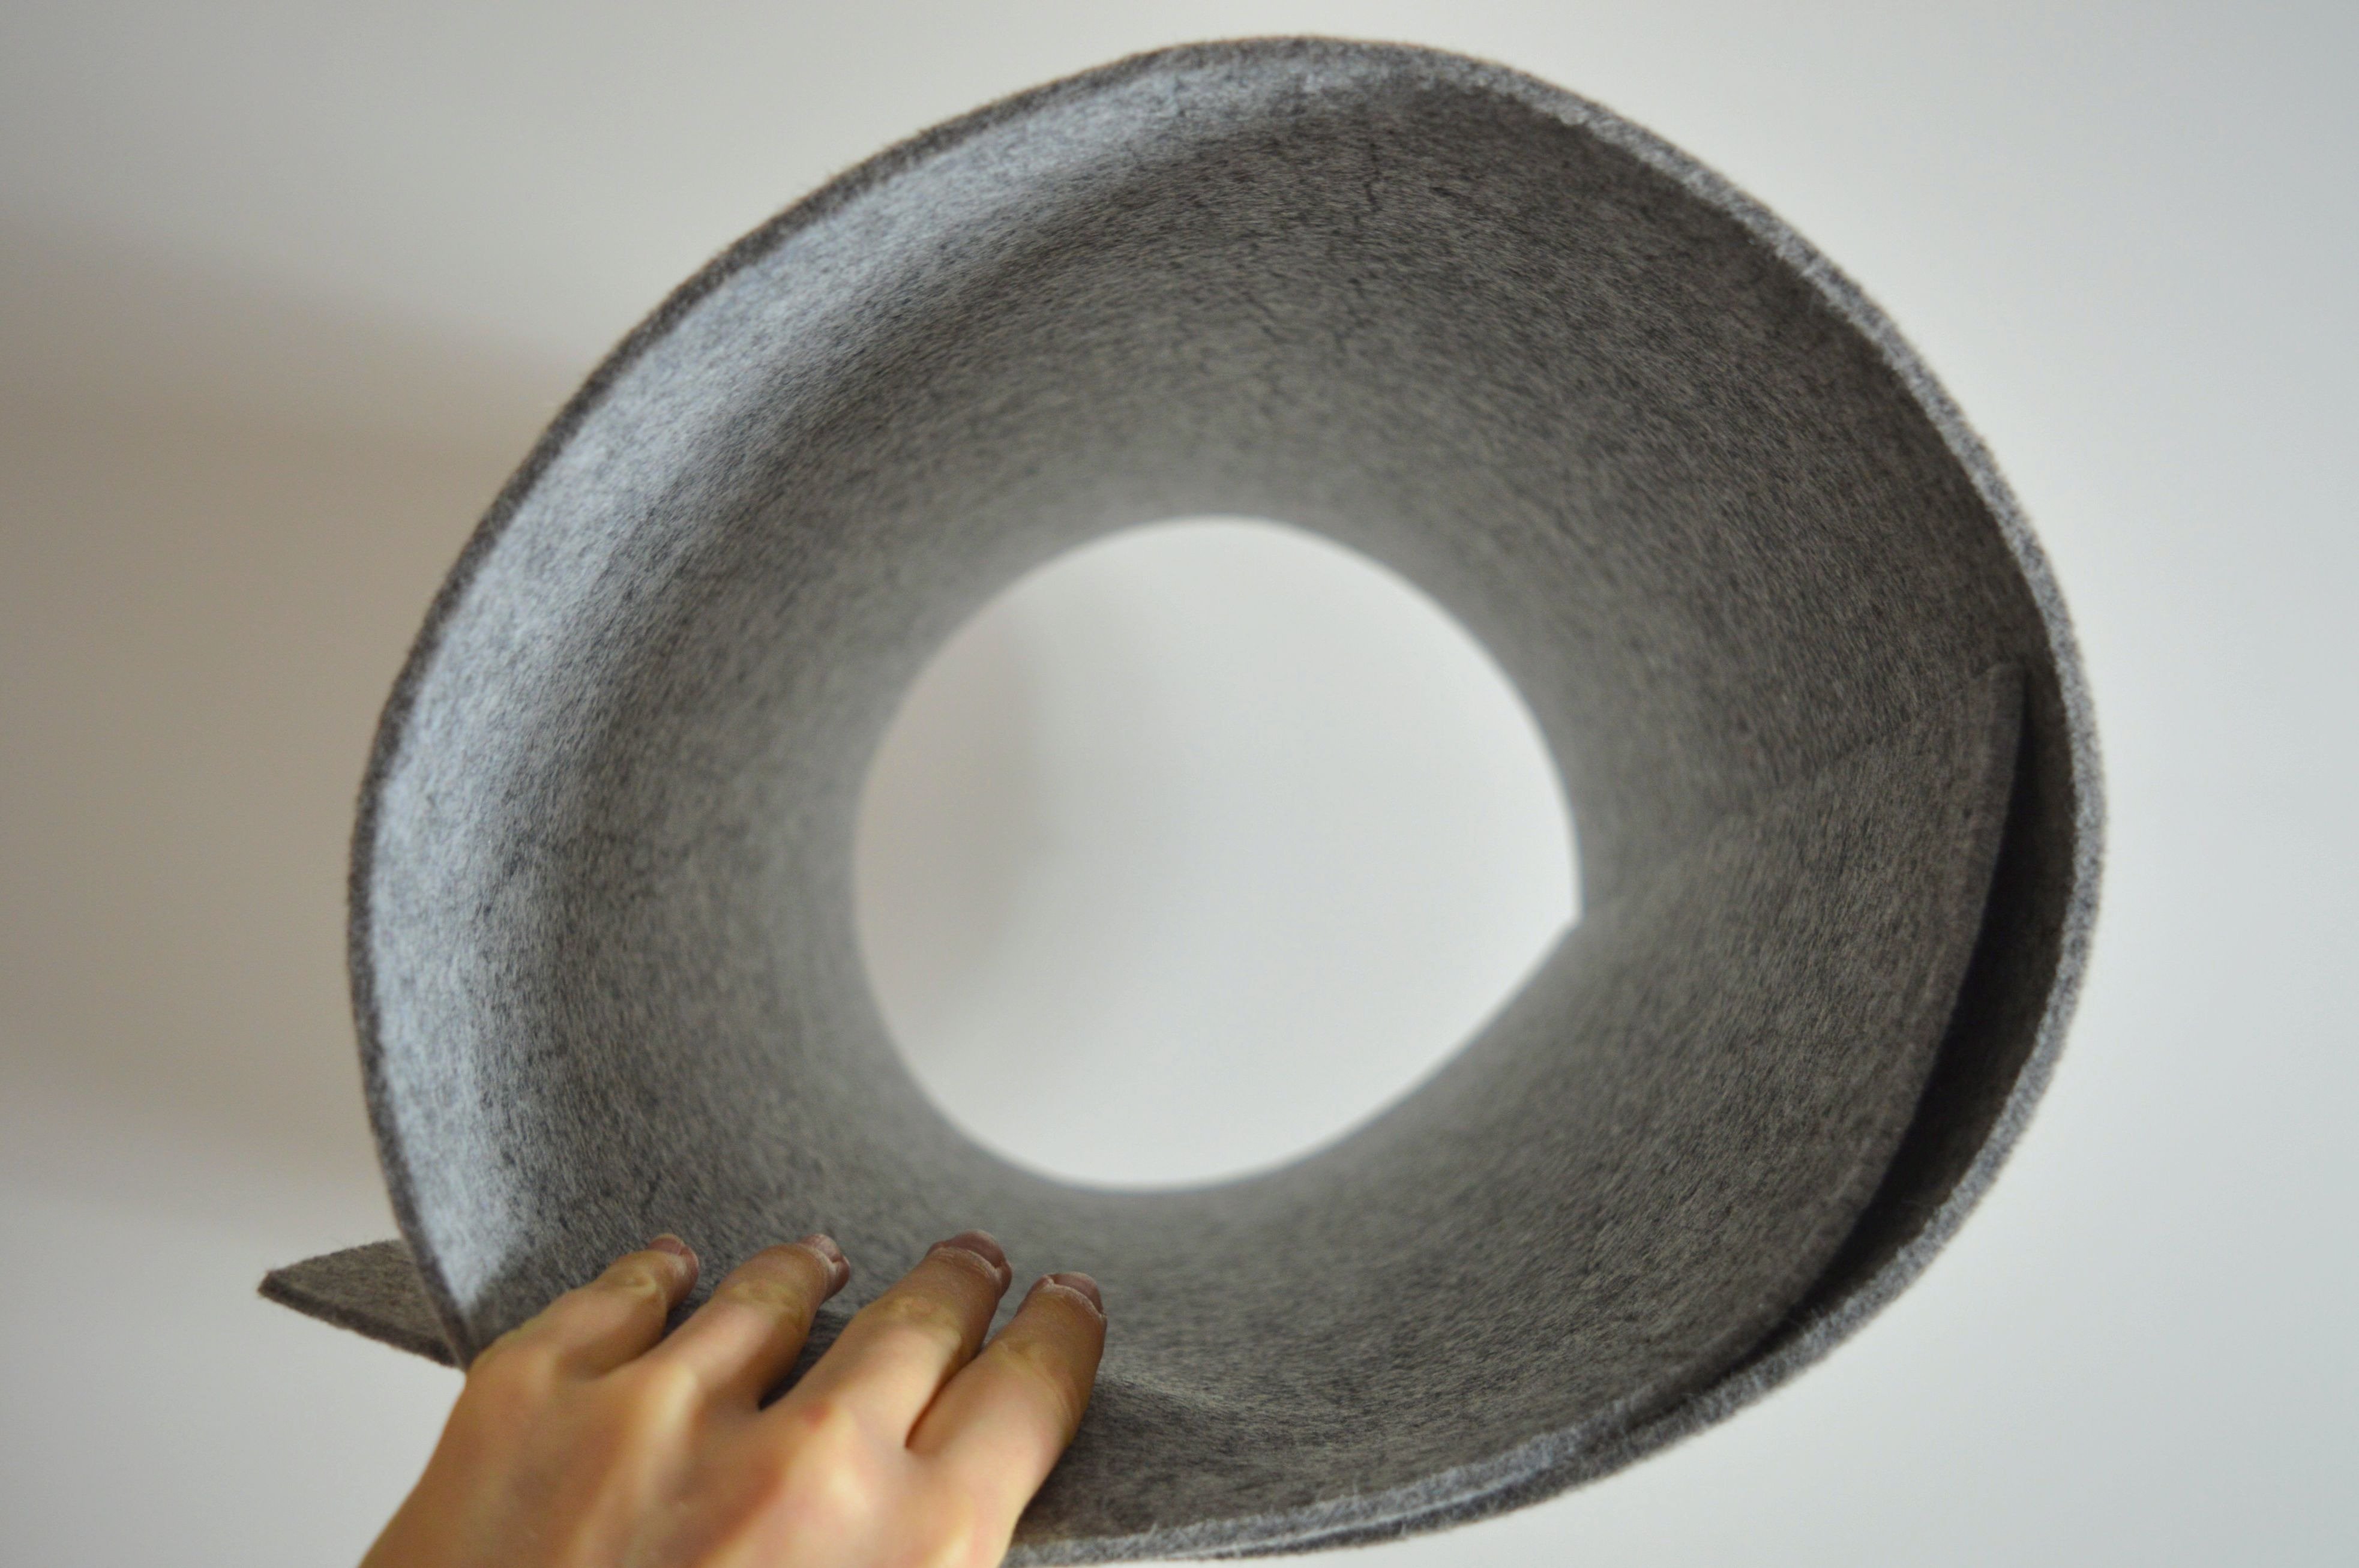
Felt is a durable, moisture-repellent and heat-insulating material and can be made of both, natural or synthetic fibers. It is easy to work with it, felt does not fray and therefore does not need to be serged. It can be used on both sides because both surfaces are the same.

Felt
MATERIAL for one bag:
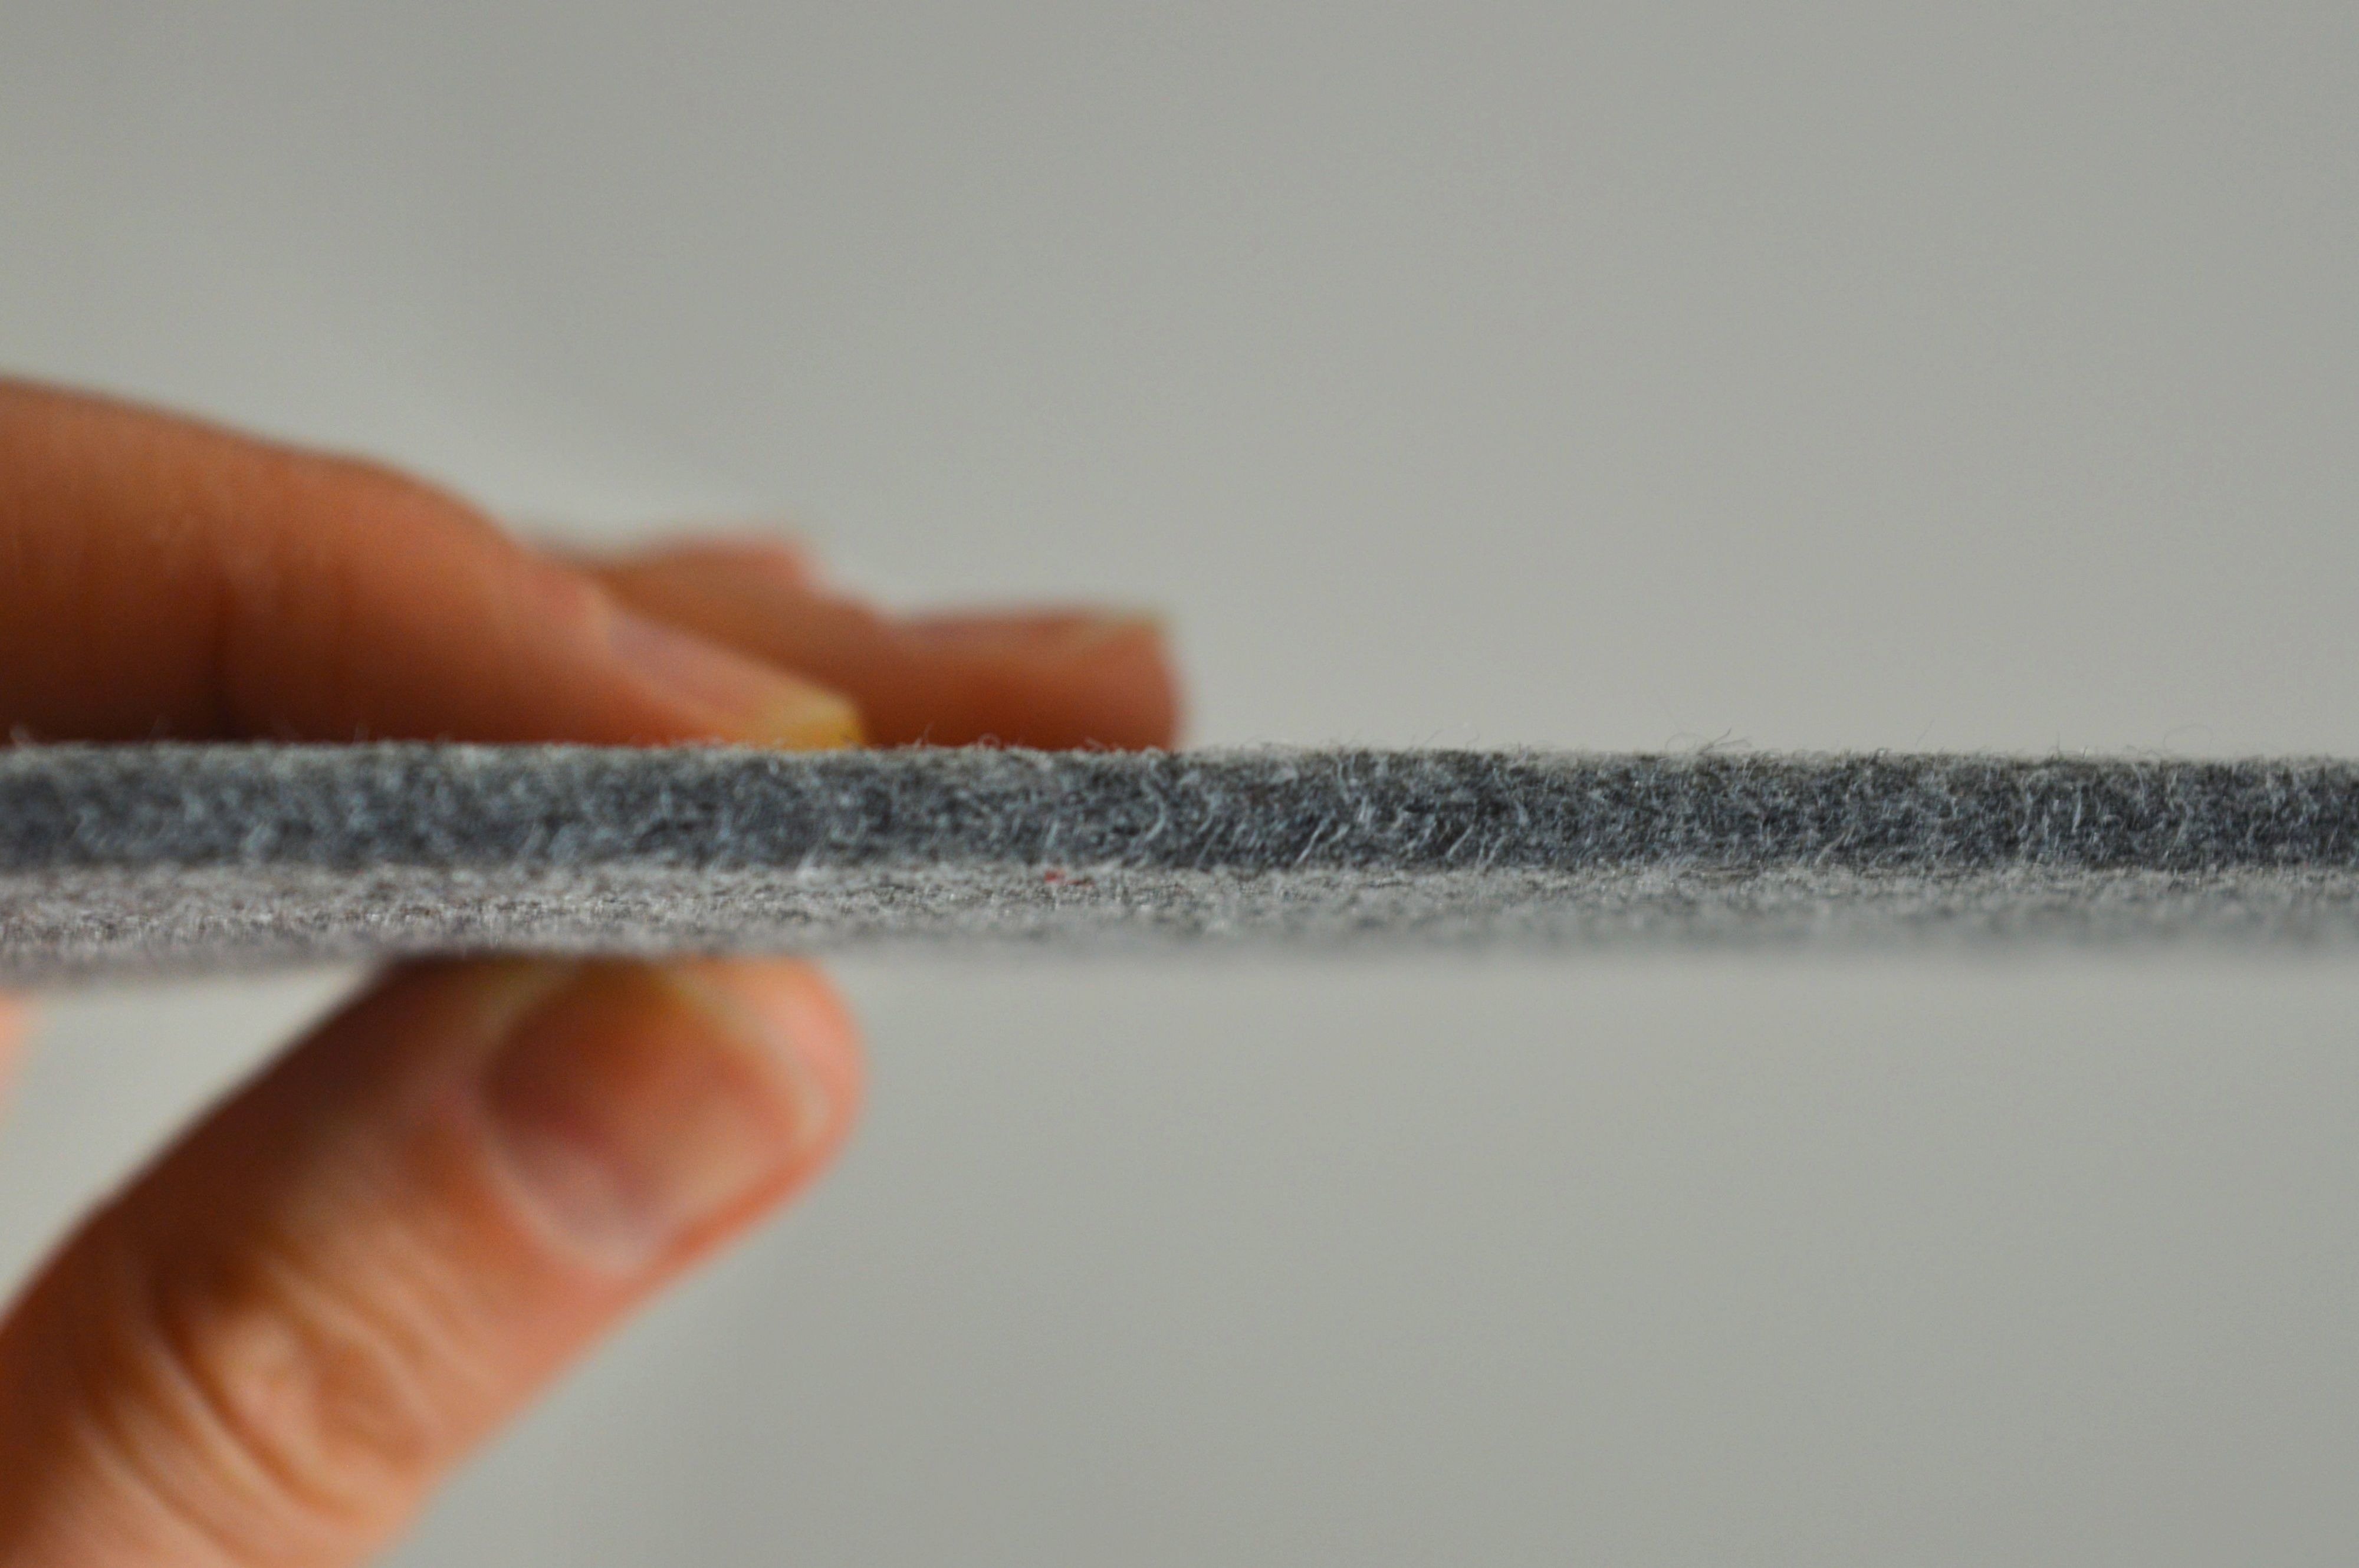
- 1 m felt (the width of the fabric I used was 0,46 m, 4 mm thick)
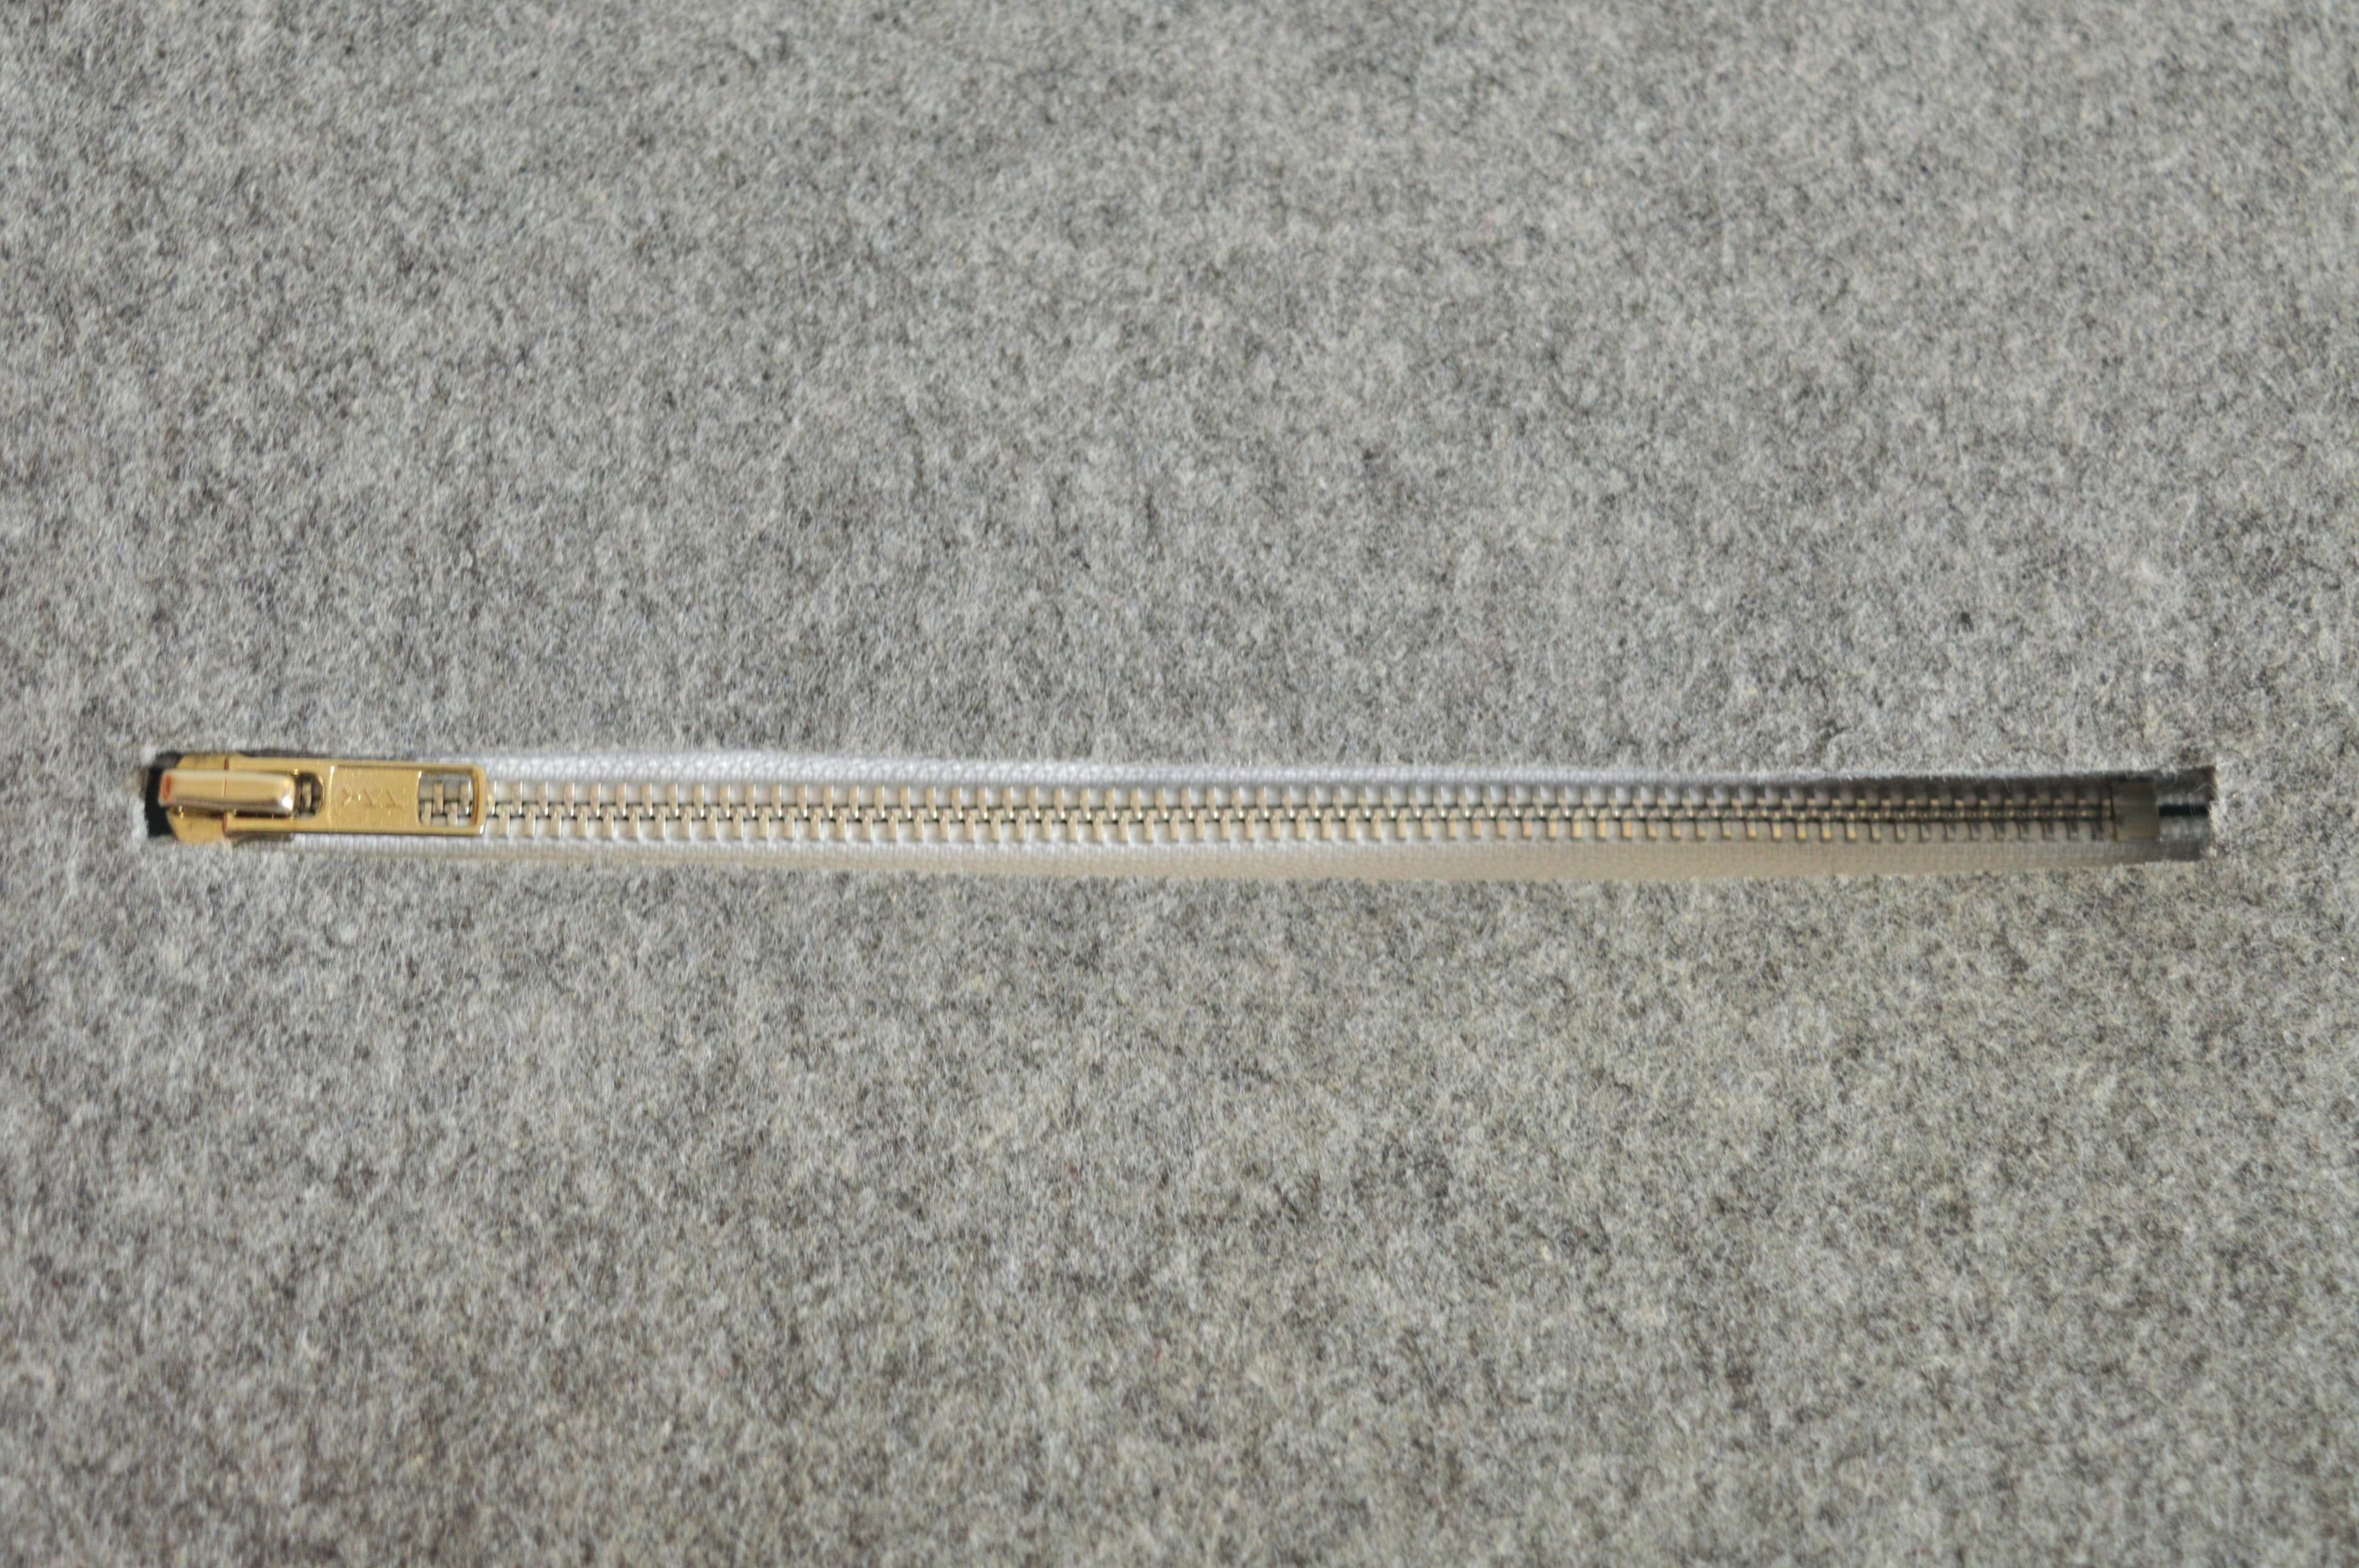
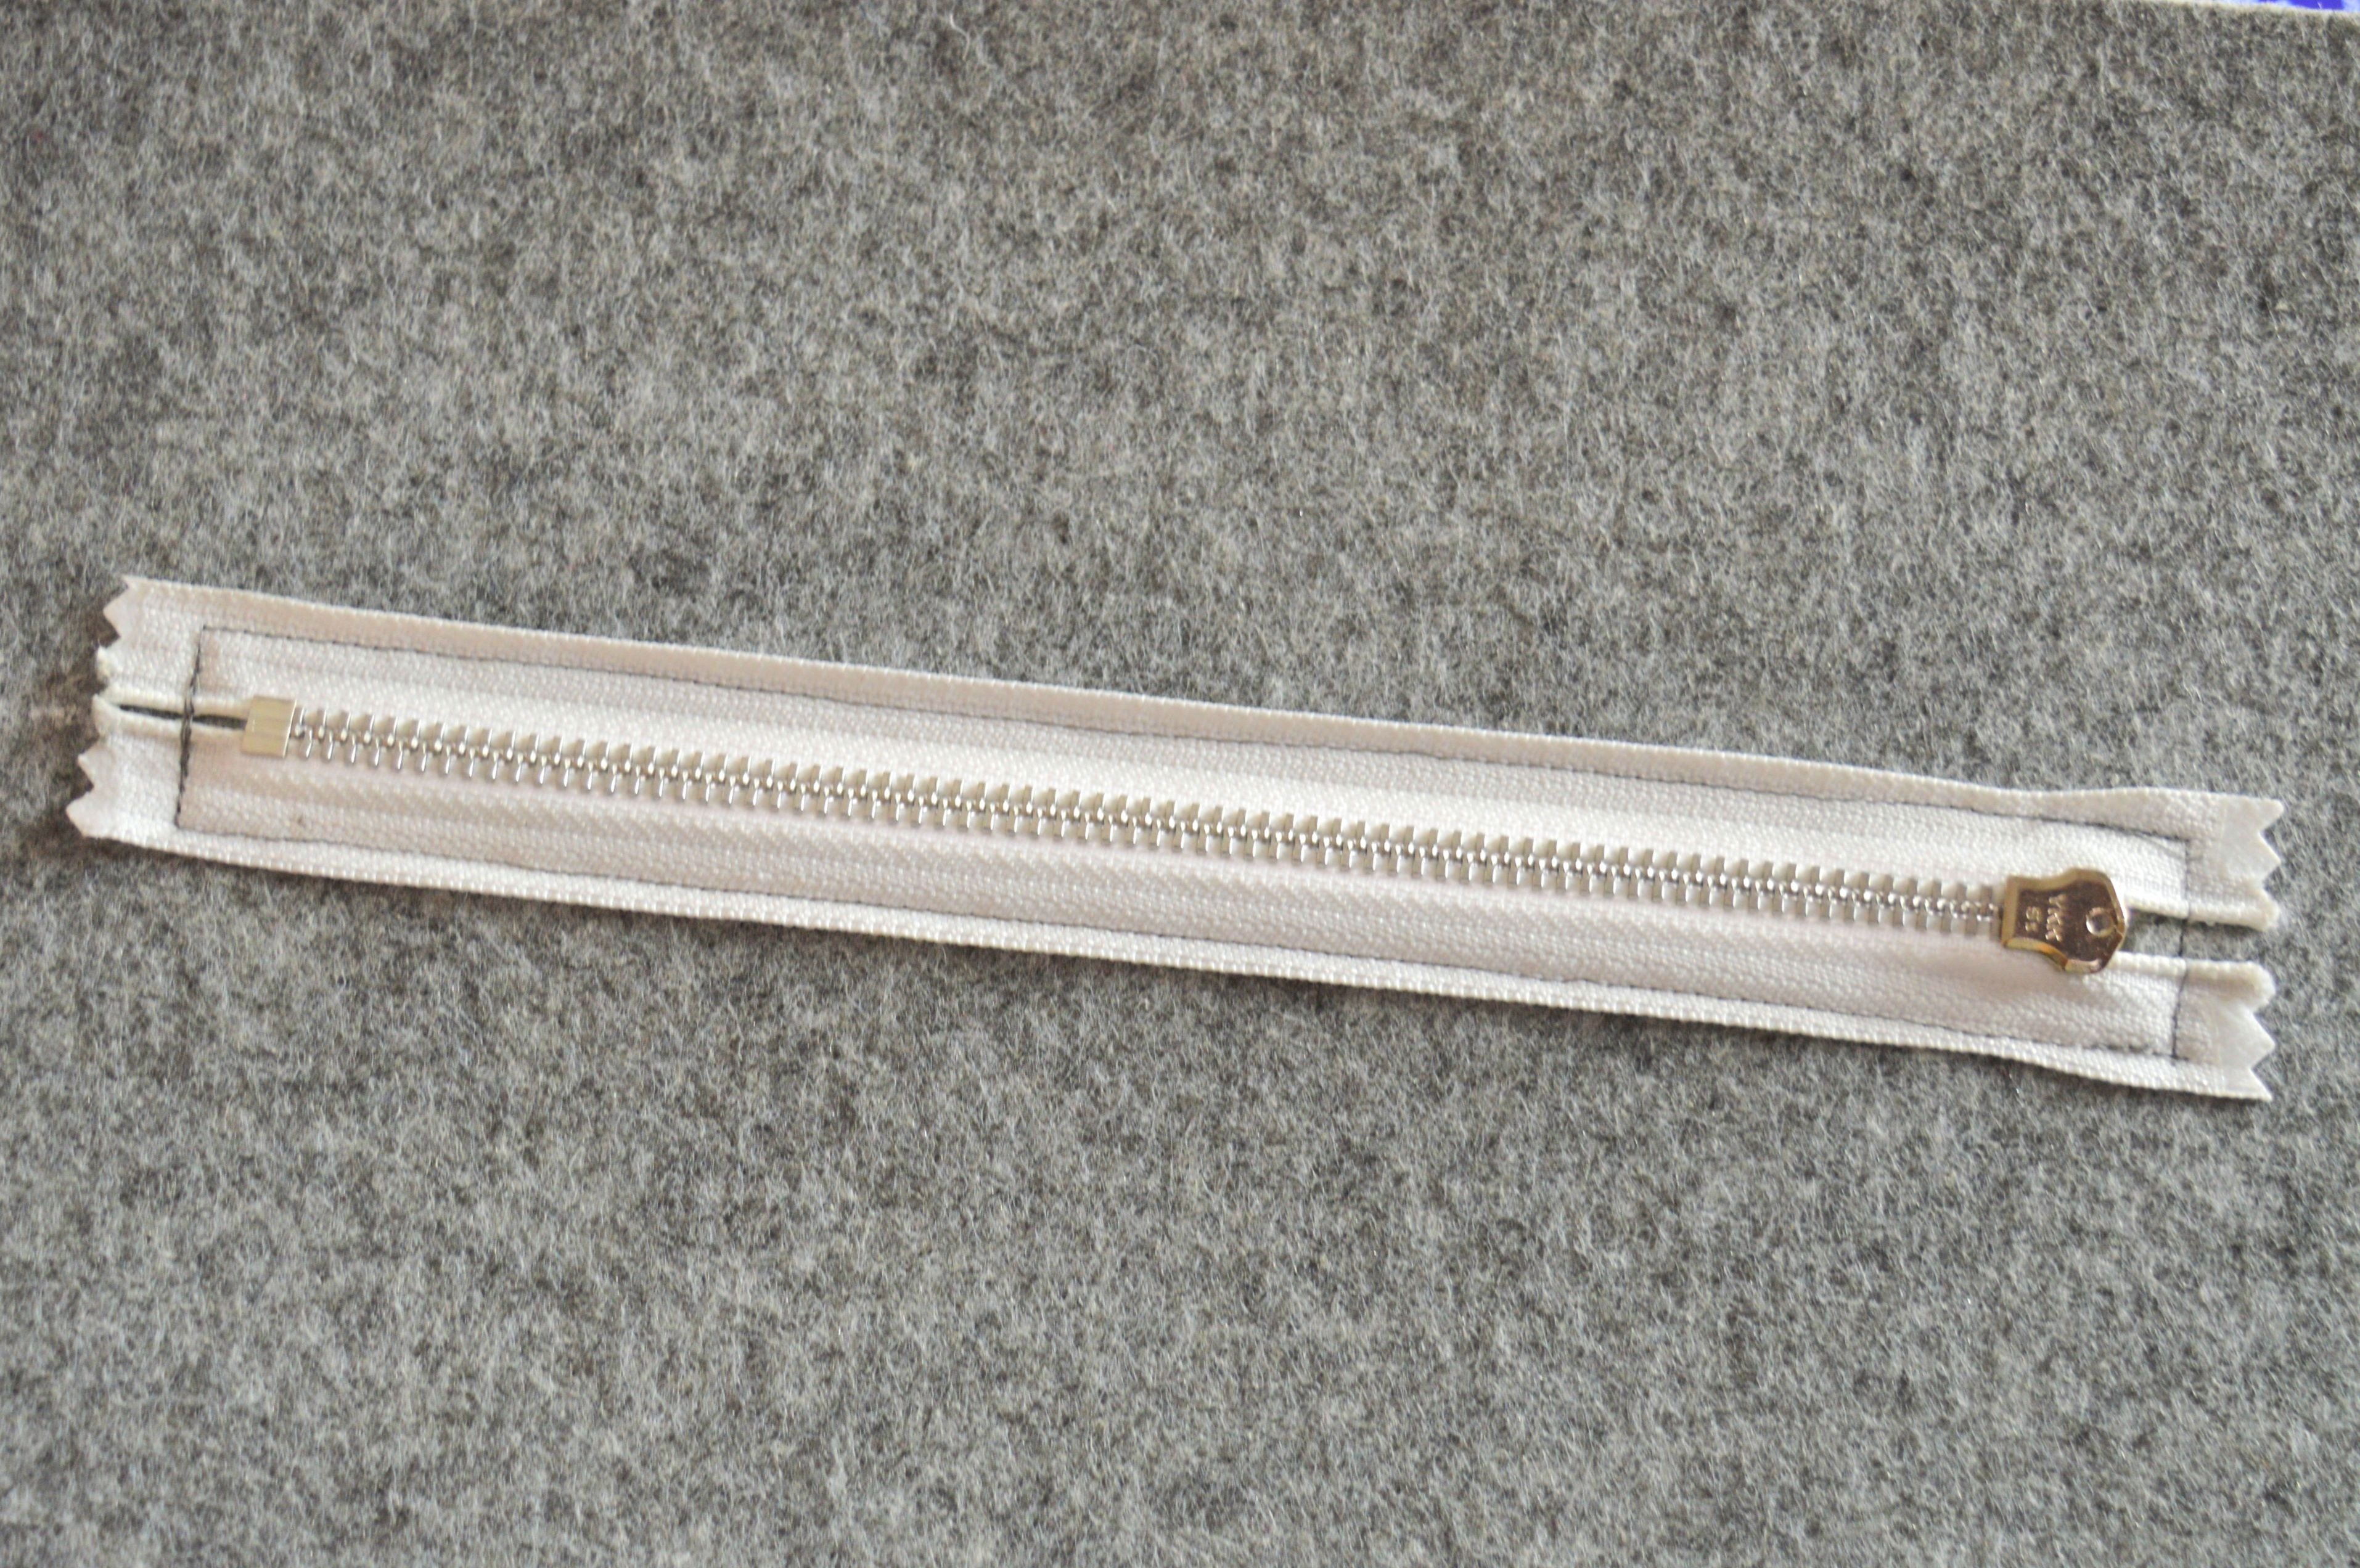
- 1 zipper 20 cm in length
- carabiner 2 cm
- thread in the matching color

Material
The finished size of the bag will be 40 x 34 cm (W x H) with the bottom of 8 cm. Handles are approximately 21 cm.
The idea of this bag was that it would be made of a solid felt that does not require additional reinforcements to form the bottom as well as the shell of the bag itself, and for this reason, a felt 4 mm thick was used. Such a fabric is robust and poorly flexible, causing slight problems during tailoring and sewing, and therefore requires a bit of experience in working with similar materials.
Felt
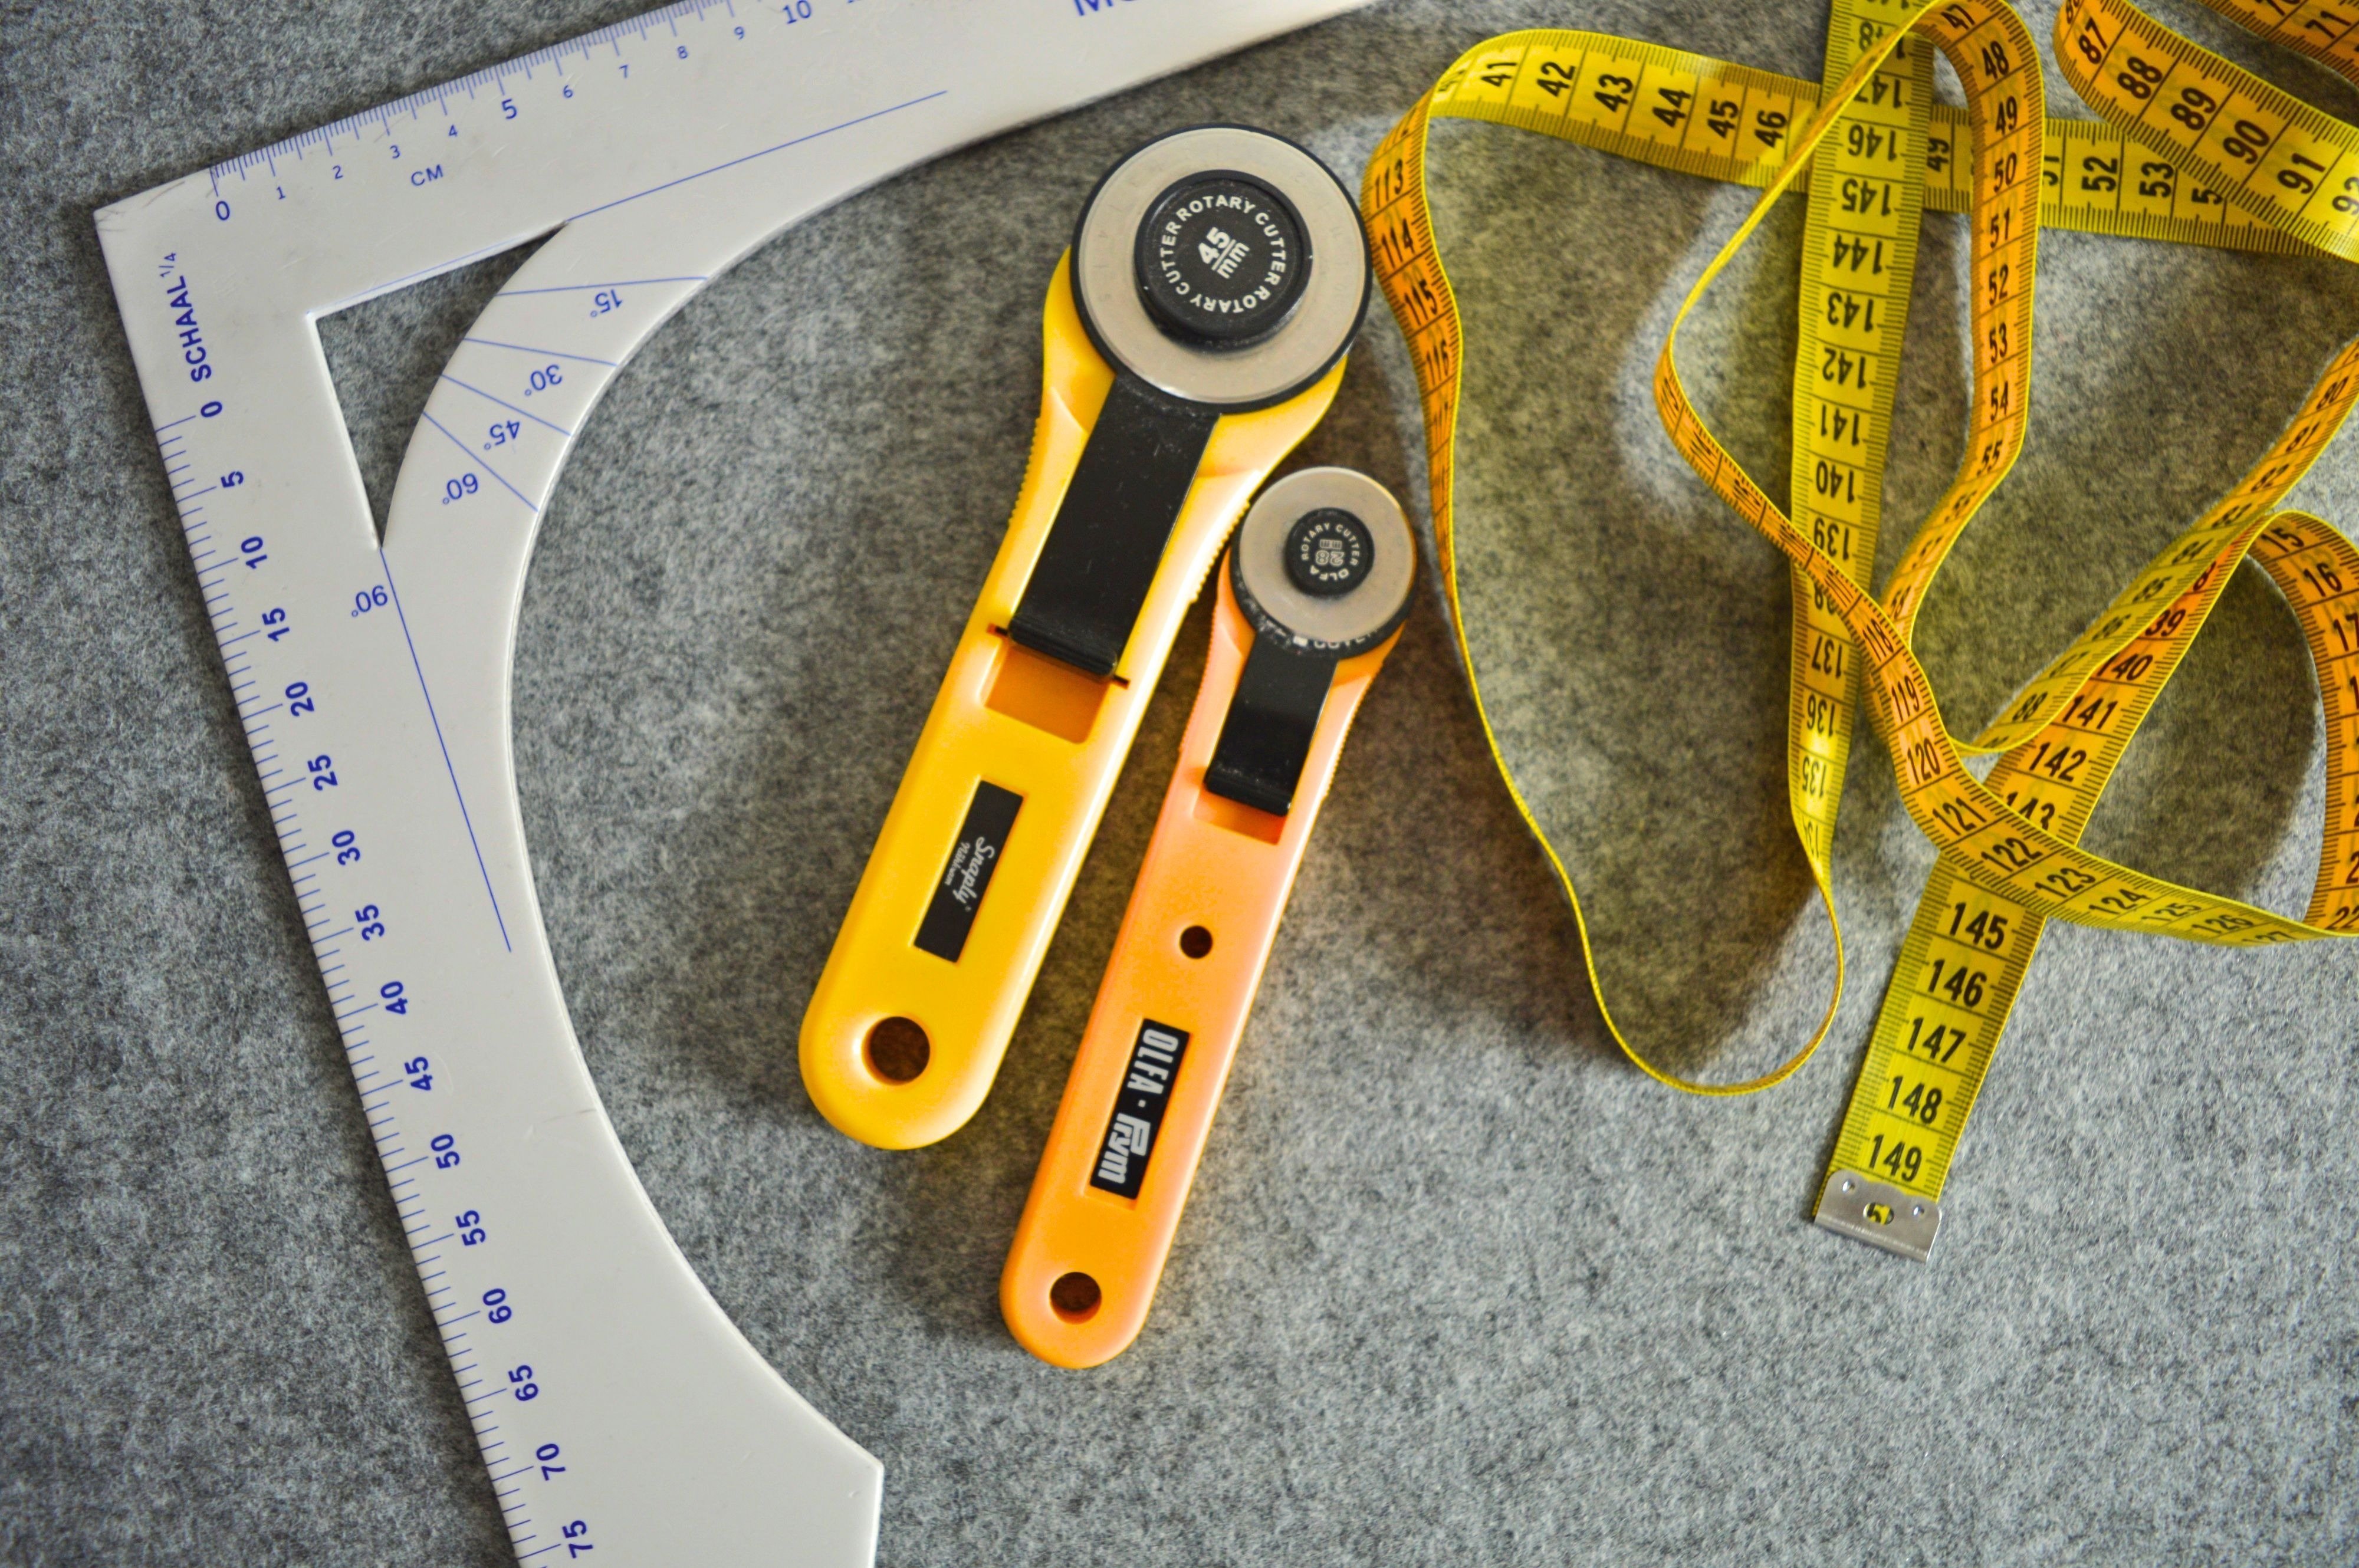
- You still need: sewing machine, pins, sewing clips, needles, scissors, rotary cutter, tailor’s chalk, ruler, measuring tape.
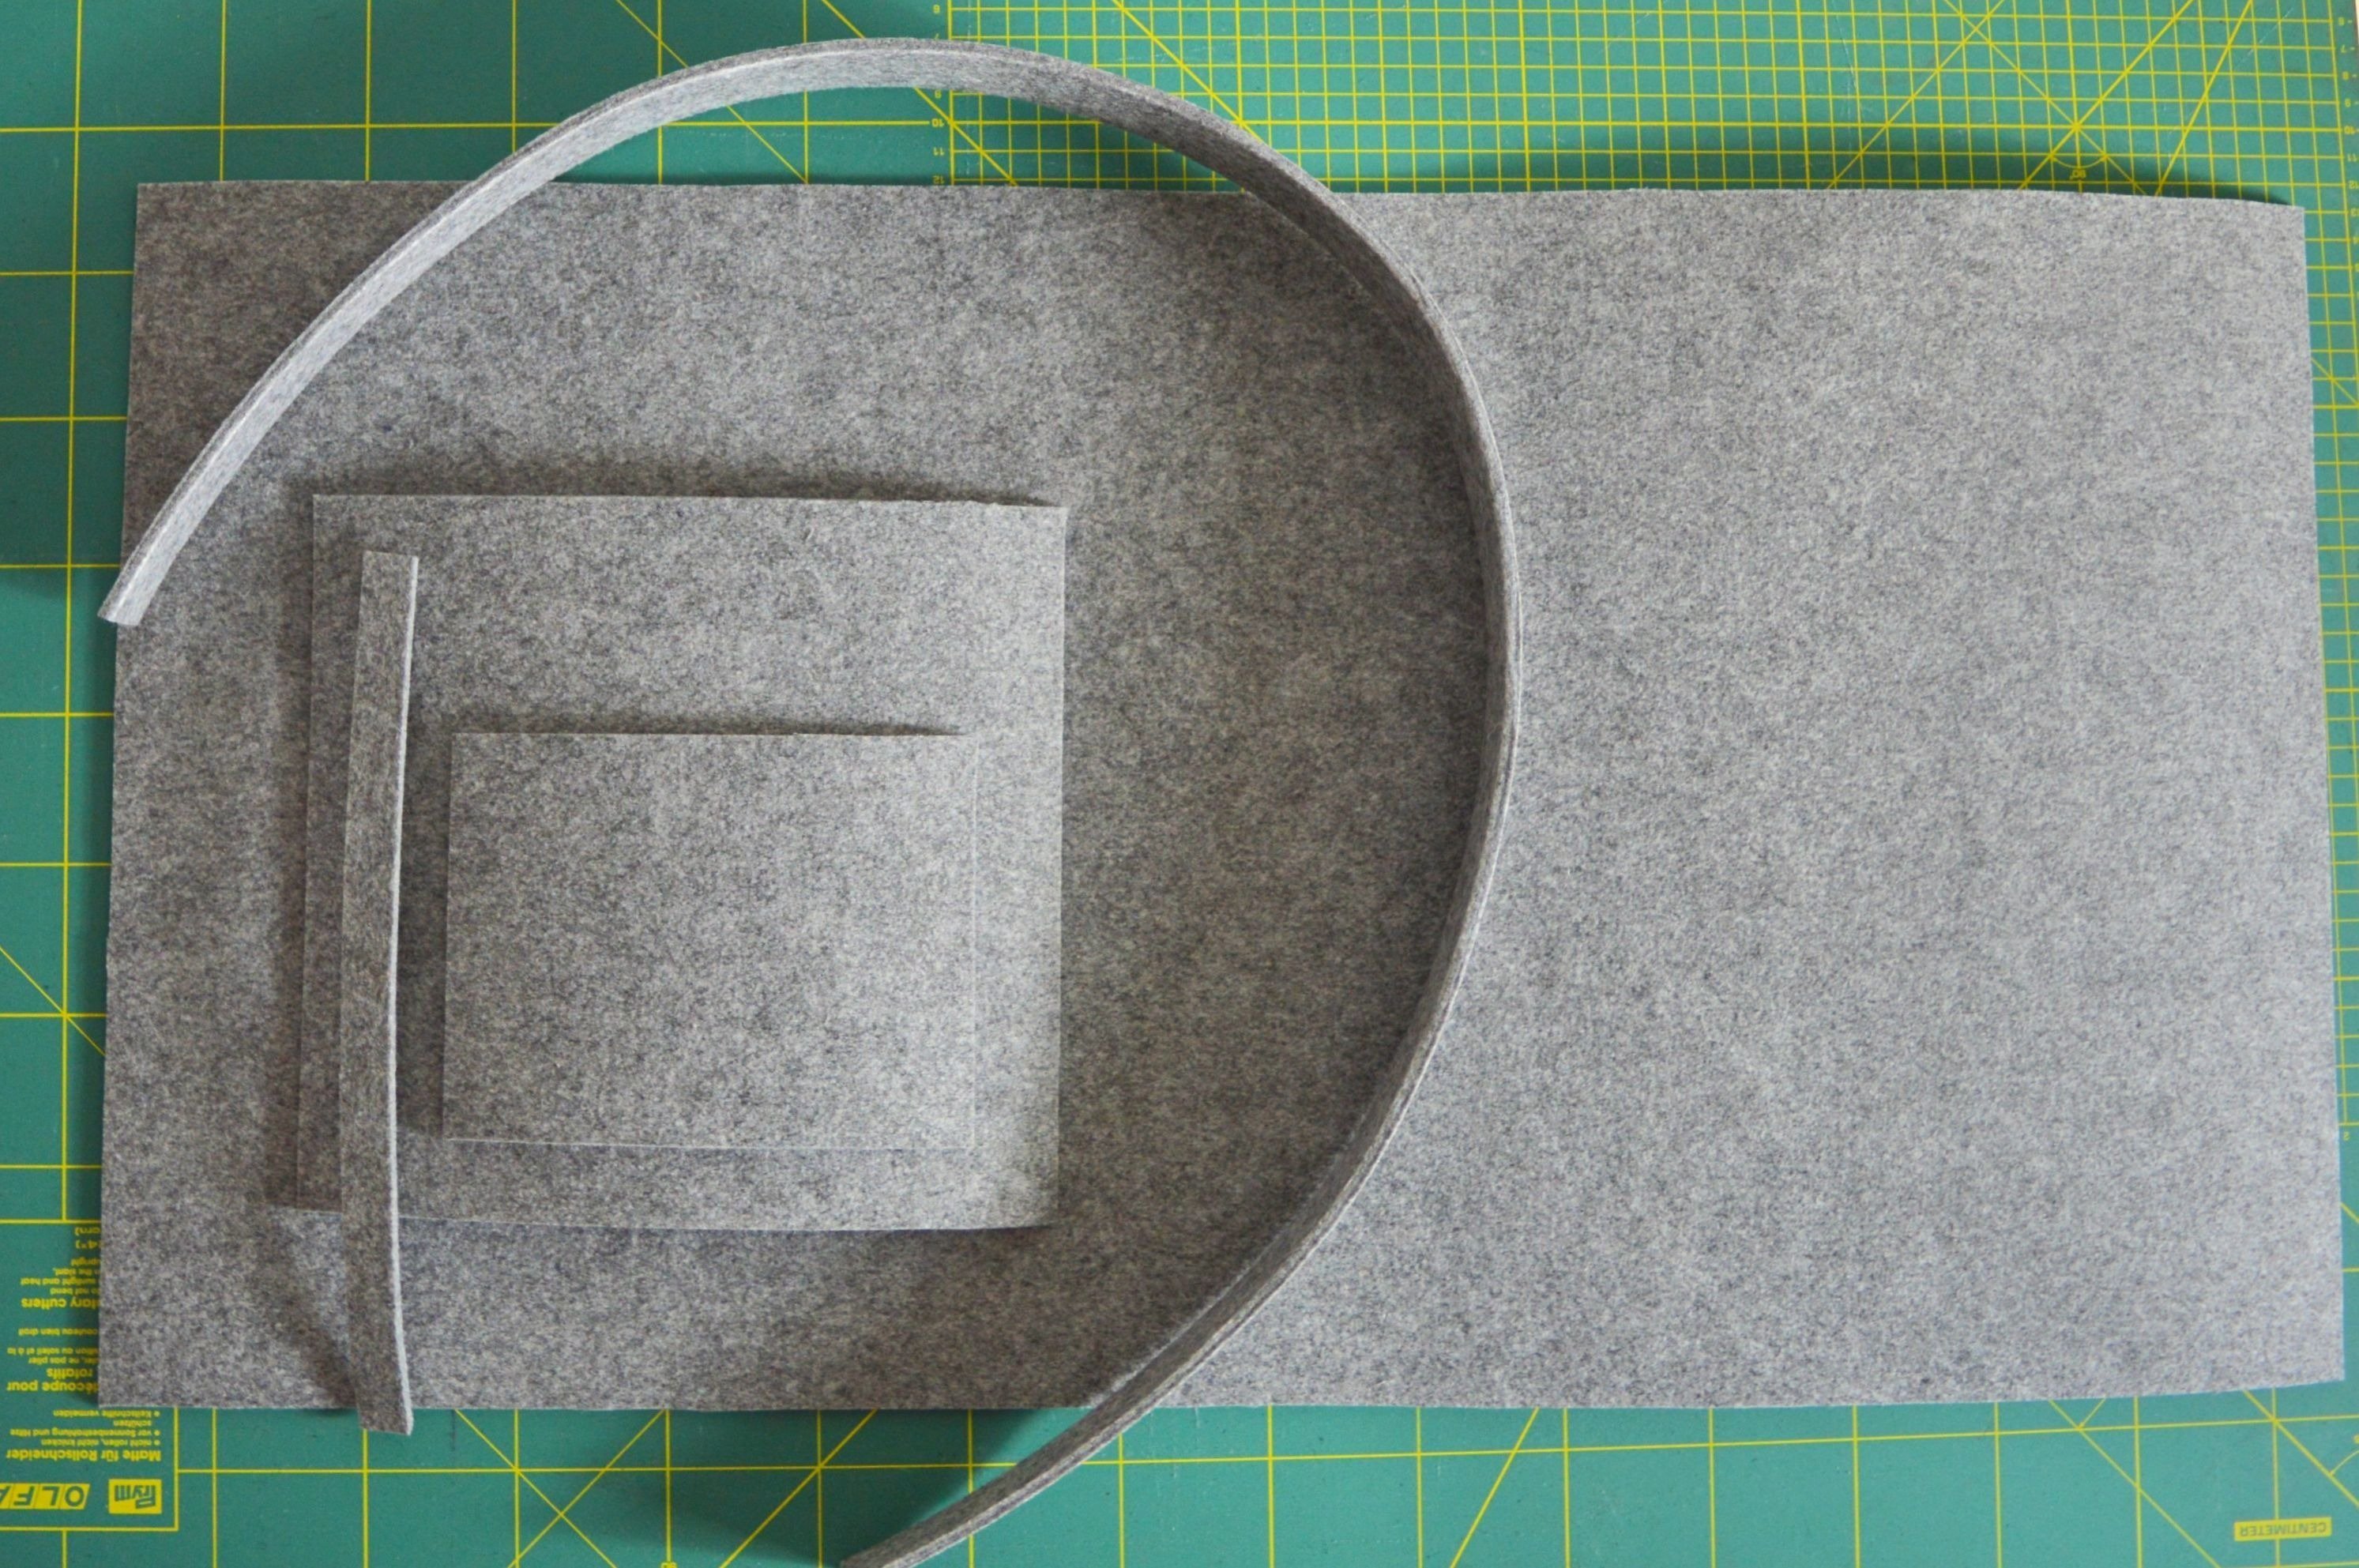
CUTTING MEASUREMENTS:
- bag body (1)41 x 76 cm (W x H)
- handles – 2 pieces (2) 4 x 50 cm
- zipper pocket (inside piece to cover a zipper) (3) 25 x 19 cm
- small pocket (4) 17 x 13 cm
- band for carabiner (5) 1,50 x 24 cm
!!! The seam allowances (where they are needed) are included in previously given measurements and are 0,5 cm.
First, draw all pattern pieces on the one (wrong) side of felt using tailor’s chalk.

Pattern pieces
Cut out pattern pieces using scissors or rotary cutter.
If you don’t have experience with cutting felt, be careful because it can quickly happen that something goes in the wrong direction.

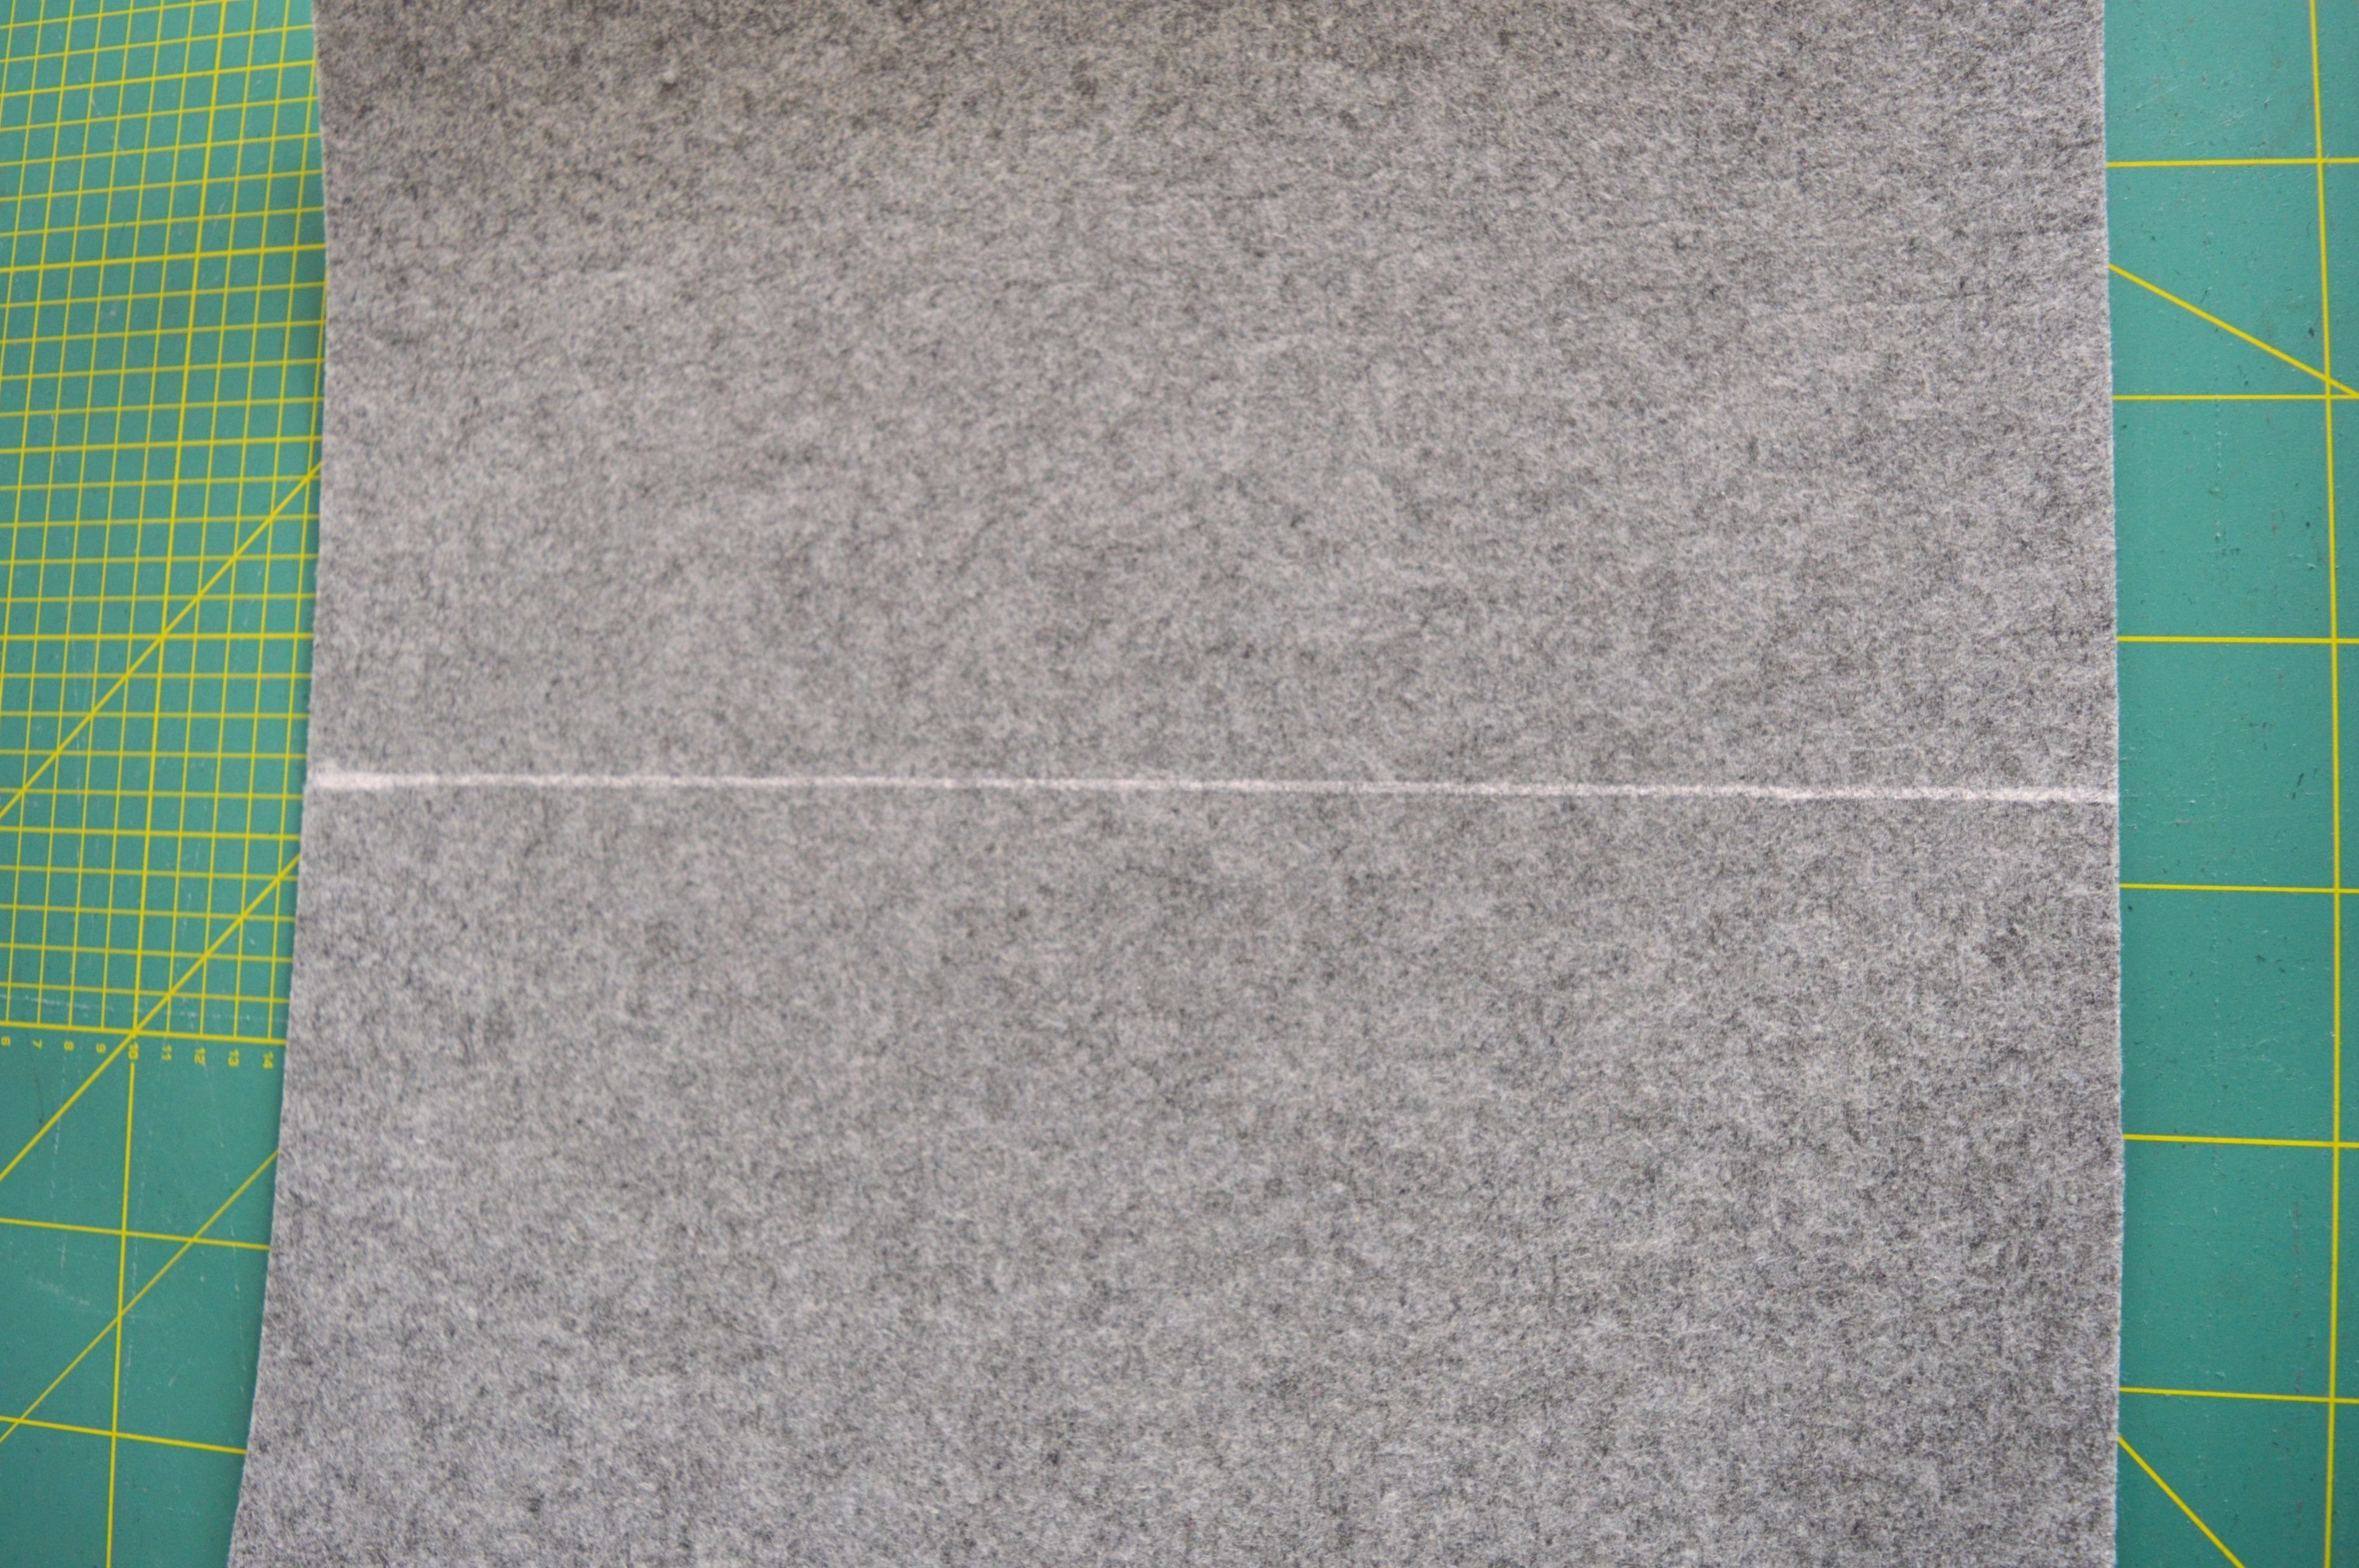
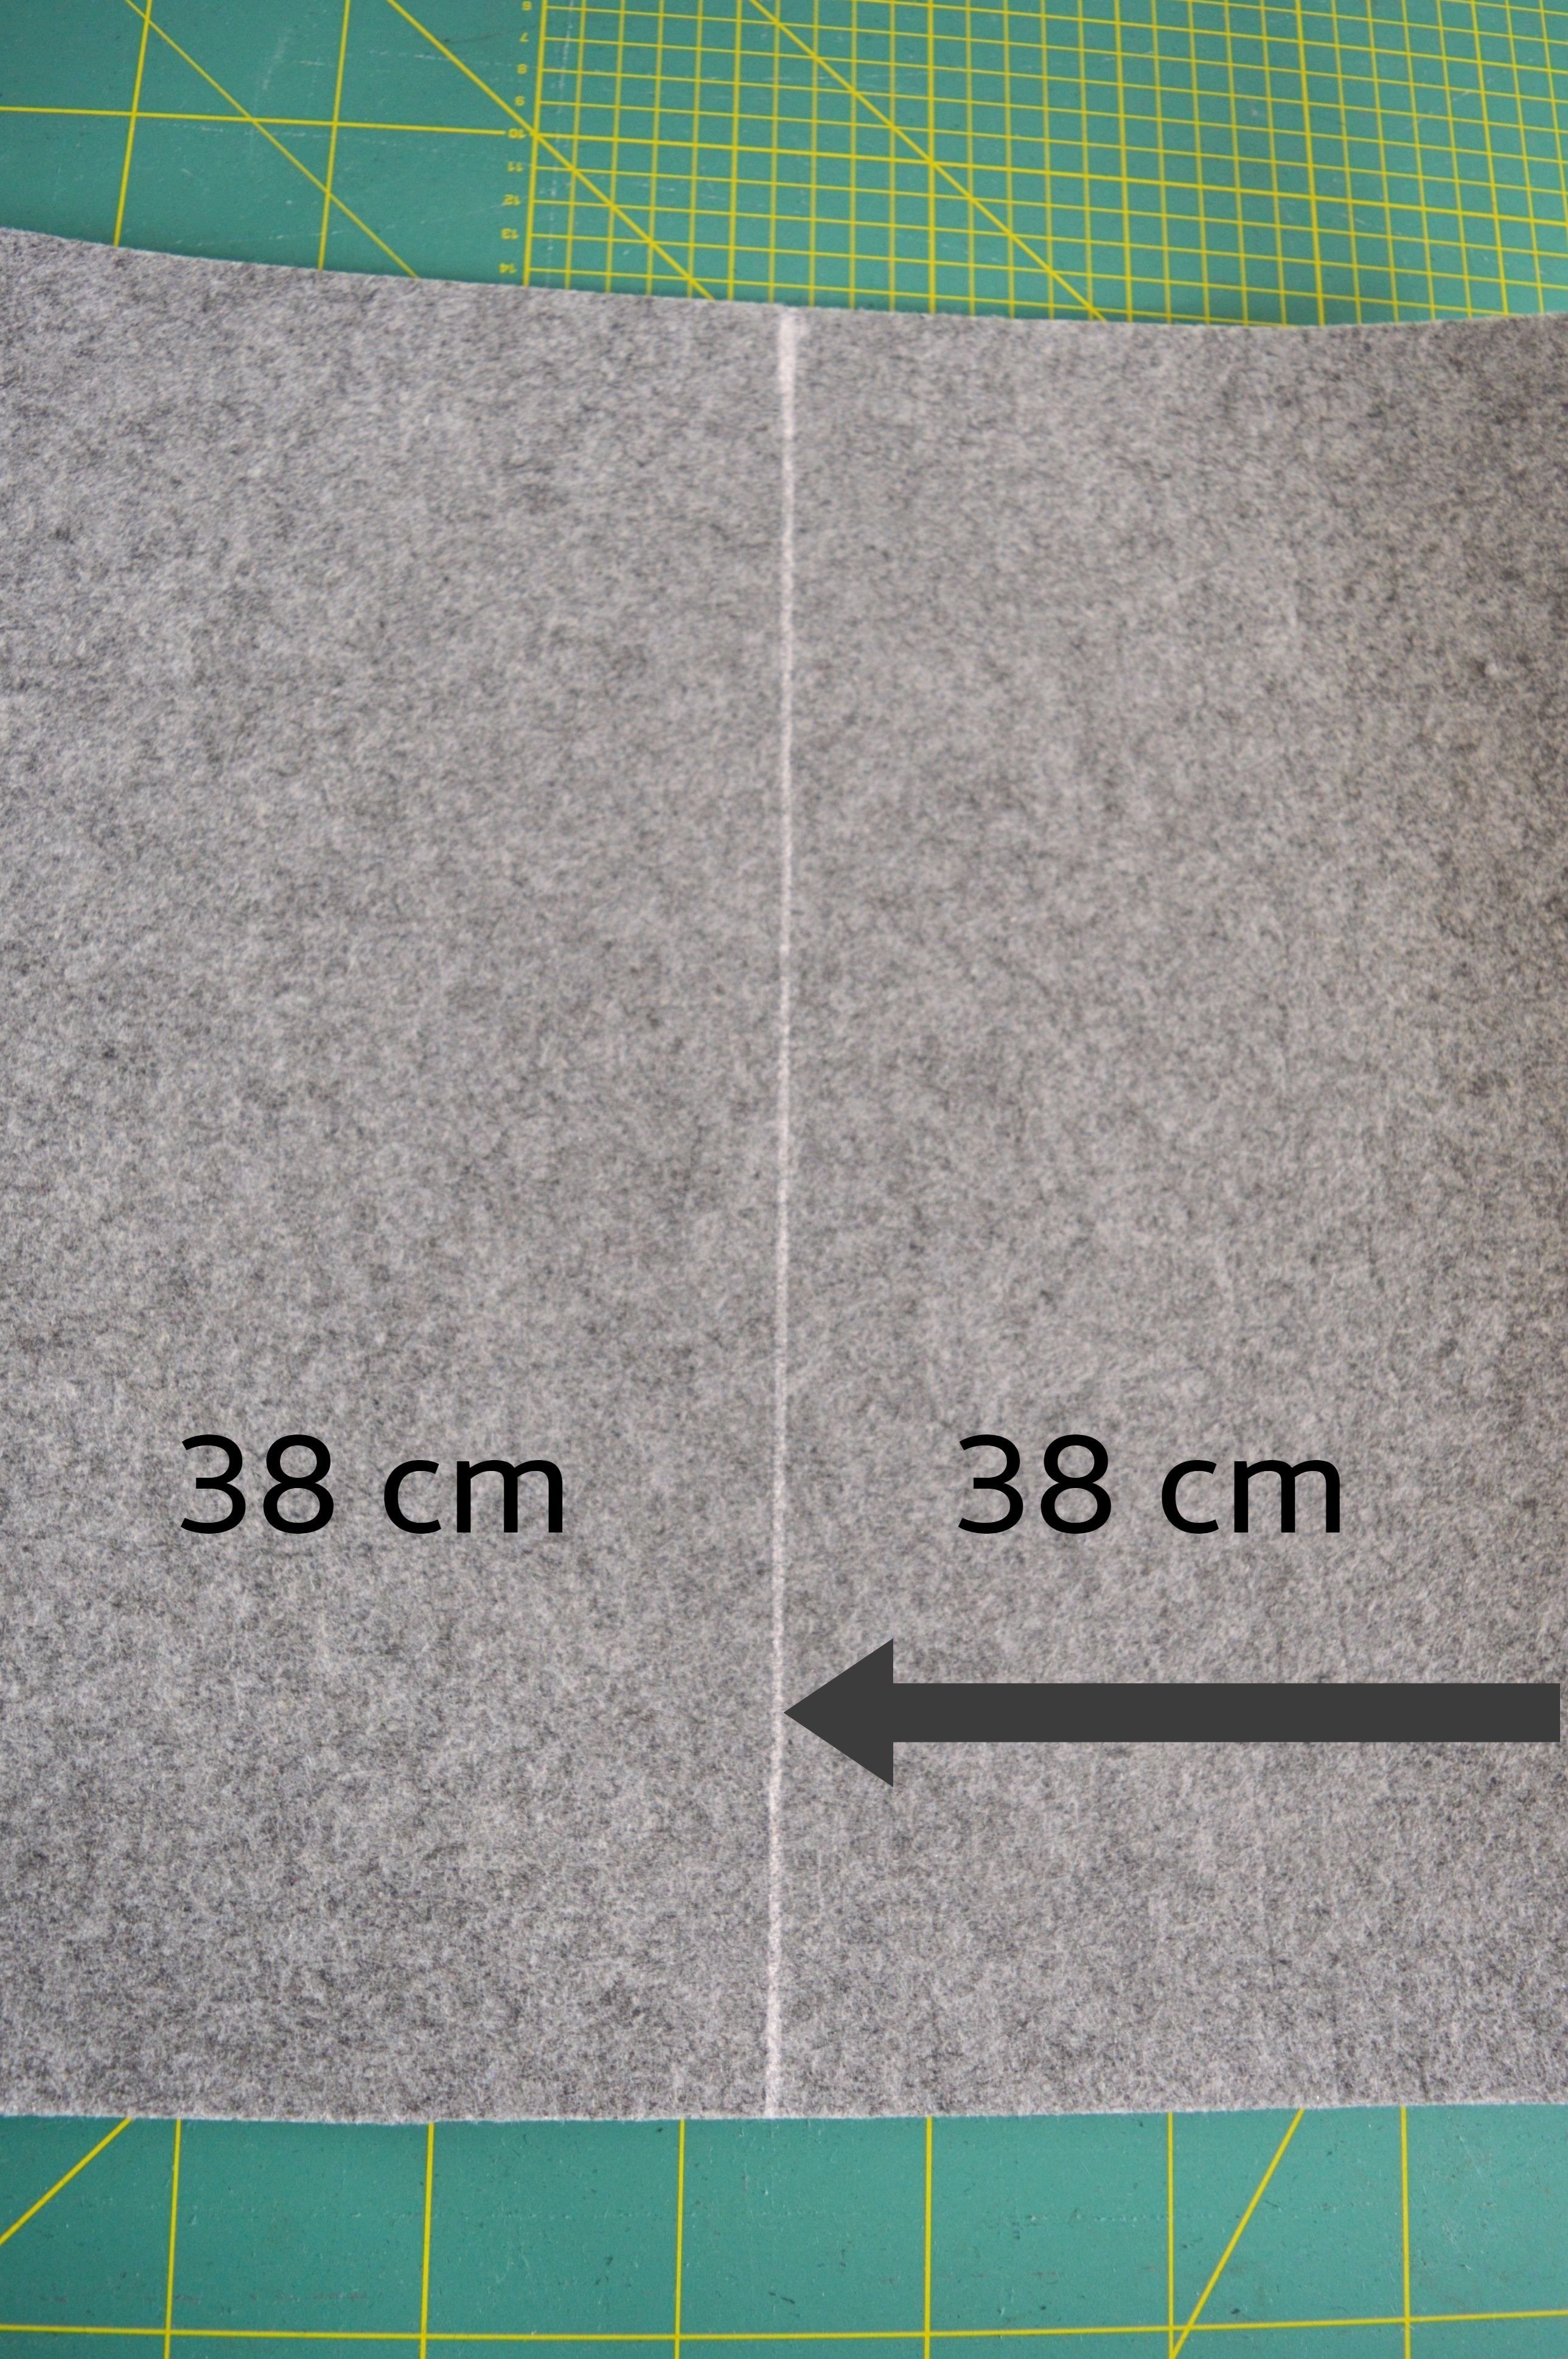
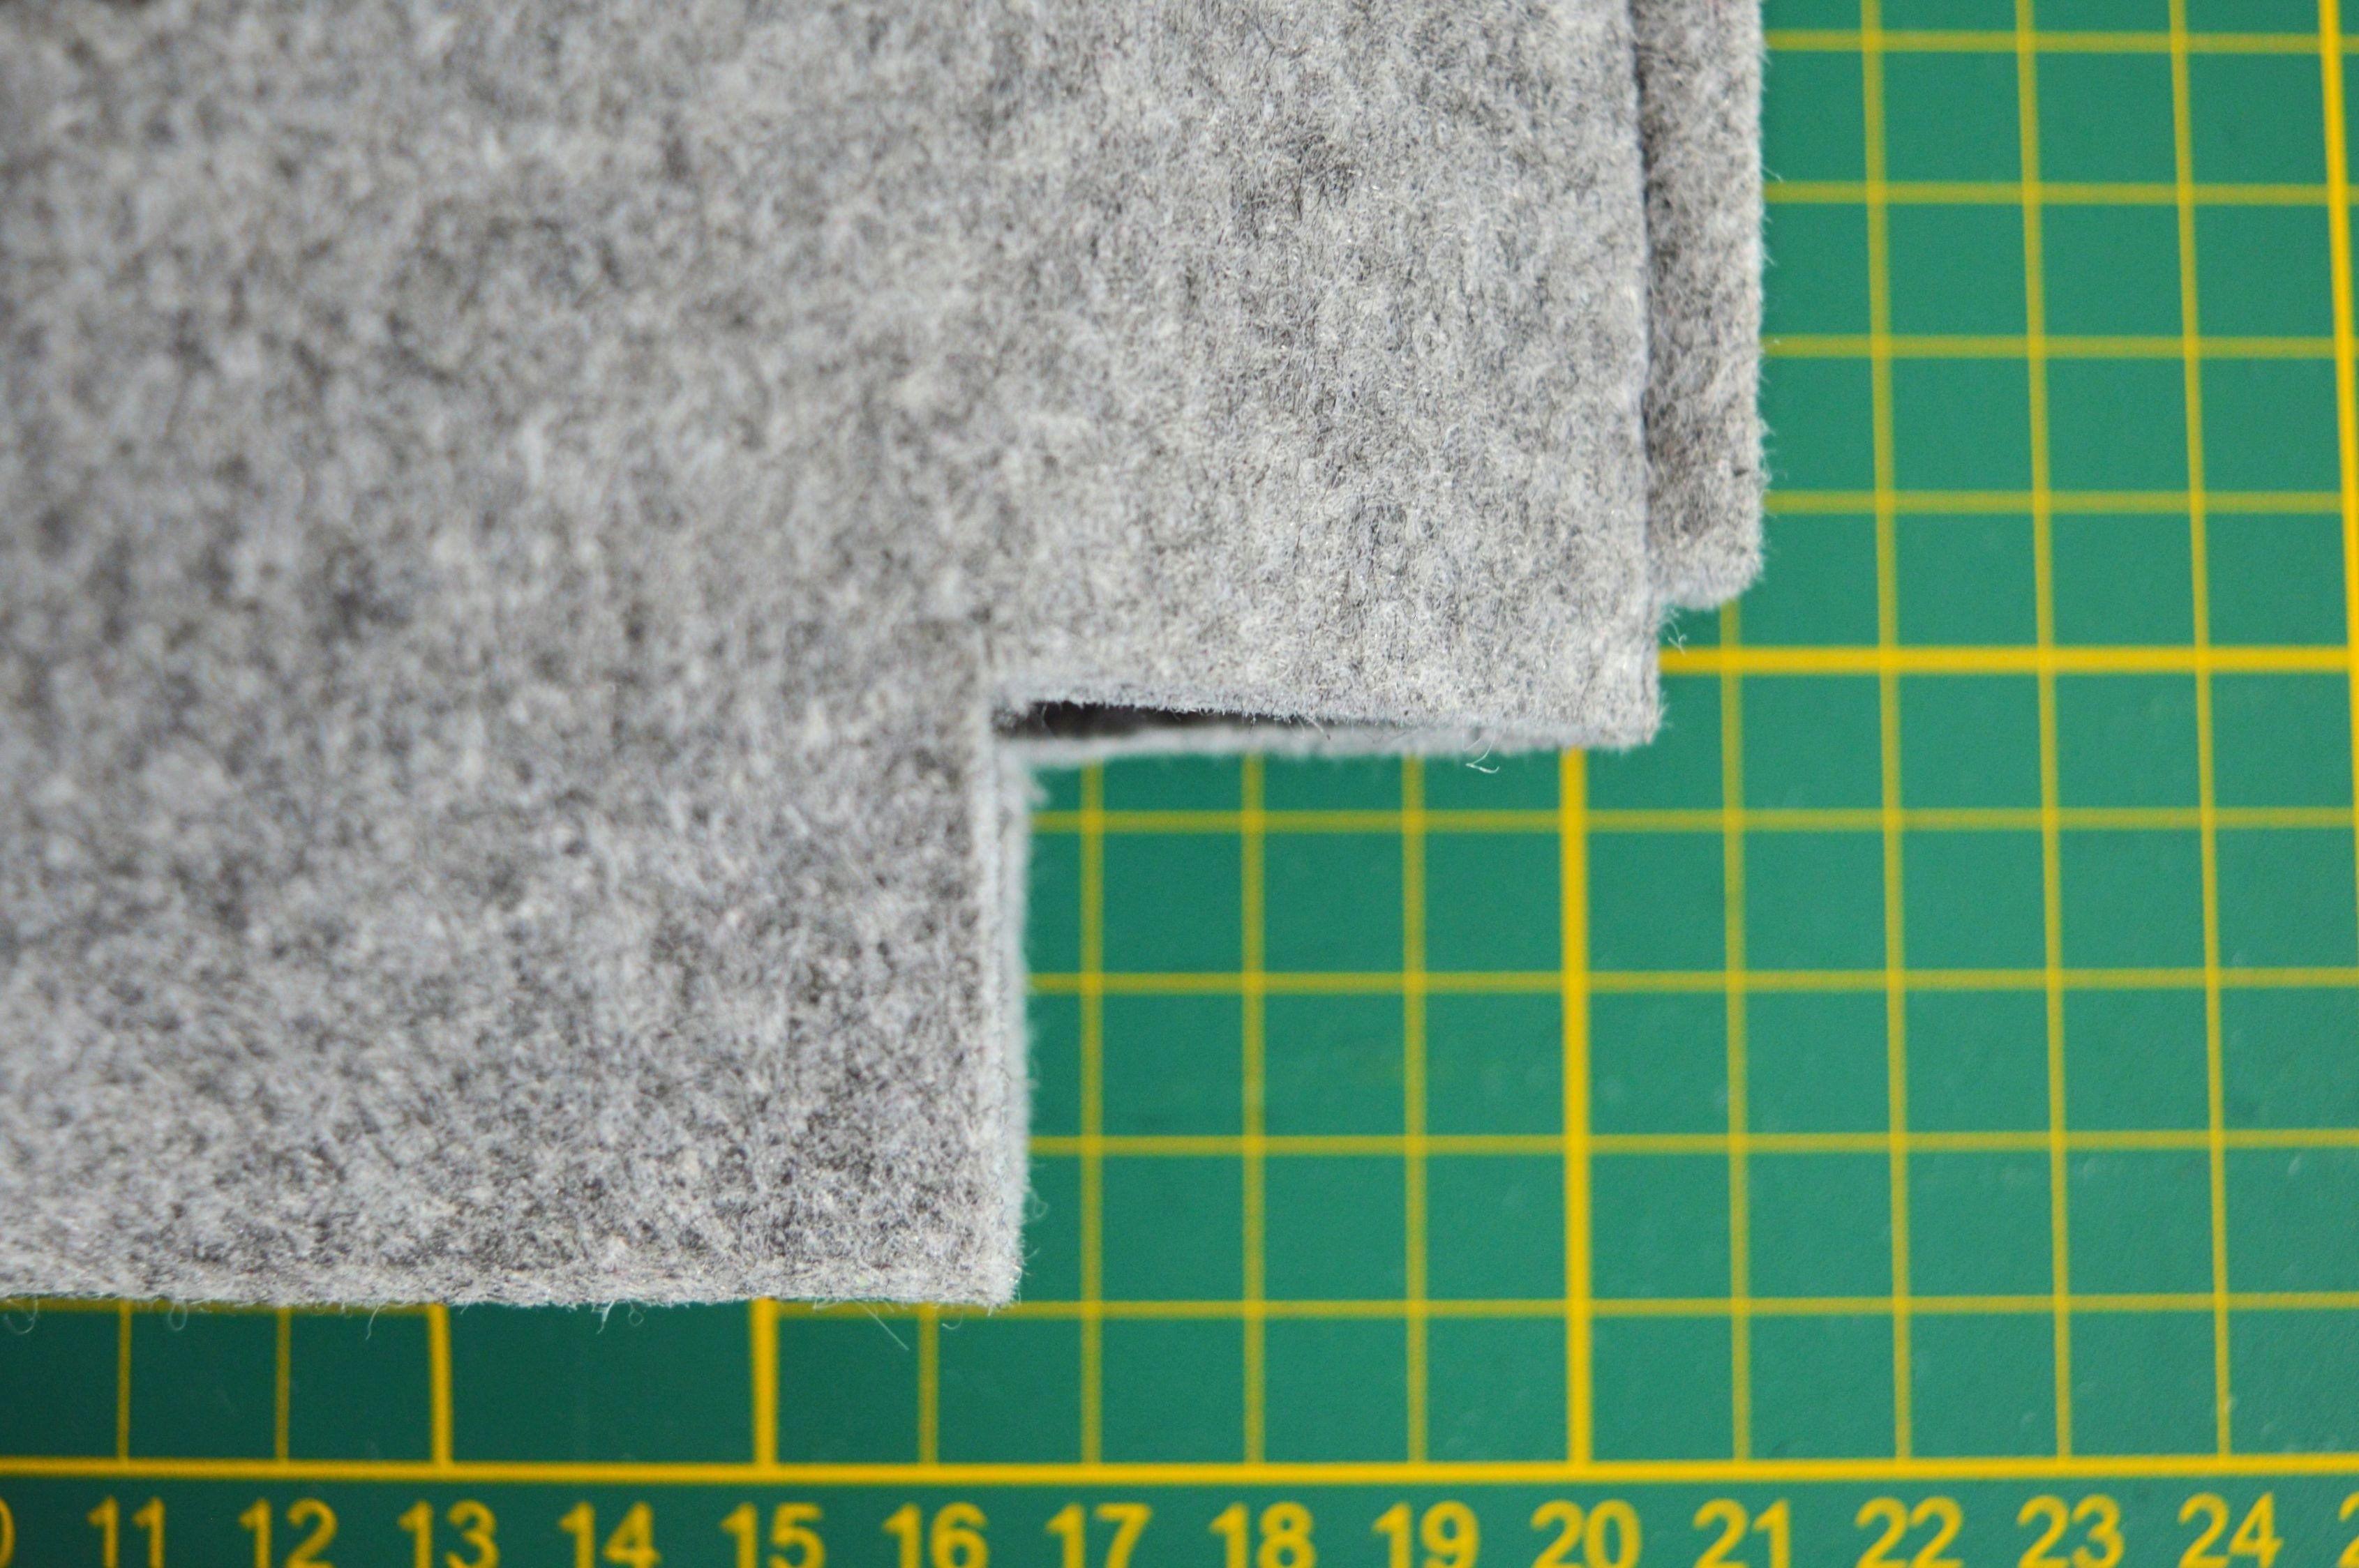
When you finished with the tailoring, let prepare the bottom of the bag.
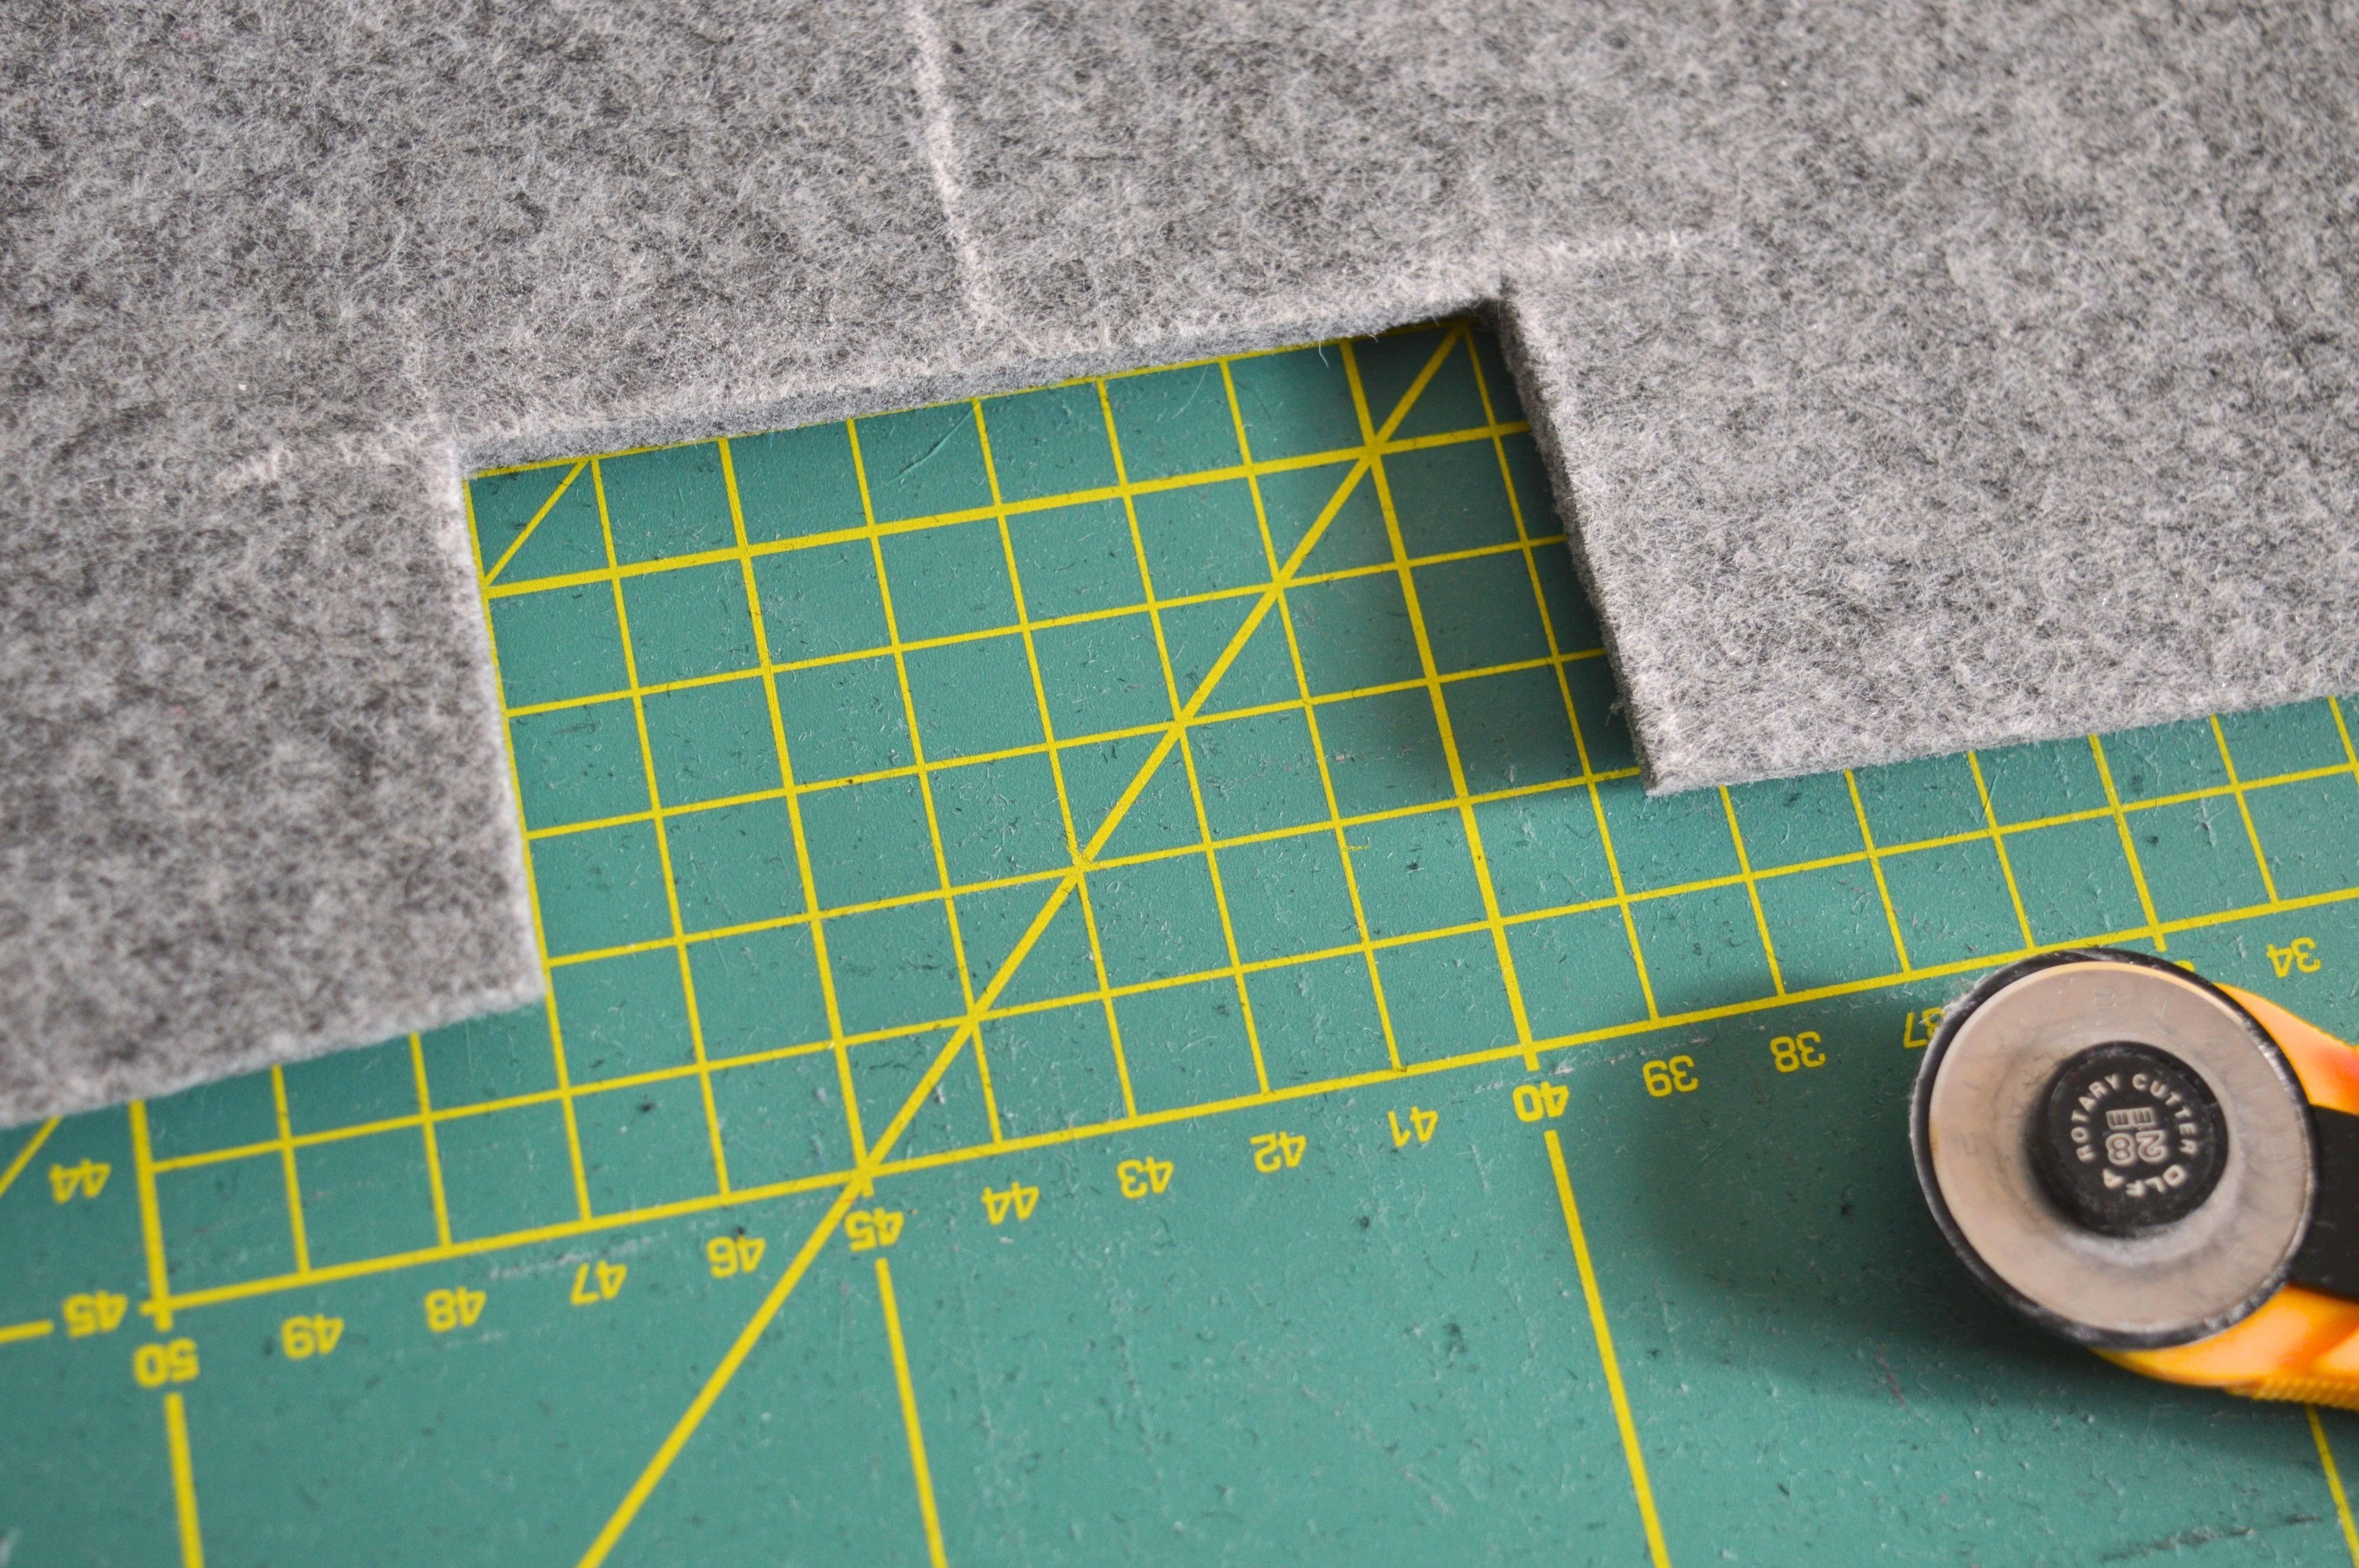
Find middle on the body part, and mark it.
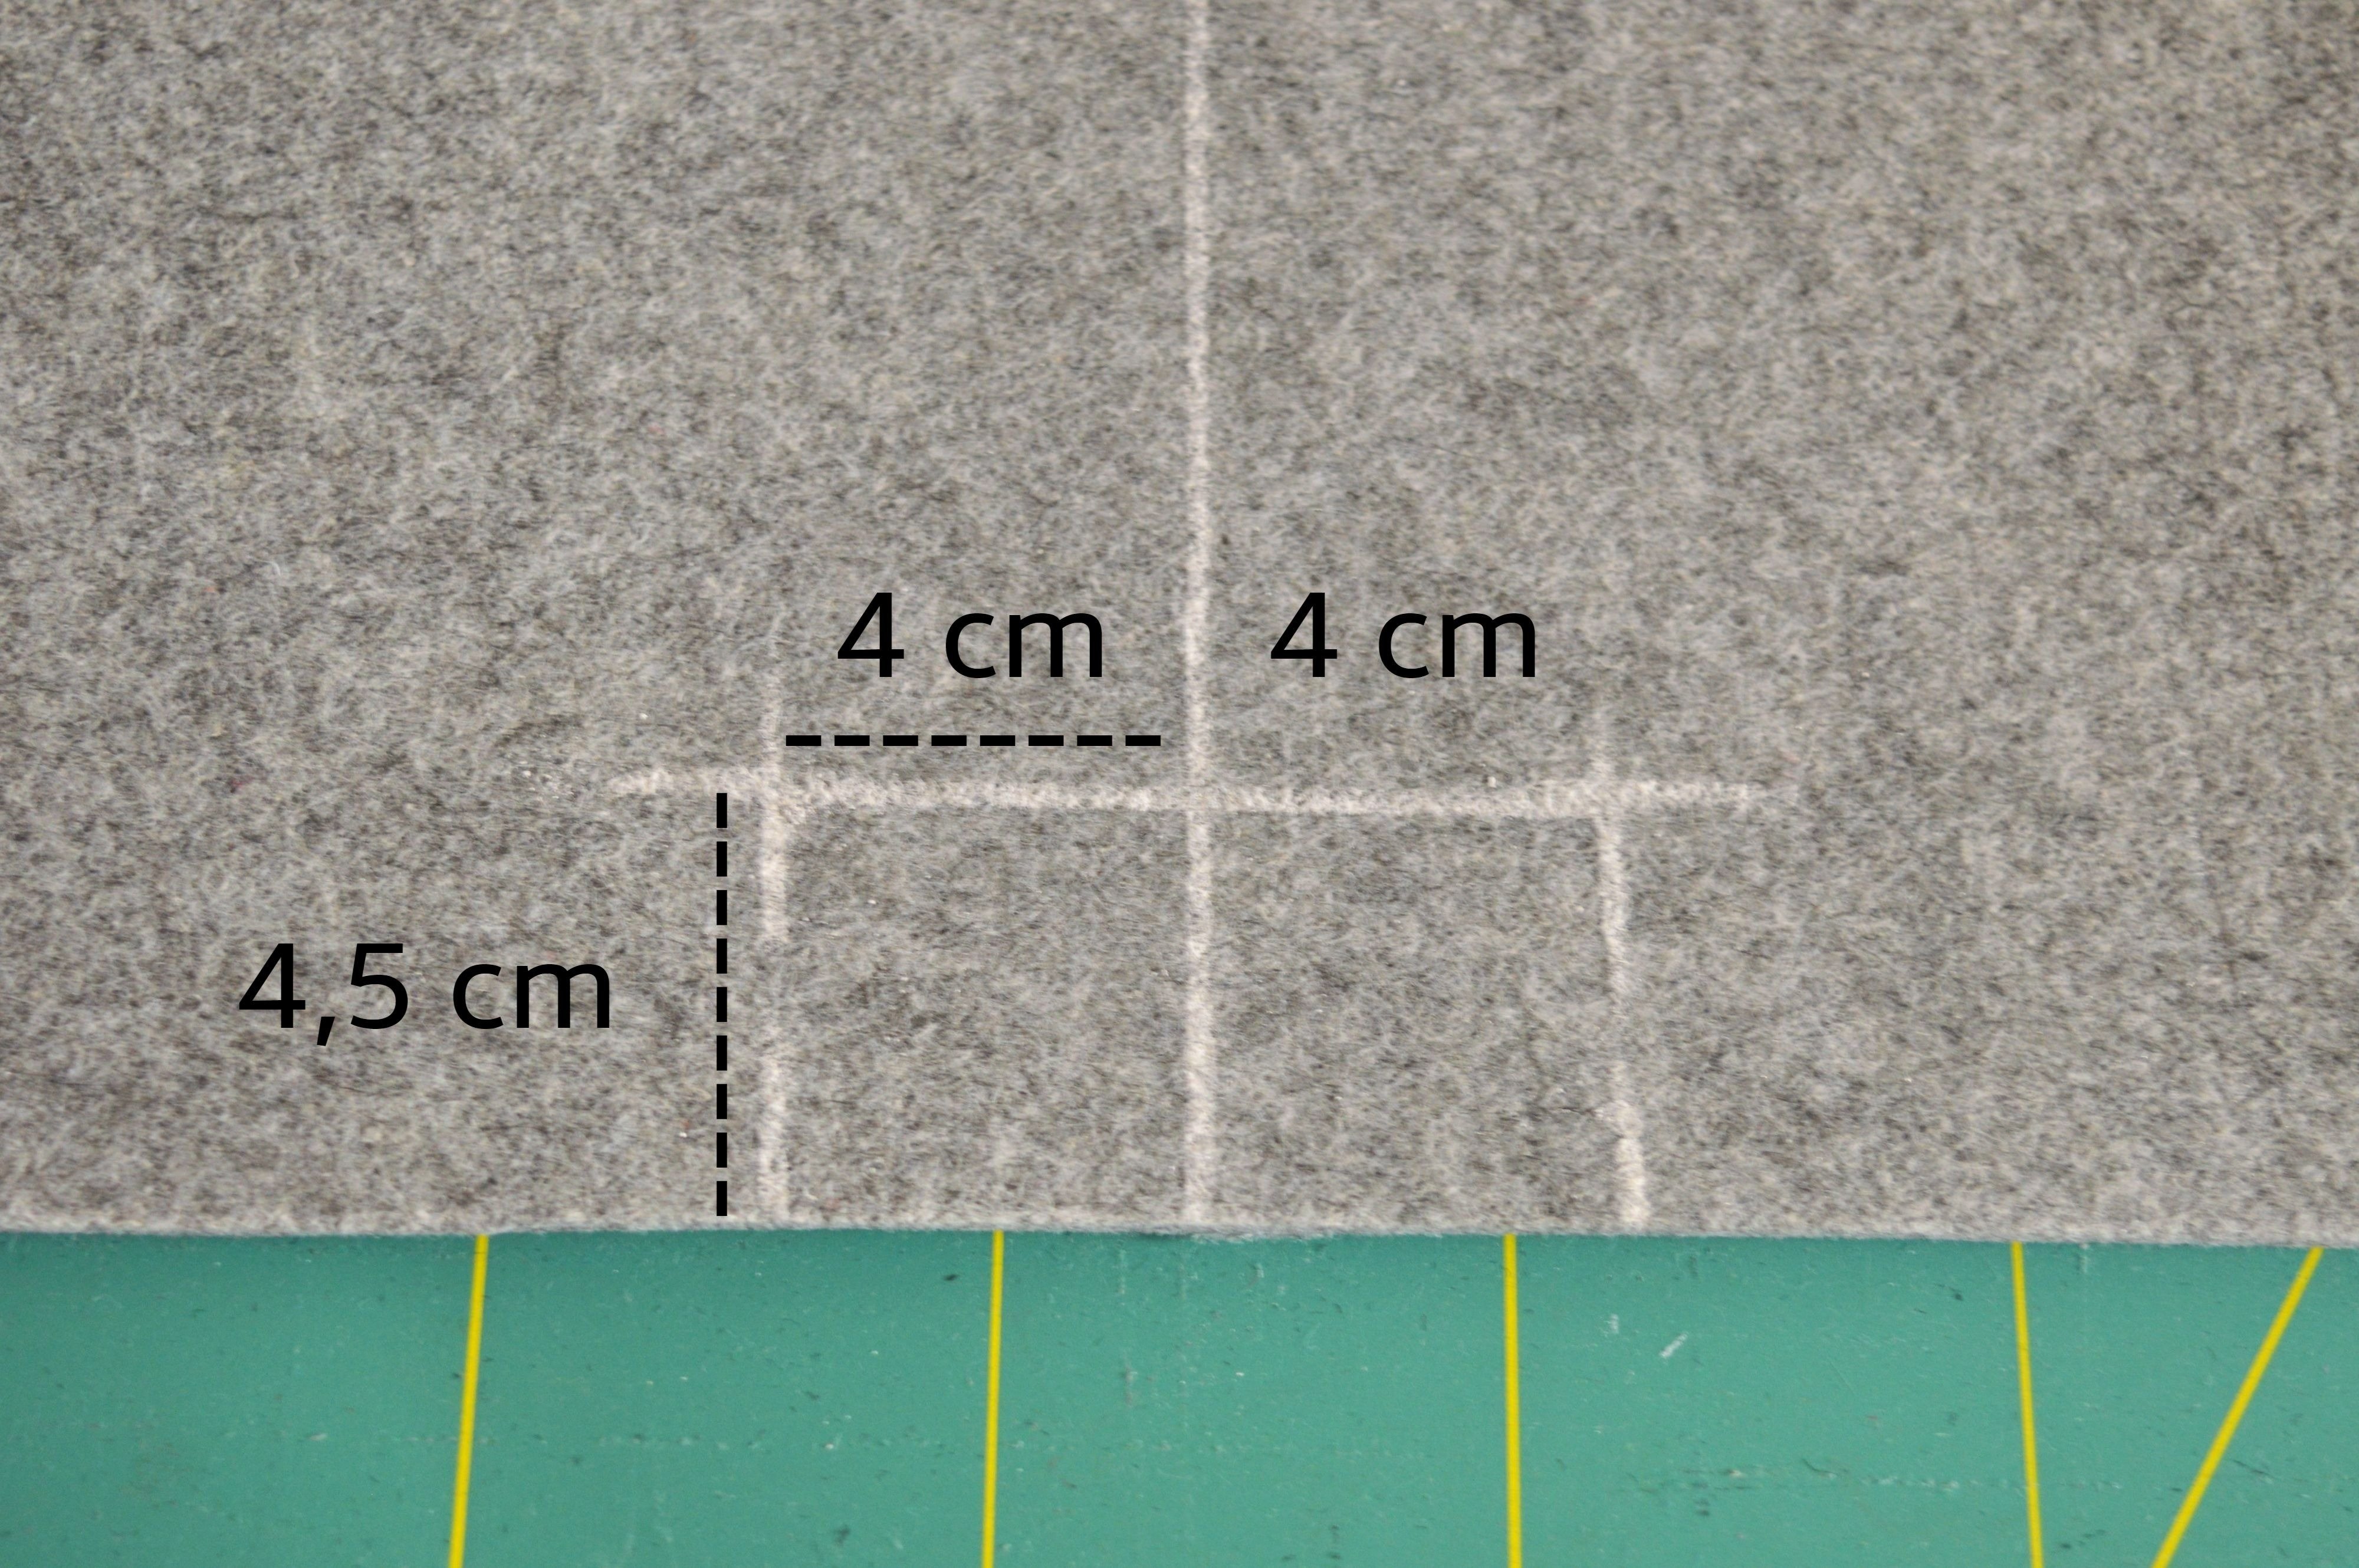
On each side edge, cut out rectangular as you see in the picture below.
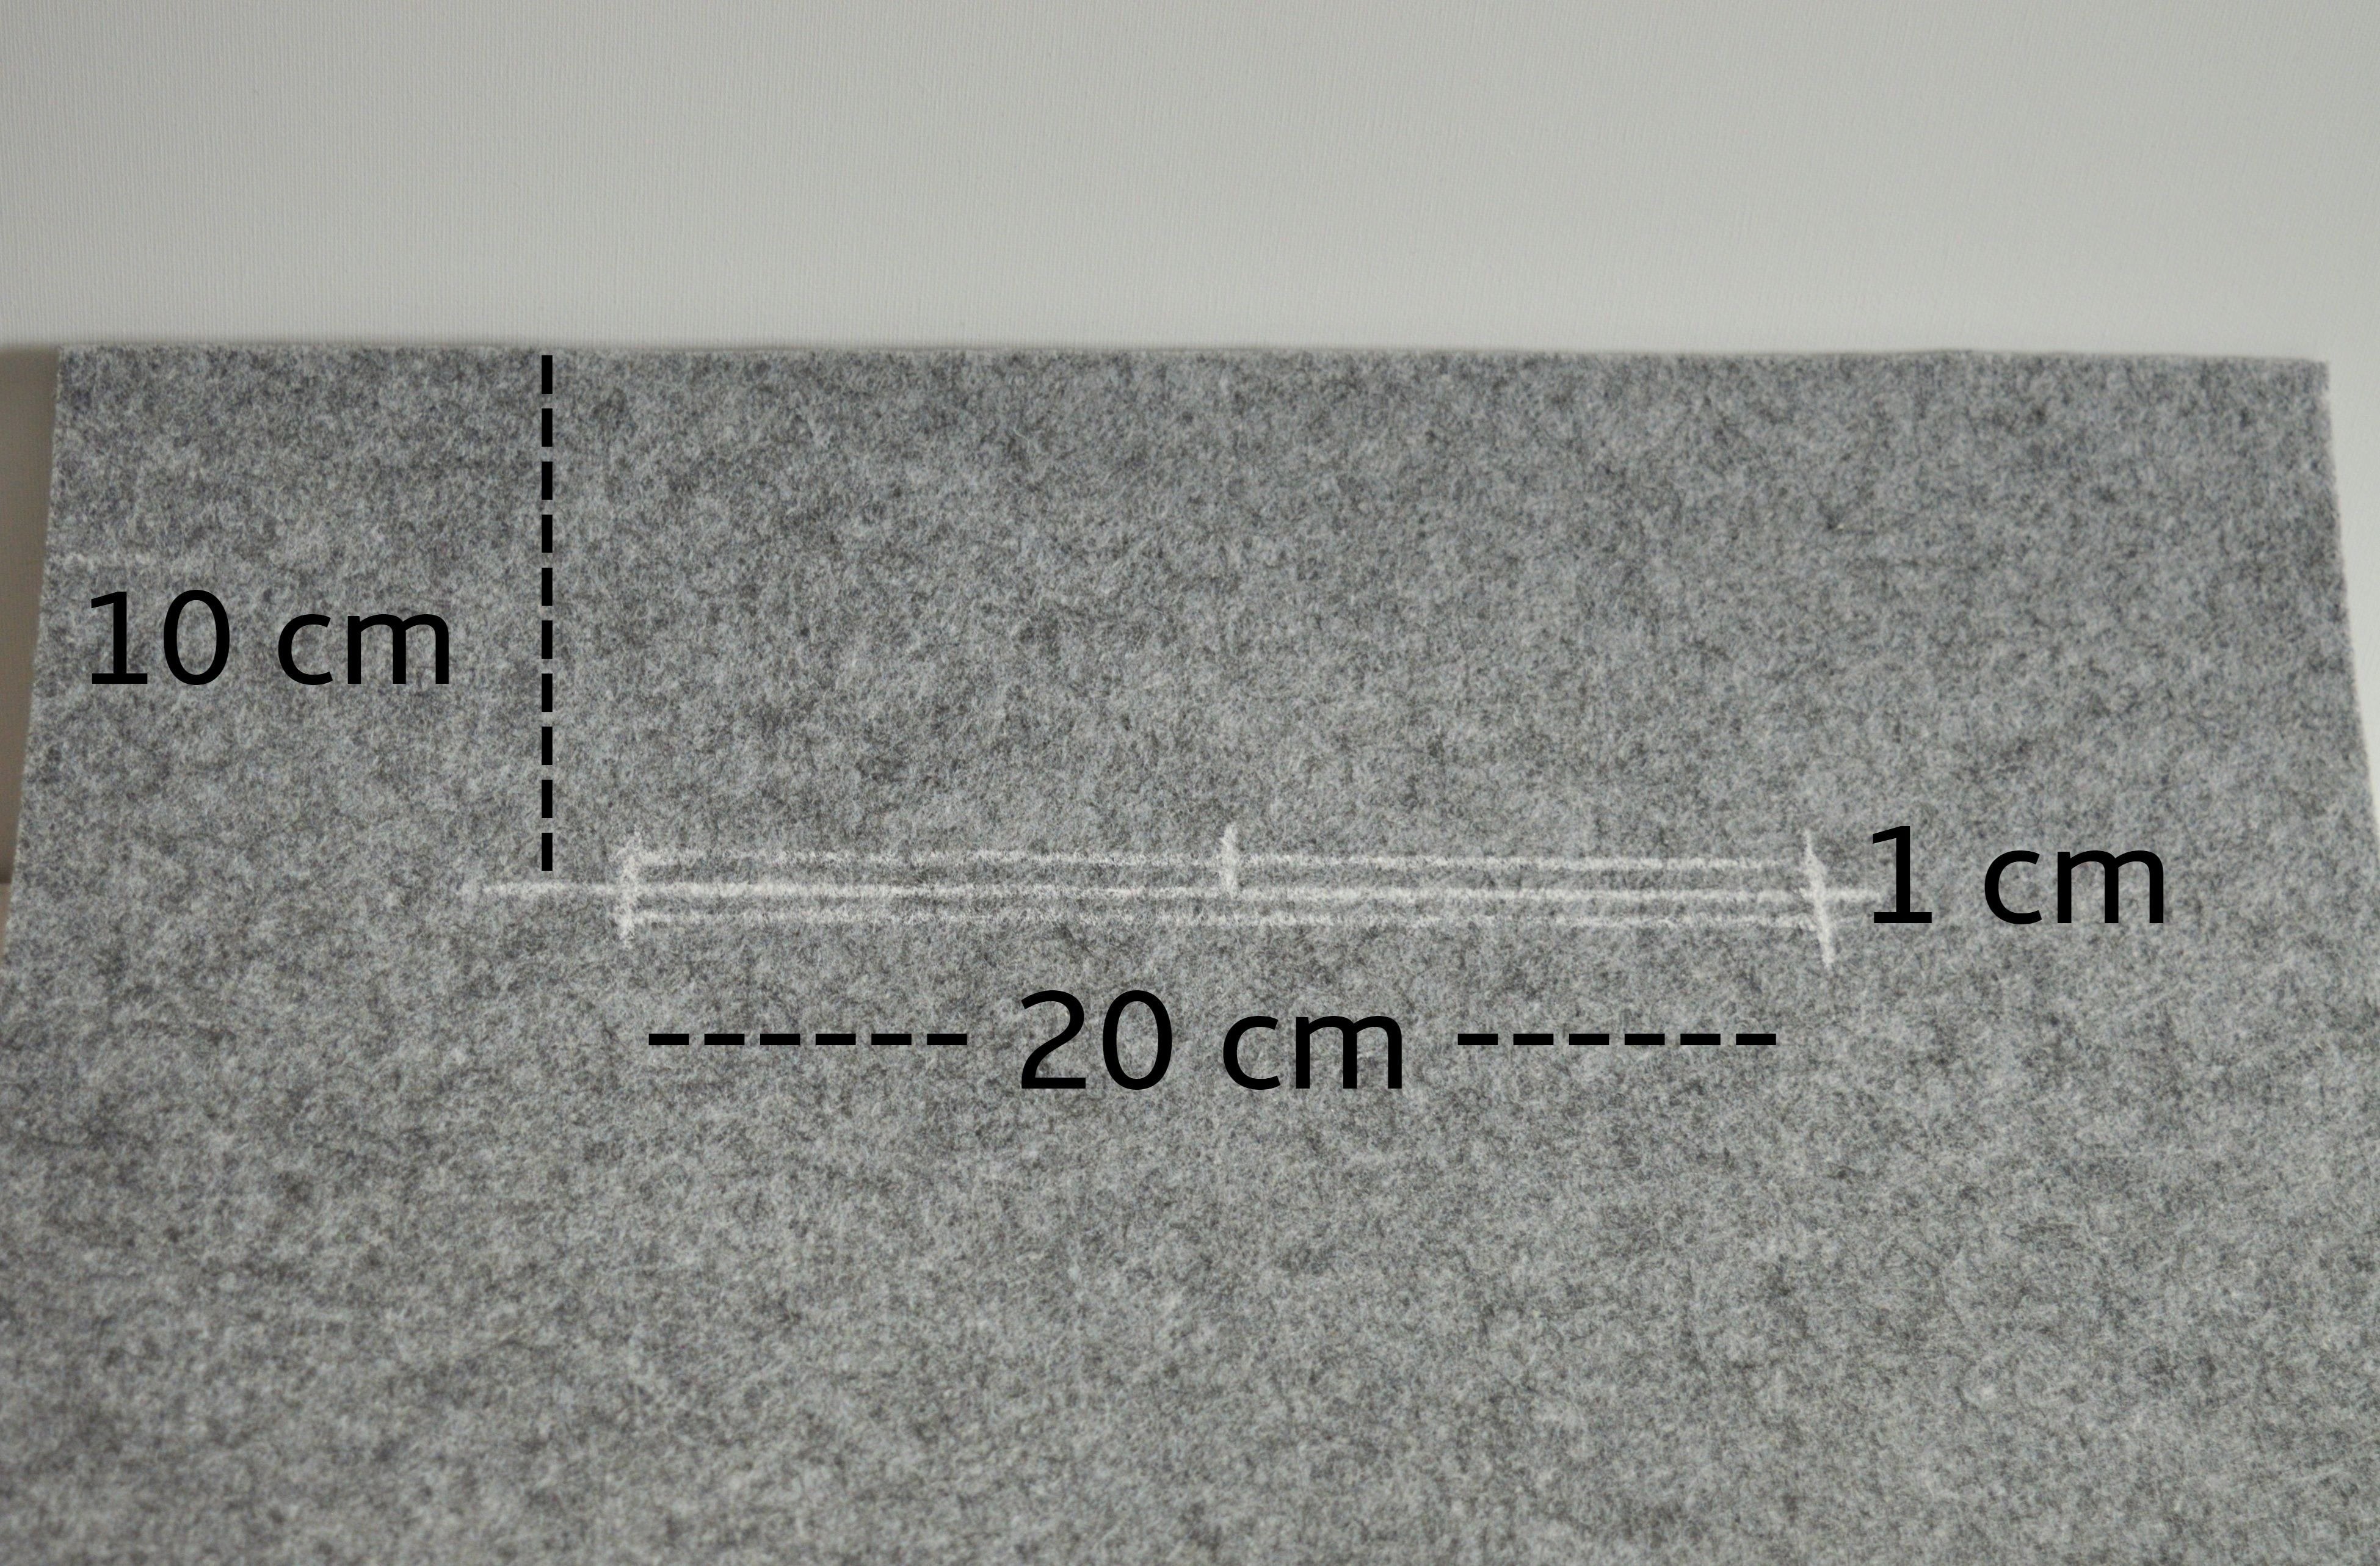
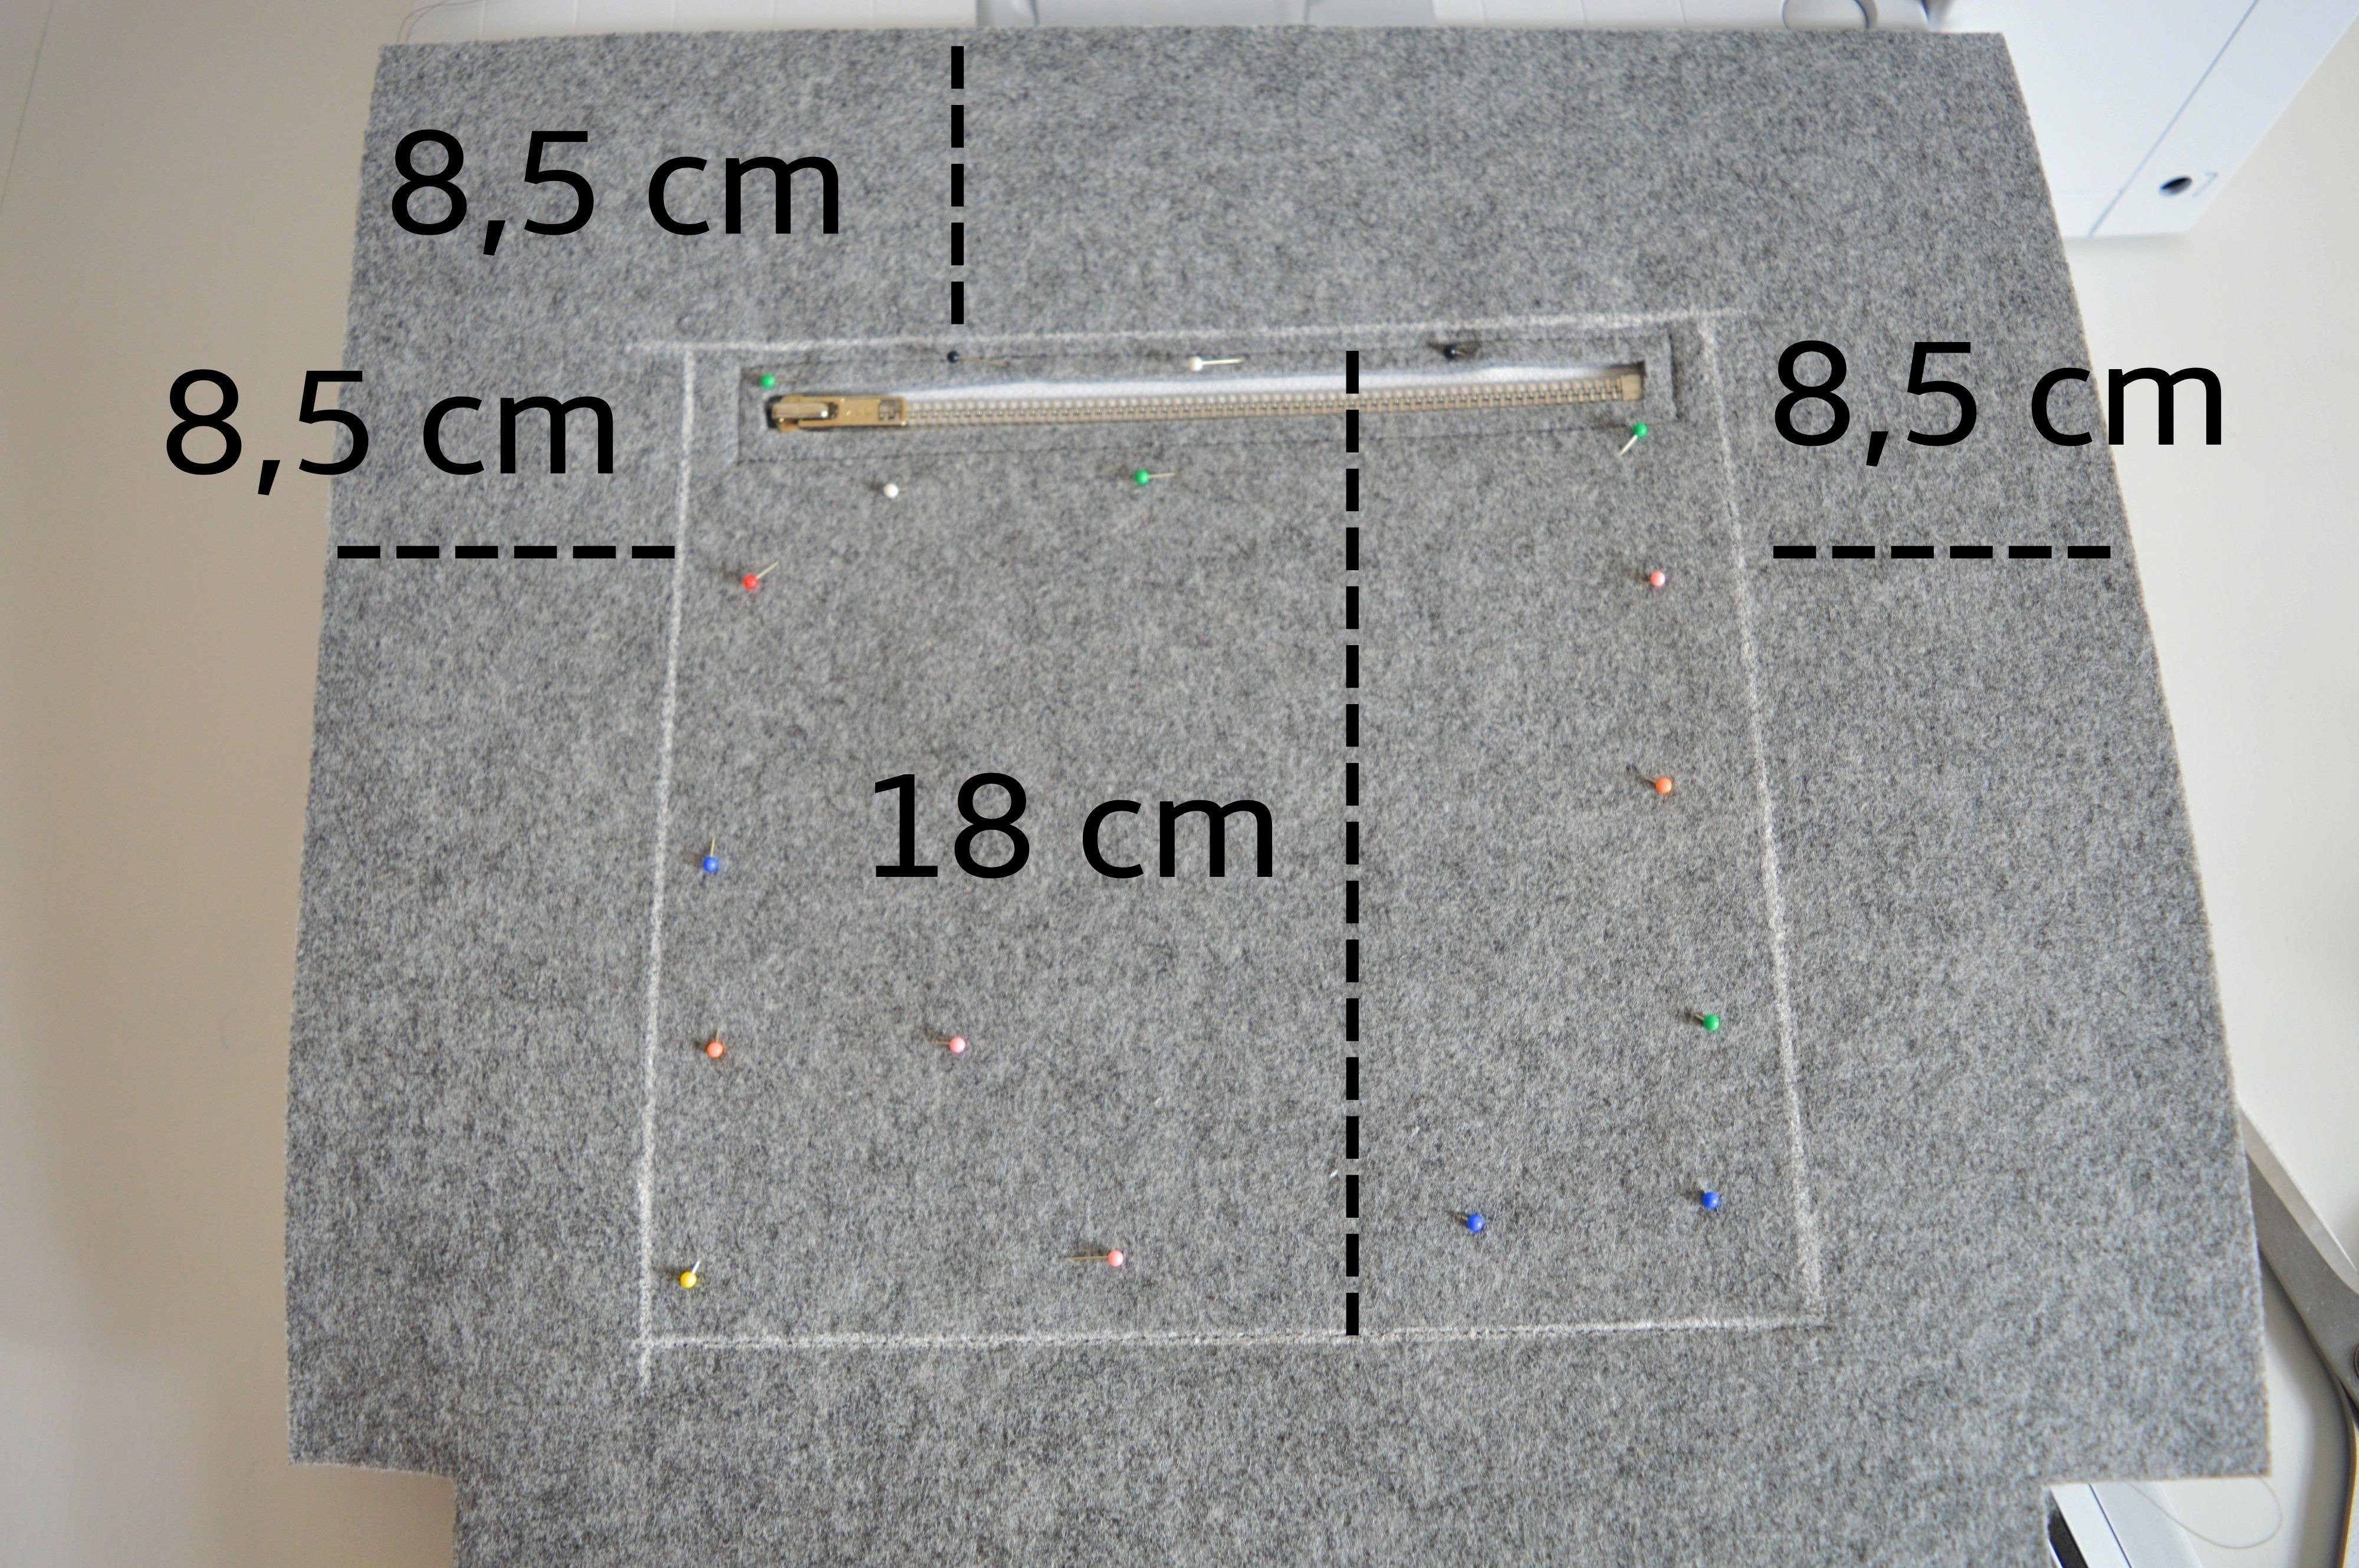
You can now draw the zipper opening. As so far, make it on the wrong side of the bag (inside).
First of all, measure 10 cm from the bag top and draw a line parallel with the top edge. The zipper is 20 cm length, you need to find the middle of that drawn line, mark it and from that point mark 10 cm to the left and the right.
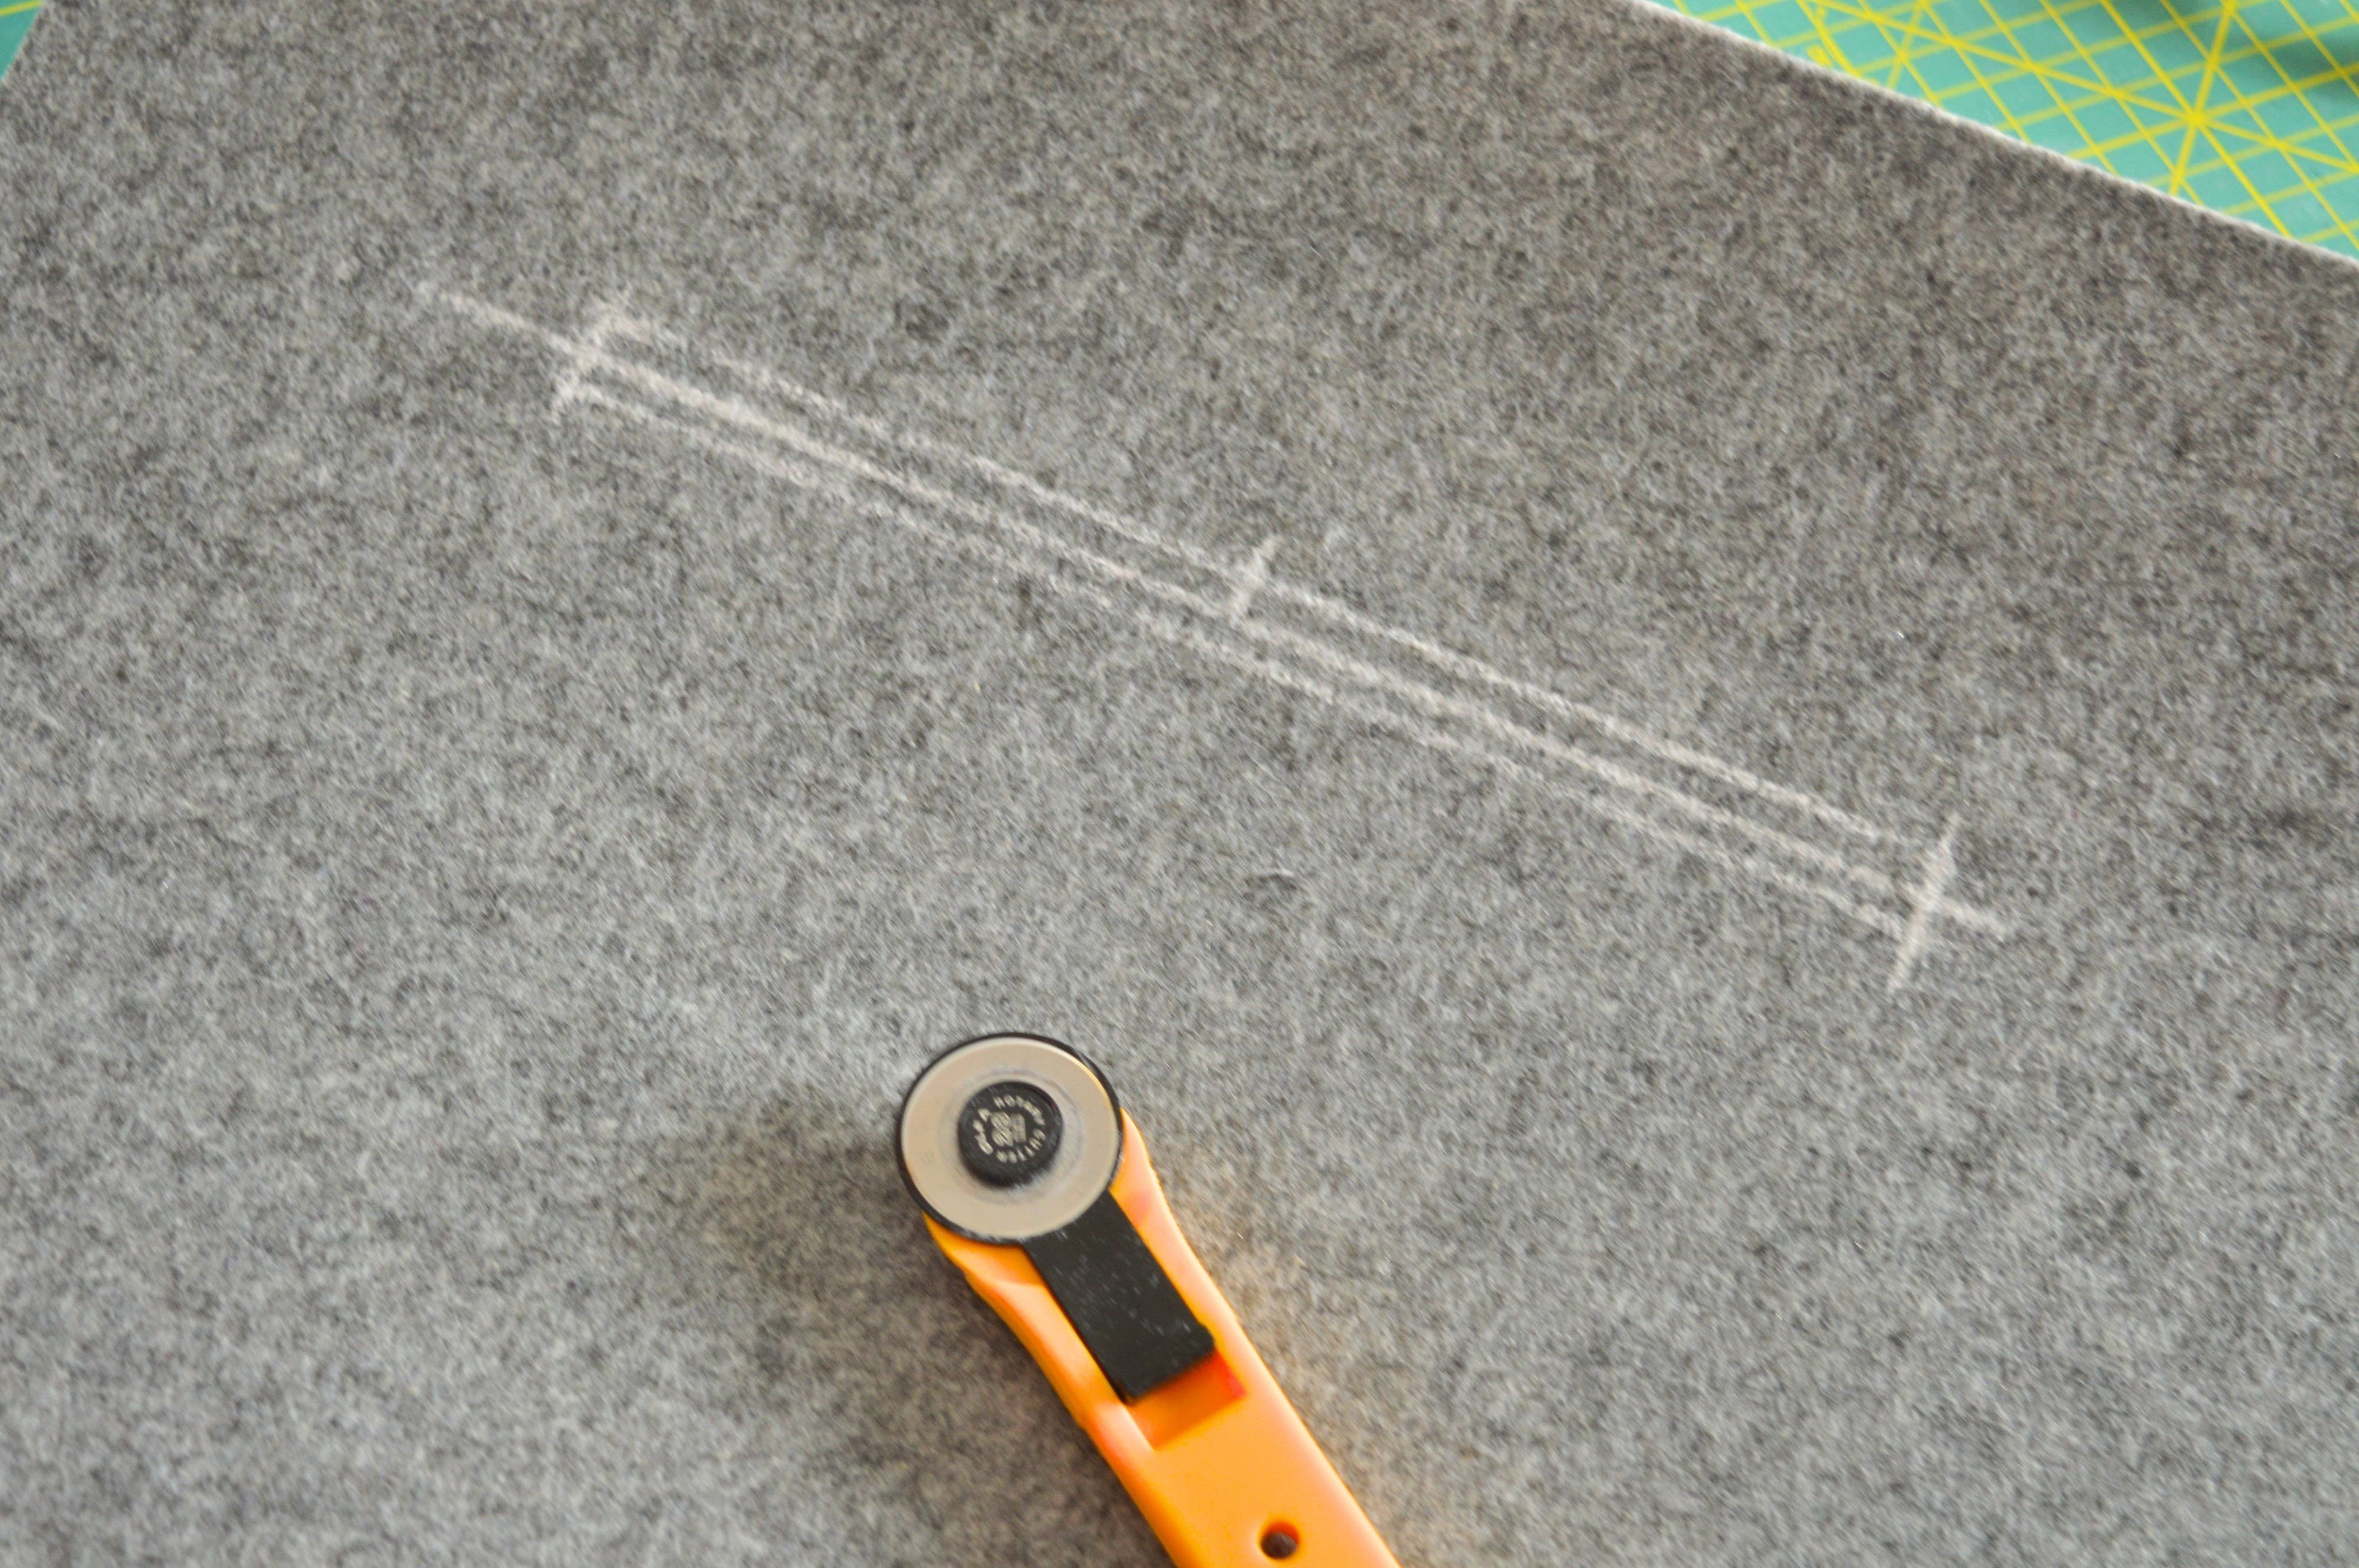
Between these two points, mark above and below from the line of 0,50 cm.
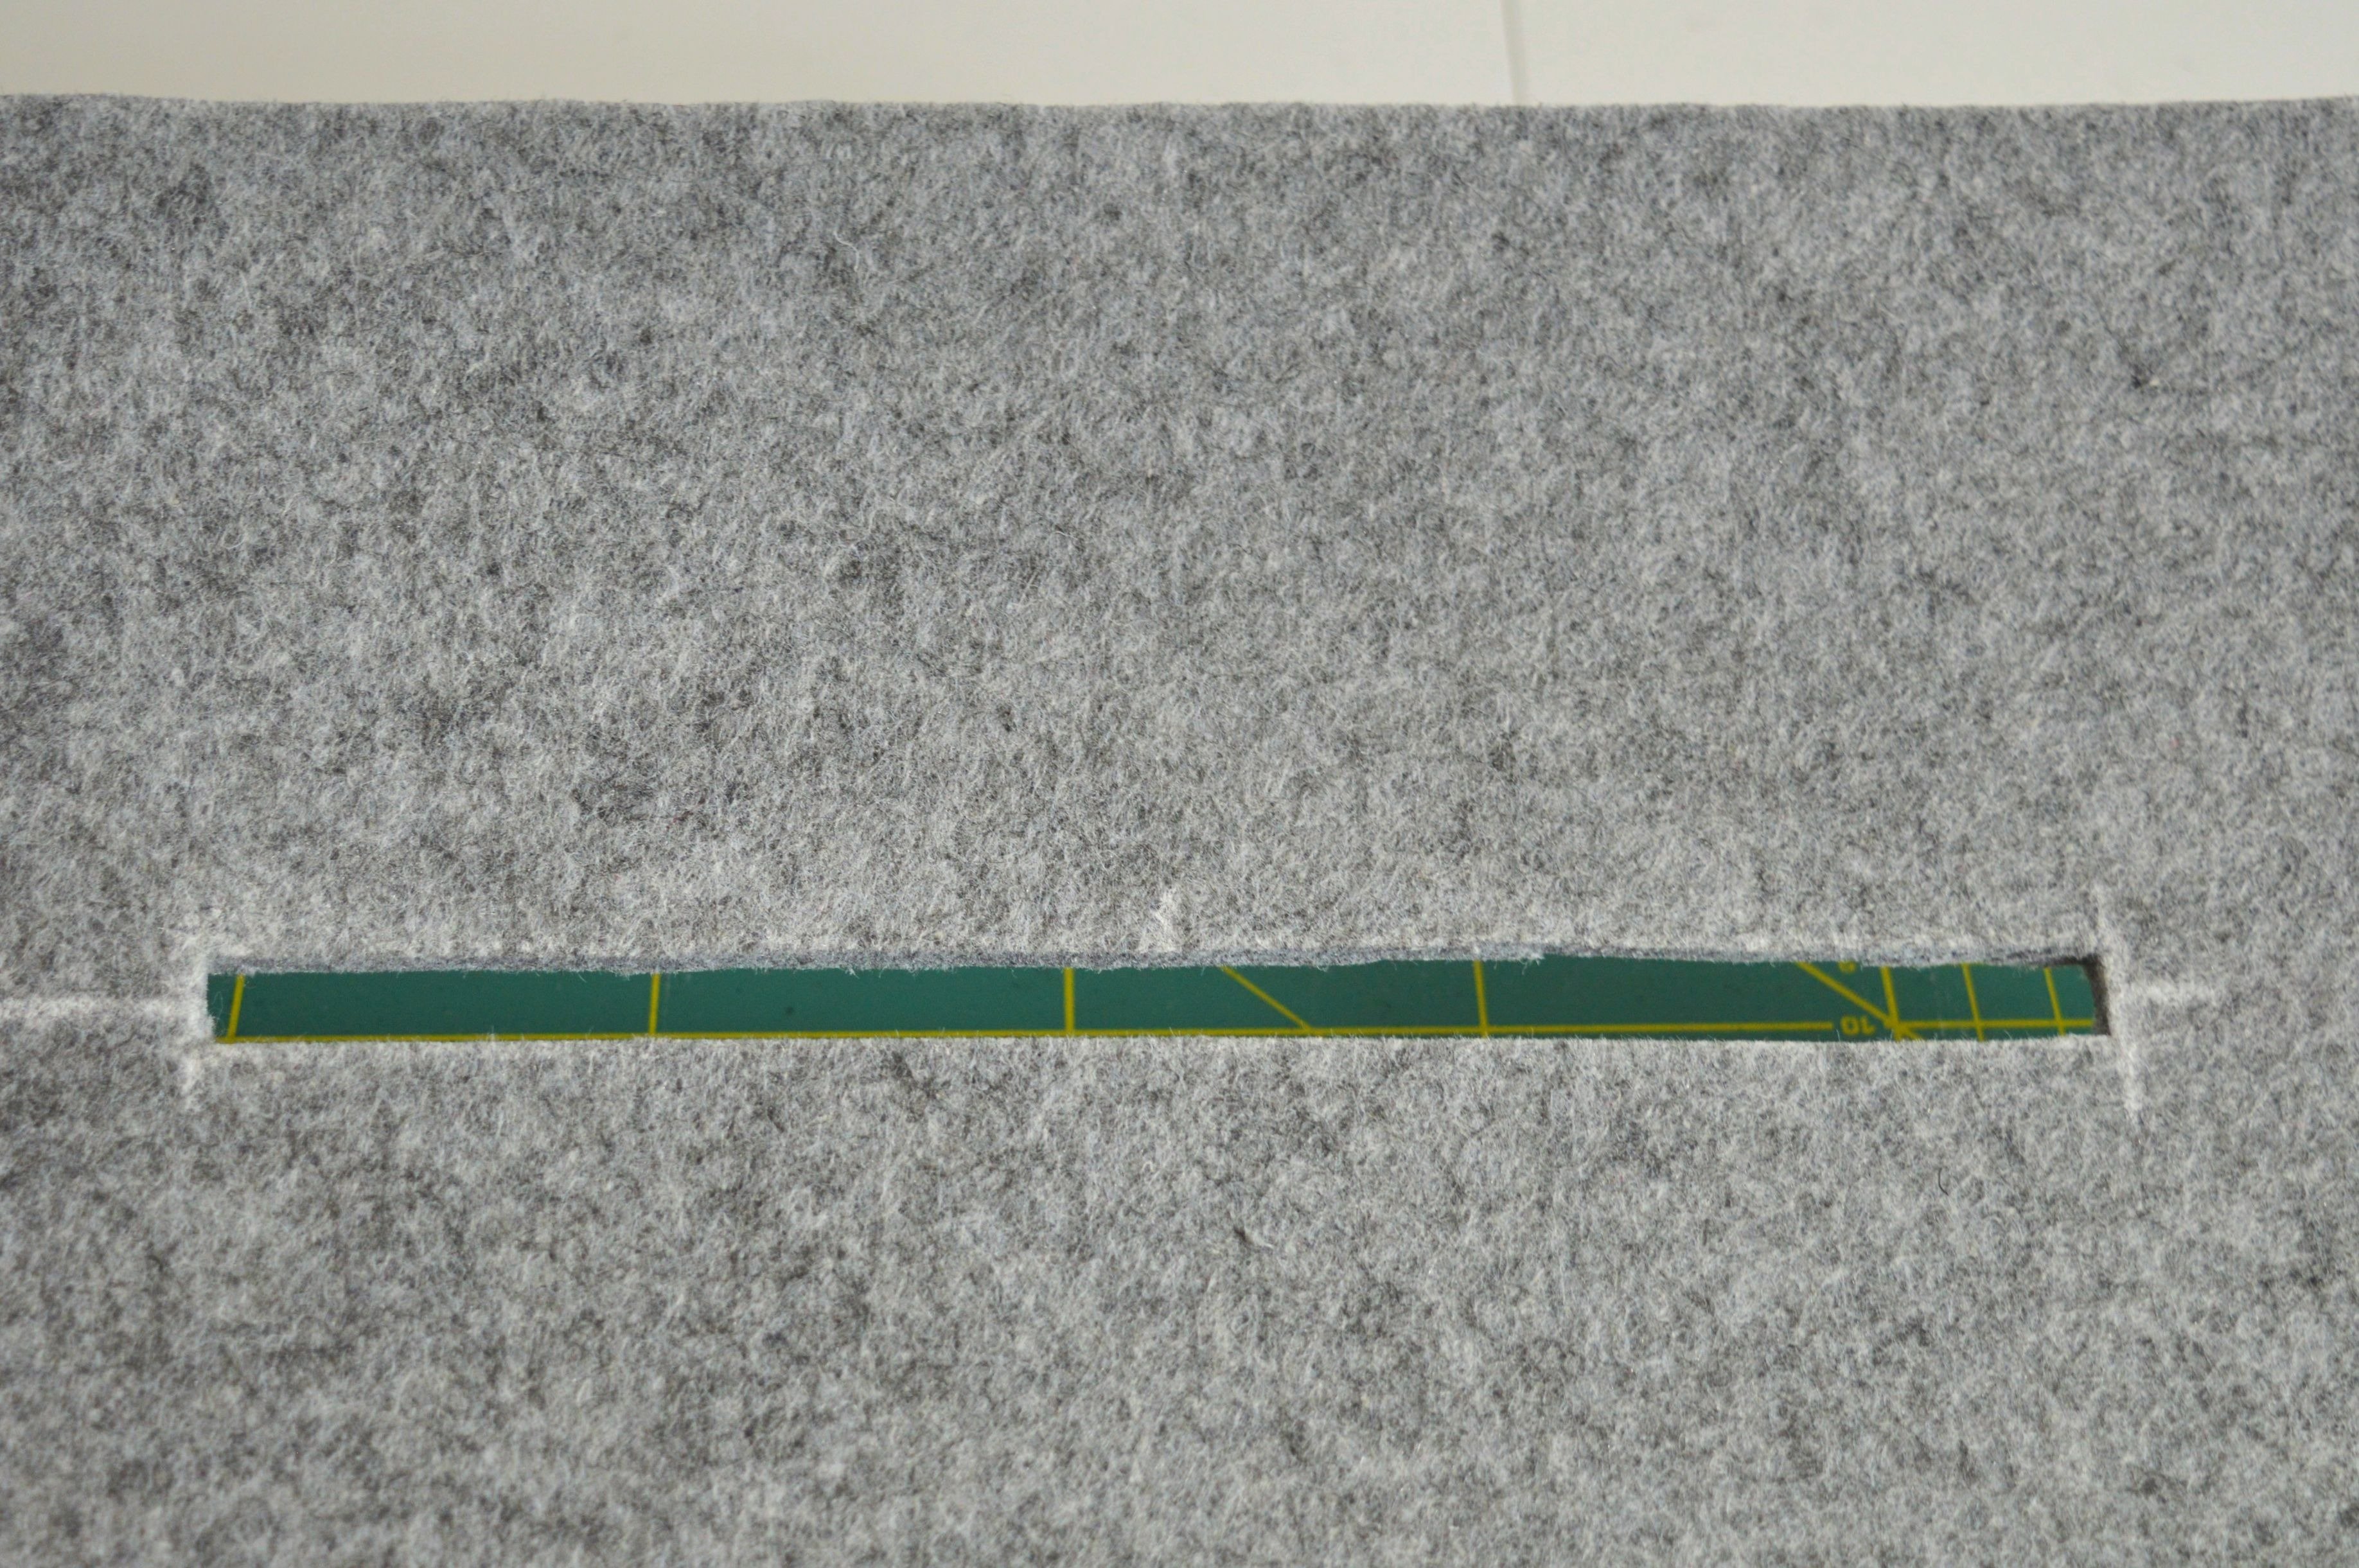
Zipper opening is marked, let cut it.
Use a rotary cutter with a smaller blade.
Place the zipper and pin it.
Here is useful to have adhesive tape (I have used Prym Wonder Tape) to secure the zipper from moving.
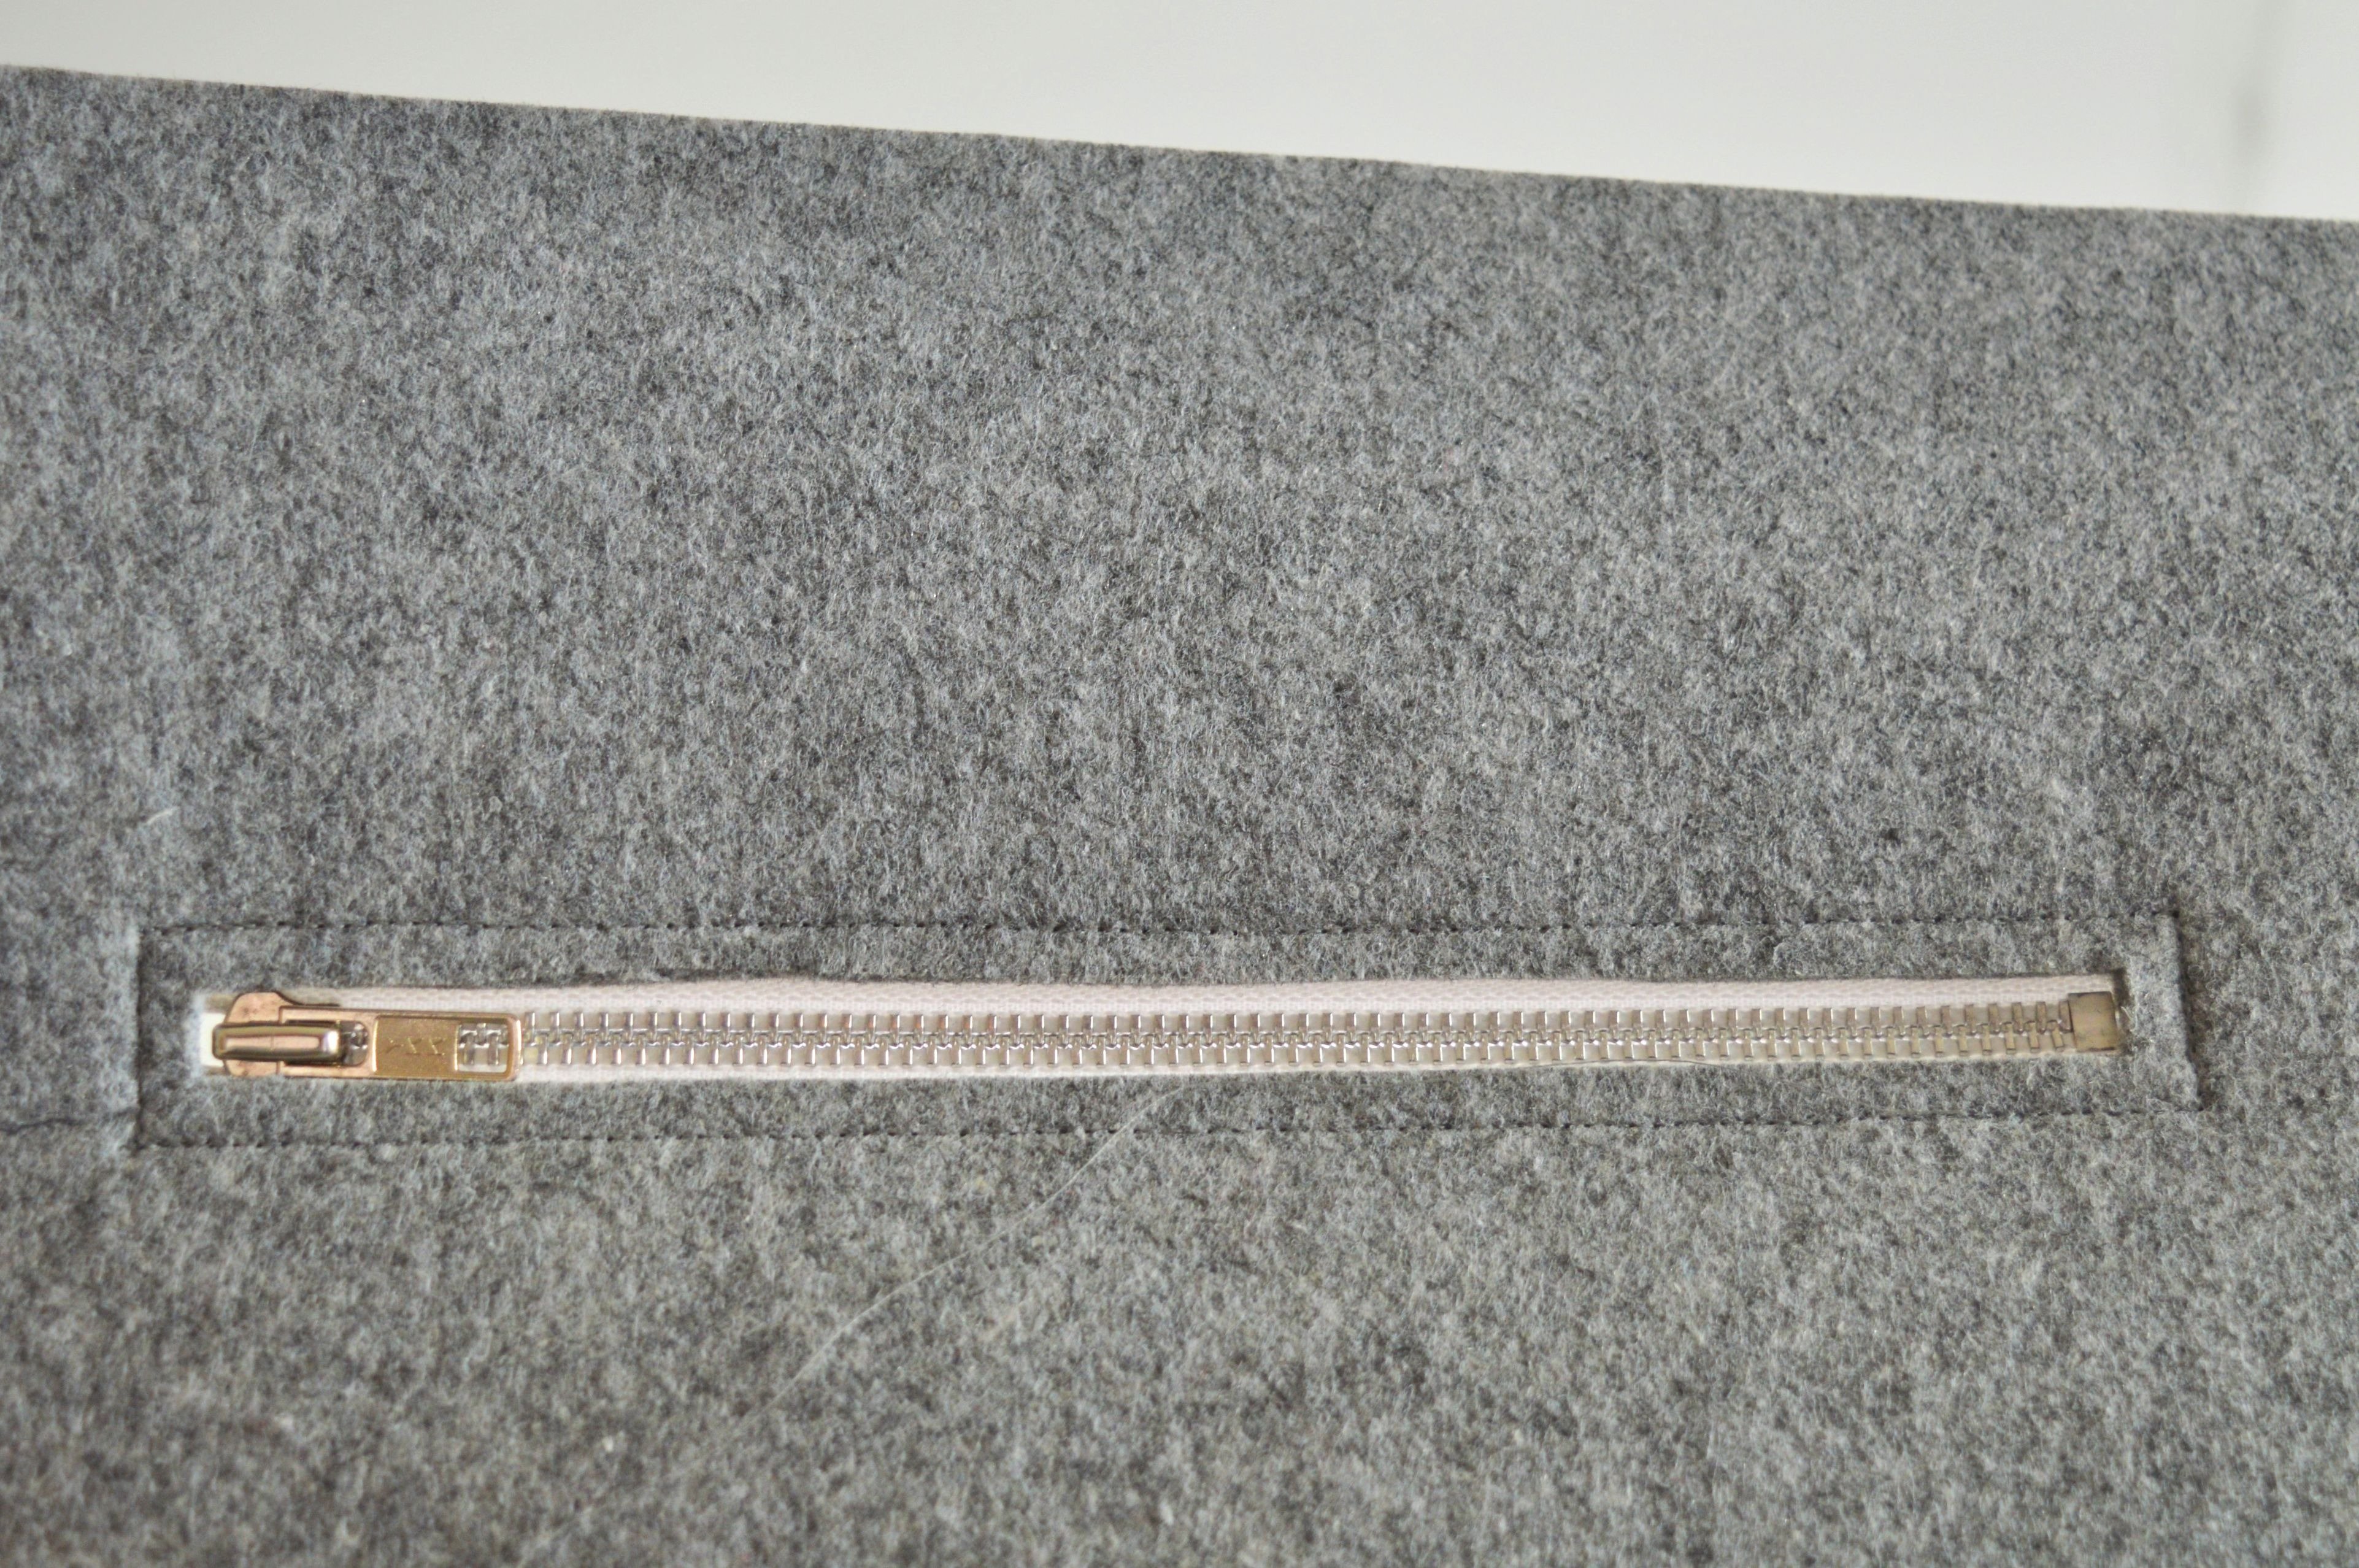
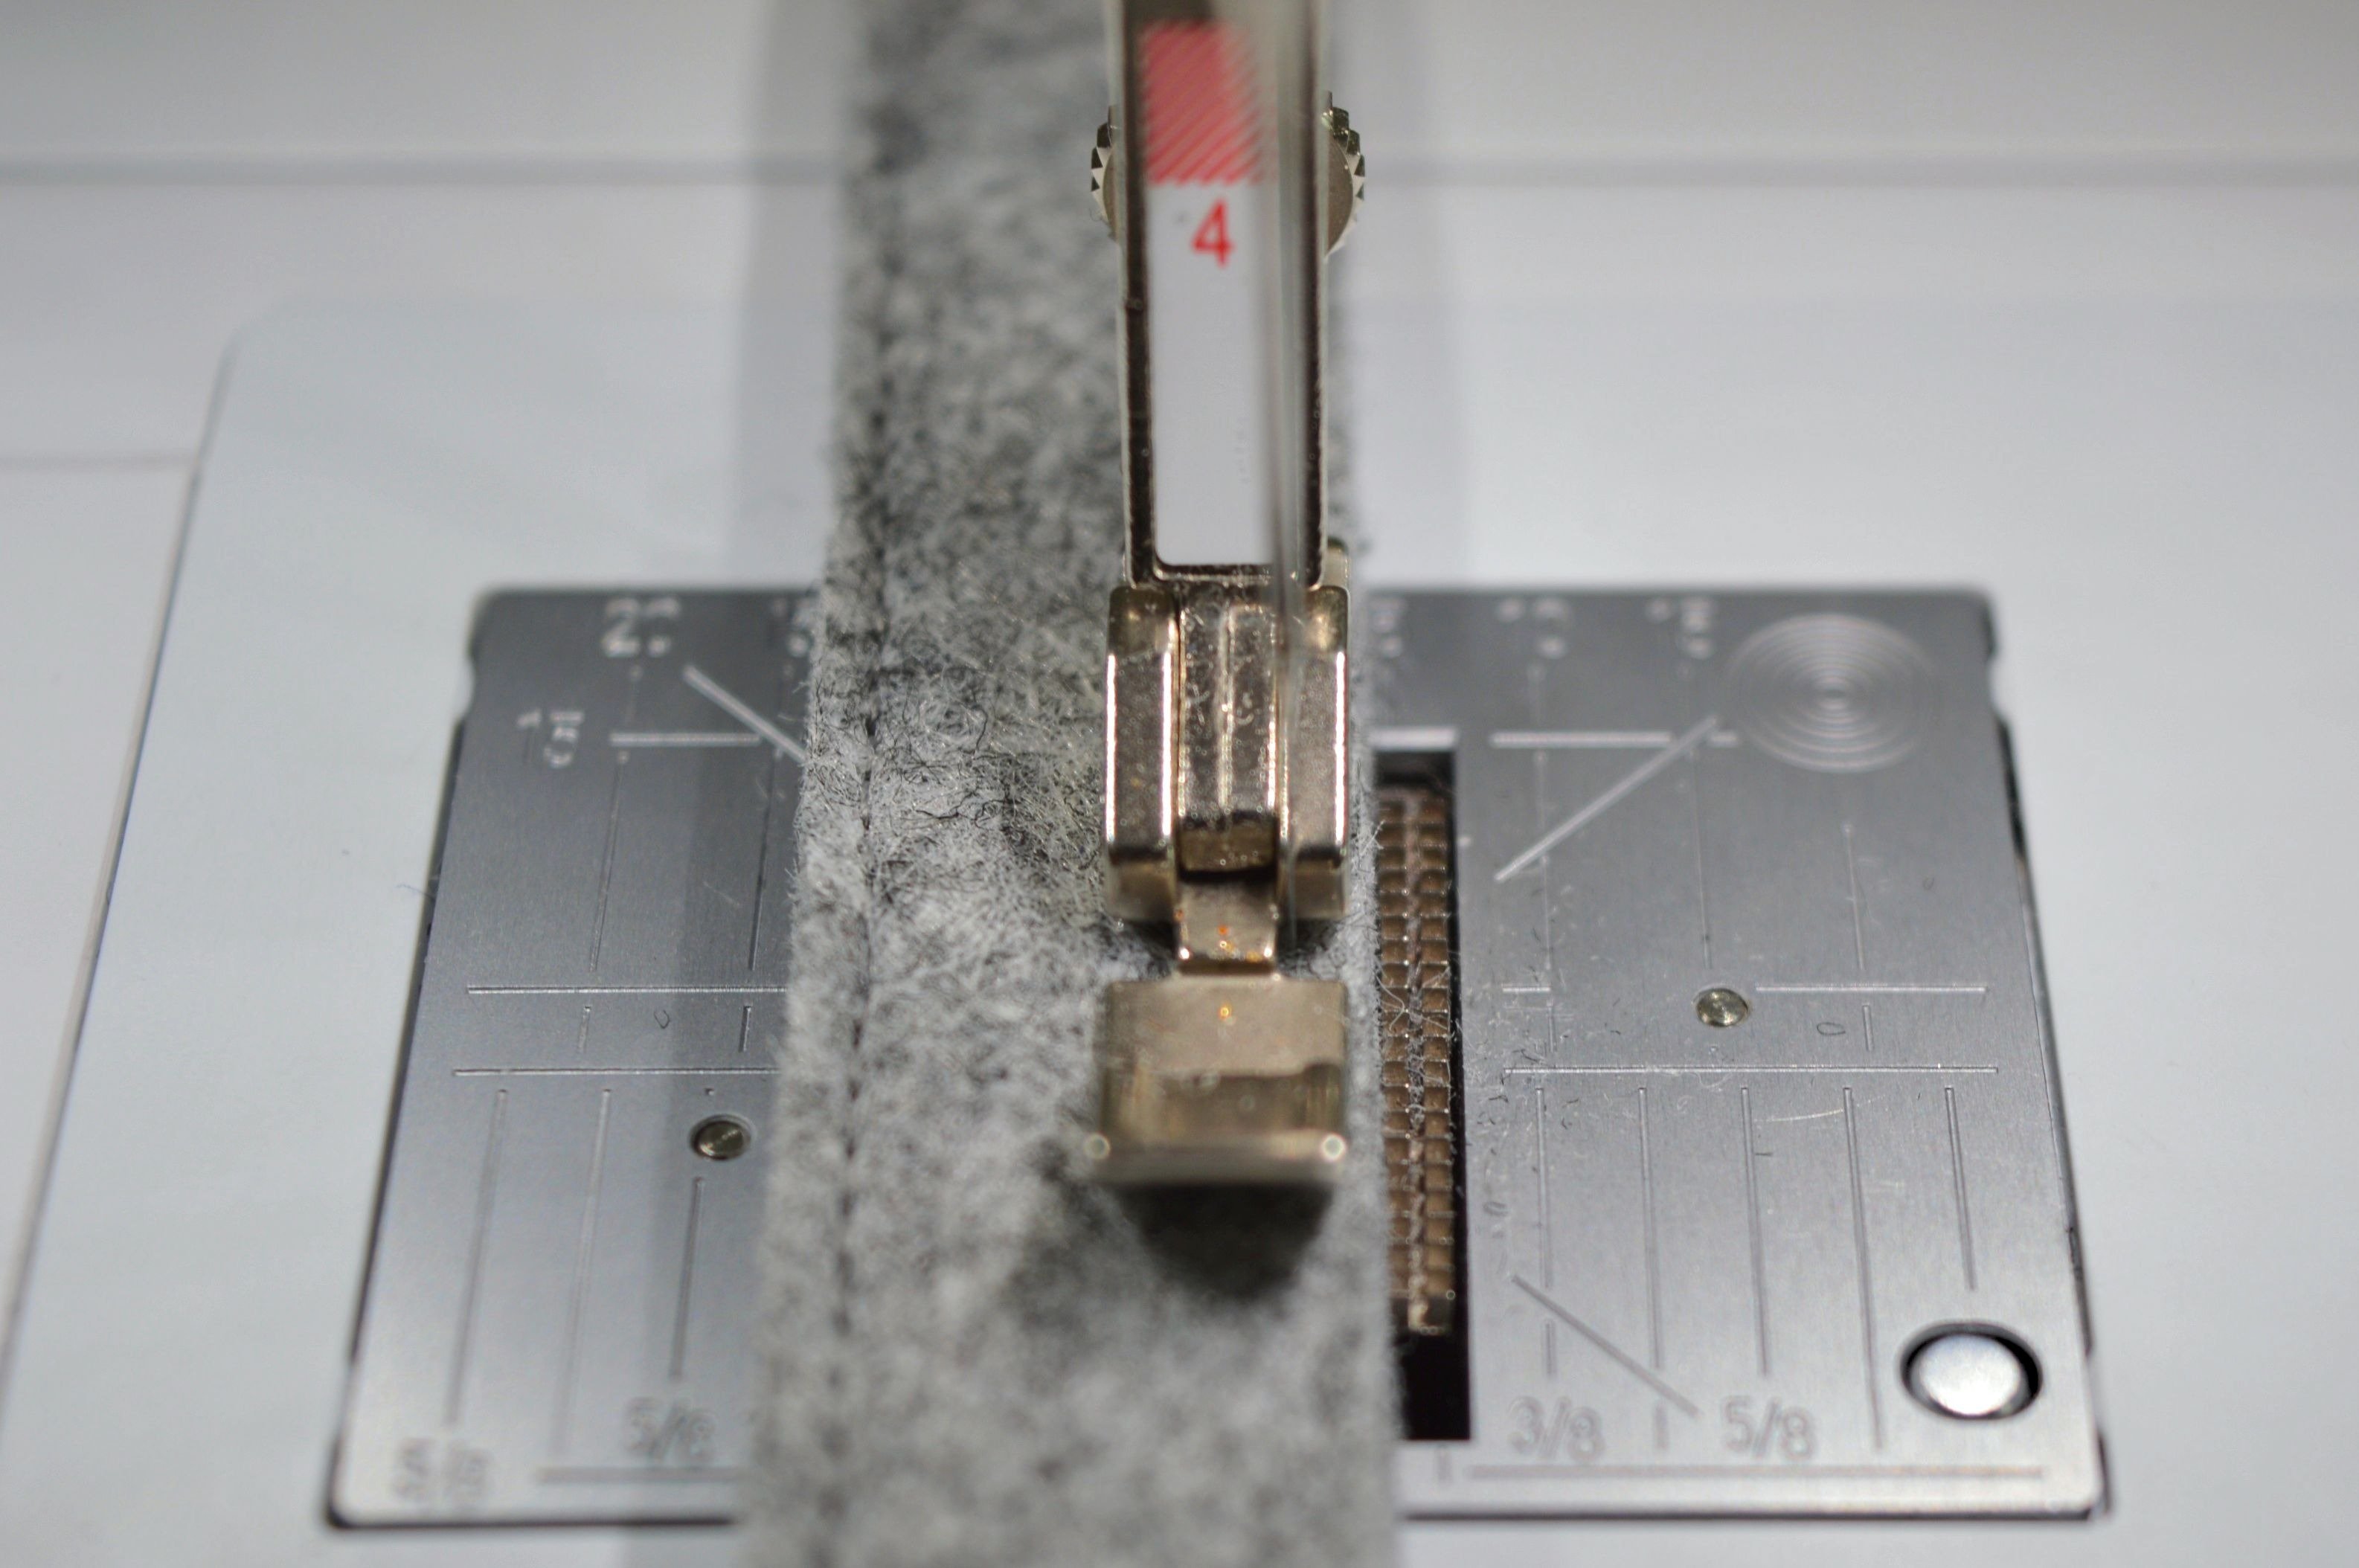
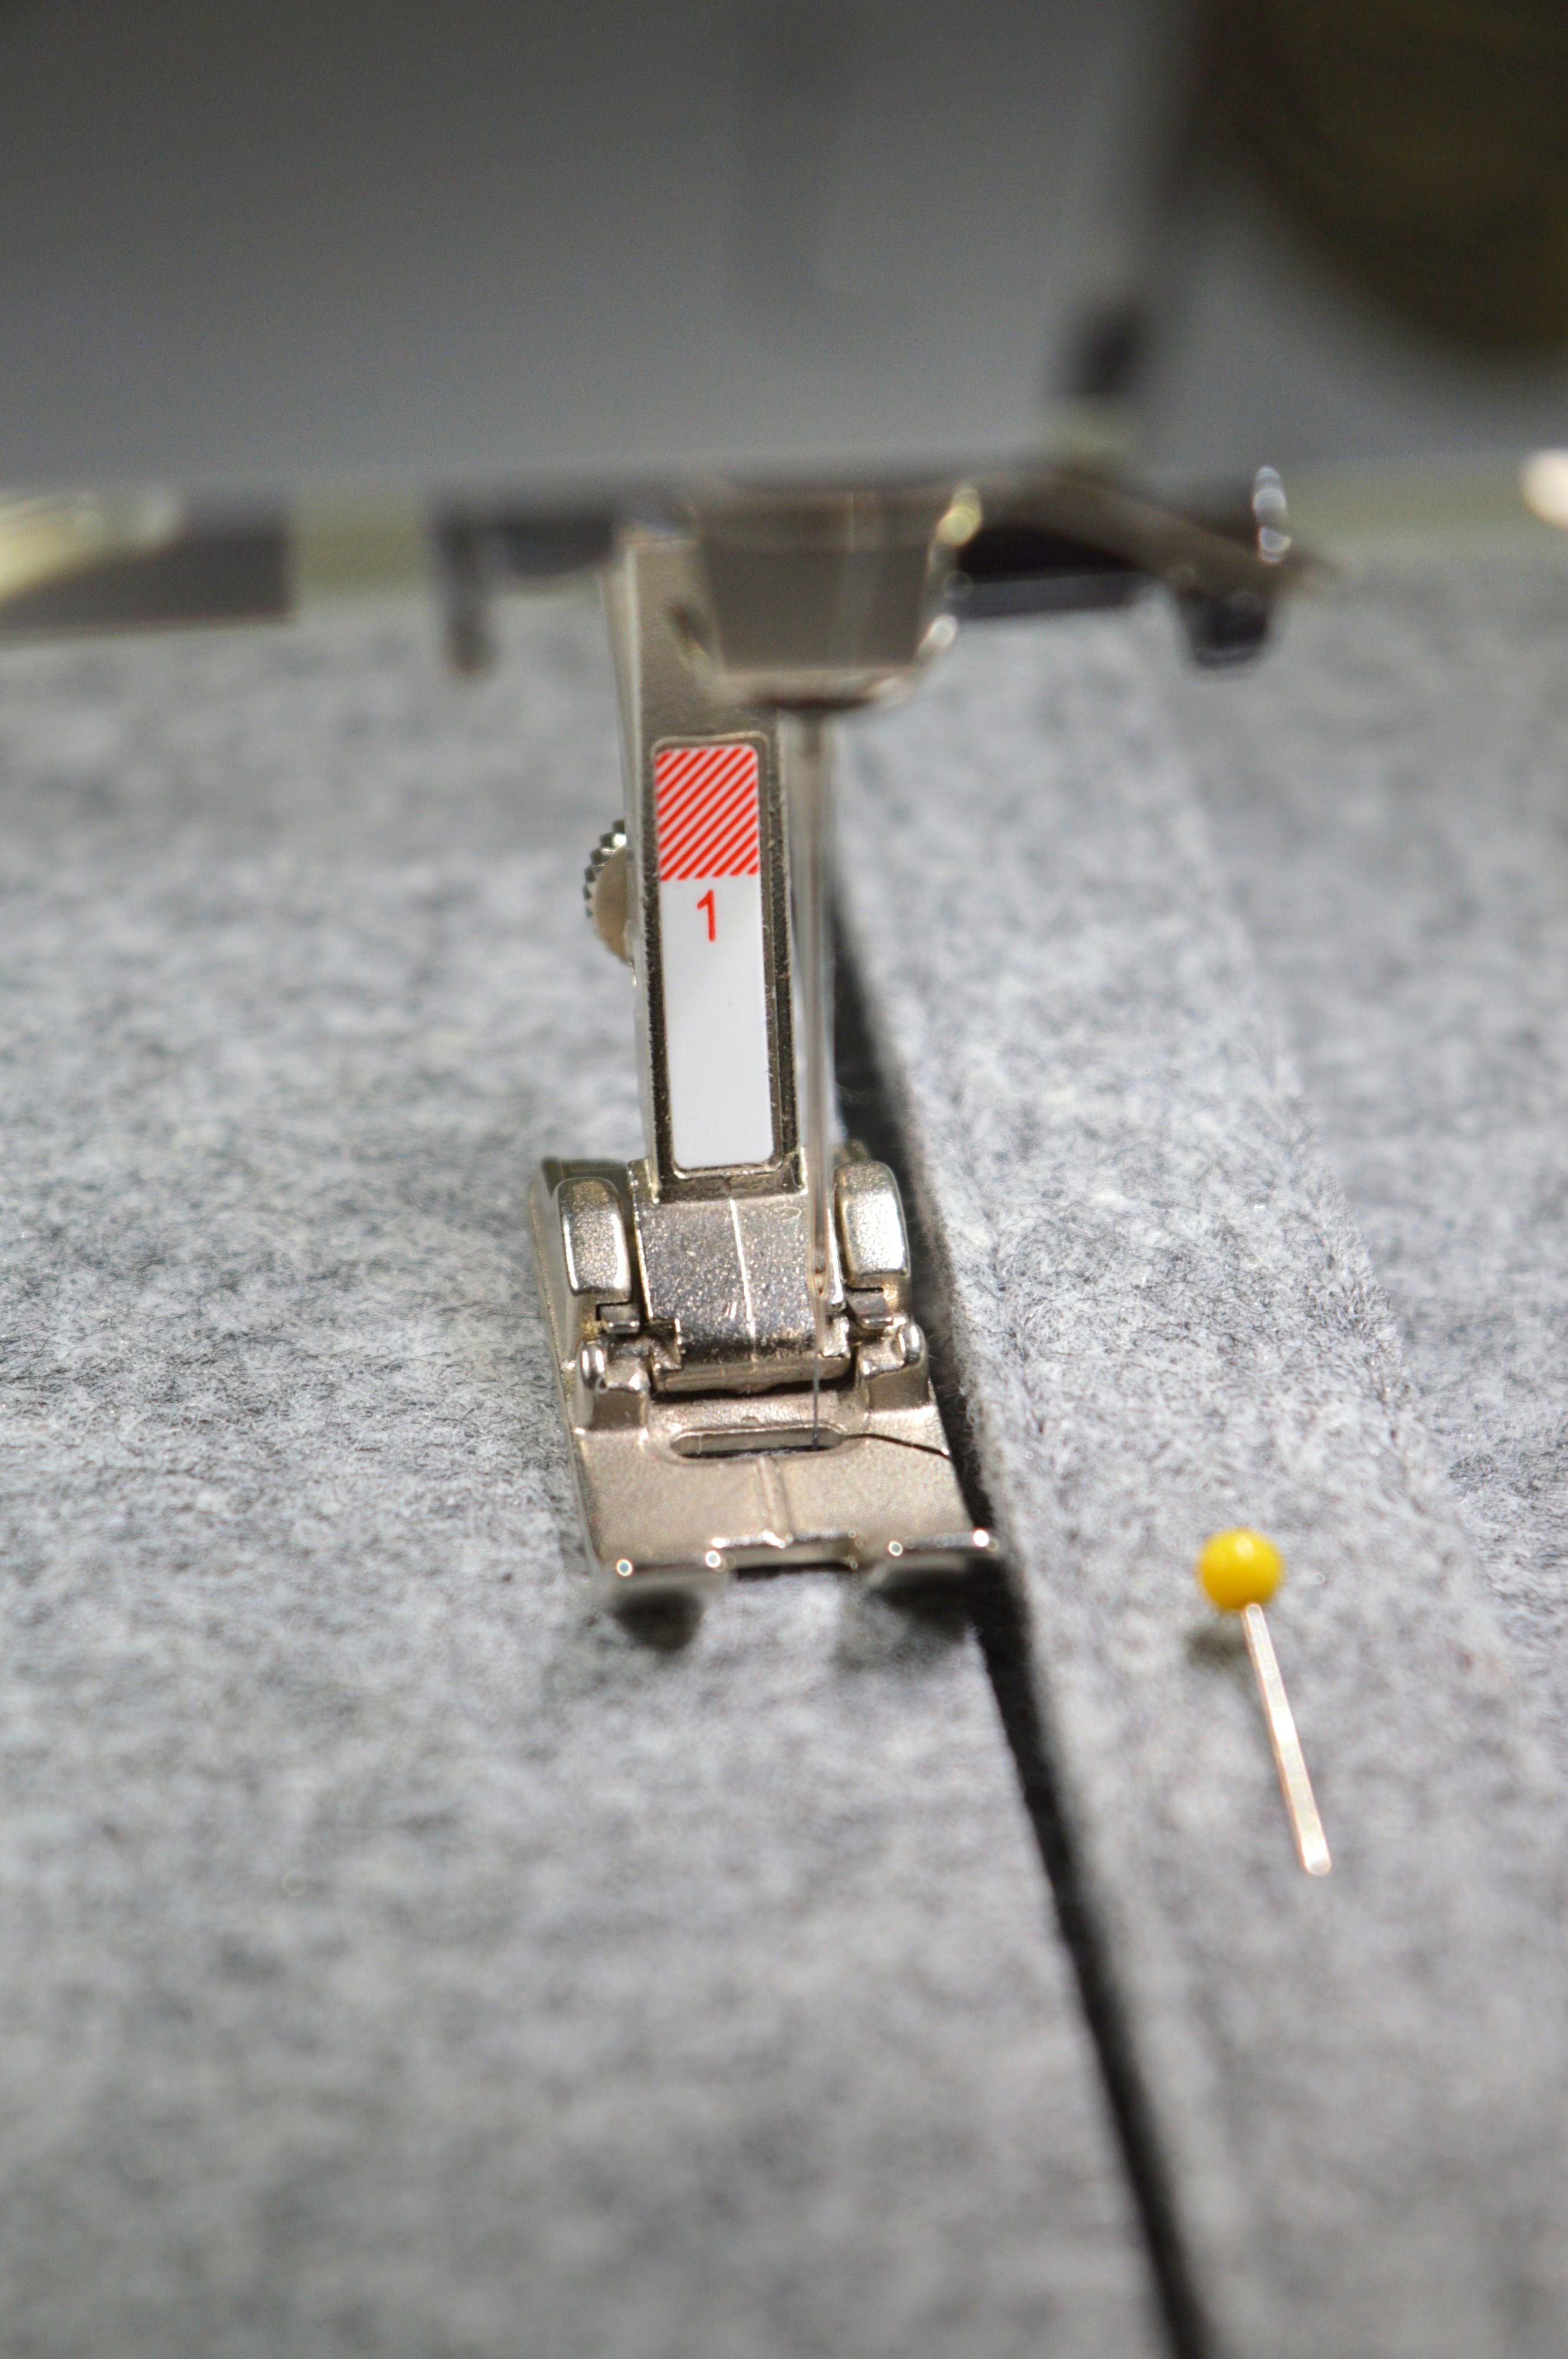
Sew the zipper.
!!! Stitch all seams on the right side of the bag (outside).
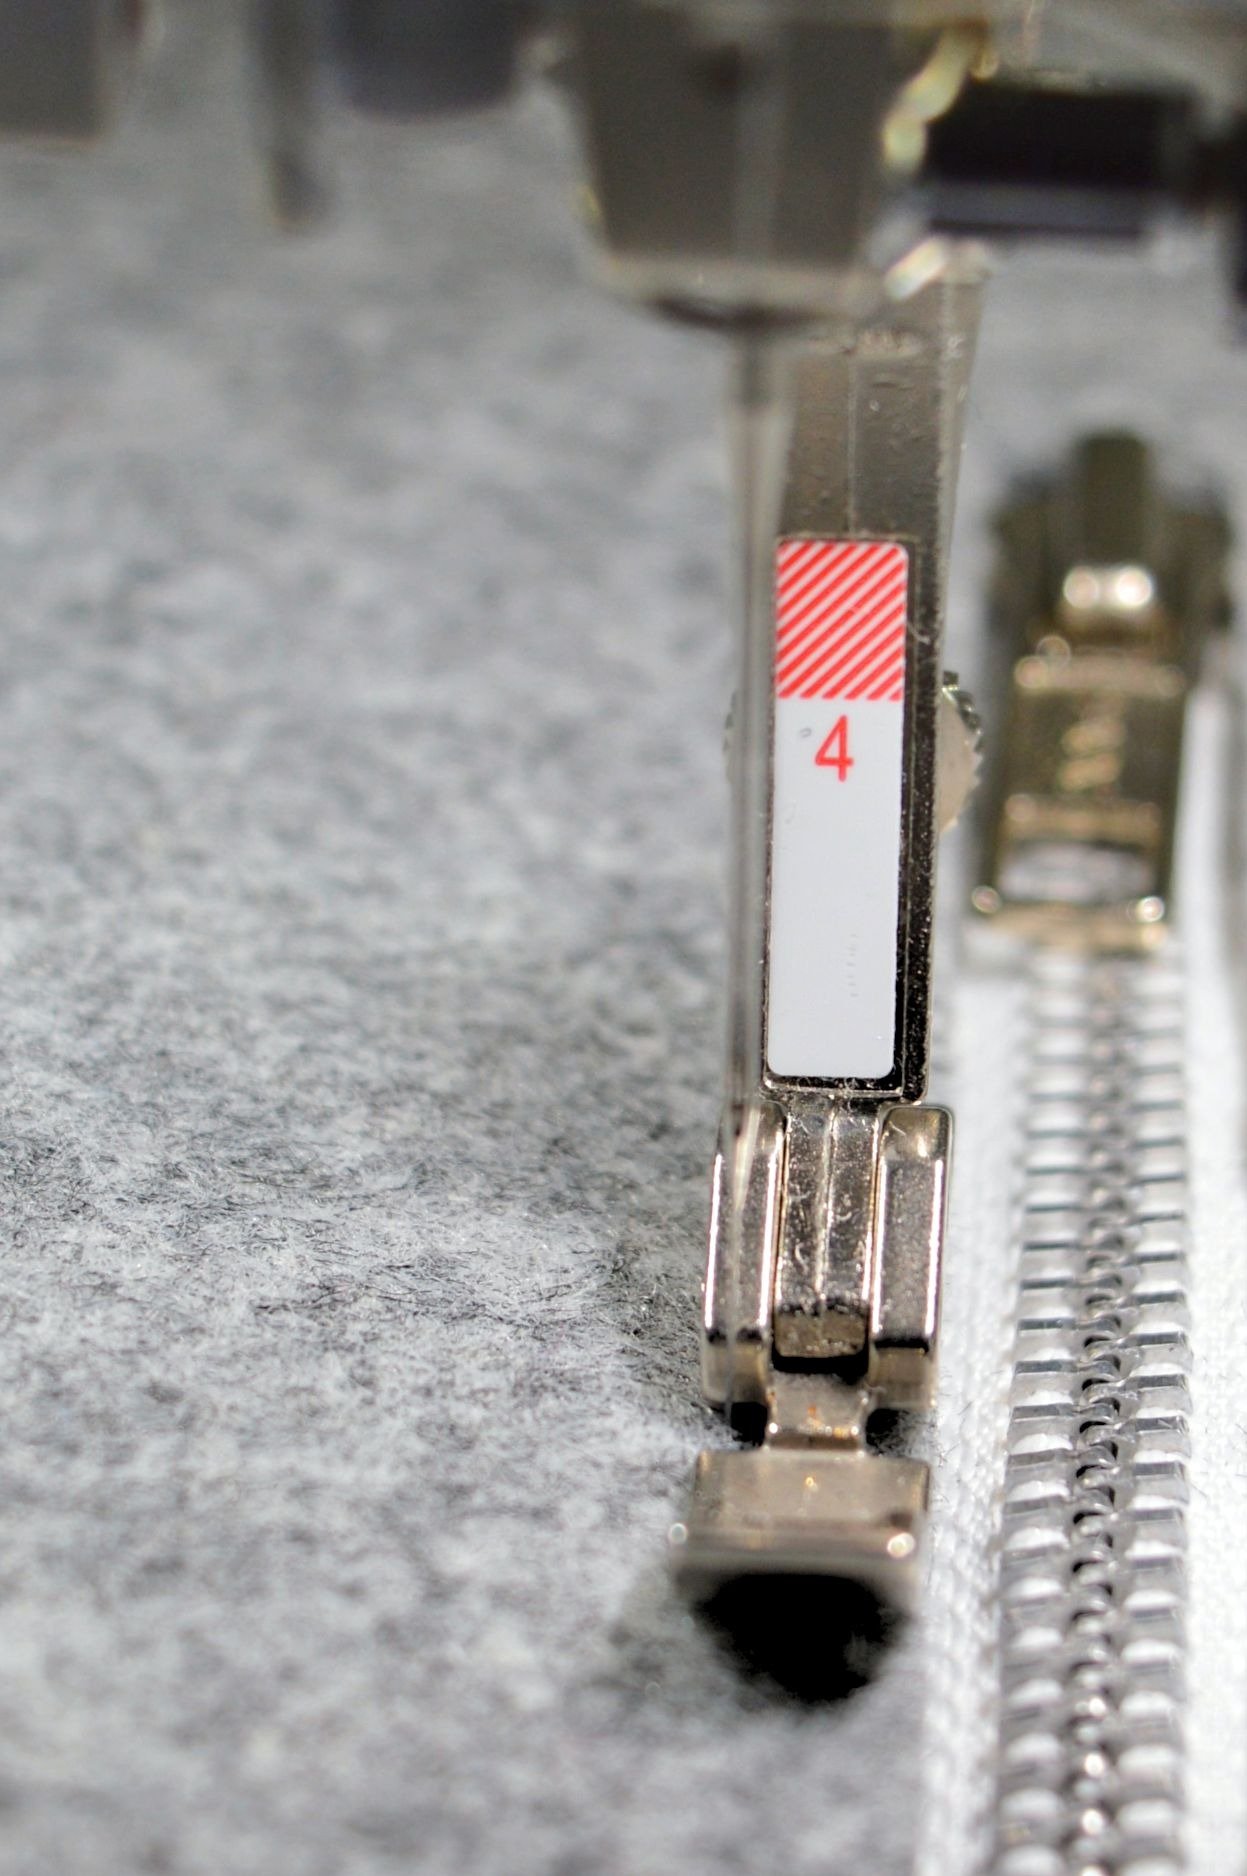
!!! Zipper foot #4, plain seam #1 and the stitch length 3
(The needle is placed on the opposite side from the edge.)
To proceed, you need to sew on a piece to cover zipper and form pocket, and before preparing it for it.
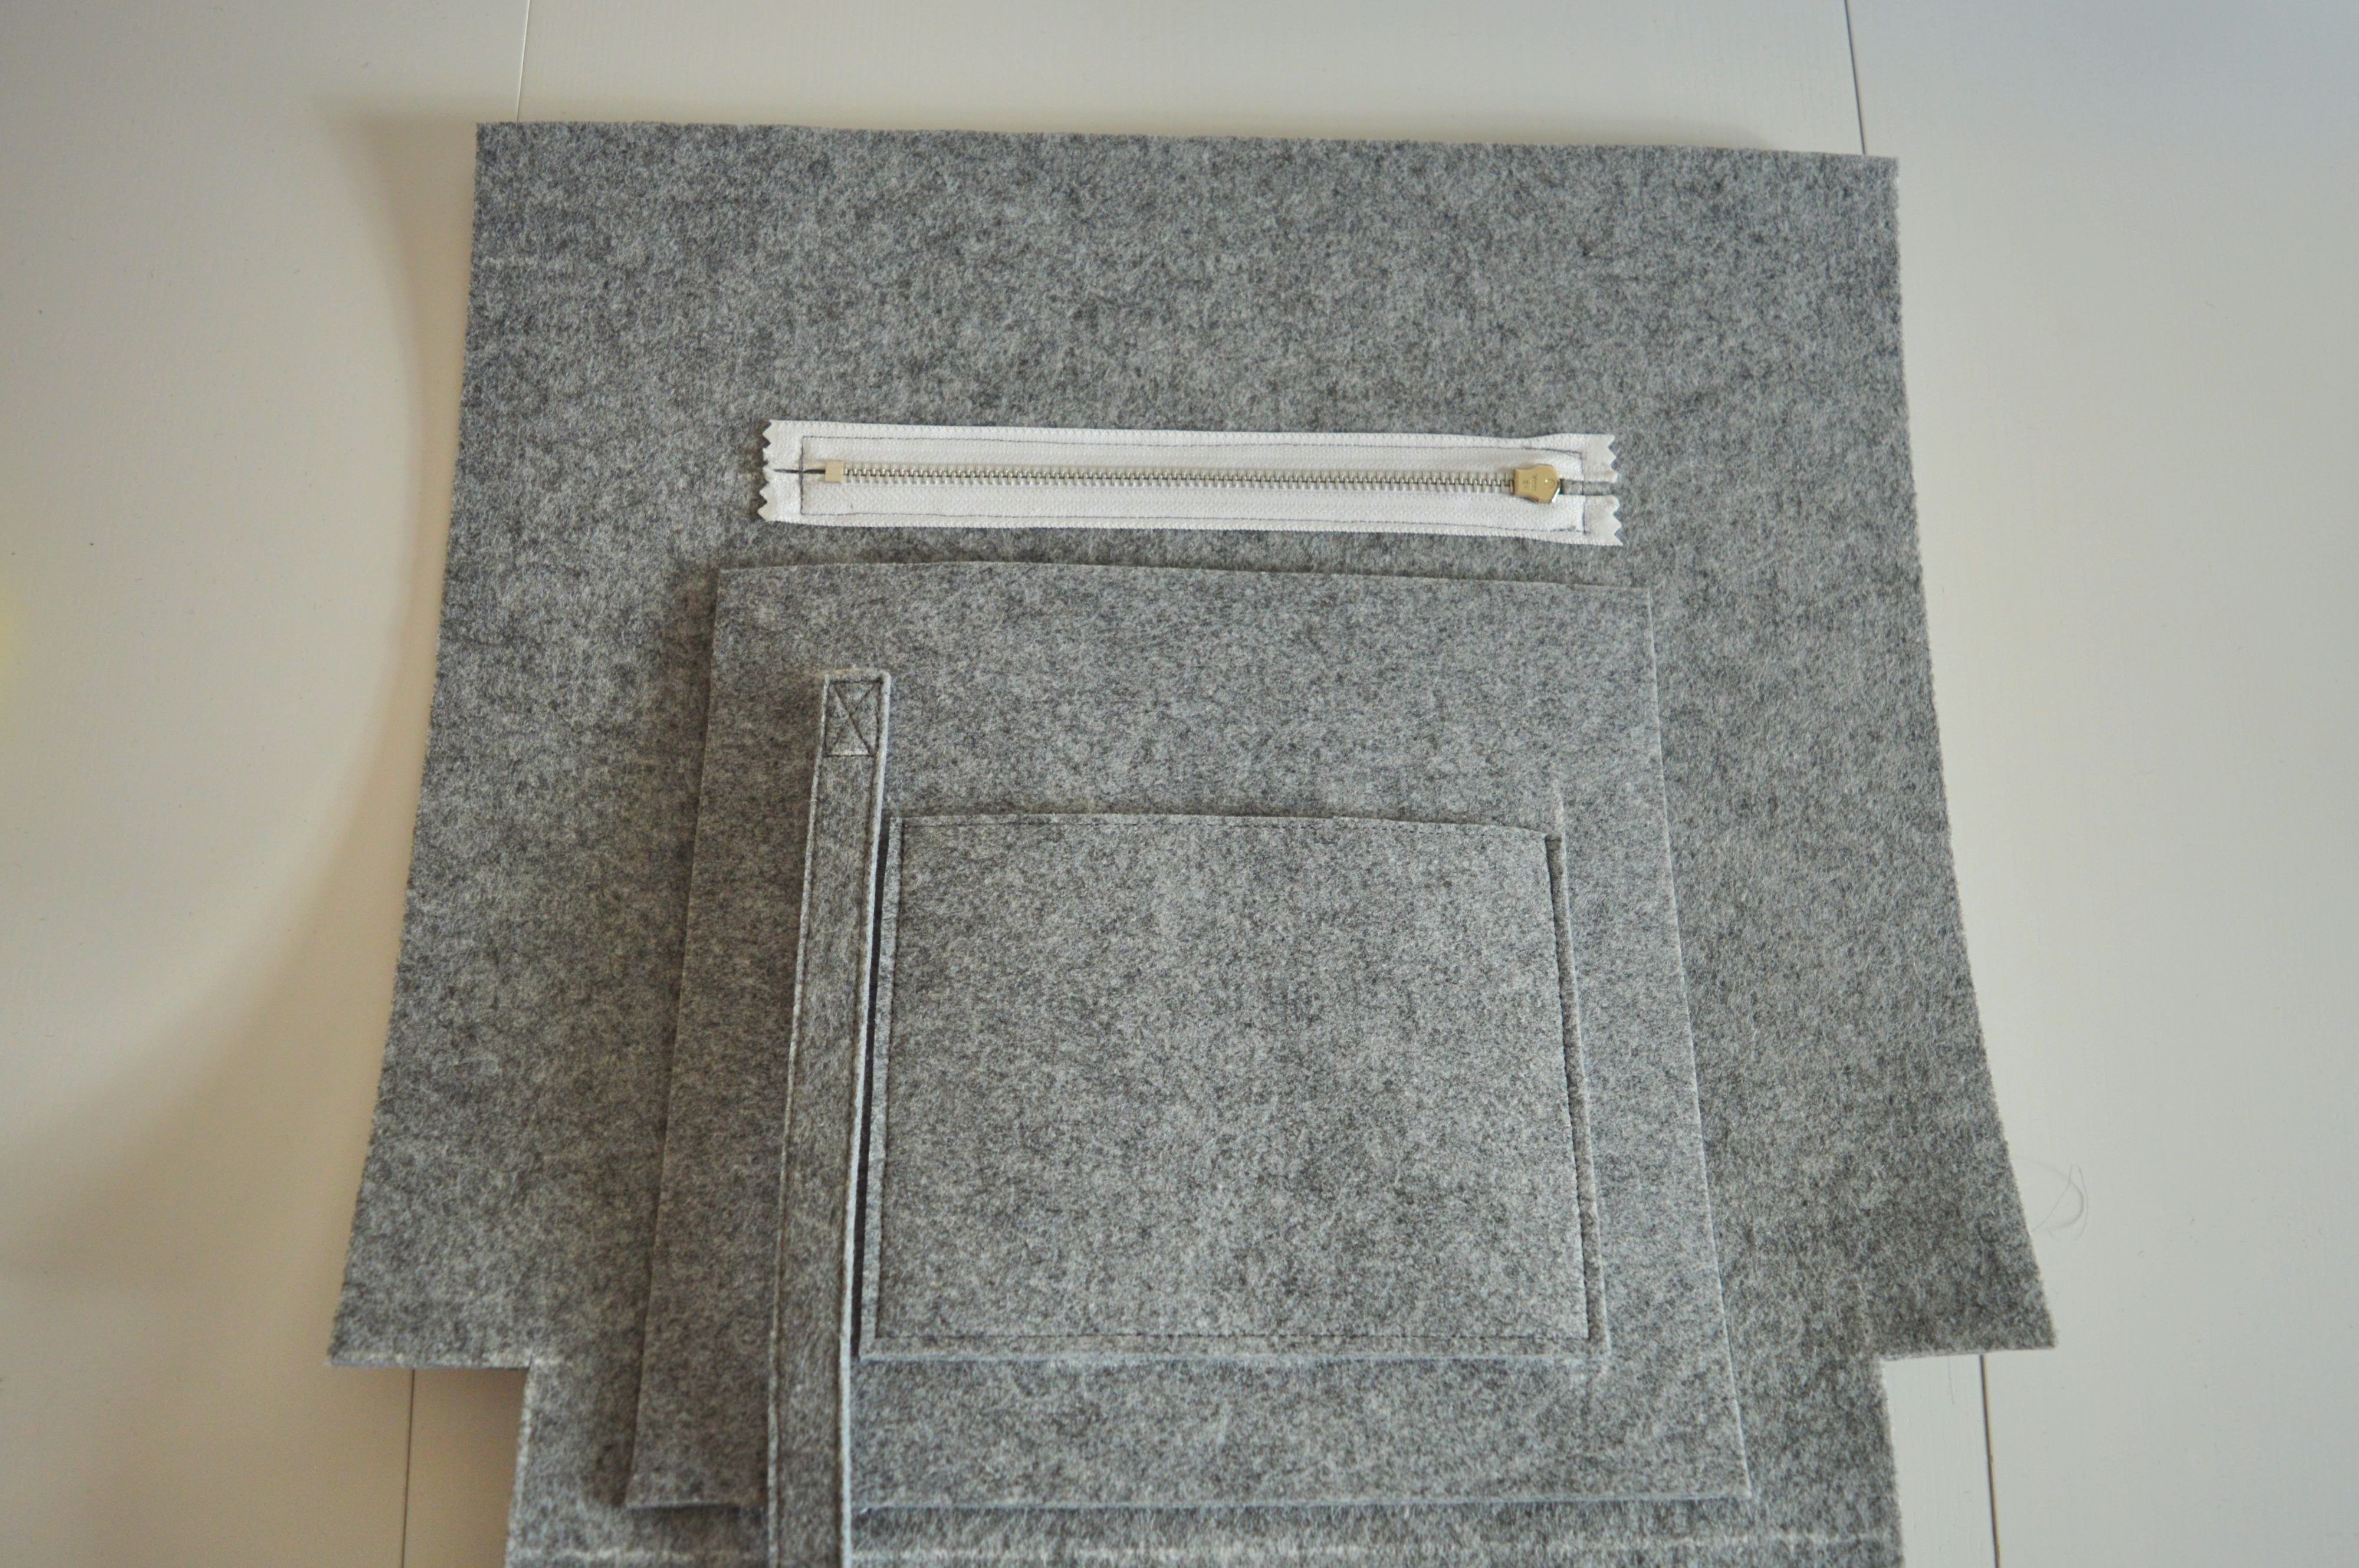
You have cut out one larger piece (inside cover of the zipper pocket), one smaller (pocket), and band for a carabiner.
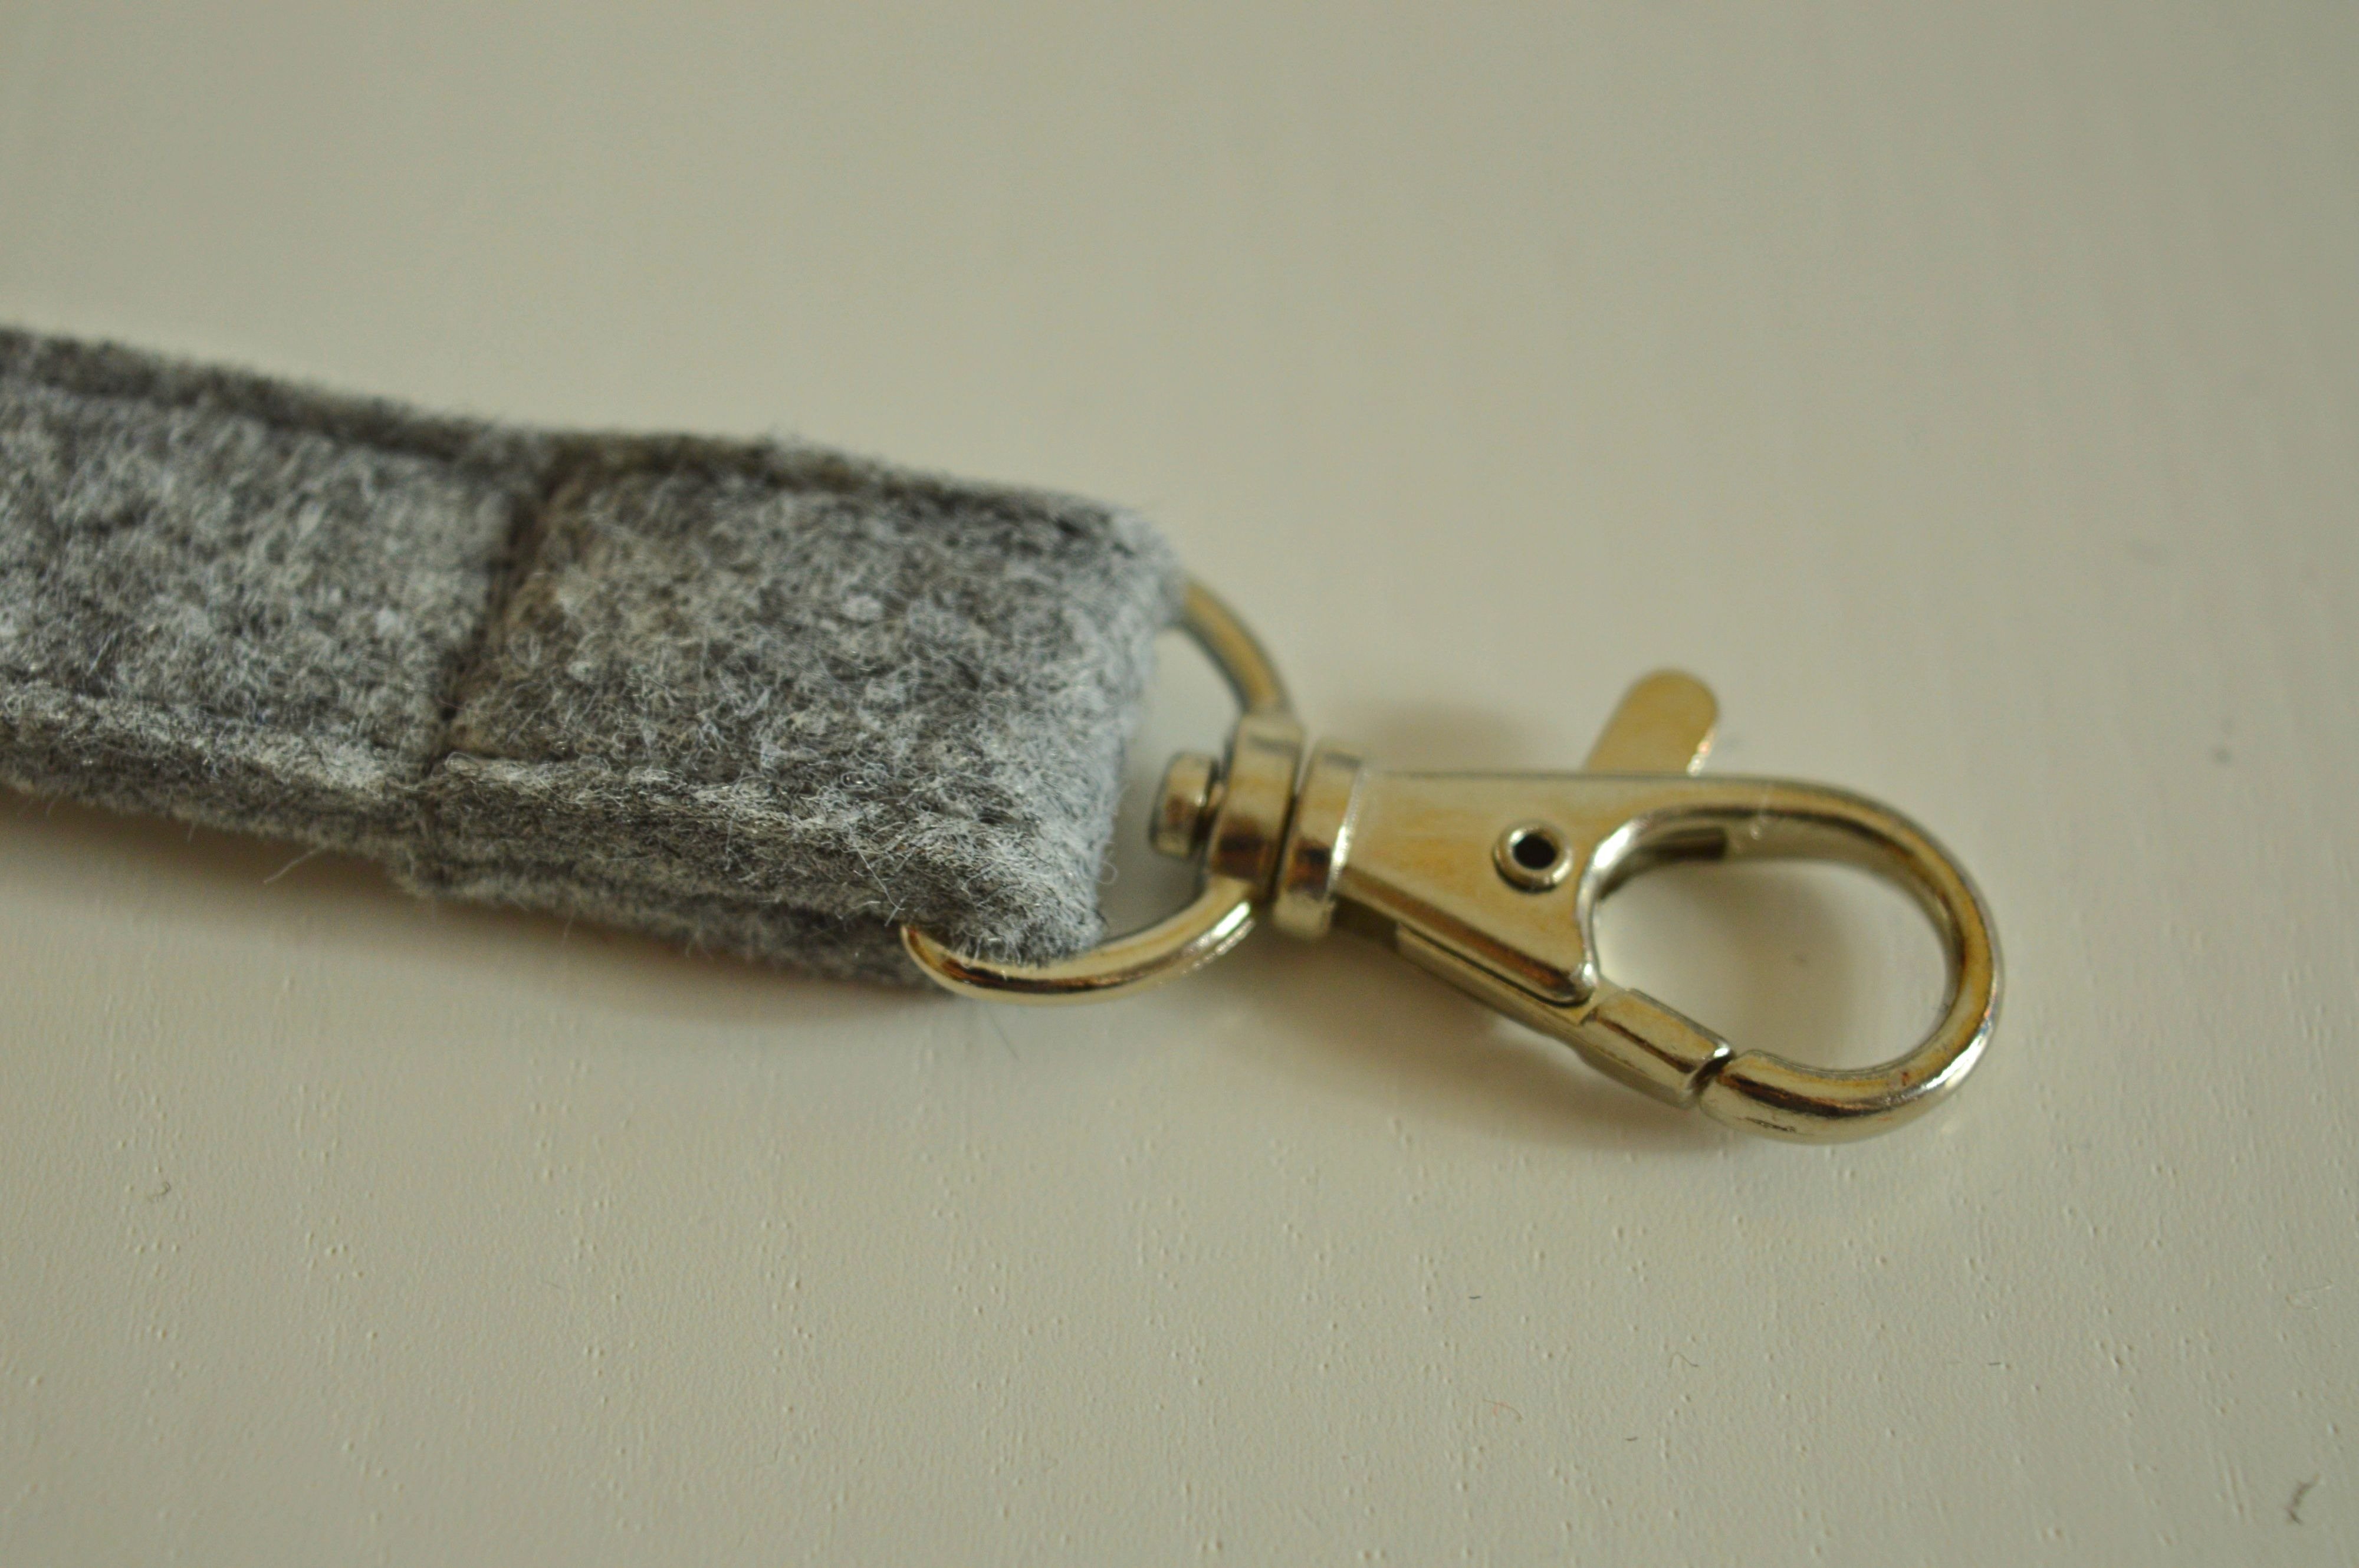
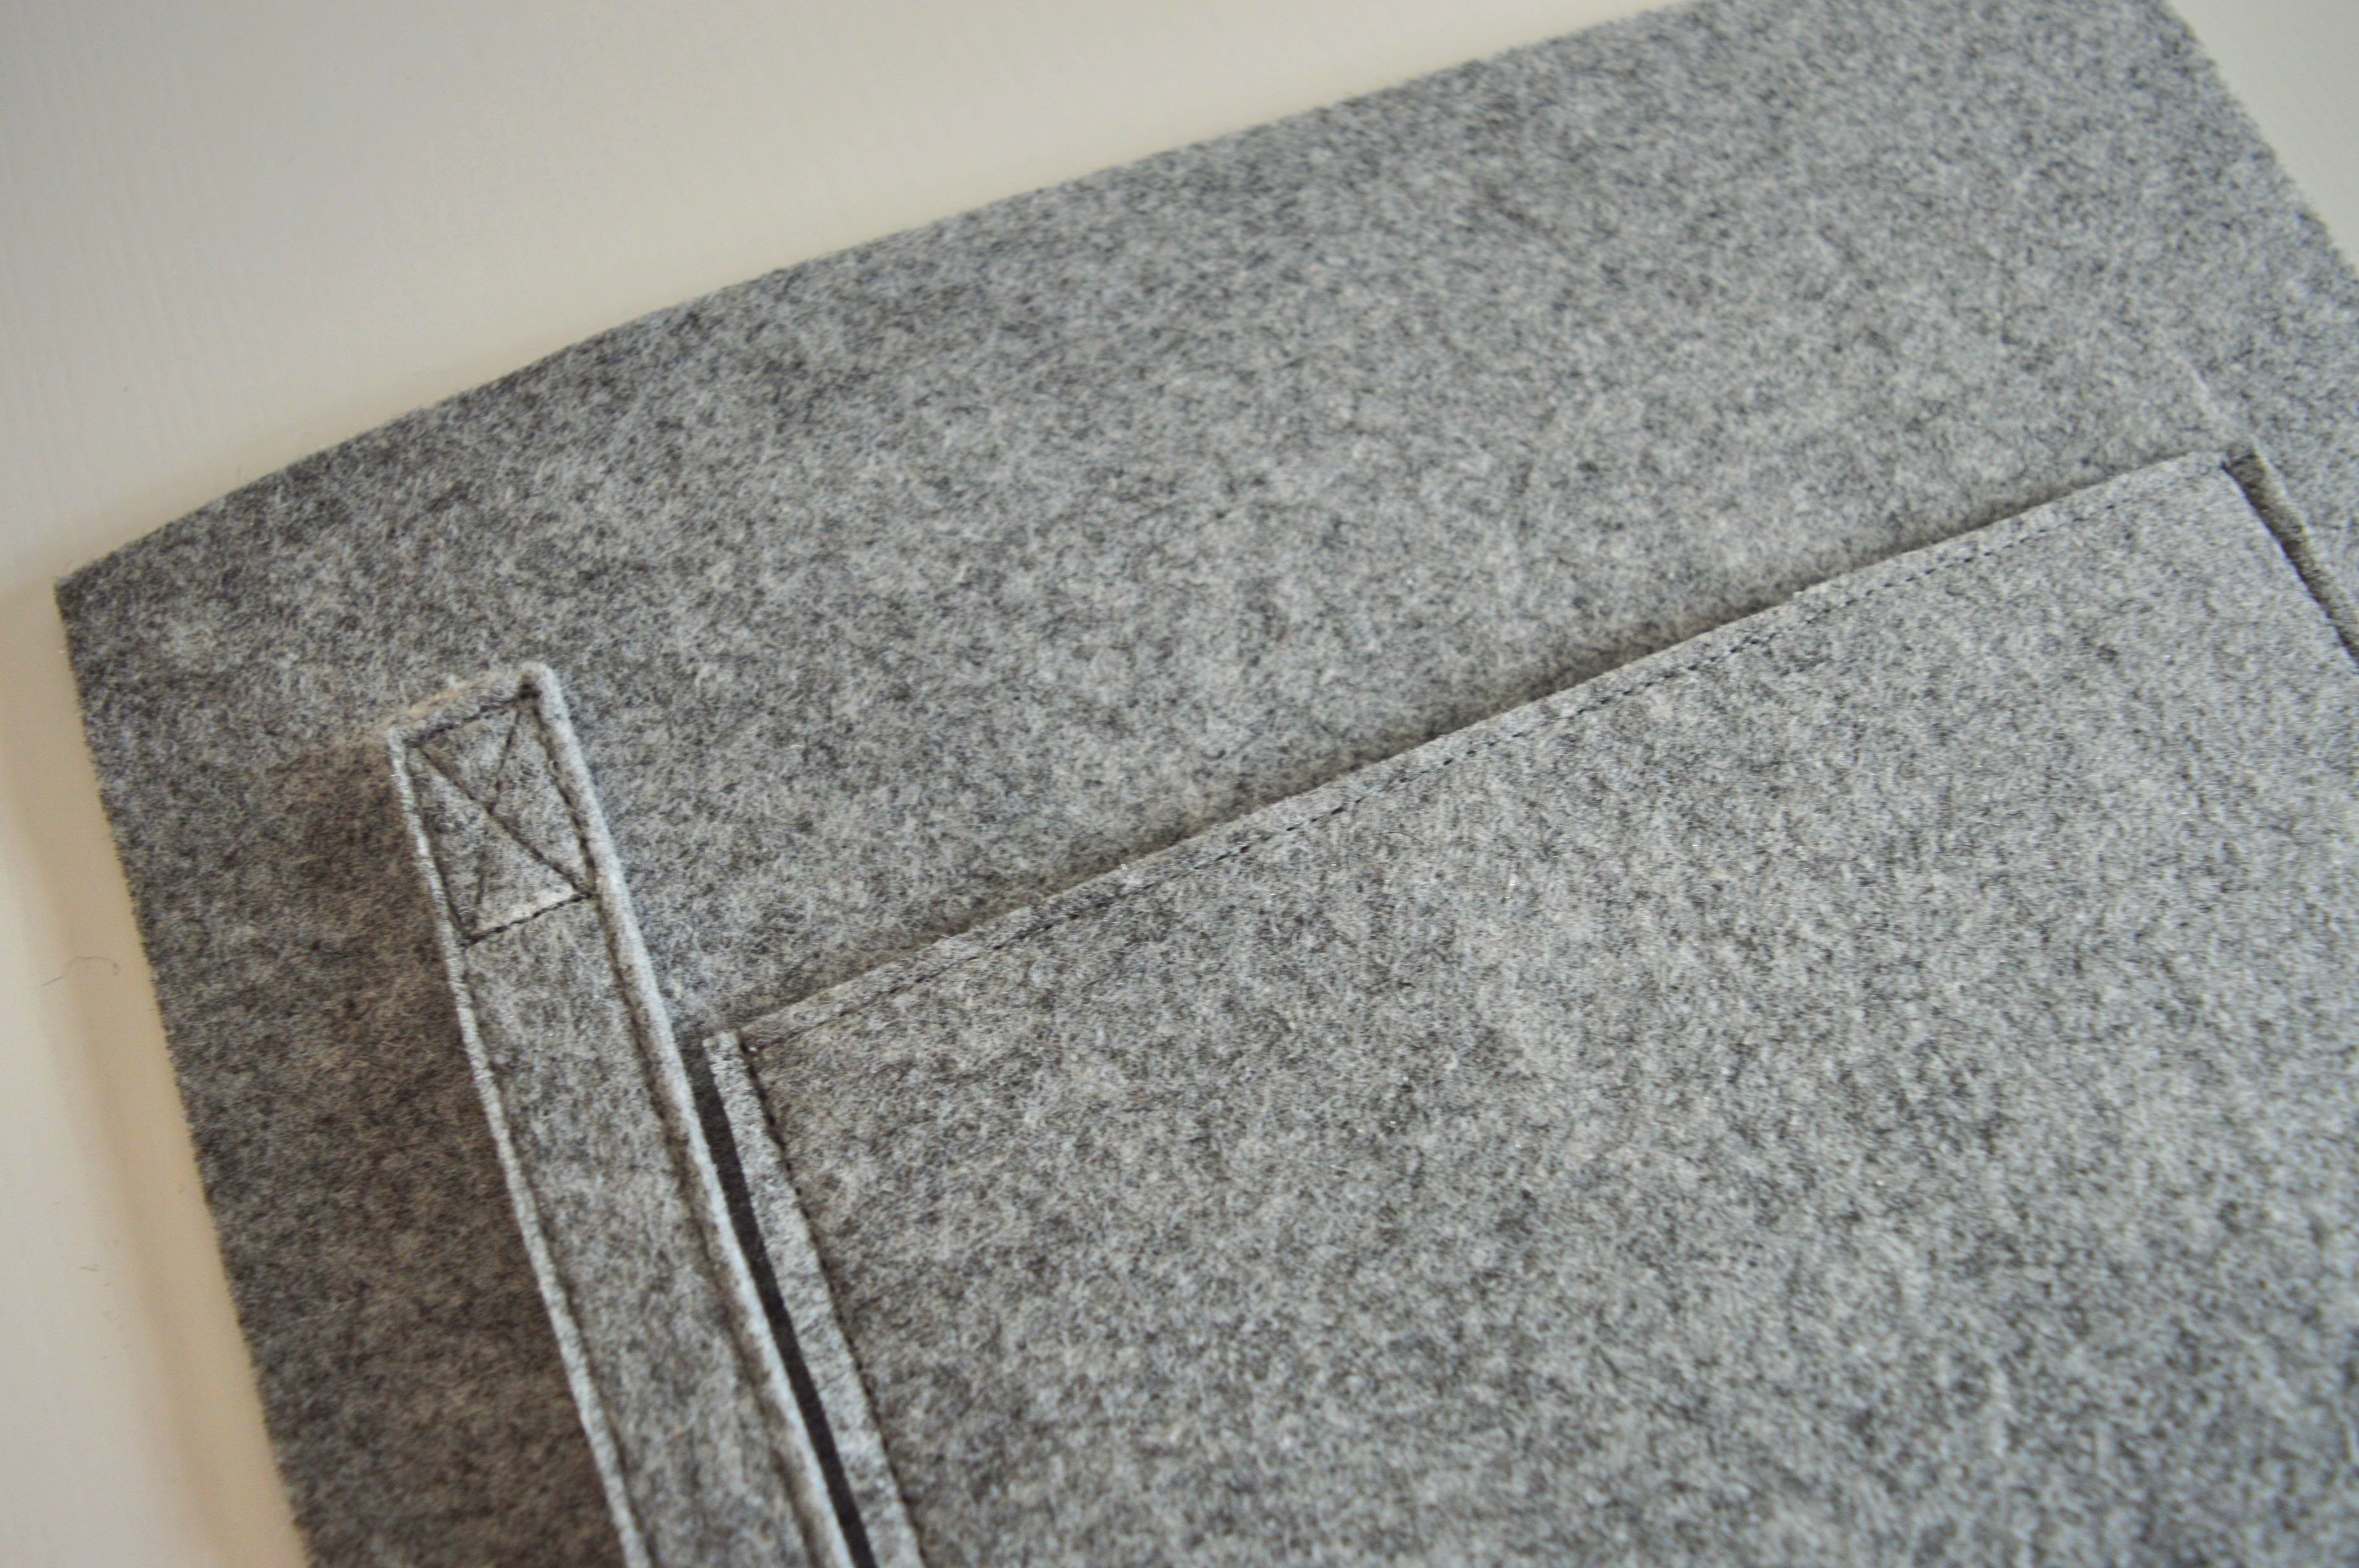
Stitch top edge of a small pocket and sides of the band for a carabiner.
Sew carabiner on one end of the band.
The idea of how inside piece should look like is shown in the pictures below.
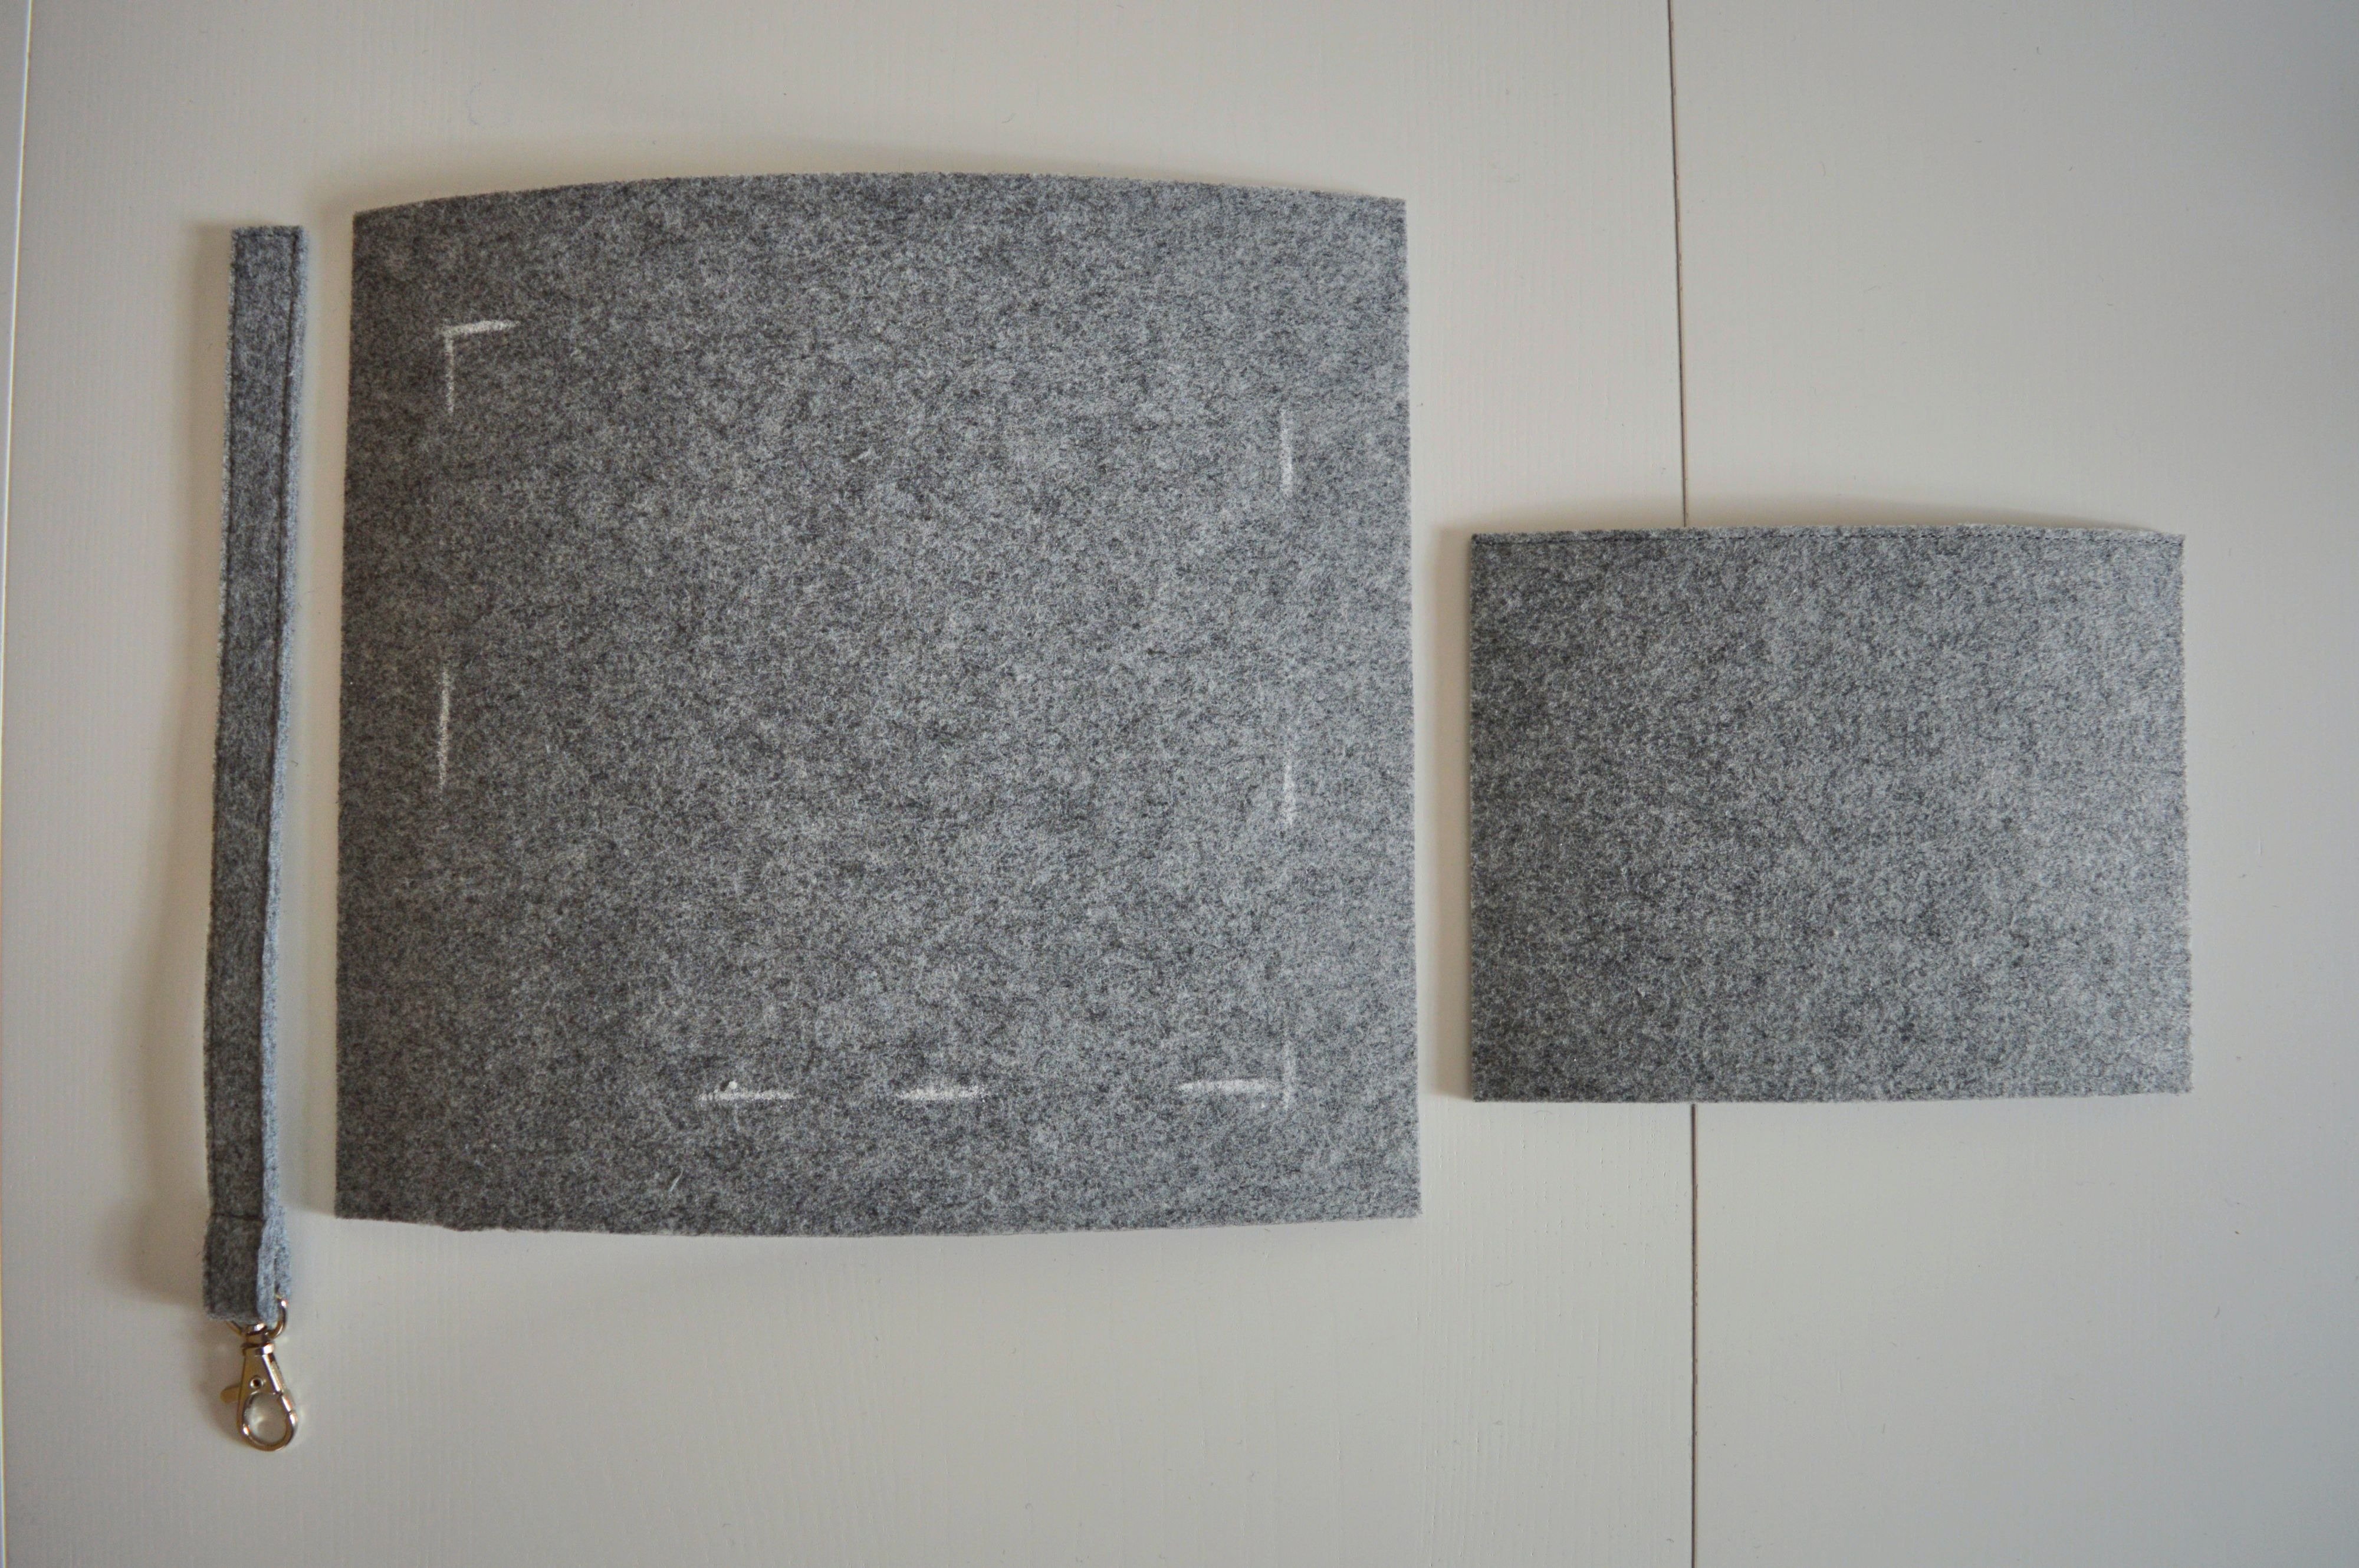

NOTE: In the pictures, the larger piece is larger than given in measurements, but that piece made difficulties when sewing bottom. Therefore it is simpler to make it smaller.
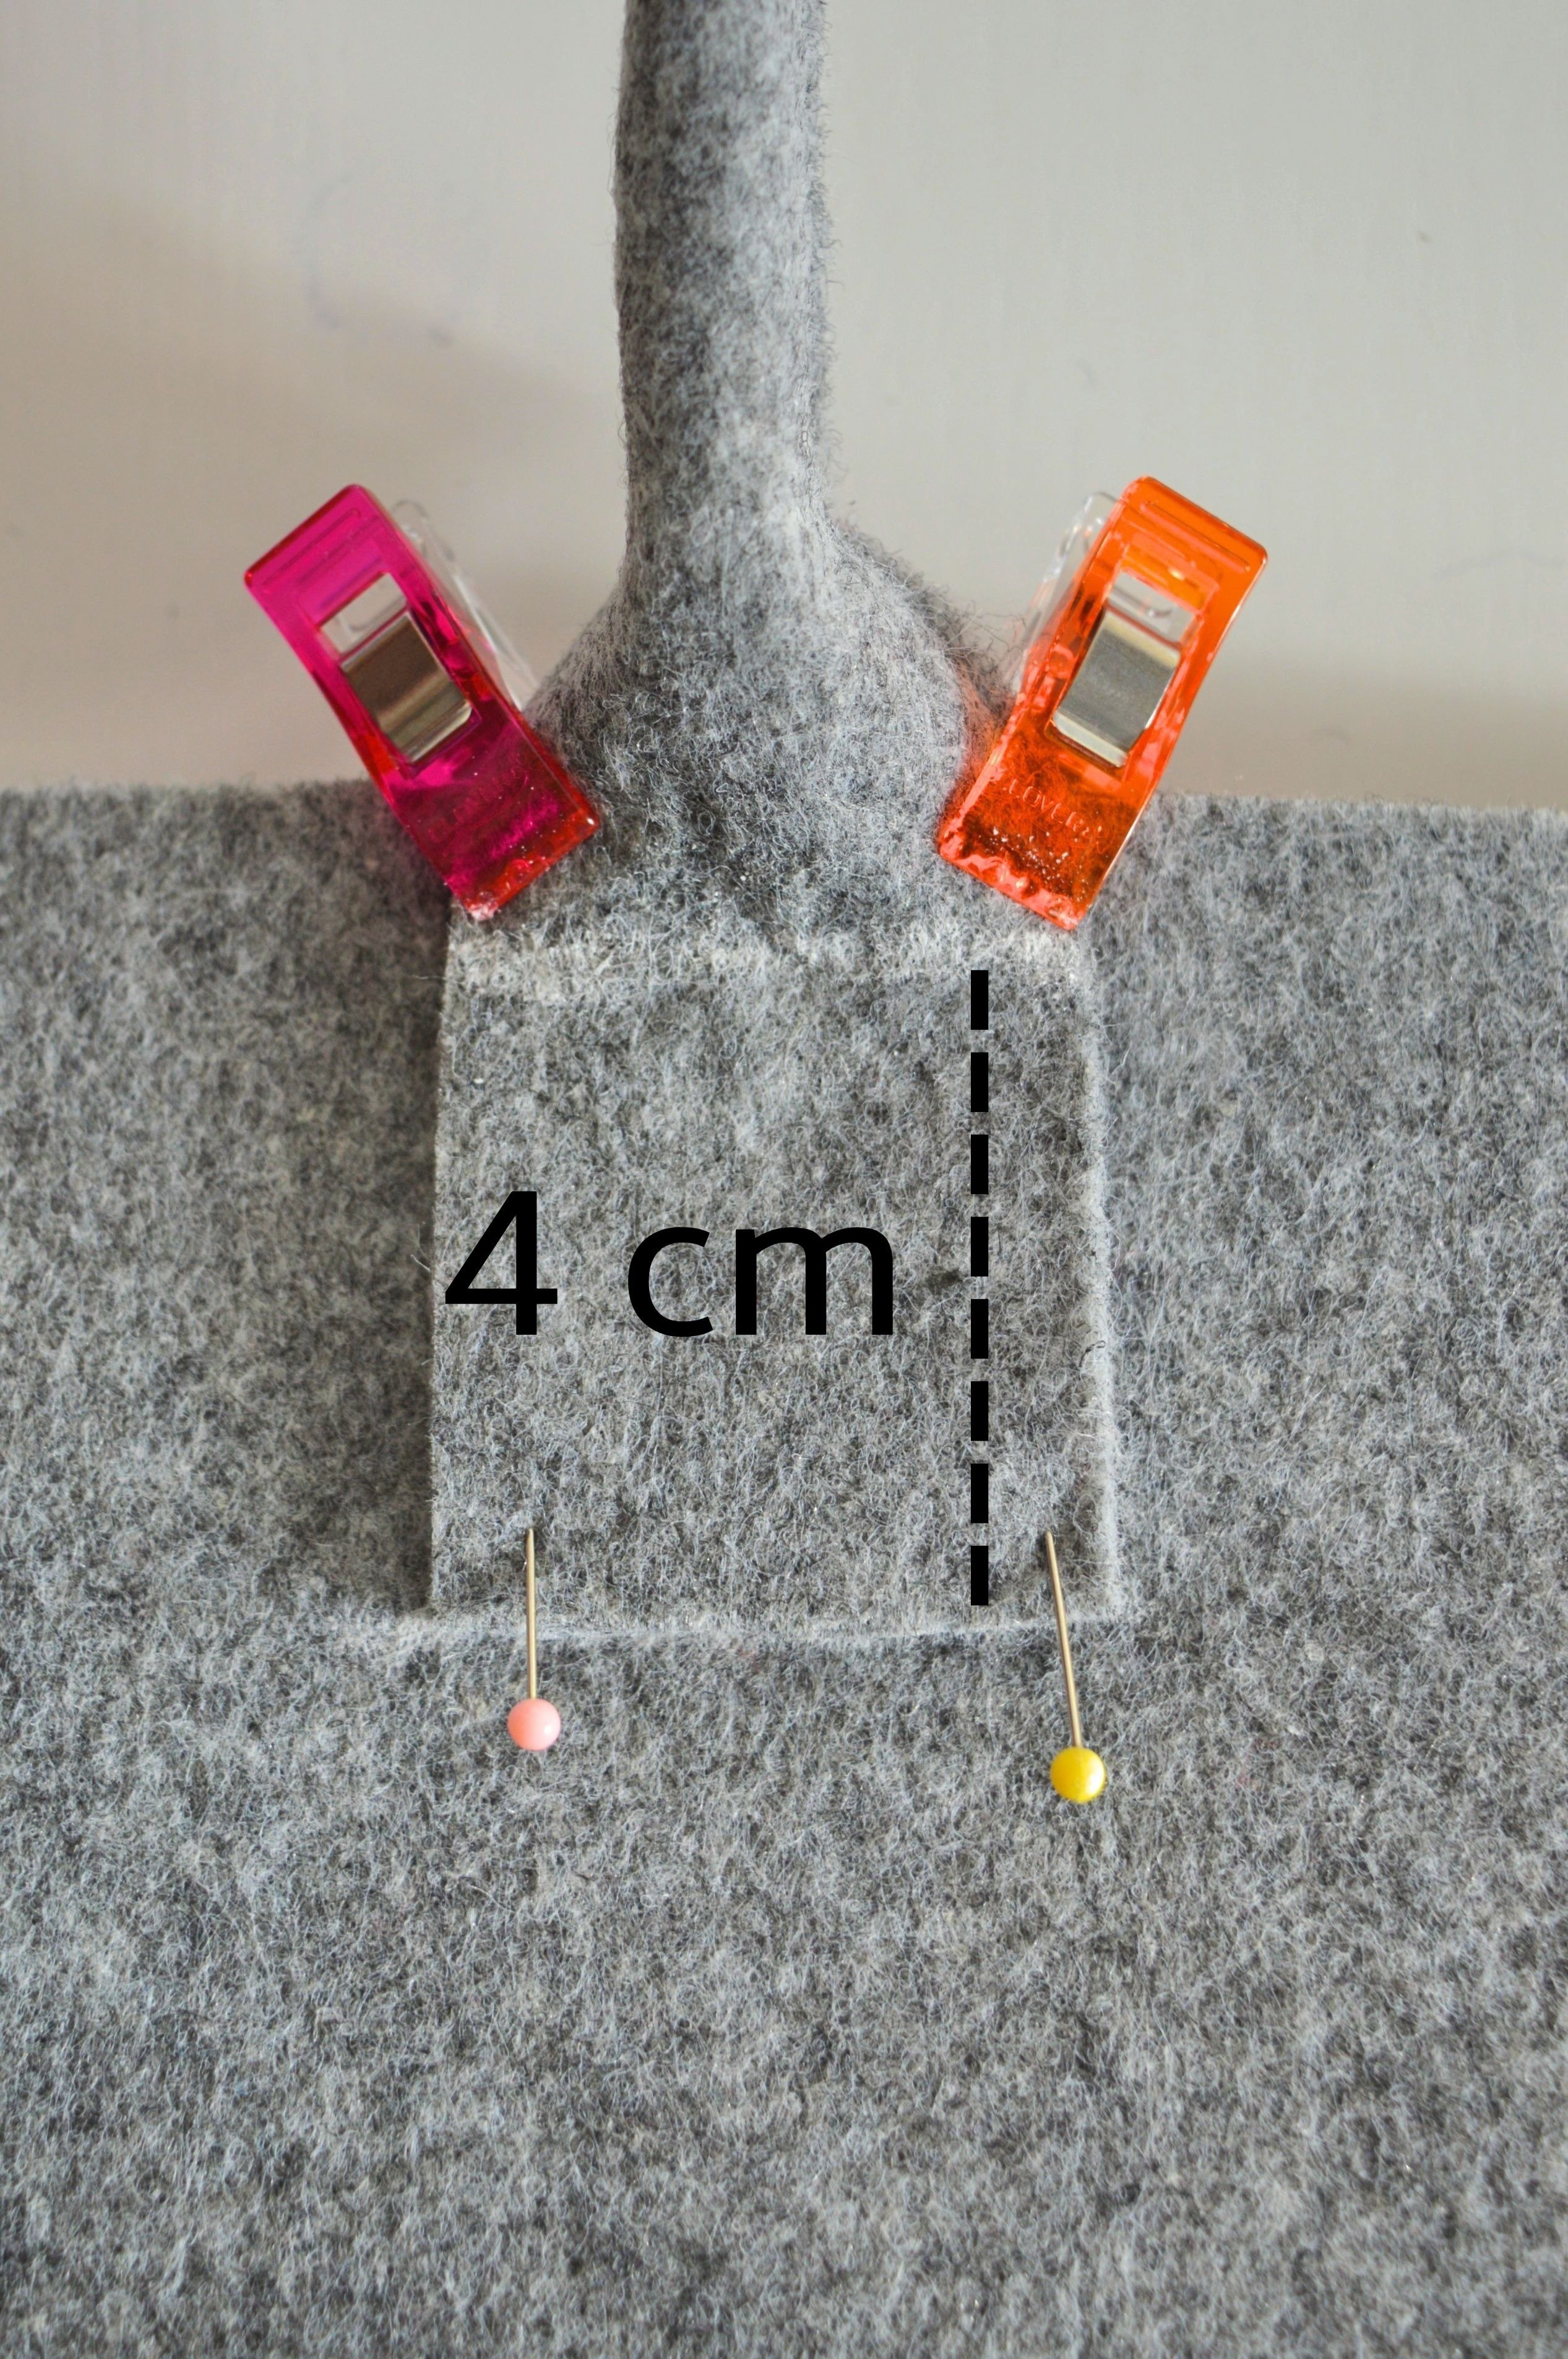
Pin the small pocket and band with a carabiner on the larger piece, so that on the larger part the distance from the edge is 3 cm everywhere.
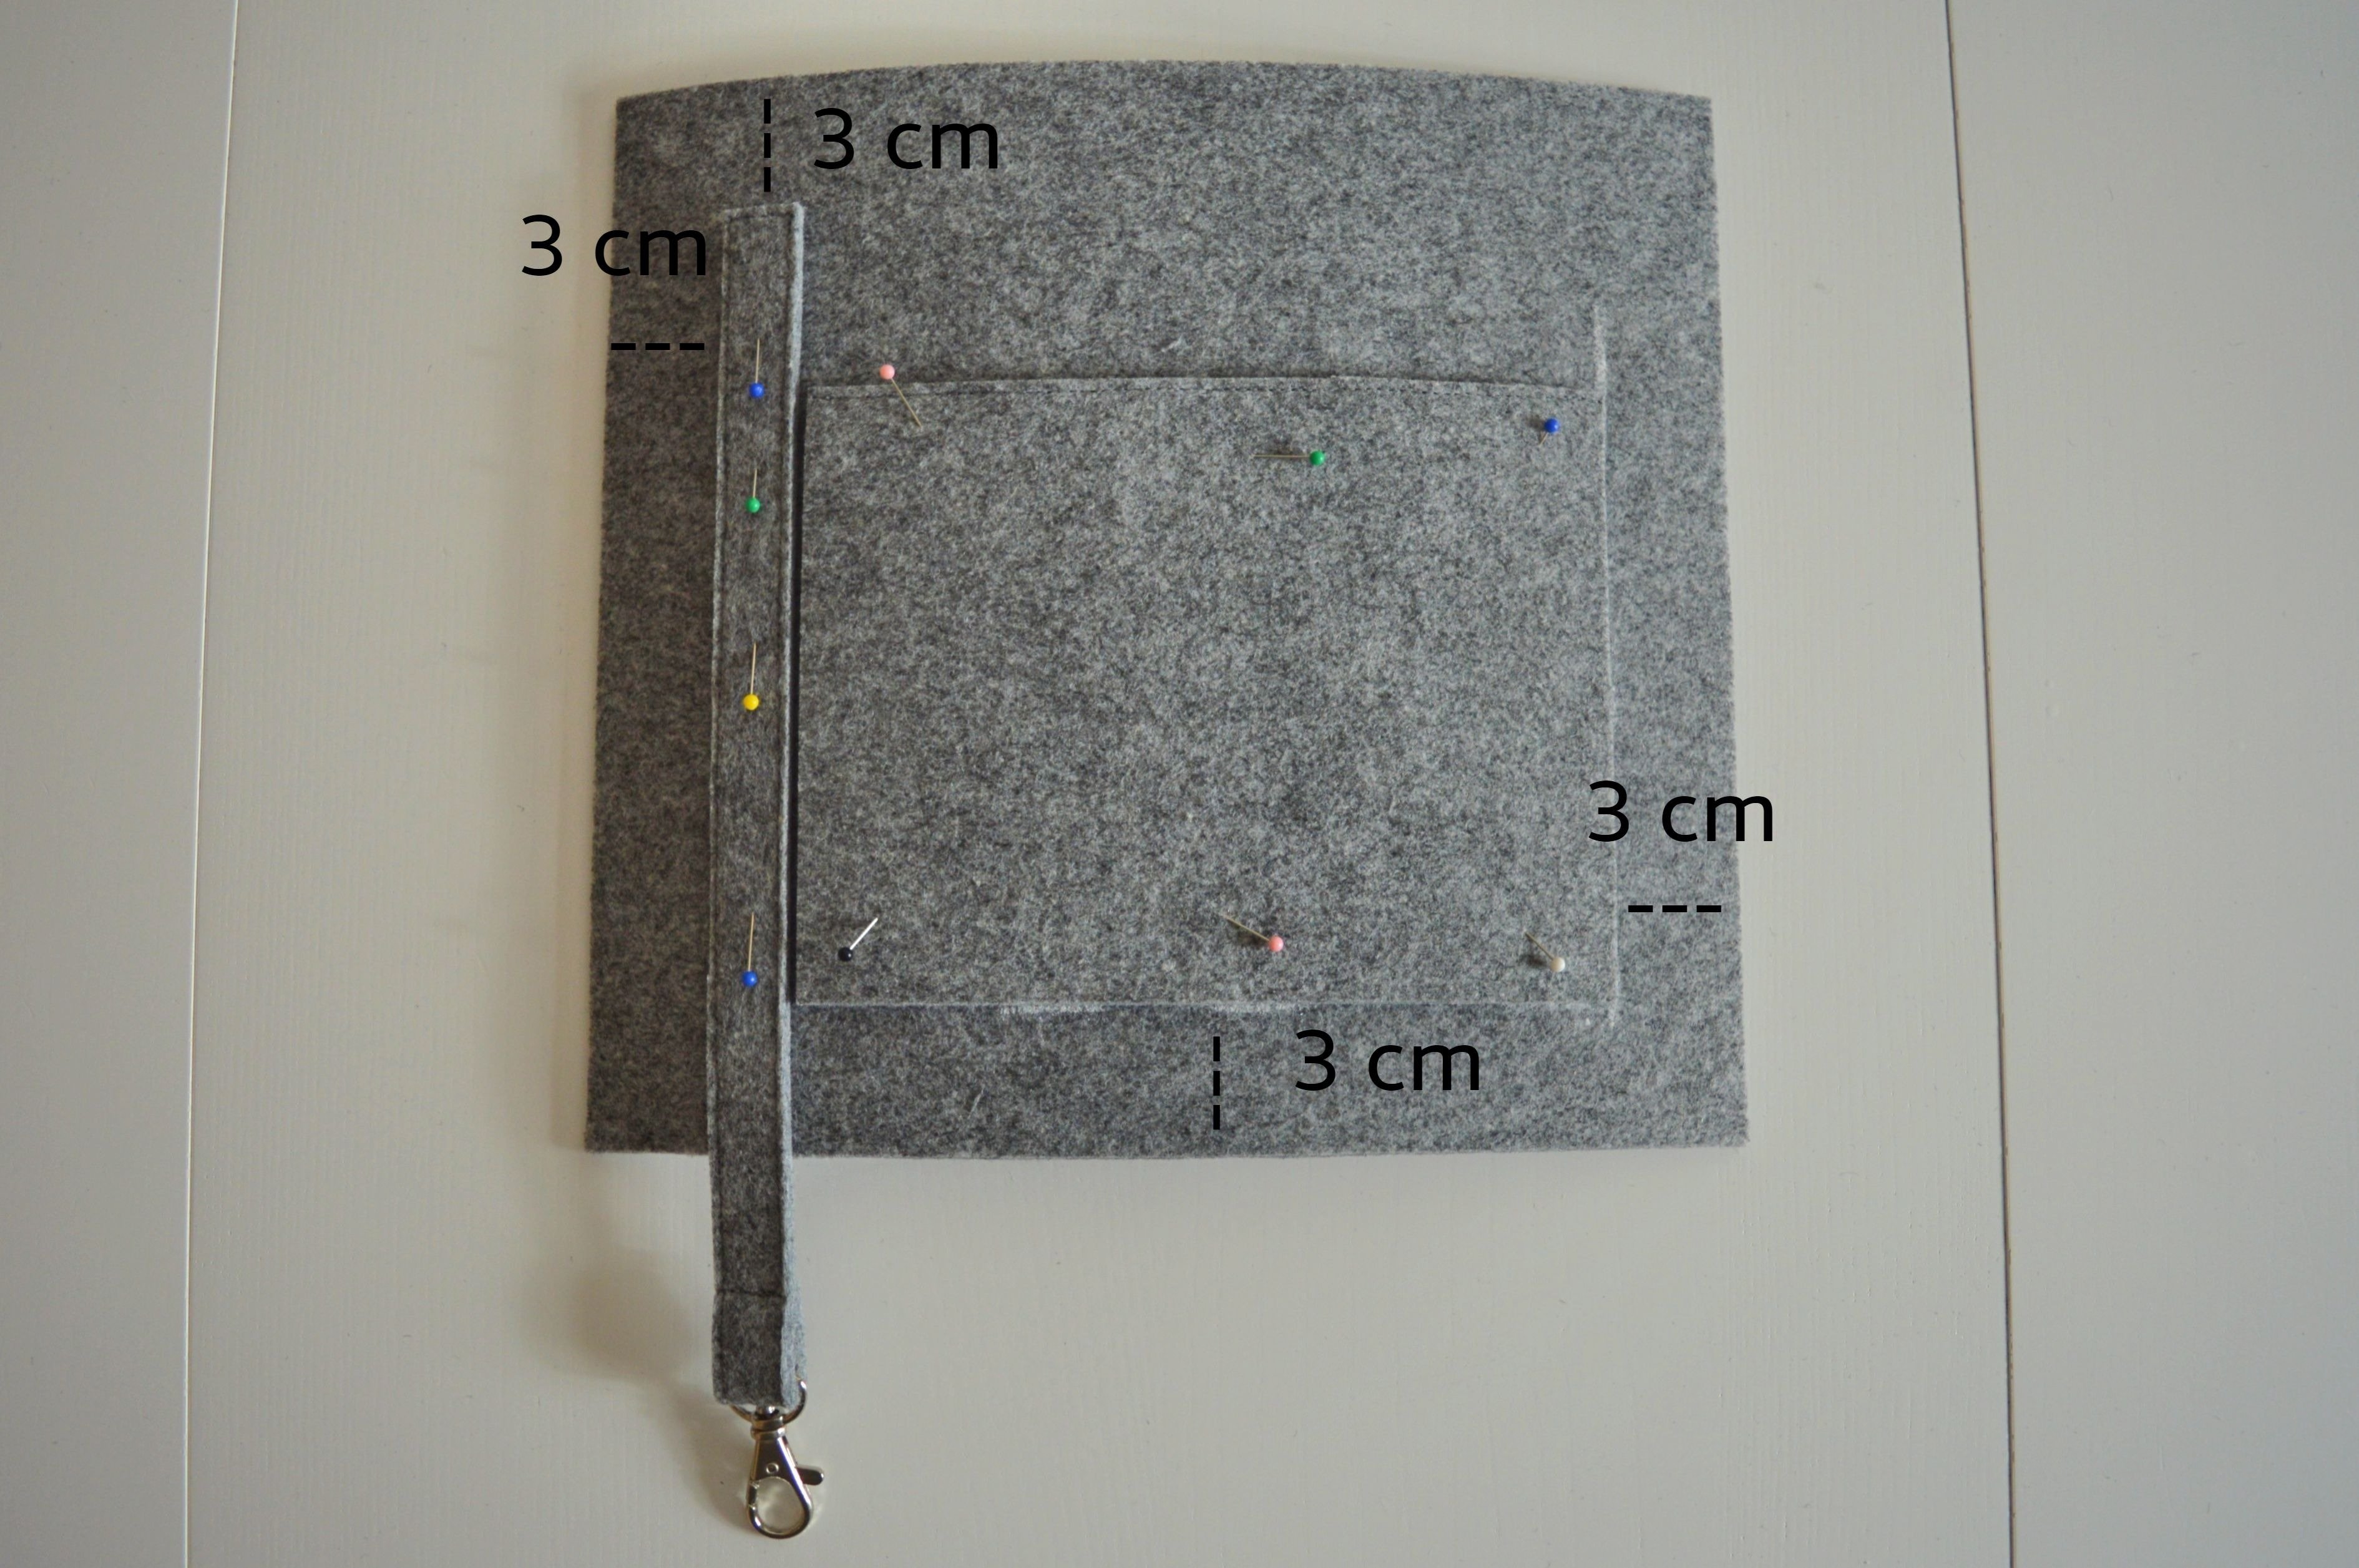
Stitch the small pocket, and then the top of the band with a carabiner.
!!! Reverse-pattern foot #1, plain seam #1, the stitch length 3
Place the finished piece on the wrong side (inside the bag), where is zipper located, of the bag, so that you marked 8 cm from the top edge, taking care that the middle of the body and the center of the piece coincide. Pin it.
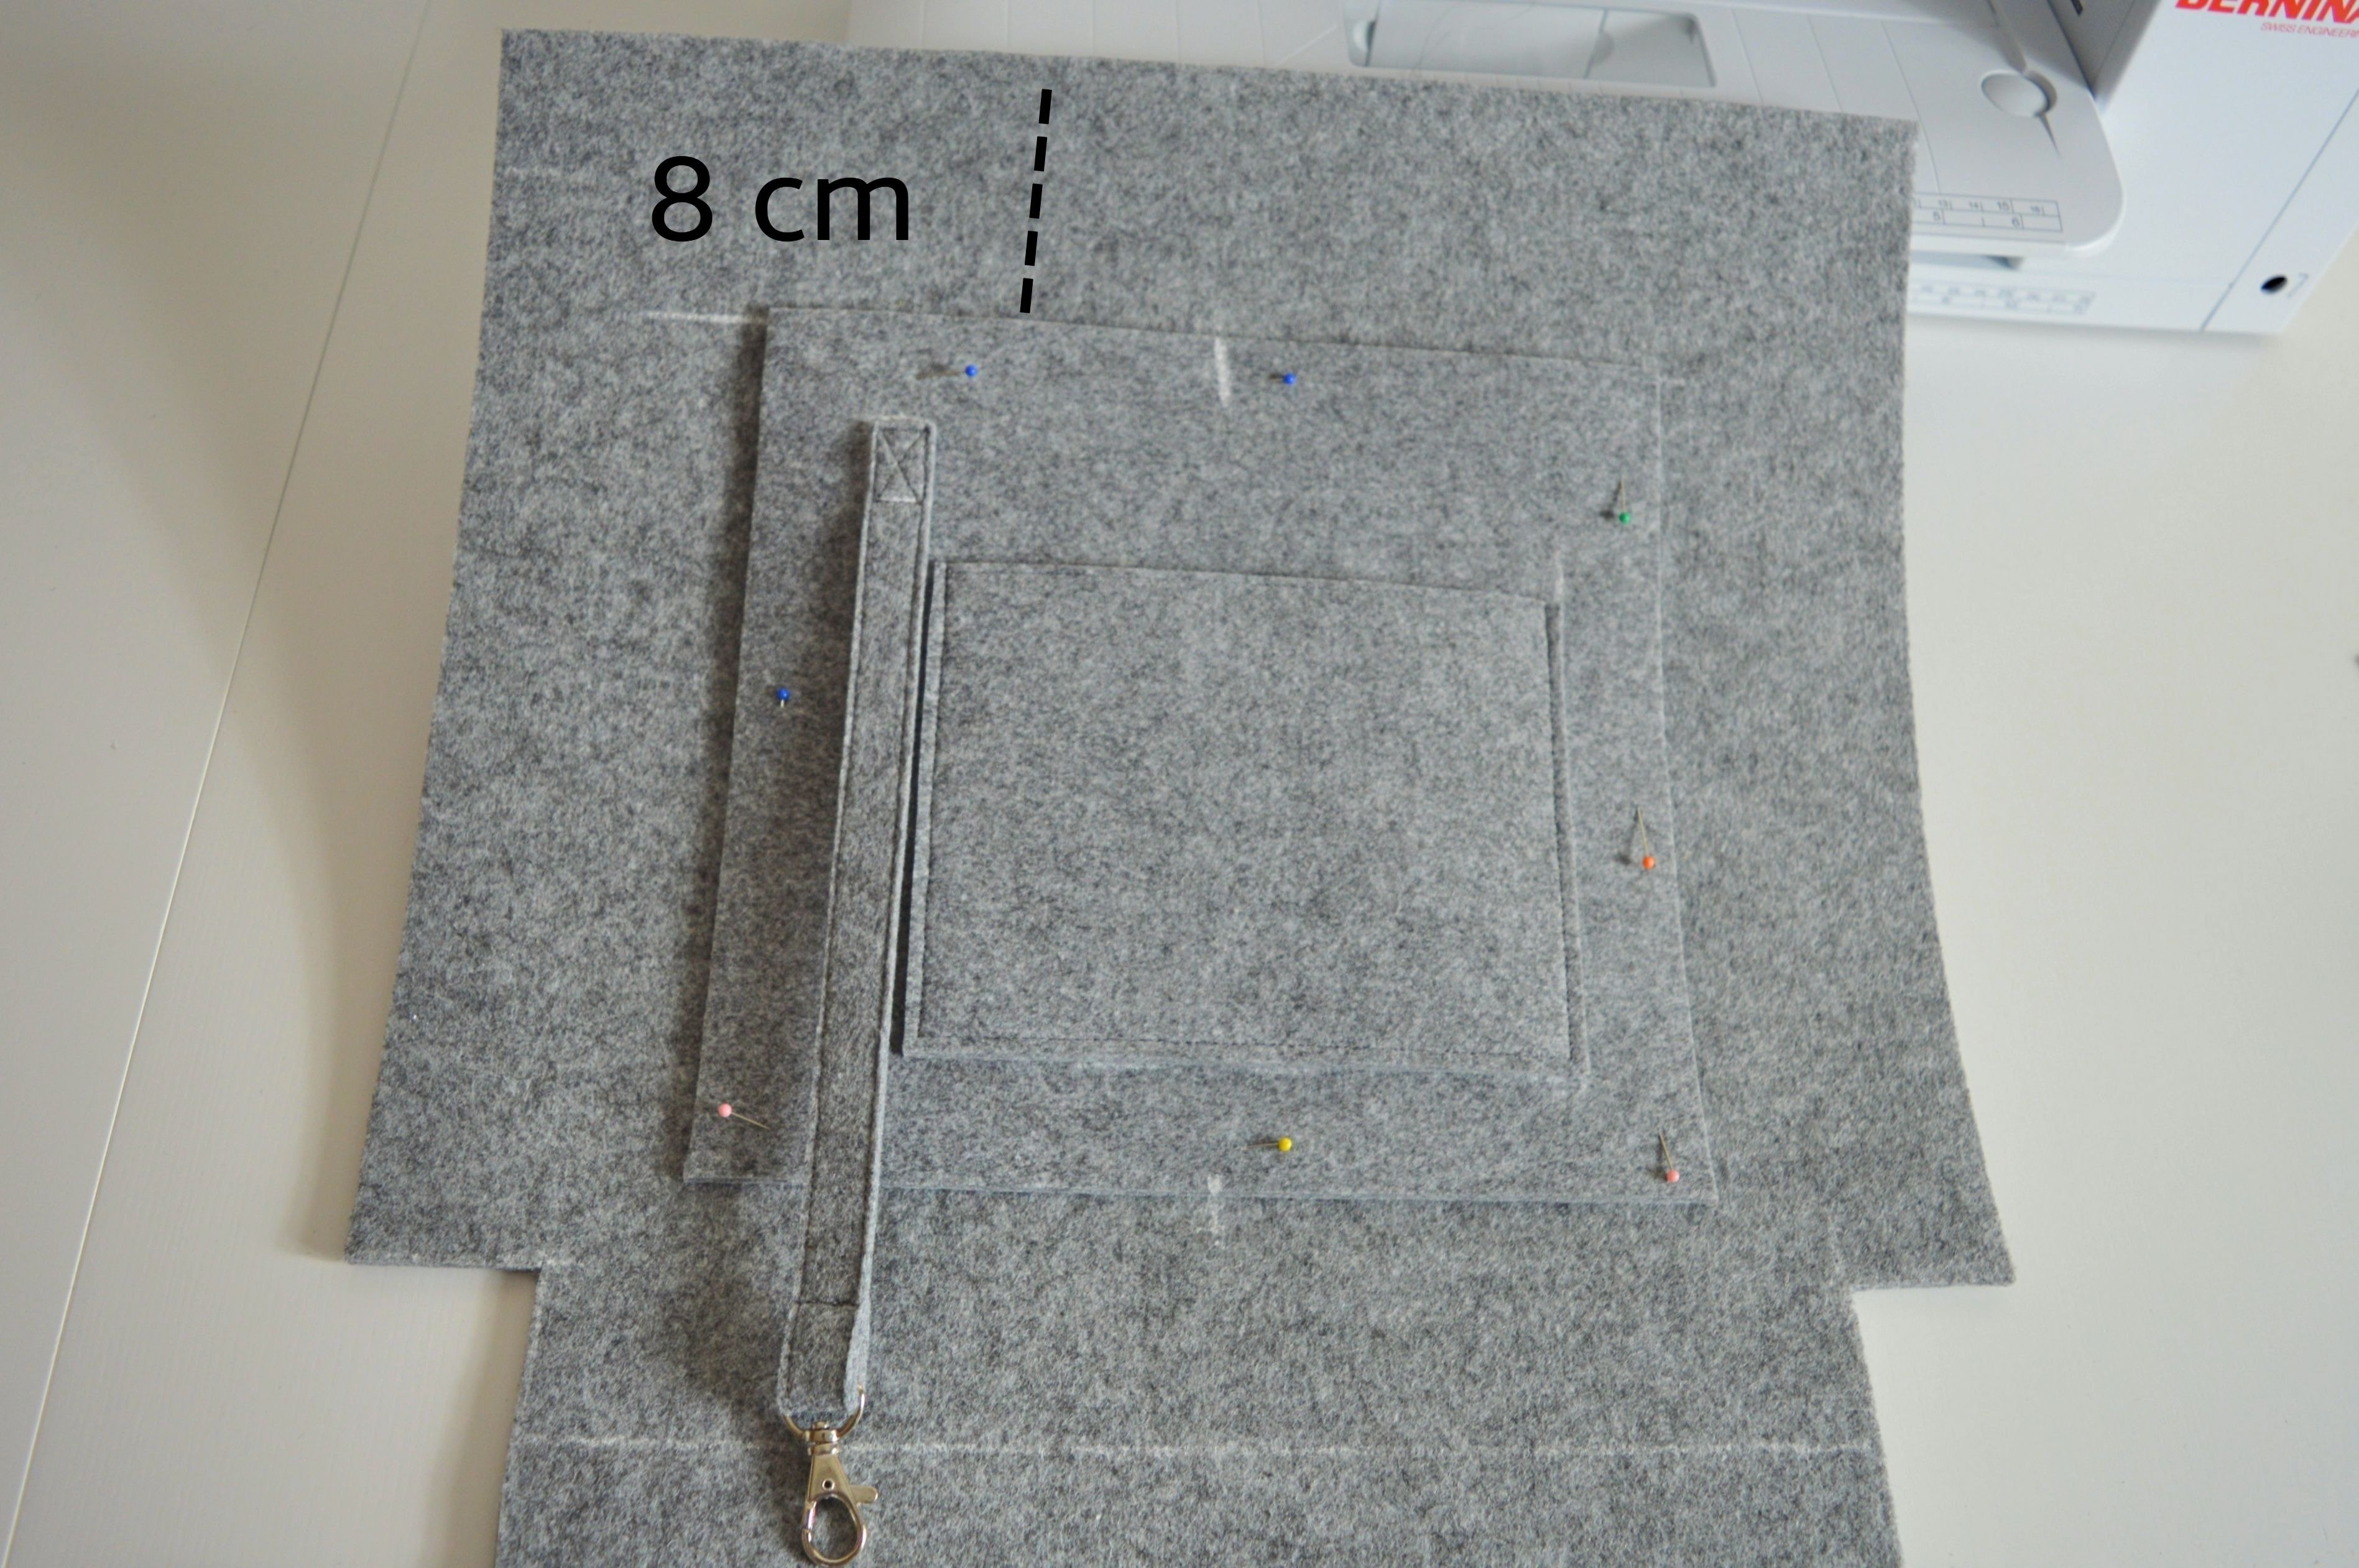
Turn to the right side, pin it again and mark the stitching edges for a pocket, as shown in the picture below.
!!! We sew on the outside, because the layers of felt under the foot move, so if we sewed from the inside, the lines of the seams would not be straight and look nice and clean.
Stitch it.
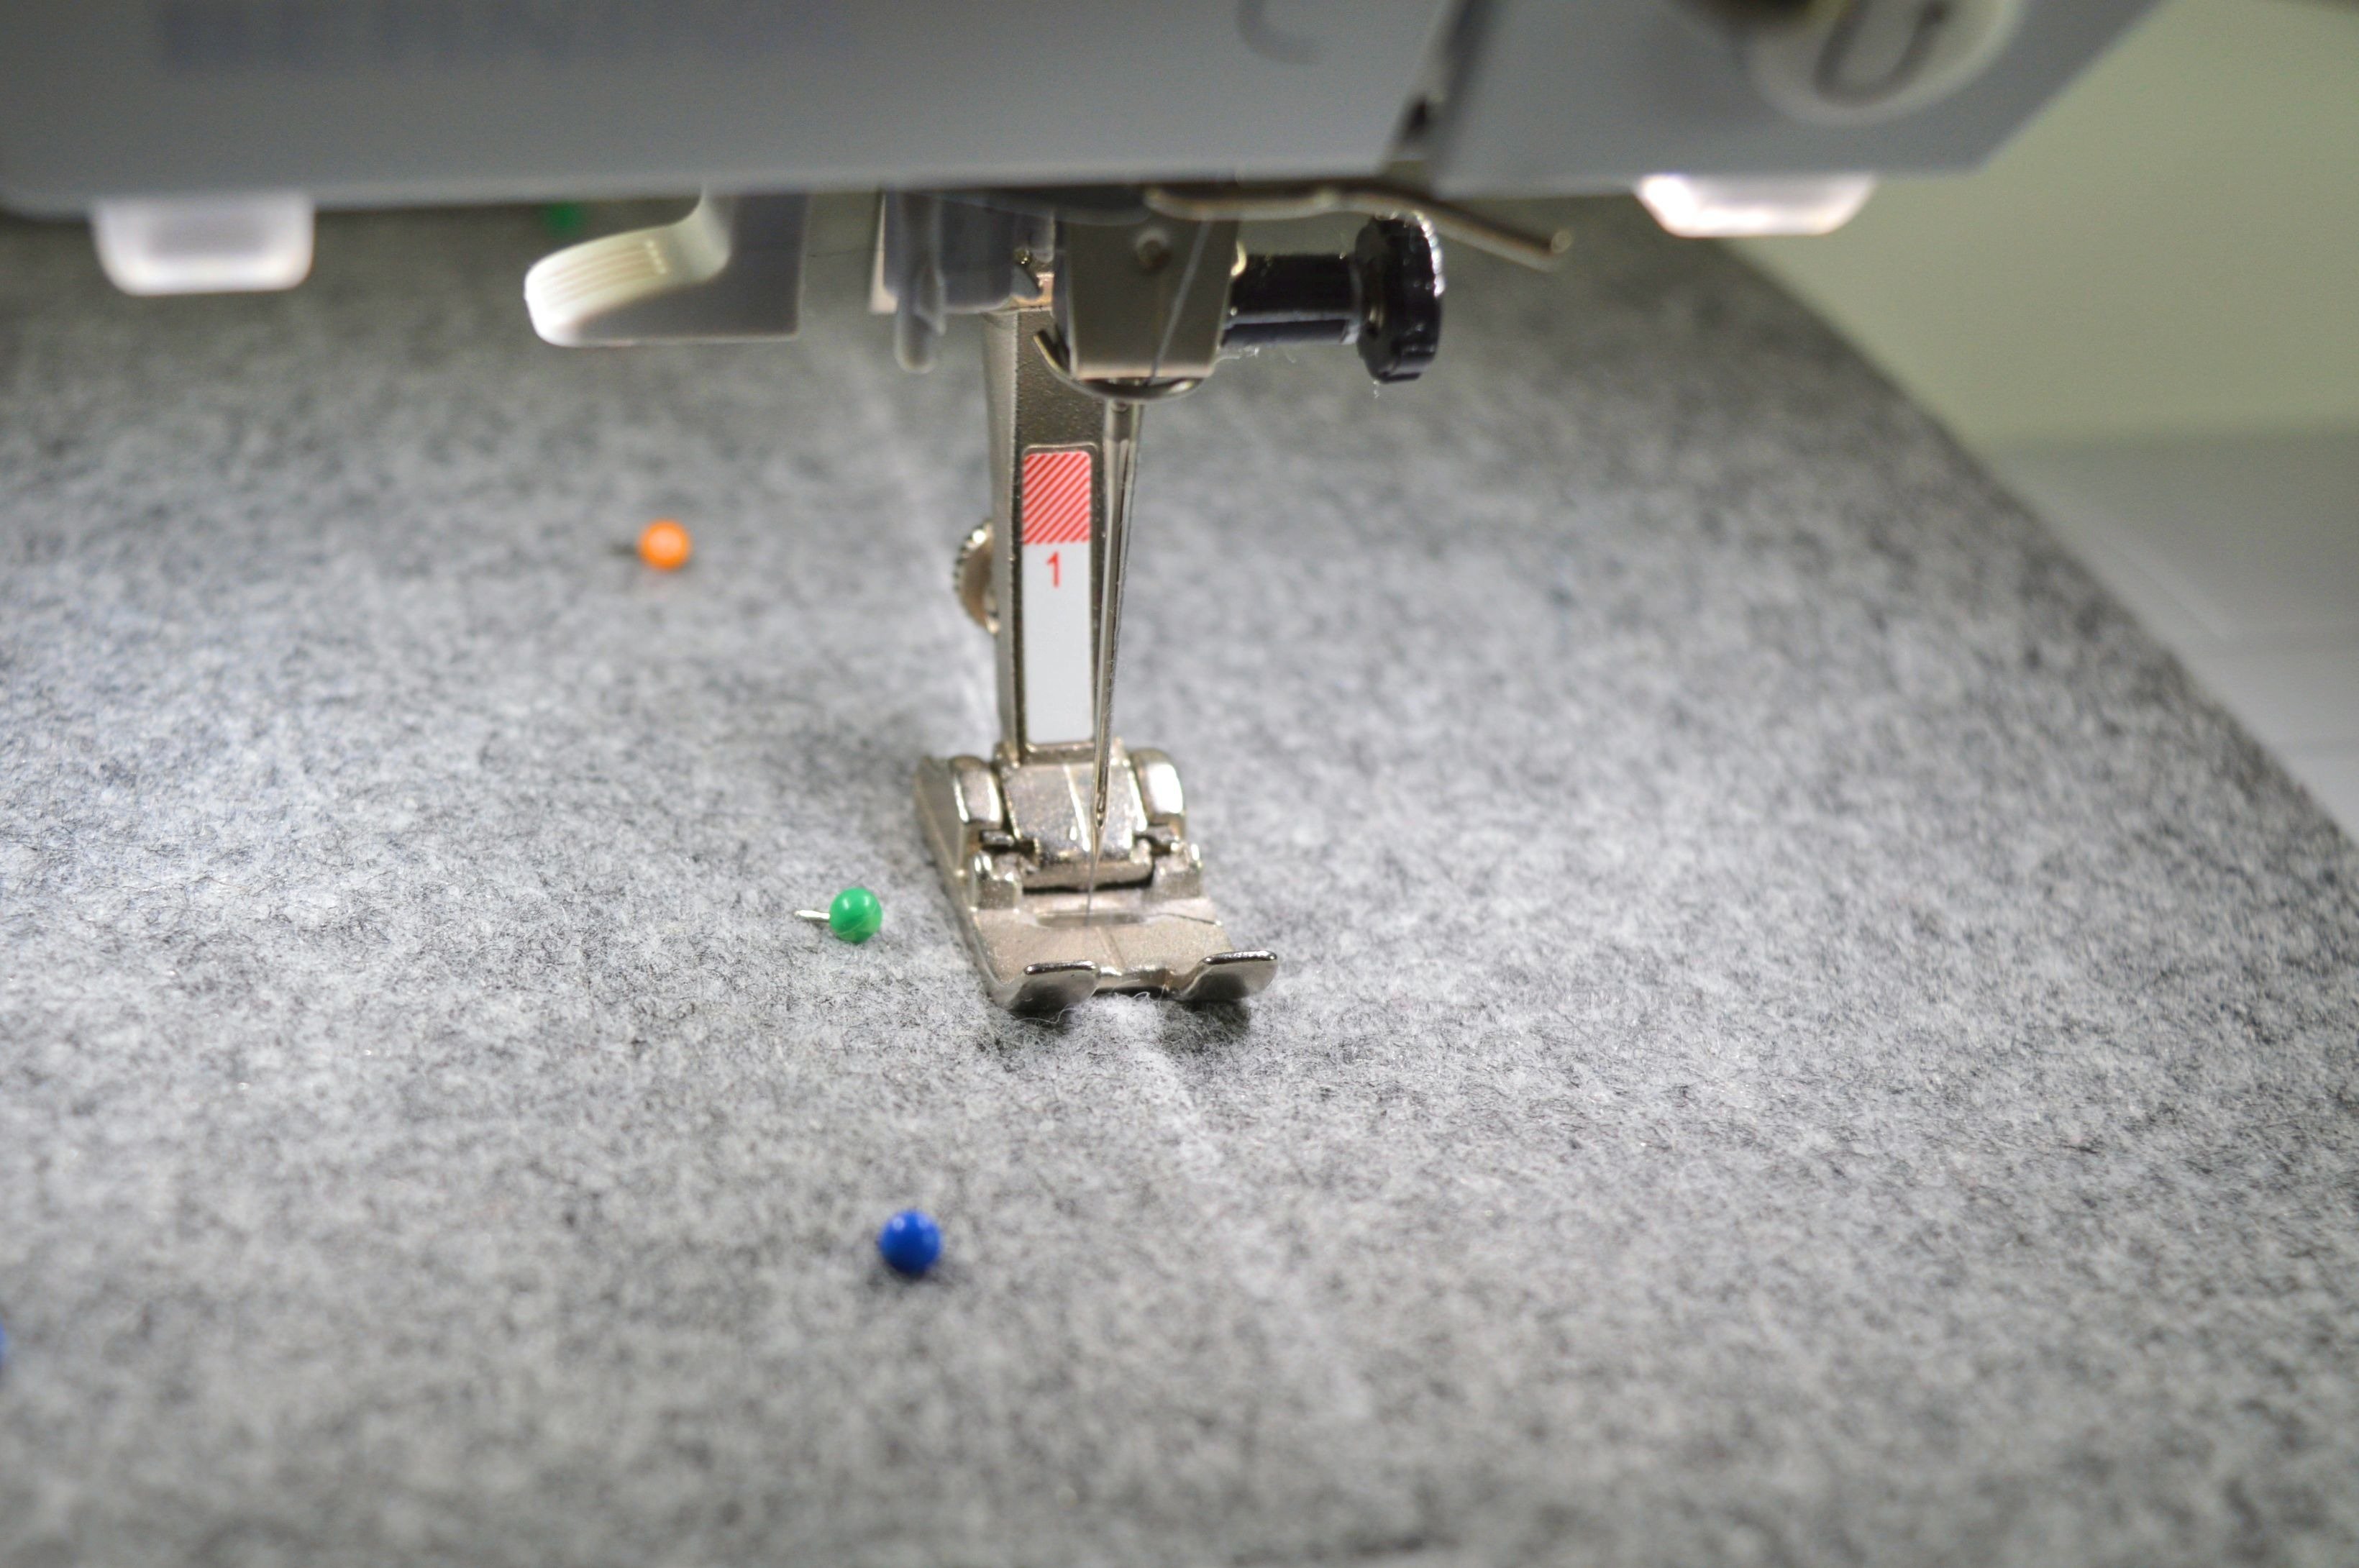
!!! Reverse-pattern foot #1, plain seam #1, the stitch length 3
(the needle is moved to the end right position)
As you see in the picture, you will also need to use alternative ways to sew it.
Now, go to the handles.
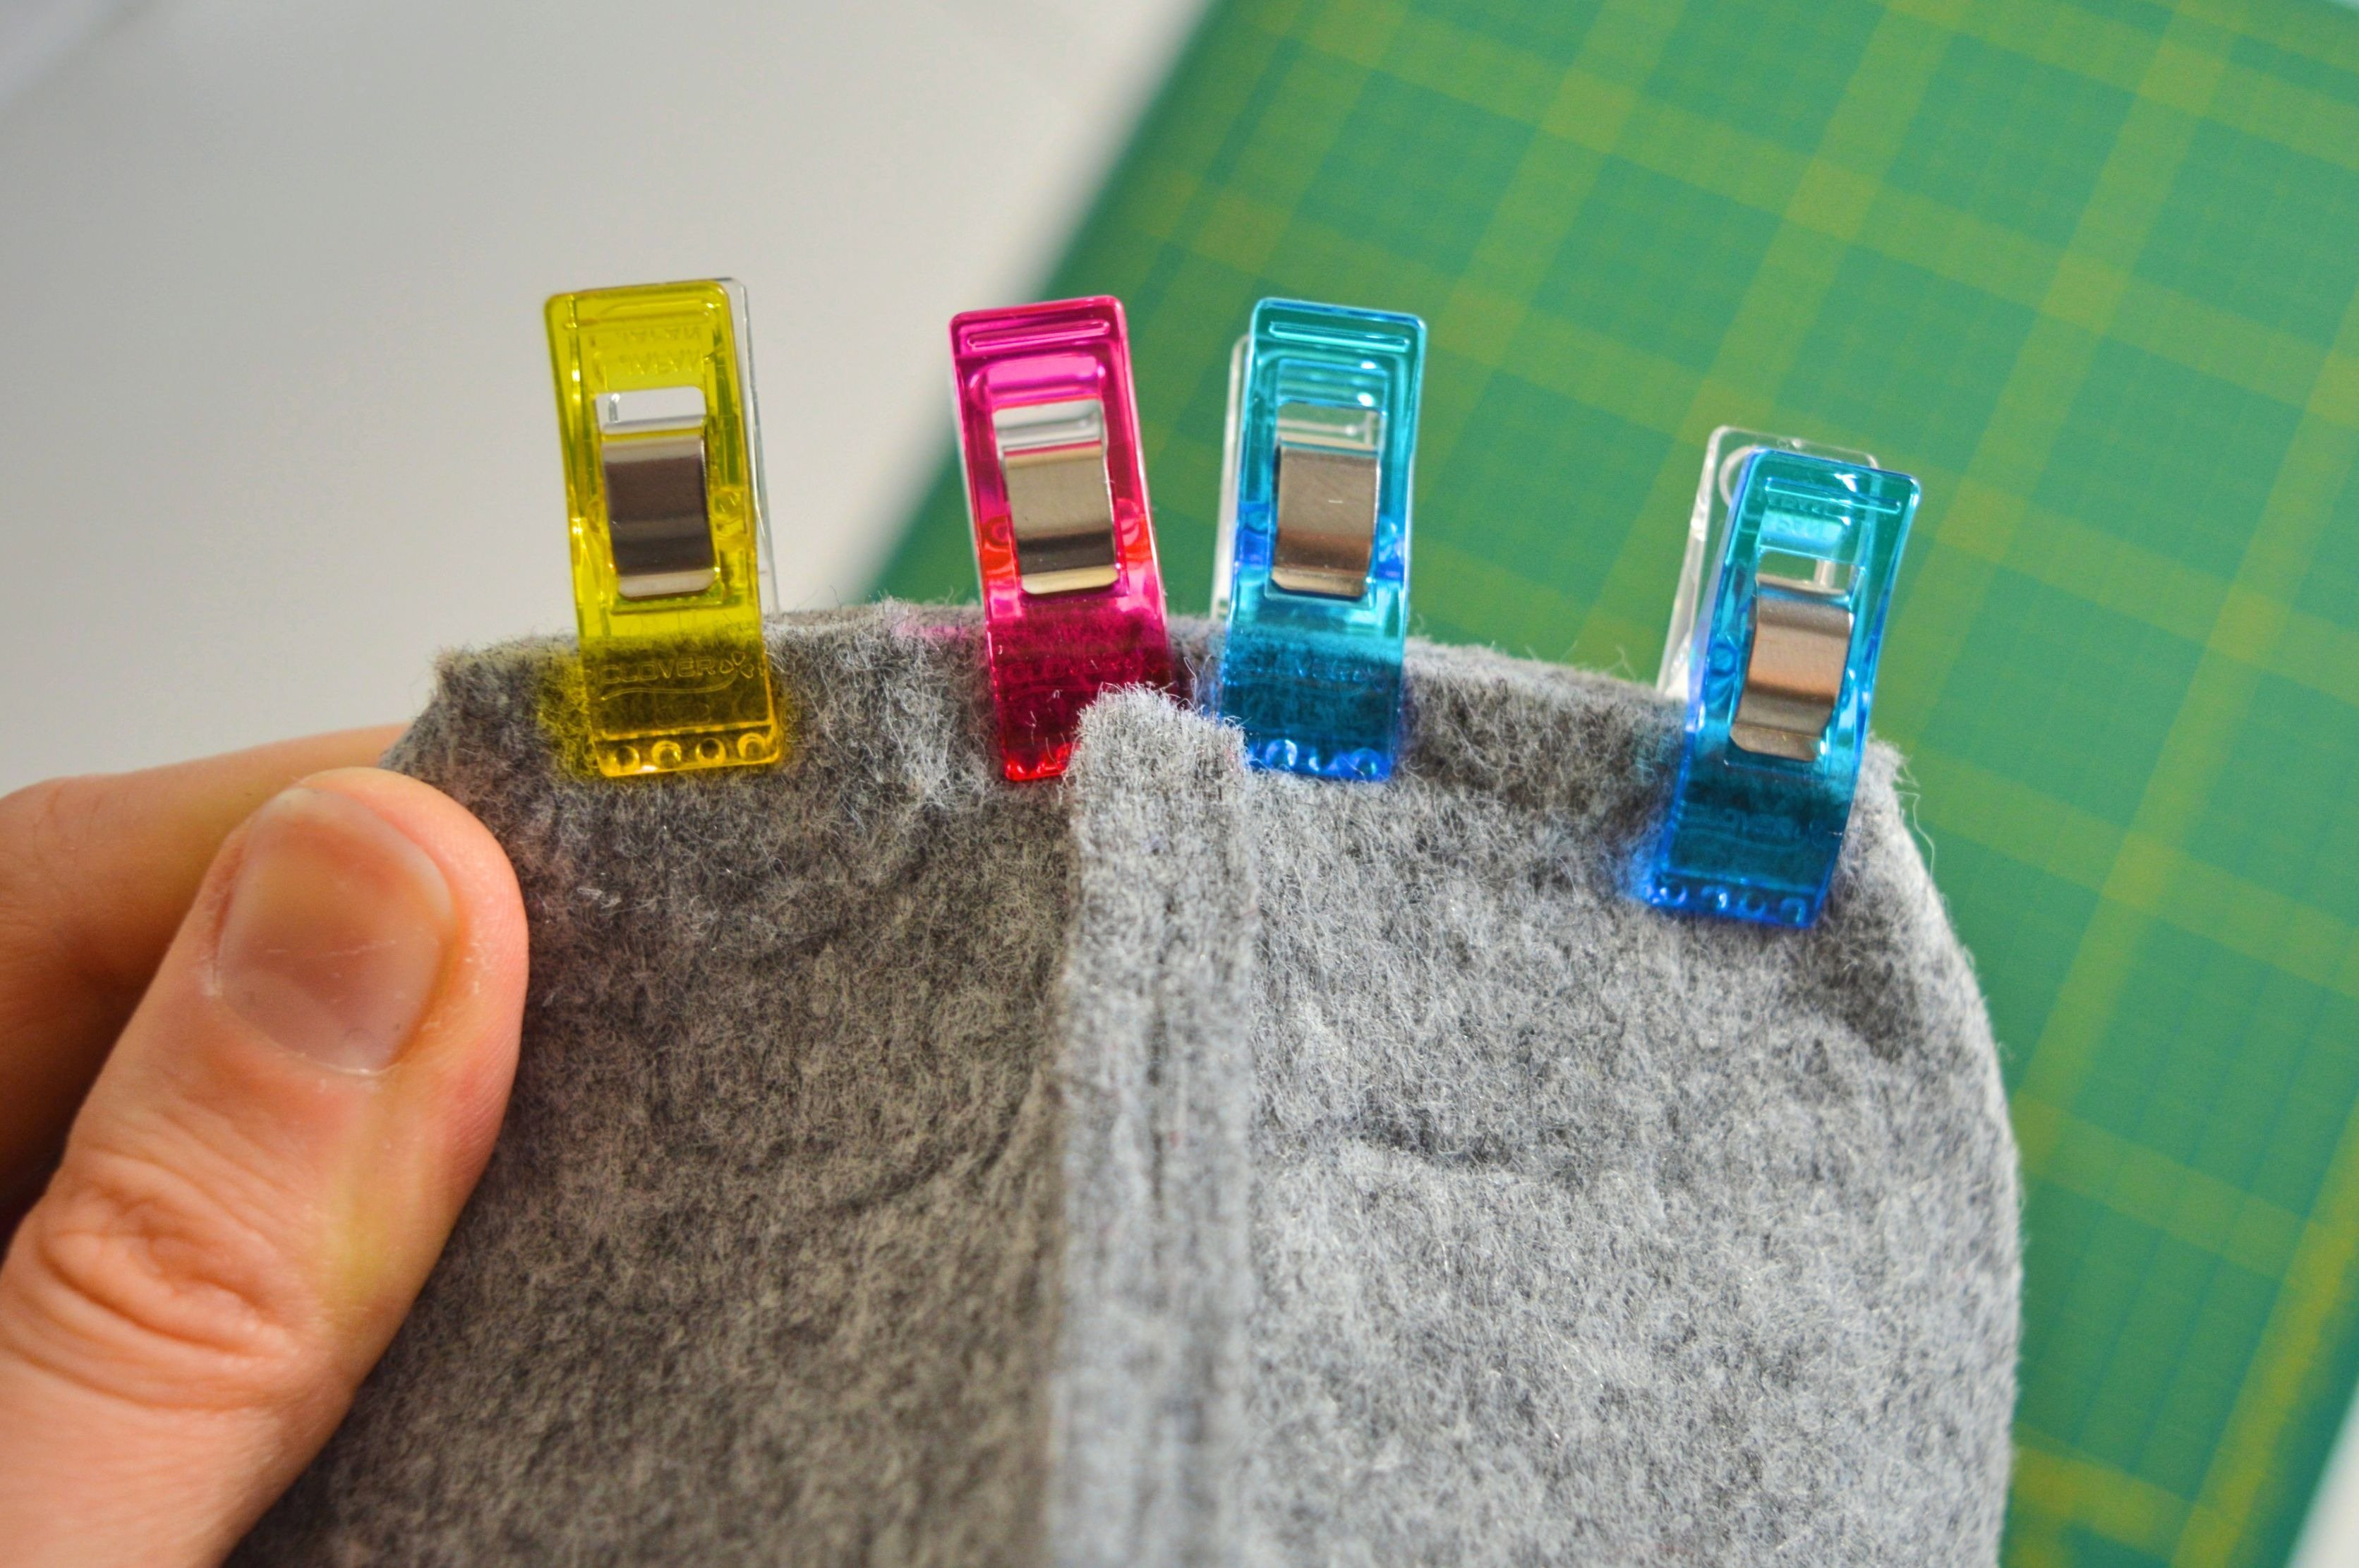
You have cut out 2 pieces 4 cm width and 50 cm length. Mark on the ends of these pieces 7 cm.
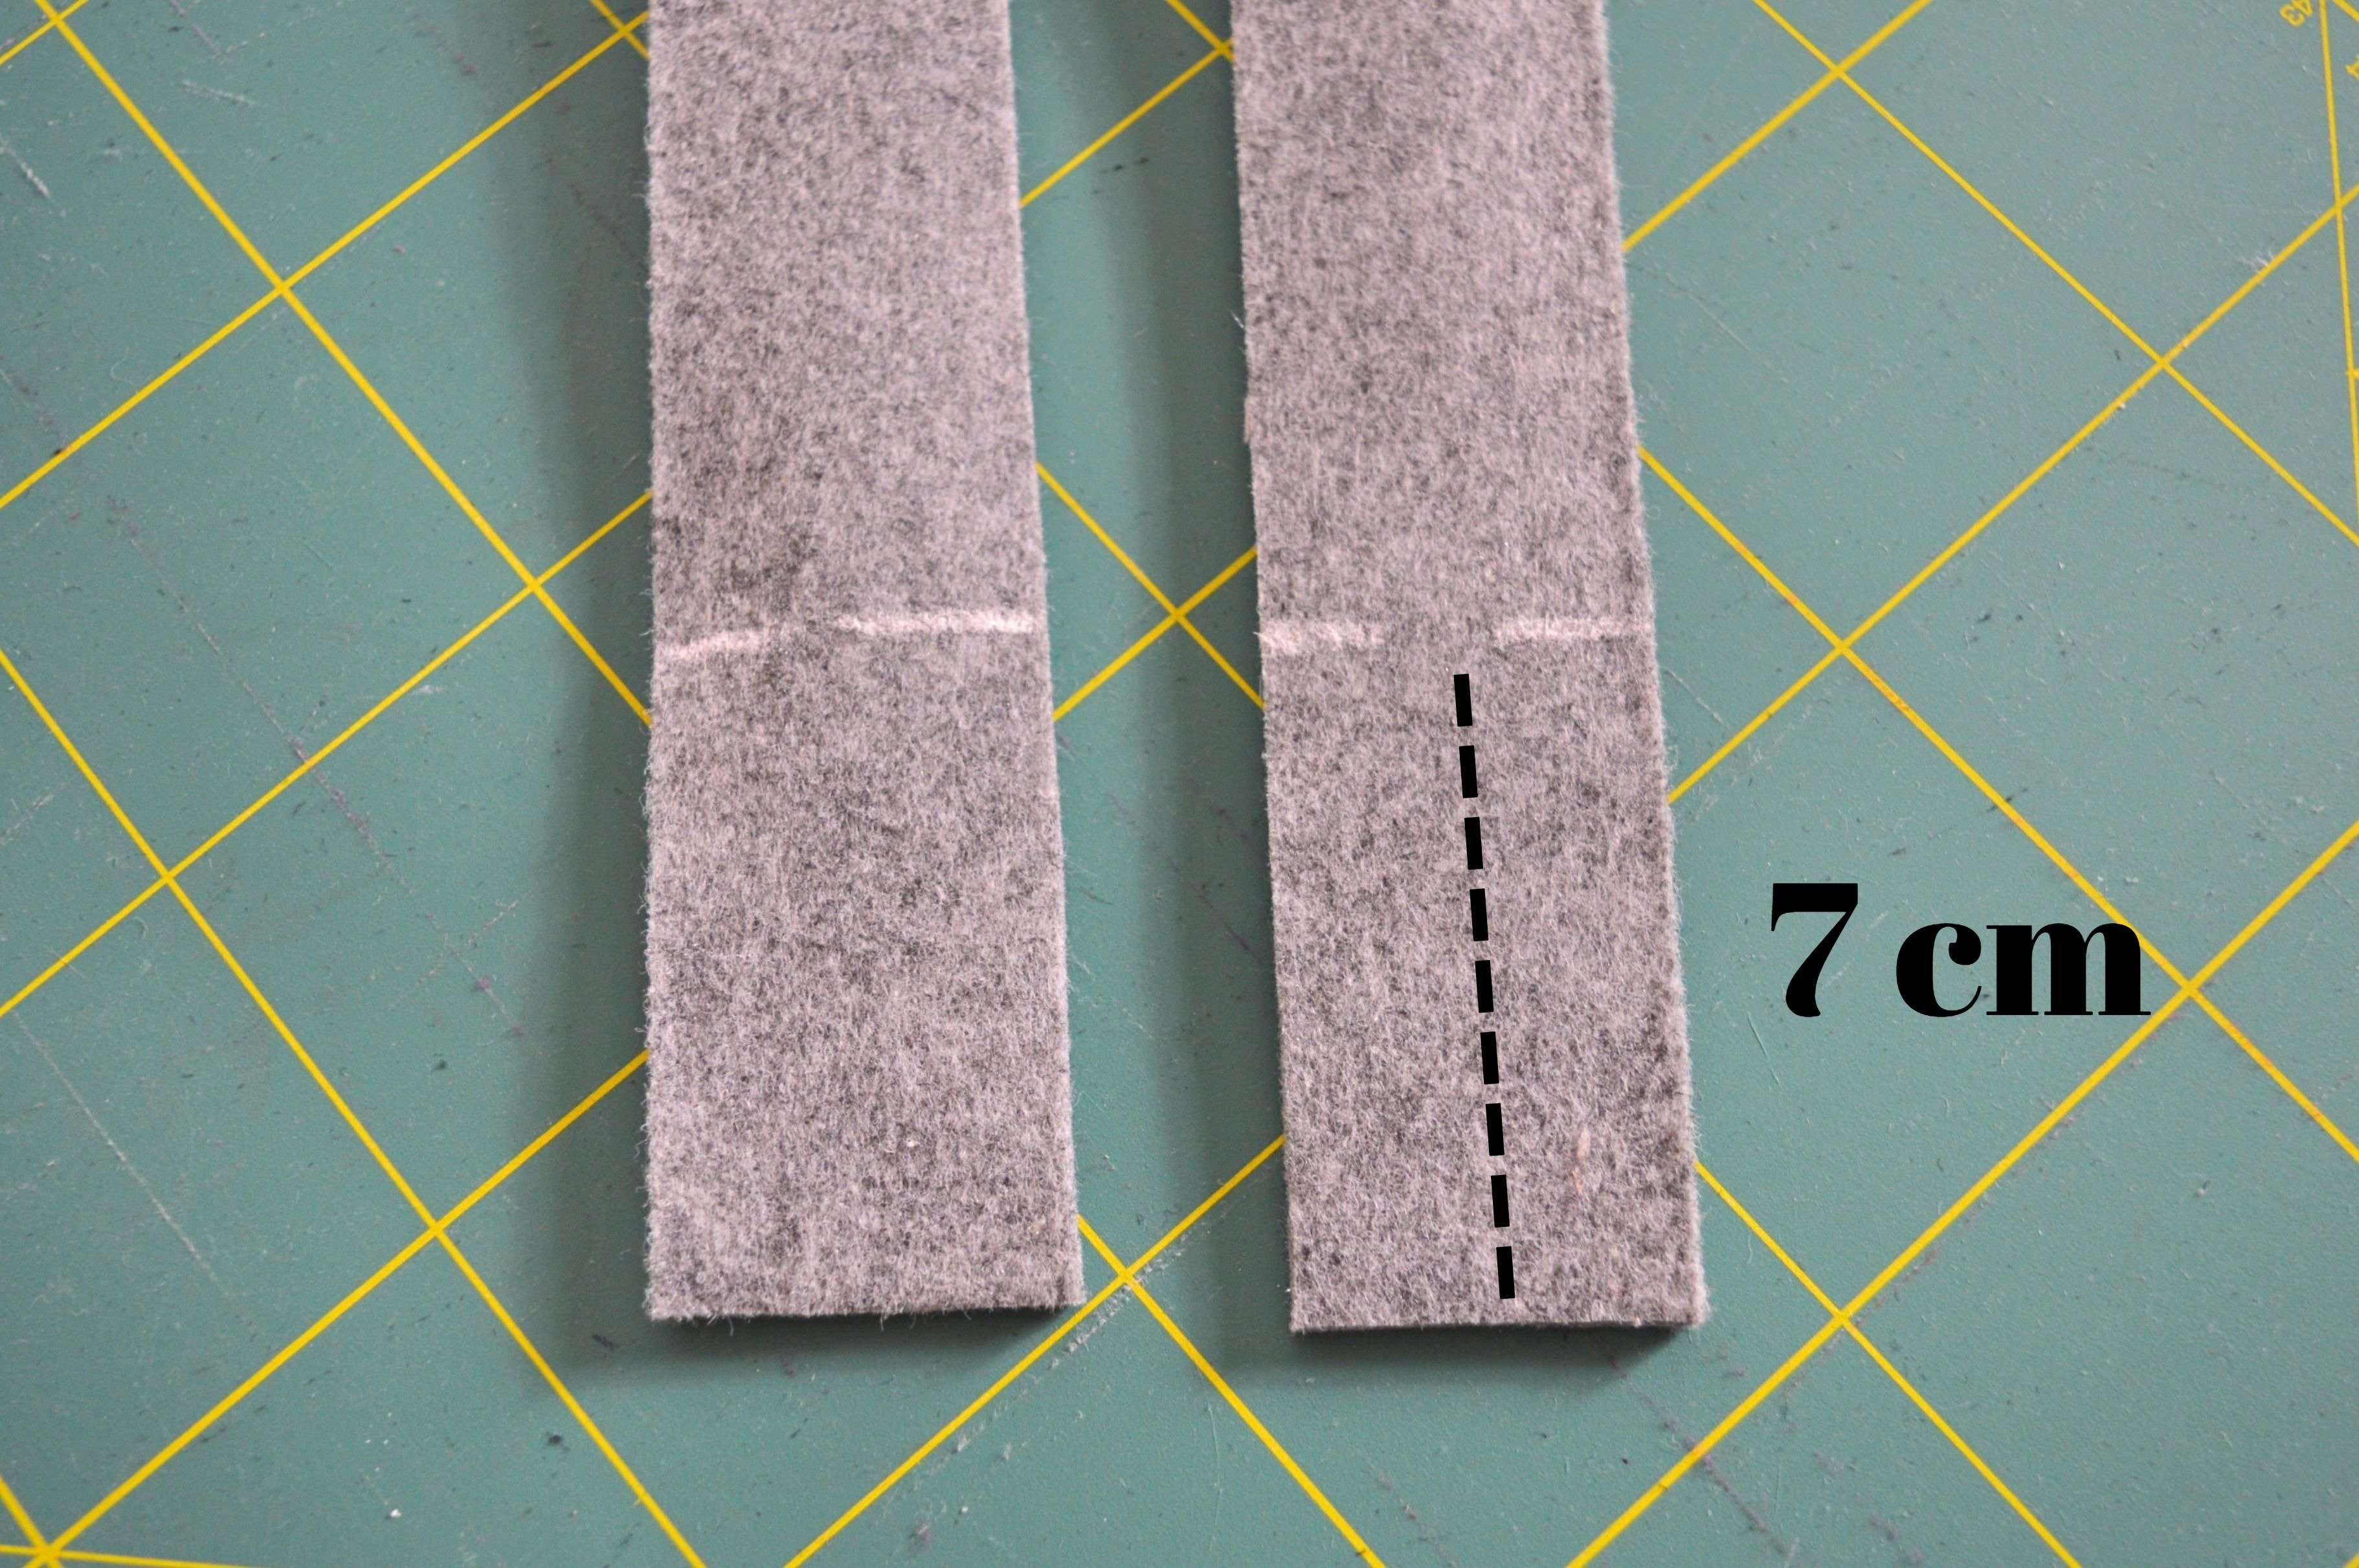
The part between these two marked 7 cm, fold using sewing clips and stitch.
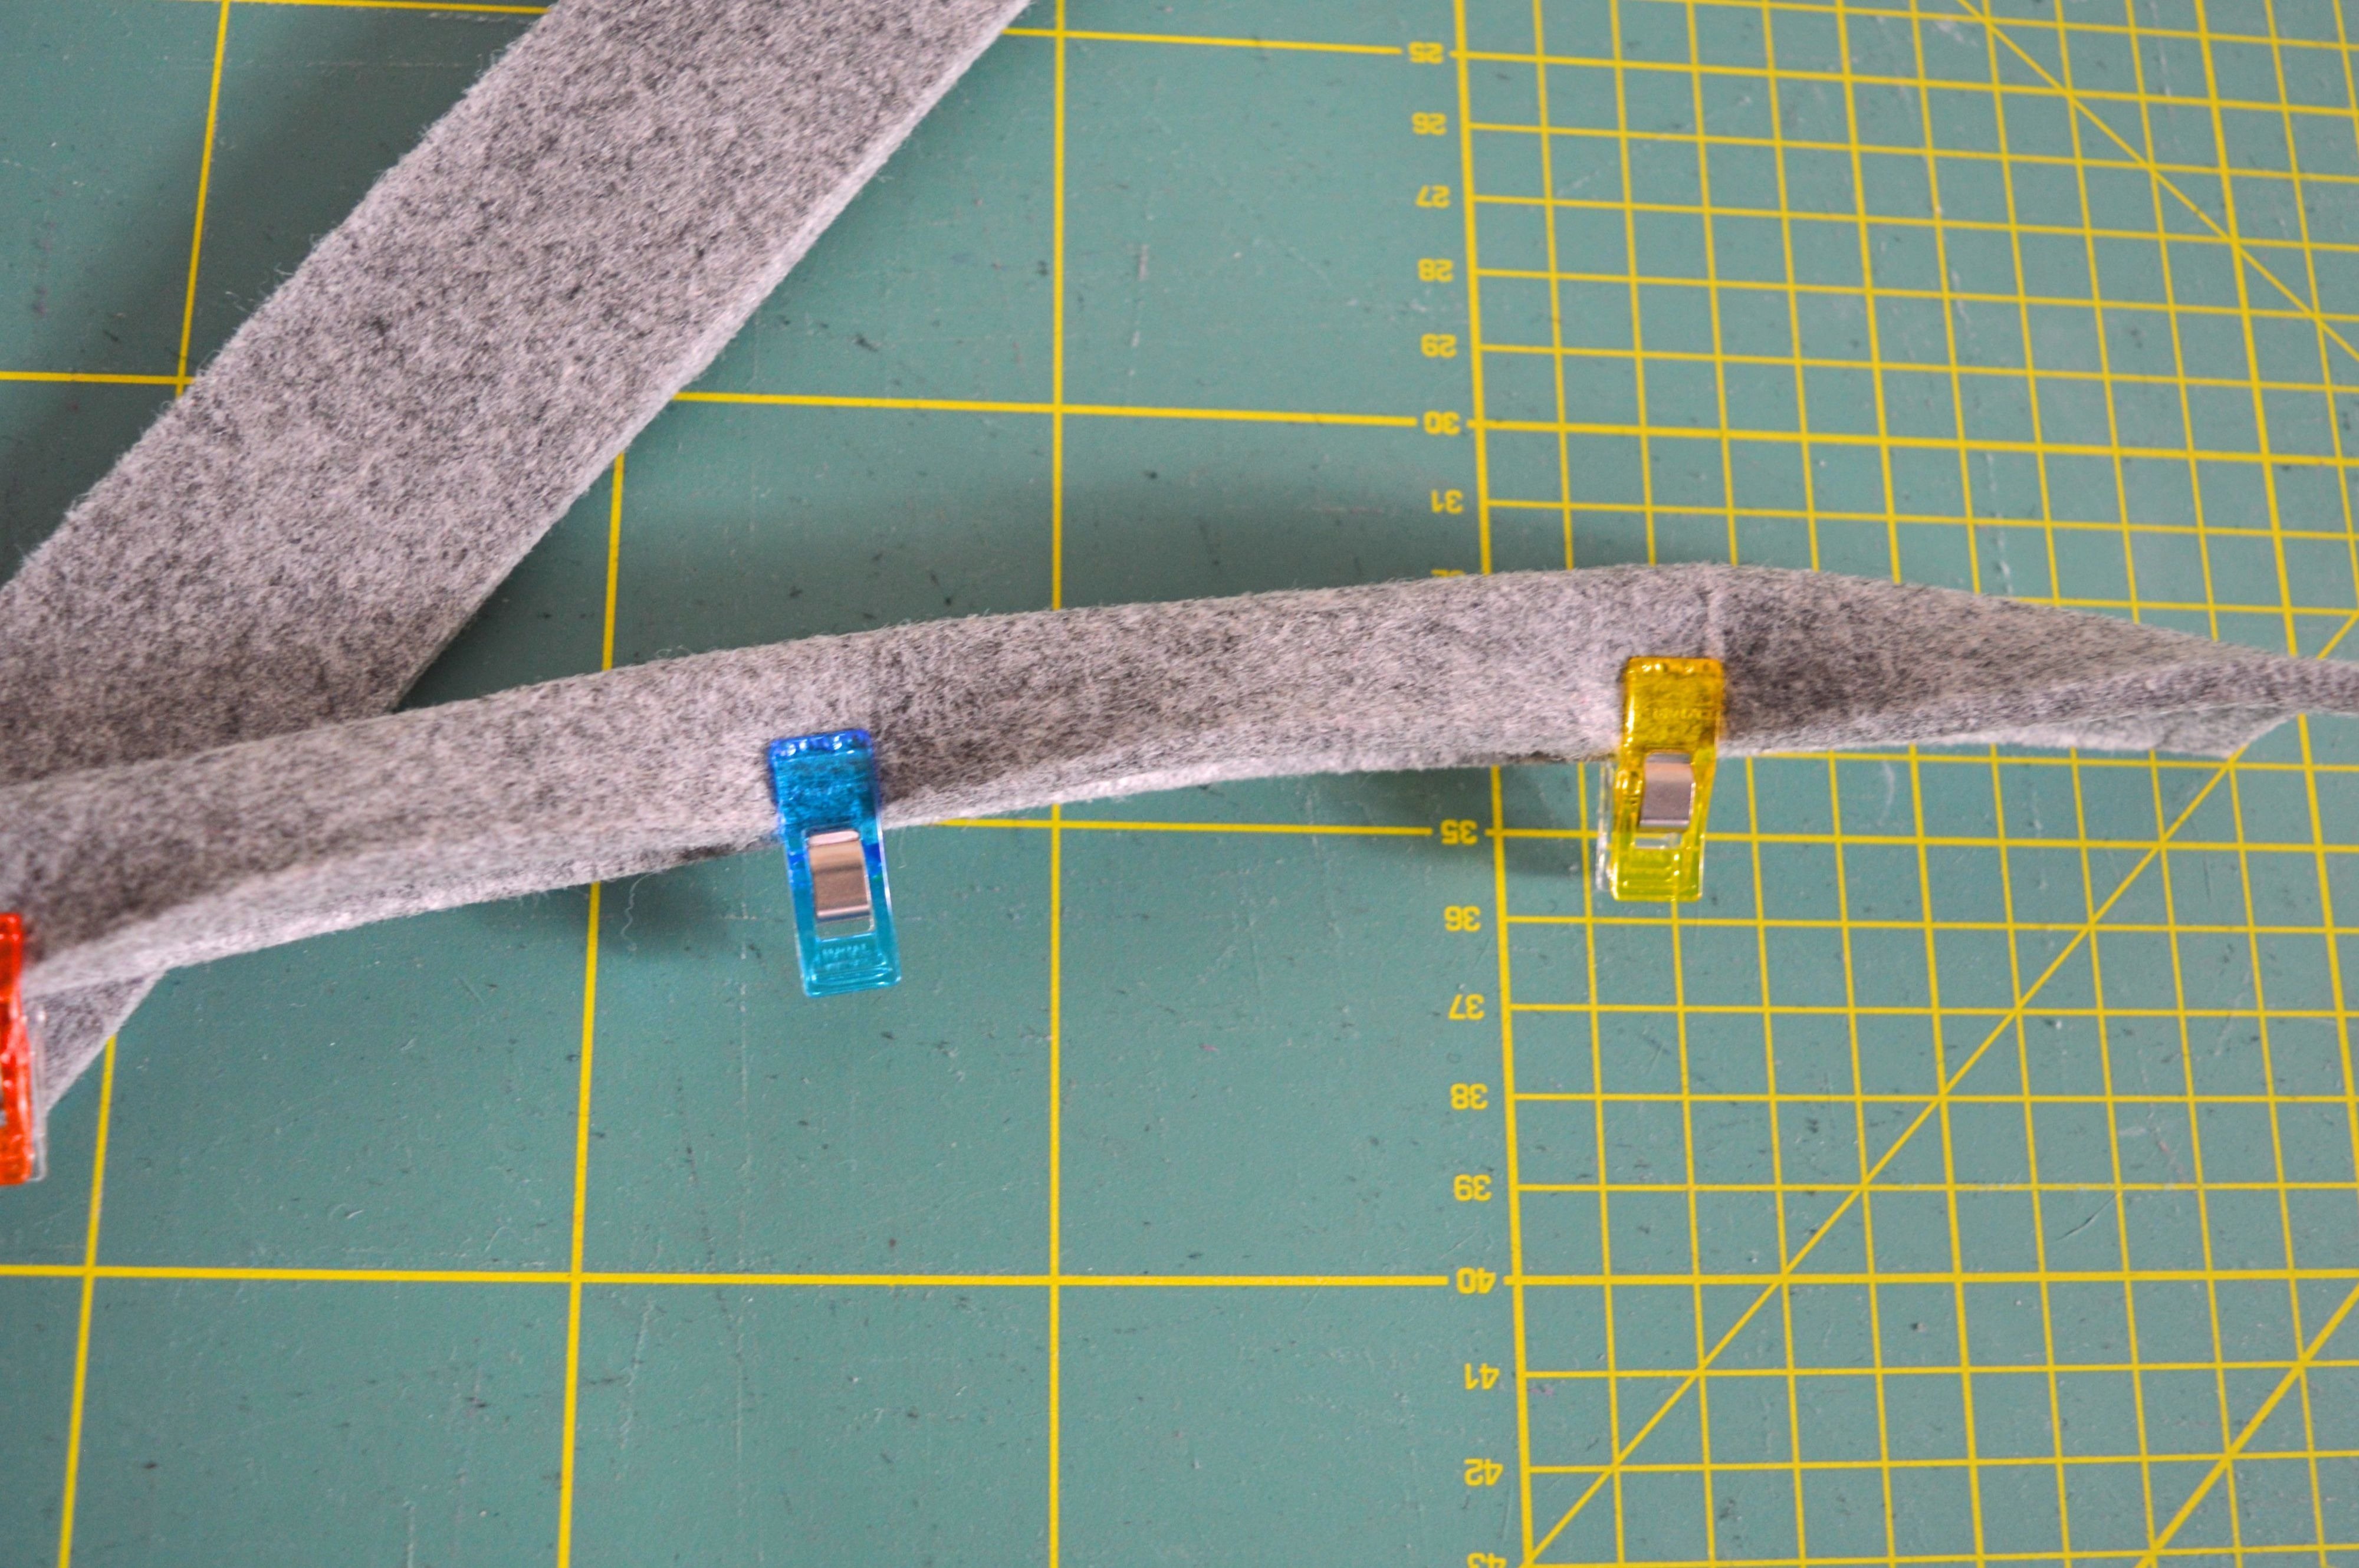
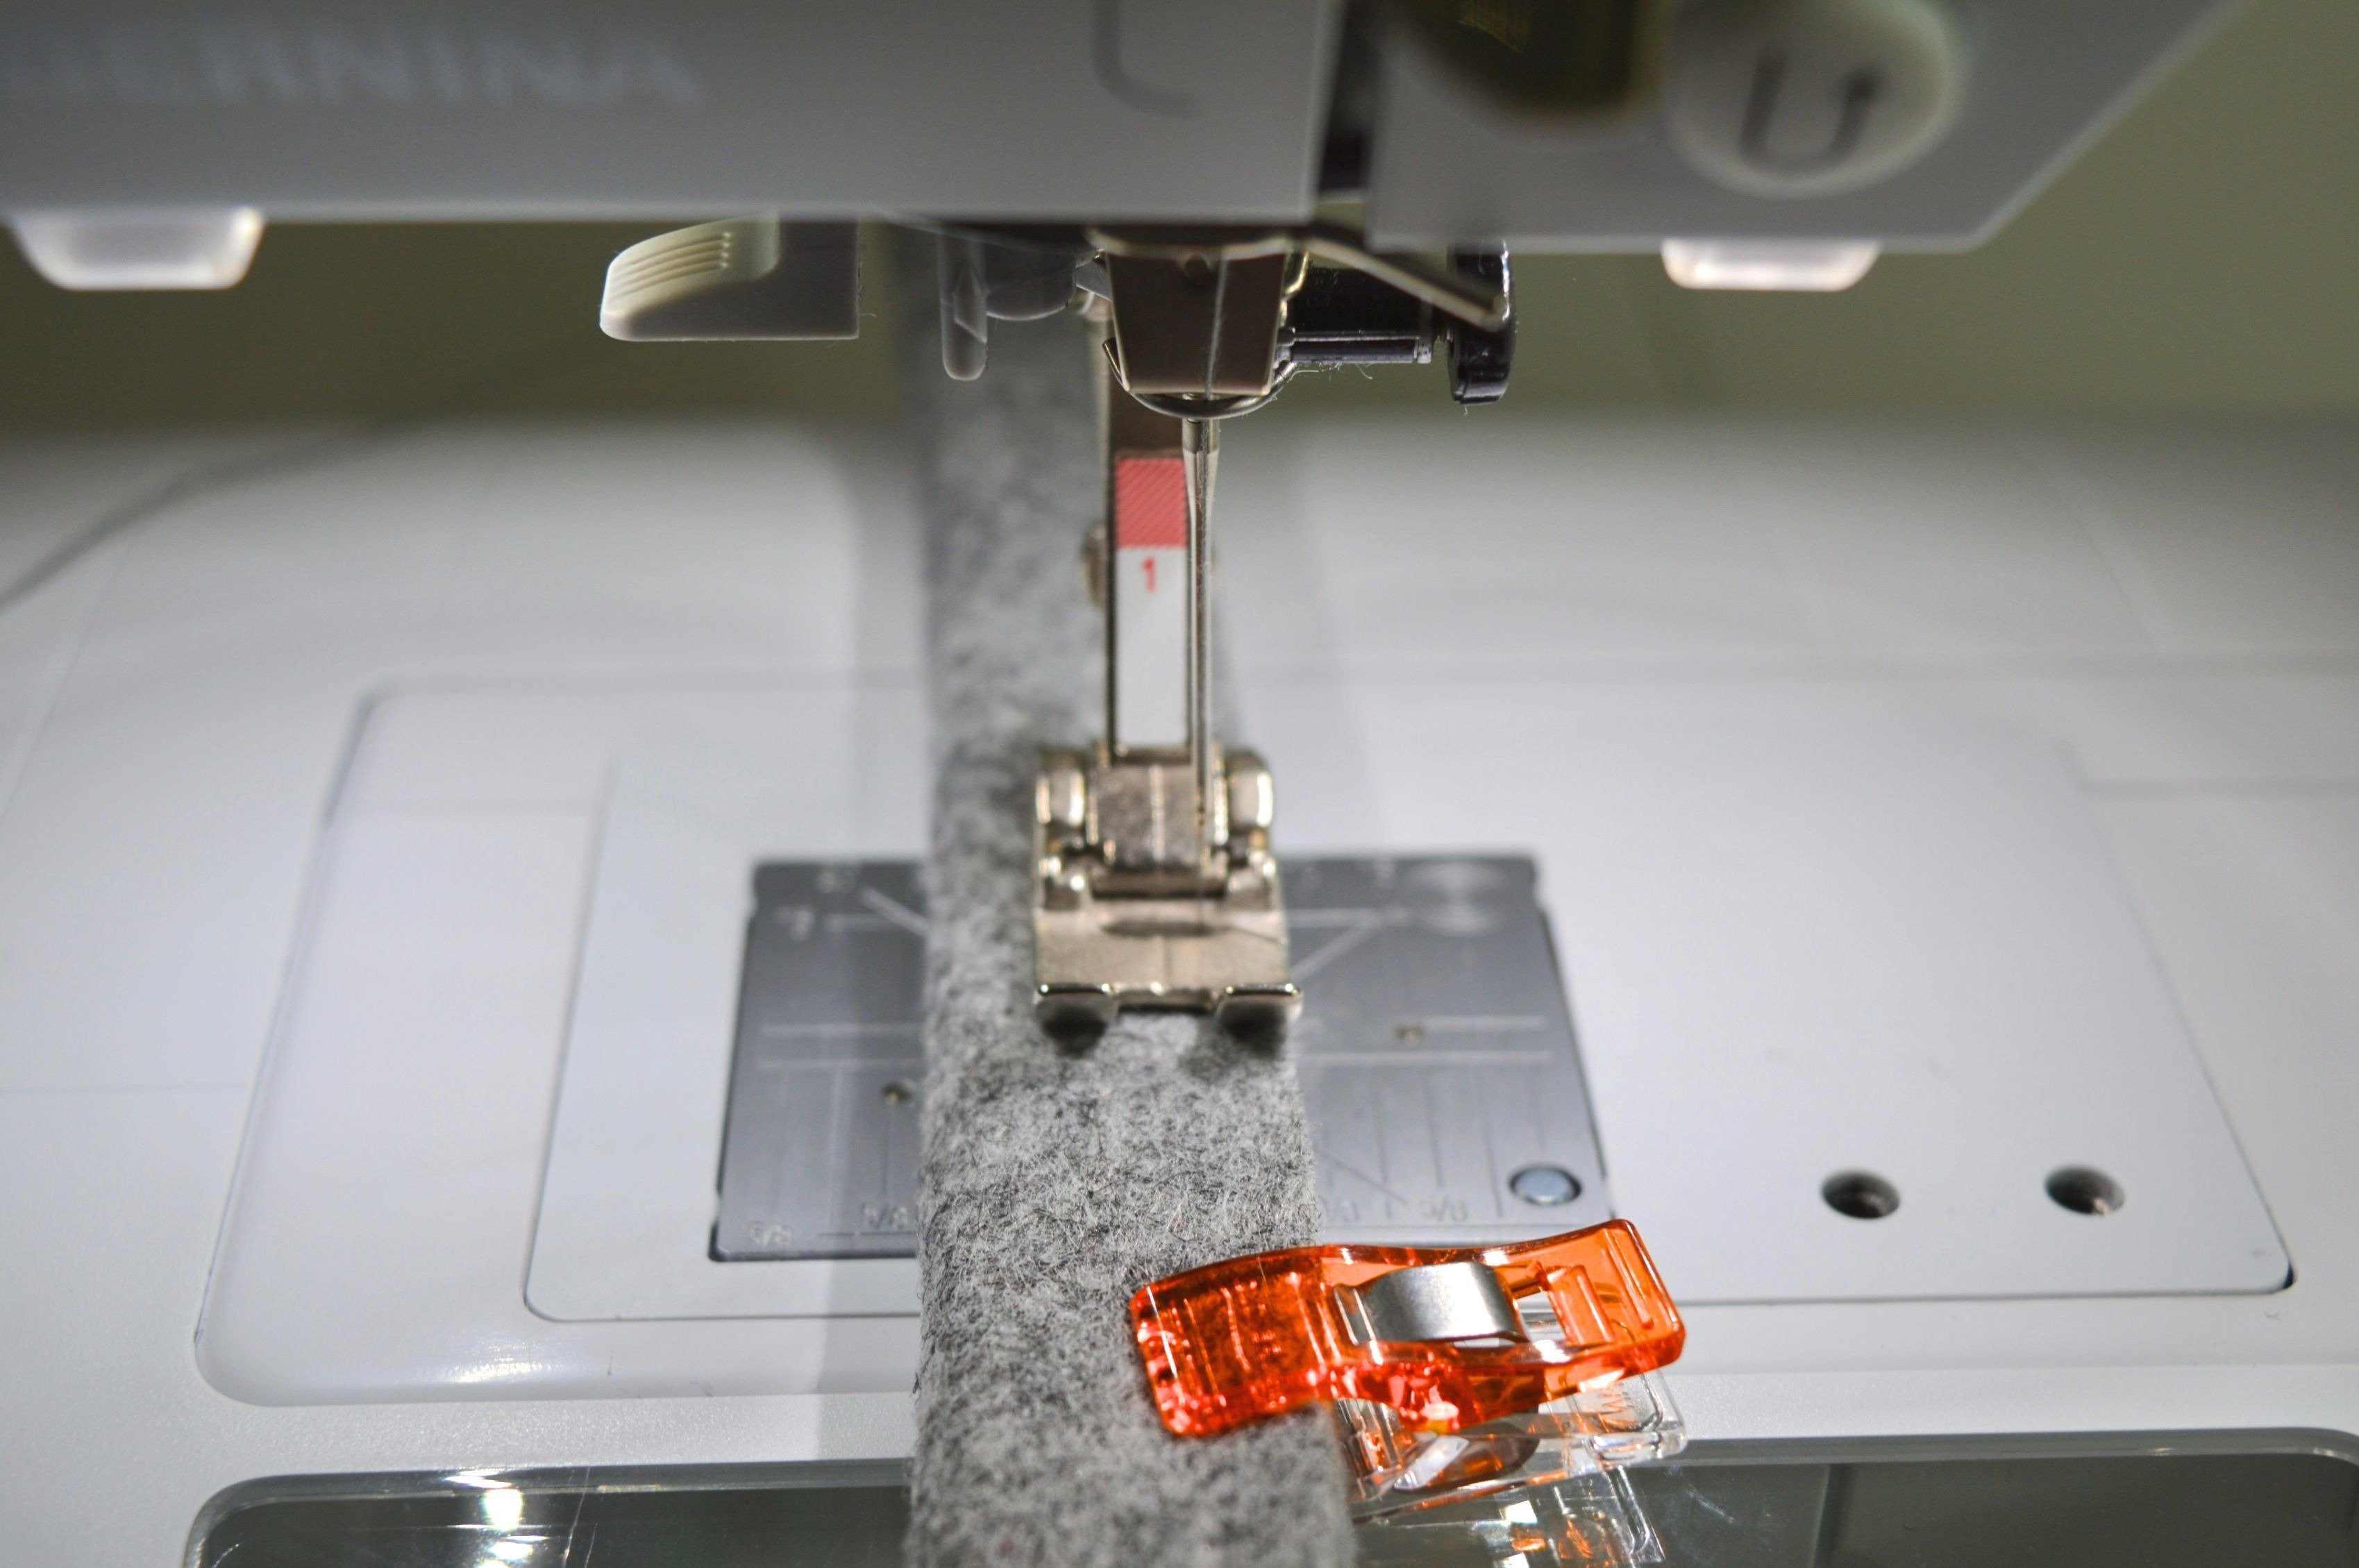
!!! Reverse-pattern foot #1, plain seam #1, the stitch length 3
(the needle is moved to the end right position)
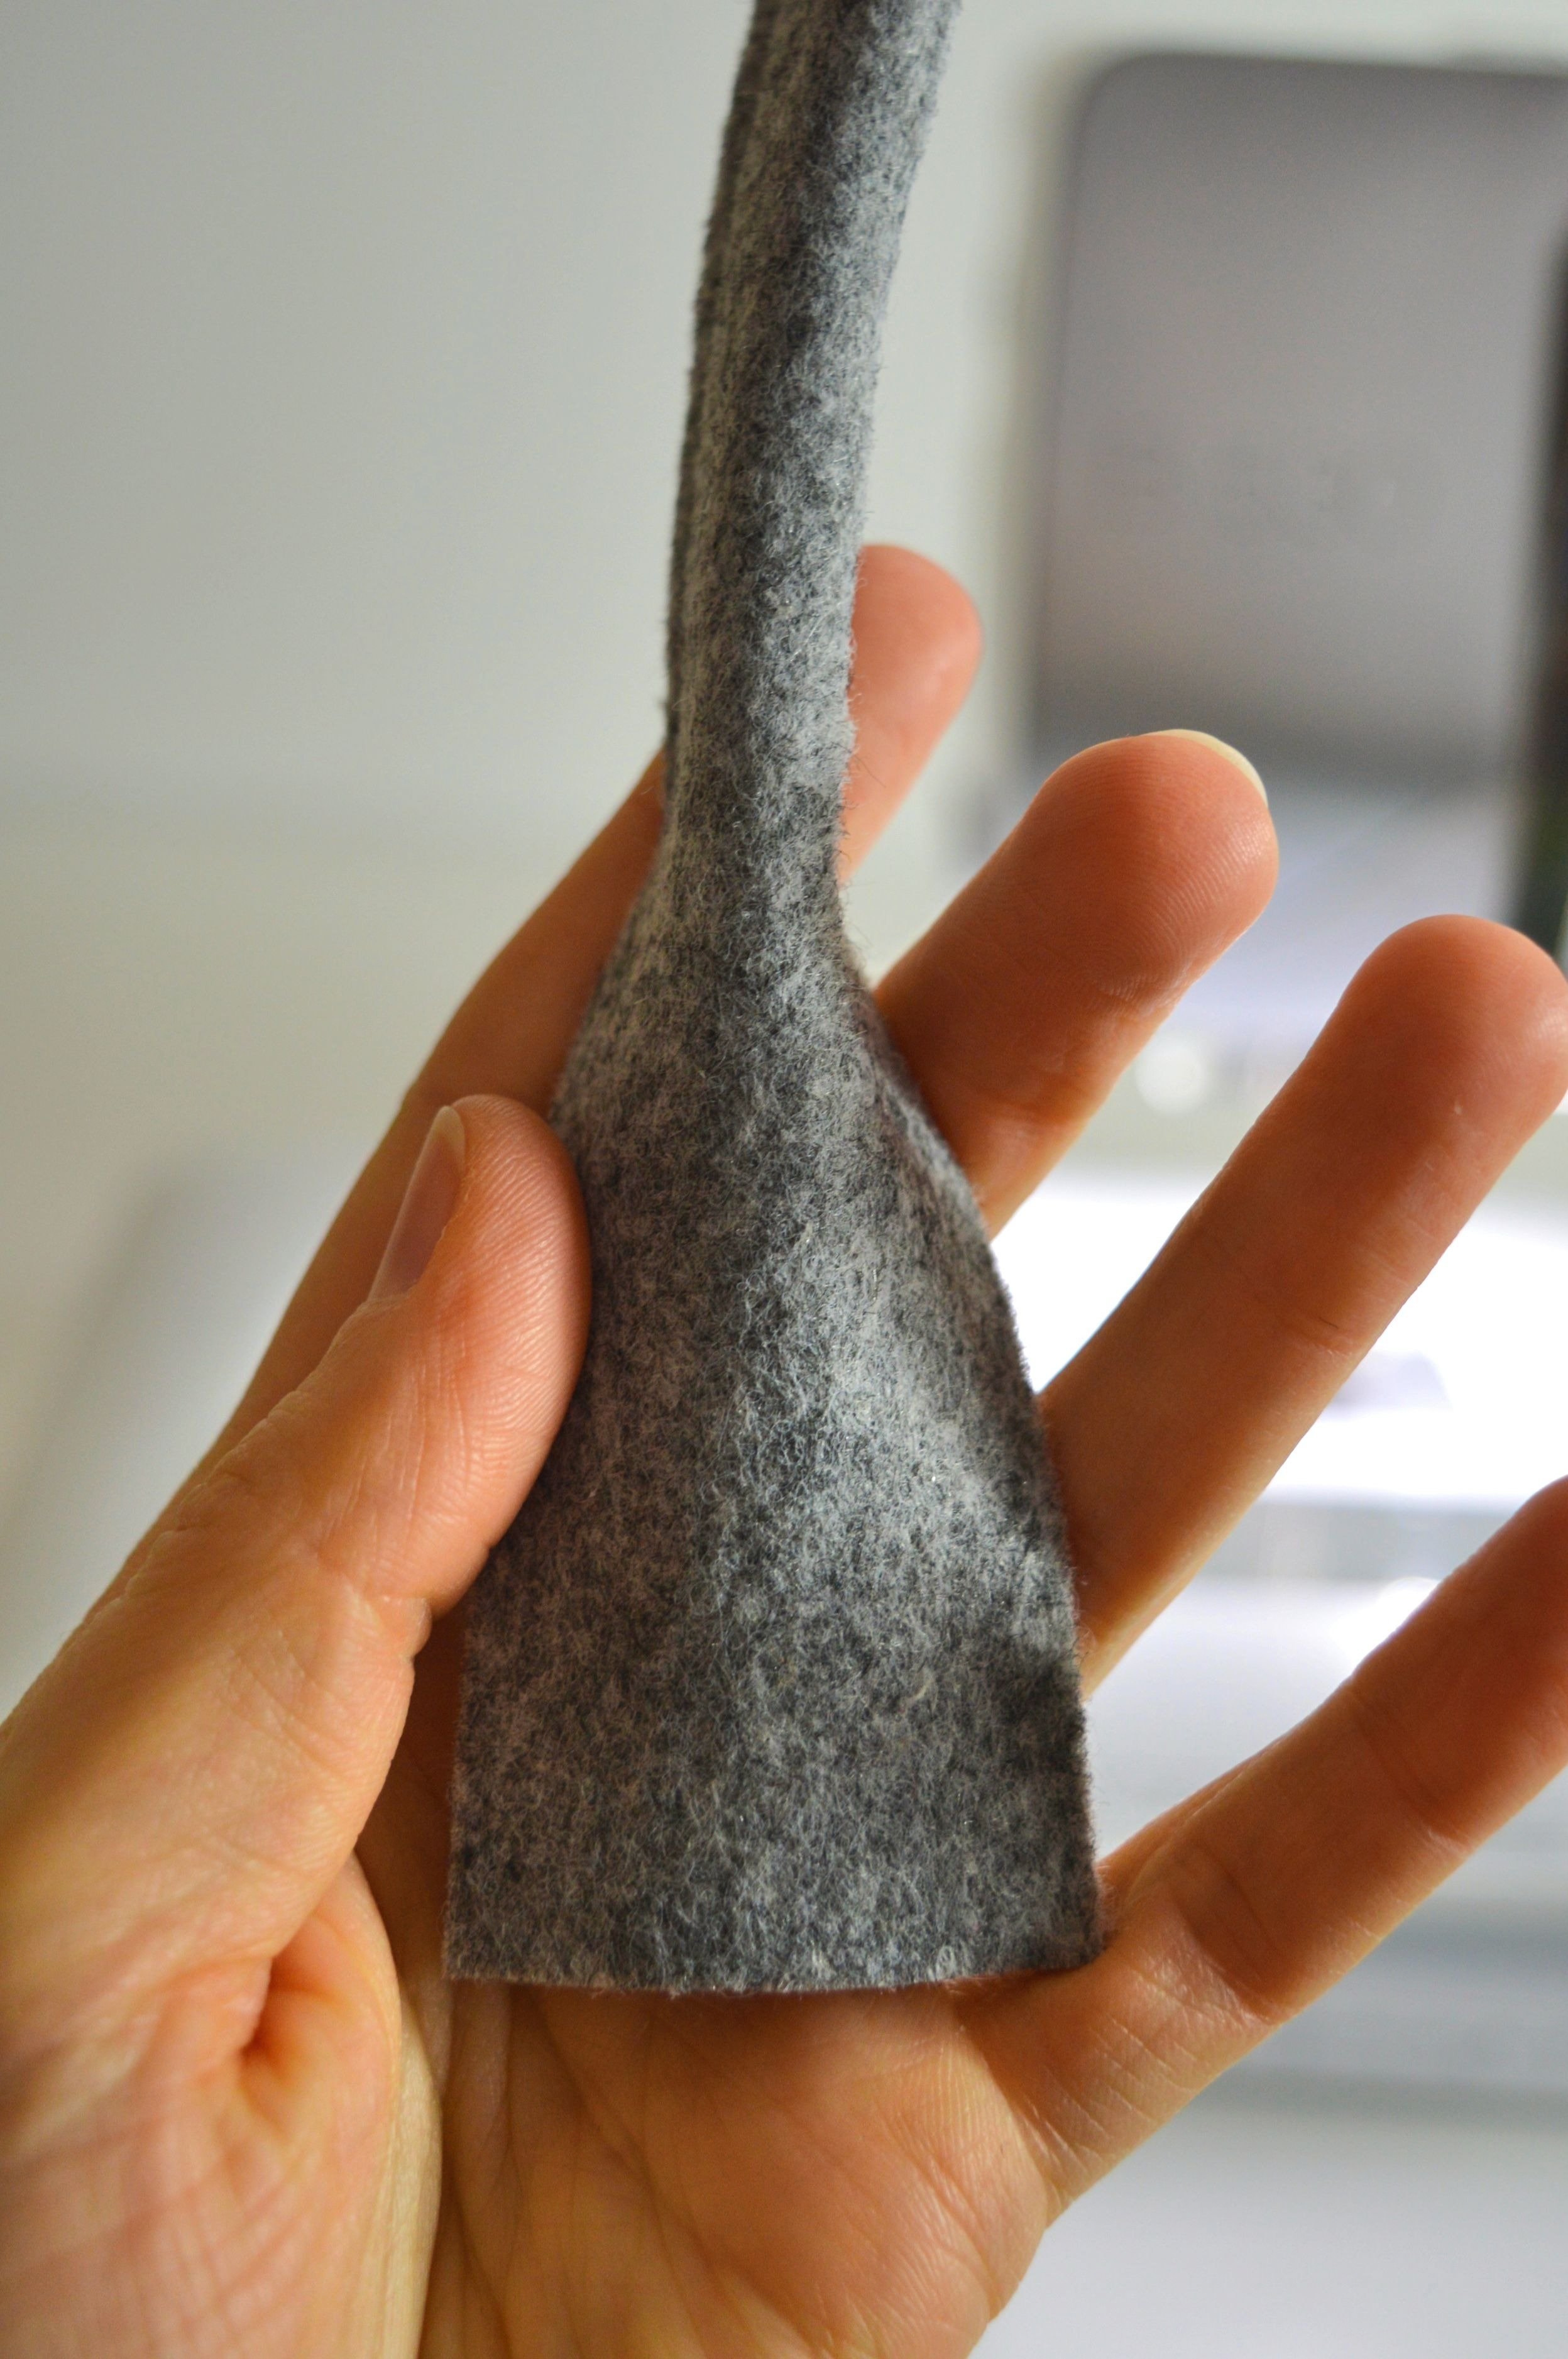
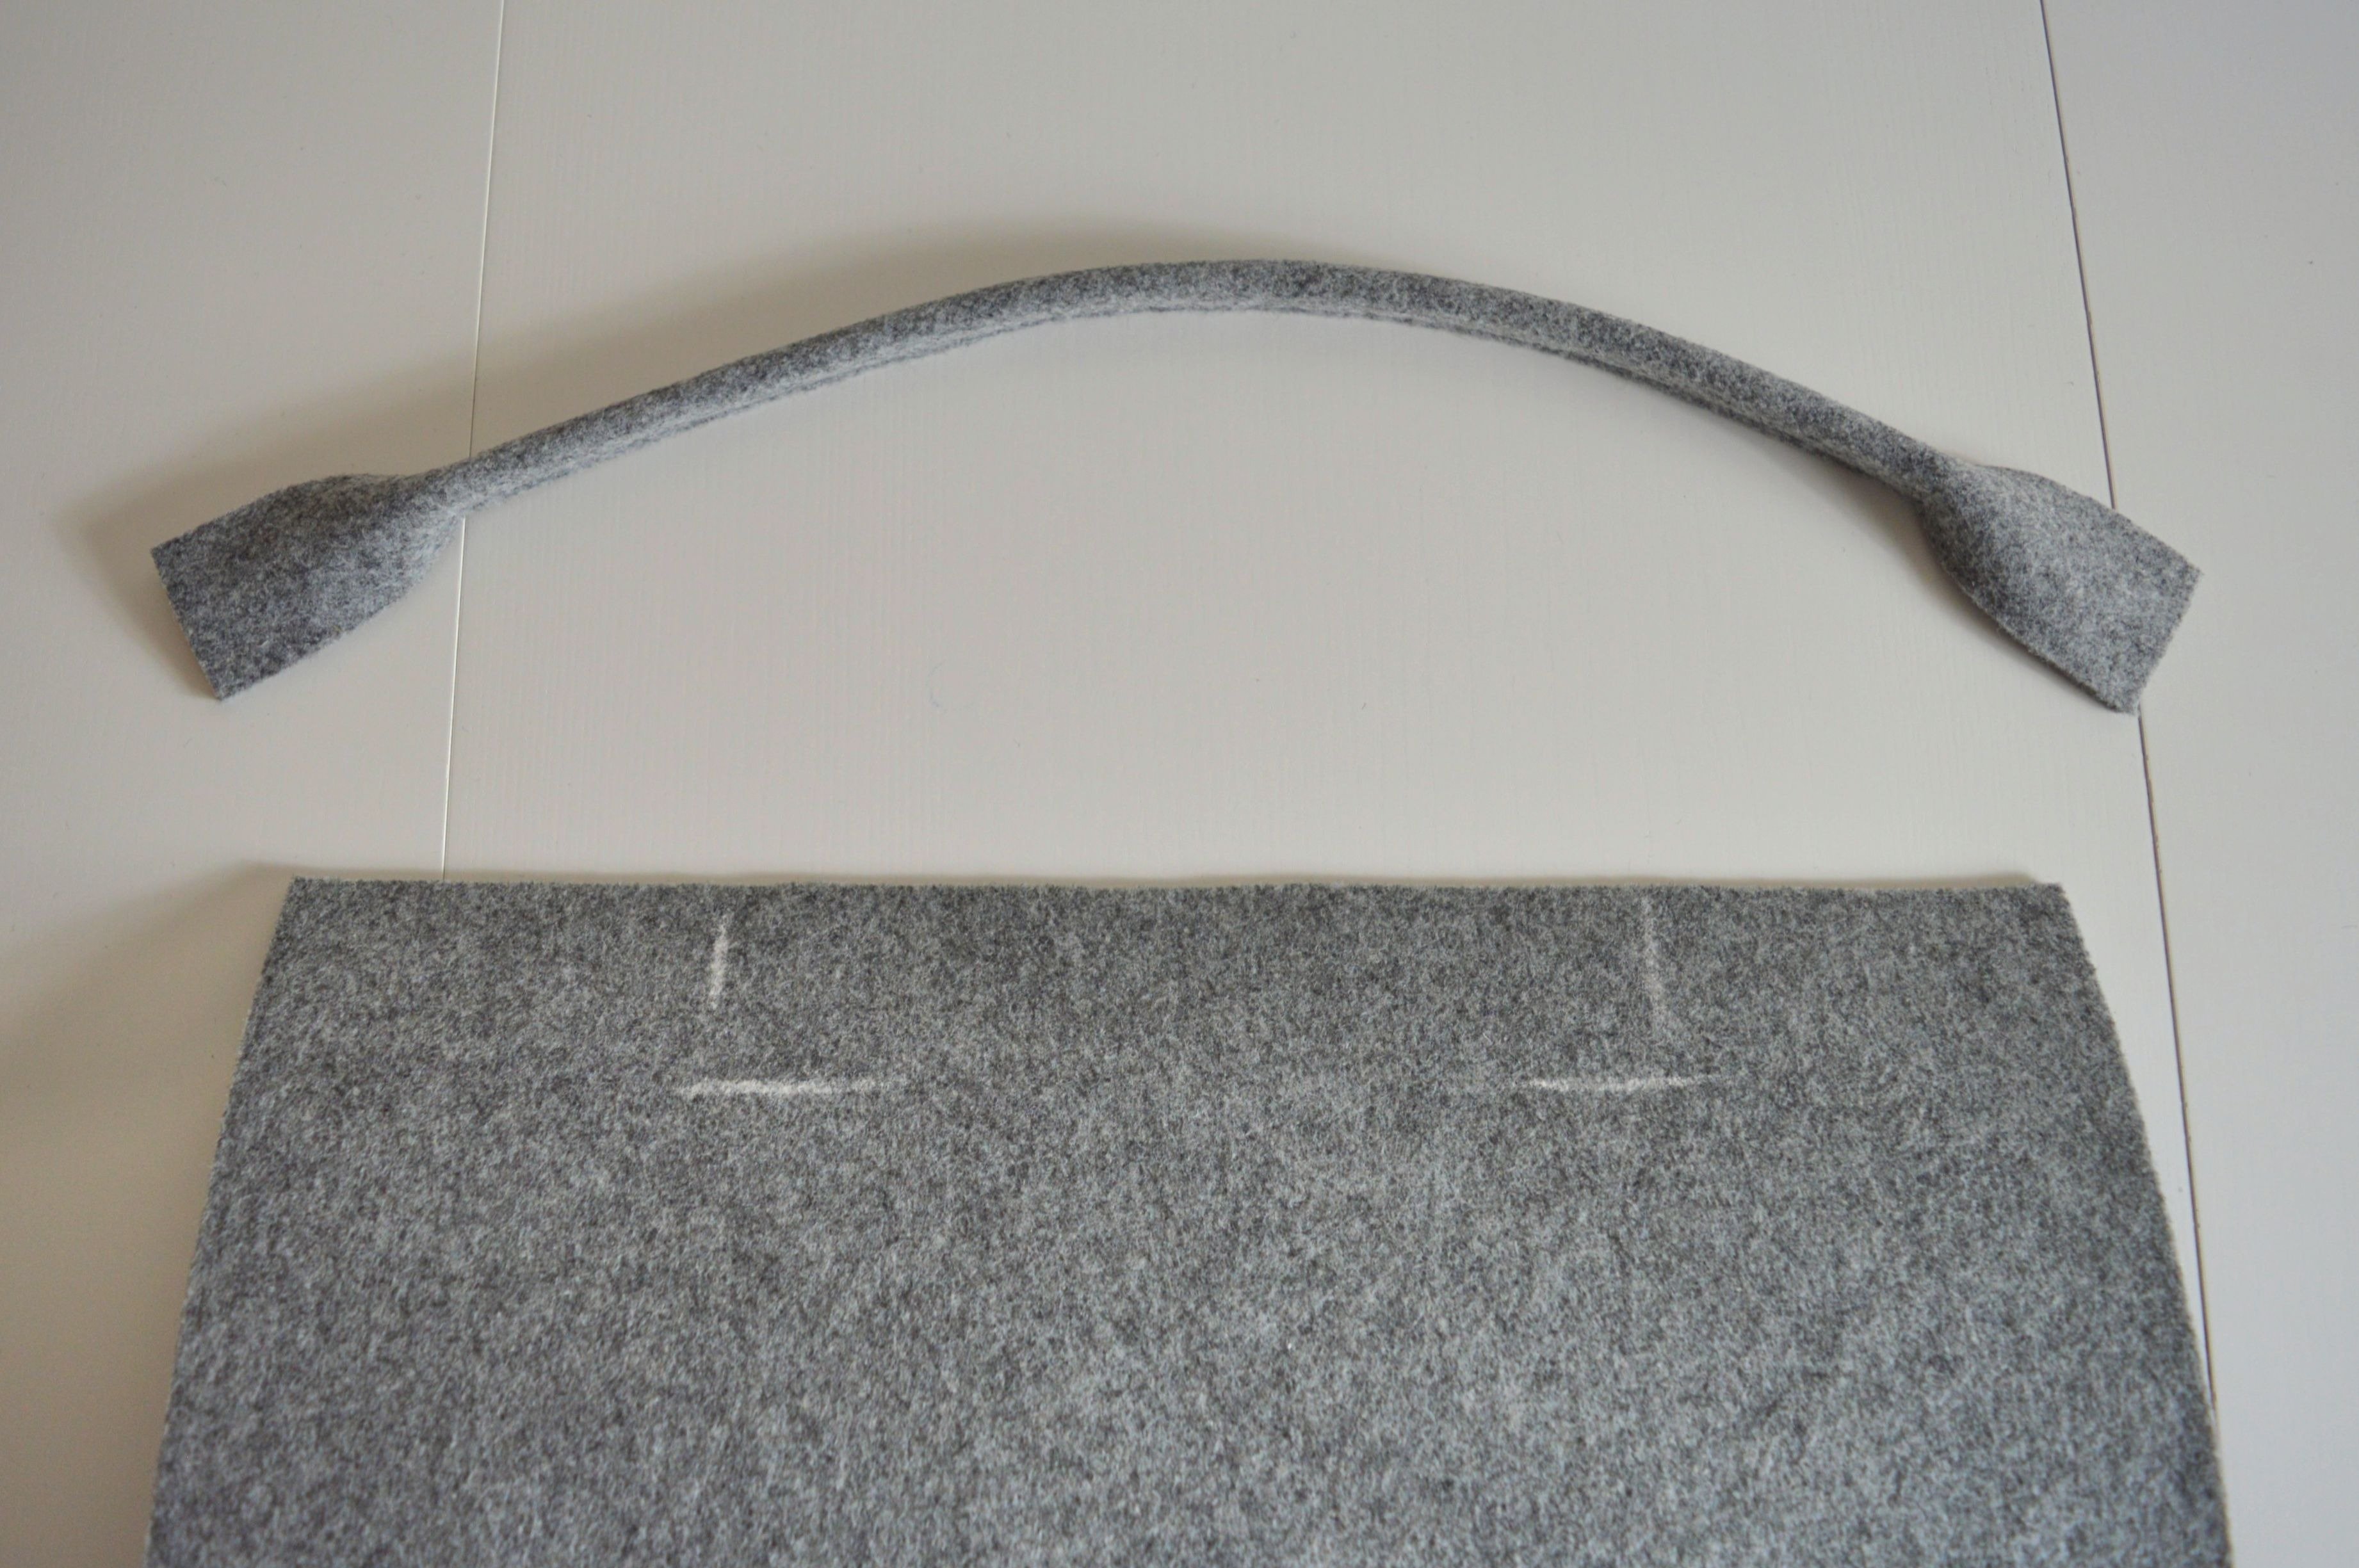
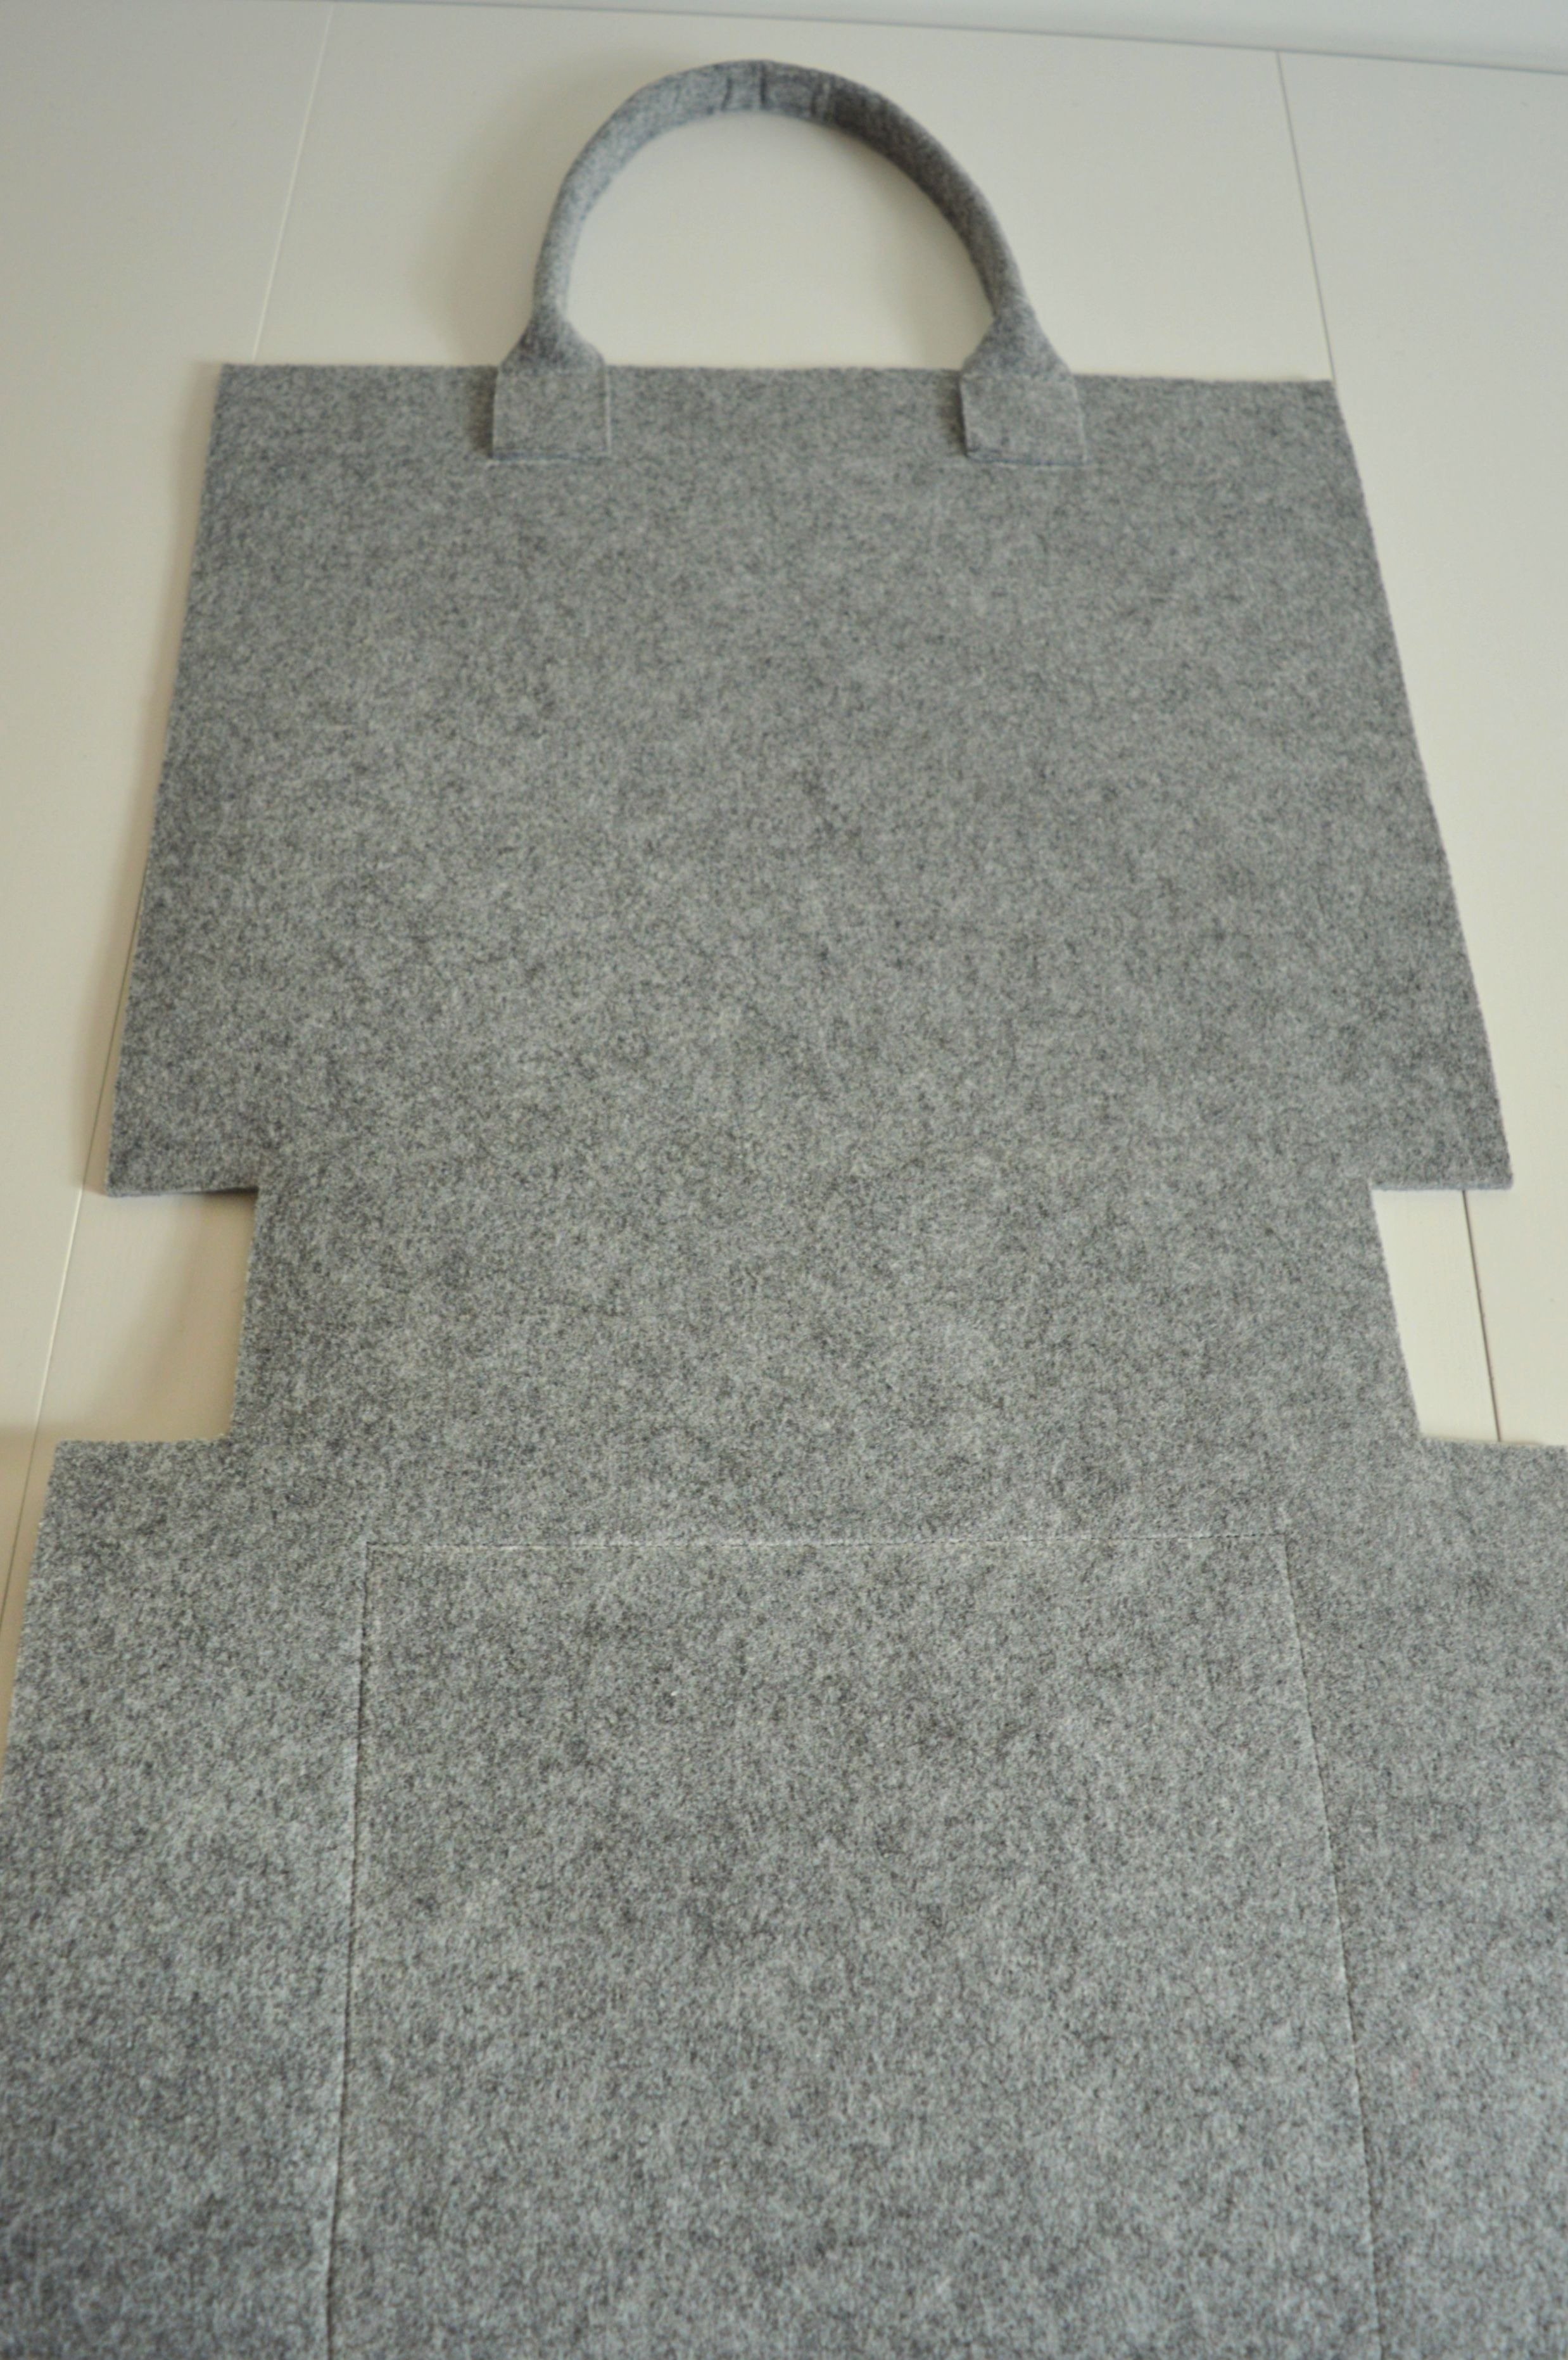
In the pictures below are finished handles.

Sew on handles on the bag, so that you mark on each top edge 5 cm and from both sides edges 10 cm to the center of the body part.
Attach the ends of handles on top. I used adhesive for fabric, sewing clips, and pins.

Mark the seam lines.
Stitch all four handles ends.
!!! Zipper foot #4, plain seam #1 and the stitch length 3


Because of felts solid, it is not possible to make decorative stitches, but with these two seams on handles, they turned out very nice.


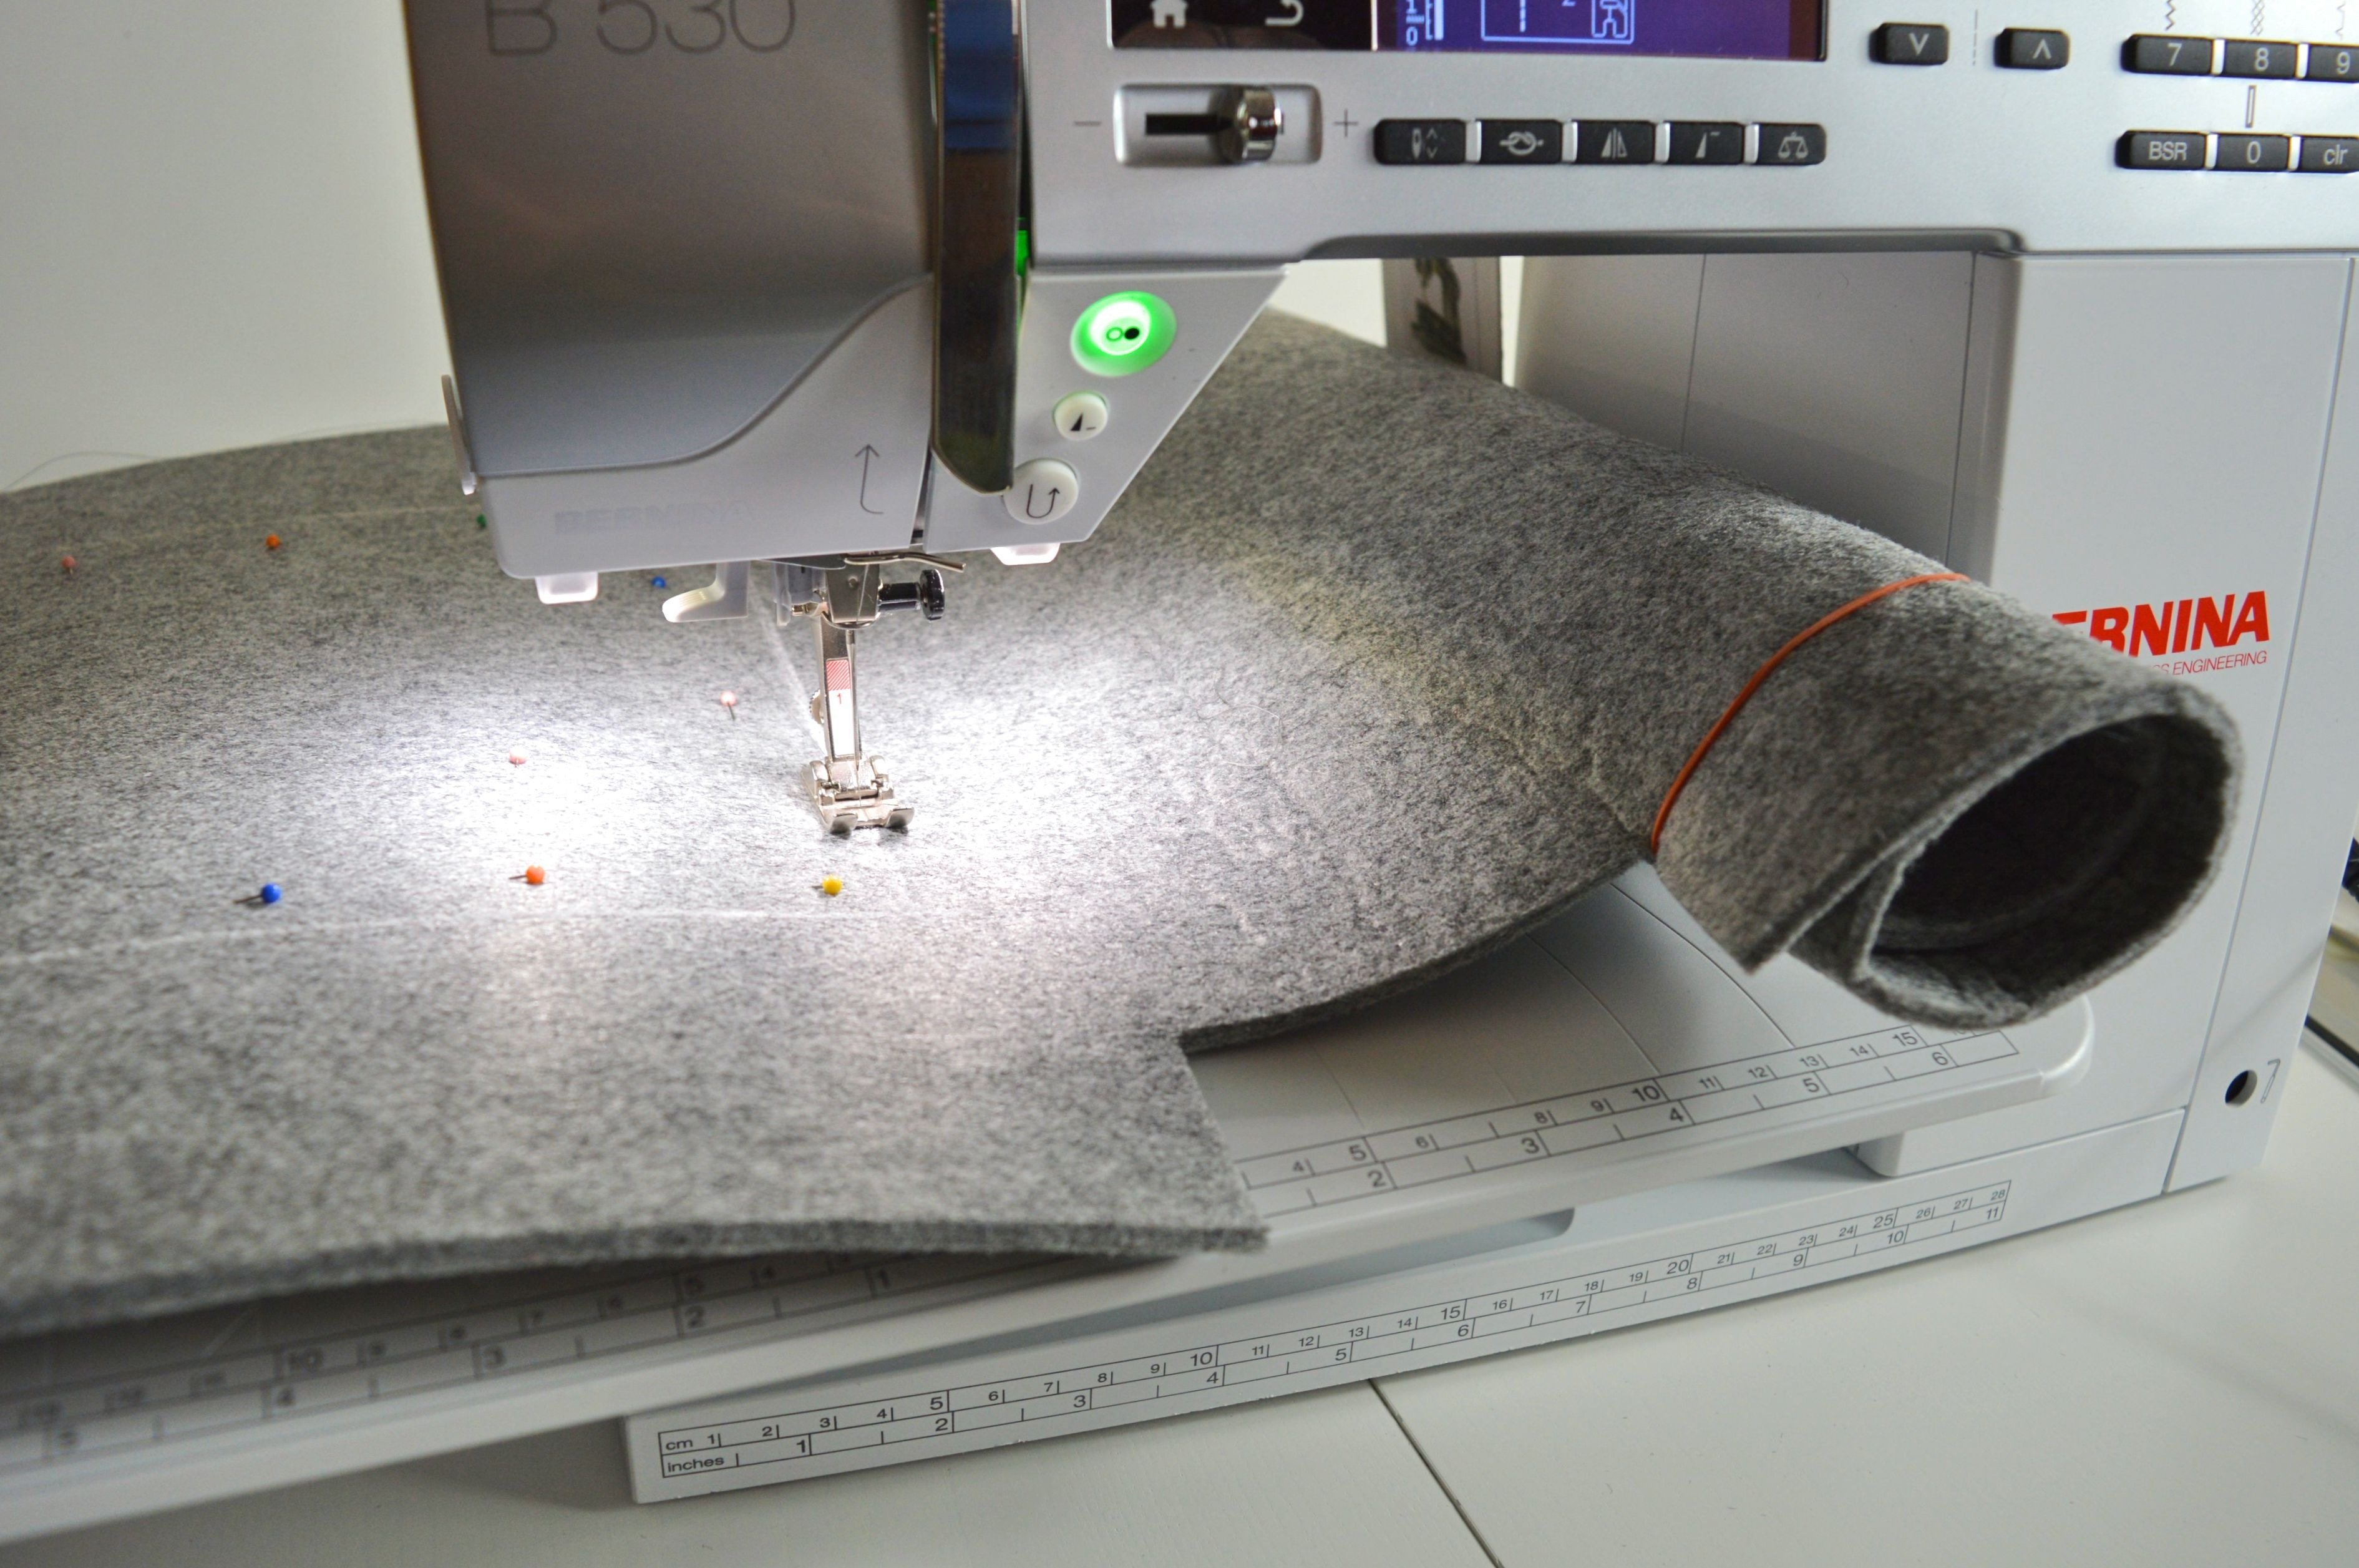
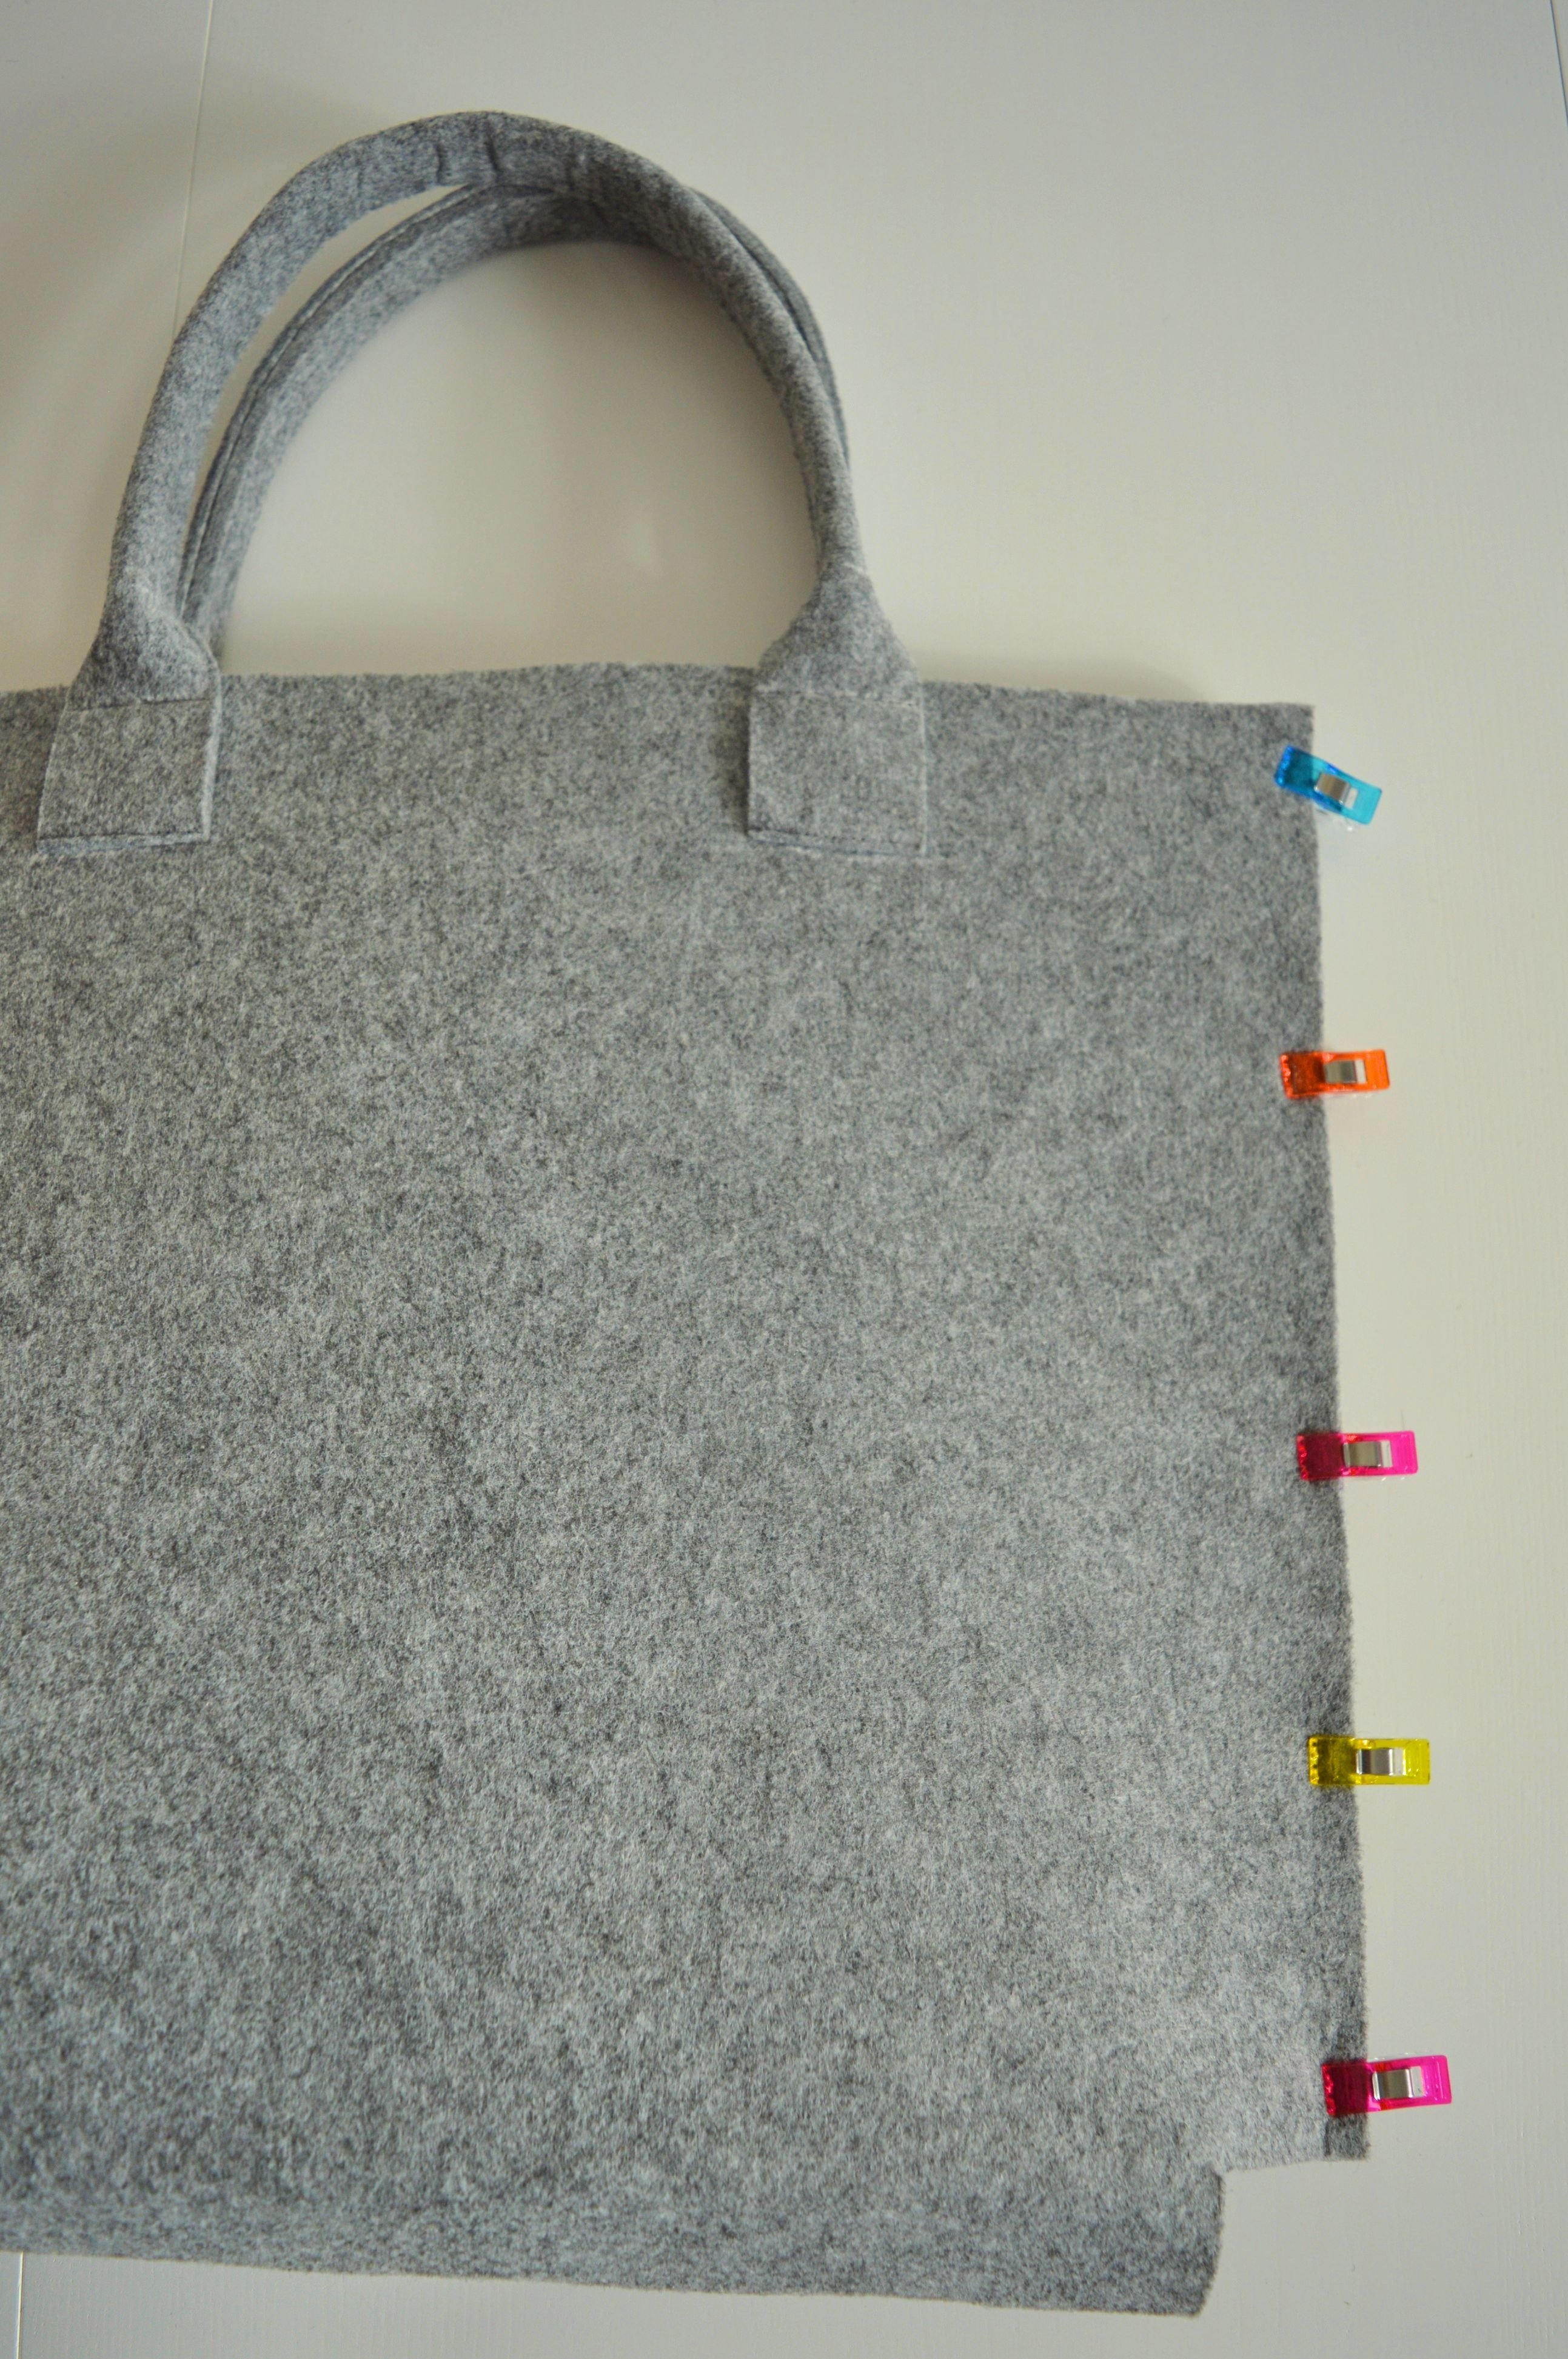
When you are finished, remain the side seams and bottom.
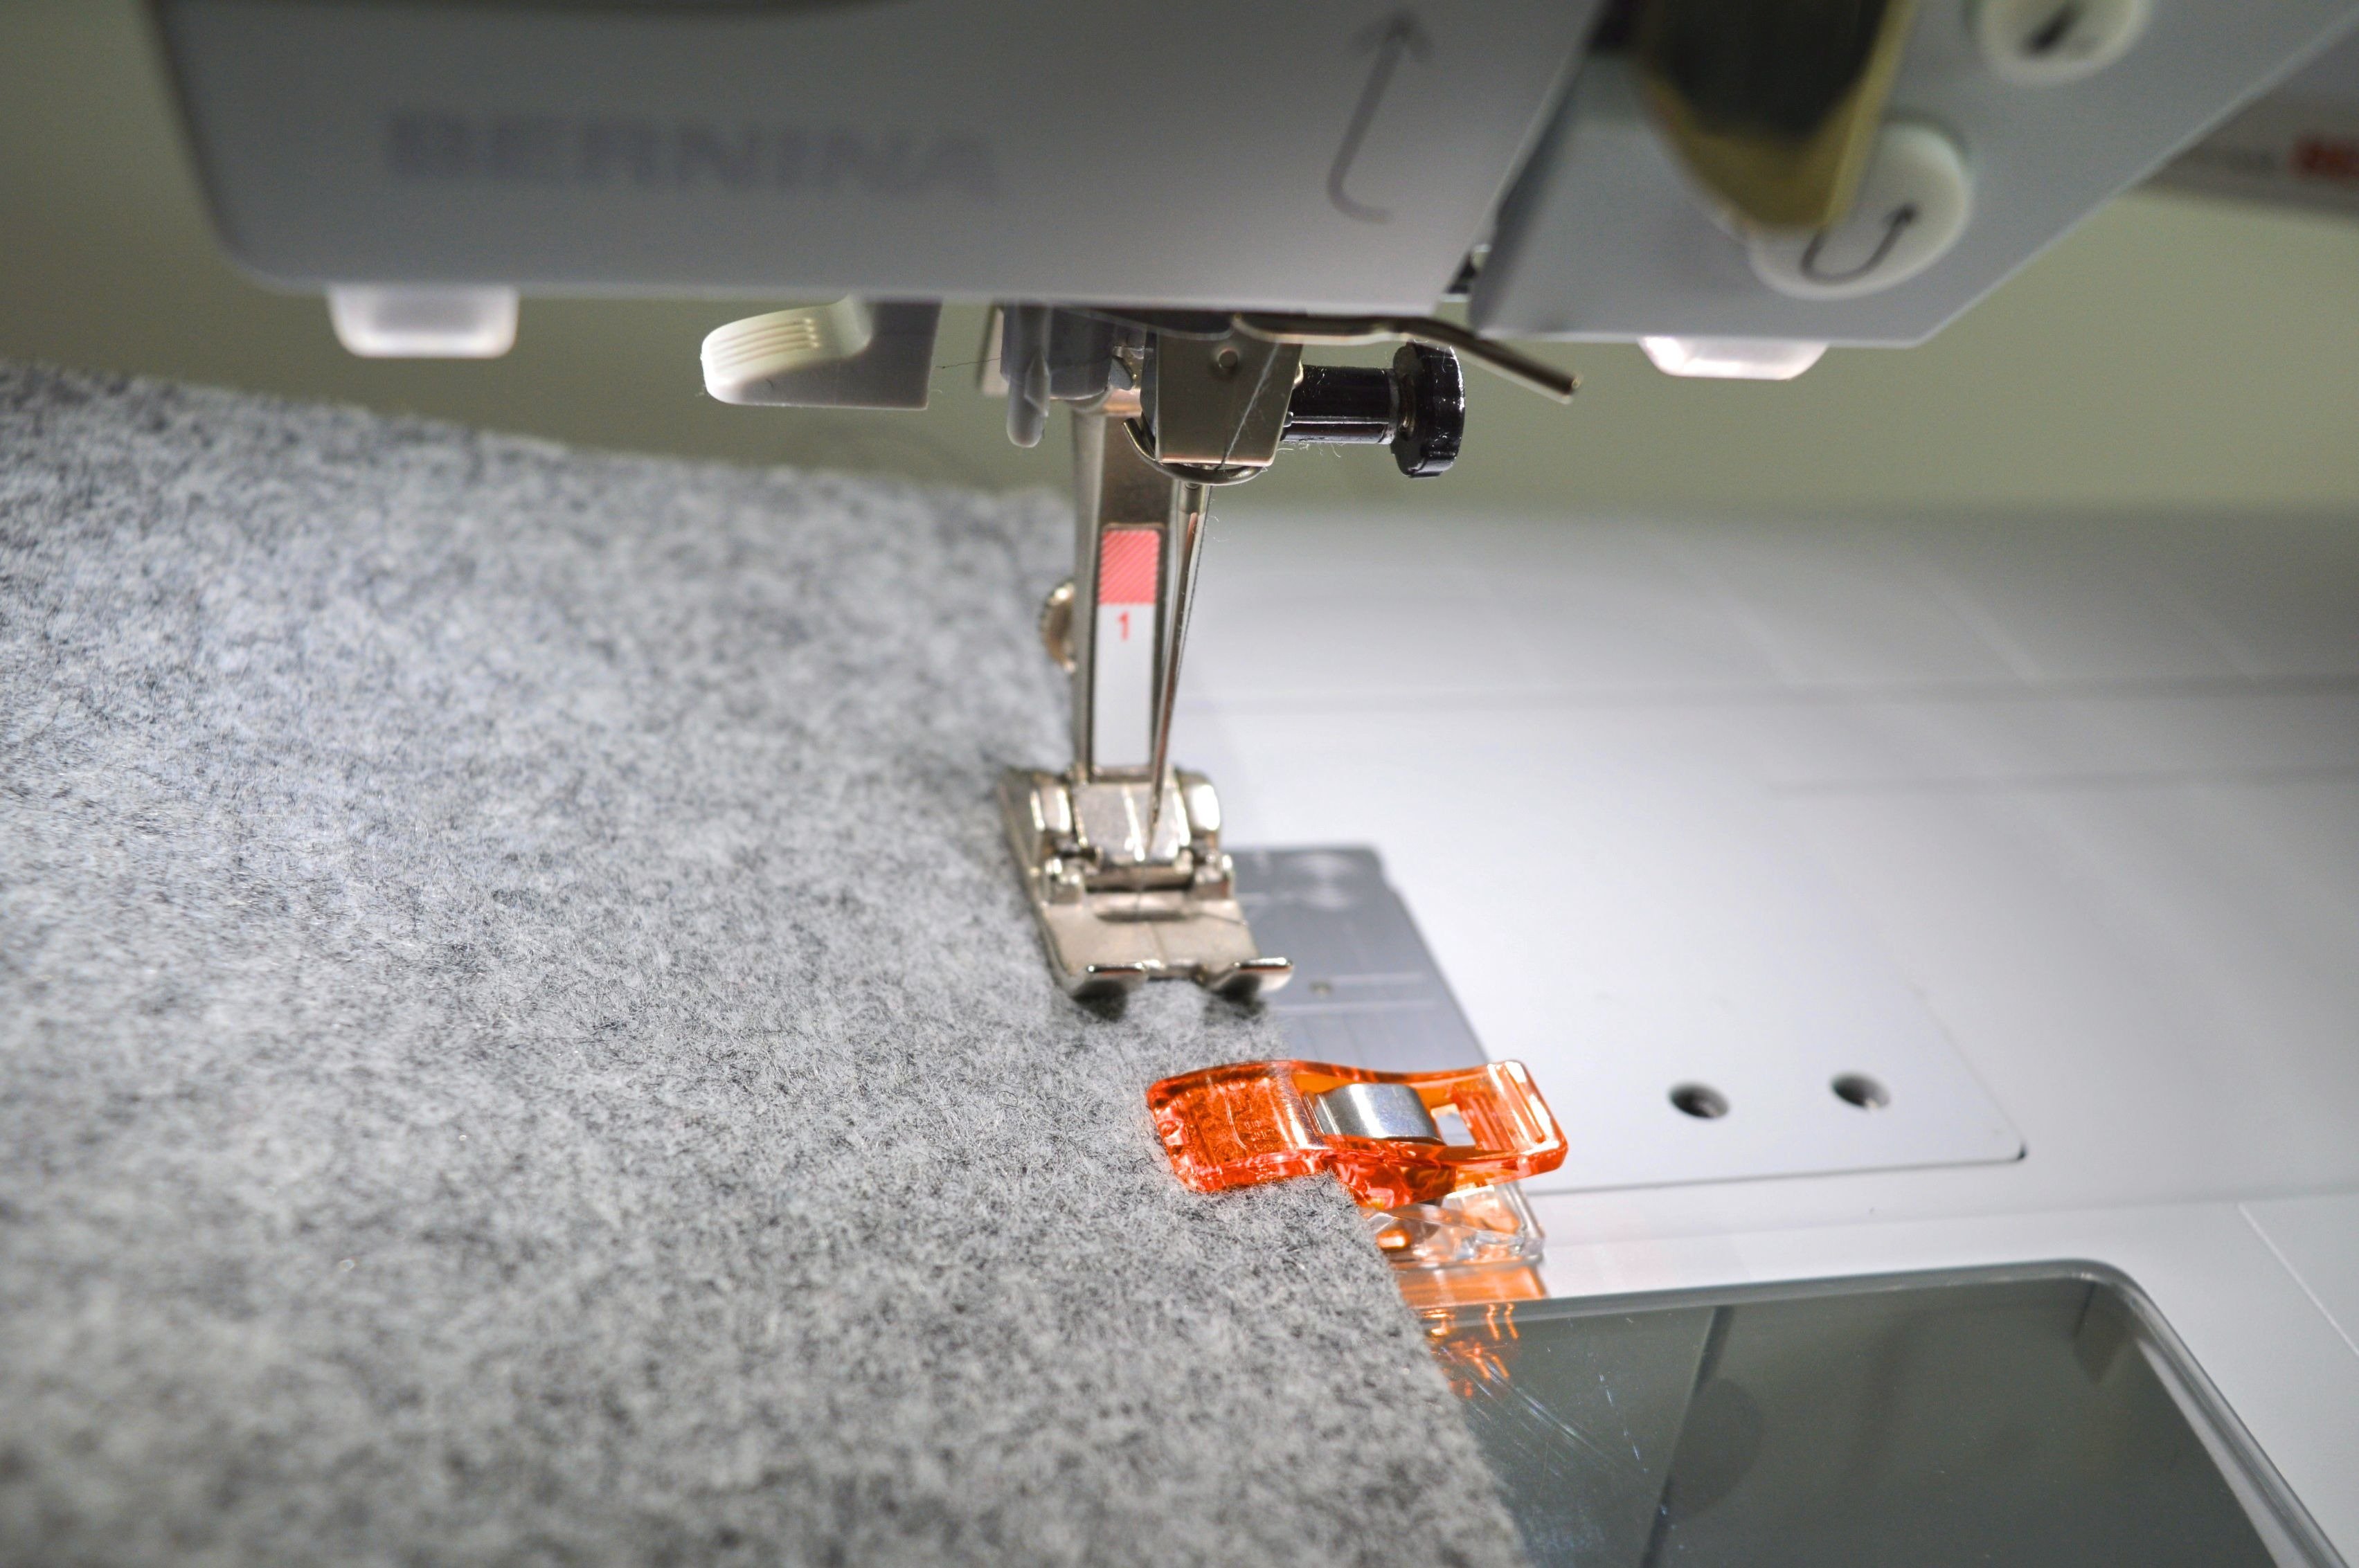
Connect the side edges and sew it 0,5 cm from the edge. That is made on the right side, i.e., on the outside of the bag.
In the picture, you can see what idea for a bottom is.

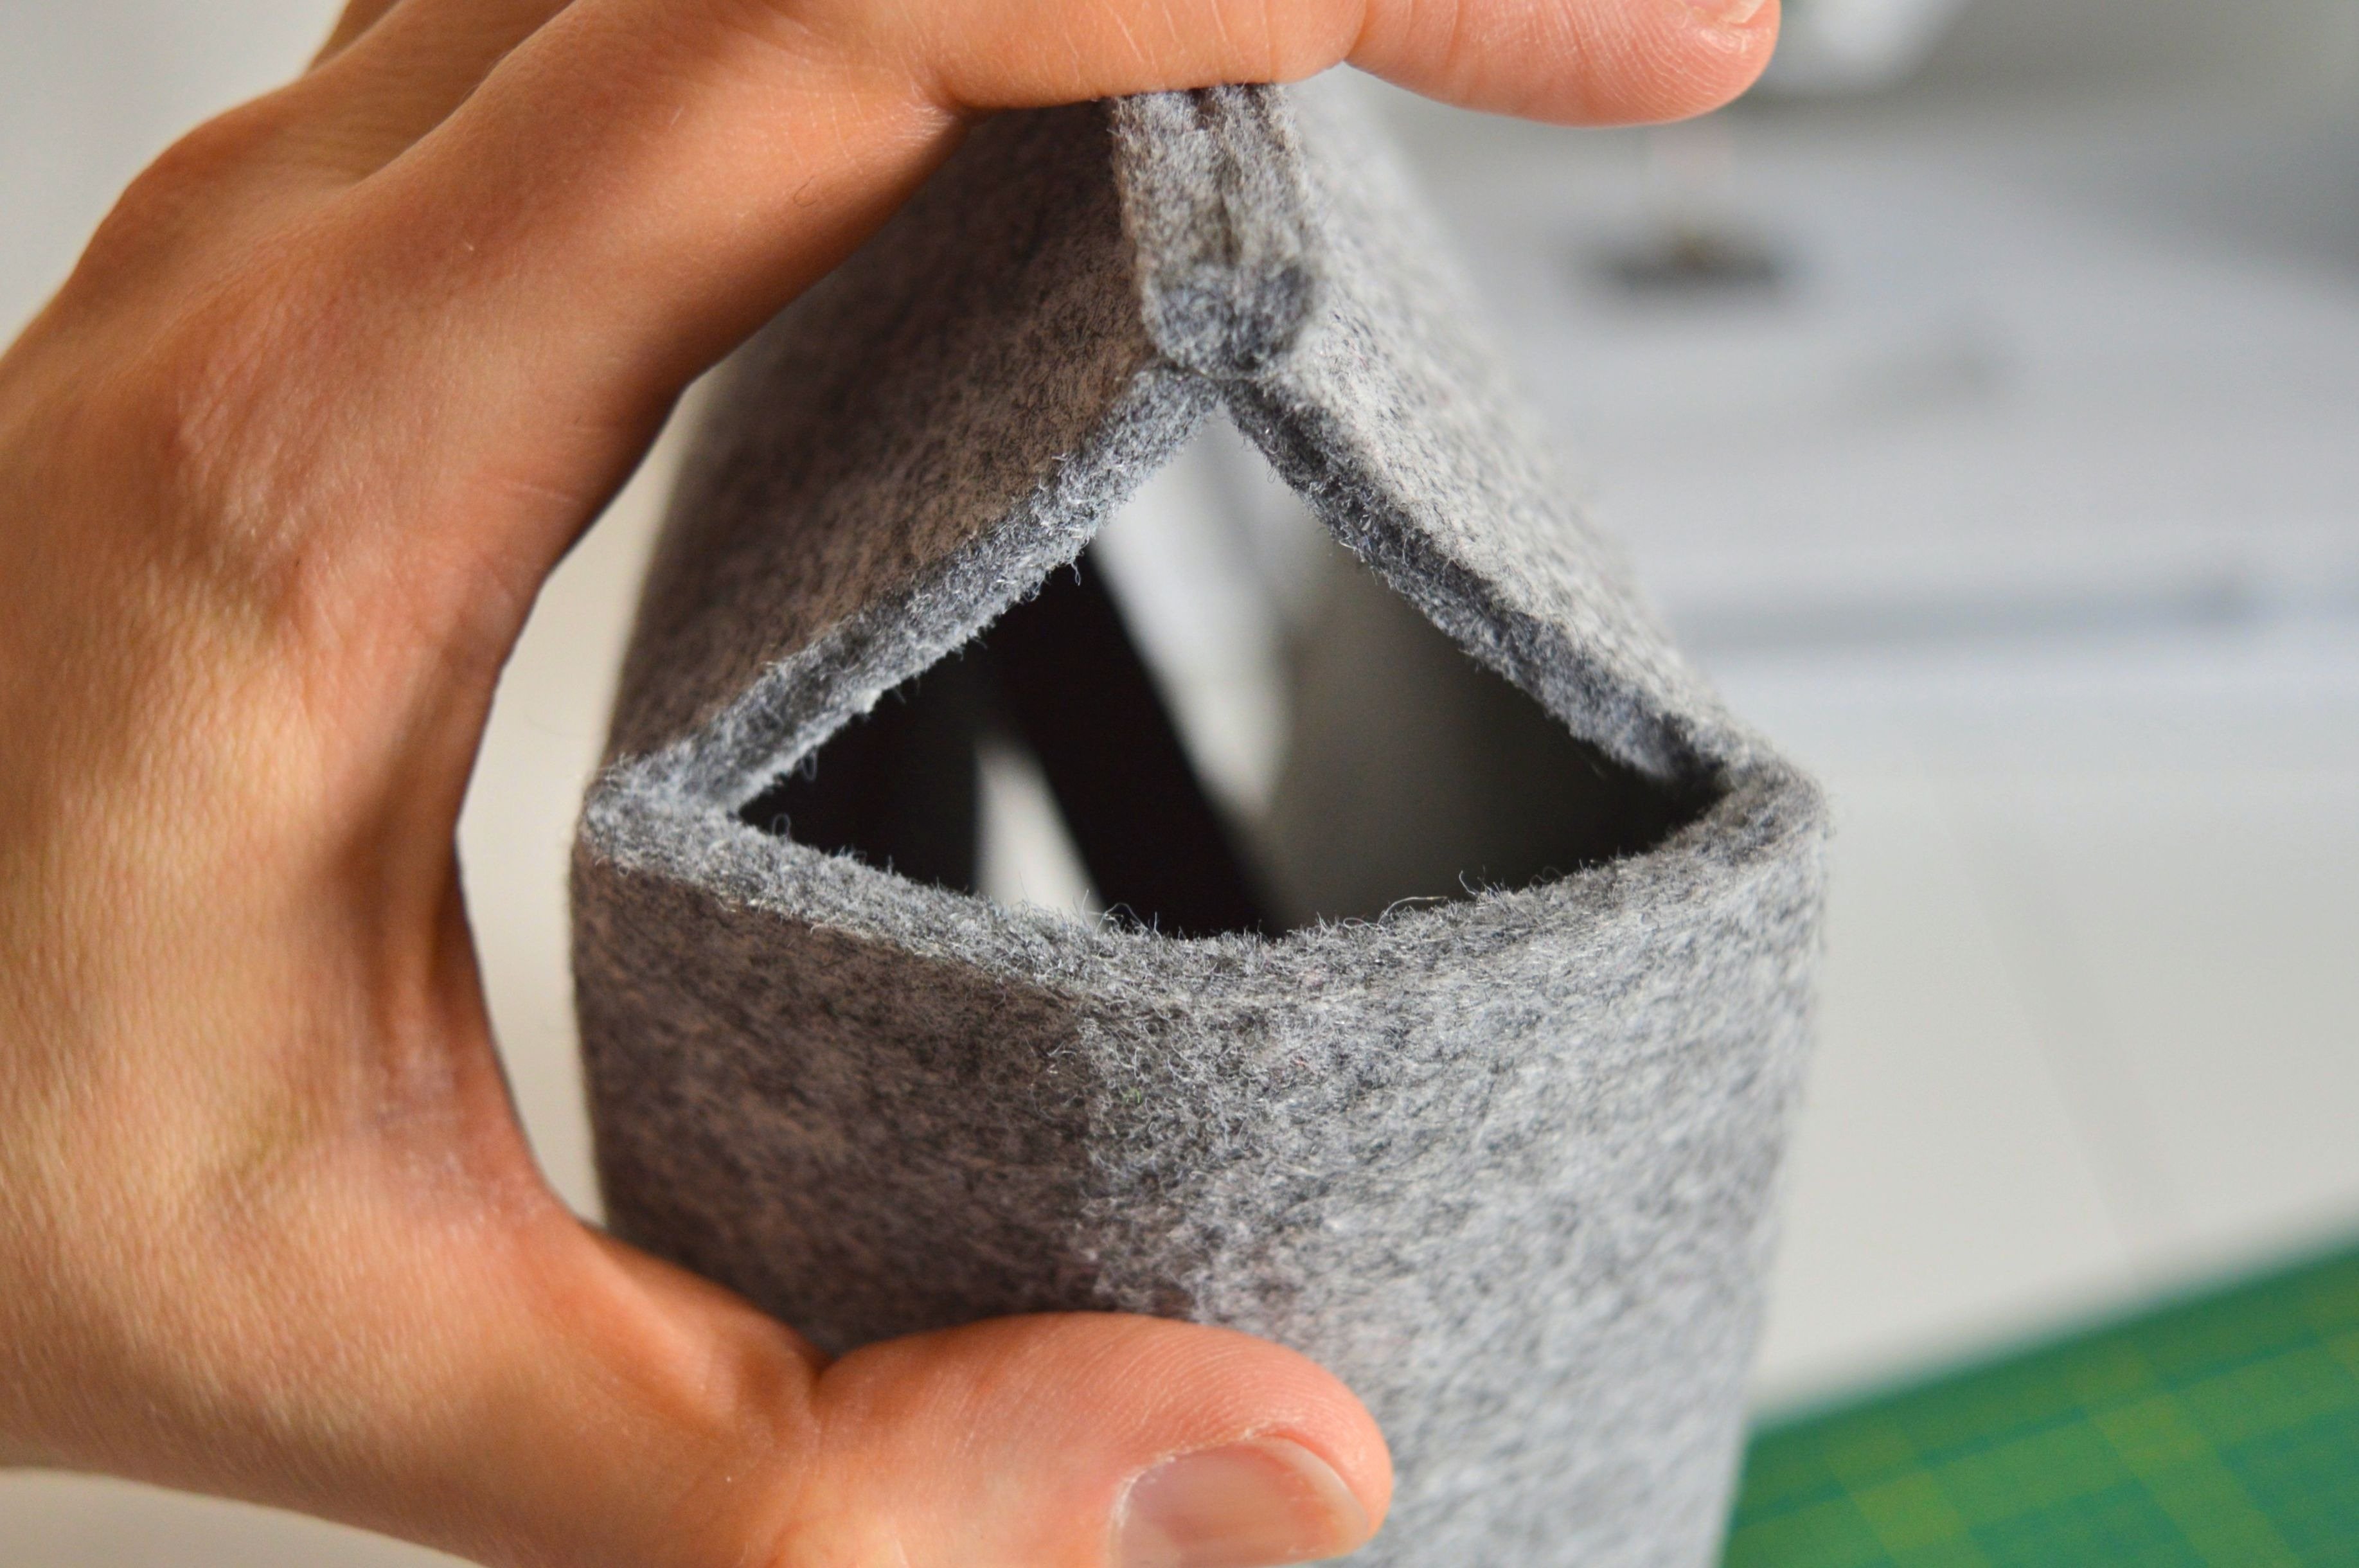
Here, you need some help.
2 layers of this felt are possible to sew together, they can be placed underneath the sewing foot. It goes a little harder, but you can sew it. The problem is stitching 3 layers of this fabric because that is too thick.
Because of that, cut square 0,5 x 0,5 cm from the corner at the bottom side edge. Do that at another side edge too.
Connect edges which form the bottom and stitch it, again on the outside.
The felt bag is finished.
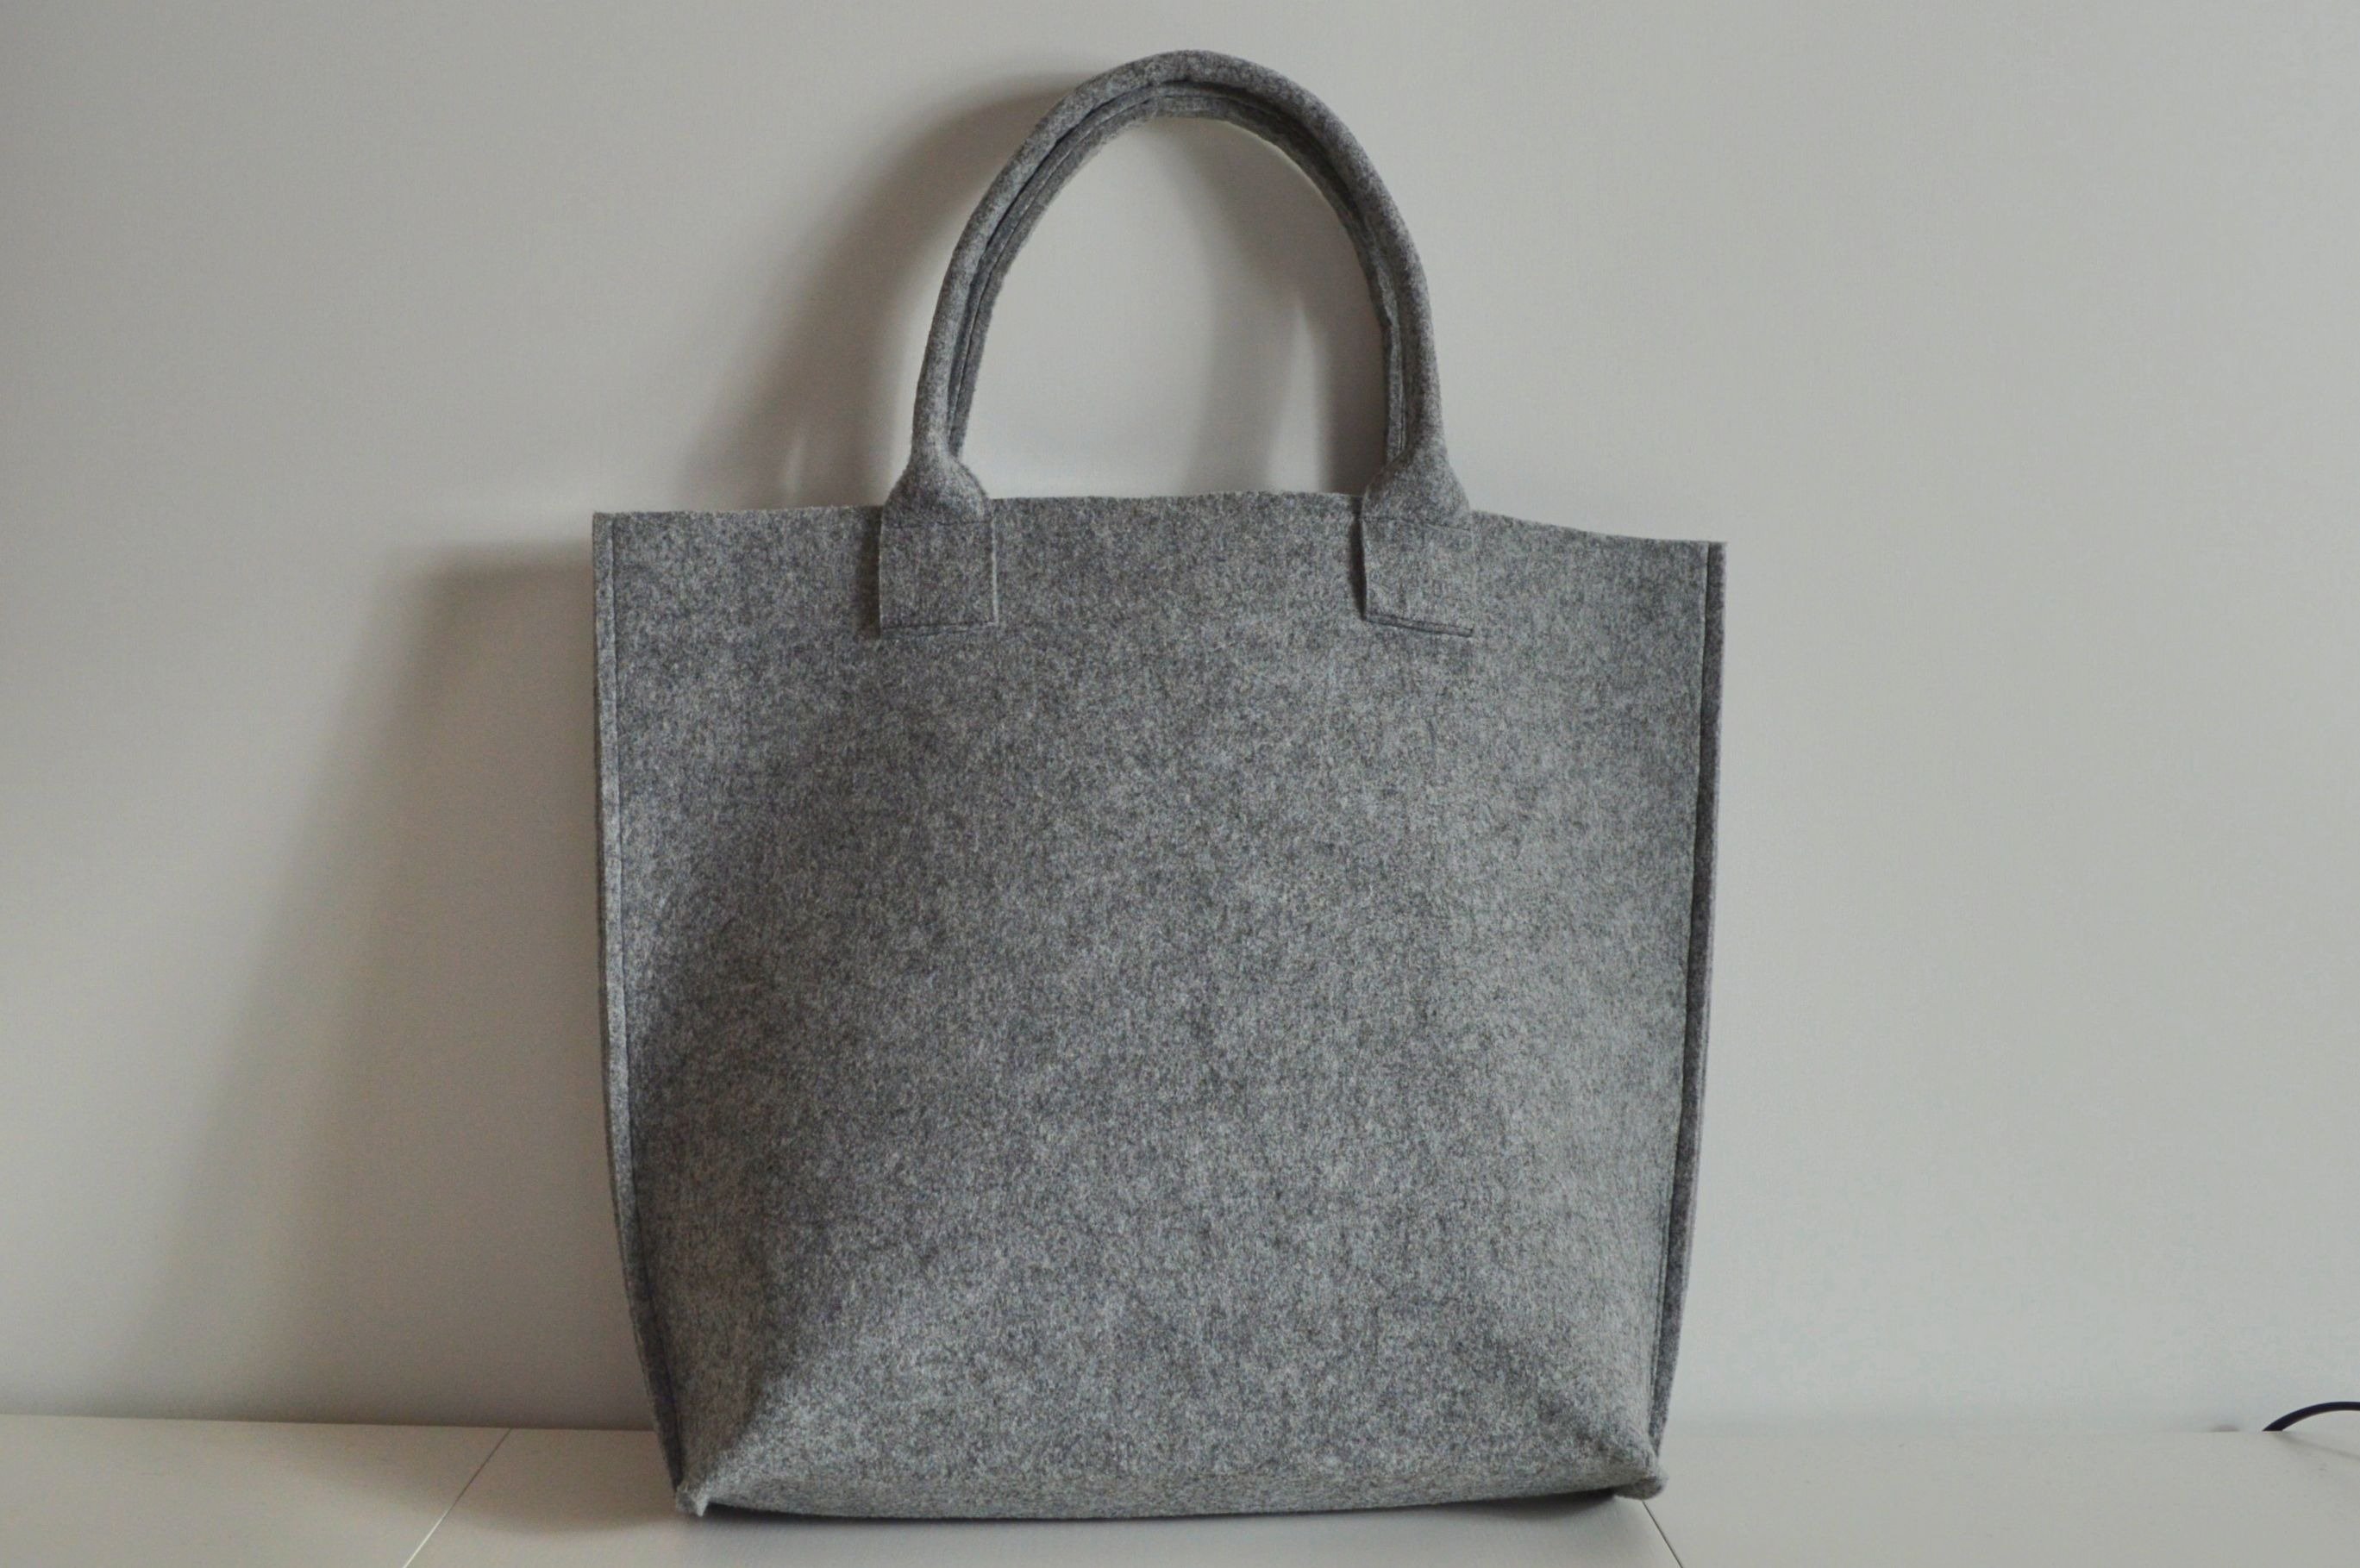
Felt Bag

Felt Bag
NOTE: You can make this bag without a zipper pocket and any additional. It is also interesting and beautiful, and much simpler to sew.
Felt Bag
As you saw, the pattern pieces are simple but cut out, and sewing of this felt requires some experience, and because of that, is this instruction required a little more knowledge of tailoring and sewing.


This was a great bag to make except I found that it was a bit too thick at the base to sew for my machine. I made a few for friends and have gotten some orders. I have altered and personalized the pattern a little and plan to try a 3mm thick felt instead and hope it gives the same effect.
In Australia I bought my felt in Spotlight. I am using my felt to make a felt bag, with additional felting added.
I have looked and looked for this type of felt material. Where do you find it?
Dear Sarah,
Here in Switzerland I can find it either in fabric stores or sometimes craft stores. But there are a few internet pages who sell felt as well:
https://www.woolfeltcompany.co.uk/
https://thefeltstore.com/
https://meaningfulcrafts.com/product-category/felt/thickness/4-mm/
These are just a few options from around the world, I am sure you would find more options when looking them up on Google 🙂
Best regards, Ramona from BERNINA International
Hi therr
inreside in a South Africa and am battling to find this felt which looks stronger and sturdier than the normal felt you find in fabric stores. Any help on where to buy it in my country?
Hy Shelly,
I cant find one with thicker felt after a short Google search, but I think if you google it and spend more time searching, you will find something – or you can order internationally on the pages I already shared above.
Best regards, Ramona from BERNINA Internaional
I bought mine on ebay
I would like to know what needle you use please. I am a felter and sell wool felt and wool creations and I am expanding into sewing with felt. I wondered though about the needle and I would not want to break a machine.
Dear Kathryne,
I make patches on felt with my embroidery machine, and there I use a universal embroidery needle, with a thickness of 70 or 80. I think for sewing felt these will do just fine as well. You could always switch to a 90 or a jeansneedle, if you feel like your machine has trouble to sew through several layers of felt.
Something else I really love to do is punch work with loose felt. If you dont know how to do punch work with a sewing machine, I would really recommend you to look into it. Its so much fun!
Here is a little video about it: How to use the BERNINA punching tool
Best regards, Ramona from BERNINA International
Here you can see my first punch work with the sewing machine, on top of the golden embroidery.
Left ist the original I tried to achieve, on the right is my version. Went way faster then by hand 😉
Bonjour , je suis novice en couture. Que veut dire ” nous cousons à l´extérieur ” ?
Merci
Bonjour Francoise,
Et bienvenue dans la monde de la couture!
Est que c’est la phrase ” Stitch all seams on the right side of the bag (outside).” ?
Excuse mois, le français n’est pas ma langue maternelle.
Cette phrase veut dire, que on doit coudre à l’exterieure du sac. L’exterieure est la côté du tissu q’on peut voire après le project est finit. On coudre à l’exterieure pour affirmer que la line est beau.
Est-ce que cela aide ?
Perfect, now if I can just find the felt… I love this.
What is your source for the wool felt ? Need to know Thx
Is this pattern available in PDF File please
I am trying to find this type of felt to make this. Here in the US it is not readily available. What should I be searching for online?
Hi Marcy Mcaneany,
try to search 4mm or 3mm thick felt for sewing projects.
I have found some here.
I hope I helped You.
Best regards,
Jelena
Michael’s and Joann’s both sell in lots of colors. Michael’s actually had it on sale .50 to $1.00. I bought every color they had and love sewing with it. I am currently working on a walking bag that will have room for bottle of water, cell phone and other pockets as needed. I’ll post picture when I am done!
Michaels and Joanns do not sell 3mm or 4 mm thick felt fabric. I did order some online from a felt manufacturer. It is quite expensive but the bag looks fabulous.