 BERNINA Corporate Blog -
I am so excited to share with you a great little trick to upcycle and repurpose fabric scraps into a beautiful quilt block. As quilters and sewists we are all left with lots of little fabric scraps in our sewing rooms. A lot of my fabric scraps that end up in my fabric stash by my sewing machine are quite small. Most of the time the colors are all over the place which means that it’s hard to combine them together.
One of my passions is natural dyeing which I use a lot in combination with my sewing. I love creating my own colors and transforming existing fabric scraps into beautiful antique looking fabrics. In this tutorial I will show you how to transform your little fabric scraps and upcycle them into a quilt block. Lets get started by transforming those fabric scraps into vintage pieces.

How to upcycle fabric scraps into a quilt block Tutorial
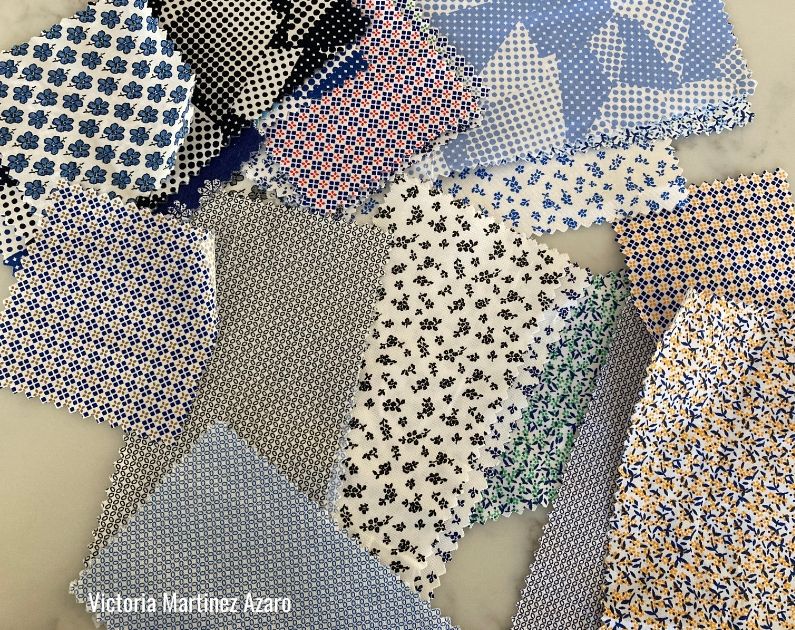
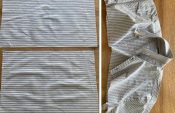
The first step is to over dye the fabric scraps with black tea. Black tea is very rich in tannin so it will over dye 100 % cotton beautifully. The brown richness from the tea will unify all the different colors from the fabric scraps and it will give them a vintage look as well. This process of over dyeing makes it super easy to combine all the different scraps into a quilt block. For this tutorial I am using 100 % cotton scraps in a variety of white, blues, light blues and reds.
Step 1: Transform the fabric scraps into vintage pieces
Materials:
- Fabric scraps (they need to be 100% cotton)
- Pot for dyeing (you can use your kitchen pots since it’s only tea)
- Black tea bags
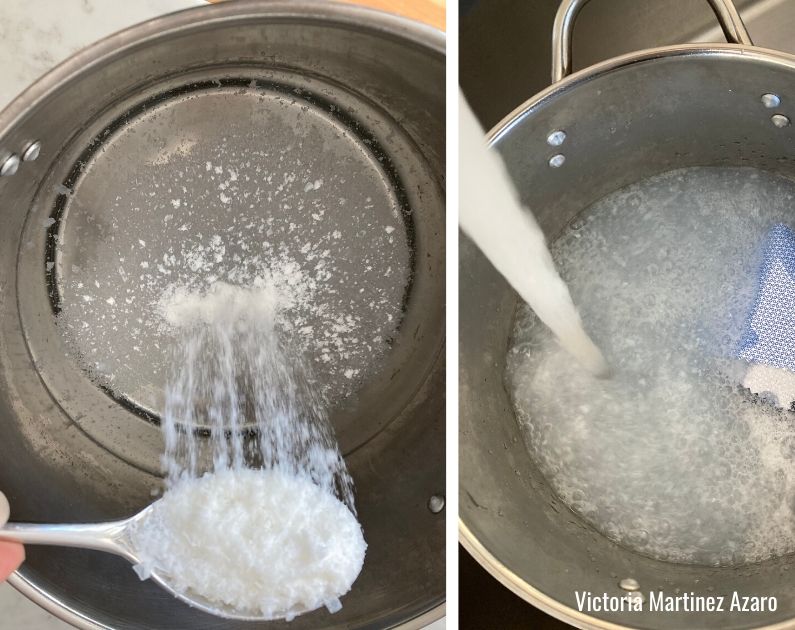
- Neutral soap
The first step in the process of over dyeing is to wash your fabric. Most probably the fabric you will be upcycling and repurposing will have some sort of industrial finish which needs to be removed so that the tea can penetrate into the fibers.
Fill a pot with clear water and pour 1 tablespoon of neutral soap into it. Stir and dissolve . Place on the stove. Place the fabric inside. Bring to a boil, reduce the heat and simmer for 15 minutes. After this time, remove from pot, rinse and set aside.

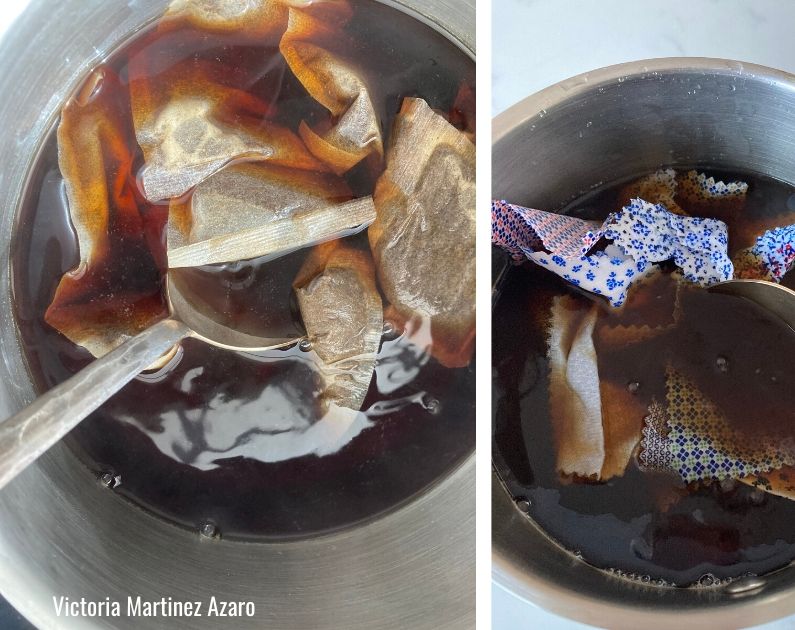
The next thing you need to do is to pour clear water in a pot and place at least 10 tea bags in it. Bring liquid to a boil and simmer for 15 minutes.
You can now place your fabric/yarn or threads inside the tea pot. Note I am leaving the tea bags inside as well. Make sure all your fibers are well immersed and there is plenty of room for them inside the pot. If there is not enough room you will get uneven dyeing and you want to avoid this!
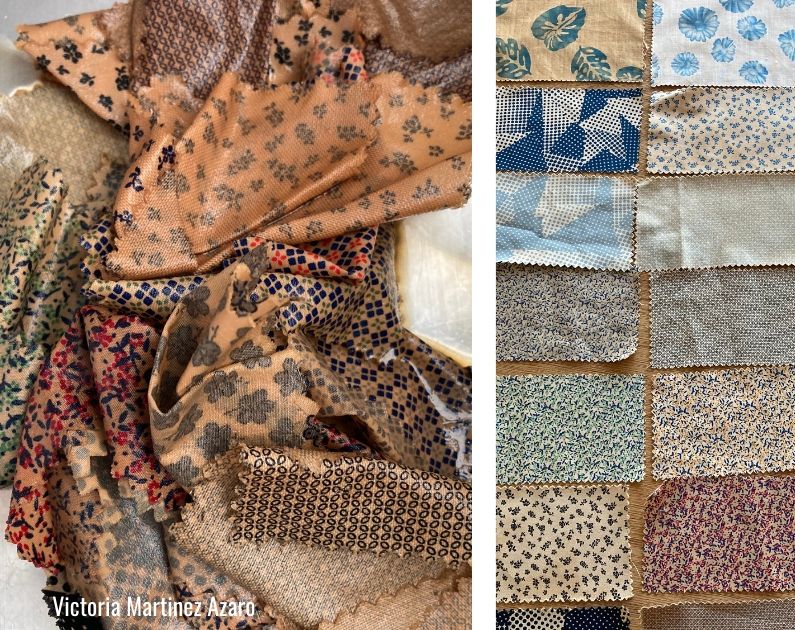
Simmer for at least 40 minutes. You can remove from the heat before this time if you fibers have taken enough dye or you can leave the fibers overnight once you remove from the heat for further color absorption. The examples shown in this tutorial were left to simmer for 40 minutes only and removed after that.

When you are happy with the tone that has been achieved you can rinse your materials with clear running water. Make sure the water runs clear and there is no excess dye left in your fabrics or threads. You now have your fabrics scraps transformed and looking fabulous to start working on the quilt block. Note that the color is now uniform and there is a vintage quality to them.
Step 2: Upcycle the fabric scraps into a quilt block
This is the super fun part 🙂 For this tutorial I am working on a quilt as you go log cabin block. It’s great because I can use all my little scrap pieces and I am also quilting as I am building my log cabin design.
Materials:
- Over dyed fabric scraps f100 %
- Matching threads
- Fabric scissors
- Rotary cutter
- Cutting board
- Walking foot
Cut a square 11 inches by 11 inches of the 100 % Cotton Batting. Cut a 2 inches by 3 inches piece of fabric. This will be the starting point of your log cabin block.
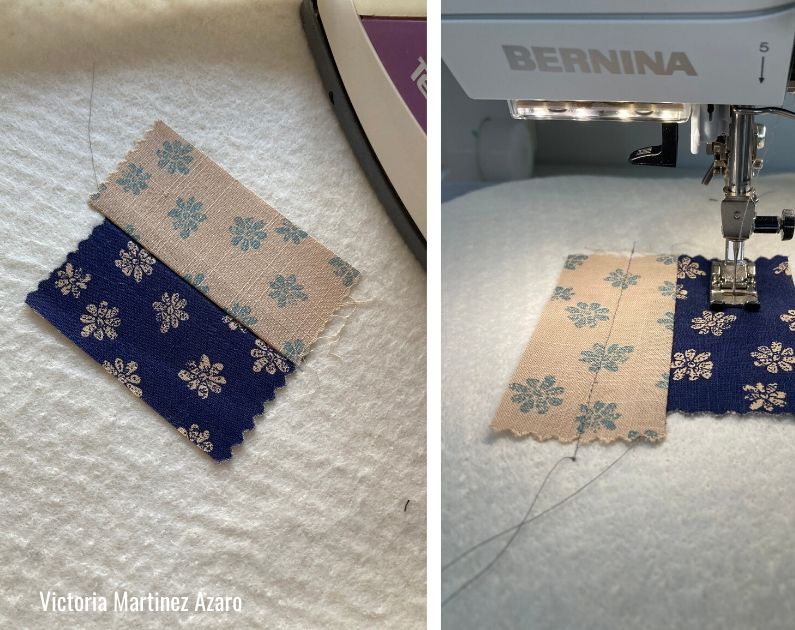
Place the piece of fabric on the batting on a diagonal. Cut another piece of fabric the same size (2 inches by 3 inches) and place it on top right sides together. Sew the two pieces of fabric together with a 1/4 inch seam allowance. I recommend using a walking foot for your machine. This will allow for the thickness of the fabric to move through your machine without any problems.

Turn the top piece to the right side and press the seam. Since you are using 100 % cotton batting you can press freely without worrying about the batting sticking to the iron.

Once the seam is nicely pressed you will do your first quilt as you go. Quilt a line of stitching in the middle of both pieces. Be sure to finish the quilting stitch beyond the pieces of fabric so that it will be covered with the following log of fabric.
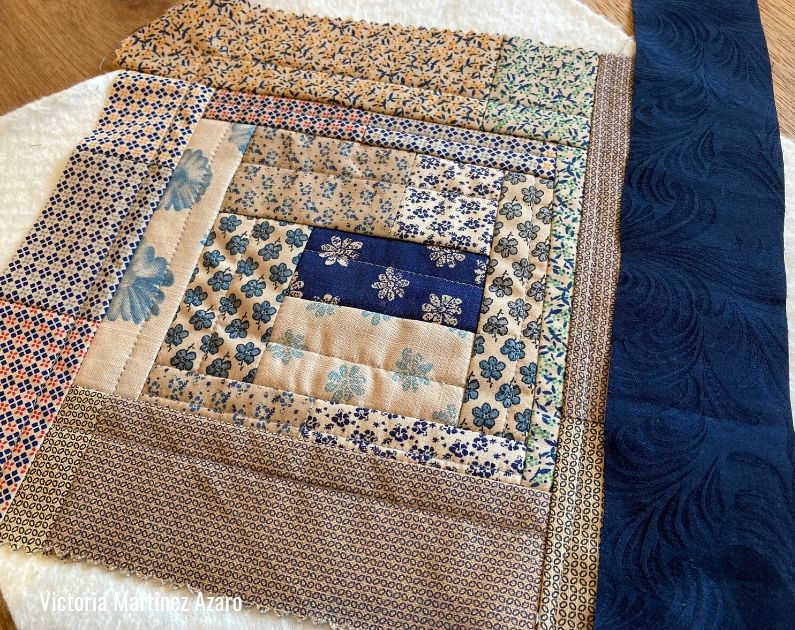
From now on you will repeat this process moving clockwise or anti clockwise (you need to decide at the beginning) around the first piece of fabric (in this case the blue log). Add the third piece of fabric (the same width as the first pieces and as long as the other two pieces stitched together), stitch, press and quilt as you go (always in the middle of the log).

Keep moving around the initial log clockwise. Each strip of fabric can be one piece or a strip made out of several pieces if you want to add extra visual texture and to use all your scraps 🙂

When you reach the edges of your batting square (it will be in a diagonal format) you can start to think about the framing. In this case I framed my log cabin block with navy blue silk scraps from a different project. Repeat the process of sewing, pressing and quilting as you go with the four blue stripes.

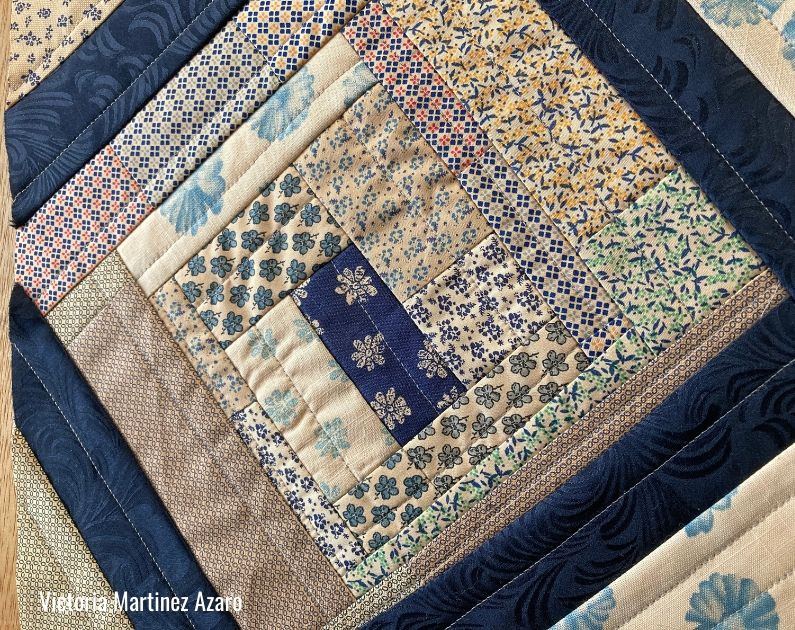
The final quilt block will look like this:
You can turn this beautiful quilt block into a quilted pillow cover or it can be the start of a bigger quilt! I hope you enjoy this tutorial and that you give it a go 🙂
How would you make a larger quilt if it’s already quilted without a backing?
Dear Vera,
I am not a quilter, so I am sure Victoria has other ideas, but I heard about stitch in the ditch quilting. Maybe that would be a way to go?
Hey Vera, as Ramona mentioned stitch in the ditch would be my go to technique for this. So basically you sew all your blocks together, then you cut a backing fabric slightly bigger than your finished block quilt. Then sew straight lines through the seam lines in between the blocks (this is called stitch in the ditch) and this will hold the quilted block and the back fabric together. Once you are finished you can bind the edges of the quilt 🙂 hope this helps!
Great article! I had done this several years ago for a different project but hadn’t thought about dyeing the scraps for them to blend well. Thanks
Thanks Terry, let me know if you have any questions about the over dyeing process 🙂
Absolutely super! Thanks for clear tips and pics. Going to try that tea trick!
Awesome Jacqui, let me know how it goes 🙂
I want to buy an all purpose Bernina machine for school use. I’m thinking about the B 590. I want to be able to quilt and embroider lettering. The kids always want lettering. Do yo7 know if the B590 embroiders built in software reasonable size letters? If it doesn’t, what is the best machine to include lettering? I don’t want to link up to a computer. It must be straight forward. I’ve used a Bernina embroidery Deco. That machine was excellent for my school.
Hello Margaret, Great you are thinking of purchasing the BERNINA 590, it’s a really great machine. It has a nice selection of lettering which can be sewn in sewing mode and if you want to go larger there is the embroidery module which is included and this means you can go really big. No need to link up to a computer. If you’re familiar with the Deco then you will love the 590. I would get in touch with your local BERNINA Dealer to check one out in person and in the meantime there are lots of videos on YouTube including getting started with embroidery on this model https://www.youtube.com/watch?v=Wq4LAvSOBbU. Thanks for all you do to encourage the kids to sew. We appreciate it. Happy Sewing!