 BERNINA Corporate Blog -
Today, let’s sew fabric light covers together. The built-in LED light string gives the fabric covers an Advent glow.
The decorative stitches on these sewn light covers also give them an attractive appearance during the day. Like many people, I particularly like covered lights and candles during the Advent season and when the days are getting shorter and darker.
I will show you how to sew two different versions of these covers with LED mini light strings. A common feature of both versions is that they are closed at the back with snap fasteners. The differences are the way the light strings are incorporated and the method for decorating the outside of the cover.

Light string wire
I initially had the idea of a bottle cover. But then, when I was sewing the cover, I realized that the wire of the mini light string provides good support for the fabric cover, so I decided not to make a bottle cover and developed the idea of these sewn light covers instead.
Lamp shade or light cover
Using the wire for support, I created a kind of lampshade, which can stand on its own or be put over a suitable vessel.
If you prefer to sew the sewn light cover without a light string or just want to use it as a bottle cover, you should always put a container inside, as otherwise the cover will not stand up.

Version 1 of the light cover
In this version of the sewn light cover, the LED mini light string is located in three strip tunnels sewn on the inside of the cover. The spaces between the strip tunnels are embellished on the outside with decorative stitches. I’m going to show you how I did it here. If you find a different way of sewing it, that is also good. You can really let your imagination run wild and sew and decorate your light cover however you like!
For this cover, I used the dimensions of a 0.5 L milk bottle as a guide. The finished size of the light cover is approx. 21 cm x 25 cm. As mentioned above, the lamp remains stable due to the inserted wire and does not need a bottle to stand up.

Materials for the larger light cover
- 3 x fabric, 23 cm x 5 cm / L x H
- 1 x fabric, 27 cm x 23 cm / L x H
- 1 x mini LED light string
- Snap fasteners
- Pins
- Decorative thread
- Water soluble marker pen
- Cutting mat, ruler and cutter
- Fabric scissors
For the two white light covers, I used light-weight woven linen. If the fabric is too dense, it reduces the amount of light showing through.
I did not put any embroidery stabilizer underneath for the decorative stitches on the outside. My tip is to sew or embroider a small test patch on your chosen fabric. If your fabric becomes distorted, I recommend using water-soluble embroidery stabilizer/ Avalon.
Pattern
There is no pattern to print out for this sewing project.
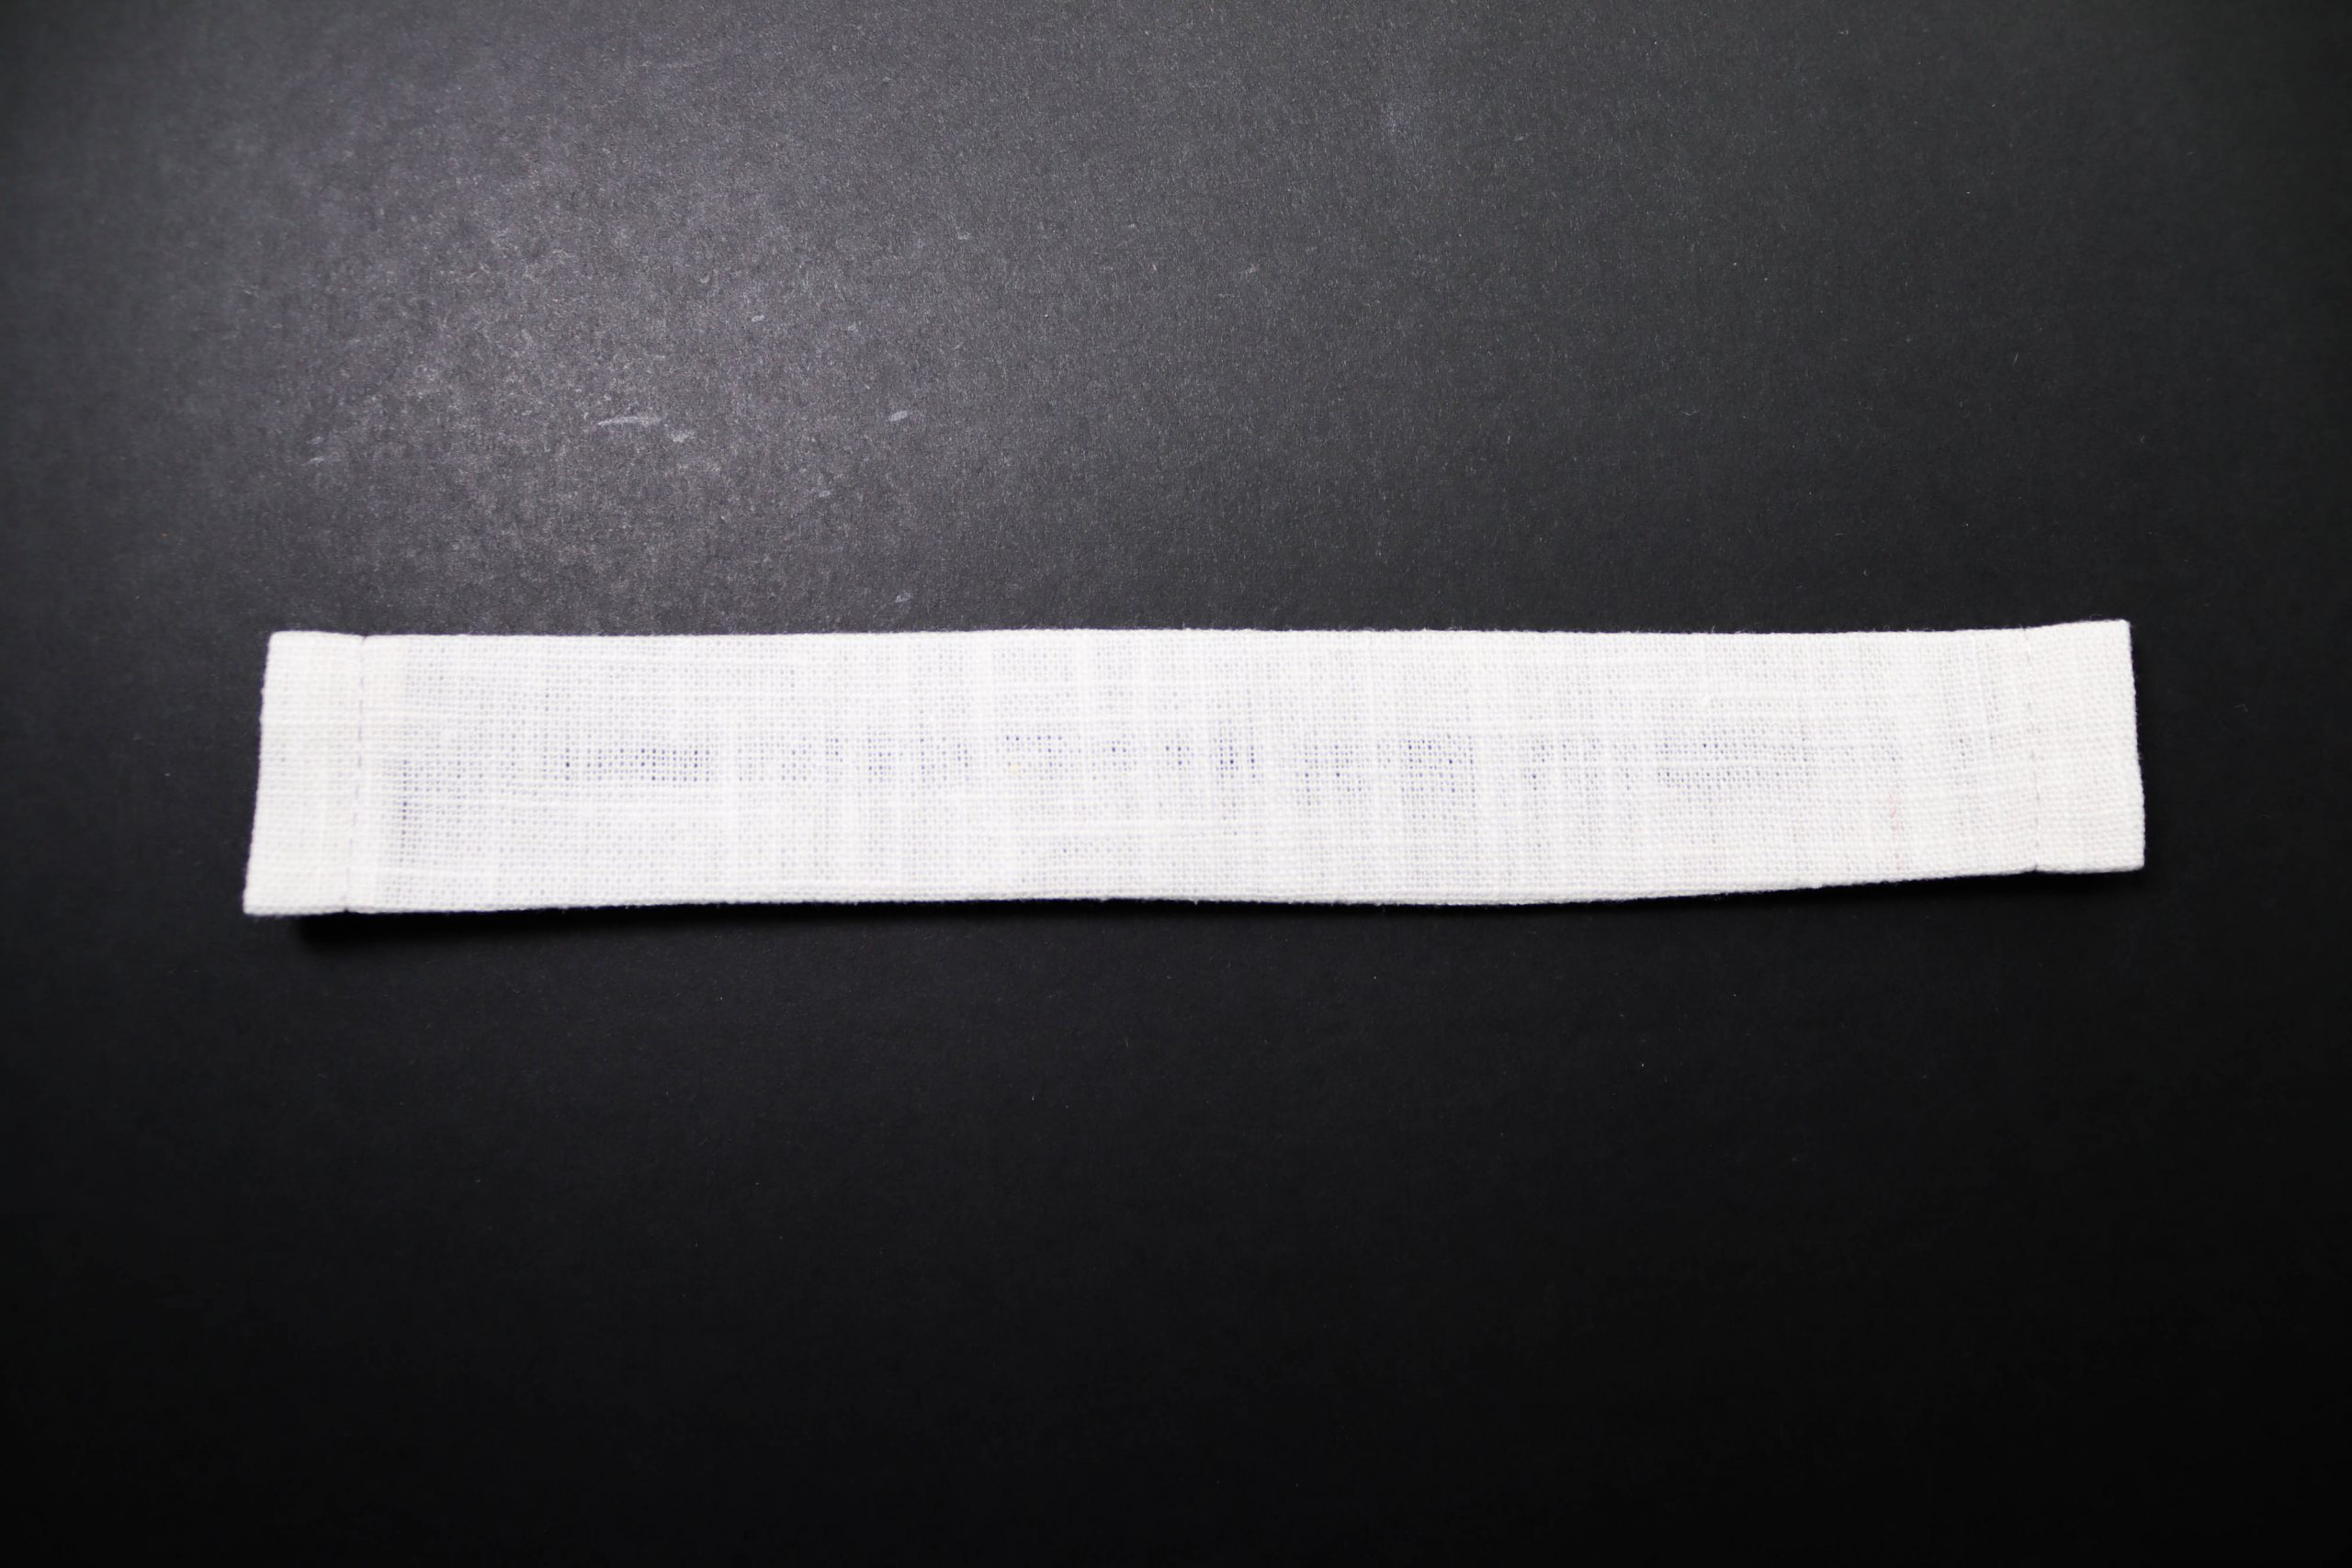
Strips for the tunnels
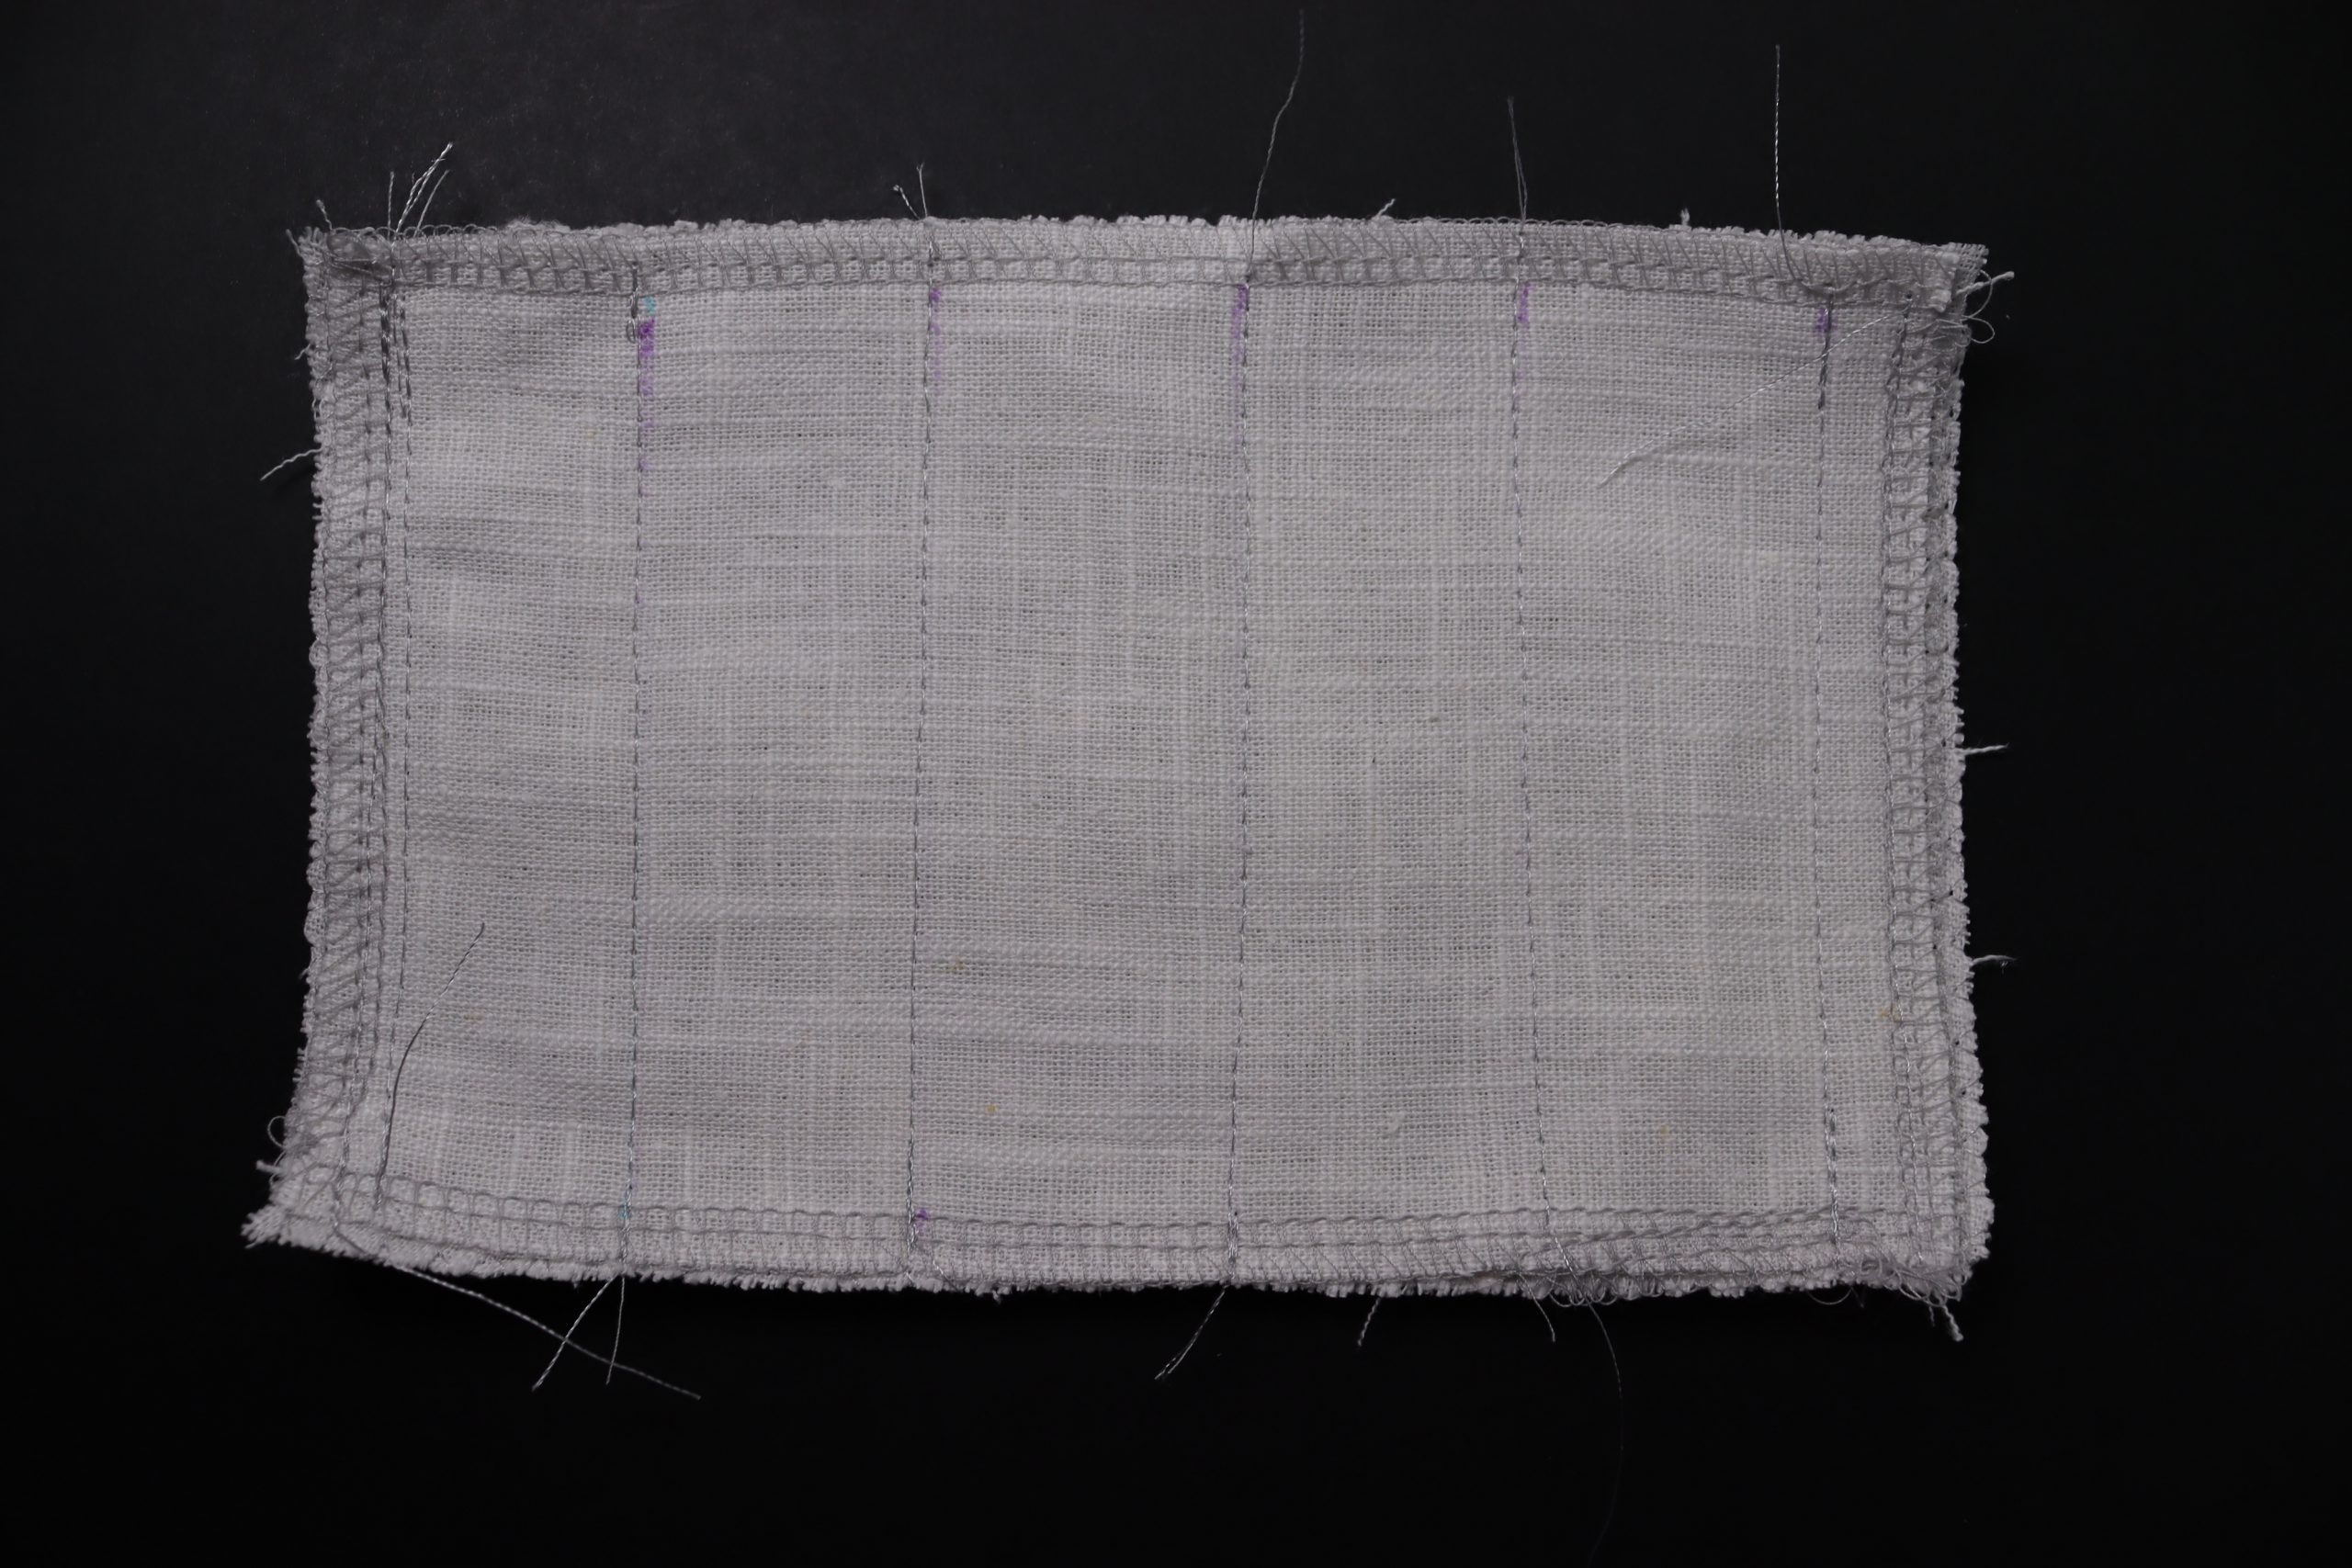
If you want to sew this version of the light cover, cut out three strips each measuring 23 cm x 5 cm. Iron all the edges 1 cm inwards and then topstitch the short sides on the right and left side using a straight stitch.
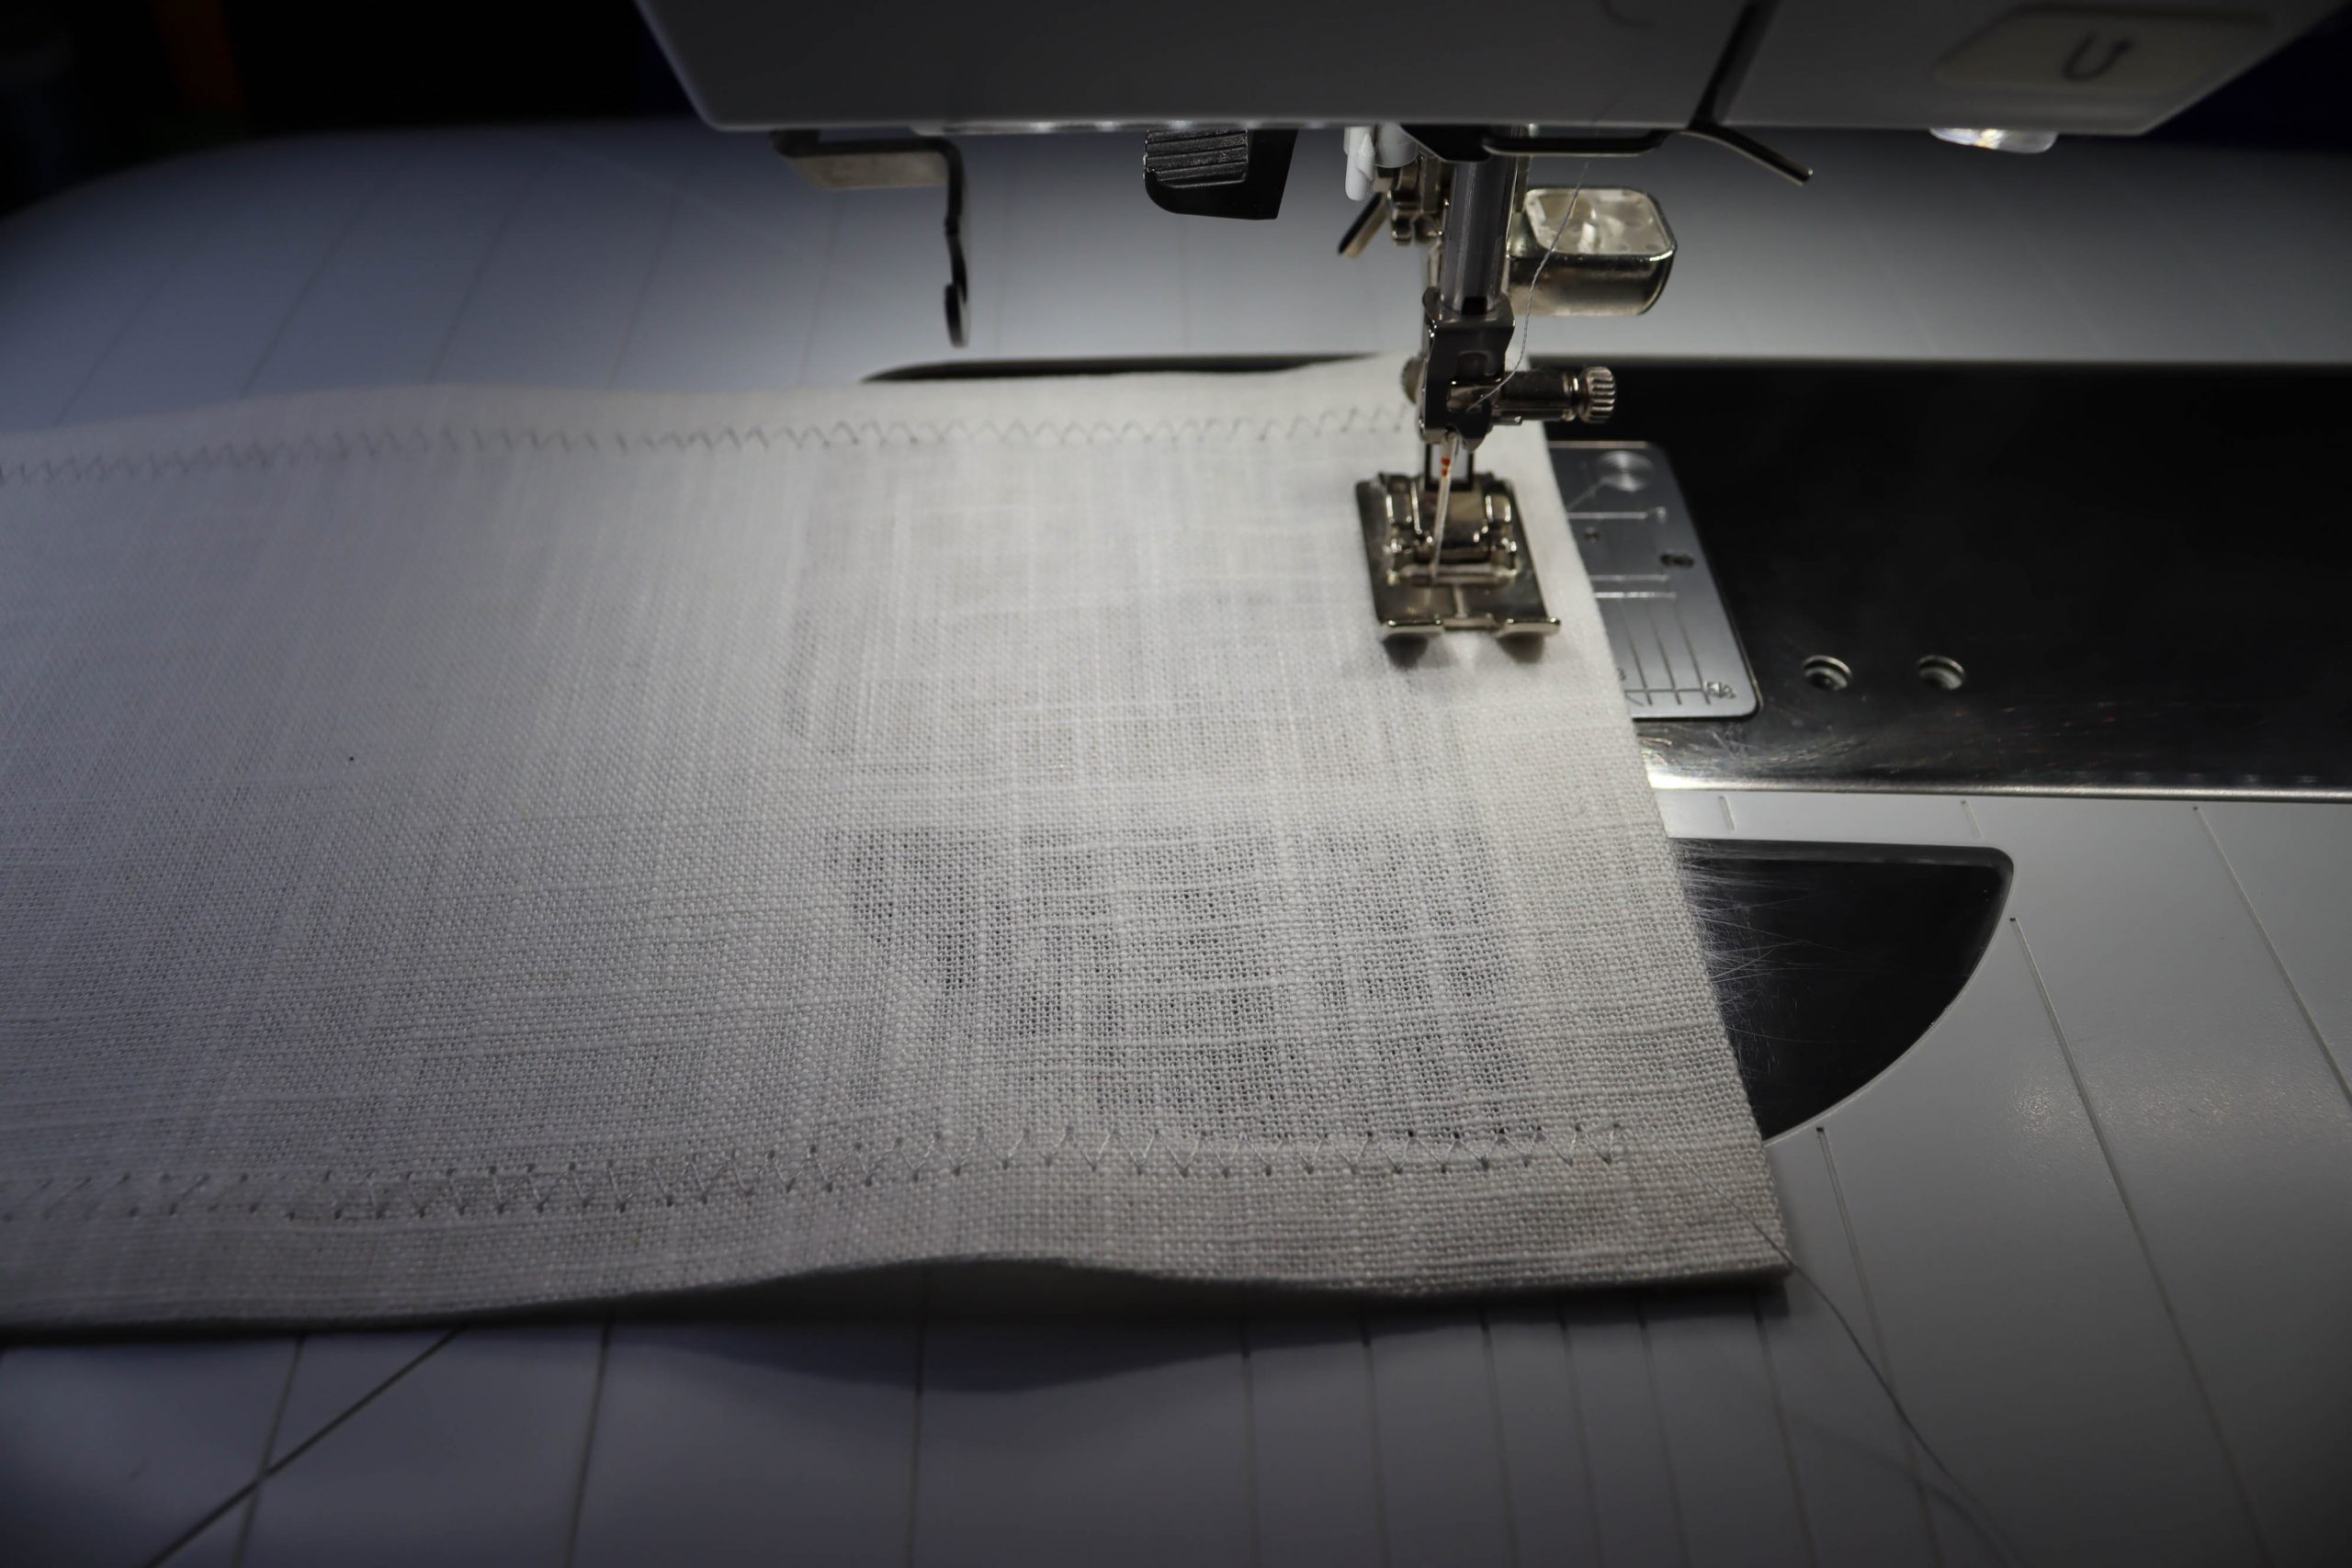
For the body of the outer cover, cut out a rectangle measuring approx. 27 cm x 23 cm. Here as well, iron all the edges inwards and then sew them in place. You can use a stitch of your choice. I just chose a straight stitch for this. You can also overcast the edges on an overlocker or sewing machine.

LED mini light string
When you have finished your three strips, attach them onto to the inside, on the wrong side of the fabric. The light string should lie inside the loops and not outside. The lights should be positioned so they form an attractive arrangement. If the loops are not evenly spaced, it gives the light a certain imperfect charm. It is important to leave enough space for the decorative stitches and that the light string can be distributed fairly evenly.

With this light cover, I actually sewed the tunnels on one at a time. It was a test run, so to speak. I’ll show you how to do it here.
Sew the strips on along the two long sides, making sure to secure the start and ends of your seams.
Here you can see that the first tunnel strip has been sewn on. The trial run threading in the light string worked great.
Decorative stitches and light string
Once you have sewn all three strips onto the inside of the outer fabric and embellished the spaces in between with decorative stitches on the right side, you can thread in the mini LED light string. For this I “wove” it in by threading it through from one fabric tunnel to the next. This procedure is repeated several times, as it depends on the length of your light string. Mine measures 2 meters and I was able to weave them through at least three times from bottom to top and back again. This gives the cover good strength, making it nice and stable.

Snap fastening
Without the snap fastening, you have now sewn a small light tapestry or light wall hanging that you could hang on the wall or, if you bend it a little, as an upright display.

If you decide on the standing light cover with snap fastening, attach three snaps on the right and left side along the long edges.
Version 2 of the sewn light cover
This light cover is made up of two pieces, which are joined together with Velcro. This has the advantage that the outer cover can easily be removed from the light cover for washing. The first version of the light cover can only be washed once the light string has been removed.
Materials for the smaller light cover
- 2 x fabric, 17 cm x 11 cm / L x H
- 1 x fabric, 25 cm x 16 cm / L x H
- 1 x mini LED light string
- Velcro
- Snap fasteners
- Pins
- Decorative thread
- Cutting mat, ruler and cutter
- Fabric scissors
For the two white light covers, I used light-weight woven linen/summer linen.
Embellishing the outer fabric
For the body of the outer cover, first cut out a piece of fabric measuring approx. 25 cm x 16 cm and here too iron all the edges inwards and then sew them in place.
You can also overcast all the edges on an overlocker or sewing machine and then fold in, iron and sew the edges. Like me, you can use a zigzag stitch. This has the advantage that the back of the fabric edges are neatened and, at the same time, the folded edges of the fabric are sewn down.
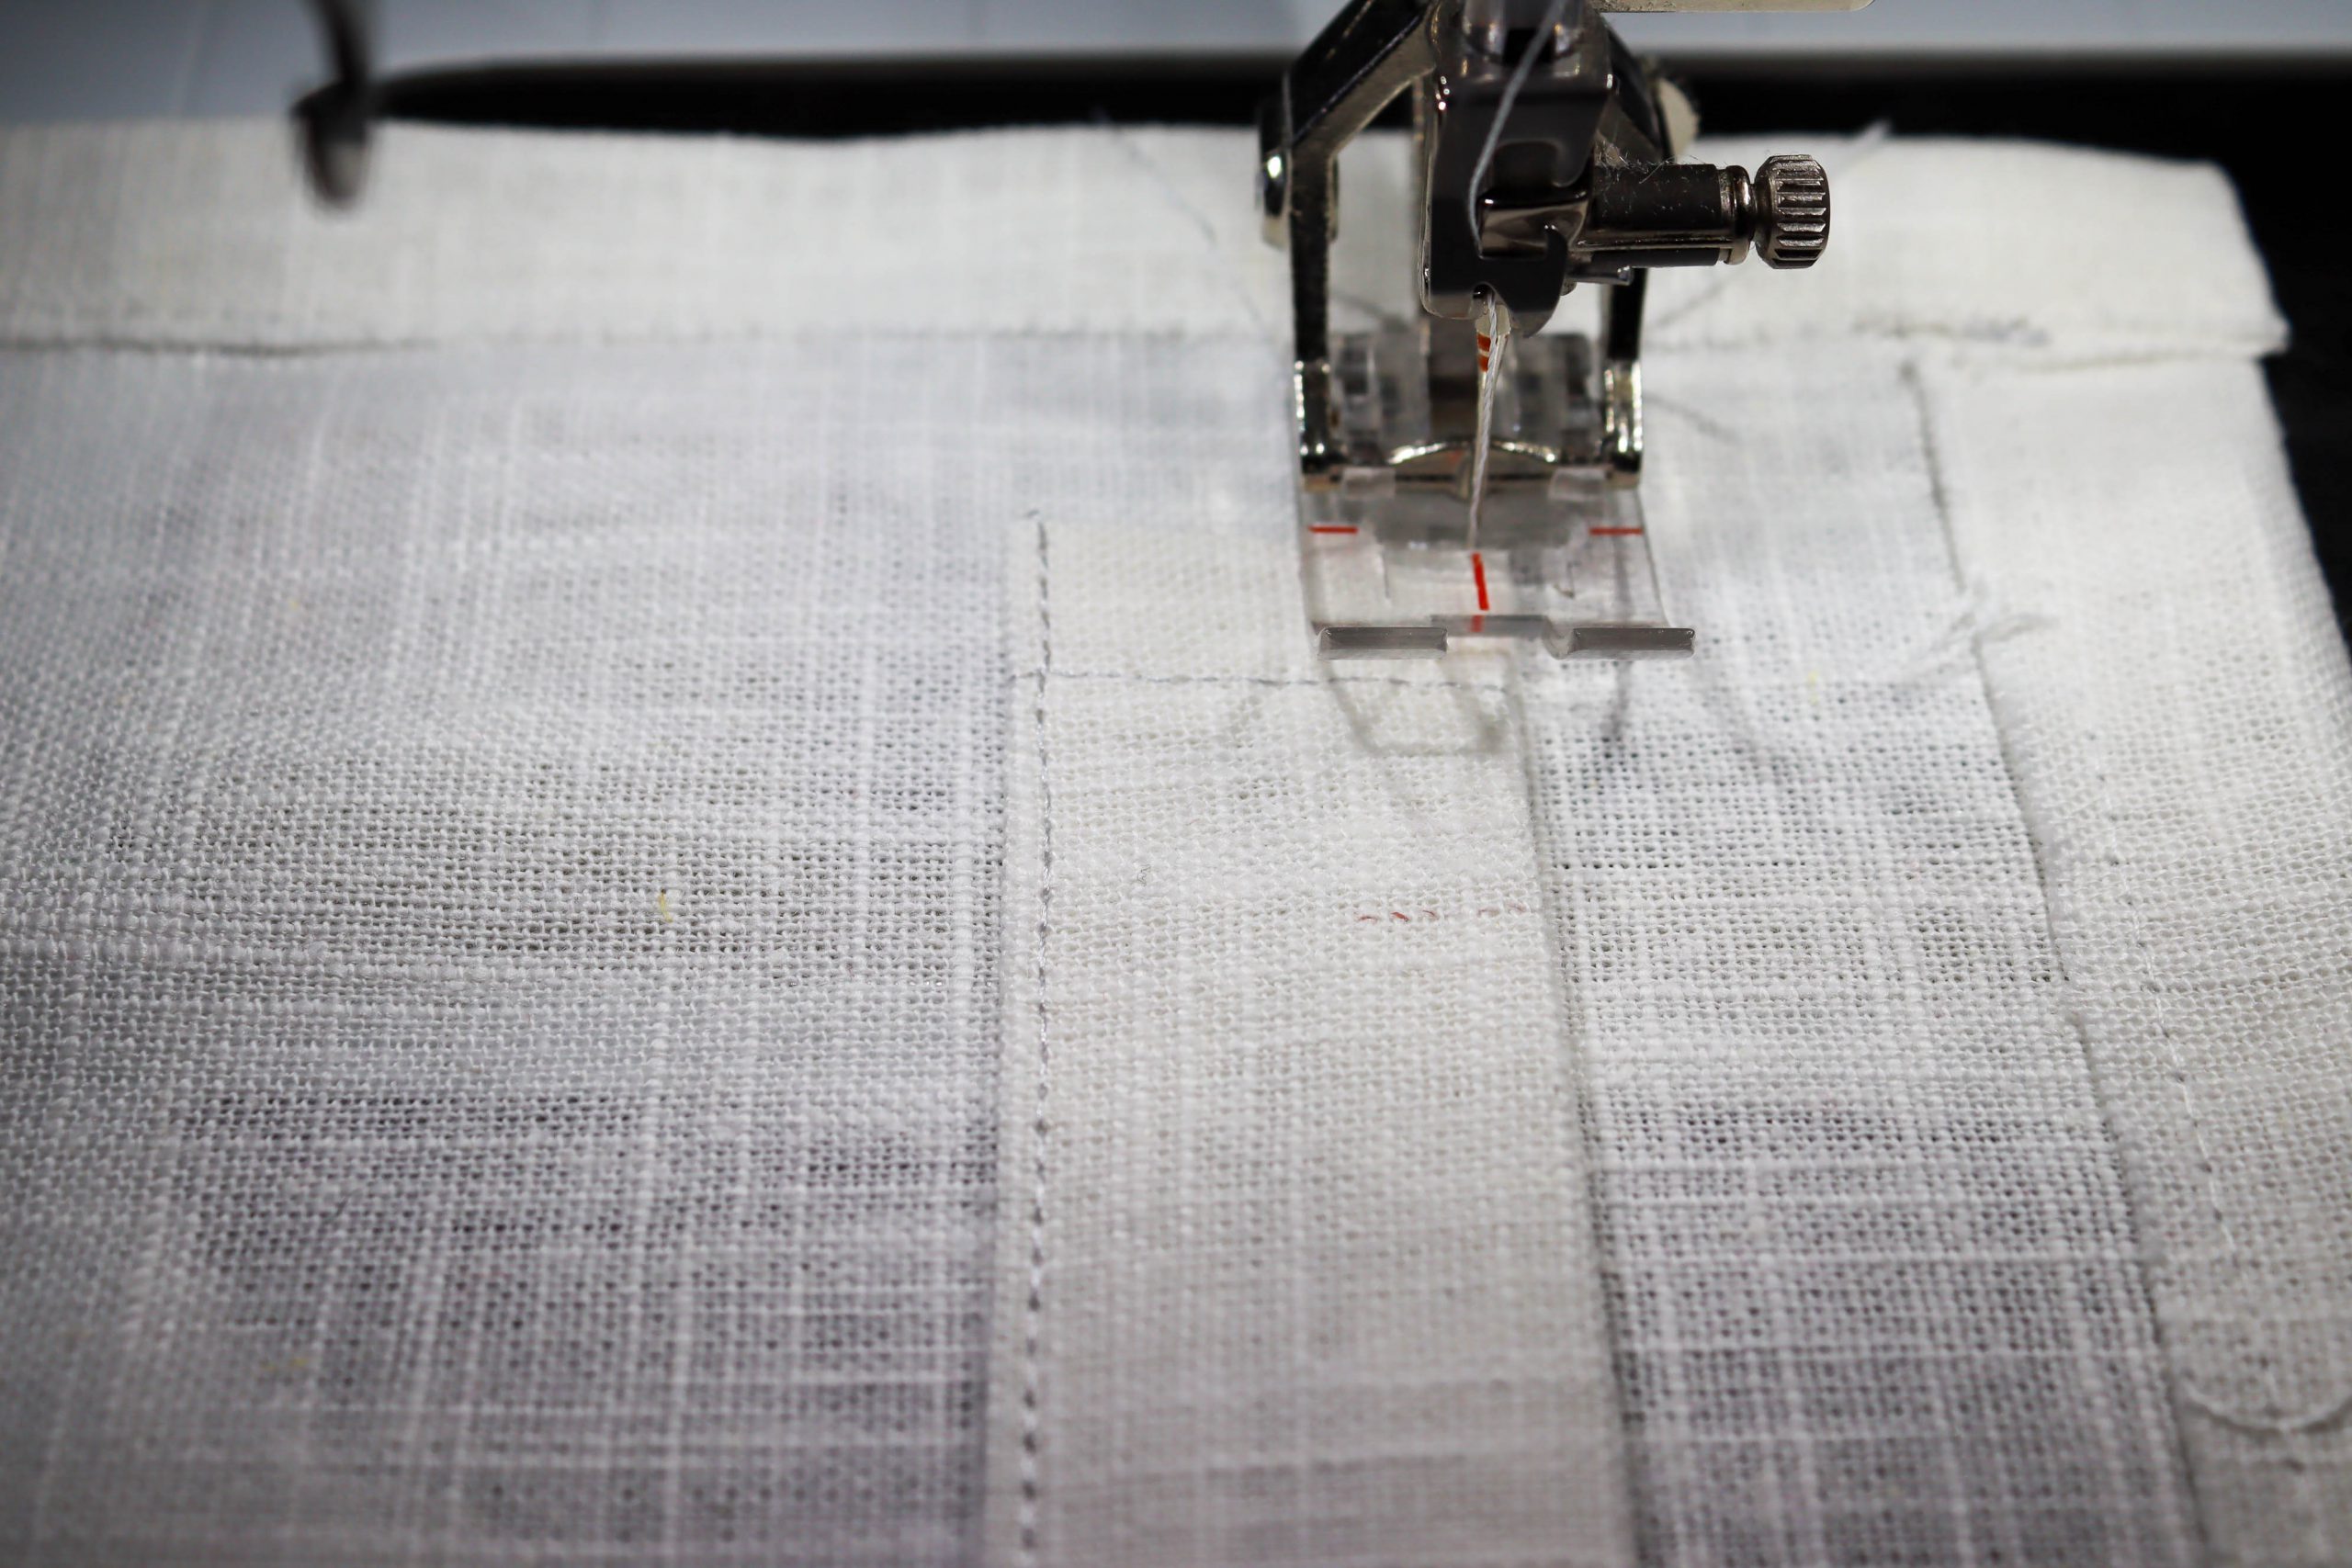
Decorative stitches
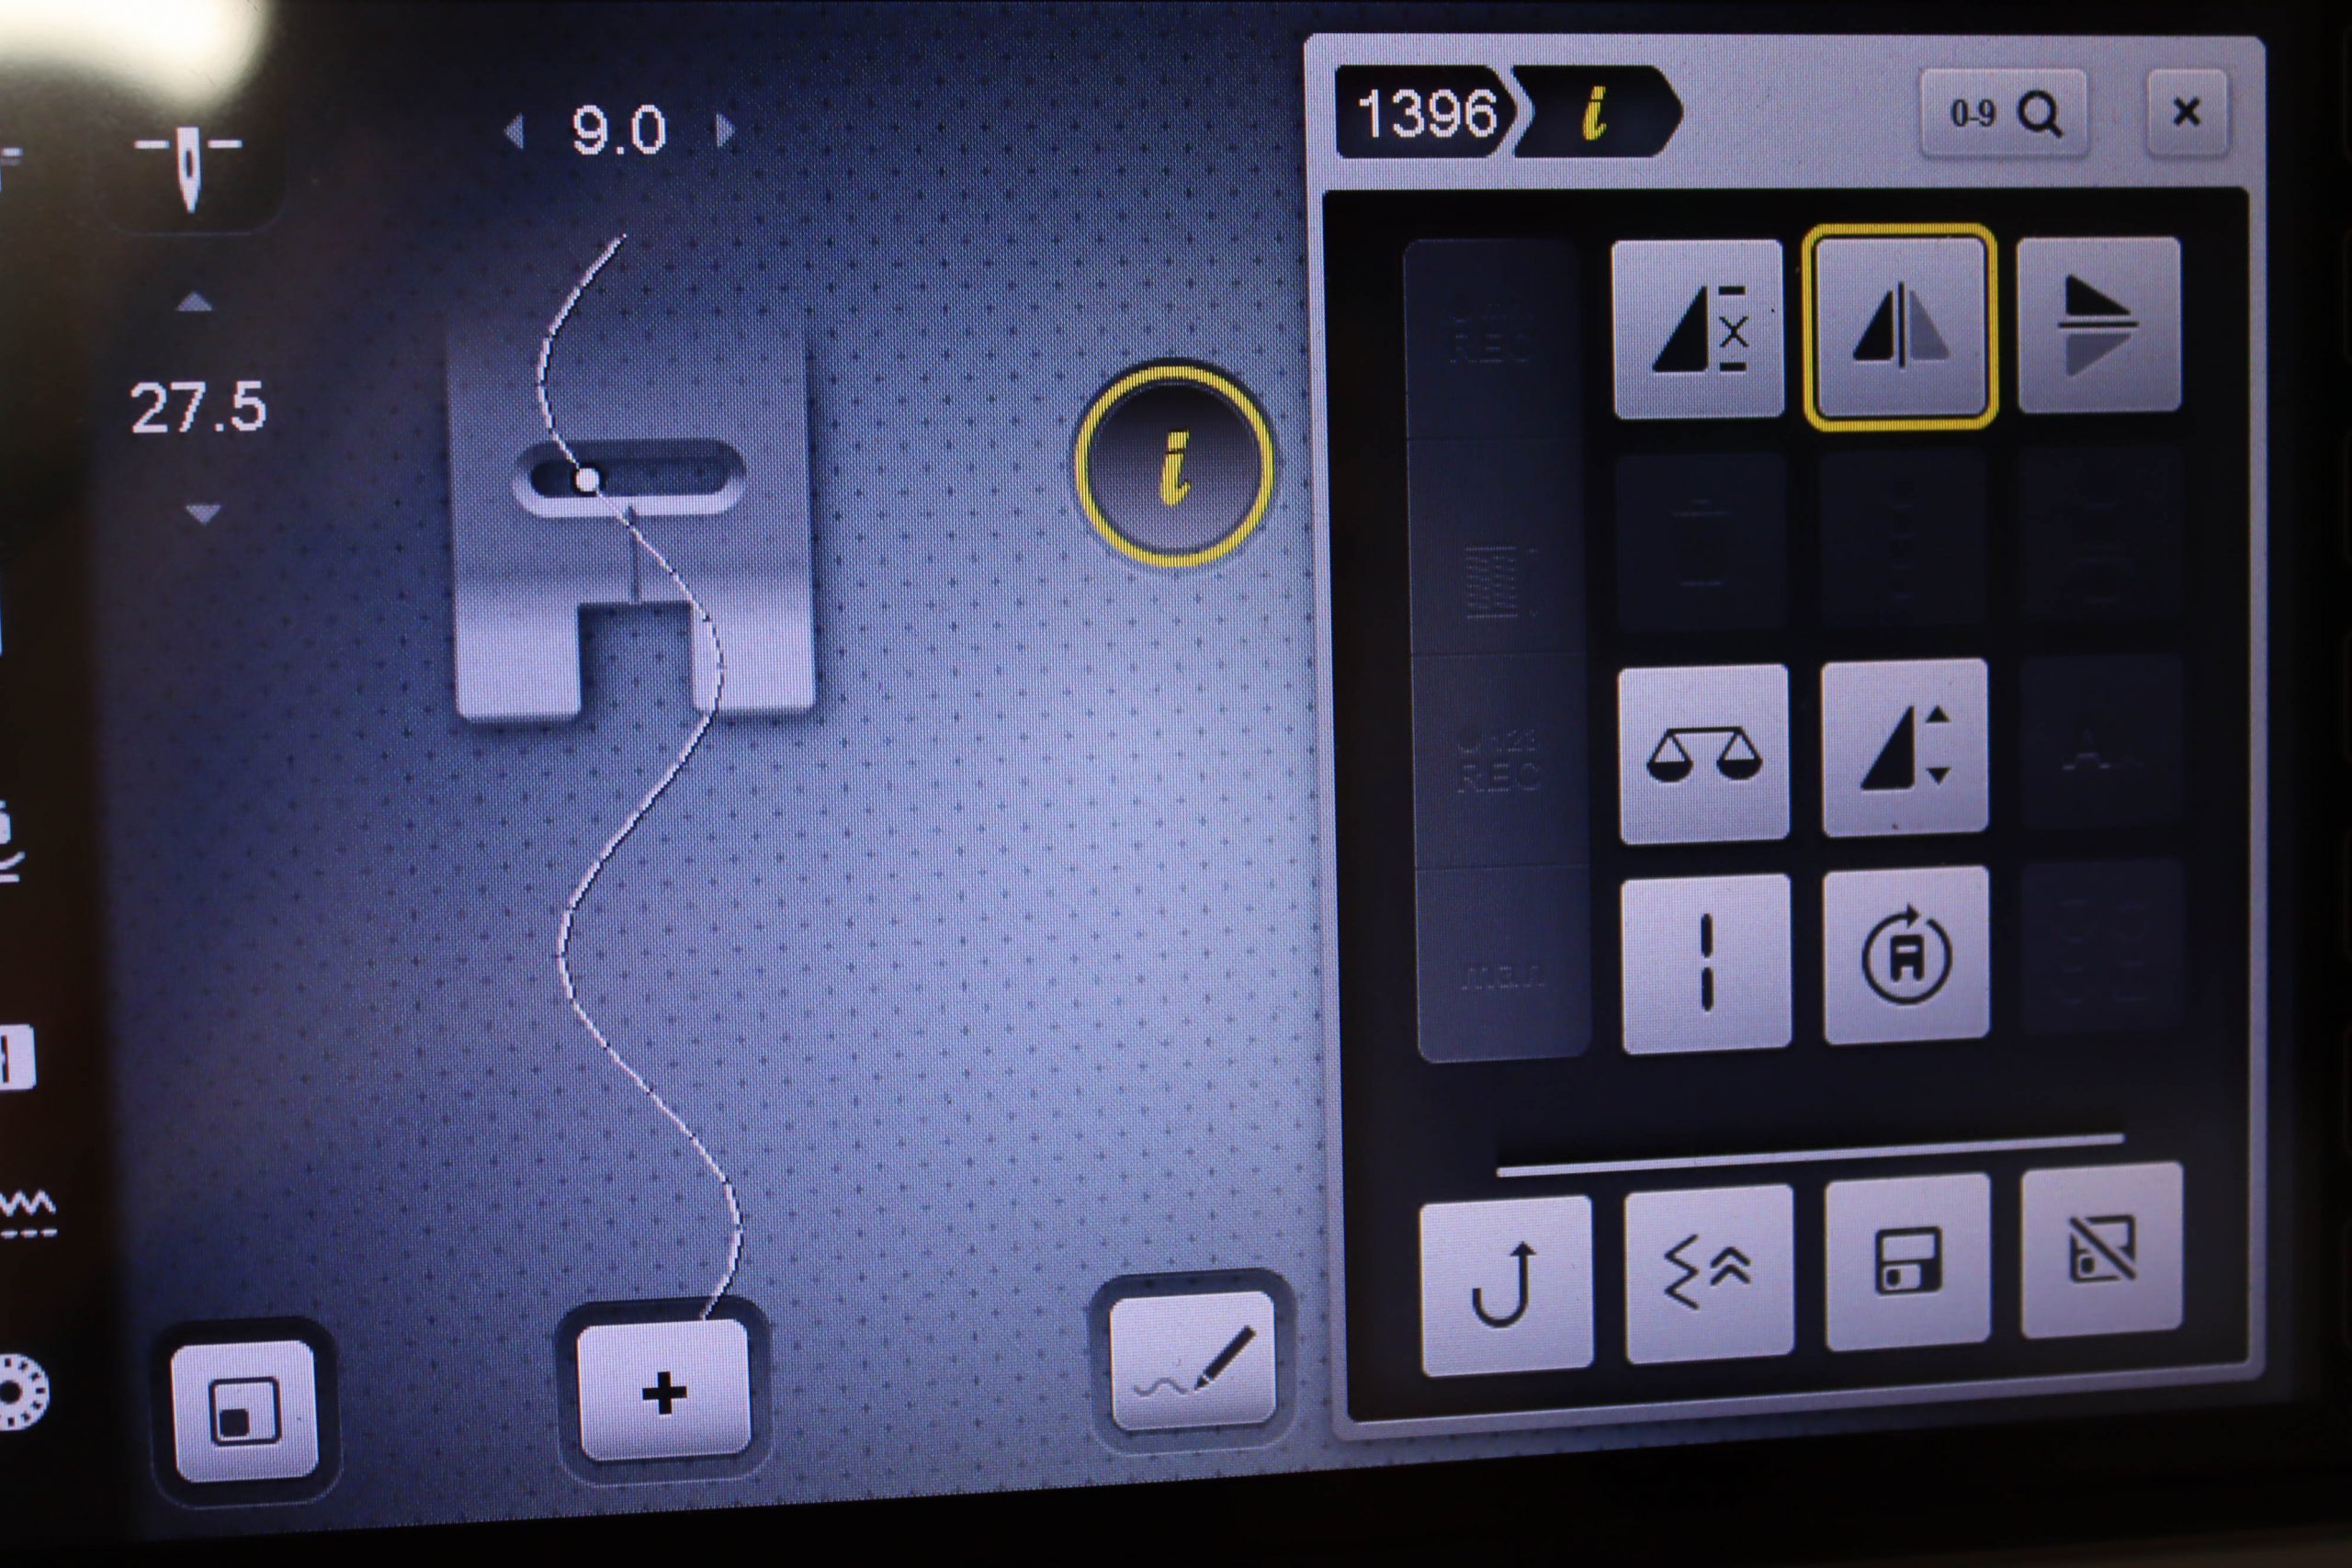
In this version of the light cover, I first embellished the outside of the fabric with various decorative stitches. For this, I selected stitch 1396 on my BERNINA 790 and the Sideways Motion Foot # 40C.


The setting function on my sewing machine allows me to flip the stitches over, enabling me to sew a wave shape without constantly having to start again.
Extra compartment for the light string
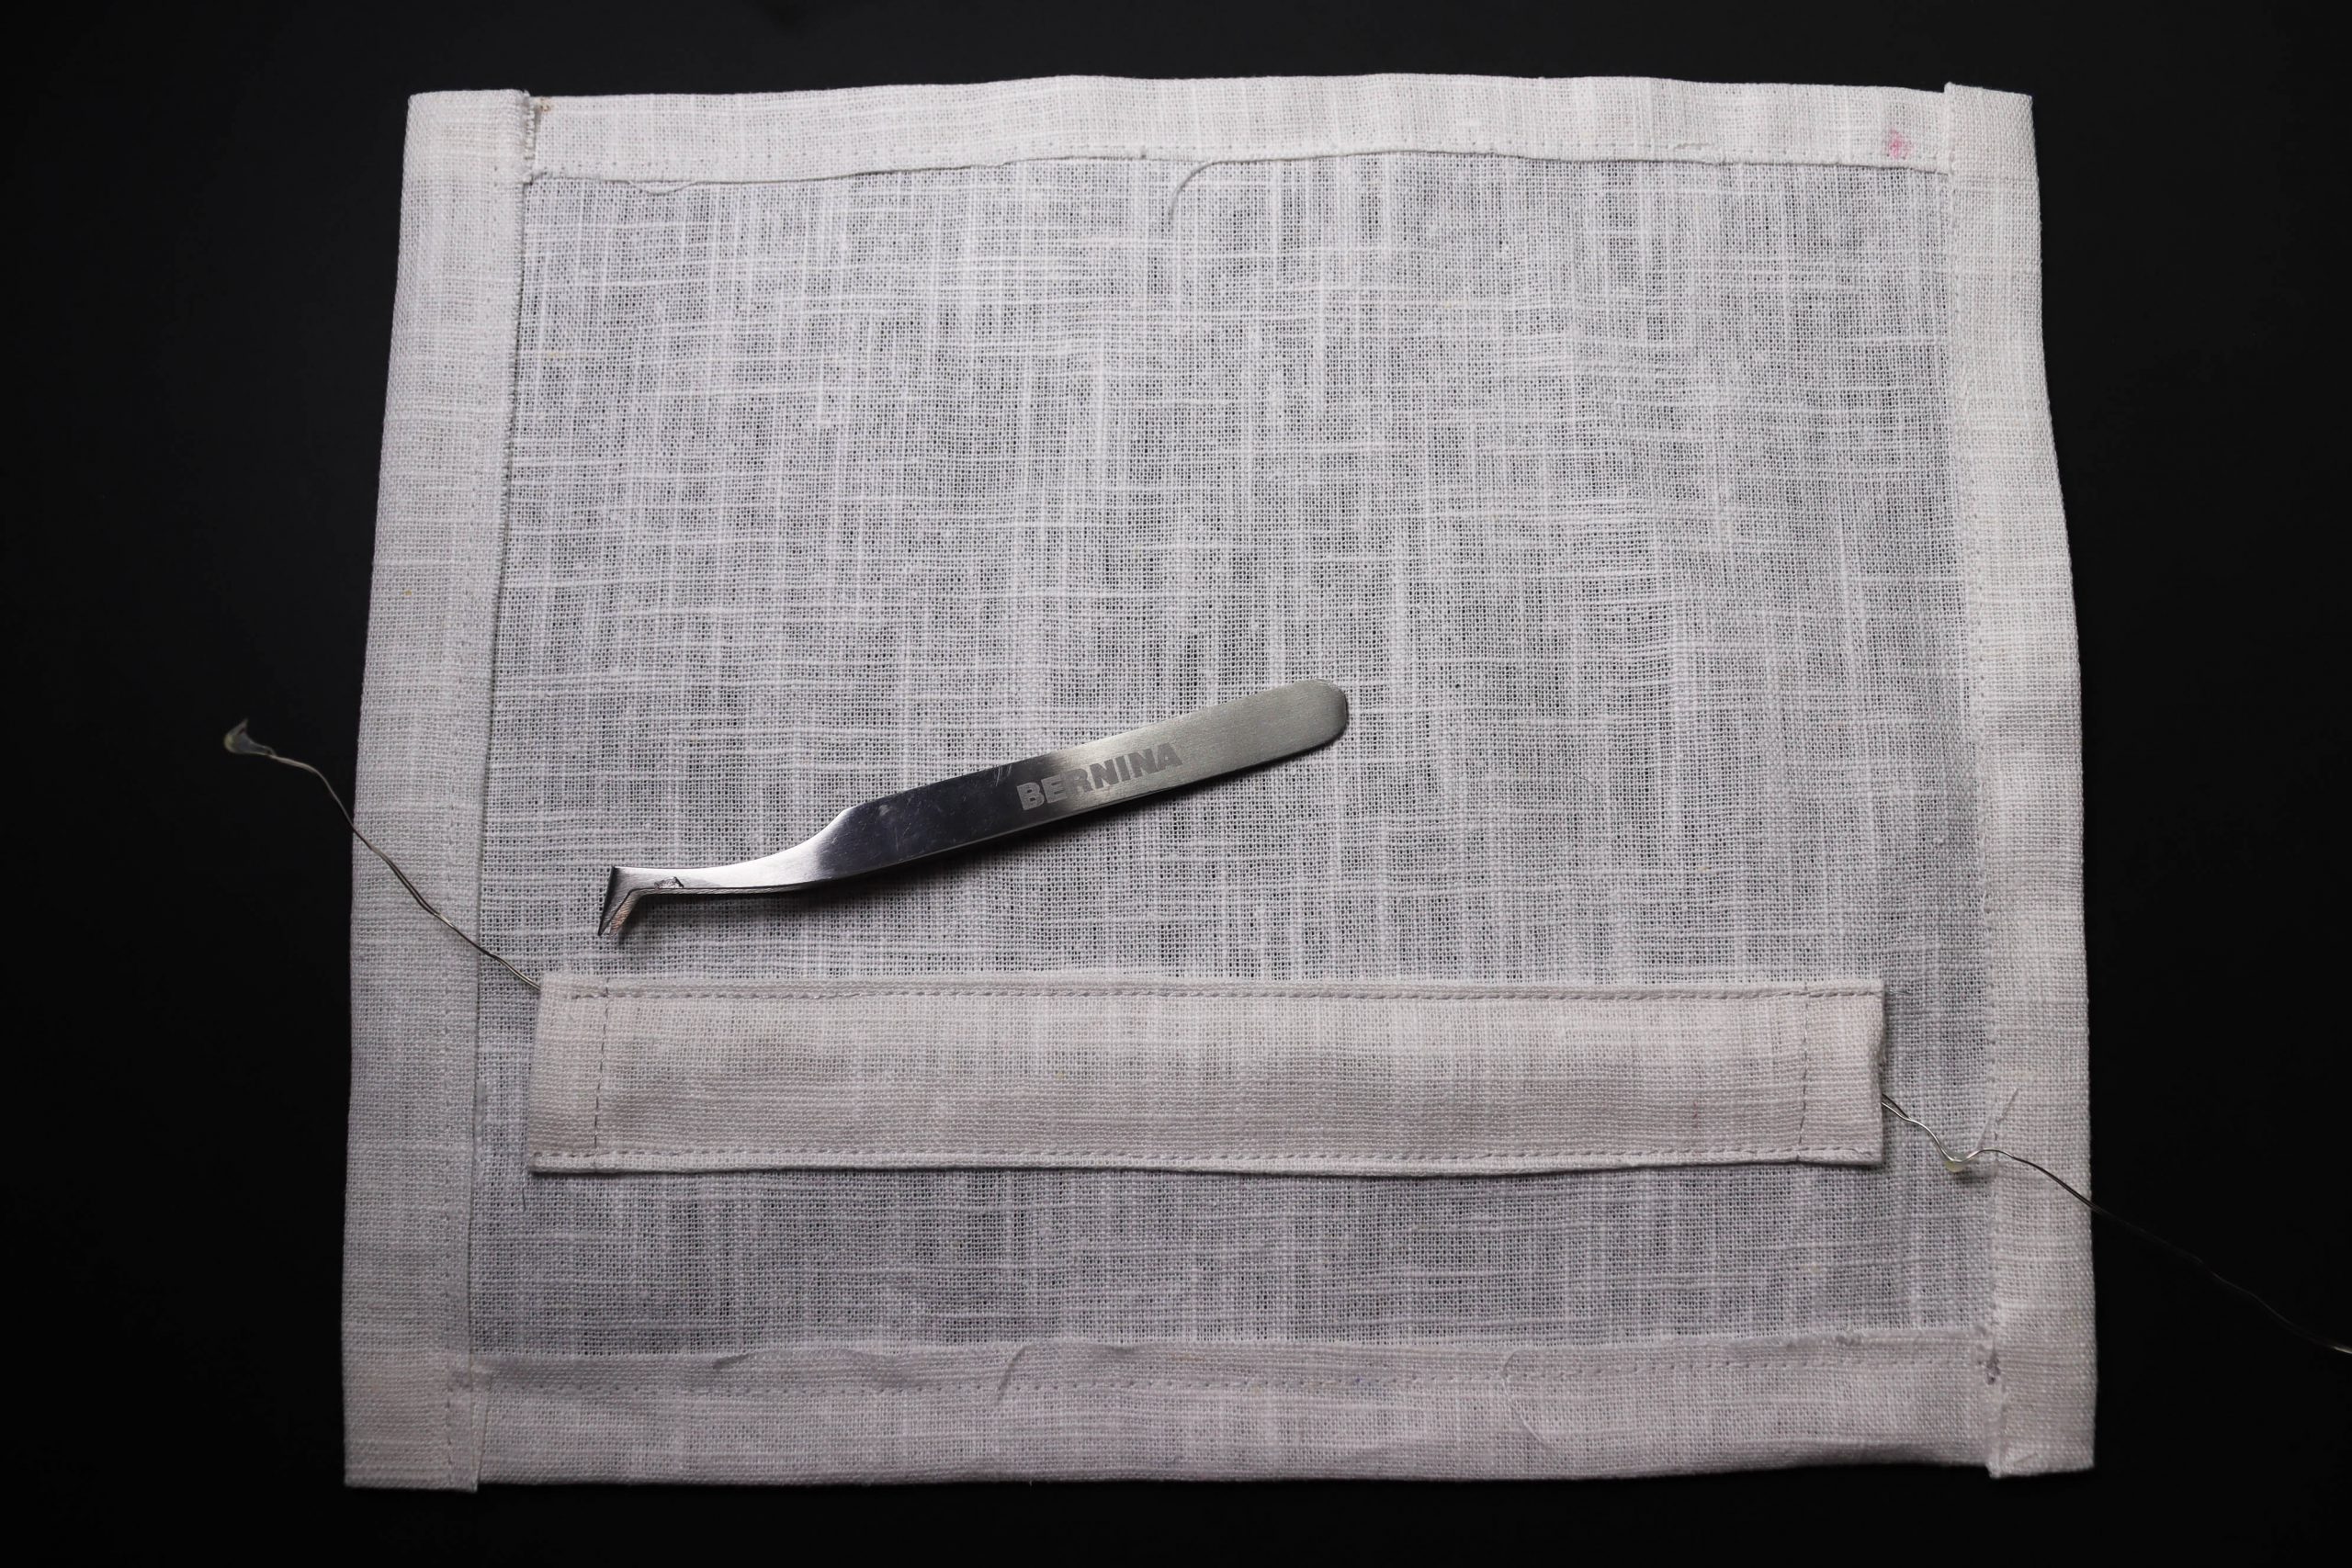
For the extra compartment to put the mini LED light string in, now cut out two rectangles each measuring 17 cm x 11 cm / L x H.
In the picture, you can see that I overcast the edges of one fabric rectangle on the sewing machine using a zigzag stitch. I hemmed the bottom one on the overlocker. Both methods are acceptable, but personally I prefer the seam on my BERNINA L 850.

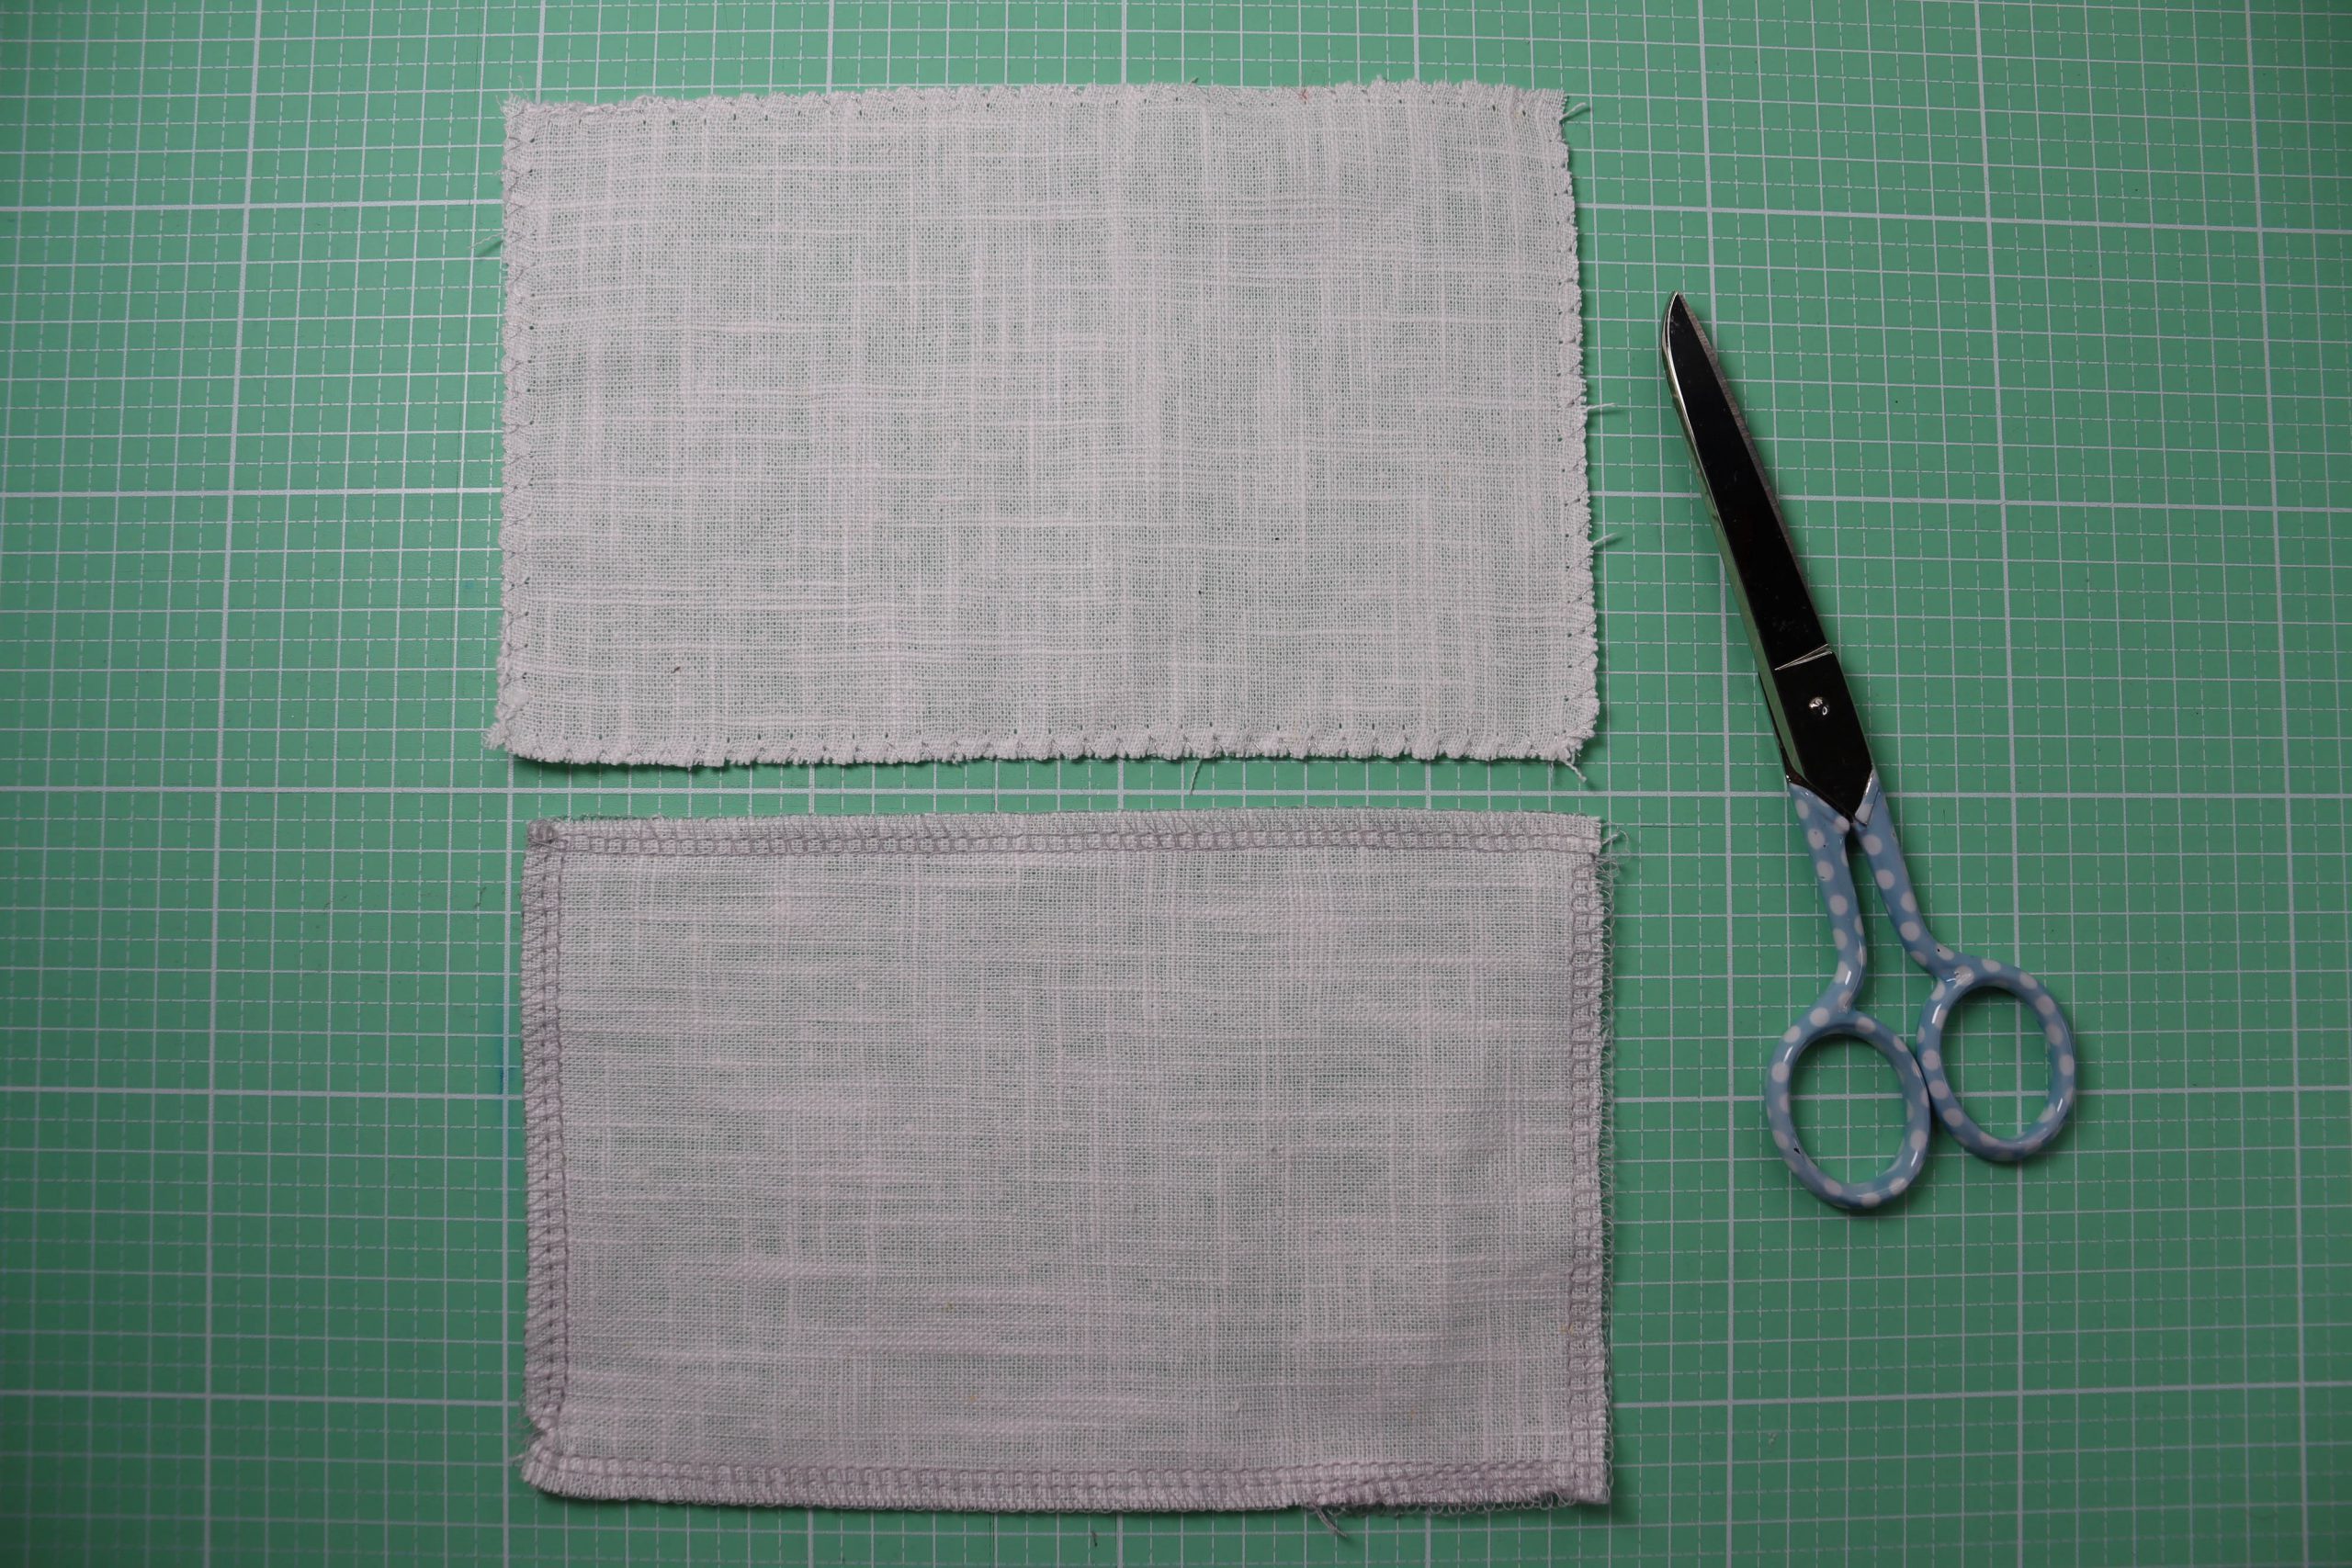
Place the two pieces of fabric on top of one another, secure them in place with a few pins if necessary. Now sew the right and left short sides together, first close to the edge and then again at presser foot width. Next, mark five long lines 3 cm apart. Then sew along these marked lines using a straight stitch. Don’t forget to secure the start and ends of the seams.
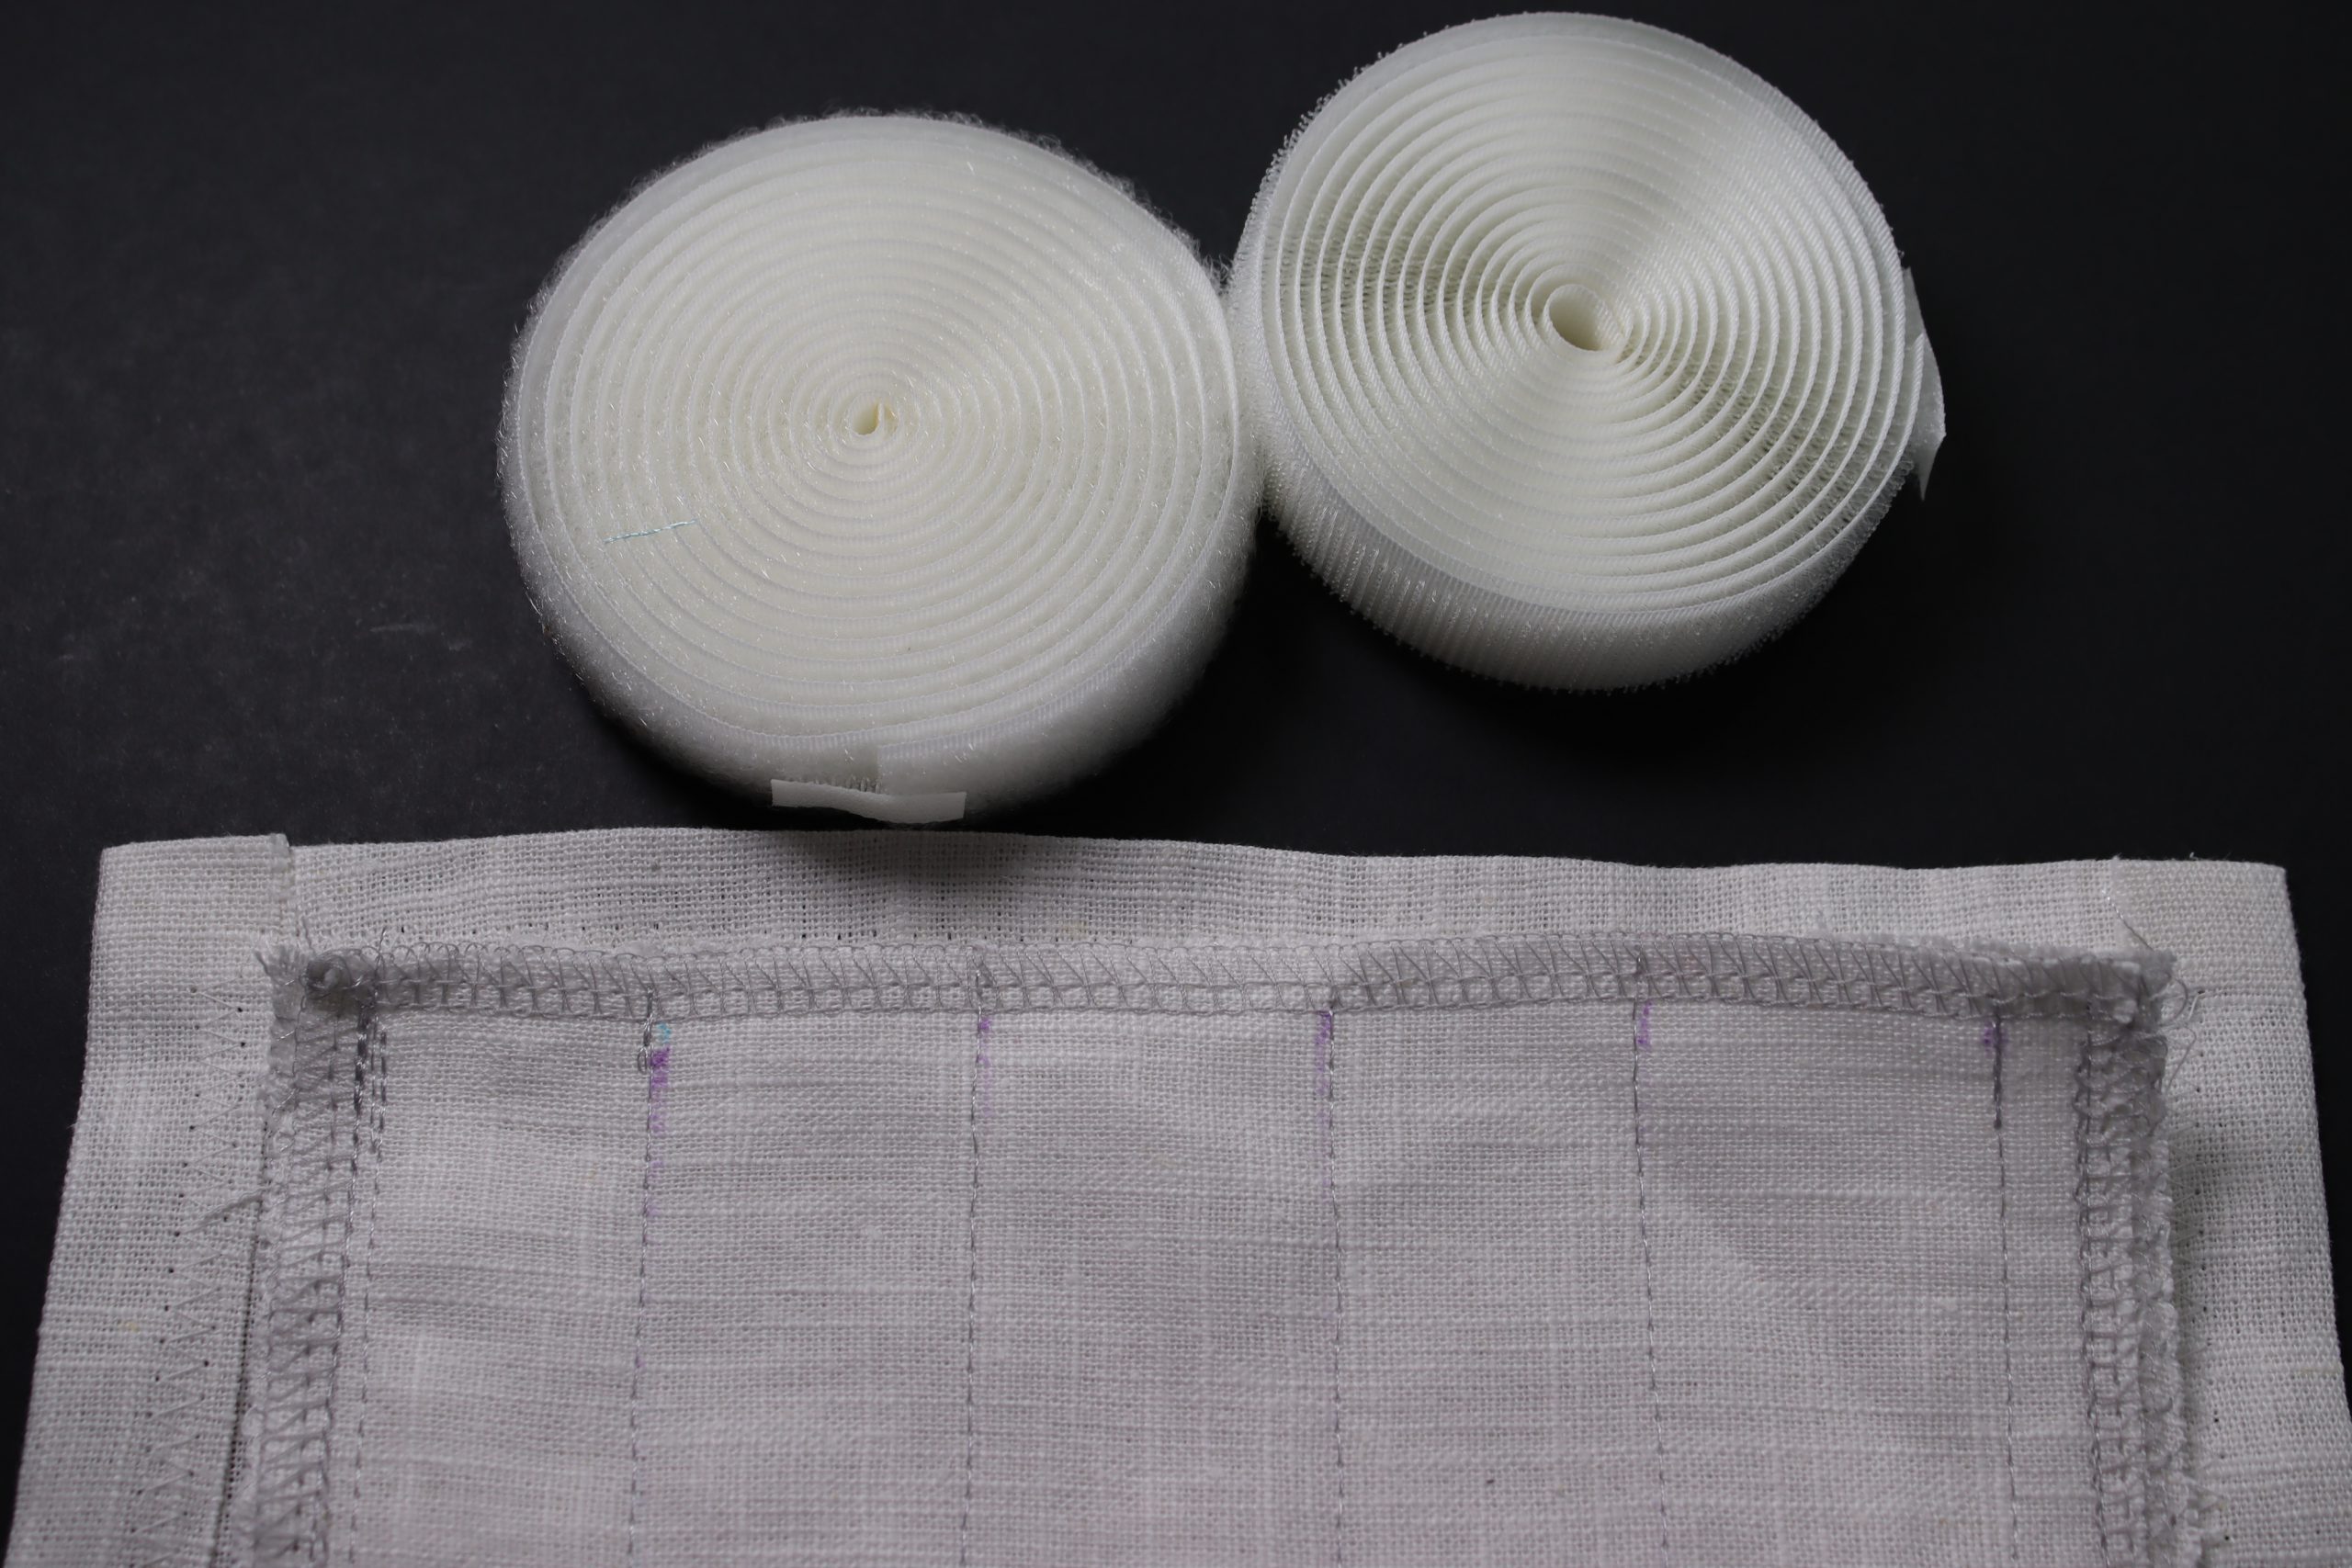
Velcro
You now have the outer cover and the inner cover with the sewn tunnels. The inside one is smaller and that is how it should be. This extra width is required later when the light string is inserted.
Now cut off 2 pieces of Velcro 2 cm long and cut them in half again. This will give you four pieces: 4 x hook and 4 x loop.
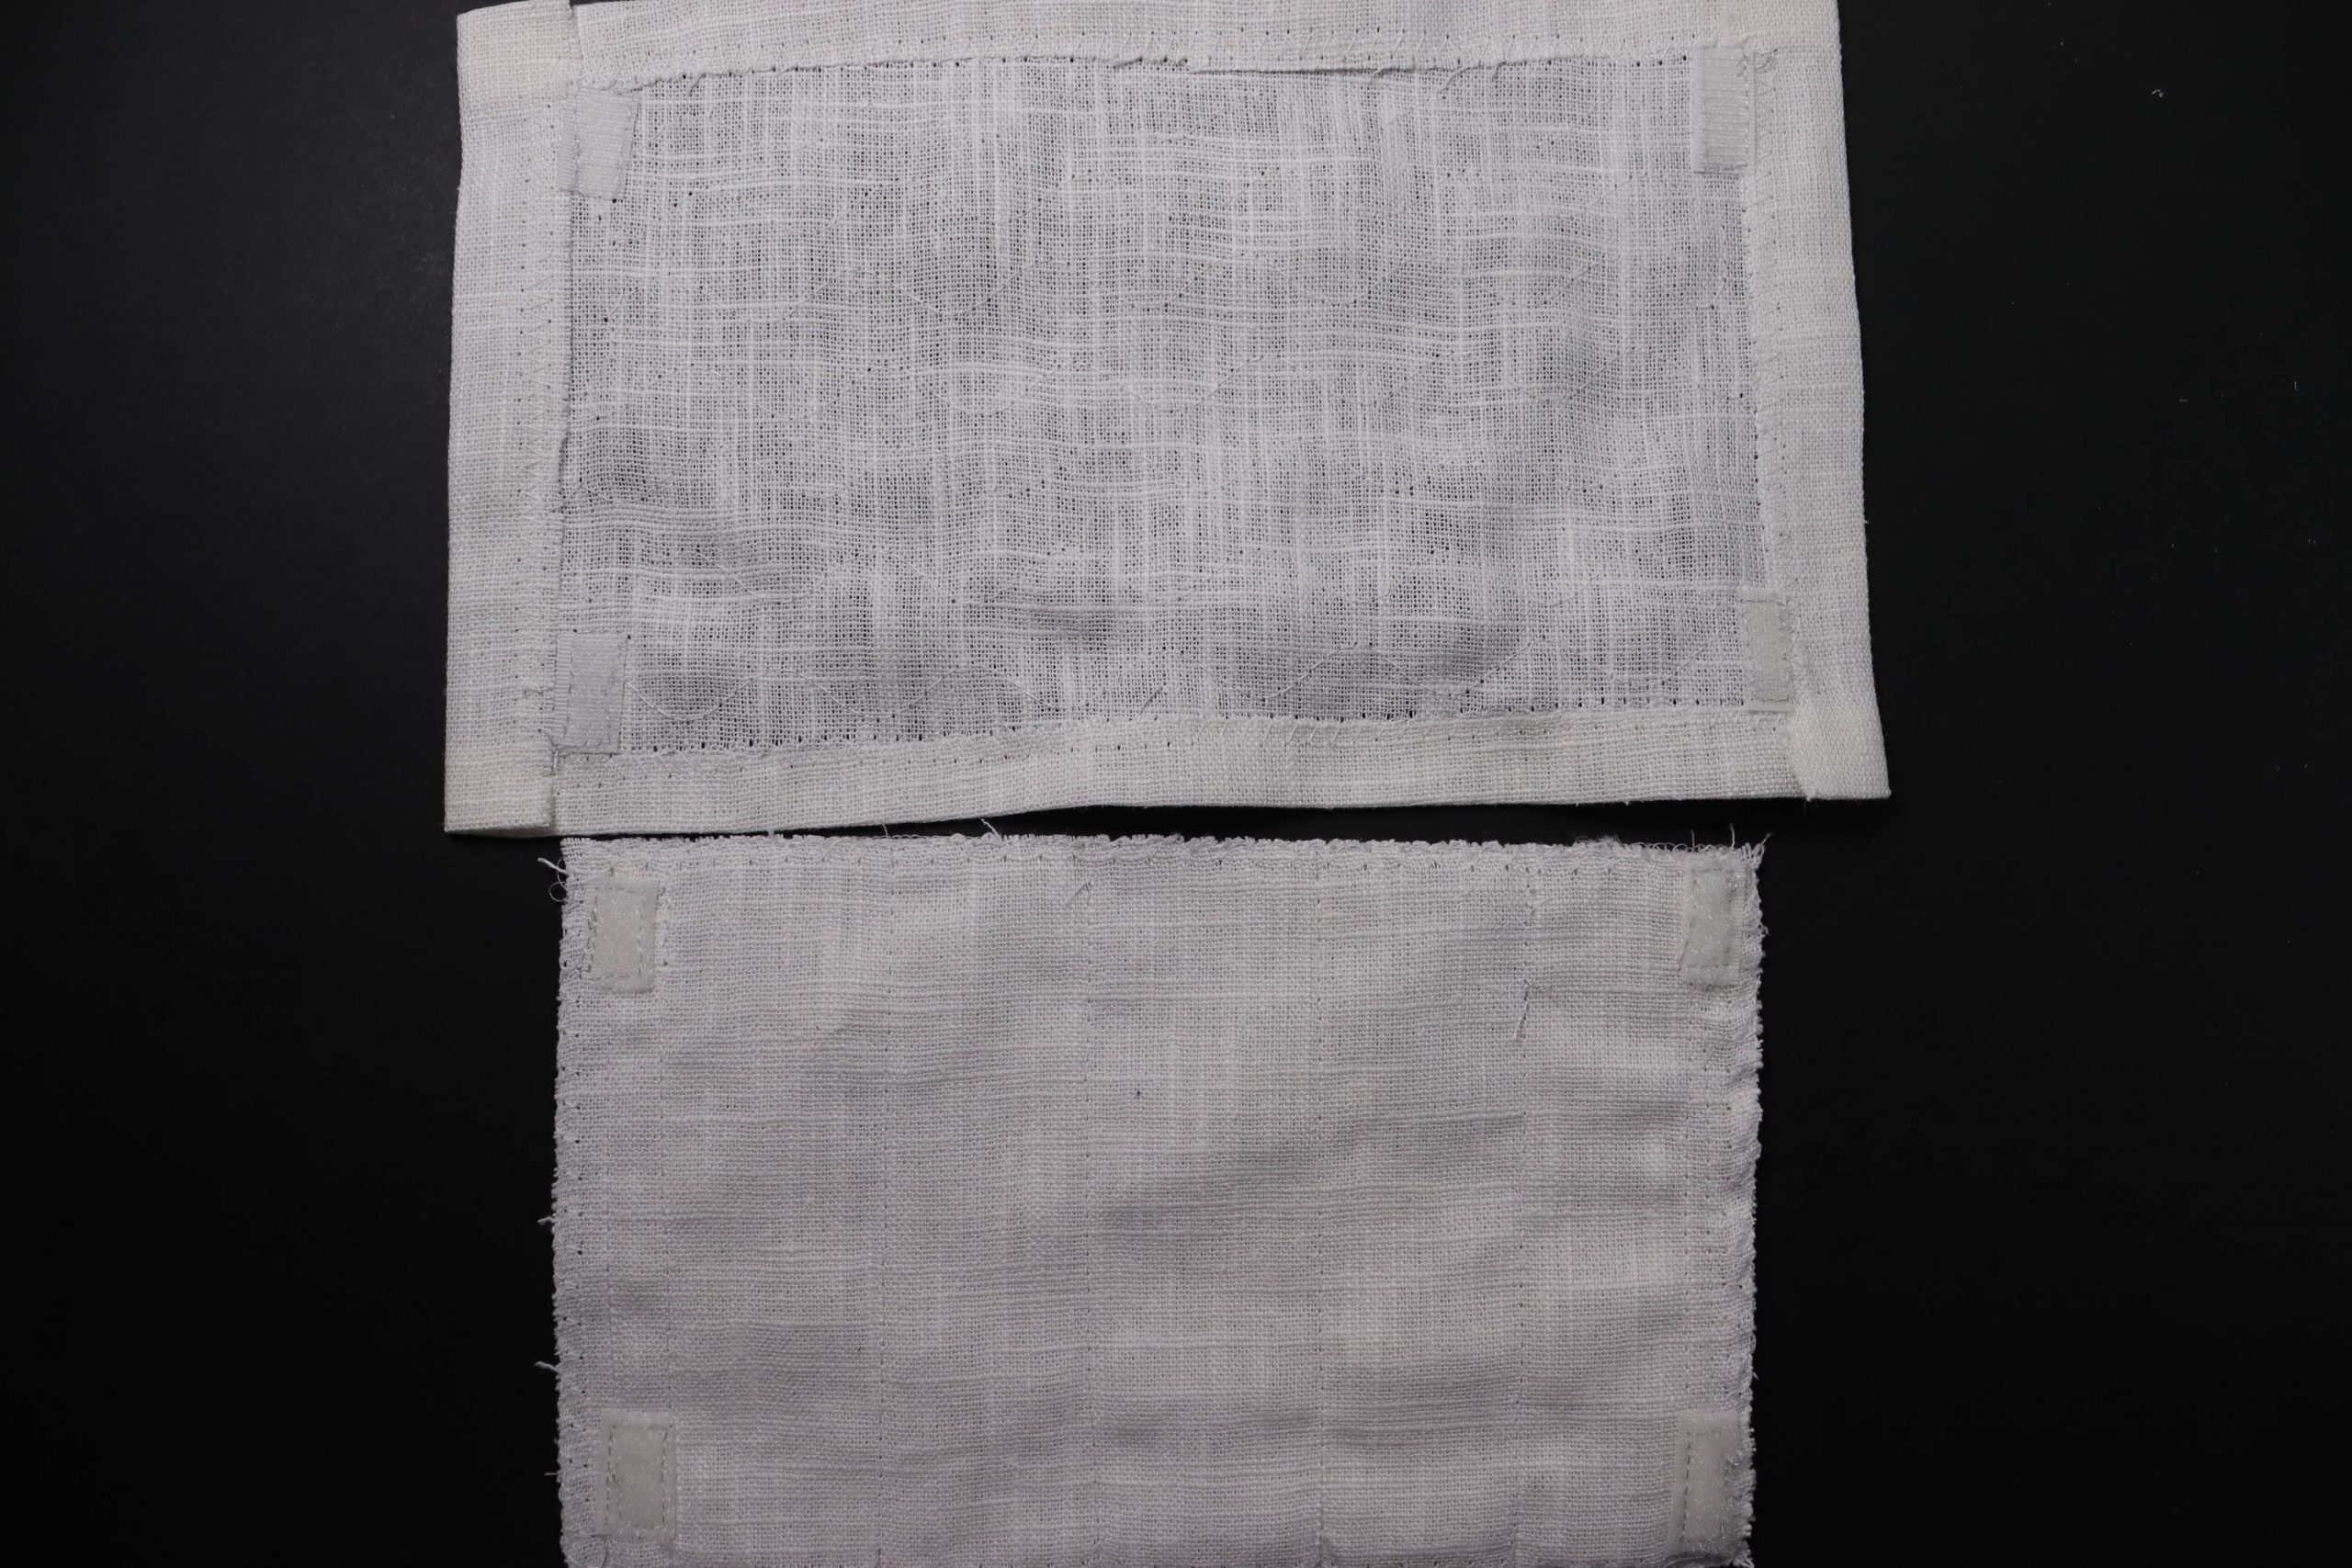
Now sew 4 loop pieces onto the back of the corners on the prepared fabric pieces for the light string. Then position the four hook pieces at the four corners on the inside of the outer fabric. They should be approx. 1 cm away from the top and bottom, and approx. 2 cm from the right and left edges.
Admittedly you can’t see the Velco fastening so well on this white linen but you have the written instructions to follow.
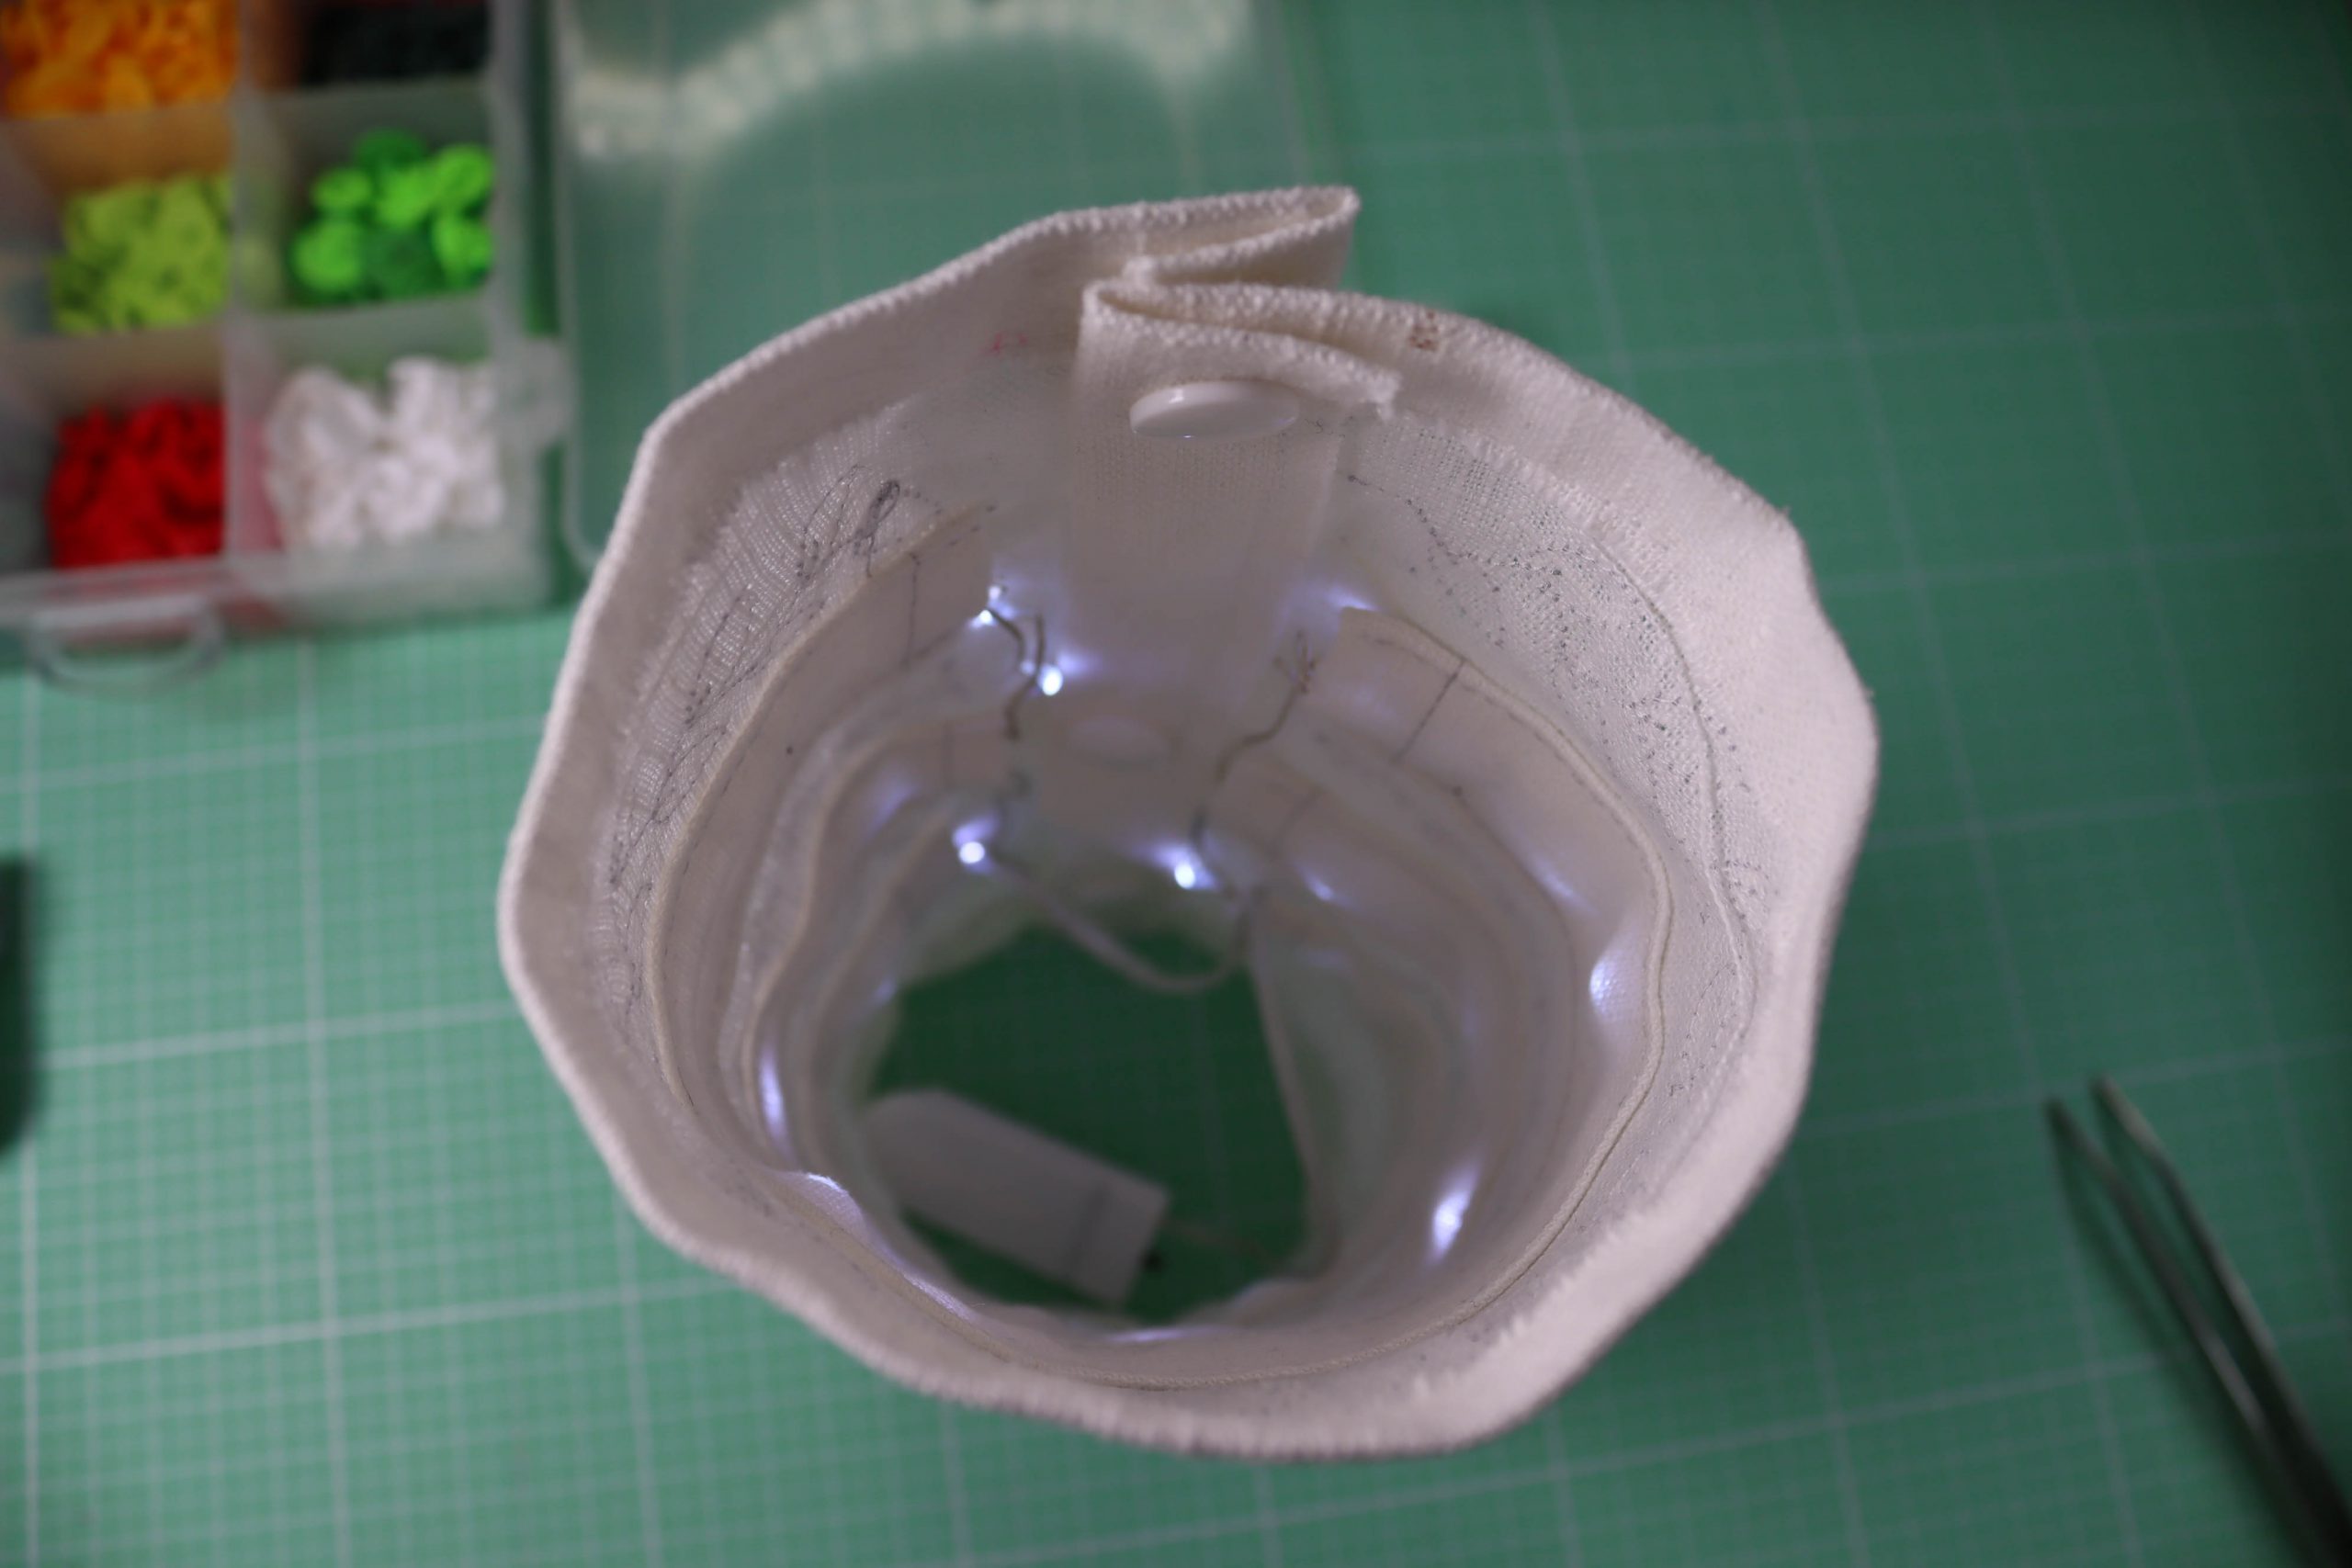
LED mini light string
After preparing the two fabric pieces, it’s time to thread in the light string. Only once you’ve done that should the two pieces be joined together with the Velcro fastenings.
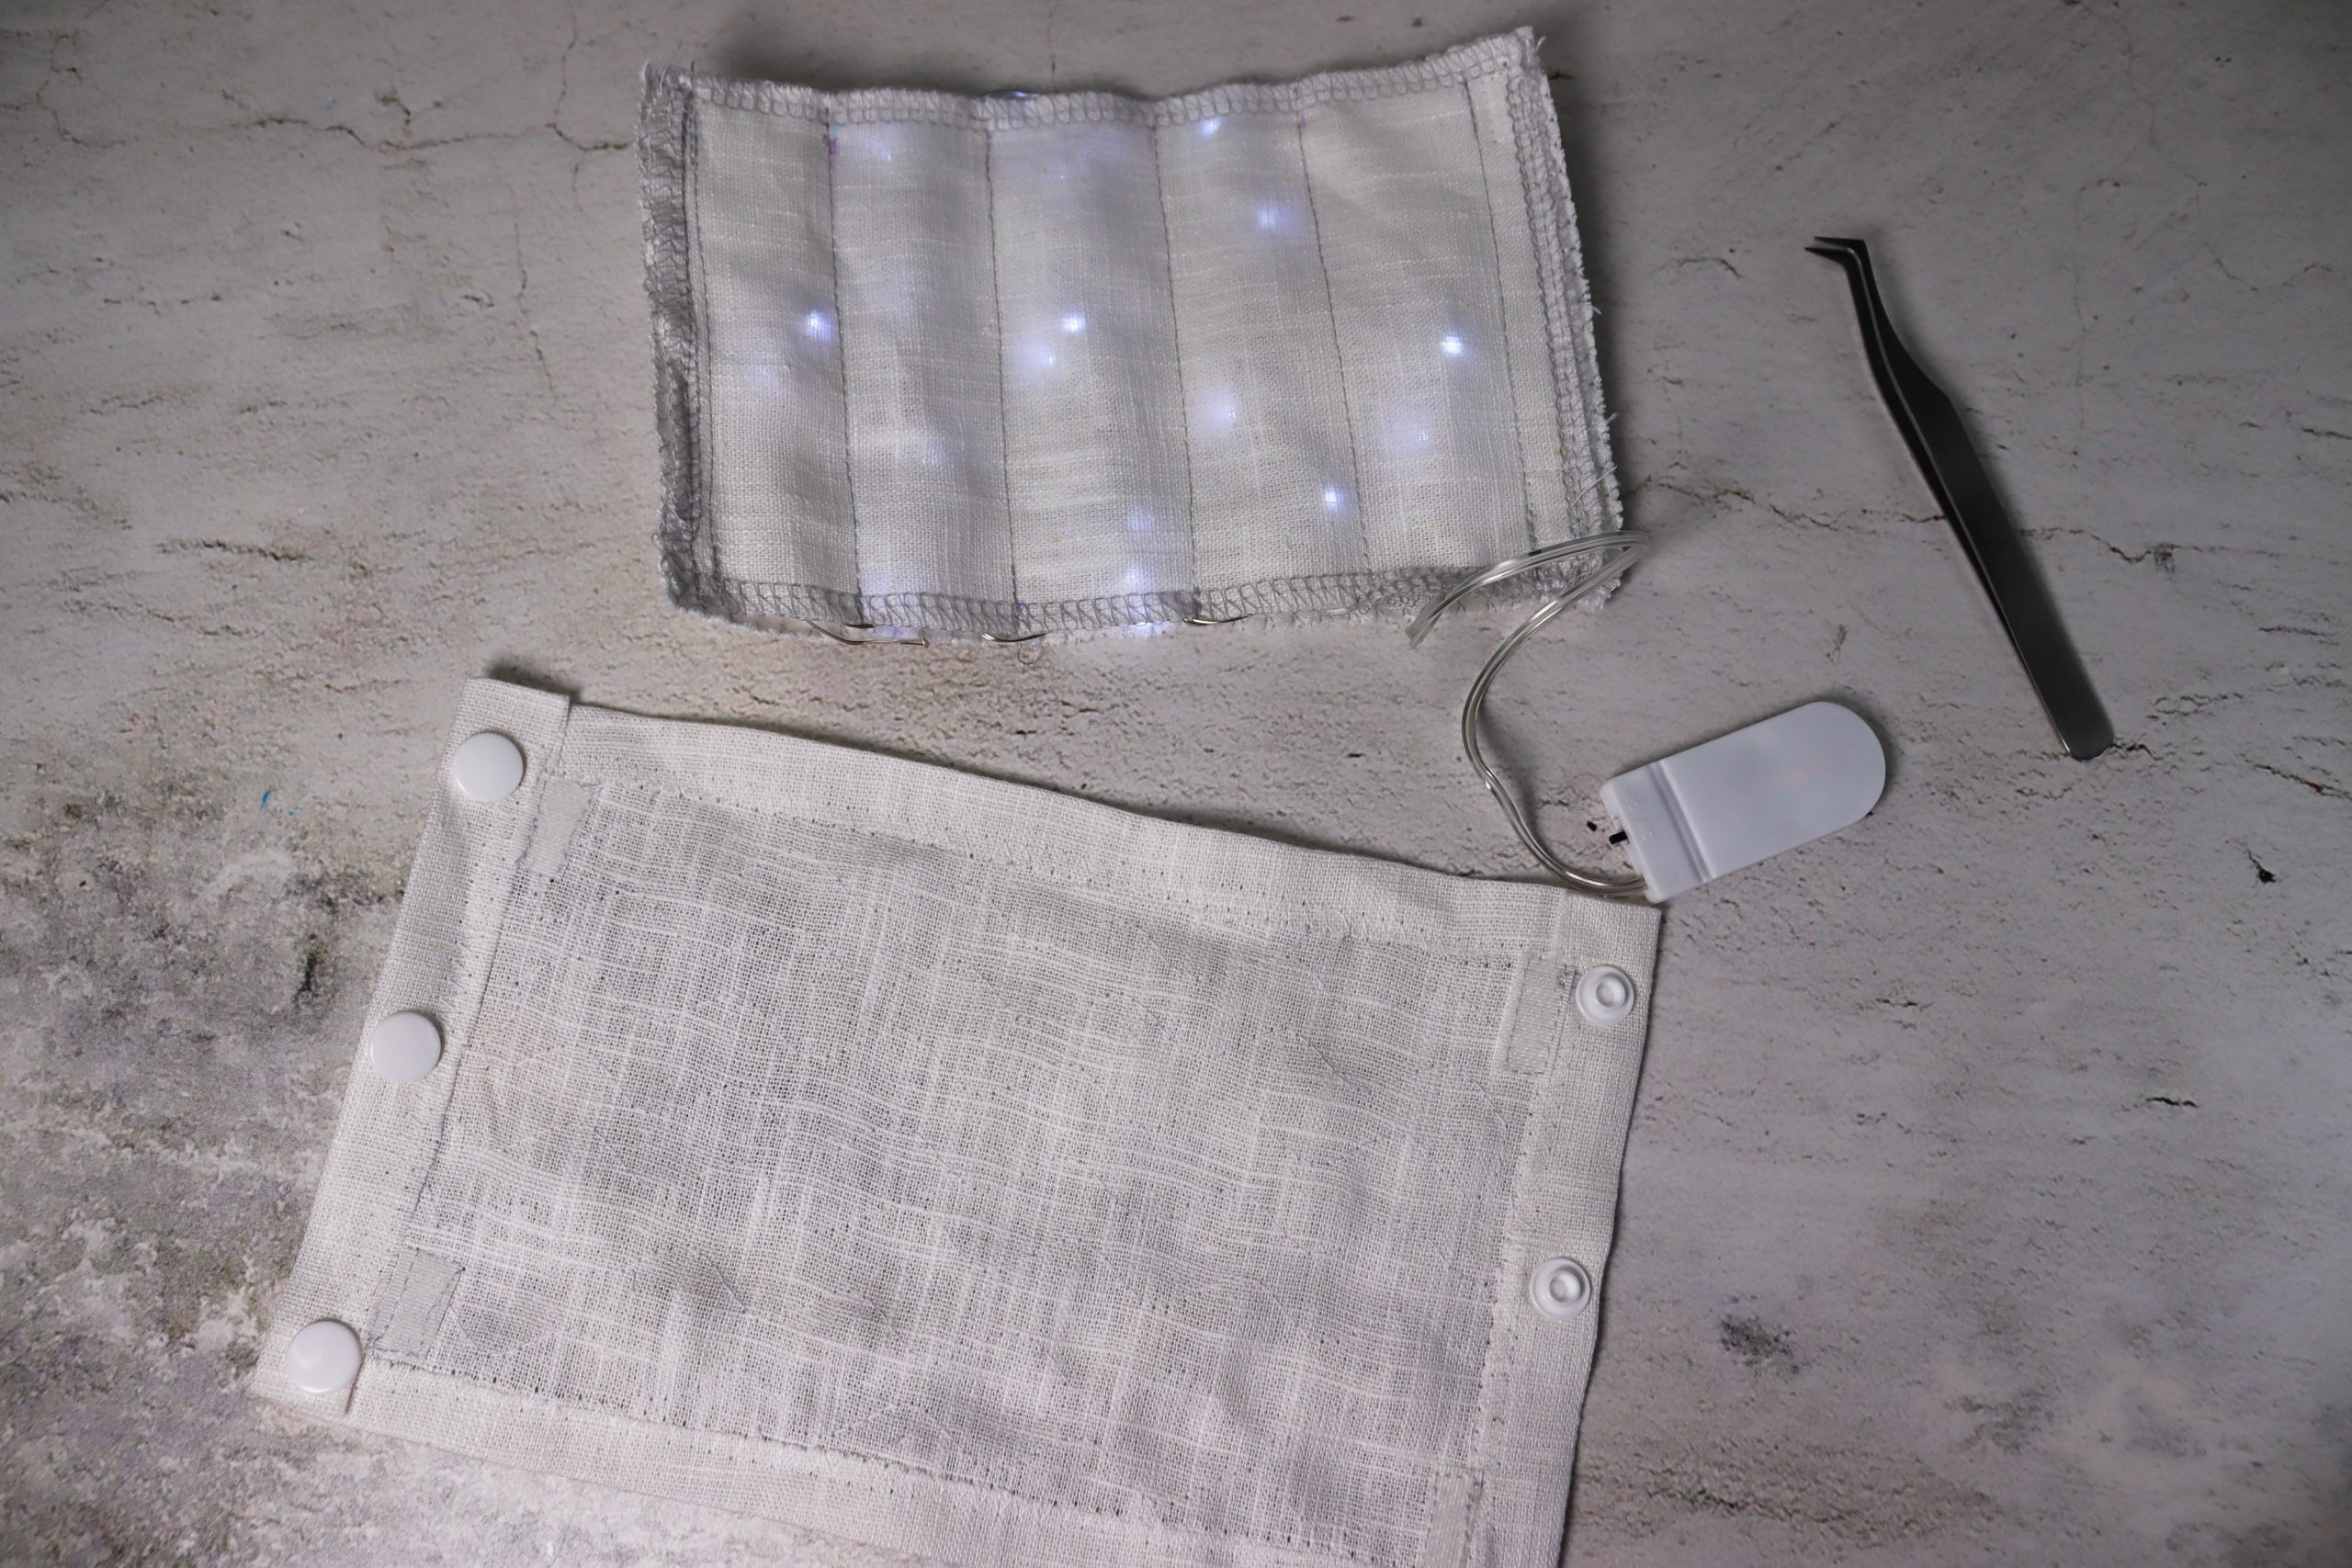
Here, snap fasteners are again attached at the sides of the long edges. Make sure they are attached so that the light cover overlaps when it is closed.

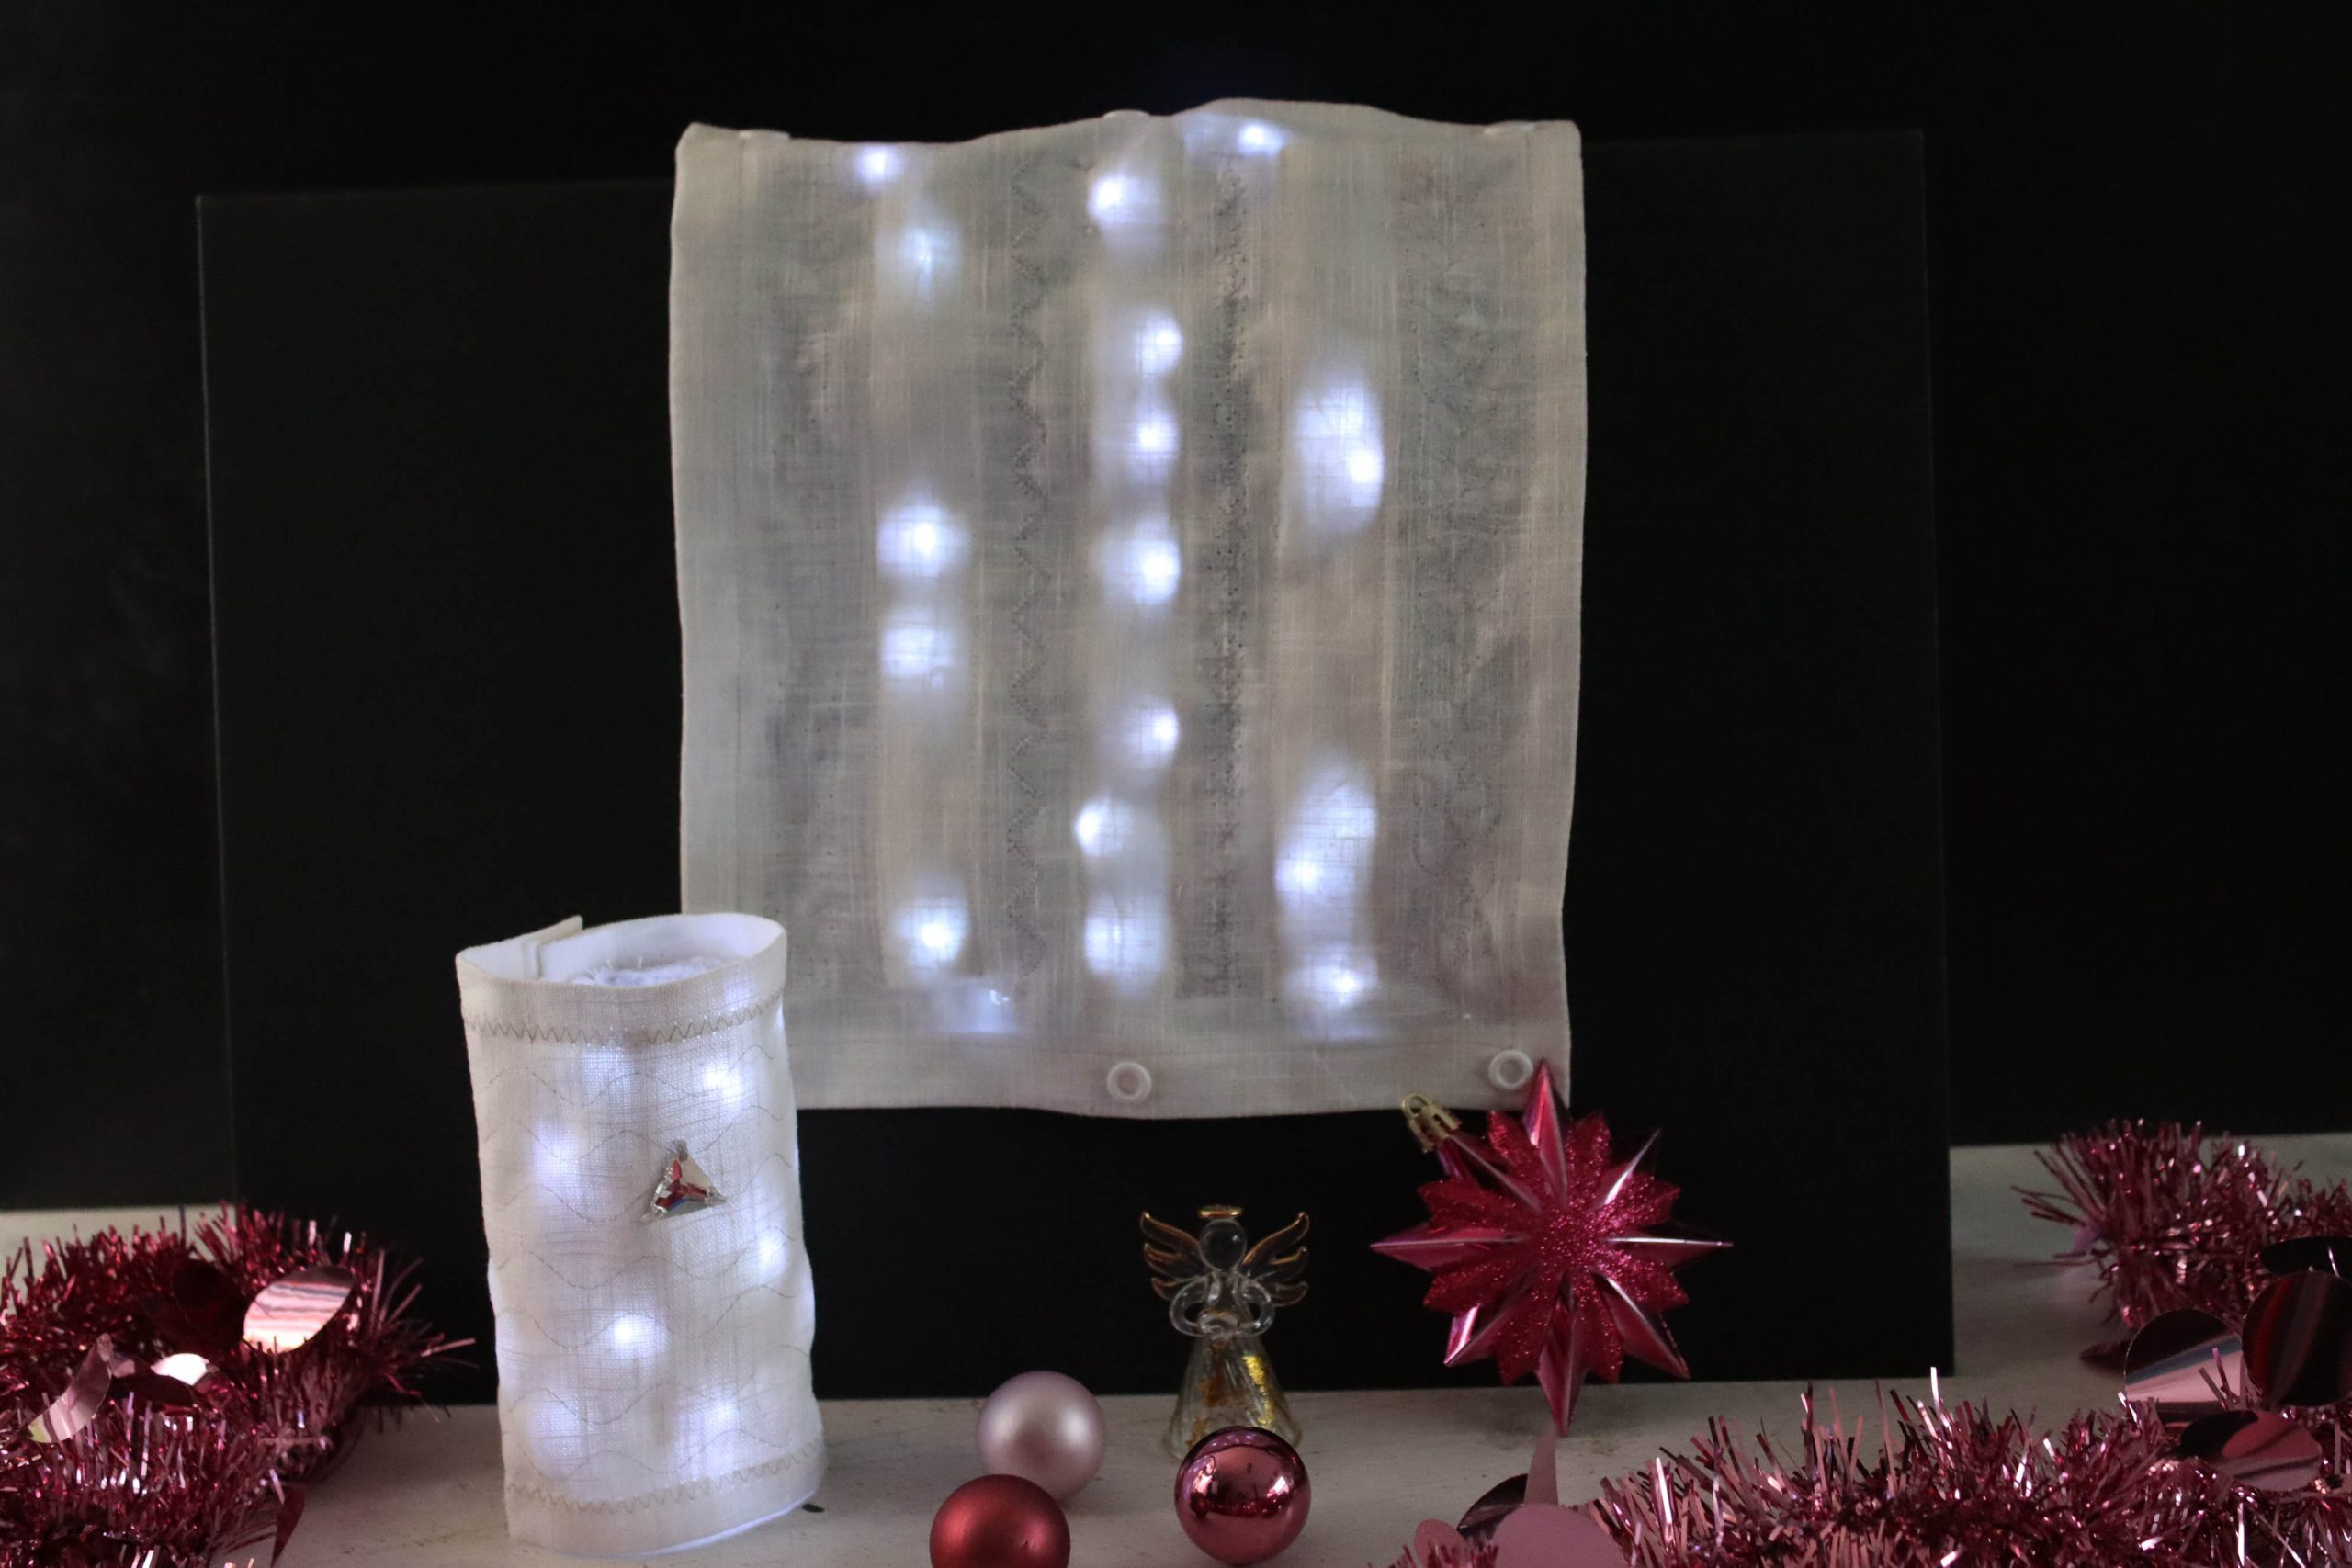
Time to shine!
The two sewn light covers are now ready to enchant us with their beautiful light, not just in the Advent season.

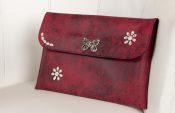
Finally, I sewed a sparkling crystal onto the small light cover to make it shine even more.
These gorgeous Swarovski crystals can be found in the Inspiration Kit, an accessory box accompanying the new BERNINA 590 Crystal Edition and BERNINA 790 PLUS Crystal Edition.

I positioned the crystal in the middle top third of the outer fabric. I fixed the little crystal in place with a drop of adhesive to stop it from slipping when it was being sewn on.

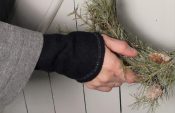
Sewing it on was easy using the Button-sew-on foot # 18 and my new magnifying lens from BERNINA’s Magnifying Lens Set.
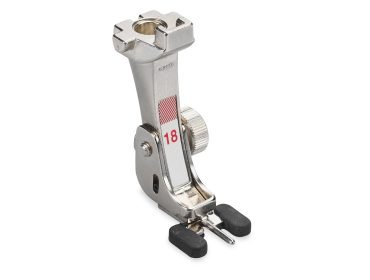

What a crisp, clear view through the magnifying lens!

The two sewn light covers are finished
If you asked me which version I liked better, I would find it difficult to answer. I would put the smaller light cover slightly ahead because it has a removable light compartment and because this version offers me slightly more decorating options.
I would be interested to know which sewn light cover is your favorite.

I wish you a happy and peaceful Advent. Good health and have lots of fun with my light covers.
Warm wishes,
Katharina RaabArt


0 Responses