 BERNINA Corporate Blog -

Welcome to the Kaffe Hat Box Quilt-Along. Today we start with a piece of the background.
Structure of the Kaffe Hat Box Quilt-Along
We will share new parts of the Quilt-Along here on the blog regularly. If you missed any part, don’t worry, you can find all available instructions here:
To all Kaffe Hat Box Quilt-Along articles
When you have finished a part of the Quilt-Along and you would like to share it with our community, you are welcome to use our Community Section. By the way, you can find a lot of inspriration there.
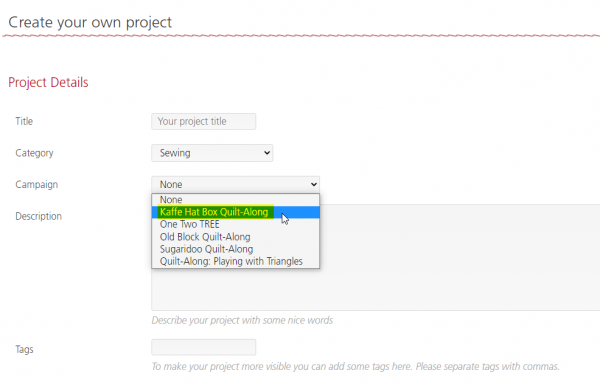
When uploading to the Community Section, make sure you select “Kaffe Hat Box Quilt-Along” in the “Campaign” drop-down list:
And if you don’t want to miss any article, you can subscribe to the newsletter and stay up to date.
Sign for the BERNINA Blog Newsletter for free
Let’s start! 
Afraid of Y Seams or do you want to learn what Y Seams are? They are not as hard as you might expect! I will show you how this is done as we piece the background of the Kaffe Hat Box Quilt.
Materials for the Kaffe Hat Box Quilt-Along
- Open Embroidery Foot #20
- Patchwork Foot #97
- optional: BERNINA 770 QE PLUS Kaffe Edition

Supplies for Entire Series
- 2 yards Ultra Clean & Tear Stabilizer
- optional:
- Fusible Woven
- Mettler Silk Wrapped Finish 50 wt Cotton Thread
- Mettler Poly Sheen Thread – purple and orange
- 36” square batting
- Plastic template
- Temporary Marker
- Quilting Ruler with 45 degree mark
- Rotary Cutter
- Scissors
Download the free templates for the Kaffe Hat Box Quilt-Along here:
Steps to make the Kaffe Hat Box Quilt
1. Quilt Block Background – Y Seams
Place the side wall and floor pieces right sides together so you have 4 sets. The floor pieces should be on top. Mark a dot 1/4” inside each corner.

Attach BERNINA Patchwork Foot #97D. Do you use the attachable seam guide? It’s a great option! Thread machine with Mettler Silk Finish Cotton thread. Align the fabric edge with the right edge of the foot. Use your Freehand System to help with exact placement.

2. Sewing along the raw edge
First, secure the start of your seam with a backstitch, then sew a 1/4” seam allowance along the raw edge slowing down as you near the marked dot. Your goal is to finish the last stitch on that dot. When the needle is in the dot, do a backstitch. Cut threads. Do same for other 3 sets.

Carefully press seams open. These are bias edges that stretch so do not move iron over fabric. Gently press.
![]()
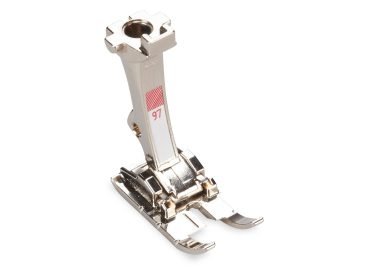
3. BERNINA Patchwork Foot #97D
The BERNINA Patchwork Feet have notches saving you the time of marking fabric. Pictured below is Patchwork Foot #97. There are 3 notches on the left toe. The first one (see arrow below) is 1/4” in front of the needle; the middle one is aligned with the needle; the last one is 1/4” behind the needle. You will use the first notch to find your stopping point.
4. Engage Needle Stop Up/Down
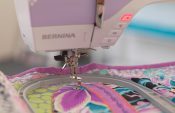
Engage Needle Stop Up/Down so the needle stops in the down position. Find your back wall fabric square. Place the back wall fabric on top of side wall fabric right sides together. Align raw edges and sew 1/4” seam allowance. Stop 1/4” from the end which is when you get to the first notch on the left toe.

With the needle down, raise the foot and check placement. Ideally, the needle should be in the seam line of the mitered corner.

This is the tricky part. With the needle down and the foot still raised, move the fabric clockwise so the floor fabric (triangle print) is aligned with the 1/4” mark on the stitch plate.
5. Carefully place back wall fabric
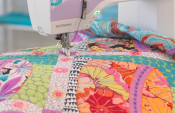
Then, carefully place back wall fabric (green dots) over floor fabric so raw edges are even. Sew your 1/4” seam allowance to bottom.

Carefully press seams to one side as pictured below. What a beautiful Y seam! Now finish the other background blocks.

Finished block size is 12 1/2” x 12 1/2”.

What’s next?
Next week get ready for machine applique and decorative stitches! We’re going to have tons of fun with thread color and new Kaffe stitches! If you want to get a head start, play with the Kaffe stitches and discover your favorites!


0 Responses