 BERNINA Corporate Blog -
September… the 9th month of the year, are you ready for the 9th block of this Crazy Mystery project? We will make a sandwich of 32 x 32 cm for the last time (after this month other measurements will be used).
You can download the pattern for the Crazy Patchwork here: LEFT SECTION and the RIGHT SECTION.
There are also two extra petterns, for a special ‘technique’ for block 9:
– Block 9, section 4 – paisley
– Block 9, section 5 – 2 x paisley
The paisleys for section 4 and 5 will be appliqued, and decorated with stitches. These appliqué figures are not that big: cut them from three different colors/pieces of (batik)fabric. To iron them onto the base fabric of the section, you will need Heatn’Bond Lite.

Lets get started: first download both sections for the pattern of this month.
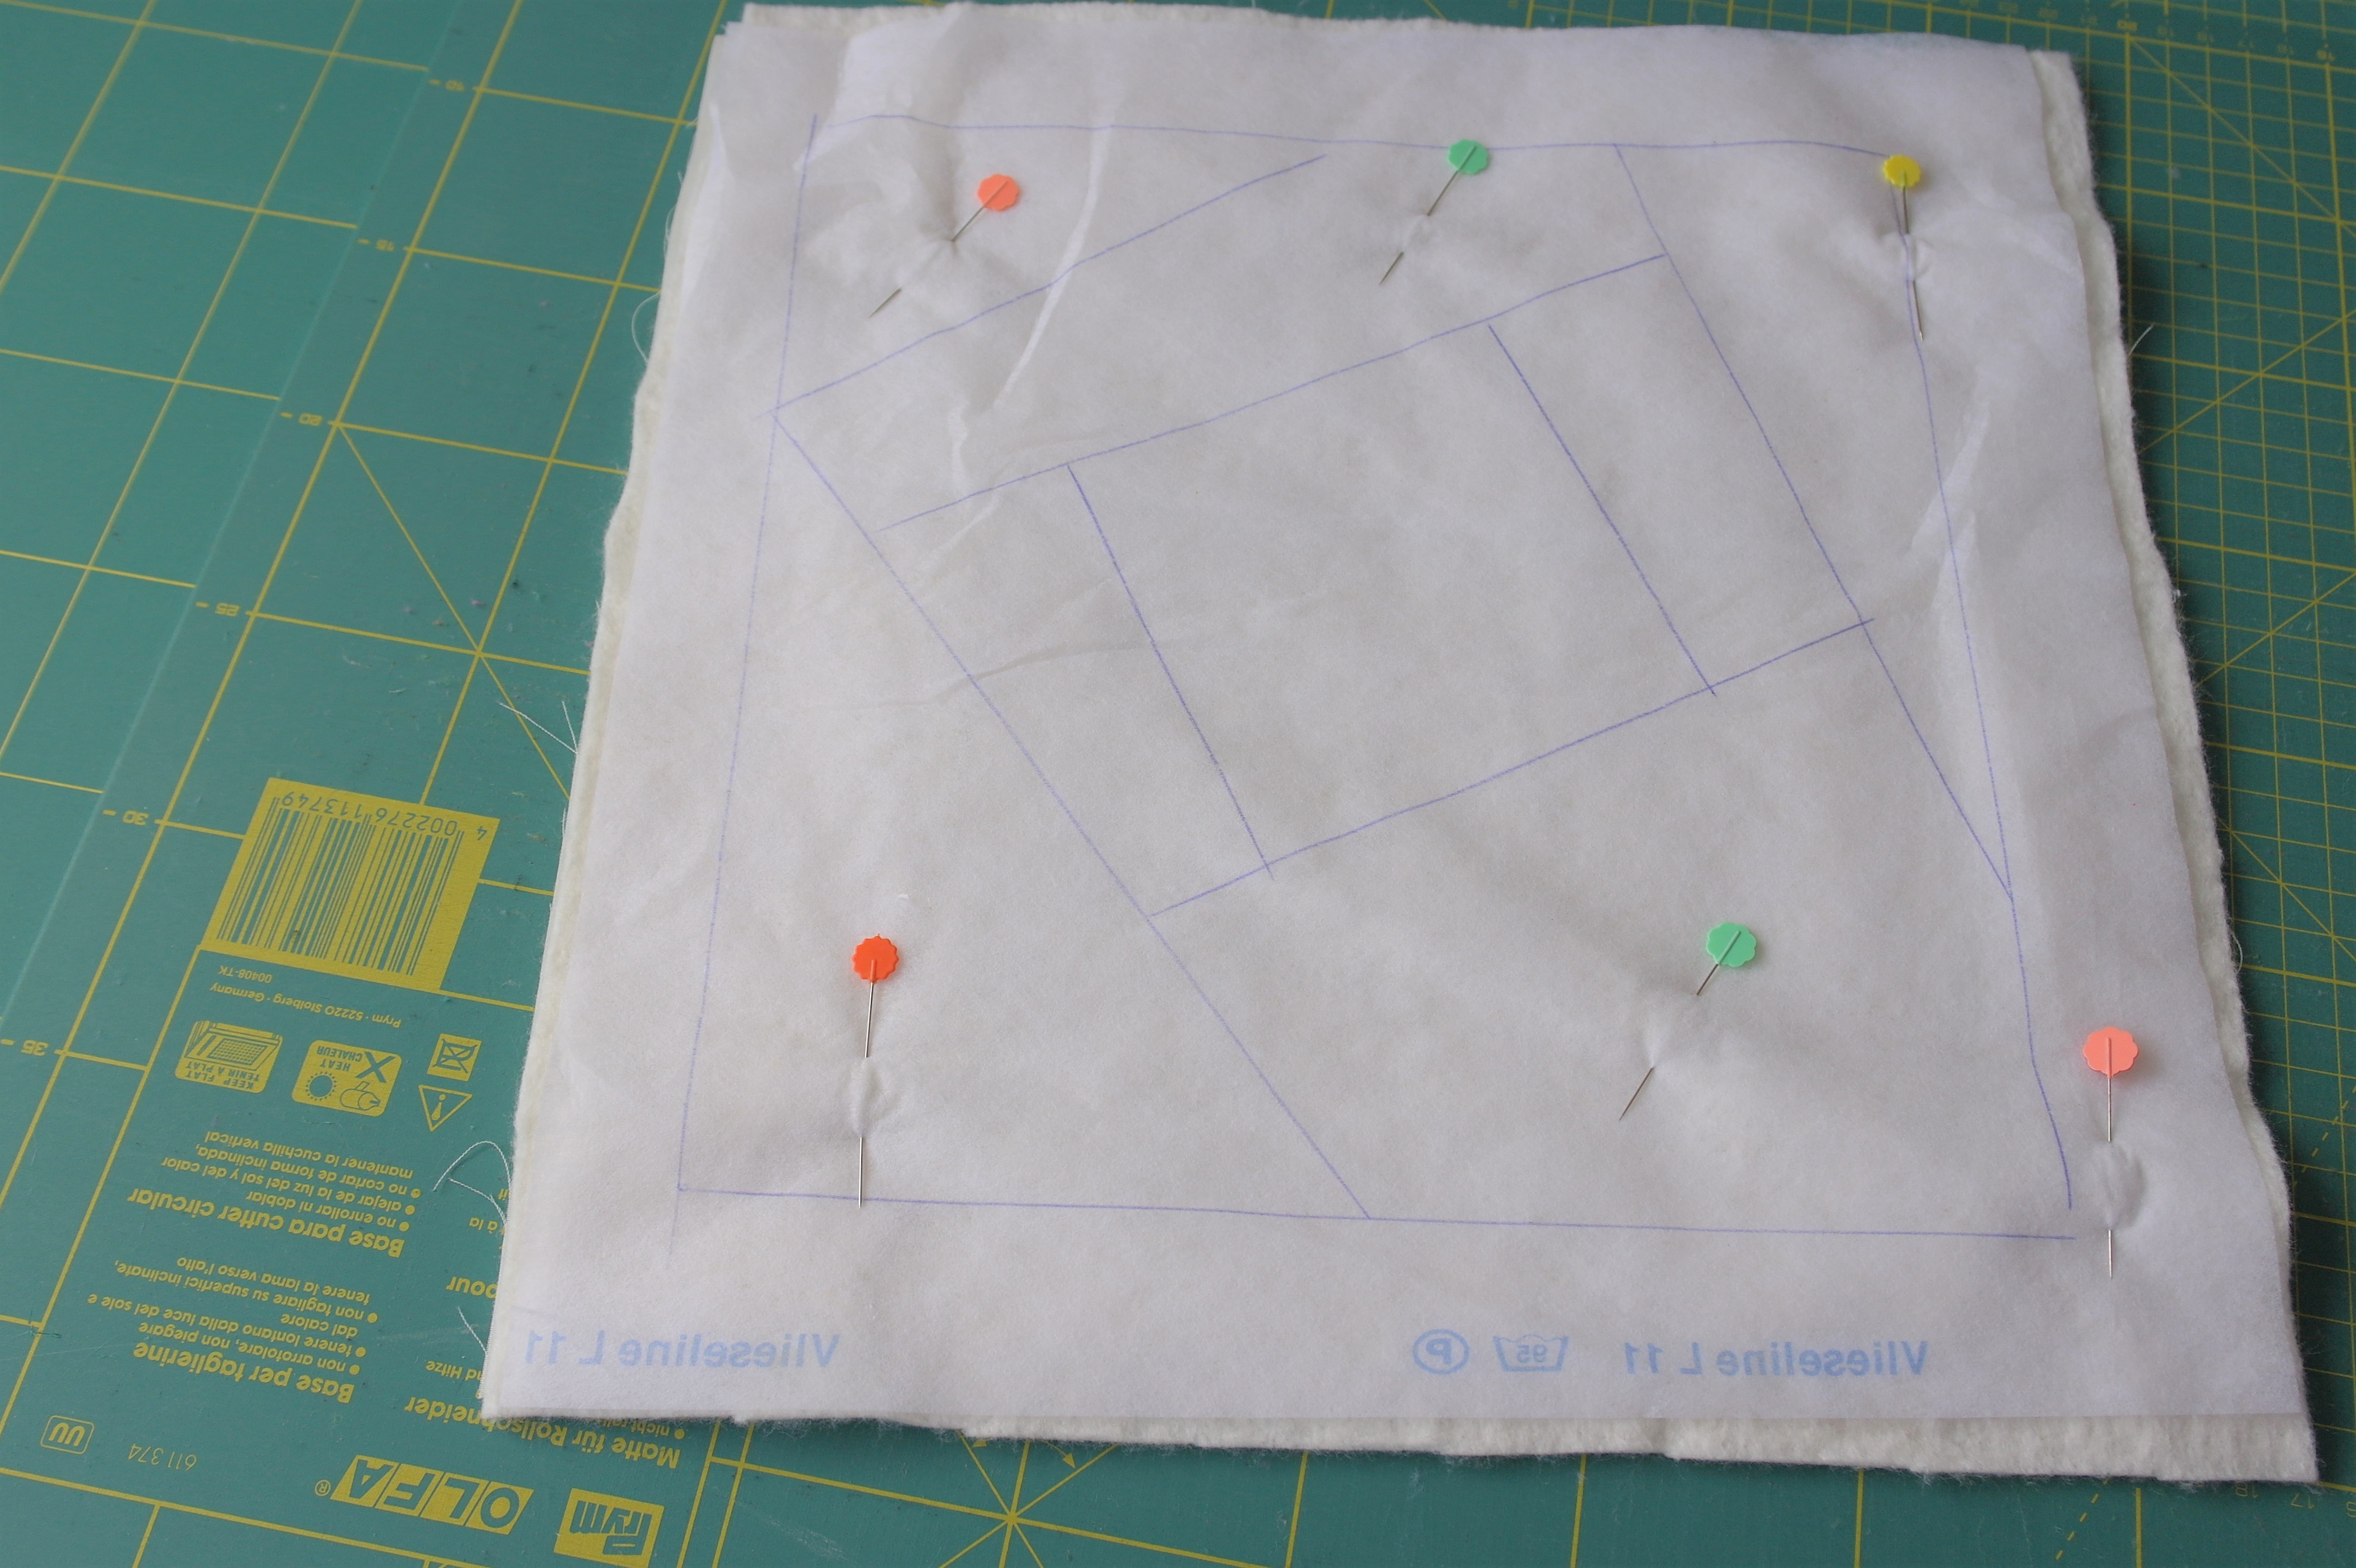
Tape both sections together to make one pattern. Draw the lines onto Vlieseline L11 of 32 x 32 cm, just like the blocks before. Make the sandwich: off-white fabric, batting (100% bamboo) and Vlieseline L11 with the lines: all at 32 x 32 cm.
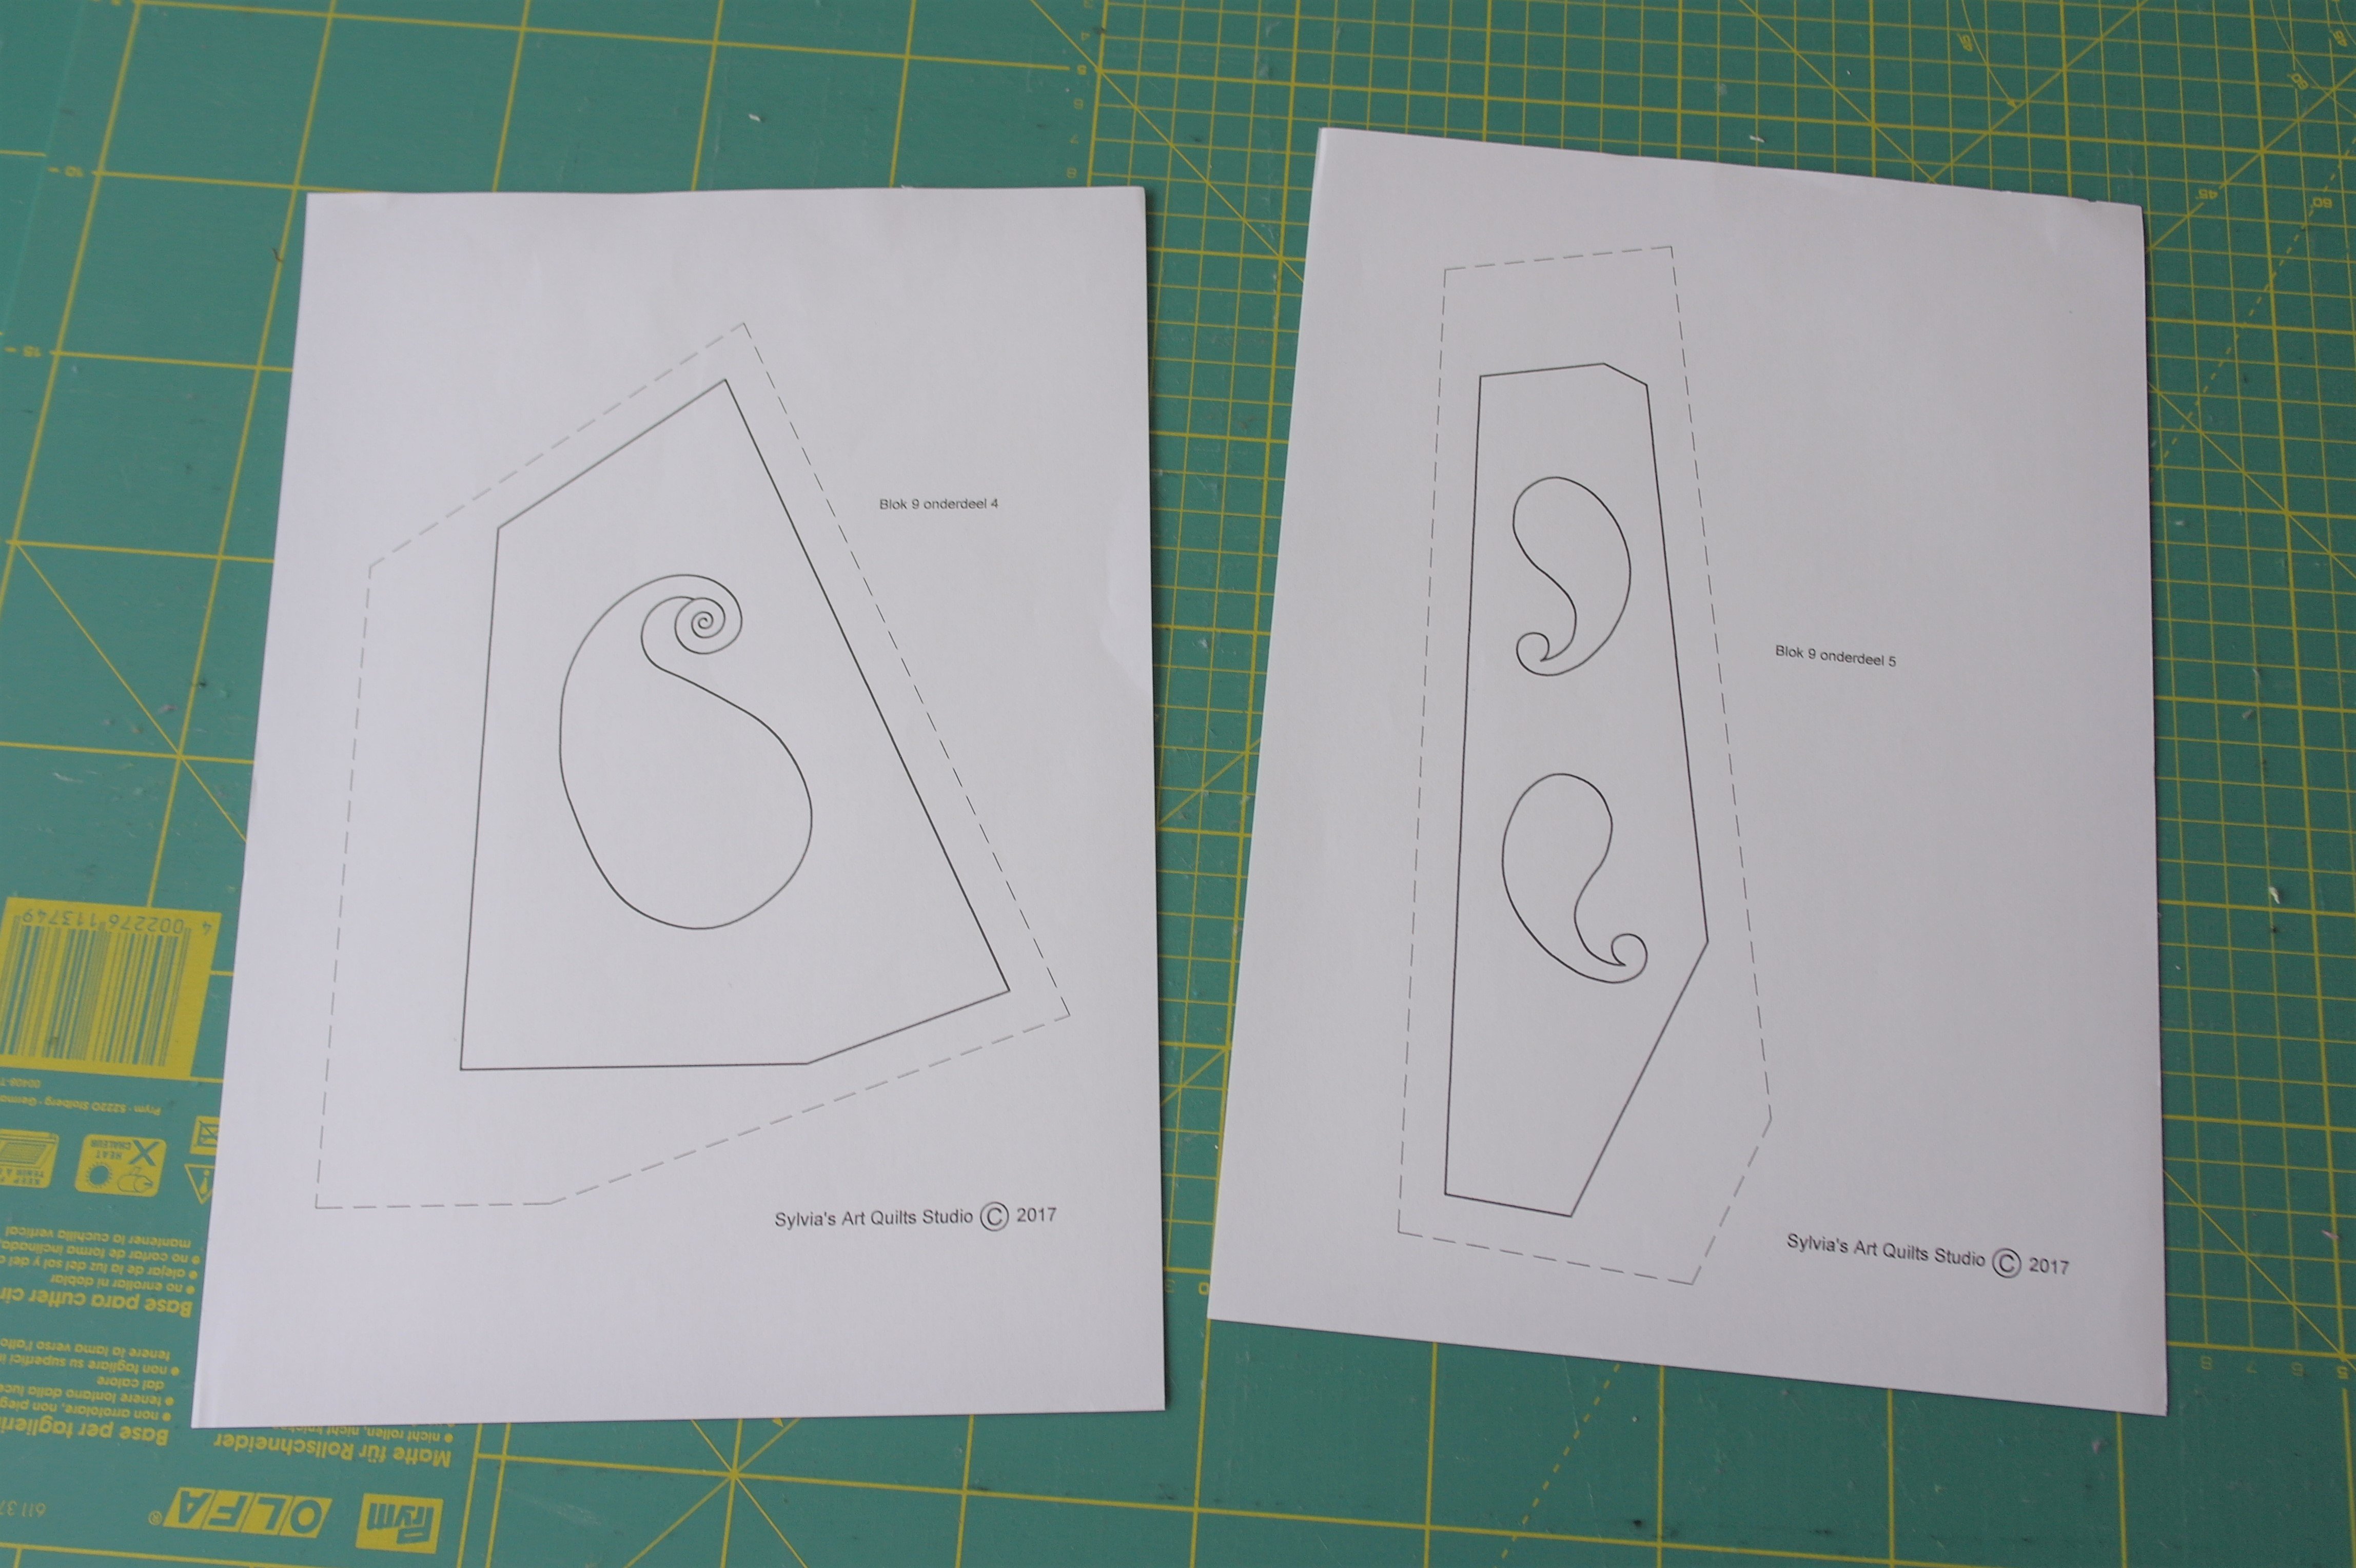
Download both extra patterns and print them,
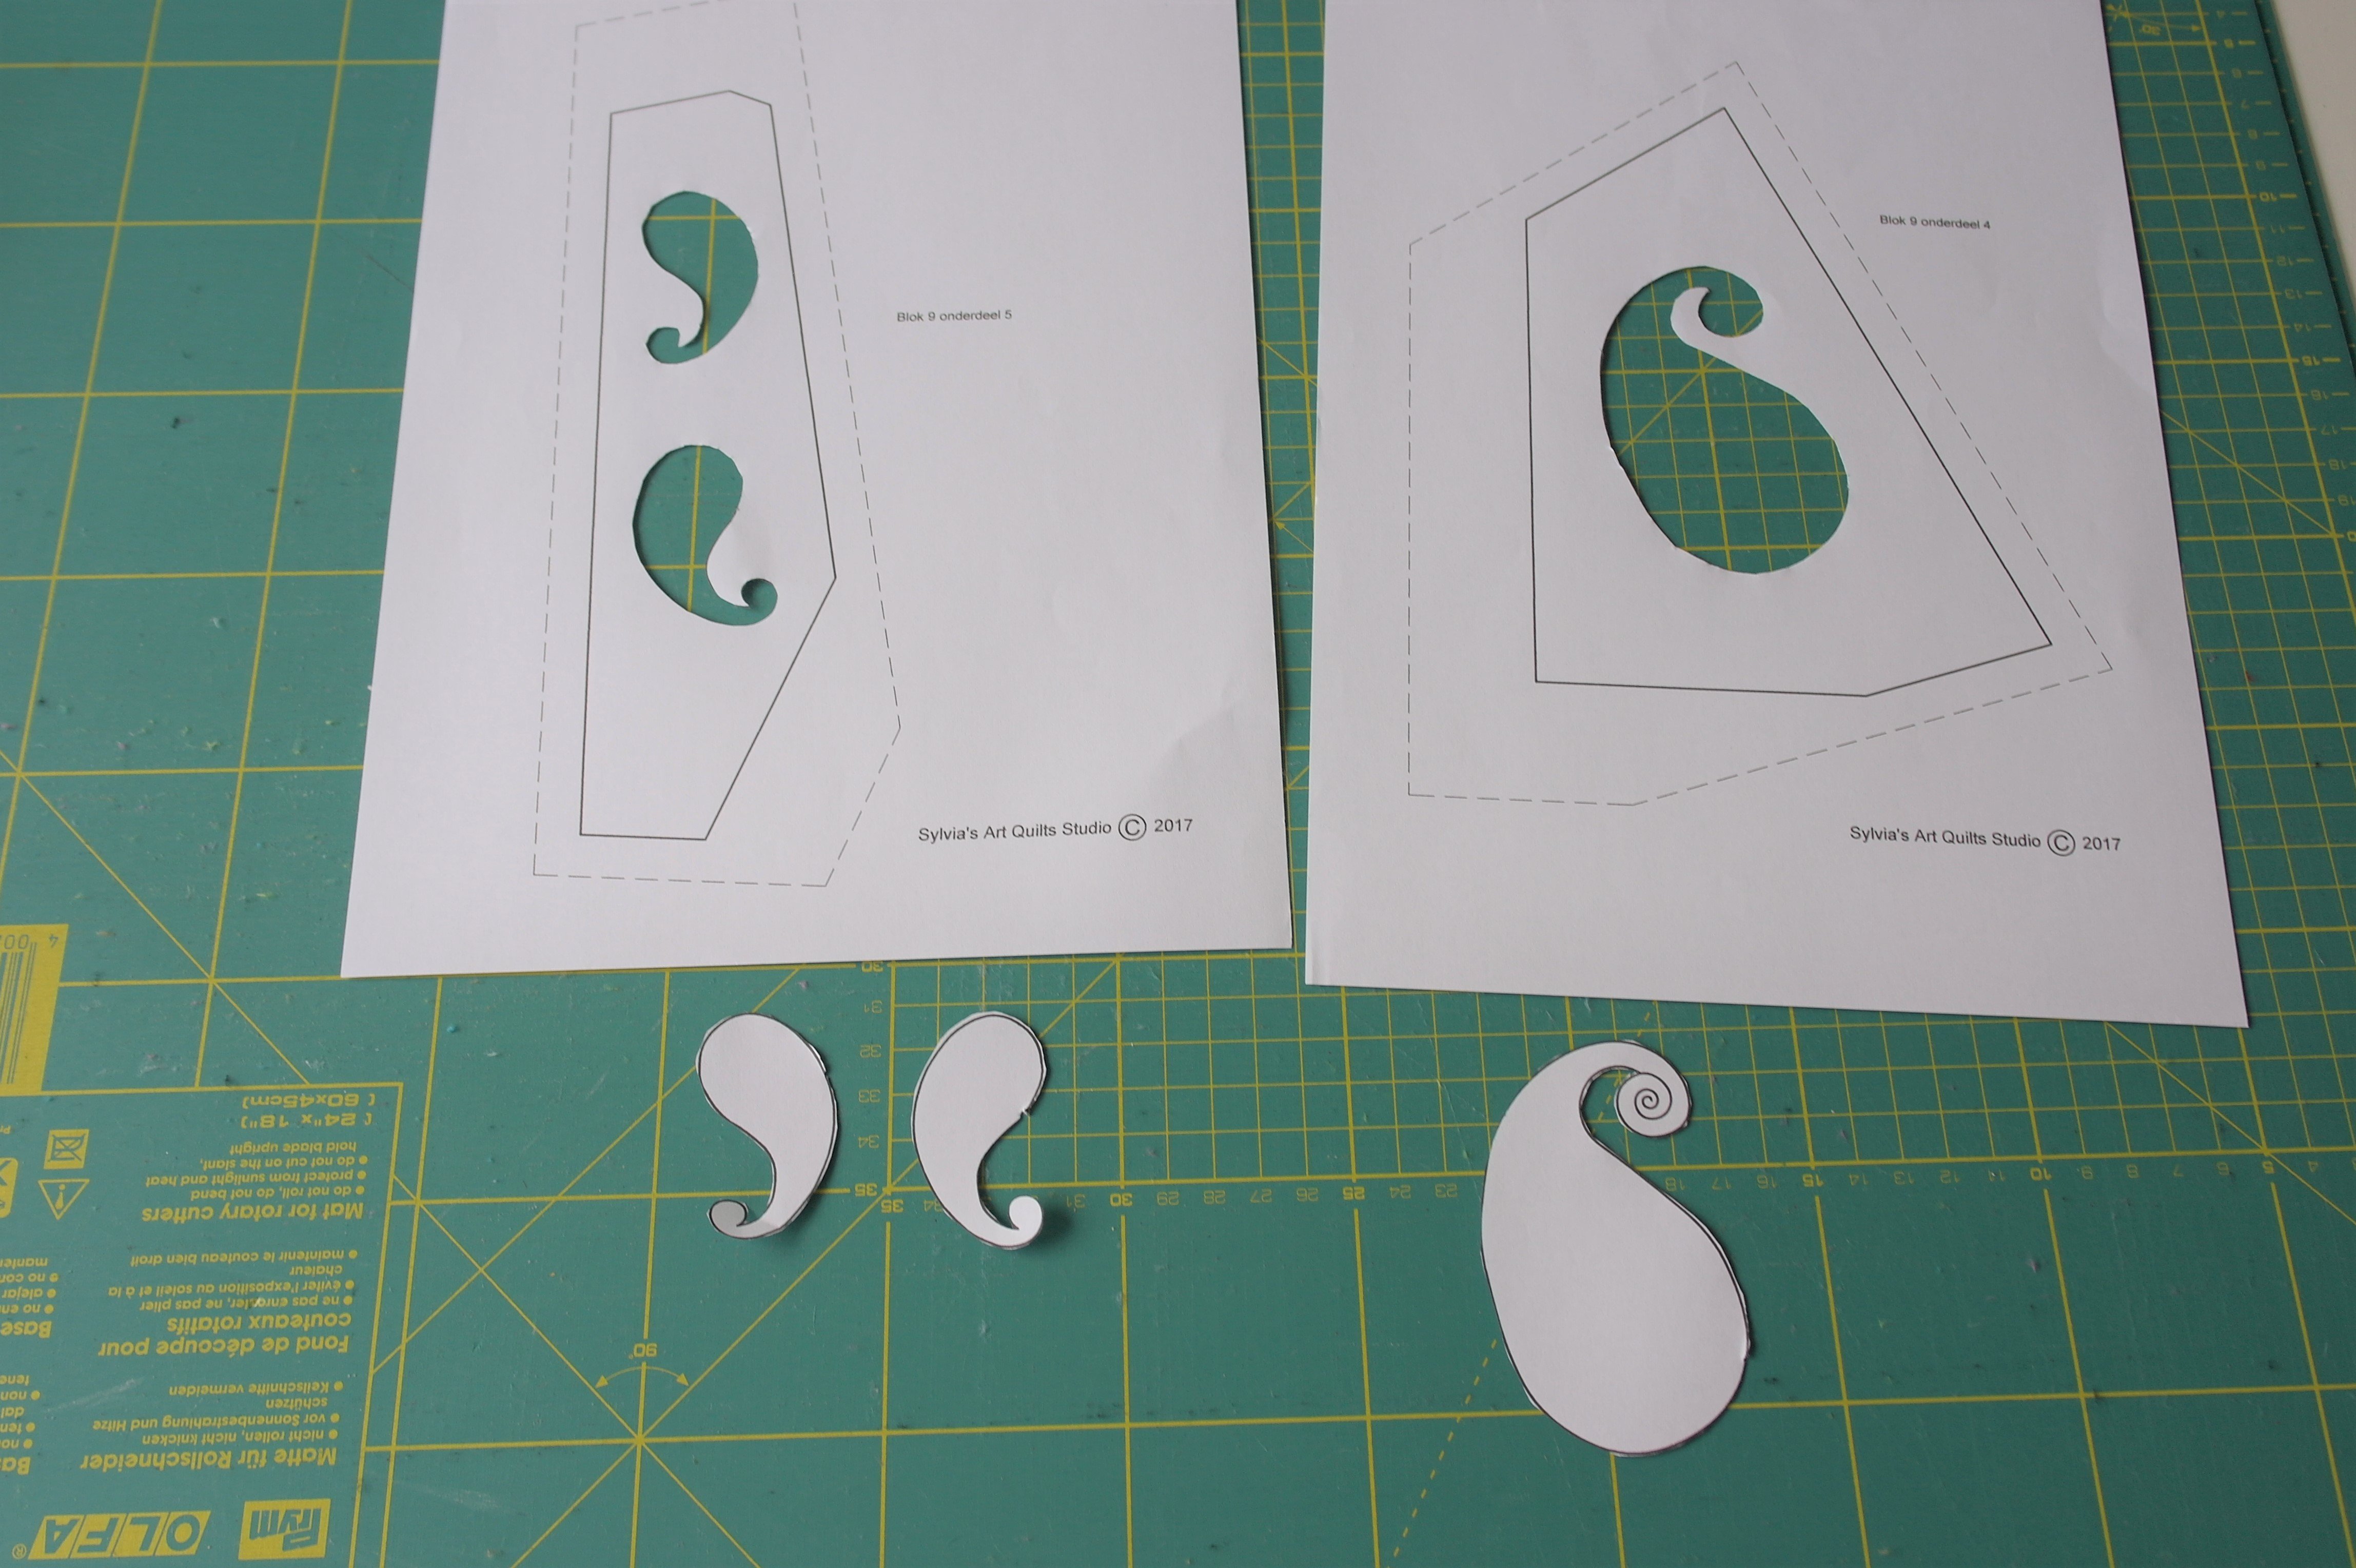
Use paper scissors, cut the three paisleys – on the solid lines – be sure to cut accurately. There will be openings in the pattern pieces.
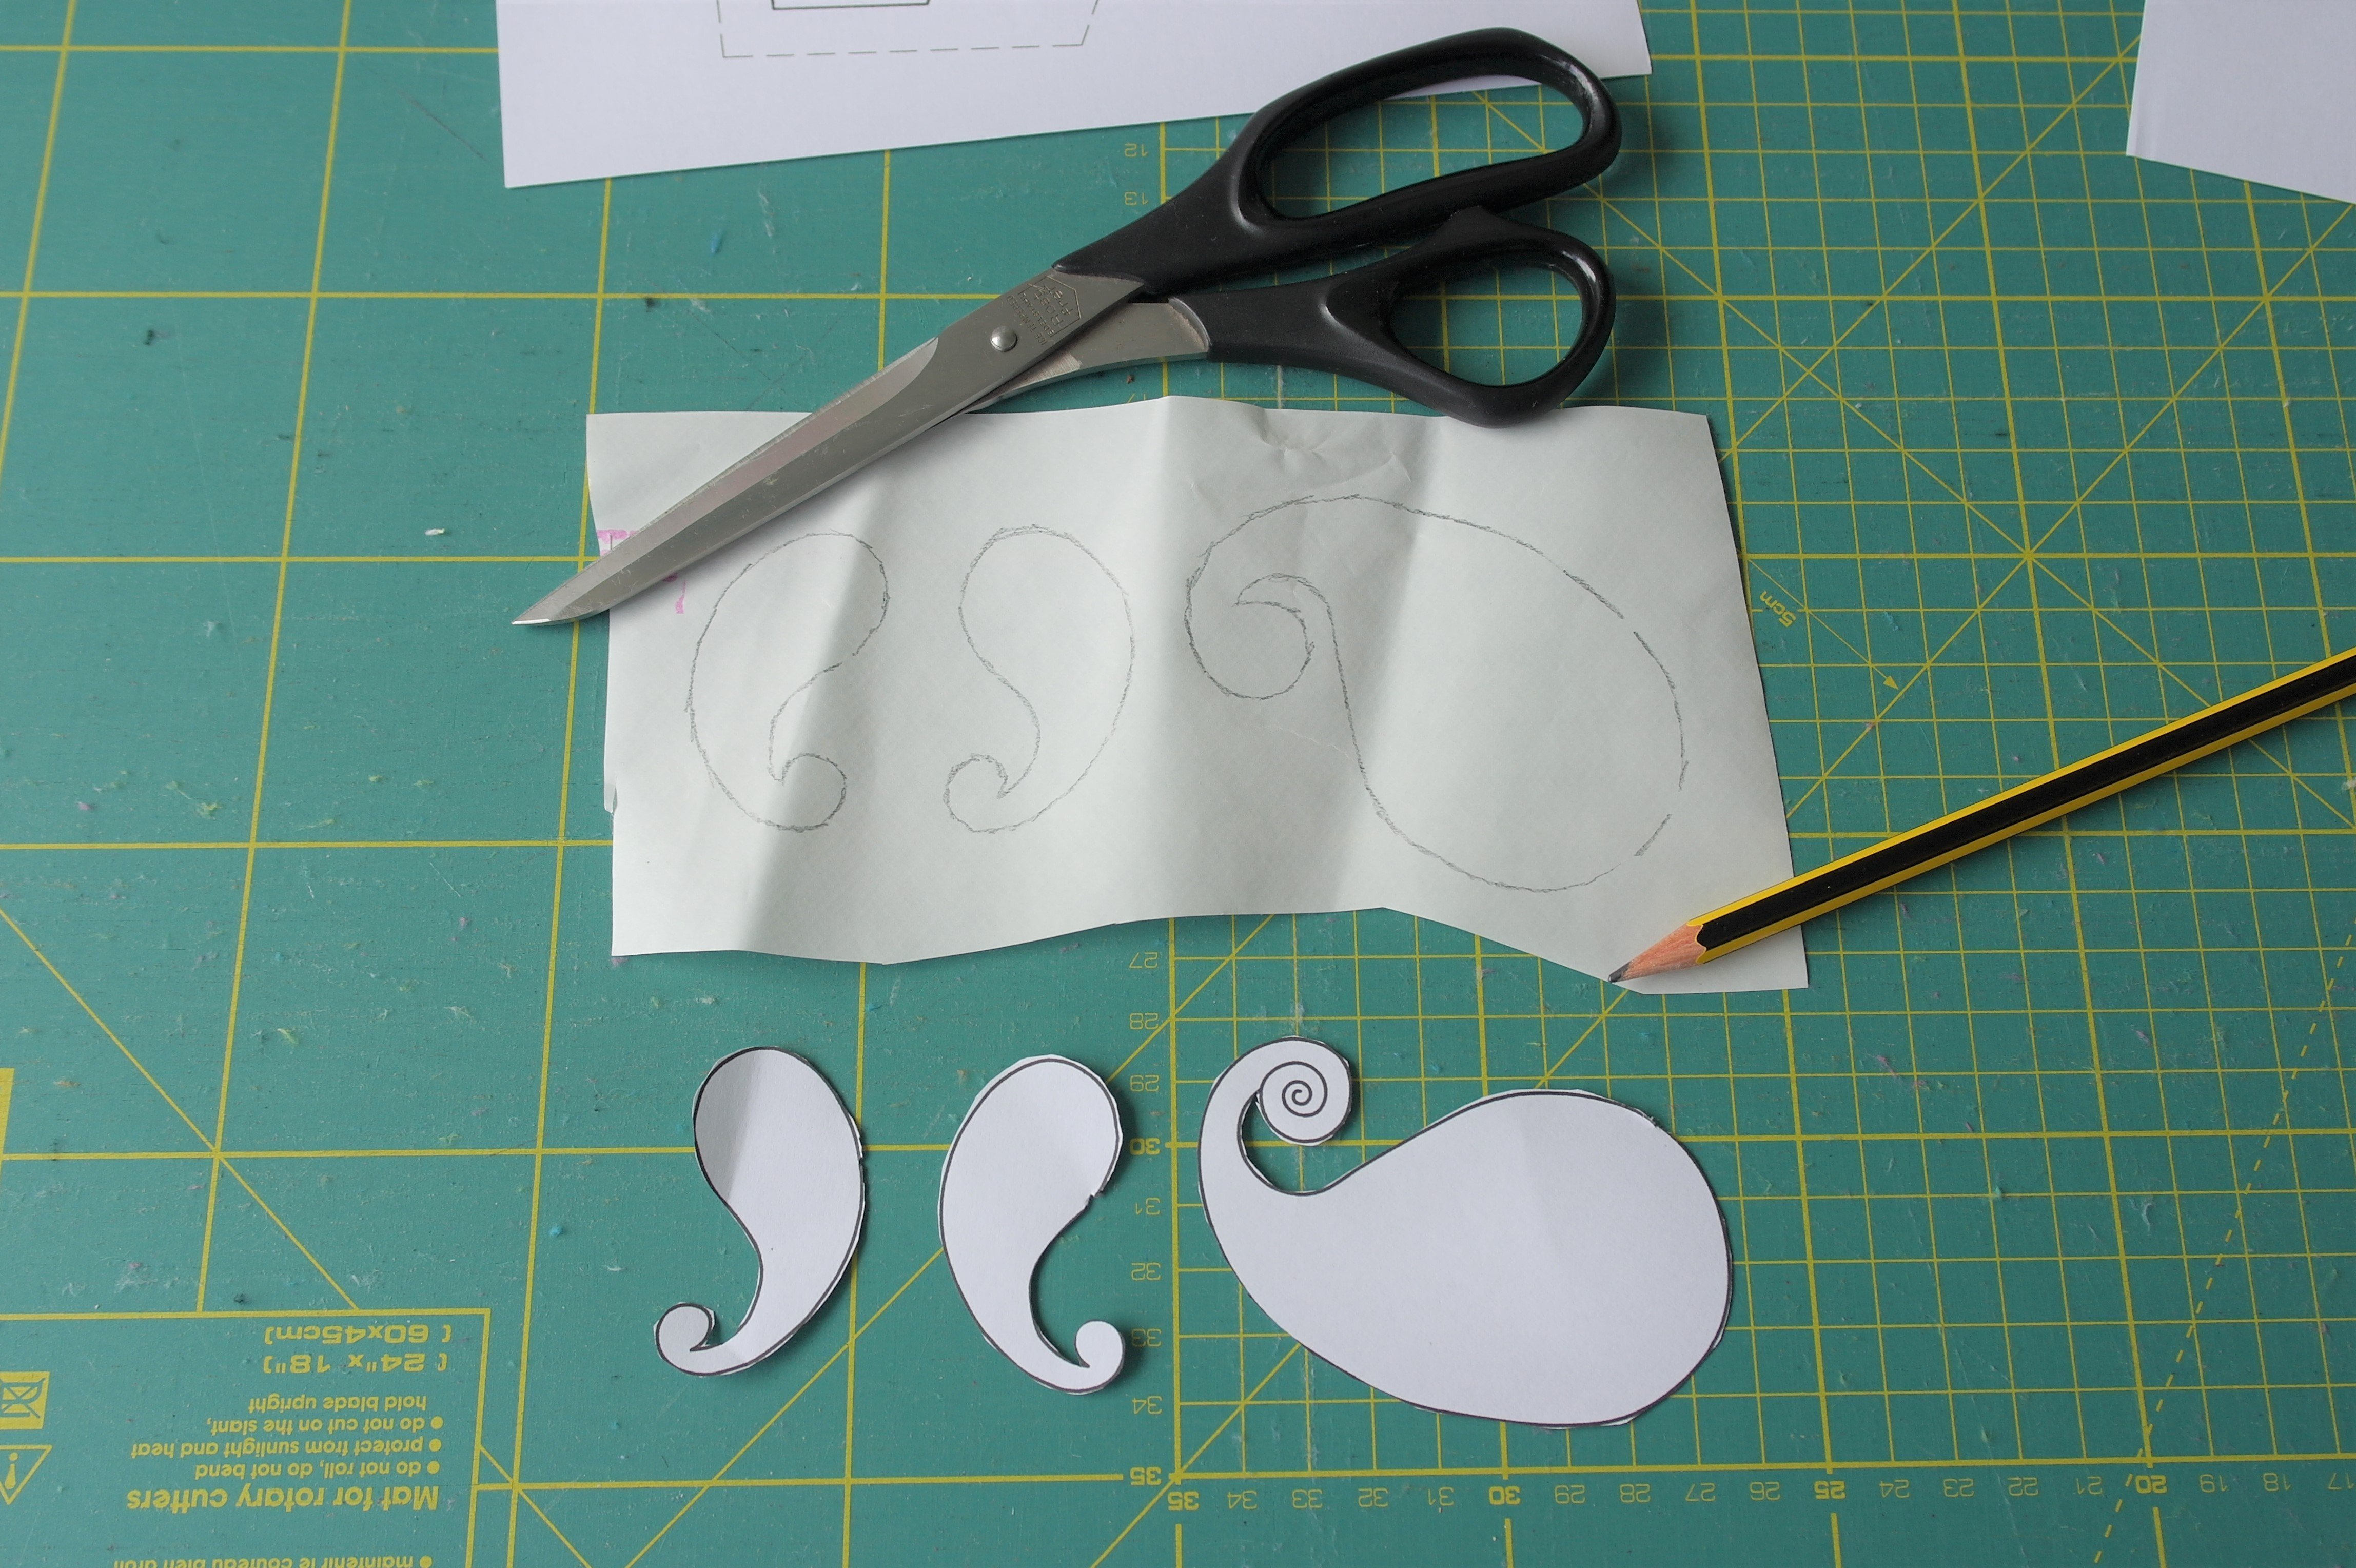
Use a piece of Heat’n Bond Lite big enough for all three paisleys. TURN THE PAPER FIGURES (mirror image), and place them onto the paper side of the Heat’n Bond Lite. Draw around them with a pencil.
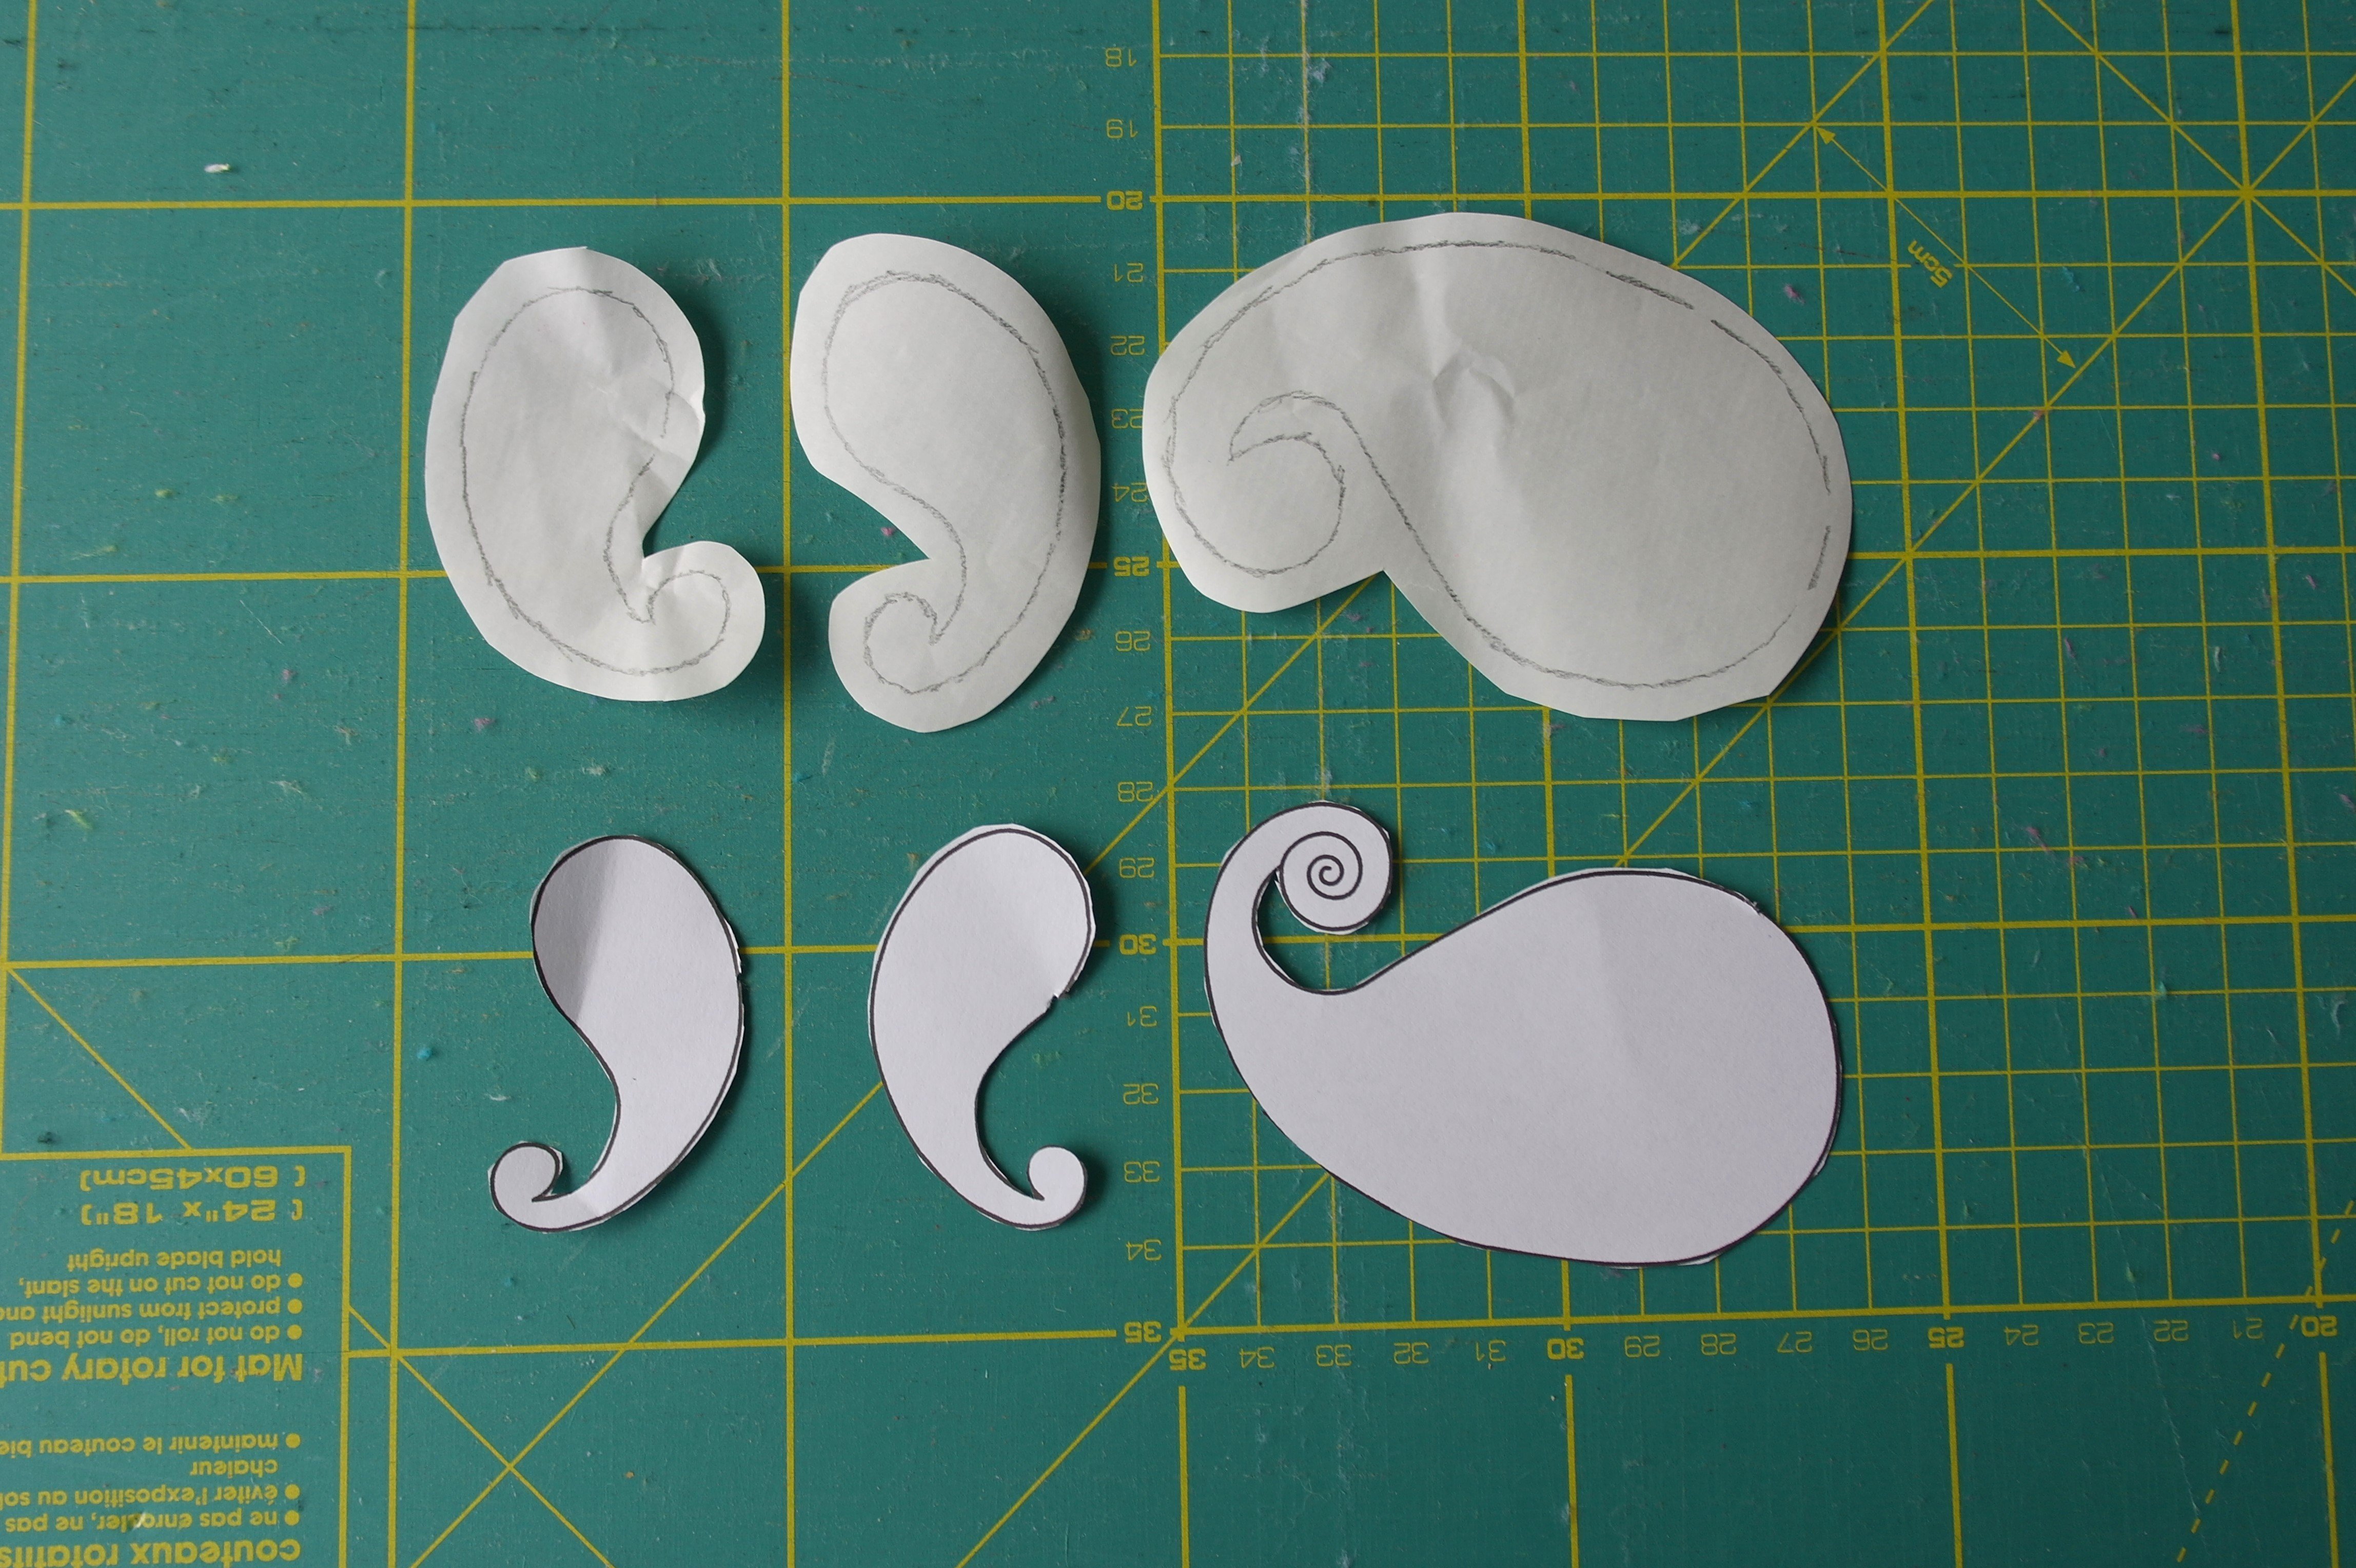
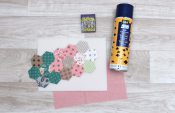
Cut the figures out of the Heat’n Bond Lite: be sure to cut them slightly bigger, aprox. 3 mm away from the pencil lines. The picture shows the upper figures from Heat’n Bond Lite/Vliesofix, lower figures are the paper templates. Put them aside until you need them.

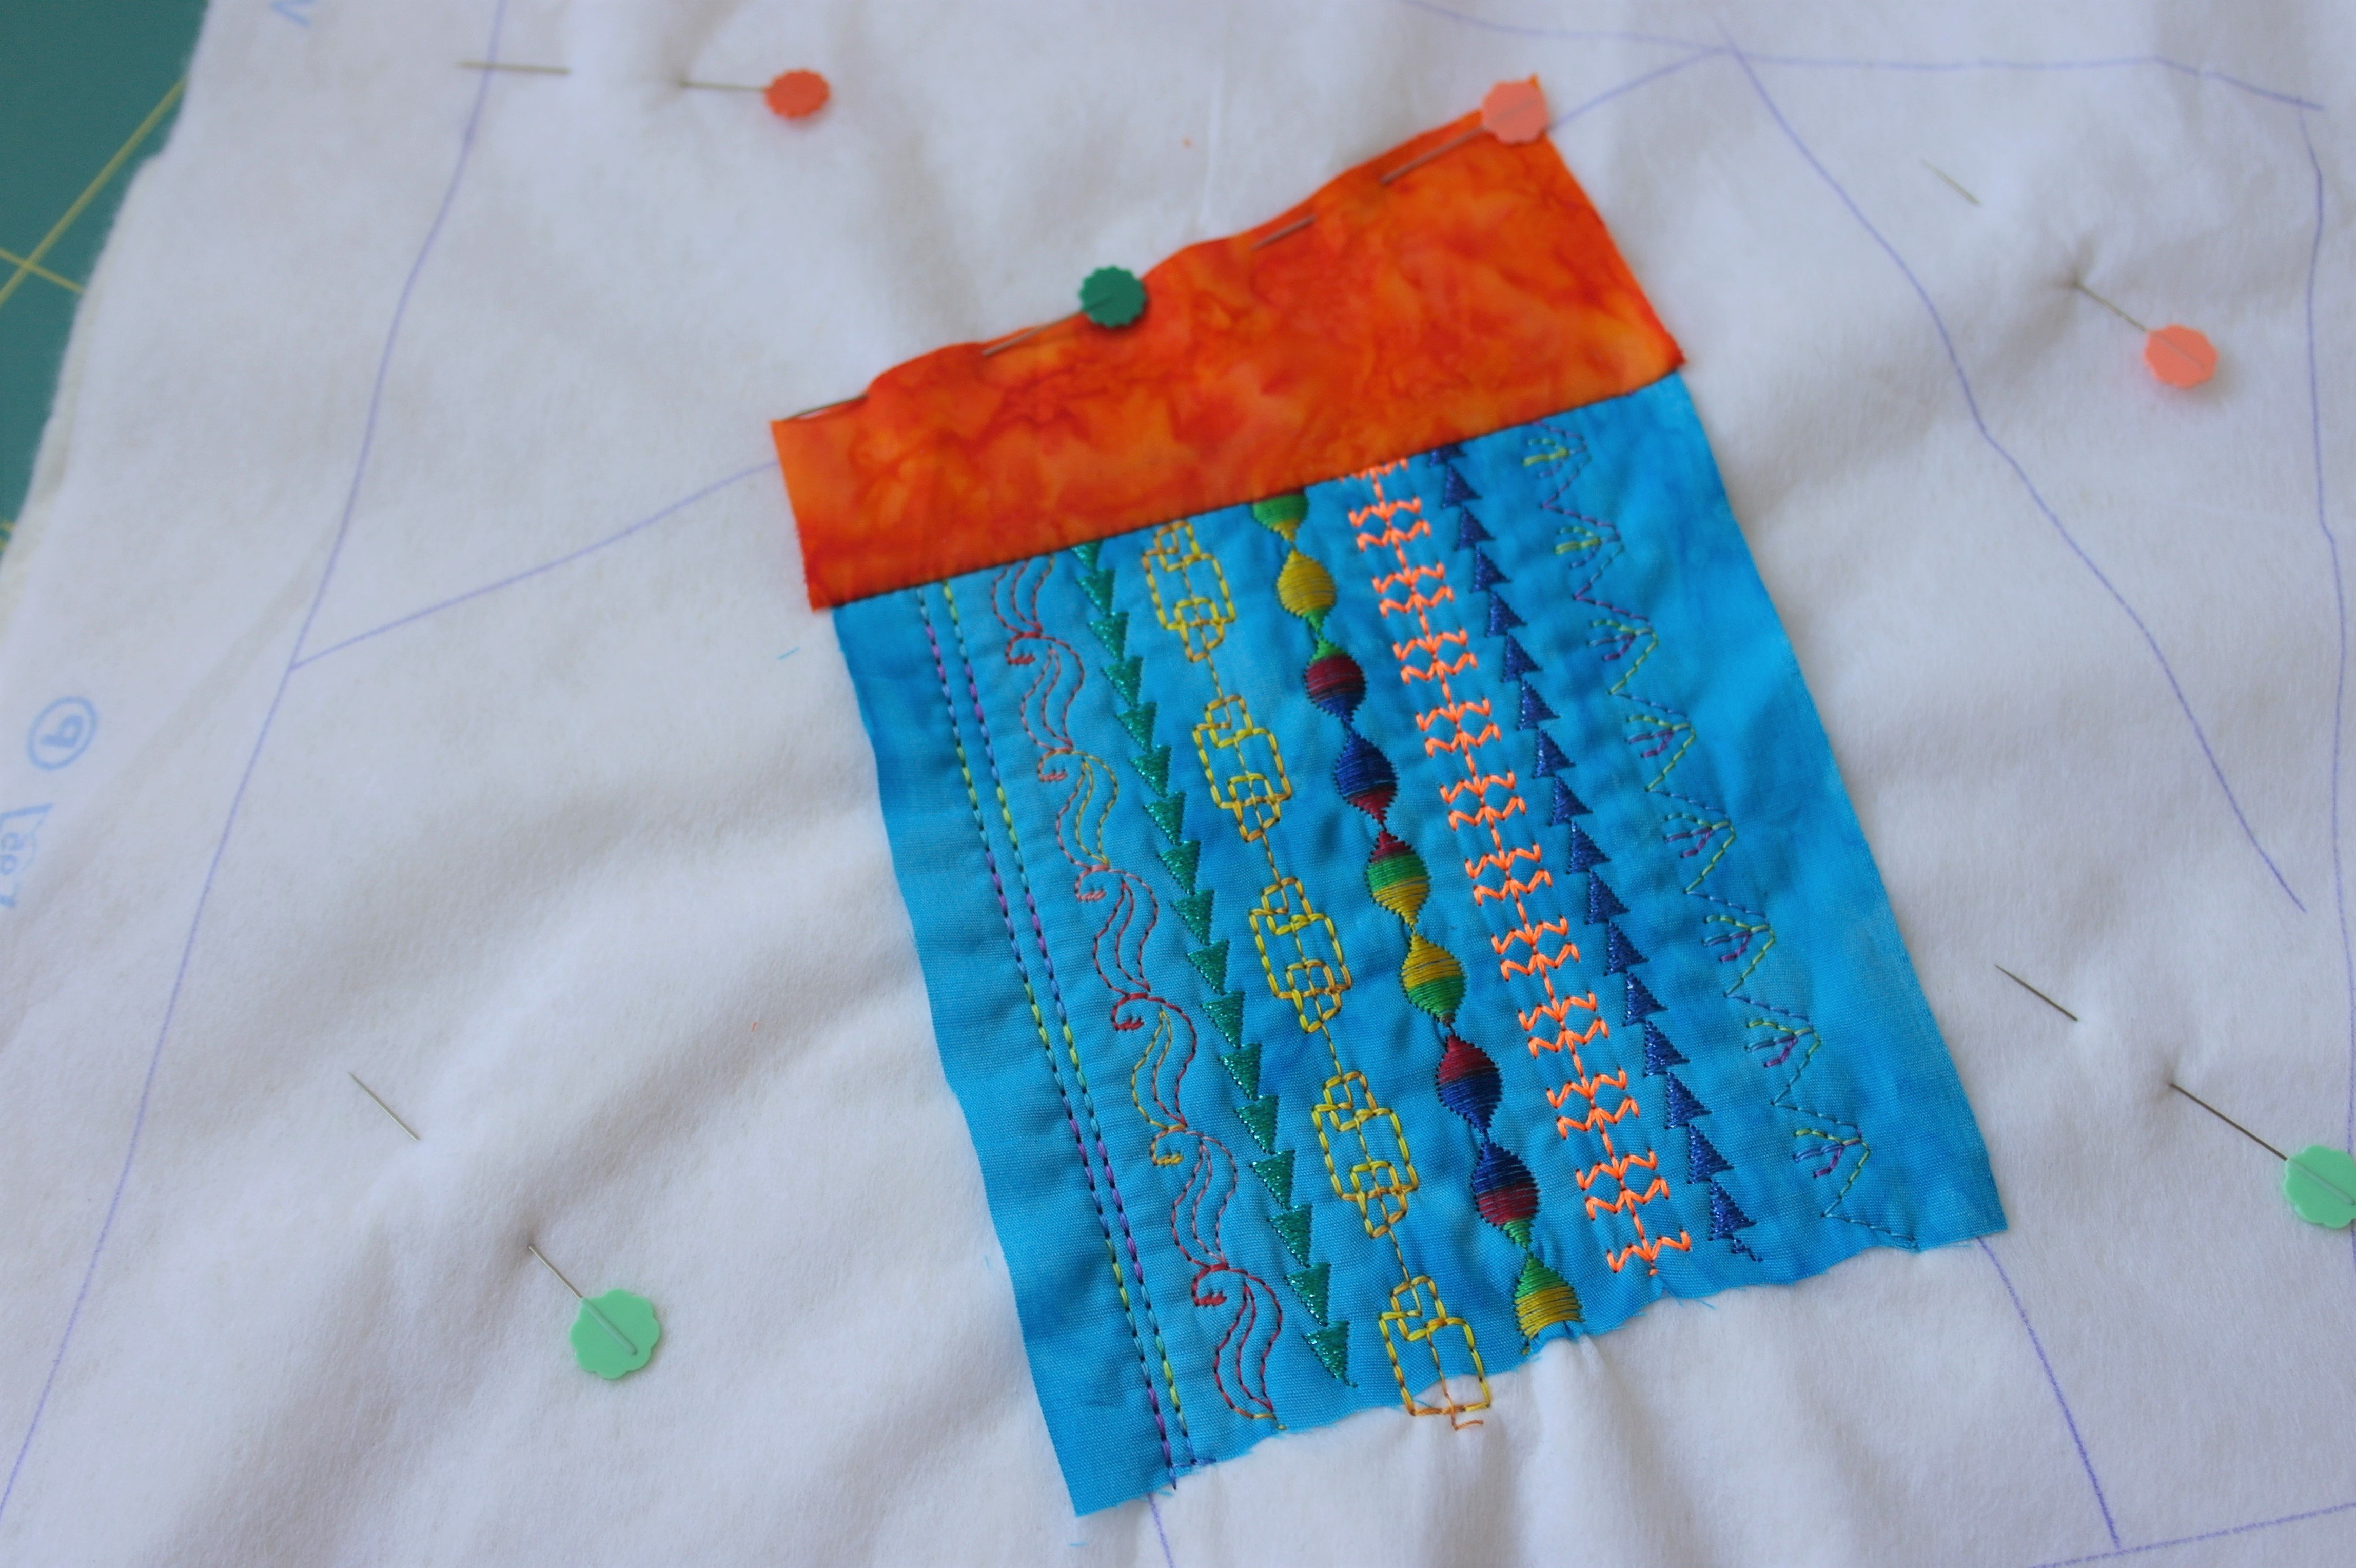
This 9th block will be made the usual way: fabric no. 1 will be cut with seam allowance, placed on section 1 and filled with decorative stitches. You will need 8 (batik)fabrics for this block, but also 3 (more) batiks to be used for the paisleys. You can cut pieces from the colors/batiks from the 8 you will use for the block, or choose different colors/batiks. However, it is important to choose colors/fabrics that will show the decorative stitches you will be making.

I like to work with variegated threads, specially when making dense decorative stitches, like satin stitches. The effect is always great. All colors of these multicolored threads will show off, certainly with Mirage/Wonderfil: the most difficult part wil be choosing just one color/thread, because I like them all. But that’s a luxury issue, isn’t it?
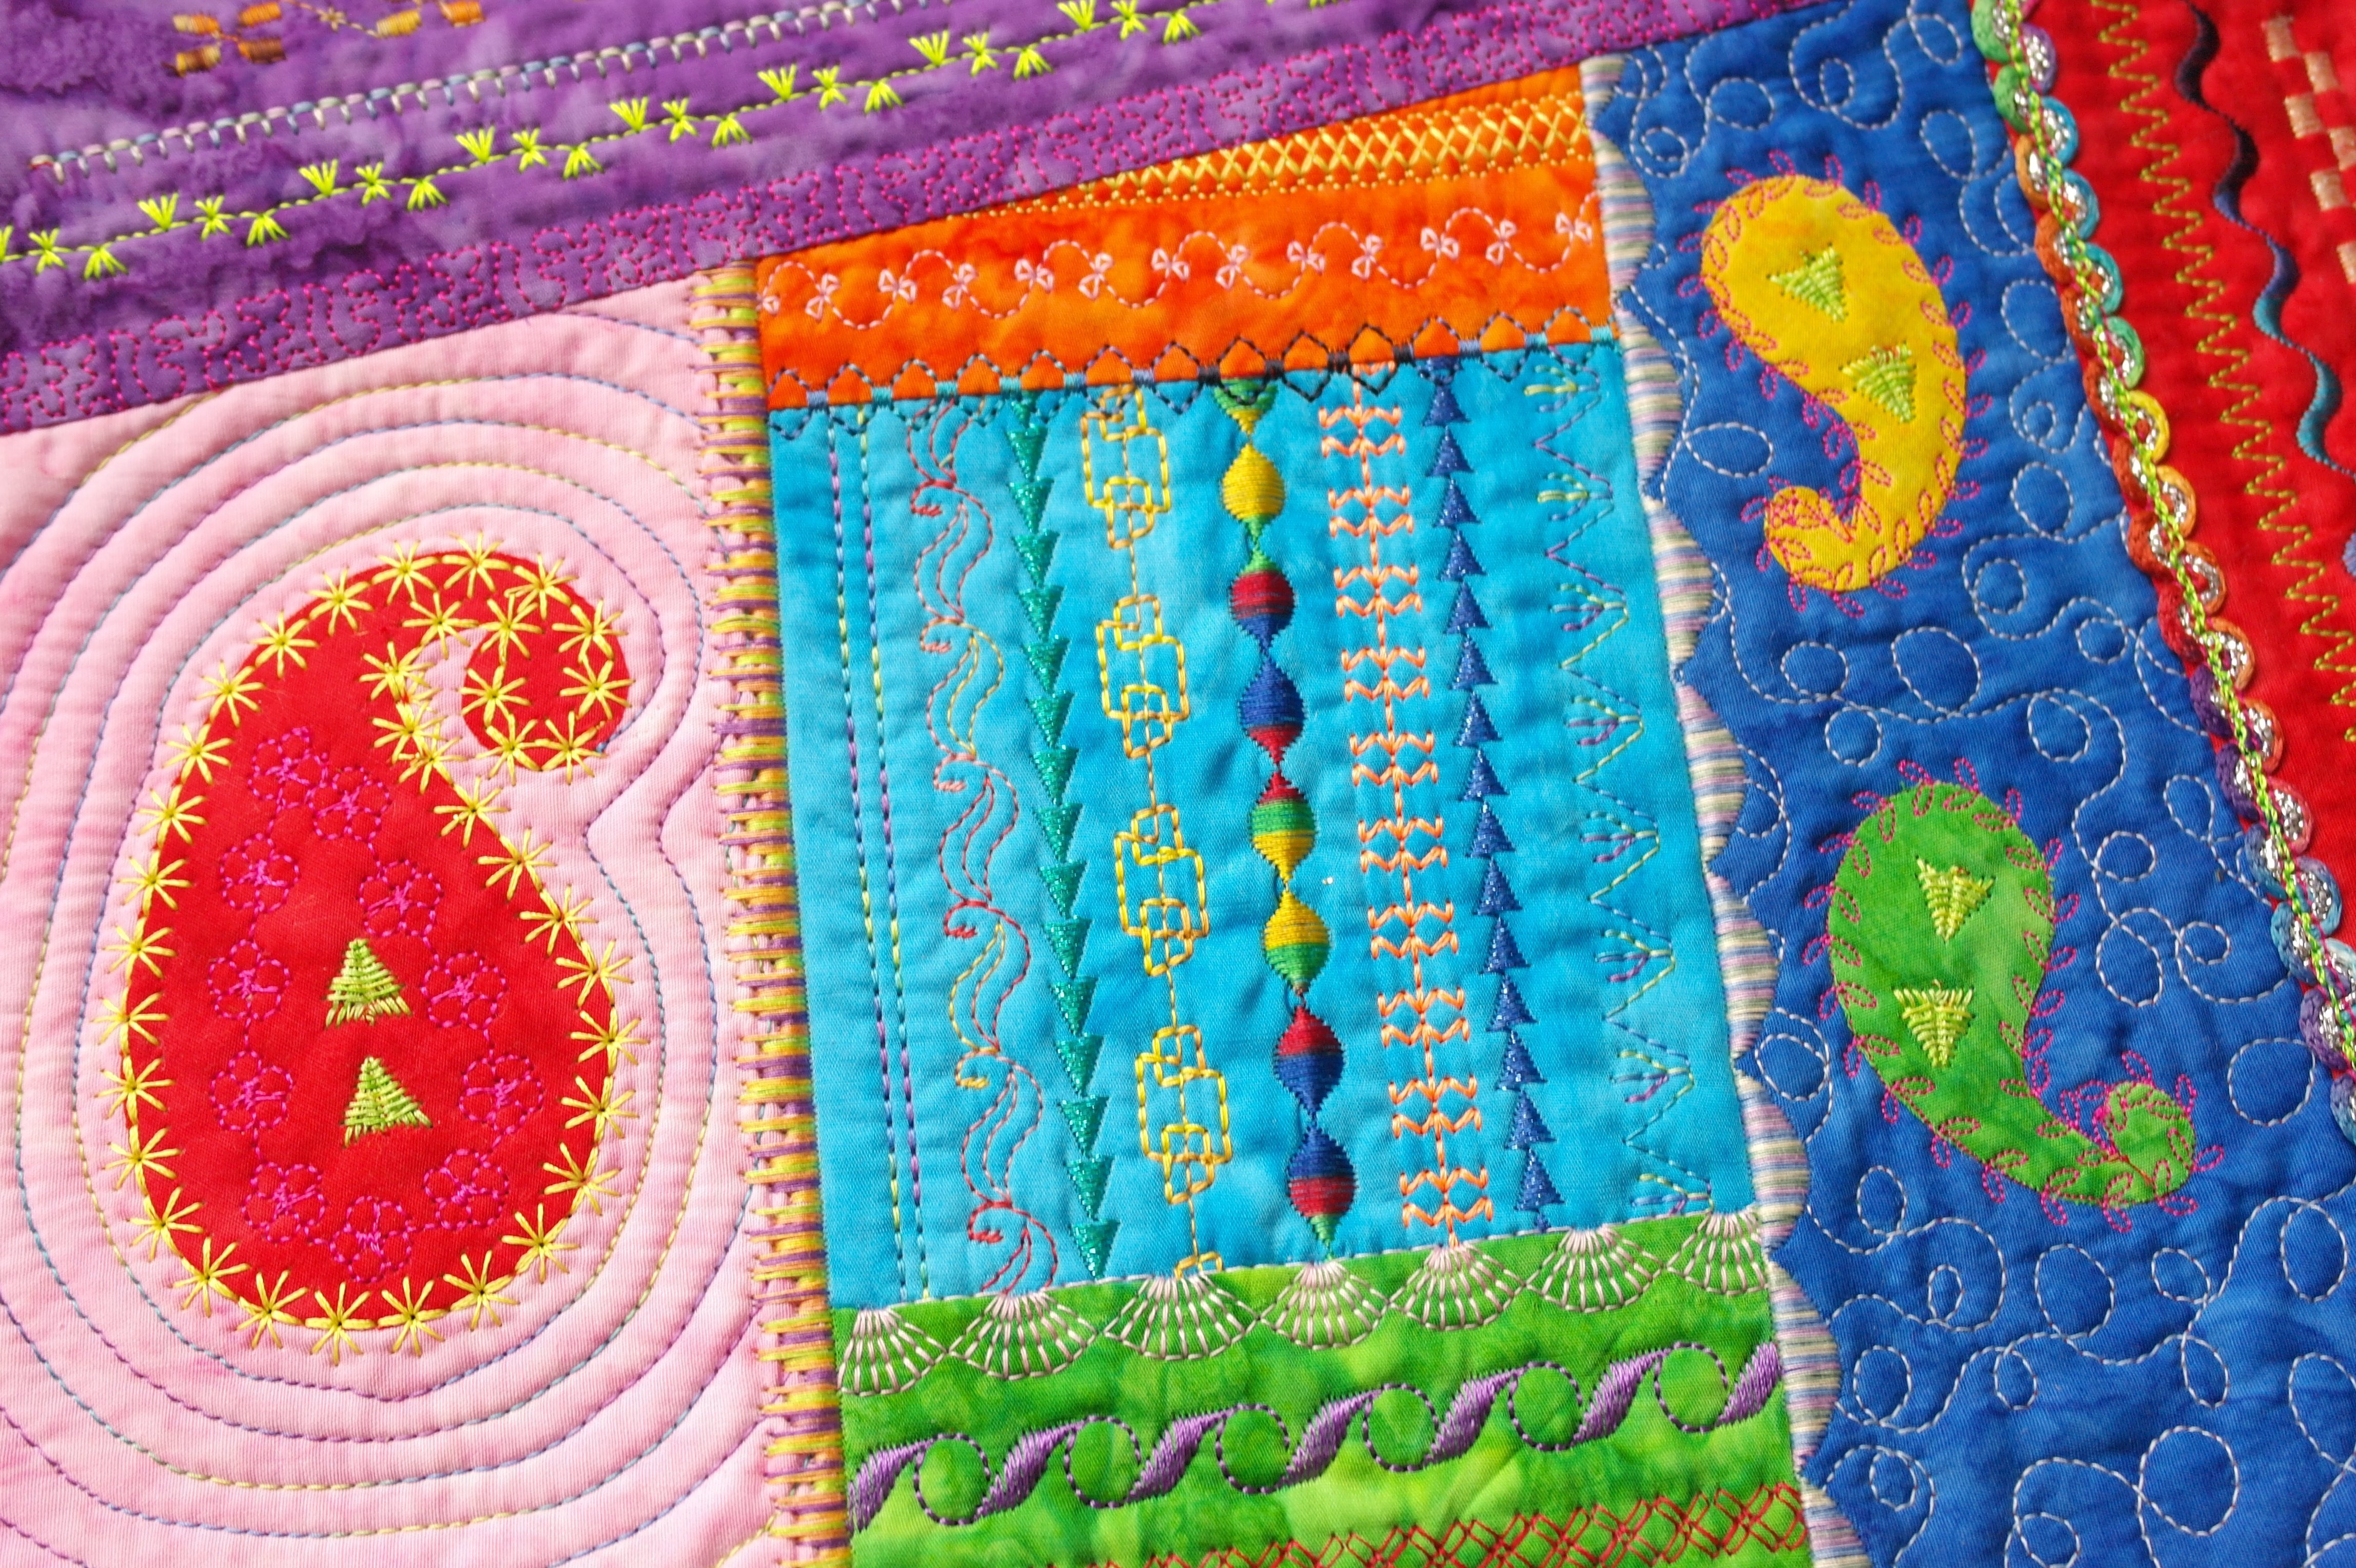
On to fabric no. 2, no. 3 and then things are a bit different, because with sections 4 and 5, the appliques are used. I will show two ways to place them onto the fabrics.
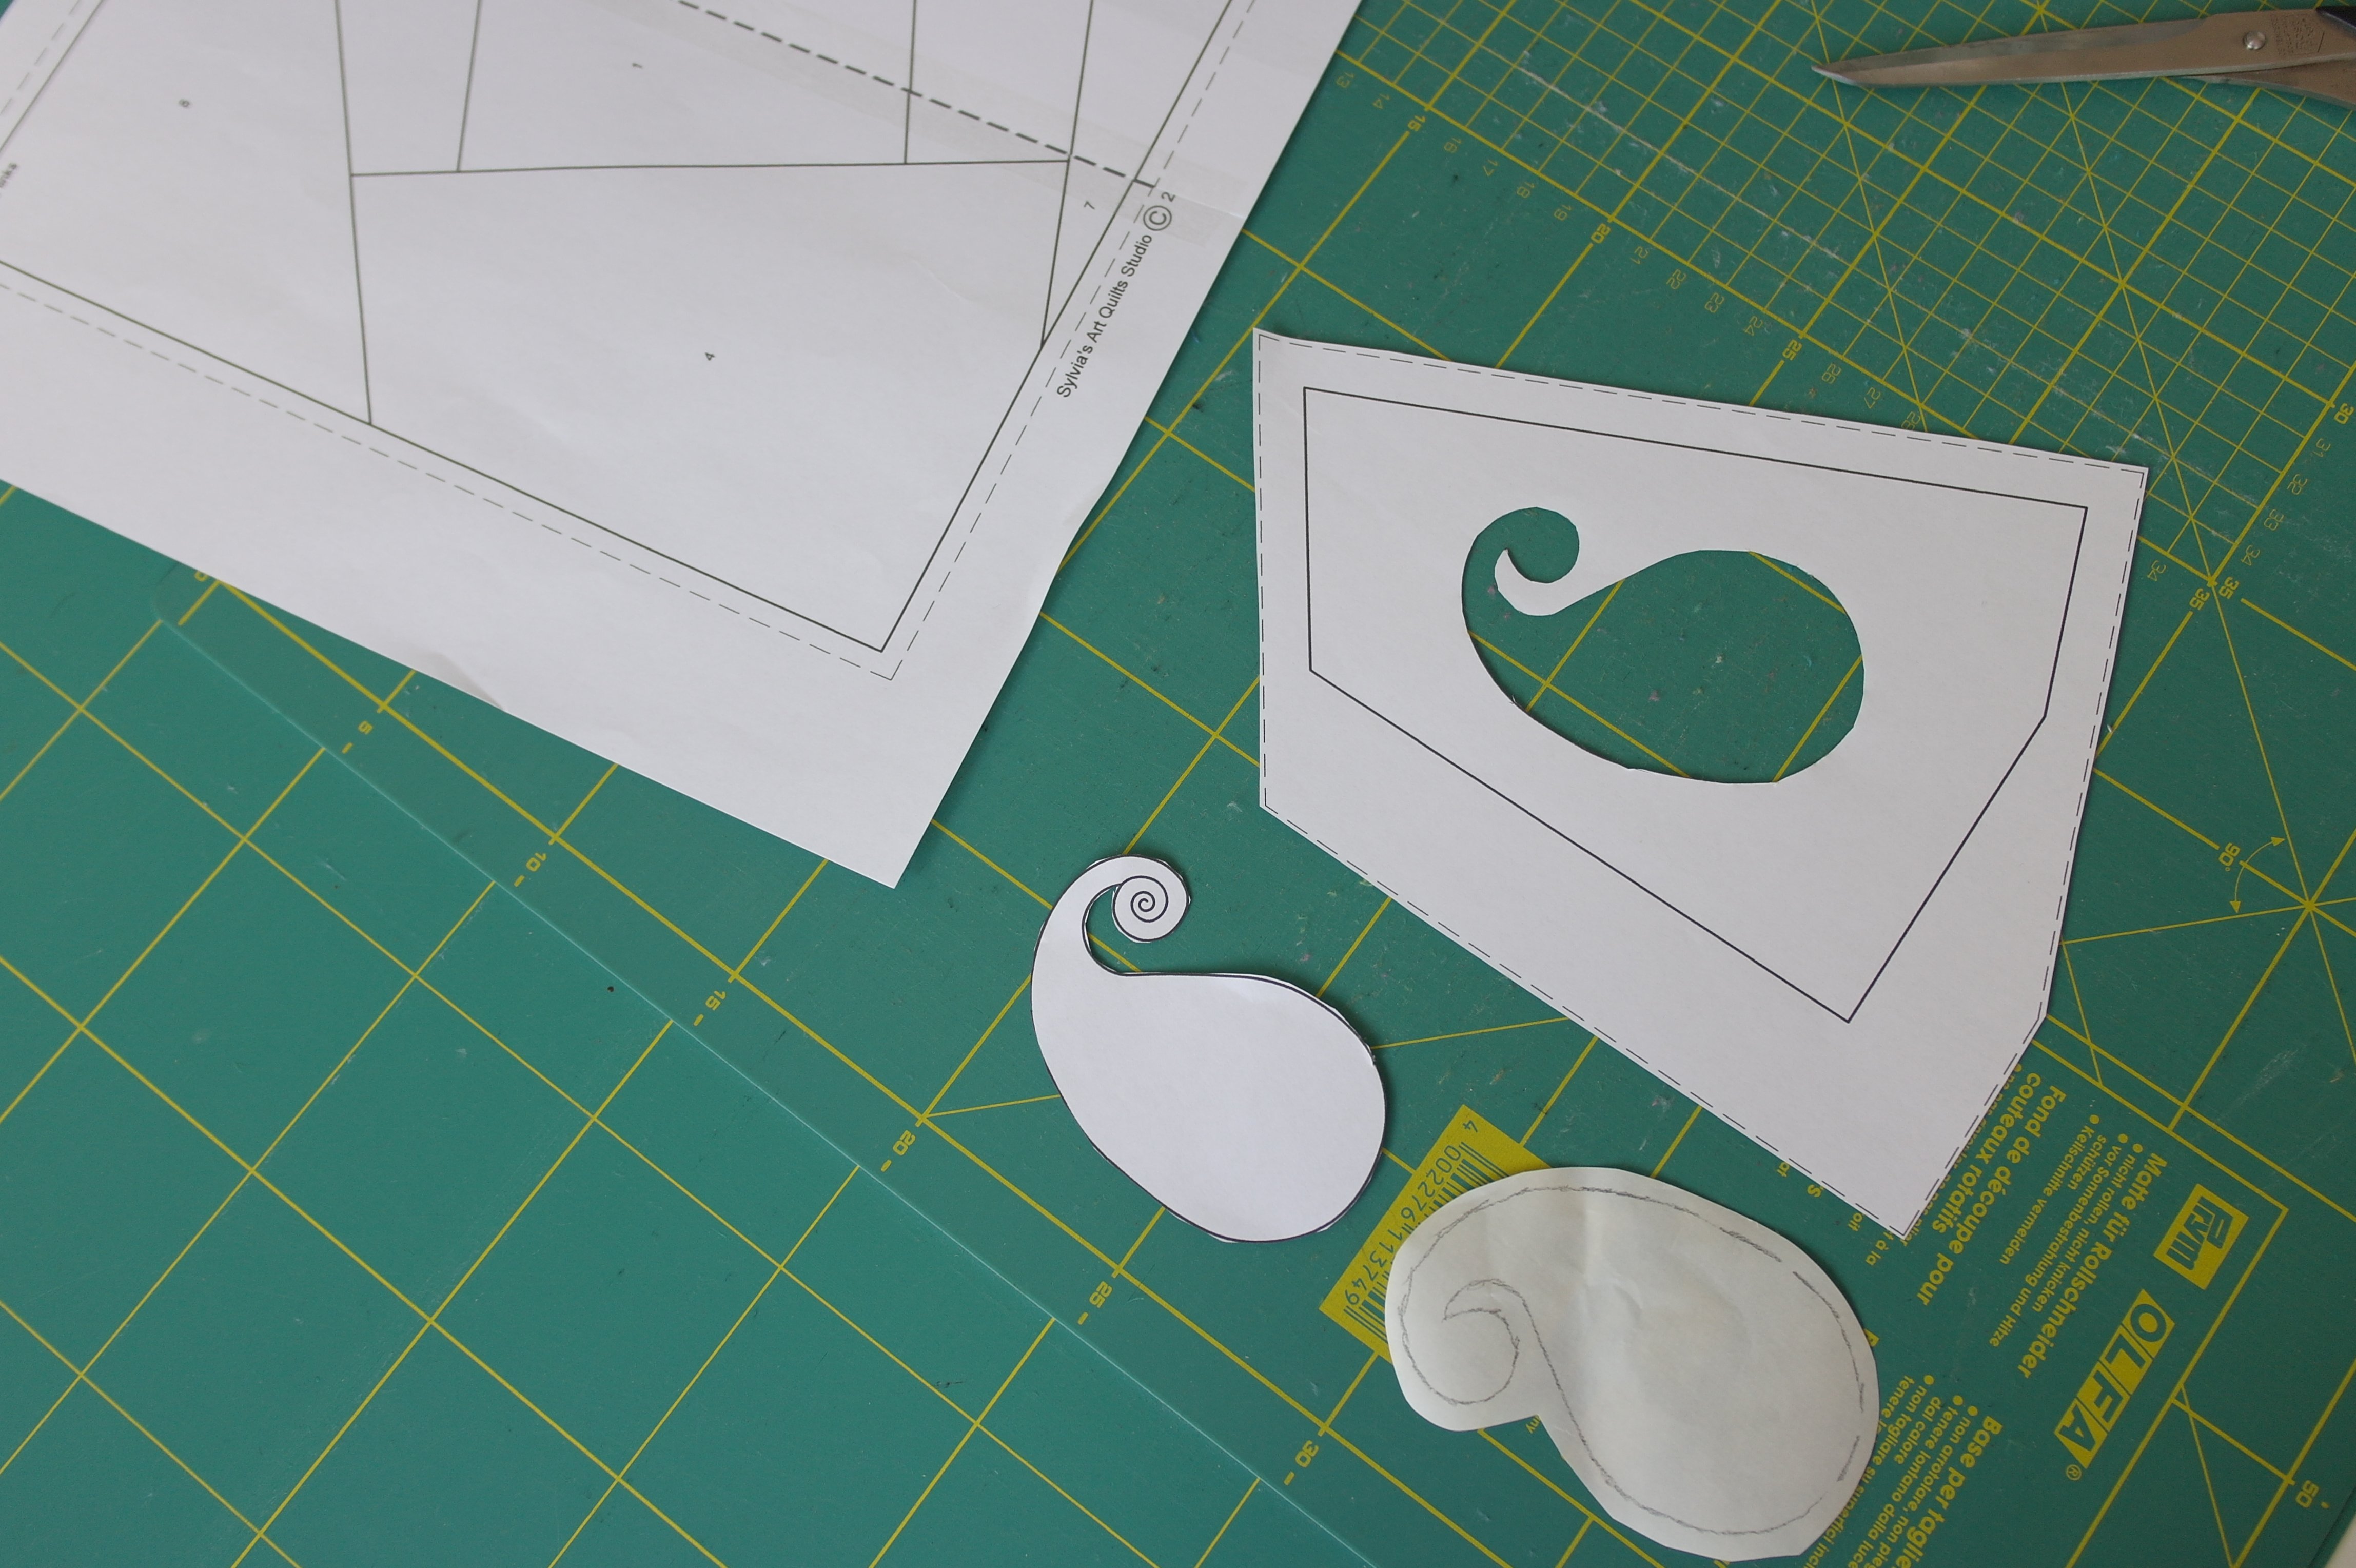
First method for fabric no. 4: take the paisleys for this section: paper template, Heat’n Bont Lite shape and the paper pattern with the cut-out shape. Choose the fabric for section 4 of your block.
Place the paper pattern onto the fabric (I have used a pink batik). Now cut the fabric slightly larger then the paper pattern. You can see that I have also added extra fabric for placement/sides of the block.

Sew this (pink) fabric to the sandwich, and fold the fabric to the right side.
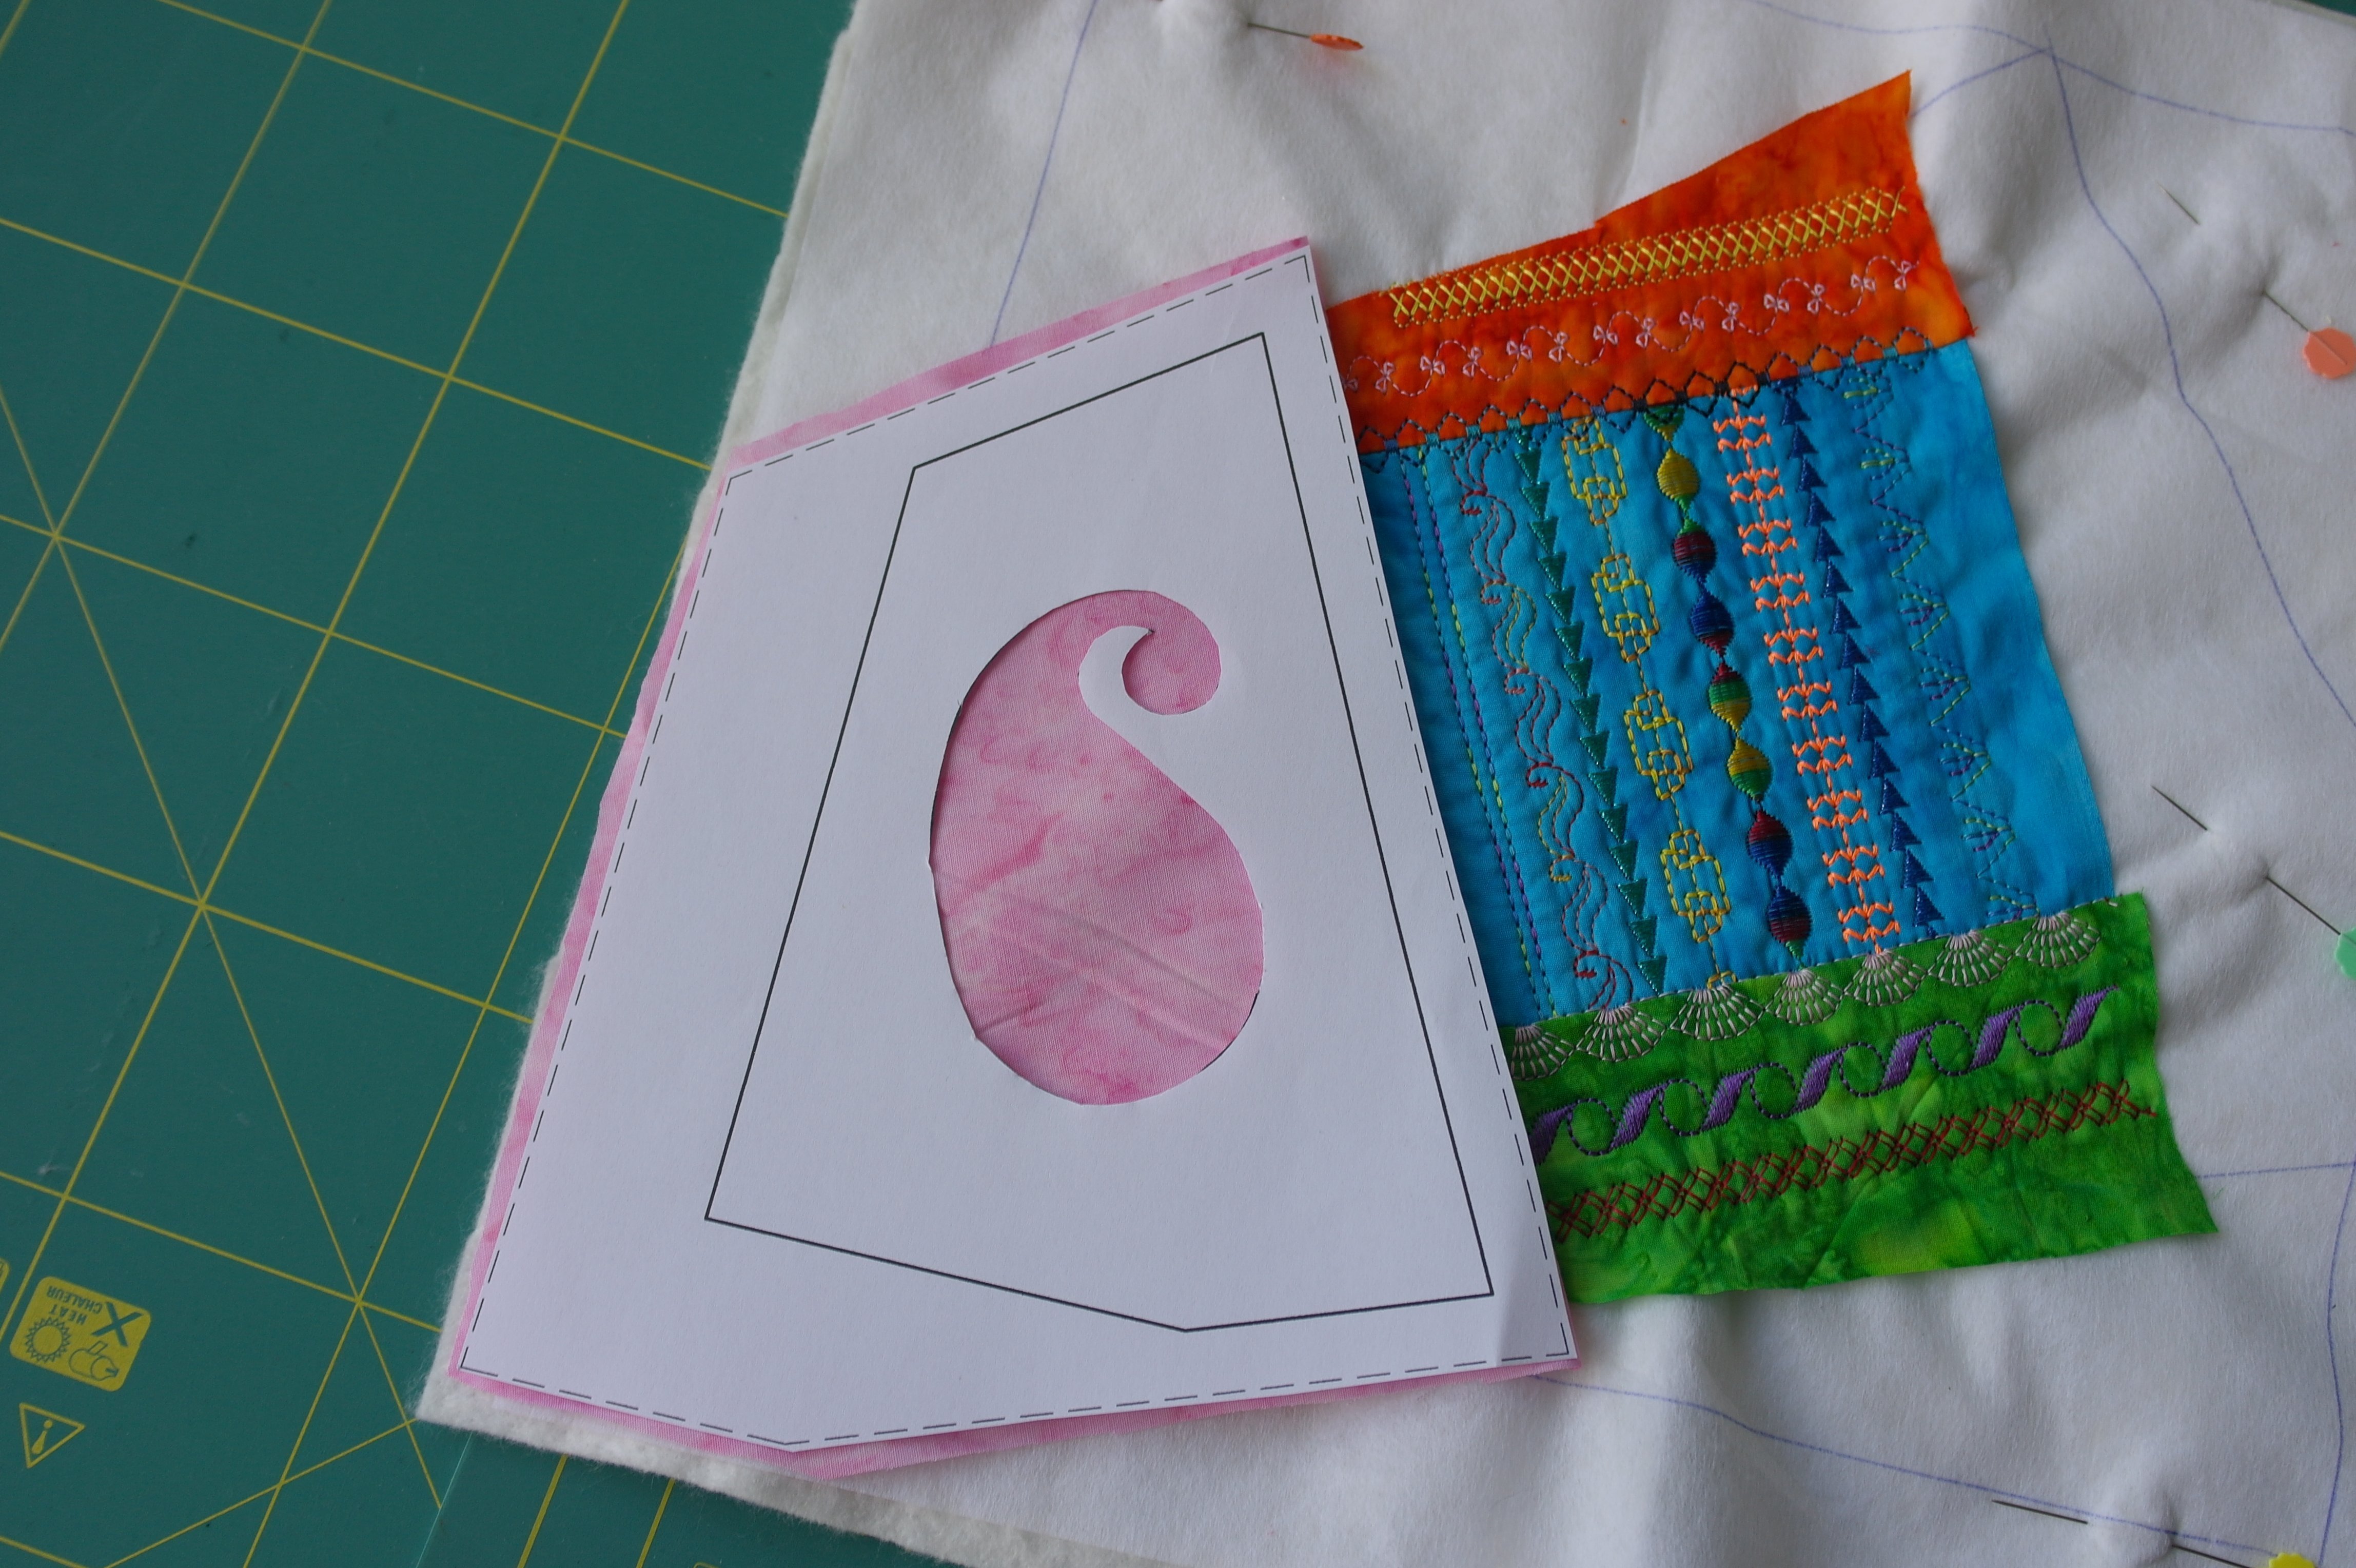
Check if the measurements of the fabric are correct, by placing the paper pattern onto the fabric after folding it back to the right side.
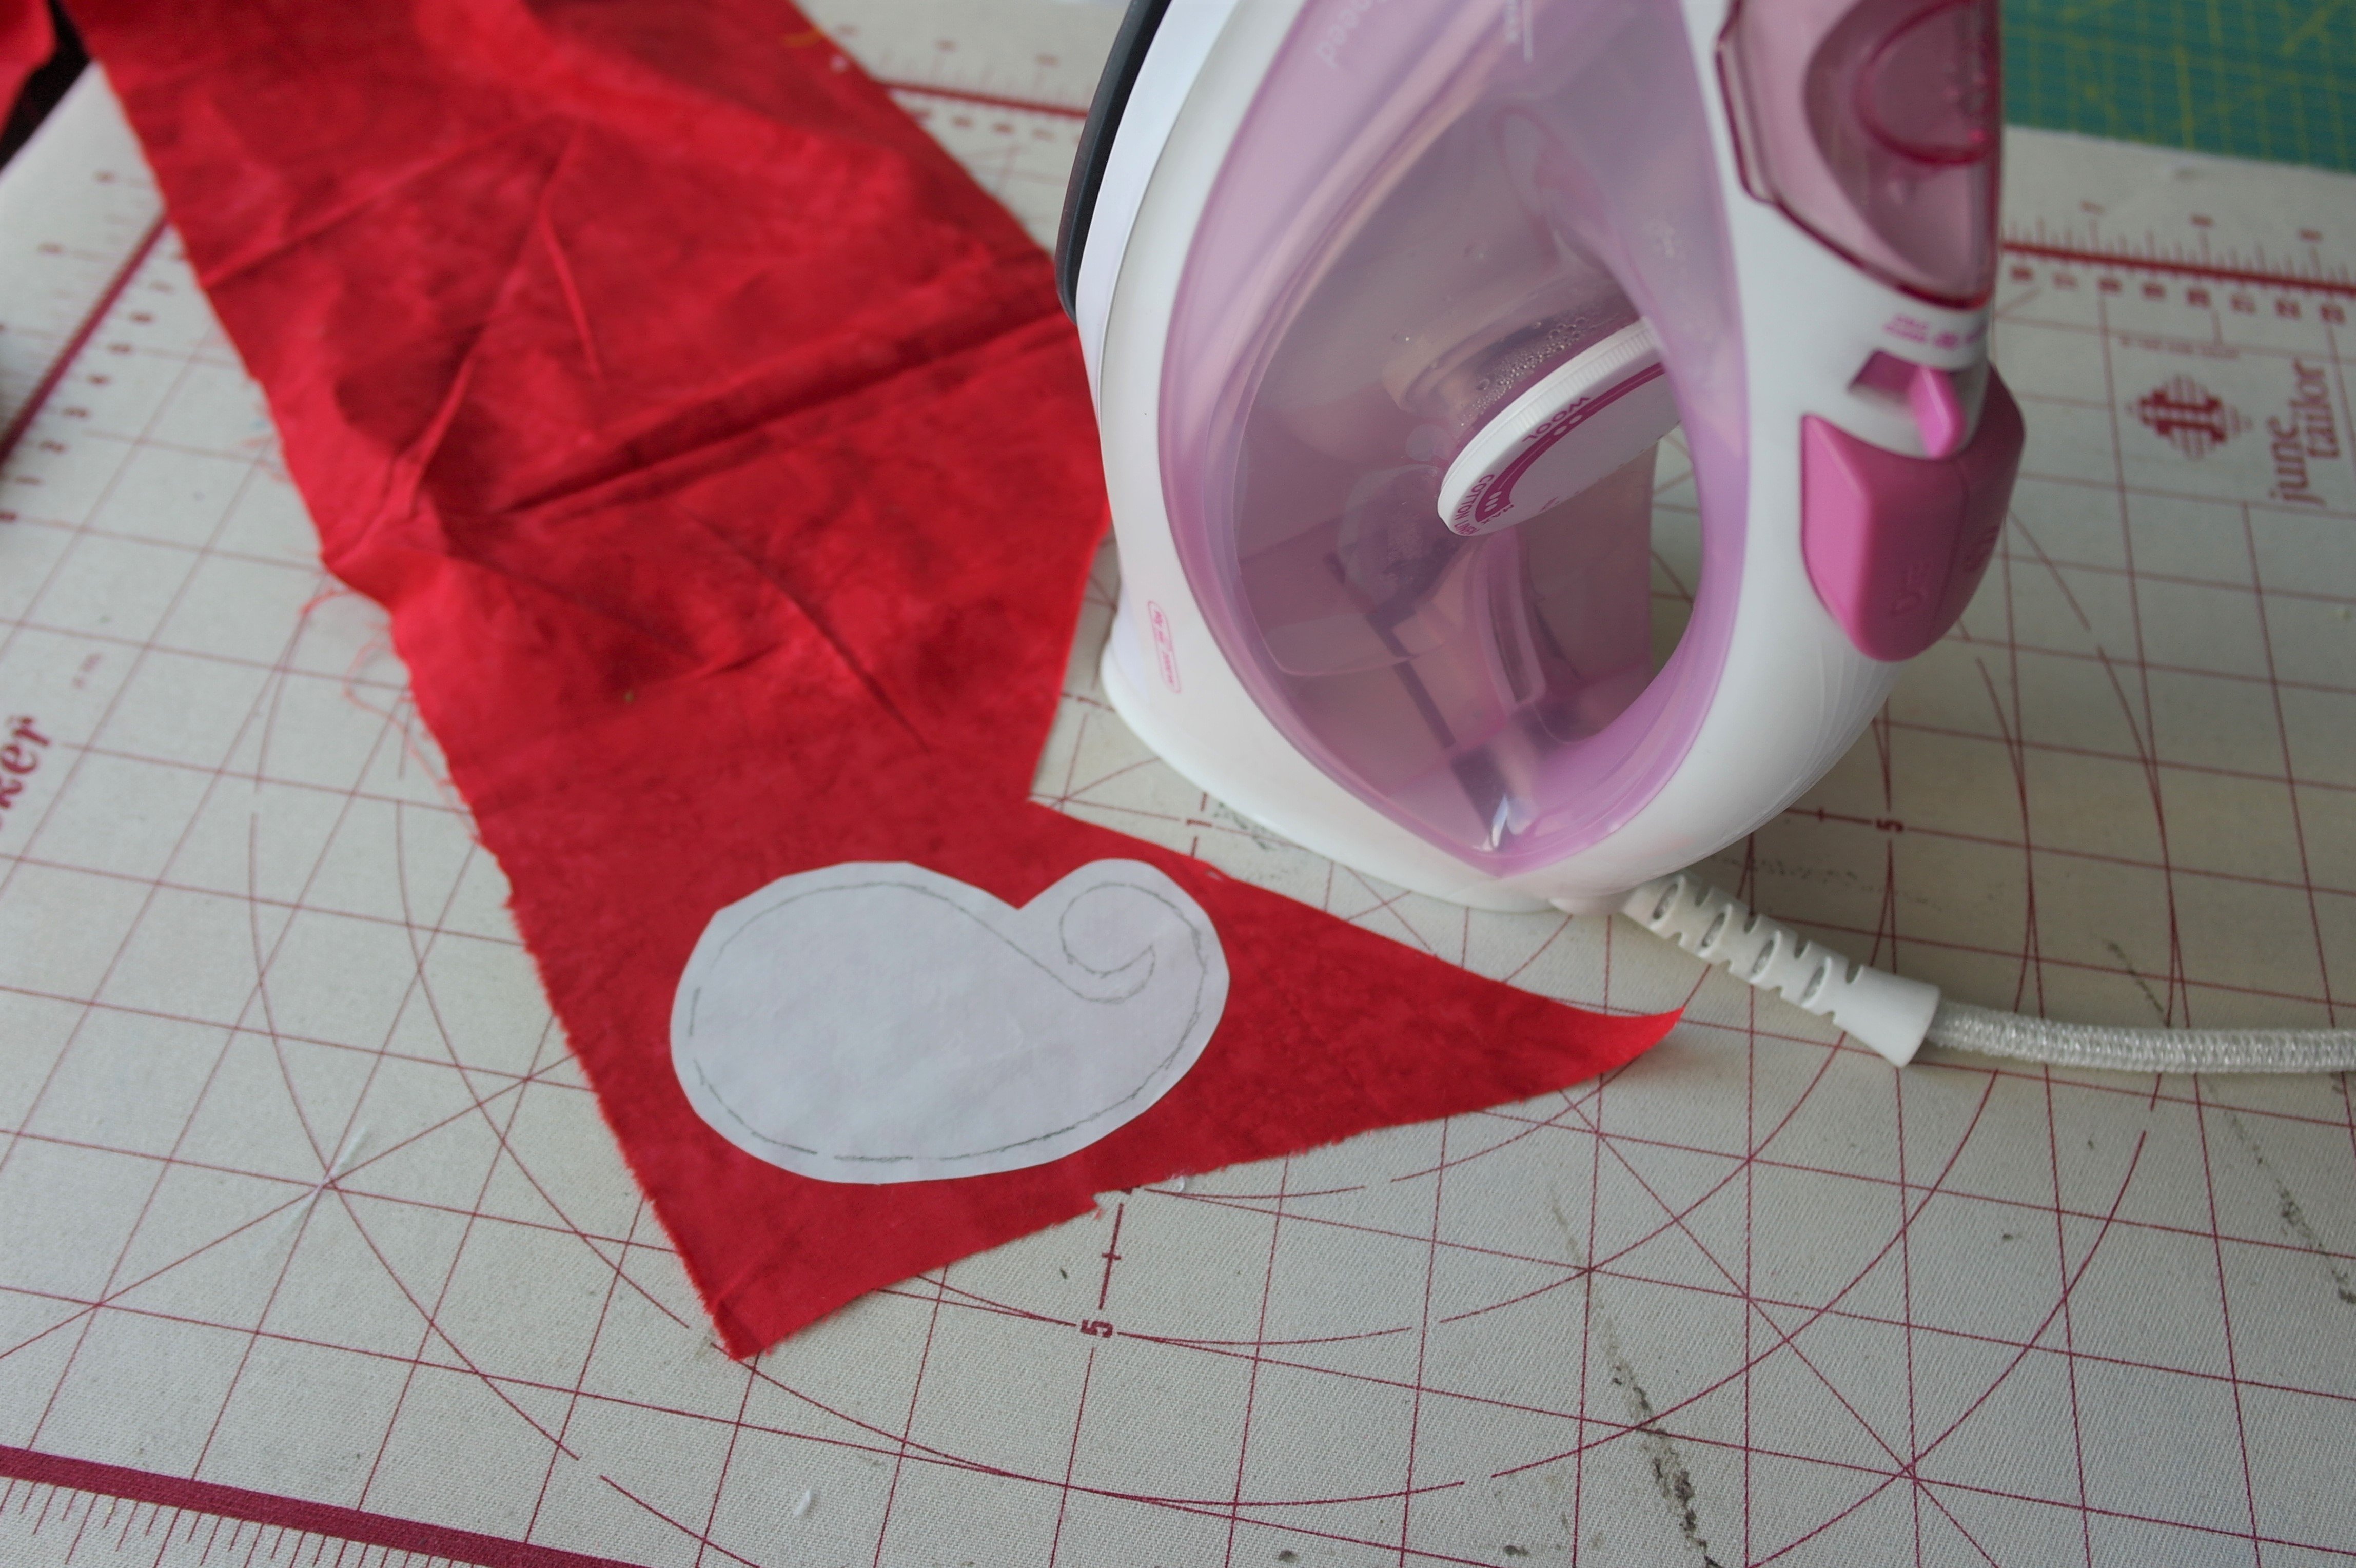
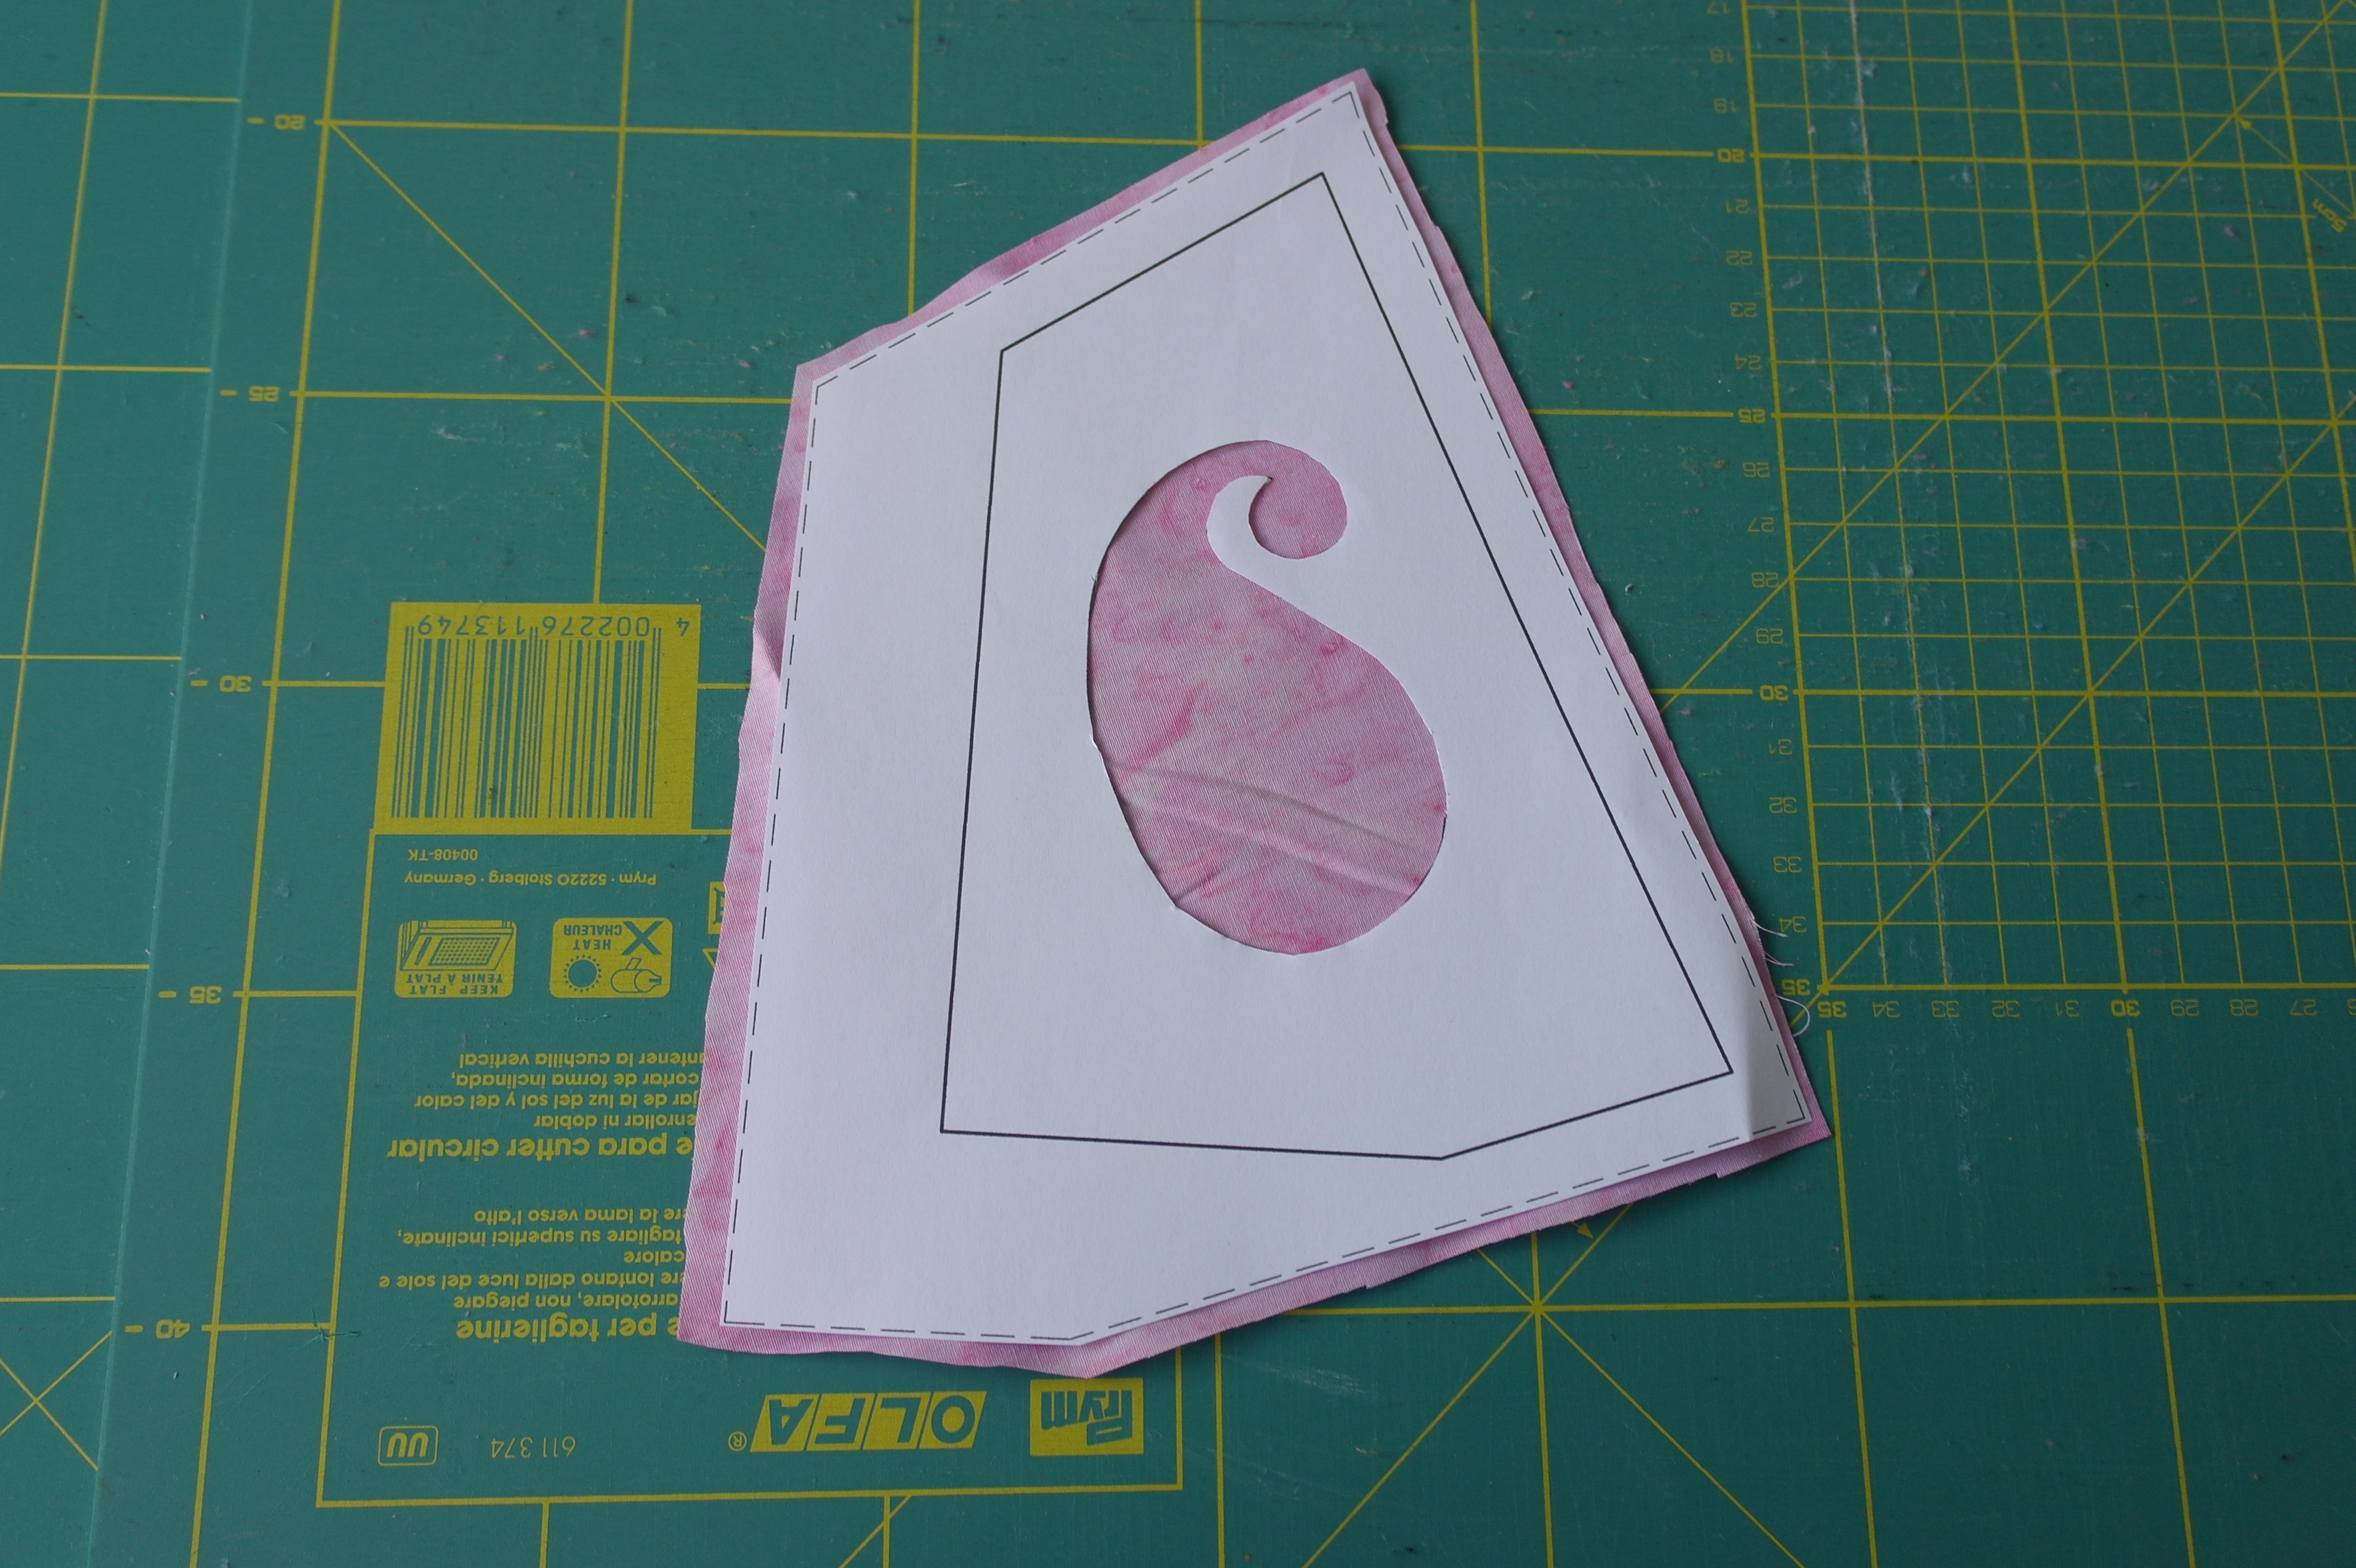
Pick a color for the paisley/appliqué, place the pattern from Heat’n Bond Lite onto the back of the fabric and iron it, using an ironing board or ironing mat.

Cut the paisley on the solid/pencil line, through the Heat’n Bond Lite and the fabric. Remove the paper at the back. Place the paper pattern again onto the pink fabric, but be sure the sandwich itself is folded away from the fabric (you cannot iron onto the sandwich, specailly if you are using a polyester batting).
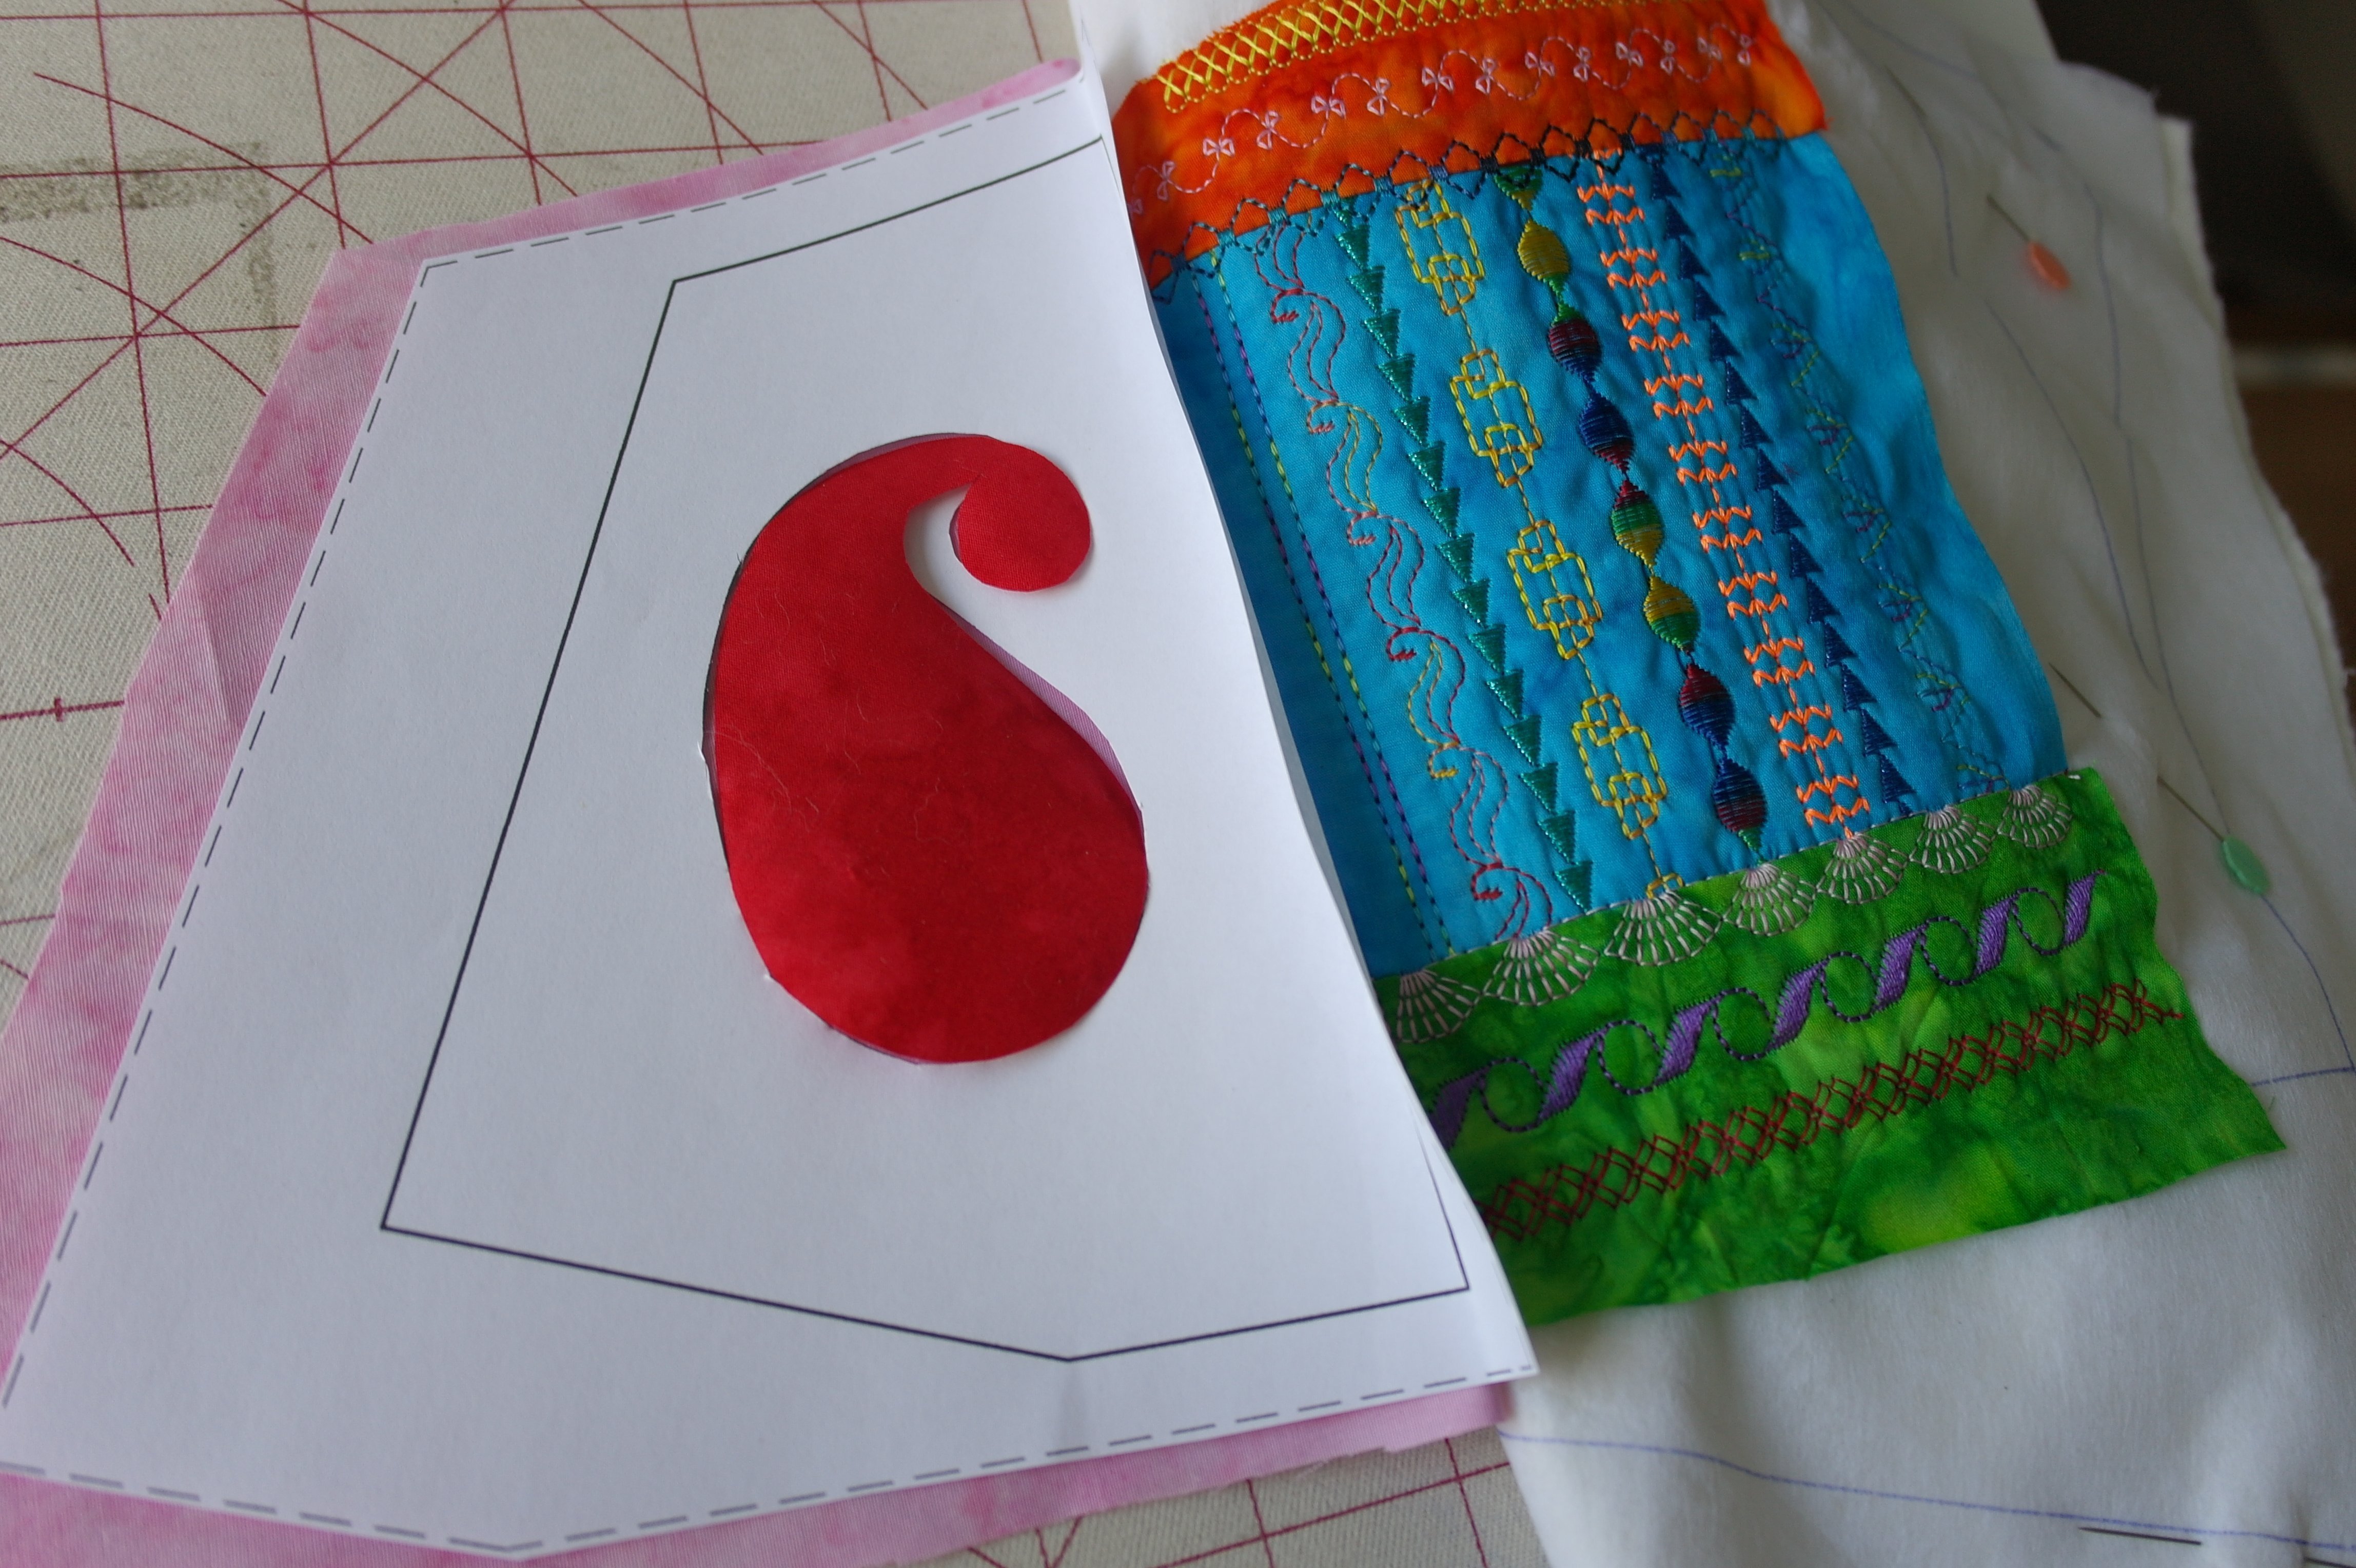
Now place the (red) paisley directly in the opening of the paper pattern: it should fit like a glove. Hold the applique down with one finger, and remove the paper pattern.
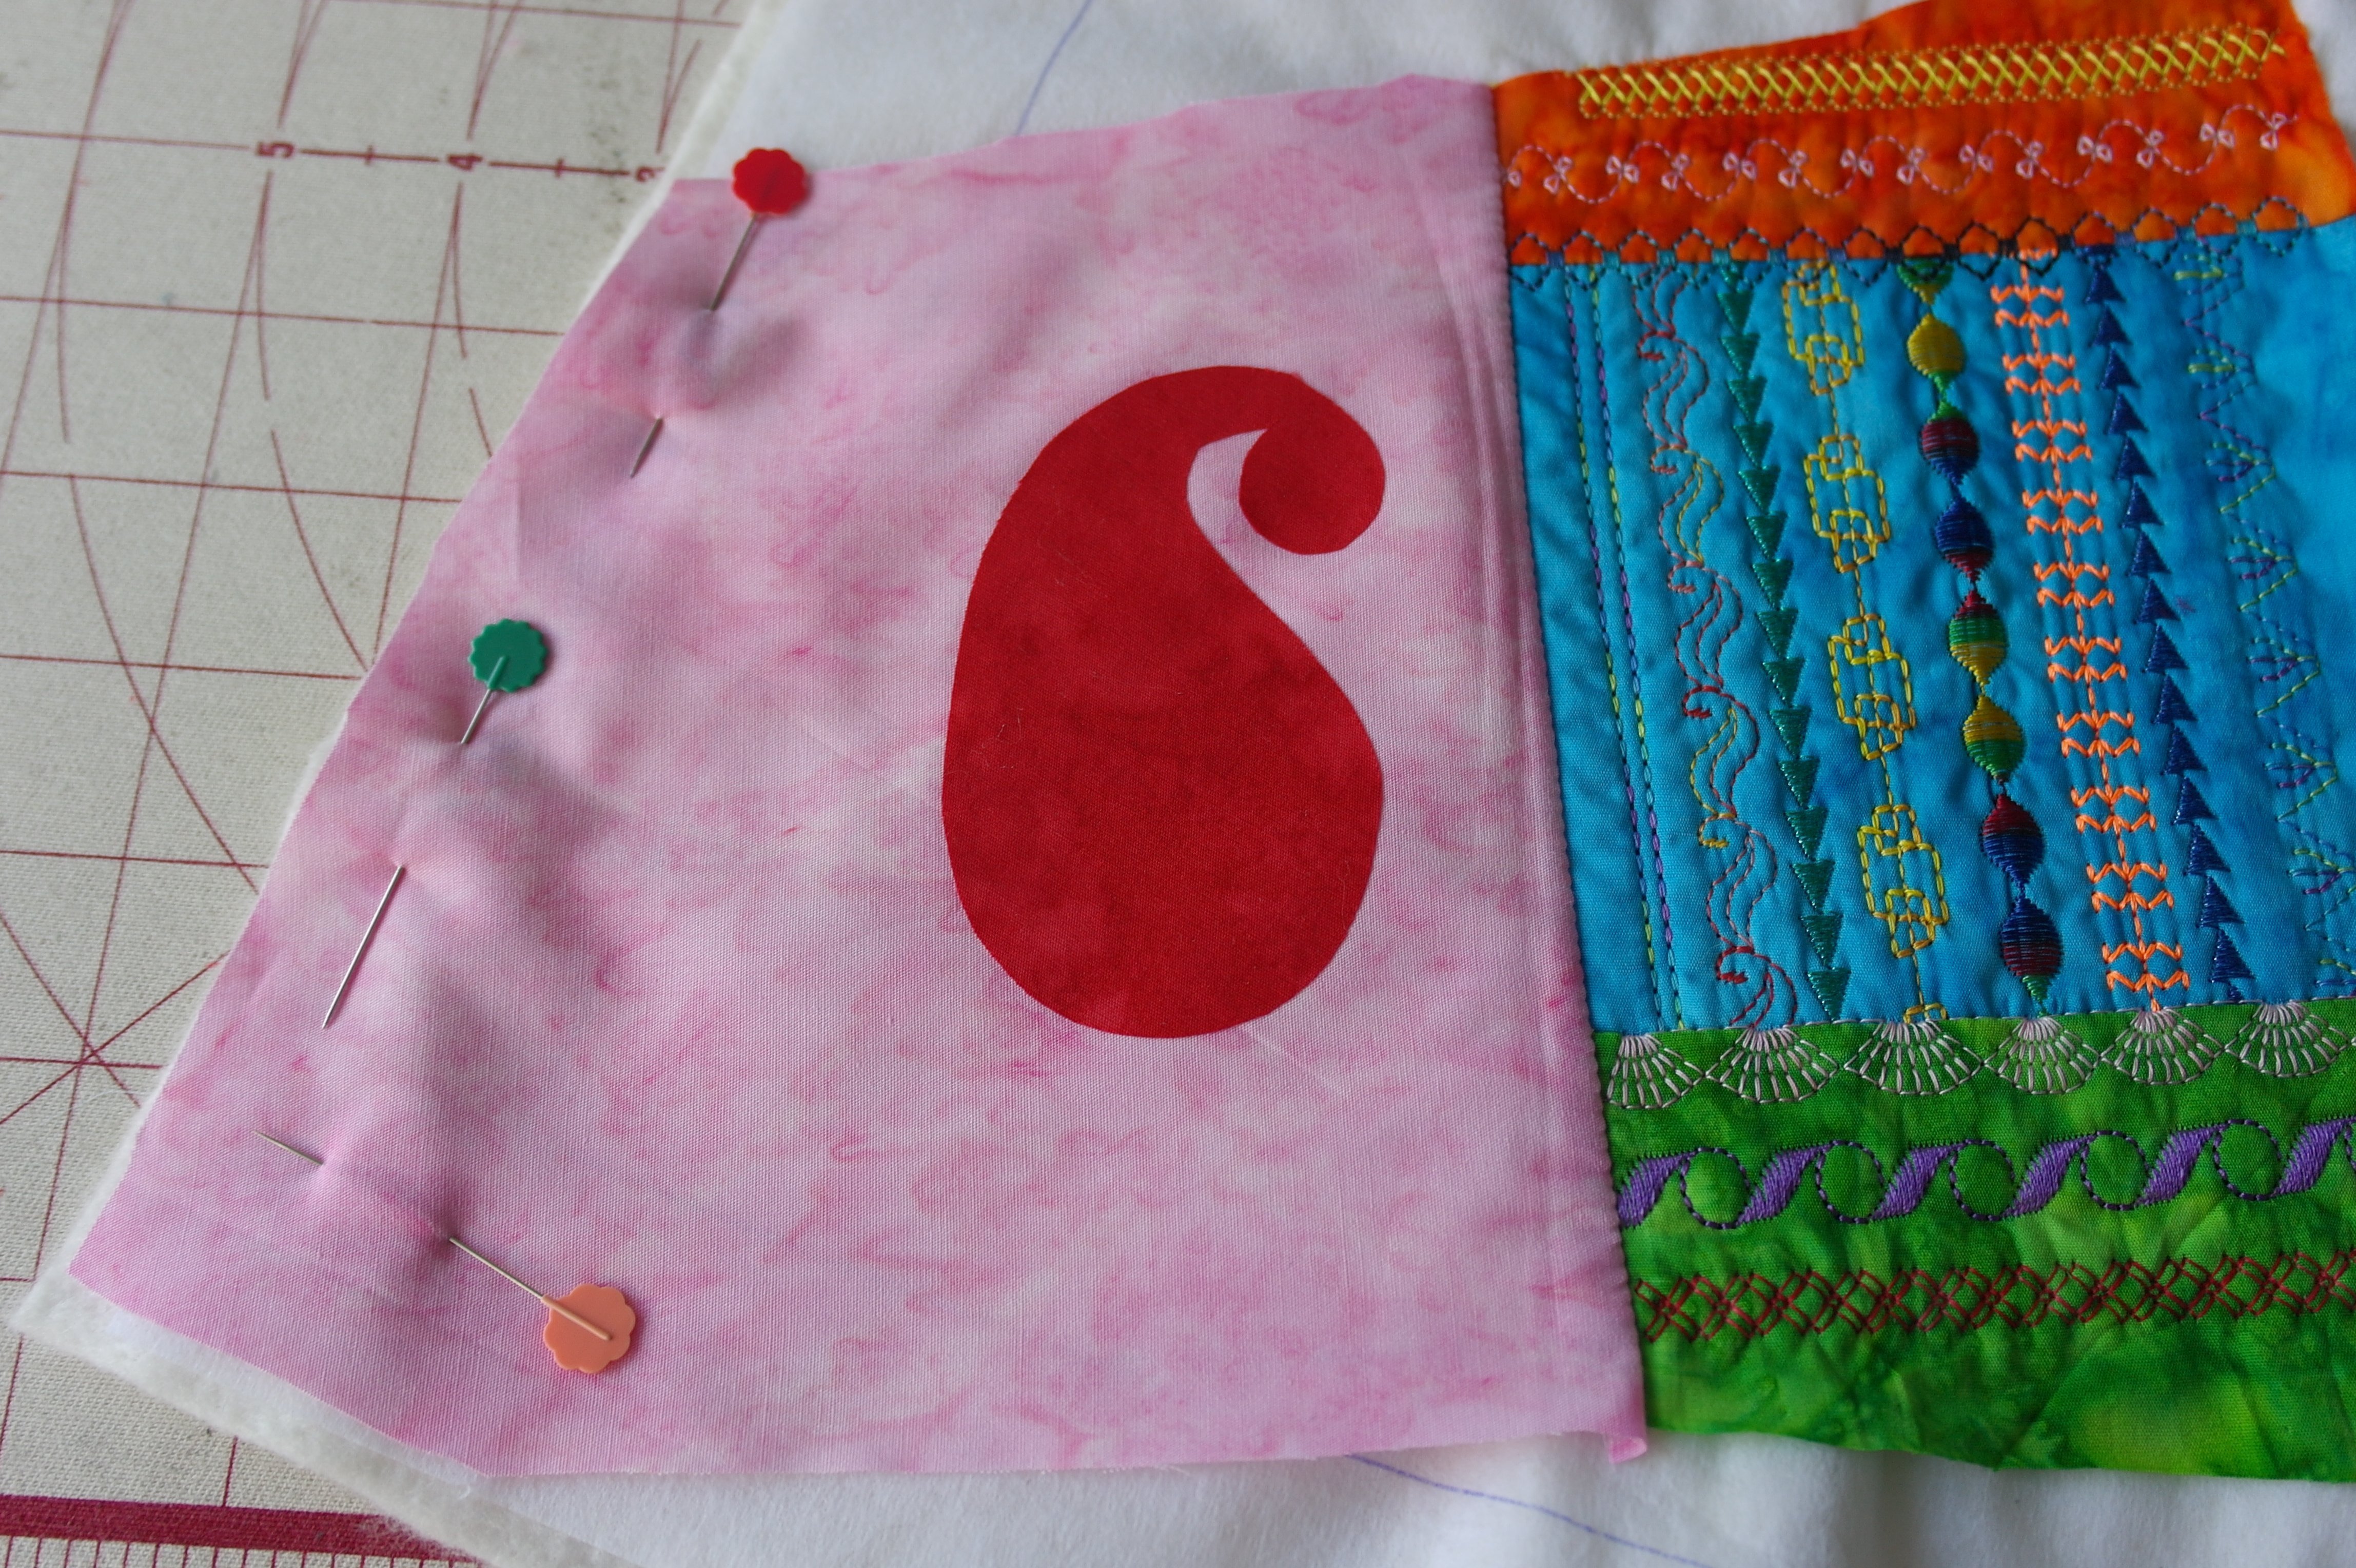
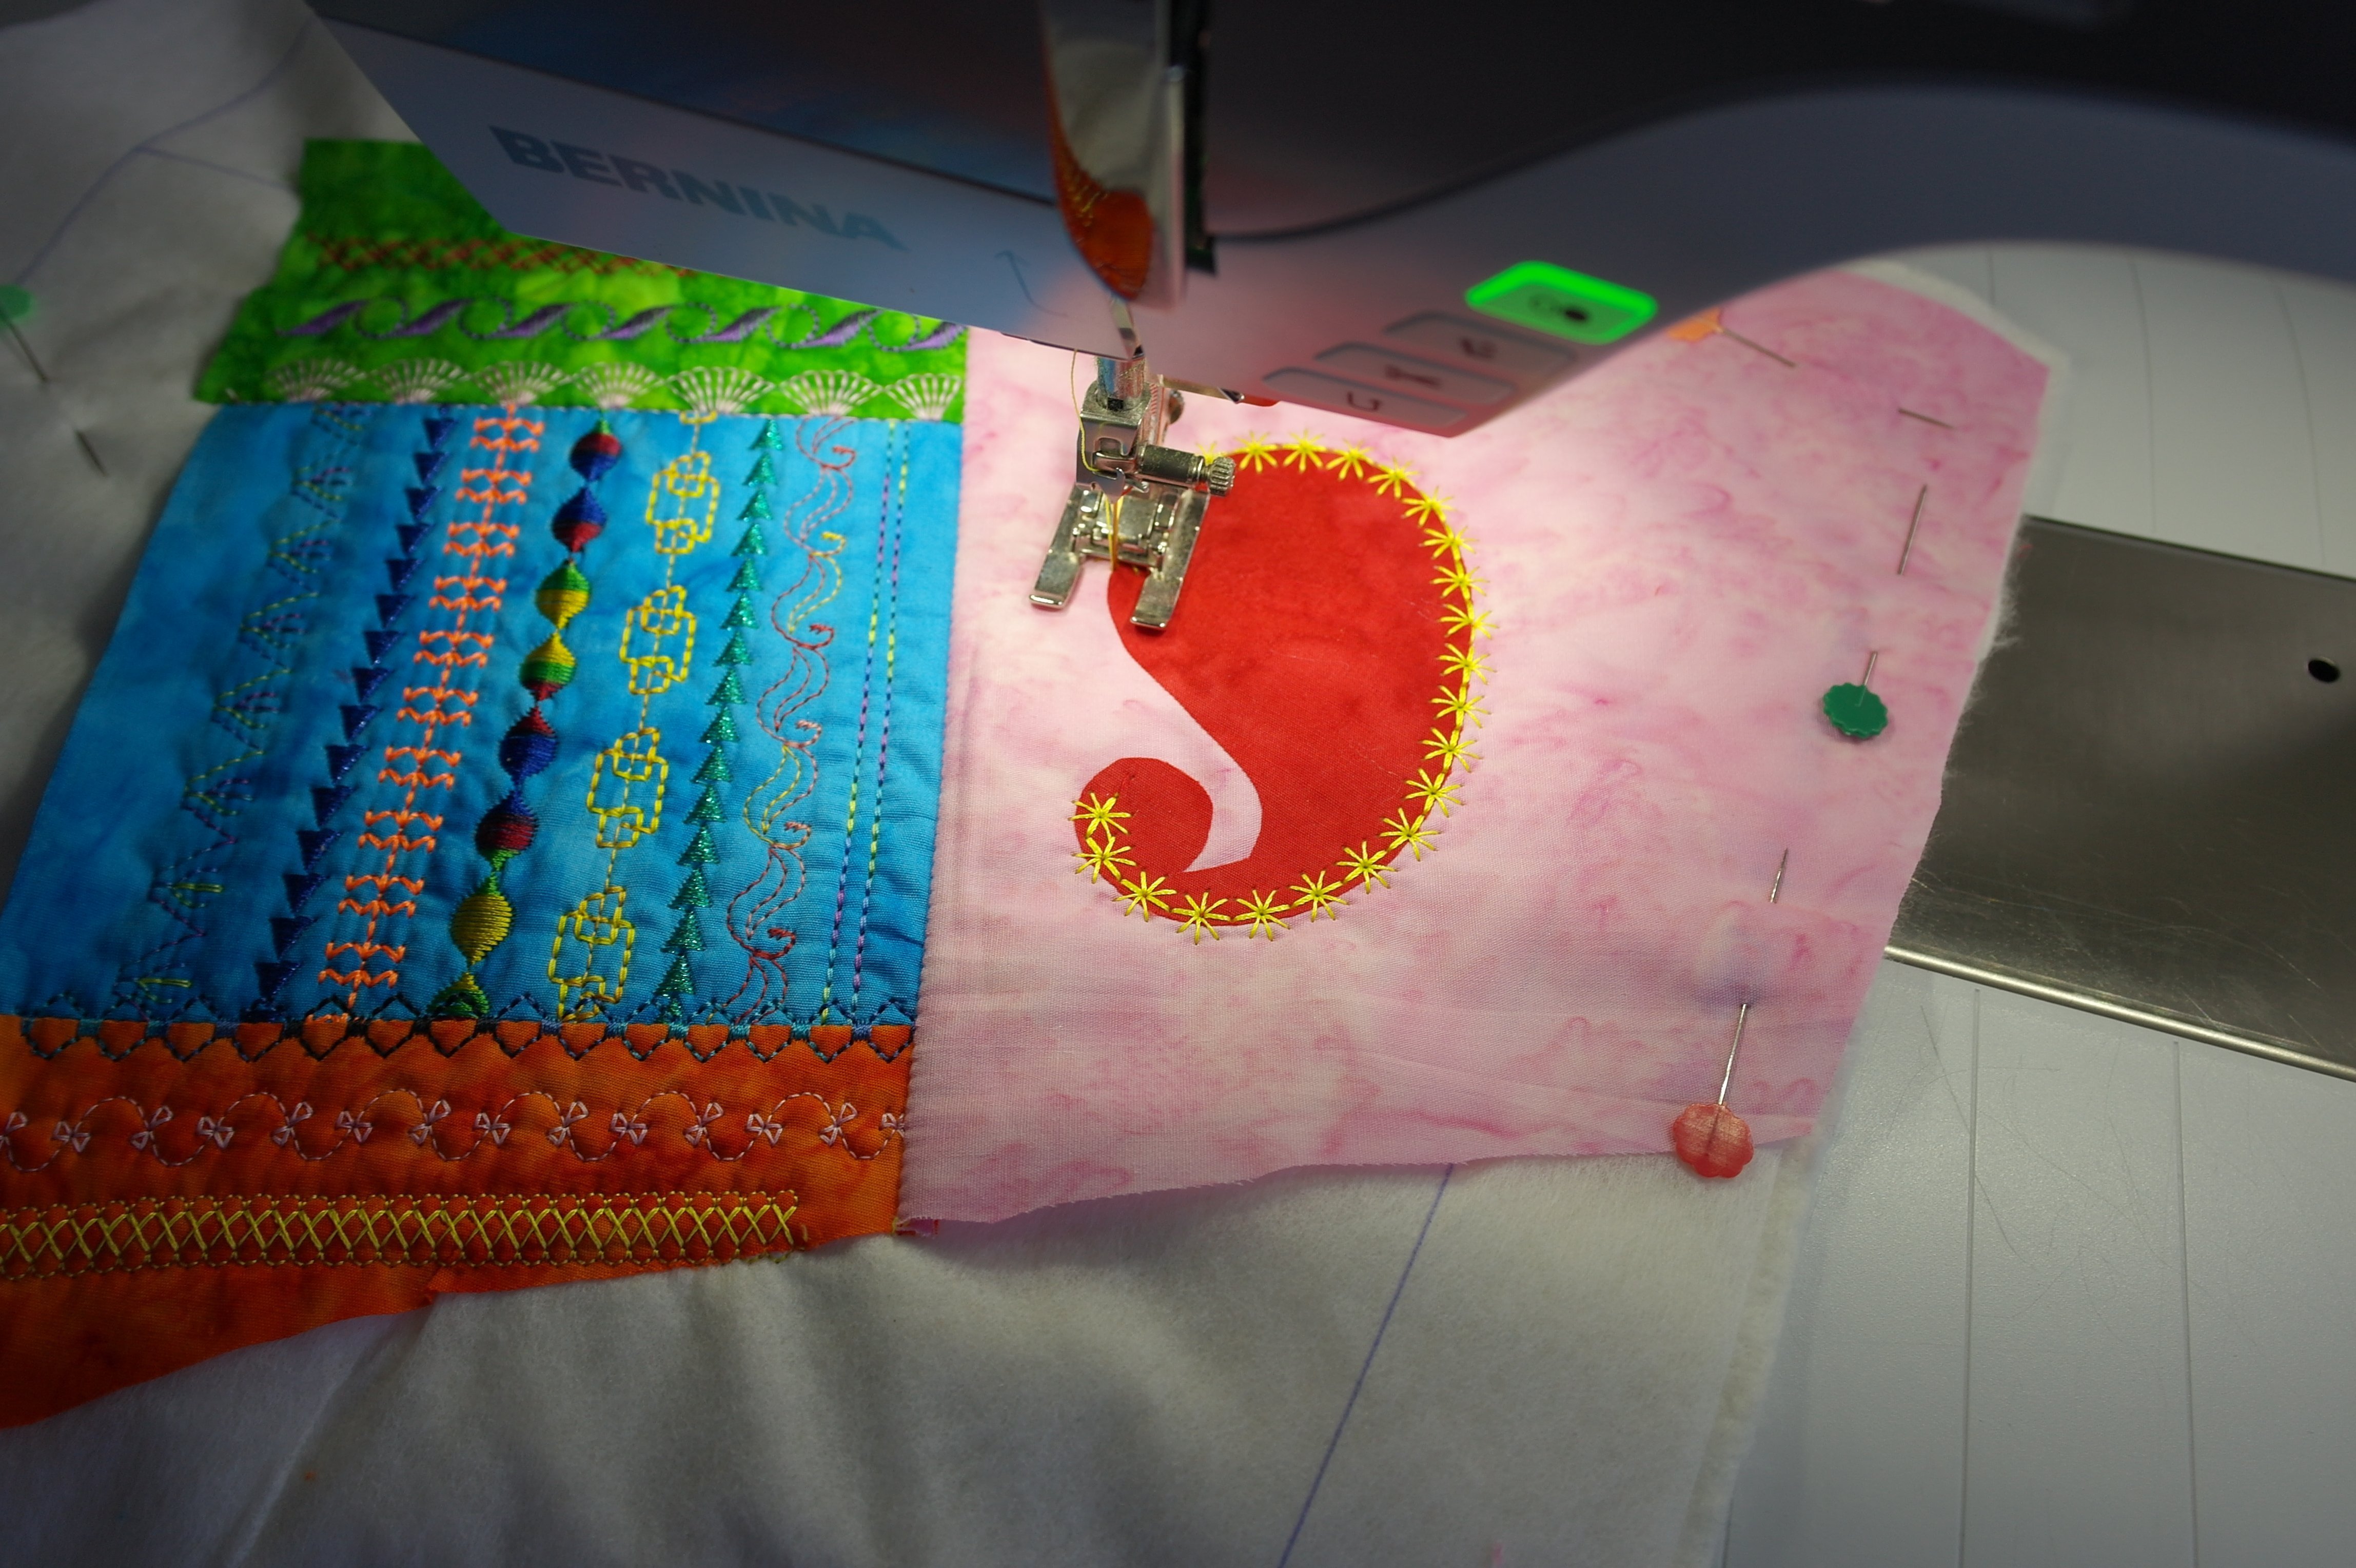
Iron the (red) paisley onto the pink fabric. Place the sandwich to the right side, pink fabric with applique and other fabrics with right sides up, and pin the sides of the pink fabric to the sandwich to hold it in place.
Now you can search for fun stitches to sew around/onto the paisley. Now you will discover how important it is to know how a stitch is made, in which direction the stitches are placed, and what the sequence of sewing is. Be sure to try the stitches of your choise onto a sample first.
I’ve choosen stitch no. 711 with my BERNINA 770QE. You can choose any stitch you like, as long as it is symmetrical, not a baseline at one side. Flowers are nice too (my second stitch).
PAY ATTENTION: before rounding a curve, be sure to finish the flower or motif. The needle stays down/in the fabric, when moving the sandwich to another position, before making the next stitch. I’ve started with the small piece on top, worked my way around the paisley and finsihed on top/close to the first motif. If your stitch/flower had a middle/stitch, use that to guide along the sides of the applique. Work slowly.
The first row is made: you can see how I am rounding the curves.
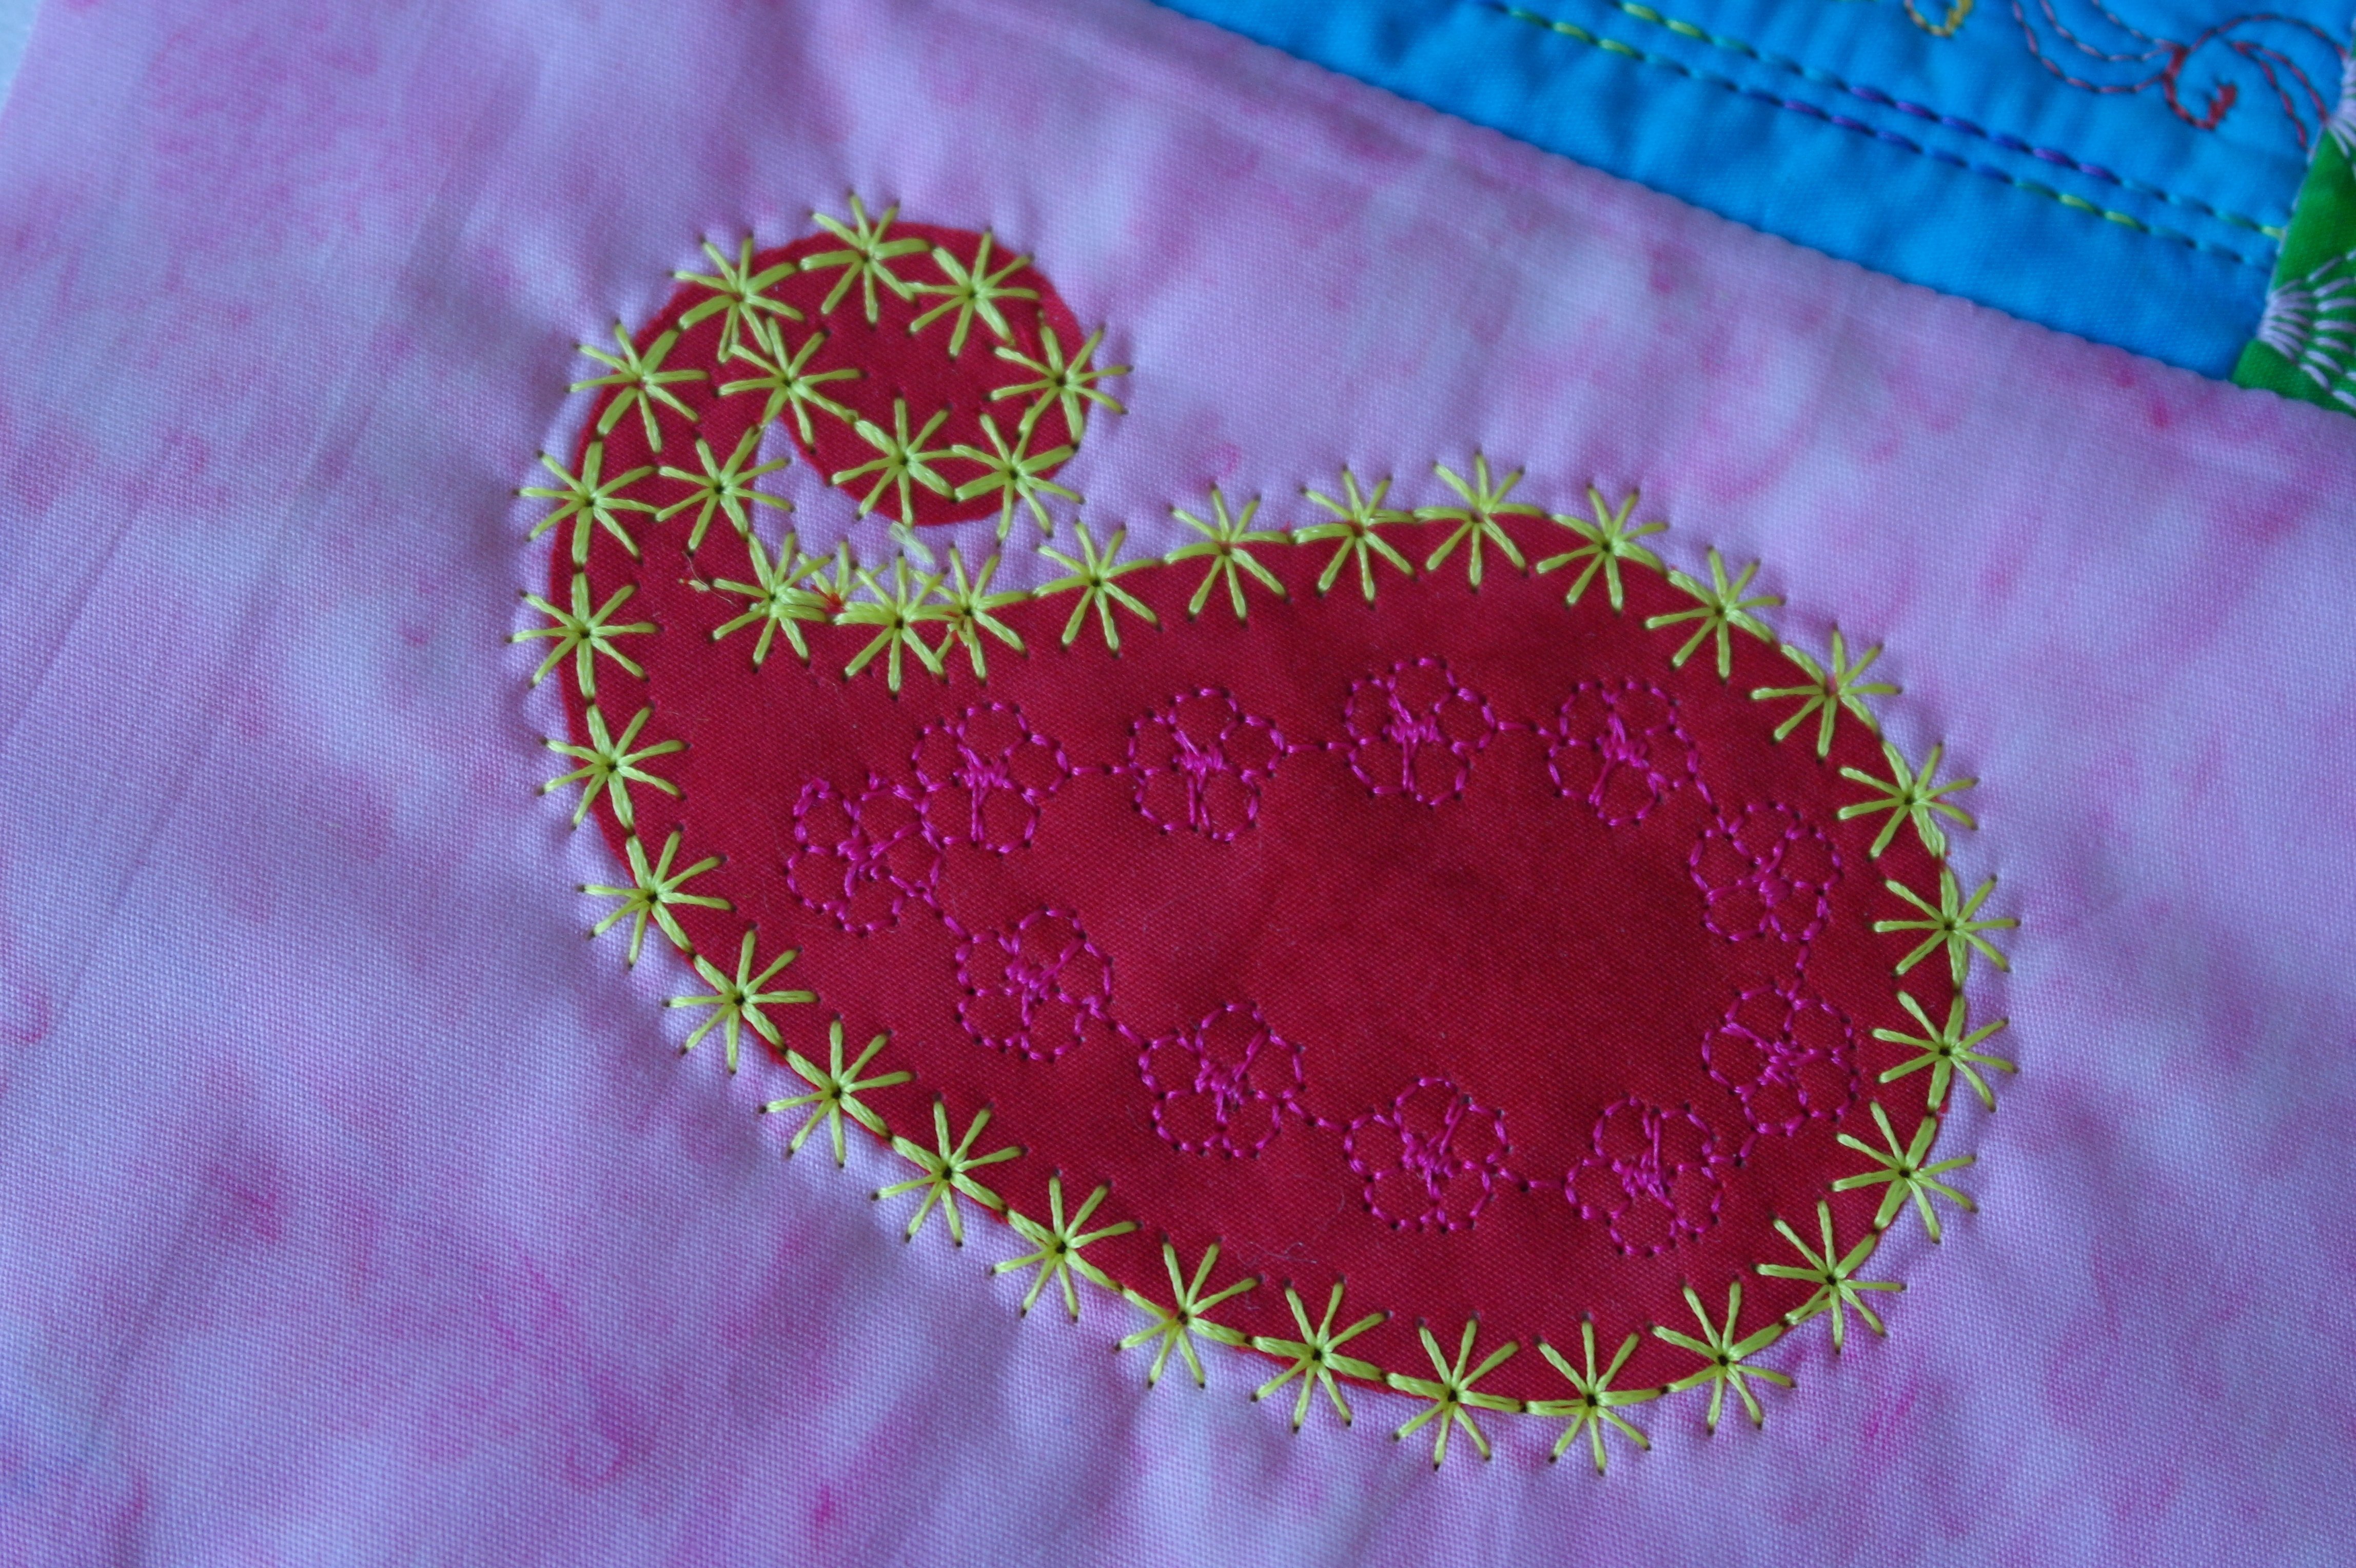
The second row of (flower)stitches is made too: both rows are made with Neon colors of Magnifico/Superior Threads: bright colors stand out more. Make a couple of rows of stitches, perhaps some more if your stitches are very small.
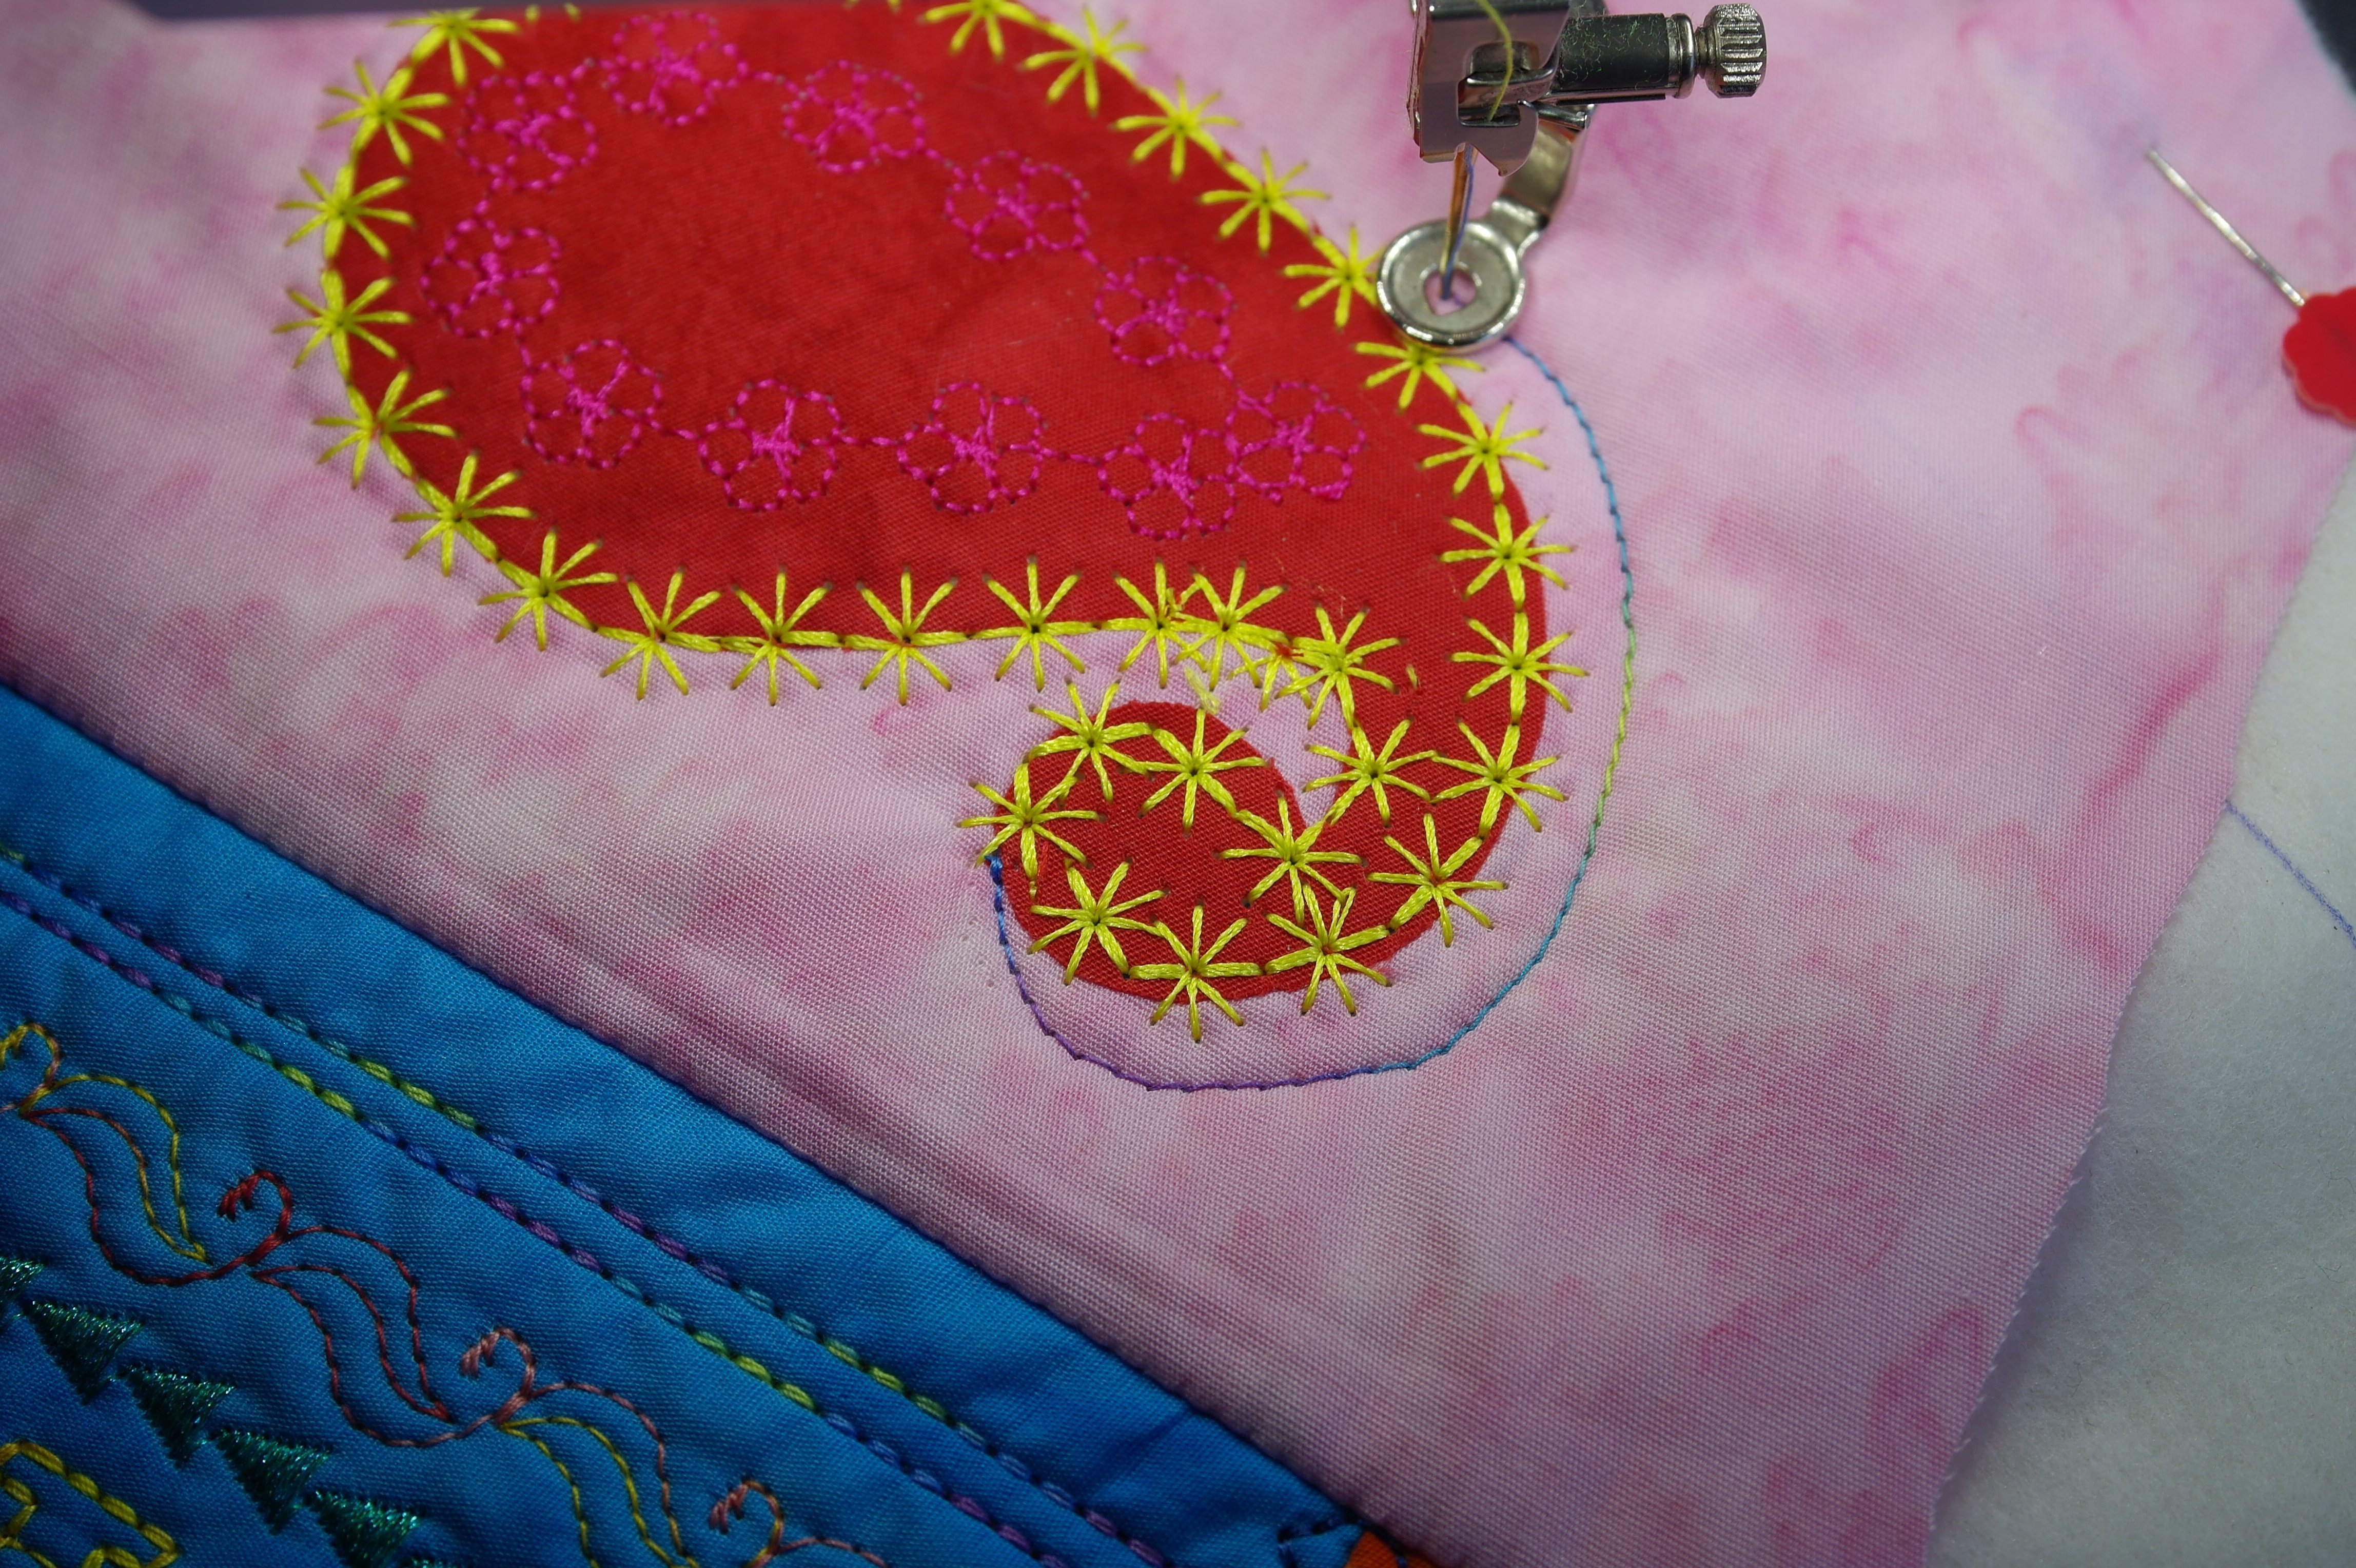
Now I have removed my Open Embroidery foot #20C, and replaced it with my Free-motion Quiltingfoot, lowered the feed dogs, to be able to quilt freehand. To fill the background/negative space of the pink fabric, I will echo quilt around the paisley, spiraling my way out, starting on top of the applique, using the width of the quilting foot as a guideline.
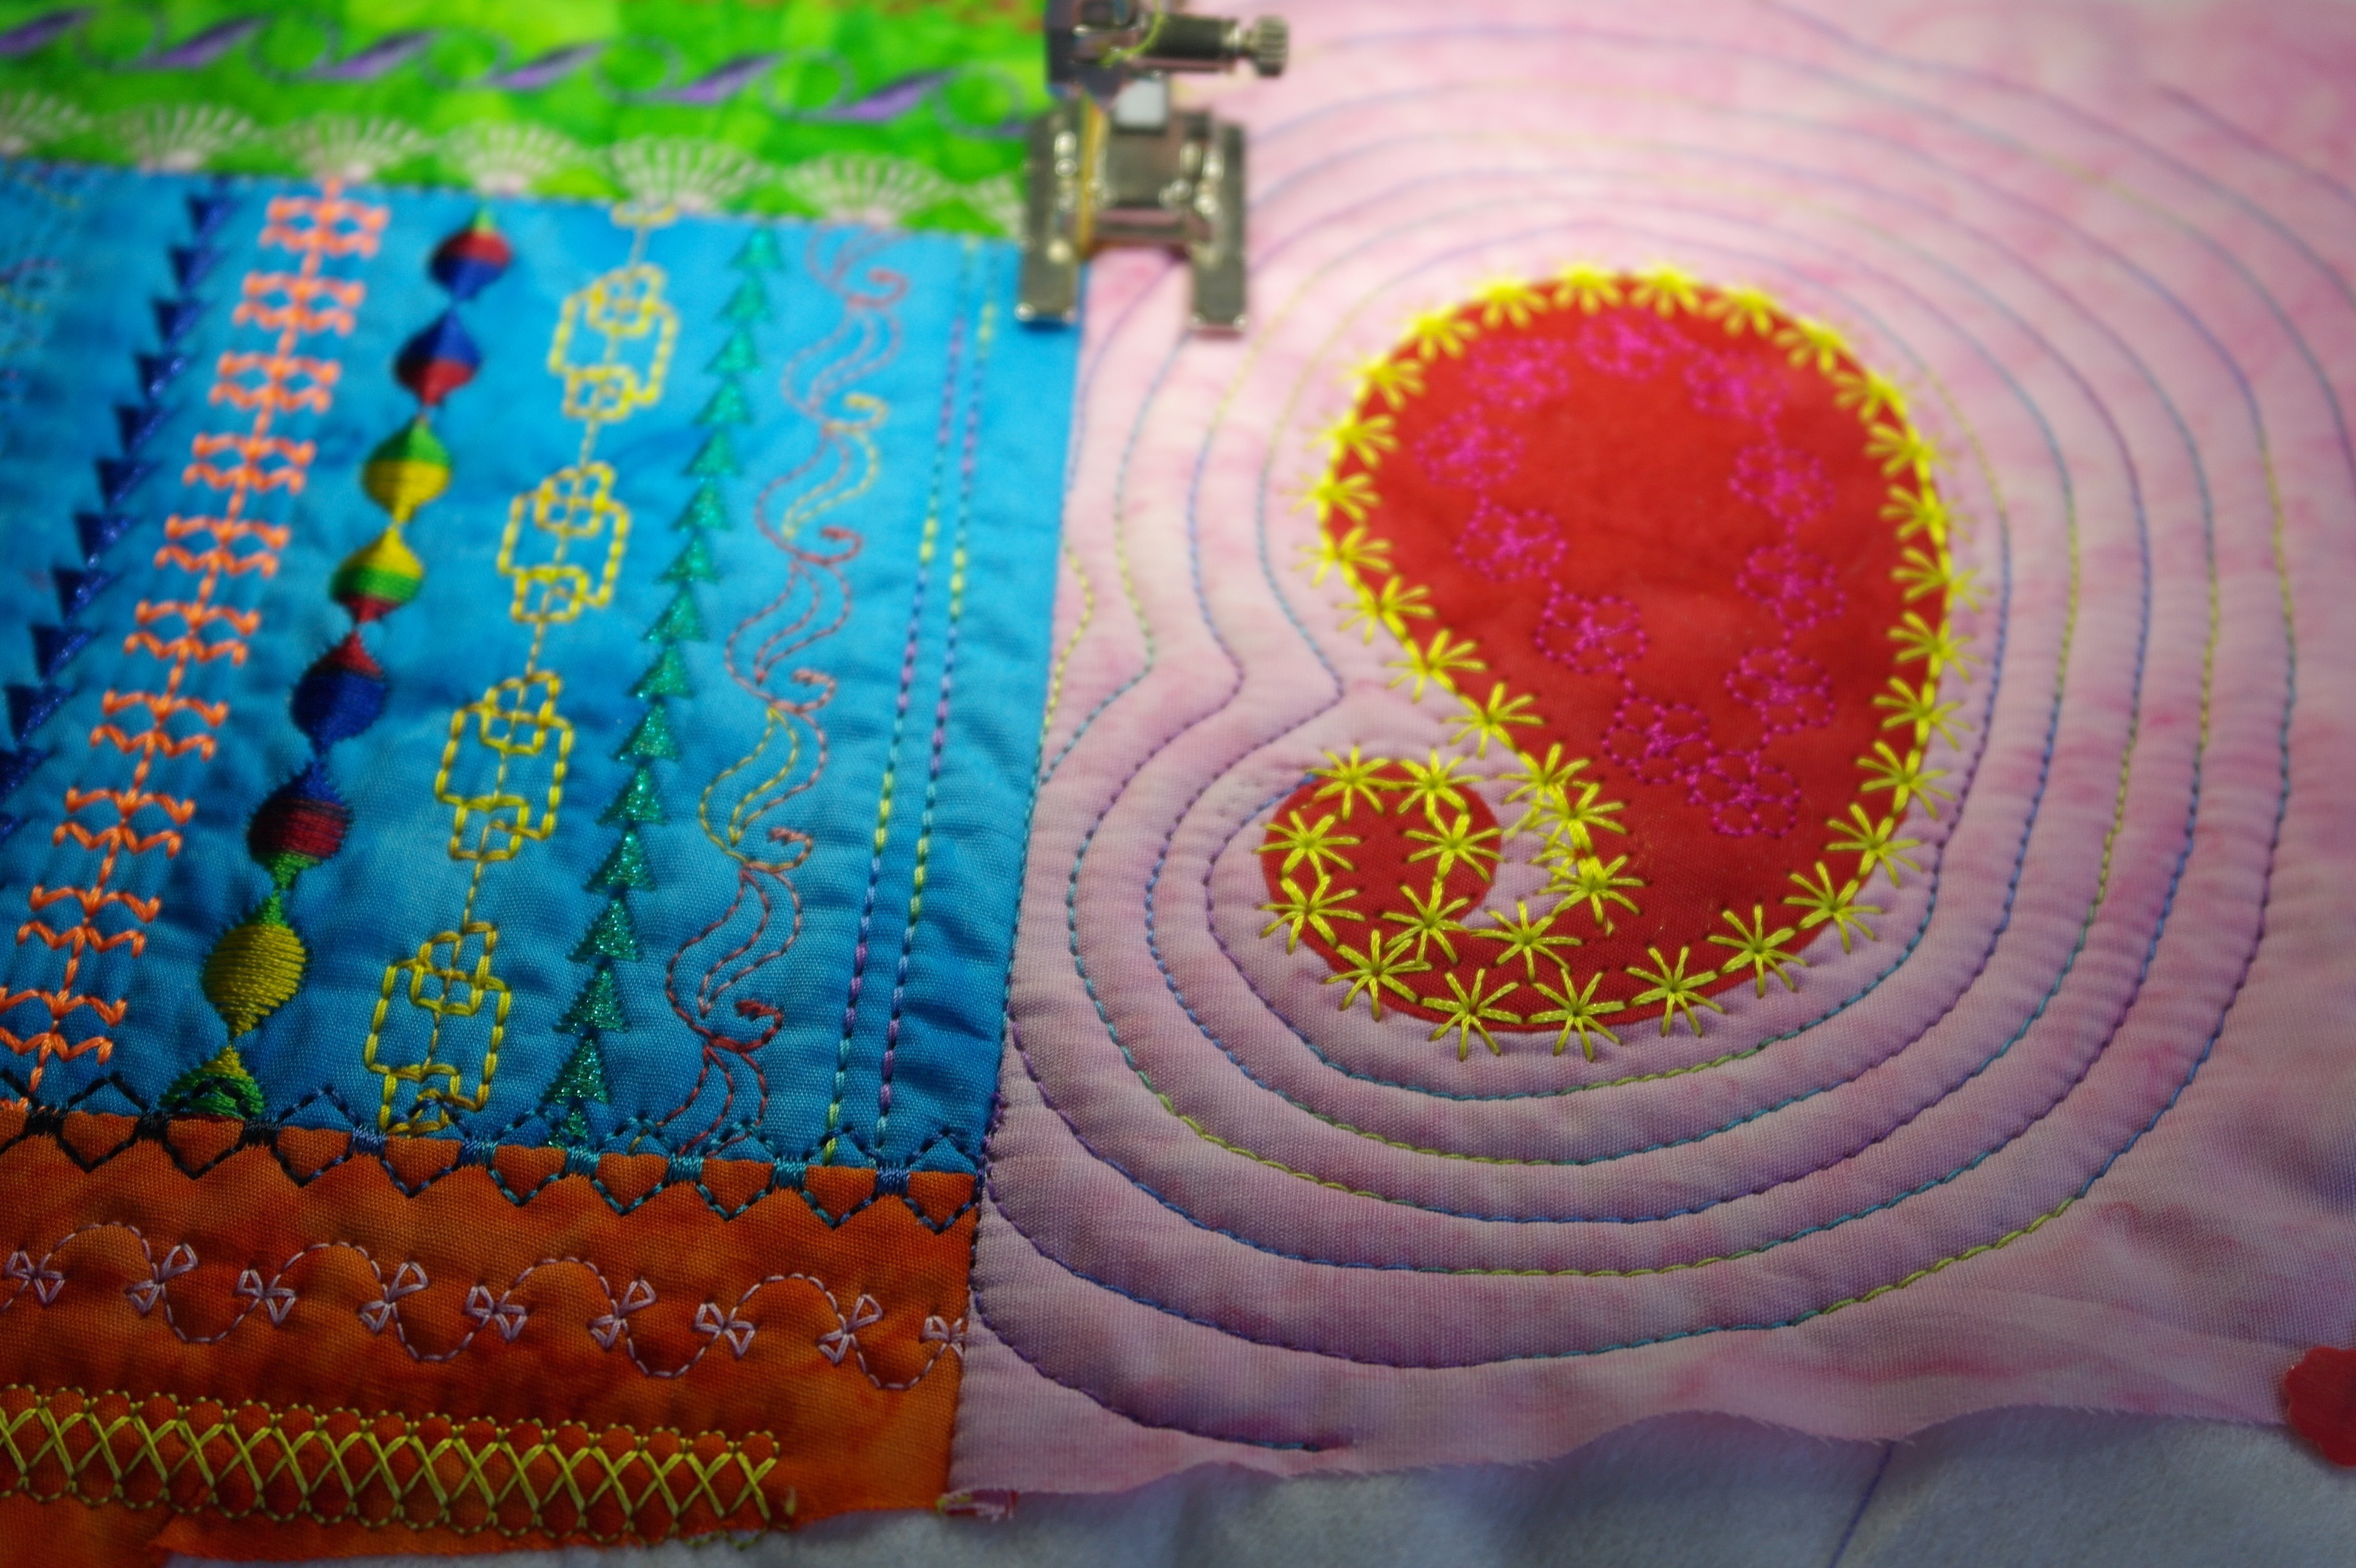
At a certain time you cannot quilt any further, because you will quilt up against the seam of the fabrics on the other side of the pink fabric. Use this seam to ‘walk’ through, and start again on the pink fabric when it is possible to continue the echo quilting. Make sure to let the quilting lines protrude to the edges of the pink fabric.
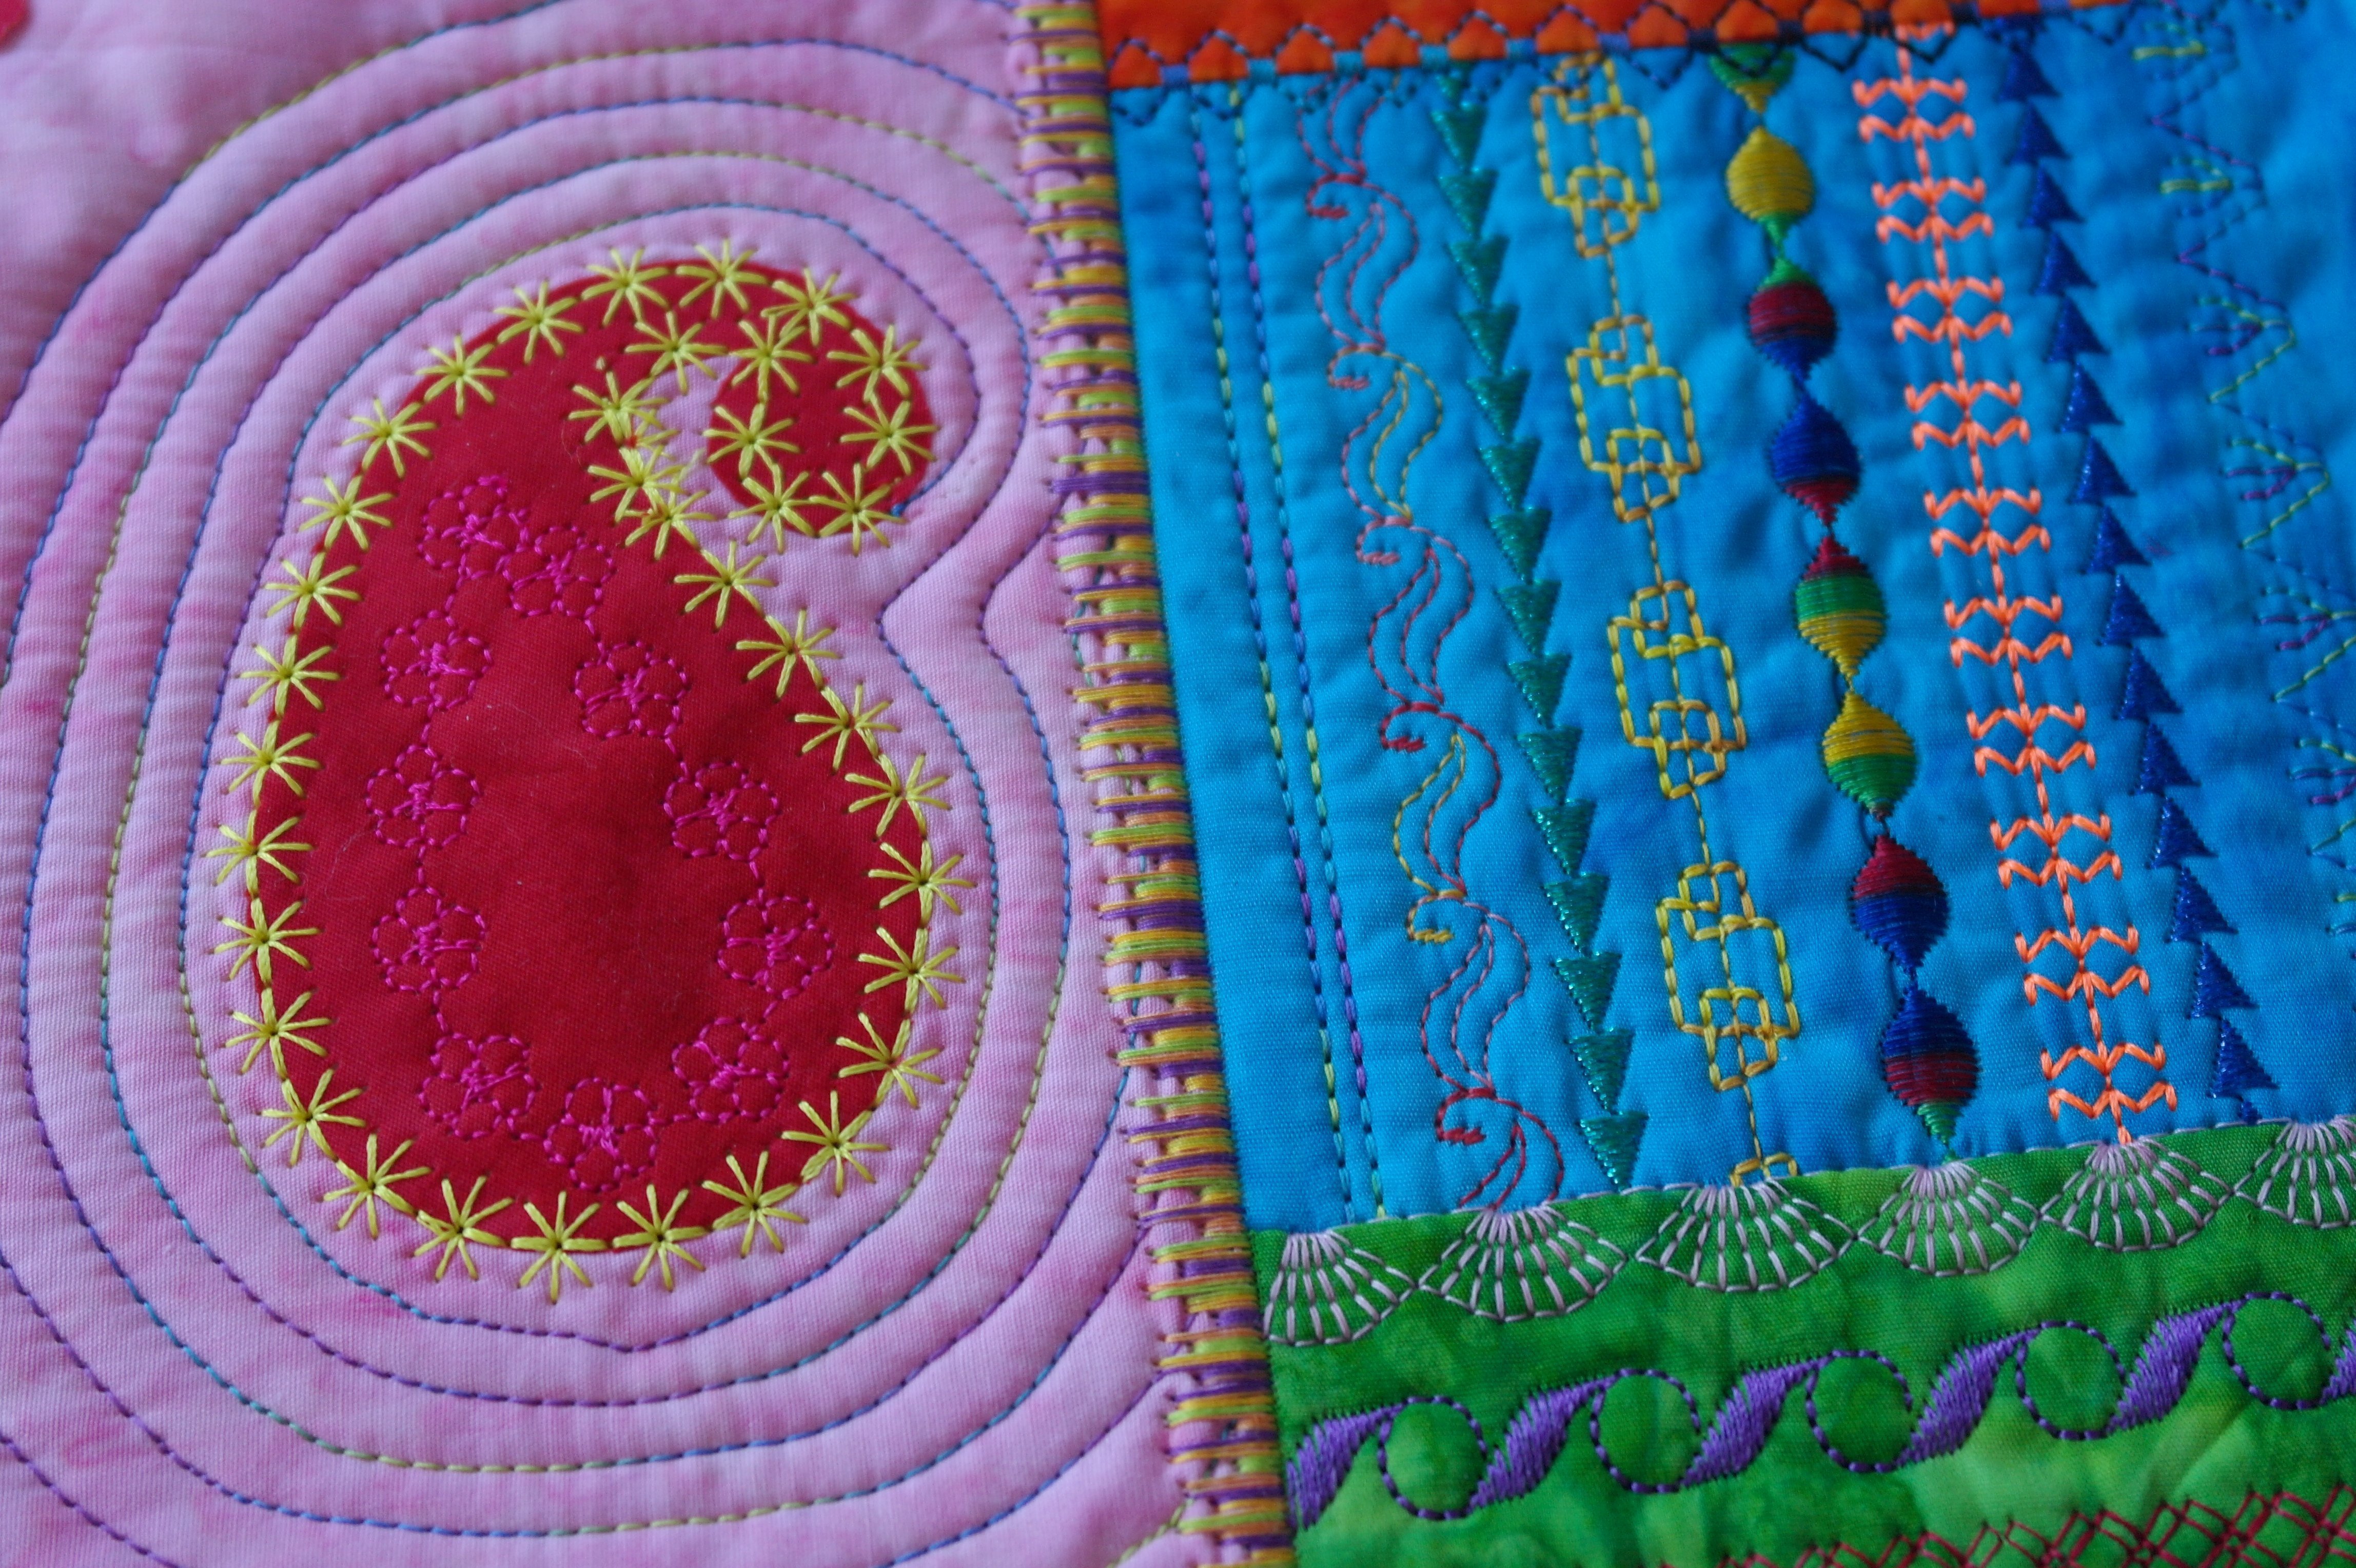
After quilting, I’ve removed the quilting foot, and mounted the Open Embroidery foot #20C again, raised the feed dogs for making more decorative stitches. Because I have used the seam between the fabrics for transporting stitches while quilting, I will place a nice dense decorative stitch over the seam. Not just to hide ugly travelling stitches, but also to enhance the effect of color. Don’t worry if your echo quilting is not equal everywhere: you can always add beads, sequins, Hotfix etc. to hide that later on.
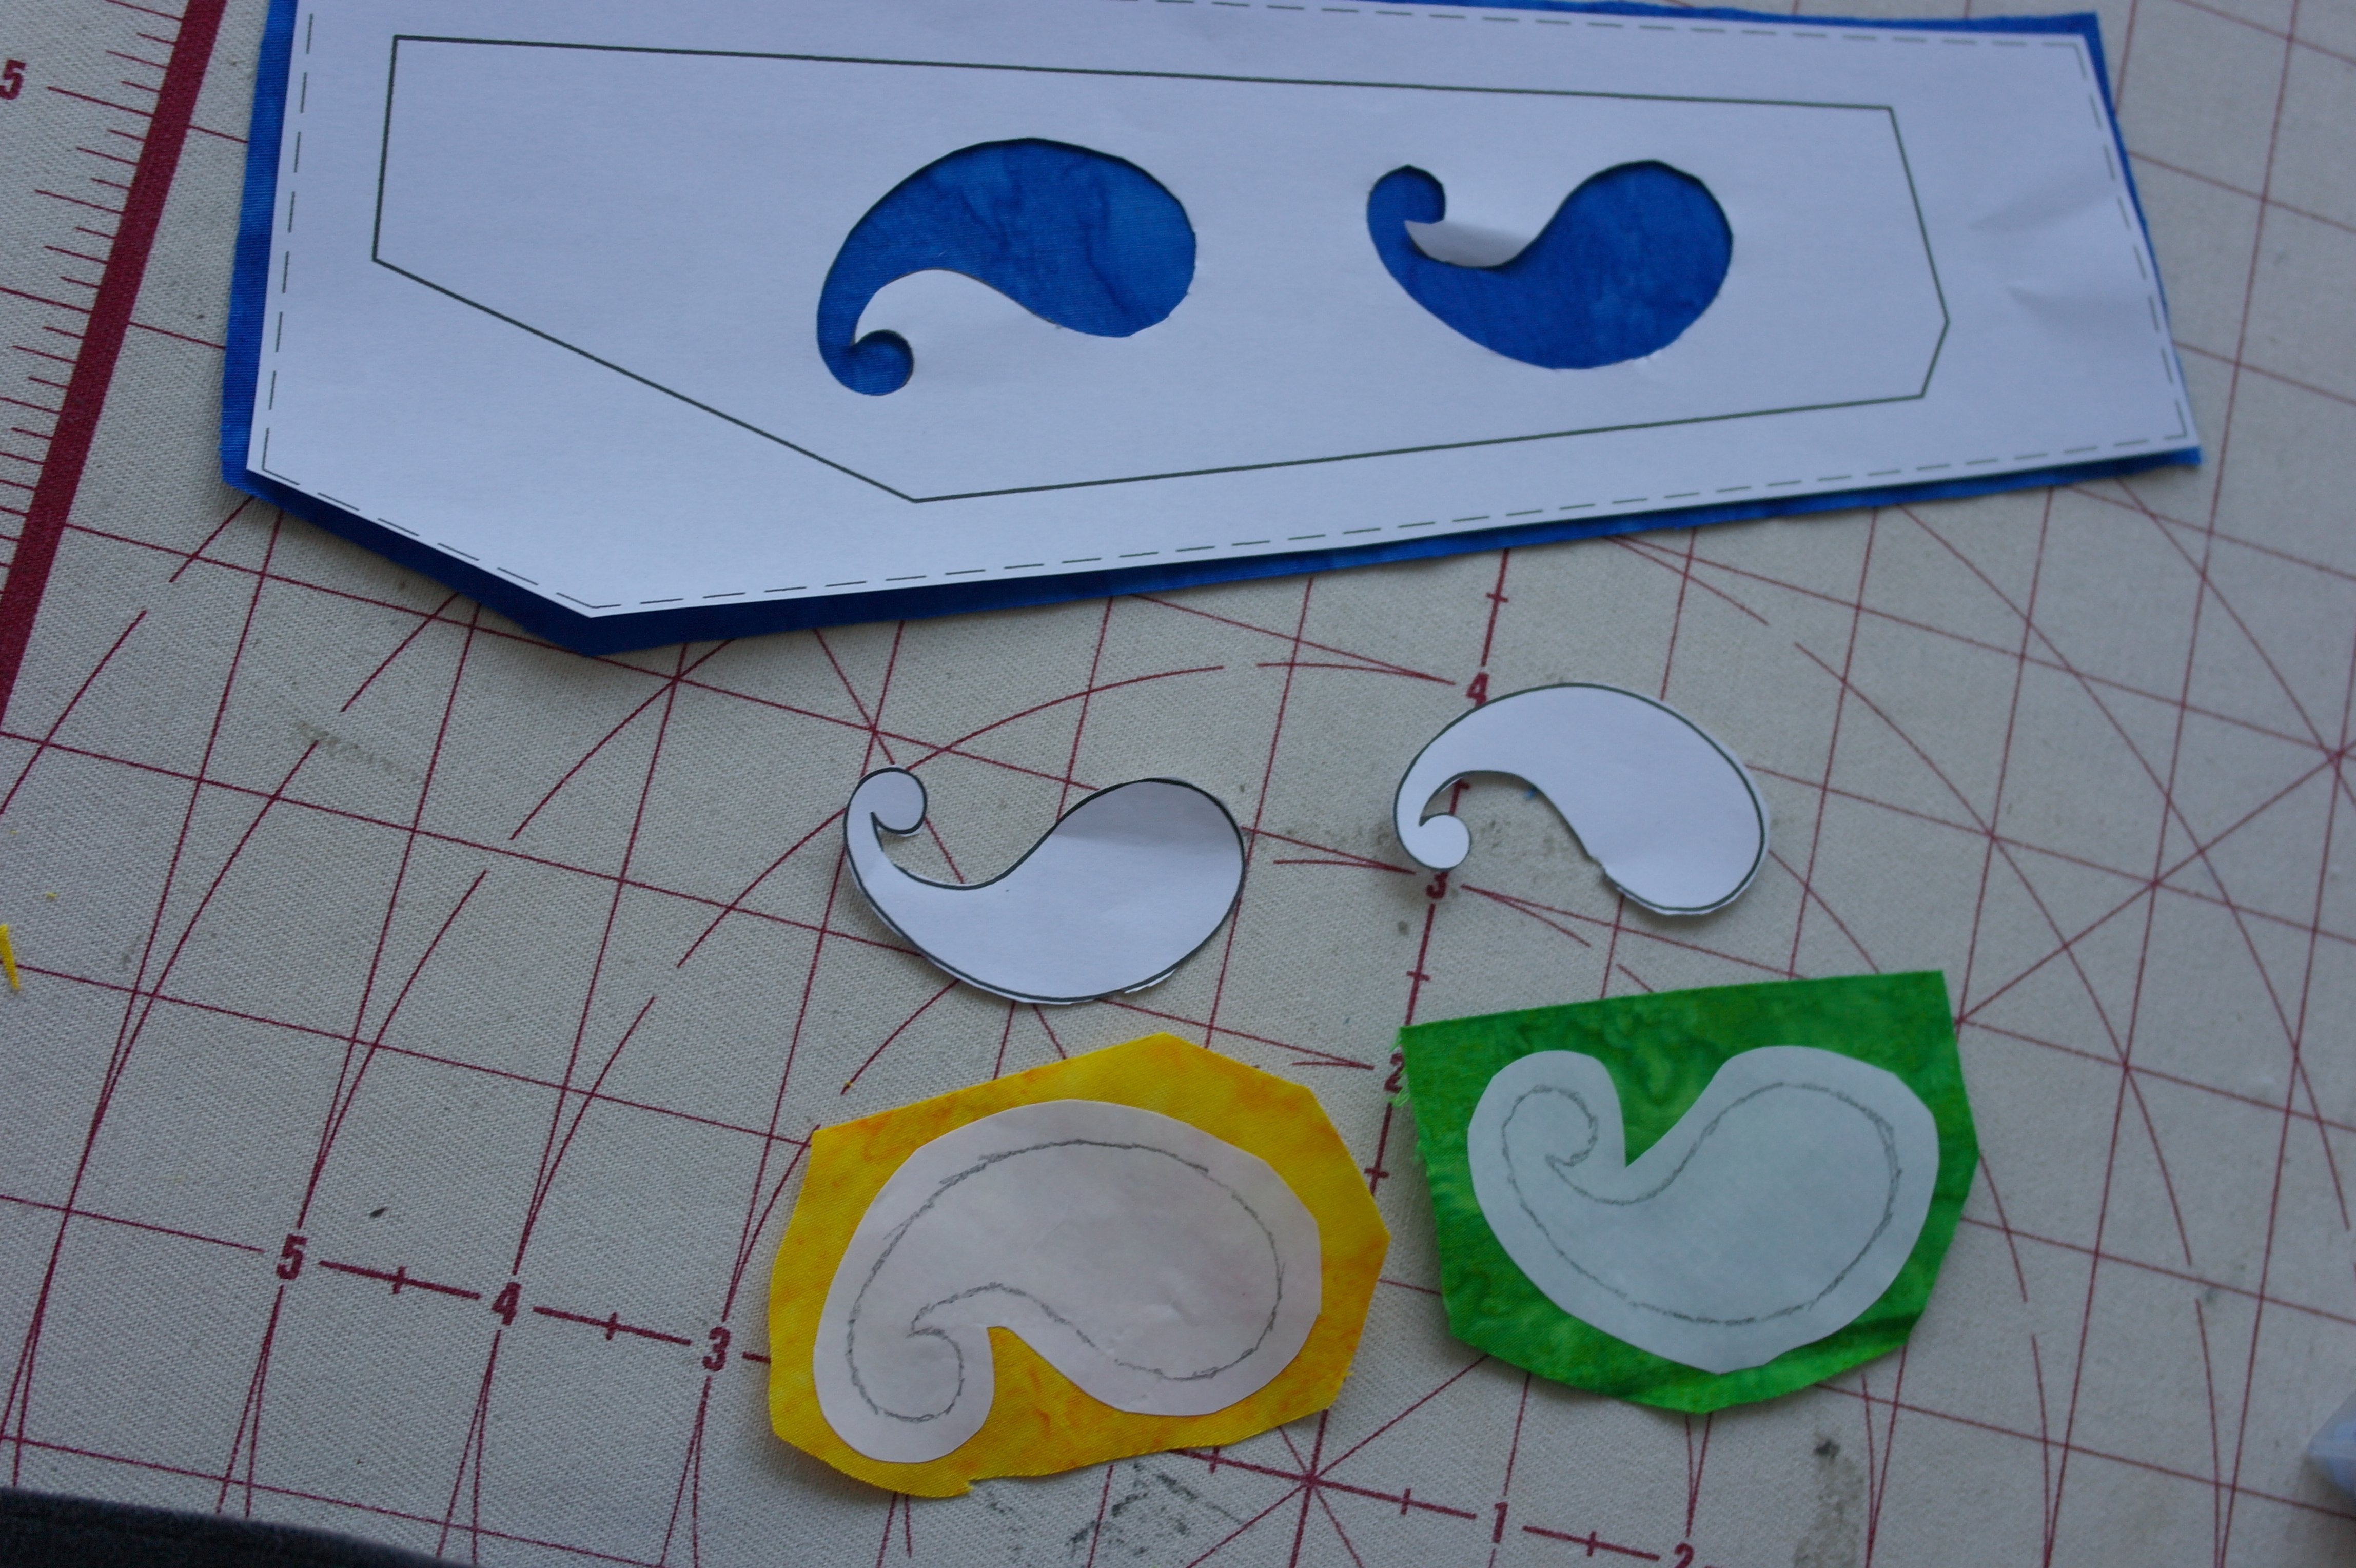
Next is fabric no.5, with a slightly different approach. Use the paper pattern again, find fabrics for both paisleys, iron them onto Heat’n Bond Lite and cut the fabric for section 5 (blue batik) the same size as the paper pattern.

Cut the appliques exactly on the solid line, and place them in the opening of the paper template: they should fit like mine.

Place two fingers on both appliques (one finger on each paisley), remove the paper. Iron the appliques onto the fabric.
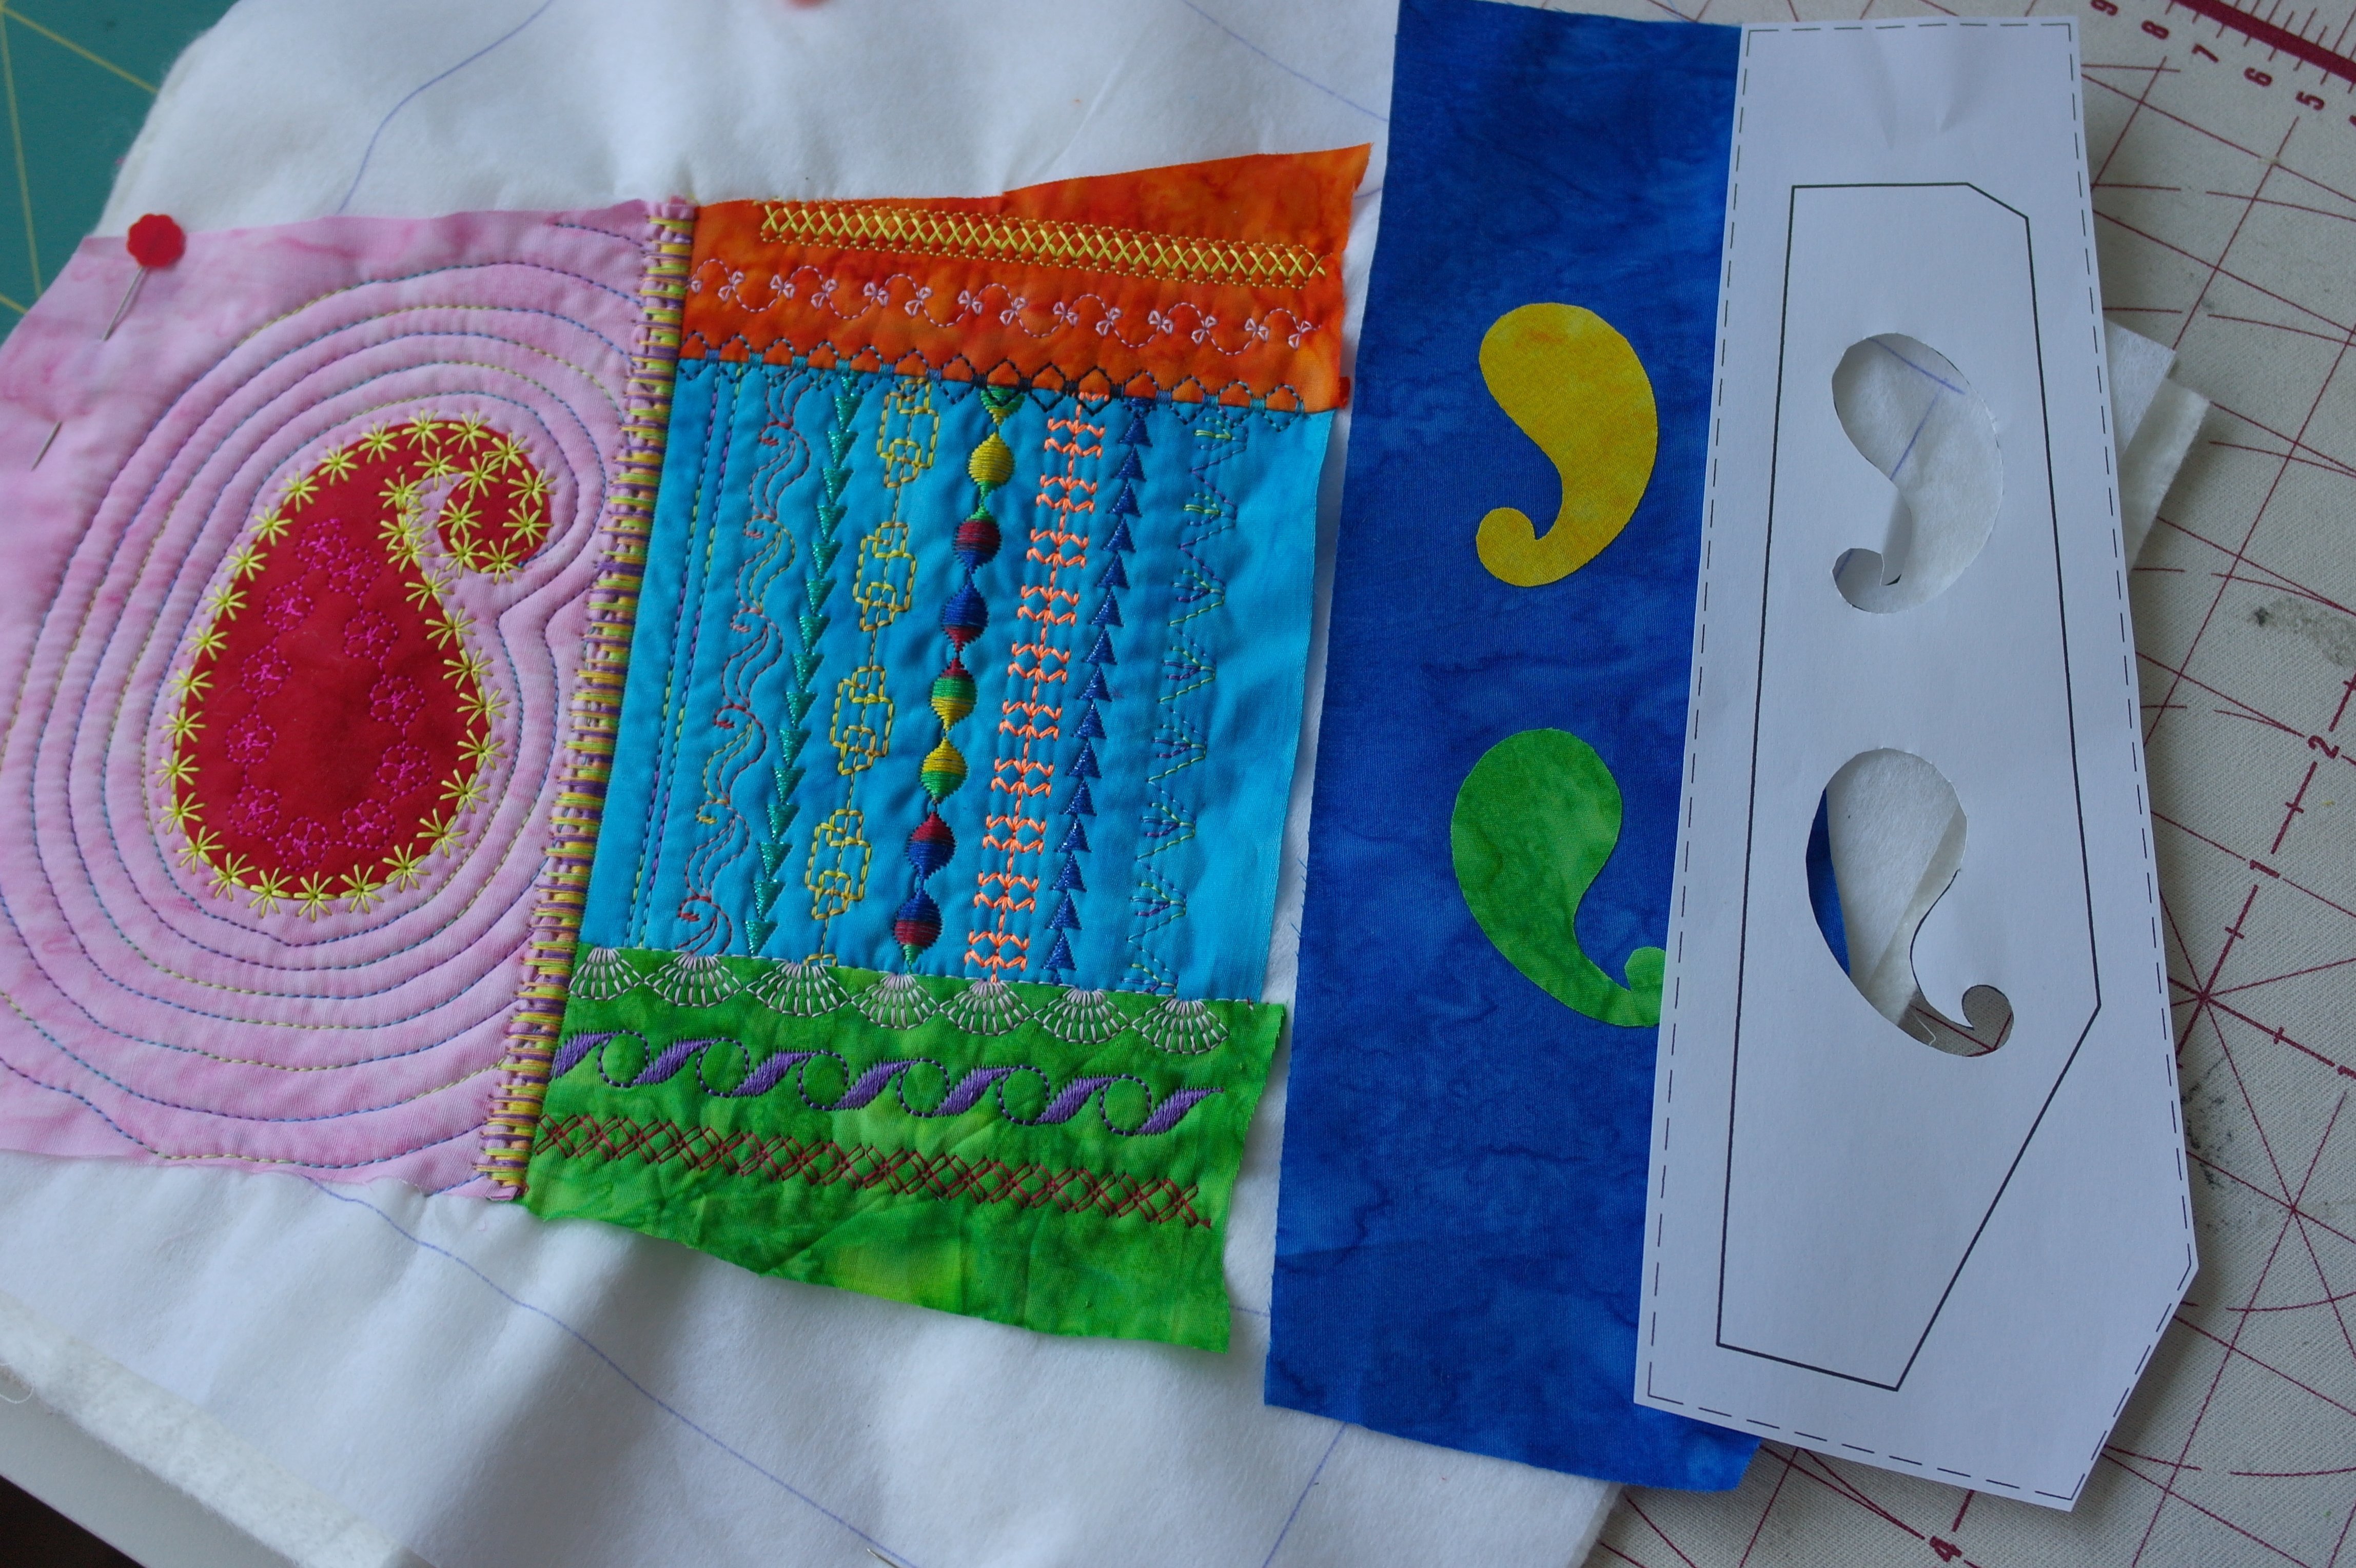
At this time the fabric with the appliques is placed onto the sandwich, together with the paper pattern, to check if it is big enough, and placed right. Turn the fabric onto the other sections, right sides together, sew it and fold the fabric to the right side. (Did you see that I have added extra seam allowances where the fabric will touch the sides of the sandwich?)
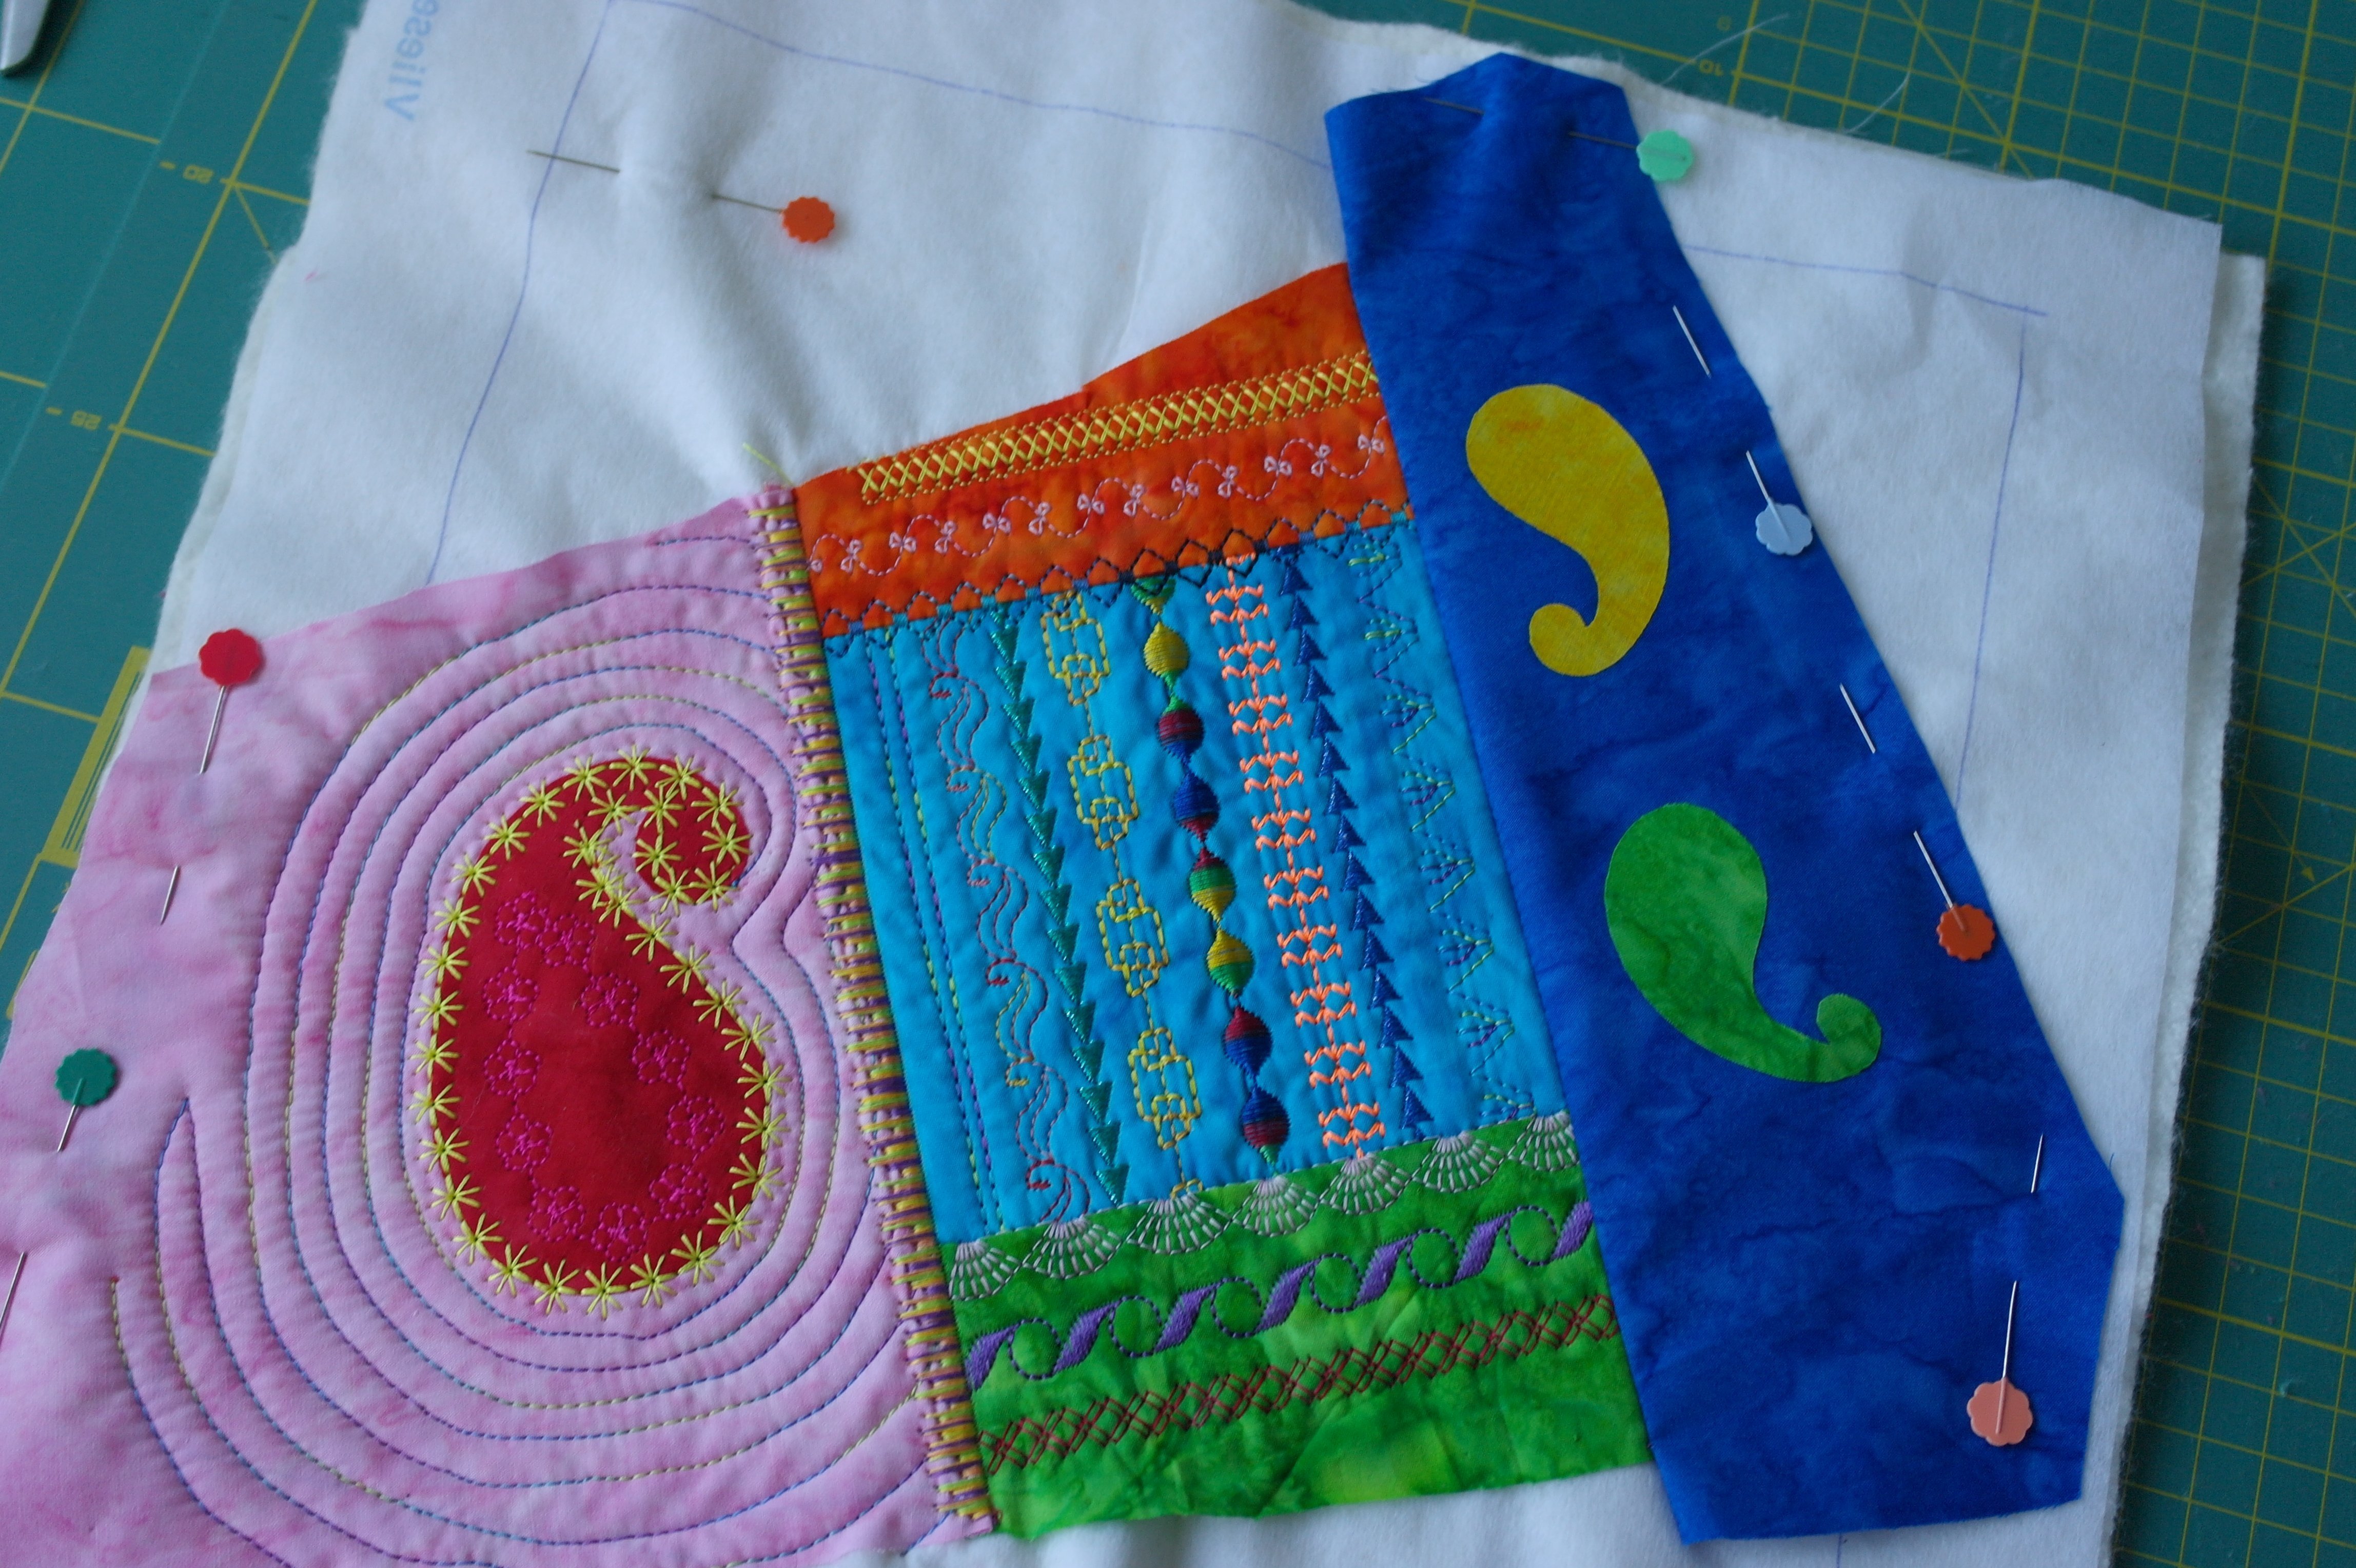
Pin fabric no. 5 to the sandwich along the edges. Use smaller decorative stitches for both paisleys, because they are smaller themselves, and large stitches are not suitable. You can make straight stitches too, or zigzag stitches: be sure to lift the presser foot every time you have to round the corner.
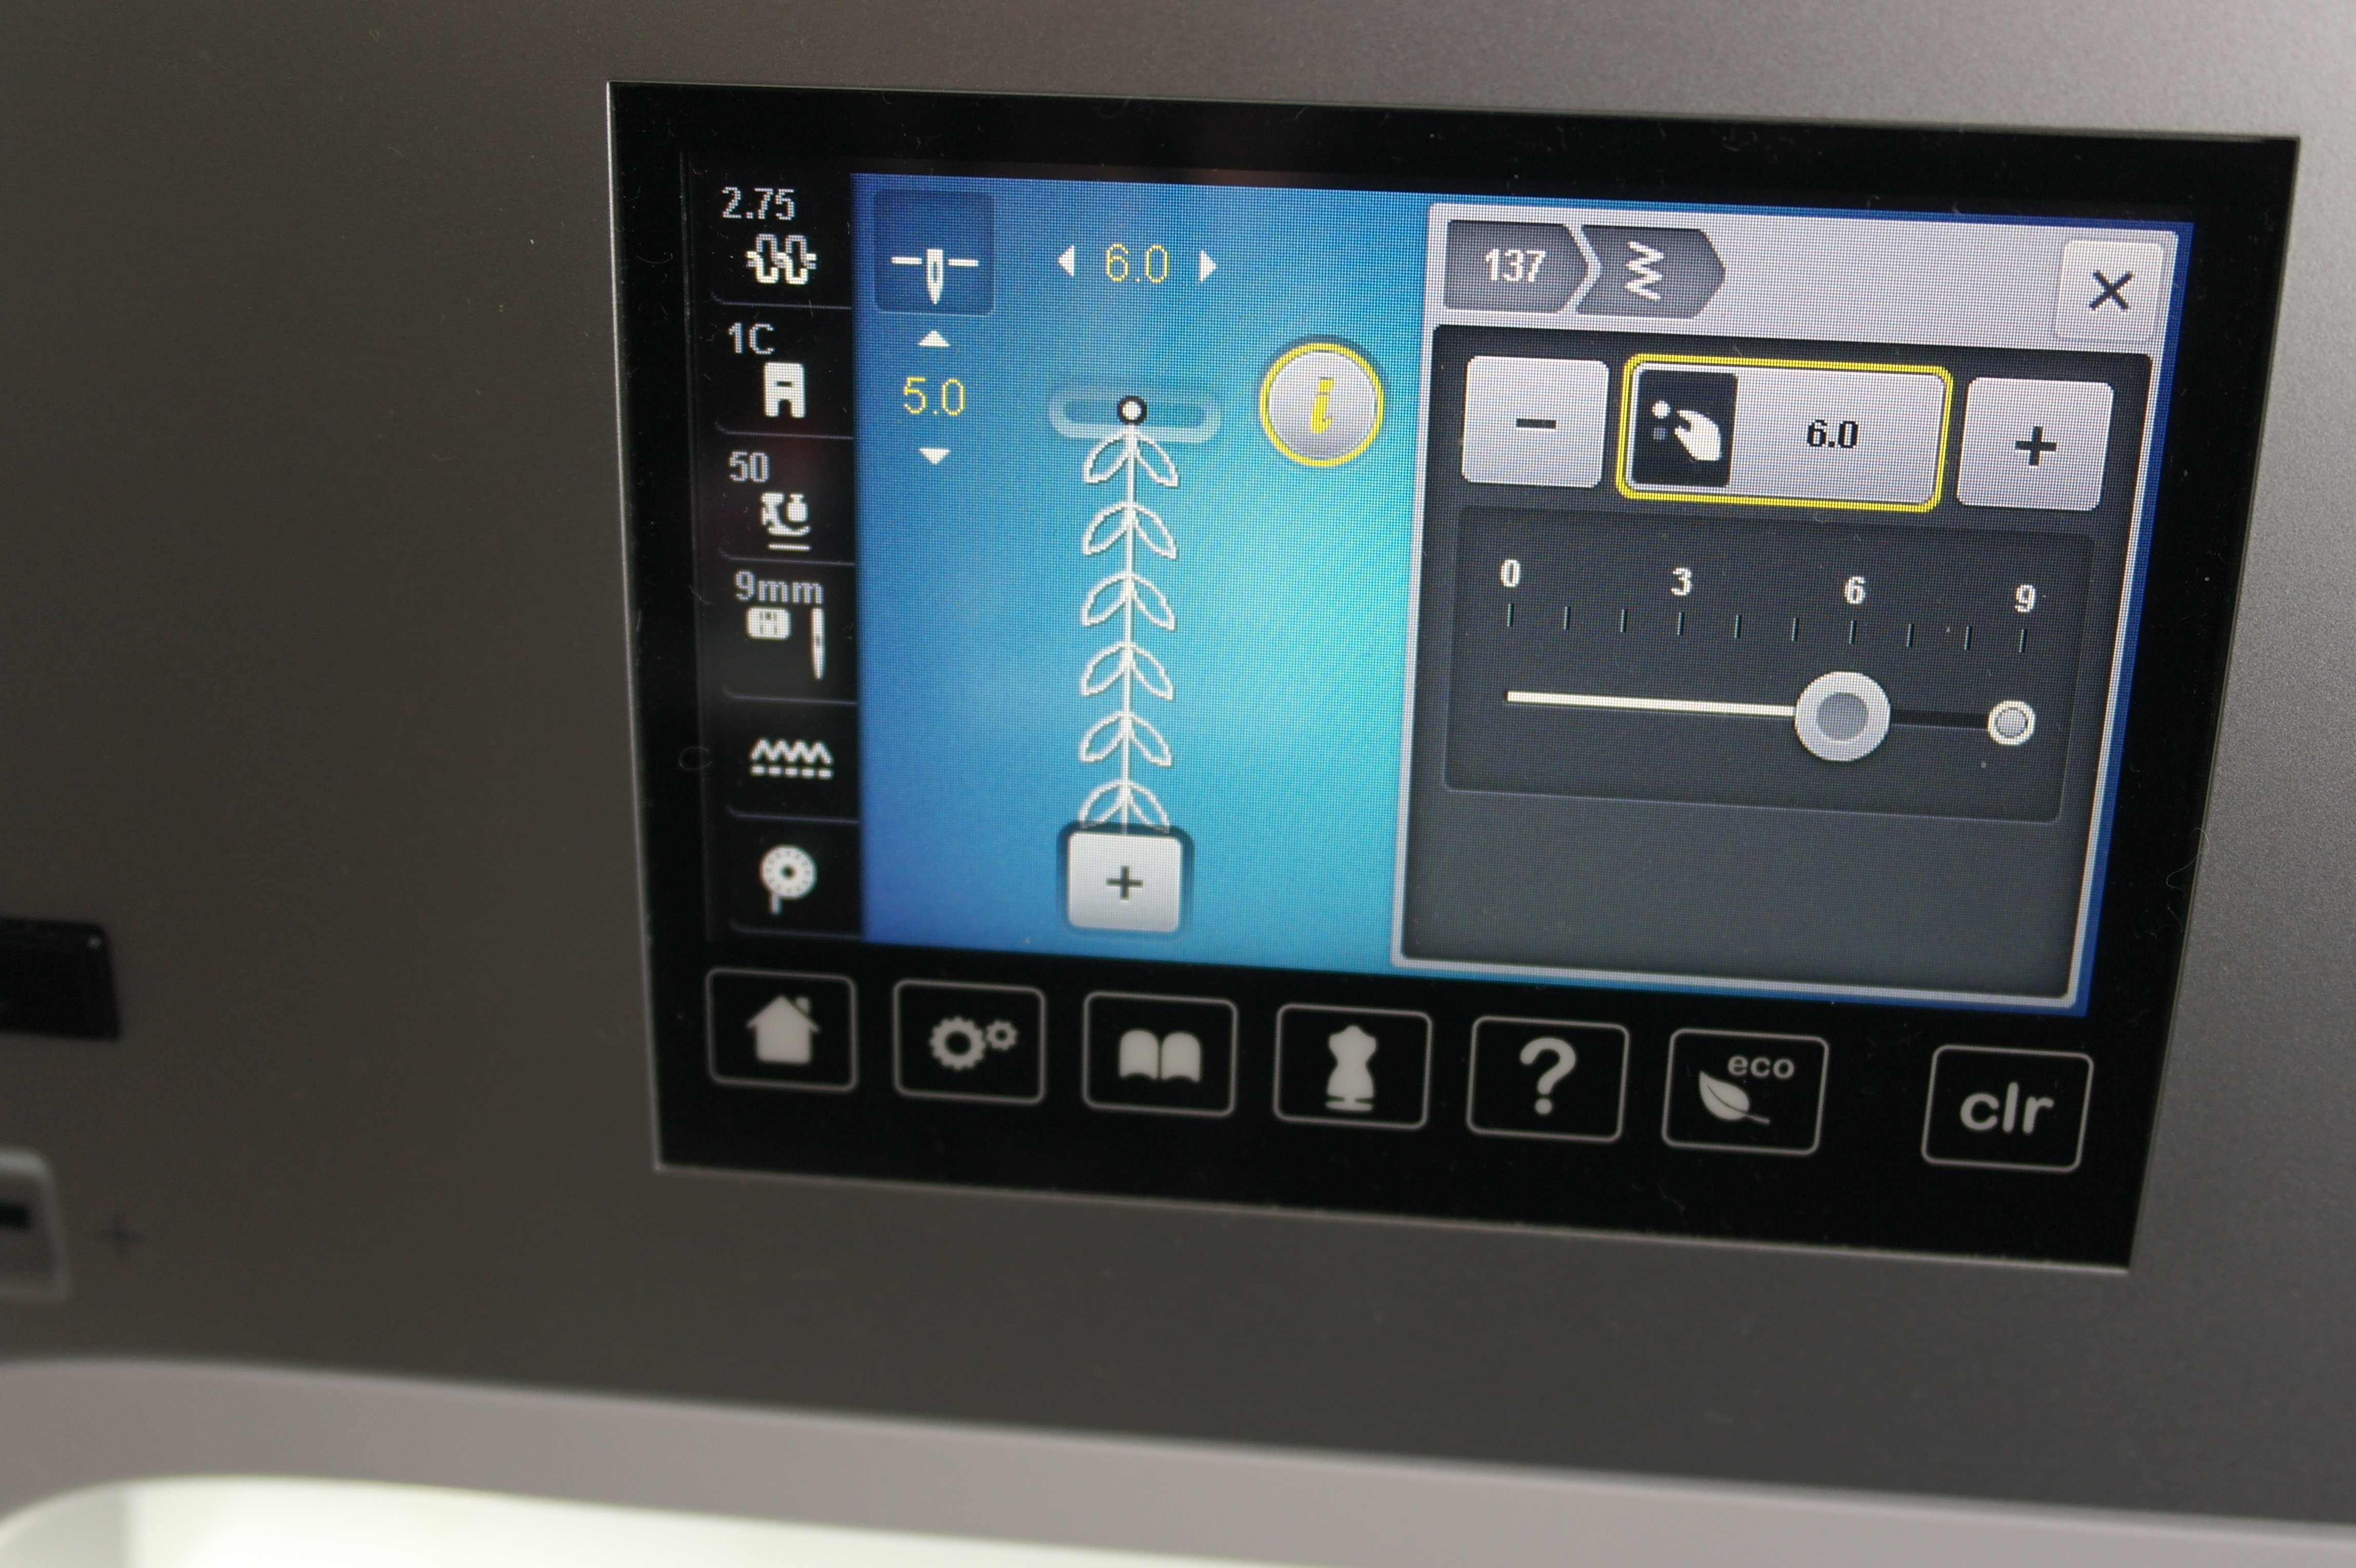
I have used stitch no. 137 gebruikt: made it much smaller and shorter: with an original width of 9.0, I’ve decreased this to 6.0, and an original length of 10.0, which I have decreased to 5.0: you can see that you have changed something, because the numbers are indicated yellow instead of white (with the original numbers).

It is important to be aware of the fact that the stitches themselves will be smaller too: if you are working with very thick thread, the stitches cannot be too small, otherwise they will be made on top of each other. Try them out on a sample first, and ajust the thickness of the stitches by using thinner theads, if the stitches are tiny.
It doesn’t matter if the stitches at the beginning and the end are not matching up properly: use a bead, sequin or Hotfix to cover them afterwards.

I have quilted curles as background of fabric no. 5, using the Free-Motion quilting foot again, and lowering the feed dogs. I have used the seam between fabric no. 5 and the other fabrics to ‘cross over’ to another place to quilt; the arrows show you where I did that.

Again, I have covered this seam afterwards, using the Open Embroidery foot #20C, raising the feed dogs again, and using a dense decorative stitch.
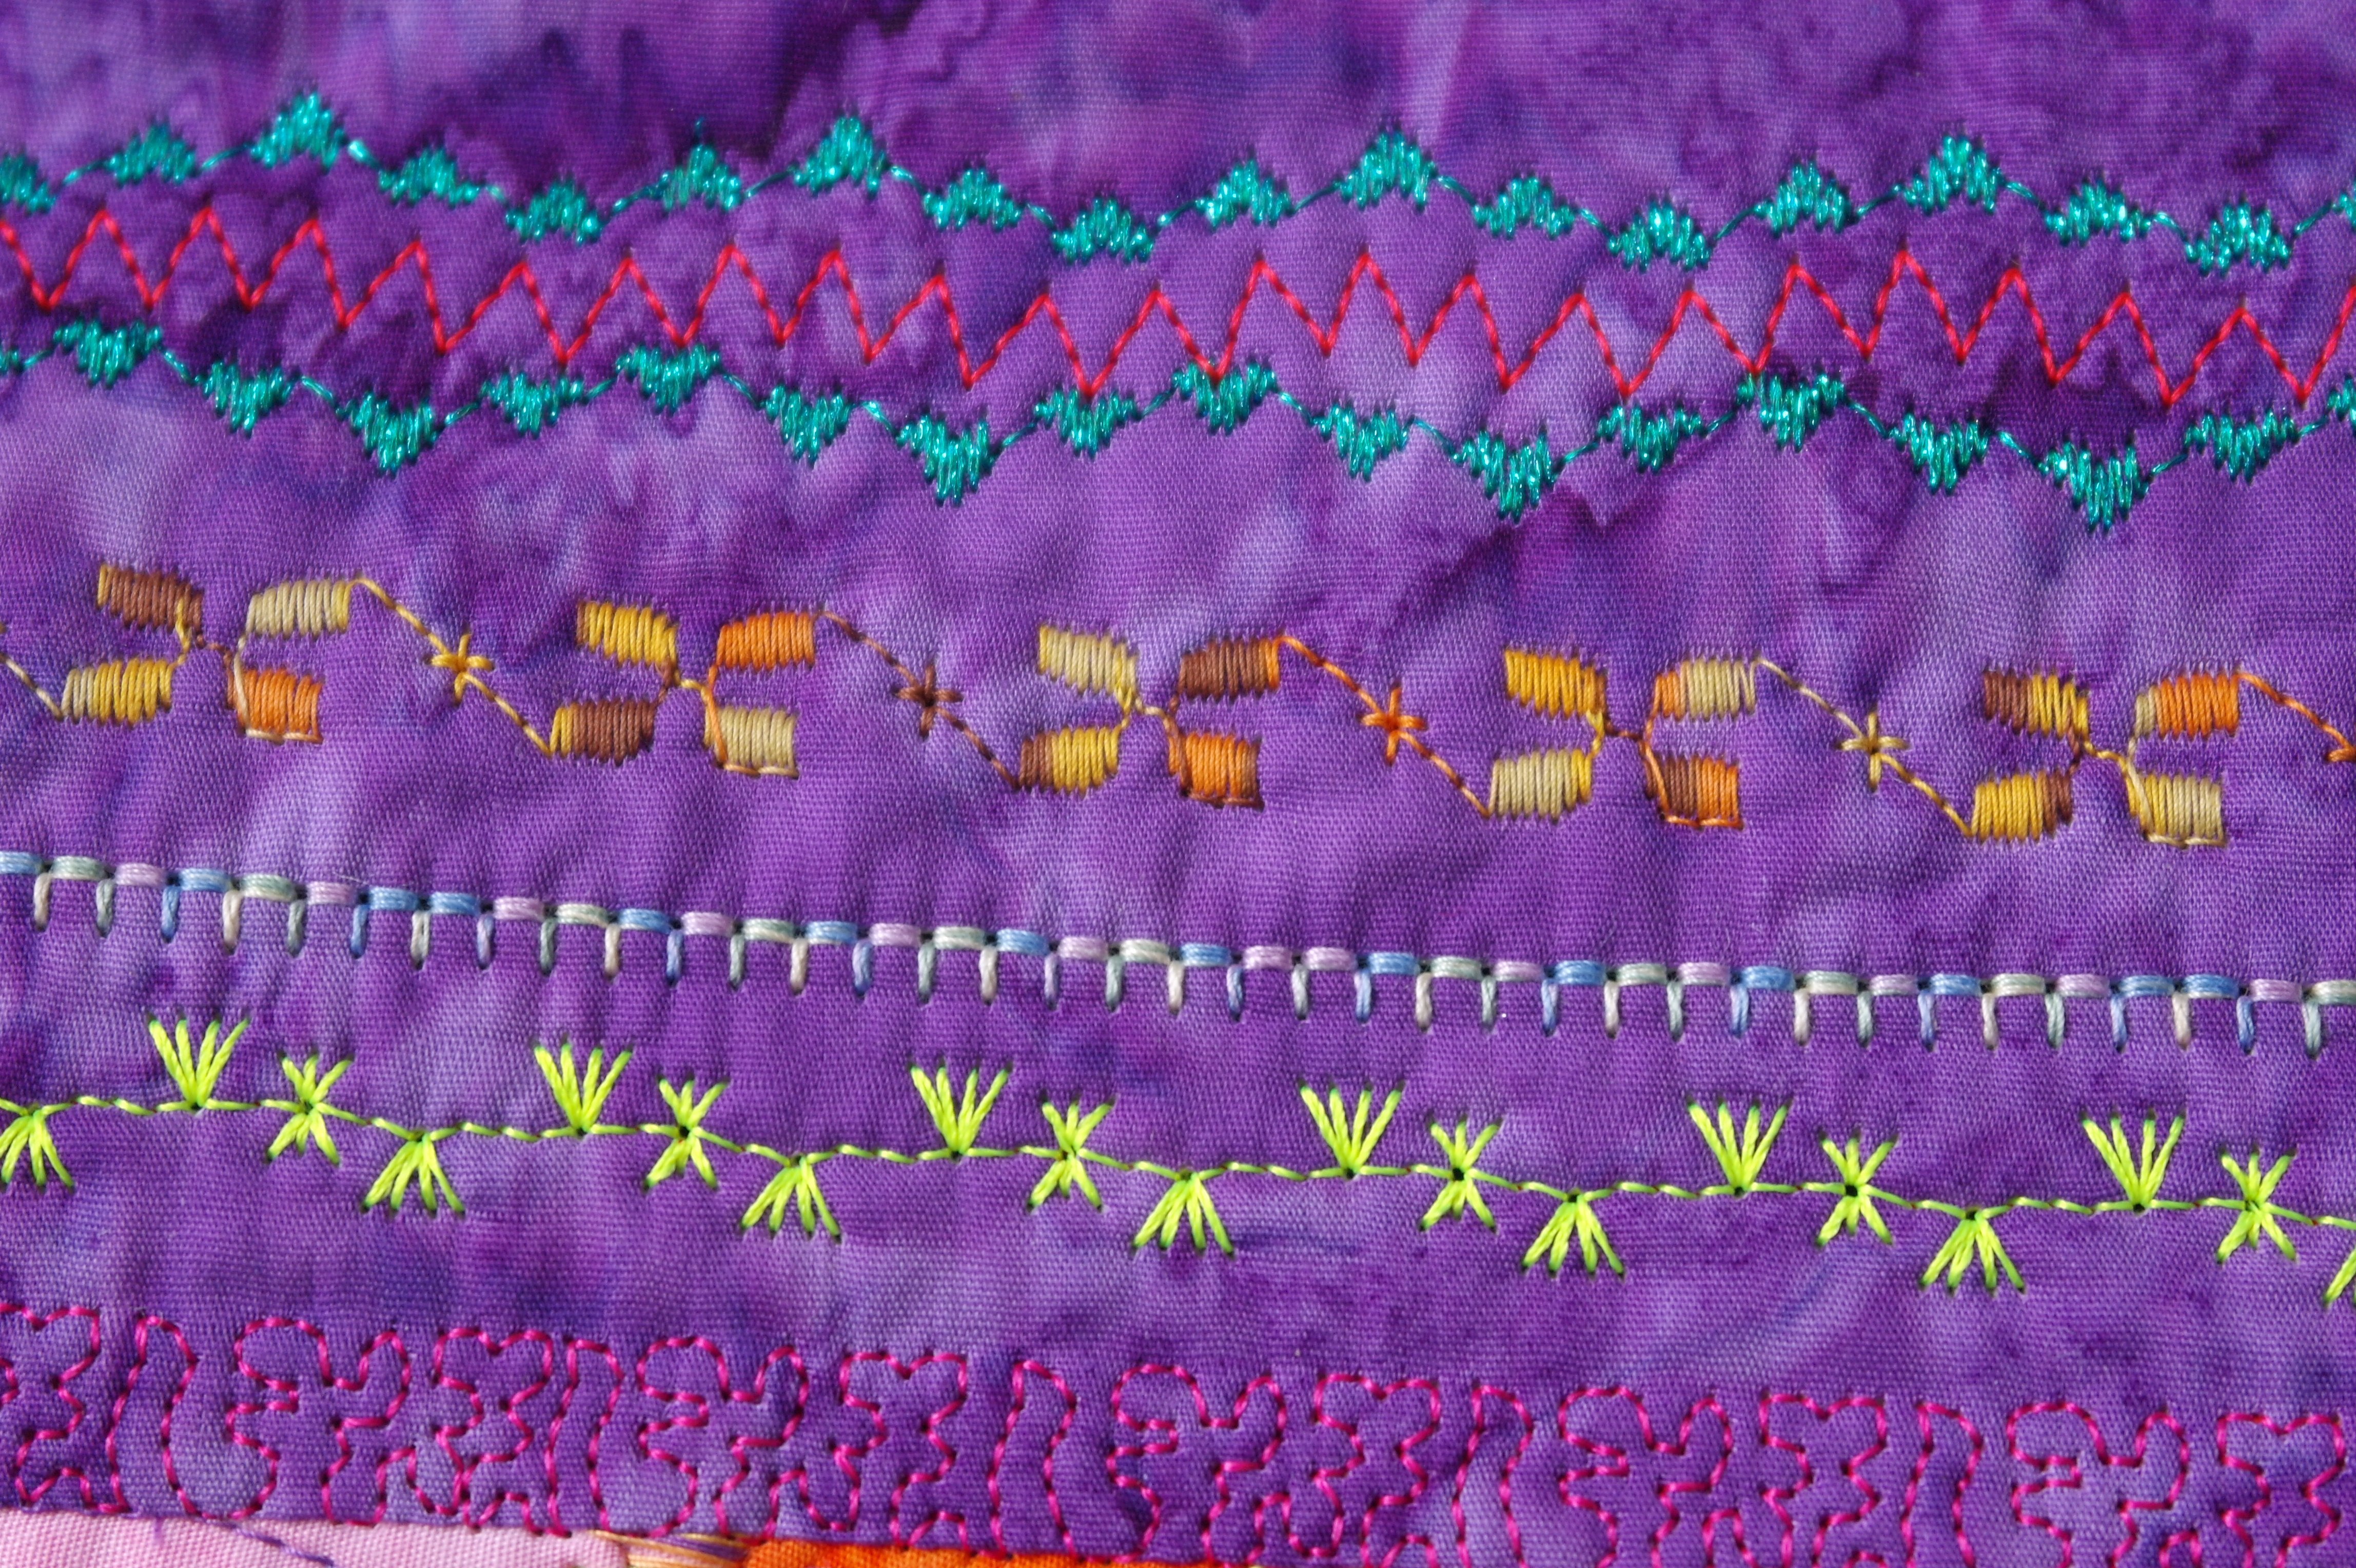
And moving on, to the remaining fabrics. I have made two rows of hearts, and a zig zag in between: the way I have made them makes you wonder if this was a default decorative stitch: you can make combinations as if this is the case. It is fun to try combinatiions of rows of stitches and make them with metallic threads and contrasting colors (upper row of stitches).
And for fun, I have made several ‘flies’- special stitches which are normally used to secure an opening of a pocket, split or zipper: stitches like these are made as a single stitch, but you can make them as often as you like. Make sure to try such a stitch on a sample first, to see how it is made. It is stitch no. 26 on my B770QE.

My block 9 is ready, and can be put aside until month 12.

Just to get an idea how things are looking right now, with the 9 blocks I’ve already made, I have layed them out on the floor. No. 1 top left, no 9 bottom right. I have rotated some of the blocks, to avoid getting the same fabrics against each other. Perhaps I will sew them together like this in the end, but I can still change my mind, because the remaining blocks for month 10 and 11 still have to be made.
Have fun with your version of block 9: remember to place a picture of your creation in the COMMUNITY of the Bernina Blog, to inspire others!
Next month different blocks: will you join me again?
Happy quilting!
Sylvia Kaptein
Sylvia’s Art Quilts Studio
IMPORTANT: when your sandwich/block is finished, check if the size is aprox. 32 x 32 cm. It can be shrunken a bit because of the stitches you have made, and the freehand quilting. BUT DO NUT CUT THE SANDWICH, not even to make it tidy!!! Leave it like it is, and put it aside until month 12.
I have just seen this from a bernina newsletter and I think your blocks are lovely. I have made odd scrap blocks and used decorative stitches on top but never tried to do a usable quilt block. I think may try it.