 BERNINA Corporate Blog -
October: Autumn is in full swing. Leaves are falling, which colores the ground. With this in mind, I have tought of a special way to cover certain sections of Block 10.
For the tenth block you can download three pages again:
Block 10 – left part
Block 10– right part
Block 10 – Crystal
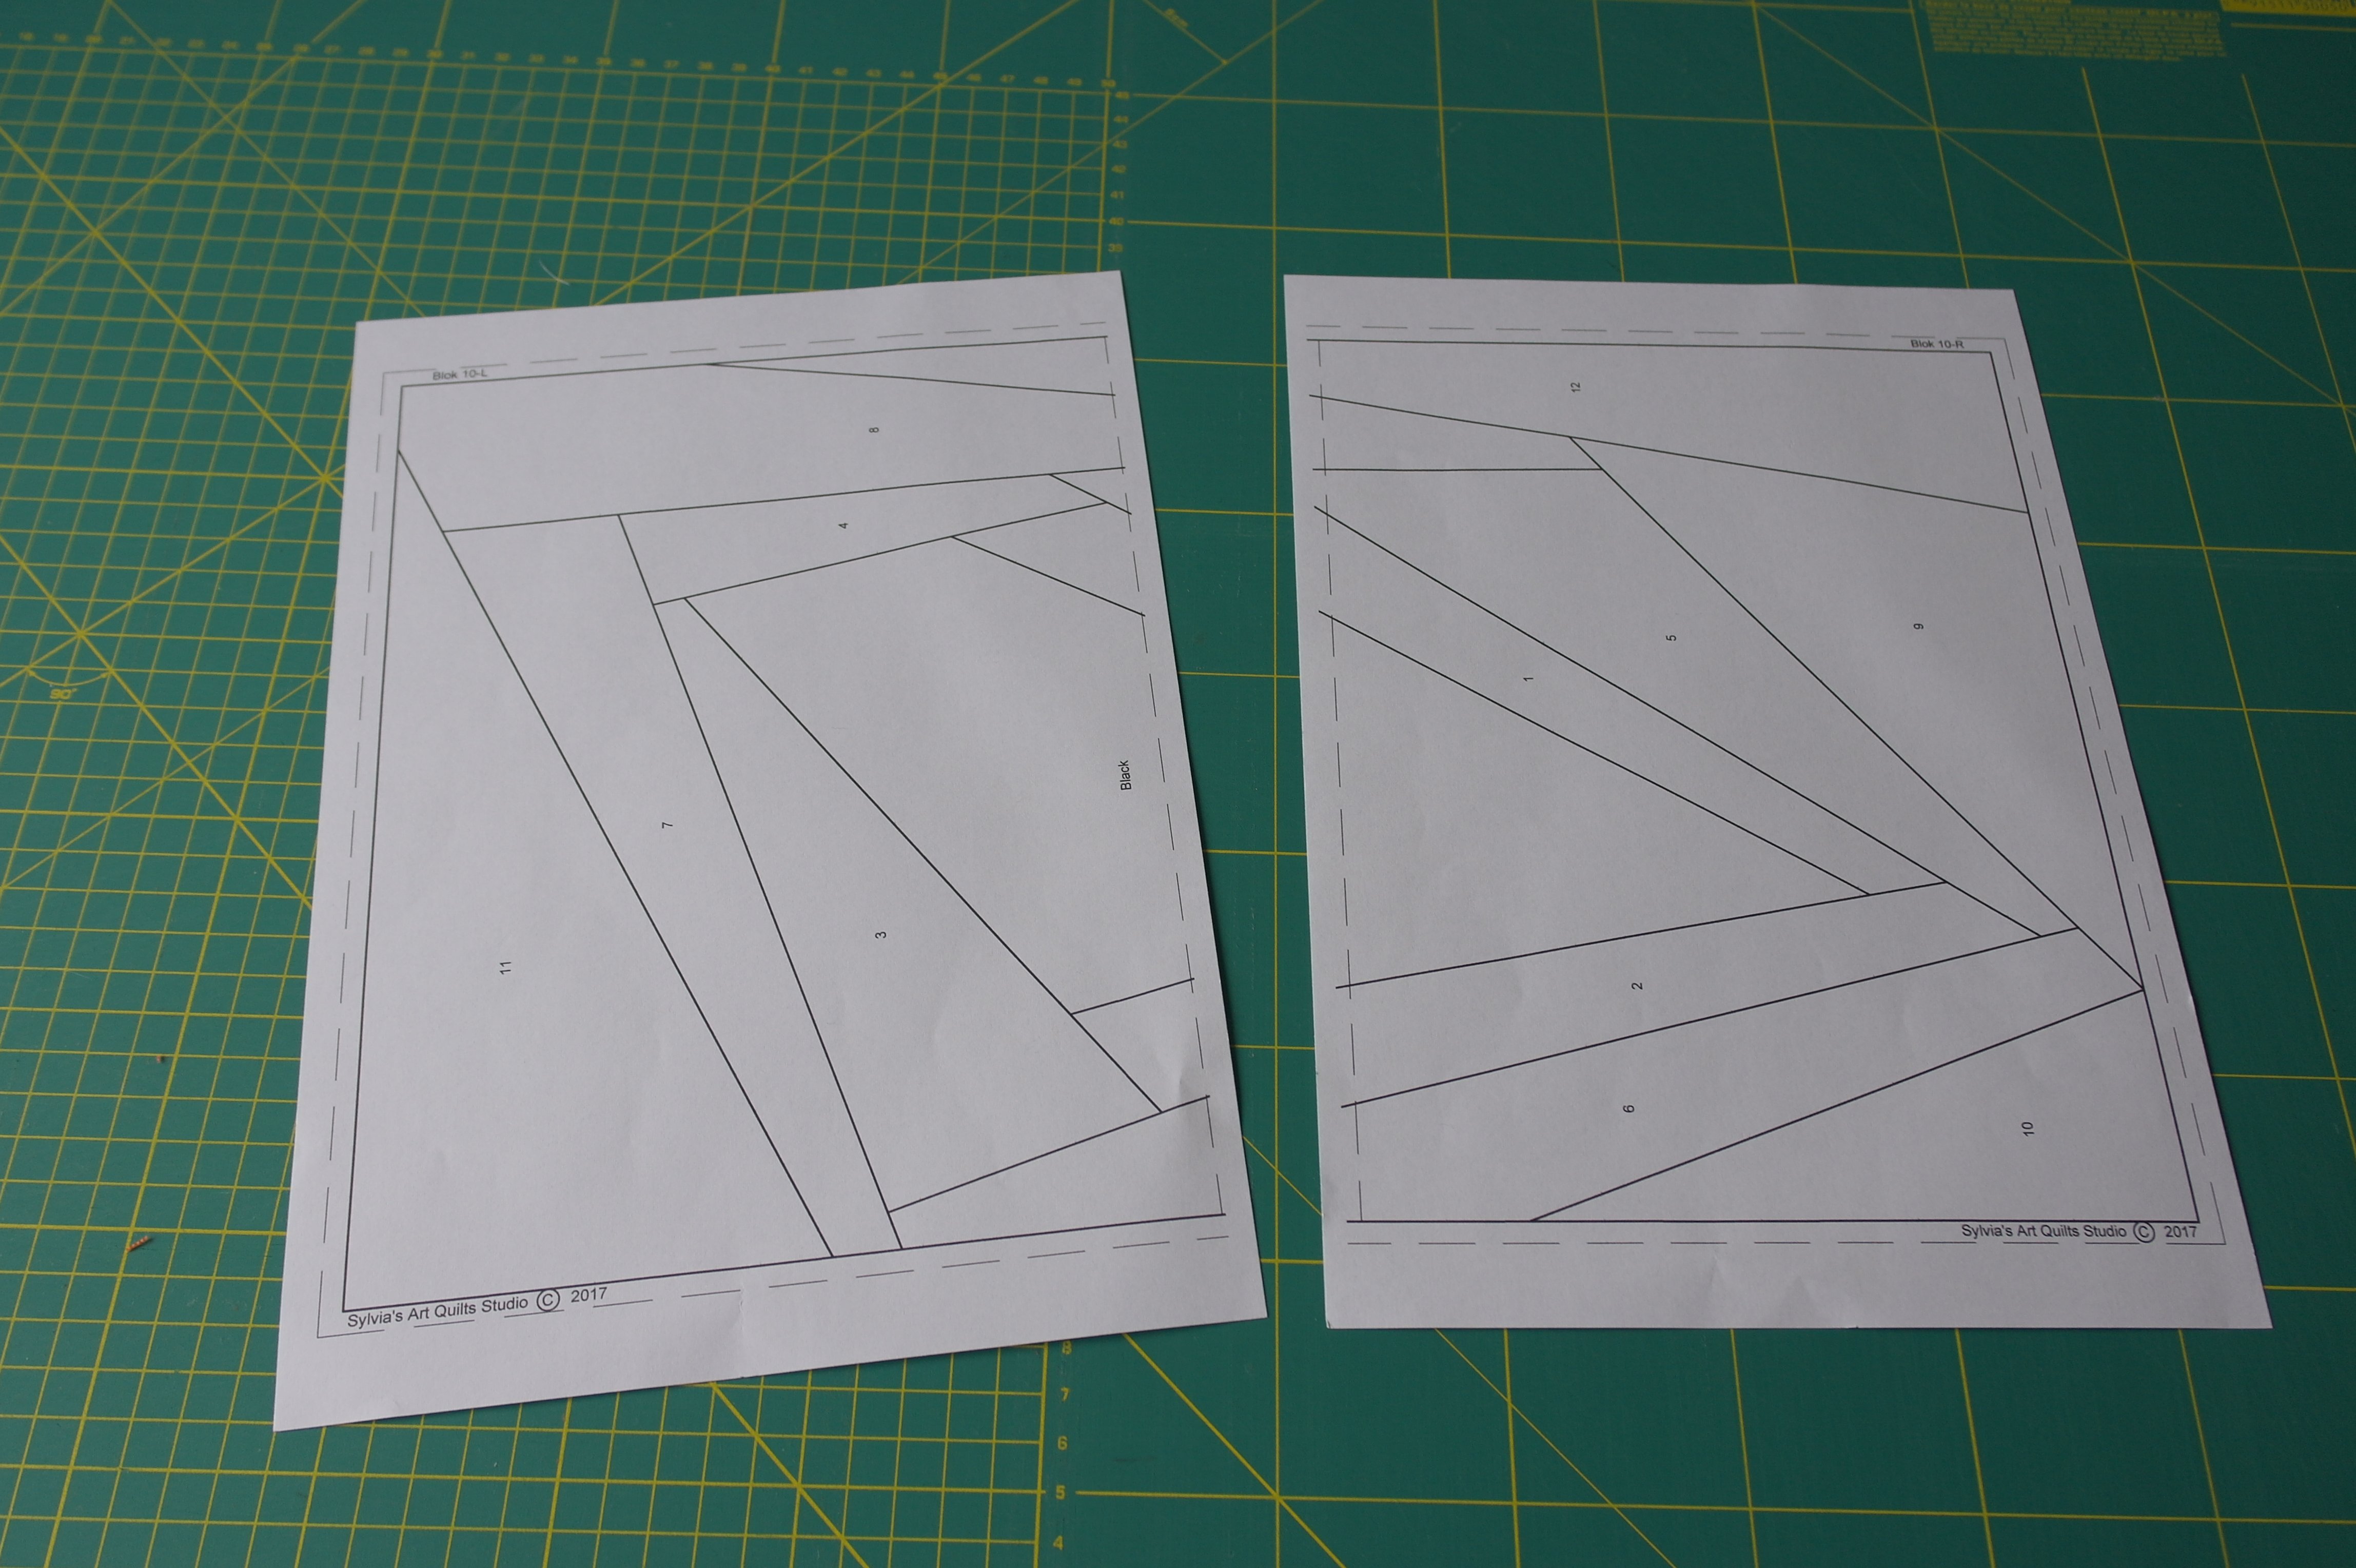
Print the paper patterns, block no. 10 consists of two pages again, just like the previous blocks – a left and right part.
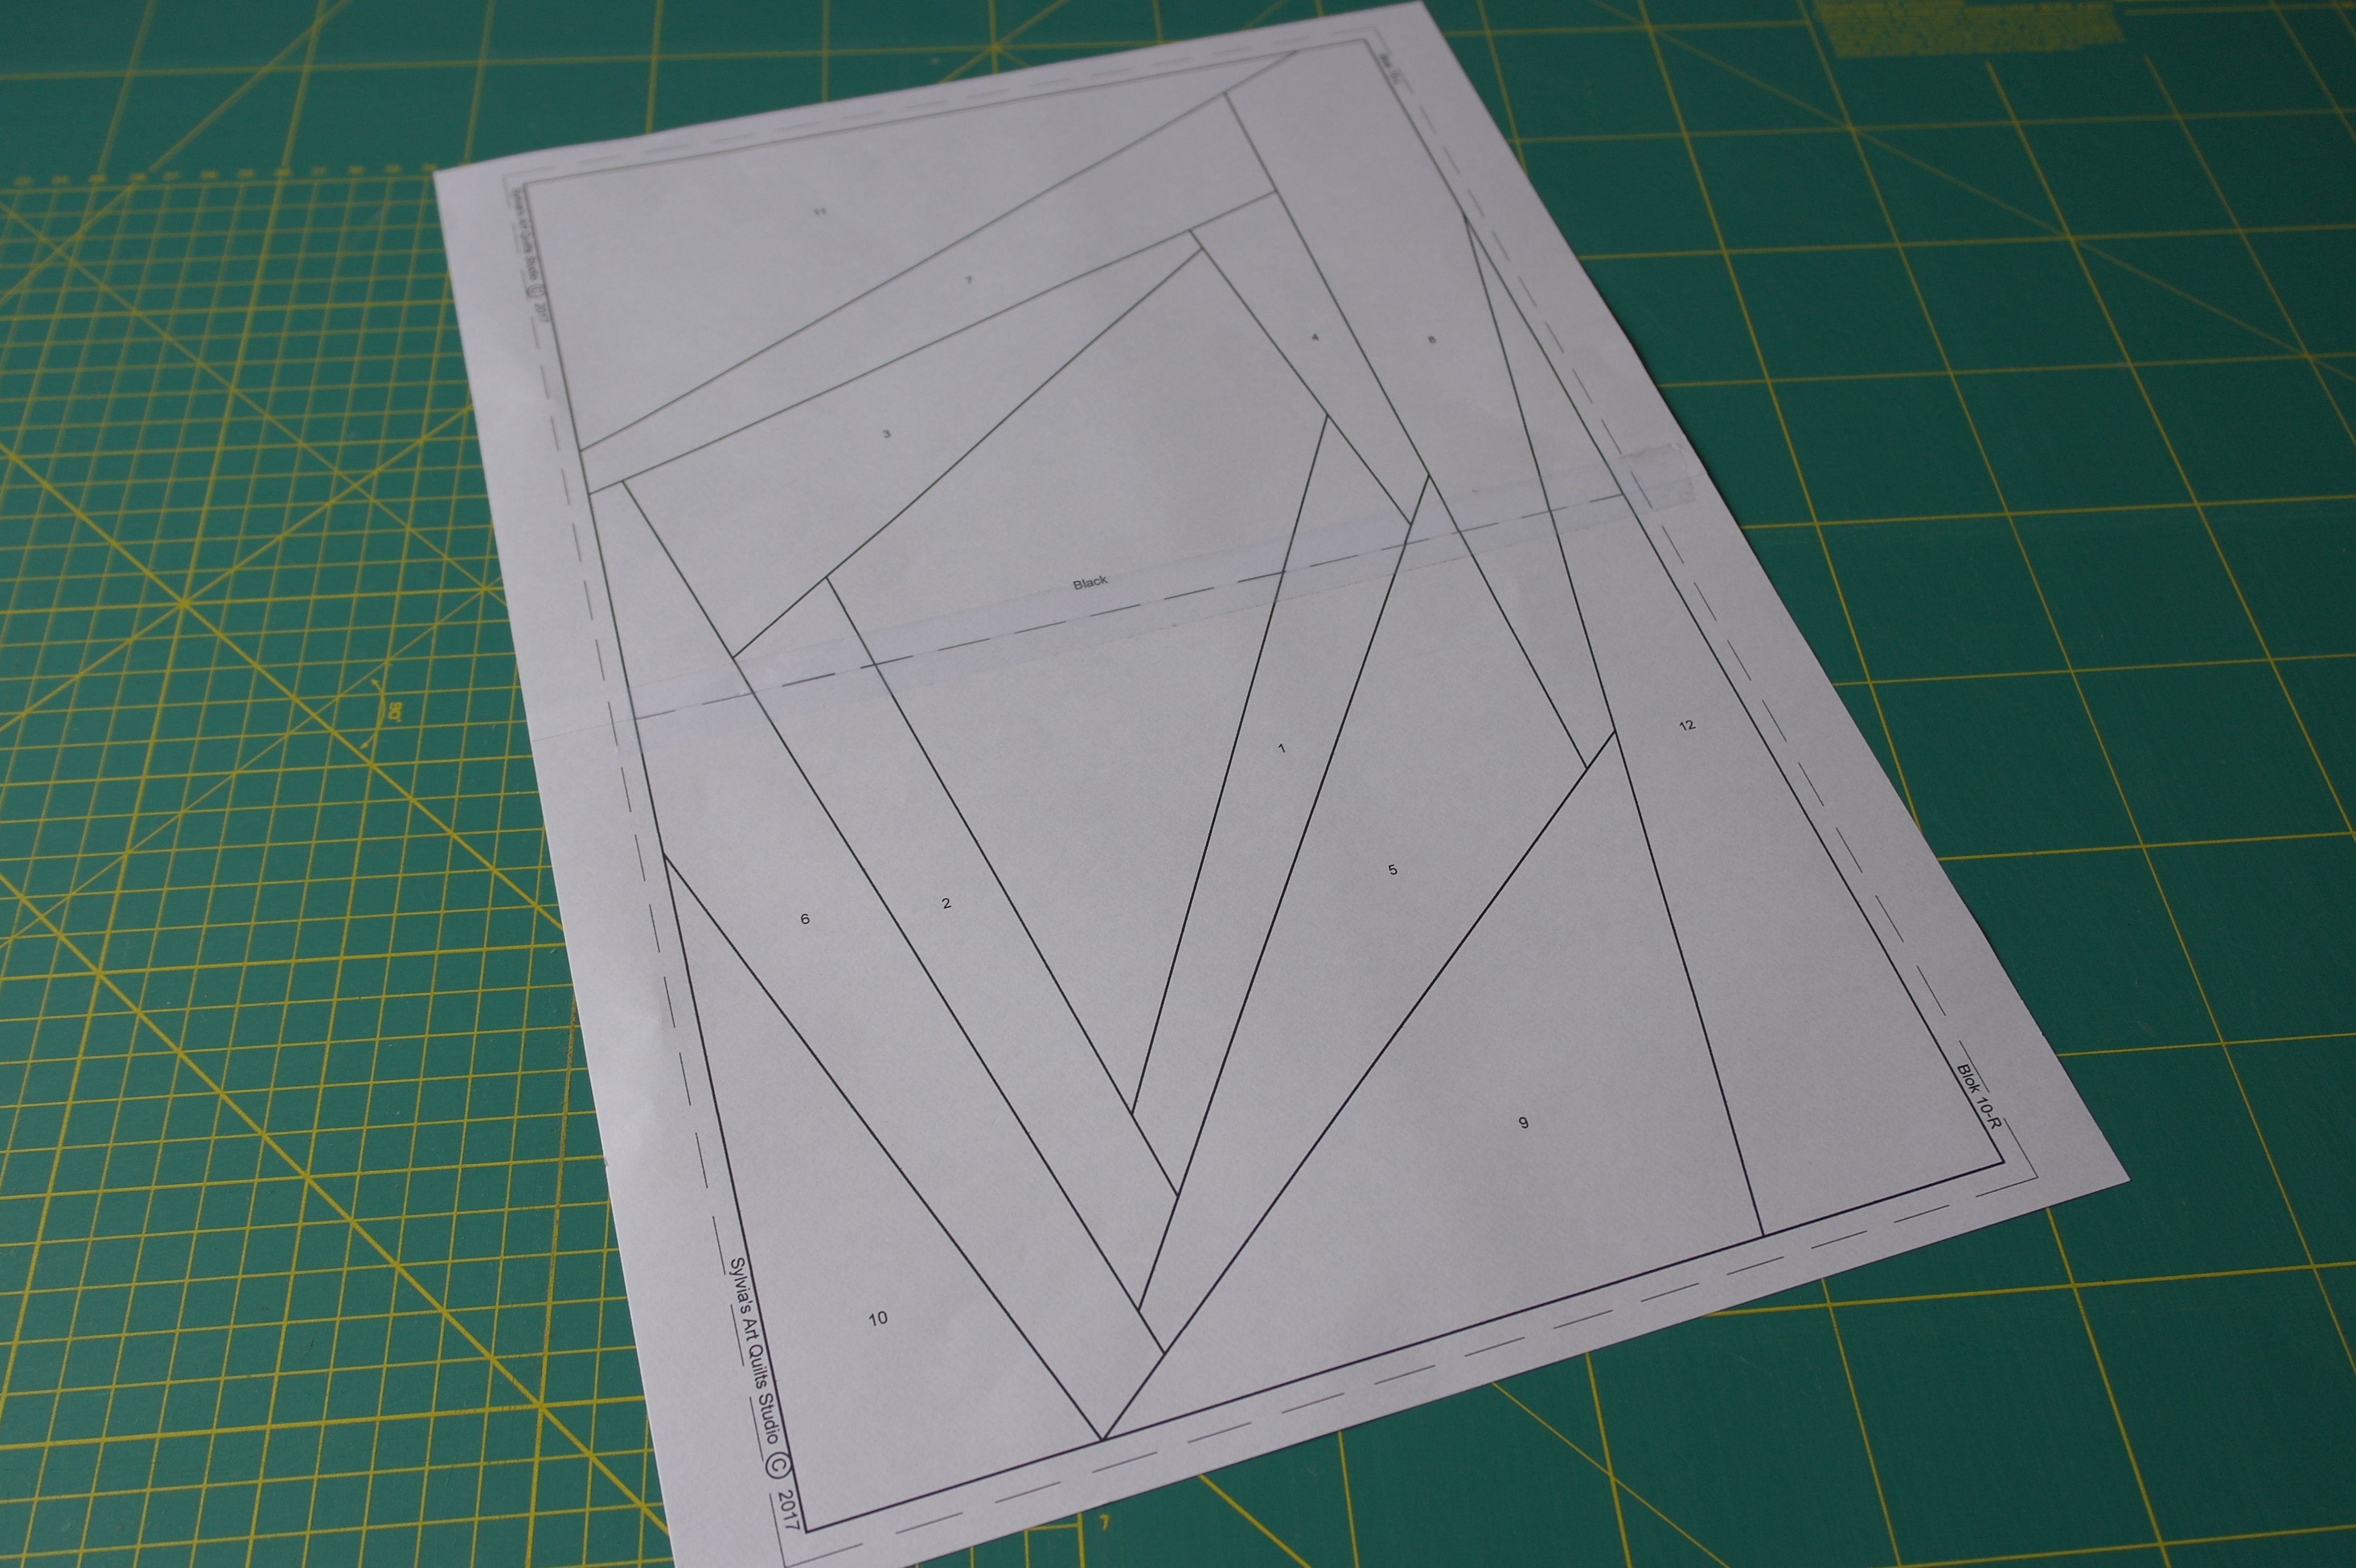
Make one large block, by taping them together (use the dotted line)
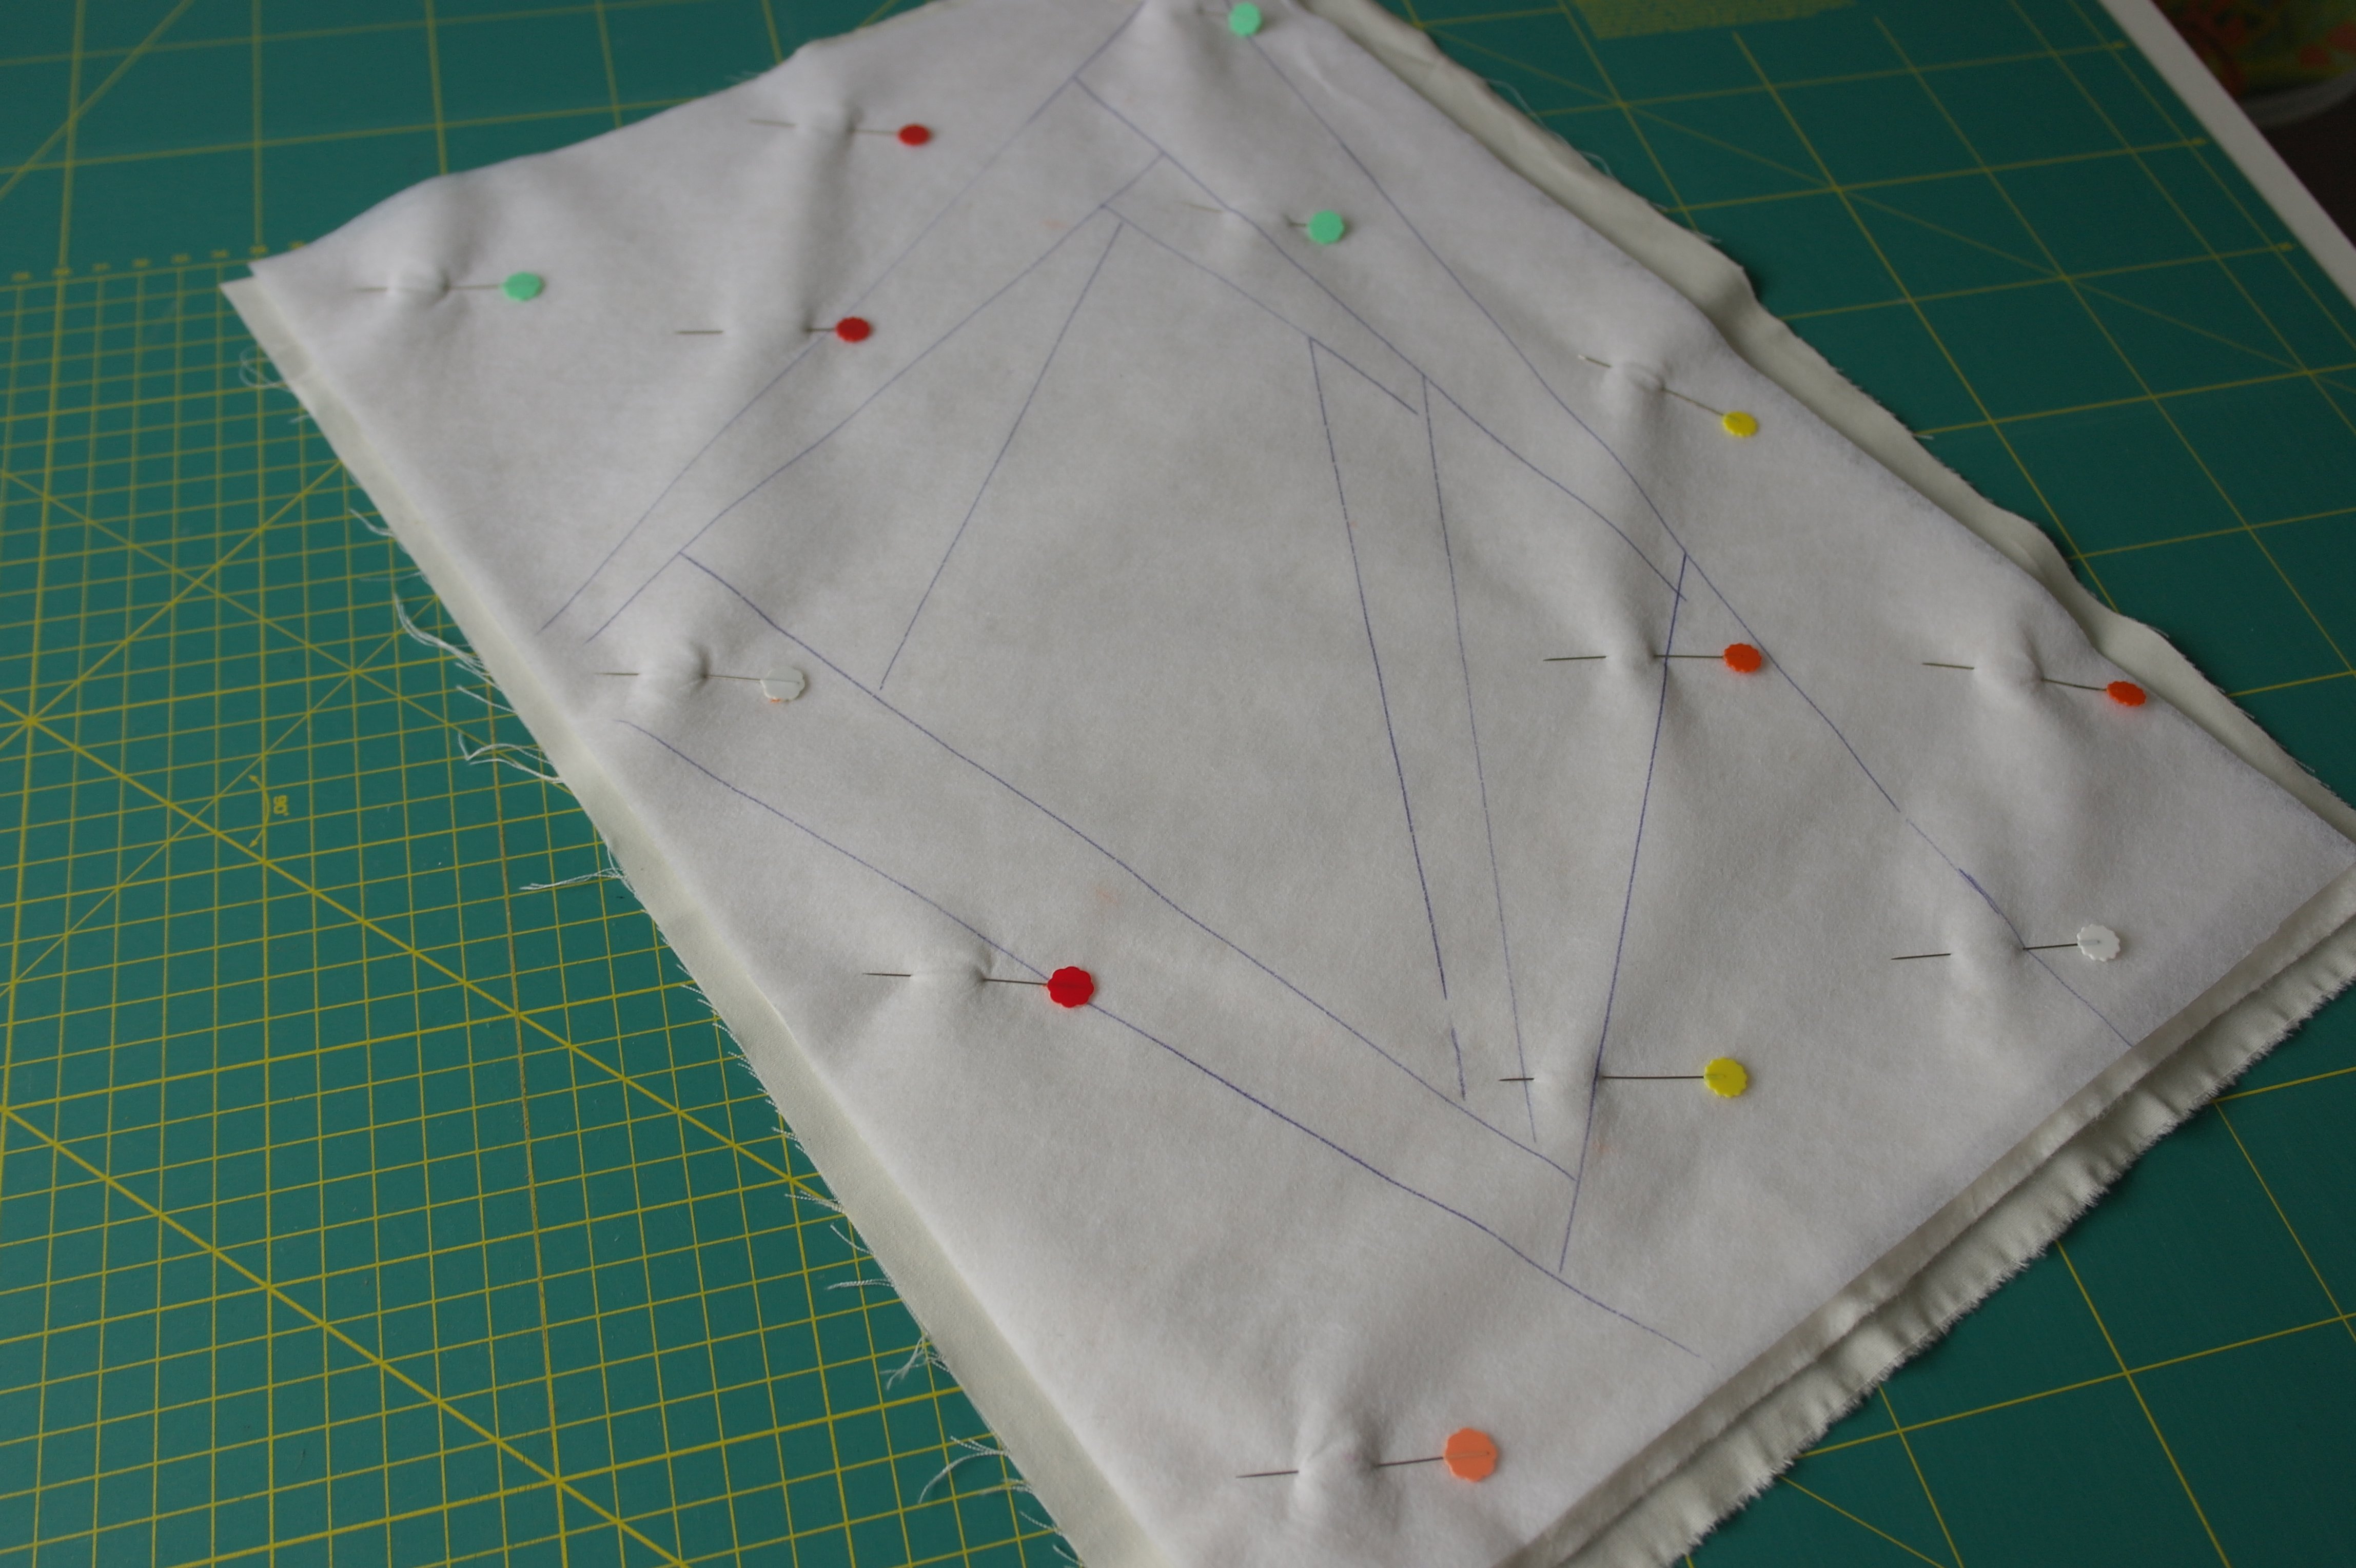
Use Vlieseline L11 – 32x45cm – place this on top of the paper pattern. Just draw all lines of the Crazy Patchwork (the rectangle is for reference only), all to the edges. Make a sandwich from off-white fabric, 100% bamboo batting and the Vlieseline L11 with the patchwork pattern. Pin them in place.

Tape the pattern of the Crystal for Block 10 to a window, or a light box,
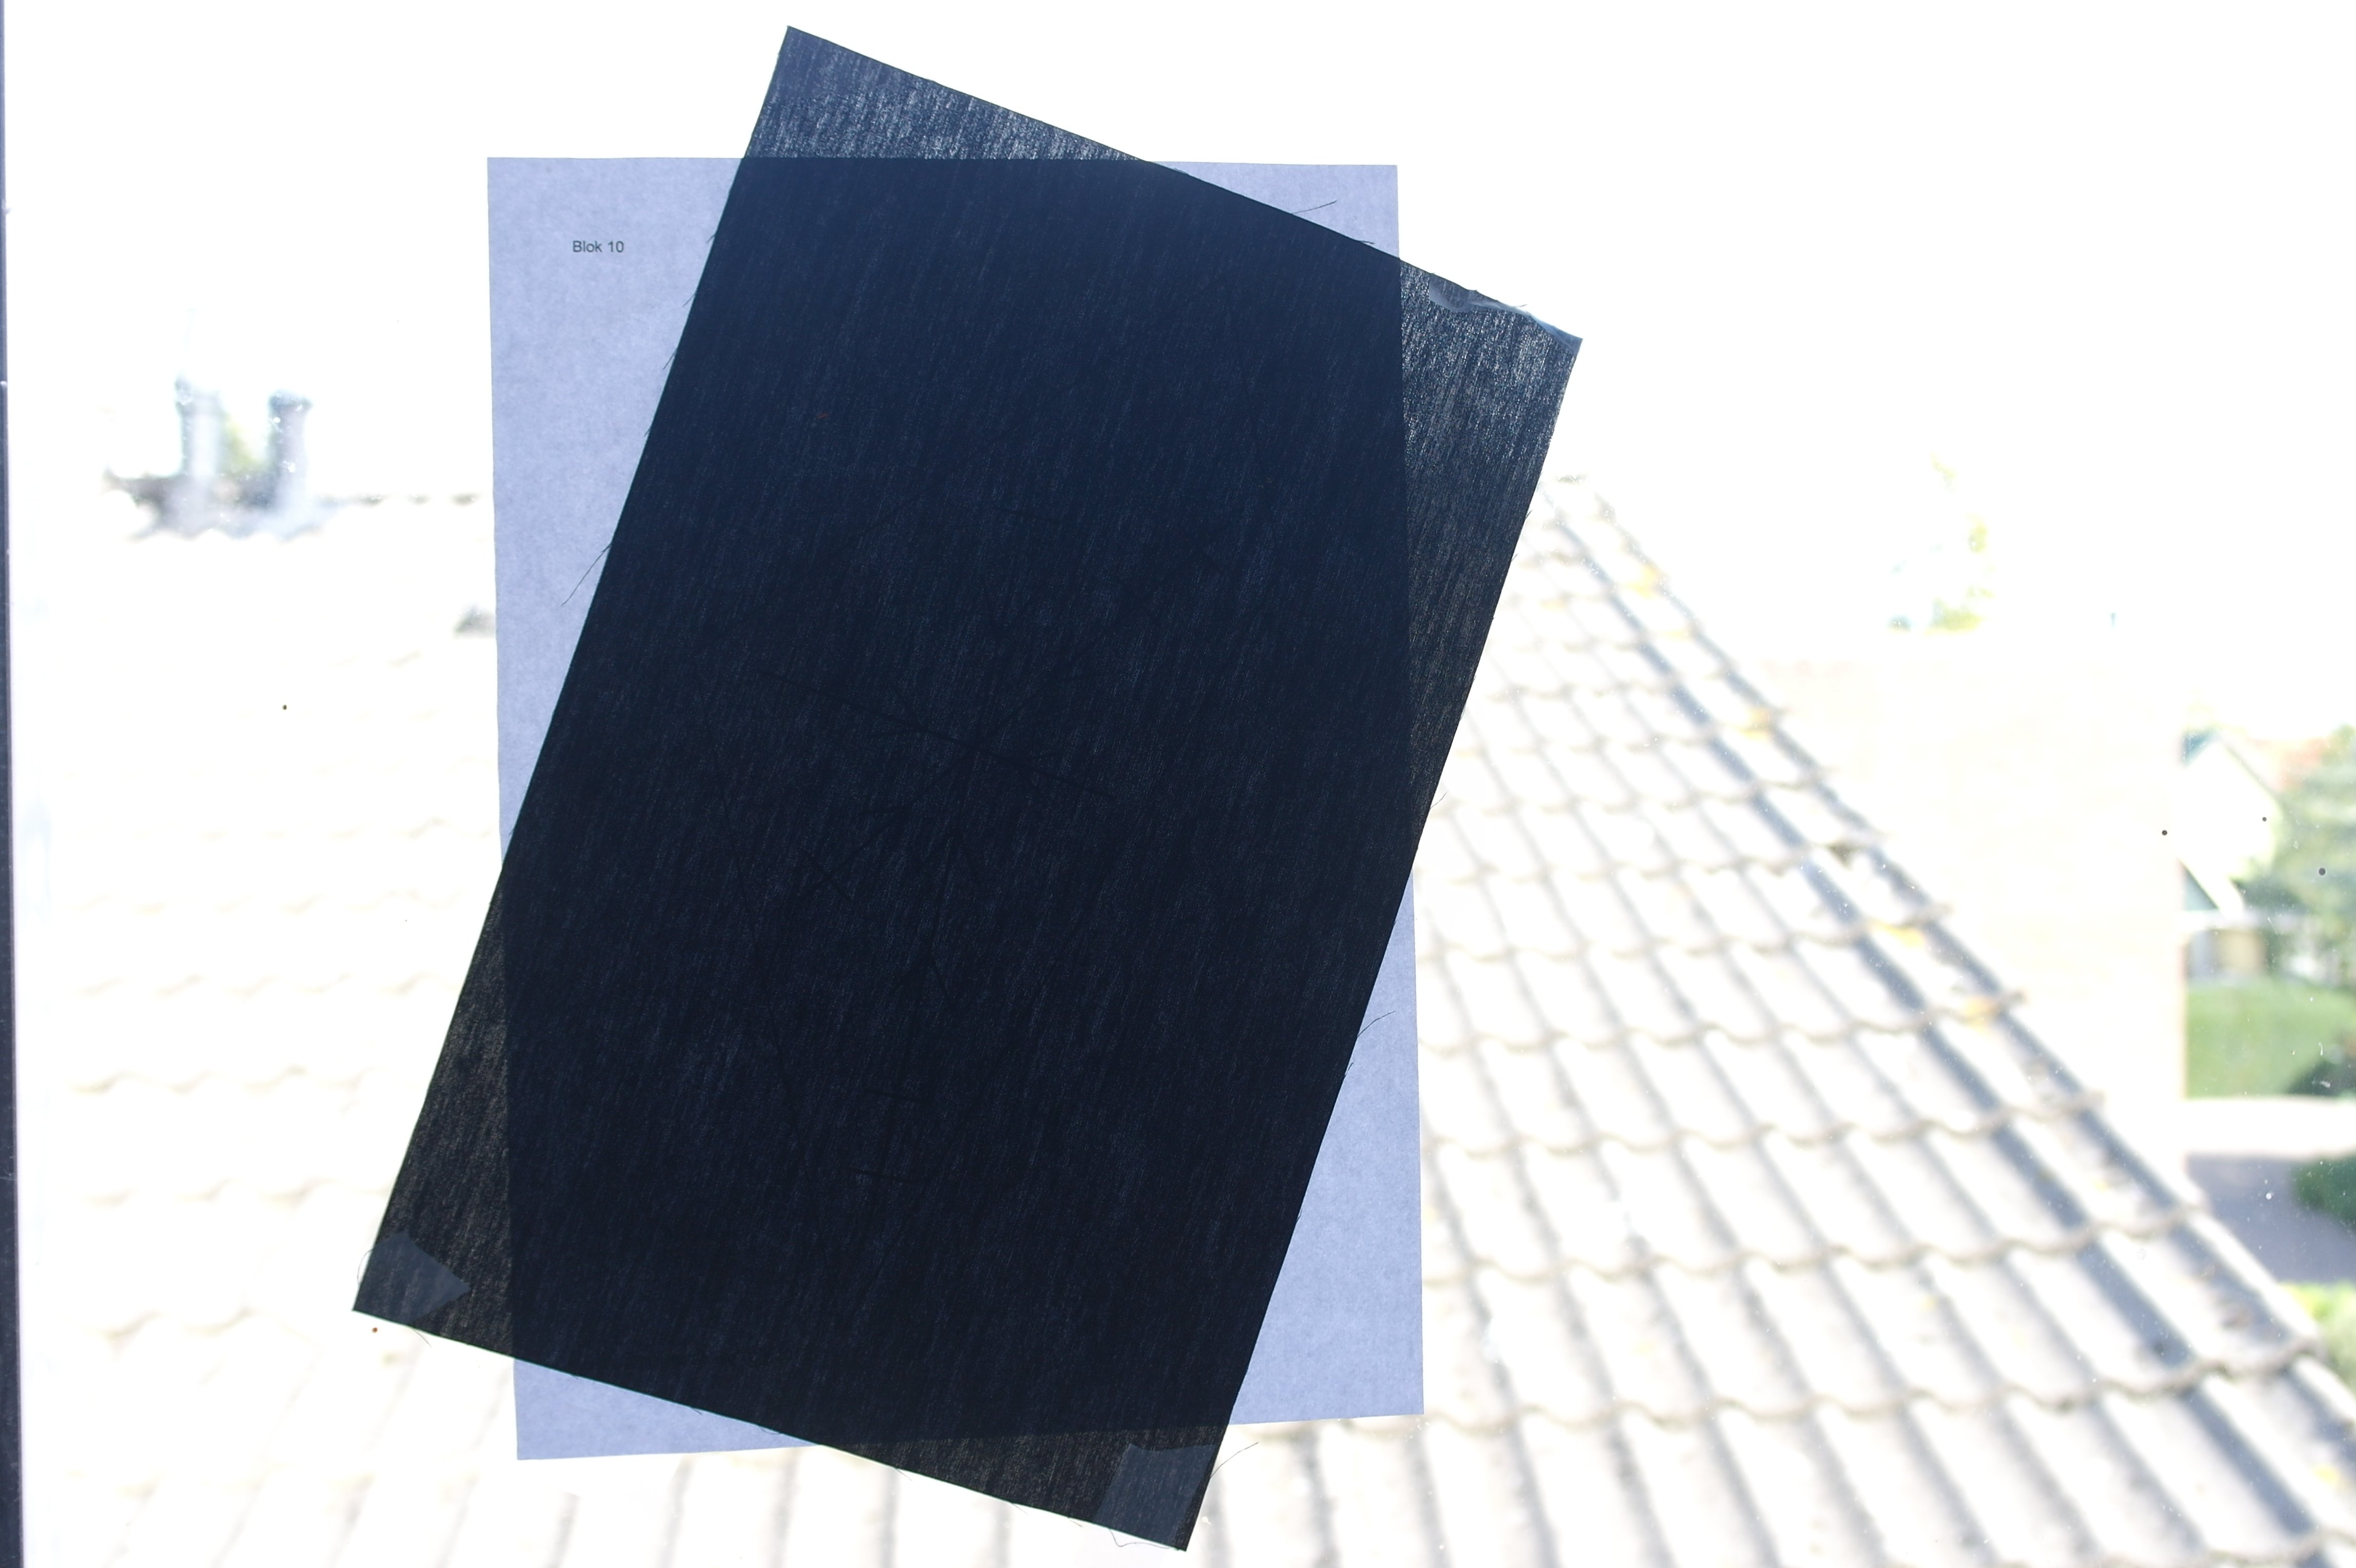
tape the black batik quilt fabric (20 x 30 cm) on top of that. Make sure there is enough fabric around the shape of the Crystal to have a seam allowance of at least 1 cm in all directions (that is why I have tilted my black fabric). Draw all lines with white watersoluble pen (or blue if you use a lighter color of solid fabric for the center). BE SURE to draw thin lines: they have to be removed with water afterwards.
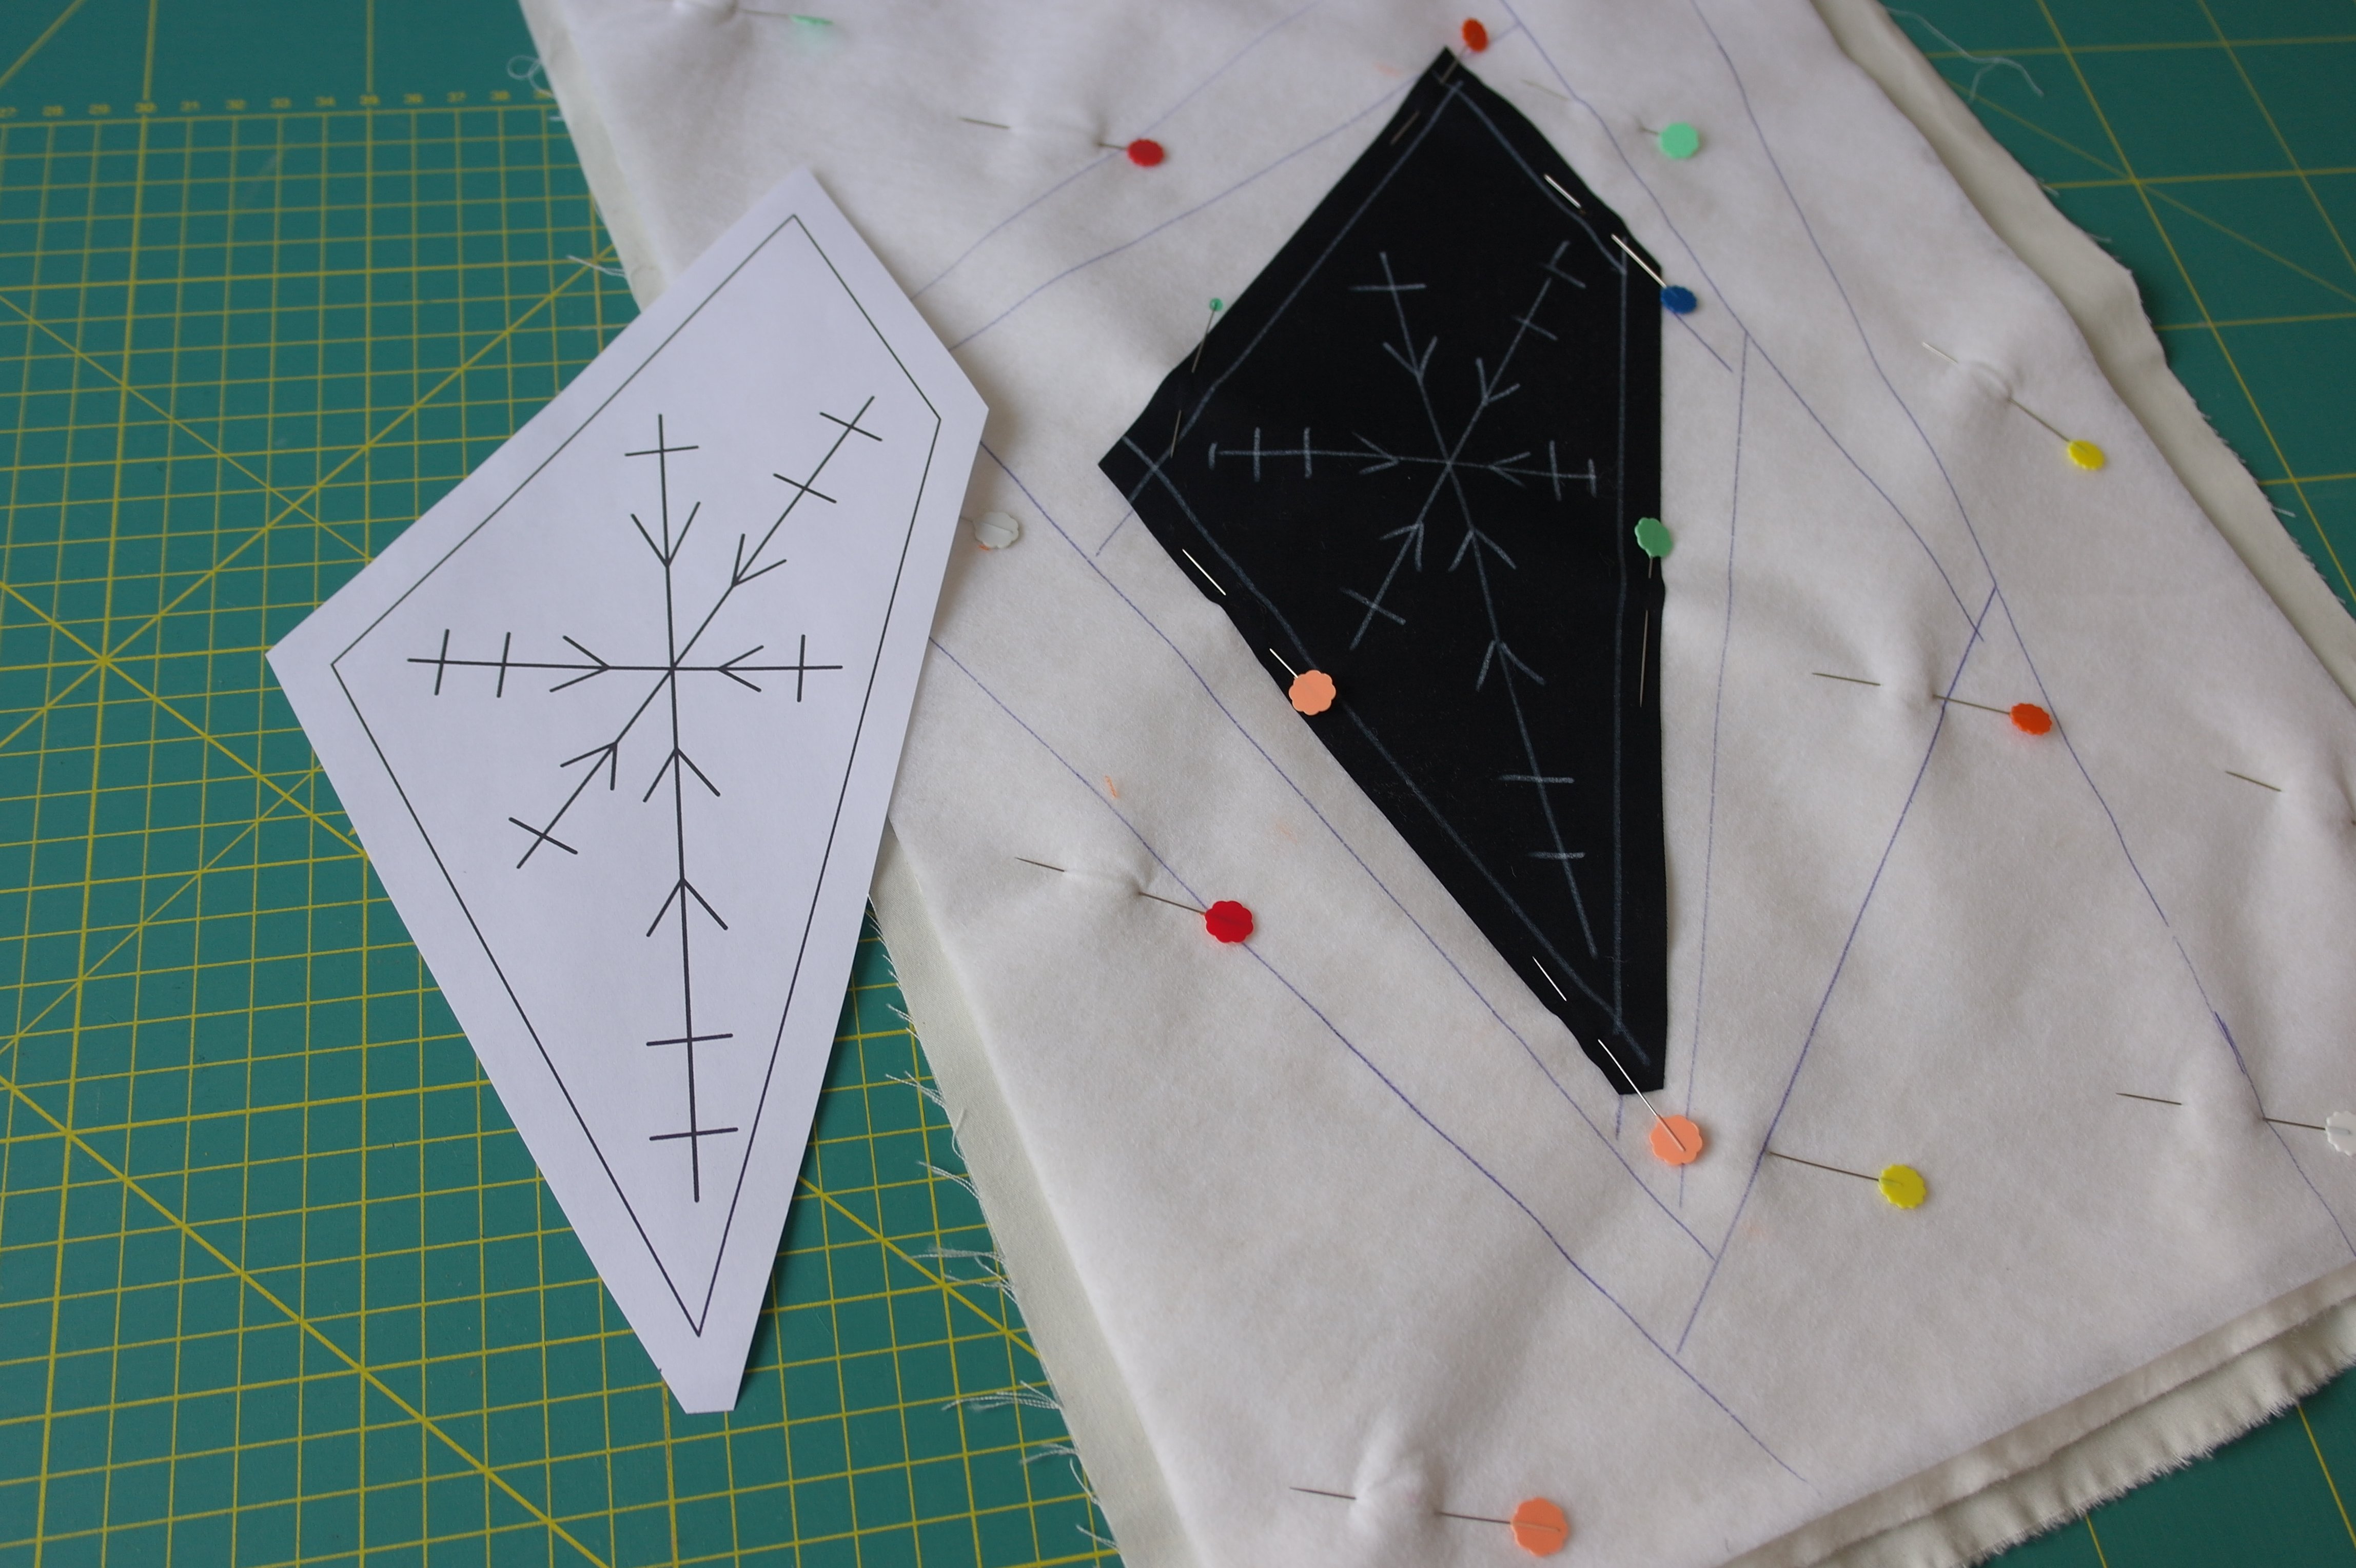
Cut the paper pattern with the Crystal to make a template, be sure to leave a 1 cm seam allowance outside the solid lines. Place the pattern on top of the black batik with the crystal drawn, and cut the black fabric the same size as the paper template. Place the black batik with the Crystal on the right spot, on the ‘center’ of your sandwich, pin in place with Flower Pins. Be sure to draw the solid lines with water soluble pen, to indicate the actual size of the section, inside the seam allowances.
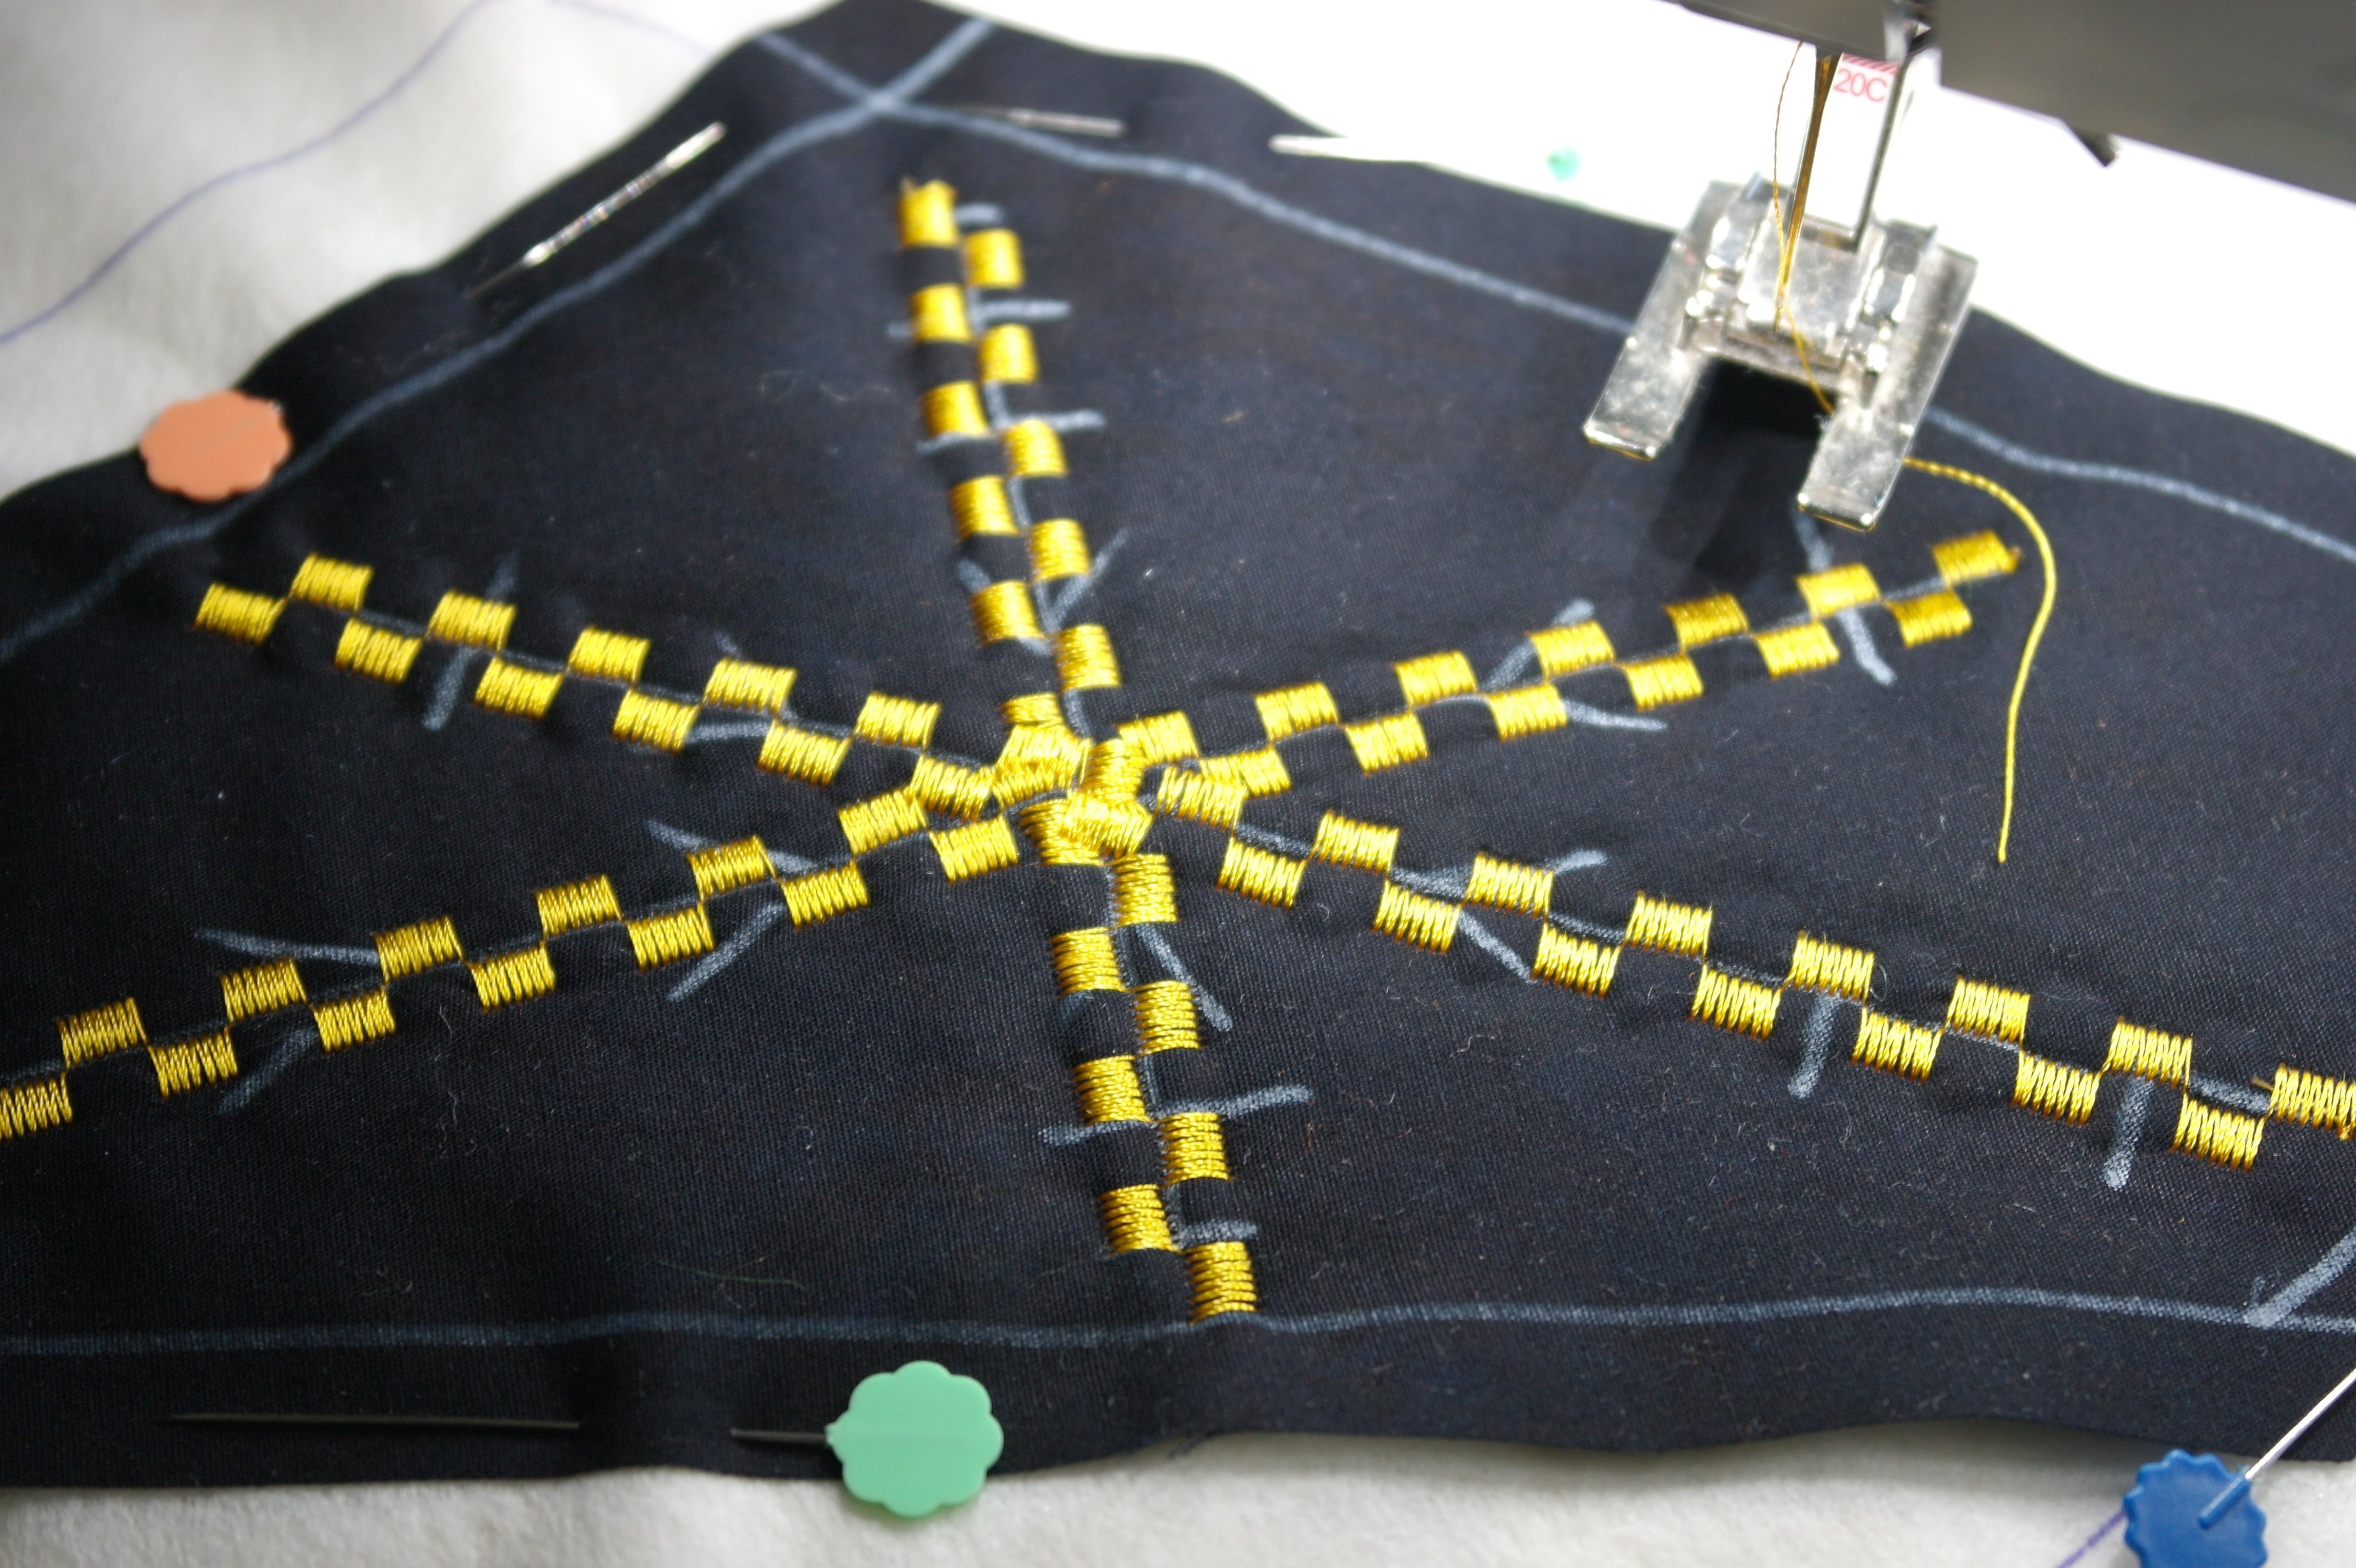
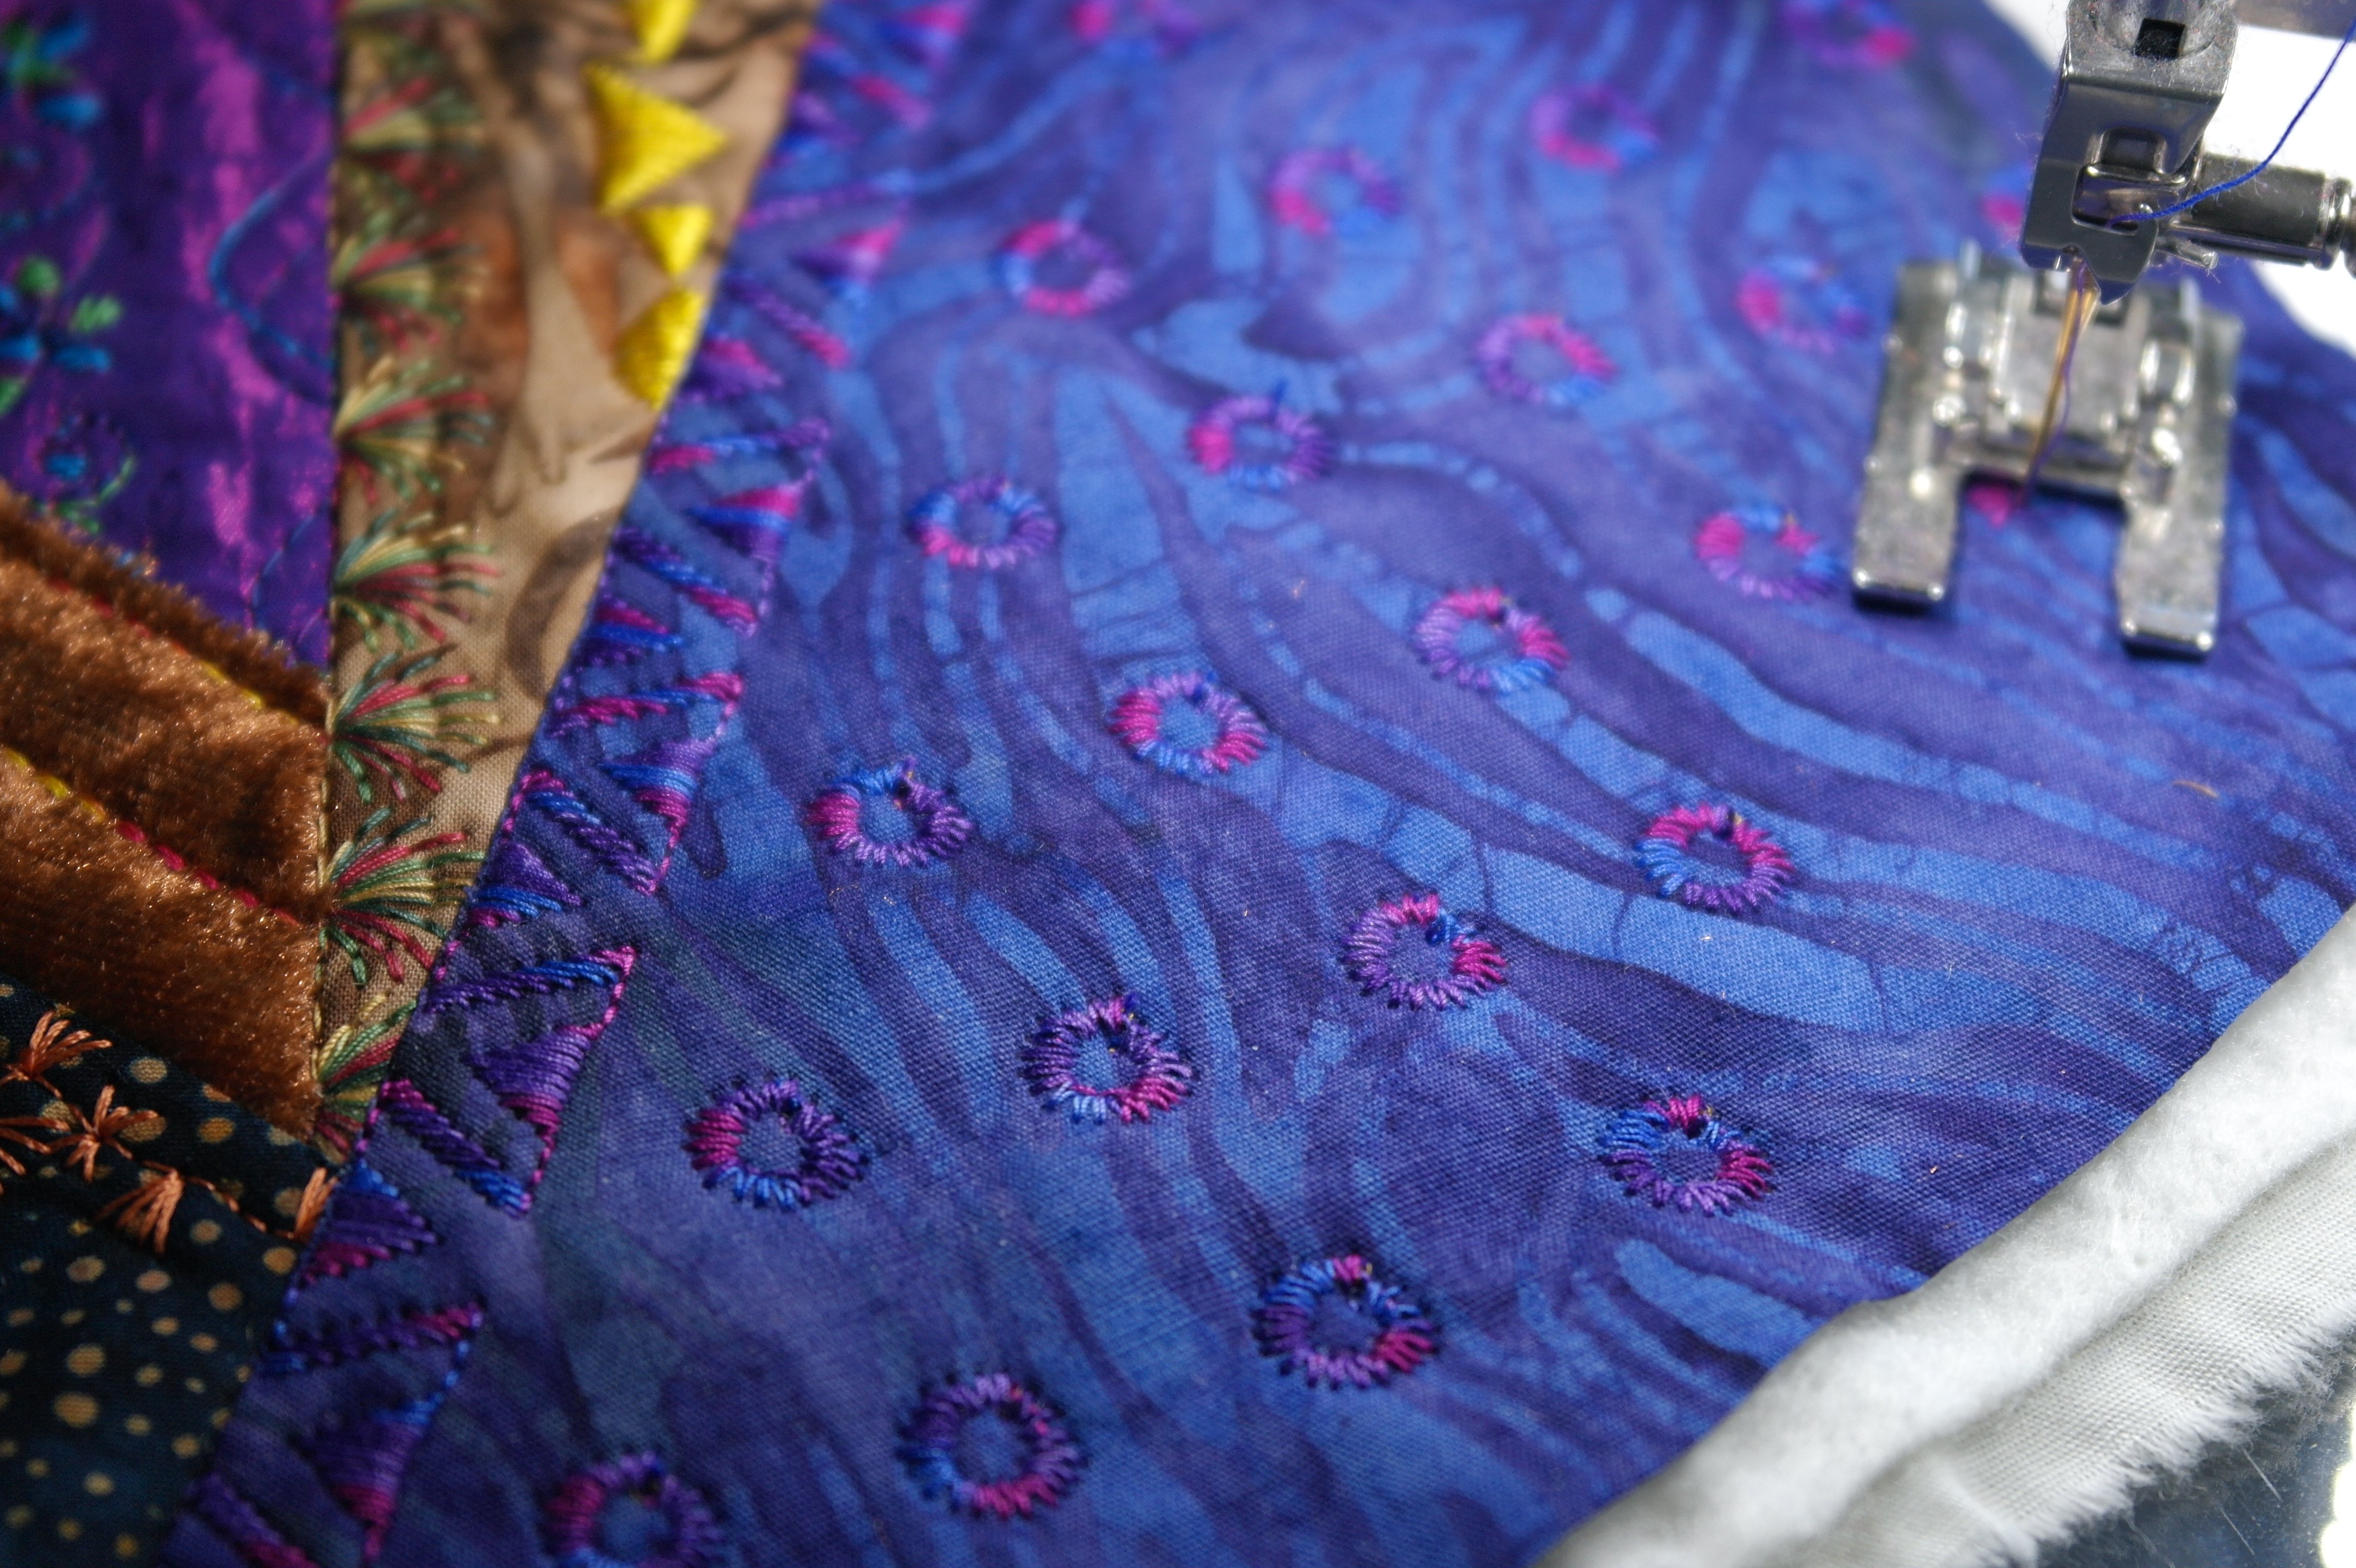
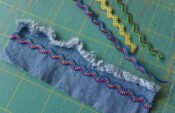
I have used Sulky Rayon 40 for covering the base lines of the Crystal, in golden yellow. The decorative stitch places squares on each side of the base line. A busy effect, specially where they cross in the center. Never mind, I will glue Hotfix stones on top of this center afterwards.
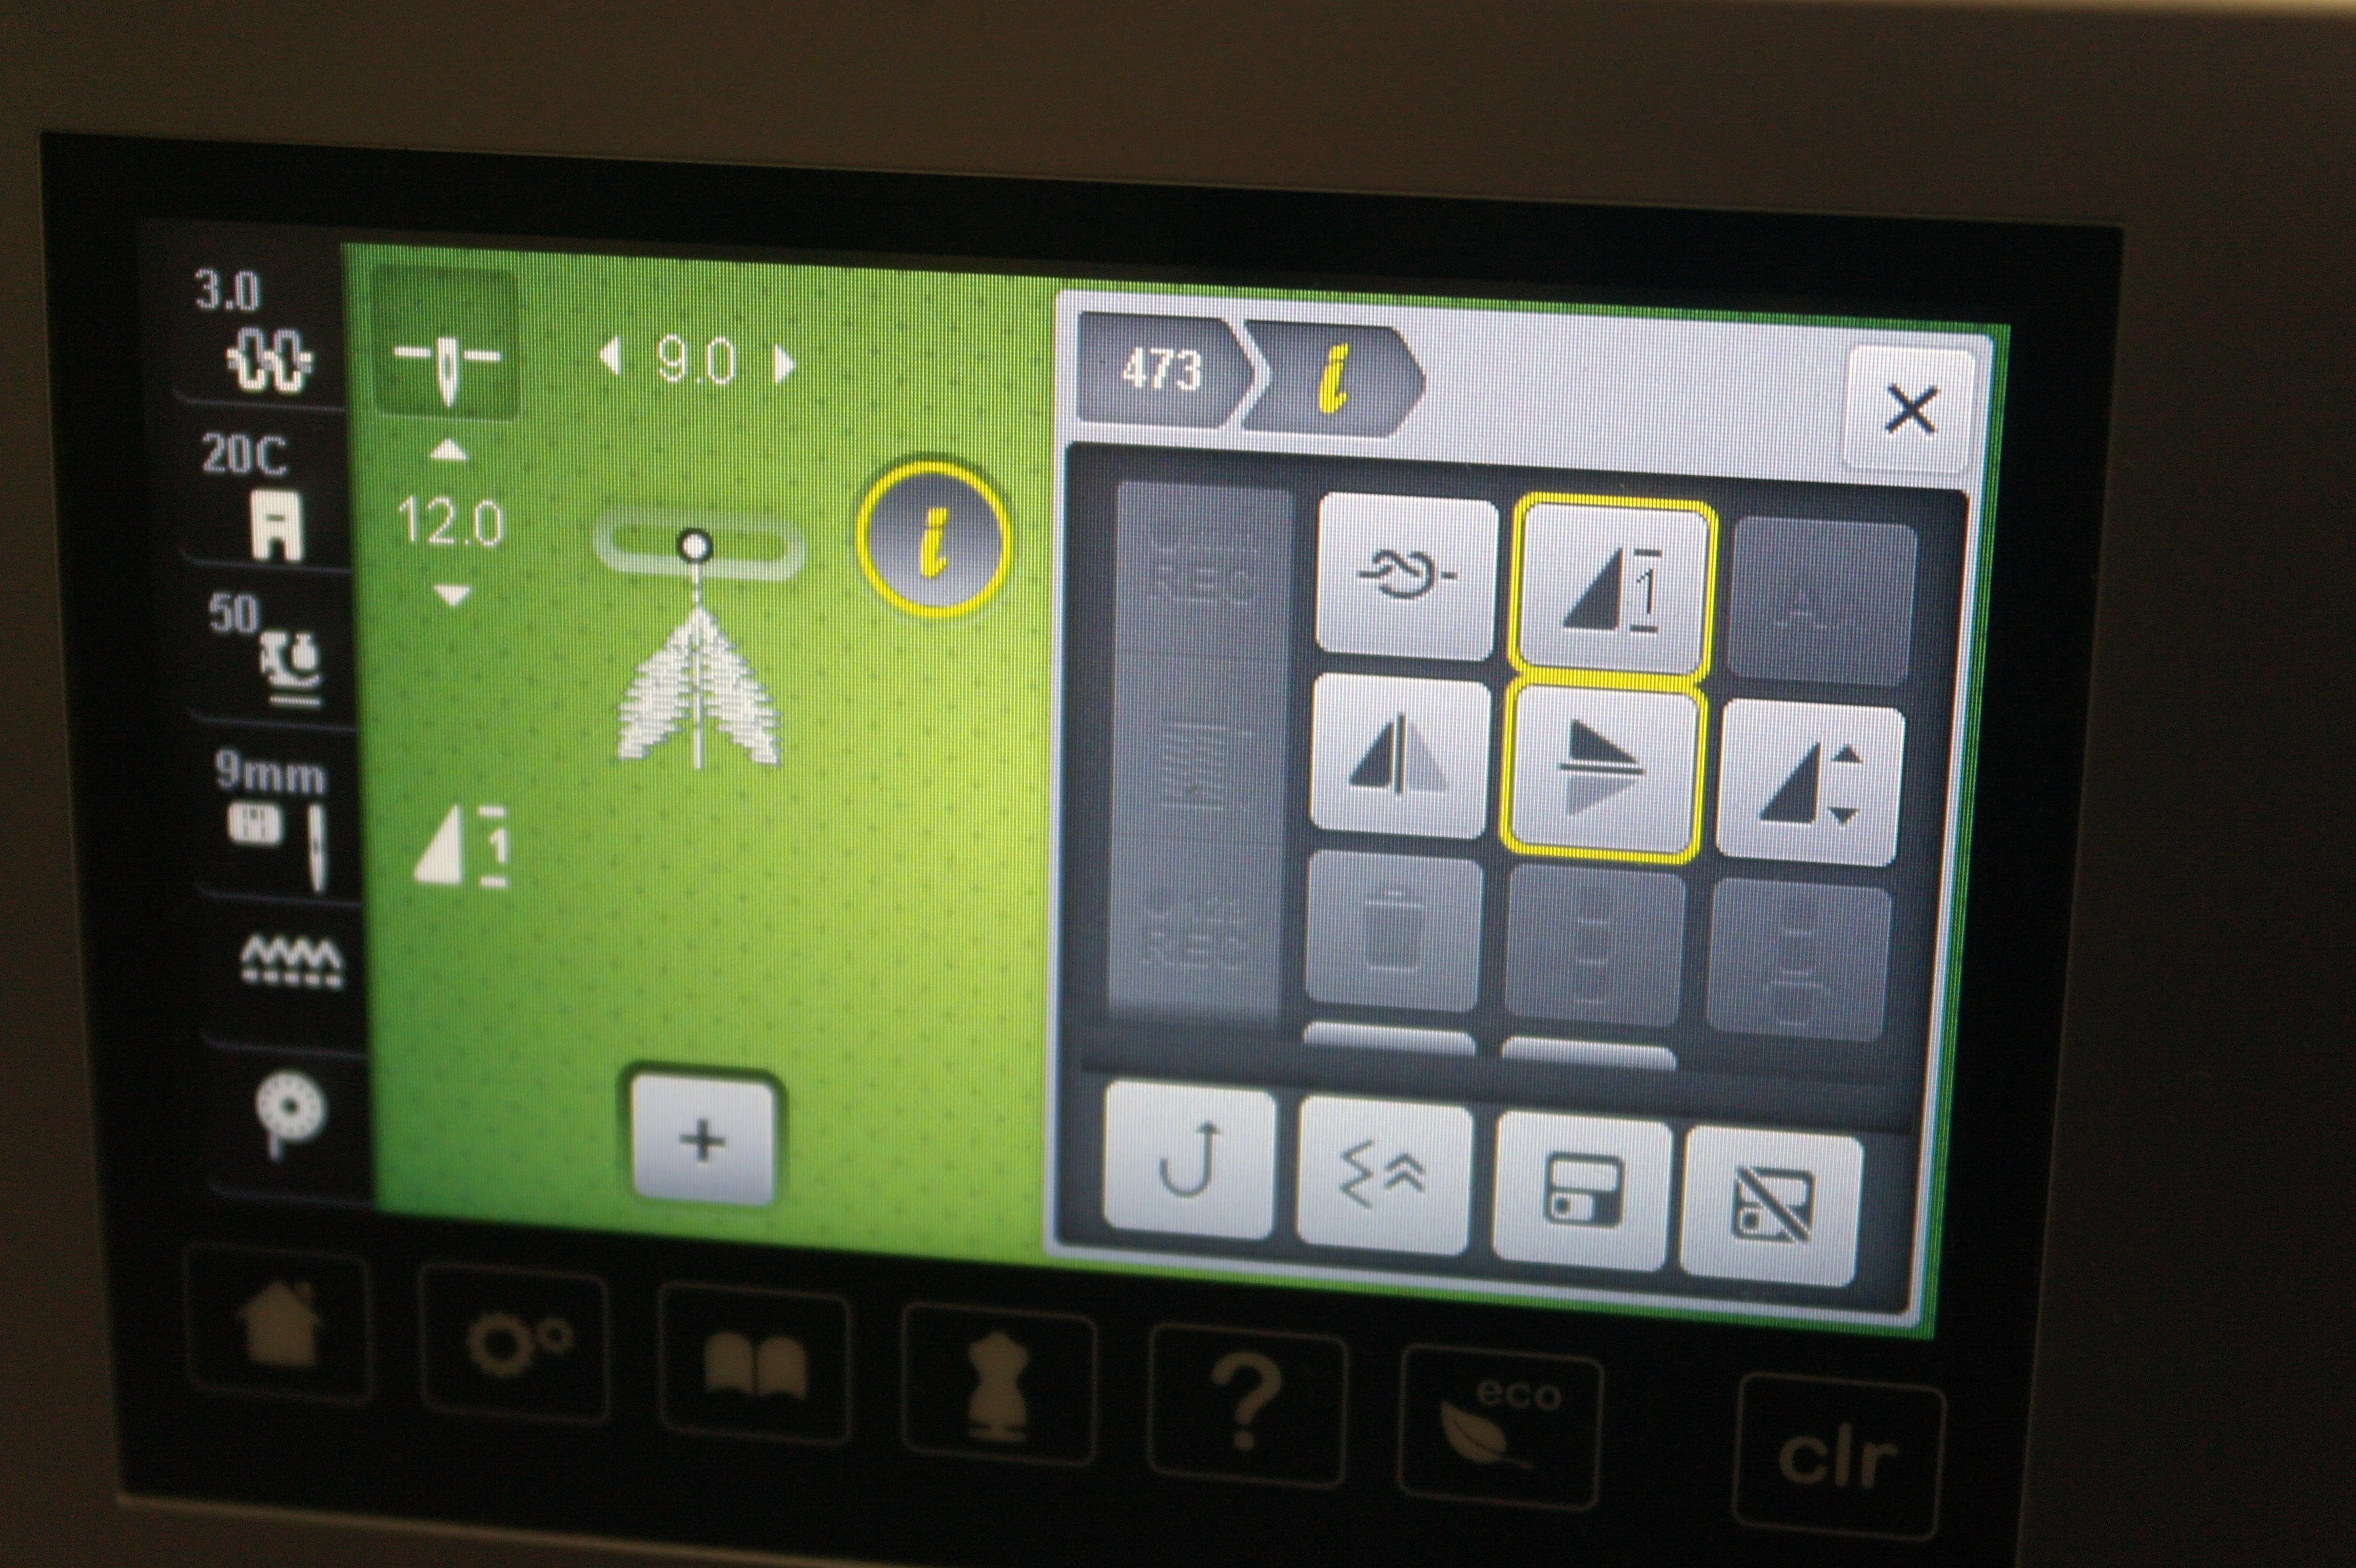
To cover the small diagonal lines of the Crystal, I have used stitch 473, a mirror image, so the ‘leaves’ of this stitch are pointing away from the base line. You can tell that something is changed with the default setting of this stitch, because of the yellow lines around some icons. I have also made sure the machine just makes one complete stitch, so I can put them per piece where I want to. To clear this, I just push ‘Clr’, bottom right.
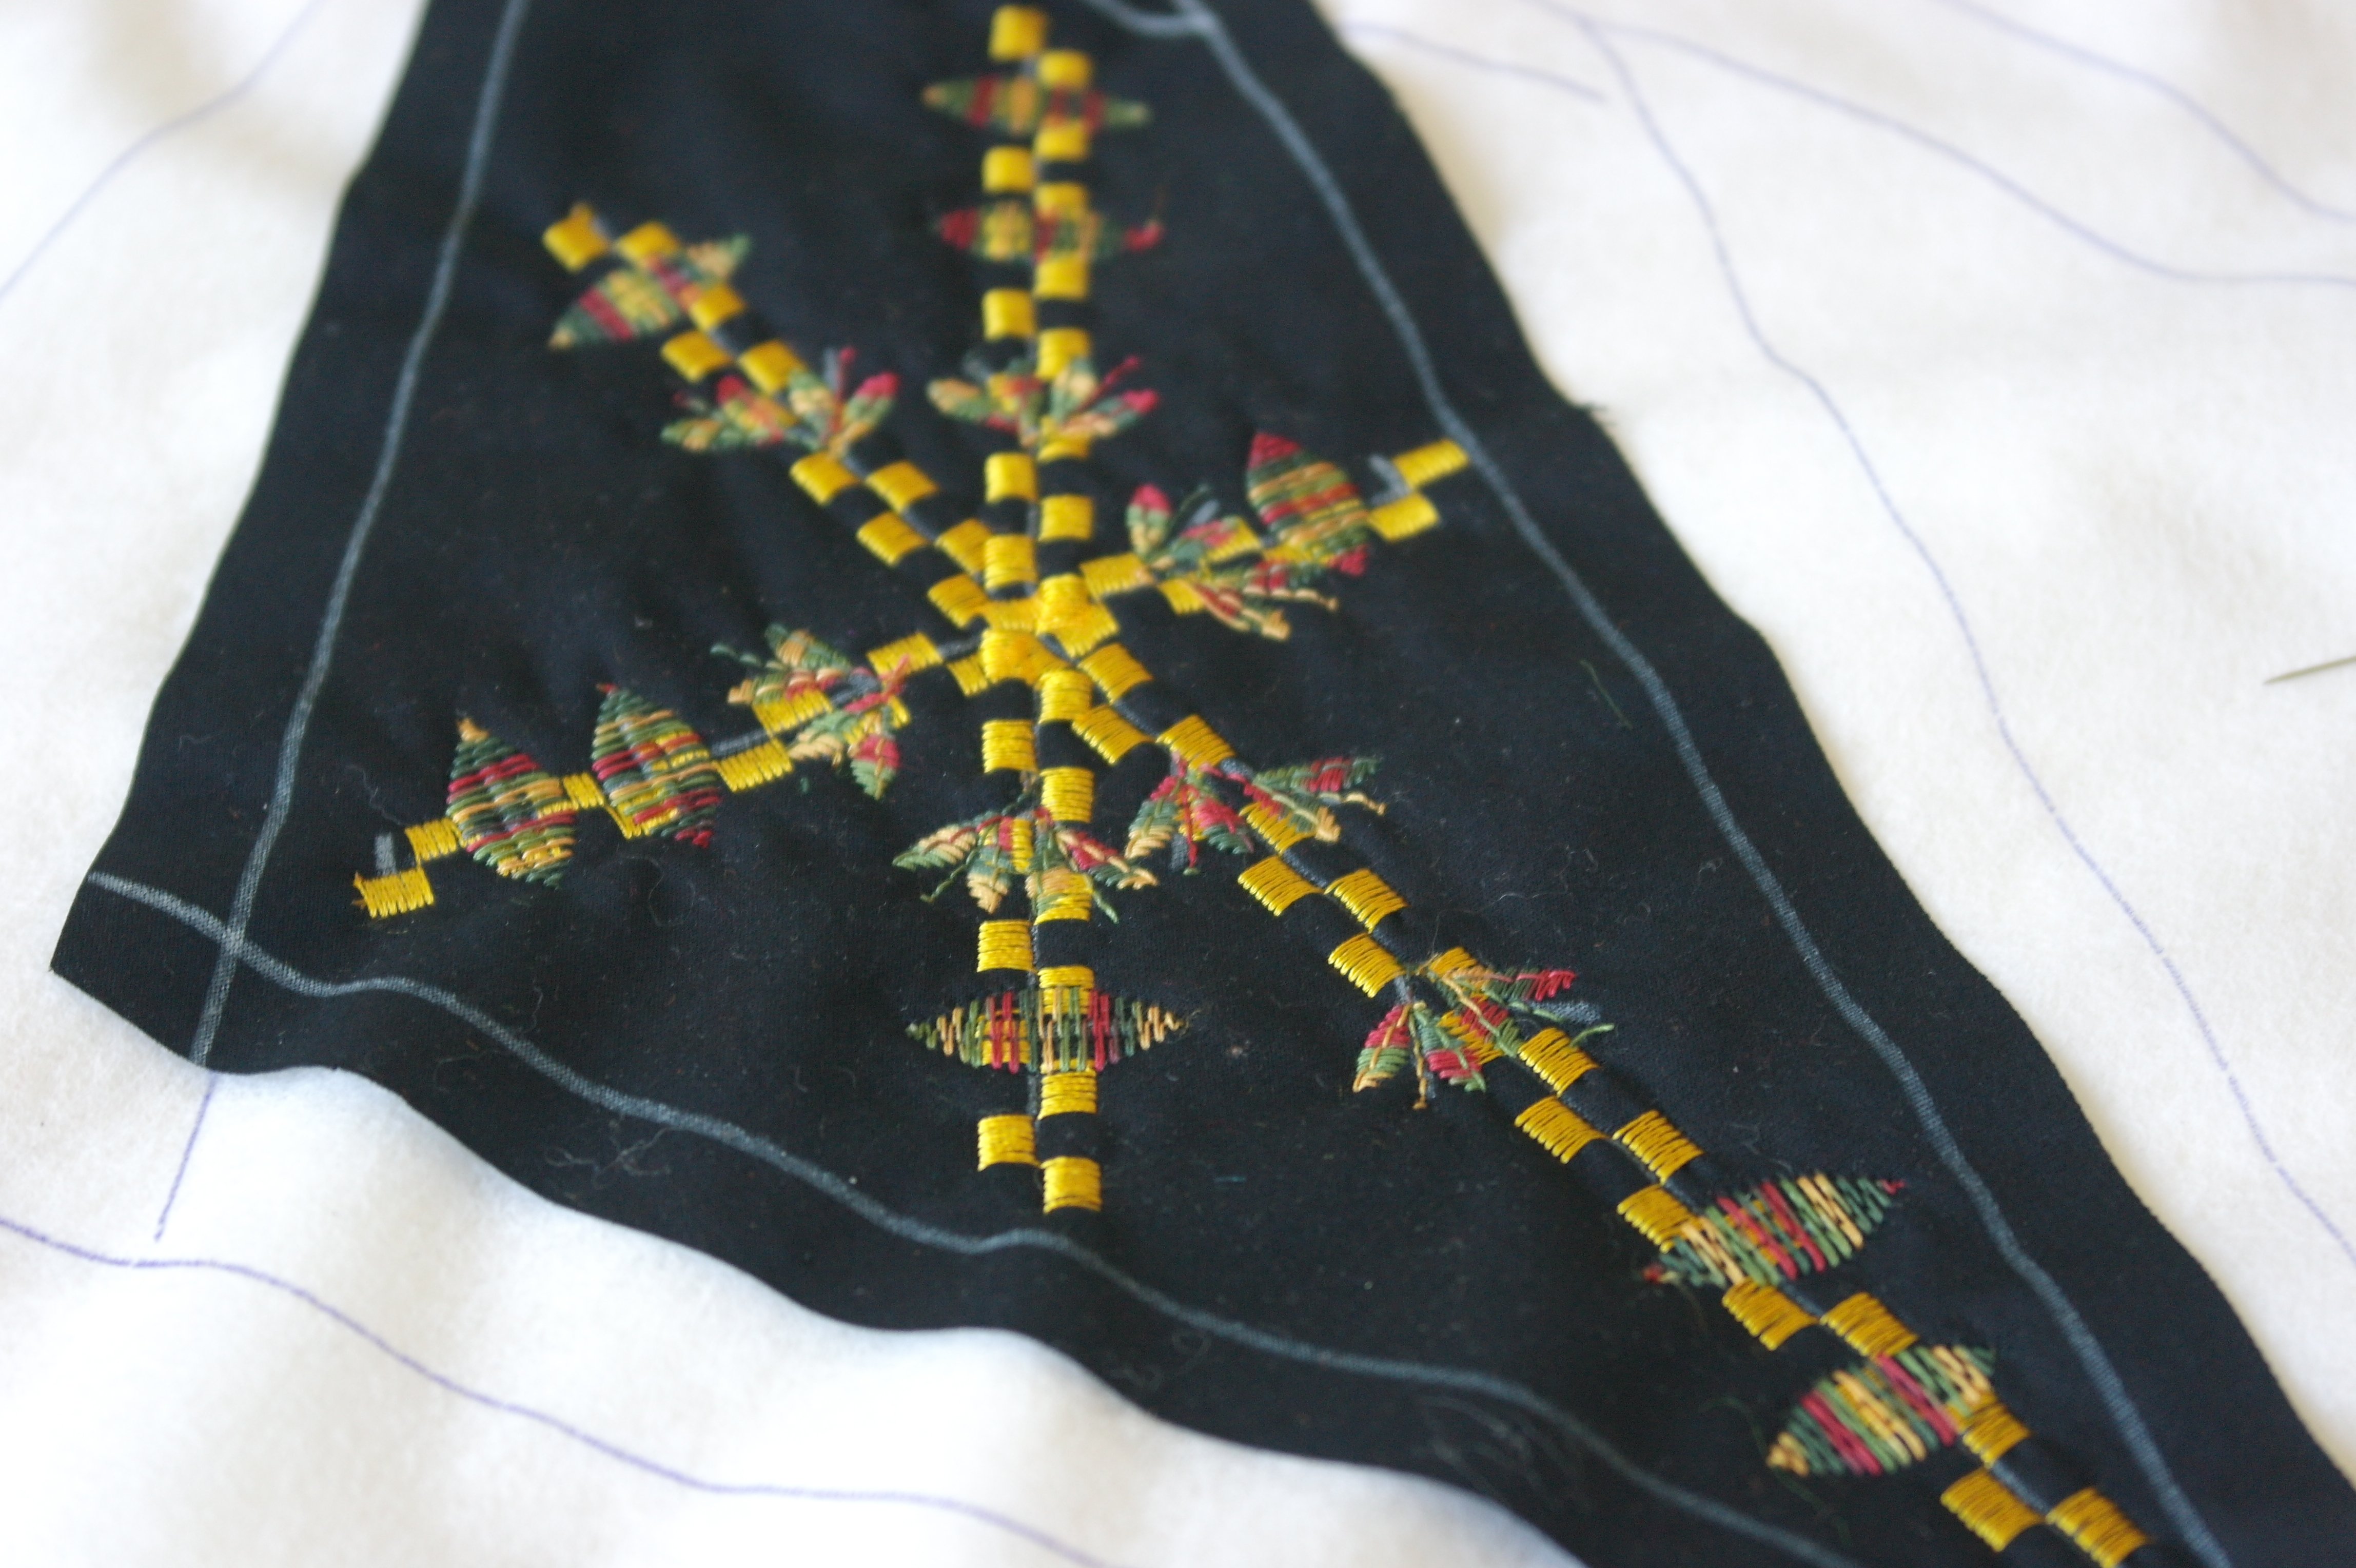
Some other decorative stitches were used (look like leaves too) with the small straight lines: all with variagated threads.
After completing the Crystal, strips/pieces of fabric are used again to cover the sections. But for certain sections I have used a special technique, mimicking the falling leaves of autumn:
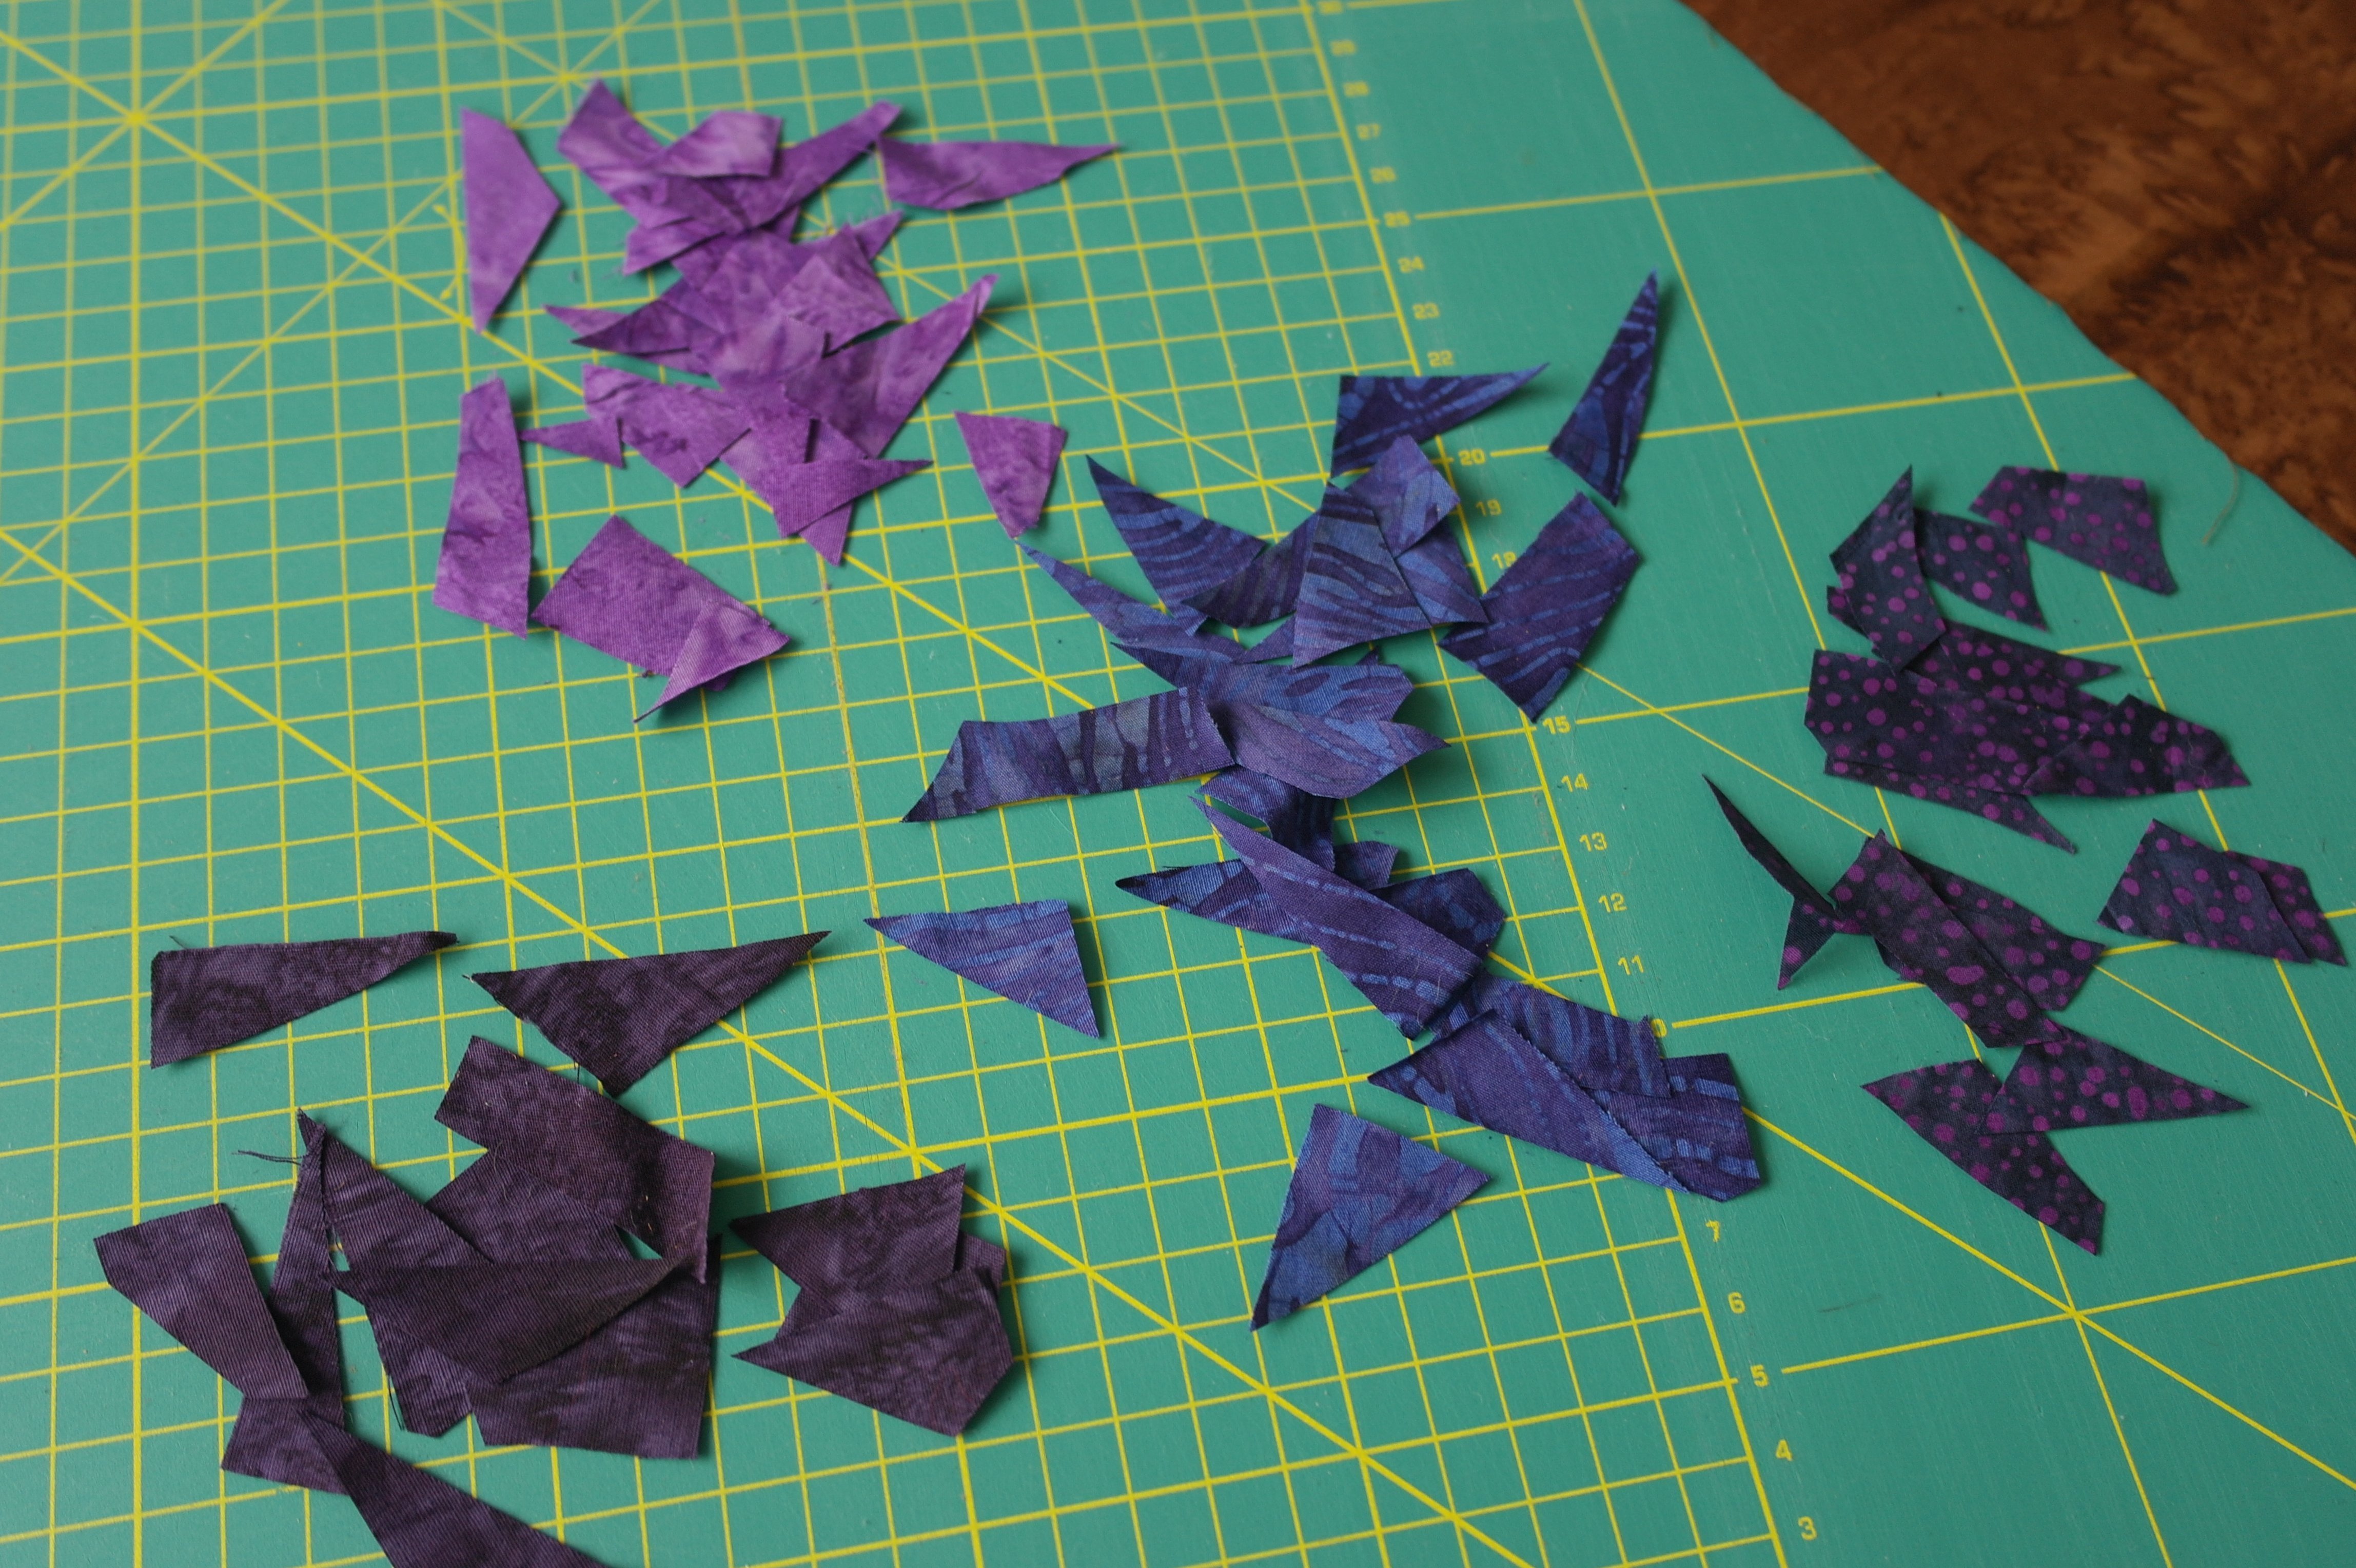
Cut small pieces of remnants, left overs from previous blocks, and sort them colorwise.
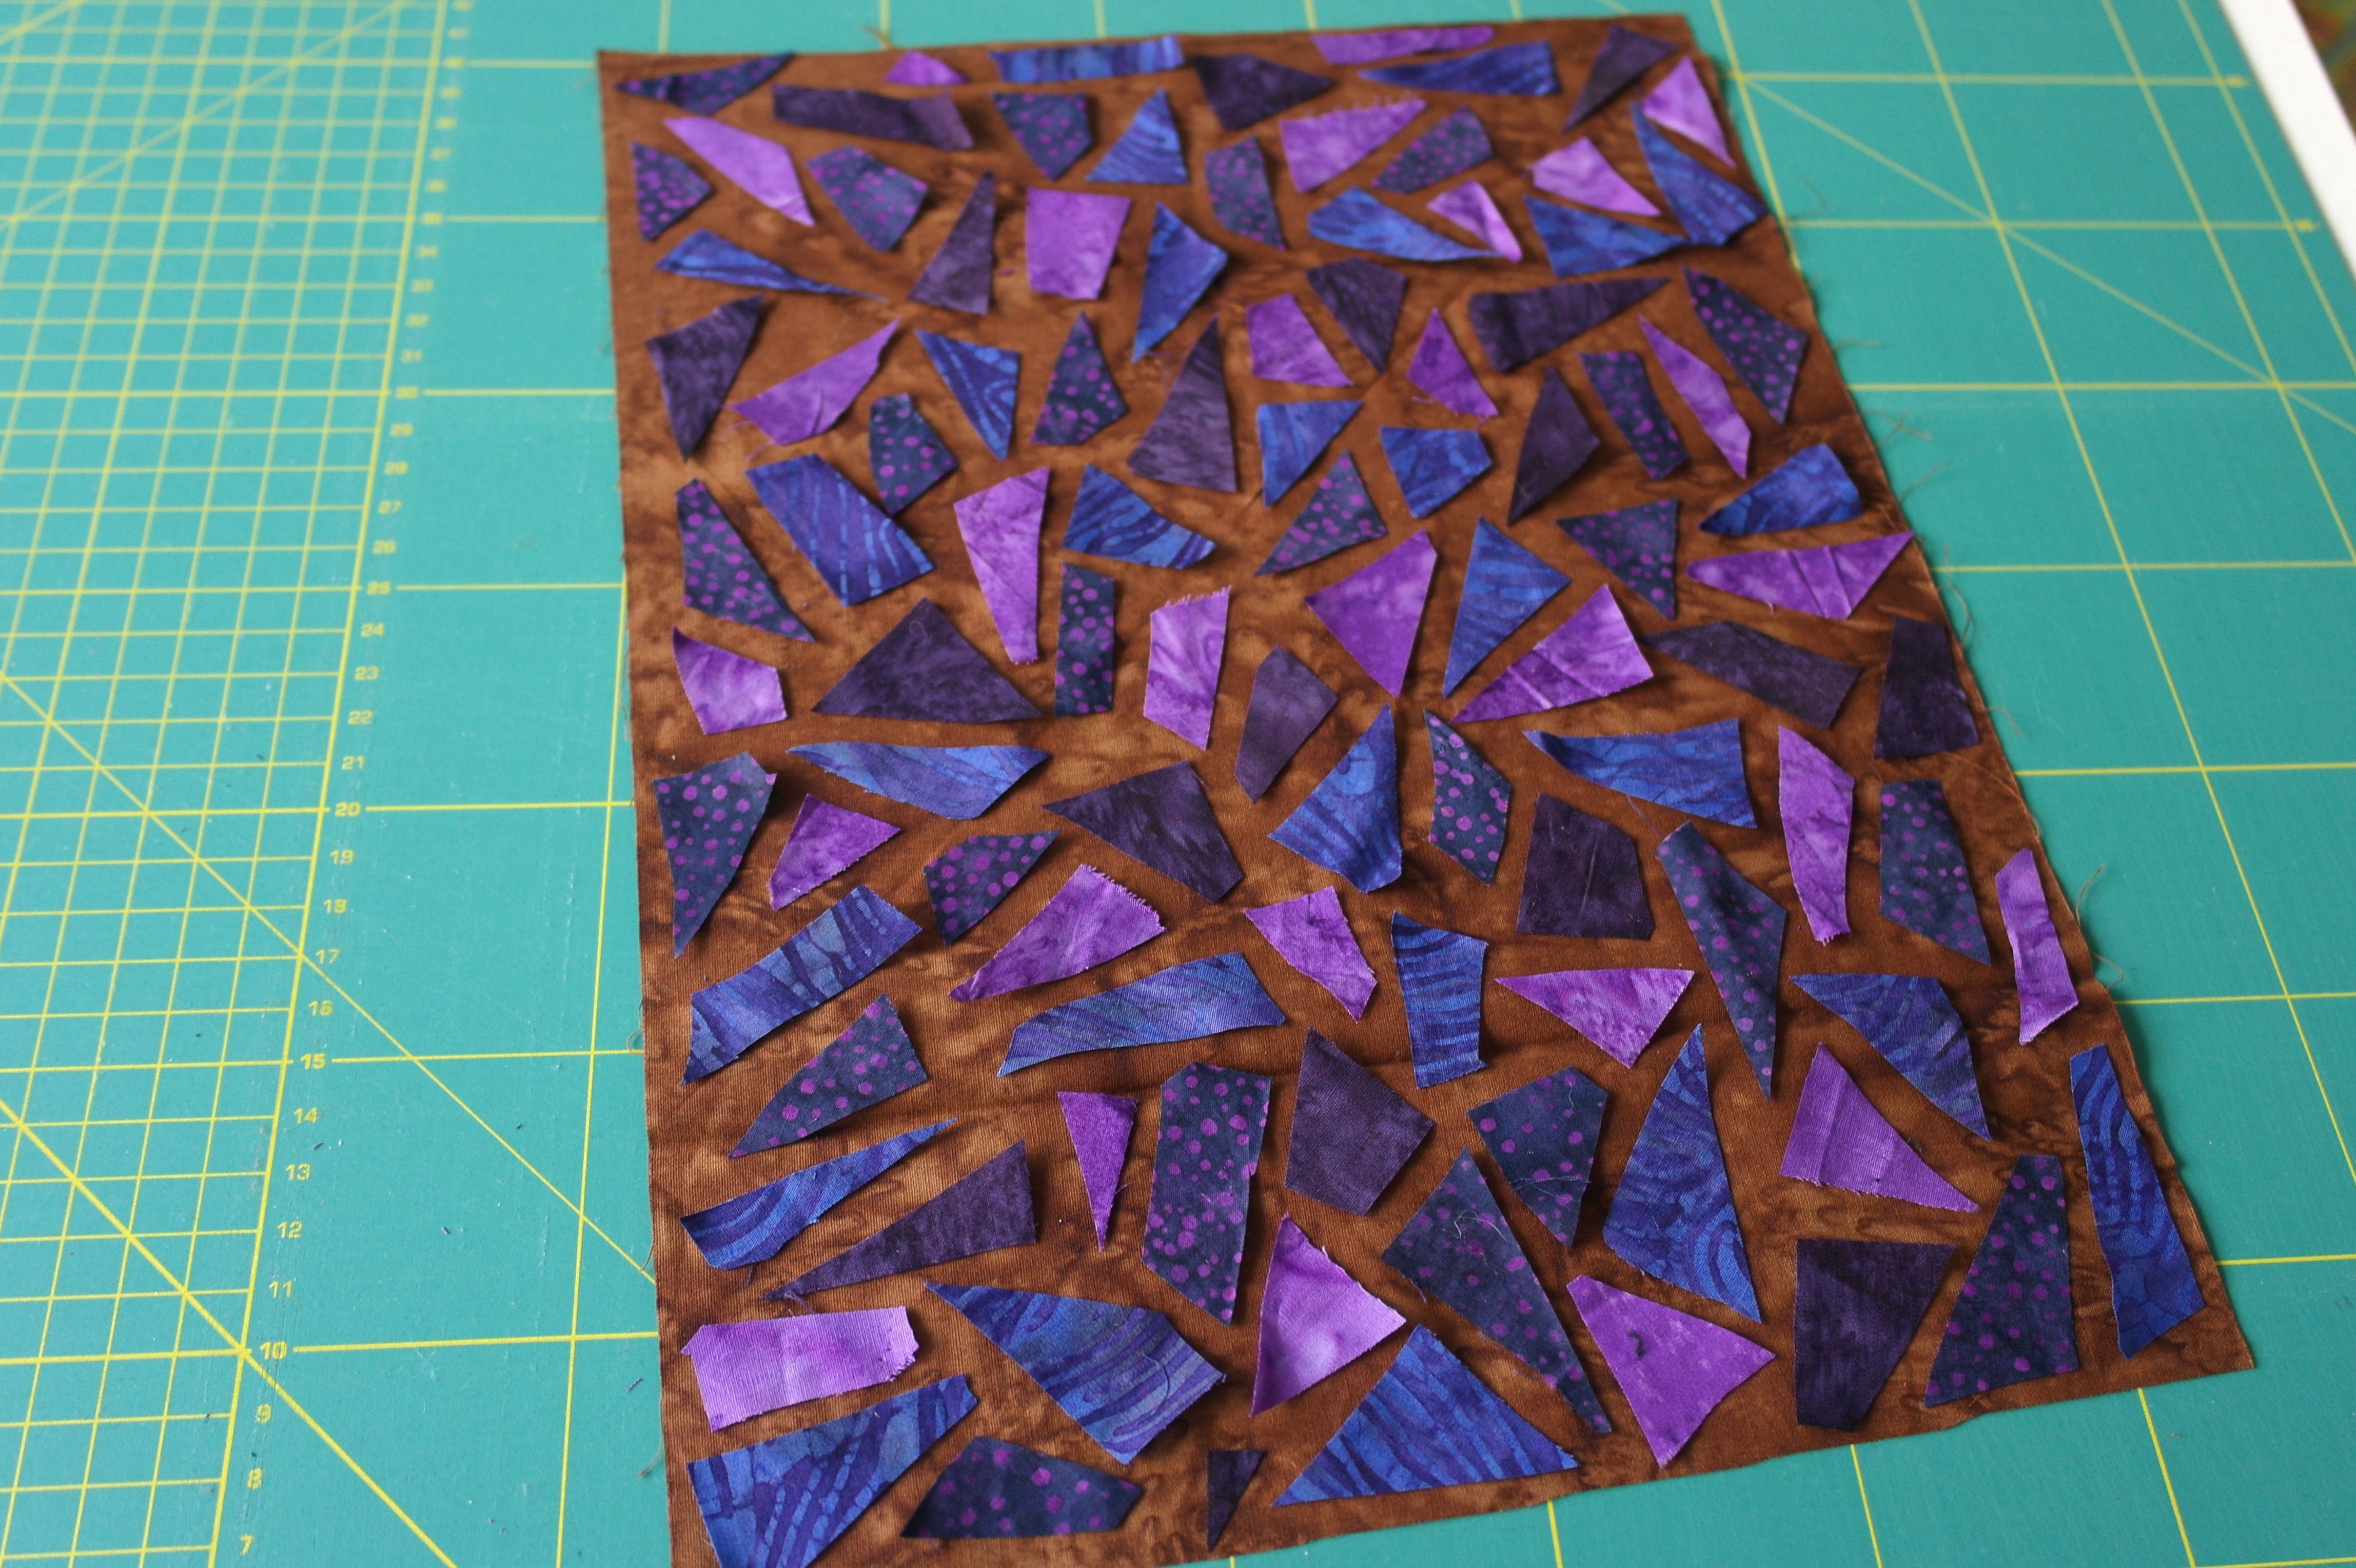
Place a large piece of (batik) fabric of at least the size of A4=printer paper in a contrasting color on your table. Place the pieces of fabric randomly on this fabric. Of course you can use some color plan, but more important is tomake sure you like the setup. I have made sure that the brown batik is still visible, and placed the piececs of fabric like a mosaic. BE SURE to check if this piece of fabric is large enough to cover all sections you want to place this, even the larger ones. Make paper templates from the pattern with extra seam allowances to know how large to cut this self-made fabric.
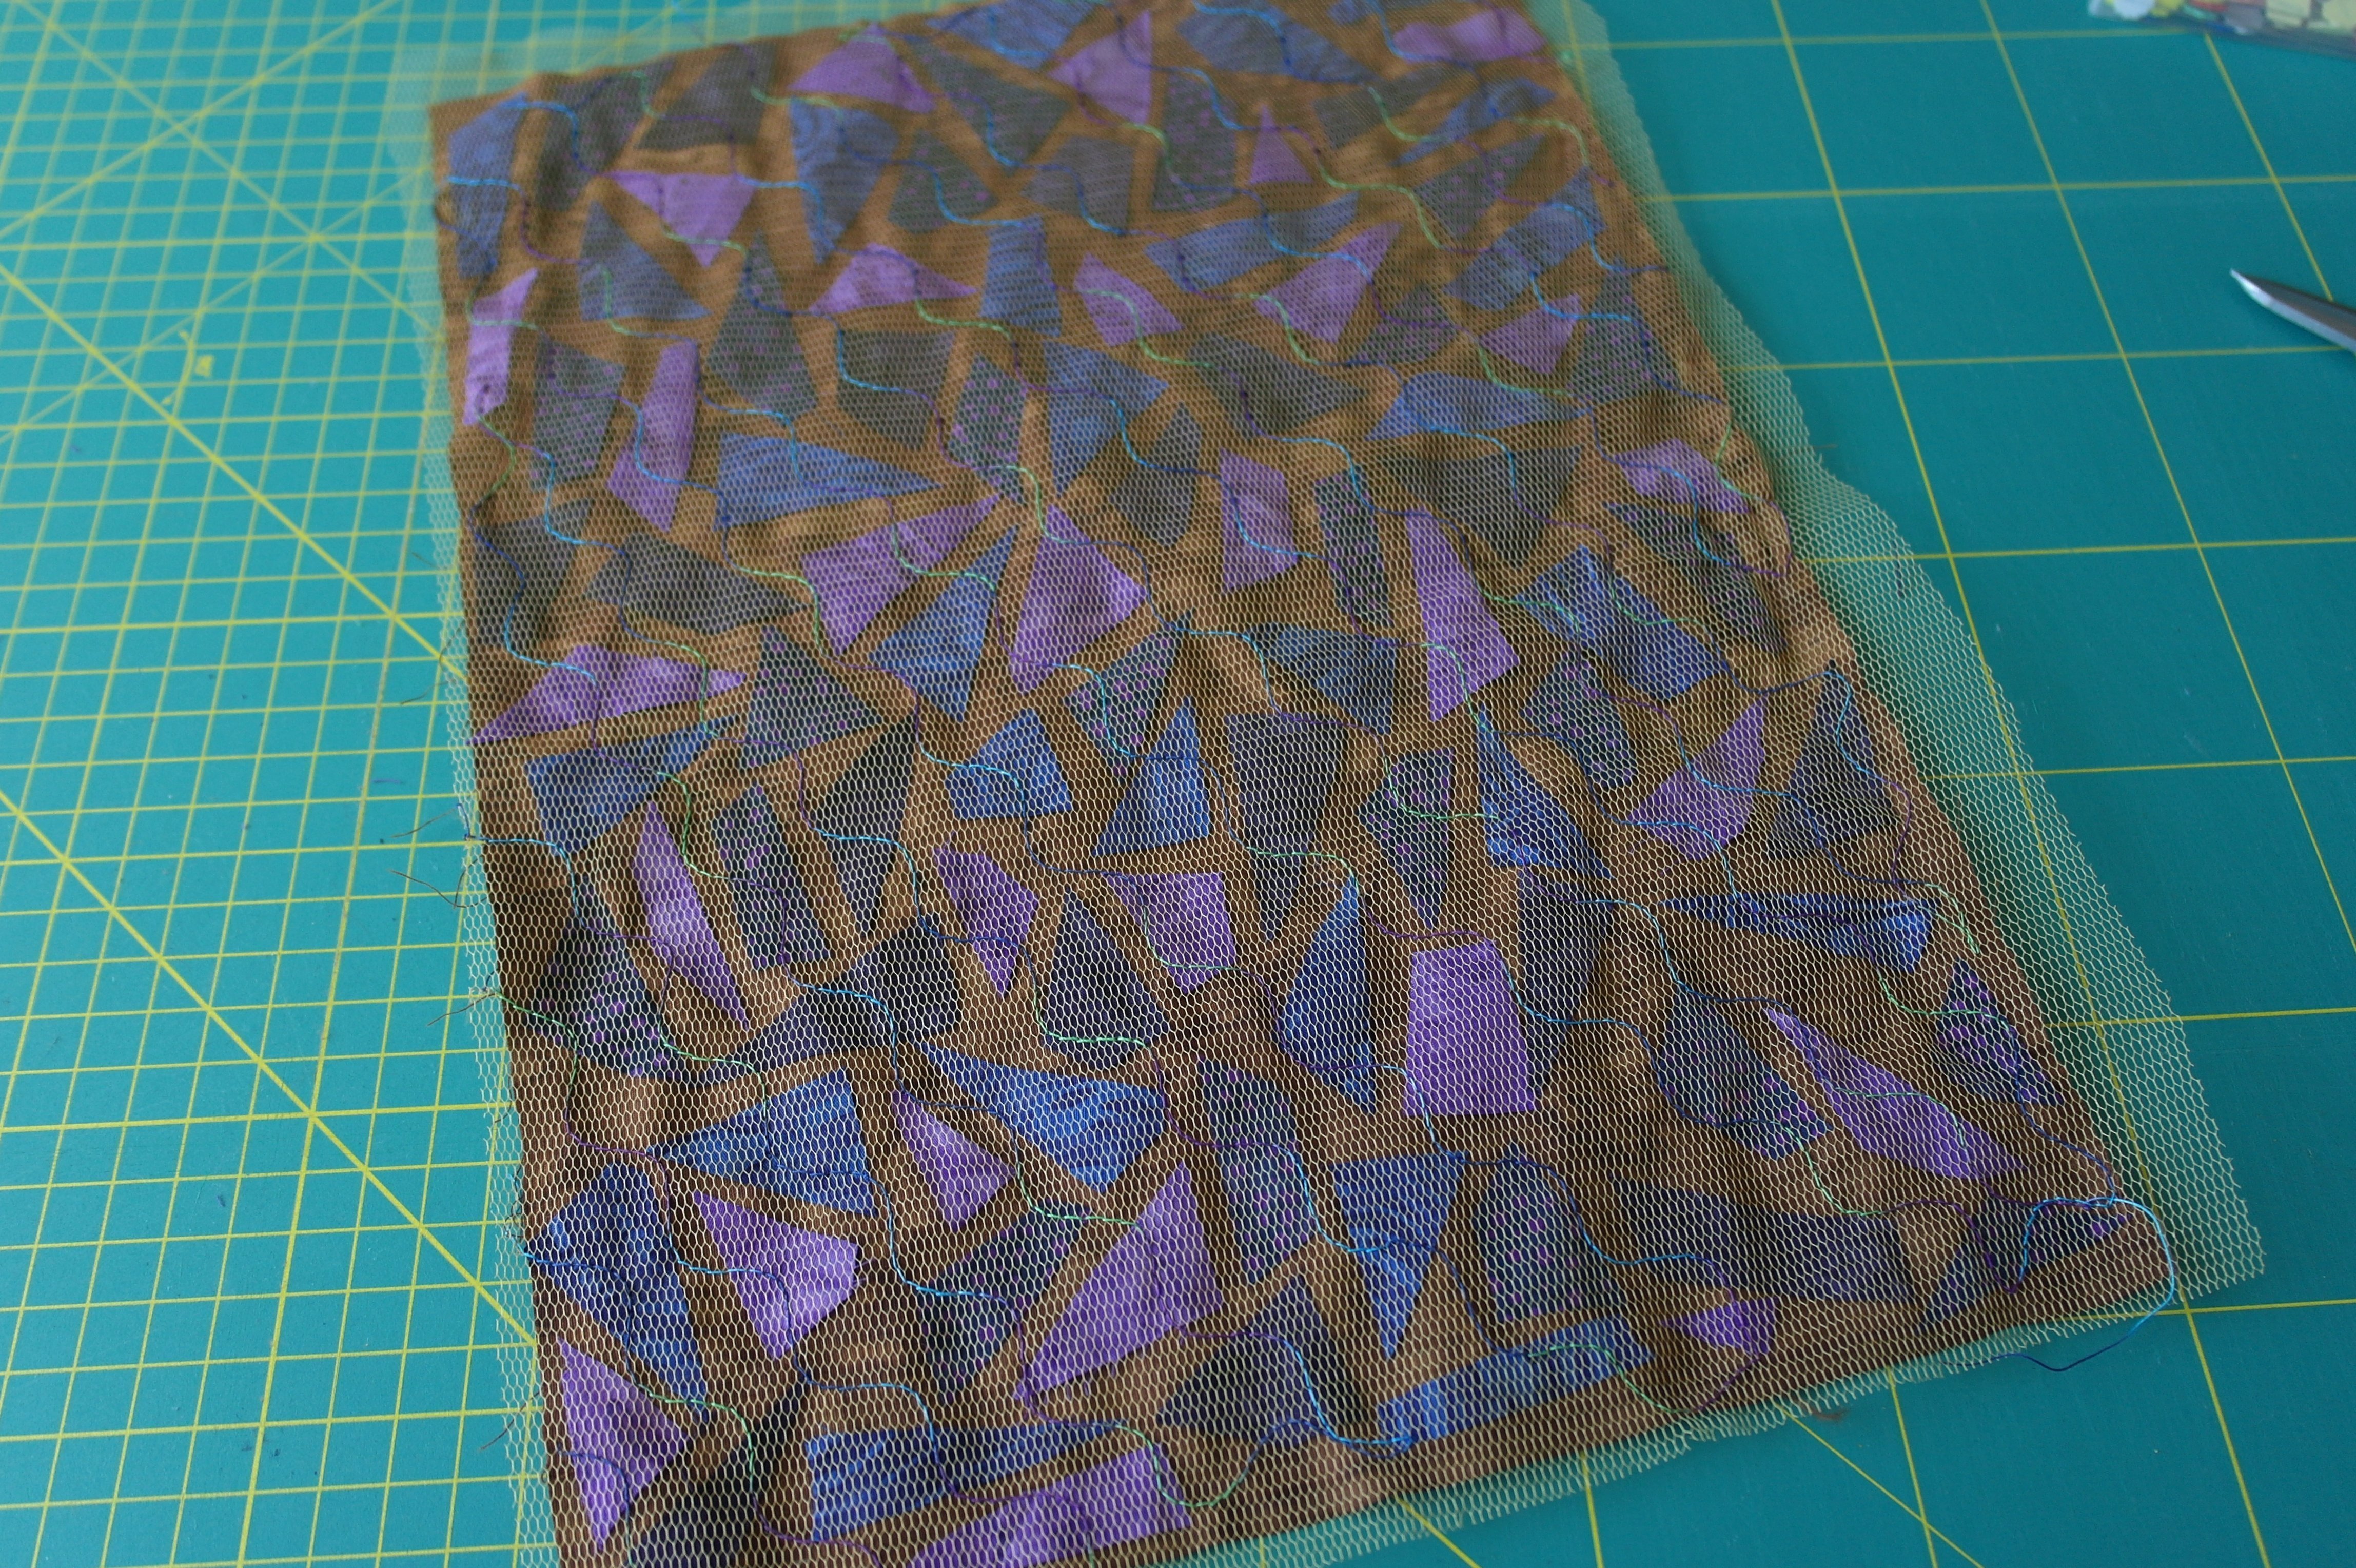
Place a light Tule over the pieces/batik, and secure all layers, make sure that you have at least tacked each small cut piece once. I have used a waving line to secure all pieces. Nothing will shift between the Tule and the brown batik now.
Before cutting, check for which sections you want to use this fabric – again, cut a paper template of each section including seam allowances and place them on top of this self-made fabric. I have used it for three sections: nr. 3, 8 en 10. Check if your piece is large enough to do so too.

Sew these fabrics onto the section of your choice, when it is due according to the number sequence. BUT BE CAREFUL: sometimes you will have to place a normal piece of fabric, and this special fabric, a lot higher to make sure the entire section is covered, after folding the fabric to the right side. Check before sewing if it will cover the entire piece.
You can add decorative stitches on these special pieces, or leave them as they are, to make the small cut pieces stand out through the Tule. I have only covered the seam with a satin stitch, and left the rest uncovered.

With cutting this special fabric, you will have remnants, which could be large enough for coming blocks.
TIP: I have secured each piece at the sides, by sewing a straight stitch along the edges, to prevent the really small cut pieces from shifting underneath the Tule.
With section 9 I have covered a blue batik with Eyelet stitches (Stitch 61 with my B770QE). Normally you will use this stitch for making holes in fabric, but I haven’t cut the center open, just left it this way. It gives the piece of fabric a beautiful appearance, specially because of the varigated thread I have used.
Cover the entire sandwich with fabrics and stitches.
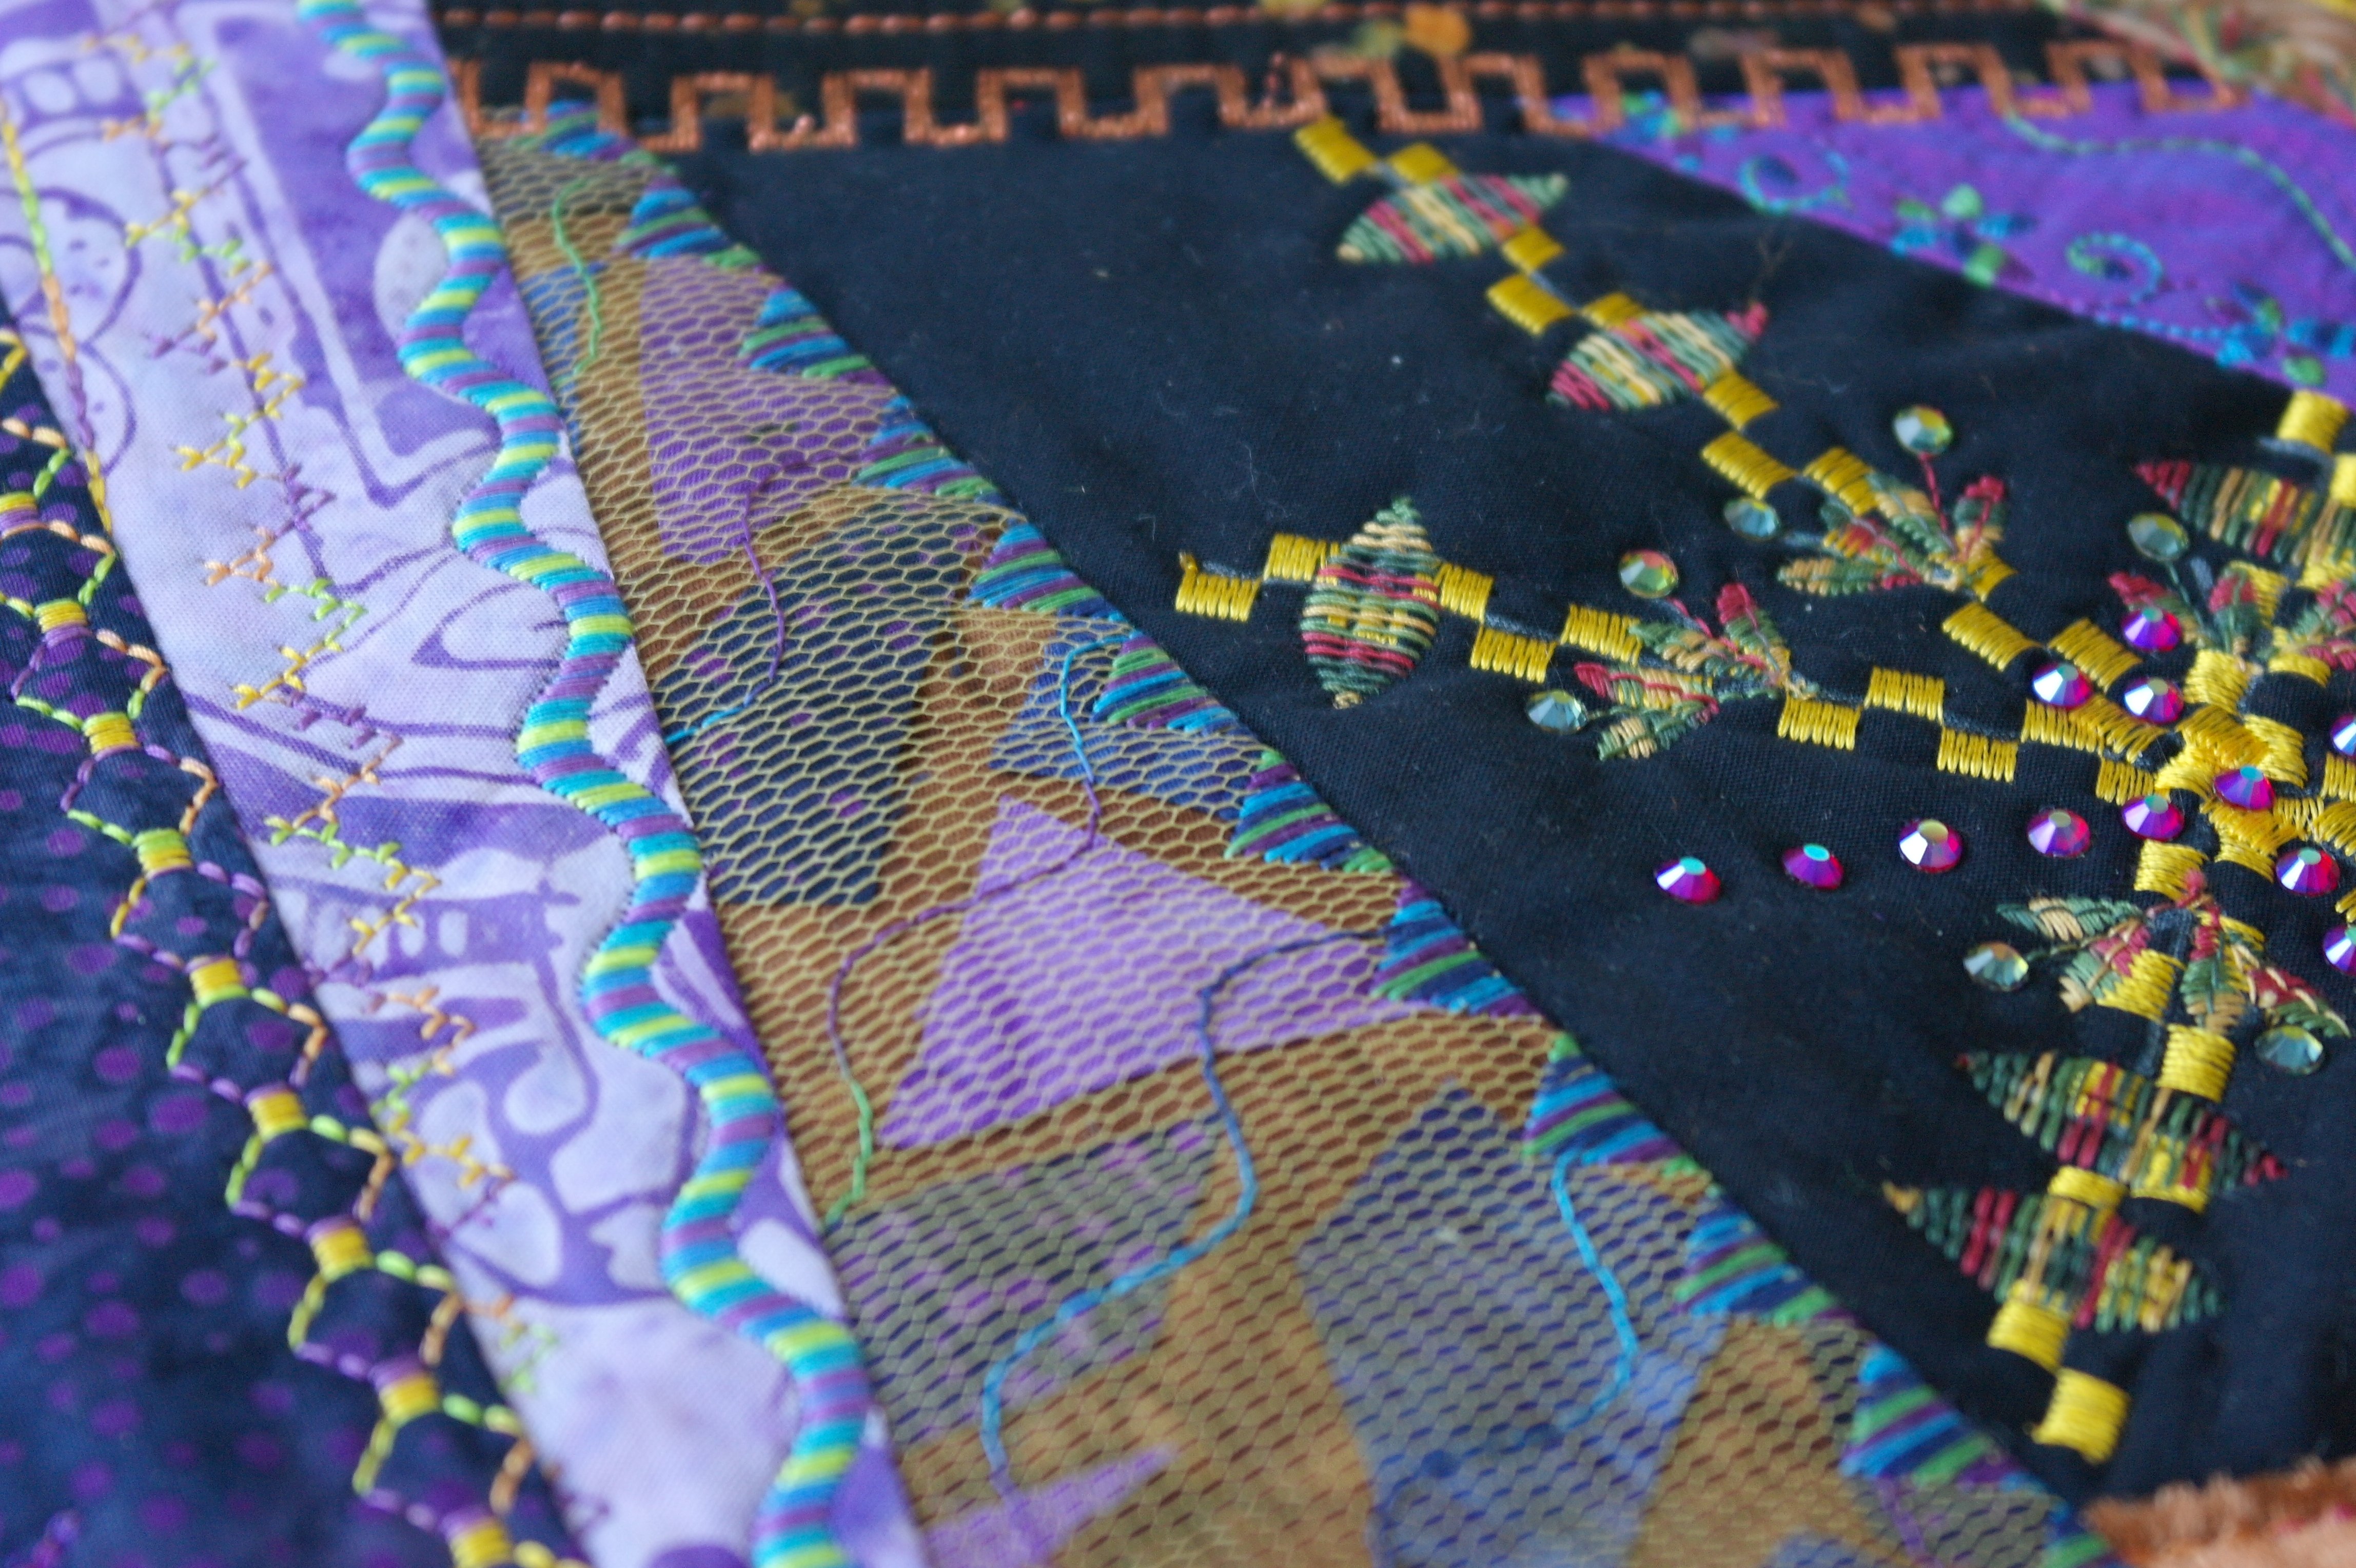
Glue Hotfix stones on the Crystal for special effect.
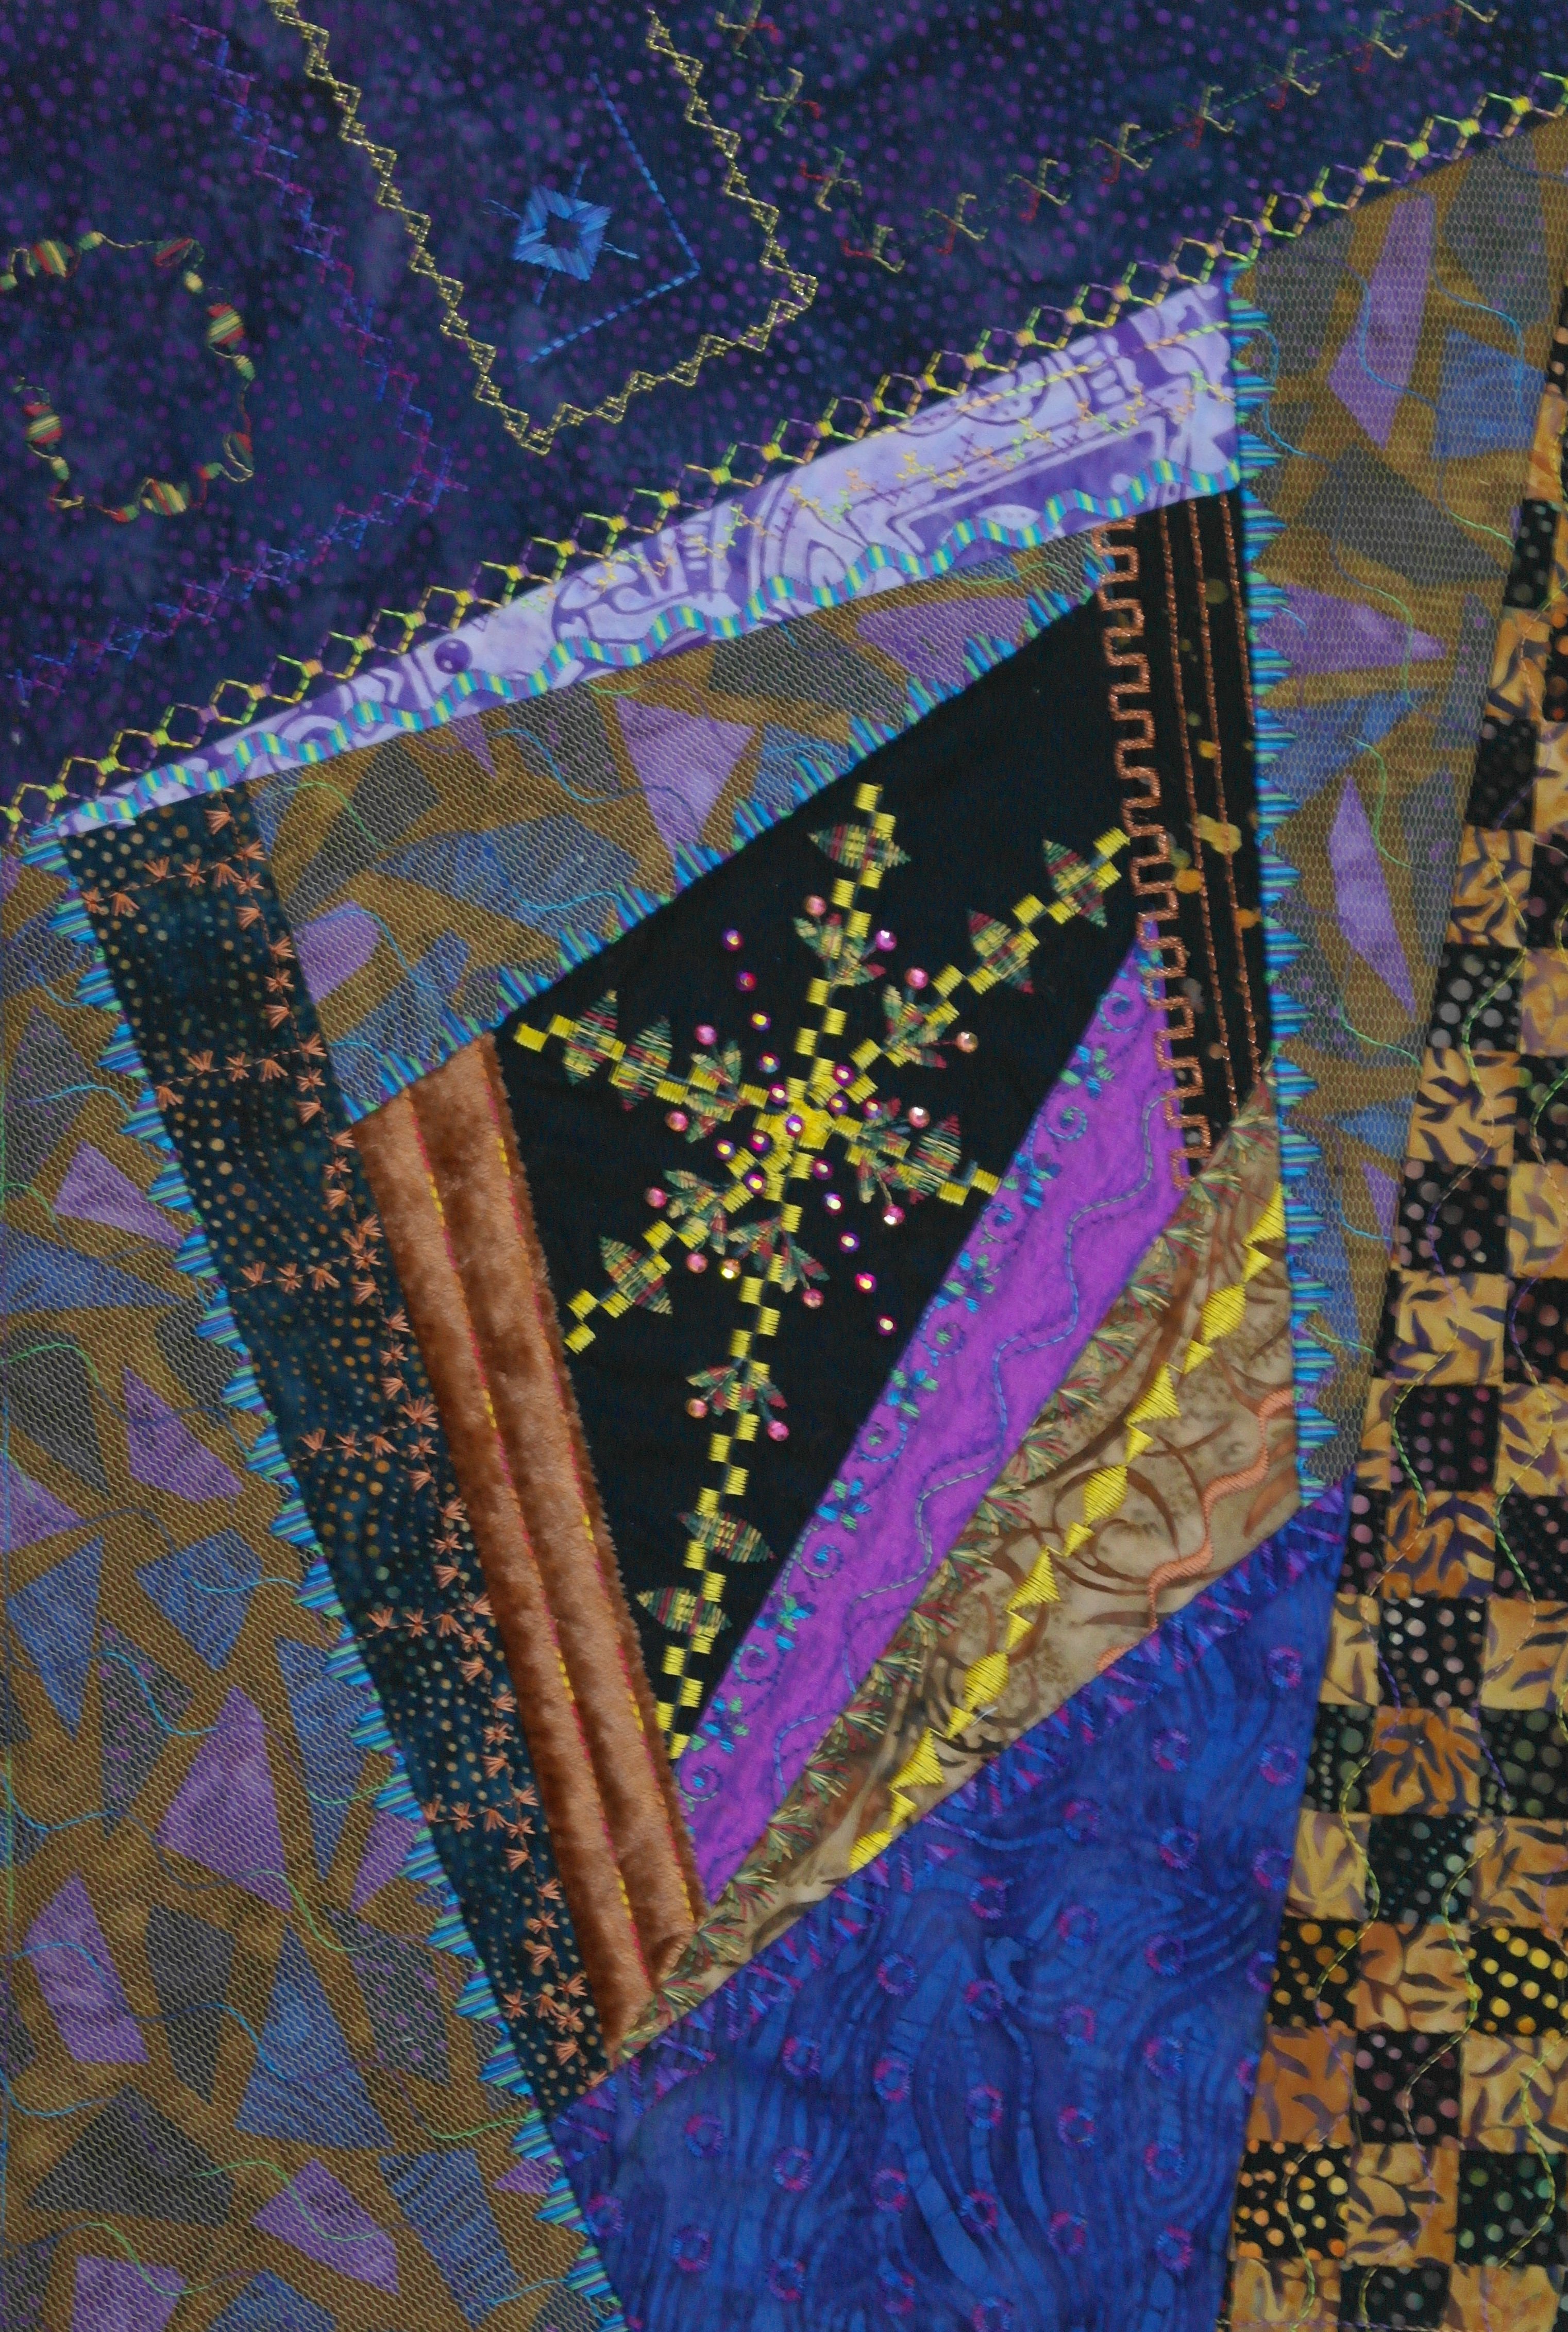
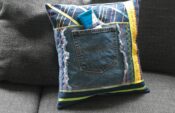
My Bloc 10 is ready again: I have used the remnant of the Meshwork fabric I have made with the previous block for Section 12: it was large enough to cover this section. Always check if you can use left-overs from fabrics with special effects for coming blocks.
I cannot wait to see what you are making of this block, with making the special ‘Autumn’ piece of fabric and adding lots of fun things.
See you next time!
Happy Quilting
Sylvia Kaptein
Sylvia’s Art Quilts Studio
0 Responses