 BERNINA Corporate Blog -
The last block for the Crazy Crystals Mystery Project 2018 is due: and no, this is not the end of the project yet! Finishing and assembly will be posted on January 15 2019, to give you all the time you need to make block 12 (and possibly some former blocks).
But first you can print out block 12: download the 3 pages, like you did before with the other blocks:
Block 12 – left part
Block 12– right part
Block 12 – Crystal
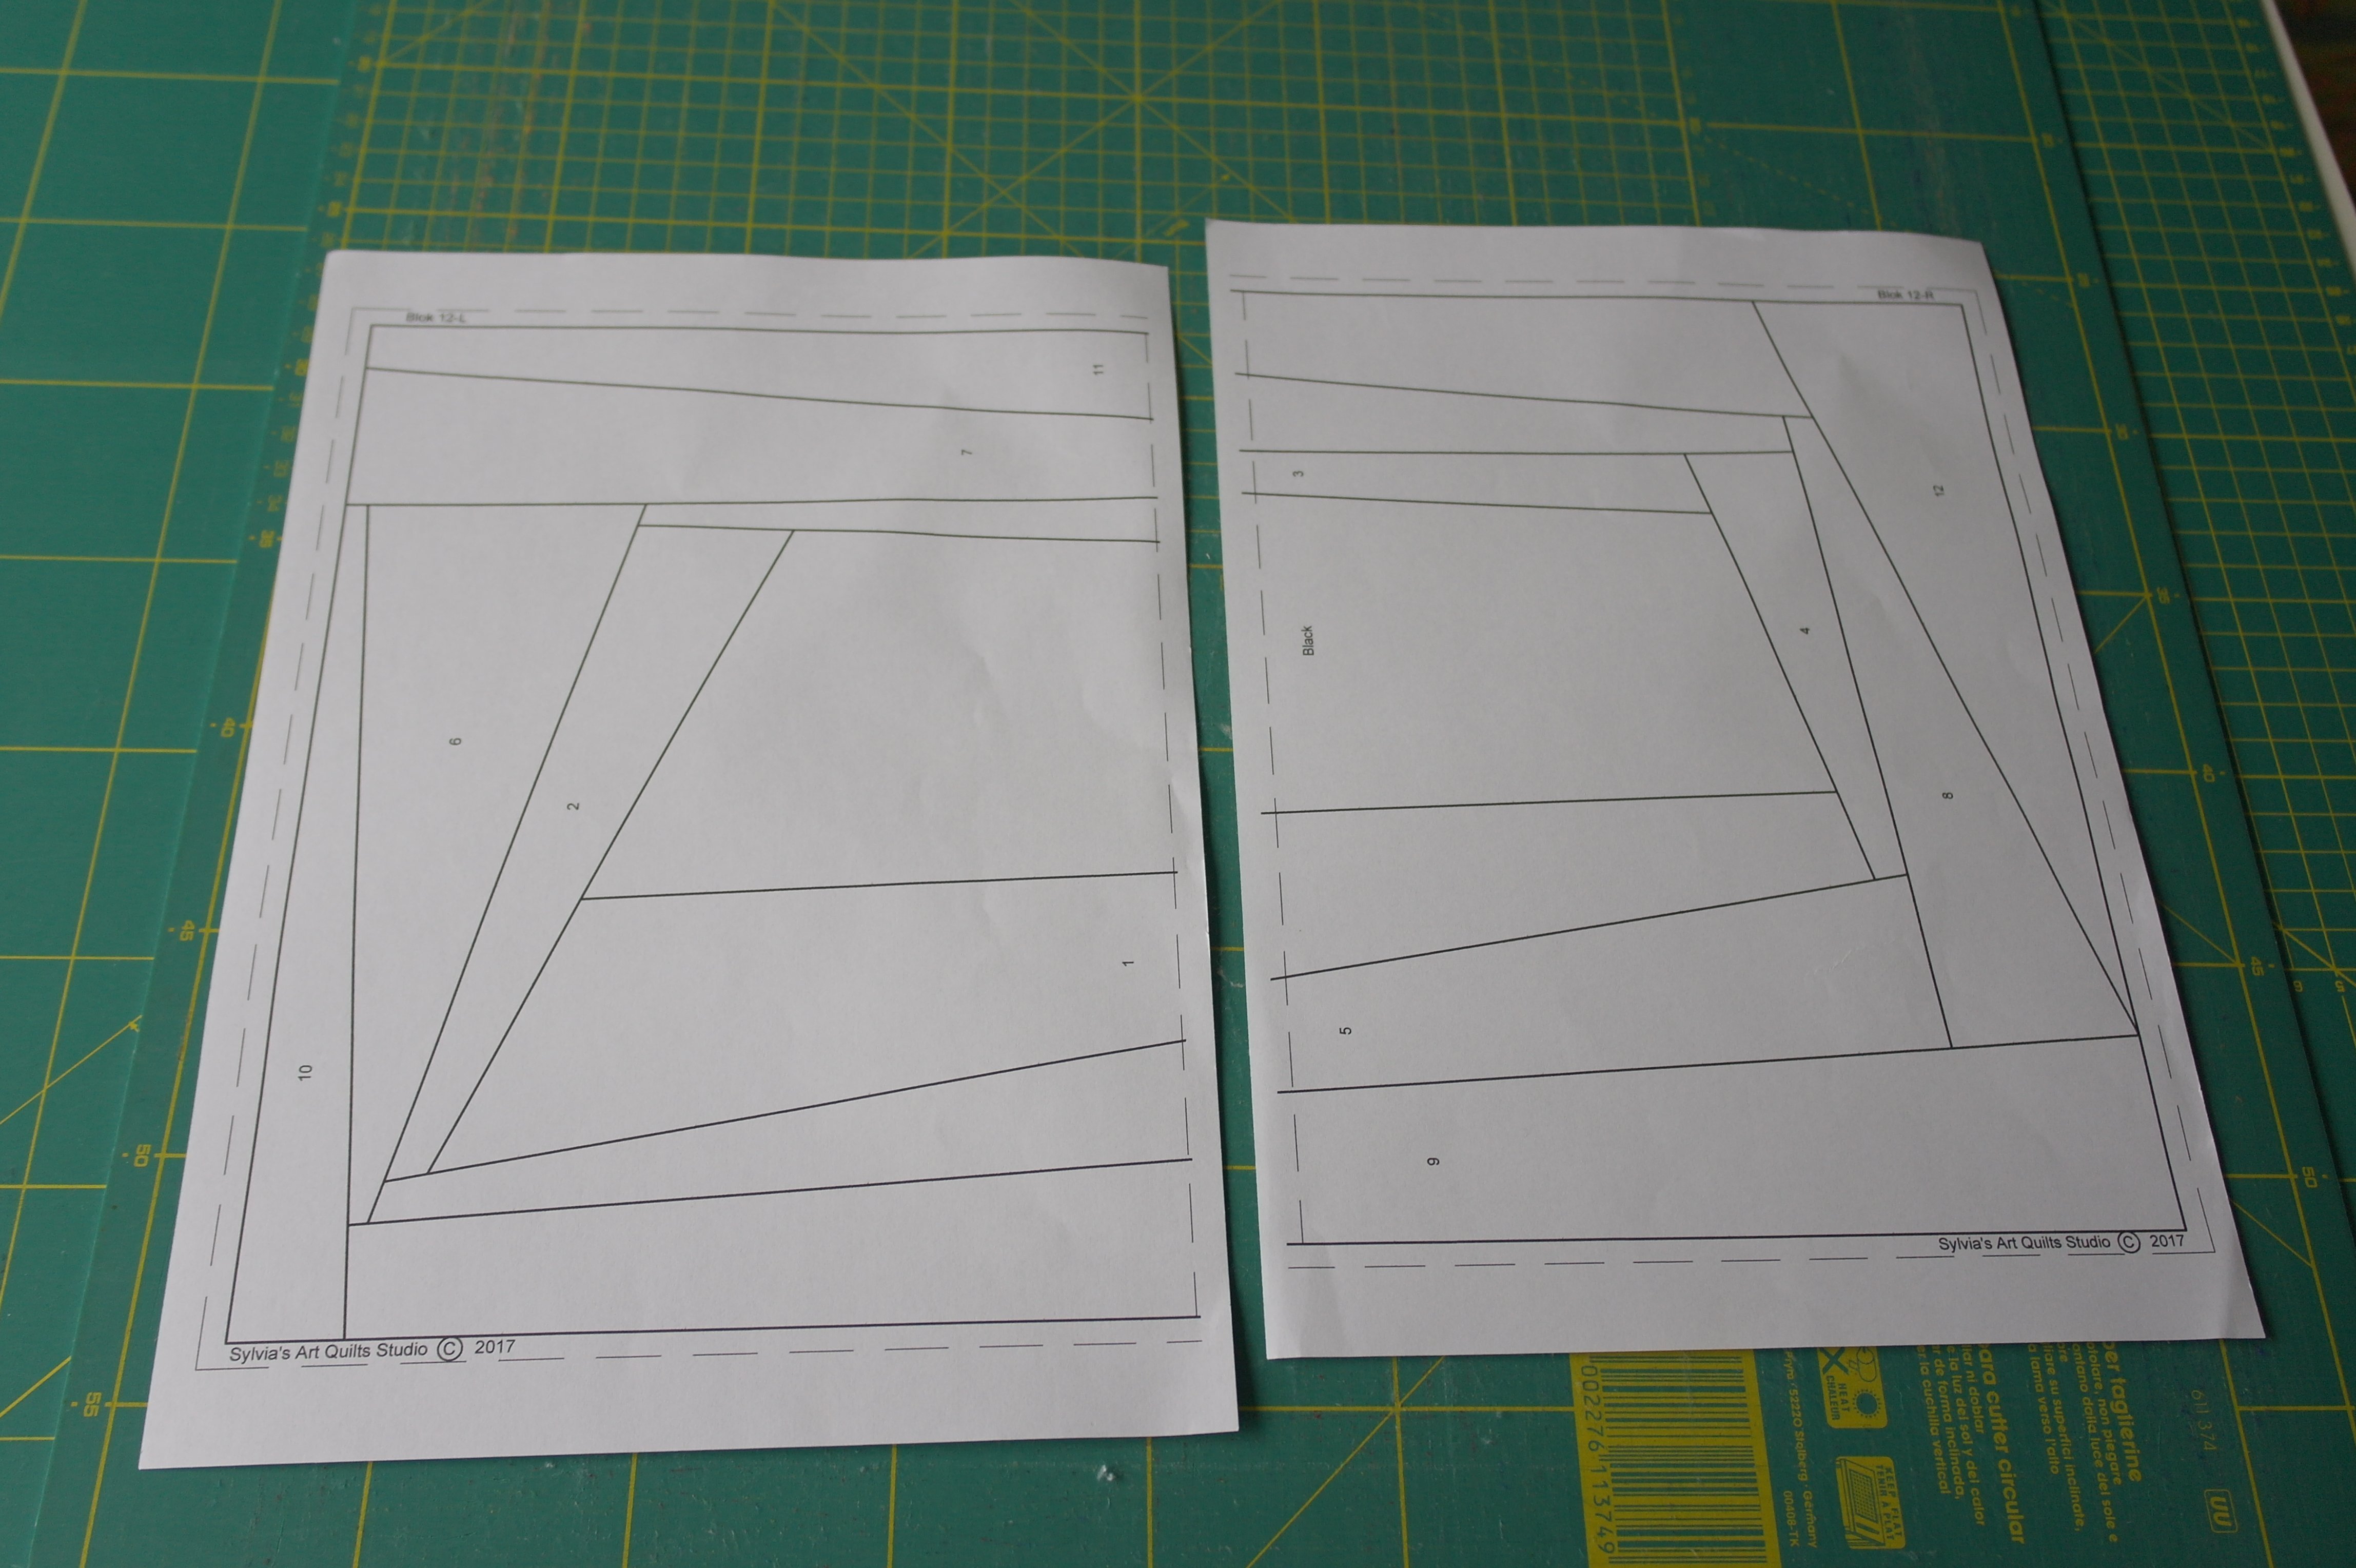
Print the paper patterns, block no. 12 consists of two pages again, just like the previous blocks – a left and right part.
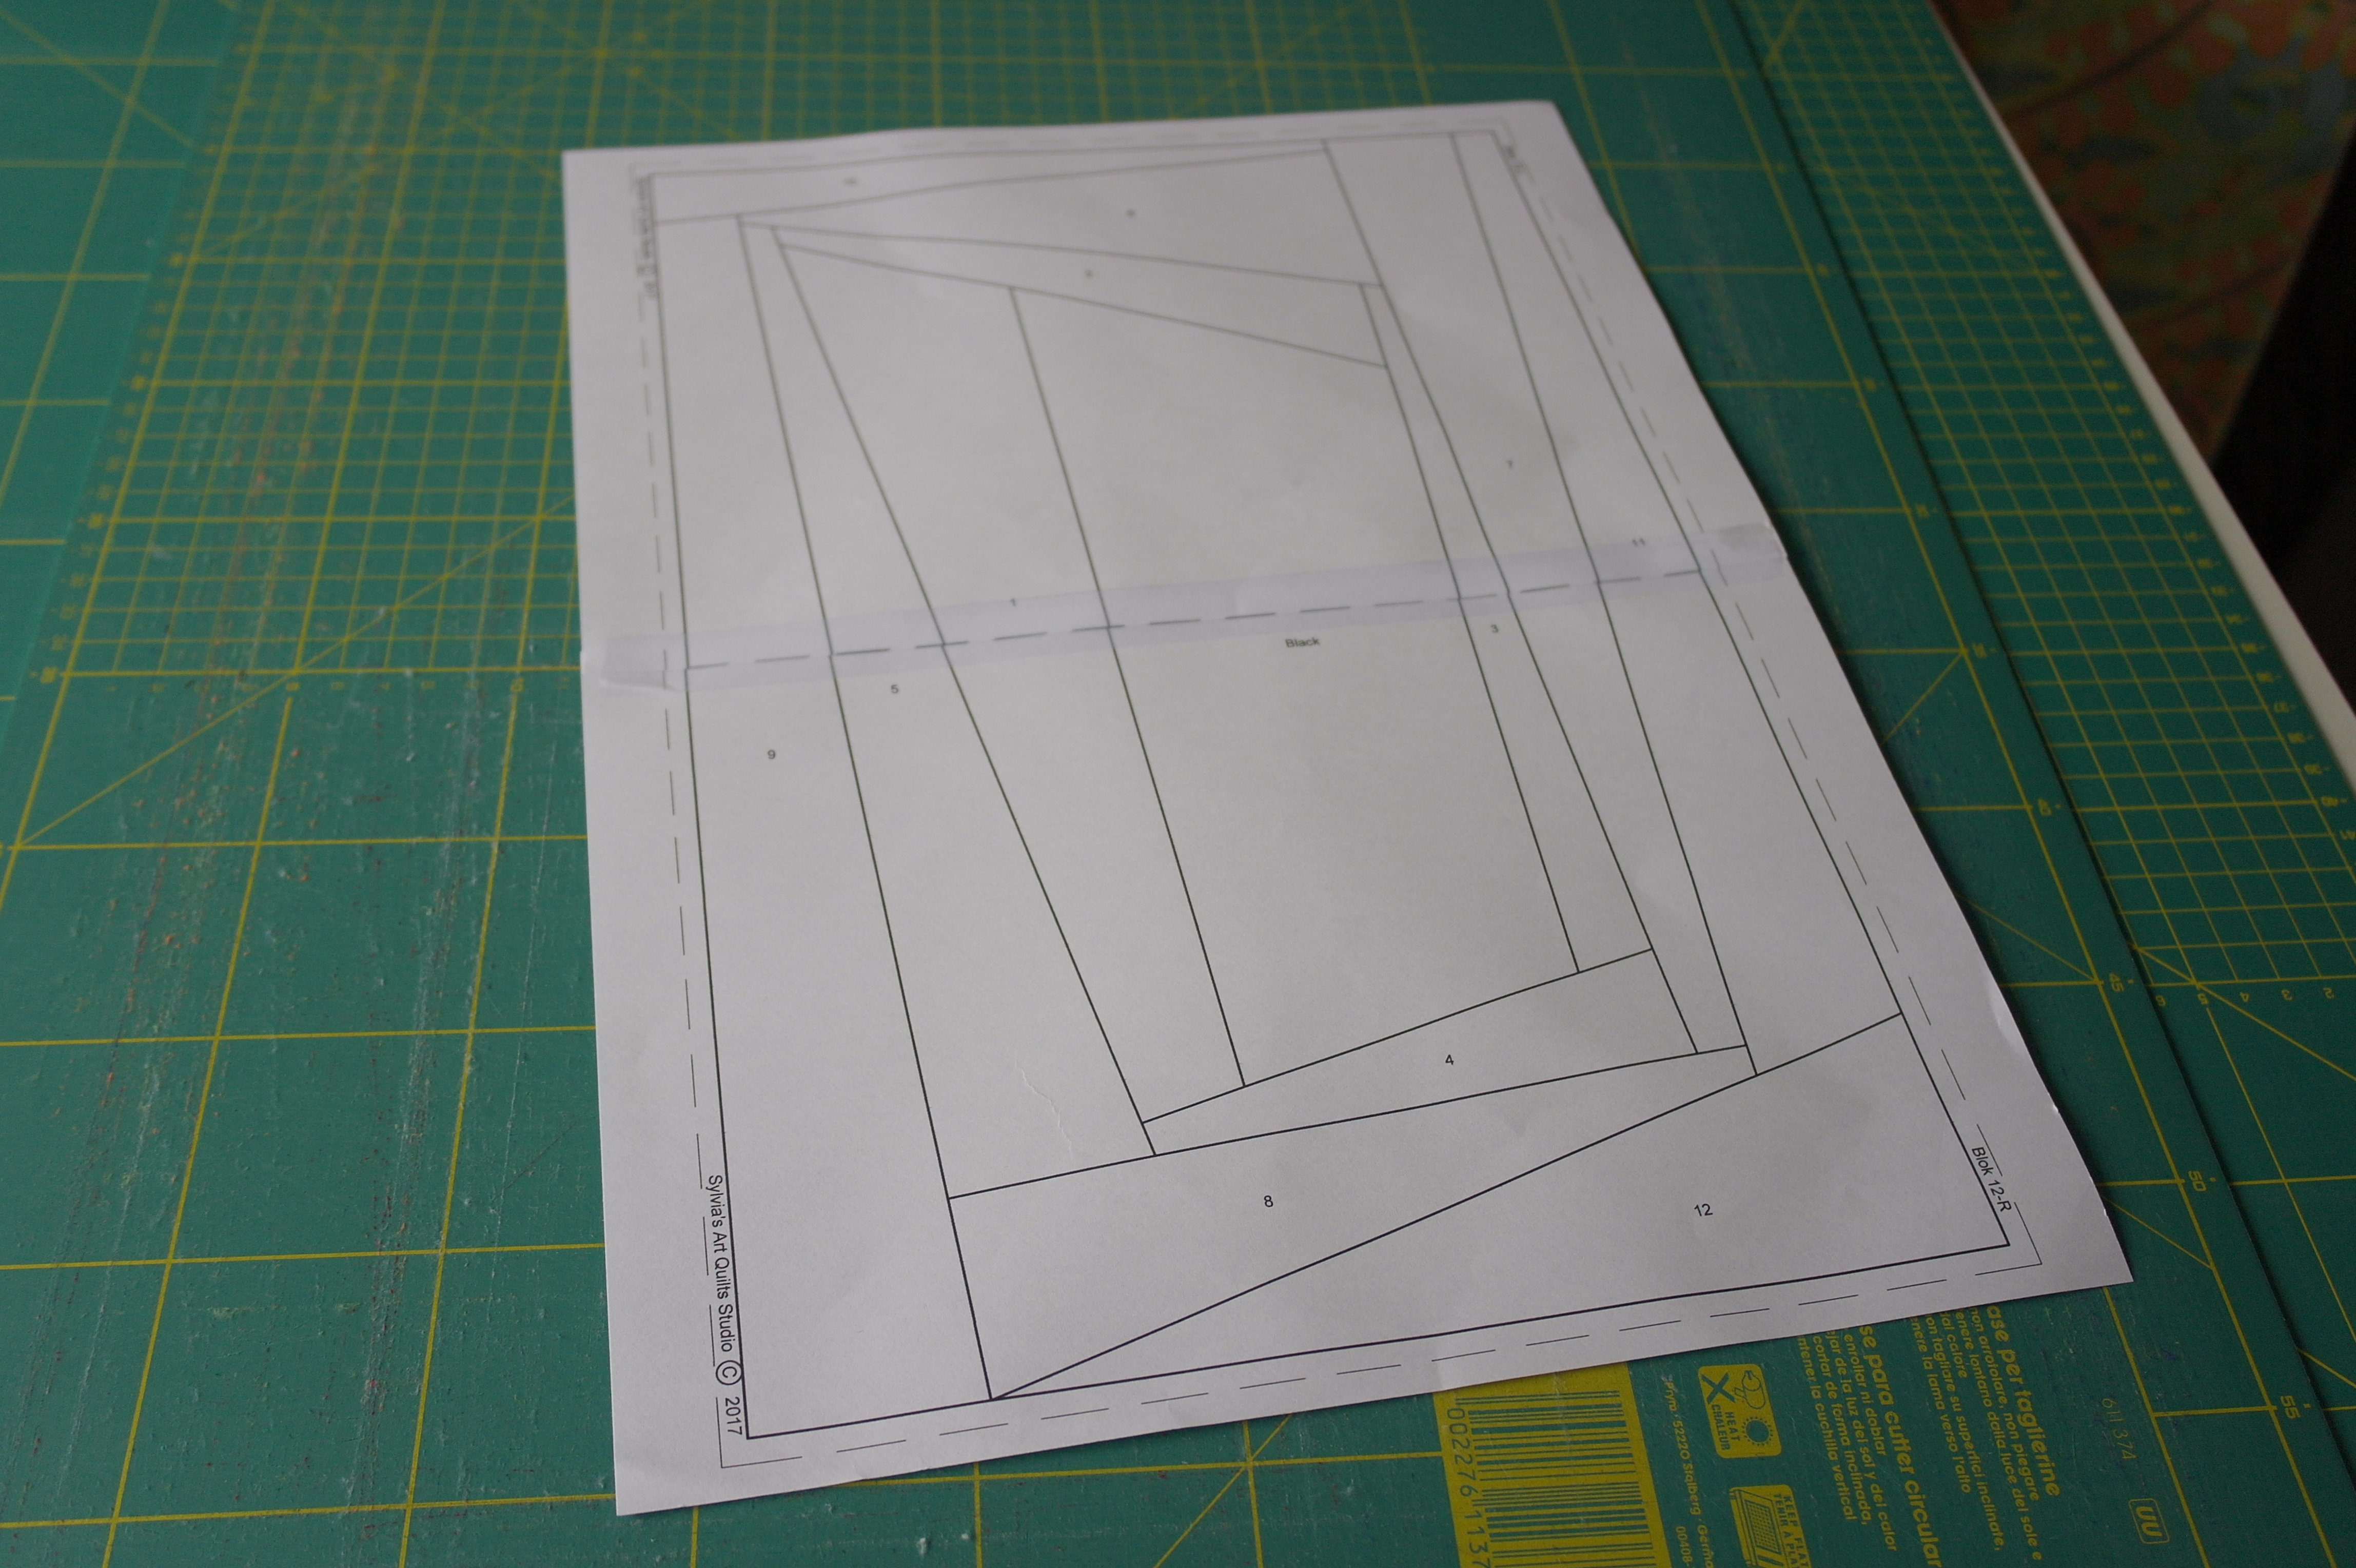
Make one large block, by taping them together (use the dotted line)
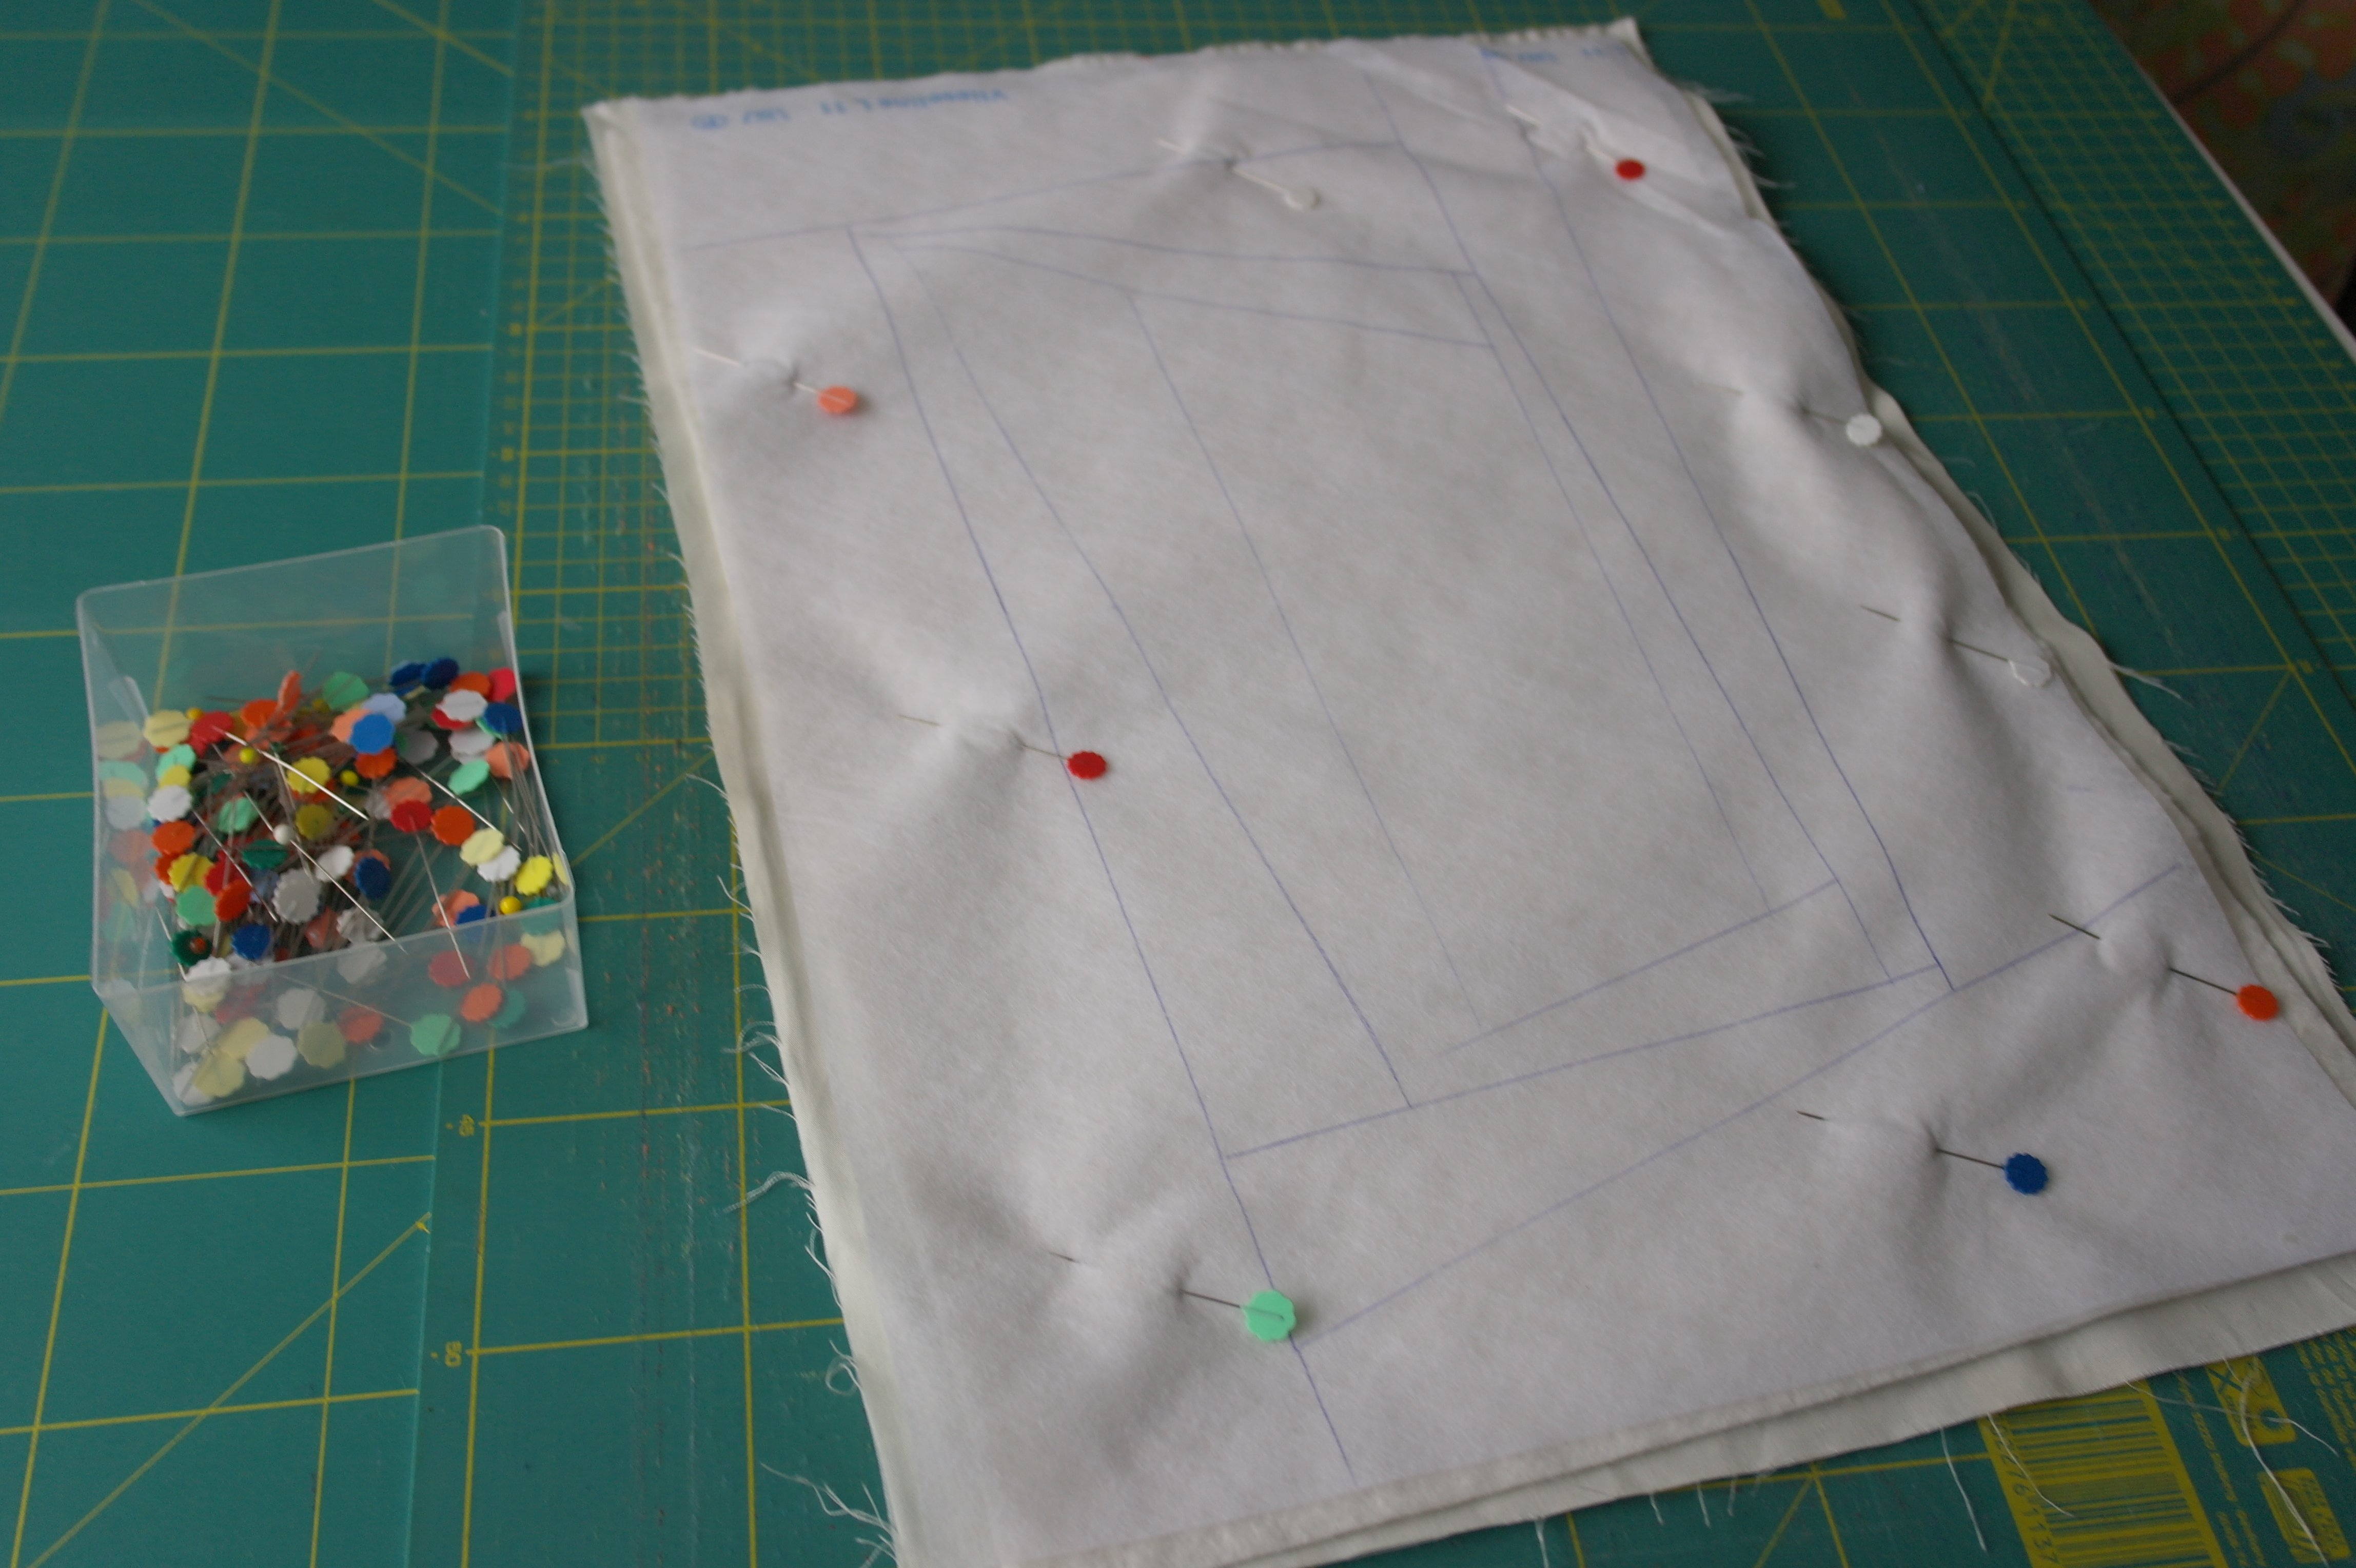
Use Vlieseline L11 – 32x45cm – place this on top of the paper pattern. Just draw all lines of the Crazy Patchwork (the rectangle is for reference only), all to the edges. Make a sandwich from off-white fabric, 100% bamboo batting and the Vlieseline L11 with the patchwork pattern. Pin them in place.
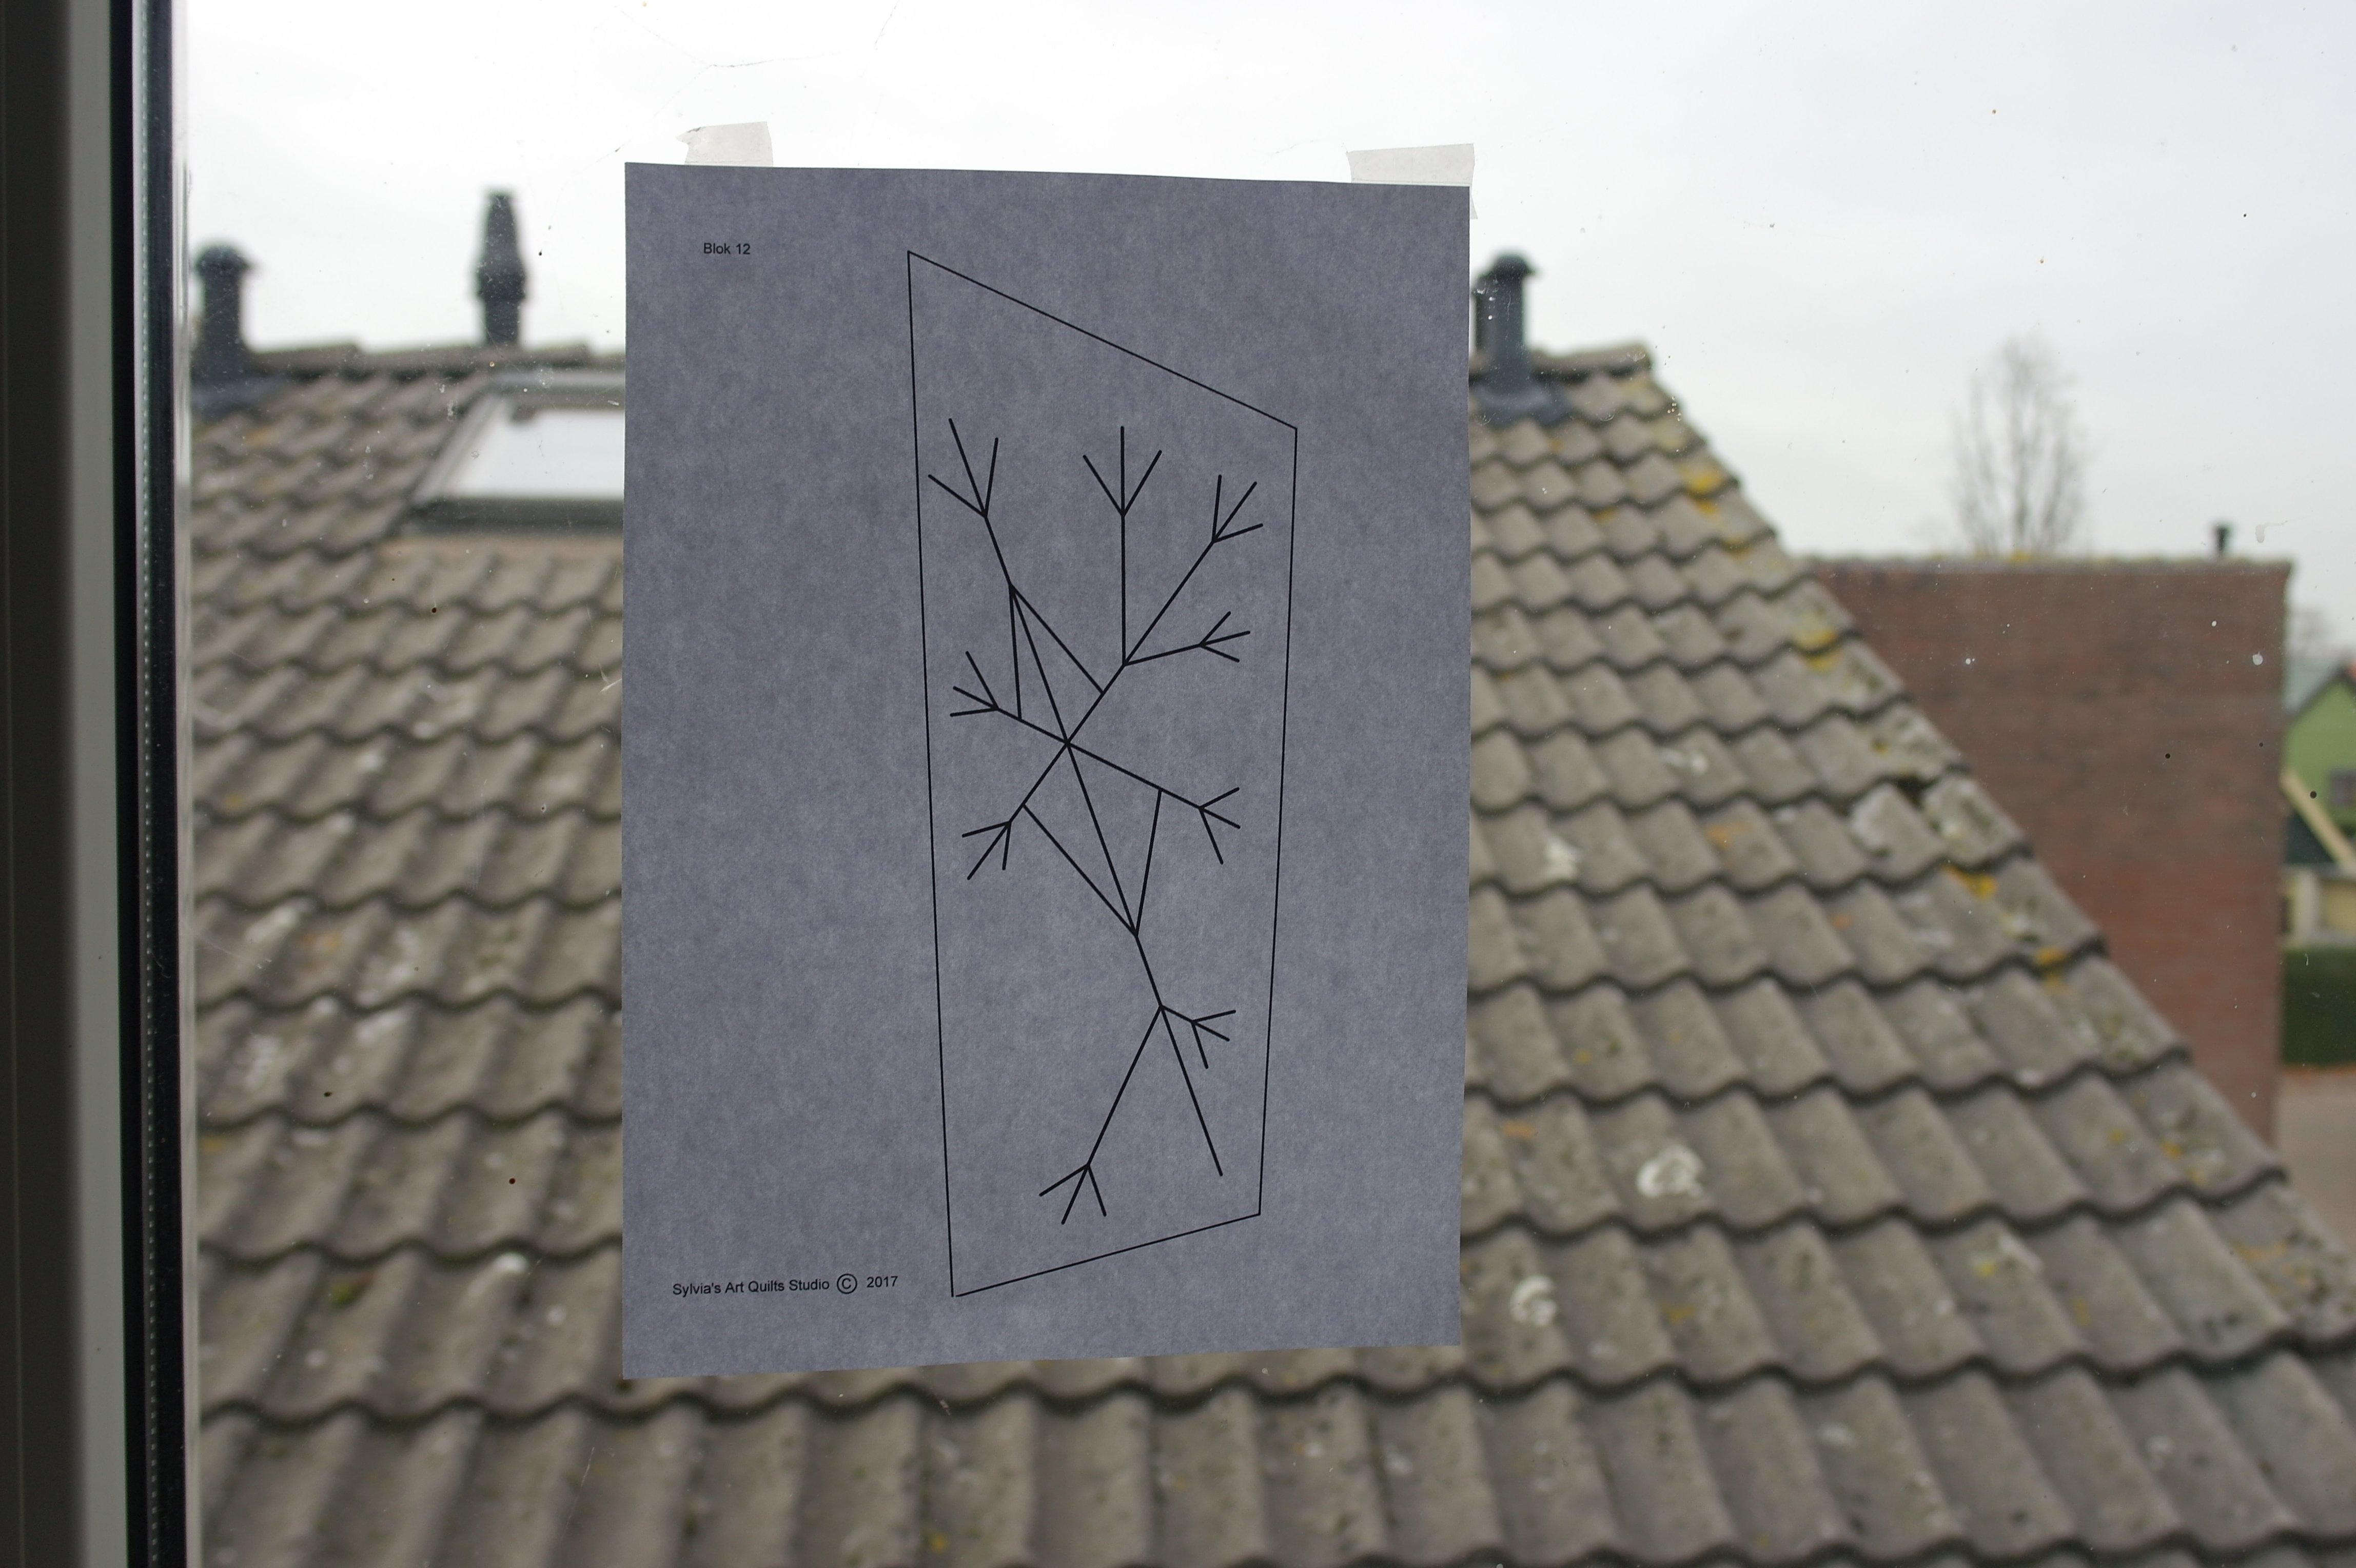
Tape the pattern of the Crystal for Block 11 to a window, or a light box,
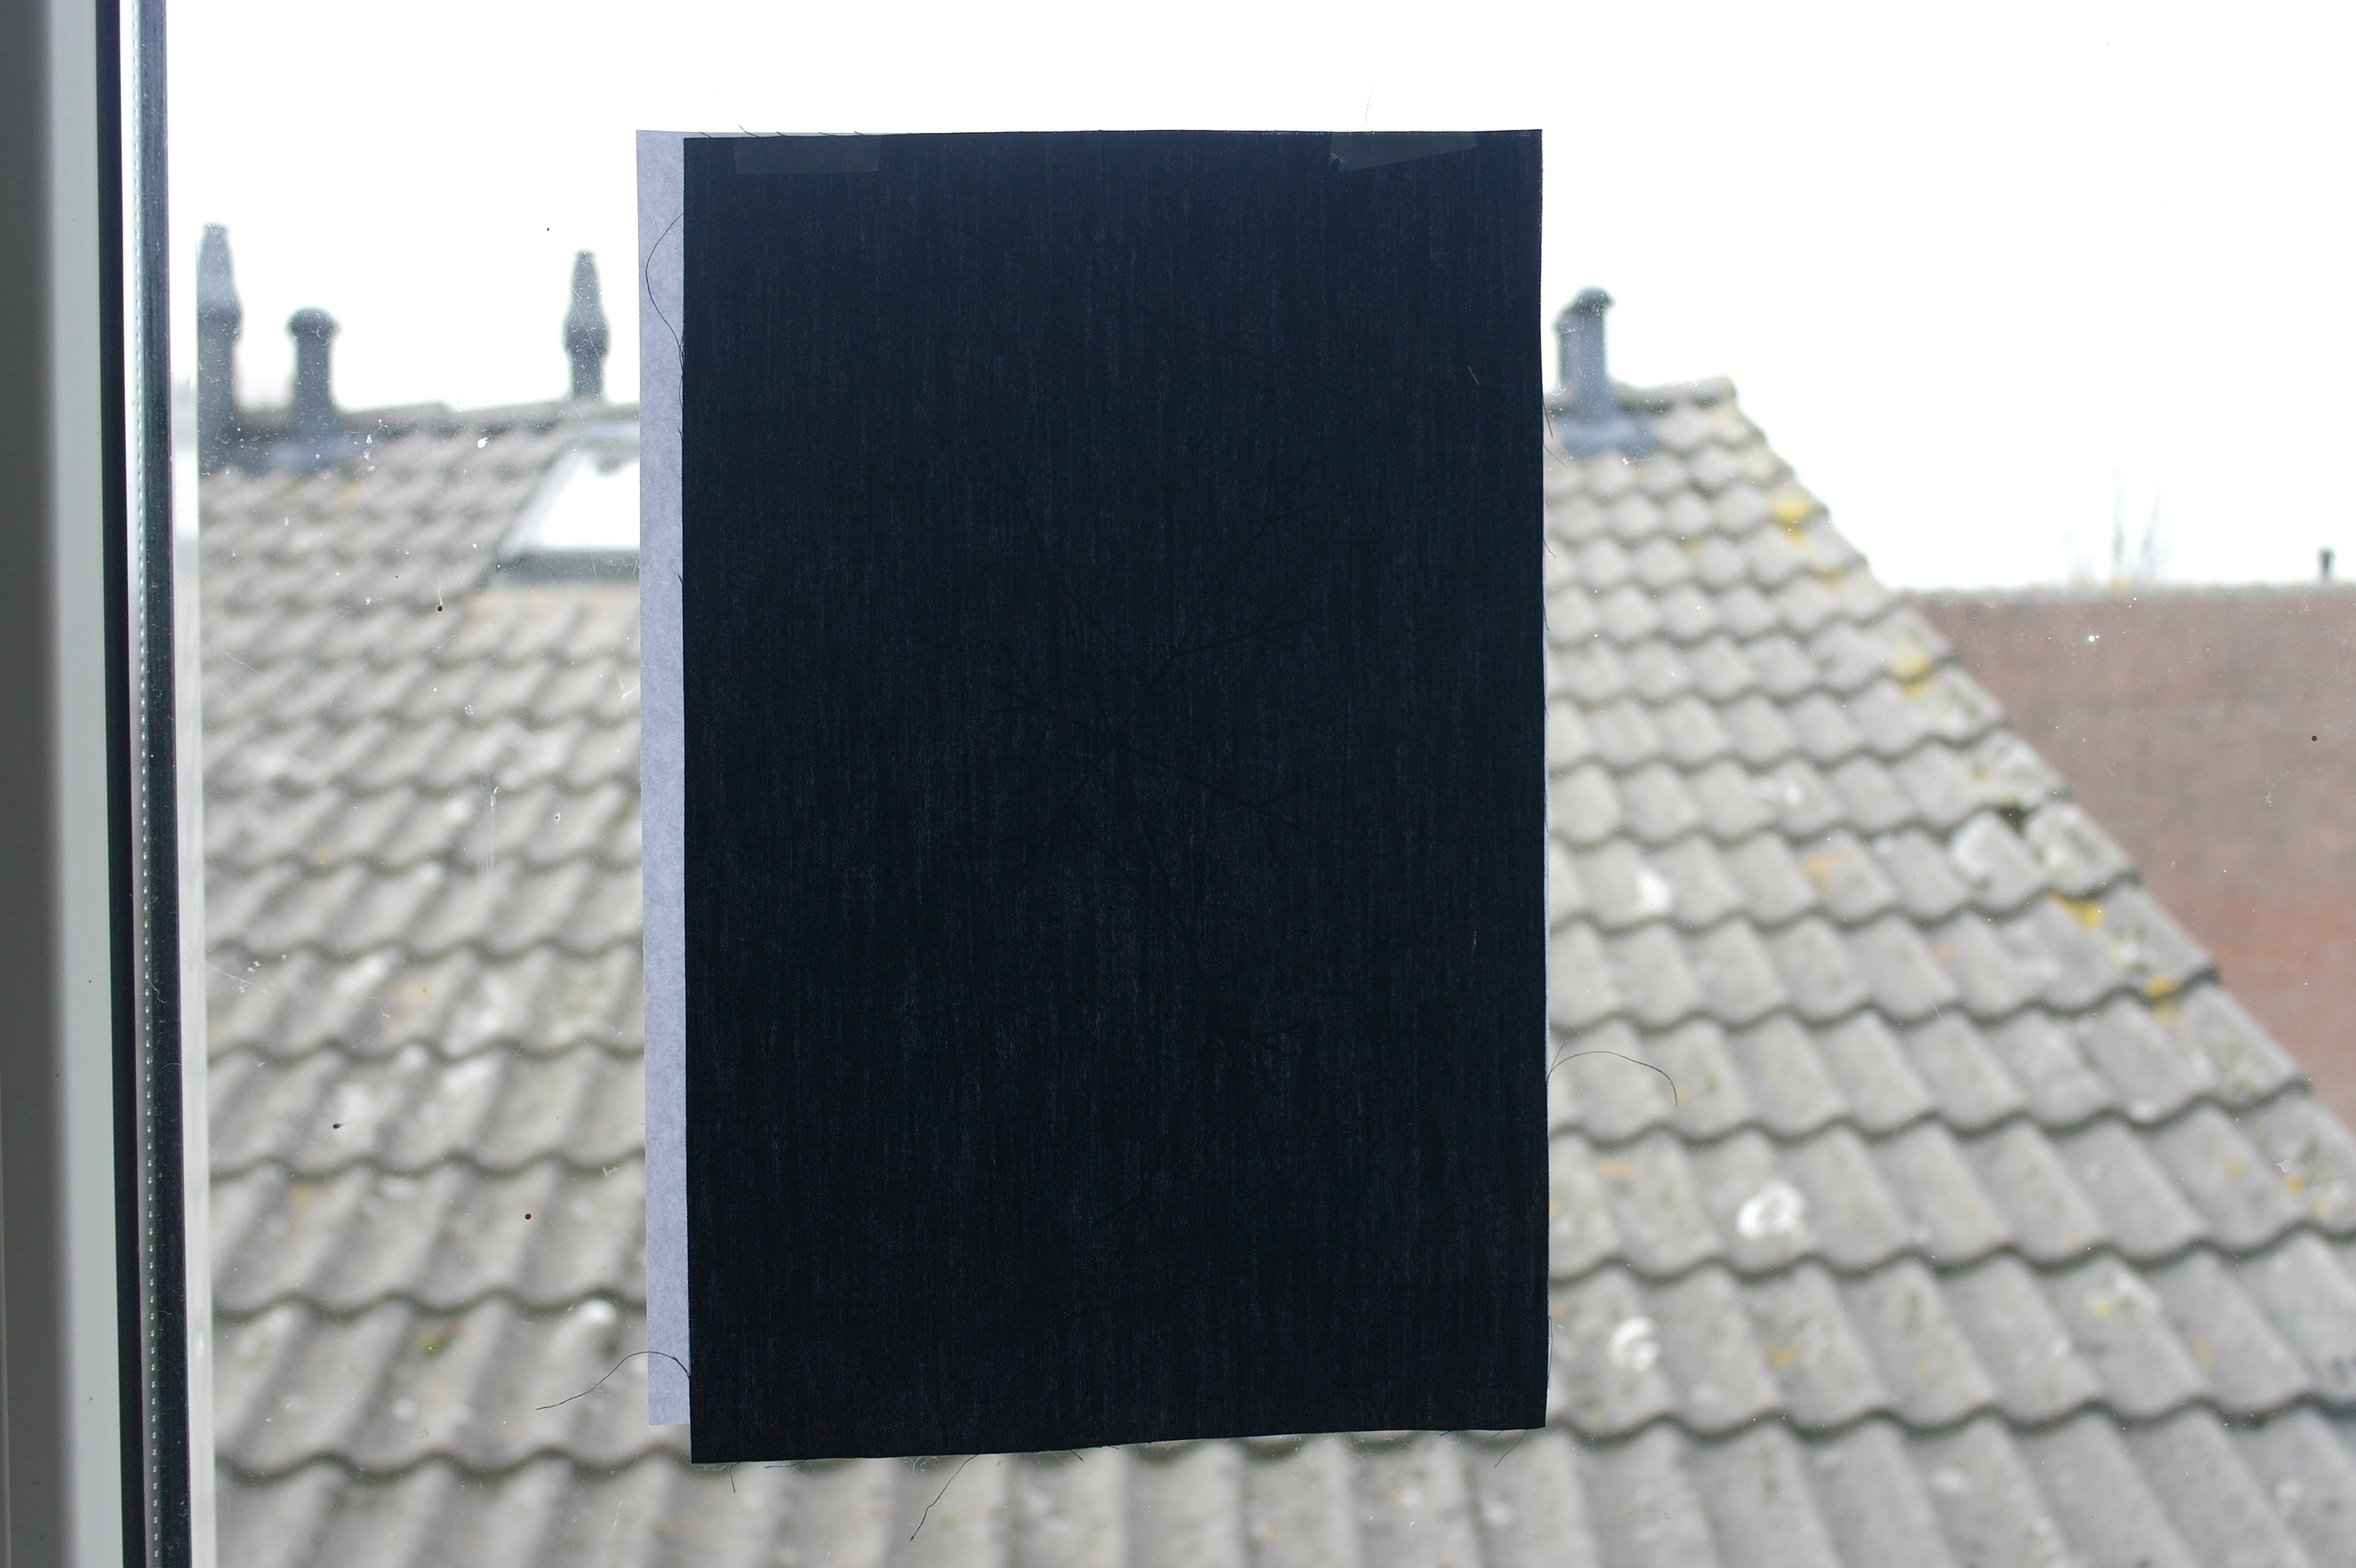
tape the black batik quilt fabric (20 x 30 cm) on top of that. Make sure there is enough fabric around the shape of the Crystal to have a seam allowance of at least 1 cm in all directions (that is why I have tilted my black fabric). Draw all lines with white watersoluble pen (or blue if you use a lighter color of solid fabric for the center). BE SURE to draw thin lines: they have to be removed with water afterwards.
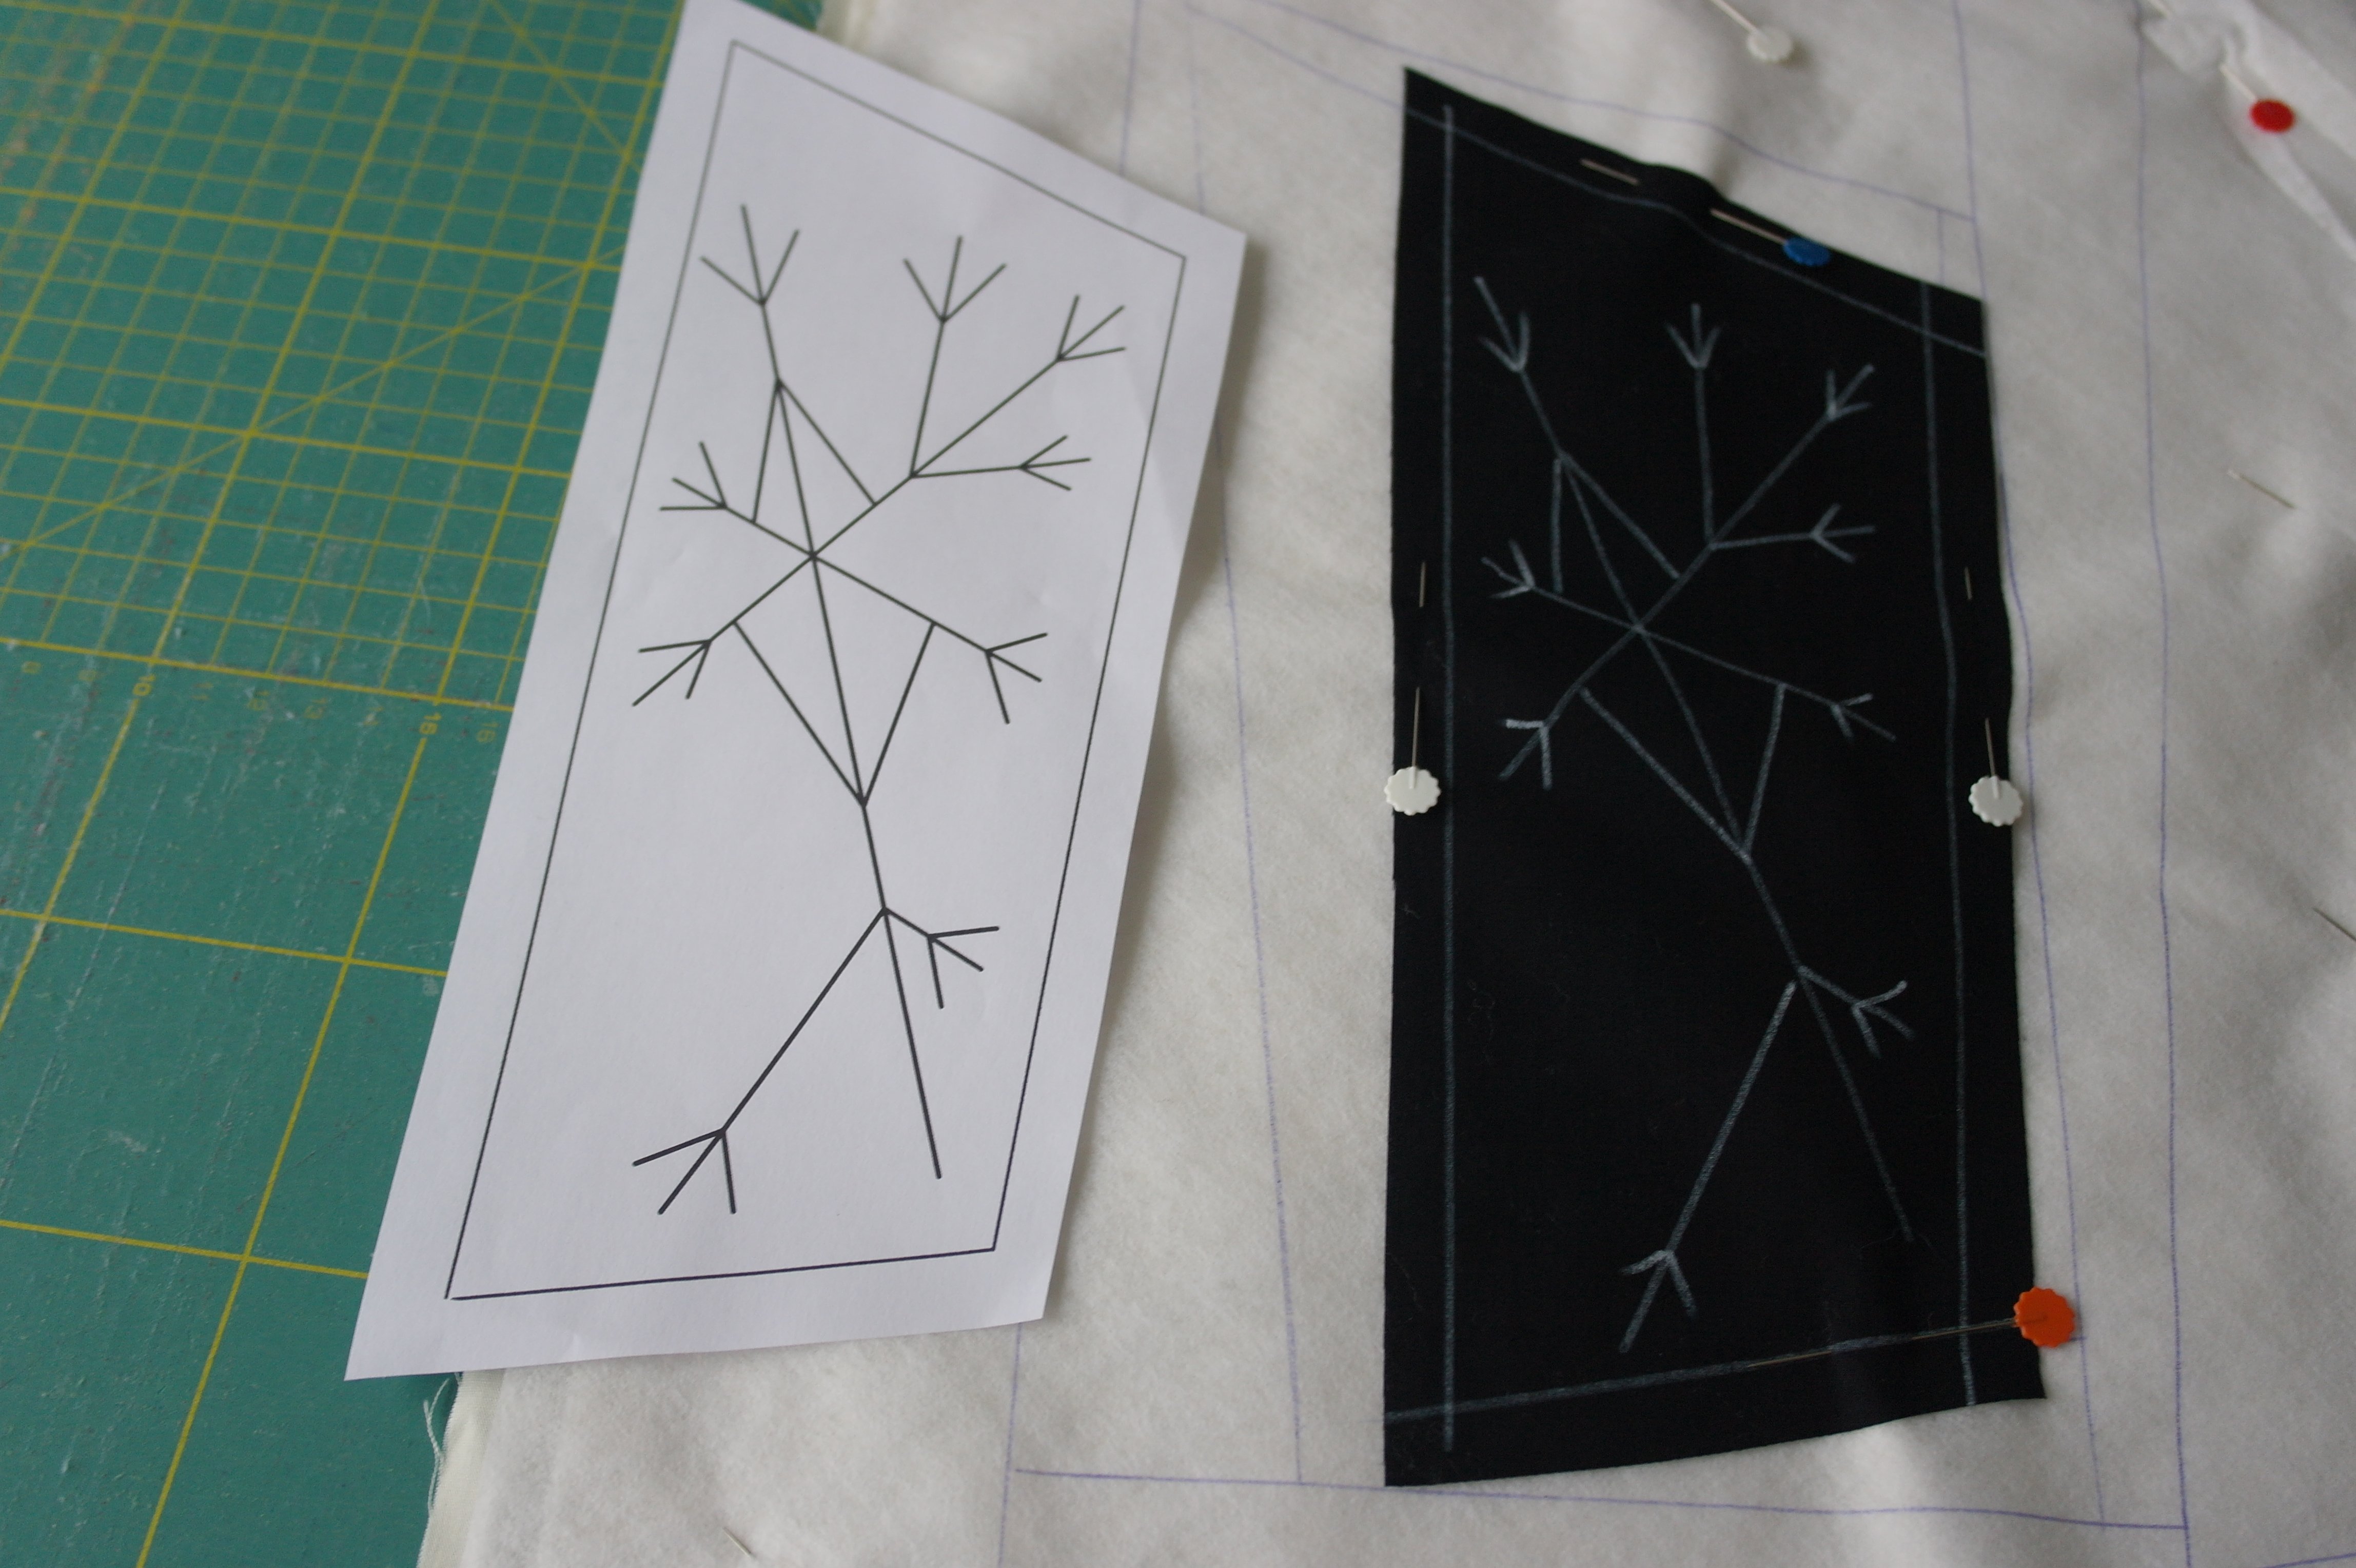
Cut the paper pattern with the Crystal to make a template, be sure to leave a 1 cm seam allowance outside the solid lines. Place the pattern on top of the black batik with the crystal drawn, and cut the black fabric the same size as the paper template. Place the black batik with the Crystal on the right spot, on the ‘center’ of your sandwich, pin in place with Flower Pins. Be sure to draw the solid lines with water soluble pen, to indicate the actual size of the section, inside the seam allowances.
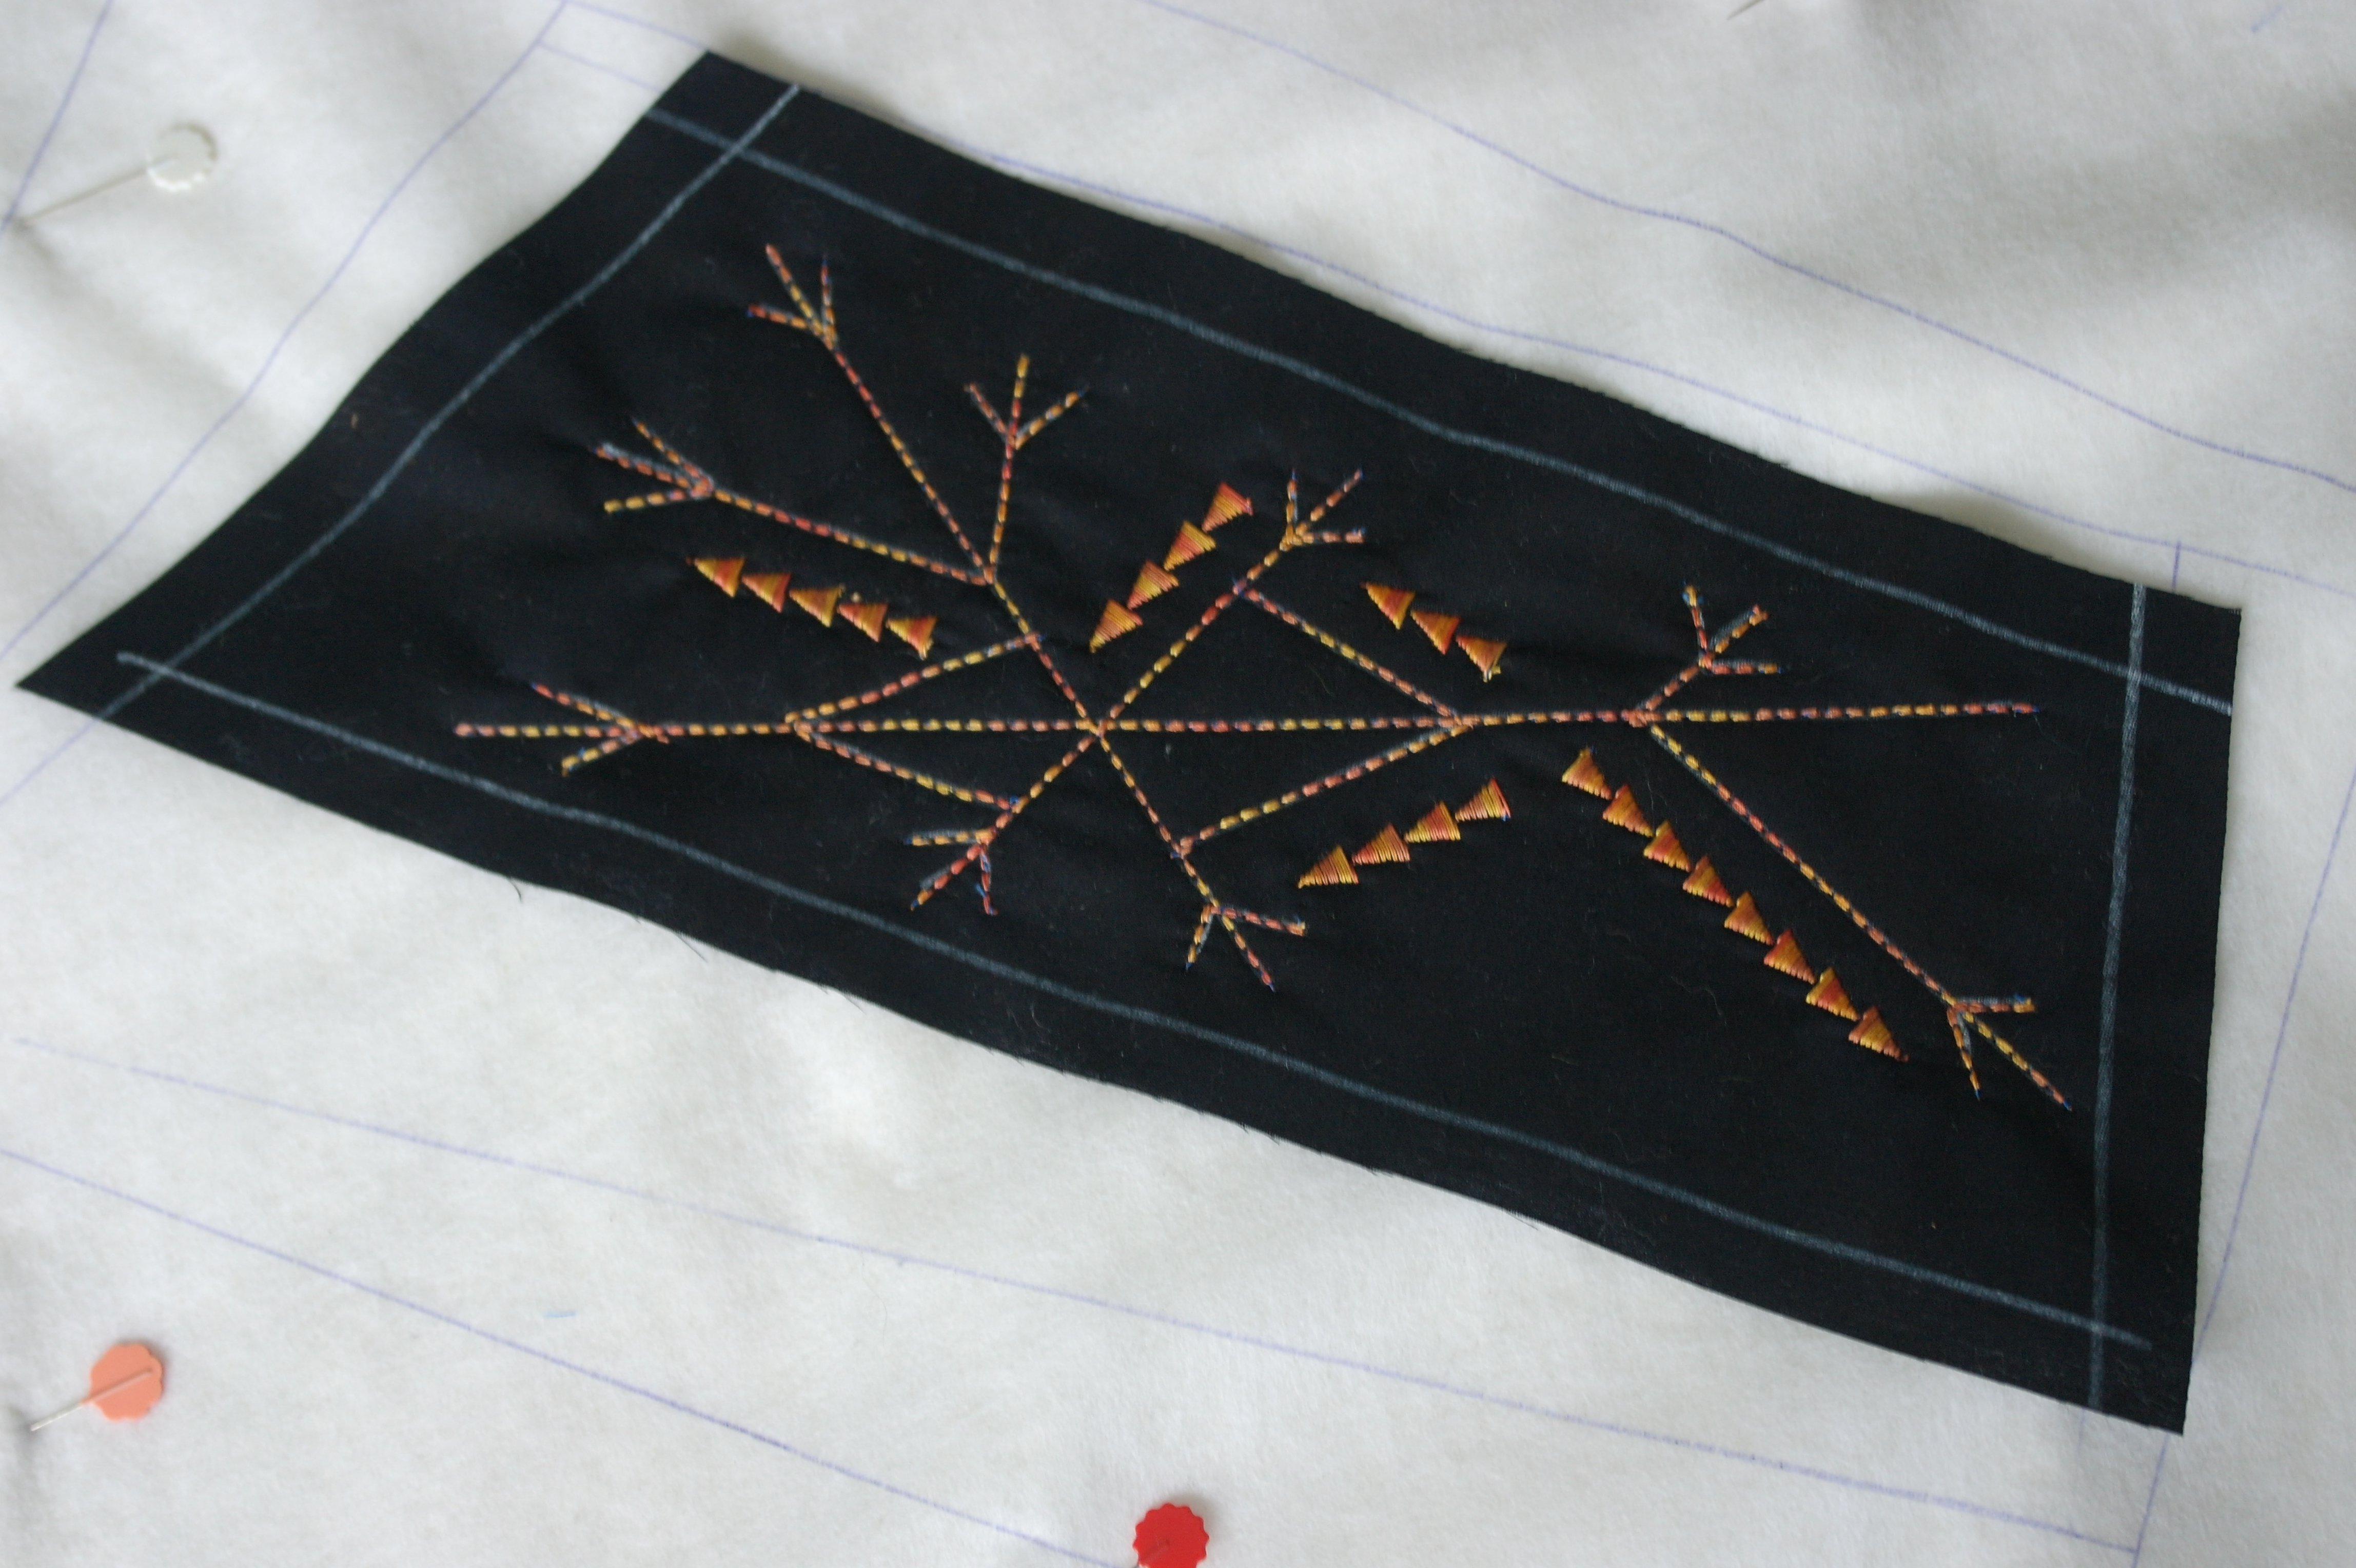
The Crystal in the center is covered with a thick straight stitch (forward, back and forward again, stitch 6), and some deorative stitches. I will add Hotfix stones later.
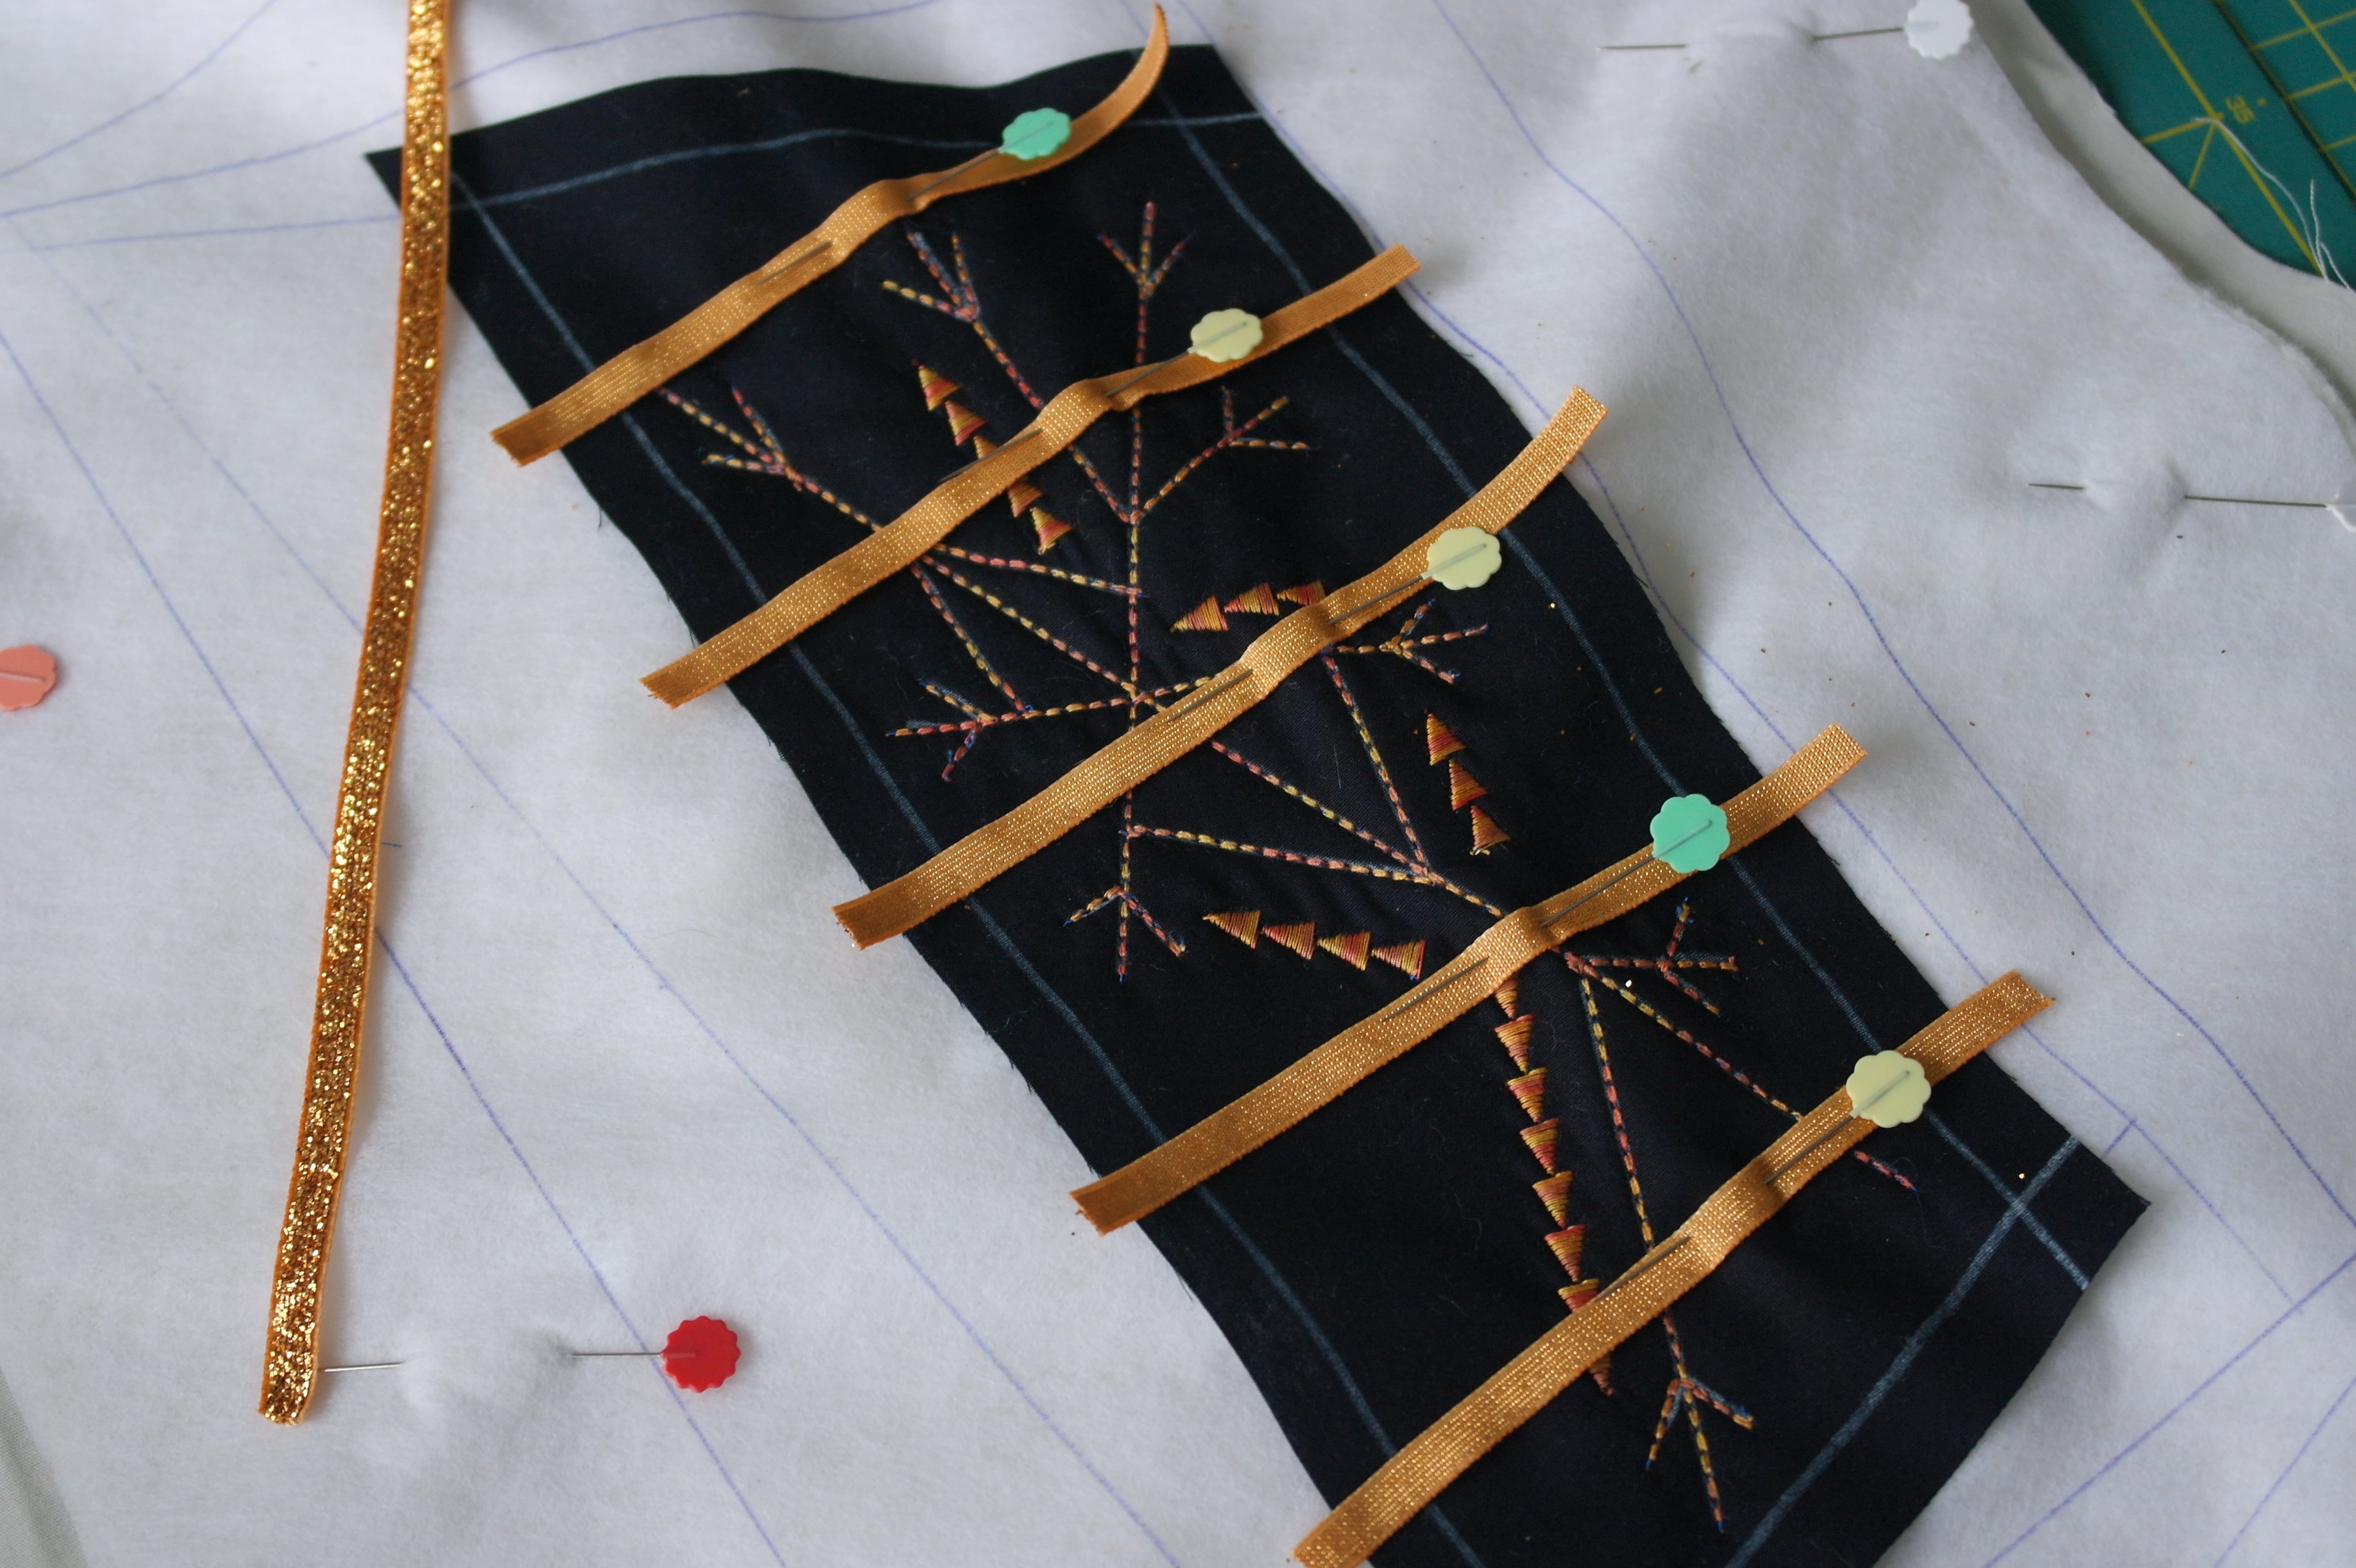
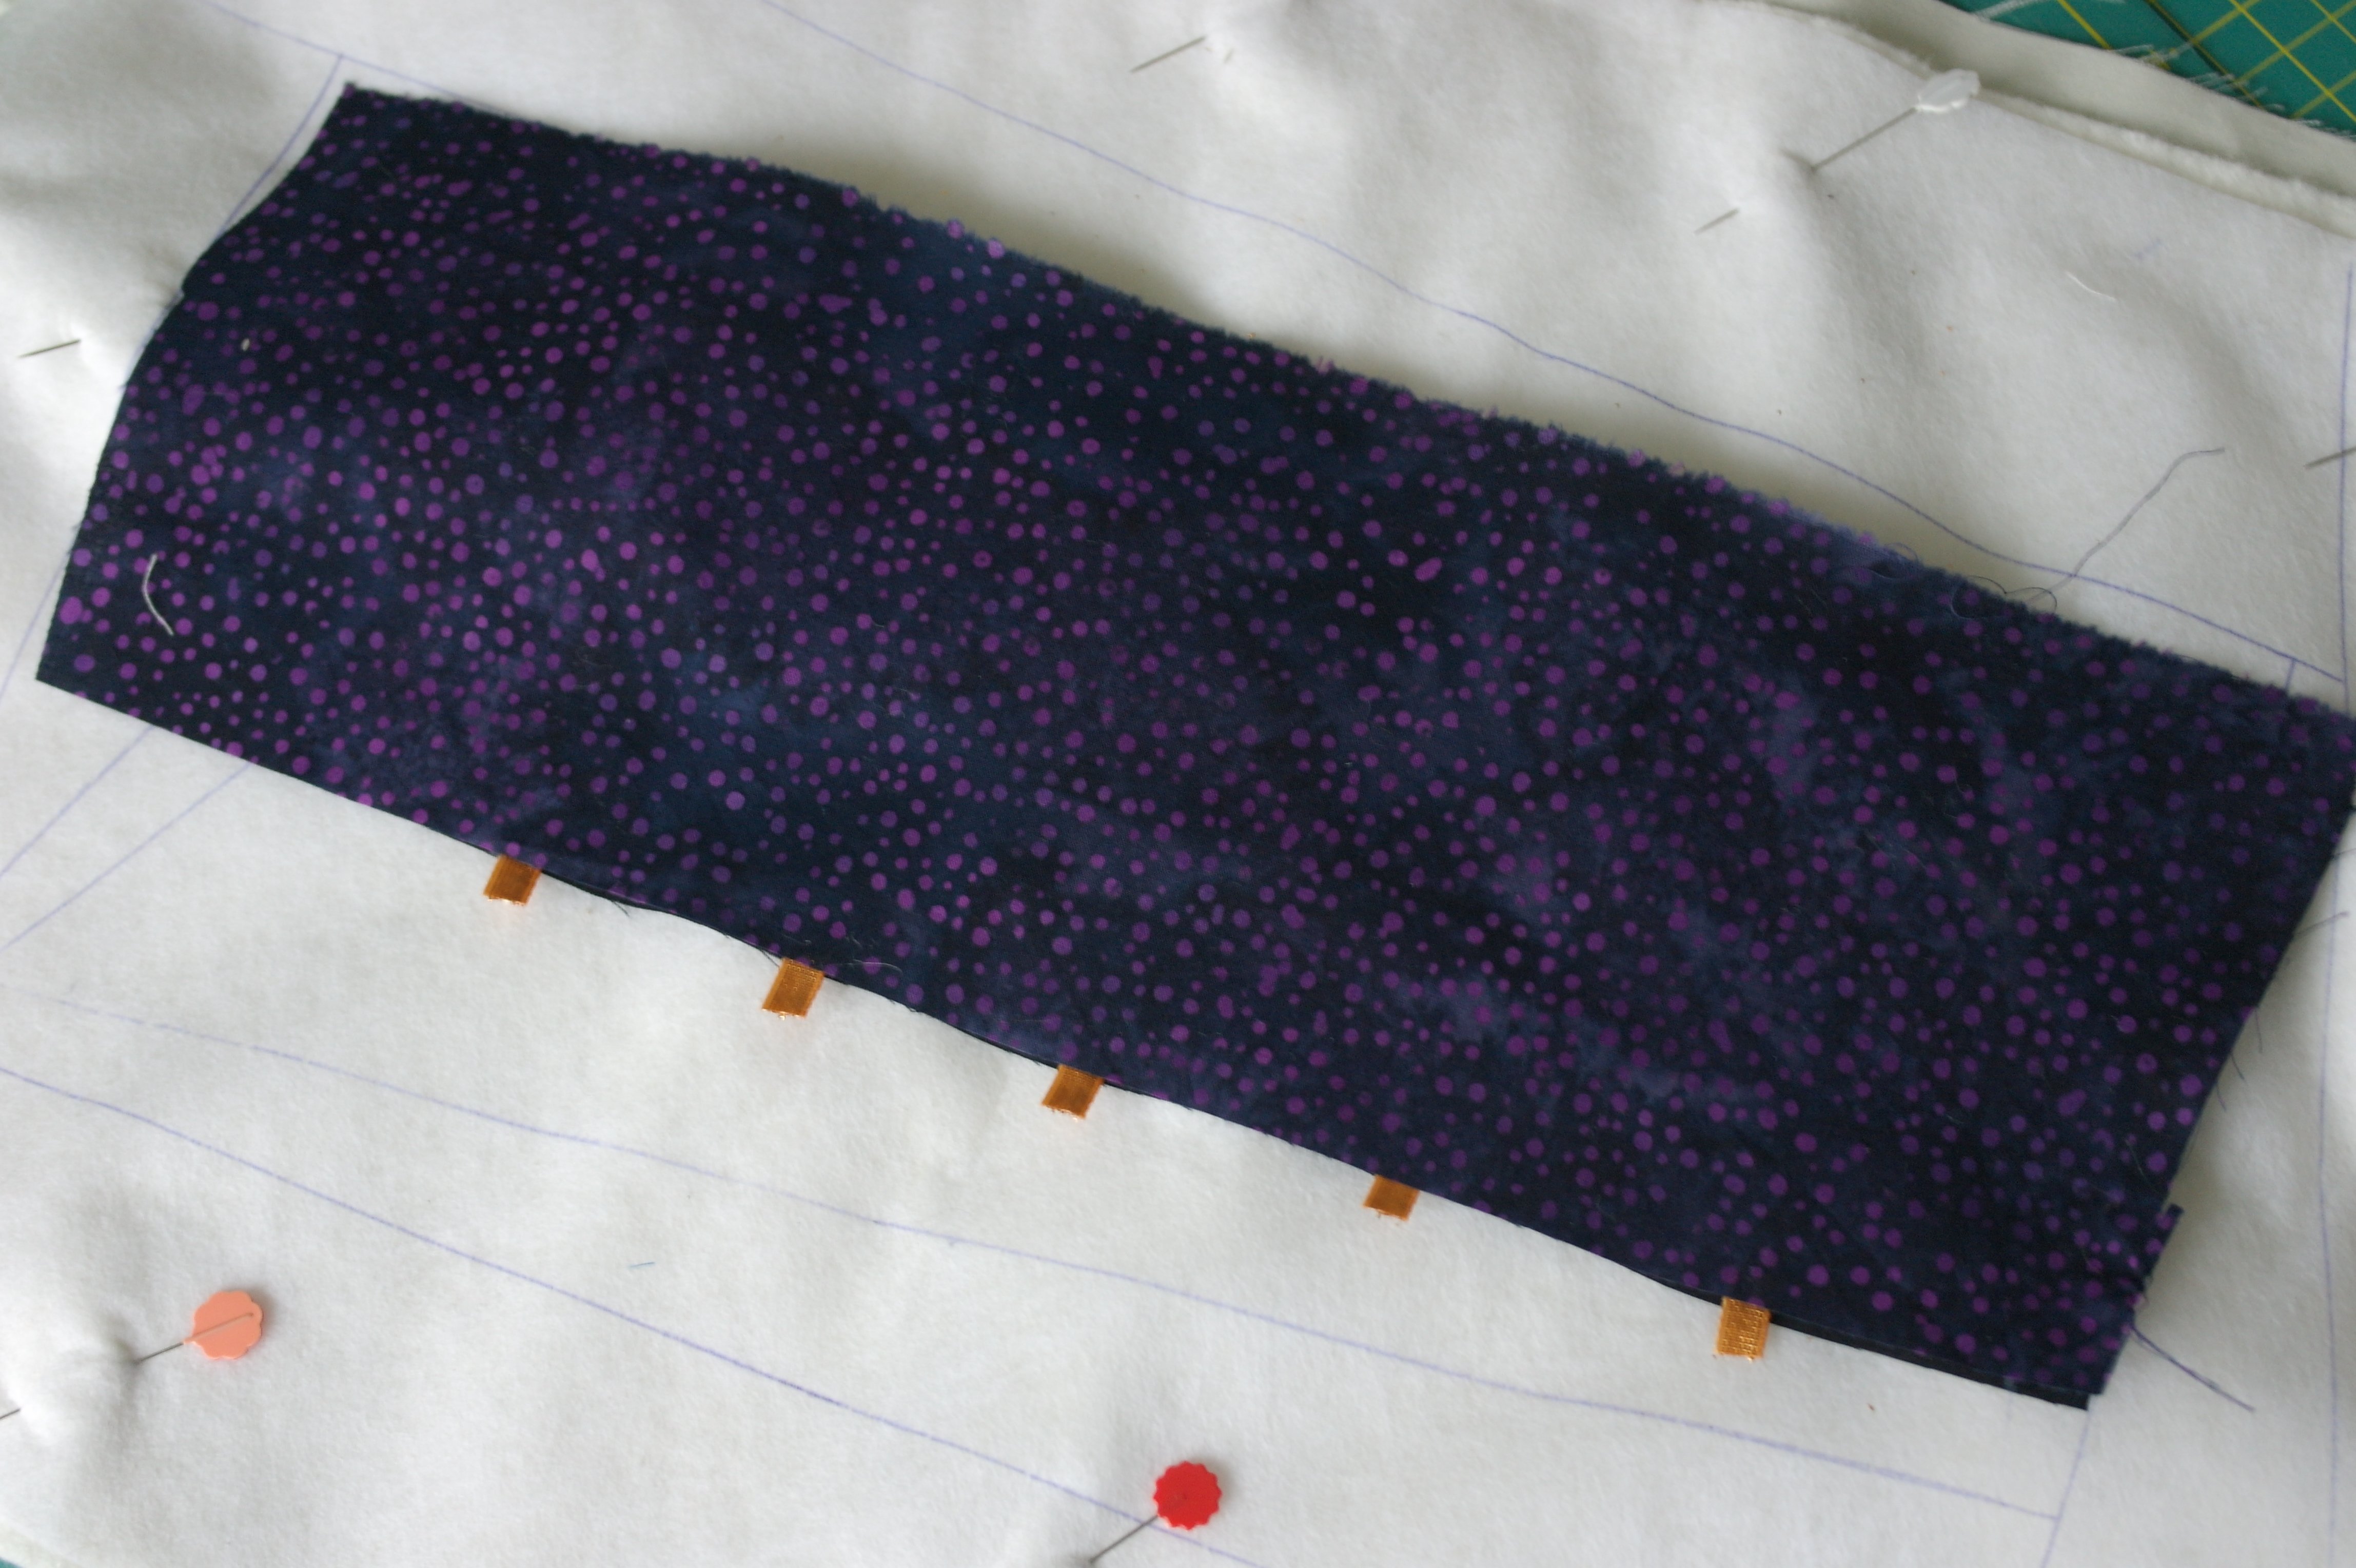
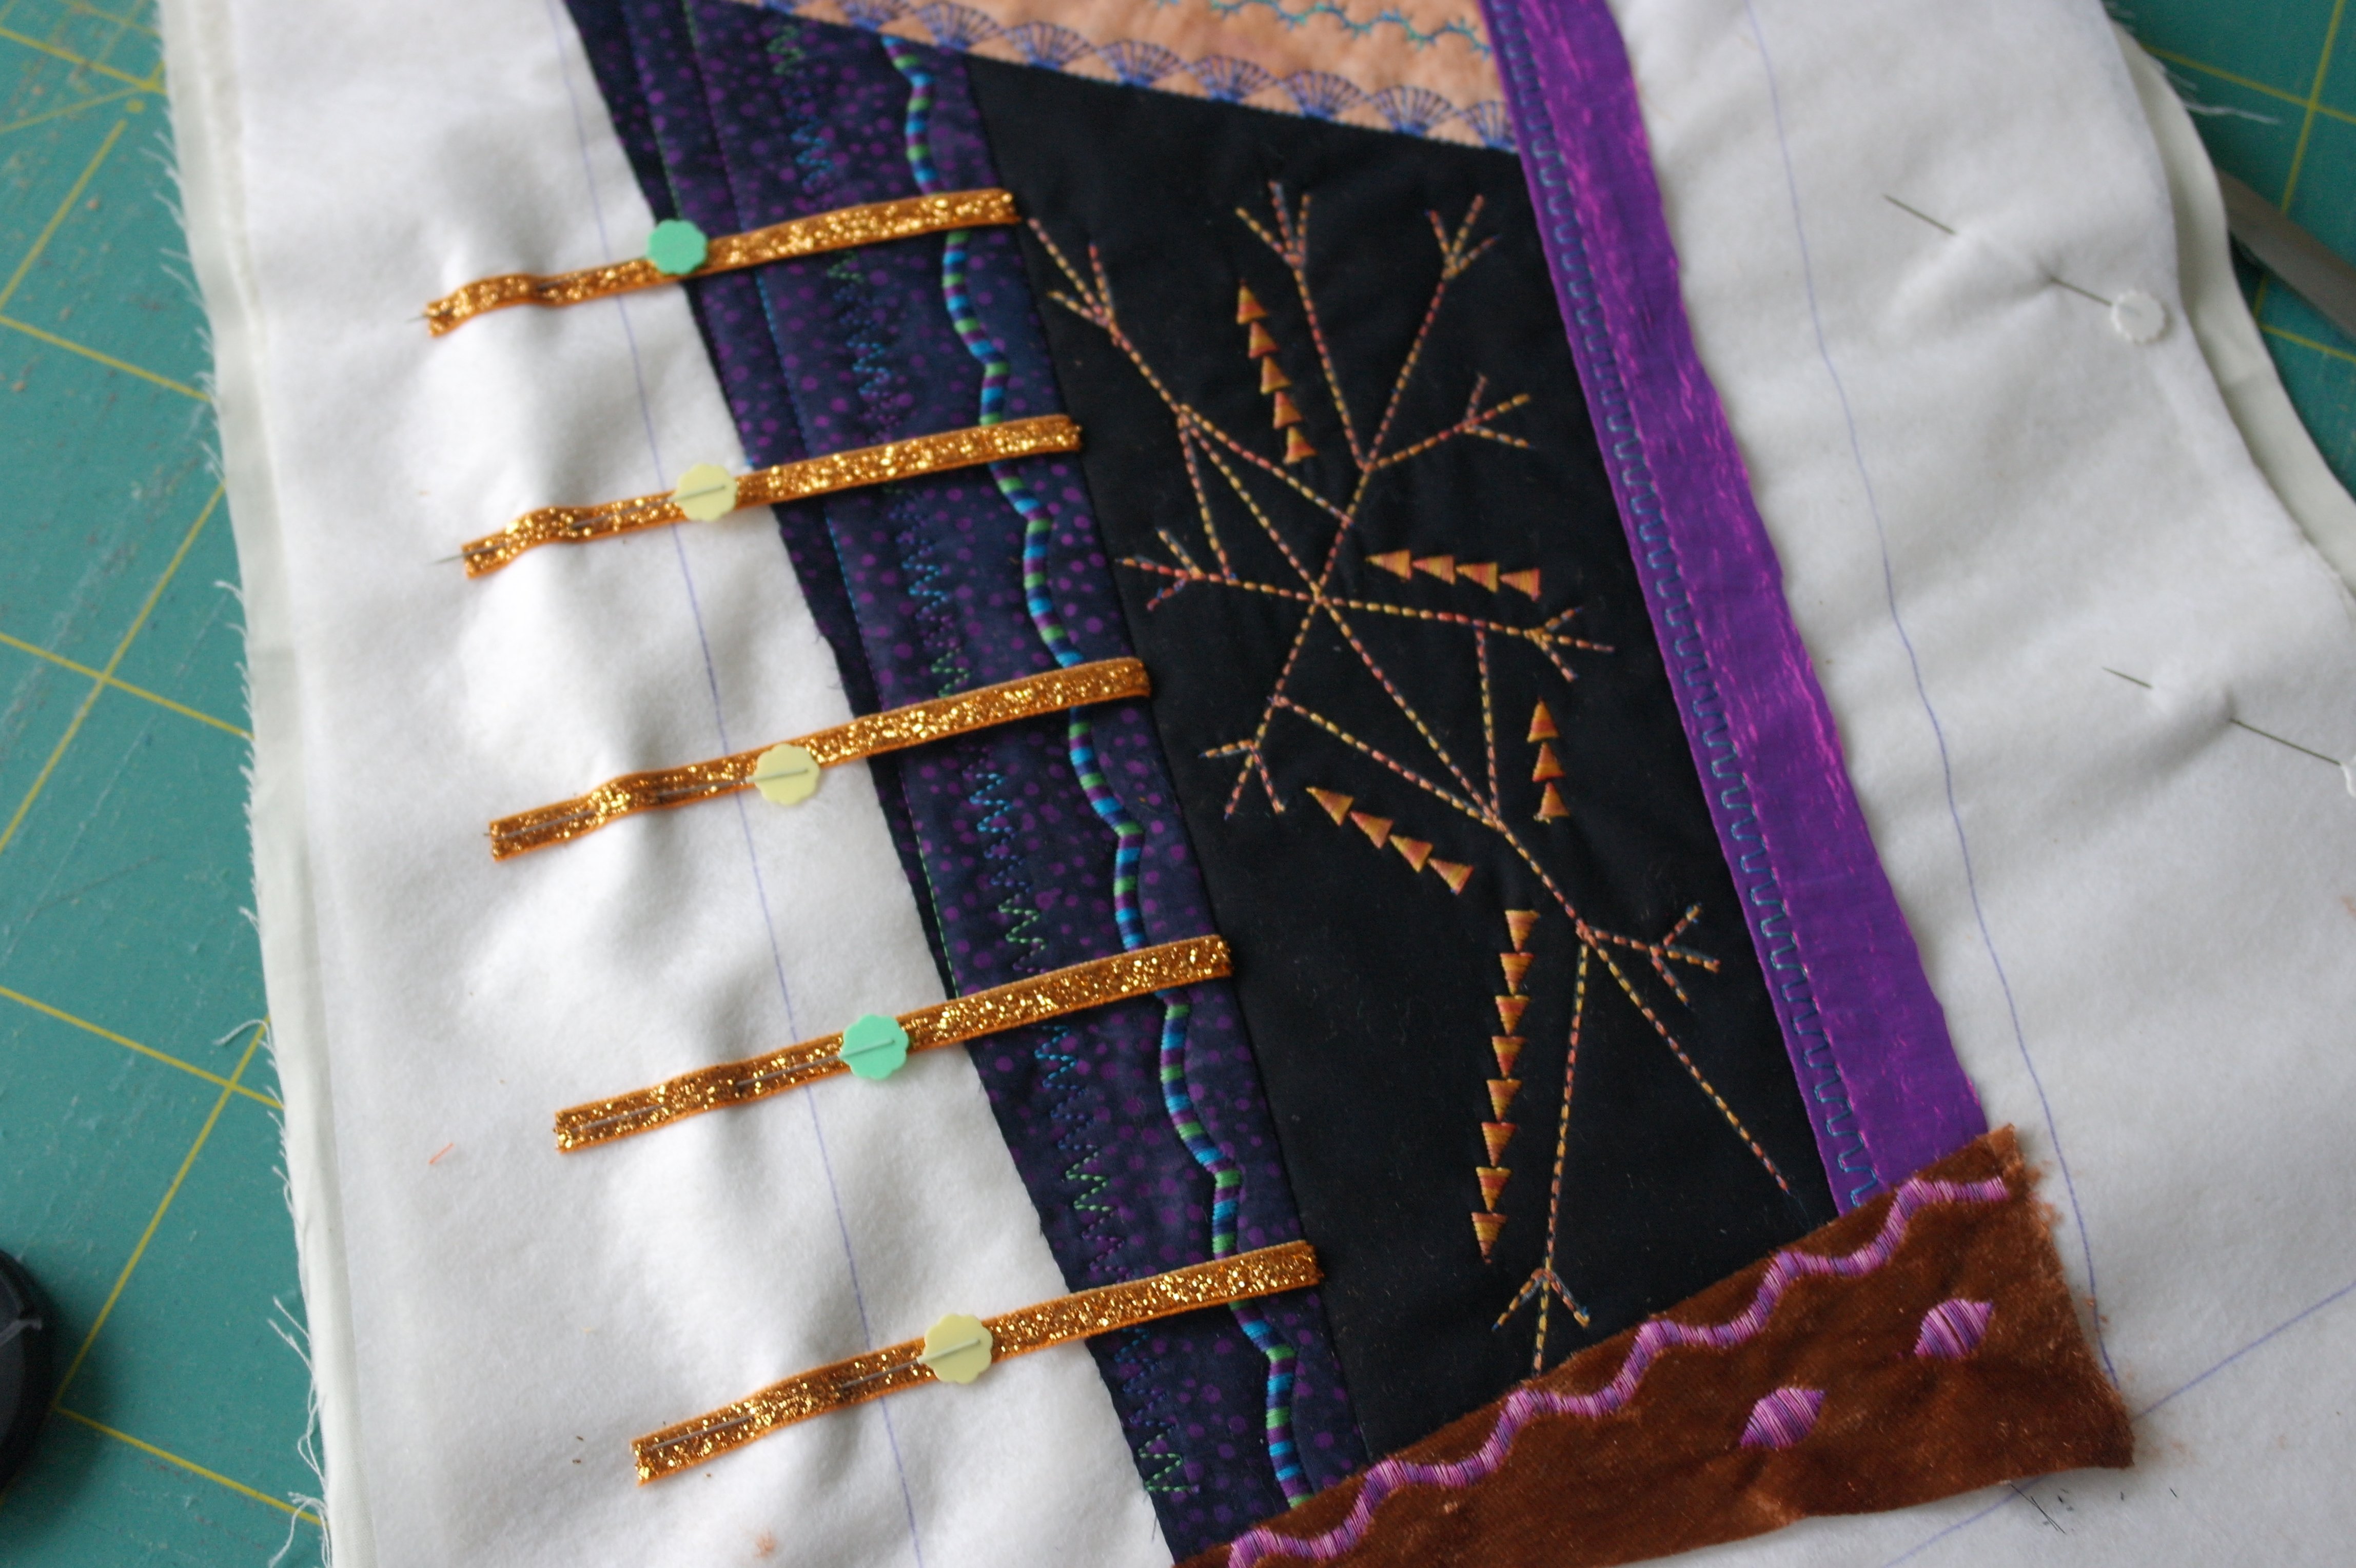
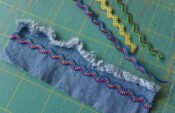
Before sewing the fabric for section 1, I have cut 5 pieces of glittering ribbon (each aprox. 10 cm in length), and placed them upside down on the Crystal center. Distance between the ribbons 5 or 6 cm. Pinned them down to secure them before sewing. You can add more ribbons, placing them closer together if you want to. I will add leaves and flowers/berries to these ribbons, once the fabric for section 9 is added.
The fabric for section 1 is placed upside down, and sewn onto the fabric – securing the ends of the ribbons.
This is how it looks: fabric 1 is folded to the right side, cut to size, seam allowance included.
I have added a row of decorative stitches first, before sewing the next fabrics onto the sandwich.
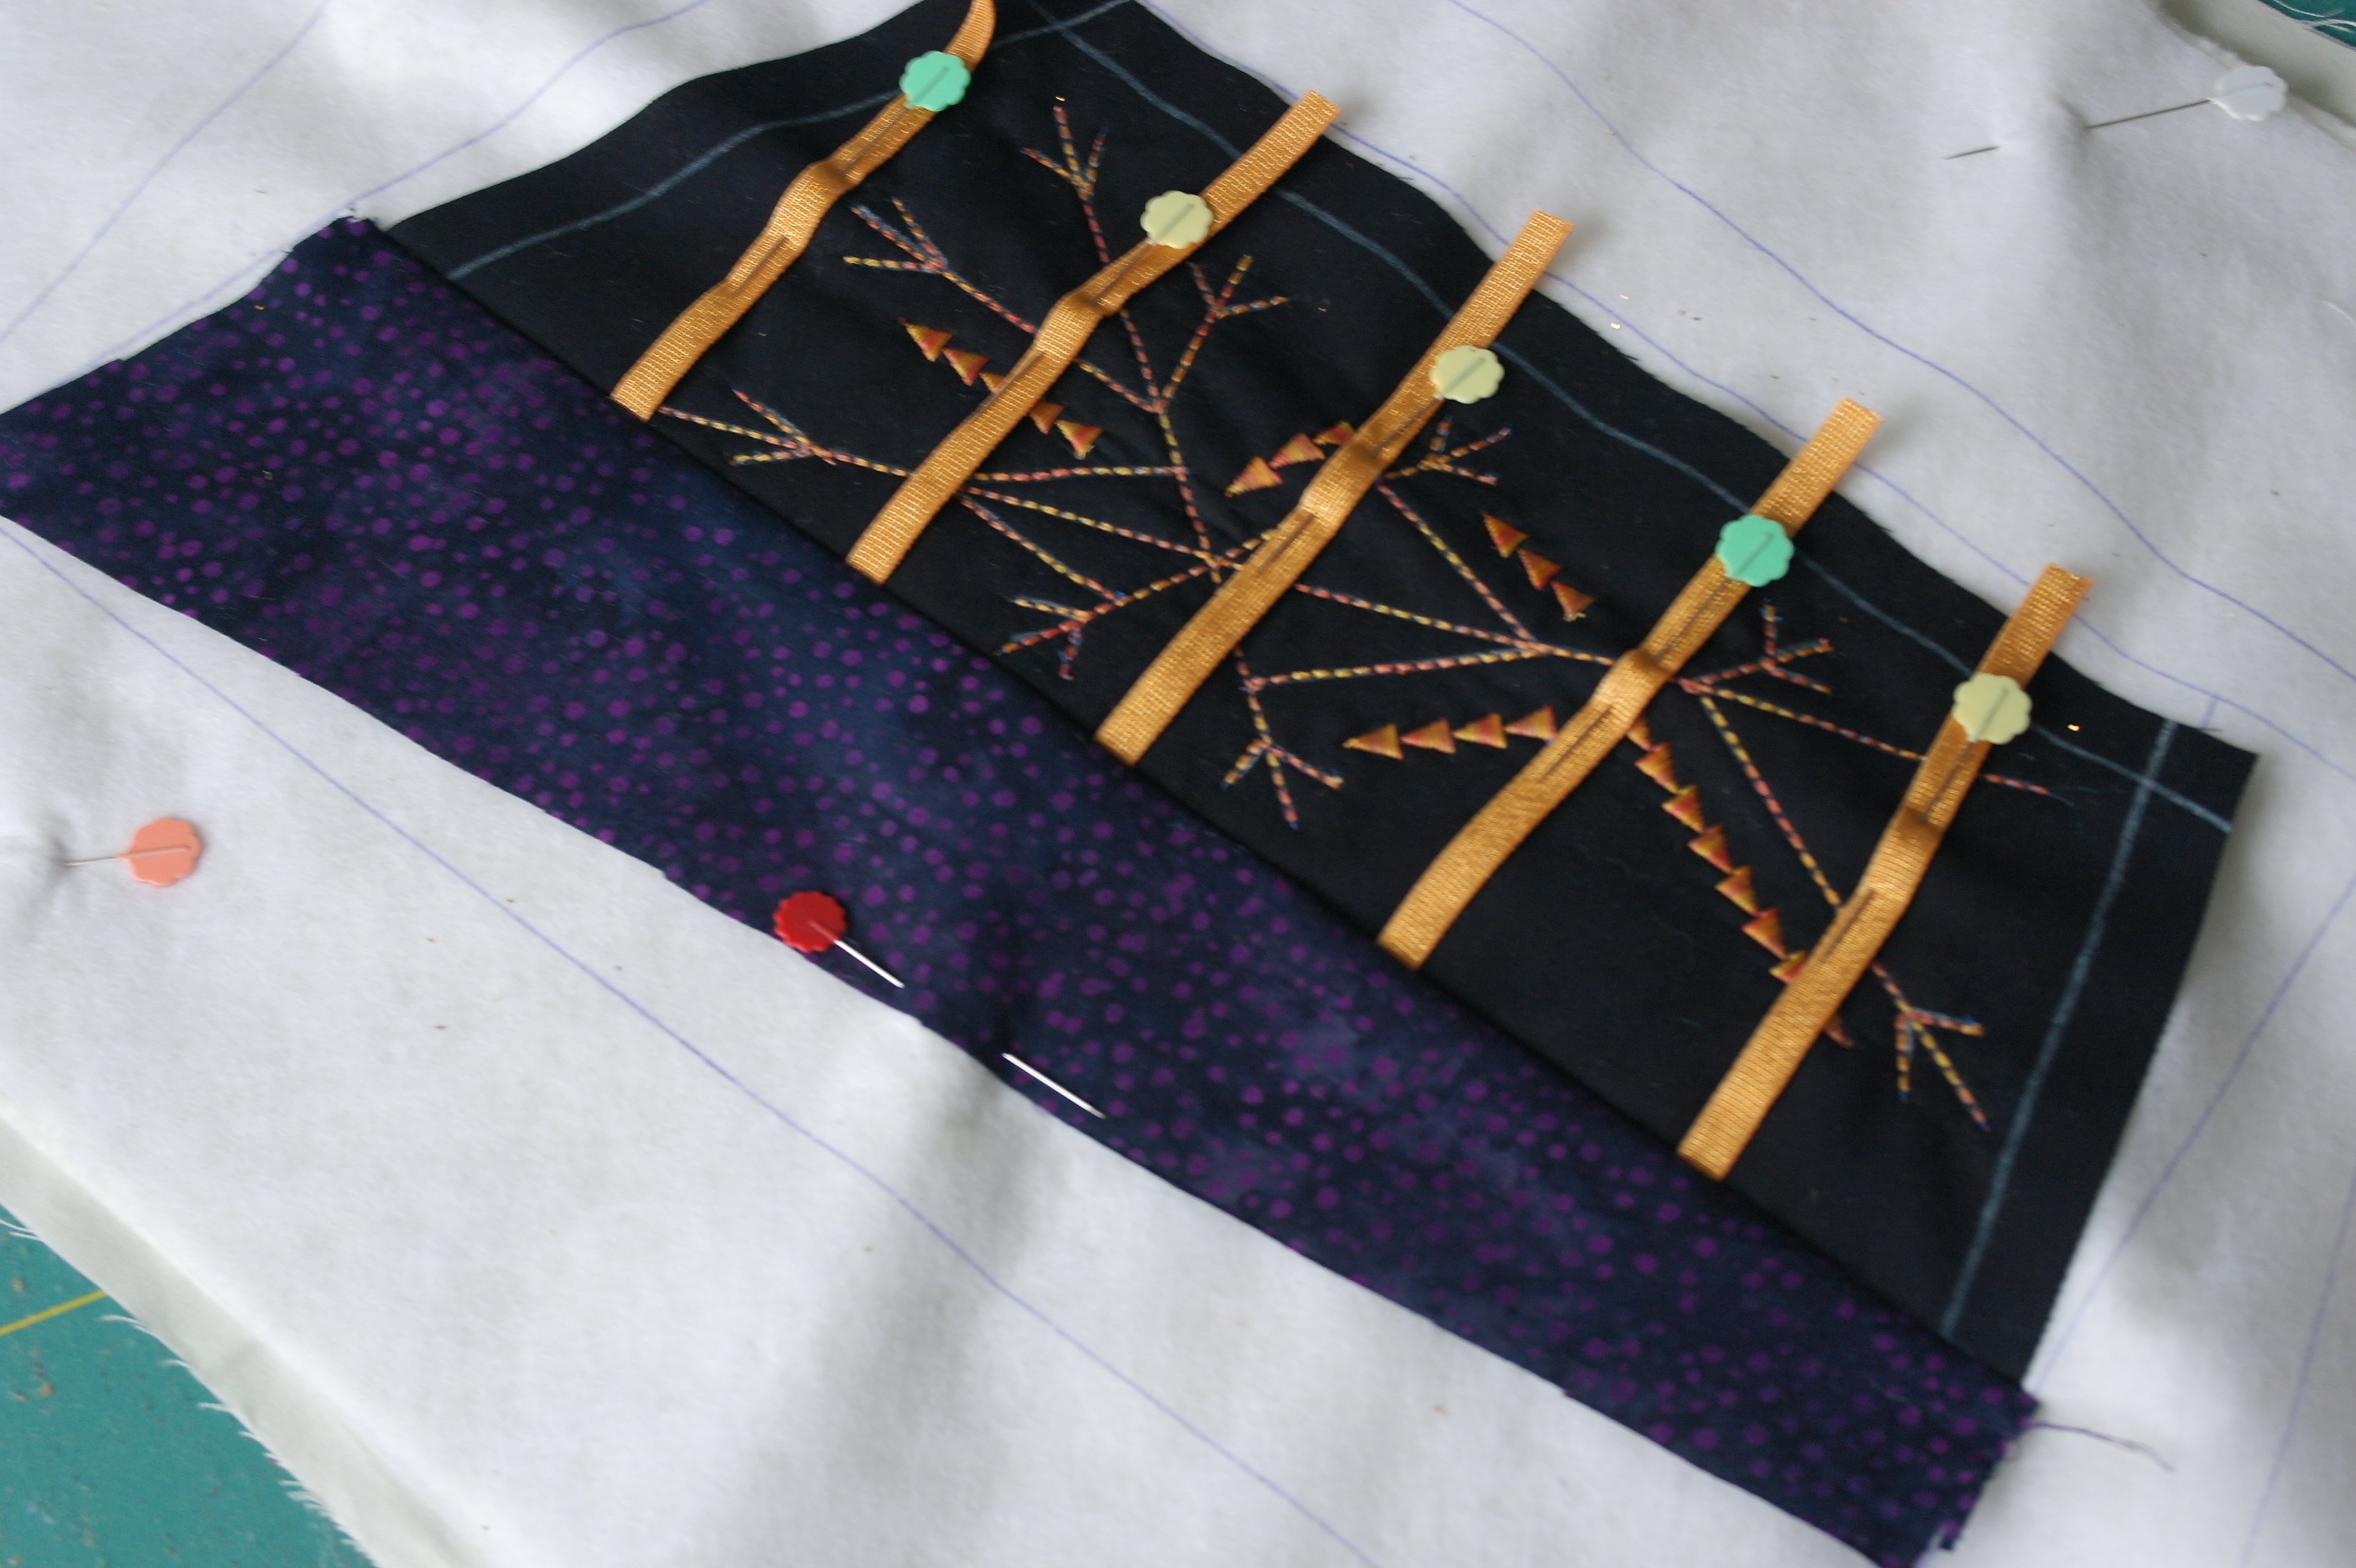
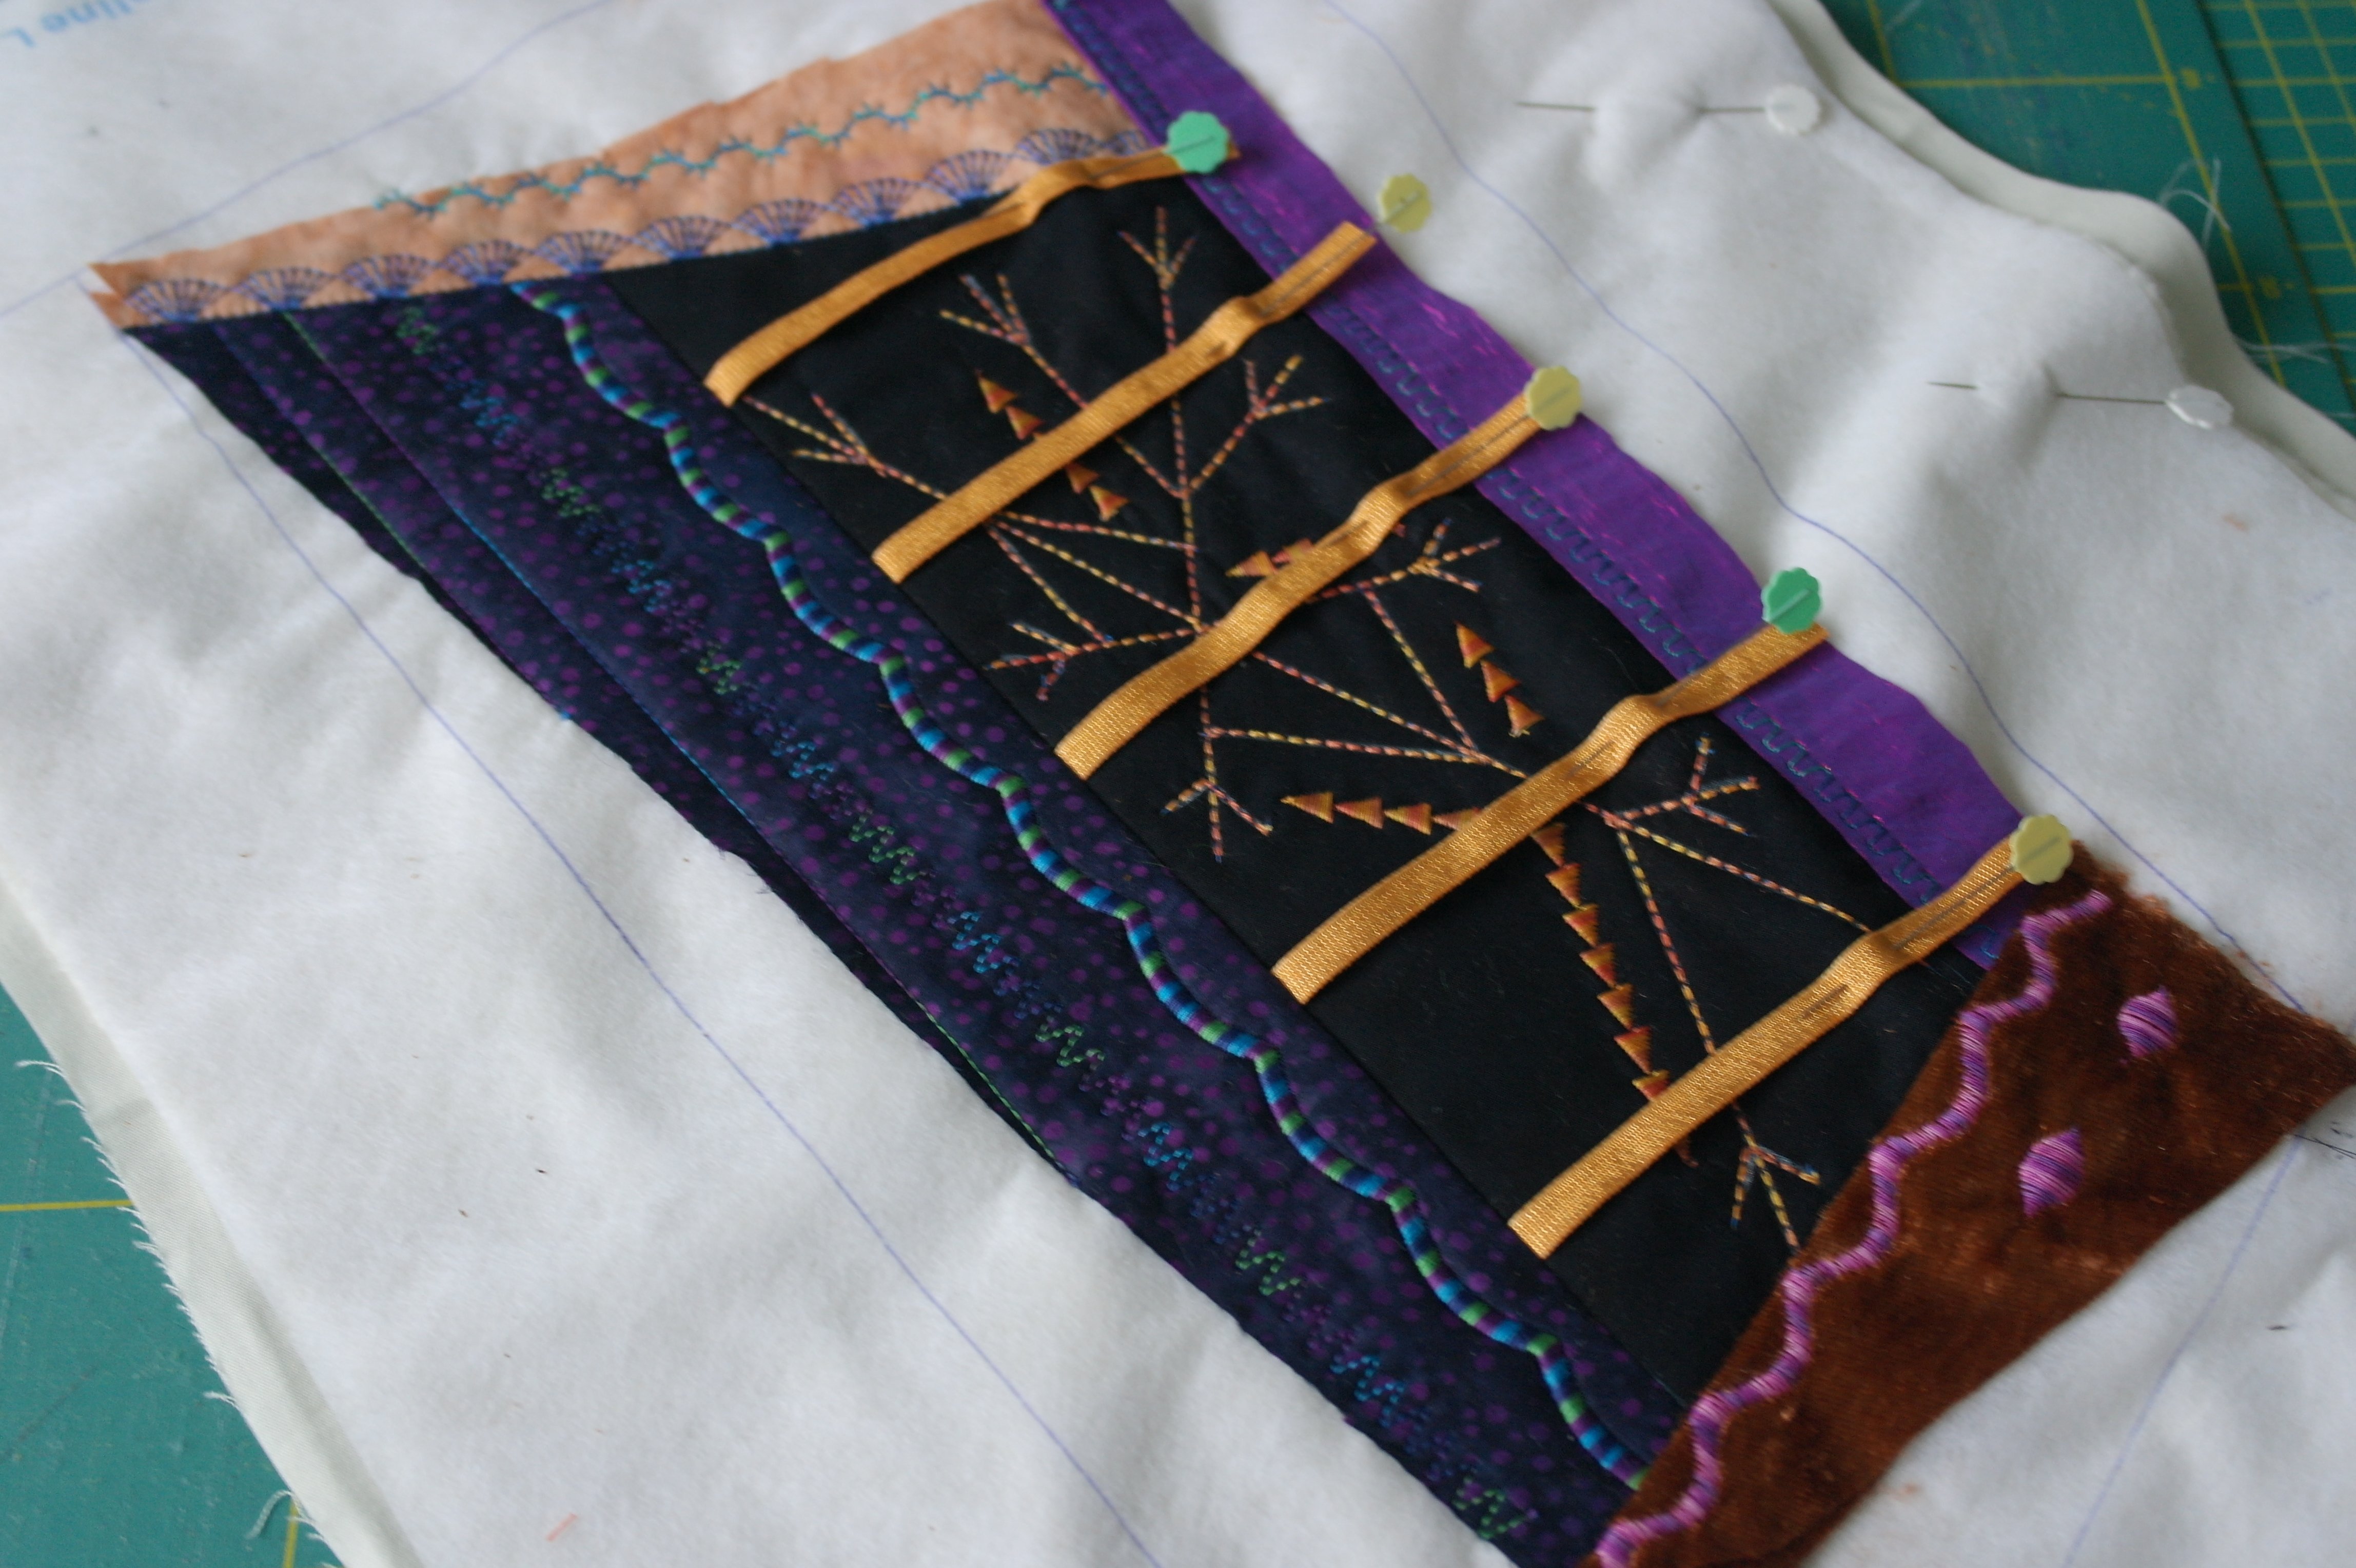
But before sewing fabrics for sections 2, 3 and 4, I have folded the ribbons to the right side, away from the seams of the fabrics I will sew. Pinning them down to hold them in place for now.
Fabrics for sections 2, 3 and 4 are added and decorated with stitches.
Before sewing the fabric for section 5, I have folded the ribbons back again, pinning them down like before. It seems like a lot of folding ribbons back and forth, but keeping them away from seams that are sewn is essential. You can let them float, but there is always the chance of sewing them accidentally between a fabric before you have sewn down fabric for no. 9, and that is not what you want.
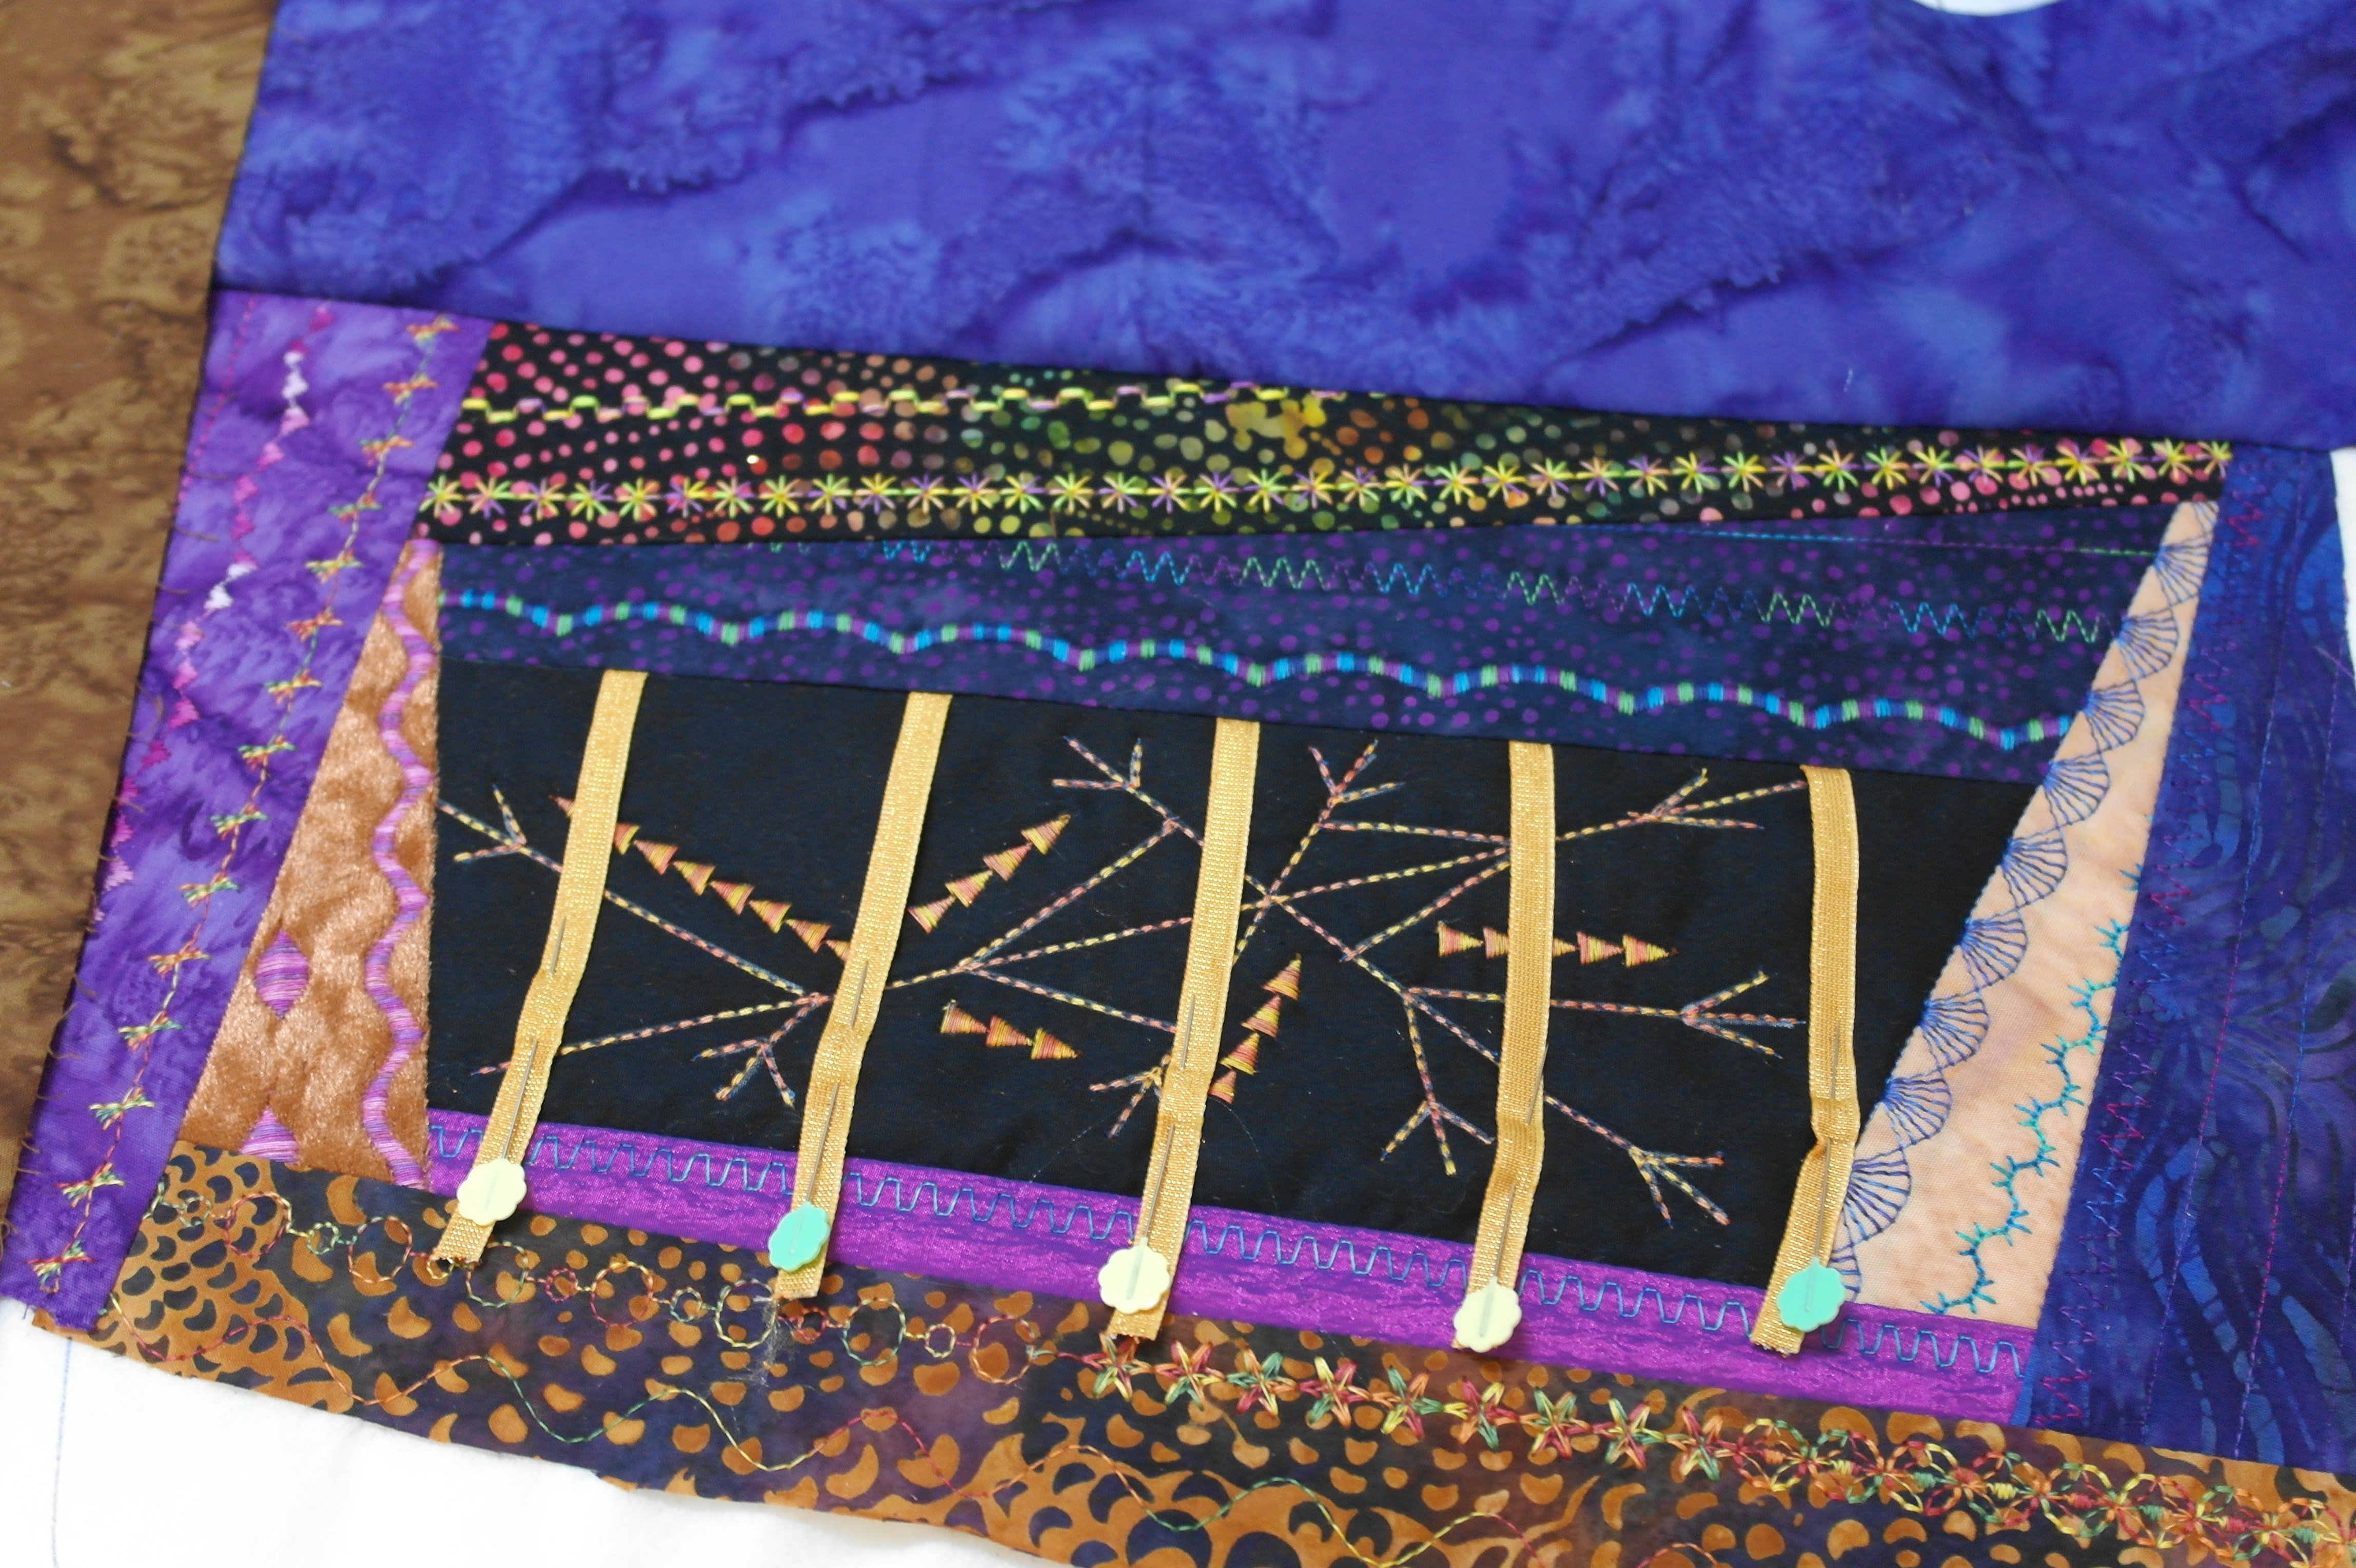
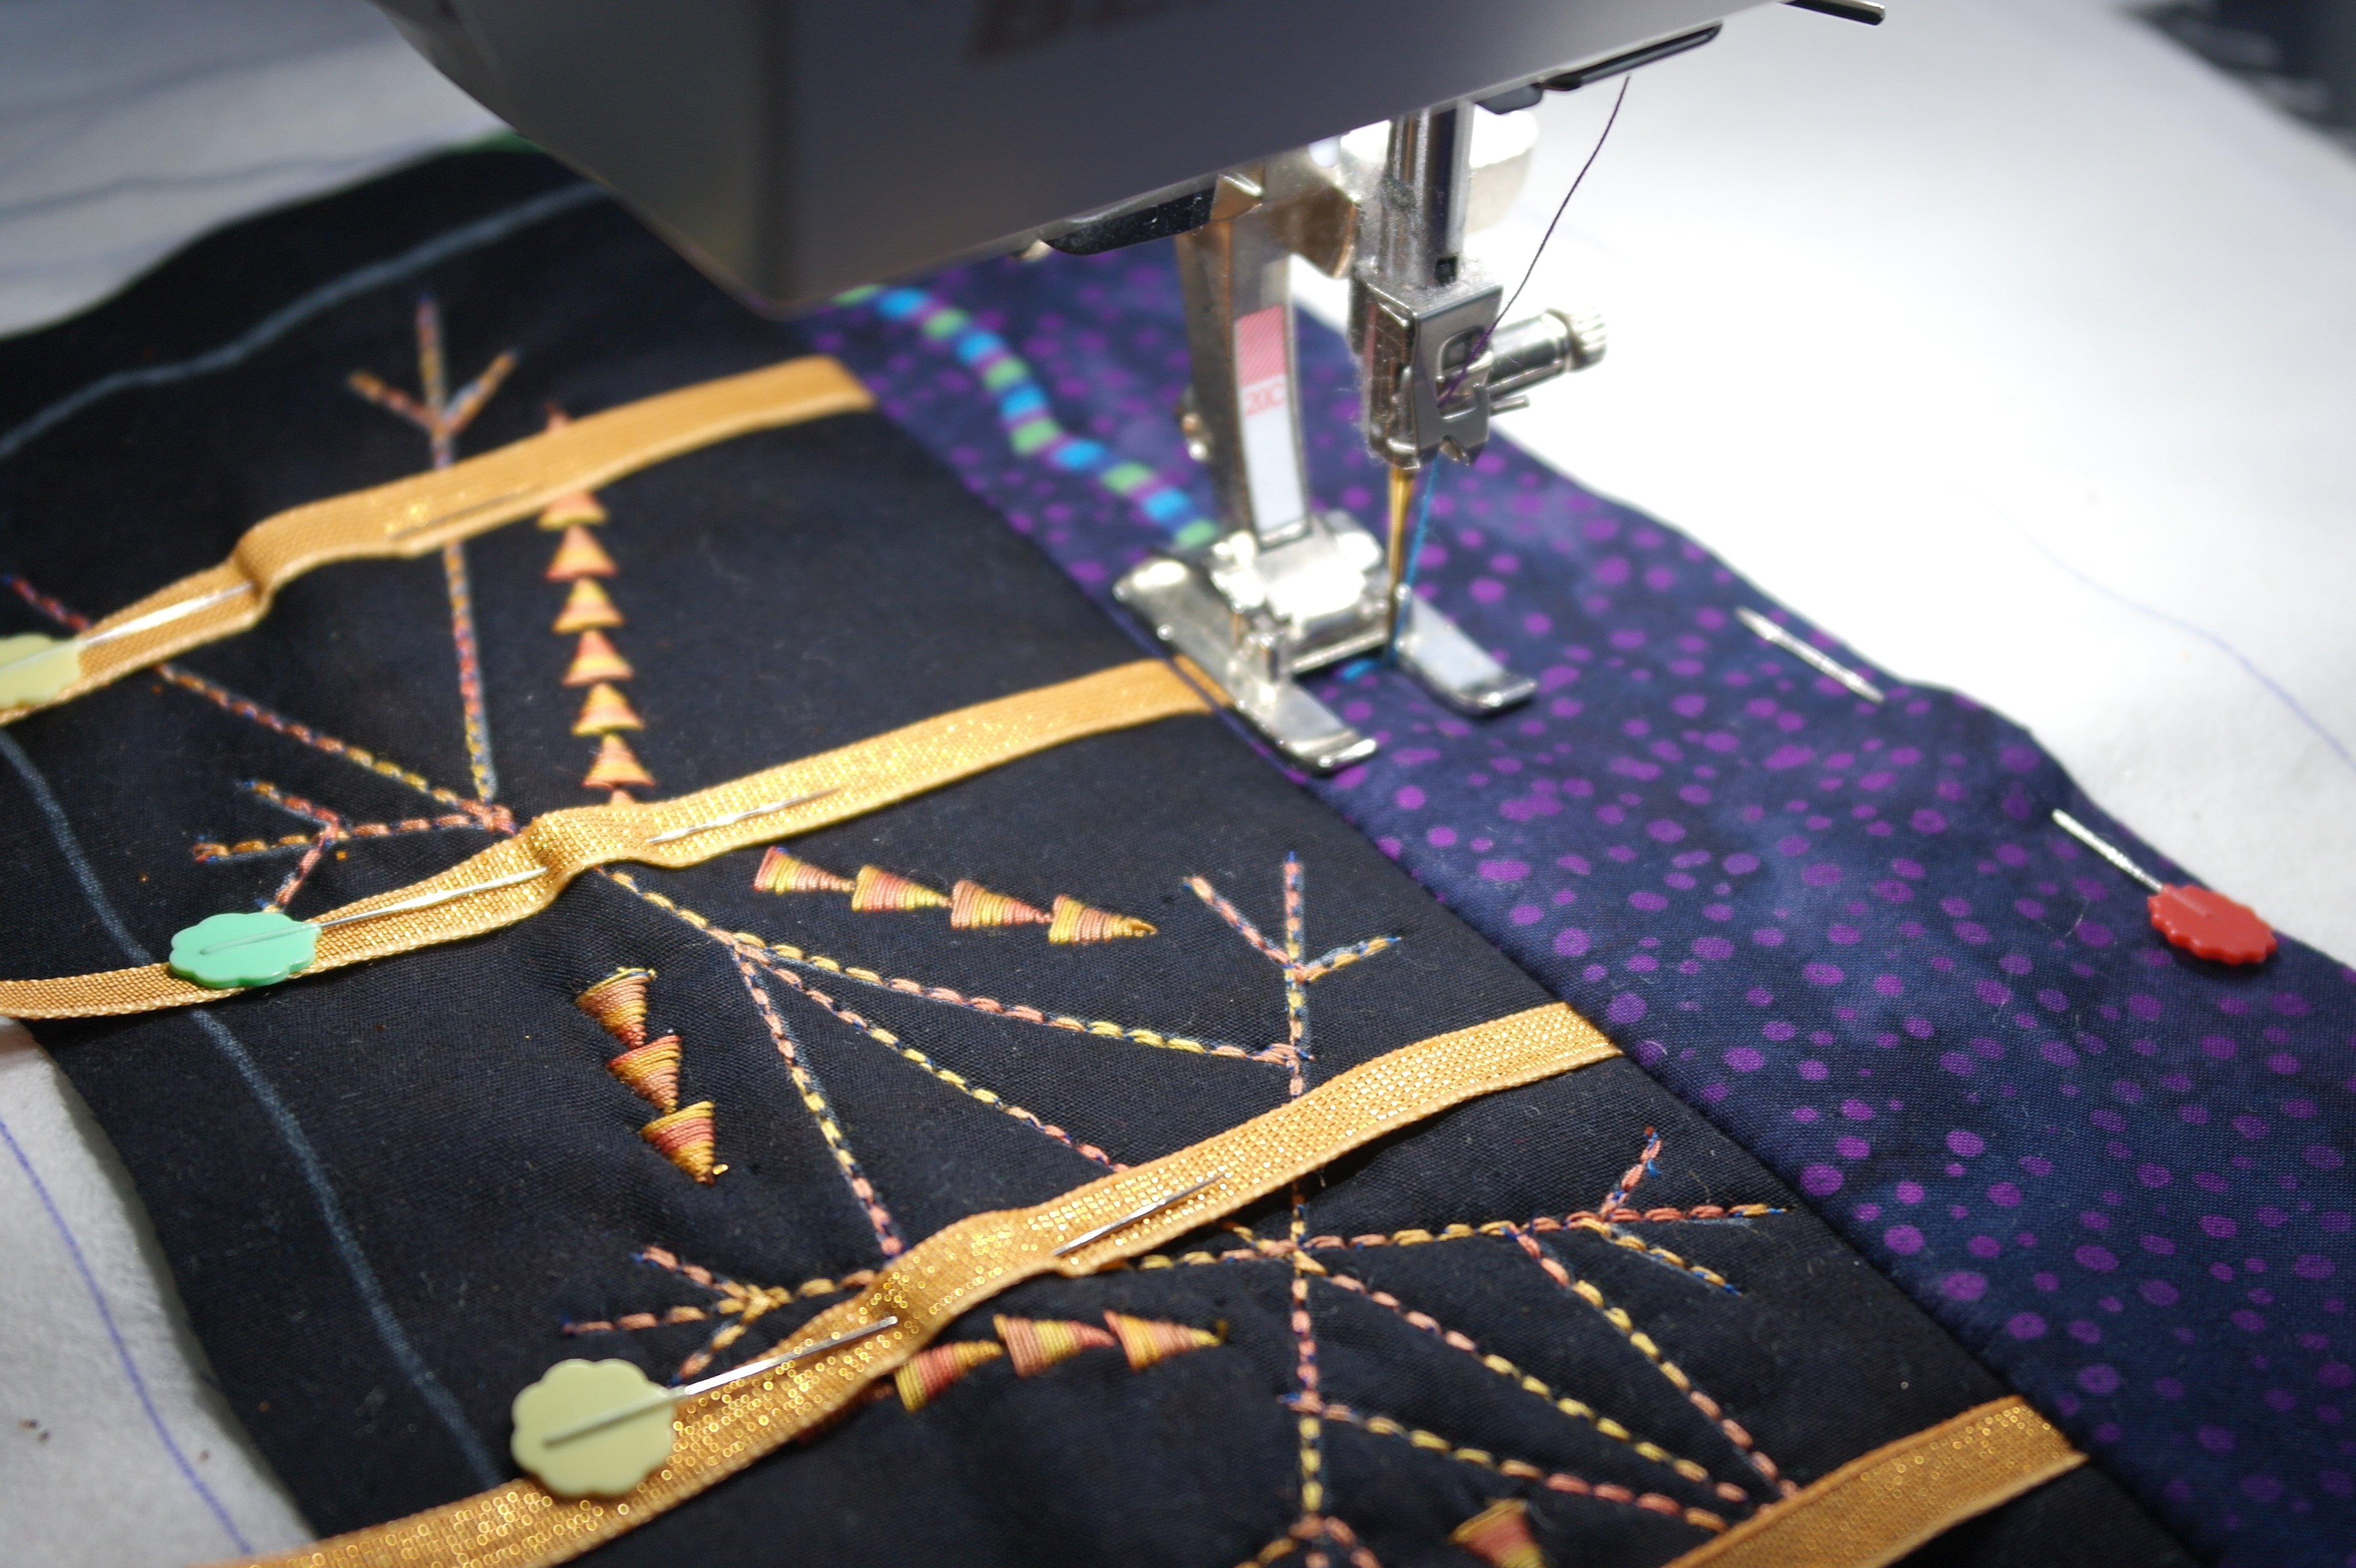
Now the fabrics for sections 5, 6, 7 and 8, but also 9 are sewn and decorated with stitches. I will just place a small row of stitches onto fabric 9, but further leave it empty, because of the ribbons that will be placed up to this fabric.
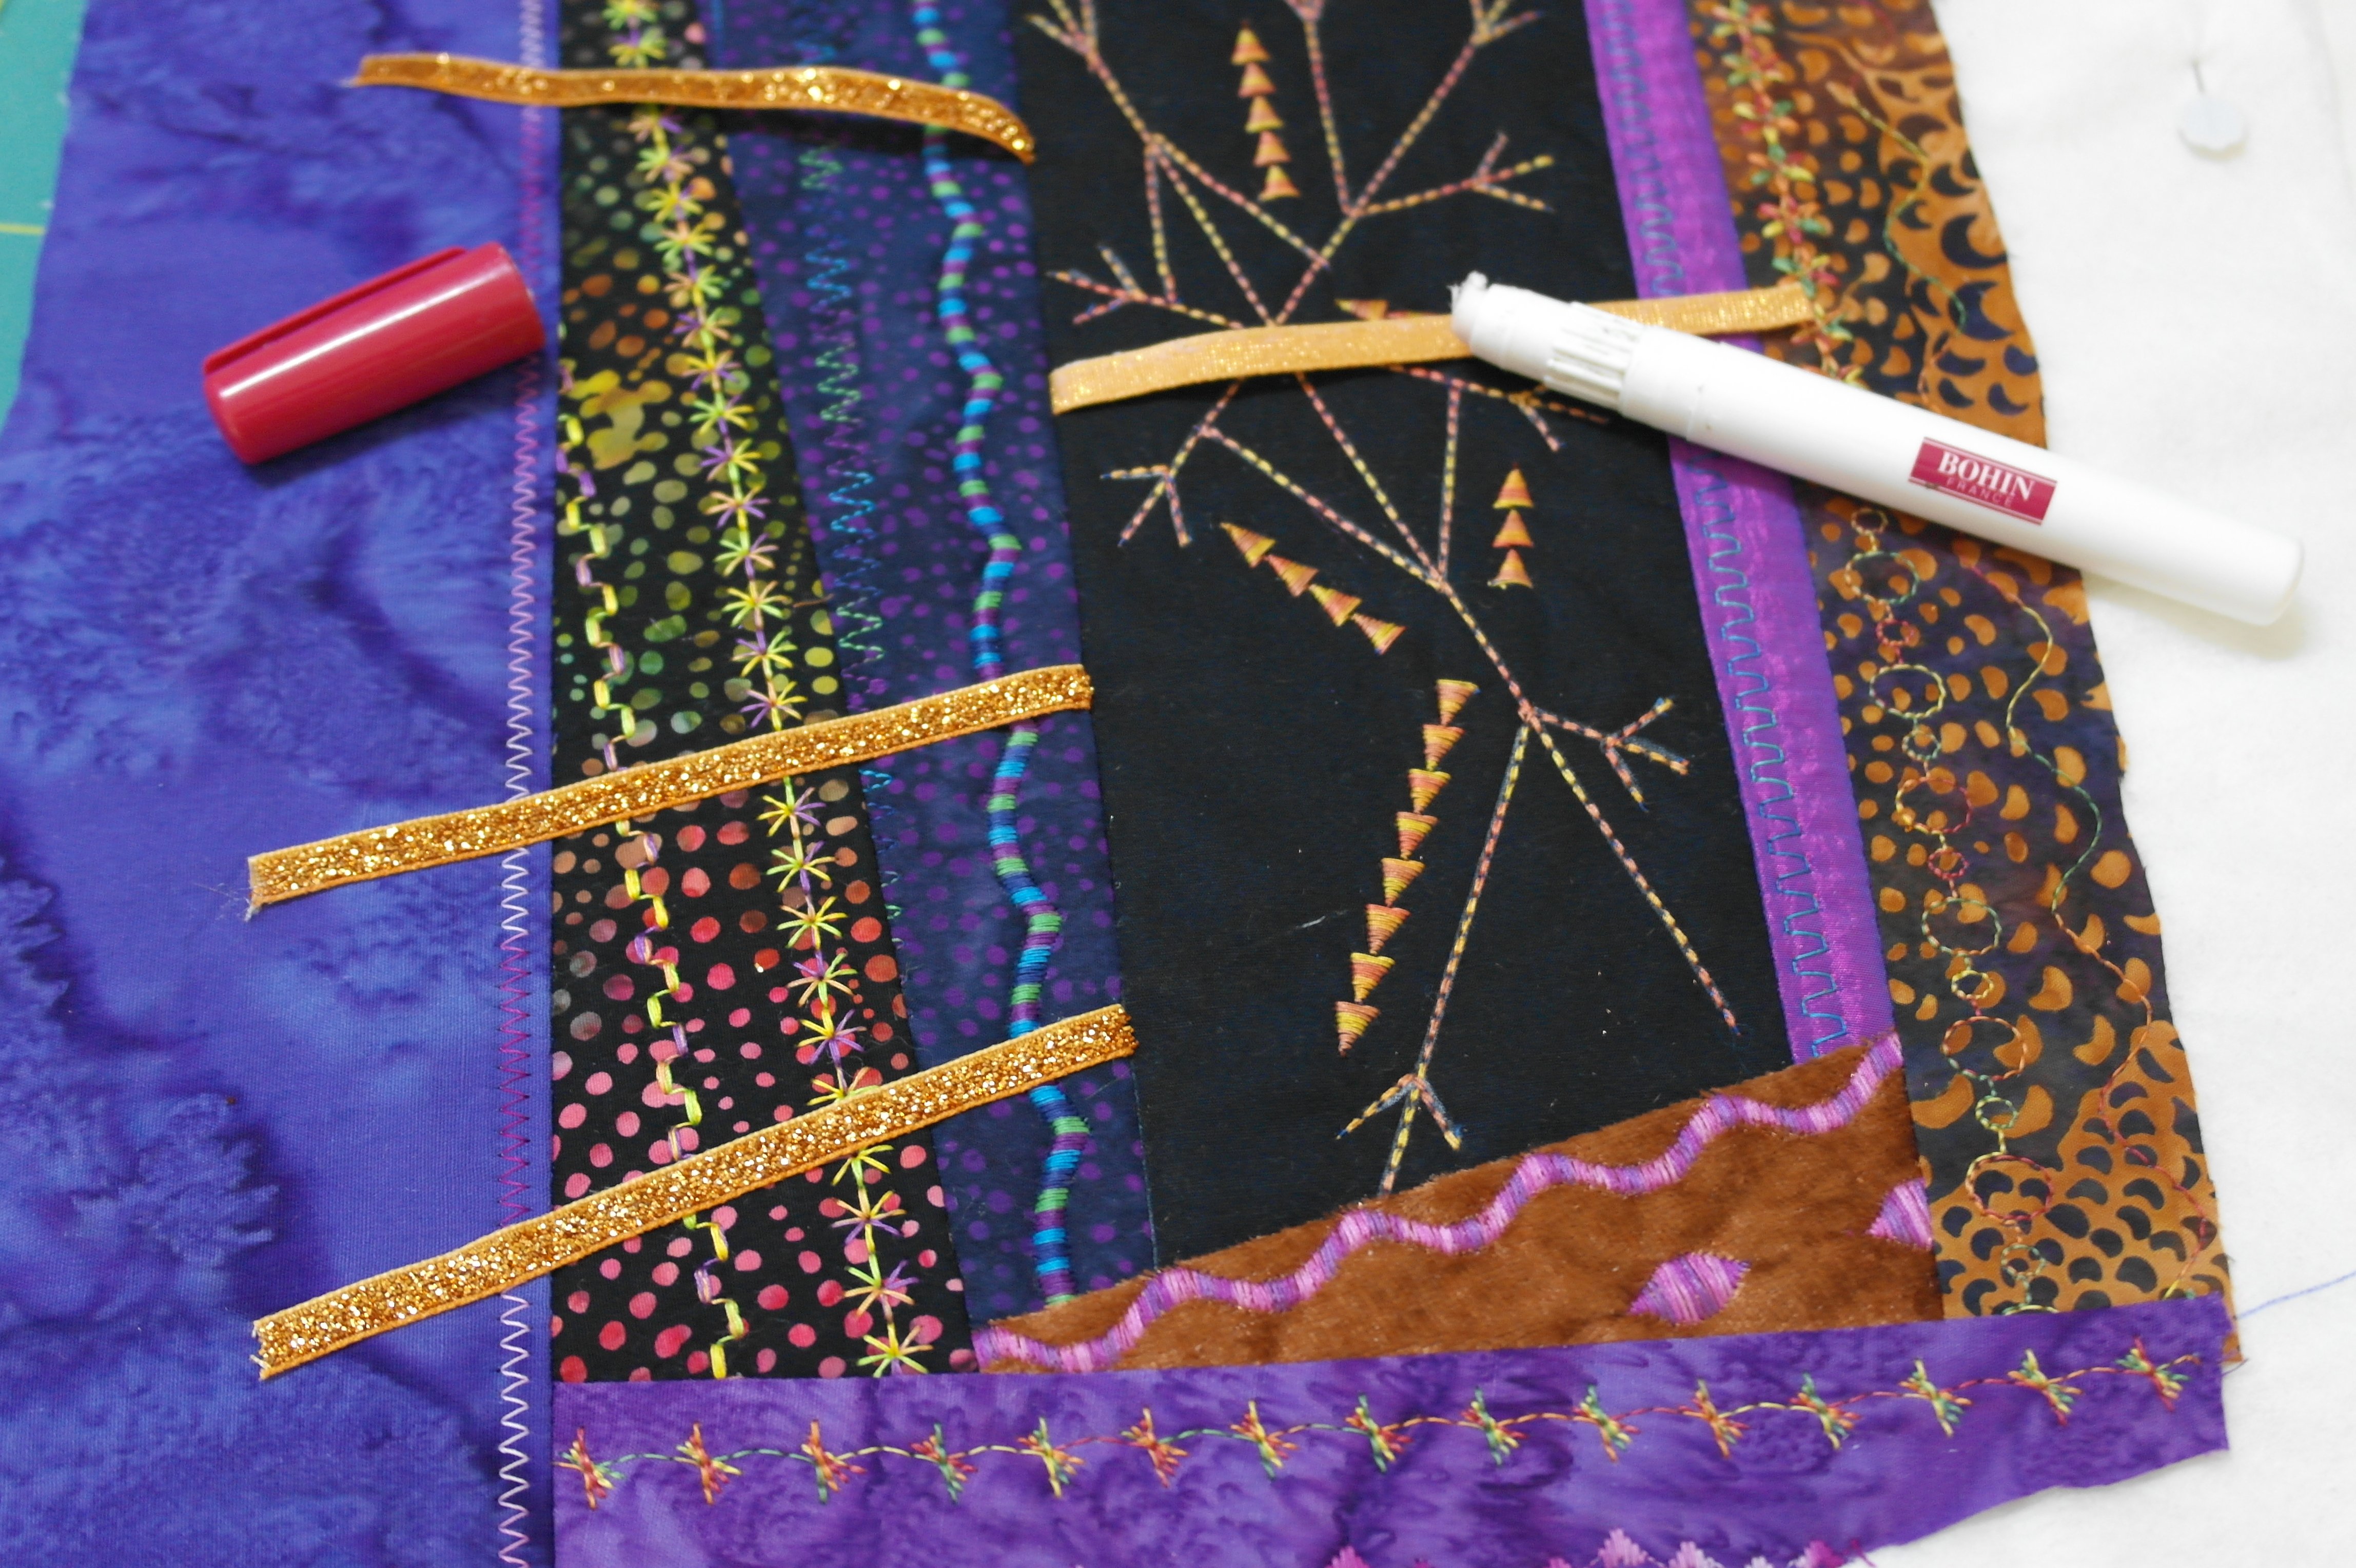
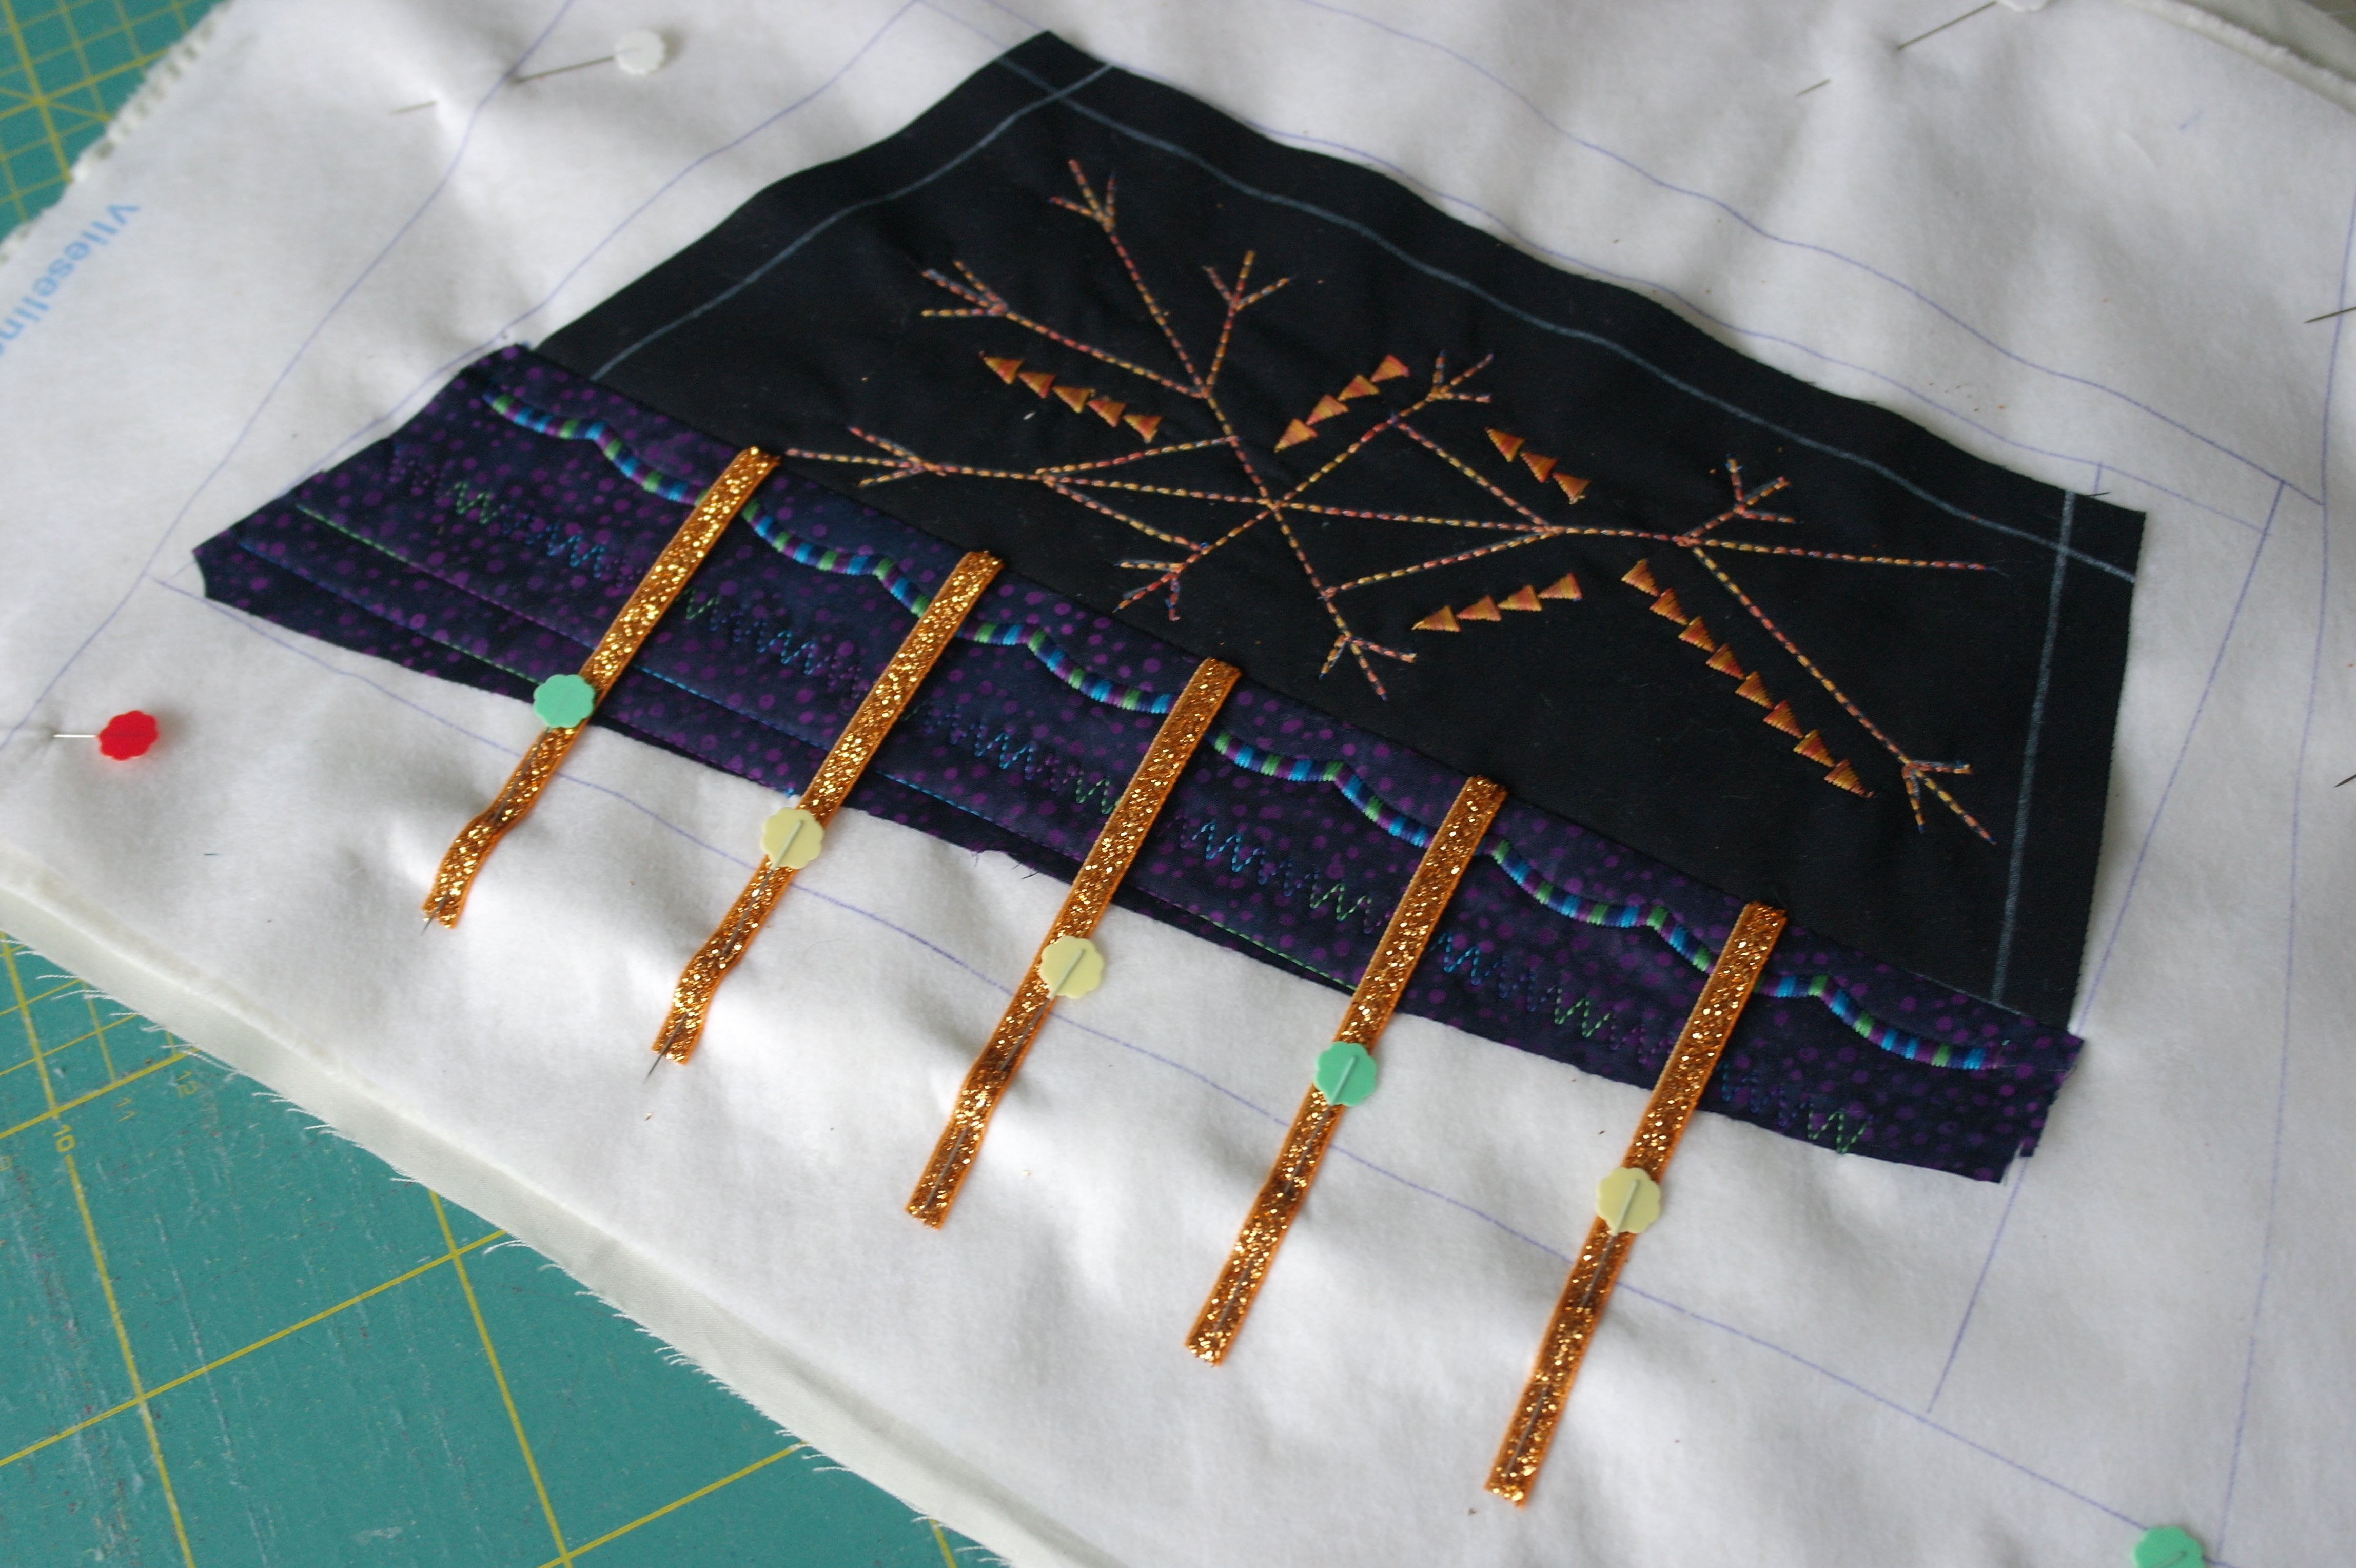
To secure the ribbons, I will use Bohin Glue Pen, the temporarely fabric glue, to prevent the ribbons from sliding to the left or right. I want them straight, but glued in a fan shape. To do so, I have glued the left and right ribbons at an angle, the middle ribbon straight, and the ribbons in between in the space that is left. Because my ribbons are small (just 5mm wide), it doesn’t matter if they are placed at an angle, because it won’t show with the seam at the black batik/Crystal in the center.
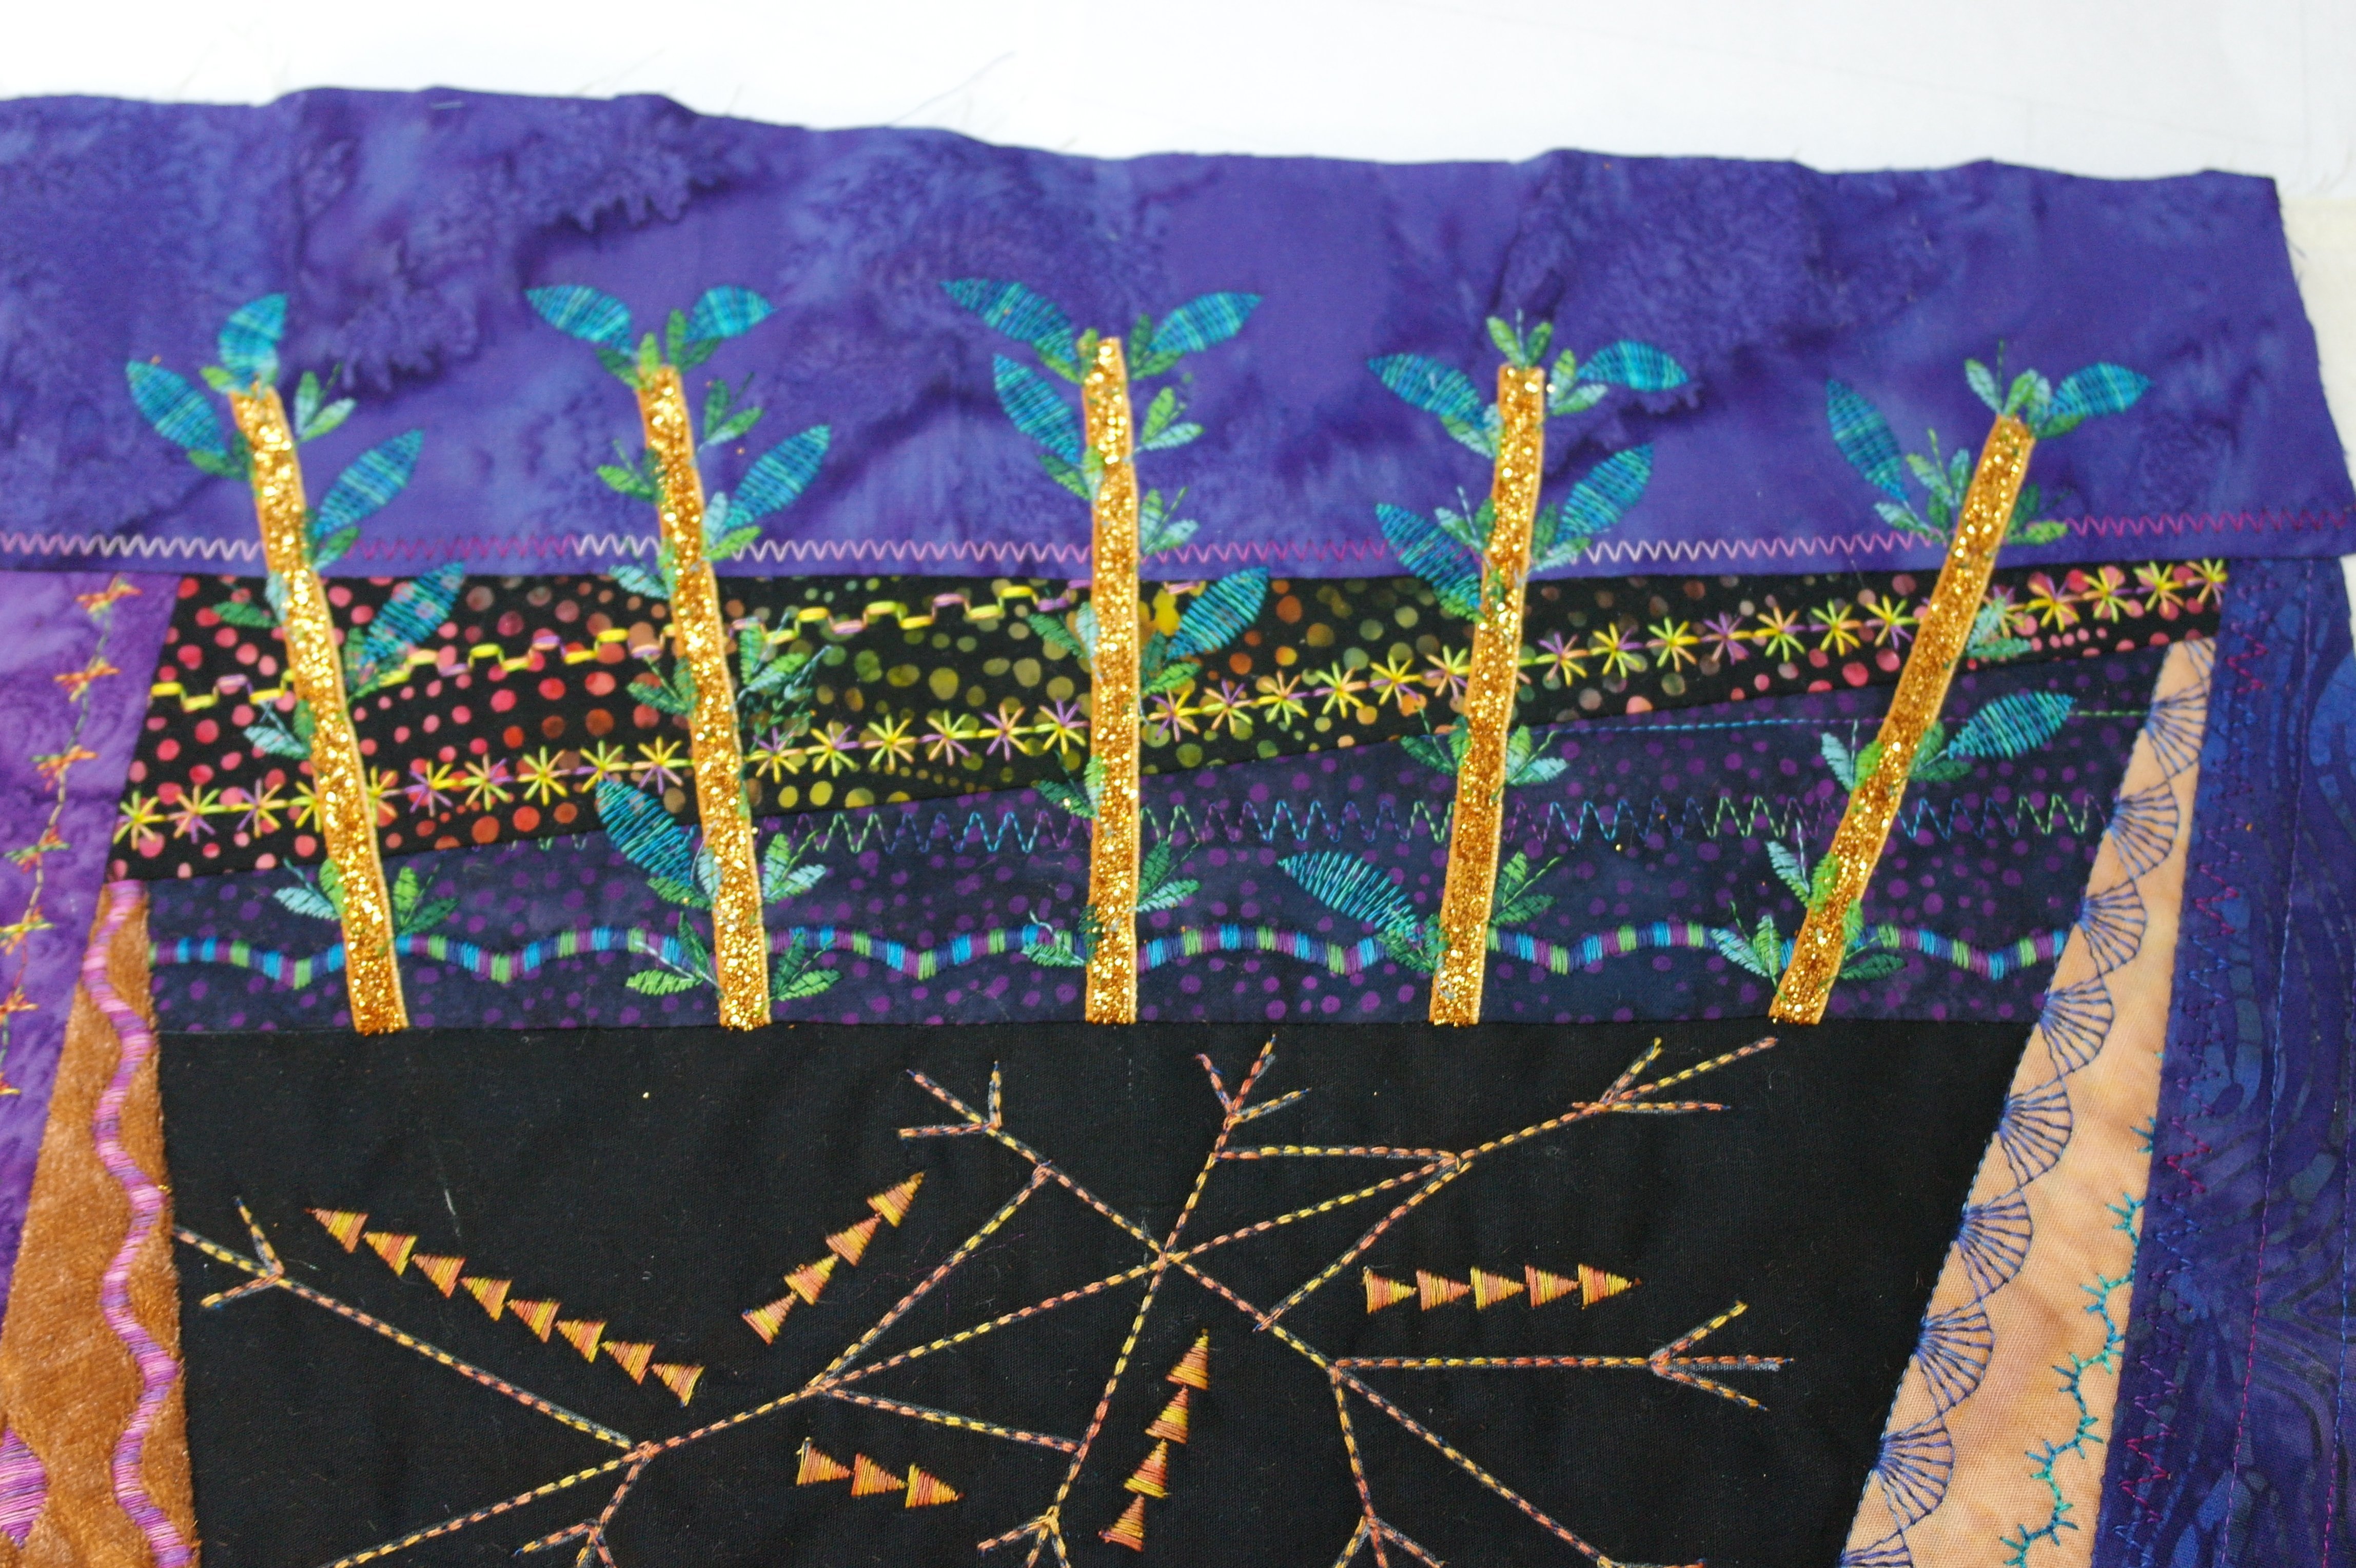
The decorative leaves I have used, are made only once: I can program stitches that way on my B770QE. I have used stitch 473 and a variegated green/blue thread. I have also mirrored the stitch horizontally, to start with a ‘stem’ so the leaves will point outwards. After adding these leaves, I have made ‘flowers/berries’, with stitch 465 and turquoise variegated thread. The flowers/berries were not always made straight: sometimes I have turned the sandwich slightly when stitching, to deform the shape of the stitch. That makes it more natural. Use any stitch you like!
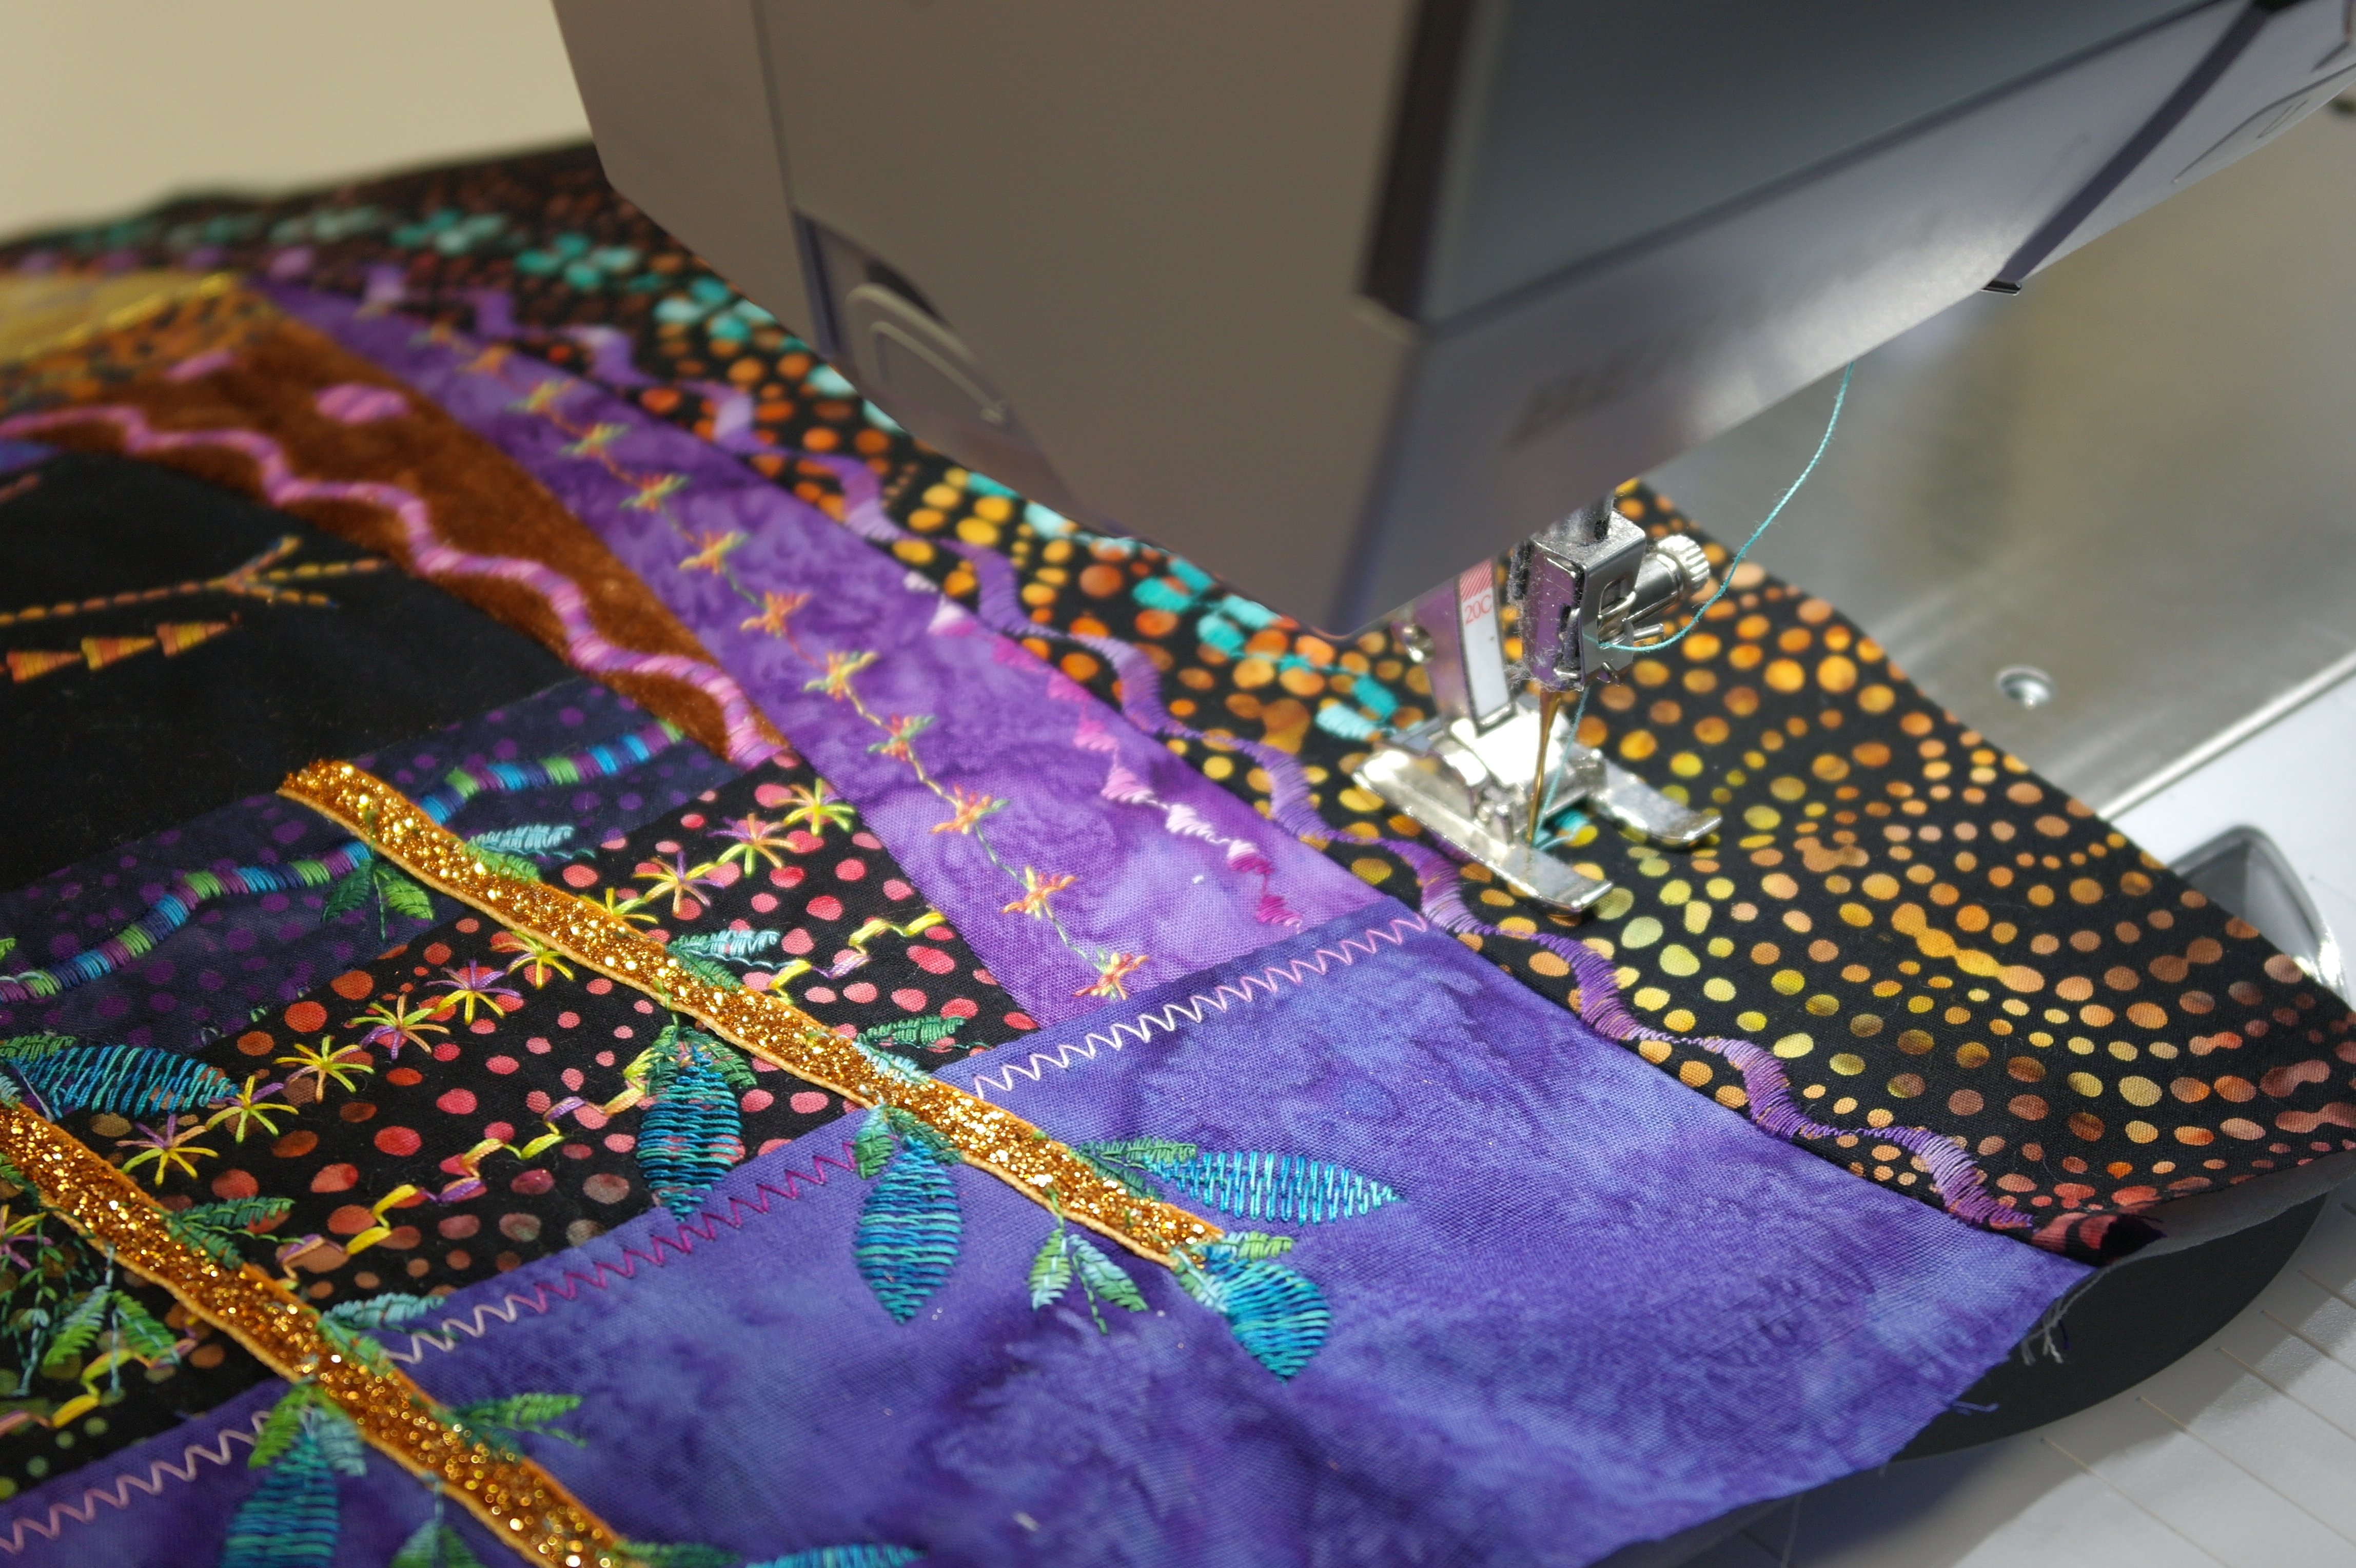
More fabrics and stitches are added, to cover the entire sandwich.
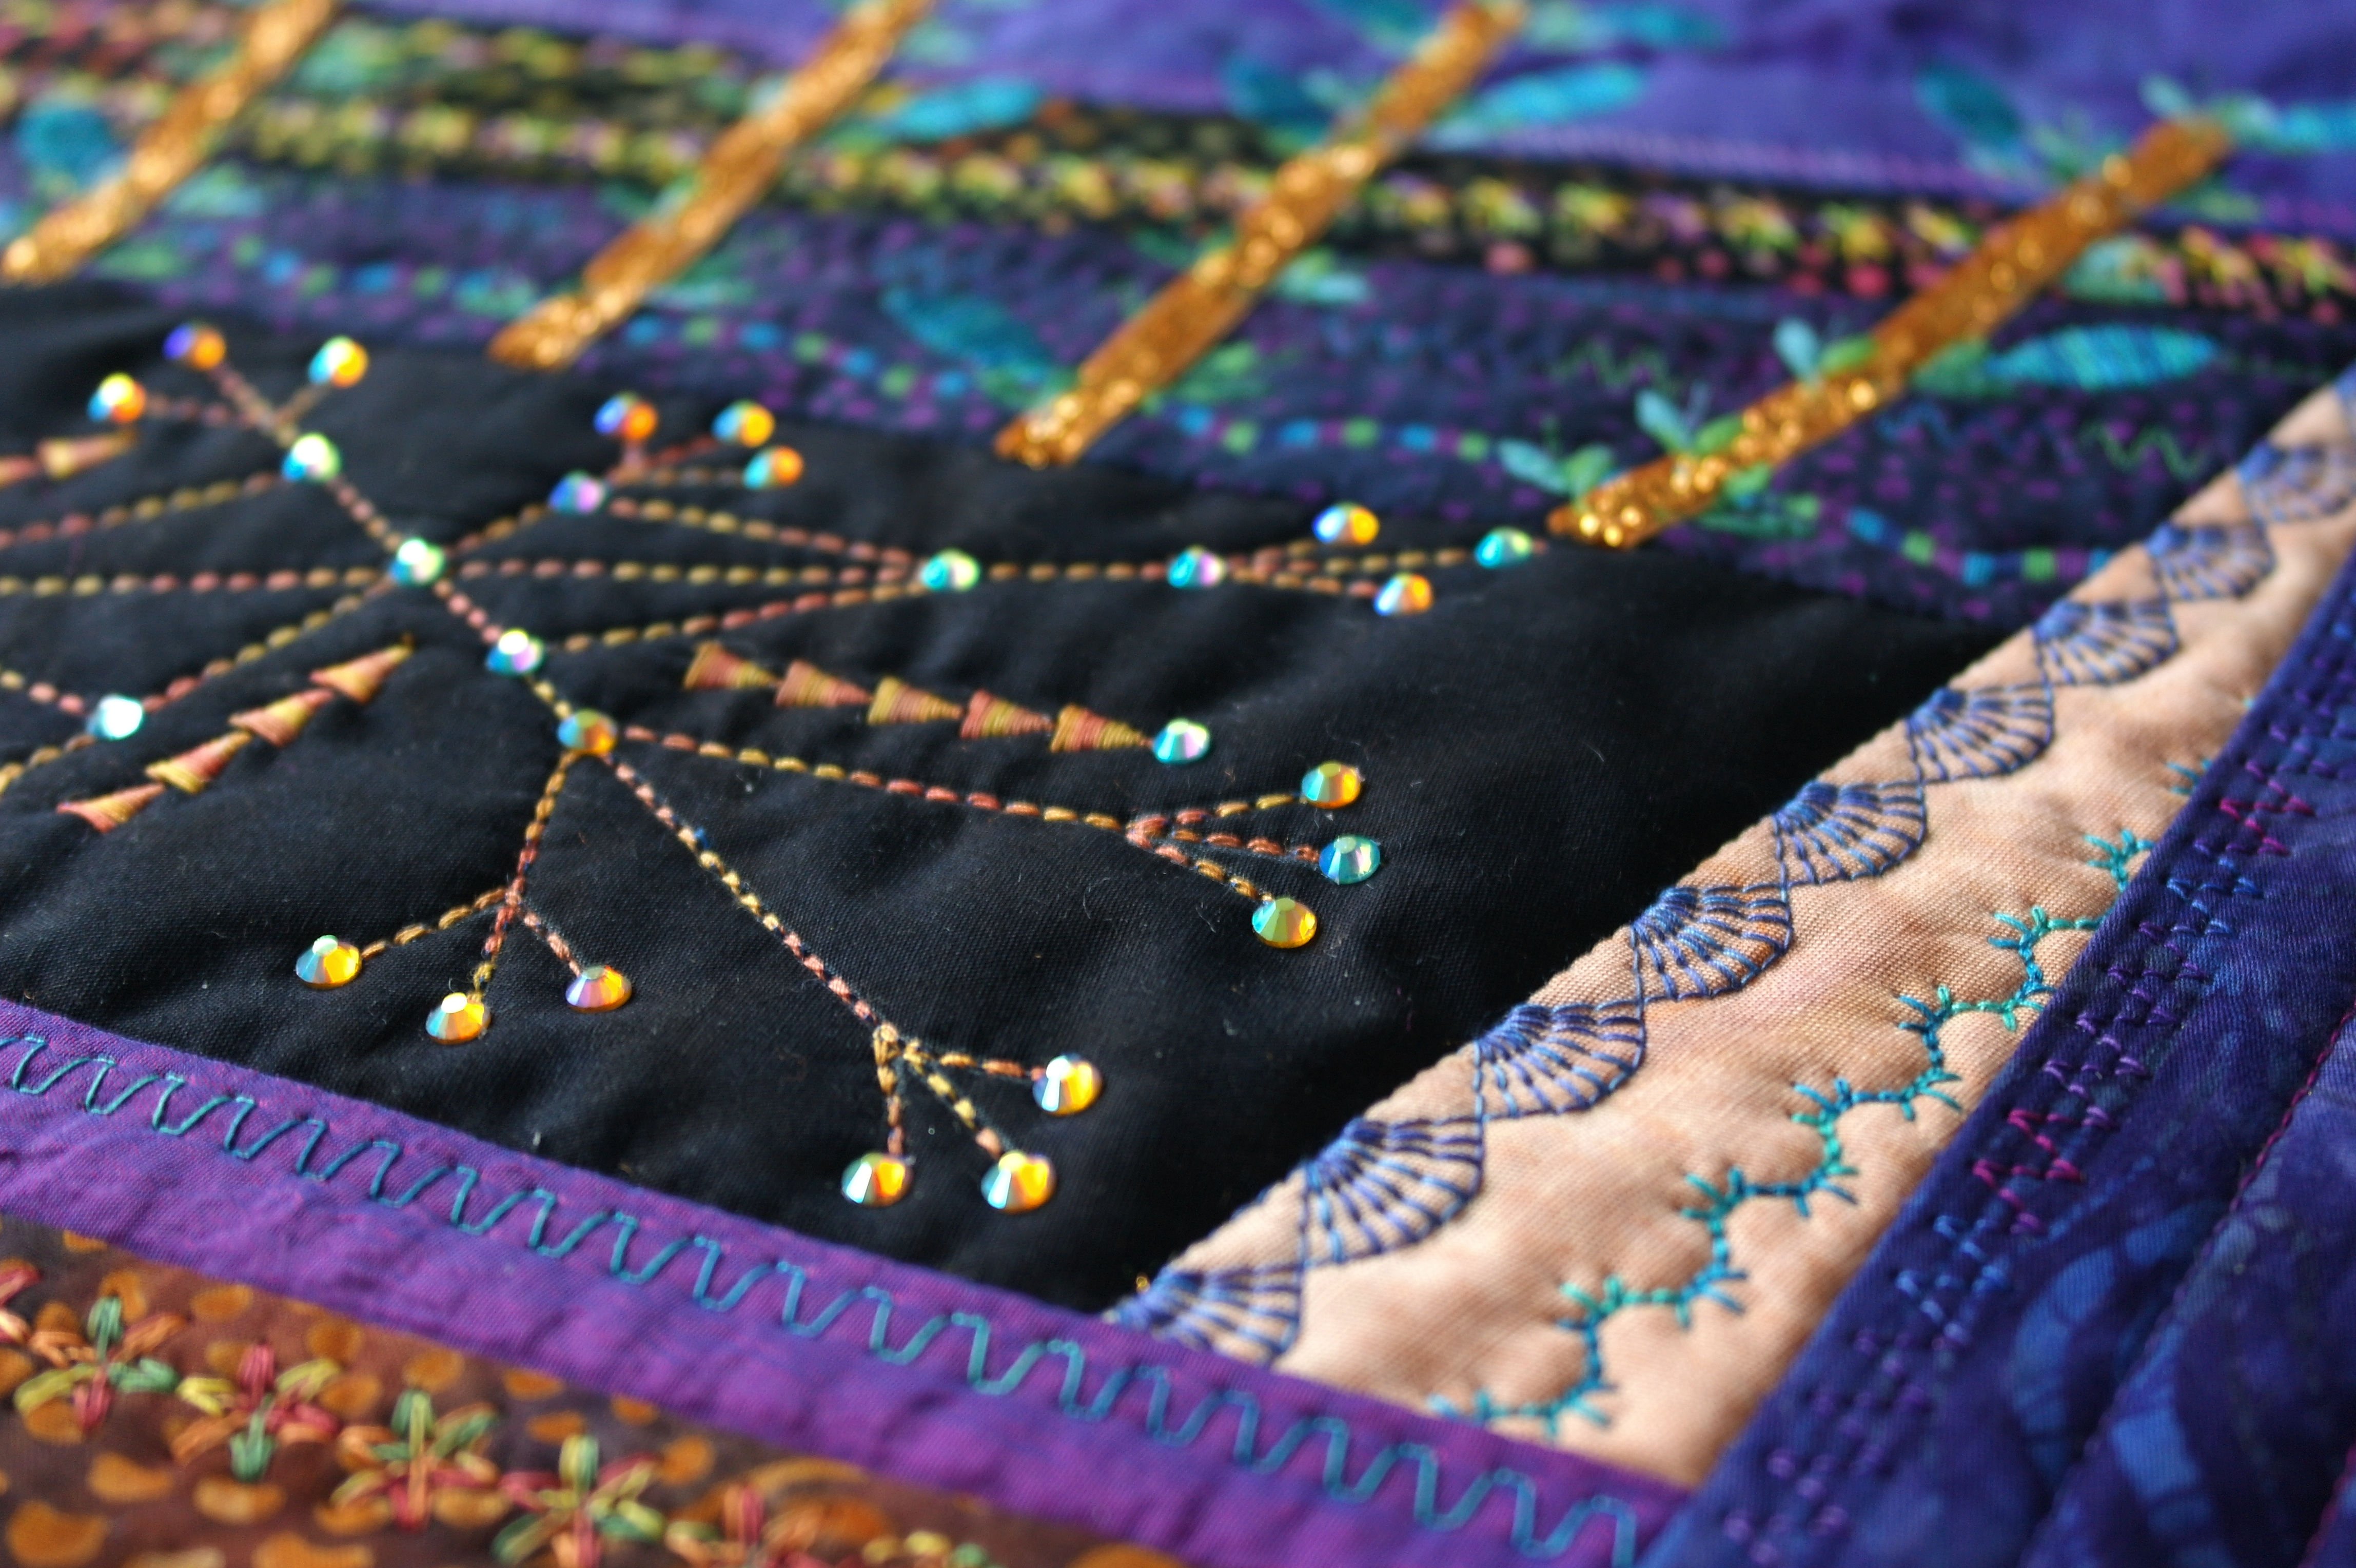
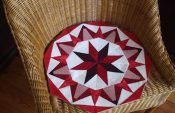
And of course the Hotfix stones are glued onto the Crystal in the center,
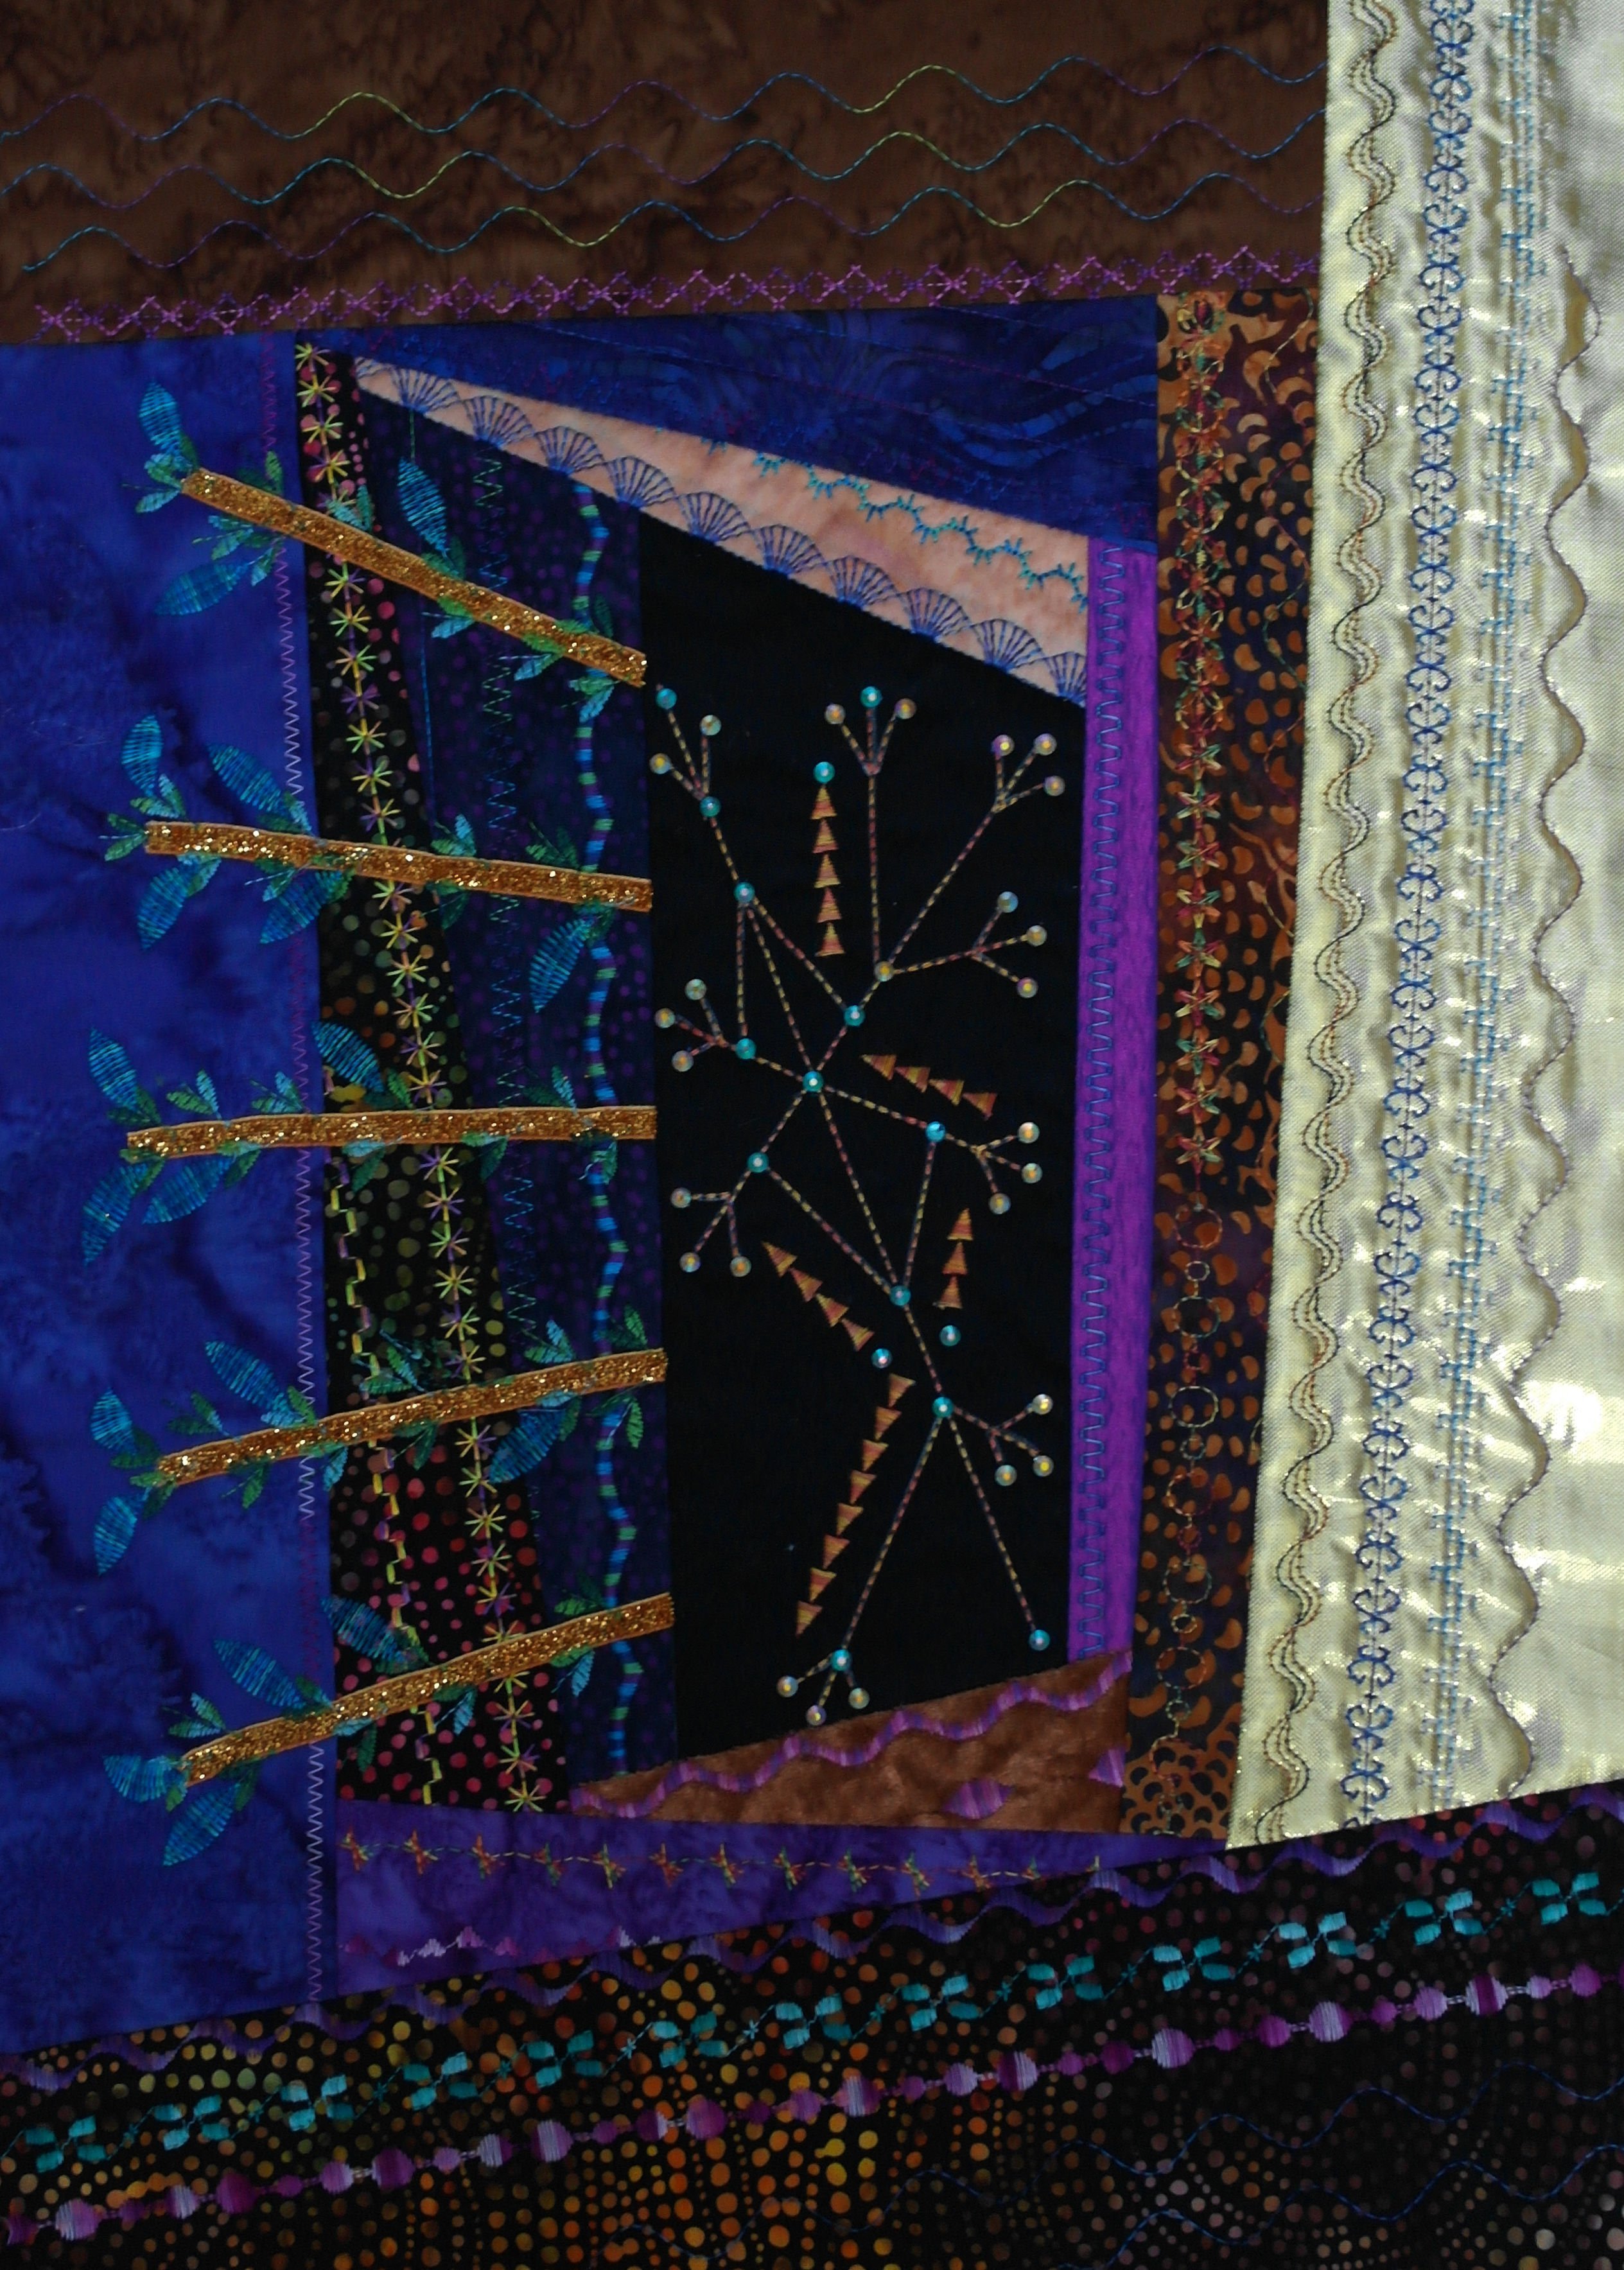
so my block 12 is ready. To delay finishing and assembly of this Crazy quilt, gives you time to celebrate the Holidays. Until January 15 2019, when you can see how all is finished.
Happy Quilting and Happy Holidays!
Sylvia Kaptein
Sylvia’s Art Quilts Studio
0 Responses