 BERNINA Corporate Blog -
Fake snake for Christmas!
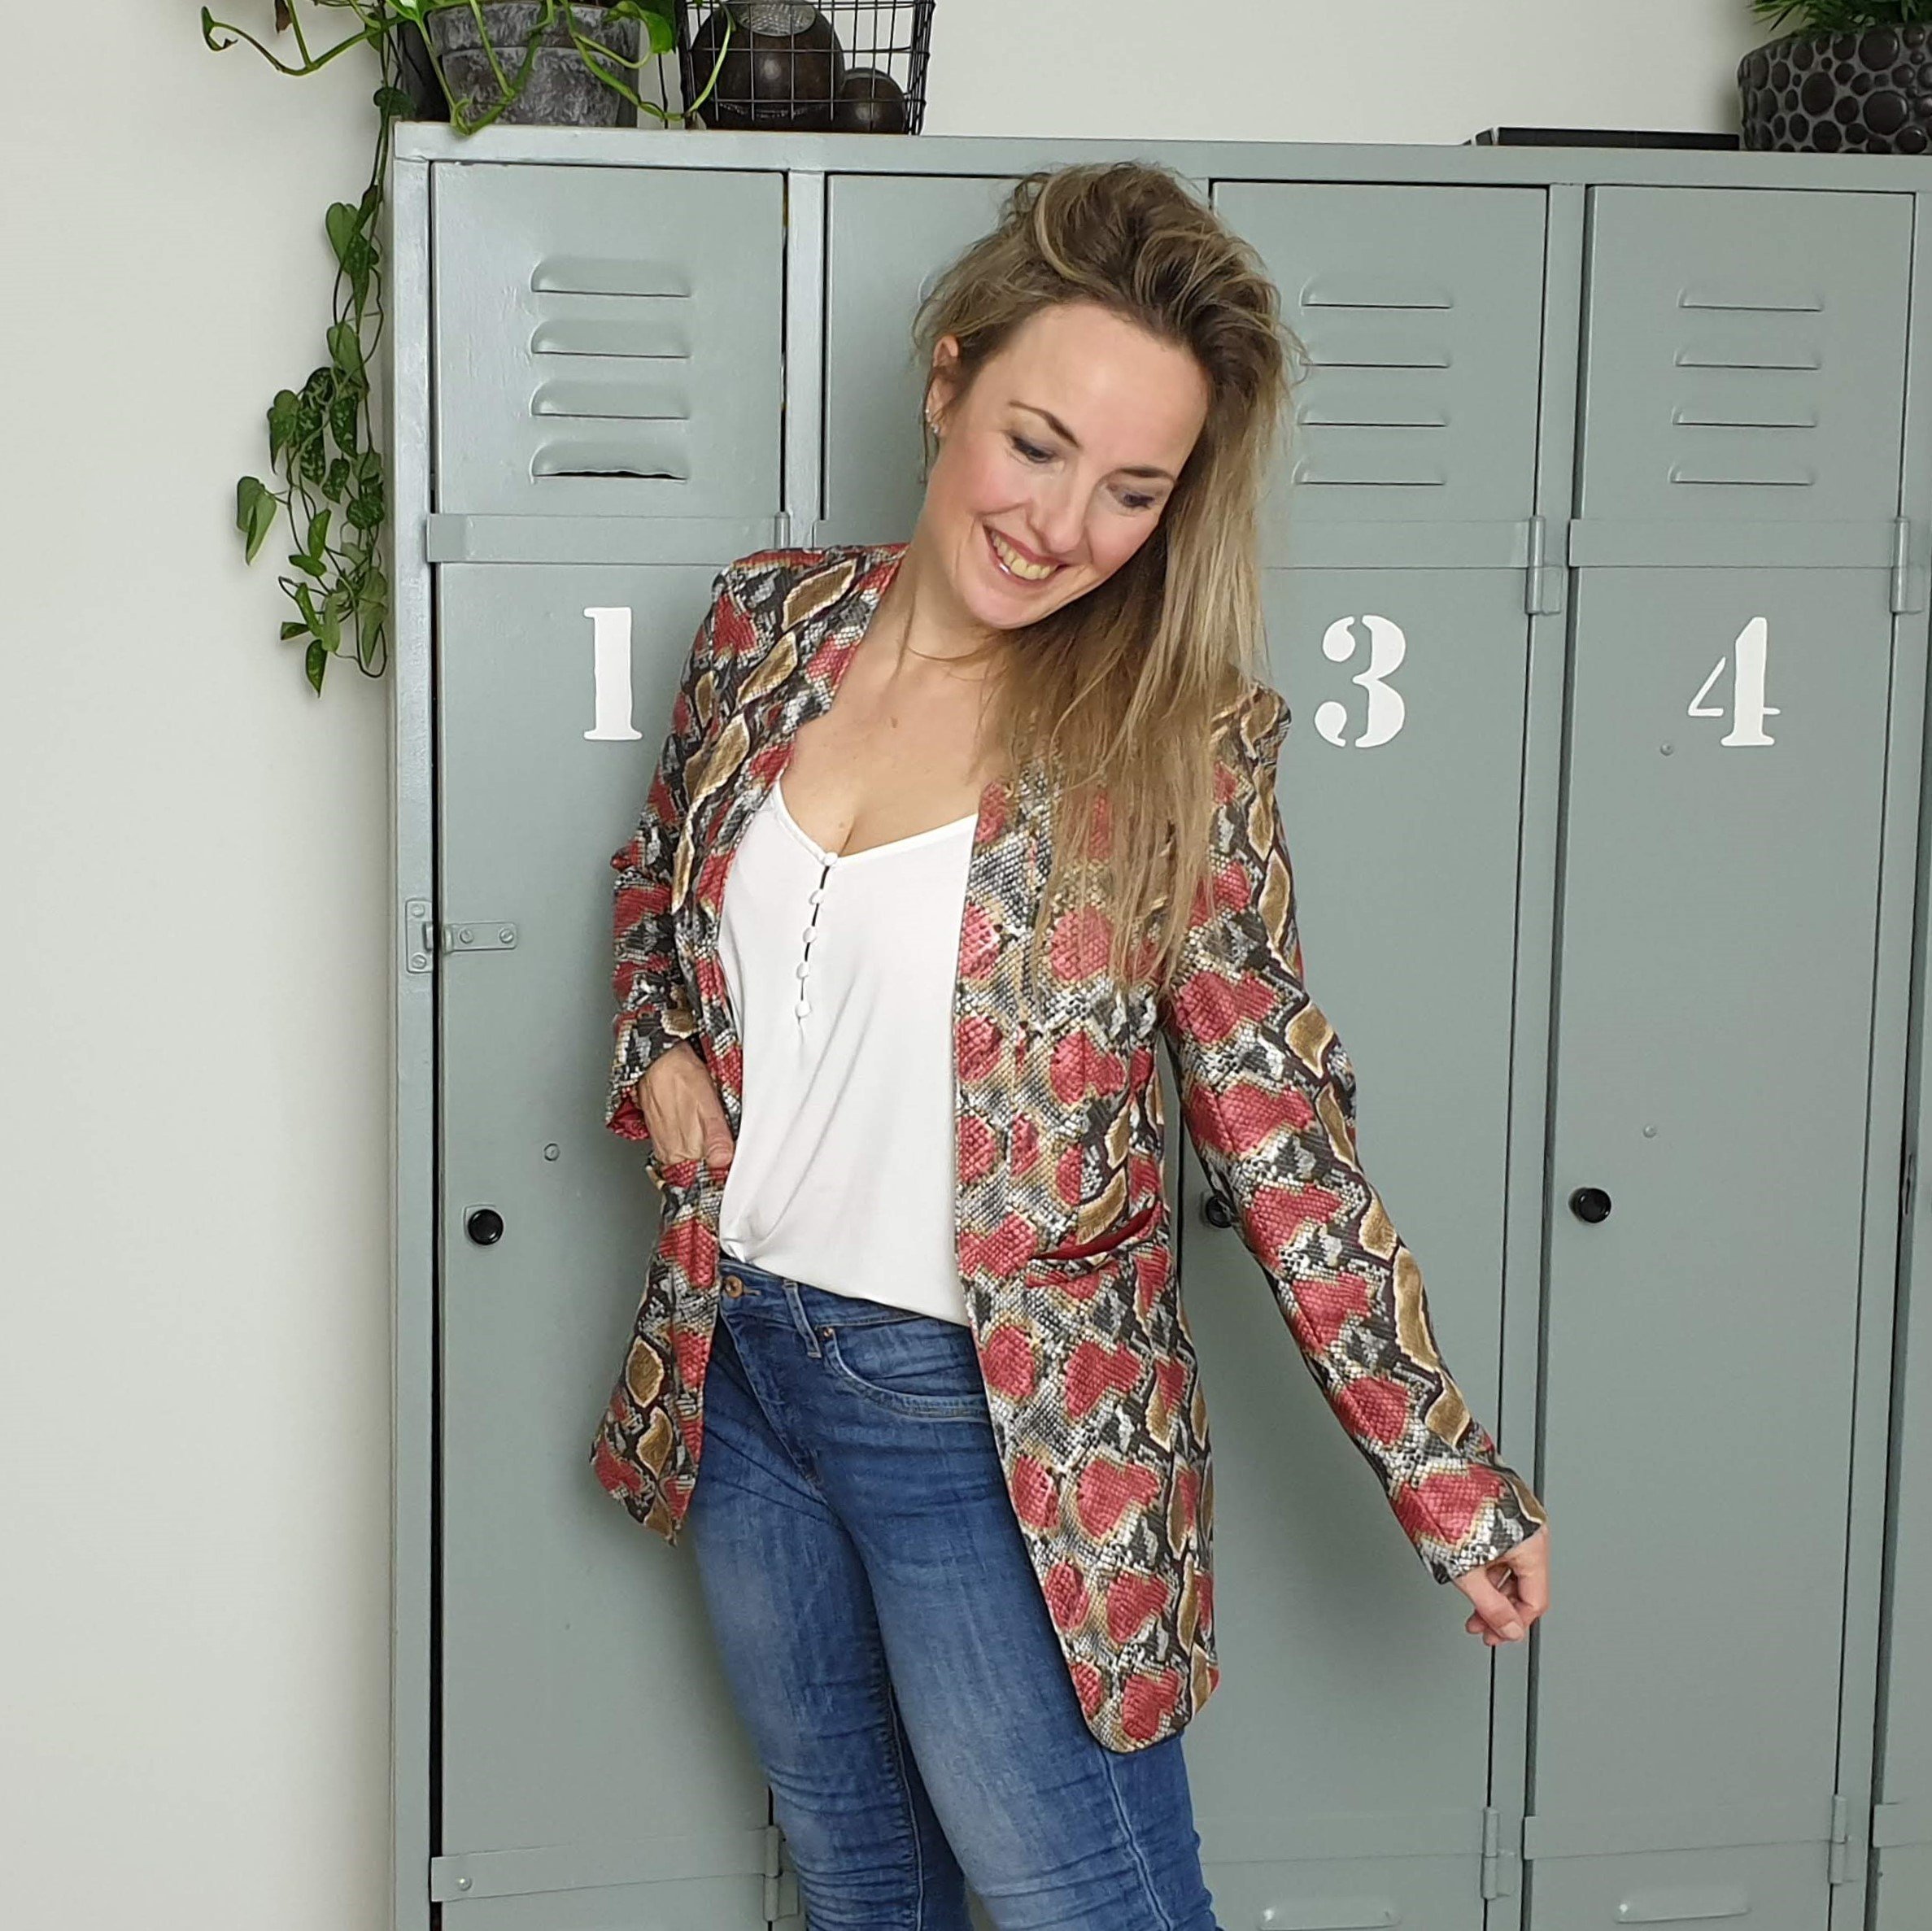
Is a fake snake leather blazer suitable for Christmas? I think so! Especially if it is combined with a little red dress. I didn’t think of this combination beforehand though…just styled it by doing.
Working with fake leather can sometimes be a bit of a challenge. In this blogpost I’ll share some tips. Like which presser foot and sewing needle I used, why I use masking tape and to pin or not to pin? …that’s the question.

This type of fabric has a sort of plastic top layer. Therefore stitching it can be difficult. It doesn’t slide well under a standard presser foot. Use a teflon foot and it is an easy sail. More on this foot further on…
Preventing holes
In sewing you might use a specific sewing needle, but universal ones are often good enough. Just try and see how the fabric reacts. I used the latter, it went well. Try by doing.
I recommend not to pin the pattern on to the fabric, use pattern weights or masking tape. I used my assortiment of pattern weights. Well in fact I don’t own actual pattern weights, but these do the trick too.
Note: You can pin you pattern if your patten has the seam allowance included. Make sure you pin in the seam allowance.
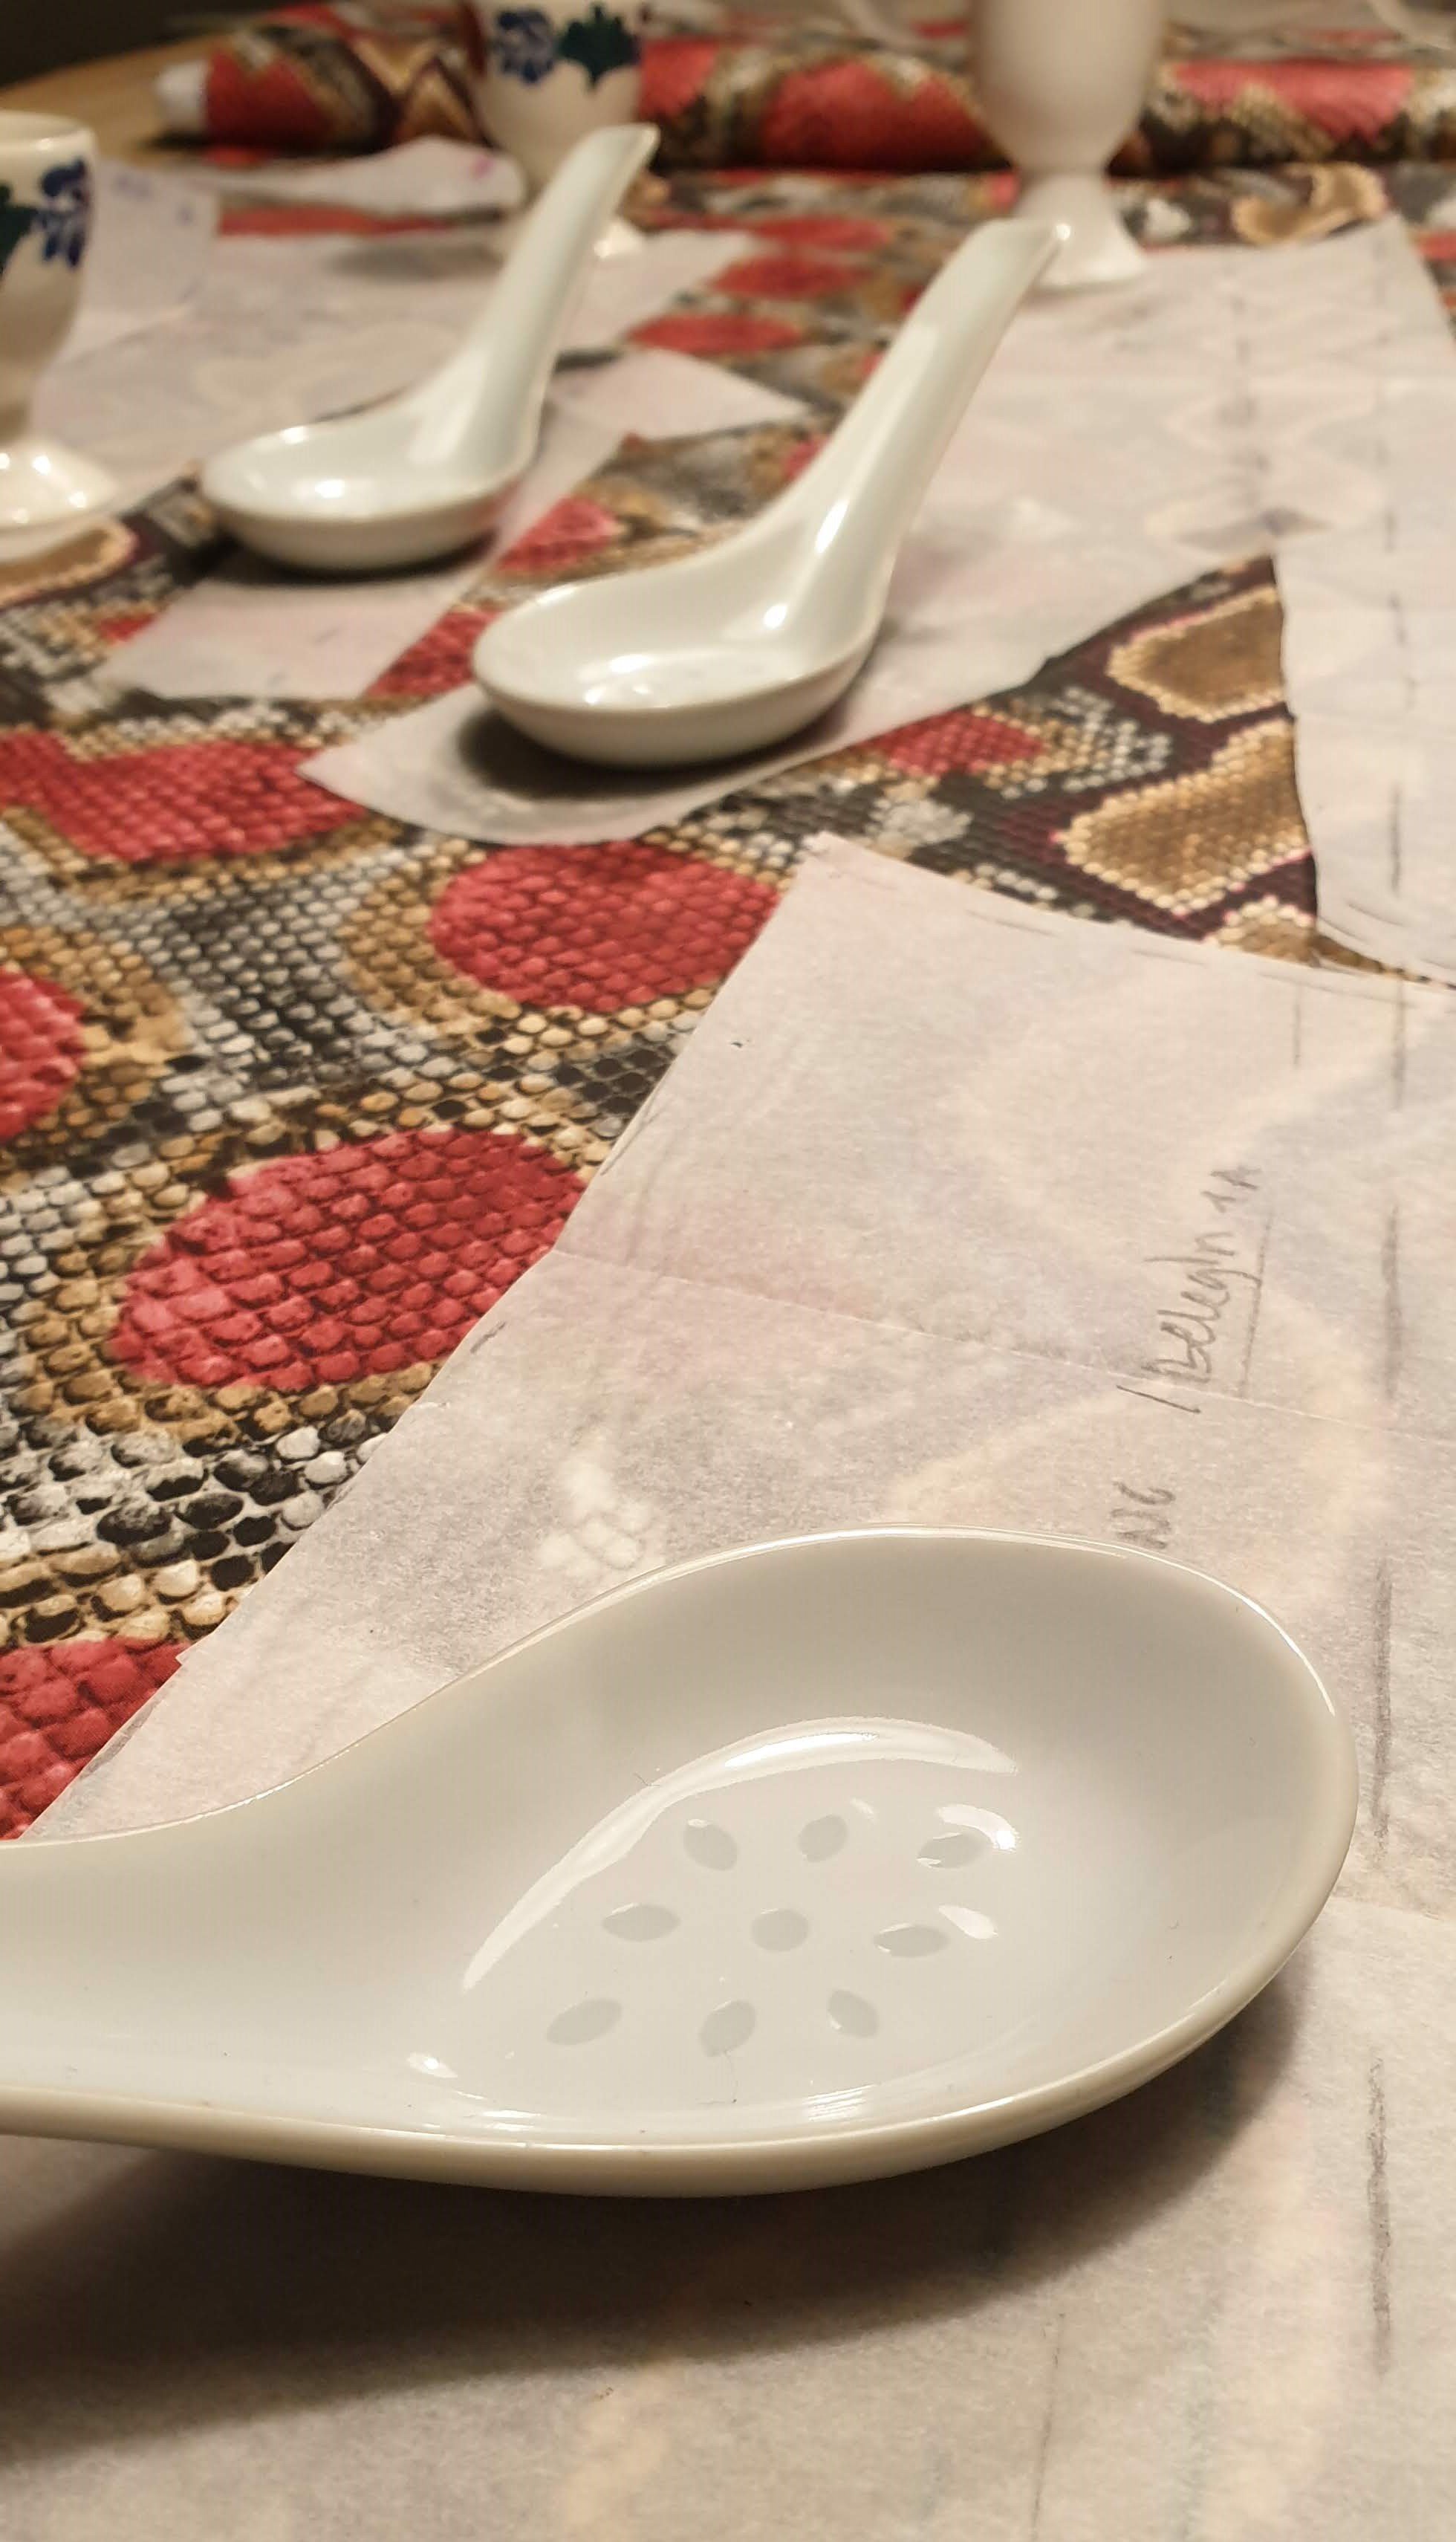
Duck spoons
Egg cups
I copied important pattern lines, such as the collar cut-out, using a normal pen and outlined it on the inside of the fabric.
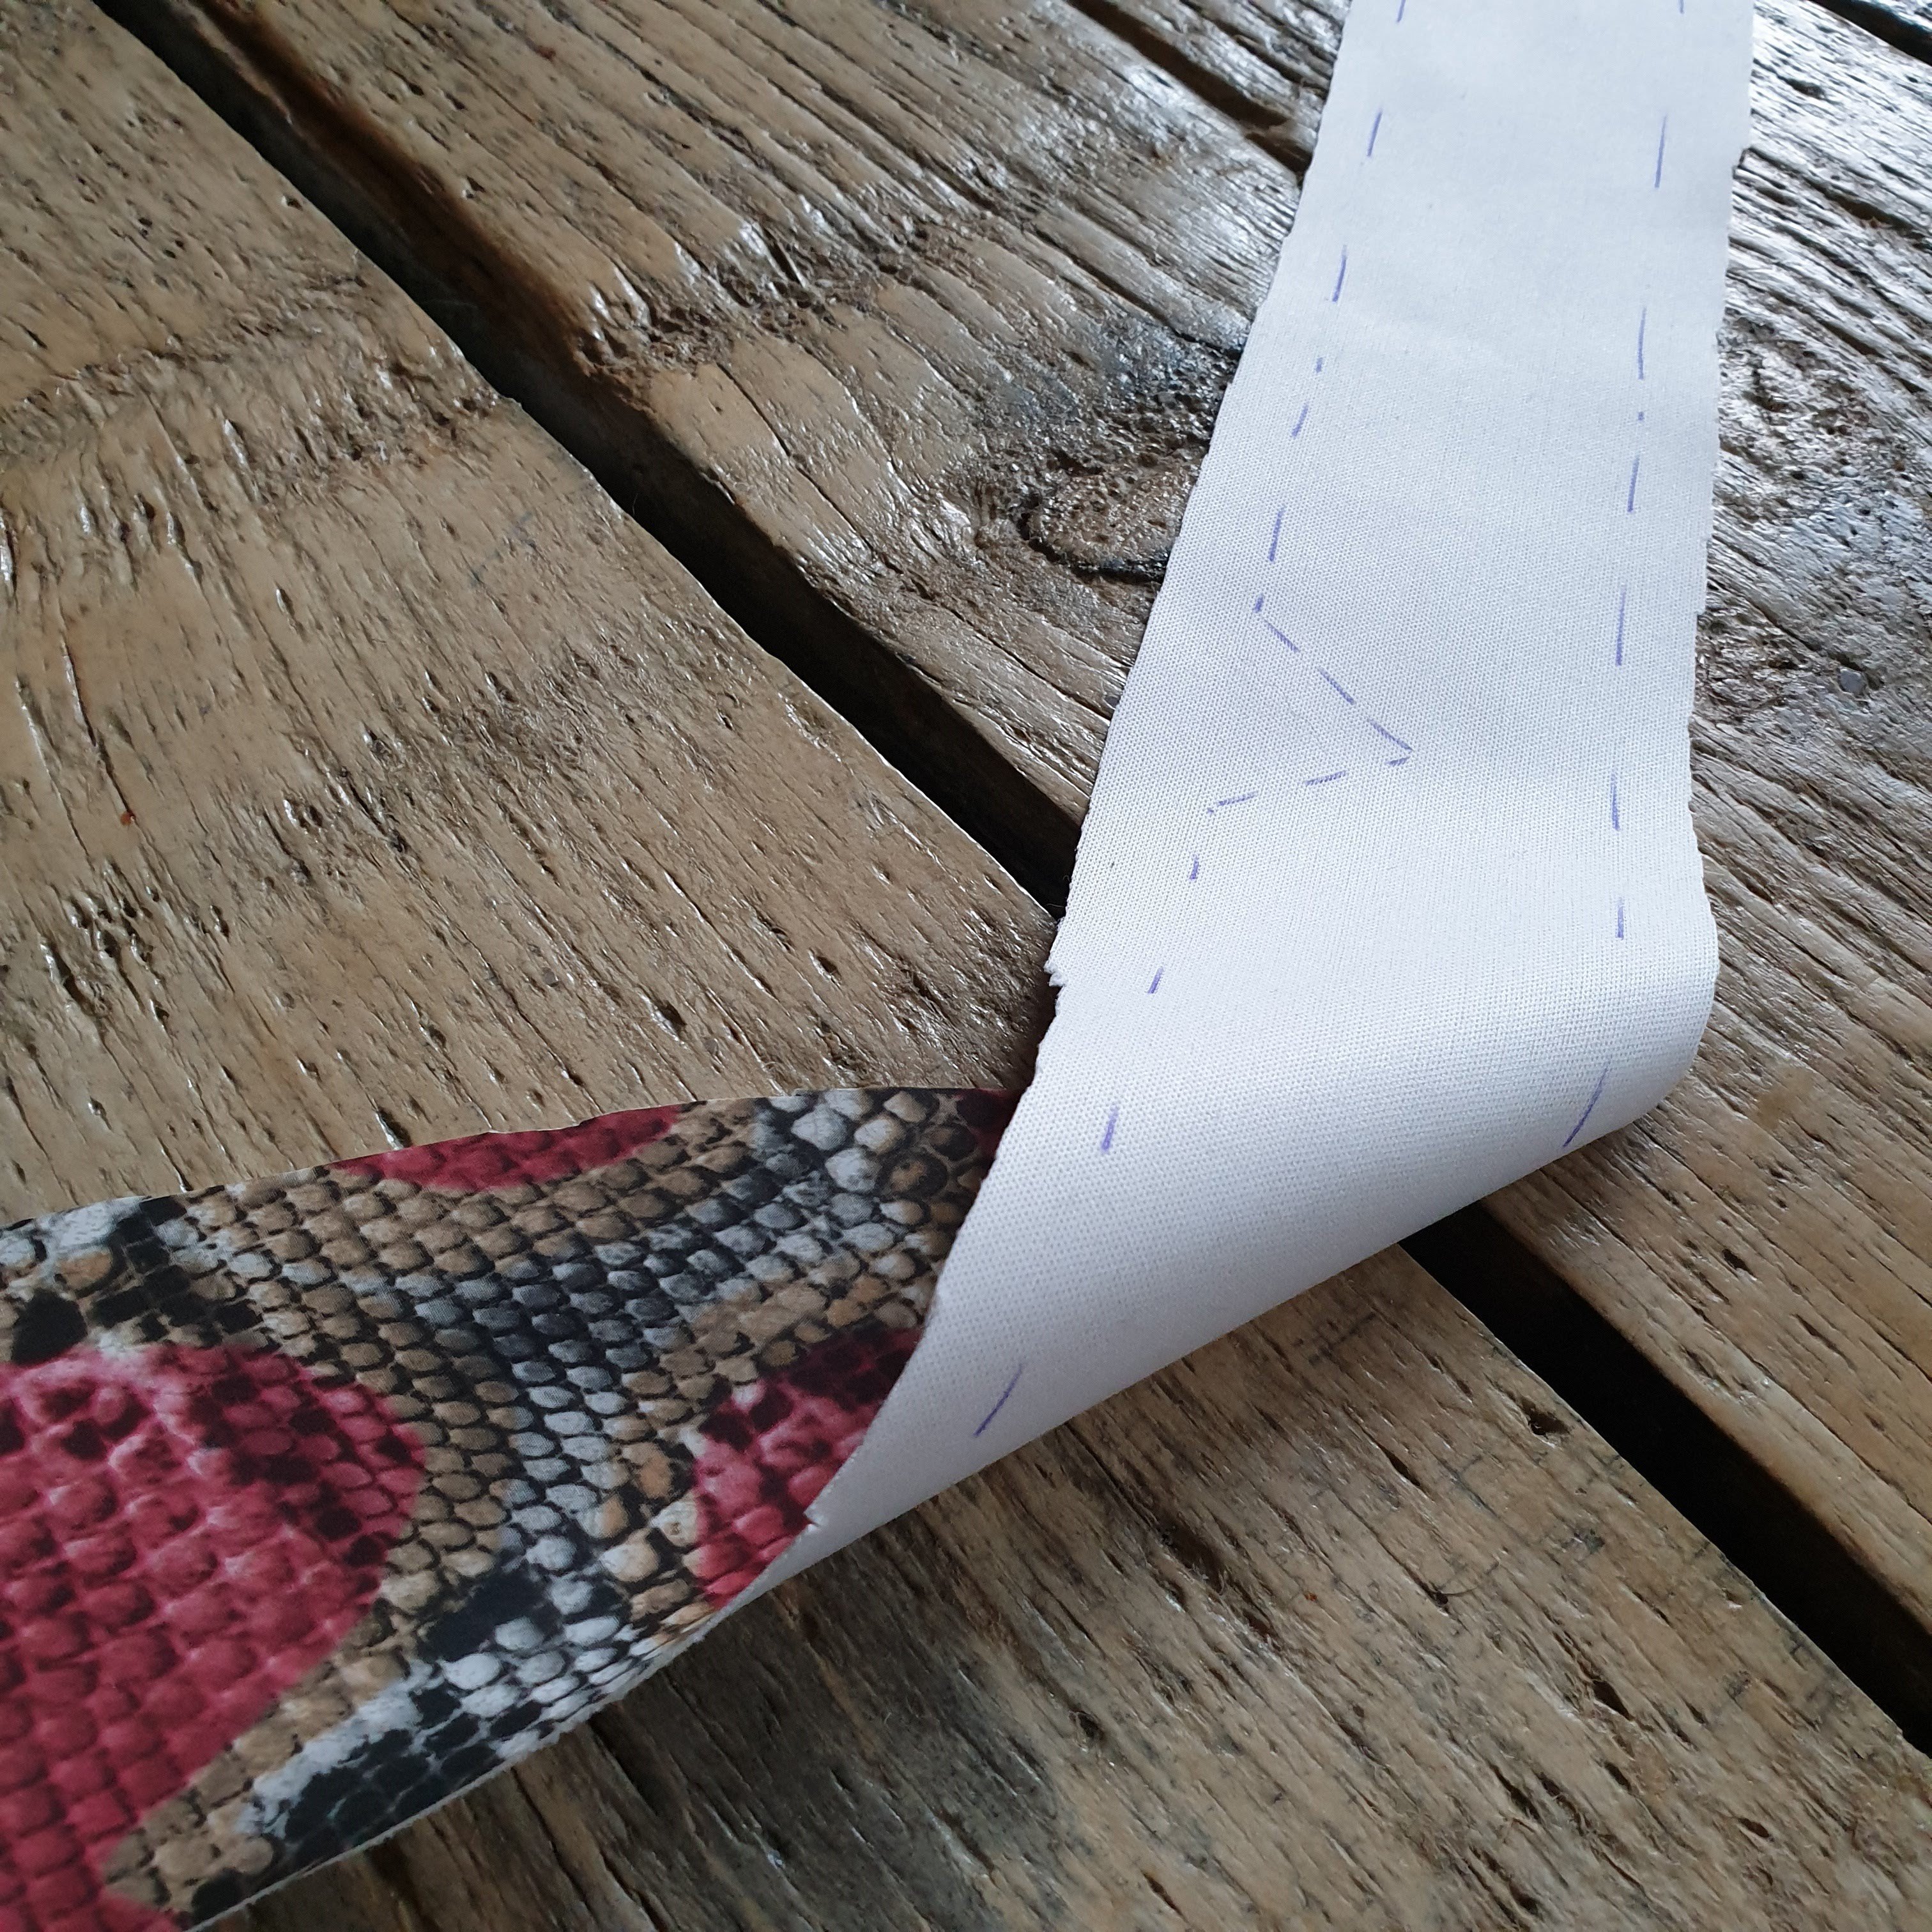
The welted pocket I did mark with basting thread. I used long stitches, so I made as few holes as possible.
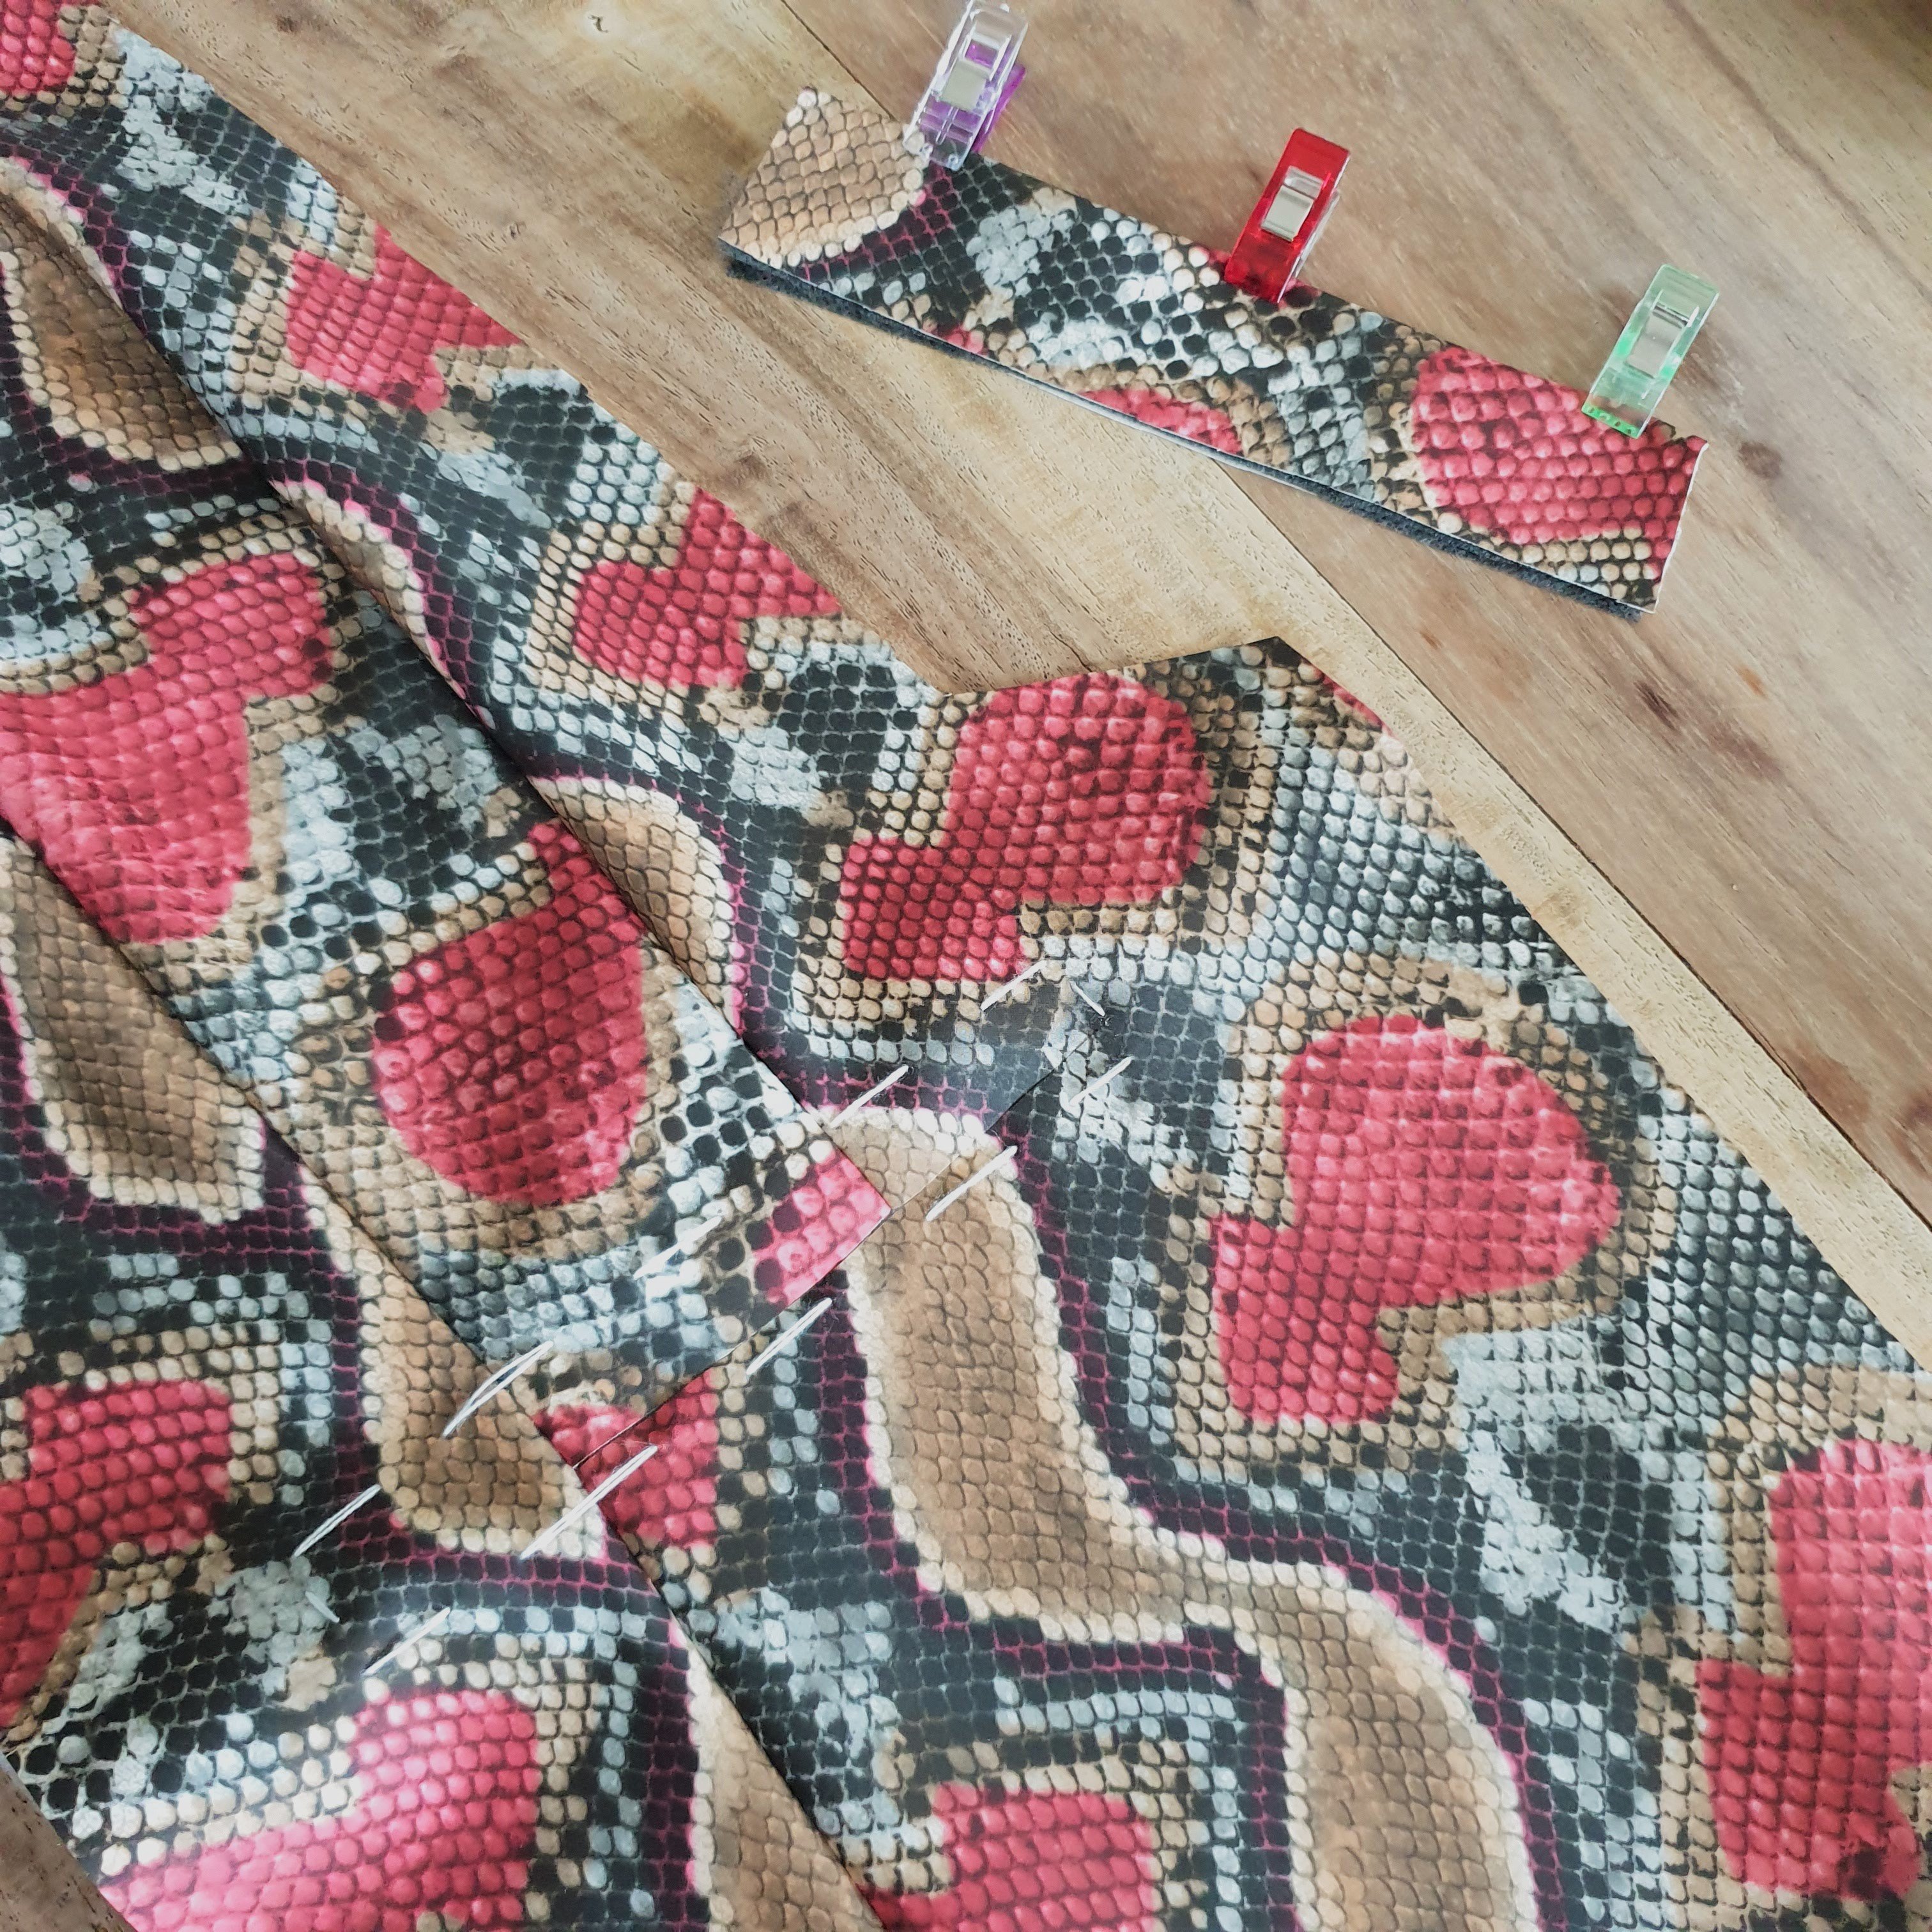
For holding the fabric together I used wonder clips or pinned it in the seam allowance like I did putting in the sleeves.

Teflon foot
For stitching I used teflon foot 52c. In fact this was my first time using this foot. It’s a relatively new foot for me. I’ve made fake leather pieces before and used some old school trics to make stitching easier. Like rubbing some candle wax on top of the fake leather or putting sheets of pattern paper on top. With this foot I can easily stitch any type of fake leather or other laminated fabric and don’t need those tricks anymore. Don’t wanna go back.
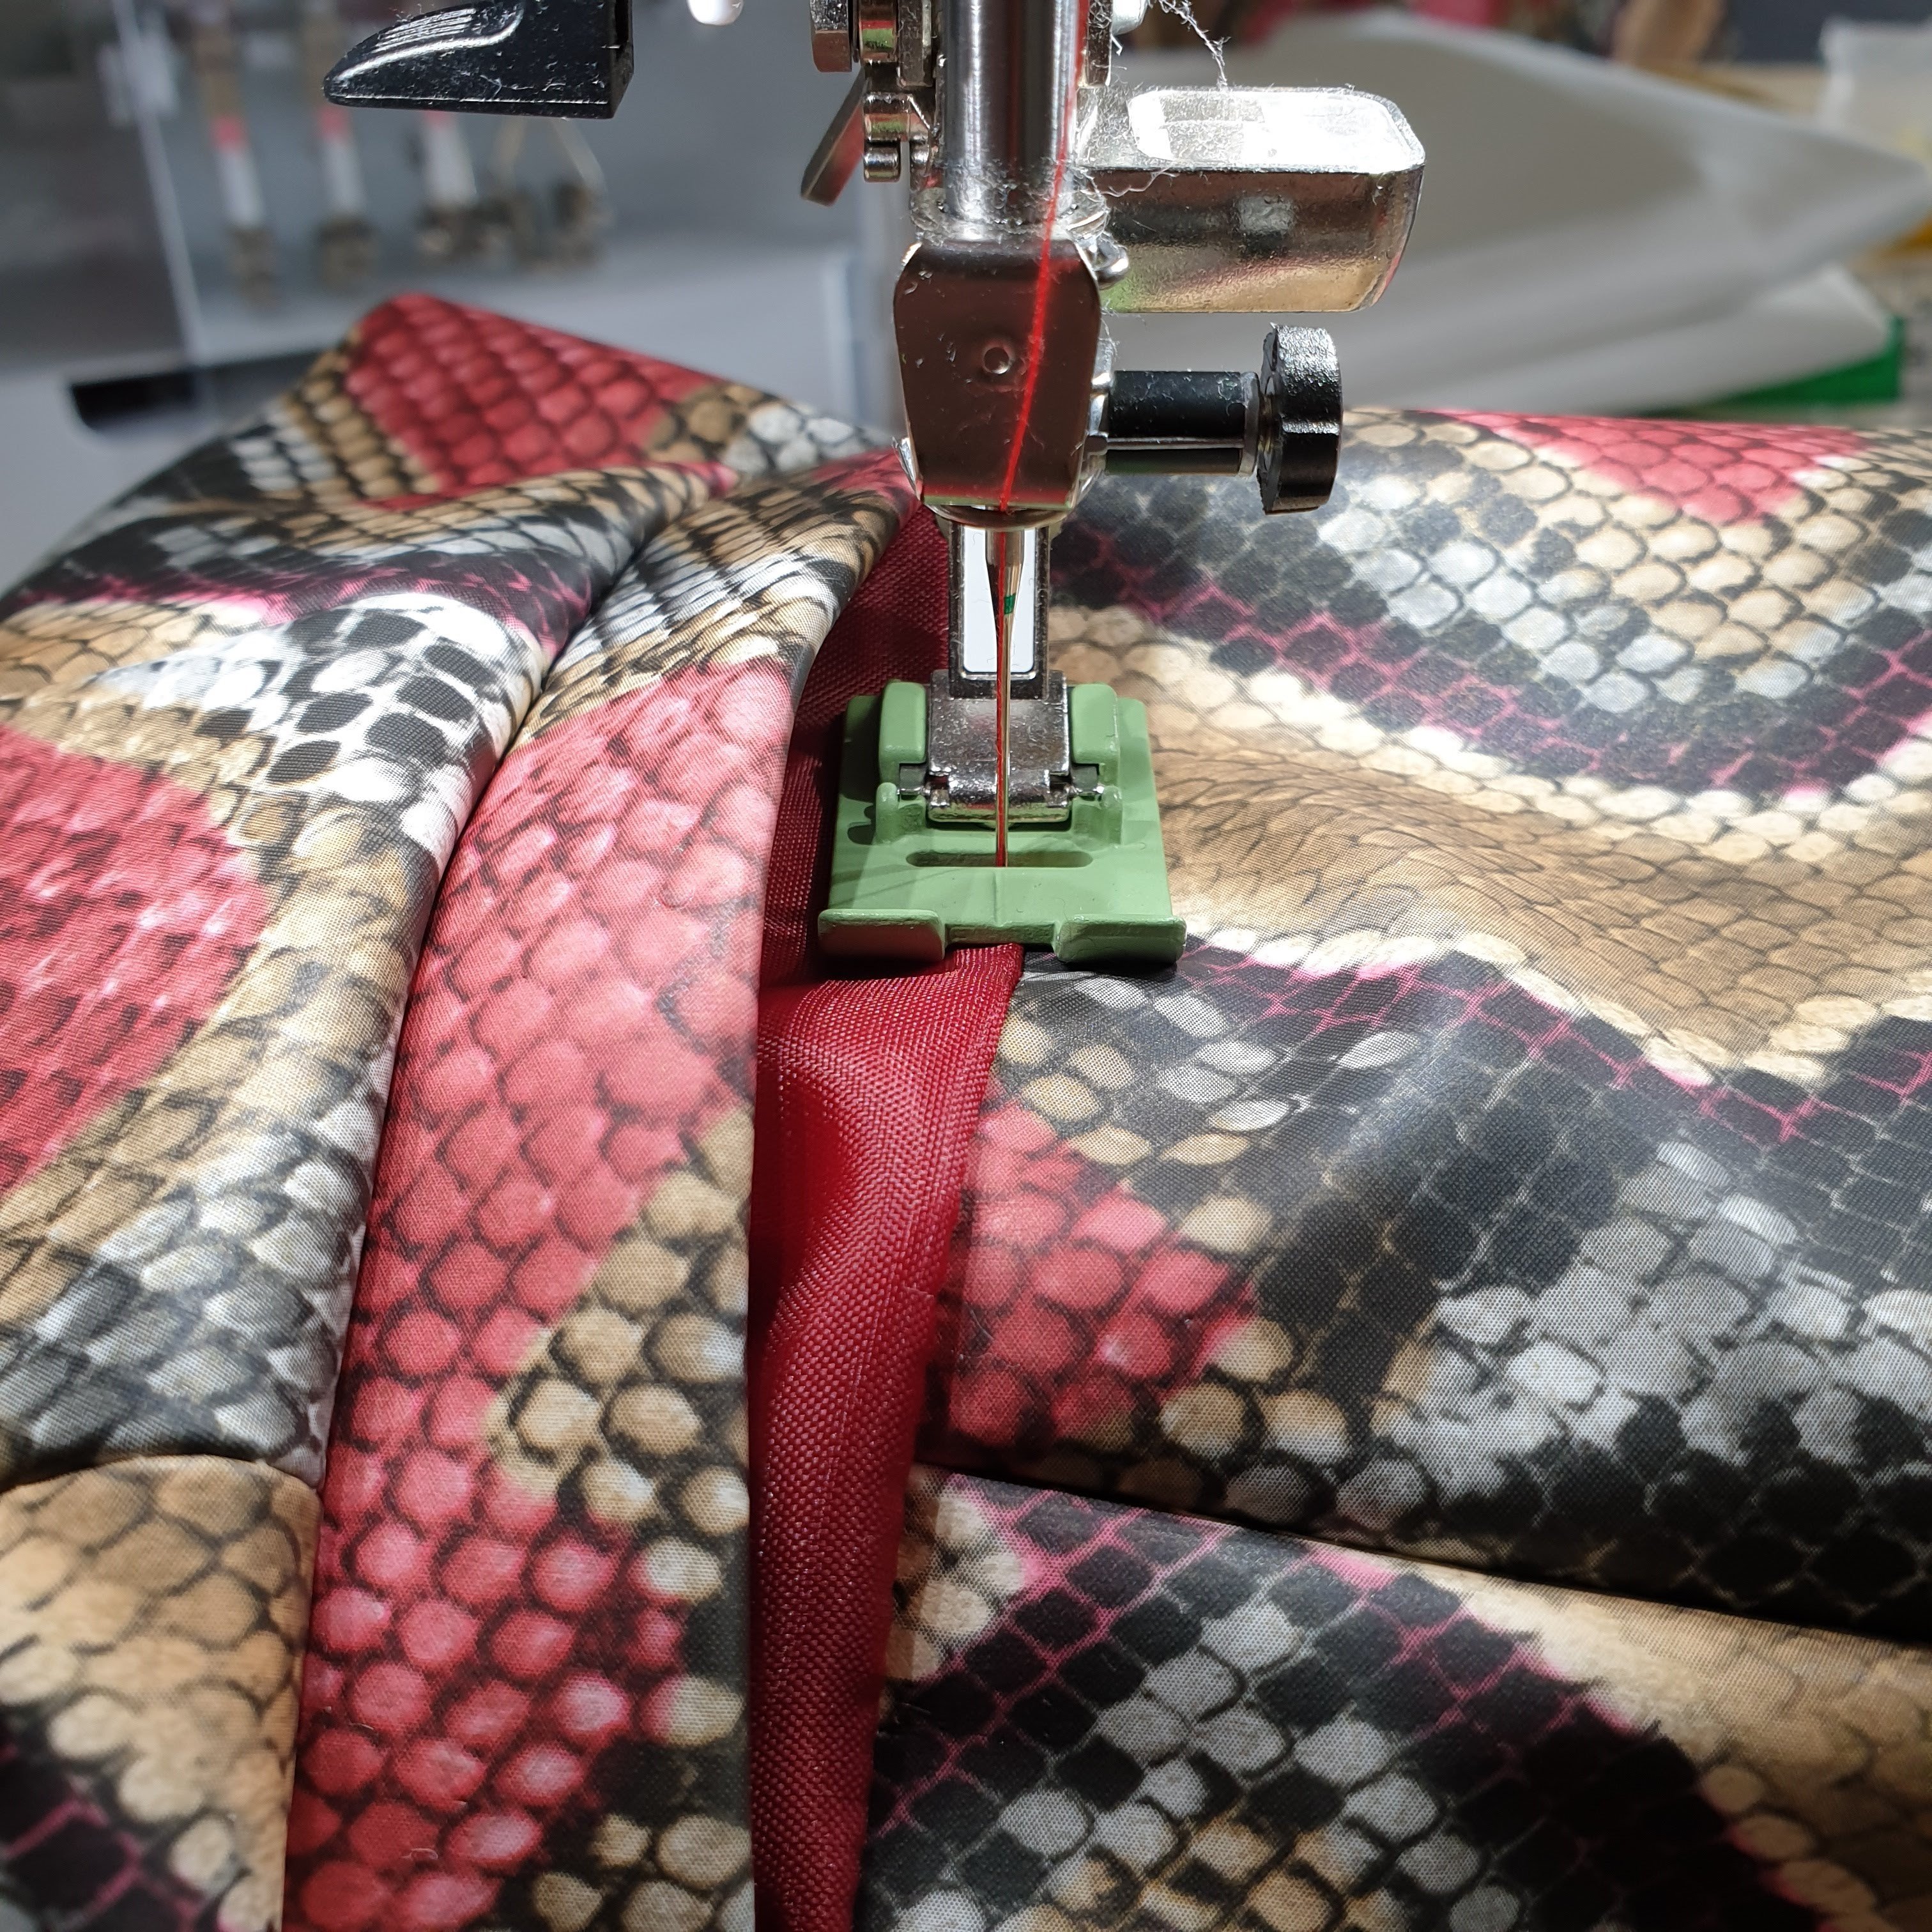
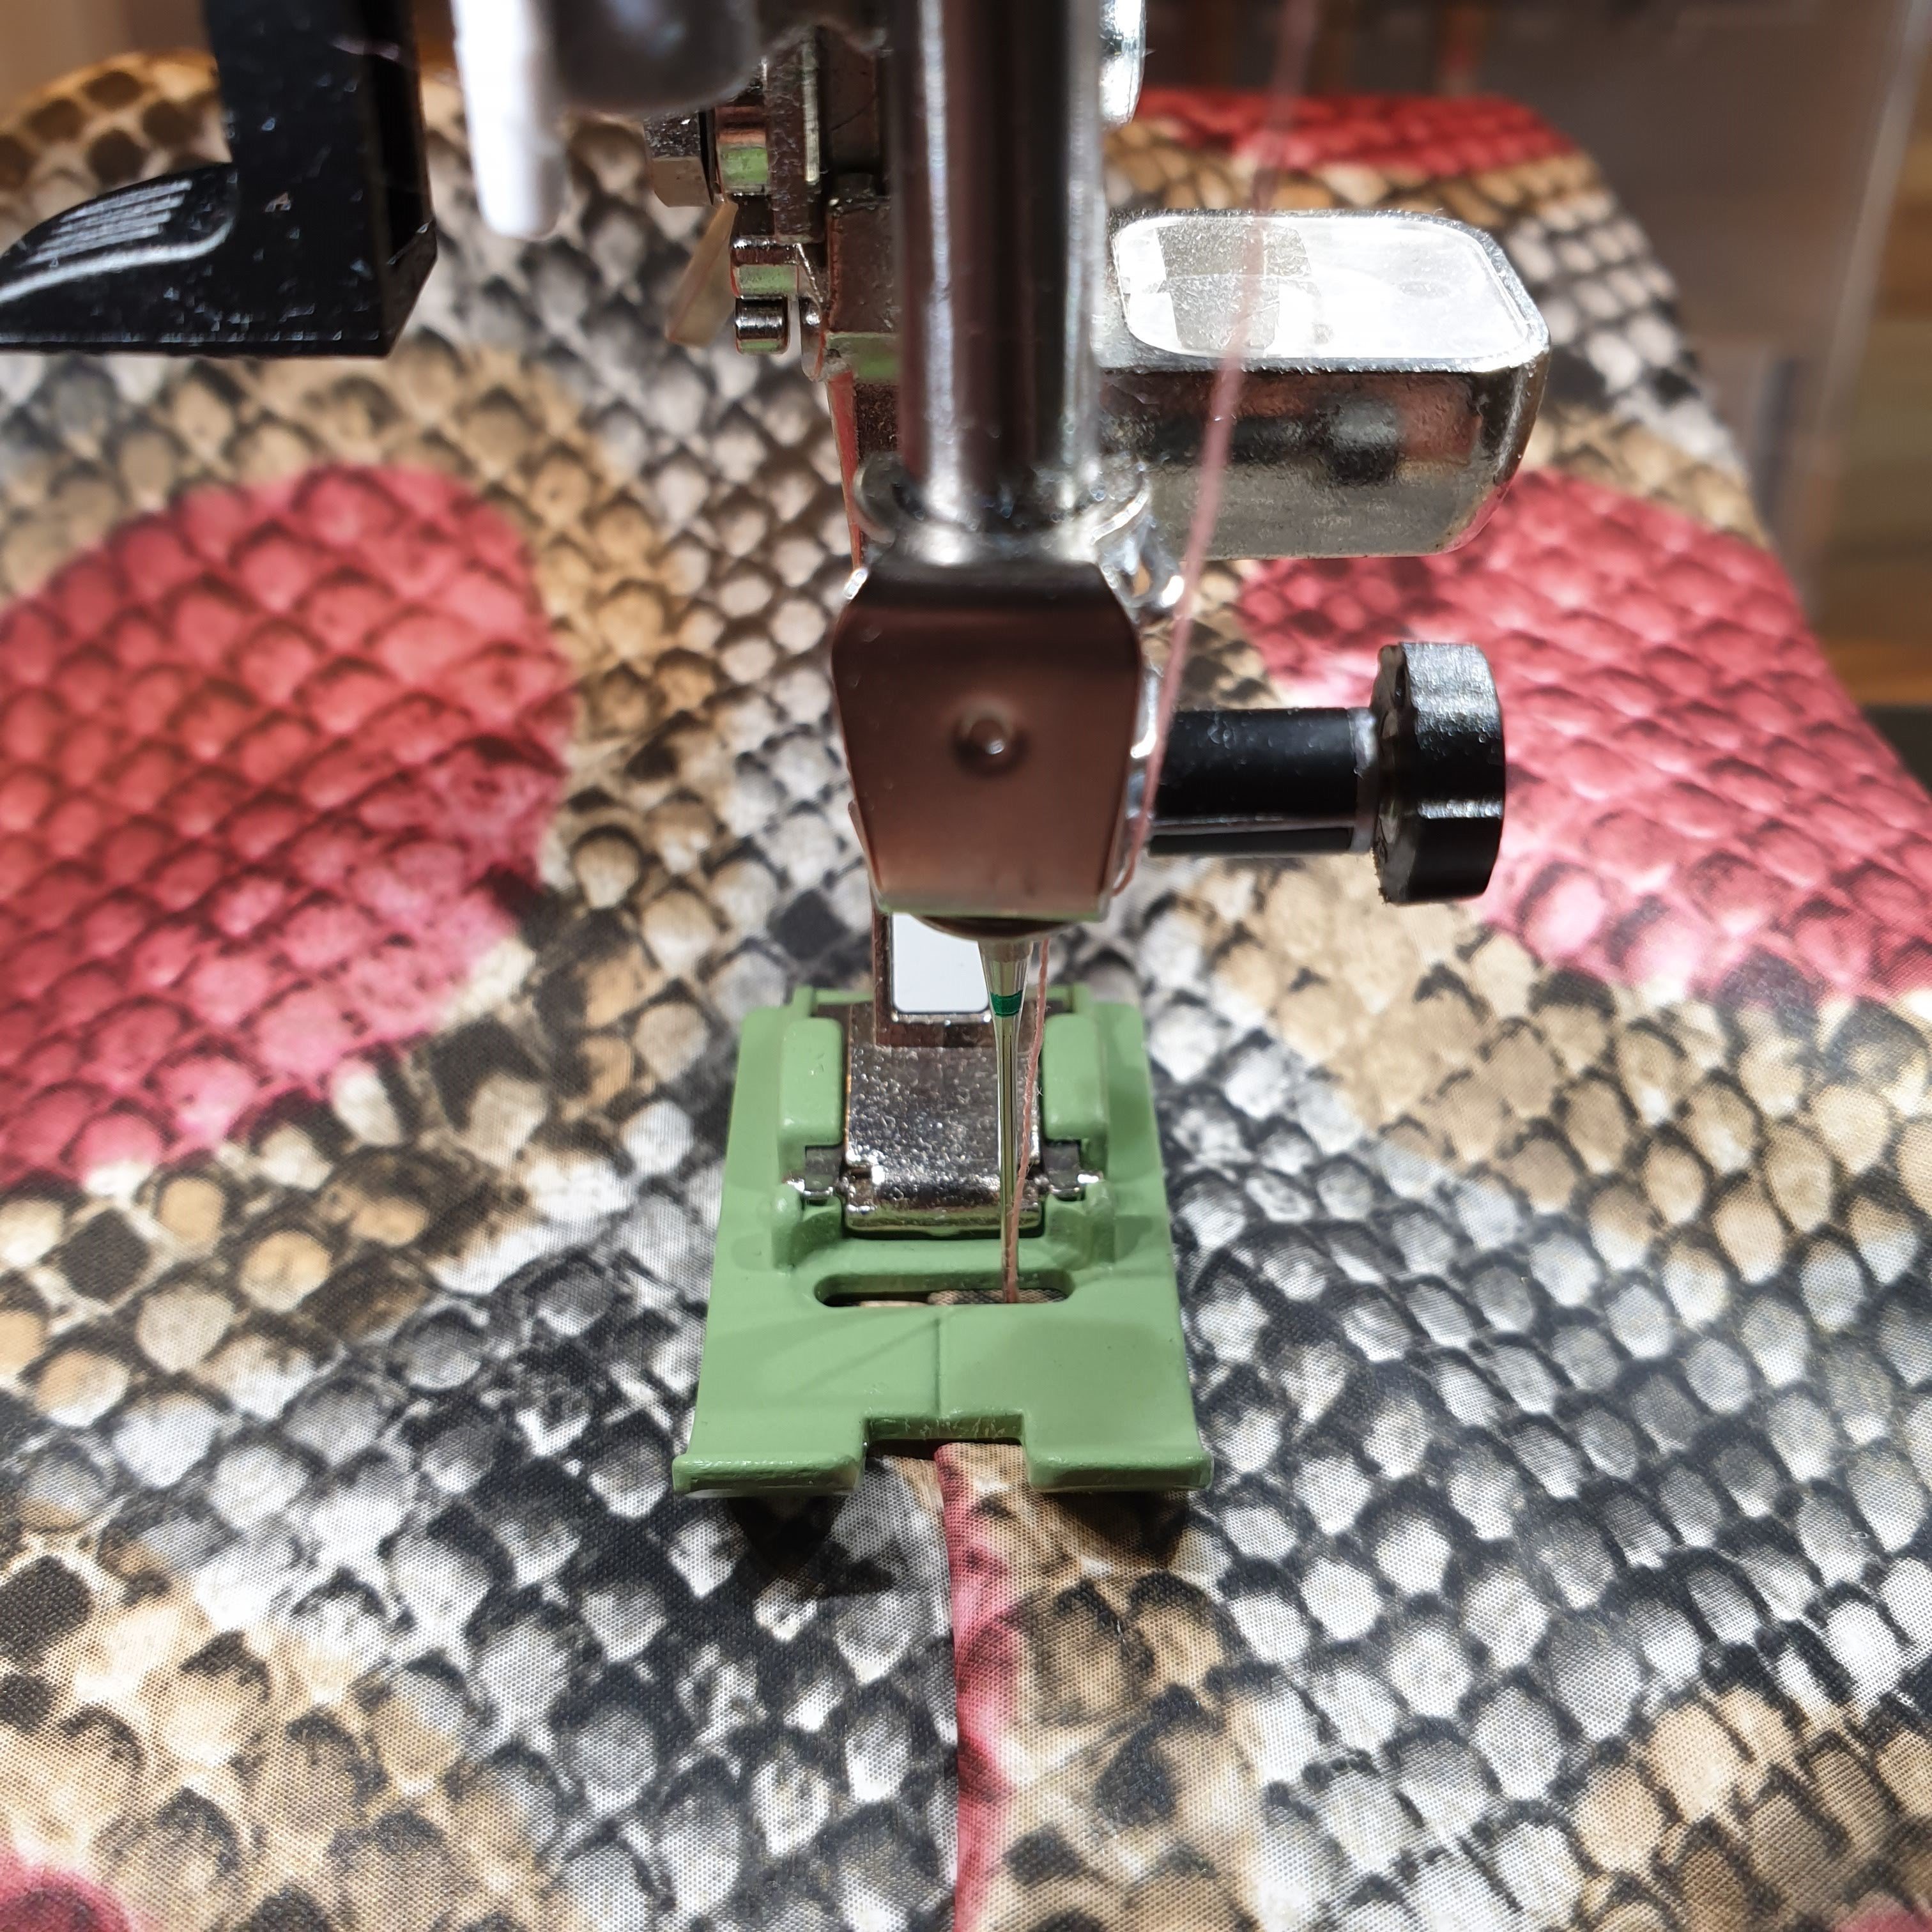
Straight stitching: Use the guide line in the middle to run over the stitching line, and put your needle off center
It is a perfect foot when topstitching over different fabrics like lining or a label. It all went really smooth.
In attaching the label I used another little trick, as mentioned before, namely masking tape. If you can’t pin it, stick it!
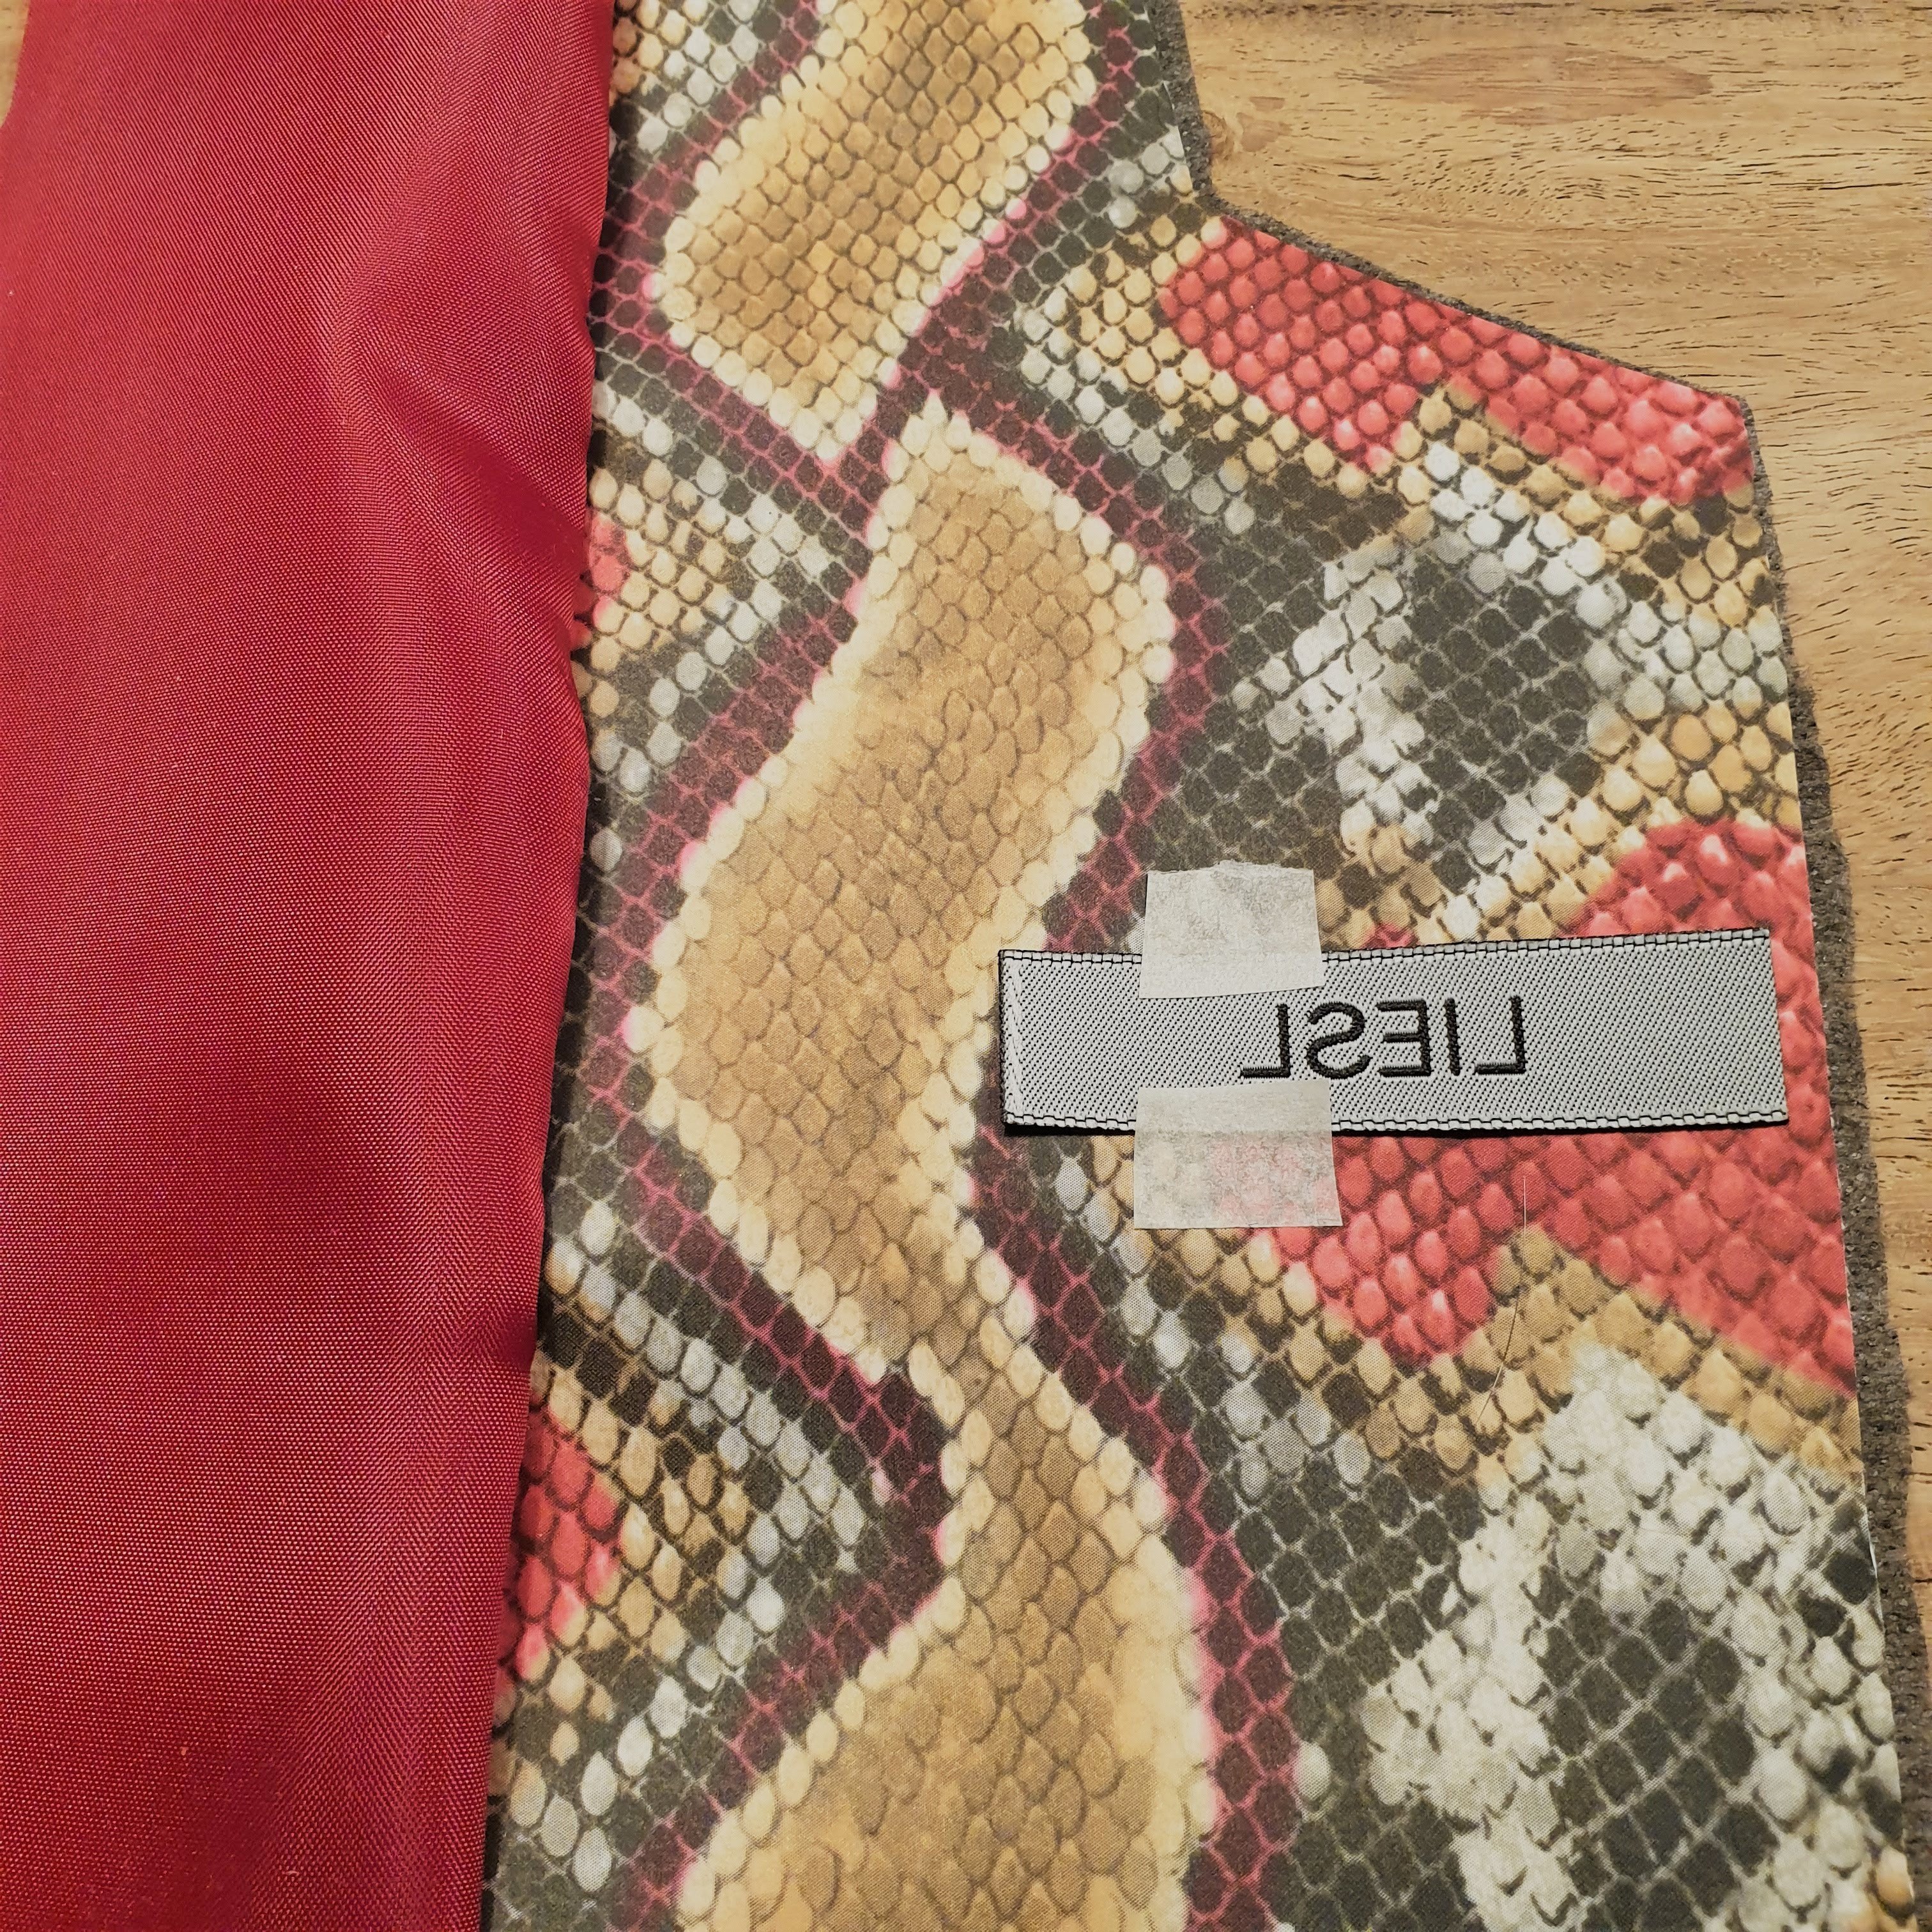
Stick it

Stitched it

Folded and stitched in between lining and facing
It’s all in the details.
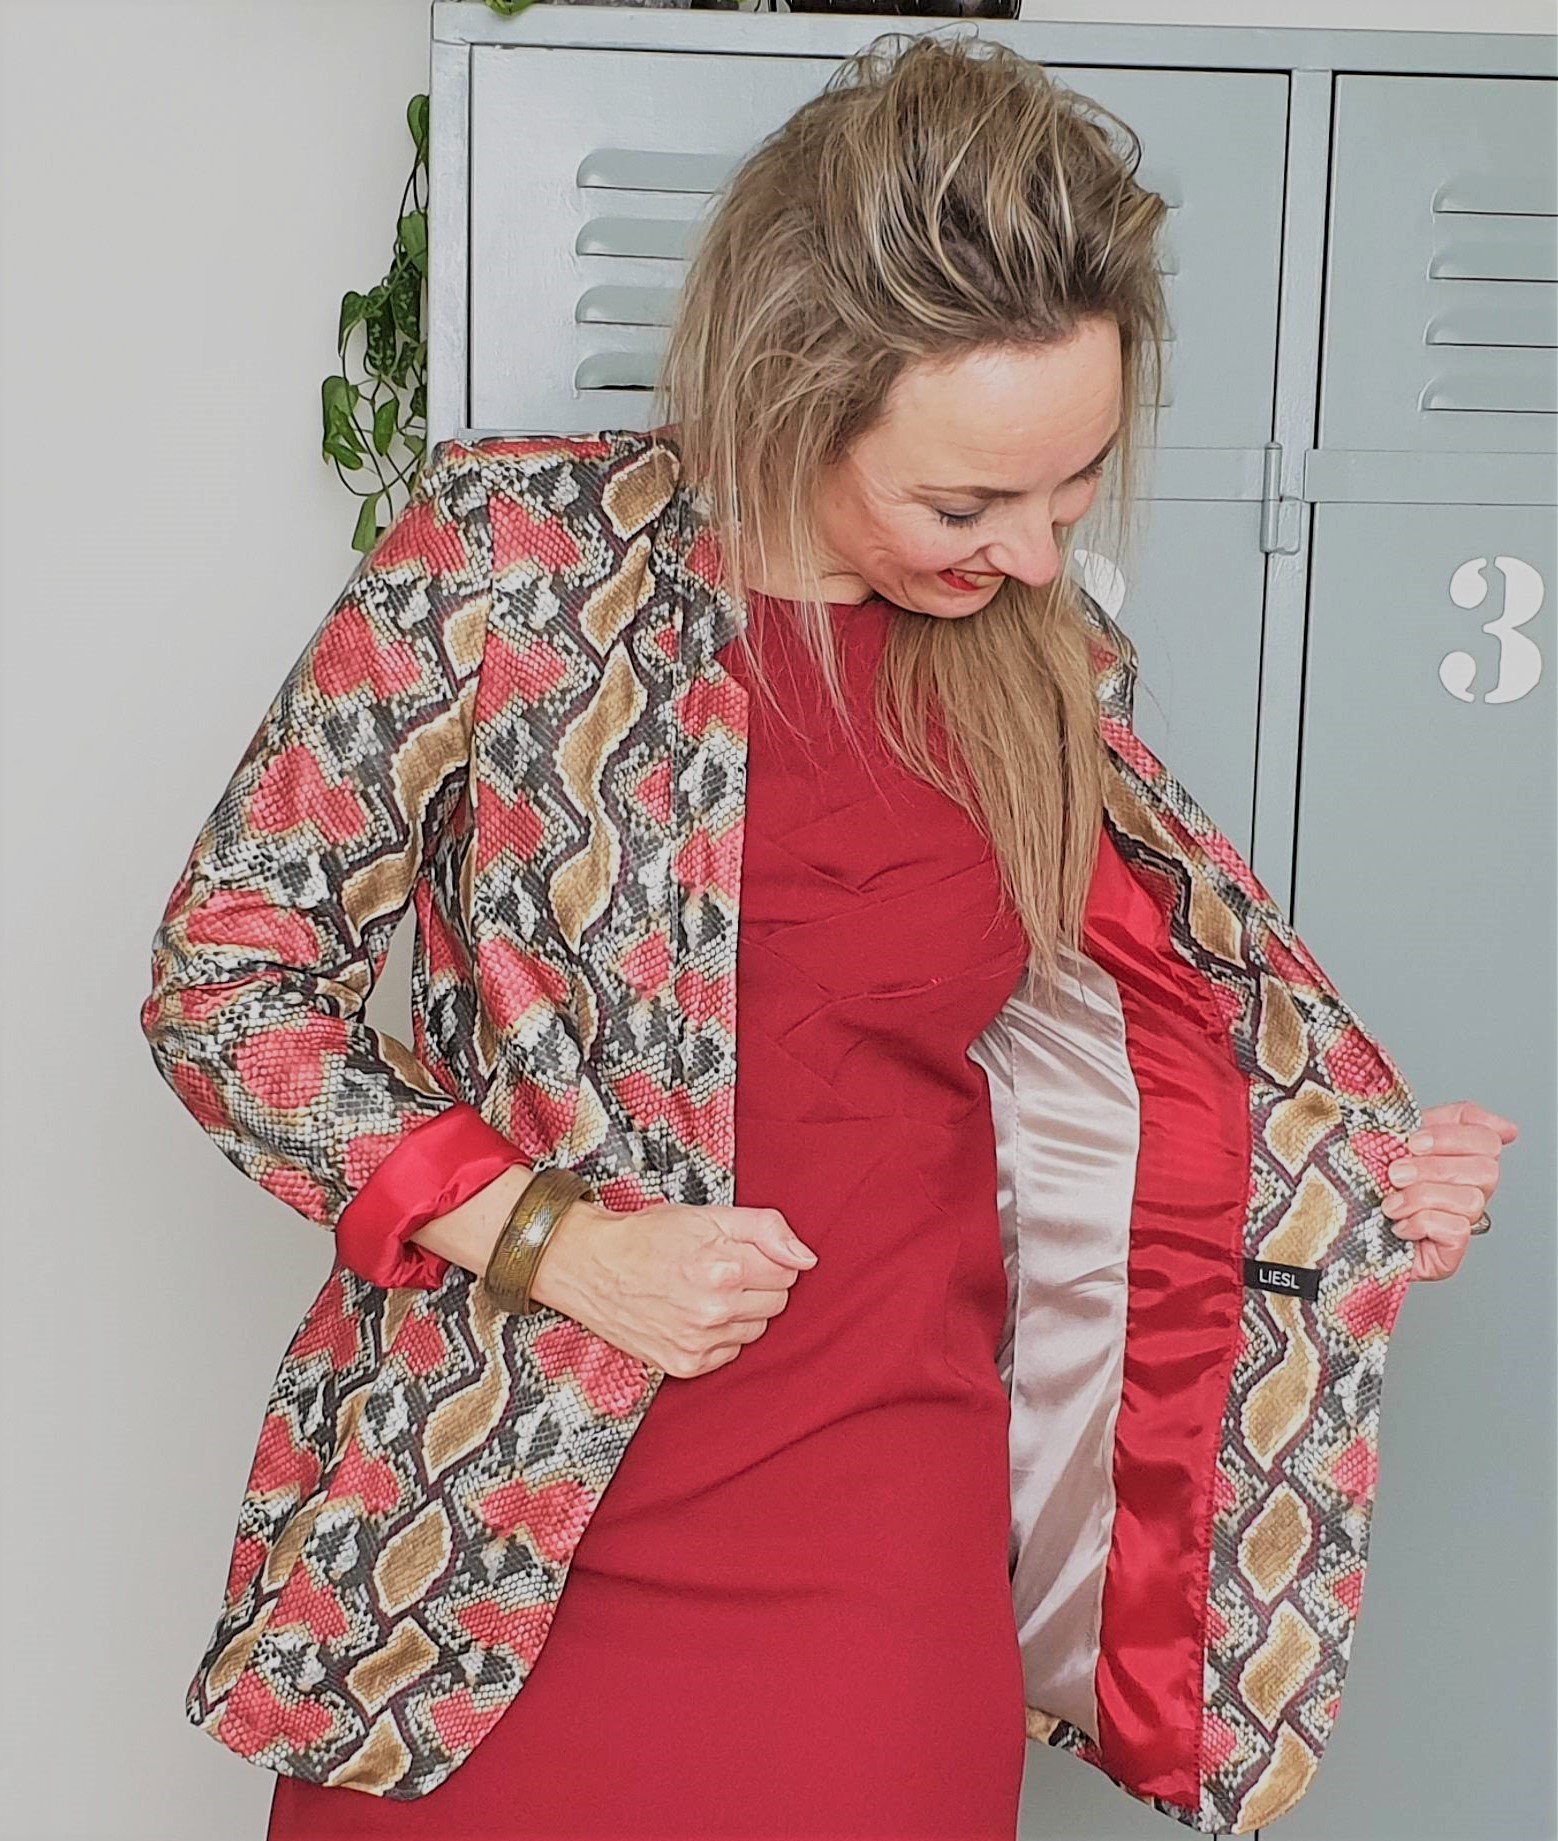

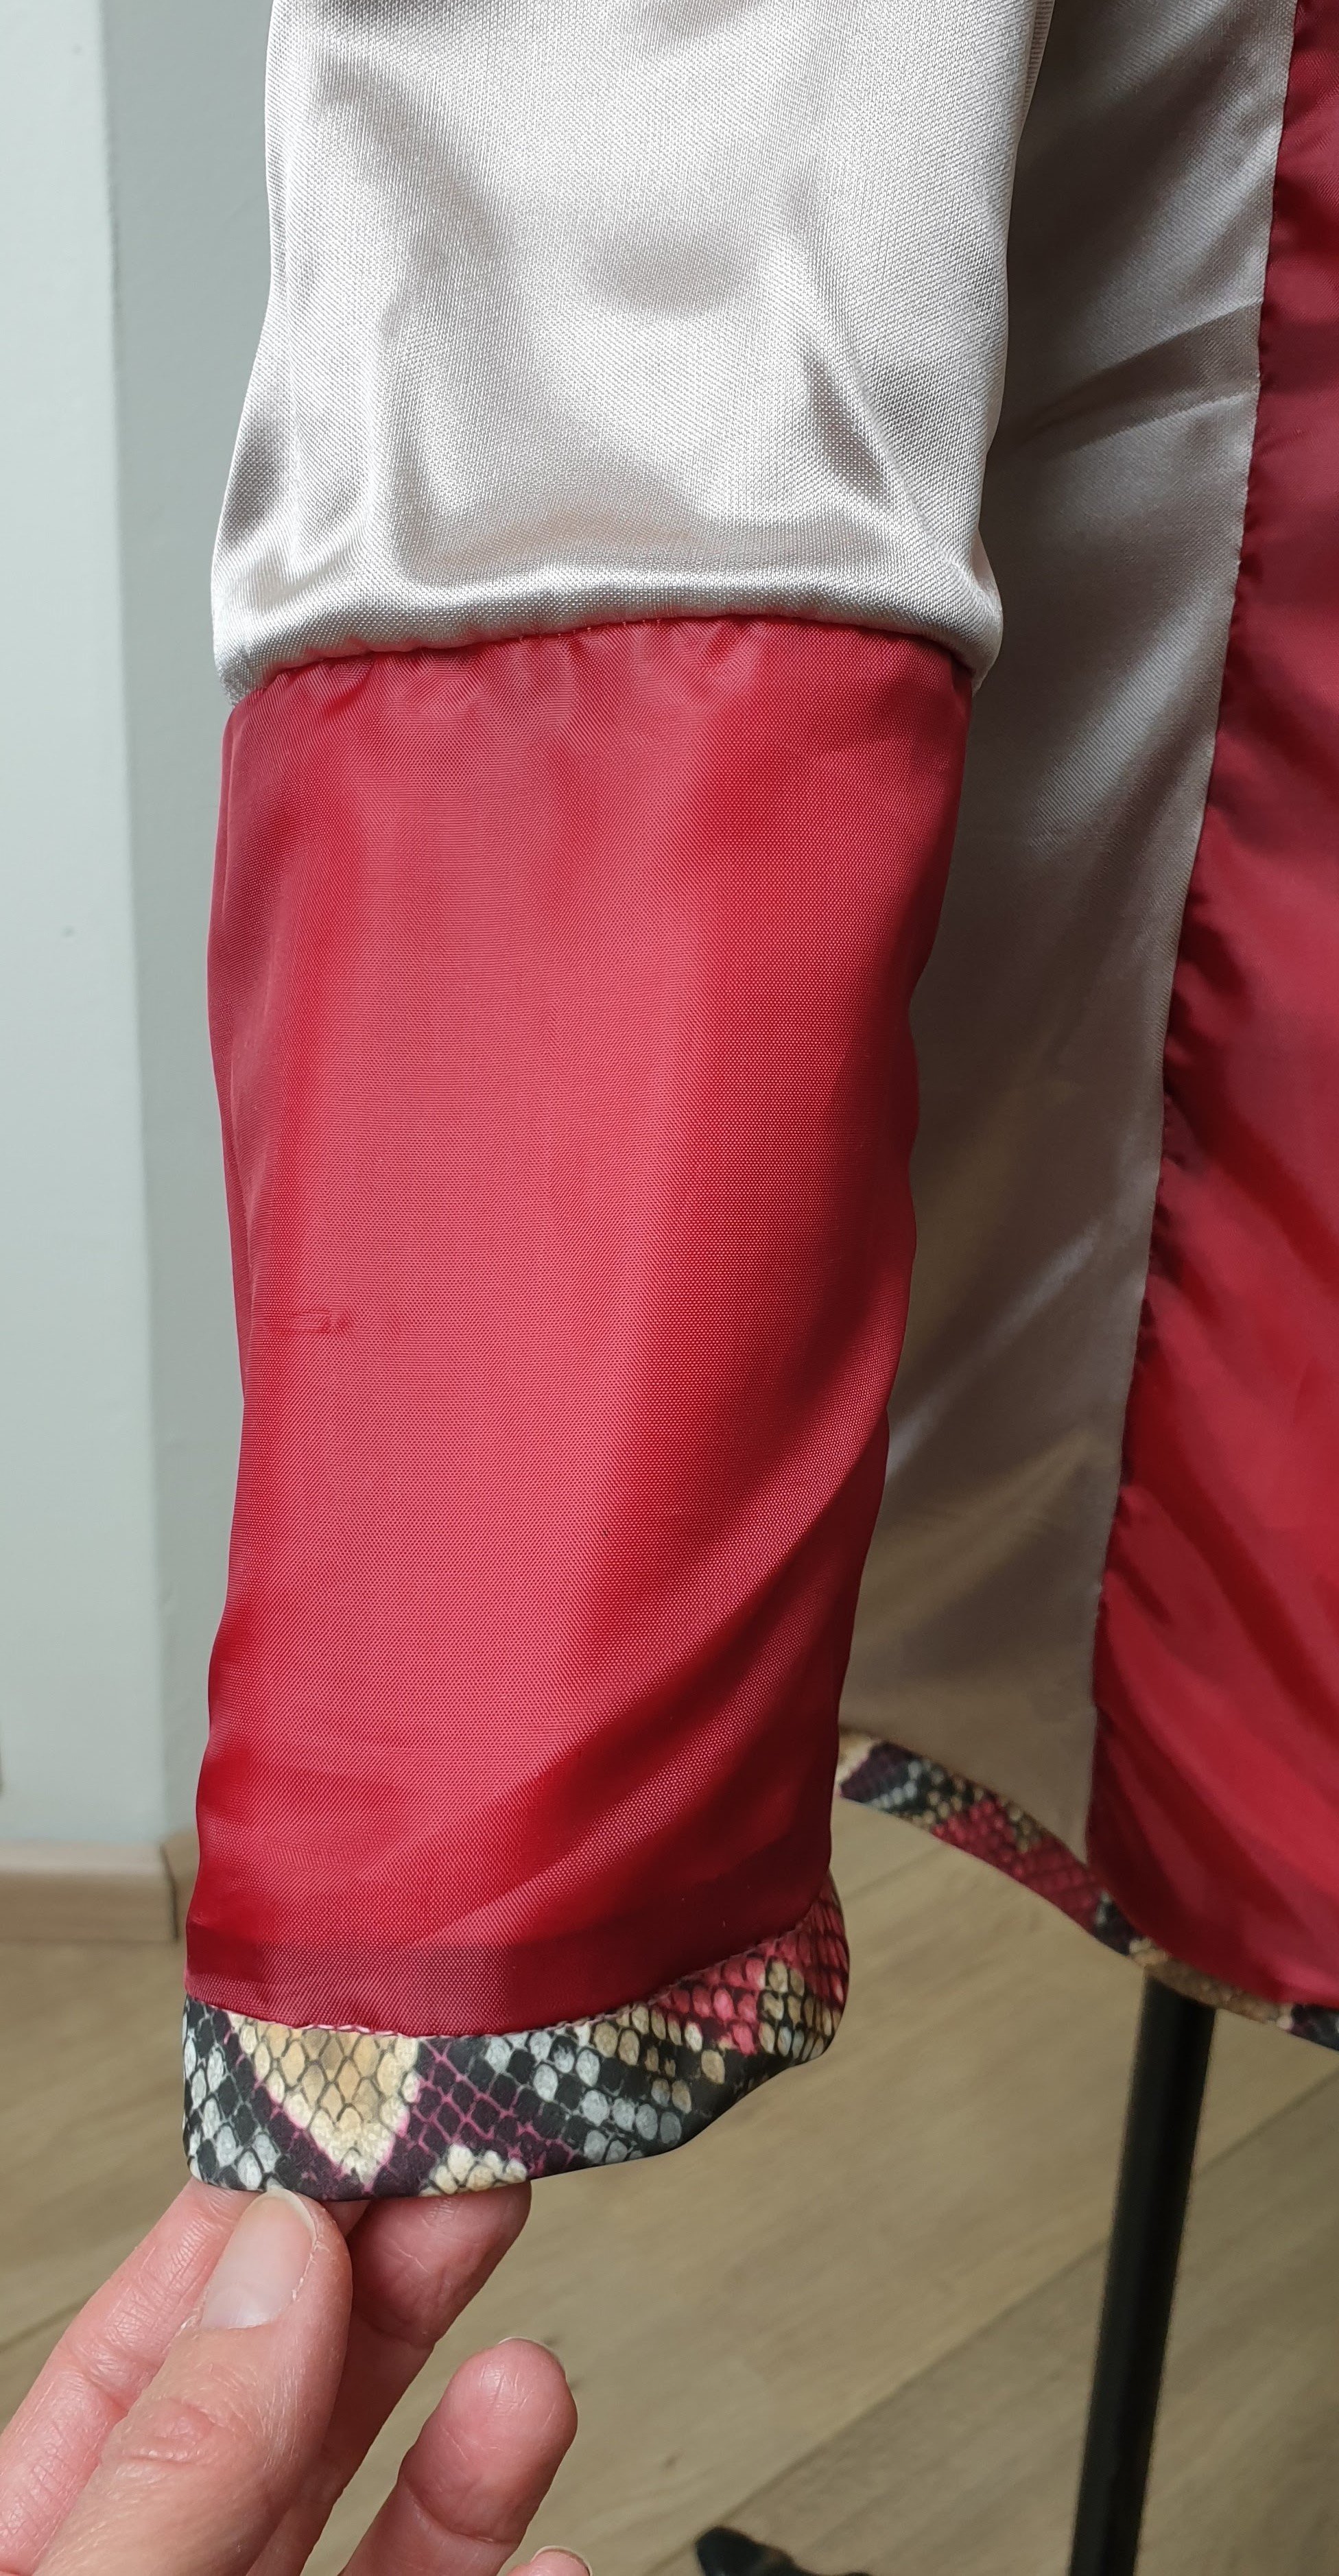
I used two types of lining. The red one has no stretch in it and the fake leather has, so I used the nude coloured stretch lining in the back and partly in the front and sleeves. At the bottom of the sleeves I used the red again. When folding the sleeves you’ll see a red detail. Love it!

Triple zig-zag
All seasons blazer
I am styling this blazer different ways. With the red dress, a black basis and with jeans. It is quite the versatile piece. The pattern for the blazer I used before in making my sequins New Years Eve piece. You can check this on another blog.

Happy Holidays!! Have a lovely and creative 2020!
I especially look forward to the month of February in which I have my own ‘sewing challenge’ planned on Instagram, called #REFEBULOUS. Next month I will tell more about this here in two seperate blogs. A little teaser… it’s a re-fashion / re-cycle / re-pair / re-use …. challenge that hopefully inspires you all to reuse fabrics, clothing and haberdashery. So excited!
Love,
Marlies
@madebyLIESL


It is quite a versatile piece. The pattern for the blazer I used before in making my sequins New Year’s Eve piece. It is a perfect foot when topstitching over different fabrics like lining or a label. It all went really smoothly. It’s a relatively new foot for me. I’ve made fake leather pieces before and used some old school tricks to make stitching easier.