Every now and then a beautiful fabric comes into your possession, asking for more then just making a pillow case. Decorating the print by machine, using Rayon threads, gives it an enhanced appearance.
What do you need to make such a pillow case?
- Quilt fabric with large flowers – 0.50×1.10m
- Stabilizer: use either Totally Stable or Heat’n Bond Lite
- Rayon 40 machine threads, dark colors matching the flowers
- DecoBob bobbin thread, matching the Rayon 40
- Machine embroidery needle or Topstitch needle
- Inner pillow 40x40cm
- Matching machine thread
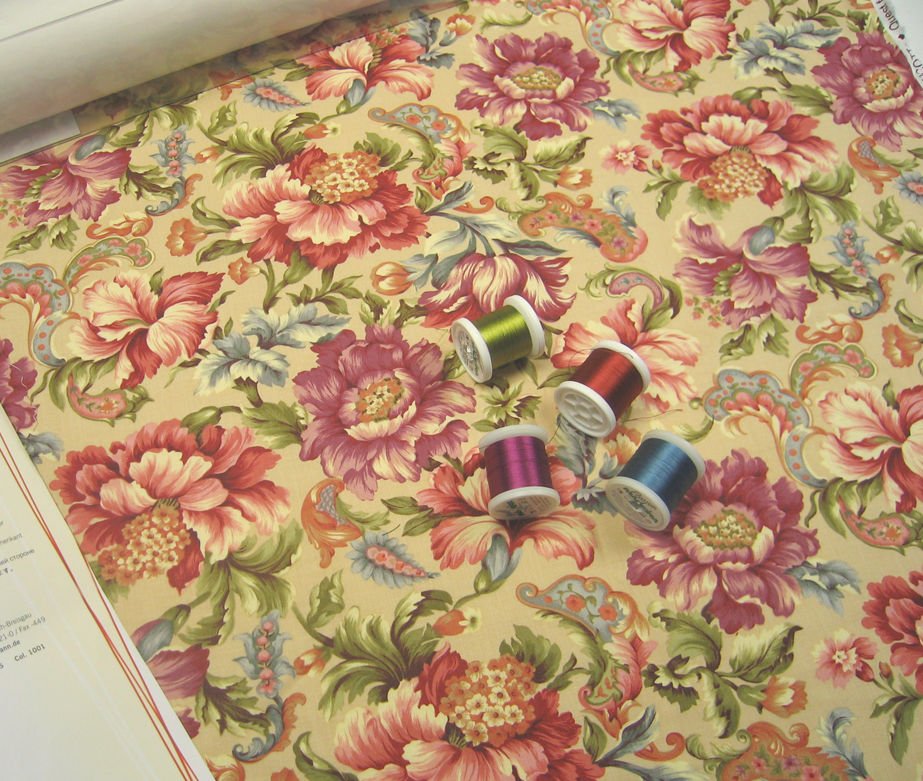
I have cut a piece of fabric at approx. 50x50cm. The rest will be used for the back of the pillow case. I’ve cut the same size out of Totally Stable, pressing it to the back of the fabric. You can also use Heat’n Bond Lite, leaving the paper to the back: don’t worry, this will be at the inside of the pillow case.
The picture above shows my matching Rayon 40 colors, each a bit darker than the flowers I want to decorate. If they were of the same hue, they won’t stand out.
Pressing the stabilizer at the back of the fabric will stiffen it, which will help while quilting free hand. I have used Rayon 40 – the first color – as a top thread, and DecoBob in the bobbin, matching colors.
The BSR was on my machine (I am working with my B770QE). If you don’t own a BSR, just use the presser foot for free embroidery.
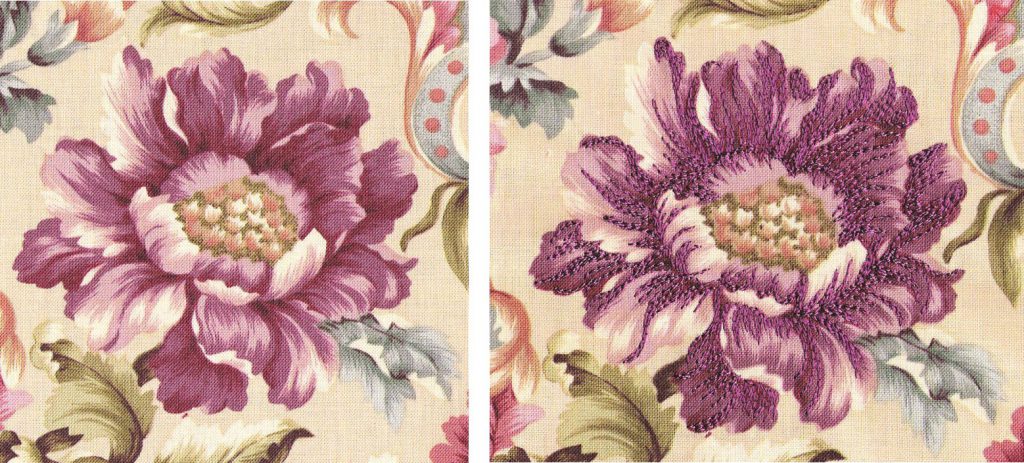
Find the first flower you want to enhance, matching it with the Rayon 40. The flower on the left of the picture above is before making stitches, the flower on the right after: doesn’t it look wonderful with these simple straight stitches? Quilting back and forth until each area you want to enhance is ready.
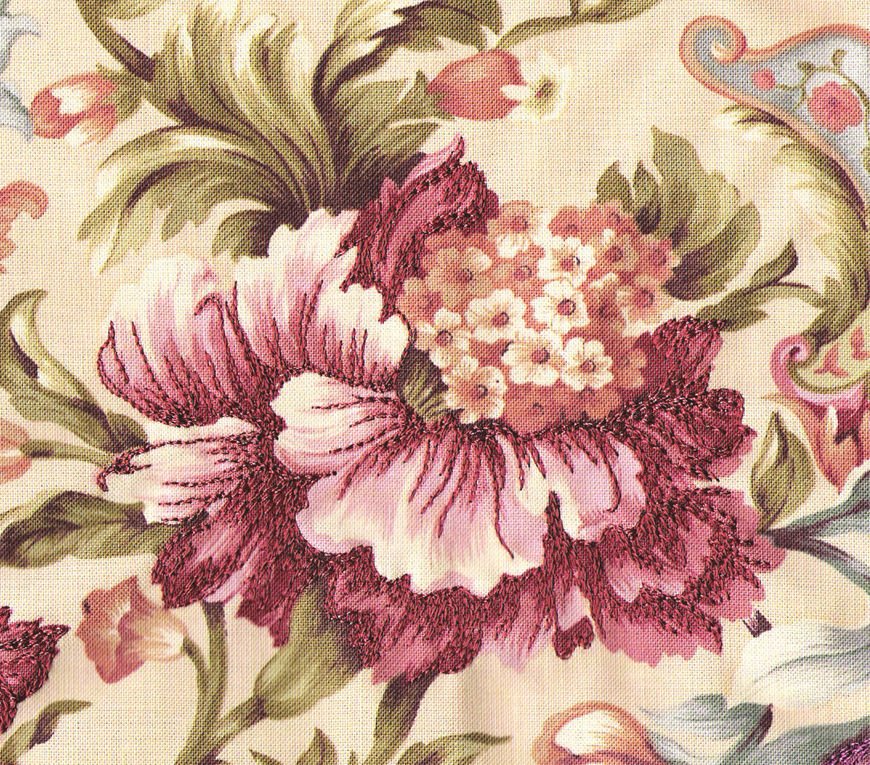
It’s like painting with thread: find the pieces you want to cover, but leave parts open, to be able to see the print of the fabric. You don’t have to cover each flower, just some larger parts. Follow the shape of flowers and leaves by making curves/stitches, do not work in straight lines, because you want to give it a natural look.
Enhance all flowers with the same color, change threads and move on to the next.
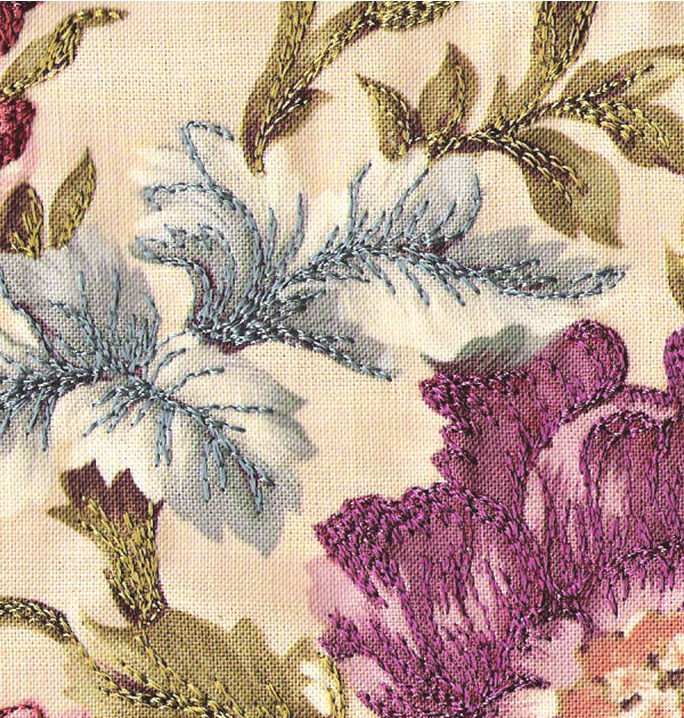
Even the leaves can be stitched: I have just enhanced the veins, not the entire leaves. Play with it all: do what you like to make it your own.
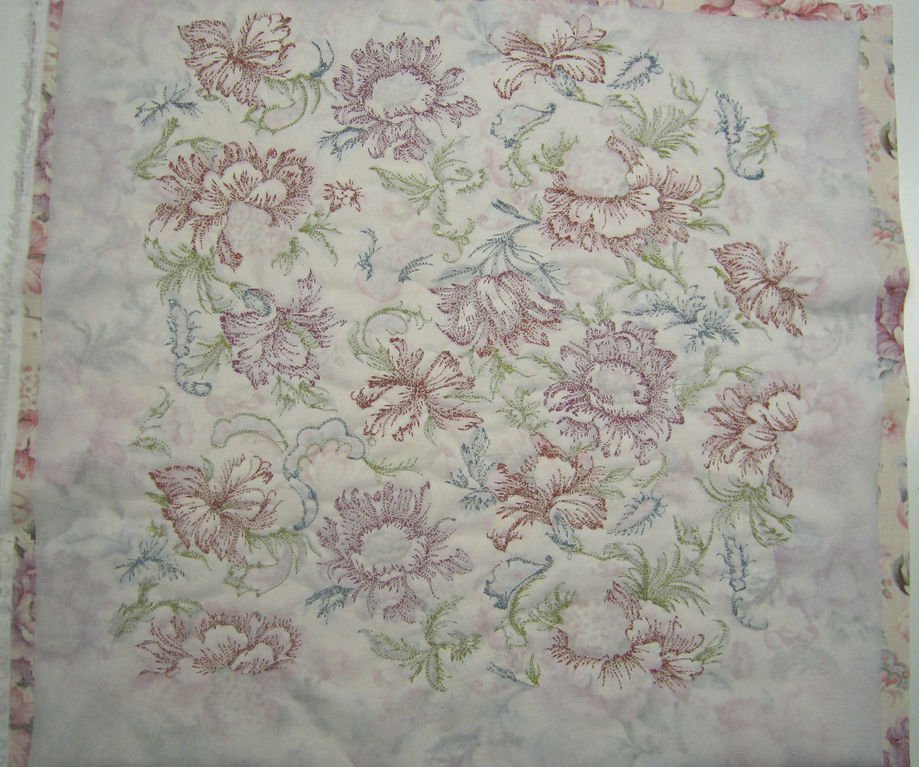
In the end, everything I wanted to enhance was ready. Looking at the back of the fabric/stabilizer gave me a good impression about the stitches. At this point I was still able to do some more quilting, but actually this is OK as it is. Cut the fabric/stabilizer back to approx. 42x42cm.
Creating the back/opening of the pillow case.
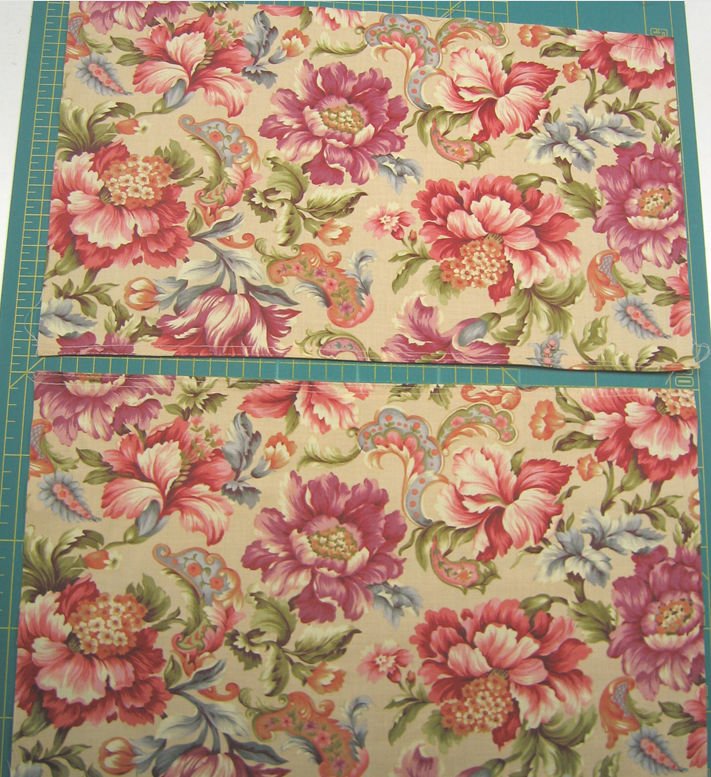
At this point machine thread is used, to sew the pillow case. I have cut two pieces of approx. 27x42cm of the remaining flower fabric. PAY ATTENTION: be sure when you place both pieces together to make the back of the pillow case, the flower print should point in the same direction. Especially with a large flower print, you will notice if one is placed upside down. Hem two long sides, facing each other, to form the opening.
Place them partly on top of each other, forming a square of 42x42inches. Pin the sides together to prevent shifting.
The front of the pillow is placed right side down, on top of the two pieces for the back (which is placed right side up). Sew all four sides, cut the corners and turn the pillow case inside out. I have sewn at 3mm from the sides, to make it look tighter.

Push the inner pillow inside the pillow case: isn’t this wonderful? An enhanced flower pillow, this will be a wonderful present.
Happy Stitching!
Sylvia Kaptein
Sylvia’s Art Quilts Studio
 BERNINA Corporate Blog -
Oh my goodness. This is gorgeous. I can imagine a beautiful boxy jacket done like this. There is so much I want to do, but not enough time. I’m a new Bernina owner, and I am just itching to create, but I don’t know where to start!
Hi Colleen, glad you like it. It is so much fun, working with just a neelde and thread via free motion quilting a.k.a. thread painting, with or without your BSR. It’s like drawing, making paintings, enhancing fabric. Just try it on samples, which you can always use to make postcards.
have fun!
Sylvia