 BERNINA Corporate Blog -
Andrea from Quiltmanufaktur and author for the German BERNINA blog is your guide for this fantastic quilt-along over the next 12 months. Together, you will sew classic patchwork blocks and combine them into a sampler. The completed quilt will be traditional, yet modern! The next part has been written and we are delighted that you join this quilt project.
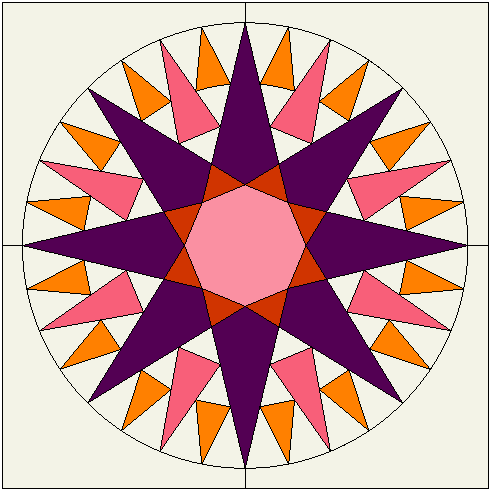
Hello everyone and welcome to the 25th block of the Old Block Quilt-Along. Today we are sewing a 20″ block, the “Mariner’s Compass”.
If you took part in the ‘6 Heads 12 Blocks – Skill Builder’ quilt-along, you will know that I presented another “Mariner’s Compass” in that on my own blog. This one also measures 20″.
(Image source: Florida Center for Instructional Technology, College of Education, University of South Florida).
The history of the “Mariner’s Compass”
A more detailed history of this quilt is available than is usually the case. On the website womenfolk.com, I found the following information, which was compiled by Judy Mathieson:
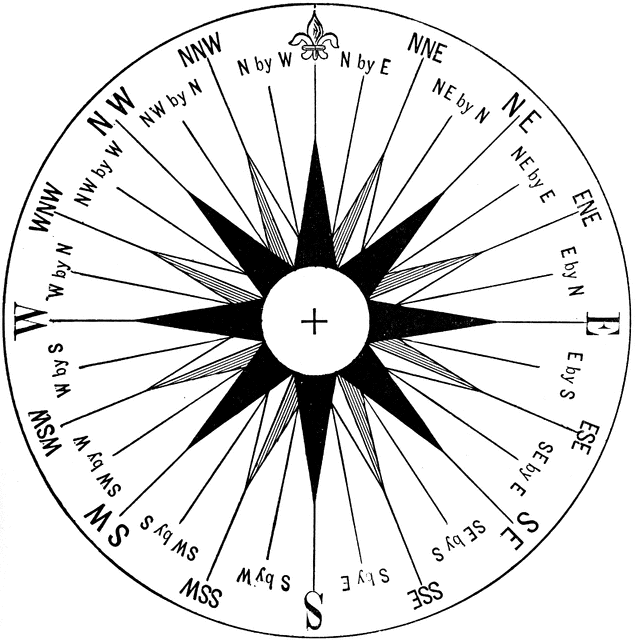
“‘Mariner’s Compass’ is the name quilters use to refer to star designs that radiate from the center of a circle as opposed to the star designs that grow from a square, like ‘Ohio Star’ or ‘Sawtooth Star’. If you are going to call your design a ‘Mariner’s Compass’ it should probably have 16 or 32 points like the compass card on a magnetic compass or a map. Barbara Brackman says that this is one of the earliest named quilting designs in America. […] The first known quilt to use the Mariner’s Compass design was made in 1726 in England. Such quilts might well have been made earlier but we must depend on this first dated quilt for certainty. It is unknown if this quilt from 1726 was even called a ‘Mariner’s Compass’ quilt as it was documented with a date but not a name. Many other quilts of this general pattern have been made over the years but only since the mid twentieth century was the name ‘Mariner’s Compass’ commonly used. Meanwhile quilts of this design have been named everything from ‘Chips and Whetstones’ to ‘The Explosion’. Sun-related names like ‘Sunburst’ and ‘Rising Sun’ were also common. The variations in the name of this quilt is a good example of how difficult it is to uncover the history of any given pattern by name.”
(Source: Mariner’s Compass Quilt Pattern History: Ancient Design (womenfolk.com), Judy Mathieson)
We are sewing the “Mariner’s Compass” patchwork block
The “Mariner’s Compass” measures 20″ (20.5″ including the seam allowance). I suggest sewing this block using the FPP method. If you don’t want to do this, I have also provided the individual pattern templates for you to print out.
Download the patchwork templates
For cutting out, I have created three PDF documents to download:
- The first is a coloring sheet. This allows you to try out colors and designs for this block to see what they look like.
- On the second PDF you will find the templates for the foundation paper piecing
- and on the third you will find the pattern templates.
On the PDFs with the FPP templates and the pattern templates, I have put a control square with a side length of 1 inch so that you can check whether your printout of the templates is the right size. It is important to set your print options to “Actual size”.
Here are the downloads:
“Mariner’s Compass” coloring sheet
“Mariner’s Compass” FPP templates
“Mariner’s Compass” pattern templates
Cutting out the pattern pieces
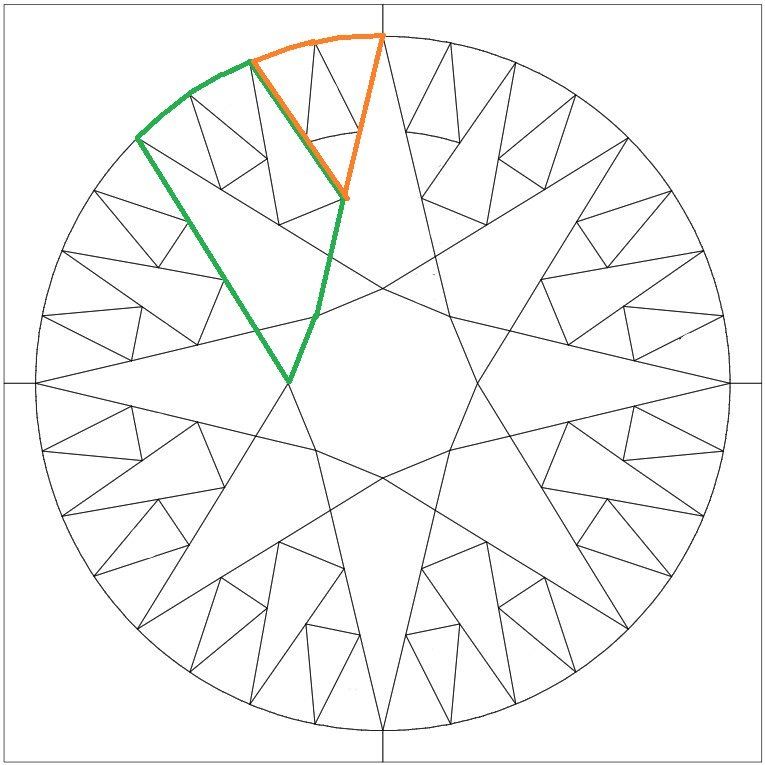
The templates for the foundation paper piecing consist of two units to be sewn, A + B. Both occur 8 times in the compass, so they need to be printed out 8 times each.
On the PDF with the pattern templates, as well as the center piece (A: once) and the template for the background (I: 4 times) you can also find the templates for the individual “wind directions”. However, I recommend that you make this block using the FPP technique!
The block is very complex to make. Before you get started, please read through all the instructions carefully.
Sewing the “Mariner’s Compass” patchwork block
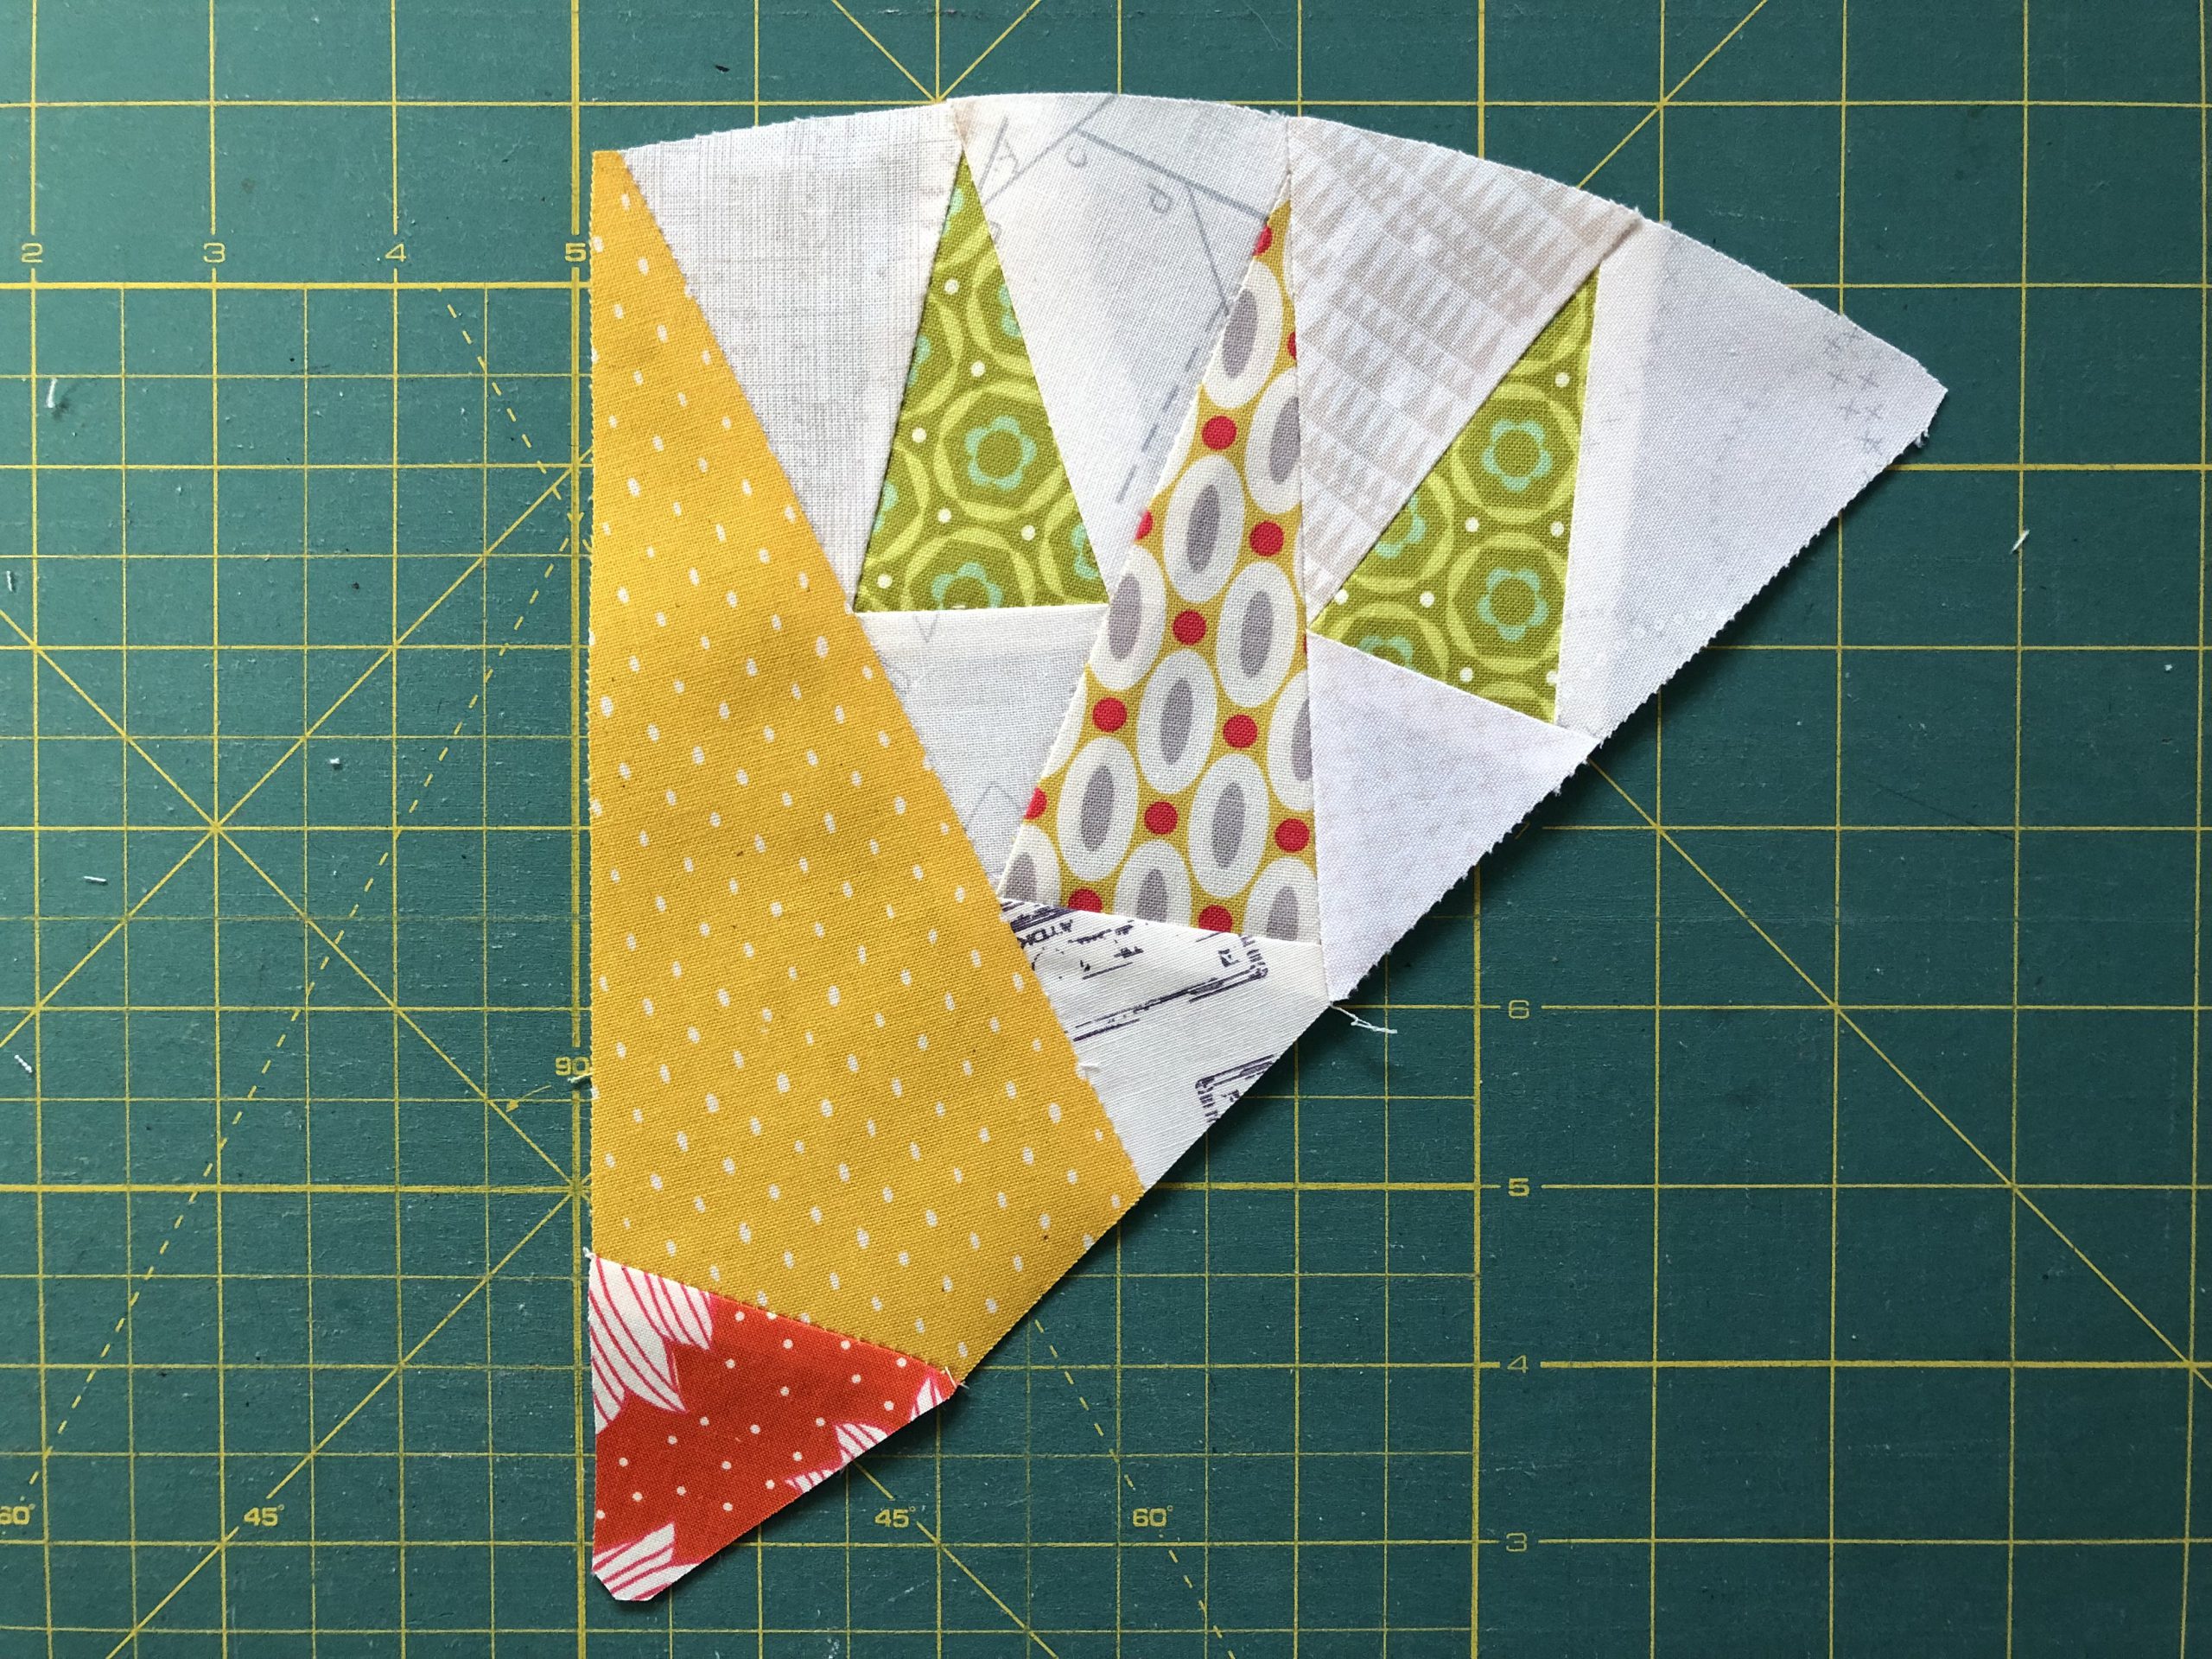
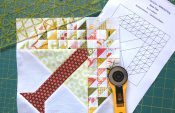
The block consists of eight equal parts, which are made up of the FPP units A + B. First, work part A eight times and then part B eight times.
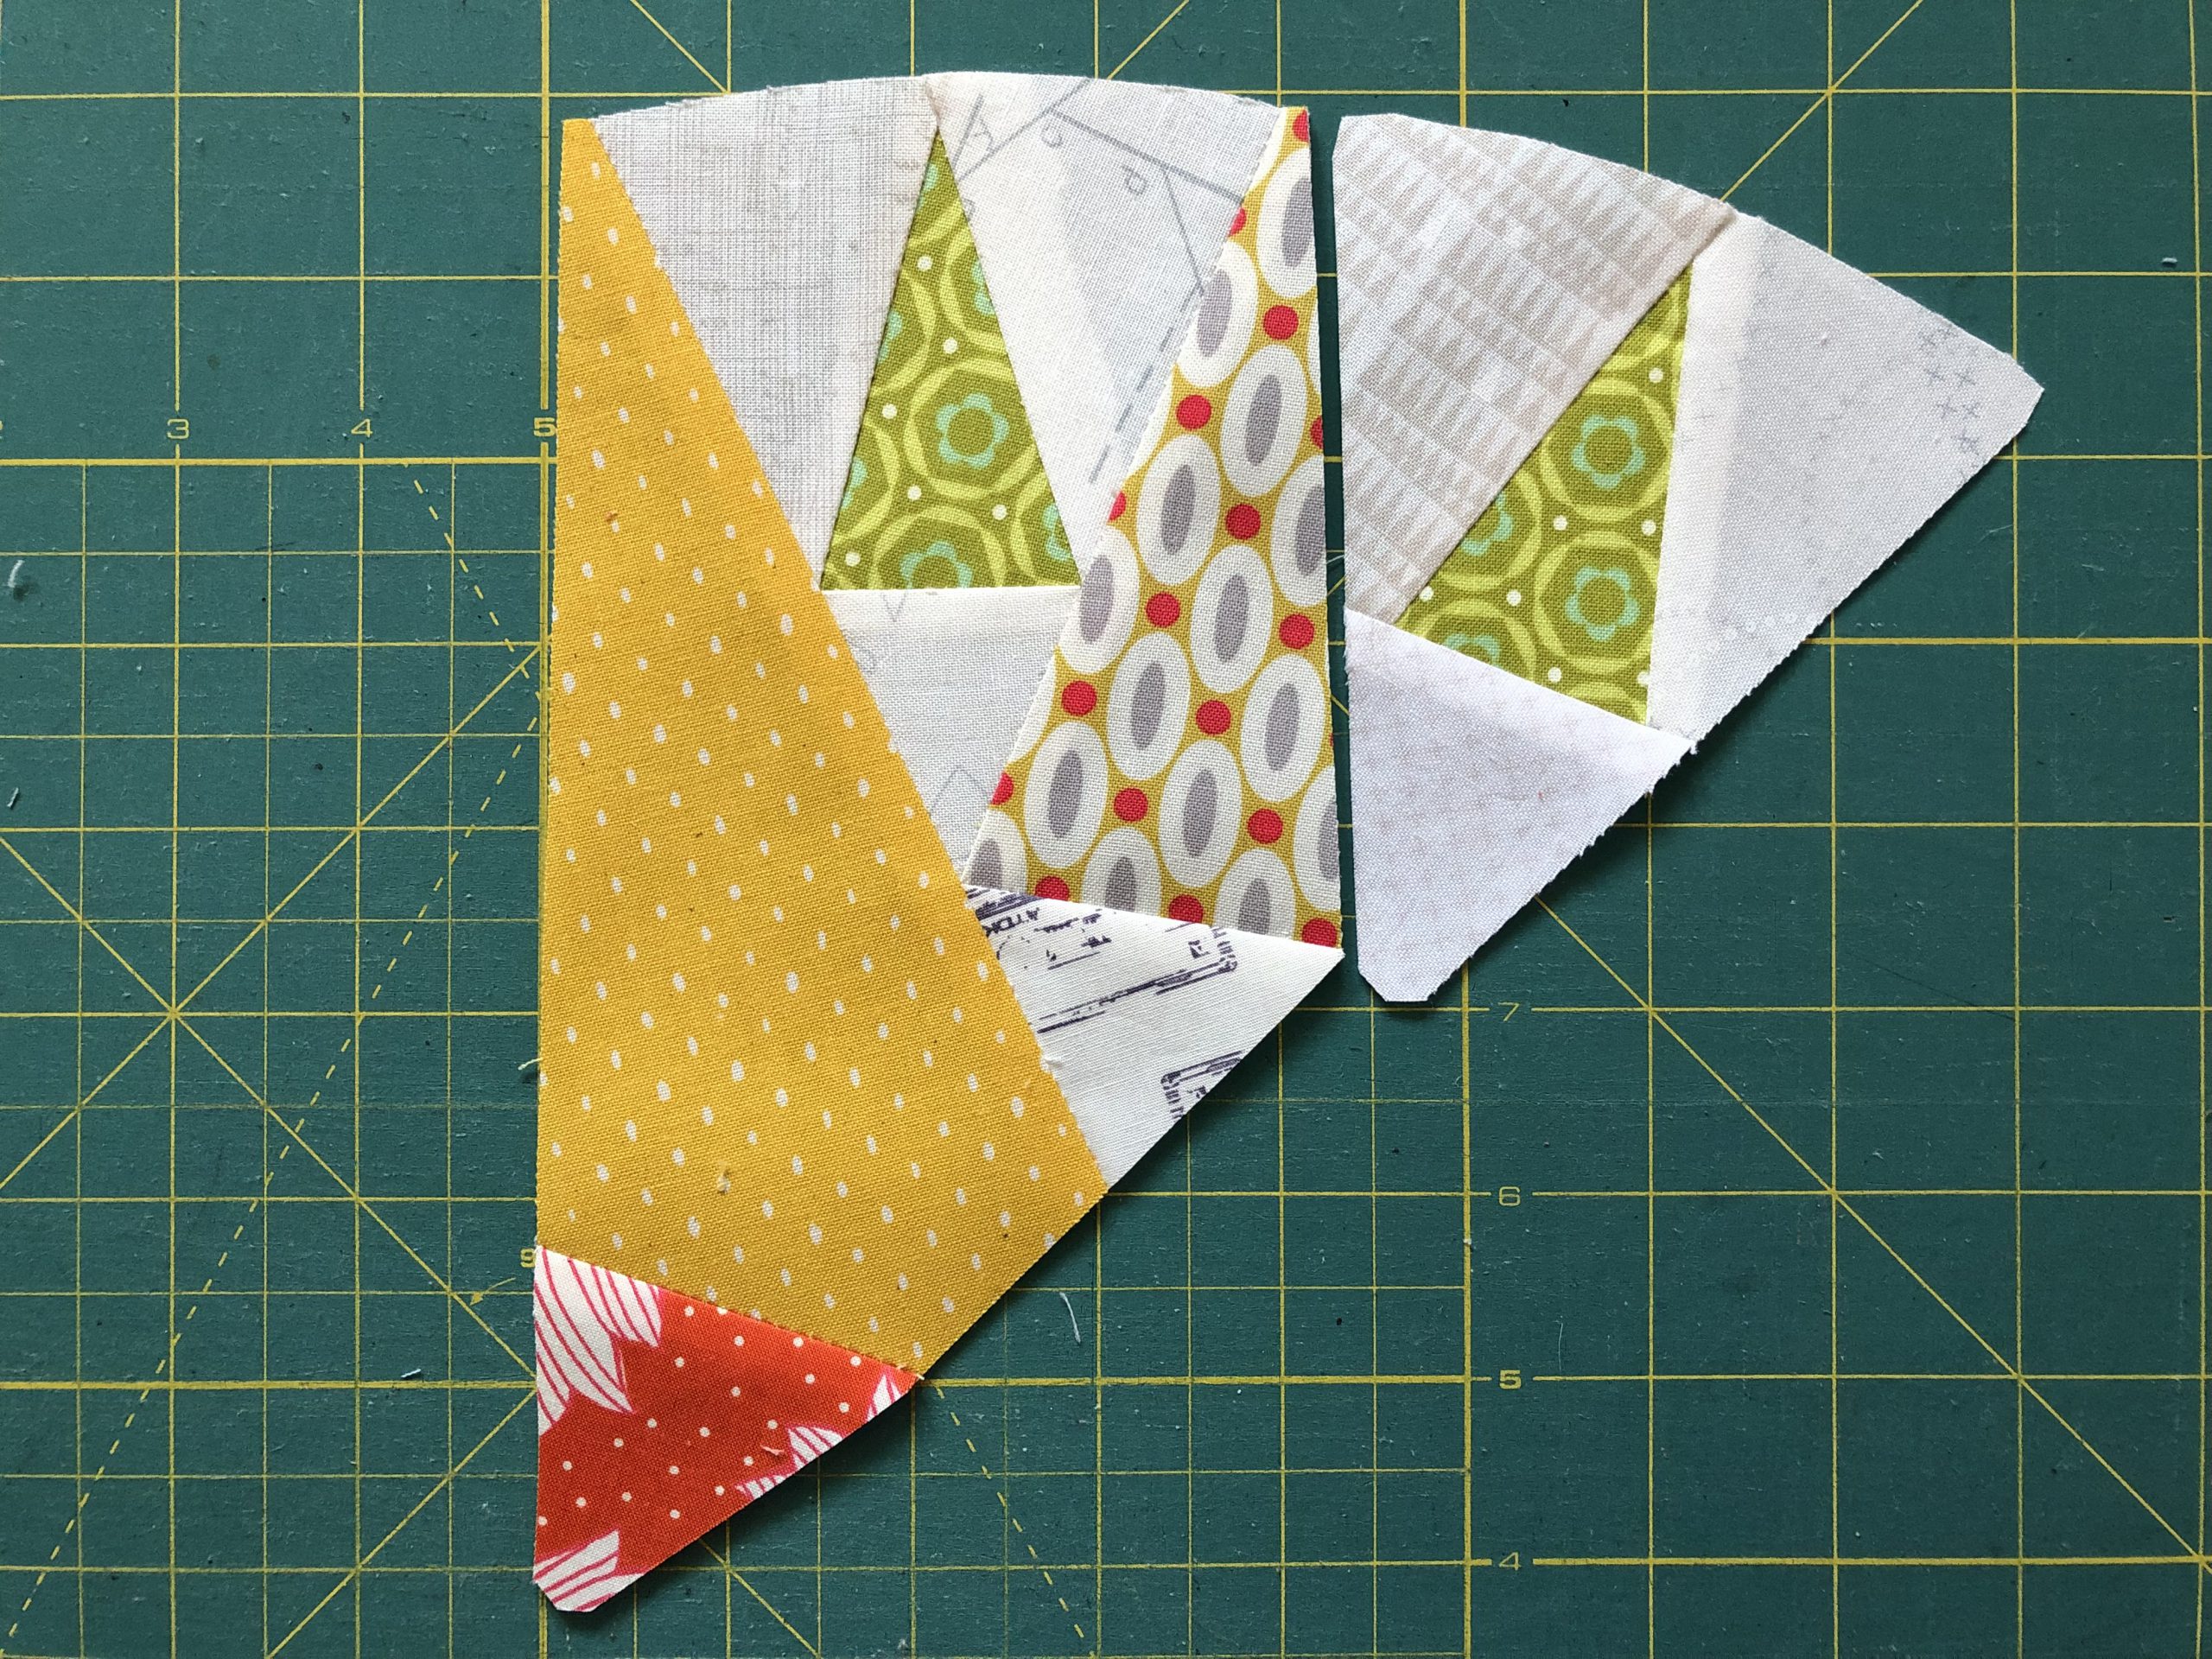
Once you have worked all the pieces eight times each, join them together as shown in the following picture.
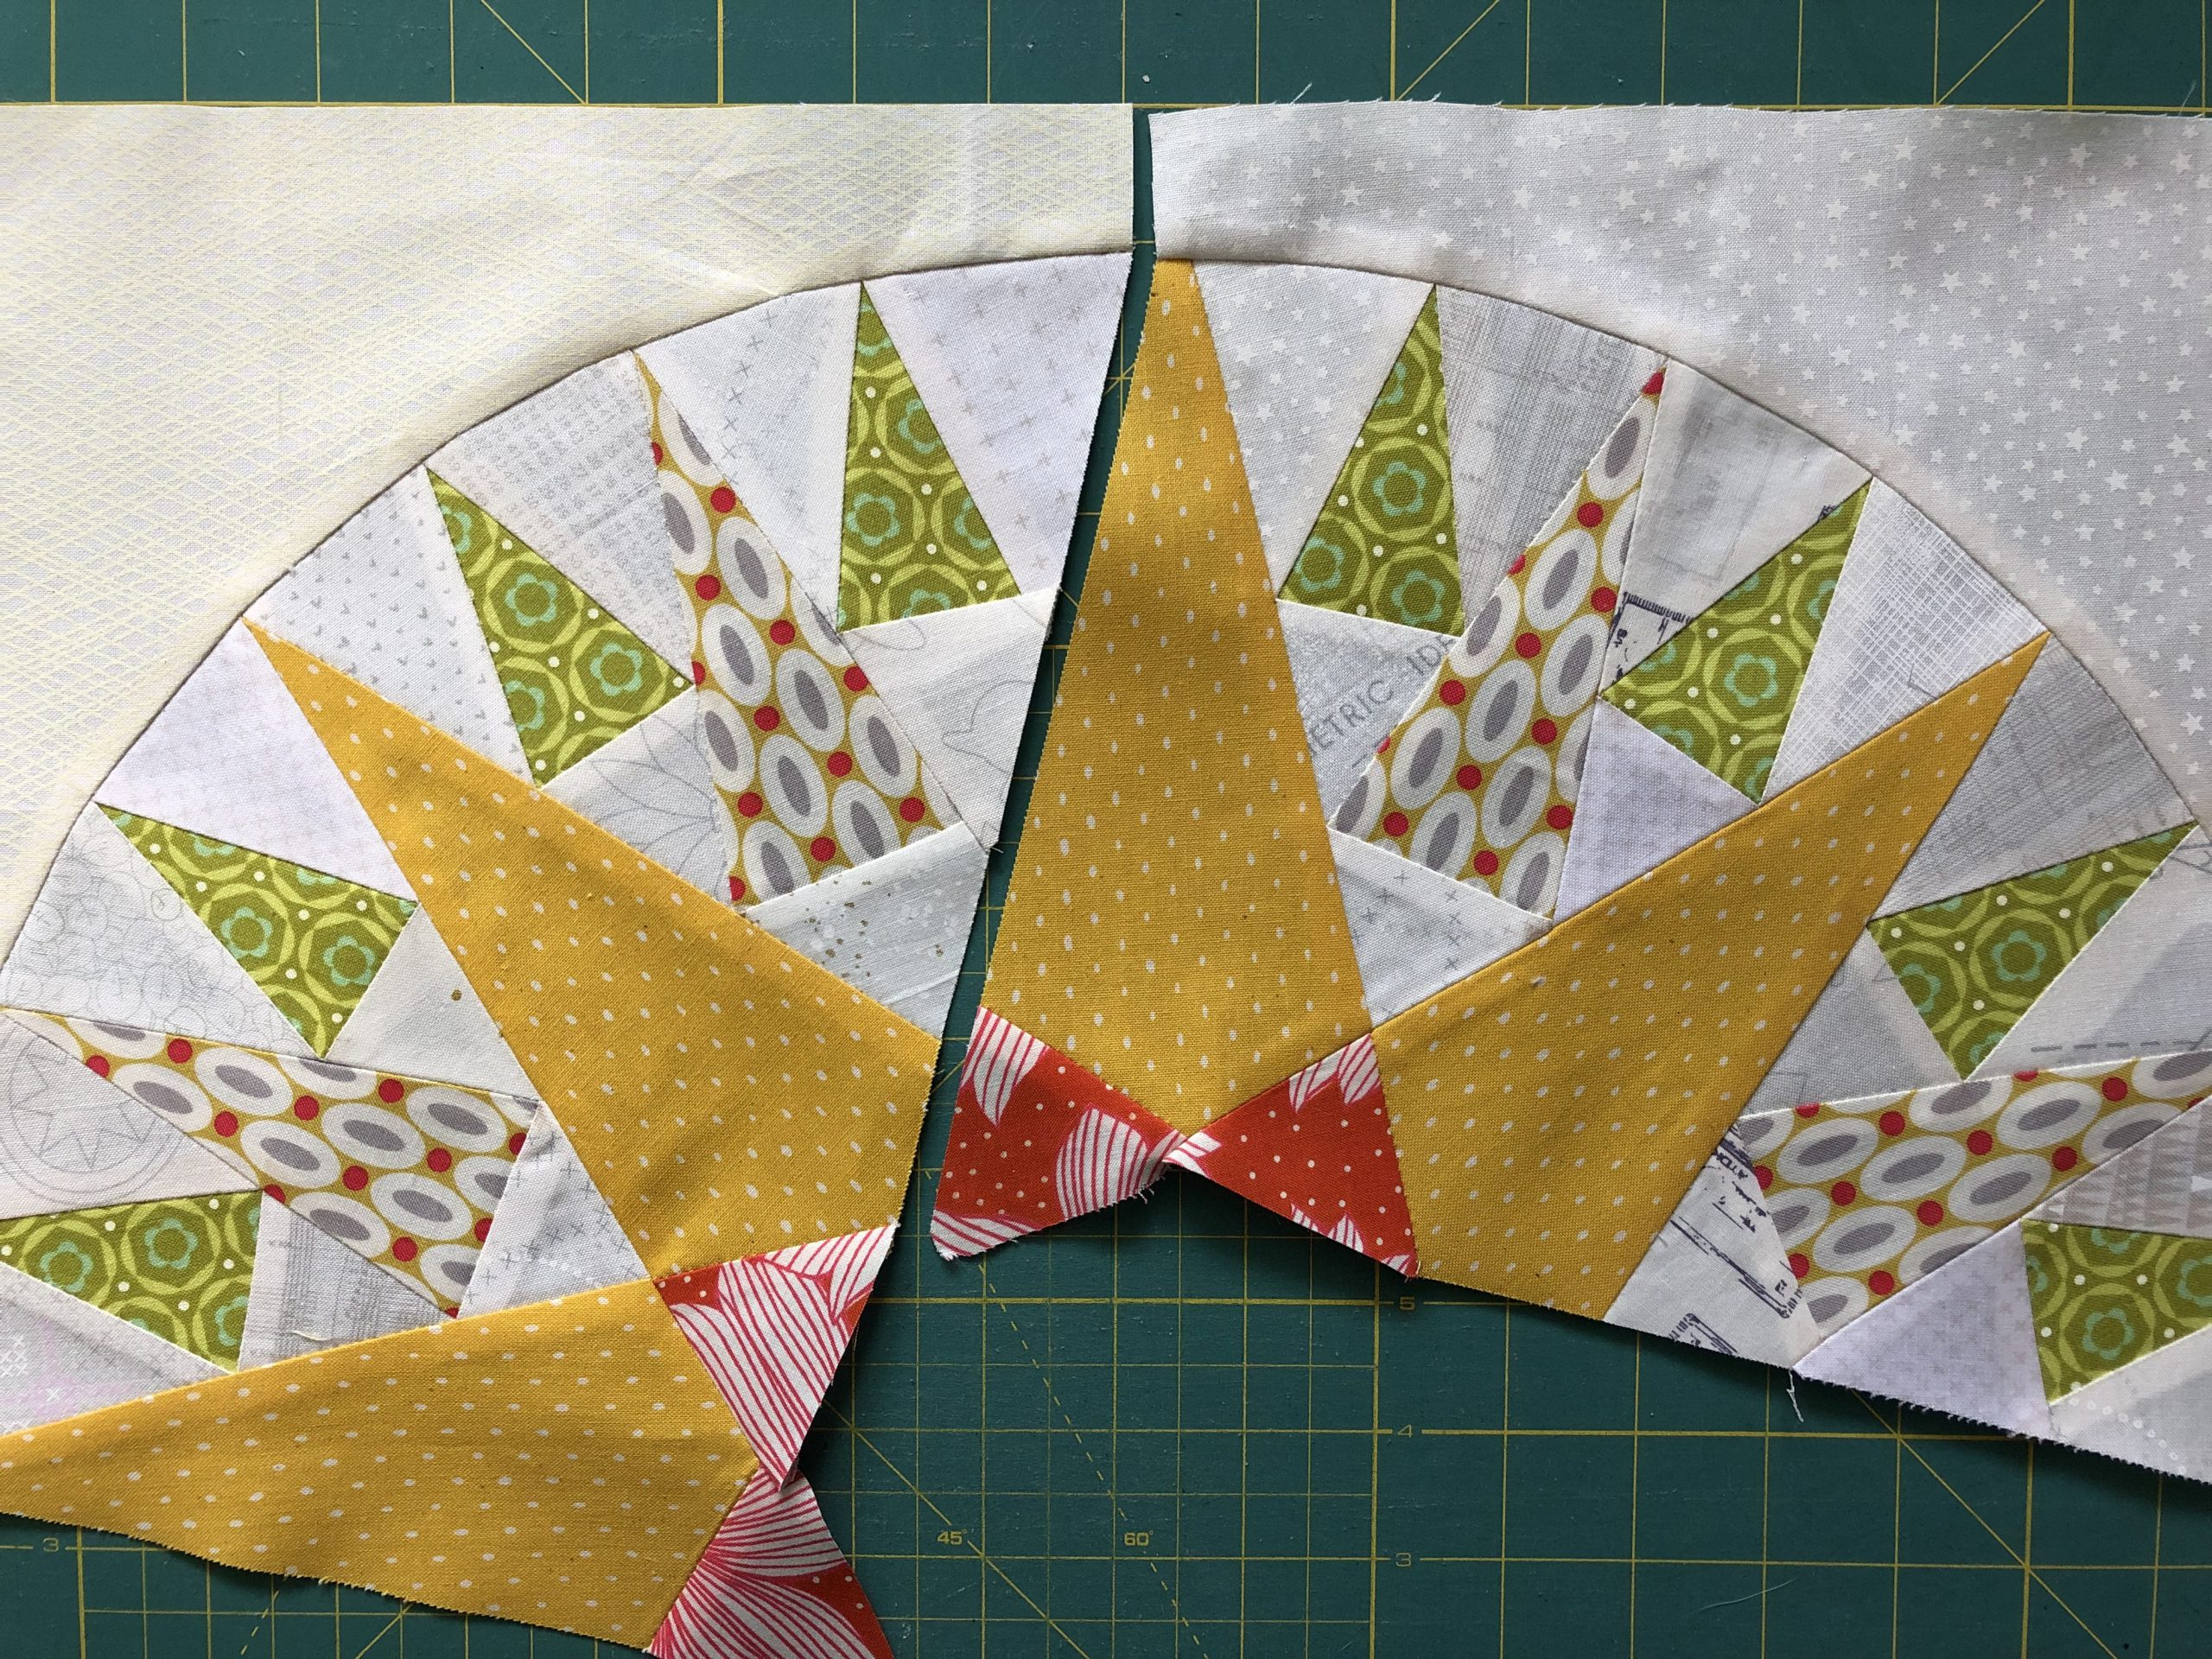
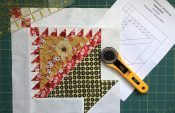
Next, sew the eight resulting pieces together.

It is a good idea to mark the intersection point on the bottom inside edge of each block piece. Pin this as shown in the next picture to the intersection point on the panel seam of the block piece below. Please make sure you only sew up to this point!

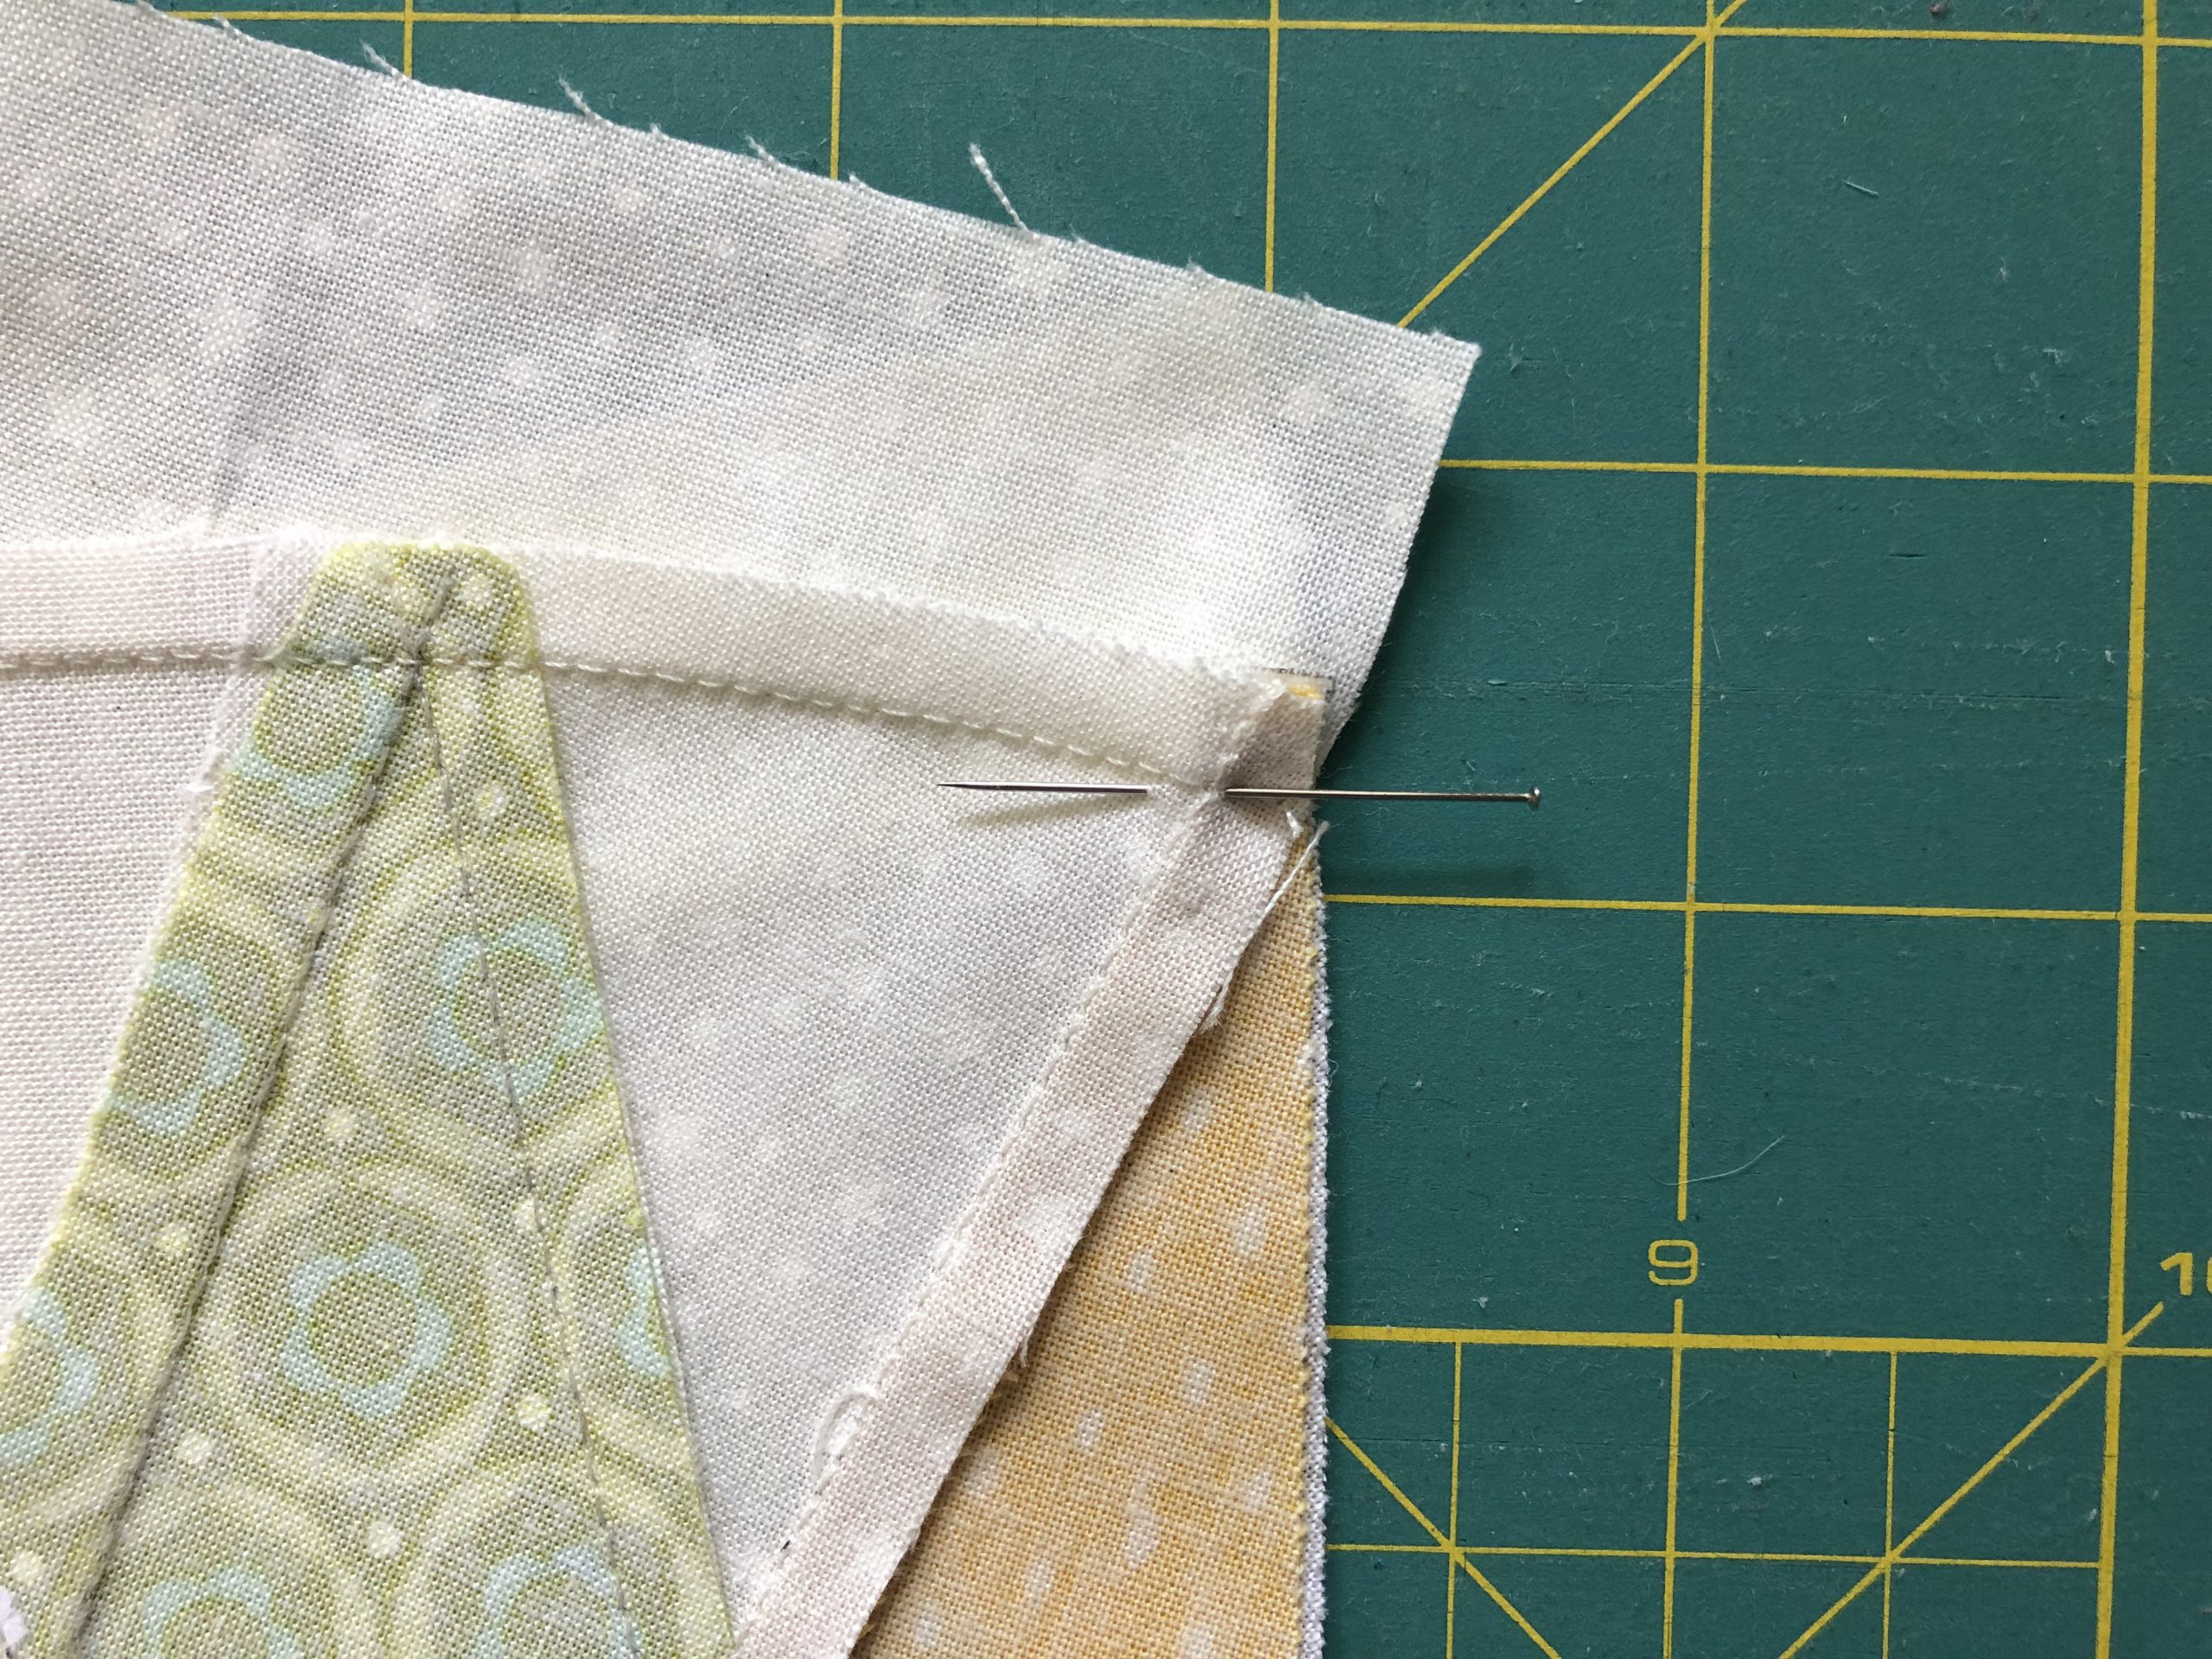
Unlike other blocks, a quarter circle background piece is now attached here. Do this with all four pieces.

In the next picture, you can see that, at the tip, the seam does not run diagonally to the background, but straight.
To enable you to sew ‘around the corner’, first pin the seam point of the two pattern pieces together as shown.
Then pin the upper cut edge together. Changing direction is not so bad, so you can sew ‘around the corner’ with no trouble here.
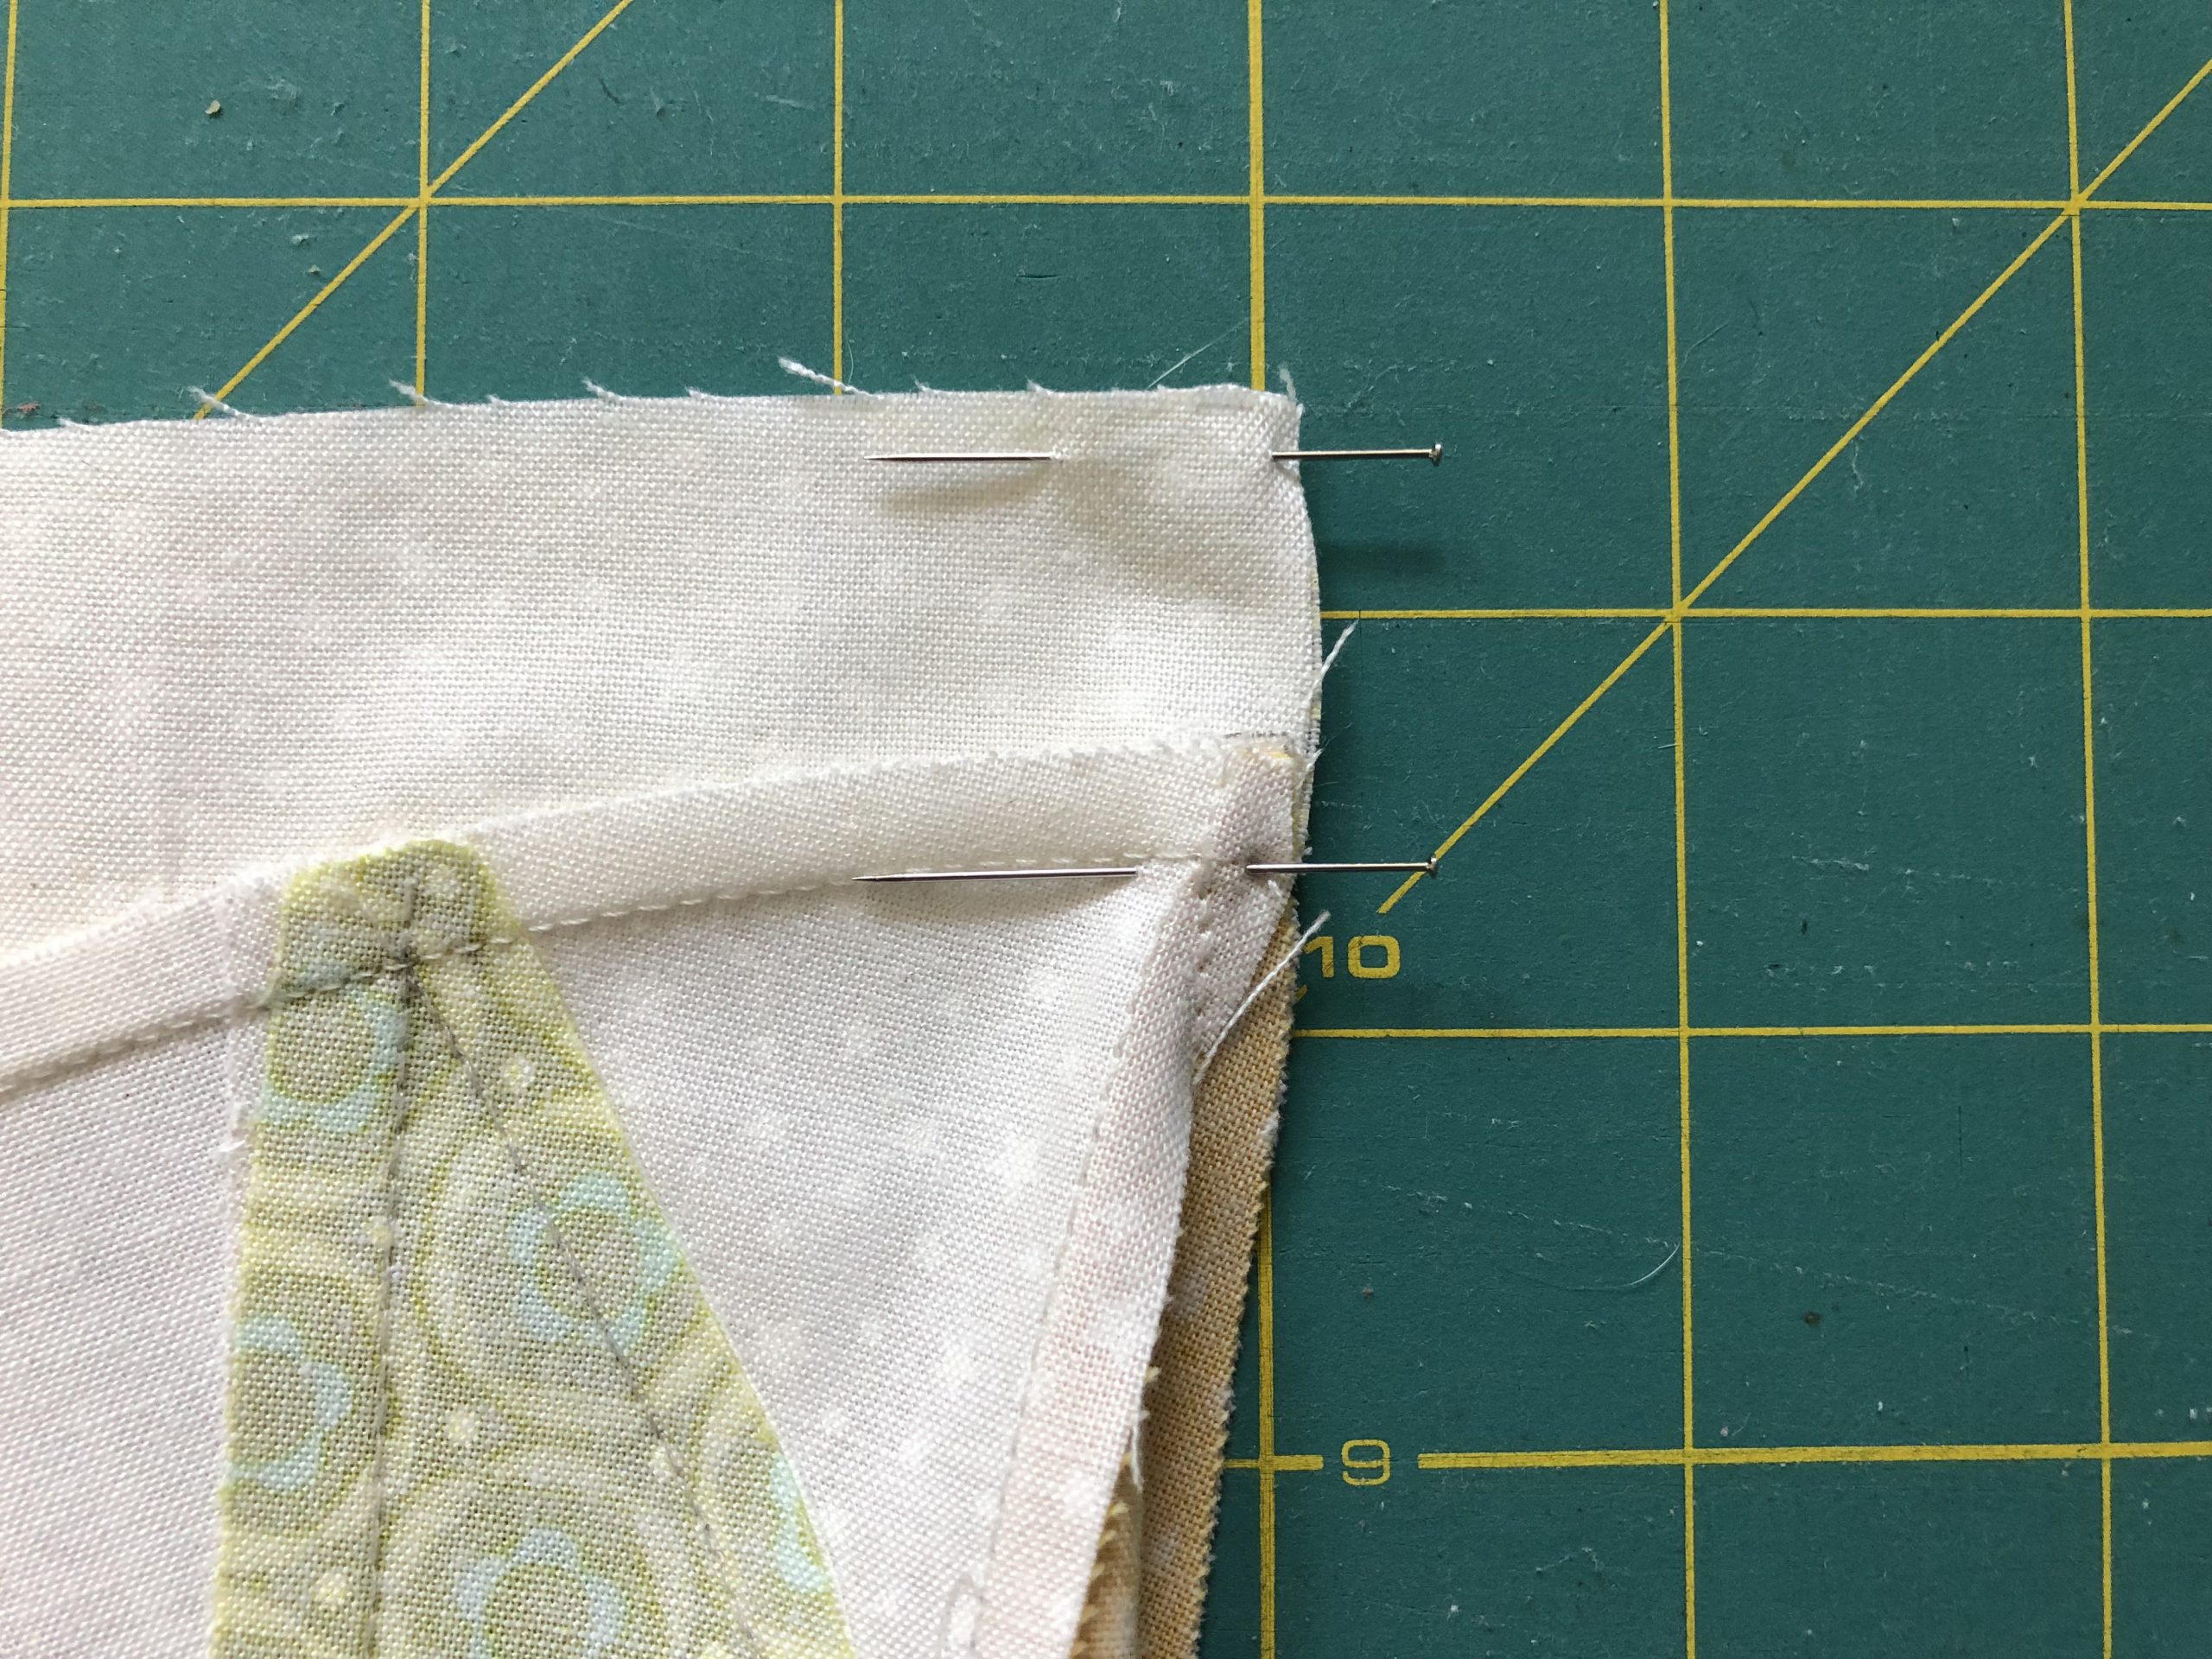
It should look like this when you have sewn it.

Close these panel seams on all four pieces. Now all that’s left is the hole in the center….
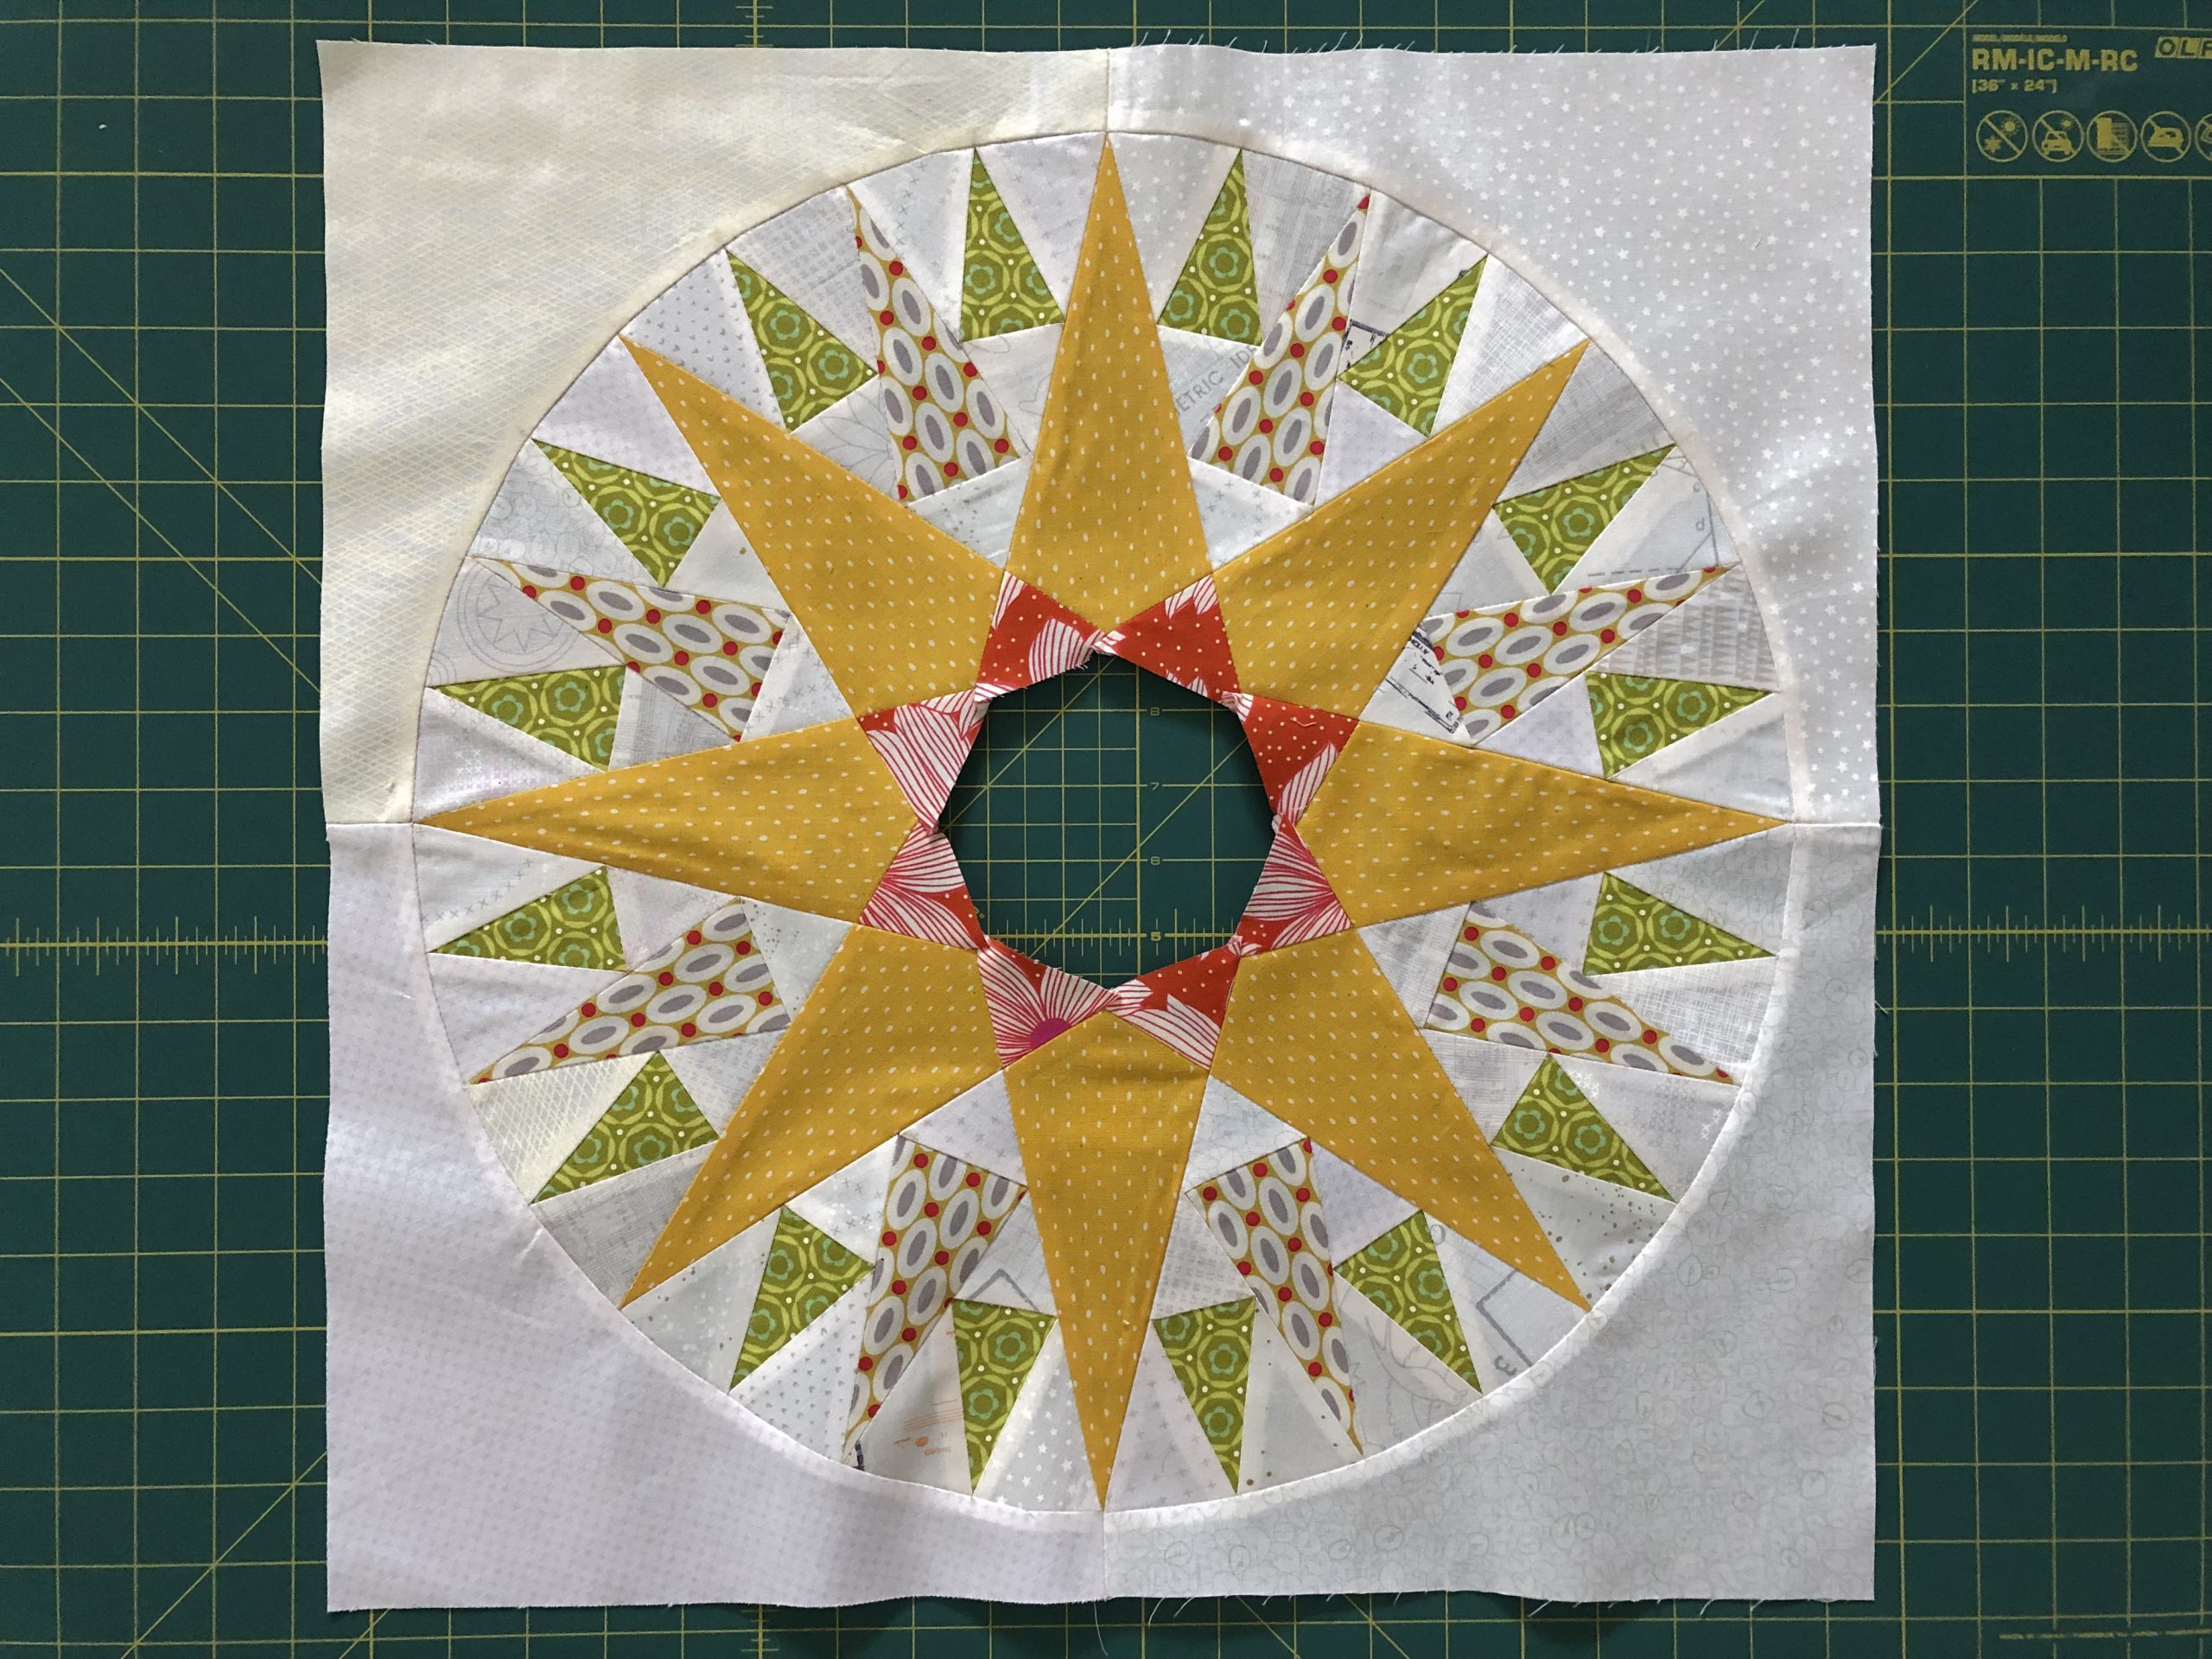
This is where the pattern piece A now goes.

Each section between the main piece and the center piece has to be sewn individually. To do this, it is best to draw the points on the pattern pieces so that you get a nice neat seam.

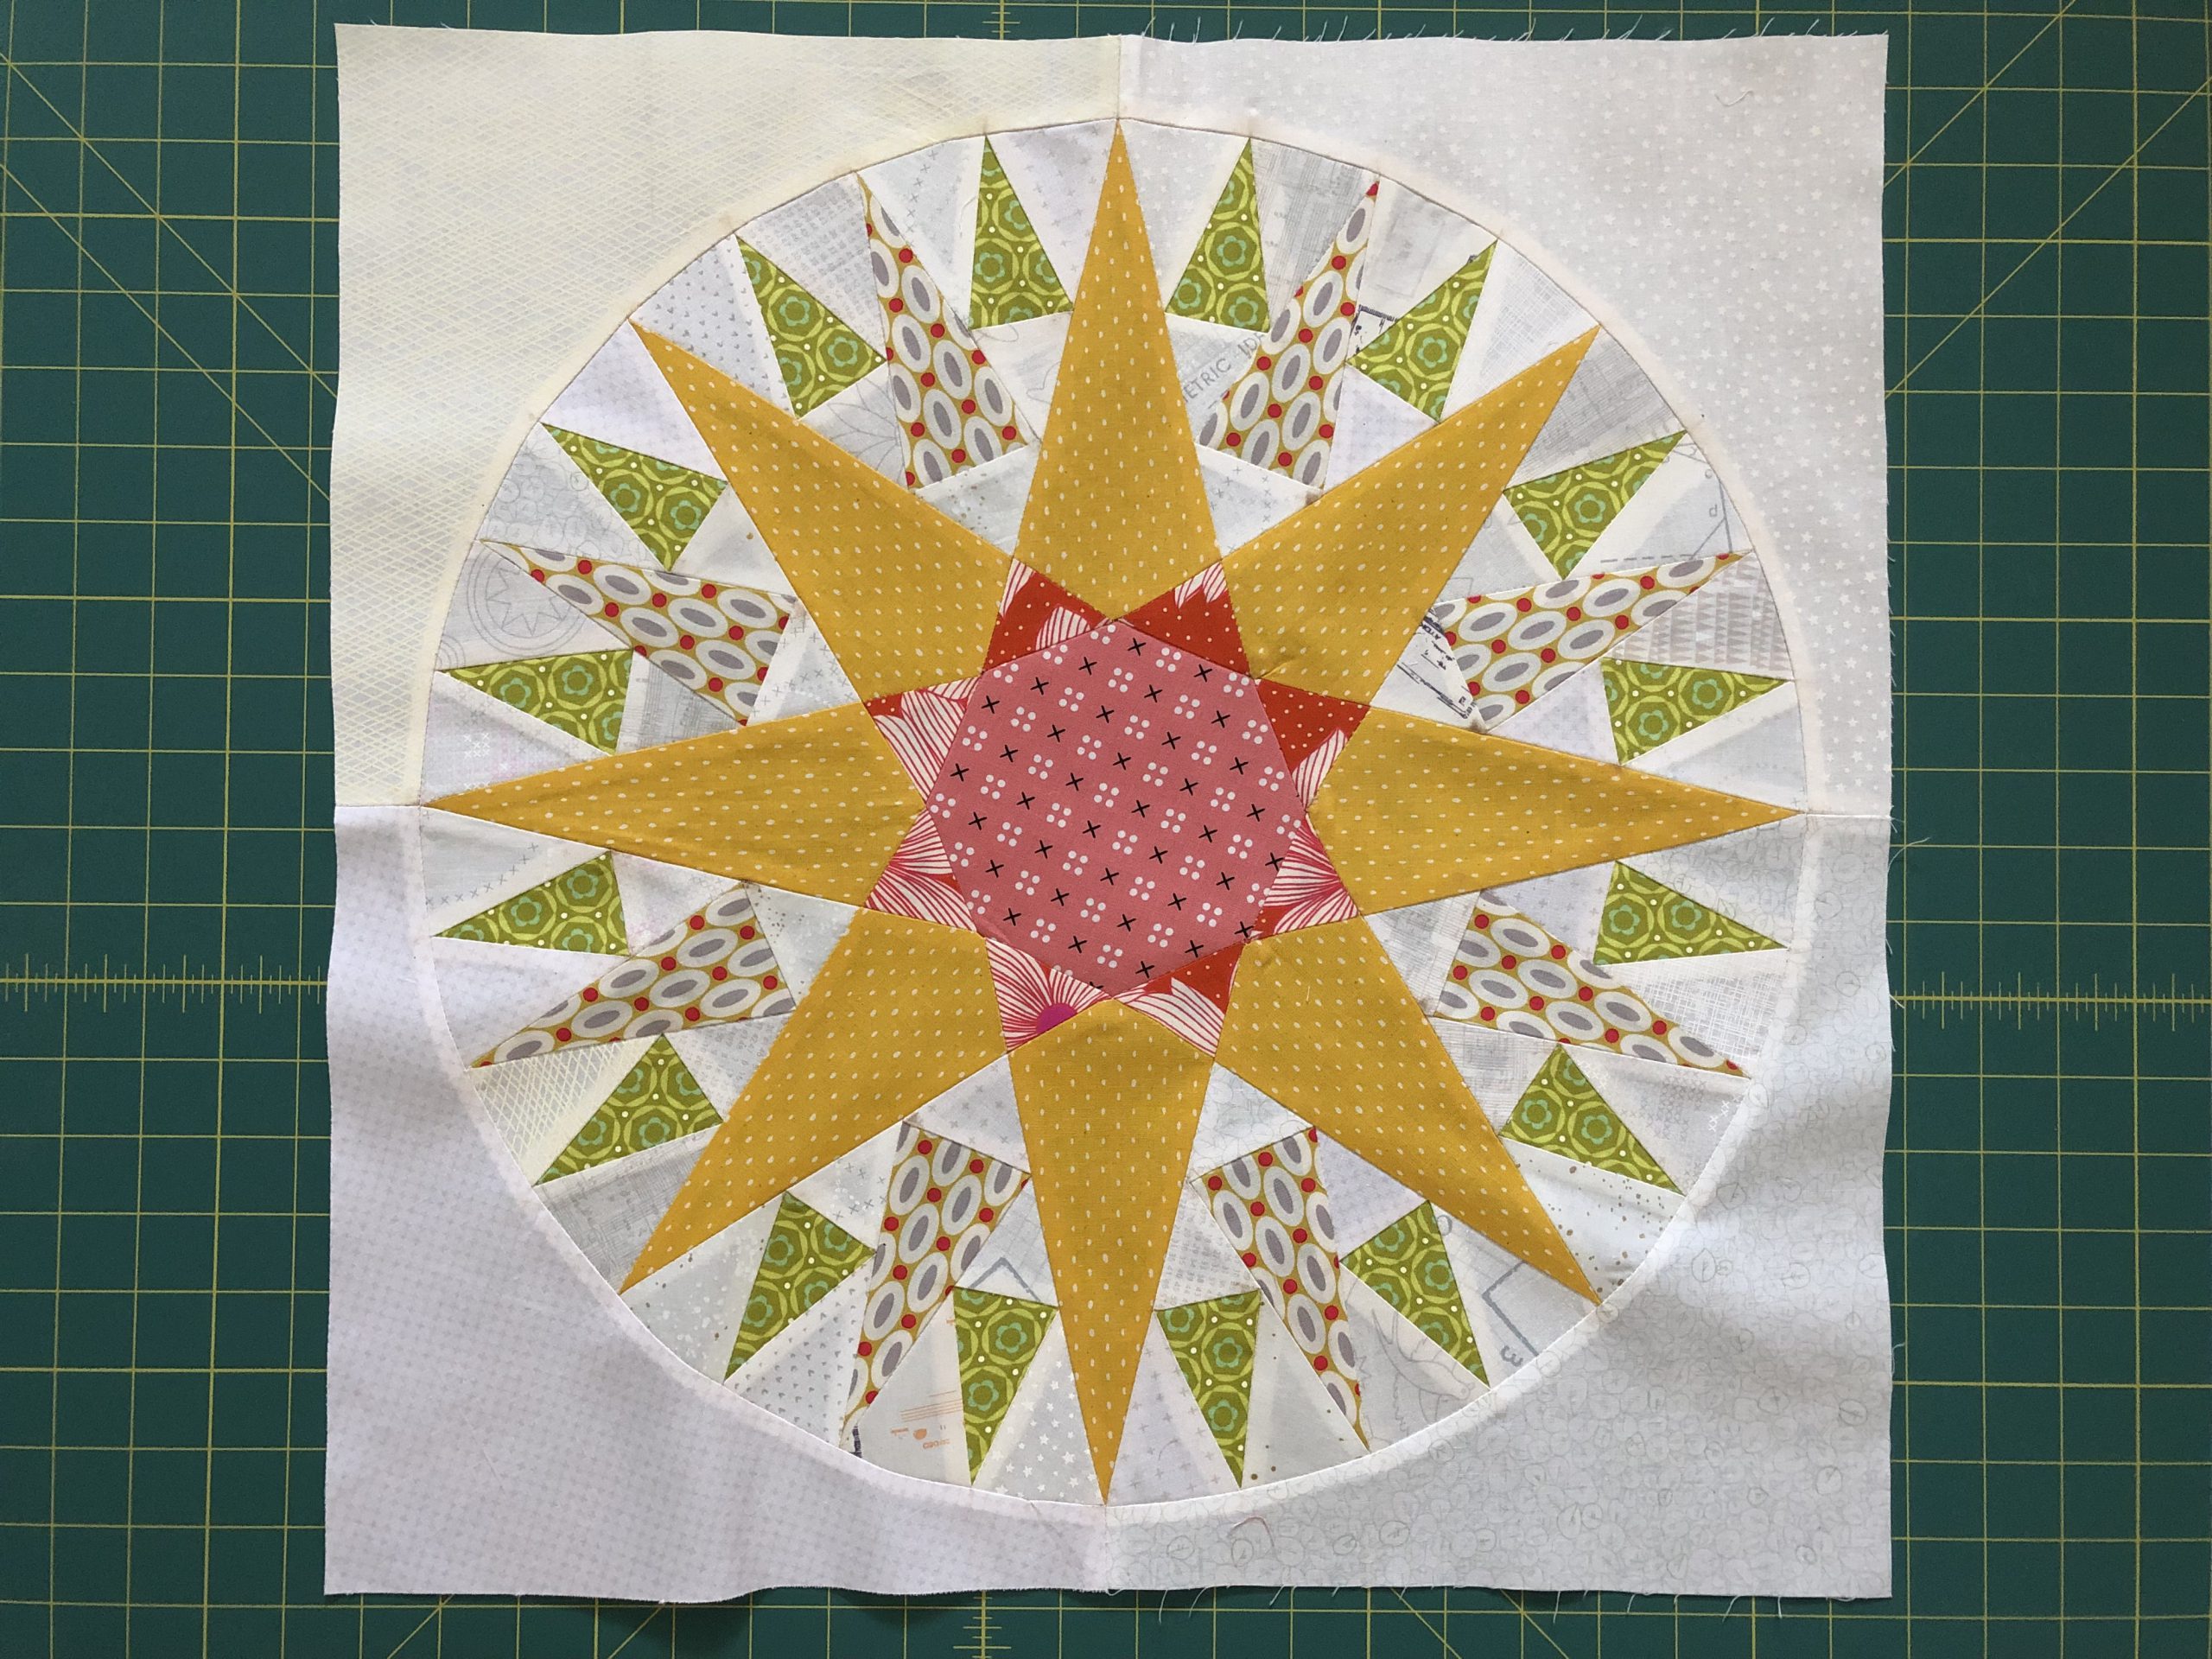
When all the seams on the center piece have been closed, this beautiful “Mariner’s Compass” is finished!
So, my dear participants, that was the last block for this year! The quilt-along will be back again in January. If you’ve gotten a bit behind with the blocks, this will give you plenty of time to sew them.
Make your own “Mariner’s Compass” block and post it here in the Community area of the BERNINA blog, on Instagram or on Facebook – wherever you prefer to show us your beautiful creations. Don’t forget to tag your picture with the hashtag #BERNINAOldBlockSampler on the social media channels!
New here?
Have you only just discovered the quilt-along? No problem! You can join at any time. Registration is not required, and you can win a BERNINA 570 QE! All the posts will remain permanently available:
In the first post, which was the invitation to participate in the quilt-along, you will find the important initial information about our joint project:
Old Block Quilt-Along – who’s in?
You can find the rest of the blocks from the quilt-along that have already been published here:
Old Block Quilt-Along – overview of all the posts
I’m glad you’re taking part and I hope to see more wonderful pictures of your blocks!
See you soon,
Andrea
Thanks for the quilt blocks
Dear Andrea,Thank you so much for these beautiful blocks. I’m looking forward to working on this quilt!