 BERNINA Corporate Blog -
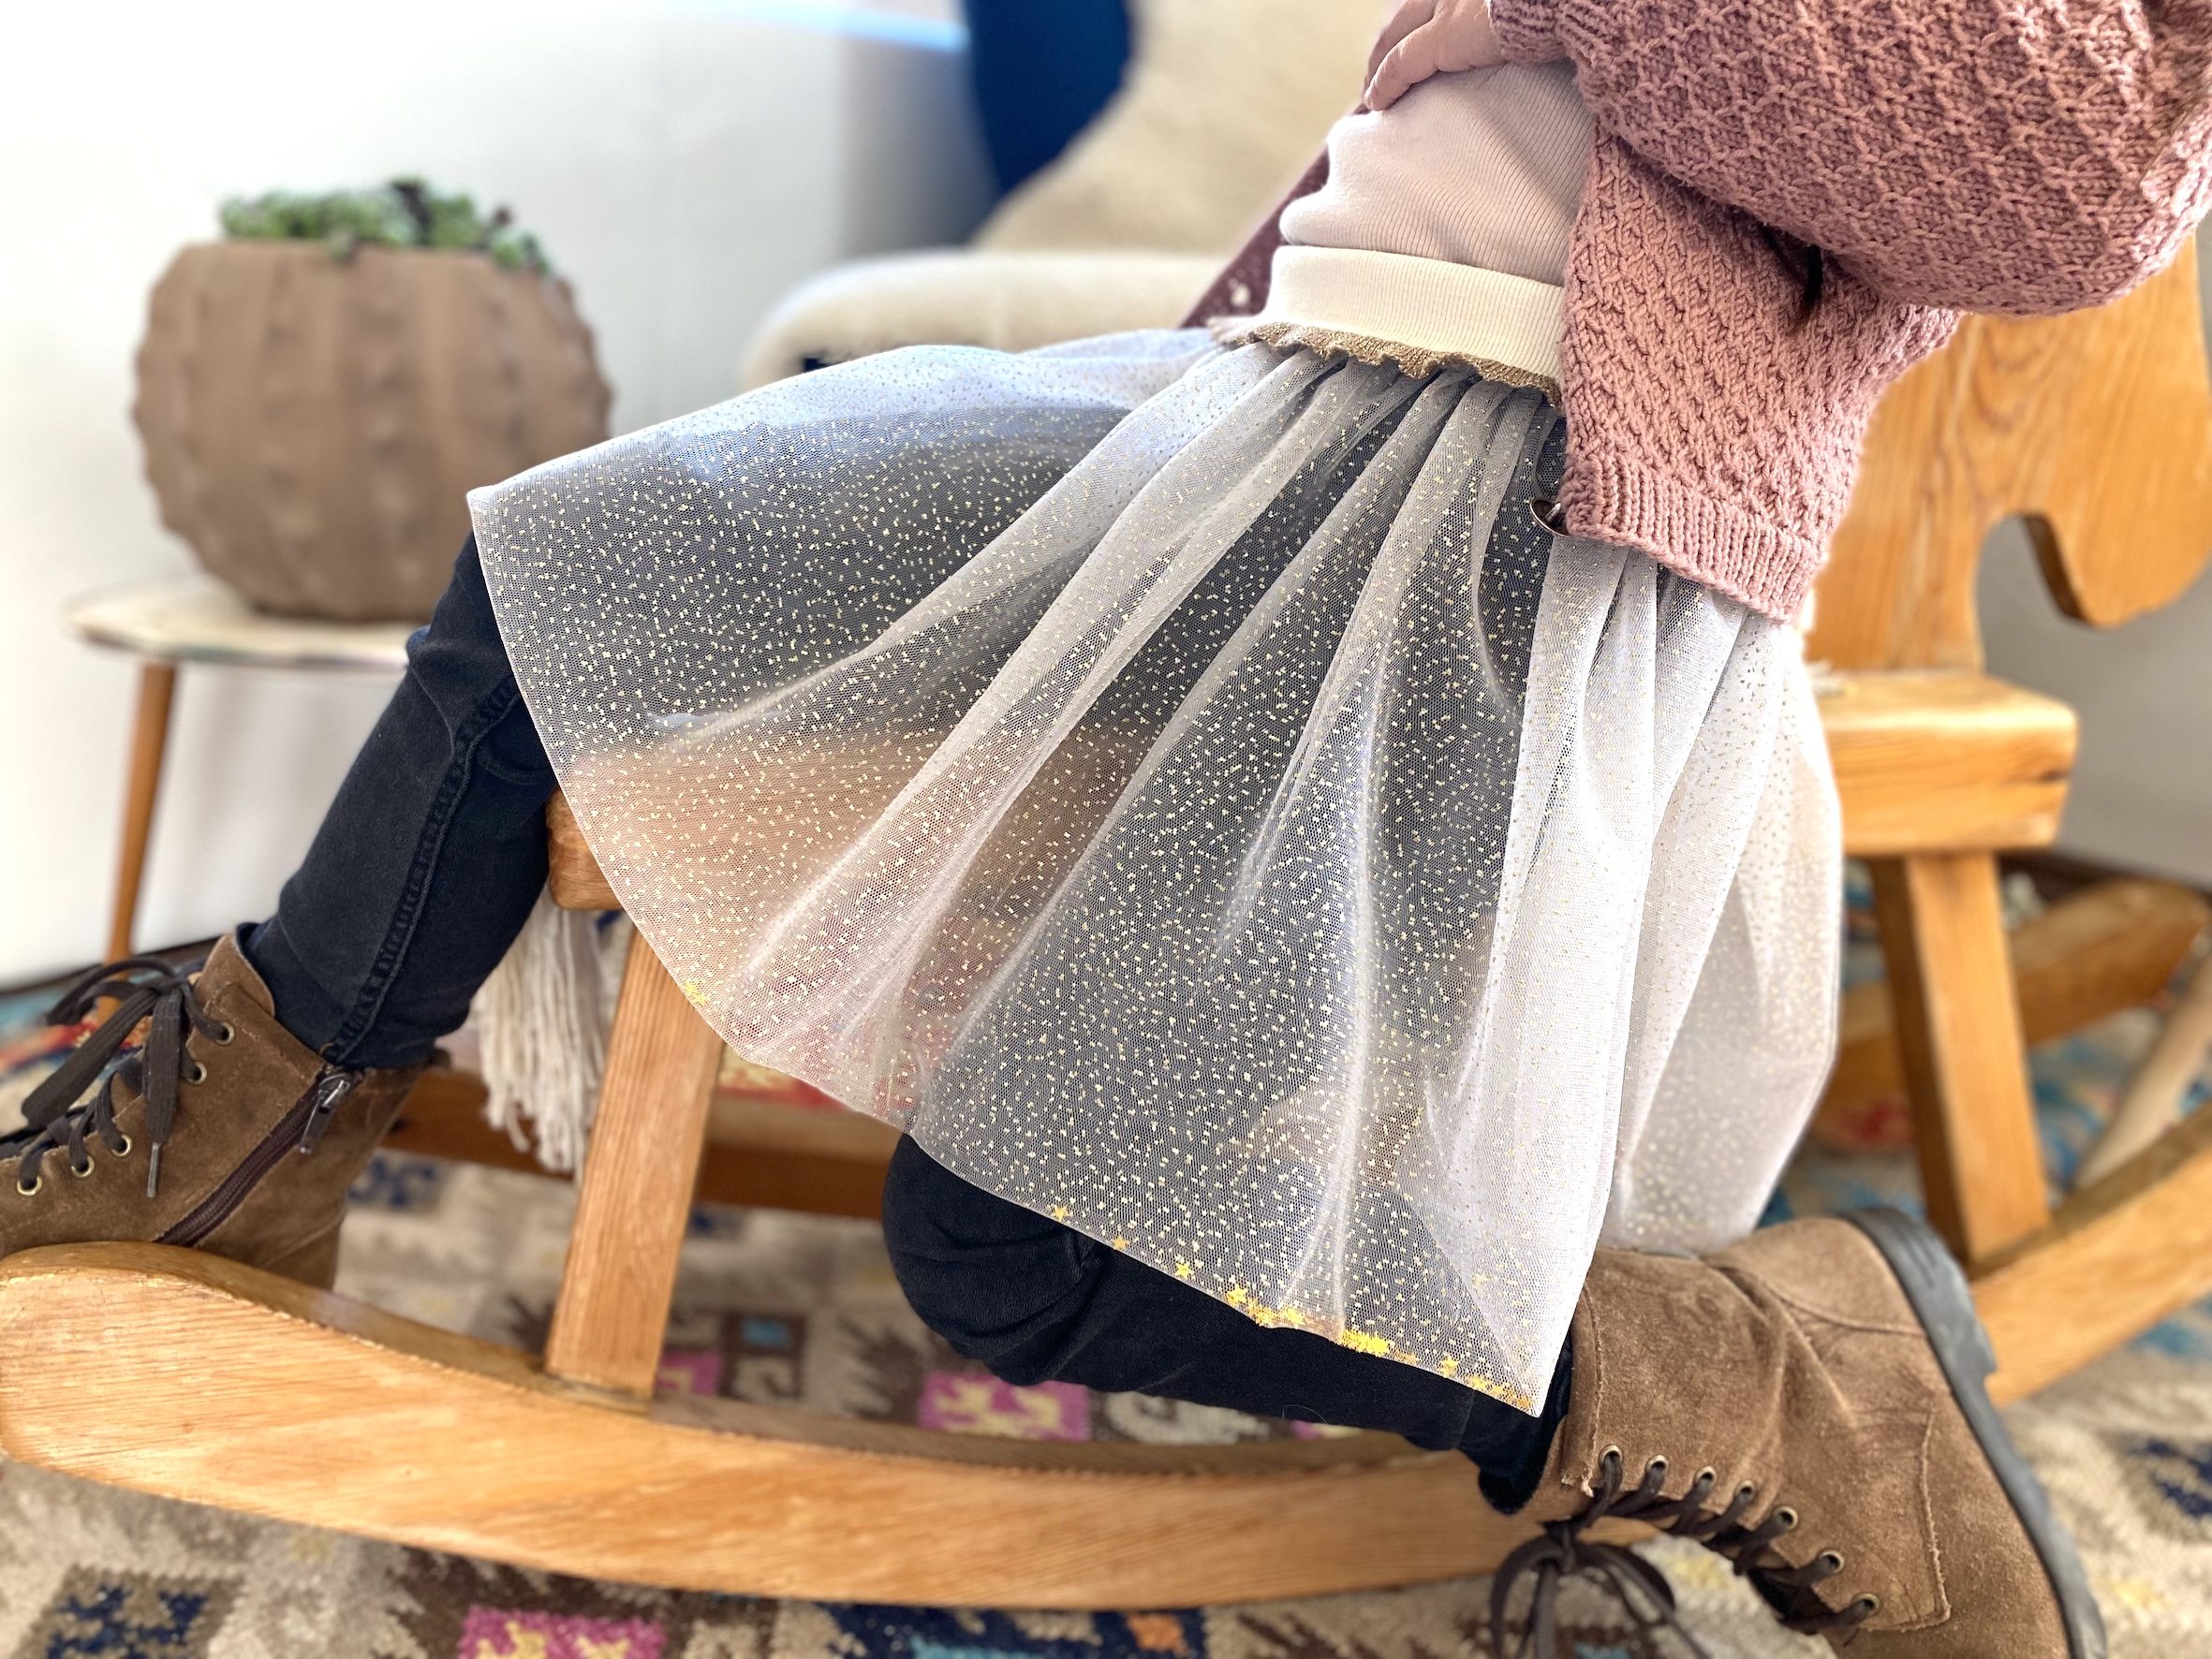
It’s only 4 days to Christmas and 10 days to New Year’s Eve! How about a last-minute glitter skirt for a sparkling Christmas full of glamour? I’m going to show you how to sew a tulle skirt that is very simple and completely suitable for beginners, but still has sophisticated details and glittering extras!
The waistband is made from ready-made cuffing with glitter ruffle, the soft tulle is printed with glitter dots and the skirt is covered with glitter stars!
Sewing a tulle skirt – instructions
What you will need
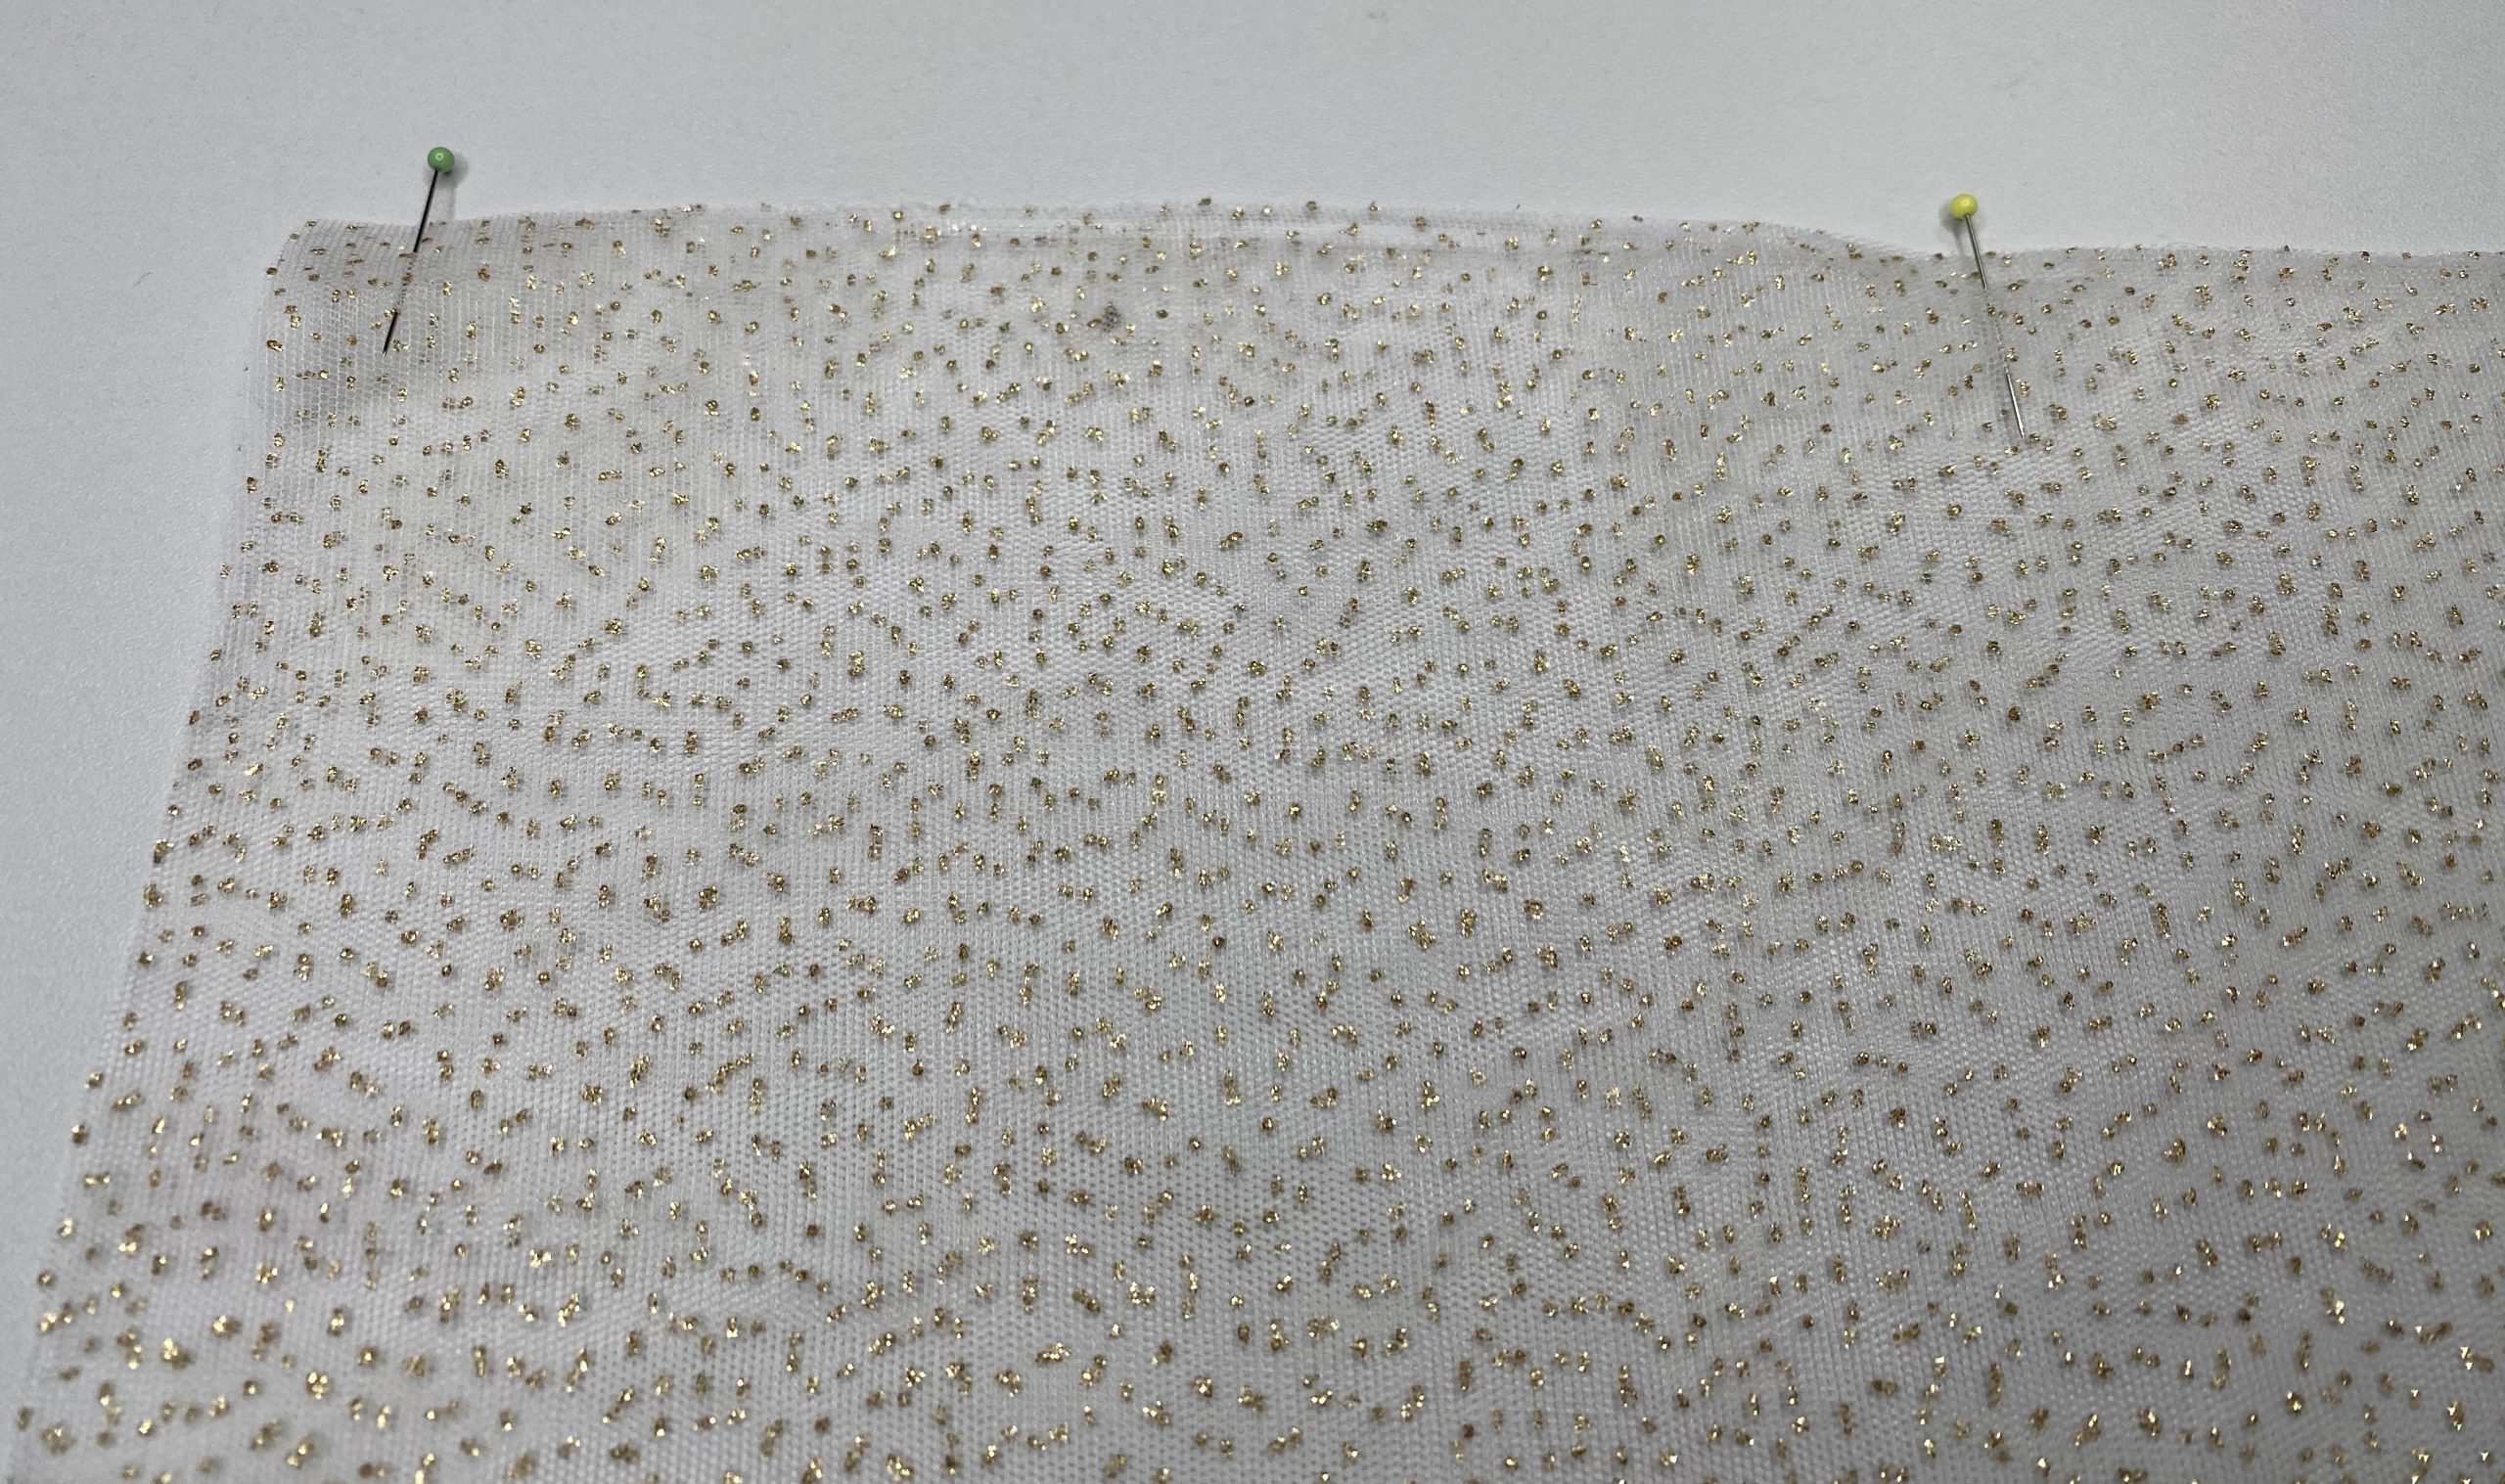
- Soft tulle (optionally with a glitter print)
- Ready-made cuffing (optionally with glitter edge)
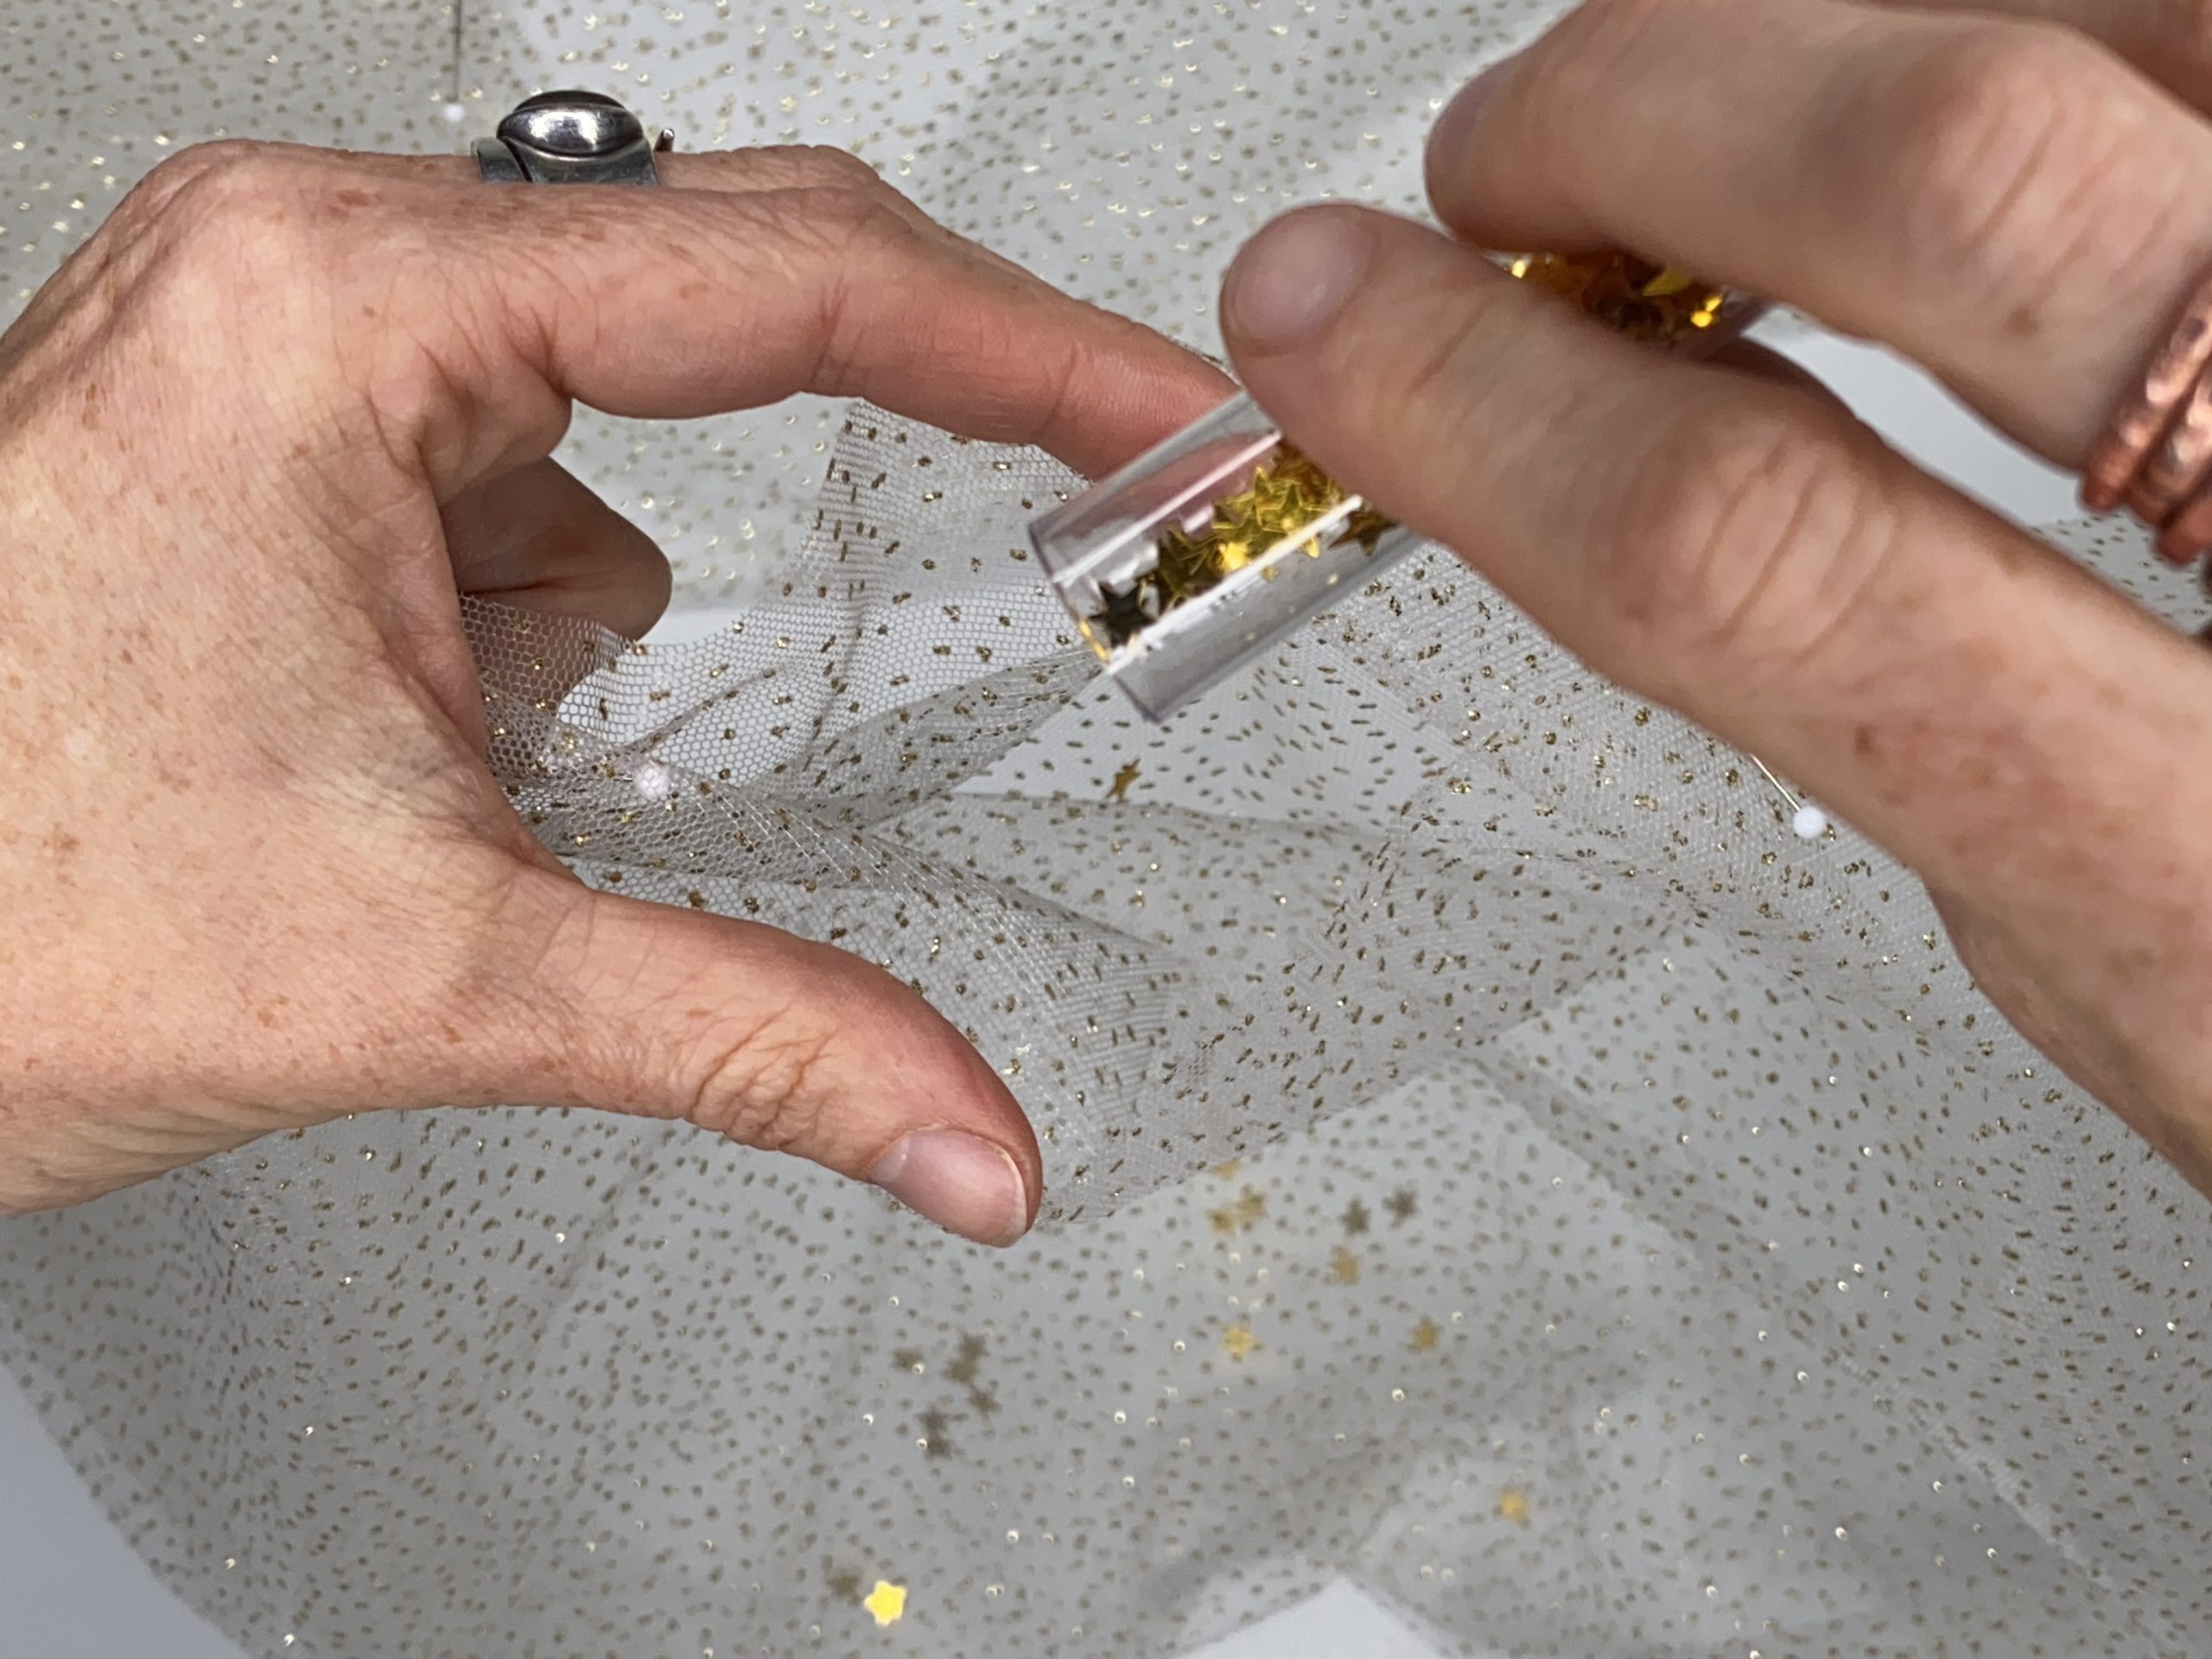
- Glitter or stars (craft supplies)
- Matching sewing thread
- Sewing machine
- Overlocker (optional)
- Pins or
- Clips
- Scissors or
- Cutting mat, ruler and rotary cutter
Preparation – taking measurements
You can sew and adjust the skirt for any size! I sewed this star skirt for my daughter, who wears age 6 clothes. The cutting measurements provided below in the next paragraph are for this size. However, you can adjust them for your required size. To do this, you first have to take and note down two measurements:
- The circumference where the waistband should sit and
- The desired skirt length from the bottom edge of the waistband.
Preparing the tulle skirt – cutting out
The skirt is double-layered, but is only made from one piece (provided the fabric width is sufficient). The piece of tulle is therefore twice as high as the desired skirt length, as it is folded at the hem. I calculated the width as three times the waistband width. So cut out the following:
- The ready-made cuffing:
measured waist size minus 2-5 cm (reducing it slightly and omitting a seam allowance gives it a little more tension so it fits well later on).
In this example, this was 50 cm (measured waist size was 52 cm). - The tulle:
height = double the skirt length, length = approx. 3 x waistband width.
In this example, this was 60 cm (height) by 150 cm (width), which was the width of the fabric.
If you need more width because you want to make the skirt bigger, you can attach several panels together. It is best to cut these straight pieces on a cutting mat with a ruler and rotary cutter.
Gathering the tulle skirt
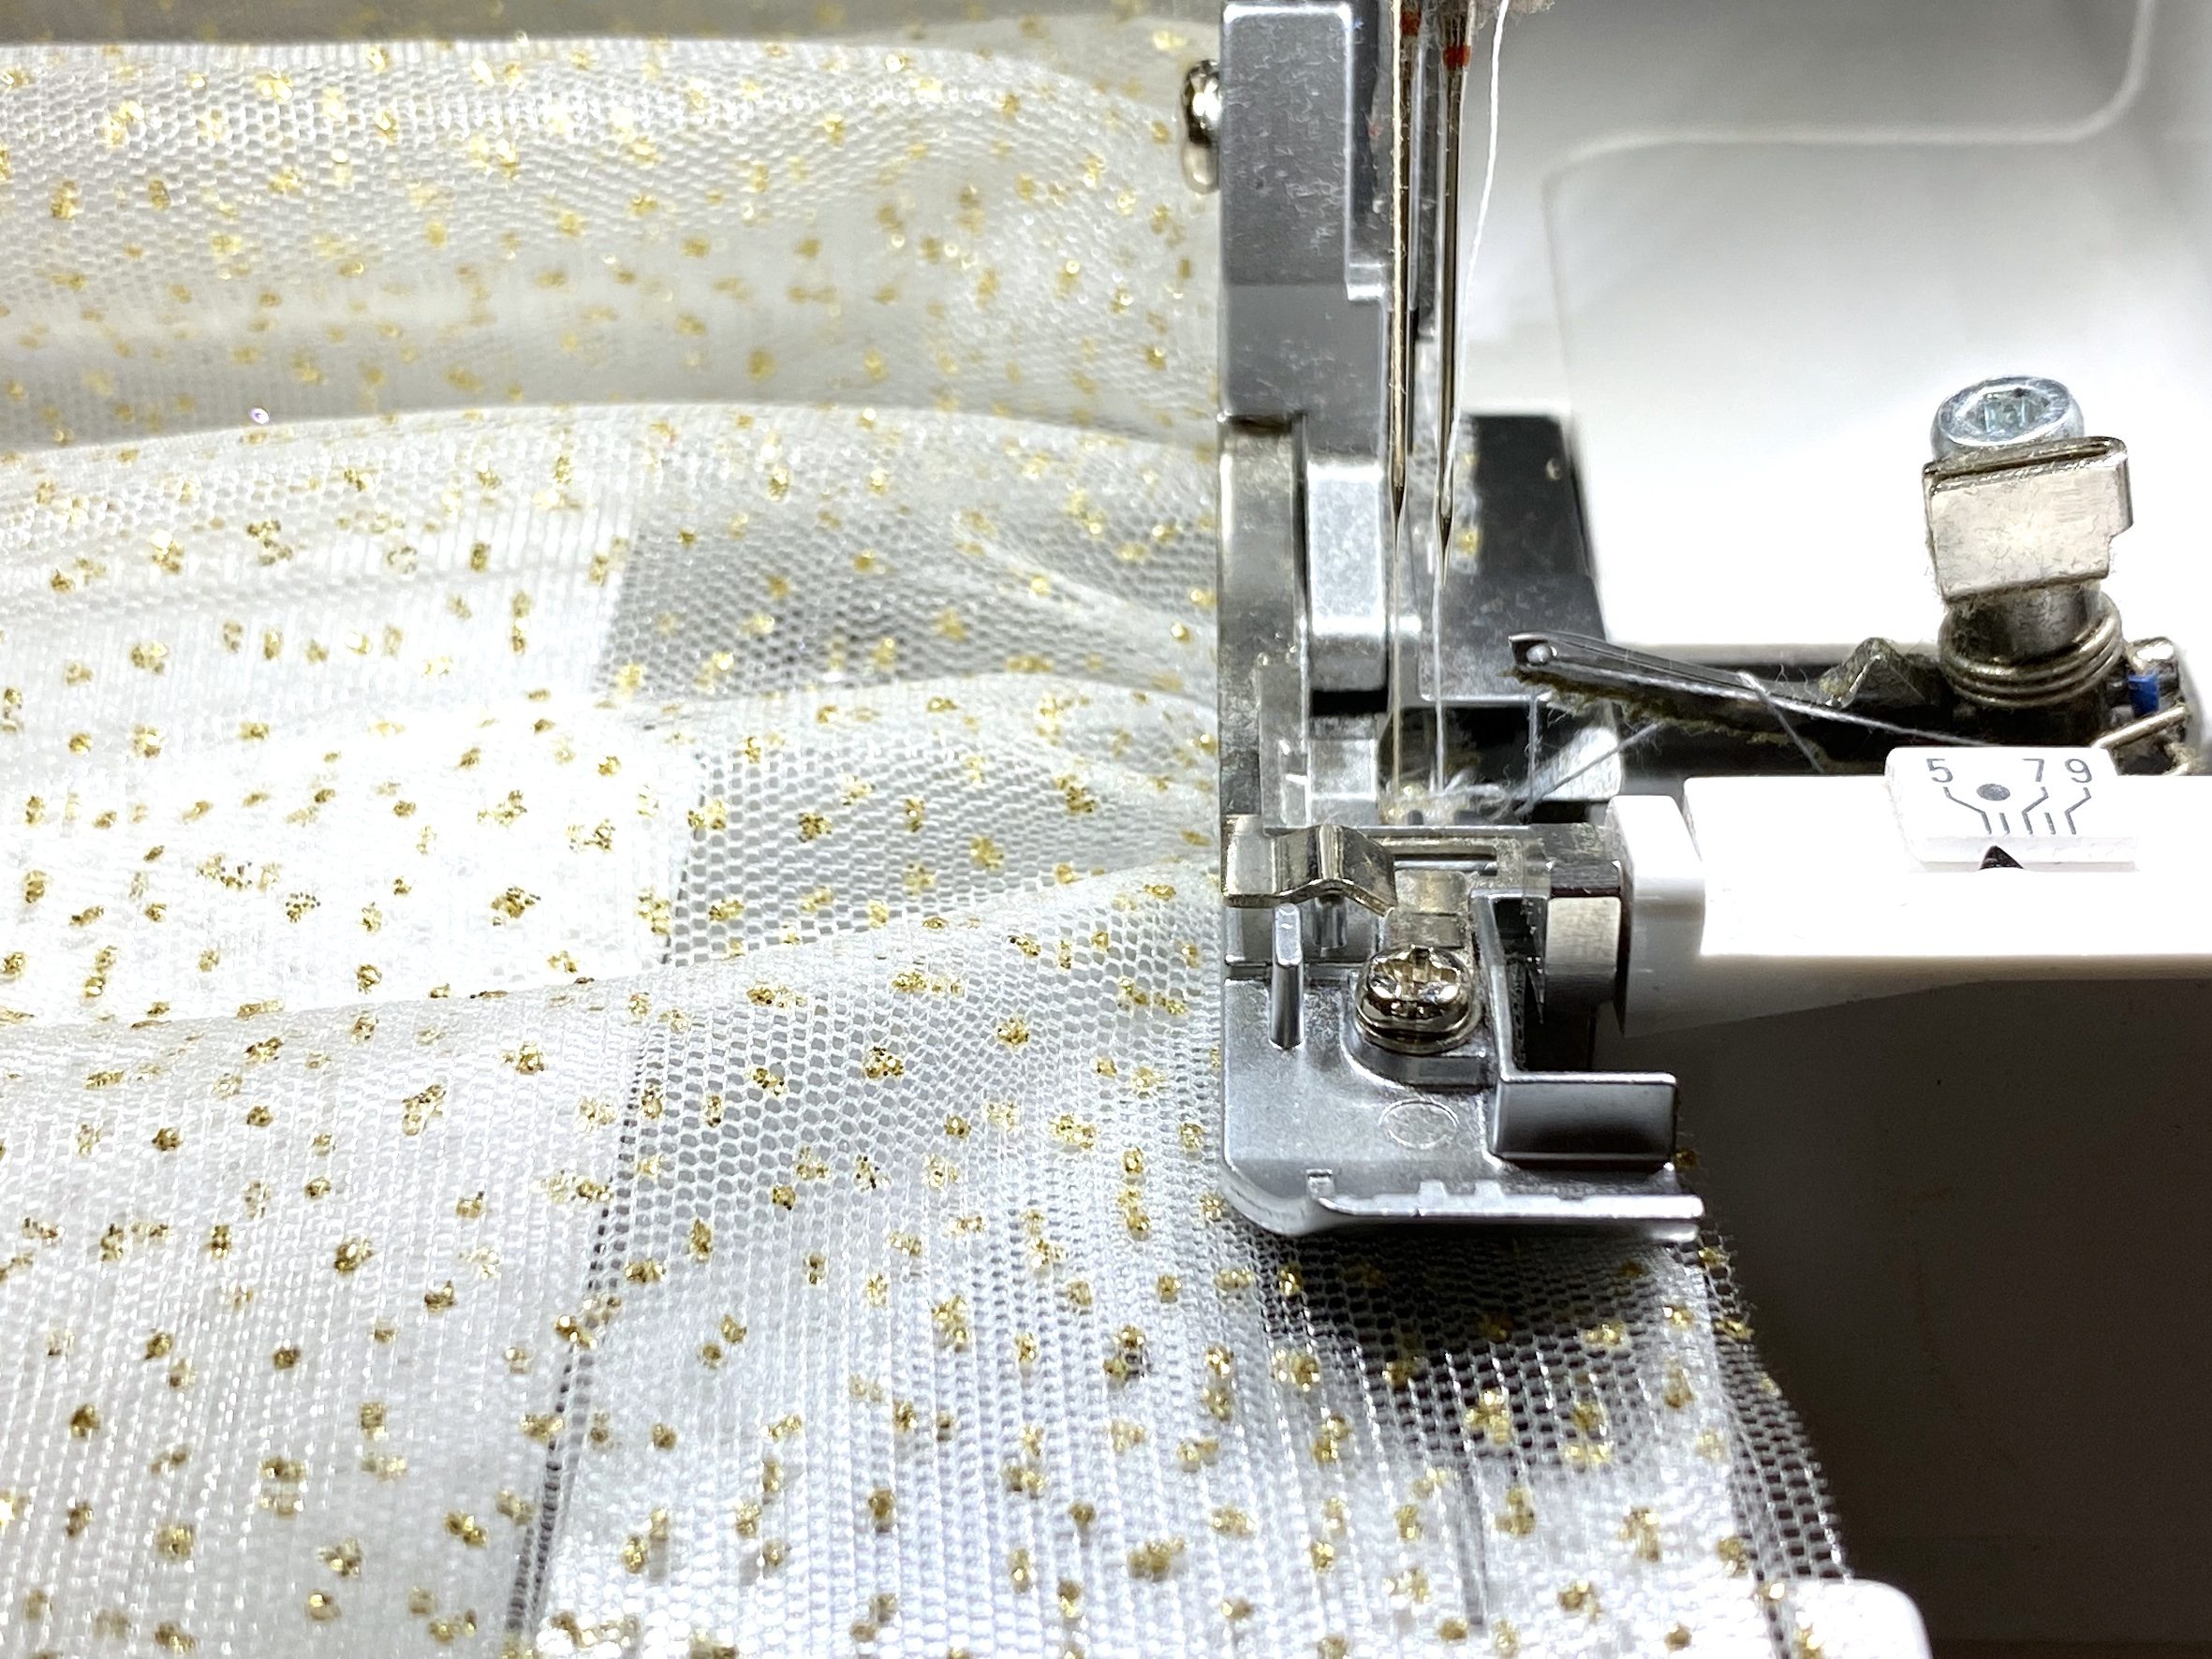
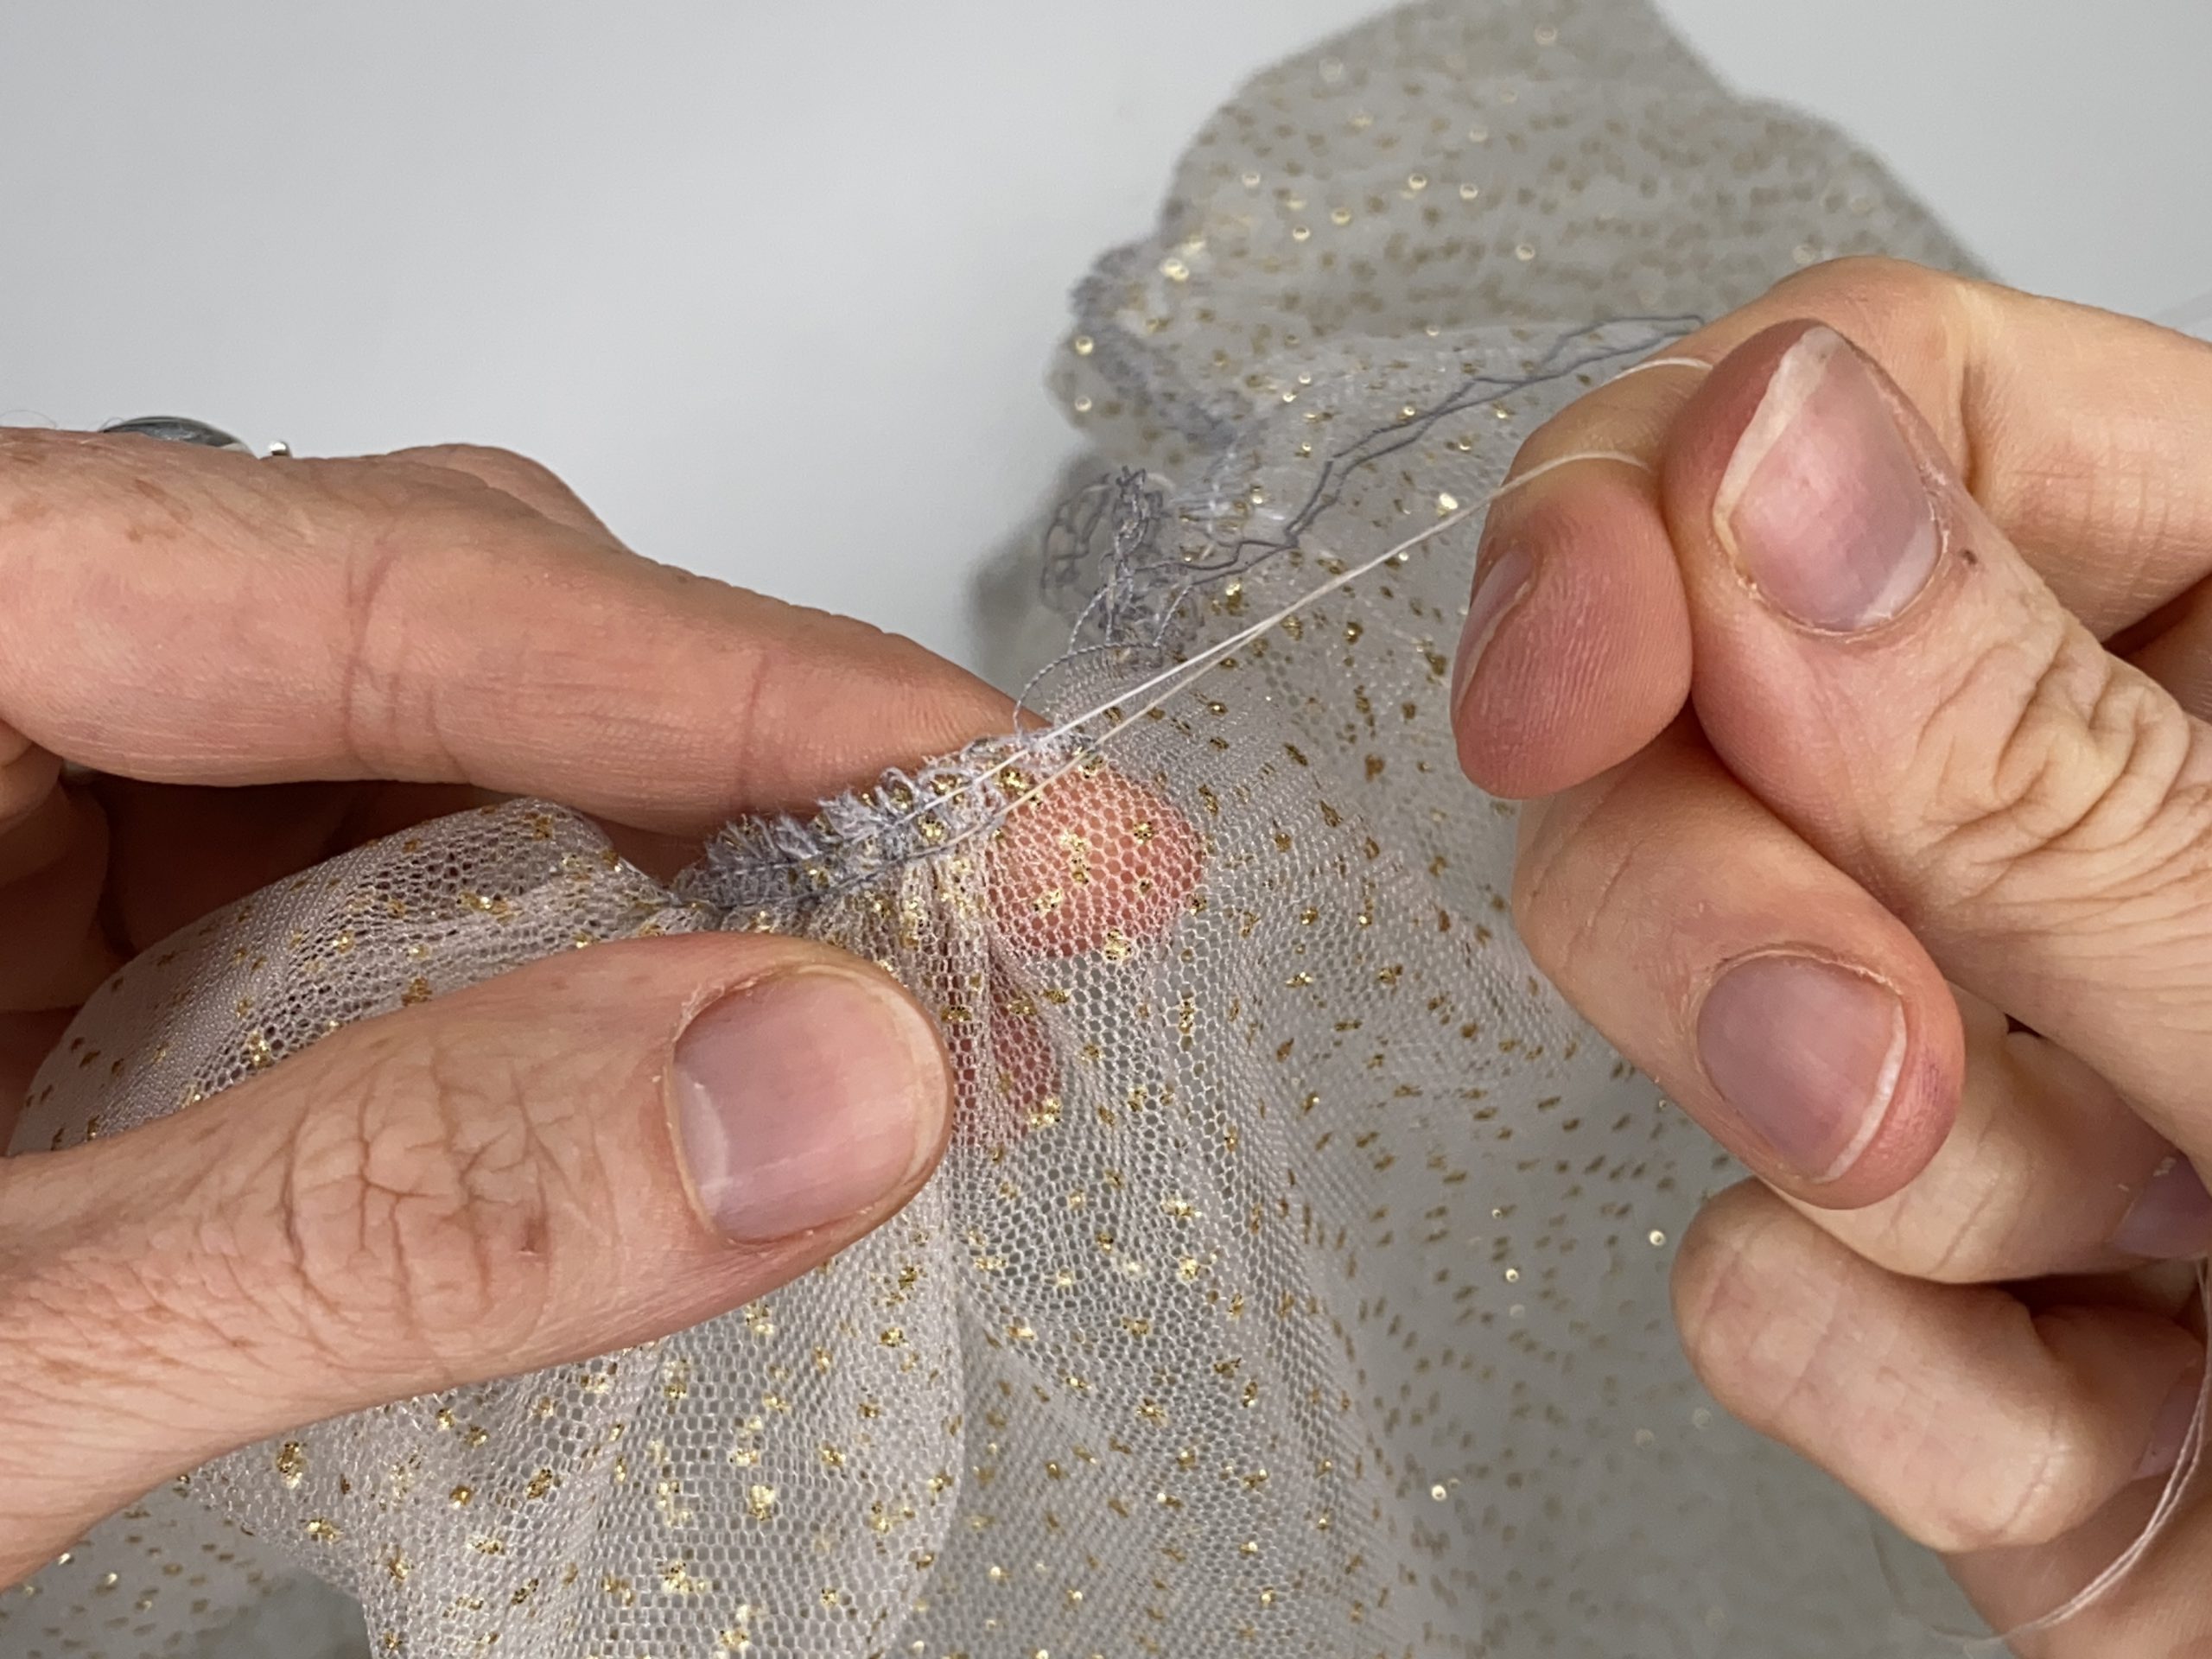
First, we prepare the tulle. To do this, we first close the side(s). Lay out the tulle with the right sides together so that the short sides are flush with each other and can be sewn a presser foot width from the edge. The thread color should match the tulle, as the seam will always remain visible due to the transparency. For this reason, I also recommend a narrow seam allowance here.
Once the tulle is closed to form a ring, you can fold the skirt piece lengthwise so that there is a folded edge at the hem. Lay the long sides flush with each other with the right side of the fabric on the outside. Fold the seam allowances in opposite directions so that they are nicely distributed.

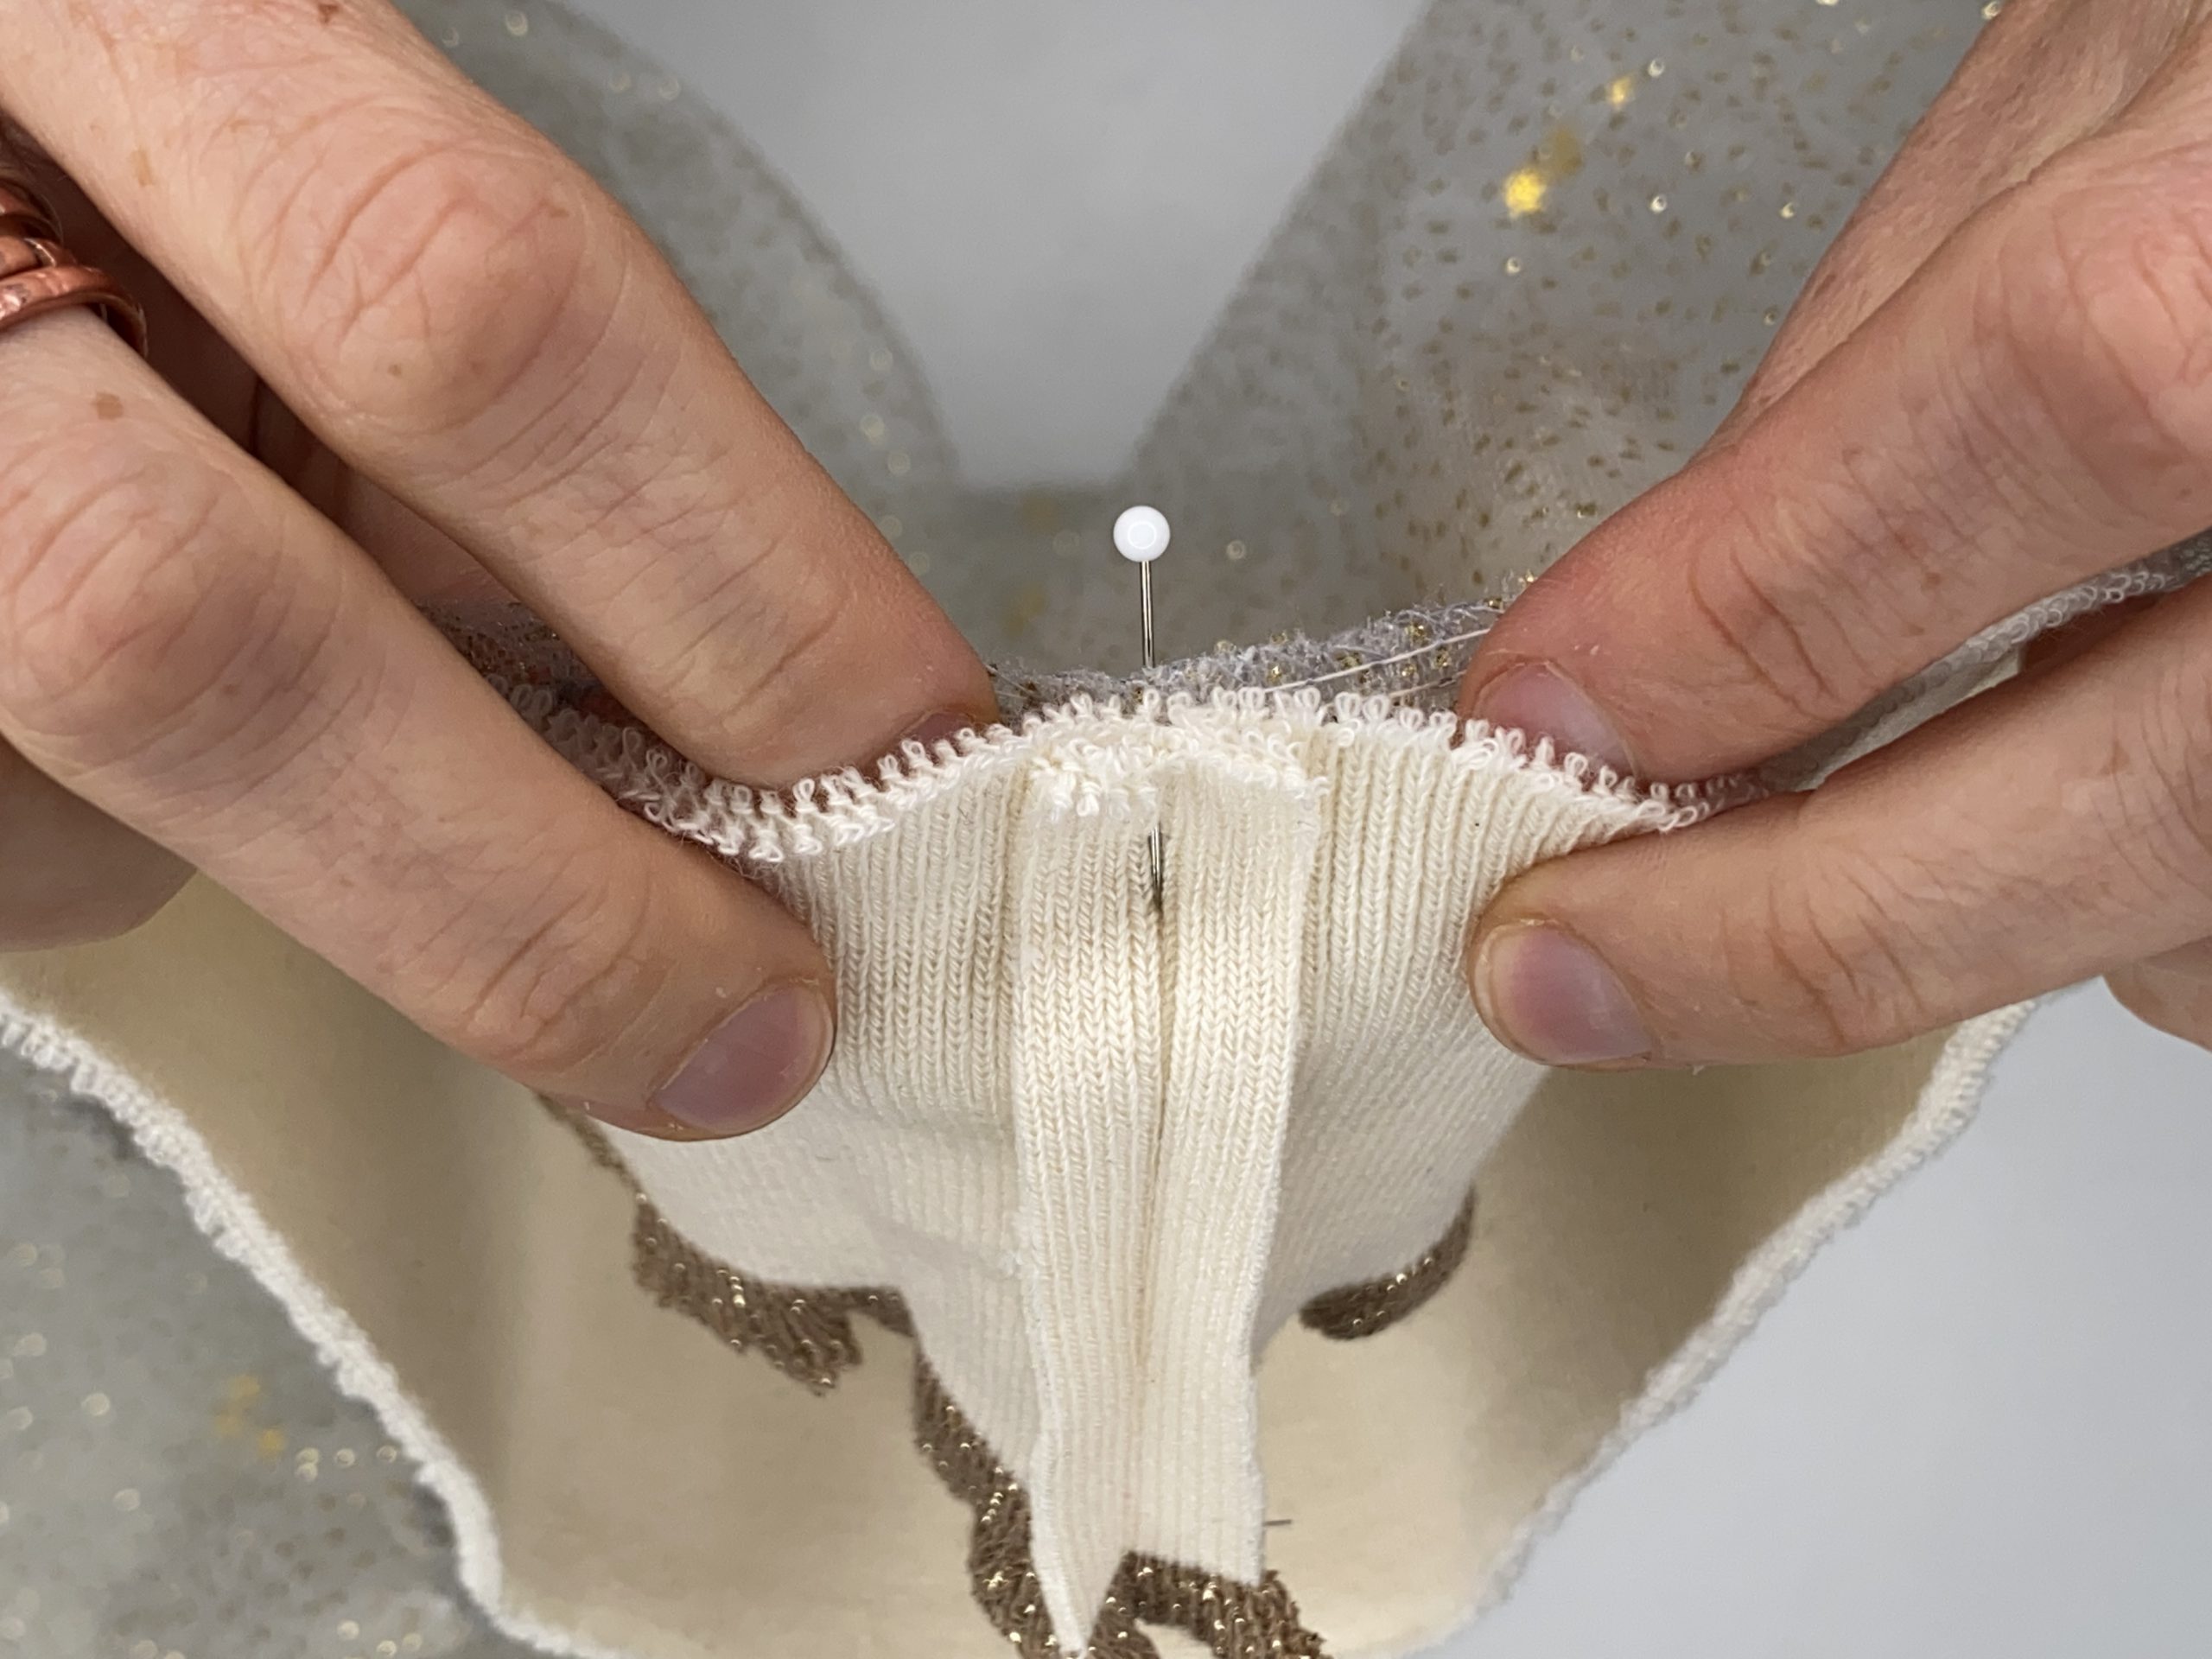
You can secure the open edges at this stage with clips or pins. The skirt section can now be covered with stars. They lie loosely later on and can be spread over the entire skirt.
Next, we gather in the edges that have just been pinned together. I did this on my BERNINA L 460. For this, I

- reduced the seam width slightly
- set a long stitch length and
- selected the highest differential feed setting.
Sew like this around the edge once and leave a small gap between the beginning and the end so that you can gather it more here if necessary. Alternatively, you can also sew in the traditional way on a sewing machine using two parallel seams and a long stitch length. Then, as in the next step, pull the upper threads to create the gathering.
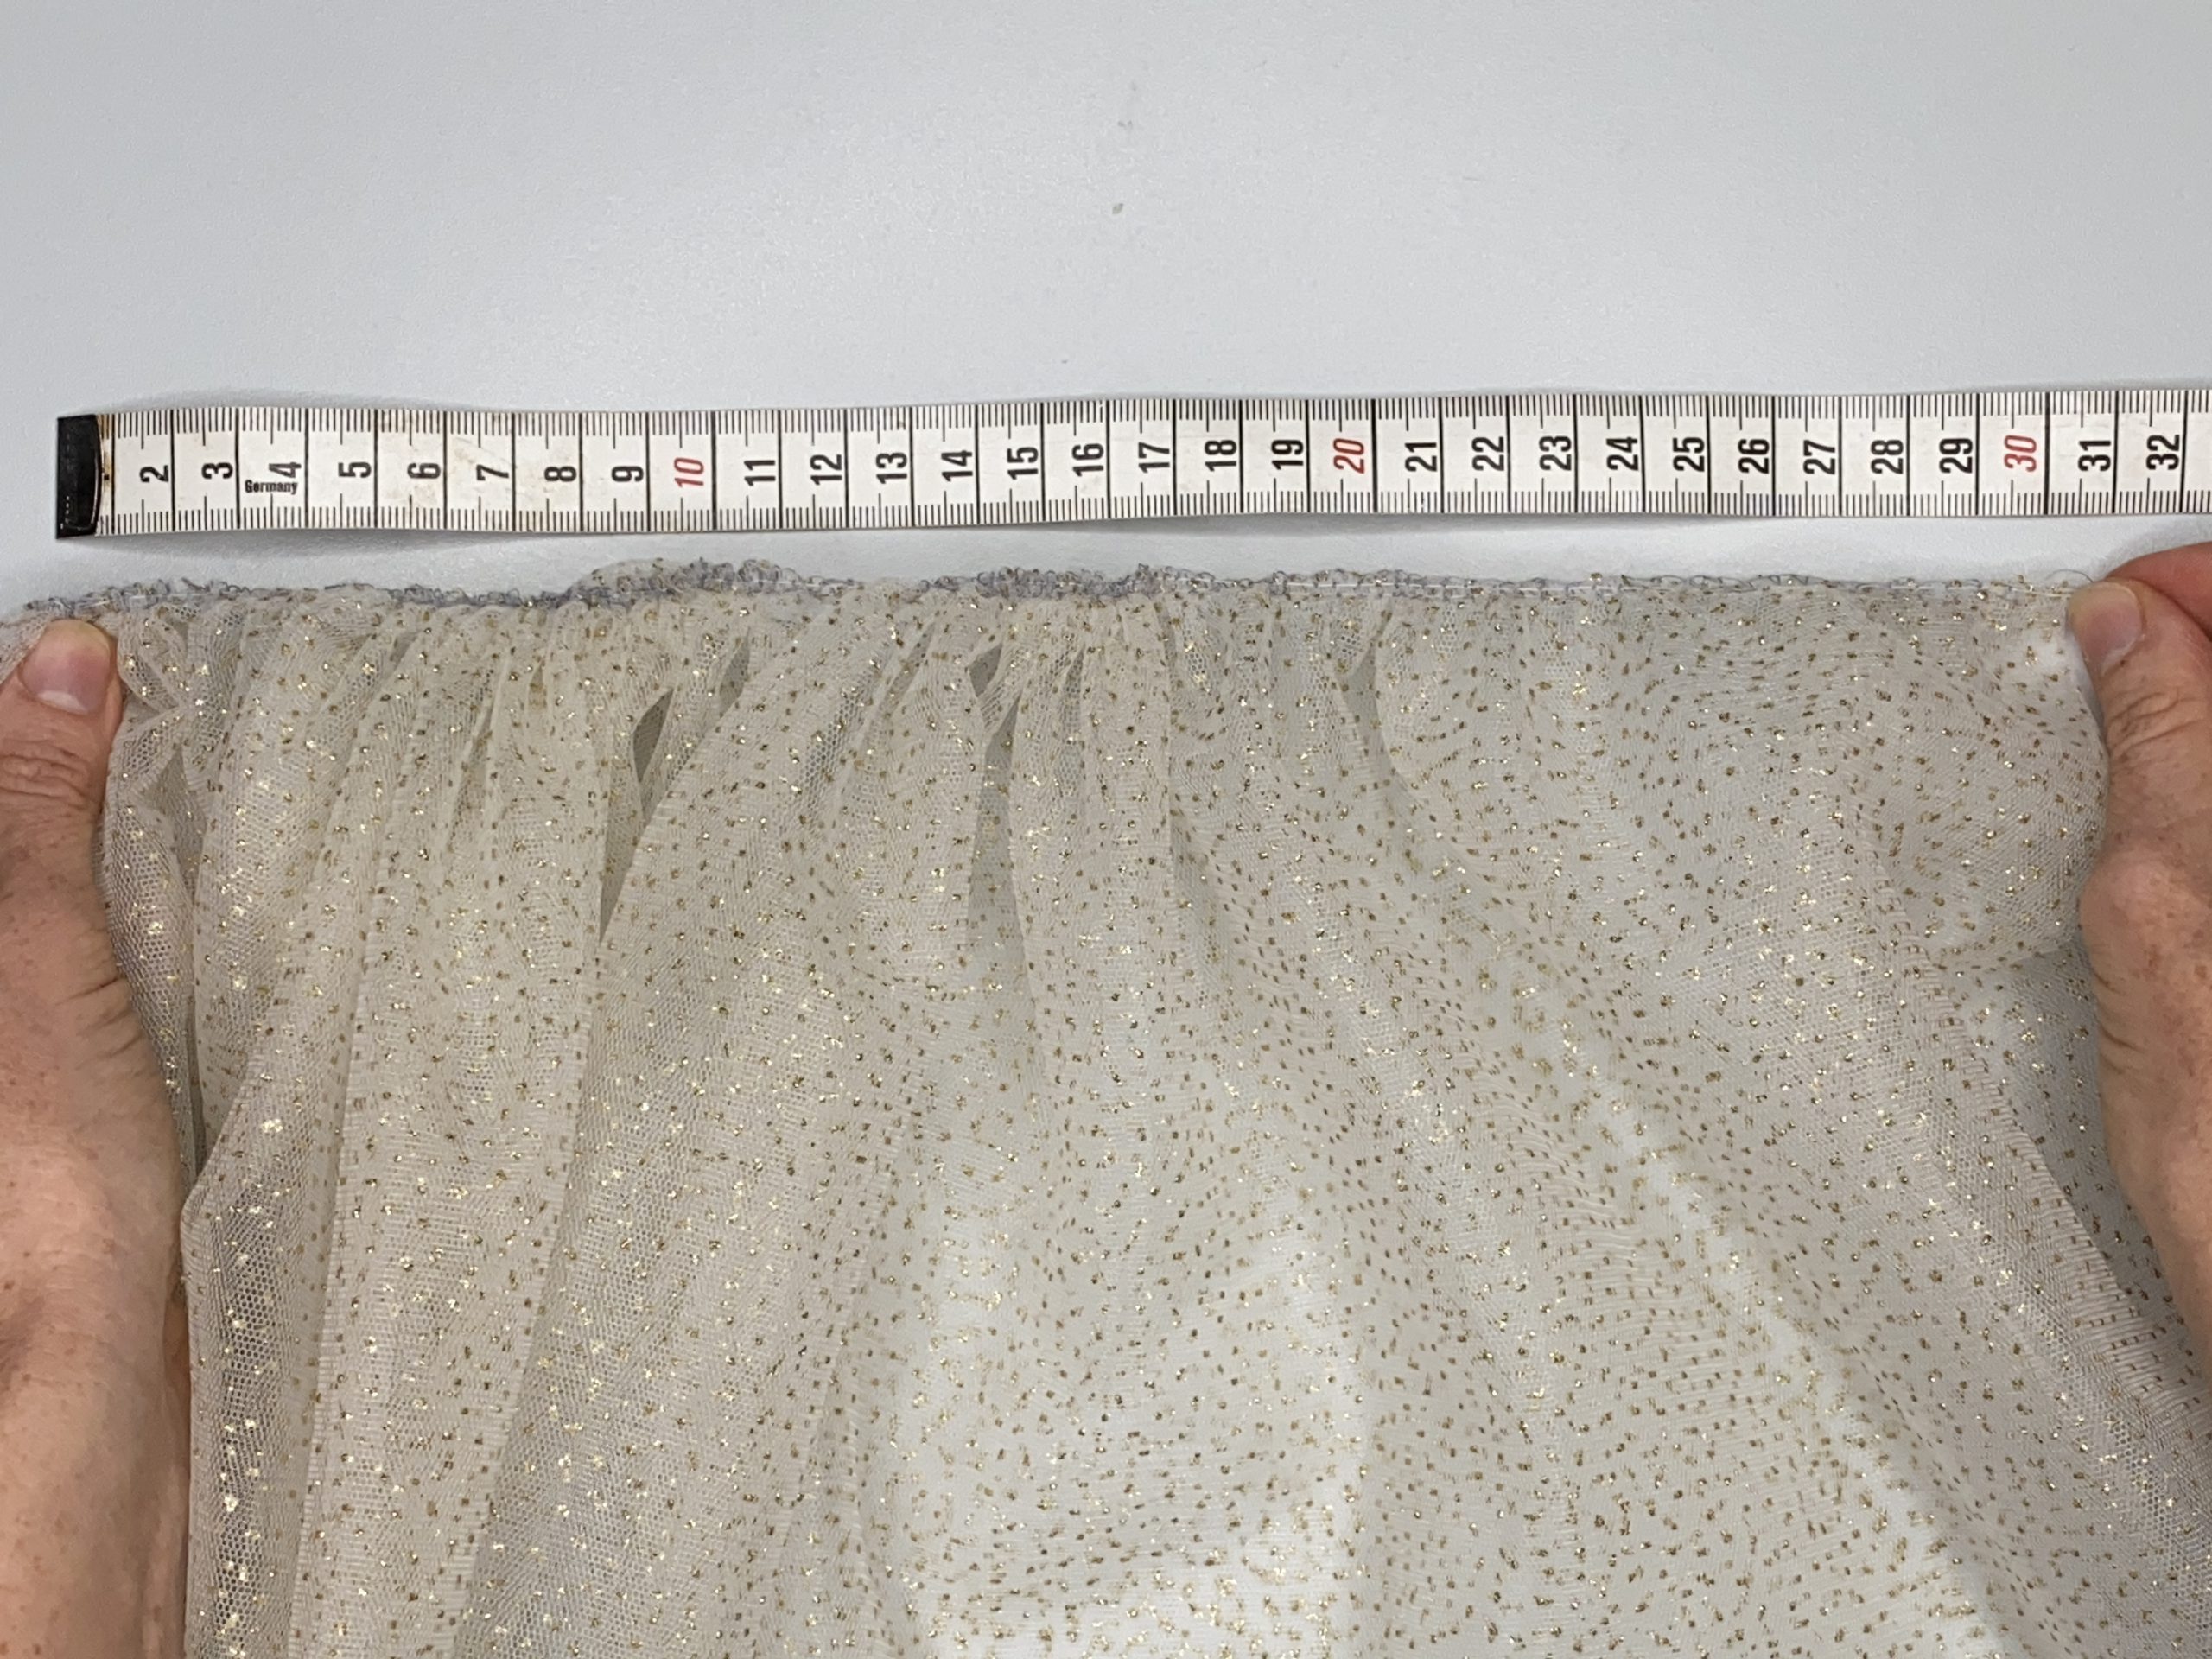
It is likely that the gathering will not be enough. However, you can gather it more by separating out the needle threads from the thread tails and pulling until the desired width is reached. This should be slightly more than the waistband width so that the skirt stretches when it is put on and the waistband stretches.
Once you have reached the desired width, knot the two start and end thread tails together to keep it in place and spread the gathers out evenly. In my example, I gathered the skirt to a width of 60 cm.
Preparing the waistband
The knitted cuffing is now also closed to form a ring, i.e. sewn together along the short sides. To do this, place it with the right sides together and secure the edges with pins or clips so that nothing moves around while you are sewing. I used Walking Foot #50 to stop the cuff from being stretched.
Sewing the tulle skirt and waistband together
The next step is to sew the waistband onto the skirt. To do this, place the knitted cuffing onto the gathered edge of the skirt with the edge that will be on the inside of the skirt later on, open (i.e. not folded yet), with the right sides together. It is best to fold the seam allowance open so that it is distributed nicely later on.
Ideally, do this when you have the waistband inside, then place the skirt piece around it and spread it out evenly.
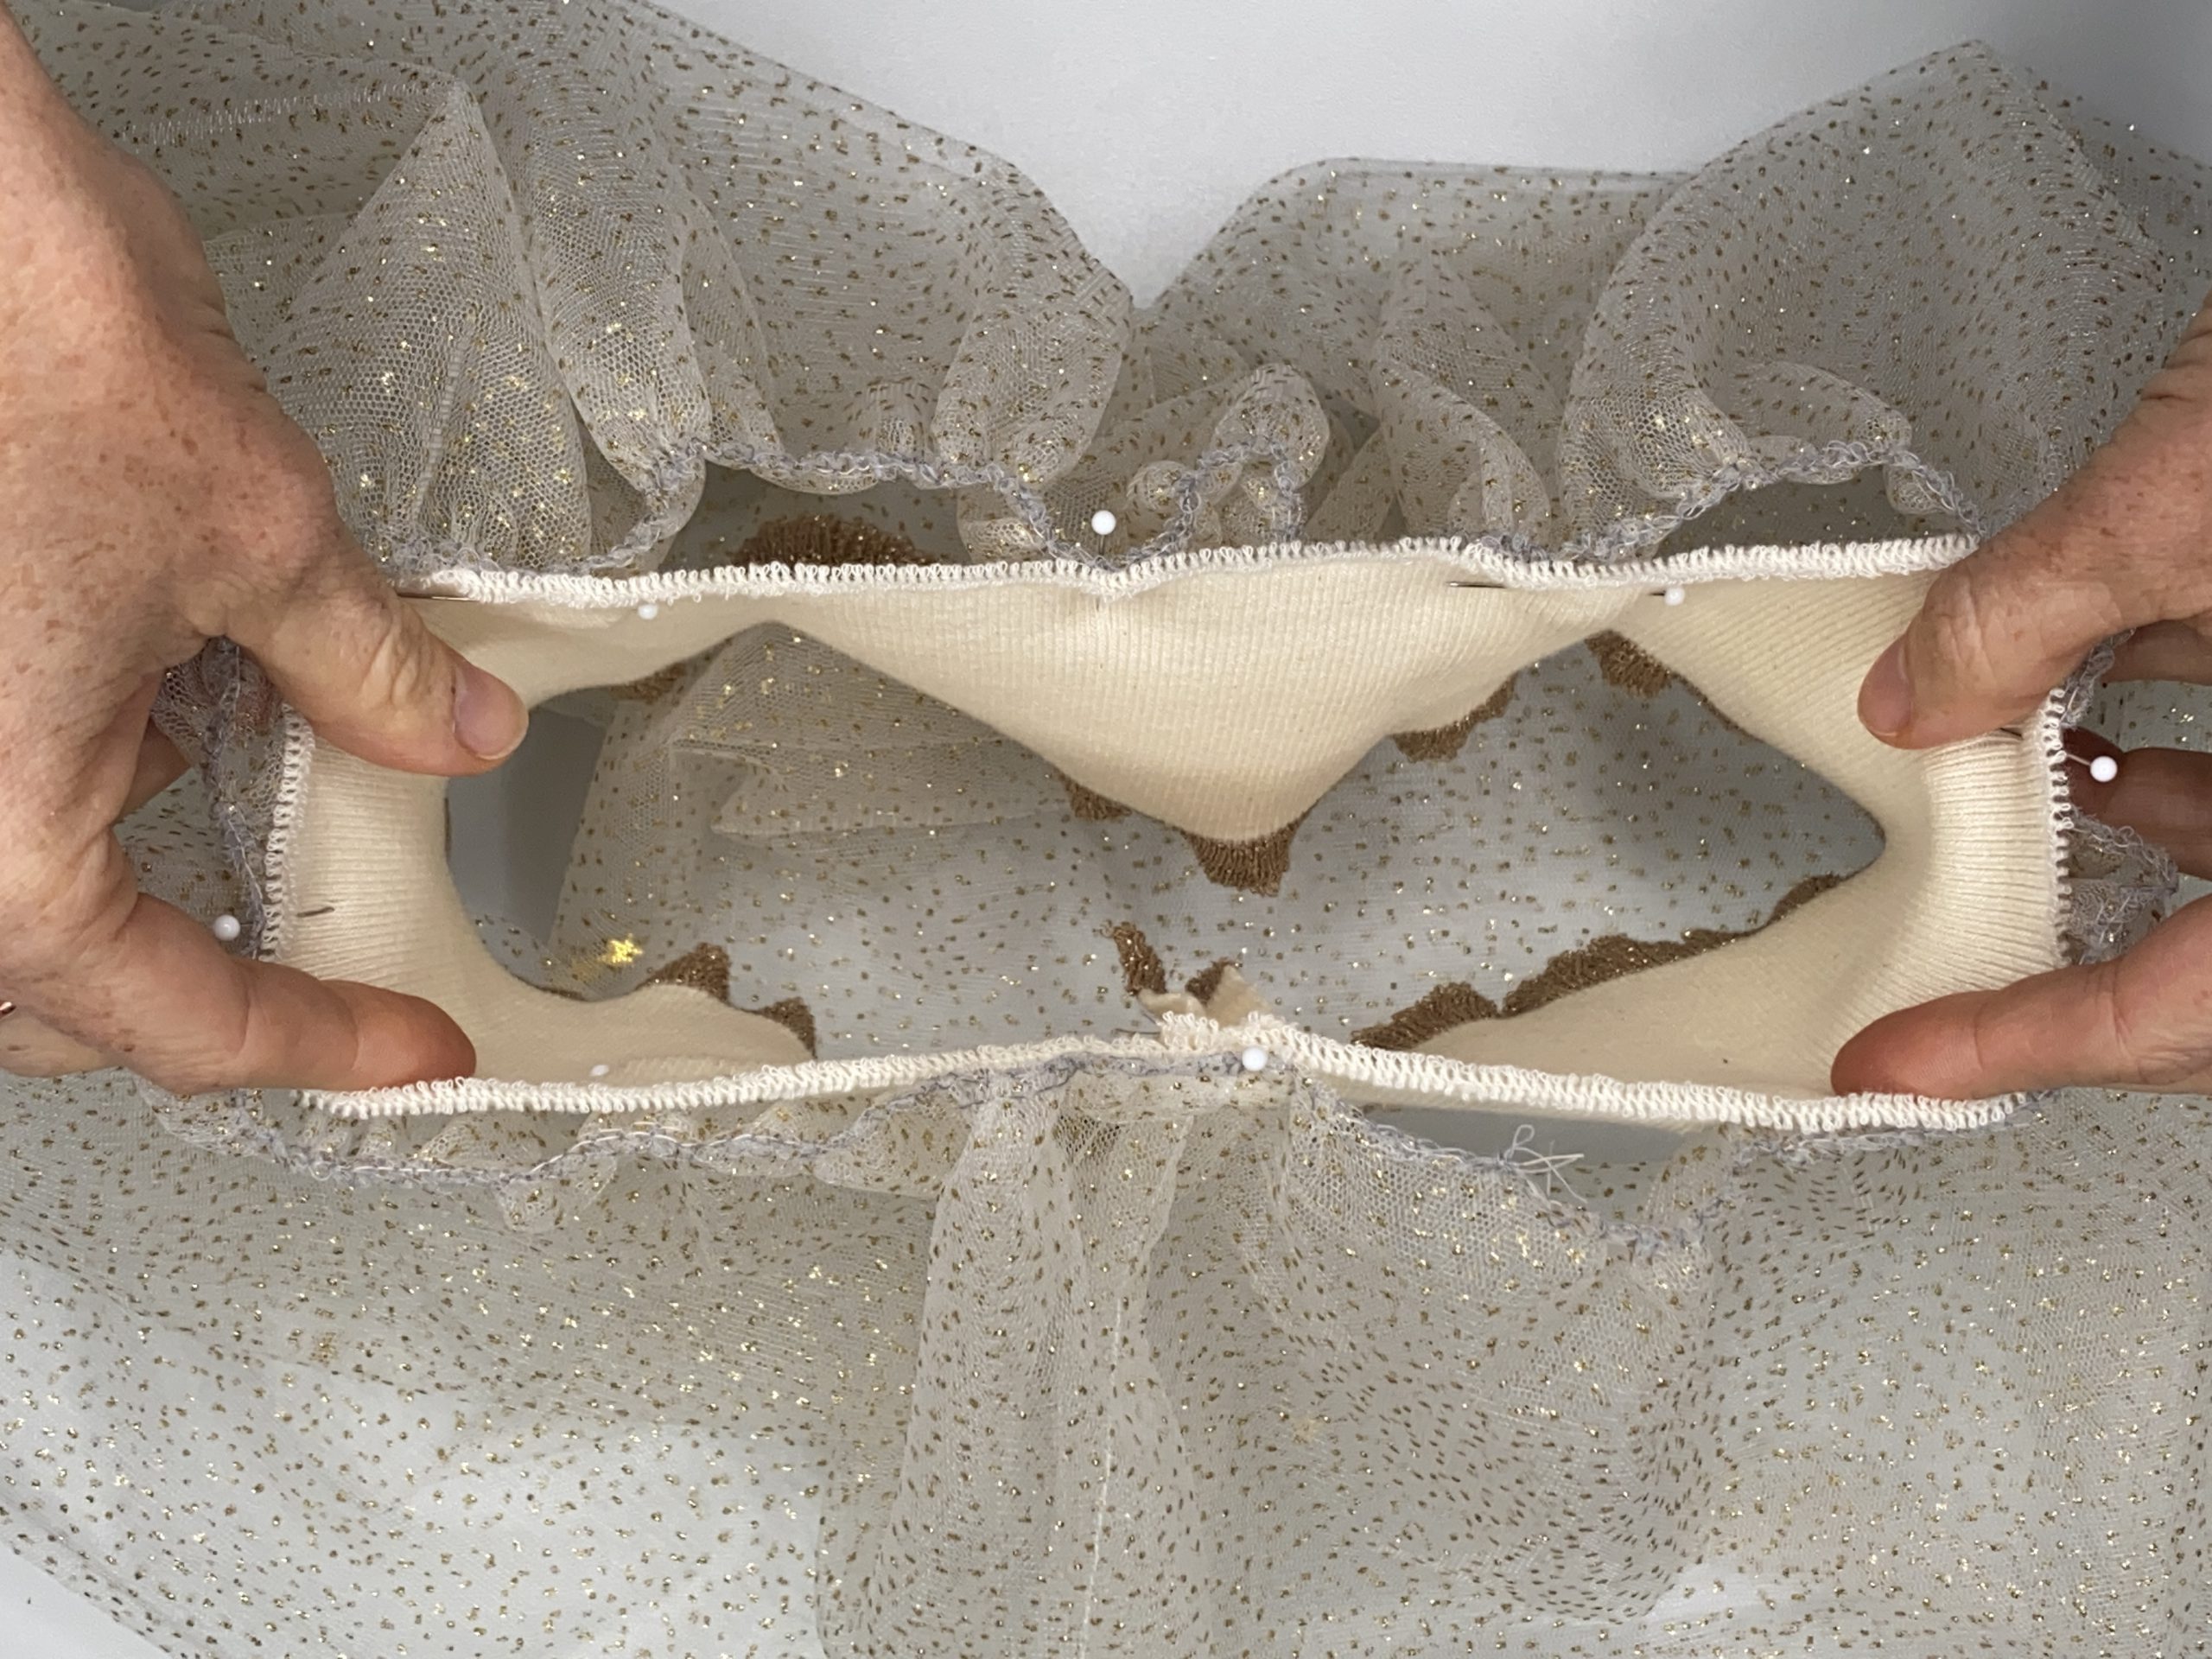
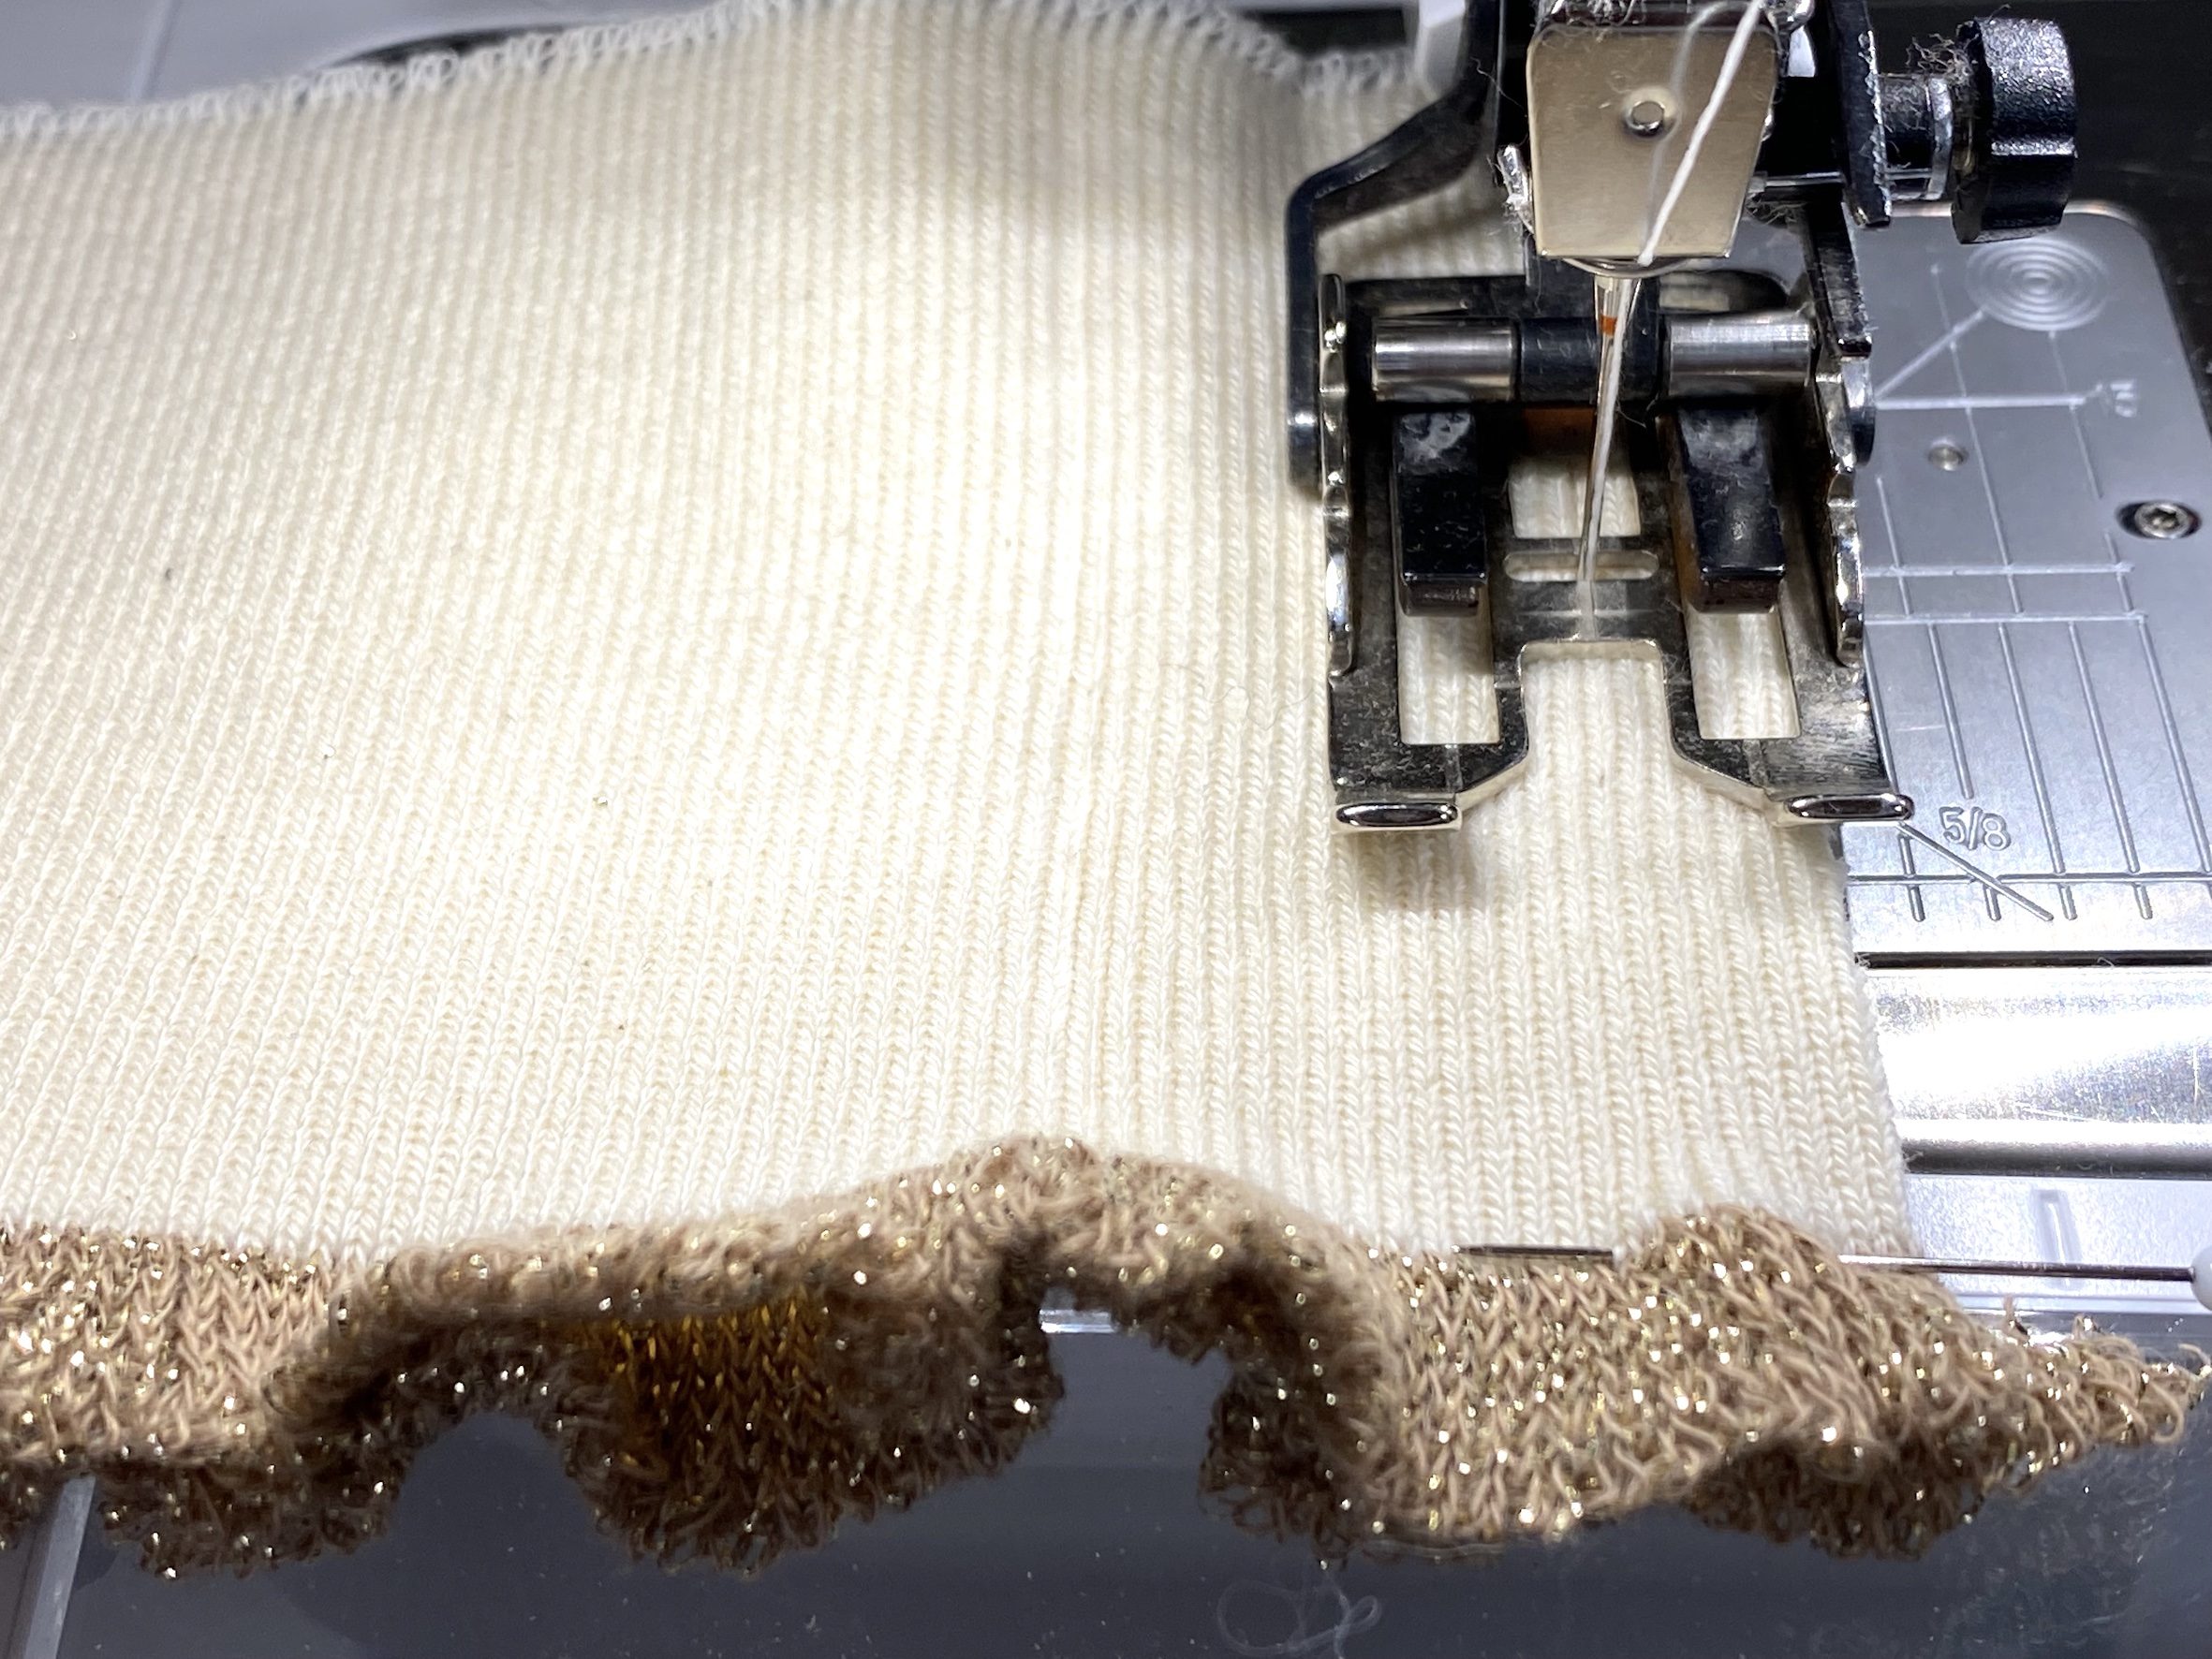
Here, I once again used my overlocker with a high differential feed setting to ensure that the remaining extra width of the skirt is attached securely and incorporated into the waistband by the sewing. The best way to do this is to have the skirt at the bottom and the waistband at the top, as shown in the next picture.

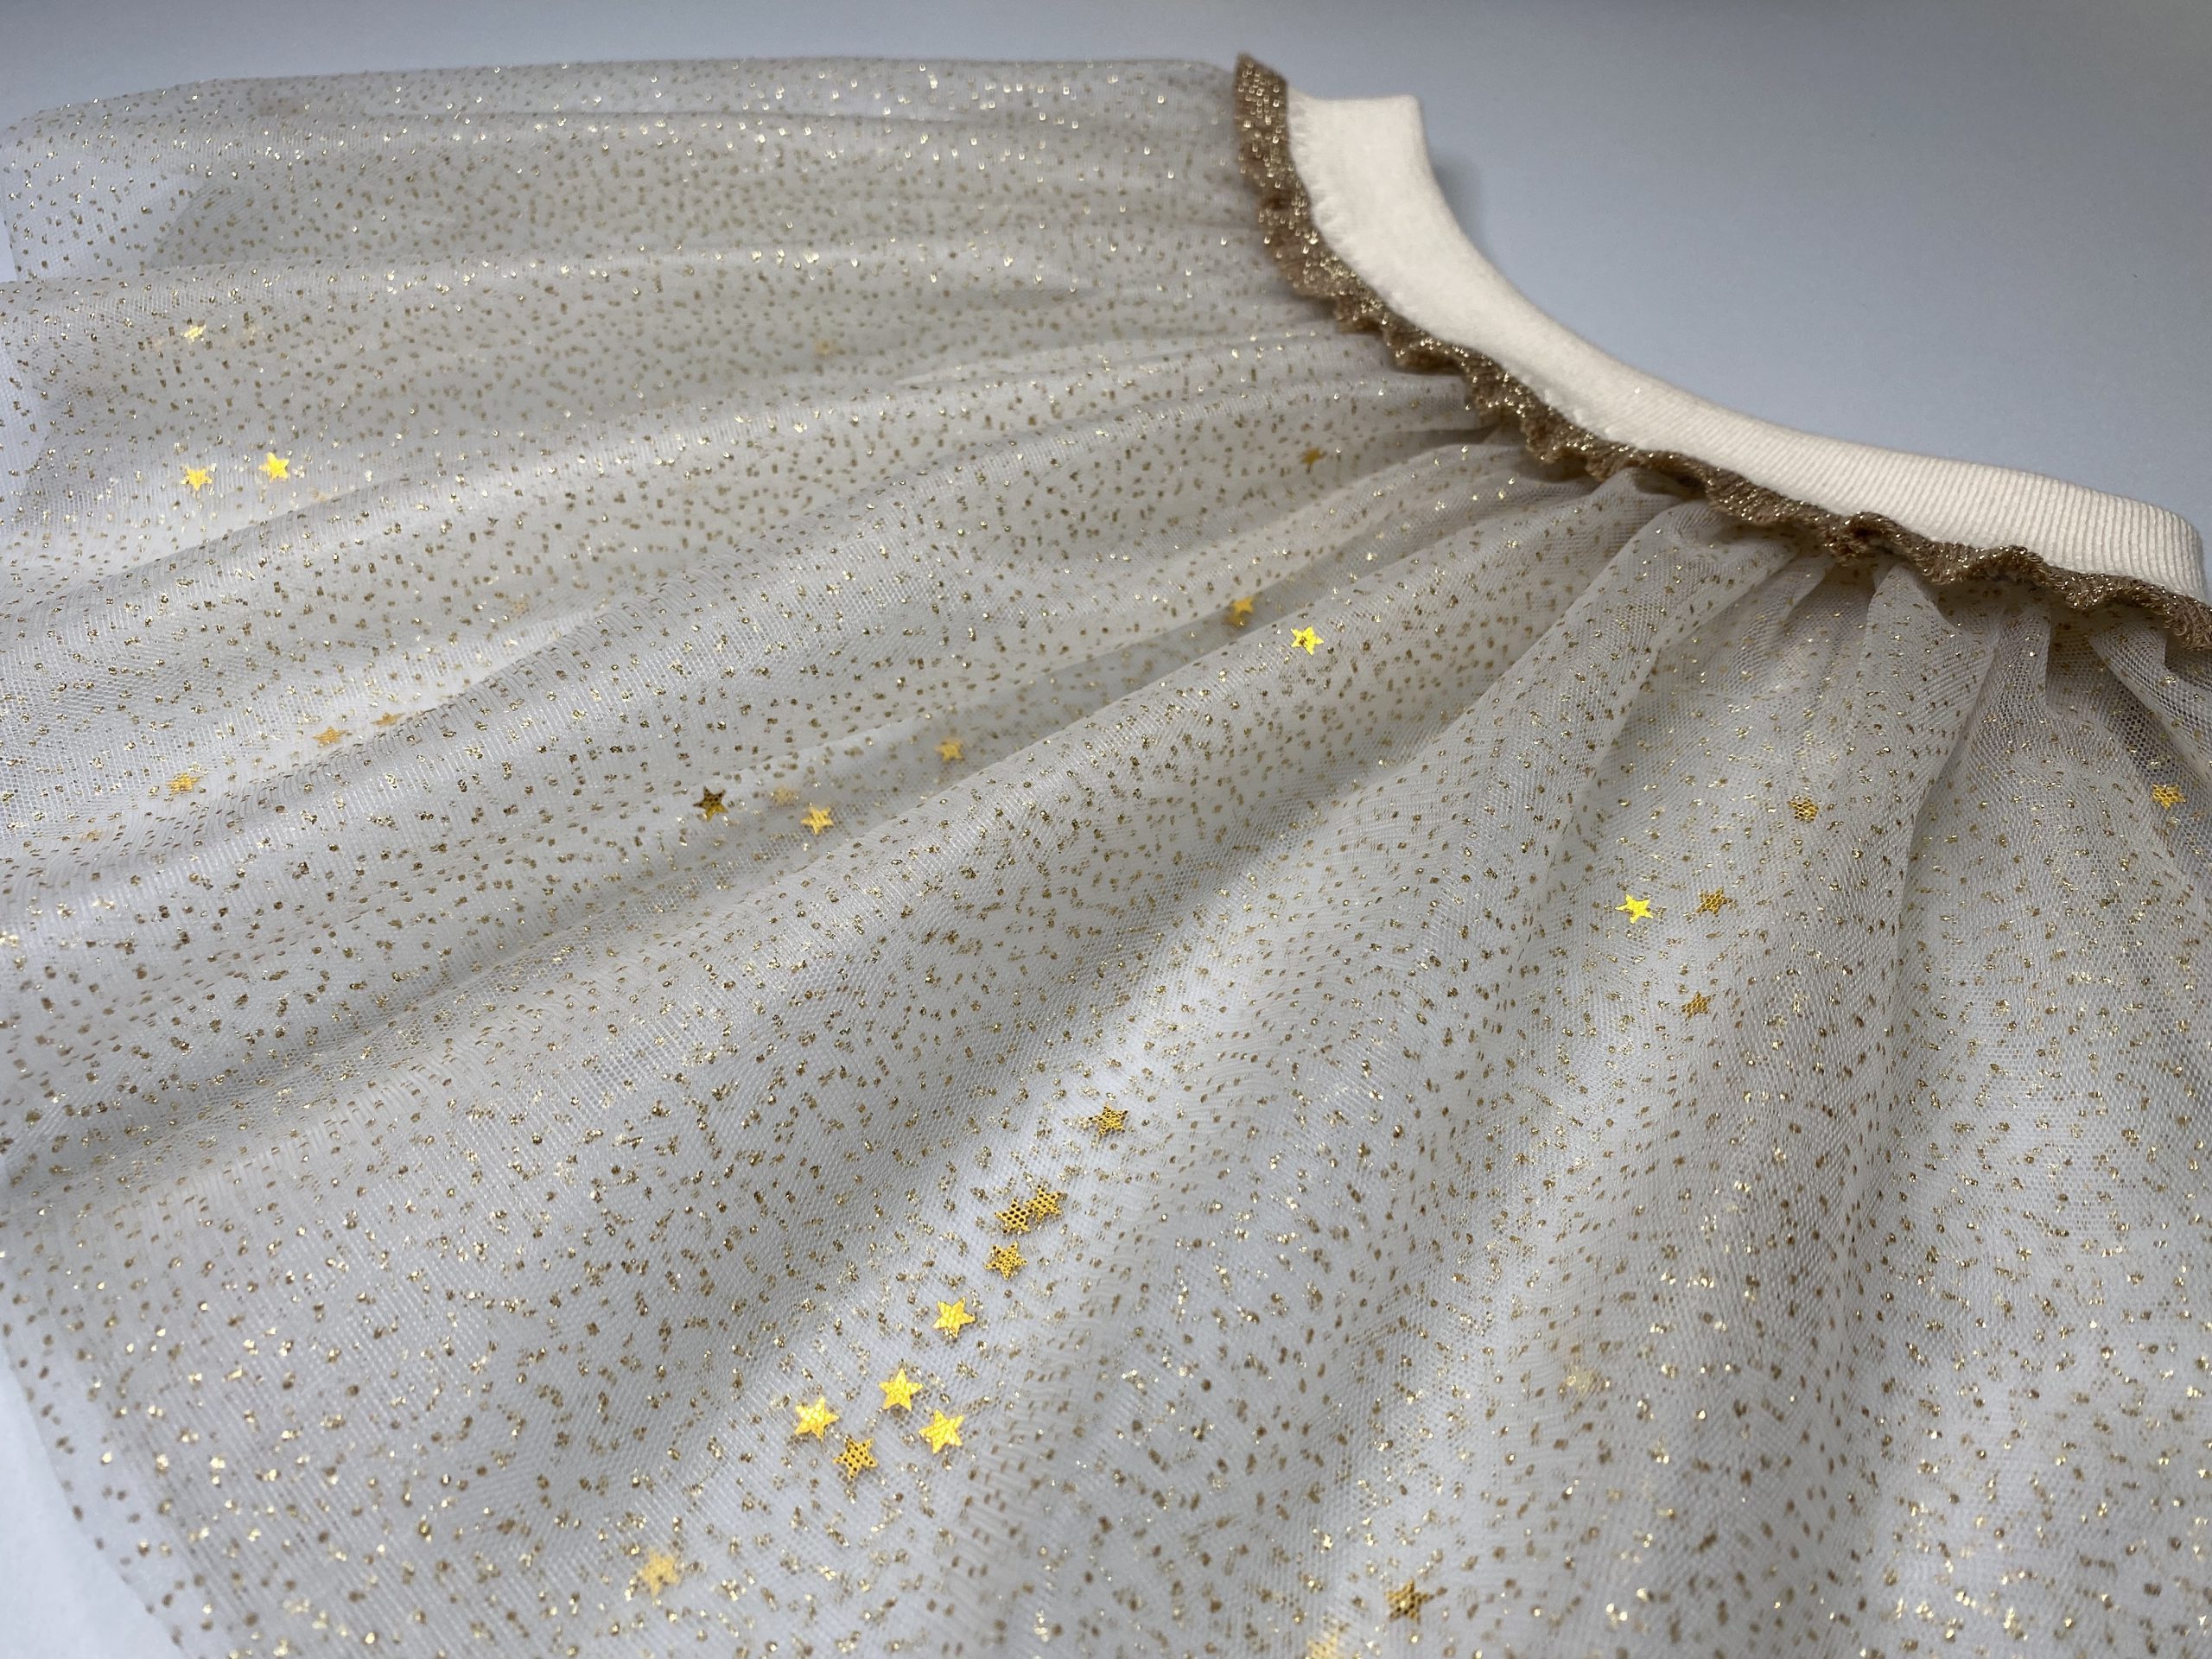
Once you have sewn one edge on, turn the cuffing outwards so that it forms the top folded edge of the waistband and the ruffle edge just sticks out above the seam. In the picture below, you can see how the newly sewn gray overlock seam is pinned onto the bottom edge of the ruffle.
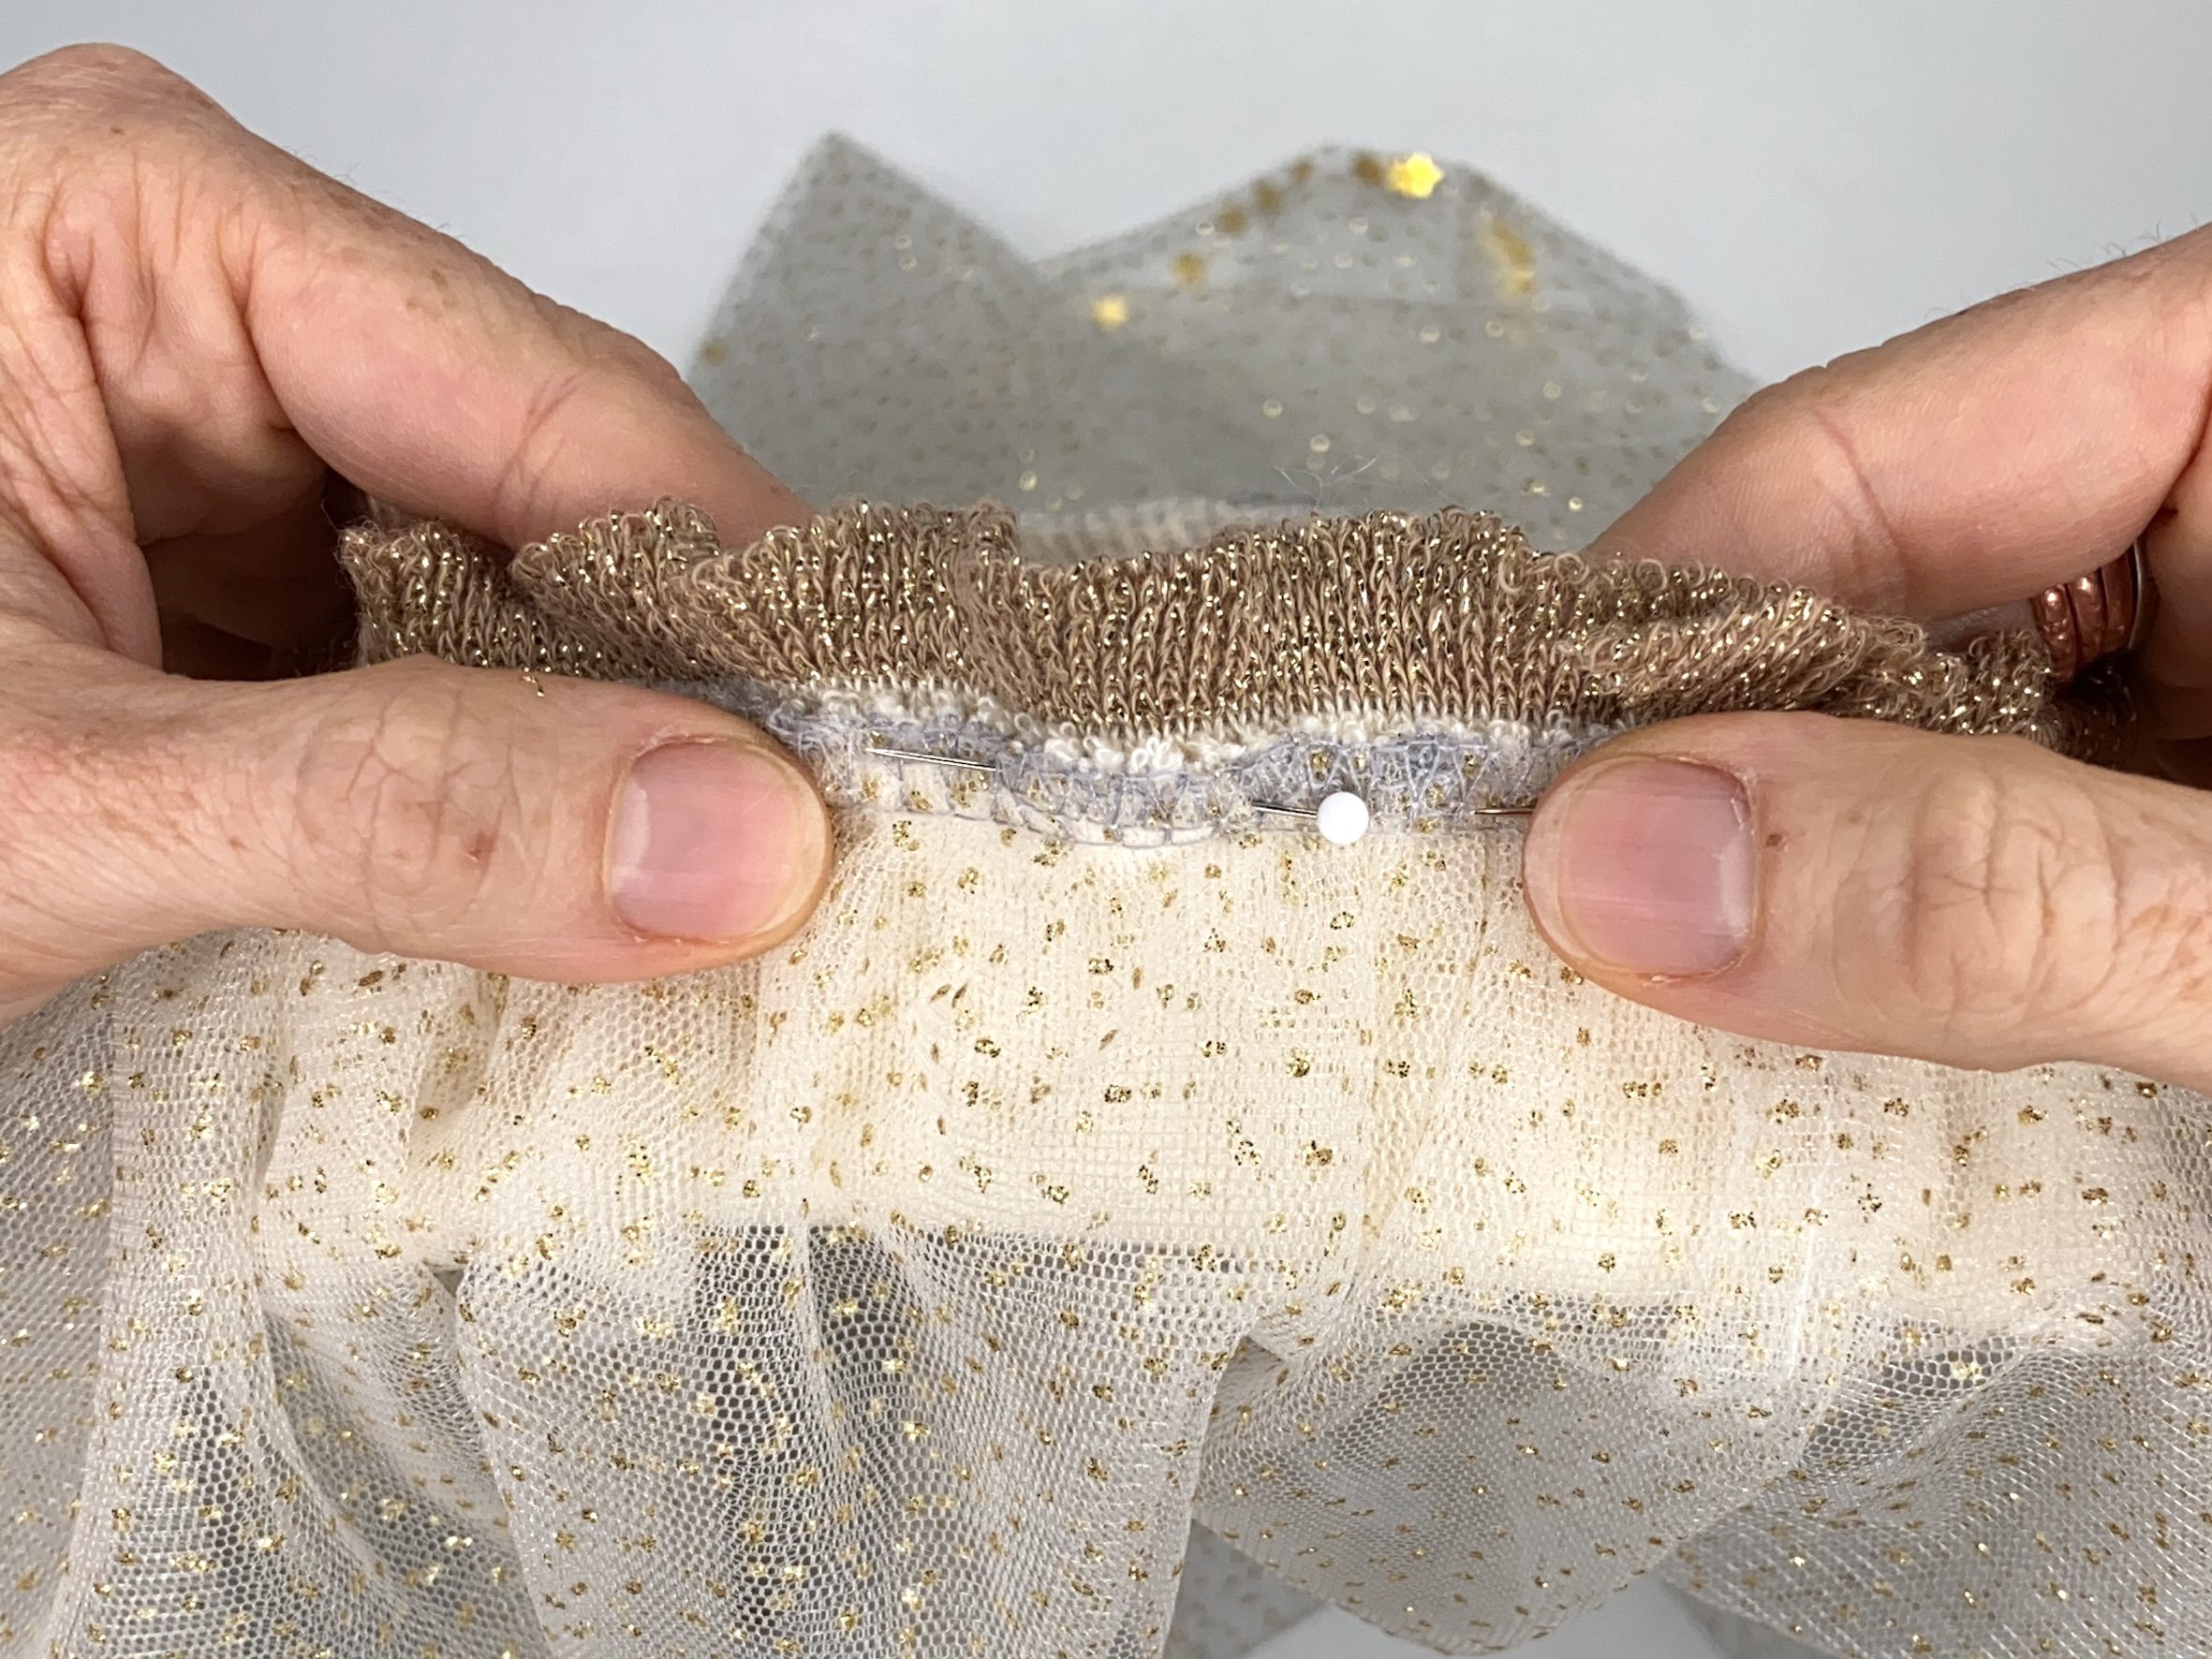
The next seam closes the waistband and will be visible from the outside, so I also sewed it on the outside to make sure it was positioned just next to the edge of the ruffle. To do this, I had to move the pins to the other side and put them closer together, as the seam allowance is on the underside and has to be firmly secured so it doesn’t slip out of place. And of course you can’t see it while you’re sewing.
Before sewing the next seam, I recommend that you do a test on a scrap of fabric to find the right settings.
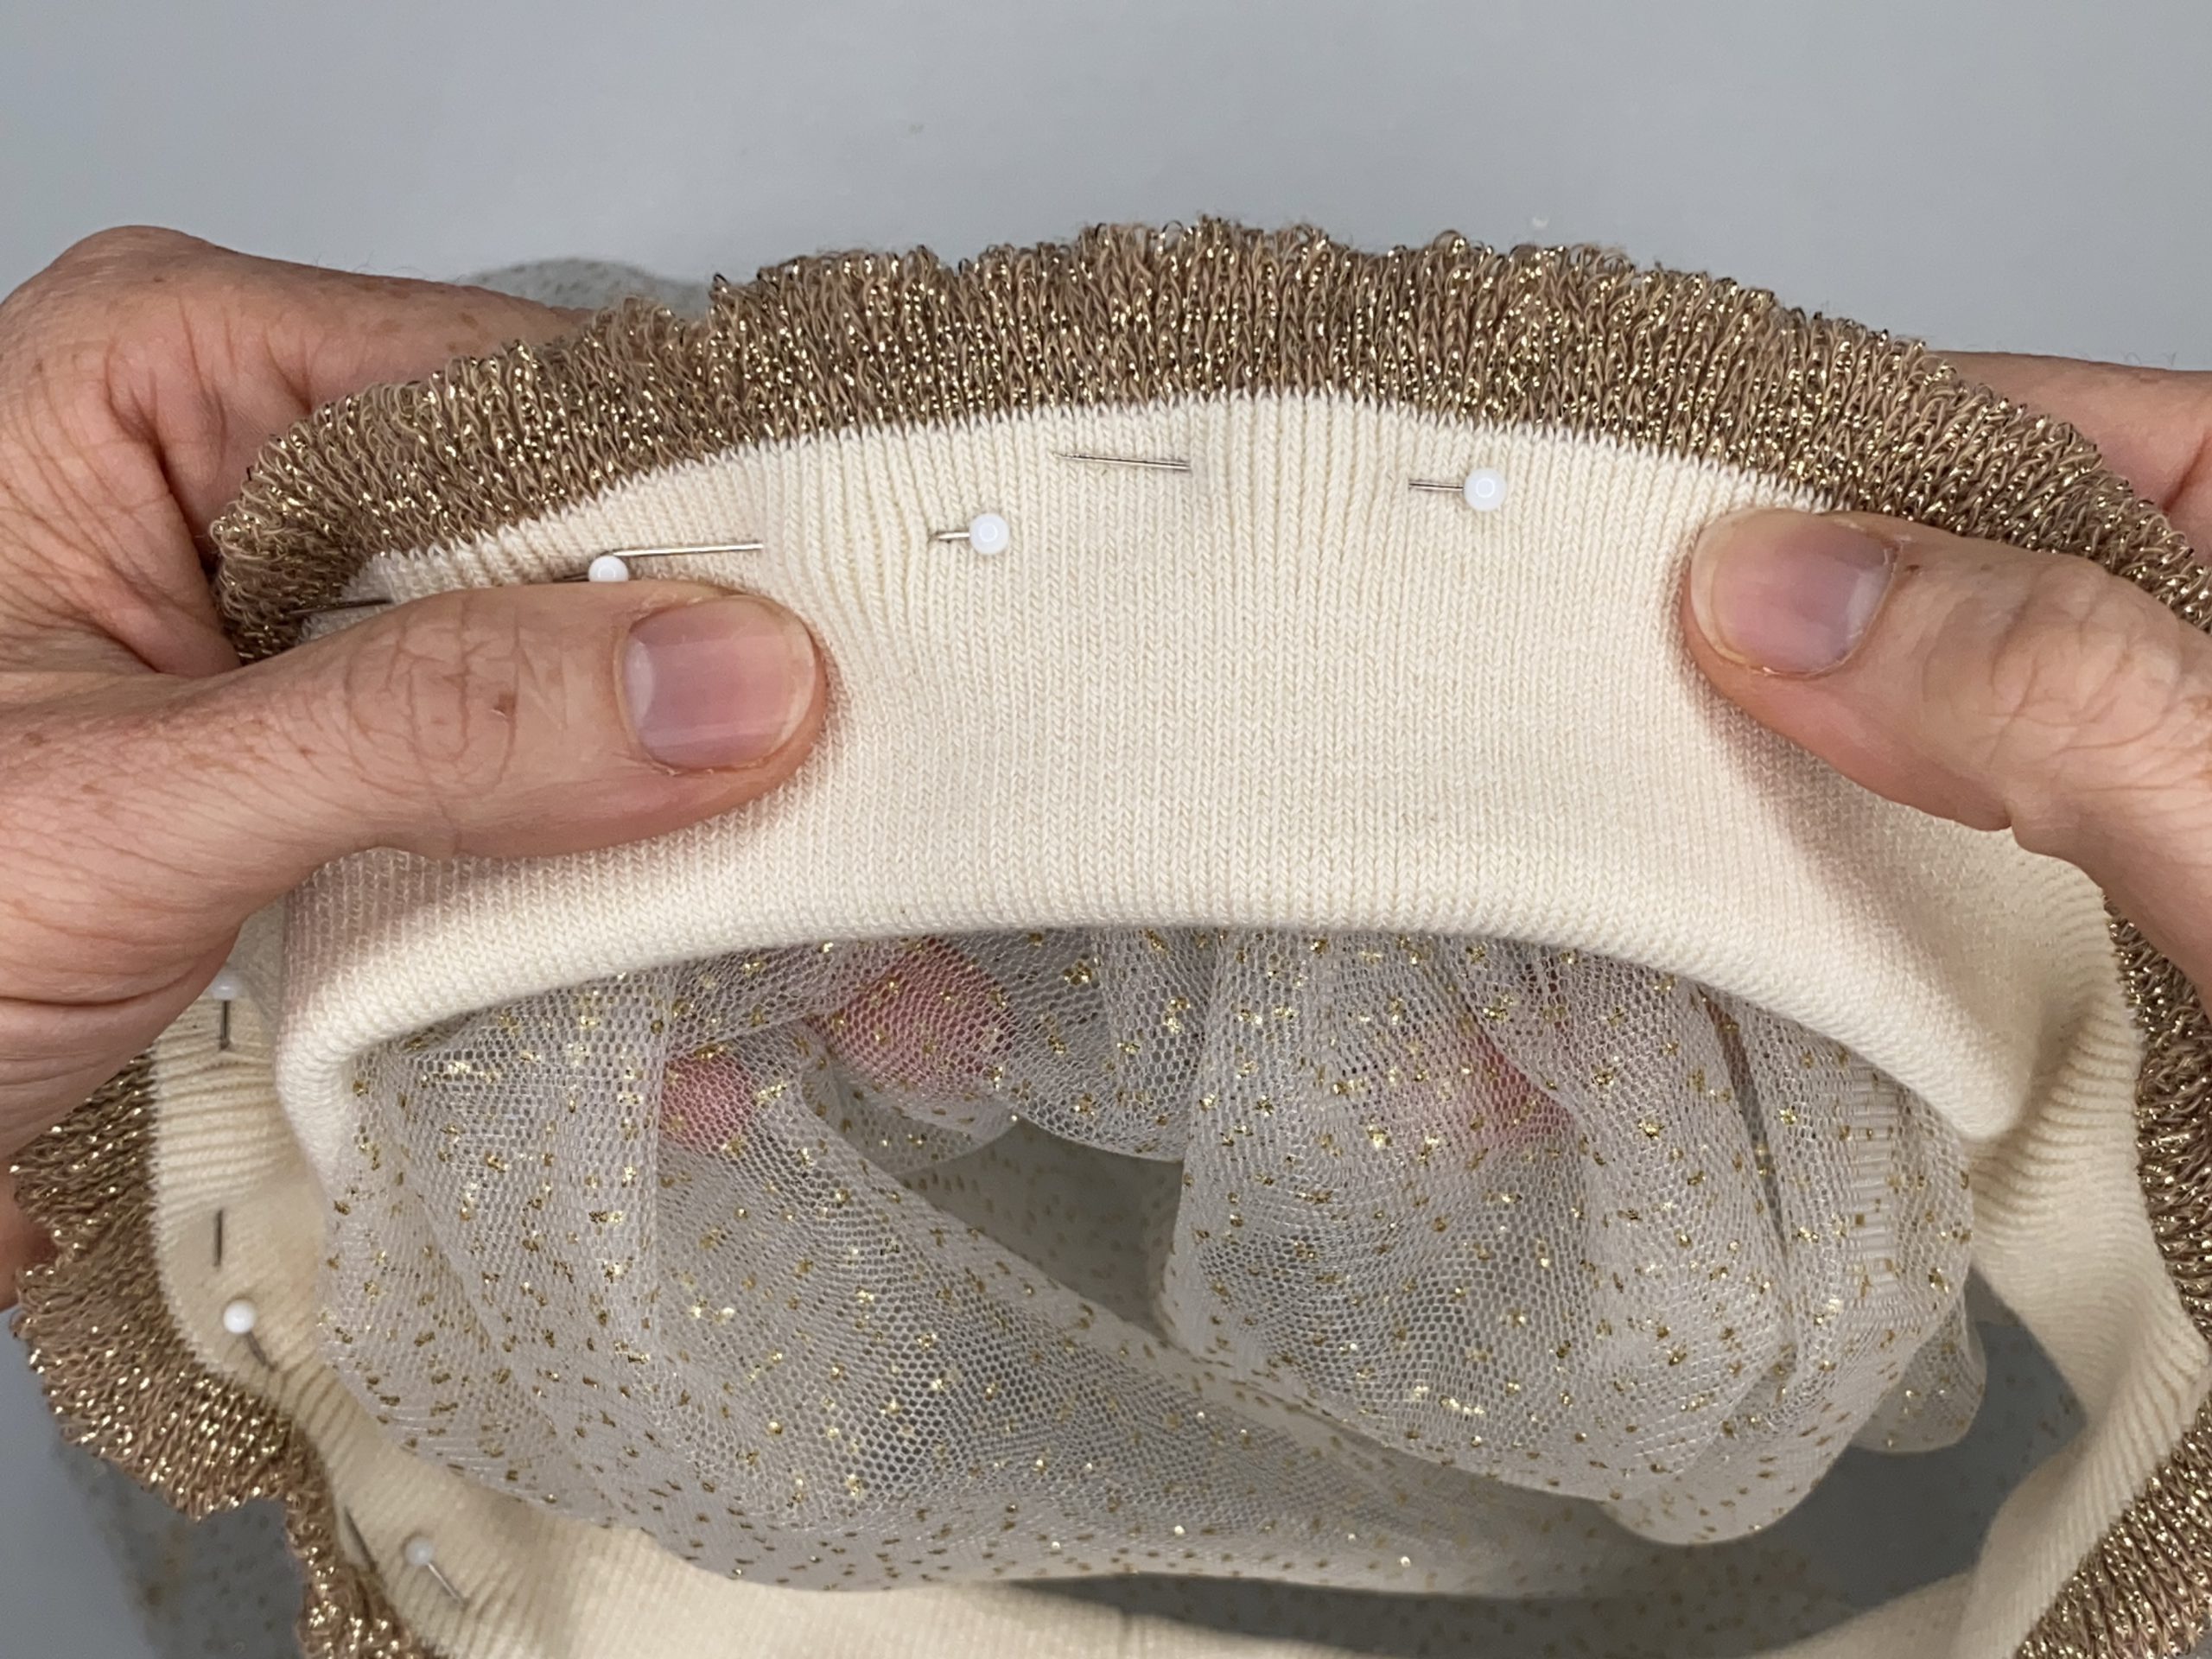
The seam has to be elastic. Therefore, for the stitch I chose a 3-step zigzag stitch with a slightly longer stitch length (number 16, stitch length 1.35). I also reduced the presser foot pressure. This prevented the seam from stretching the waistband too much. I sewed it on the BERNINA 535.

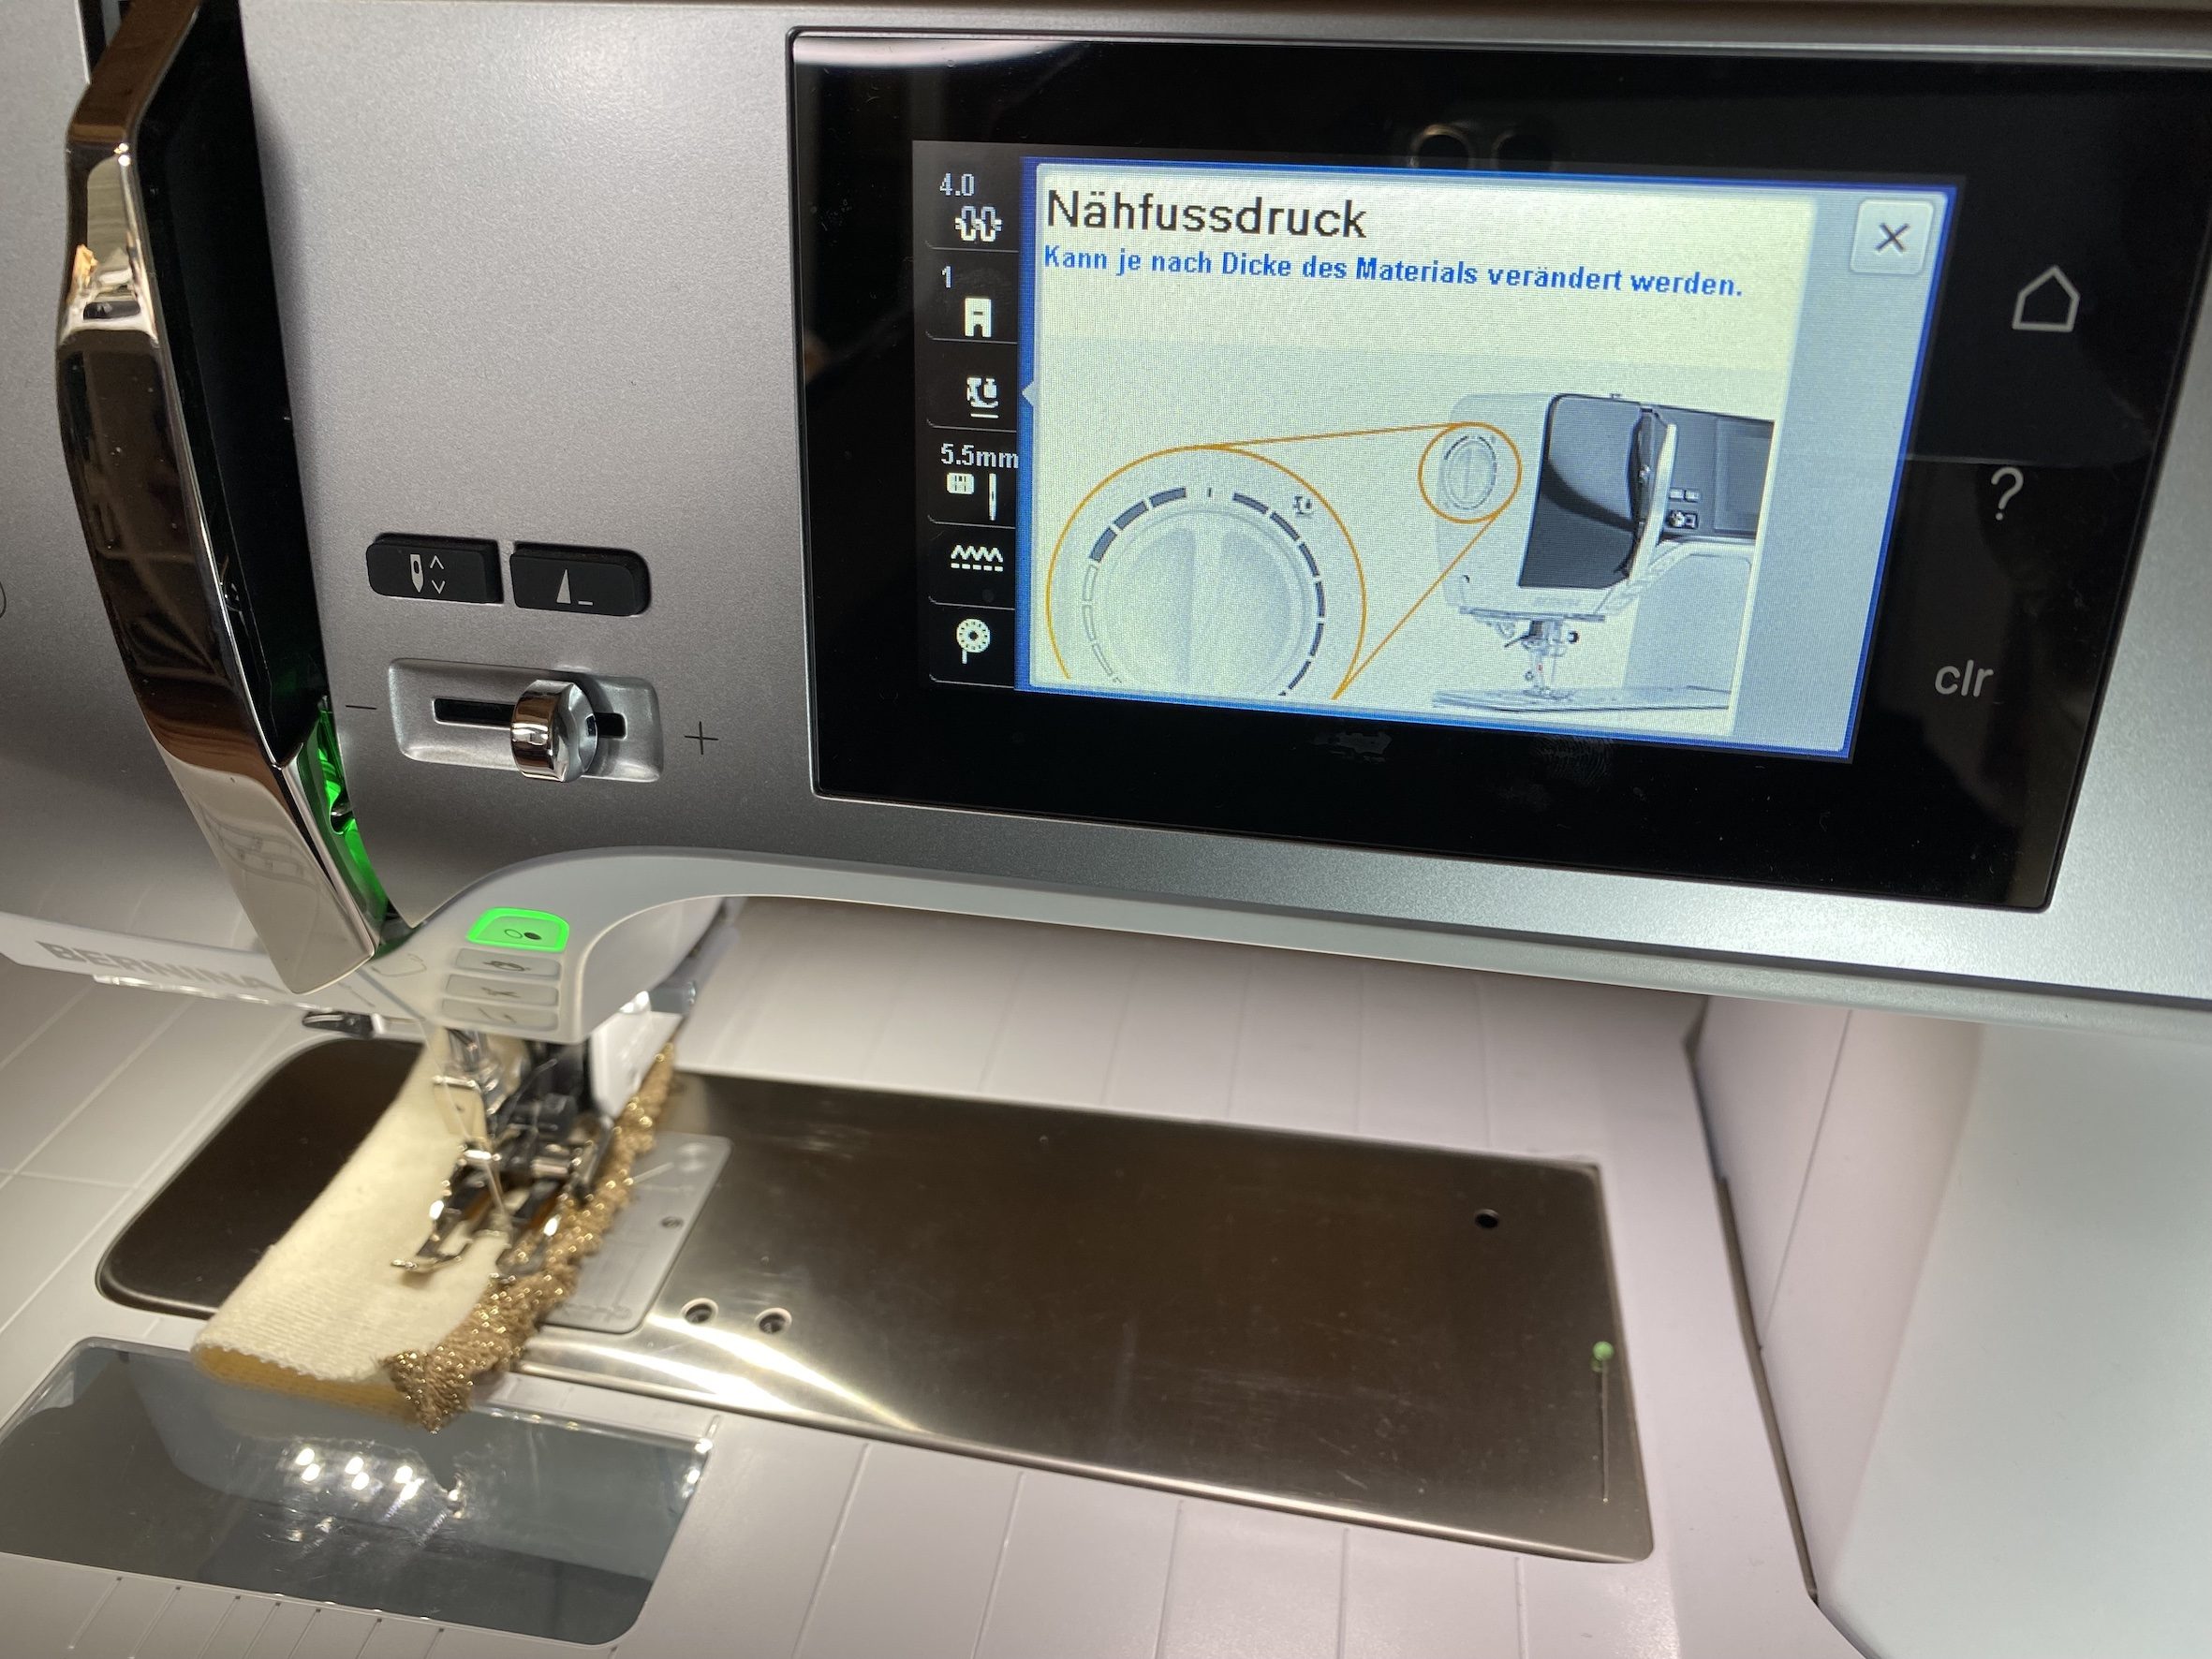
I used the Walking Foot again for this and positioned it so that the seam runs nice and close to the edge of the ruffle. As this seam will ultimately appear on the outside of the tulle skirt, you should again look for matching sewing thread. Alternatively, you might want to achieve a different effect using contrasting thread. You could use a glitter thread, for example.

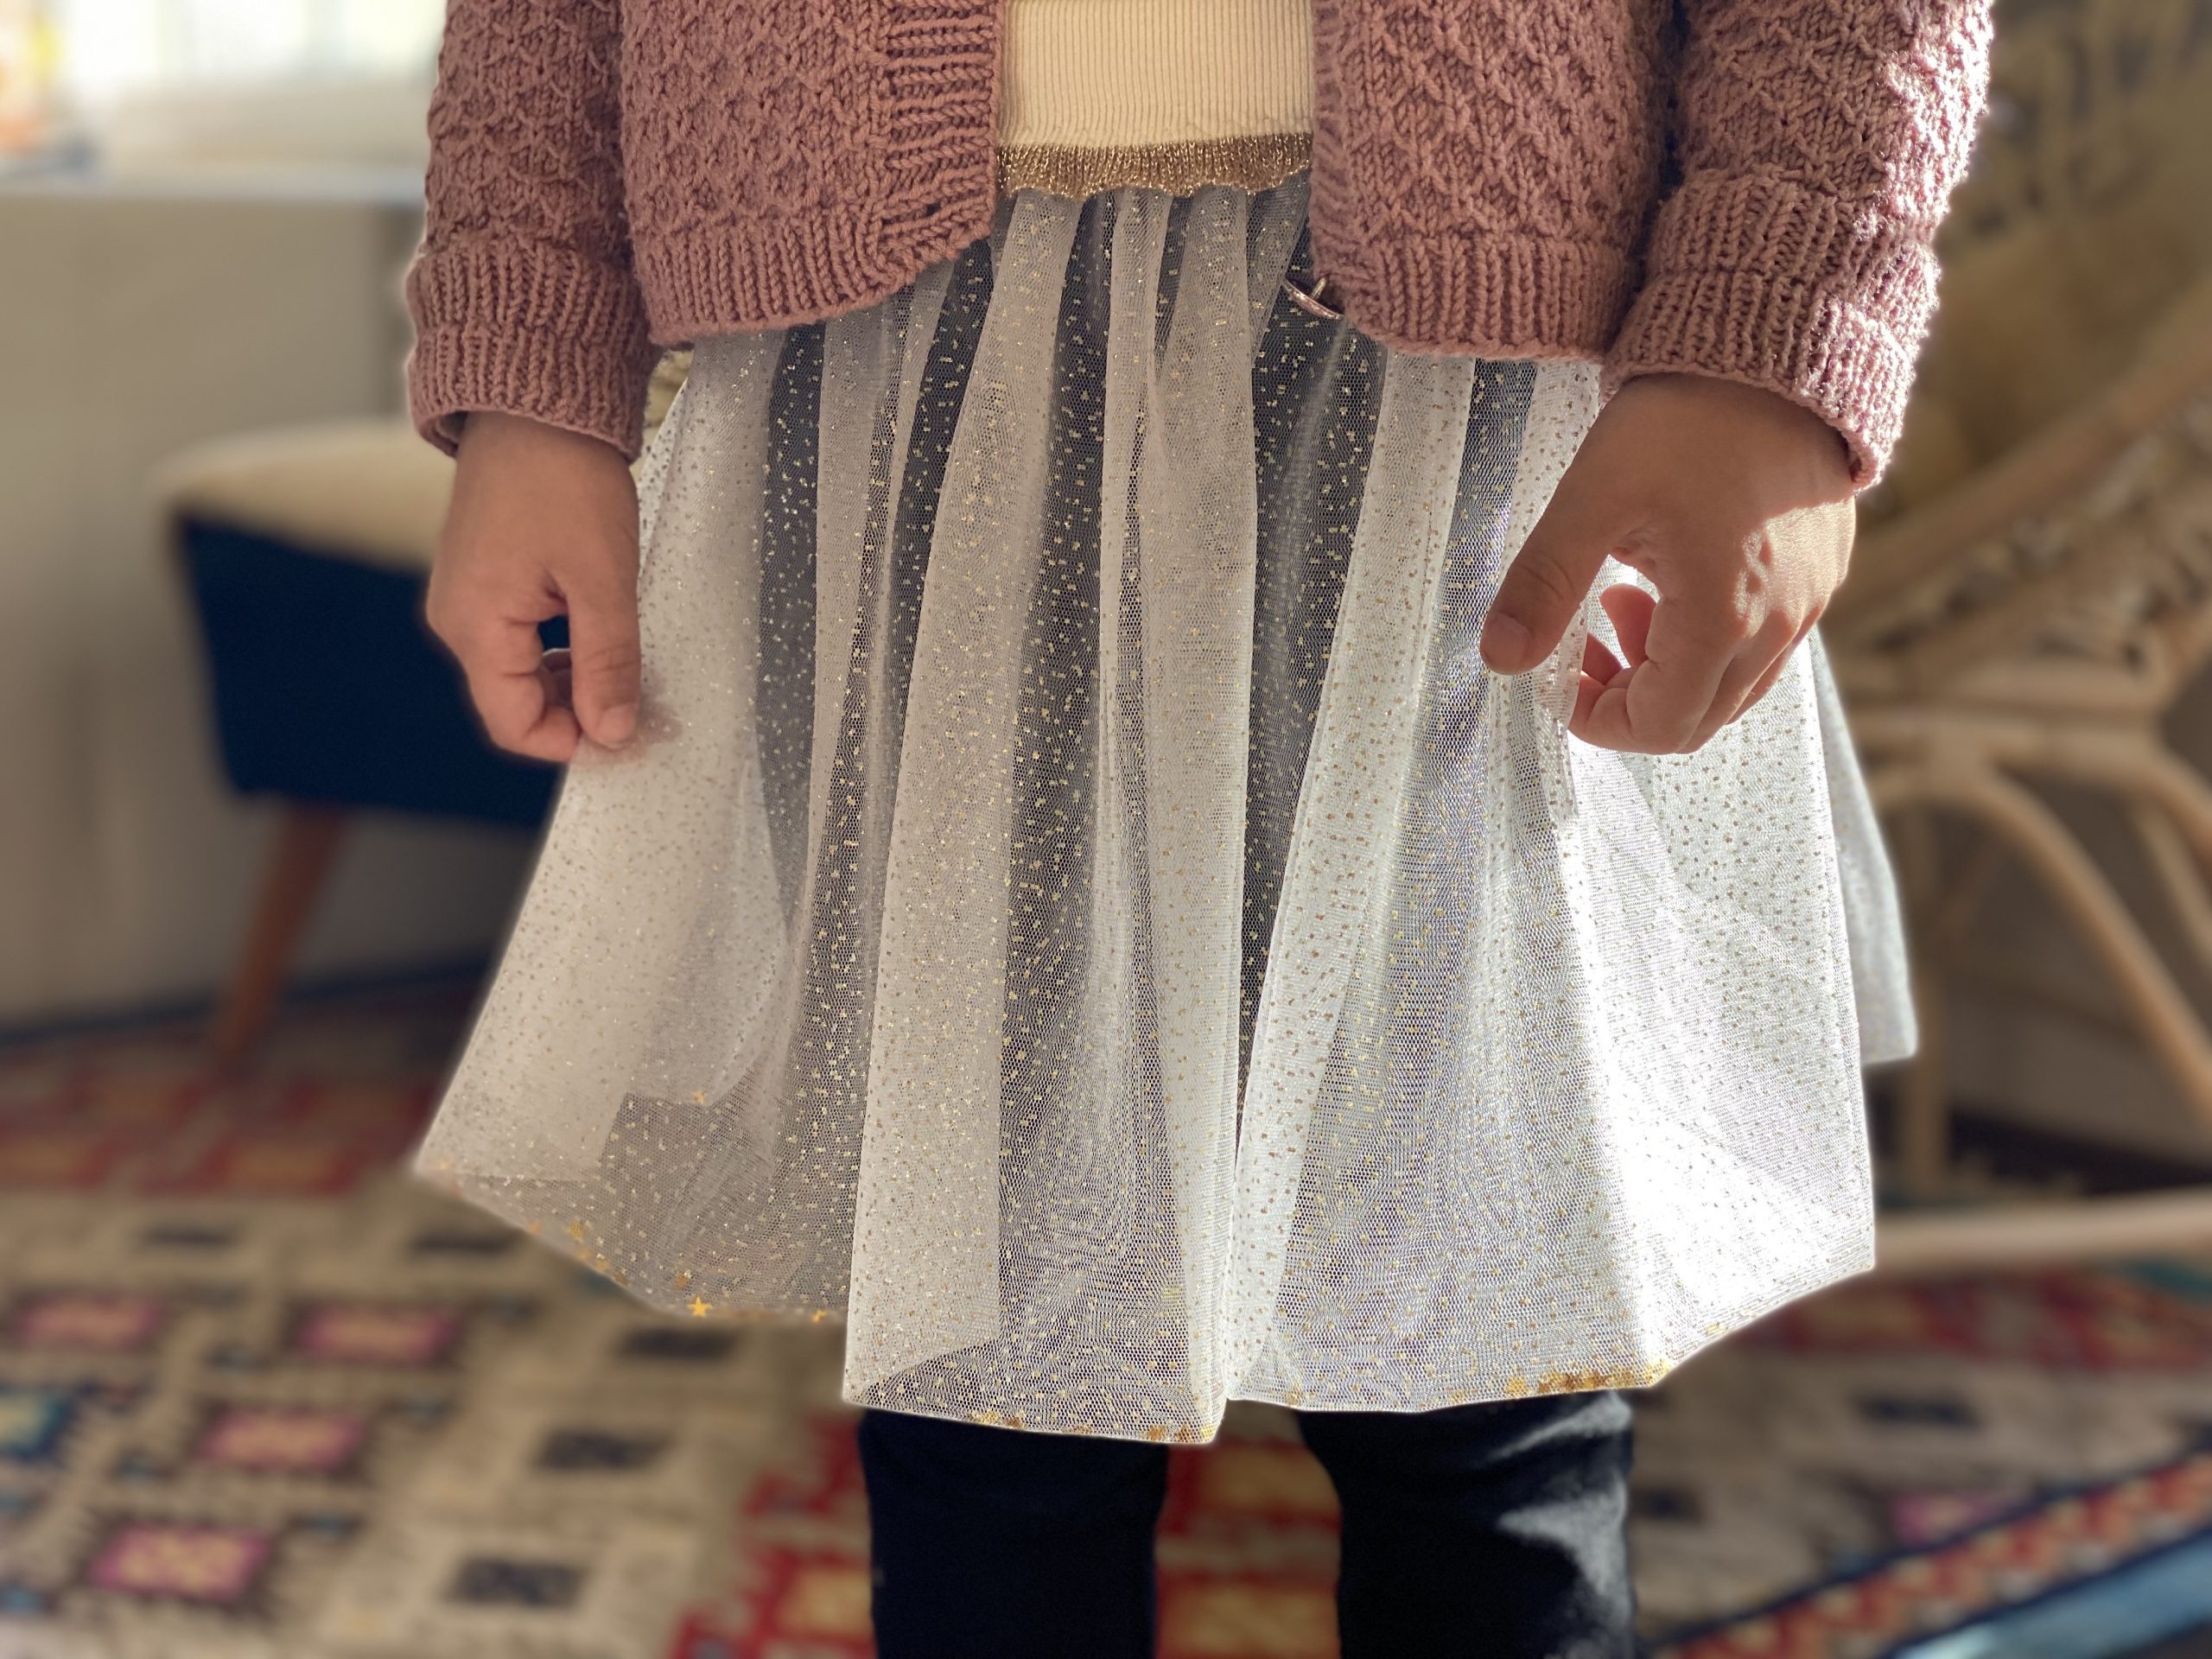
Now fold the waistband upwards and your star skirt is finished. This tulle skirt is very quick to sew – a real last-minute project!
The skirt is the perfect sparkling piece for a glamorous evening event. Time to shine!
By the way, you can also line this tulle skirt to make it opaque. I deliberately decided not to include a lining here. If I sewed another one in my size, I would also sew in a lining skirt.
I hope you enjoy sewing and wearing your own tulle skirt. Why not share your own version with us and tell us who you sewed it for and the occasion when it was worn? I can’t wait to see your sparkling creations!
Katja


0 Responses