One thing is always left over when sewing: Remnants of fabrics! But no matter how small they are, you can still conjure up something pretty from them, for example creative Christmas decorations! Today we are sewing and embroidering Christmas decorations from scraps of fabric. We have reached the 15th door of the Blog Advent Calendar.
I especially love free-motion embroidery or thread painting! It is almost like doodling, but with a sewing machine. You can let the needle run free: it doesn’t have to be perfect and accurate – quite the opposite: the freer the better. In combination with small pieces of fabric left over from other projects, you can create great appliqués and embellishments. I used this technique to make pretty Christmas tree balls for the festive season. I don’t know yet whether they will actually go on the tree, or perhaps in the Christmas window, on the table or as a tag on the presents. In any case, they are a pretty detail for the Christmas season – and with the right thread, they also sparkle!
Sewing Christmas decorations – Material supplie
You are bound to find the material for these Christmas tree balls in your stocks or in the leftover box. You need:
- Fabric remnants, preferably from woven fabrics
- Vliesofix
- Carrier fabric (not visible later)
- Felt
- Thread
The fabric are best made from woven fabric. They can match harmoniously, sparkle like Christmas or be wildly thrown together.
Preparation
First, I ironed Vliesofix onto the back of the fabric remnants. I made sure that the Vliesofix was cut a little smaller than the pieces of fabric so that none of them would land on the ironing board and then stick there while I was ironing them on. The adhesive side can be recognized by the rough grip and should face the fabric. You can tell whether the Vliesofix is already stuck by the fact that the backing paper becomes transparent. The heat from the iron causes the adhesive to melt and fuses with the fabric. This requires enough heat for a few seconds, so you can leave the iron at one spot and count silently to 10.
Before removing the backing paper, you should wait until the heated adhesive from the Vliesofix has cooled down again. Otherwise, the paper will not come off easily or the adhesive layer may come off when peeling it off.
Once the piece of fabric has been prepared, it can be cut into pieces. I did this with a rotary cutter on a cutting mat. First cut crosswise into strips of different widths and then diagonally lengthwise again so that the strips are of different lengths.
It is best to leave the individual snippets separate, especially if you have fabrics that can be used on both sides, such as my light-colored jacquard, which has a beautiful golden shimmer on the back, or the purple-gold woven fabric with the beautiful fine pattern, which can also be shown on both sides. Since the glue is barely visible, it would only get complicated if you mix them. And it might lead to strips being ironed on with the adhesive side up…
Designing the Christmas decorations
Now you can combine and arrange the strips by placing them on a piece of fabric. This fabric only serves as a carrier and will not be visible later on!
Before ironing on, make sure to check again that all strips are placed with the adhesive side down. Once everything is firmly ironed and has cooled down, you can use a glass or another tool to draw a circle and then cut it out.
This is where free-motion embroidery or thread painting comes into play. This requires a firm fabric as a base. I used a nice, slightly thicker gray felt and ironed on the circles. If you have several, make sure there is enough space between them!
Sewing and embroidering with metallic thread
For even more Christmas spirit, I chose a glitter thread in copper, which goes perfectly with the small metallic dots in the gray stripe.
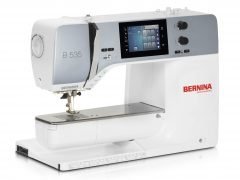
With such metallic threads, the beginning of the thread tends to untwist a little which makes threading difficult. With the threader on my BERNINA 535, however, this didn’t pose problem and was done in no time at all.
An embroidery foot or quilting foot is best suited for thread painting. I have used the Quilting Foot #29 because I really like the see-through effect.
When stitching, the fabric is guided by free-motion under the foot. For this reason, it is important to use a suitable foot that leaves enough space for the sewing material. Secondly, the feed dog must be lowered. At first, it will take a little practice to become familiar with the free-motion technique and to be able to move the fabric safely and evenly so that the lines are exactly as you want them to be.
I stitched three rounds around the circle and deliberately went over the edges again and again. At the top I have stitched a hanger.
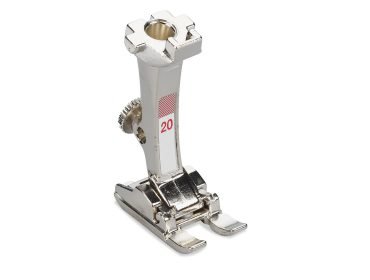
Because I was still missing something, I also sewed a decorative stitch into the ball using the metallic thread and Open Embroidery Foot #20.
Now all you have to do is cut it out, and you have a pretty Christmas pendant.
I have also added a nice ribbon to hang my Christmas ball on the Christmas tree or tie it to a present. A pretty Christmas decoration in any case!
I hope you like my Christmas recycling of fabric remnants. Of course, this also works really well with other Christmassy shapes, e.g. a Christmas tree or a star. Cookie cutters are wonderfully suitable to be used as templates. This is how you can easily sew and design pretty Christmas decorations!
I hope you have lots of fun snipping and sewing!
Katja
 BERNINA Corporate Blog -







Great little project, thank you!