 BERNINA Corporate Blog -
This tutorial was written by Ines, an author for the German BERNINA Blog, and translated for our English readers.

With the new BERNINA PLUS Upgrade on my BERNINA 770 QE, I have so many new possibilities! In addition to new features such as the triple stitch function for decorative stitches, the selection of the presser foot and the basting function in BSR mode, the upgrade also includes so-called “quilting in the hoop” projects – i.e. patchwork blocks that can be sewn in the embroidery hoop and then quilted in the embroidery hoop.

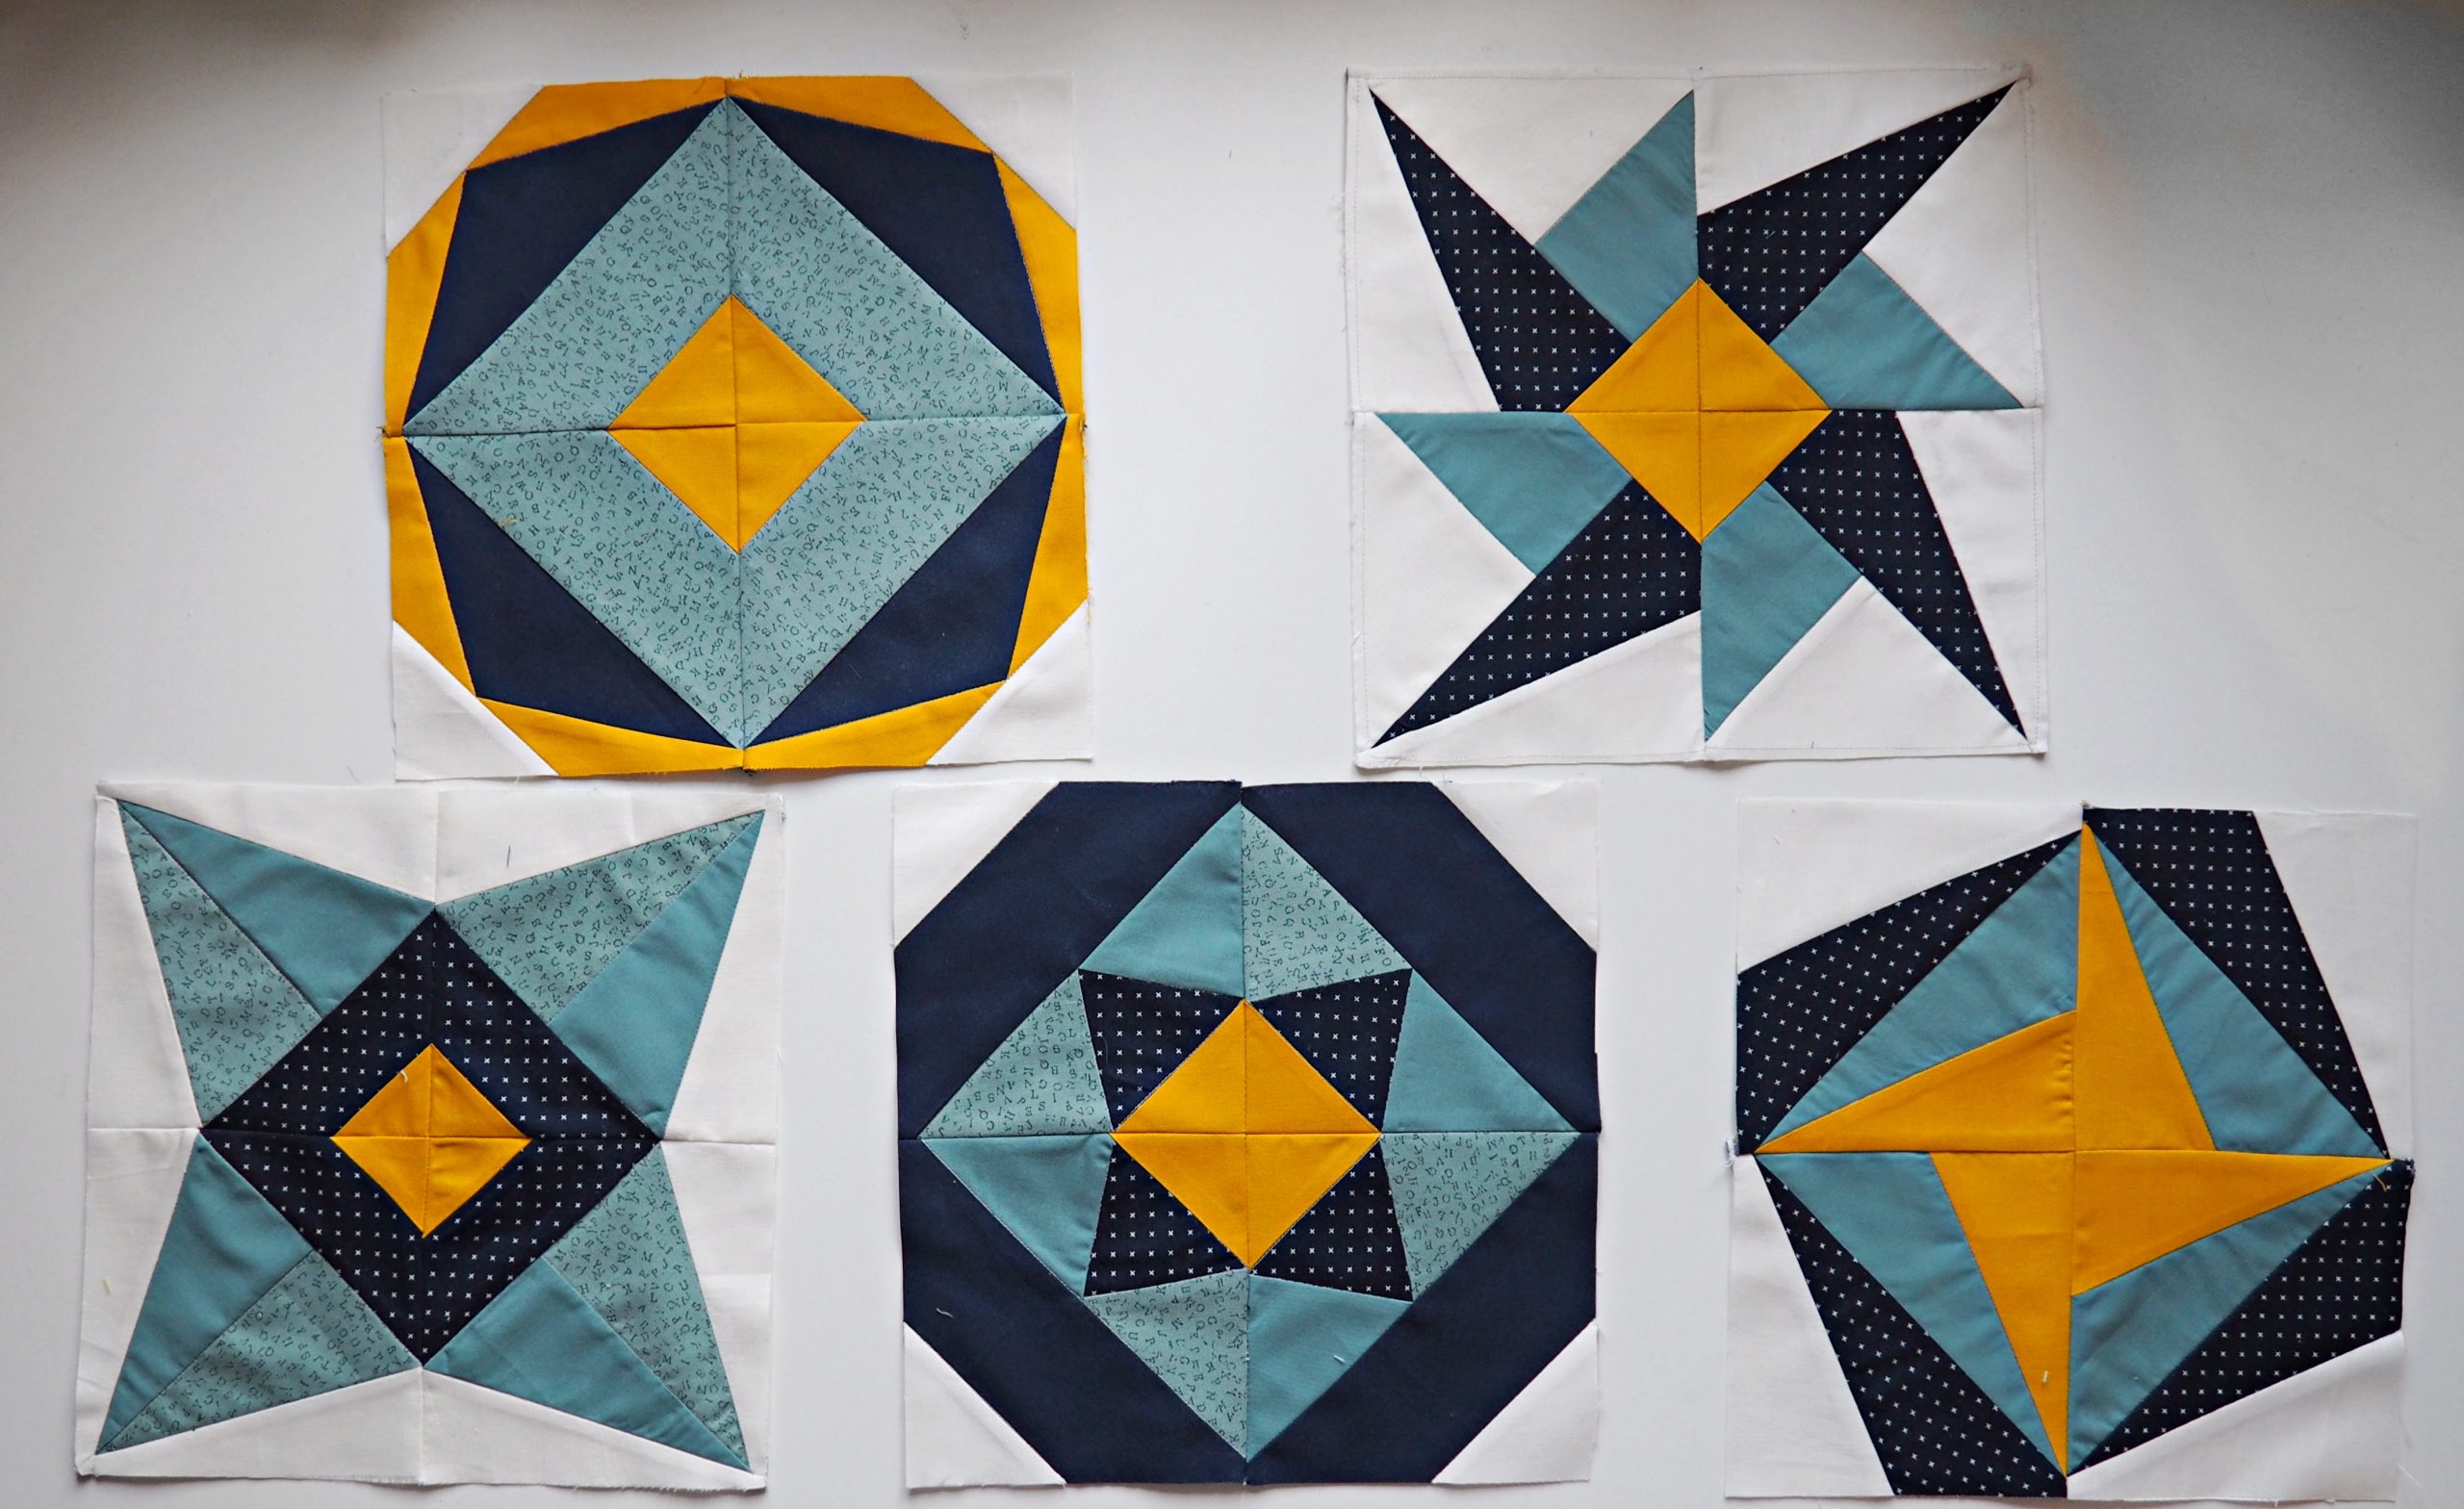
My five “in the hoop” blocks
Patchwork made in the hoop
In today’s post, I will show you how to piece these patchwork blocks “in the hoop”, i.e. in the embroidery hoop. In a next post, the blocks – joined together to form a table runner – are quilted in the embroidery loop.
If you are working on another machine, you don’t need to worry: these embroidery files for the “in the hoop” patchwork blocks can be purchased from OESD (a subsidiary of BERNINA).
The new folder for “quilting in the hoop” projects
After the upgrade, in the new embroidery file folder No. 9, you will find…
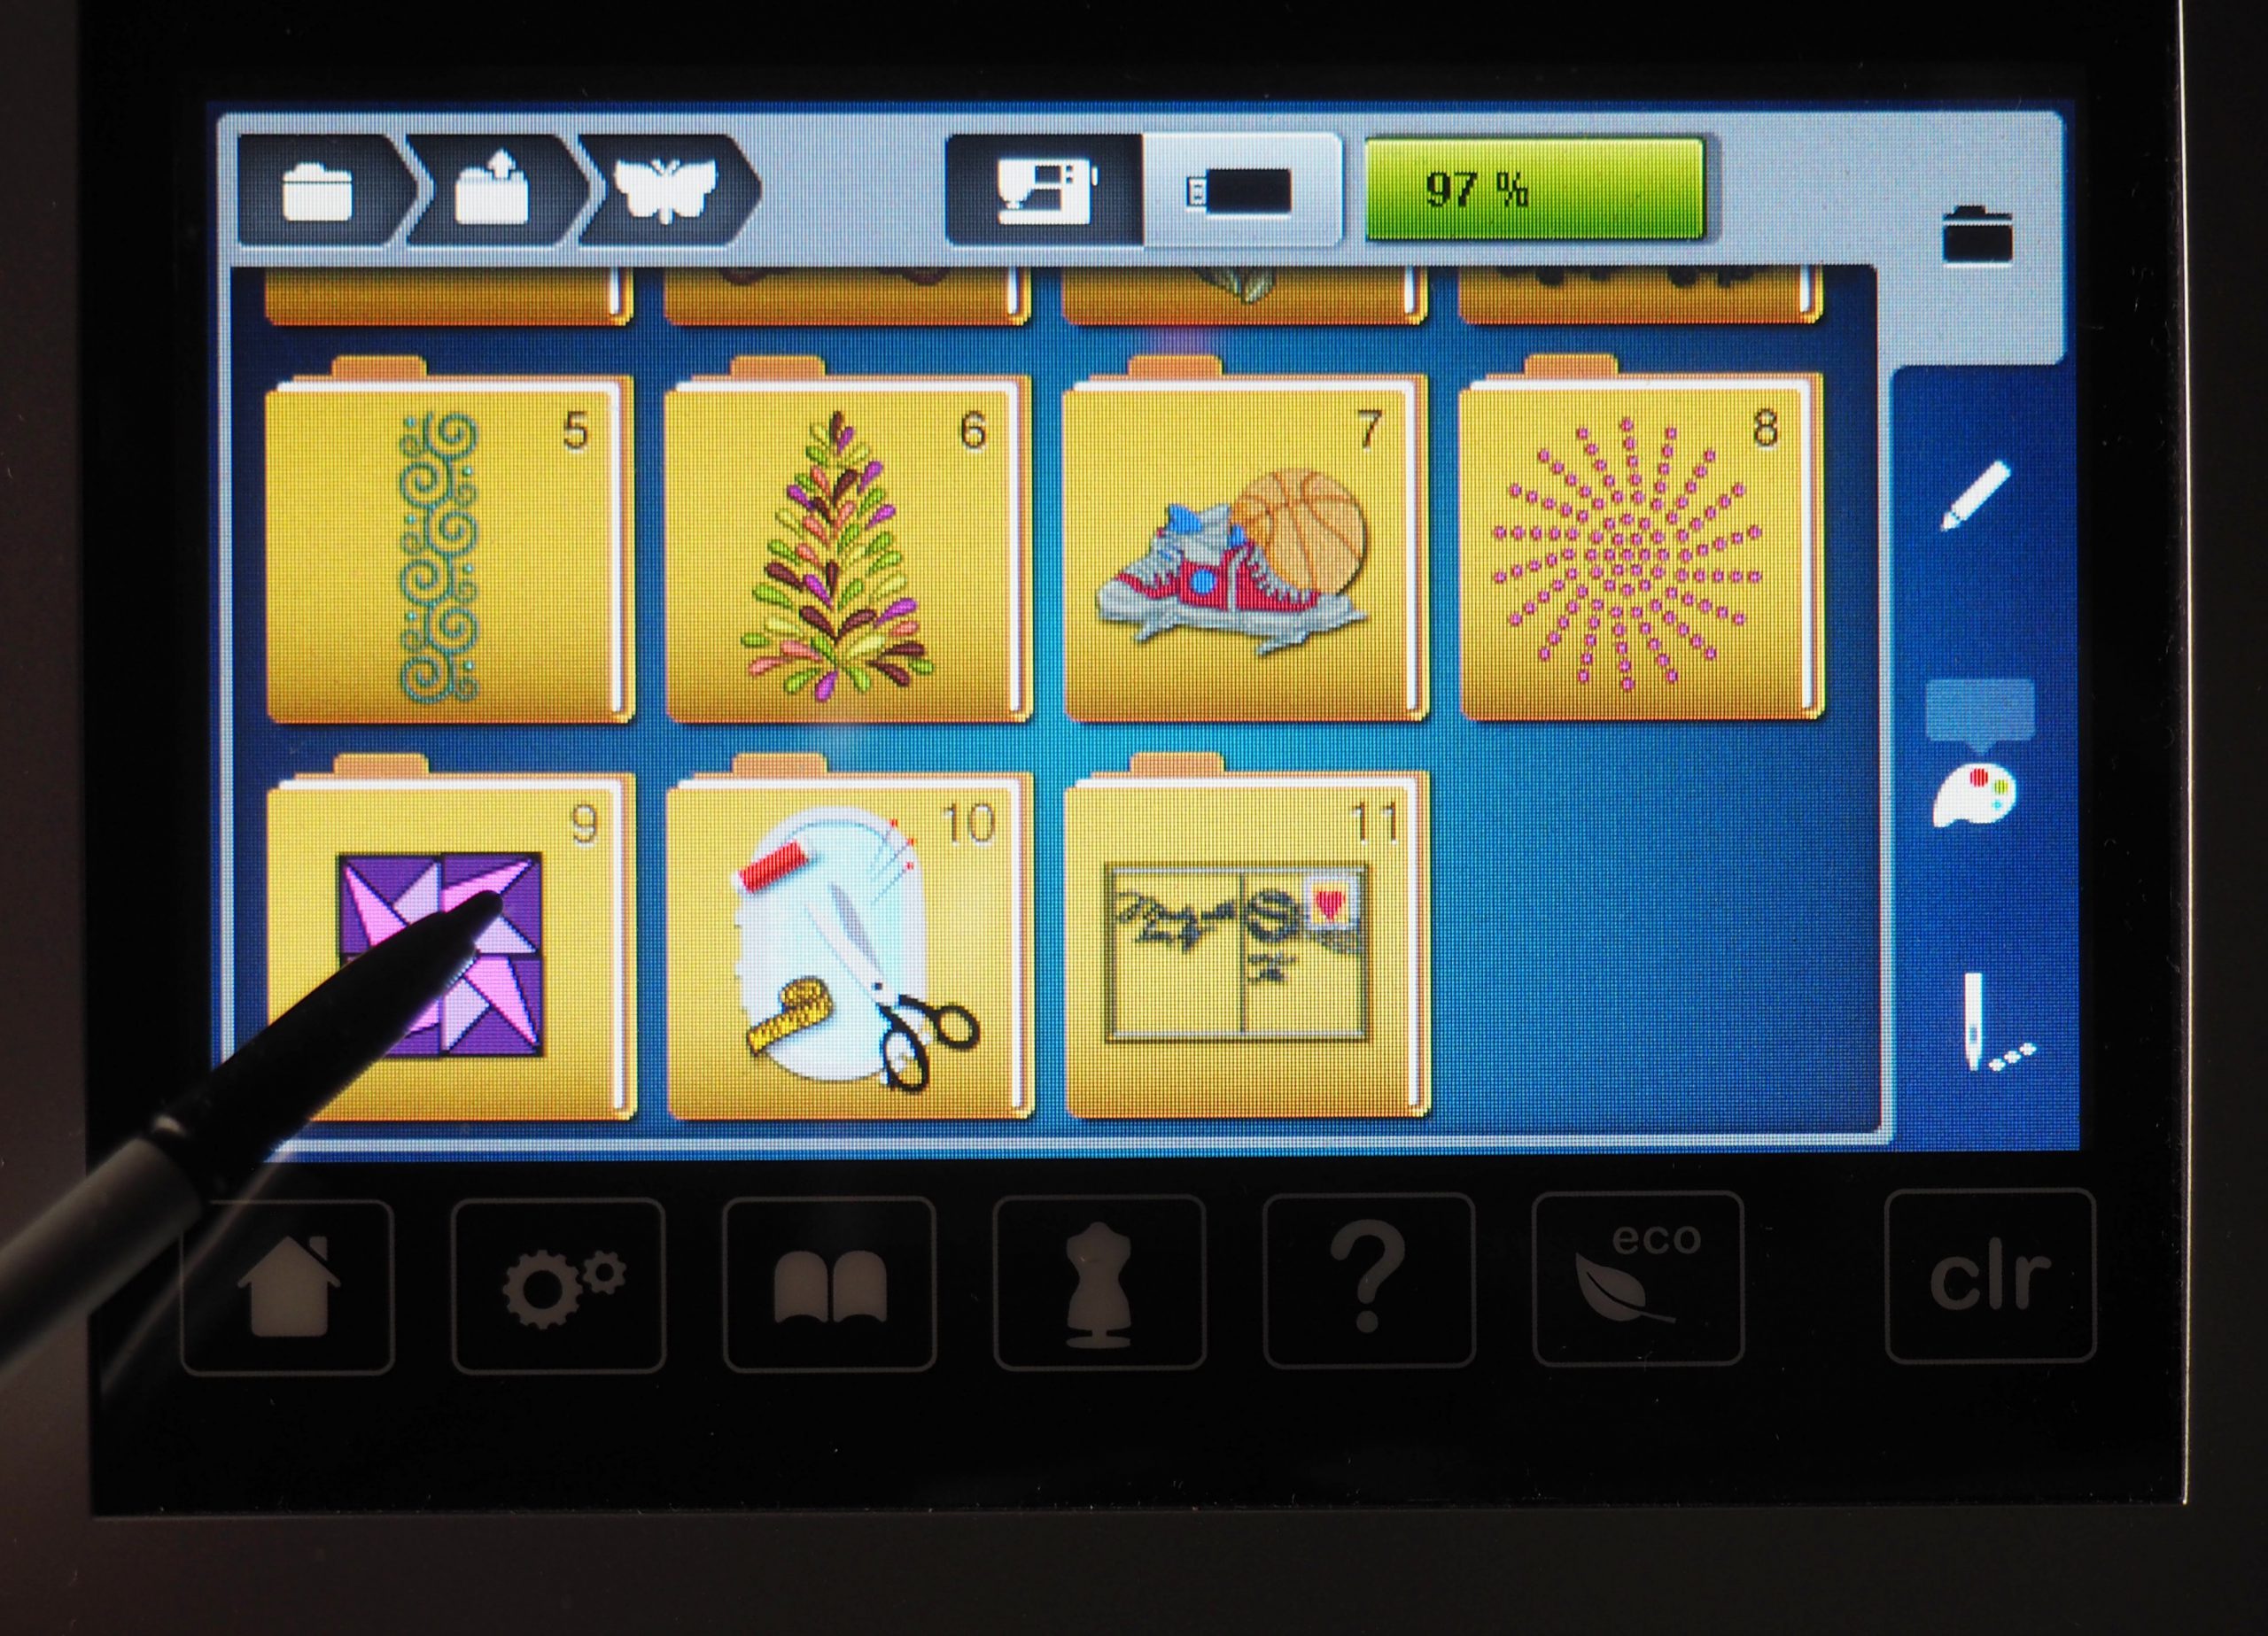
…these “quilting in the hoop” projects: nine different patchwork blocks and nine matching quilting patterns, each measuring 5.5″ square.
Four 5.5″ squares sewn in the same way with the embroidery module are then sewn together to form a 10.5″ patchwork block. The size given here refers to the size before sewing and therefore includes the seam allowance of 1/4″. Once sewn in place, the small block measures 5″ and the assembled block 10″.
Before you start embroidering, however, you need to make some preparations.
Sewing patchwork blocks “in the hoop” – preparations
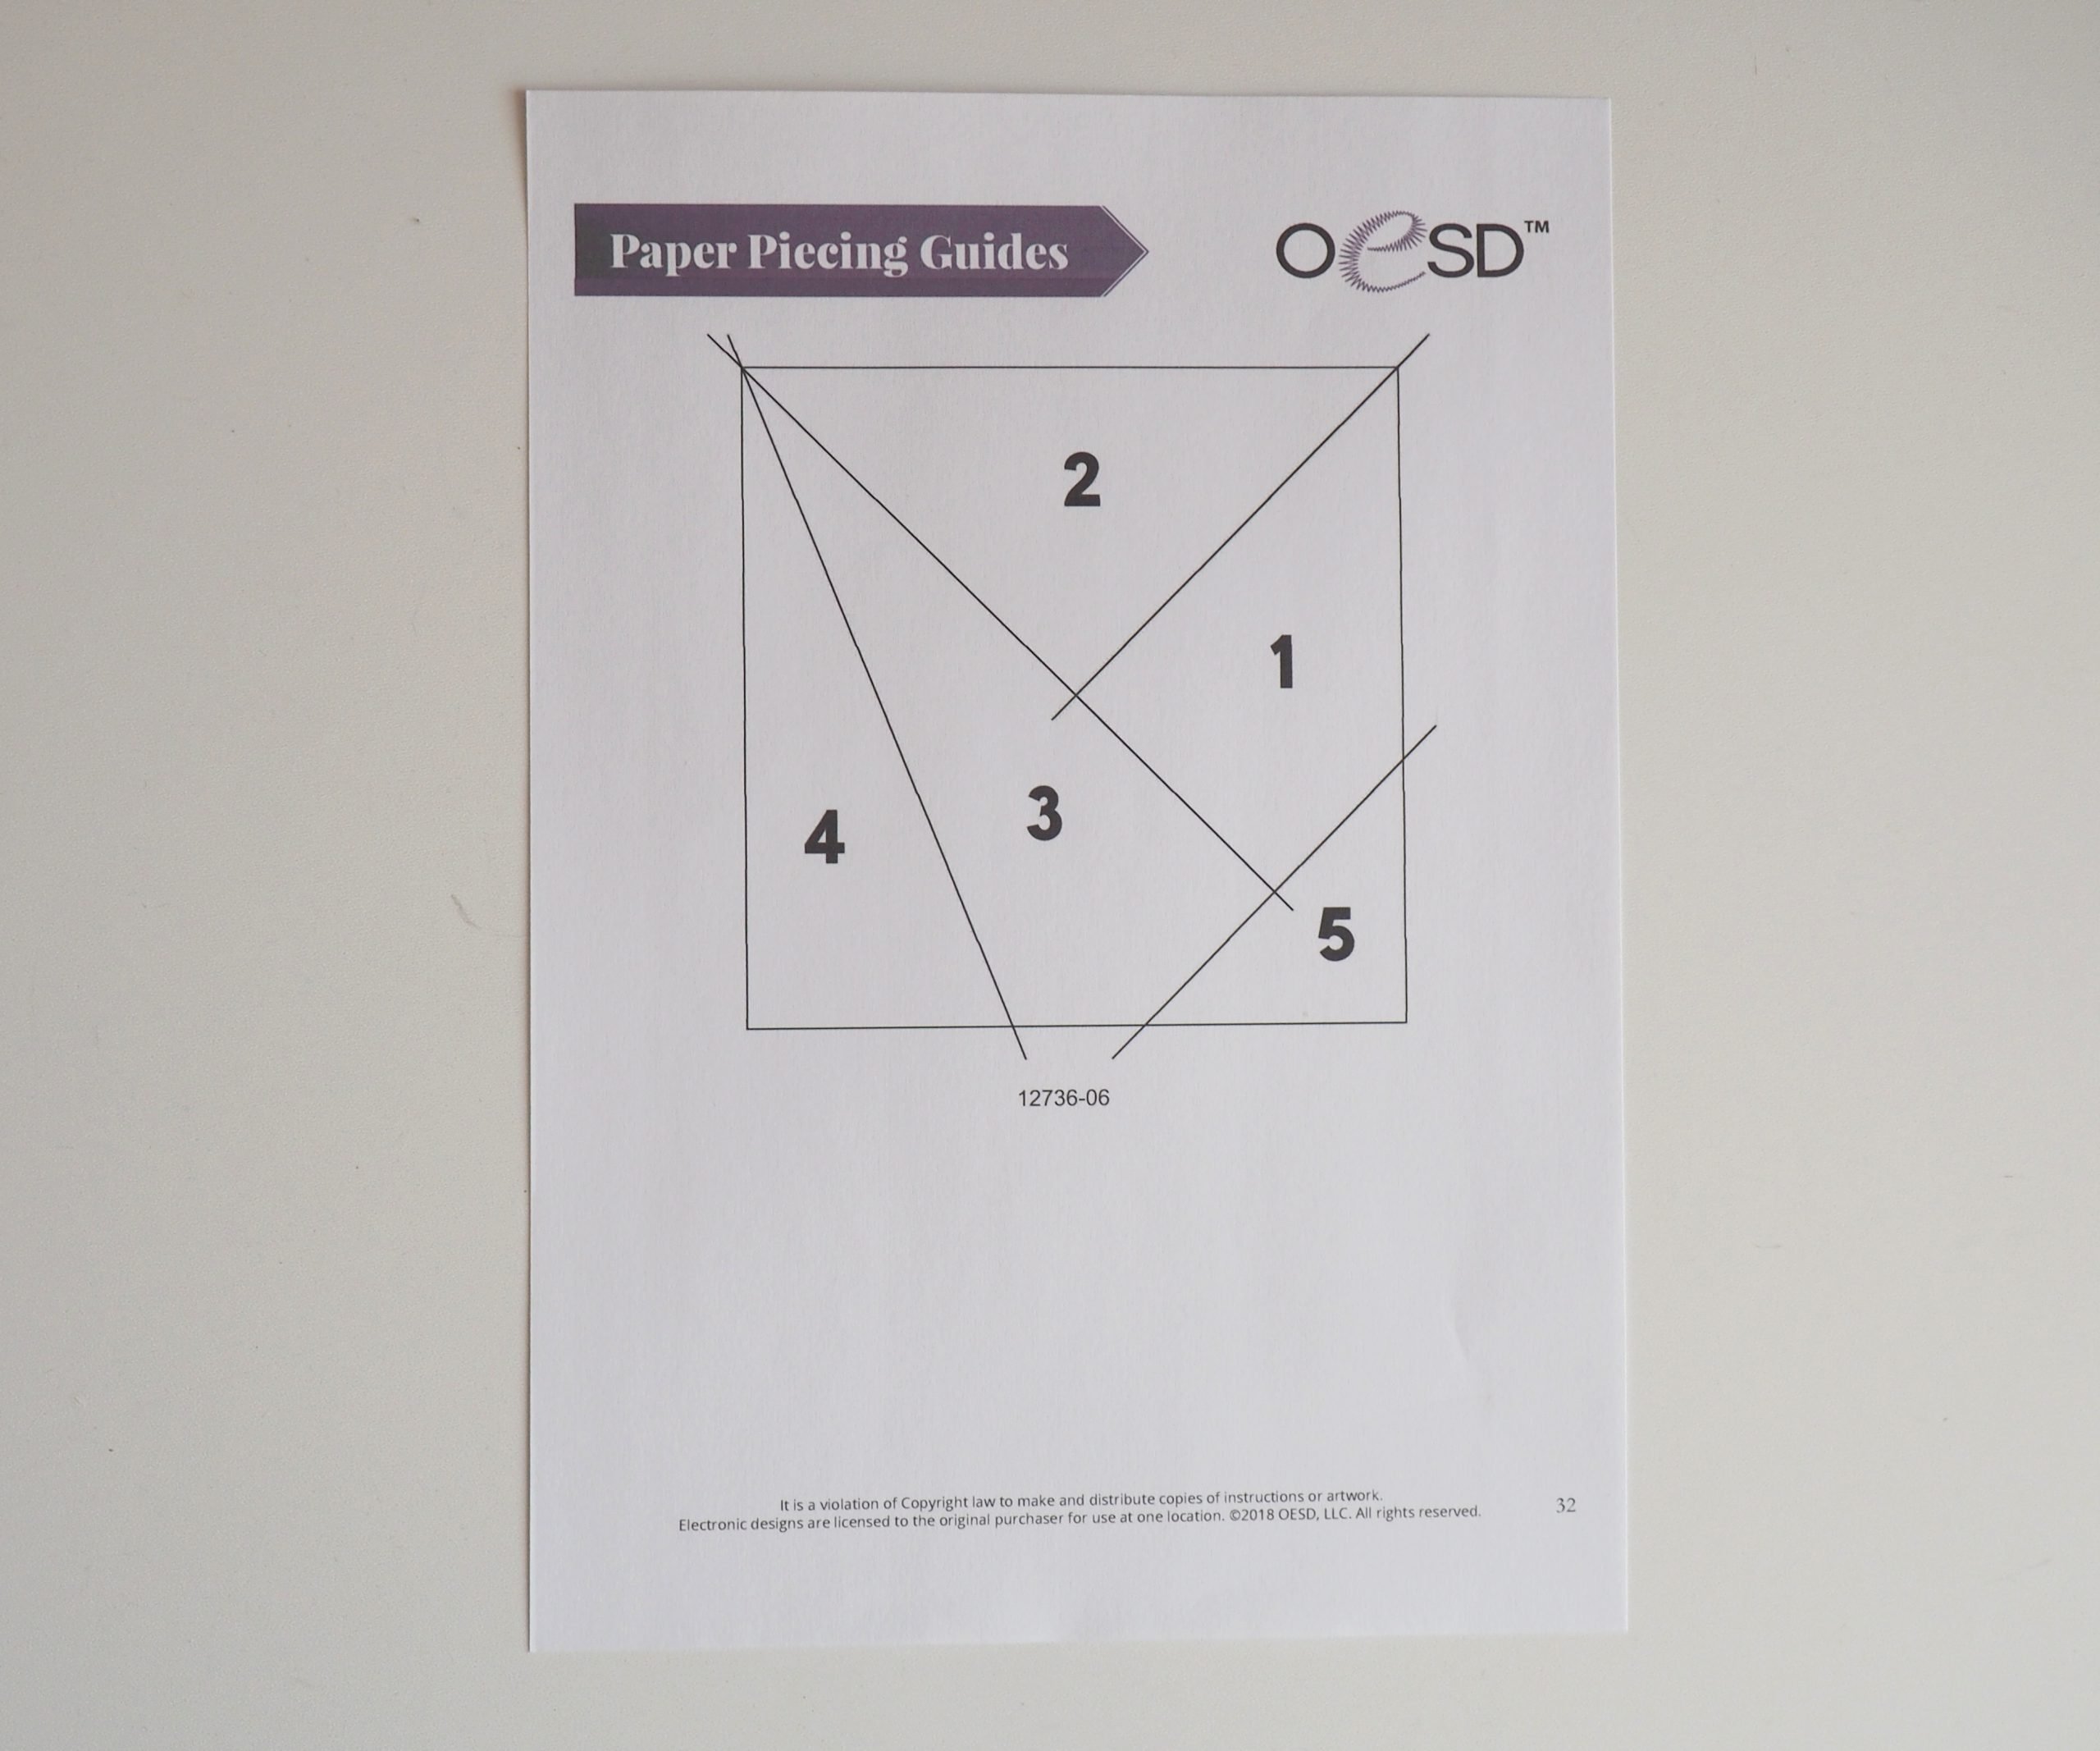
The template for the “quilting in the hoop” projects
You can download the free PDF template from the OESD page (Preview Sewing Information for #12736). I selected block no. 6 as the first example and printed it out in its original size.
You can use this printout as a coloring sheet by printing it out four times, cutting out the four squares and gluing them together to form a large 10″ block, and coloring them in to match your chosen fabrics. This allows you to see what it will look like.
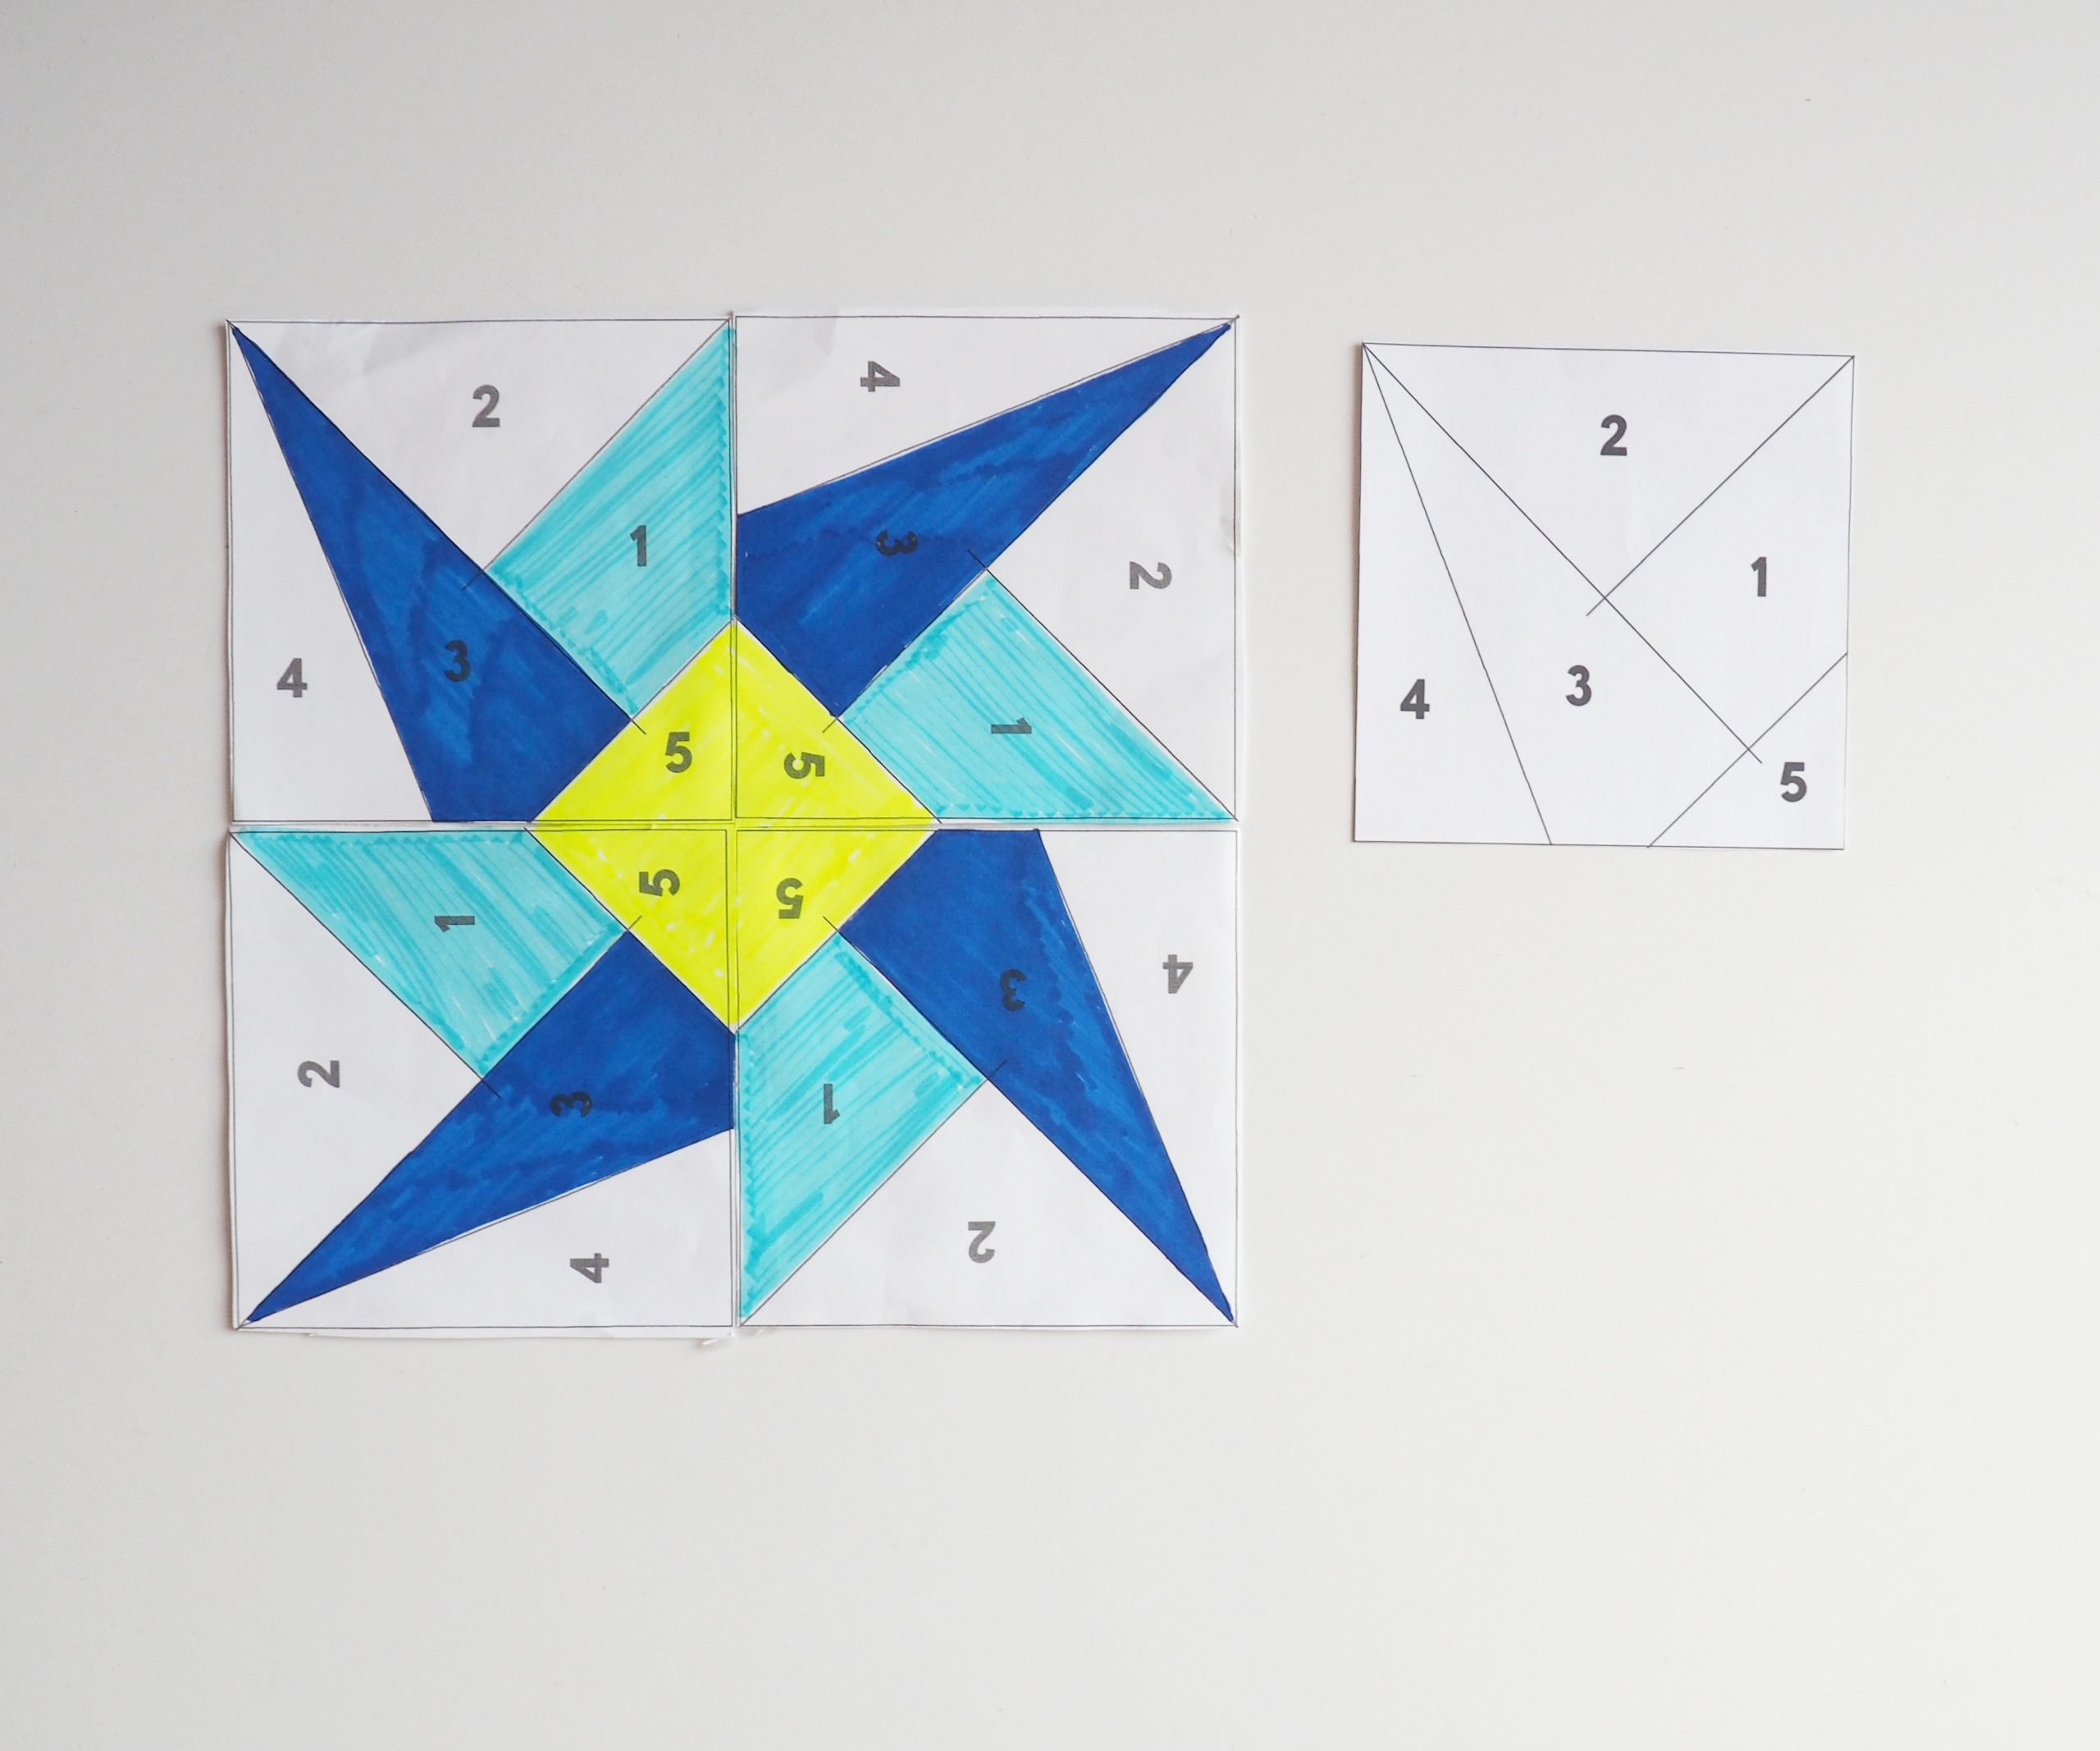
The PDF pattern is also used as a pattern for cutting out the individual pieces of fabric. For this, cut one of the paper squares into its individual pieces and you have the cutting pattern.

Materials for making “quilting in the hoop” projects
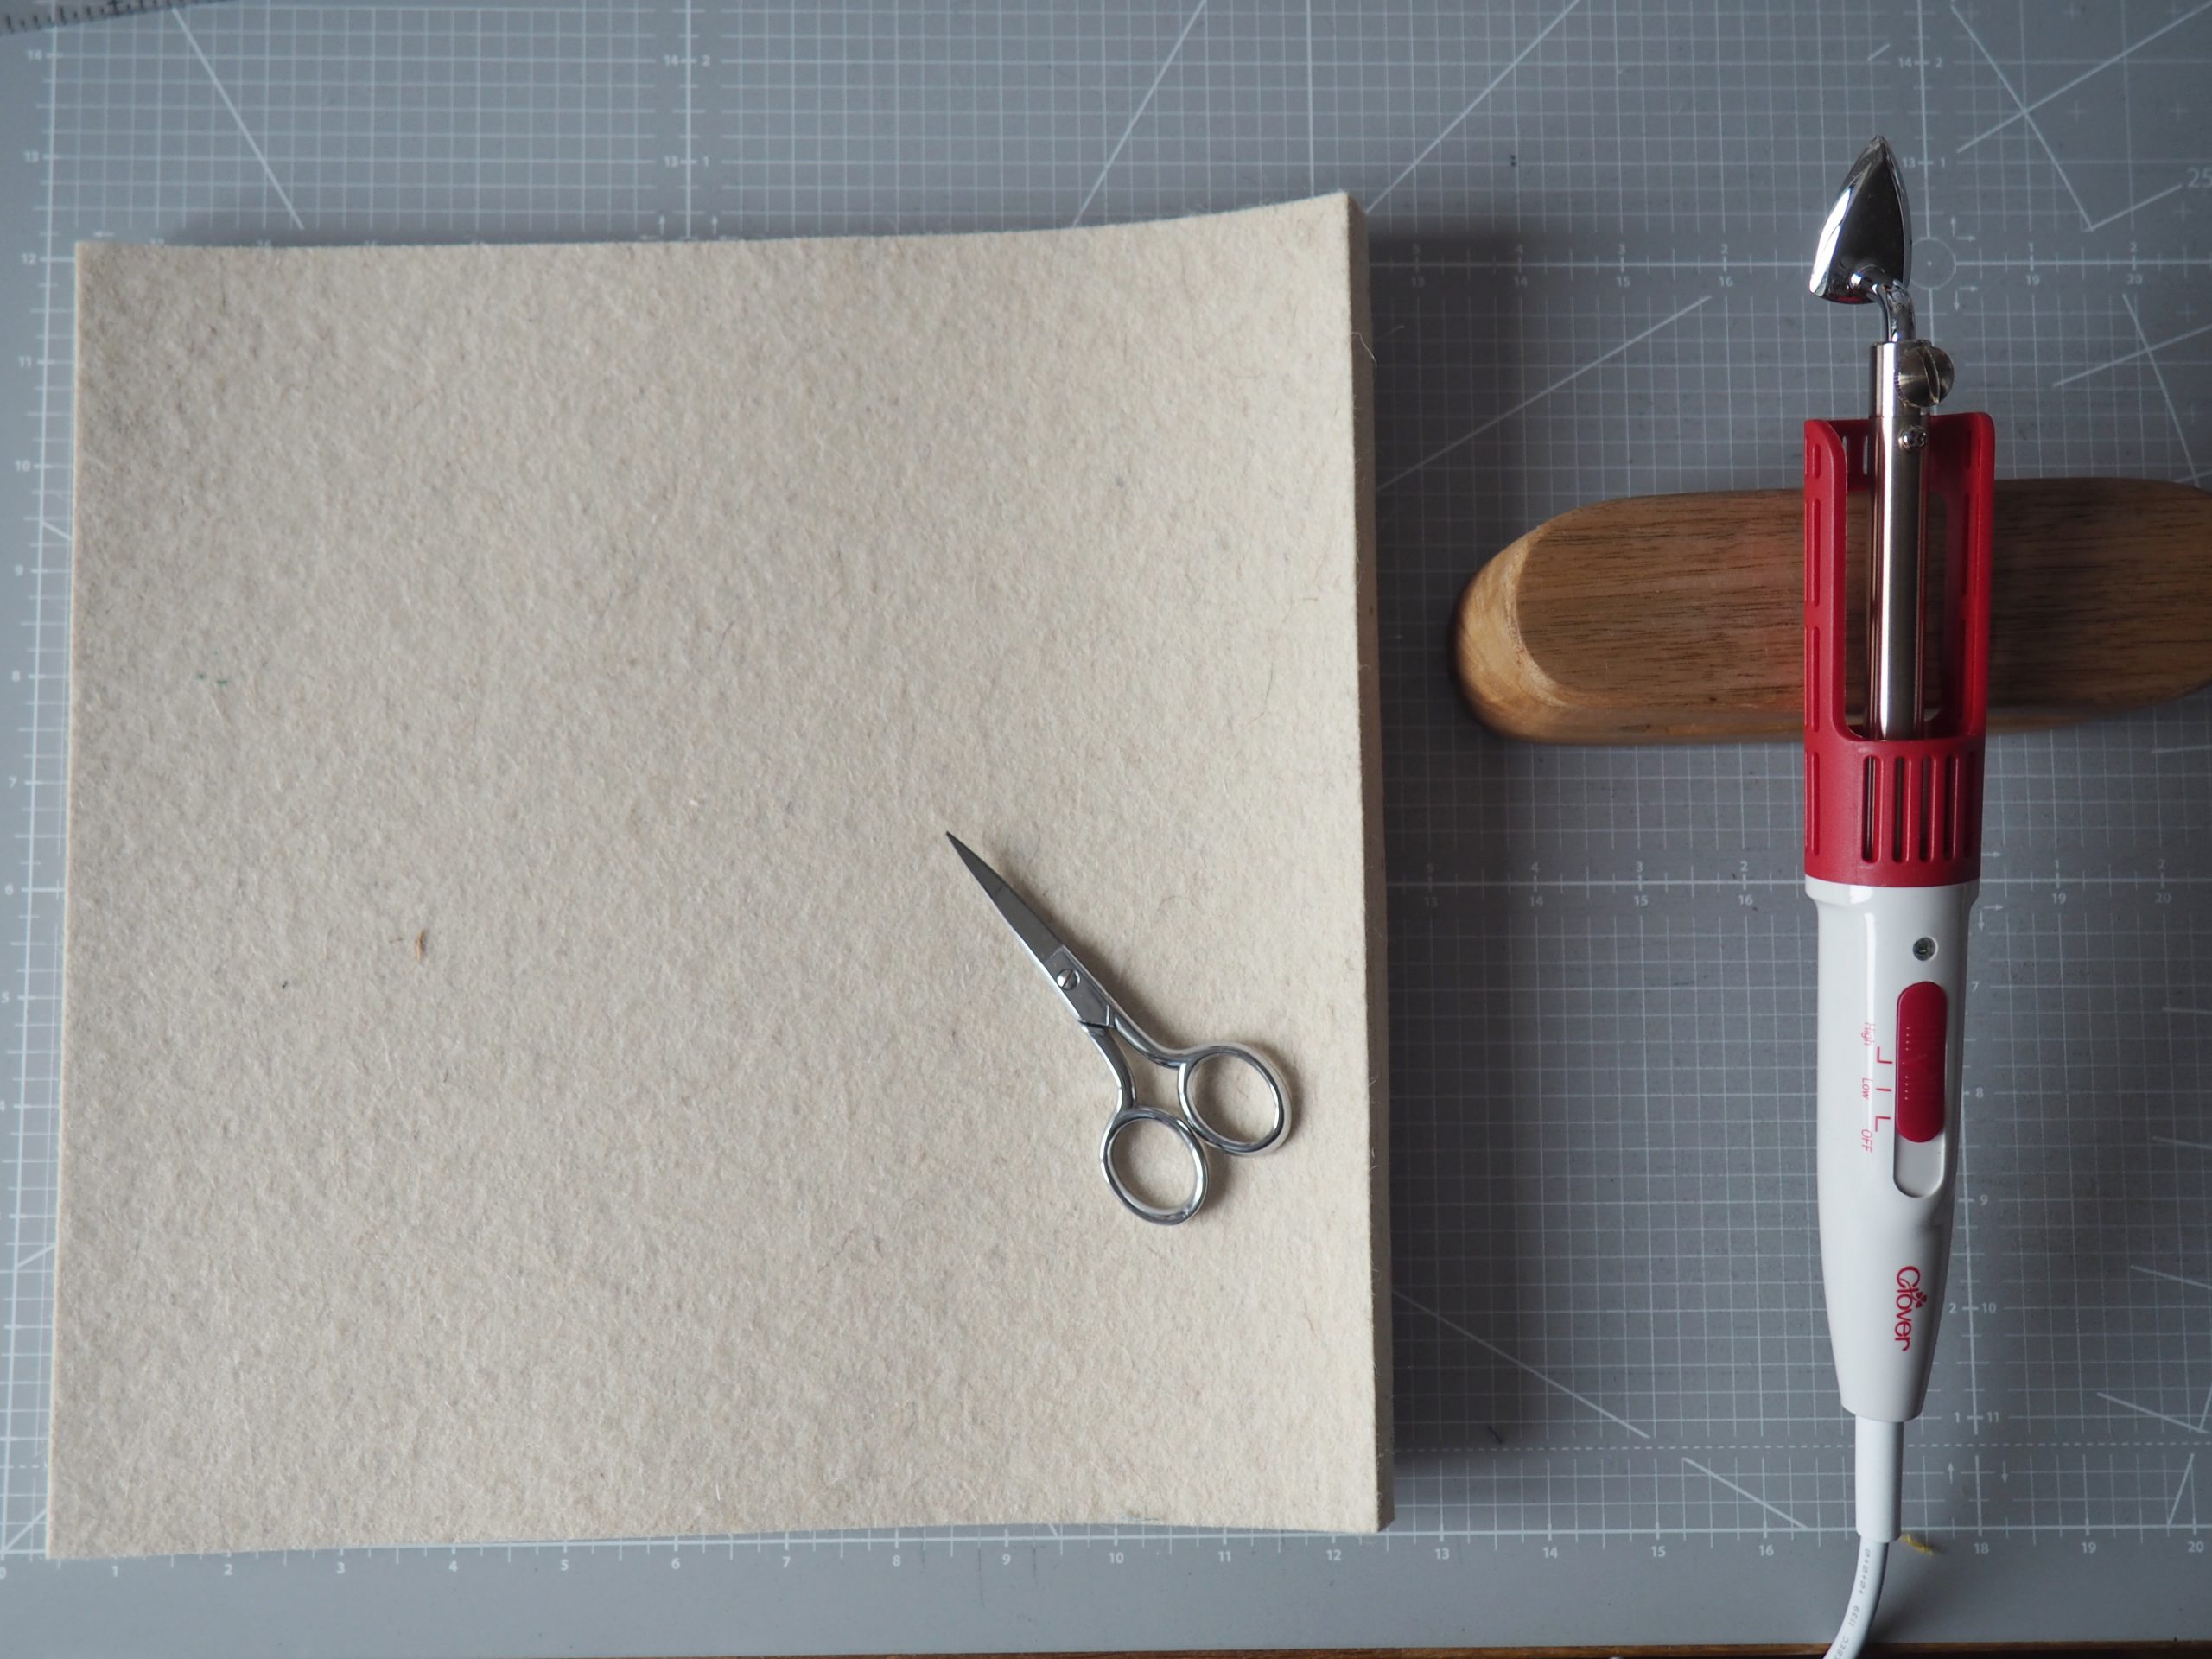
In addition, you will also need
- Iron-on, tear-away stabilizer, i.e. fusible embroidery stabilizer or similar. It is smooth on one side, similar to freezer paper.
The stabilizer is hooped with this smooth side facing up, as the fabric is adhered to this side using heat. - A mini iron, possibly with an ironing board
- Scissors to trim seam allowances inside the embroidery hoop. I like to use scissors with a curved blade, but appliqué scissors are also suitable.
- A marker, if required
Sewing patchwork blocks “in the hoop” – instructions
General information about embroidering the “quilting in the hoop” patchwork blocks
The PDF template printed out in the first step above is also important so that you know the embroidery sequence. The patchwork blocks are sewn in the embroidery hoop according to the foundation paper piecing principle, i.e. sewing on paper, except that here, the correct sewing of the lines is carried out by the embroidery function.
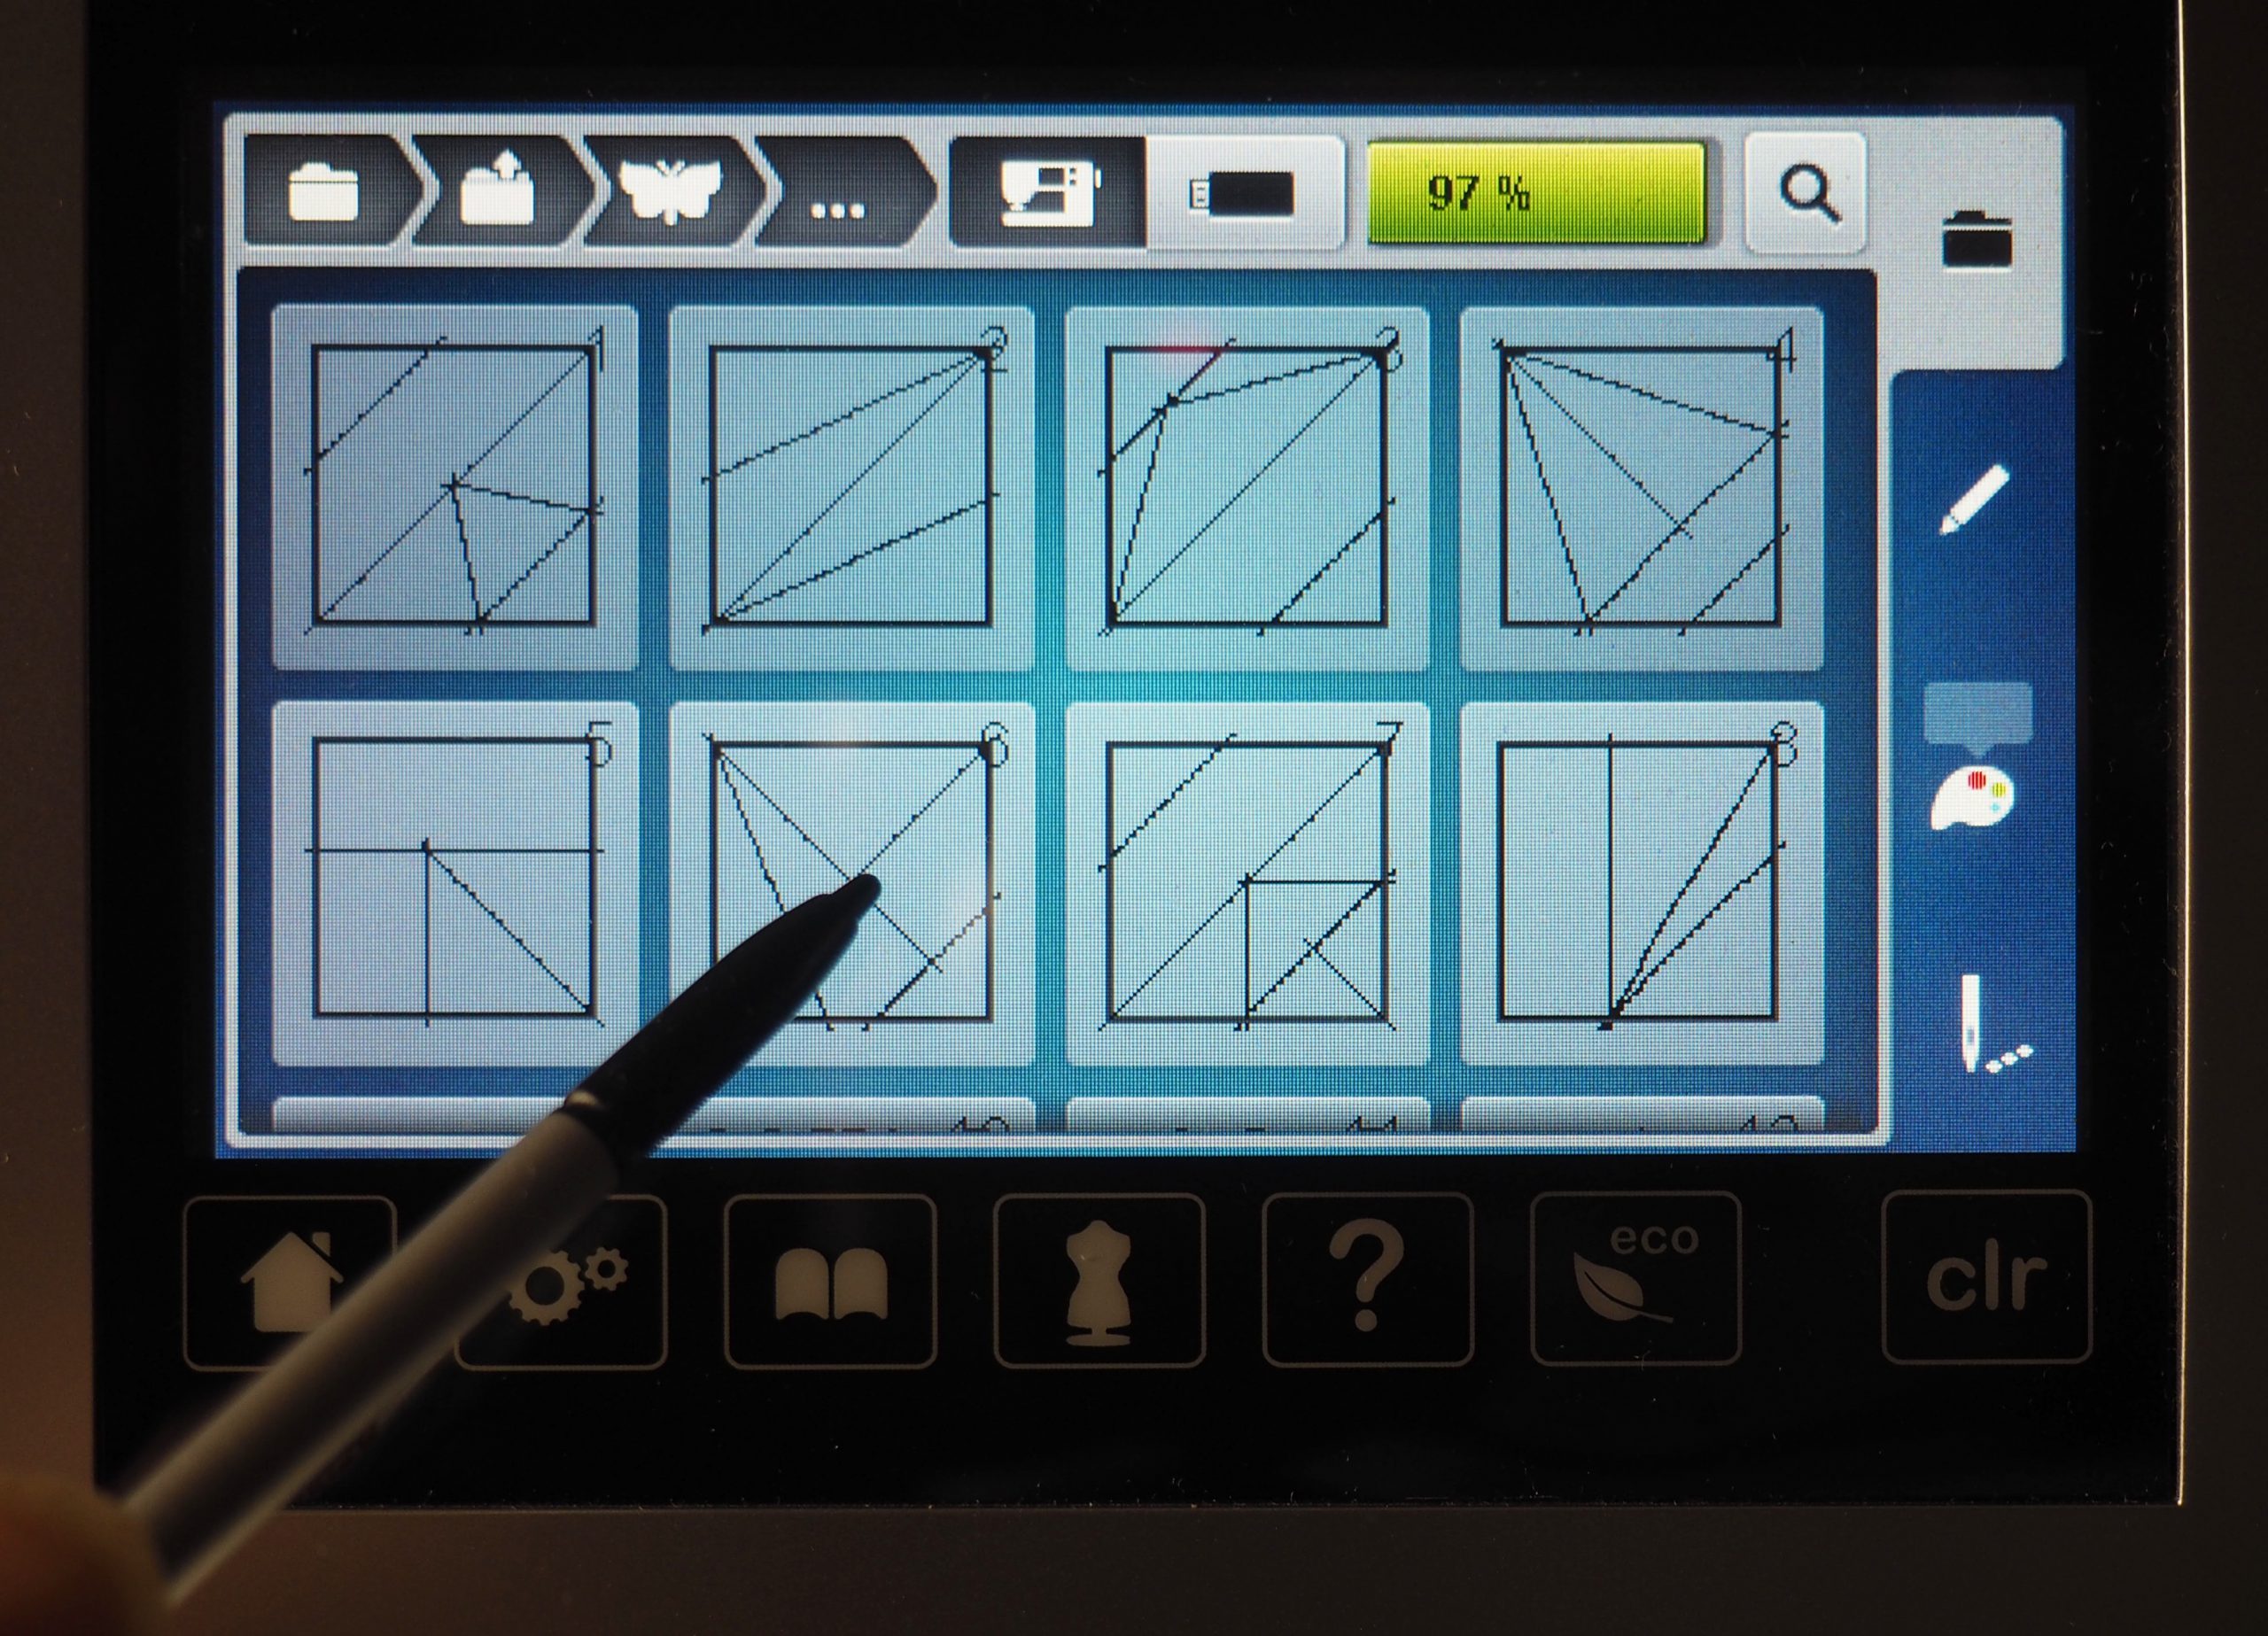
The picture below shows all the diagrams of the individual blocks with their embroidery sequences.
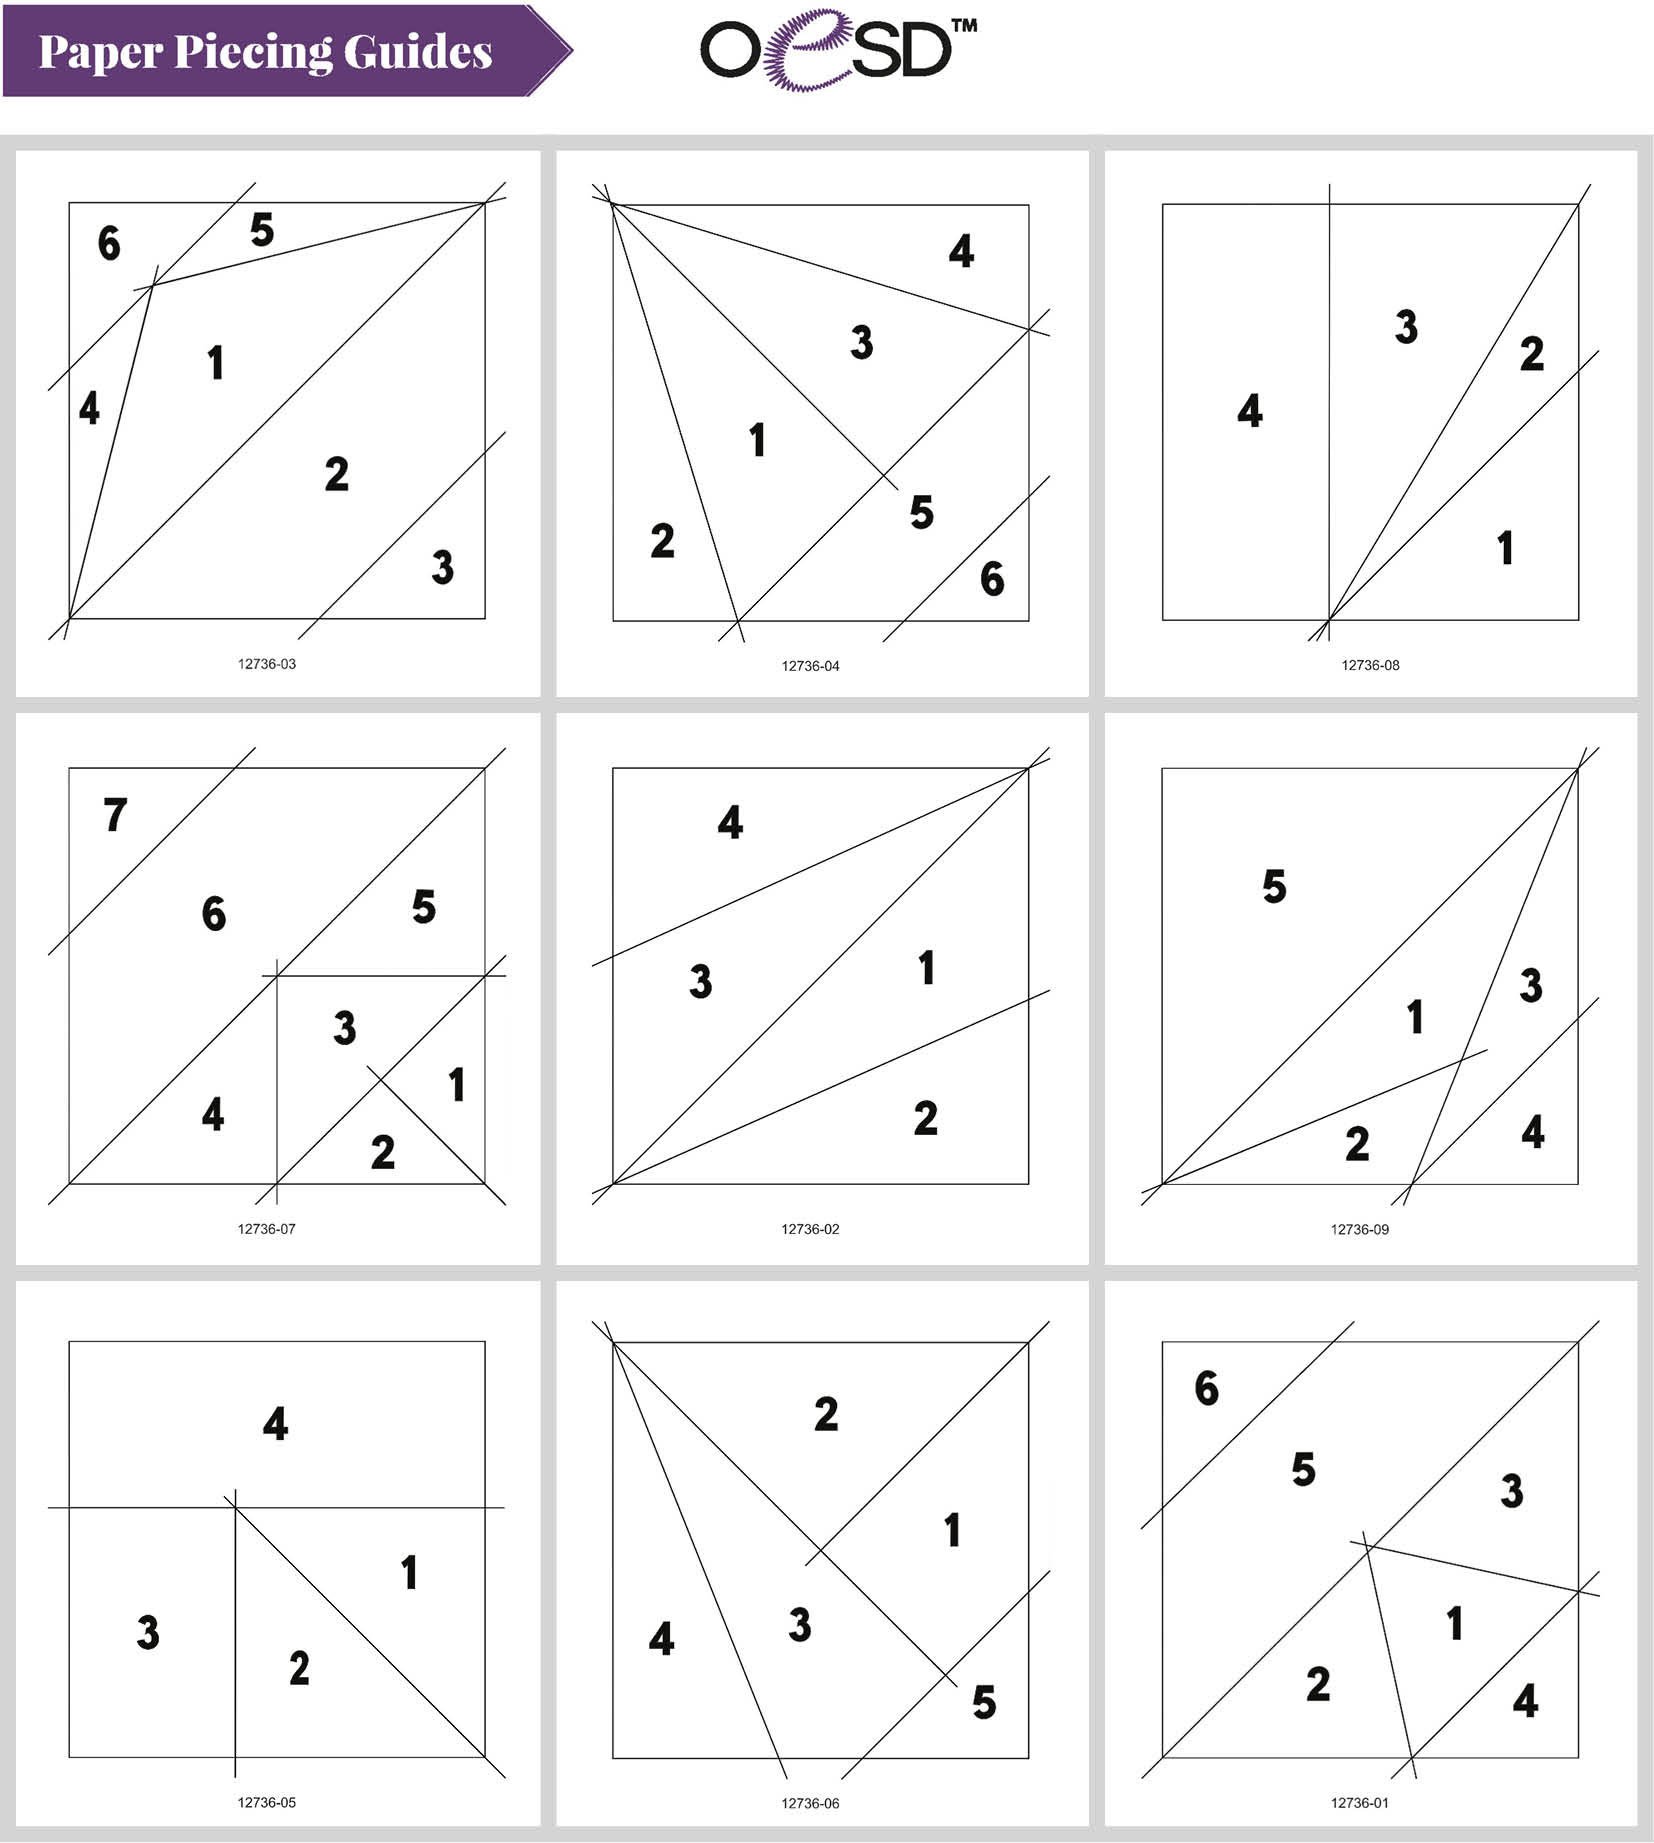
Overview of the nine blocks
Each of the blocks follows a uniform embroidery sequence, which only differs in terms of the number of areas. Each block starts with two steps:
- Embroidery step 1: Embroider the block’s basic pattern with all the relevant lines
- Place fabric 1 on area 1
Then do the following for each area
- Embroidery step 2: Embroider the starting line for fabric 2
- Place fabric 2 with the right sides together with the seam allowance over the starting line, but not covering the “new” area.
- Embroidery step 3: Embroider fabric 2 along the starting line
- Trim the seam allowance
- Fold over the new embroidered area and iron
These steps are repeated for each new area, i.e.
- Embroidery step 4: Embroider the starting line for fabric 3
- Place fabric 3 with the right sides together over the starting line but not covering the “new” area.
- Embroidery step 5: Embroider fabric 3 along the starting line
- Trim the seam allowance
- Fold over the new embroidered area and iron
- …
The last step is to embroider around the outside of the square.
Cutting out the fabrics
The individual pieces for a 5.5″ block are cut out using the paper pattern pieces. Lay the paper pieces on to the right side of the ironed fabric as a cutting pattern and cut out with a seam allowance of at least 1/4″. Cut out each pattern piece 4x, as four individual blocks make up a large quilting block.
The embroidery process in practice
Below, I will show you how to embroider a “quilting in the hoop” block like this, using block no. 6 as an example.
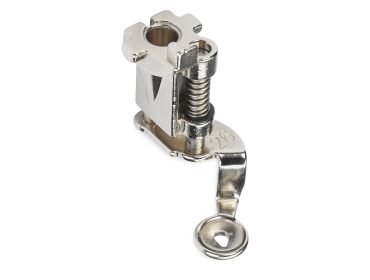
Set up your machine for embroidery, i.e. attach Embroidery foot # 26 (drop-shaped) insert the straight stitch plate, lower the feed dog, and select a suitable needle and thread. Open block no. 6, which is located in folder no. 9.
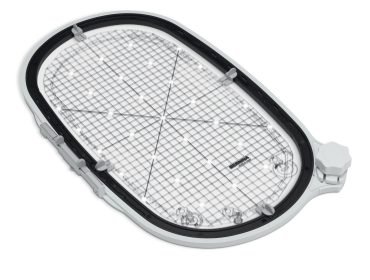
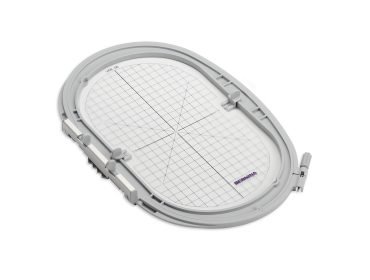
As the embroider hoop, you will need at least the Large oval hoop. To embroider two blocks in one hoop, you will need the Maxi Hoop I used the Maxi Hoop for the photos and opened block no. 6 a second time by clicking on the plus symbol. The fusible tear-away stabilizer is hooped drum-tight.
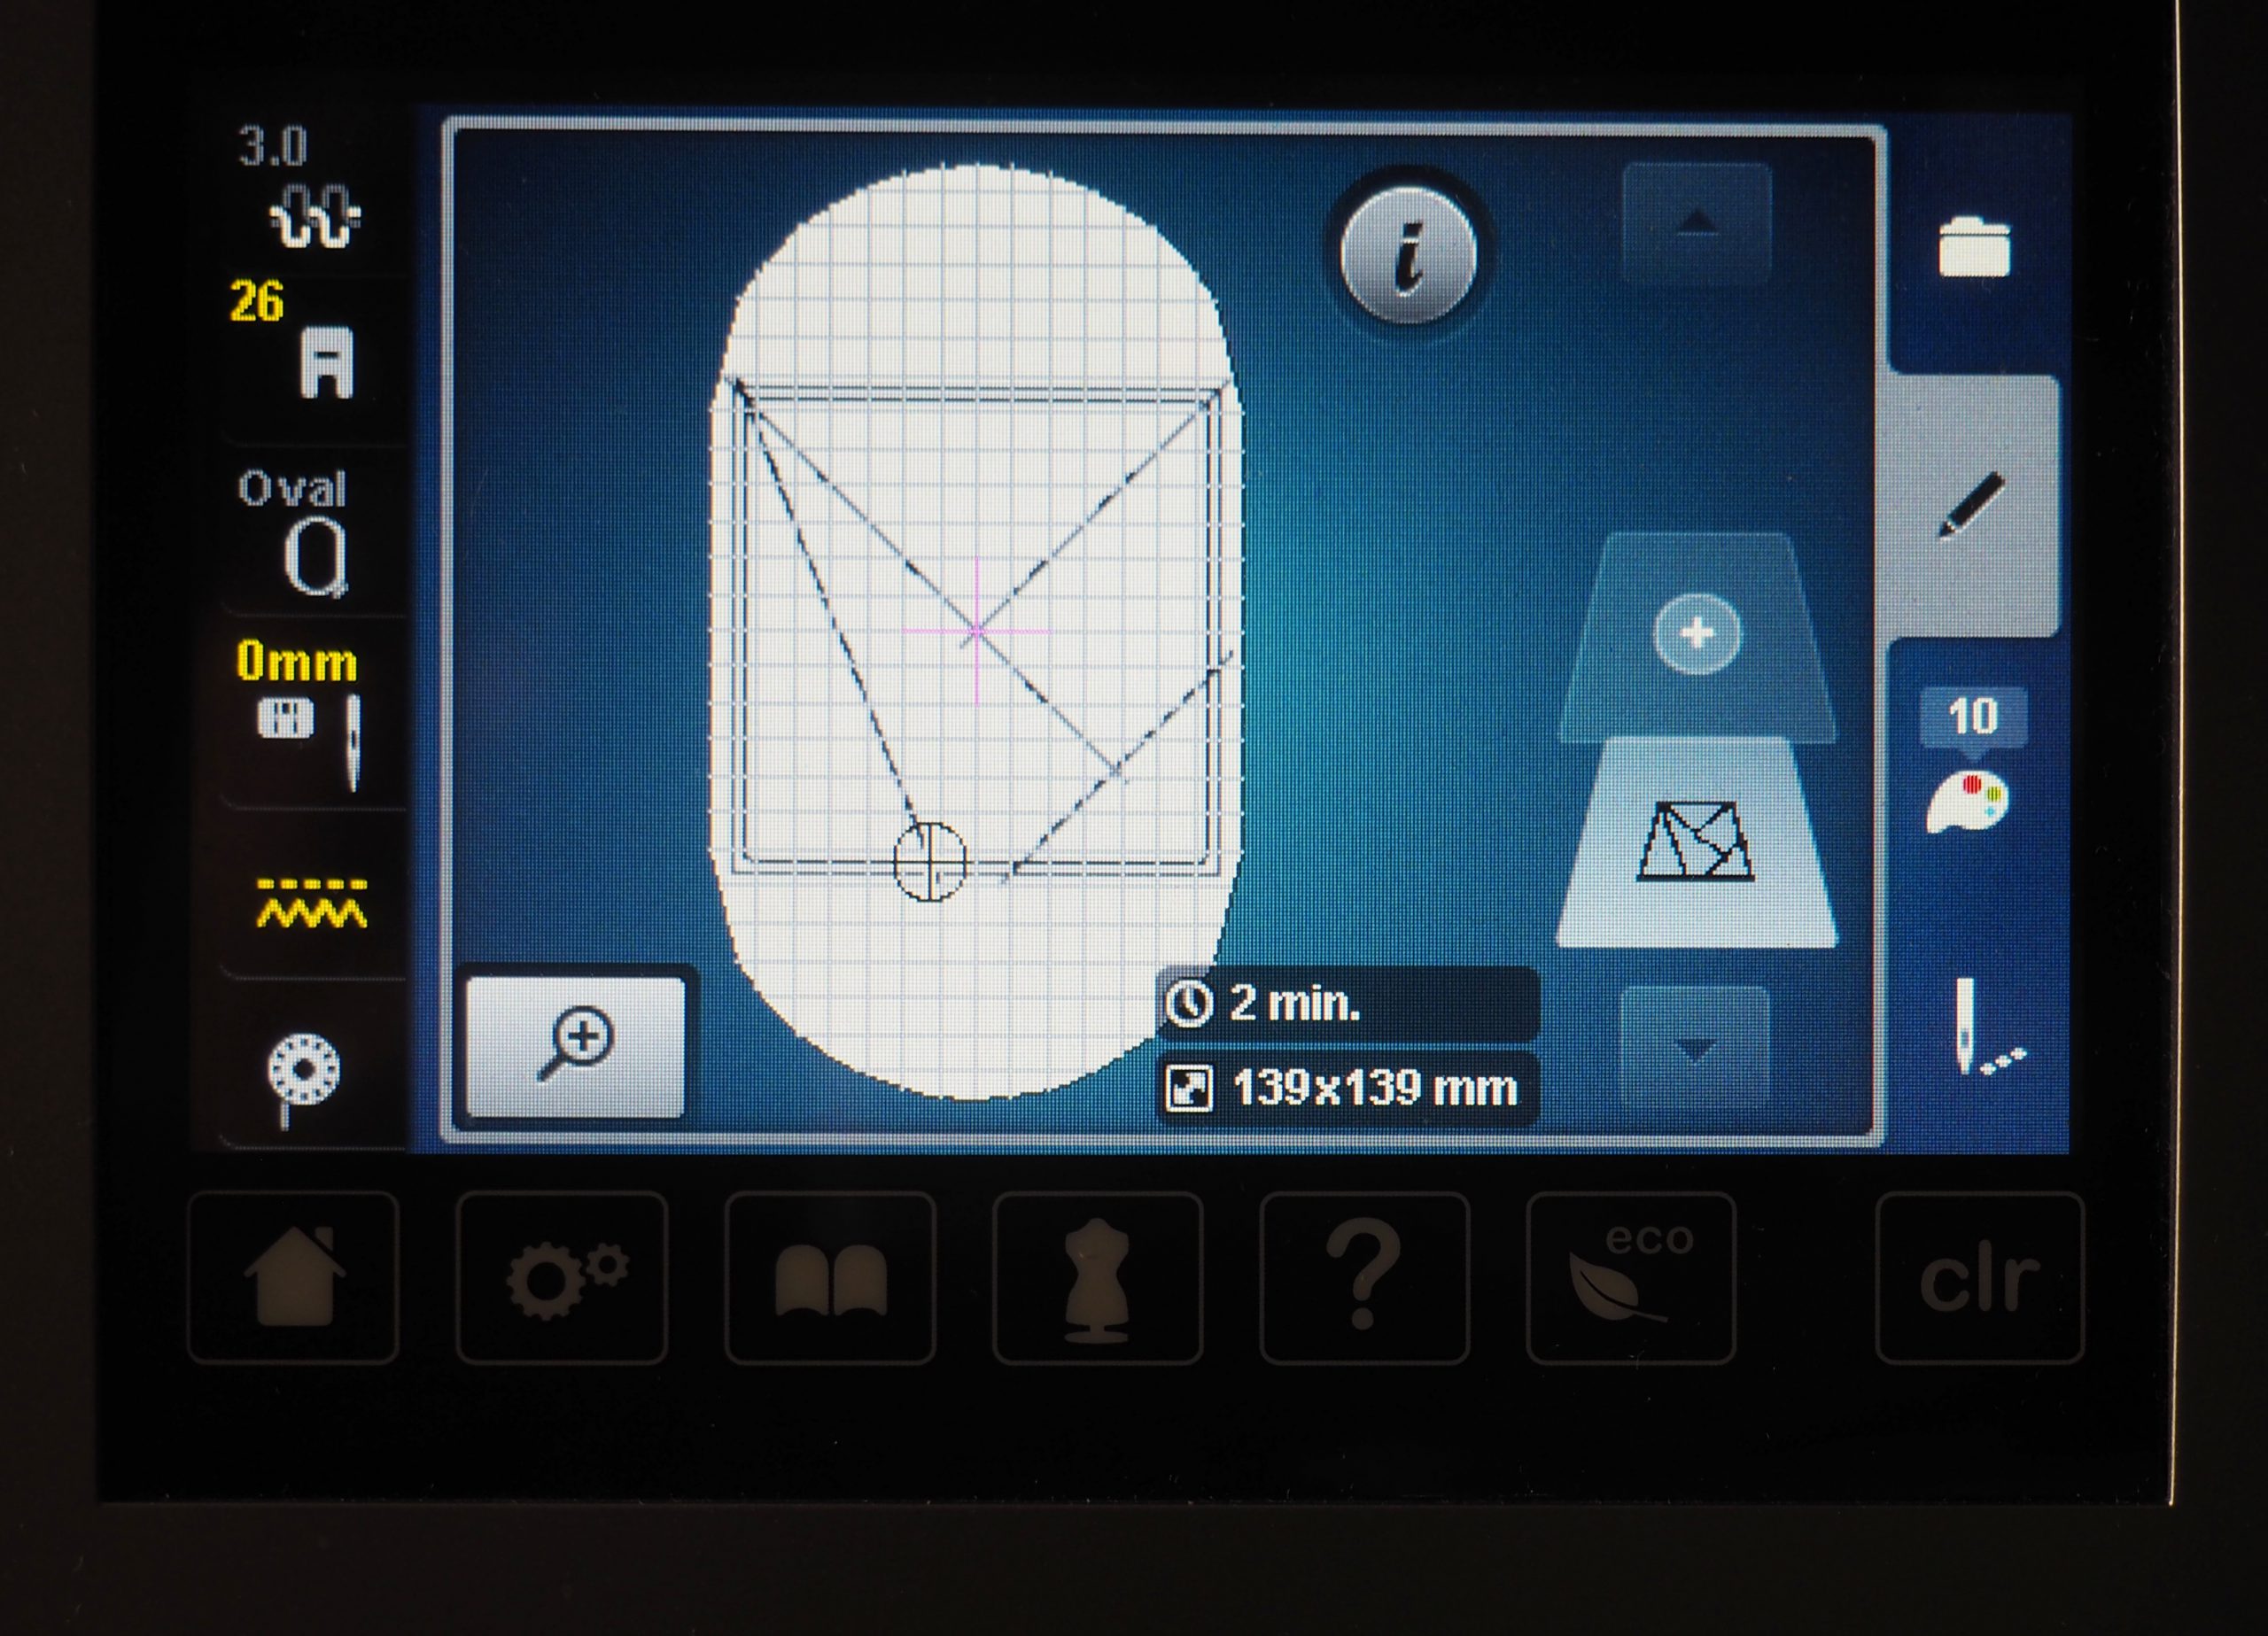
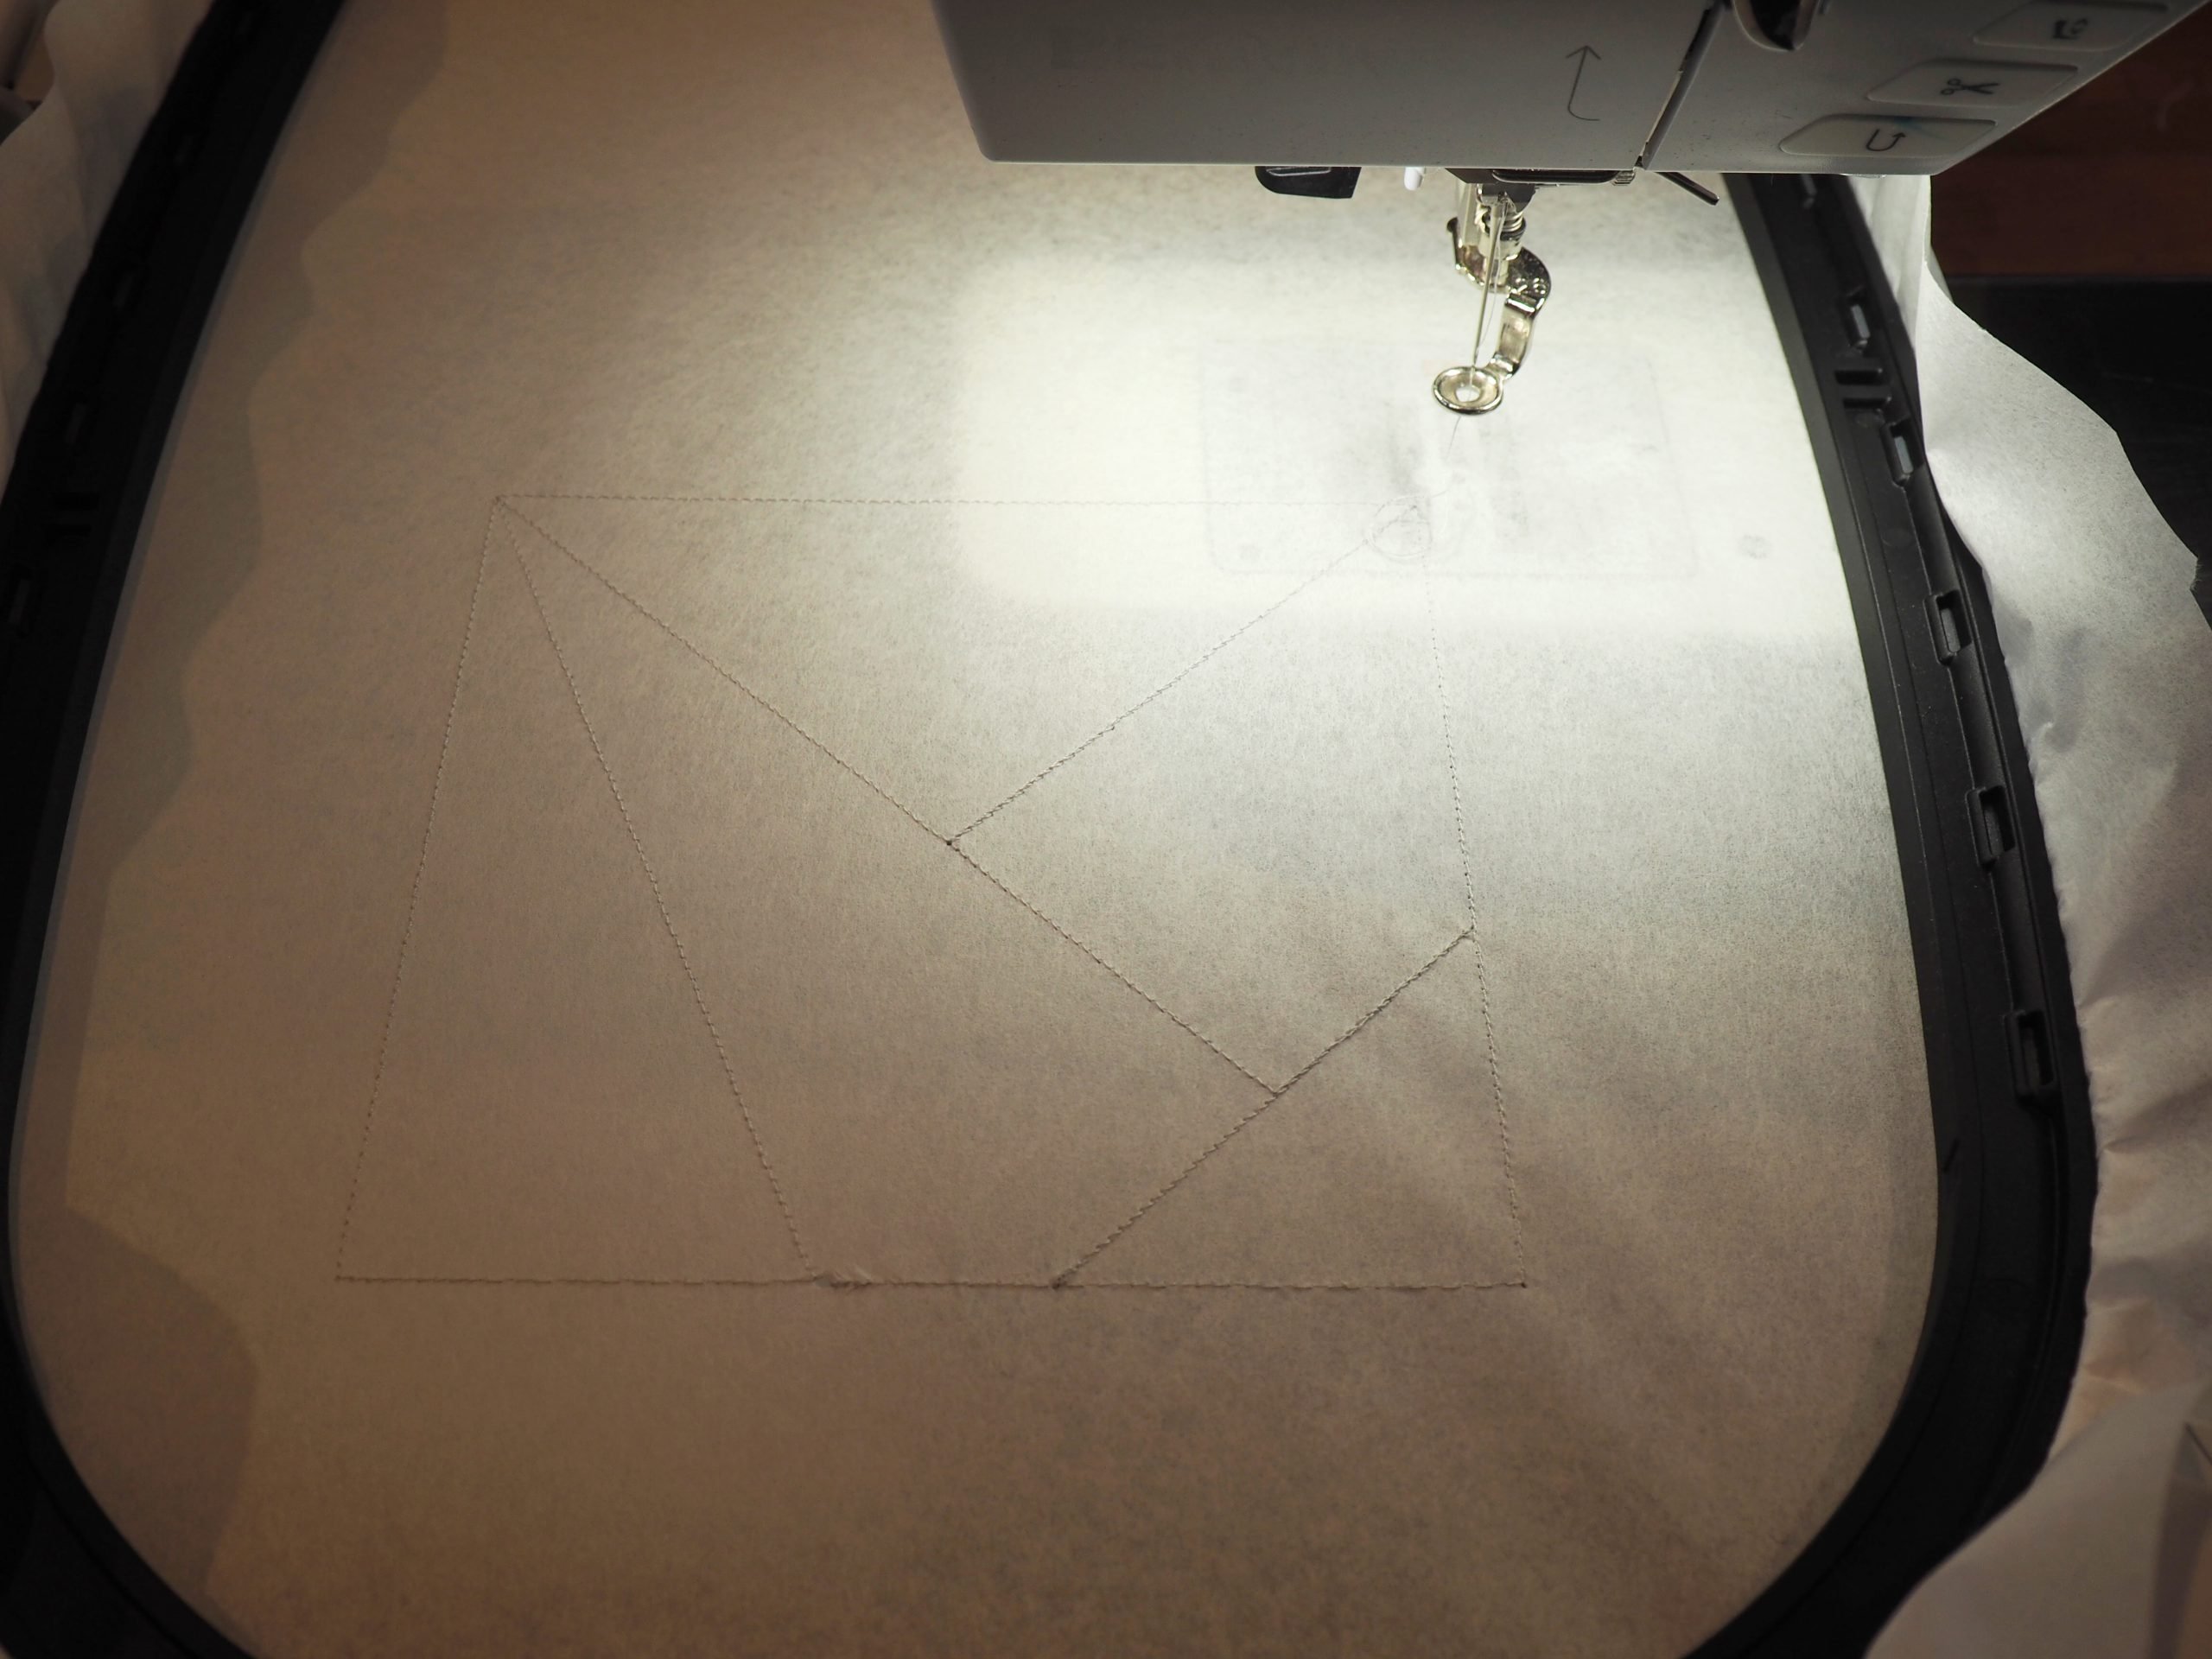
In the first embroidery step, the outline of the block is embroidered.
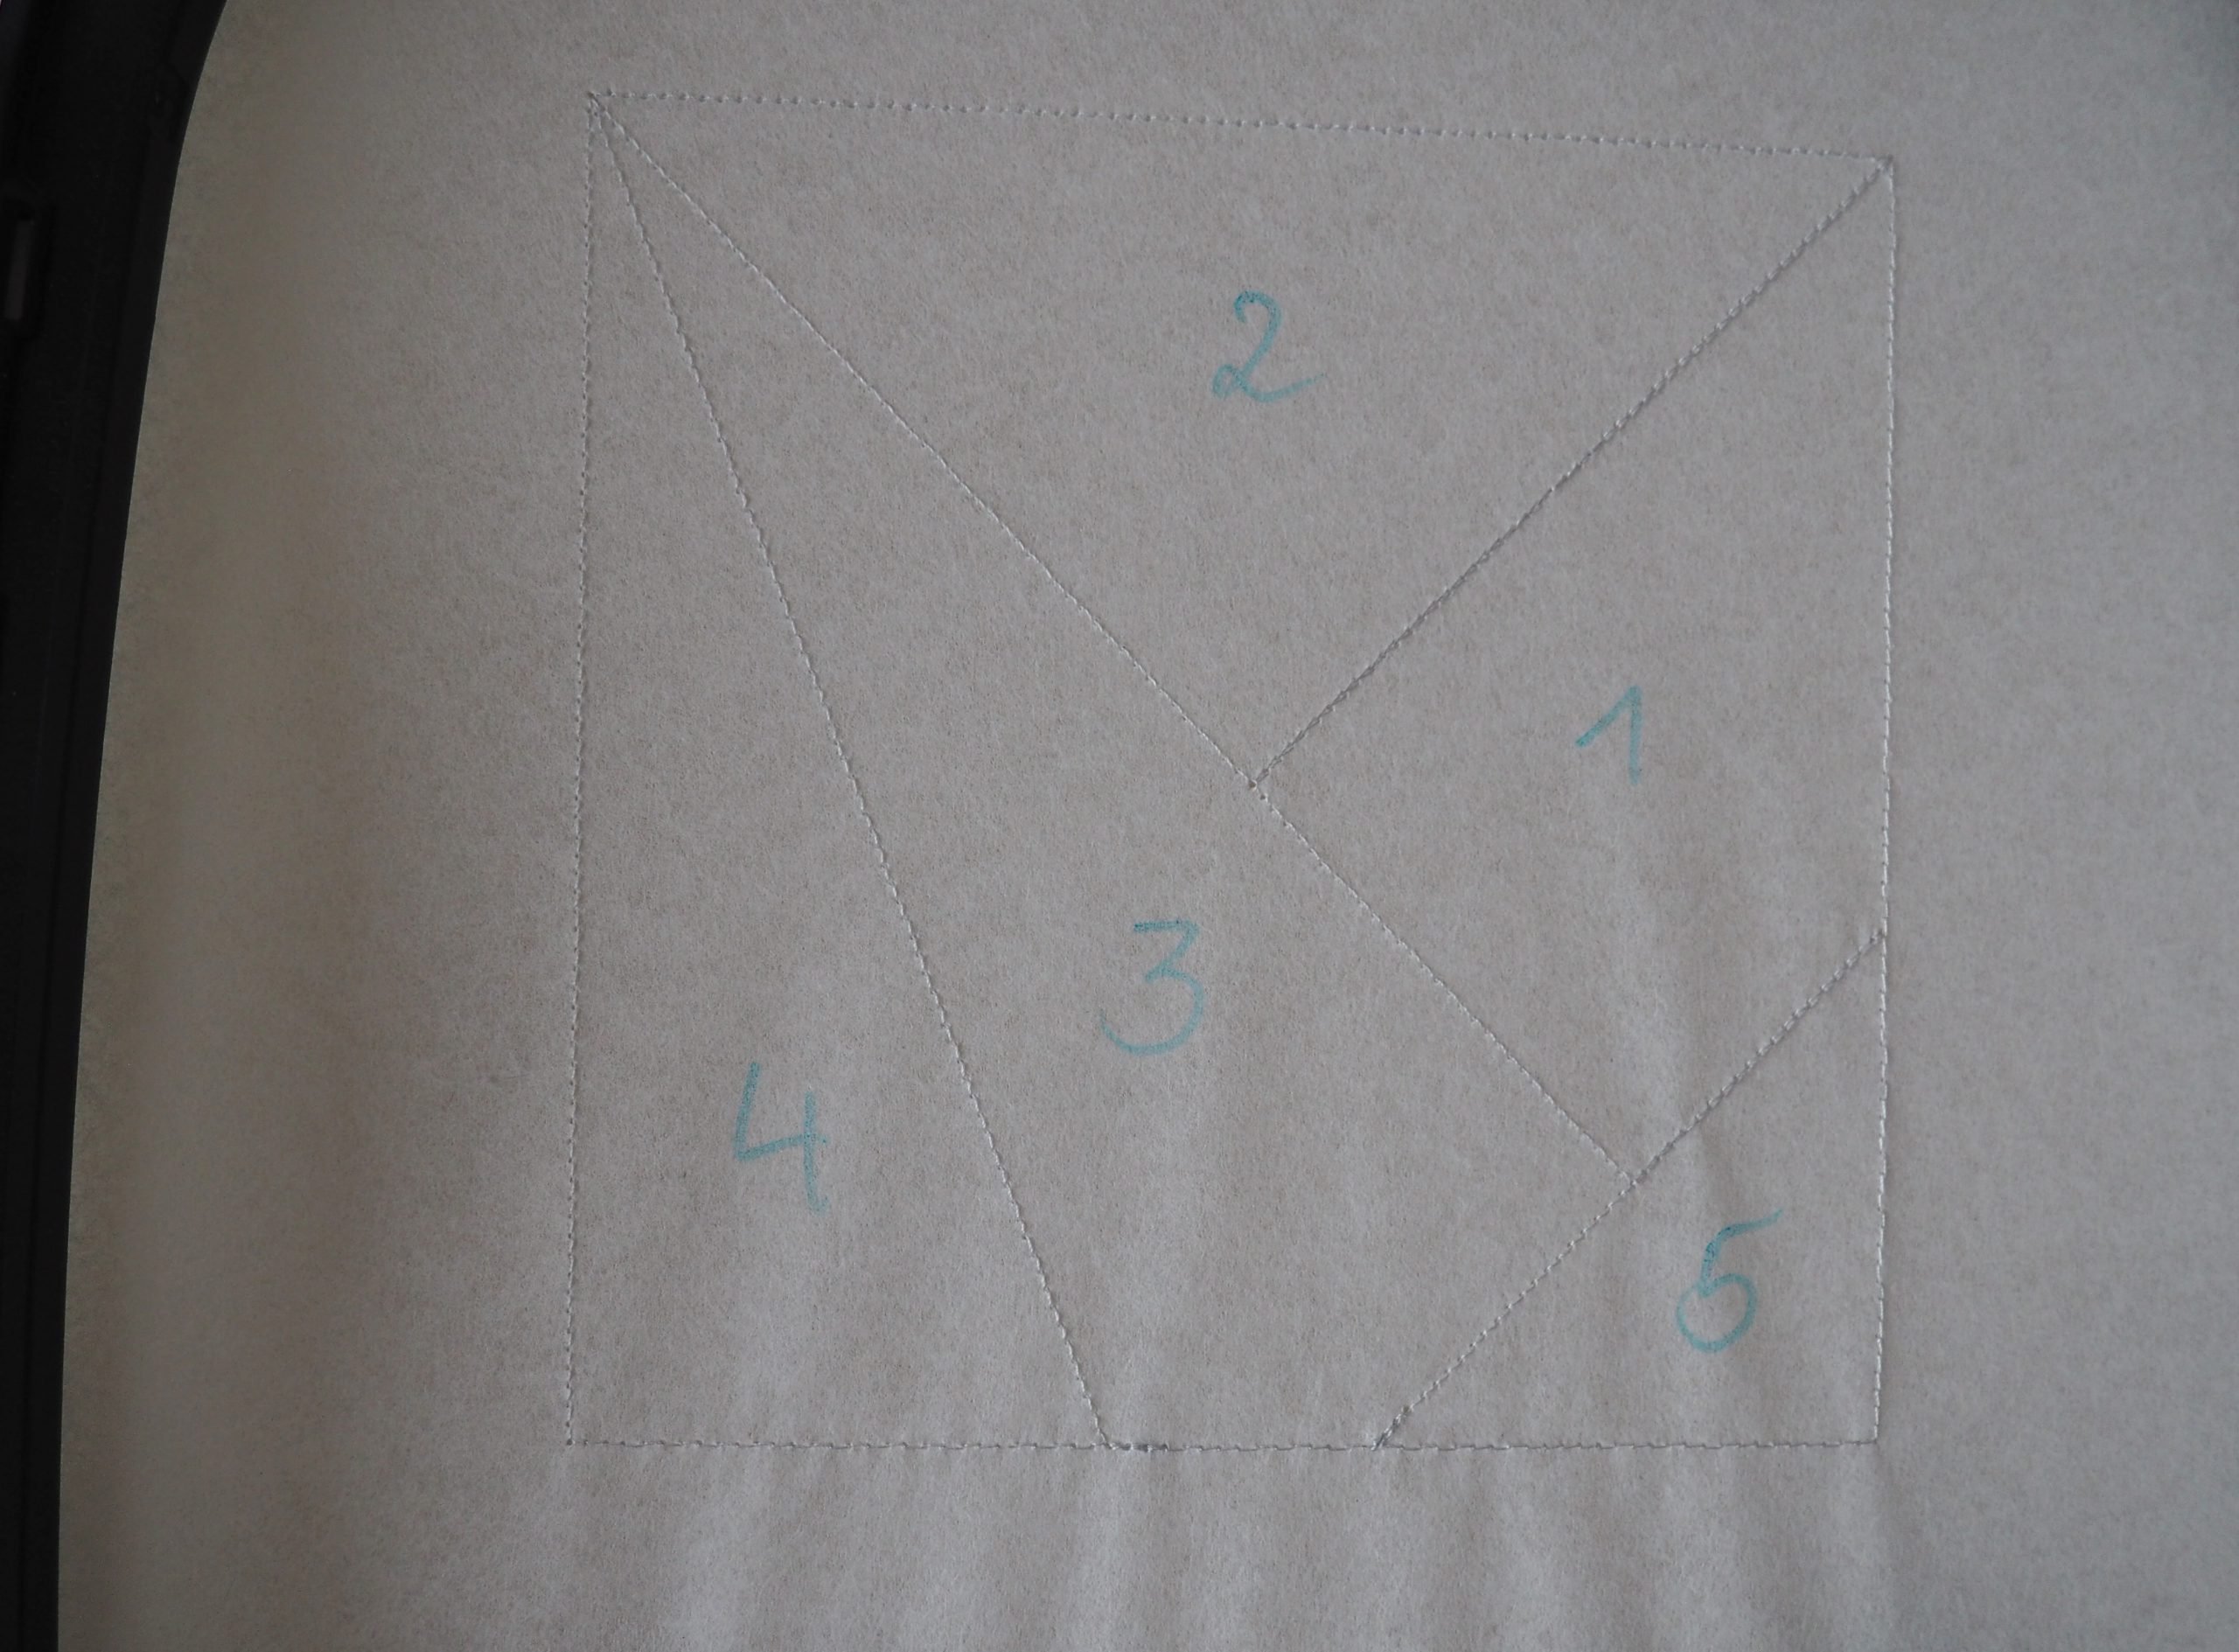
In order not to lose track, you can mark the areas with the numbers according to the diagram.
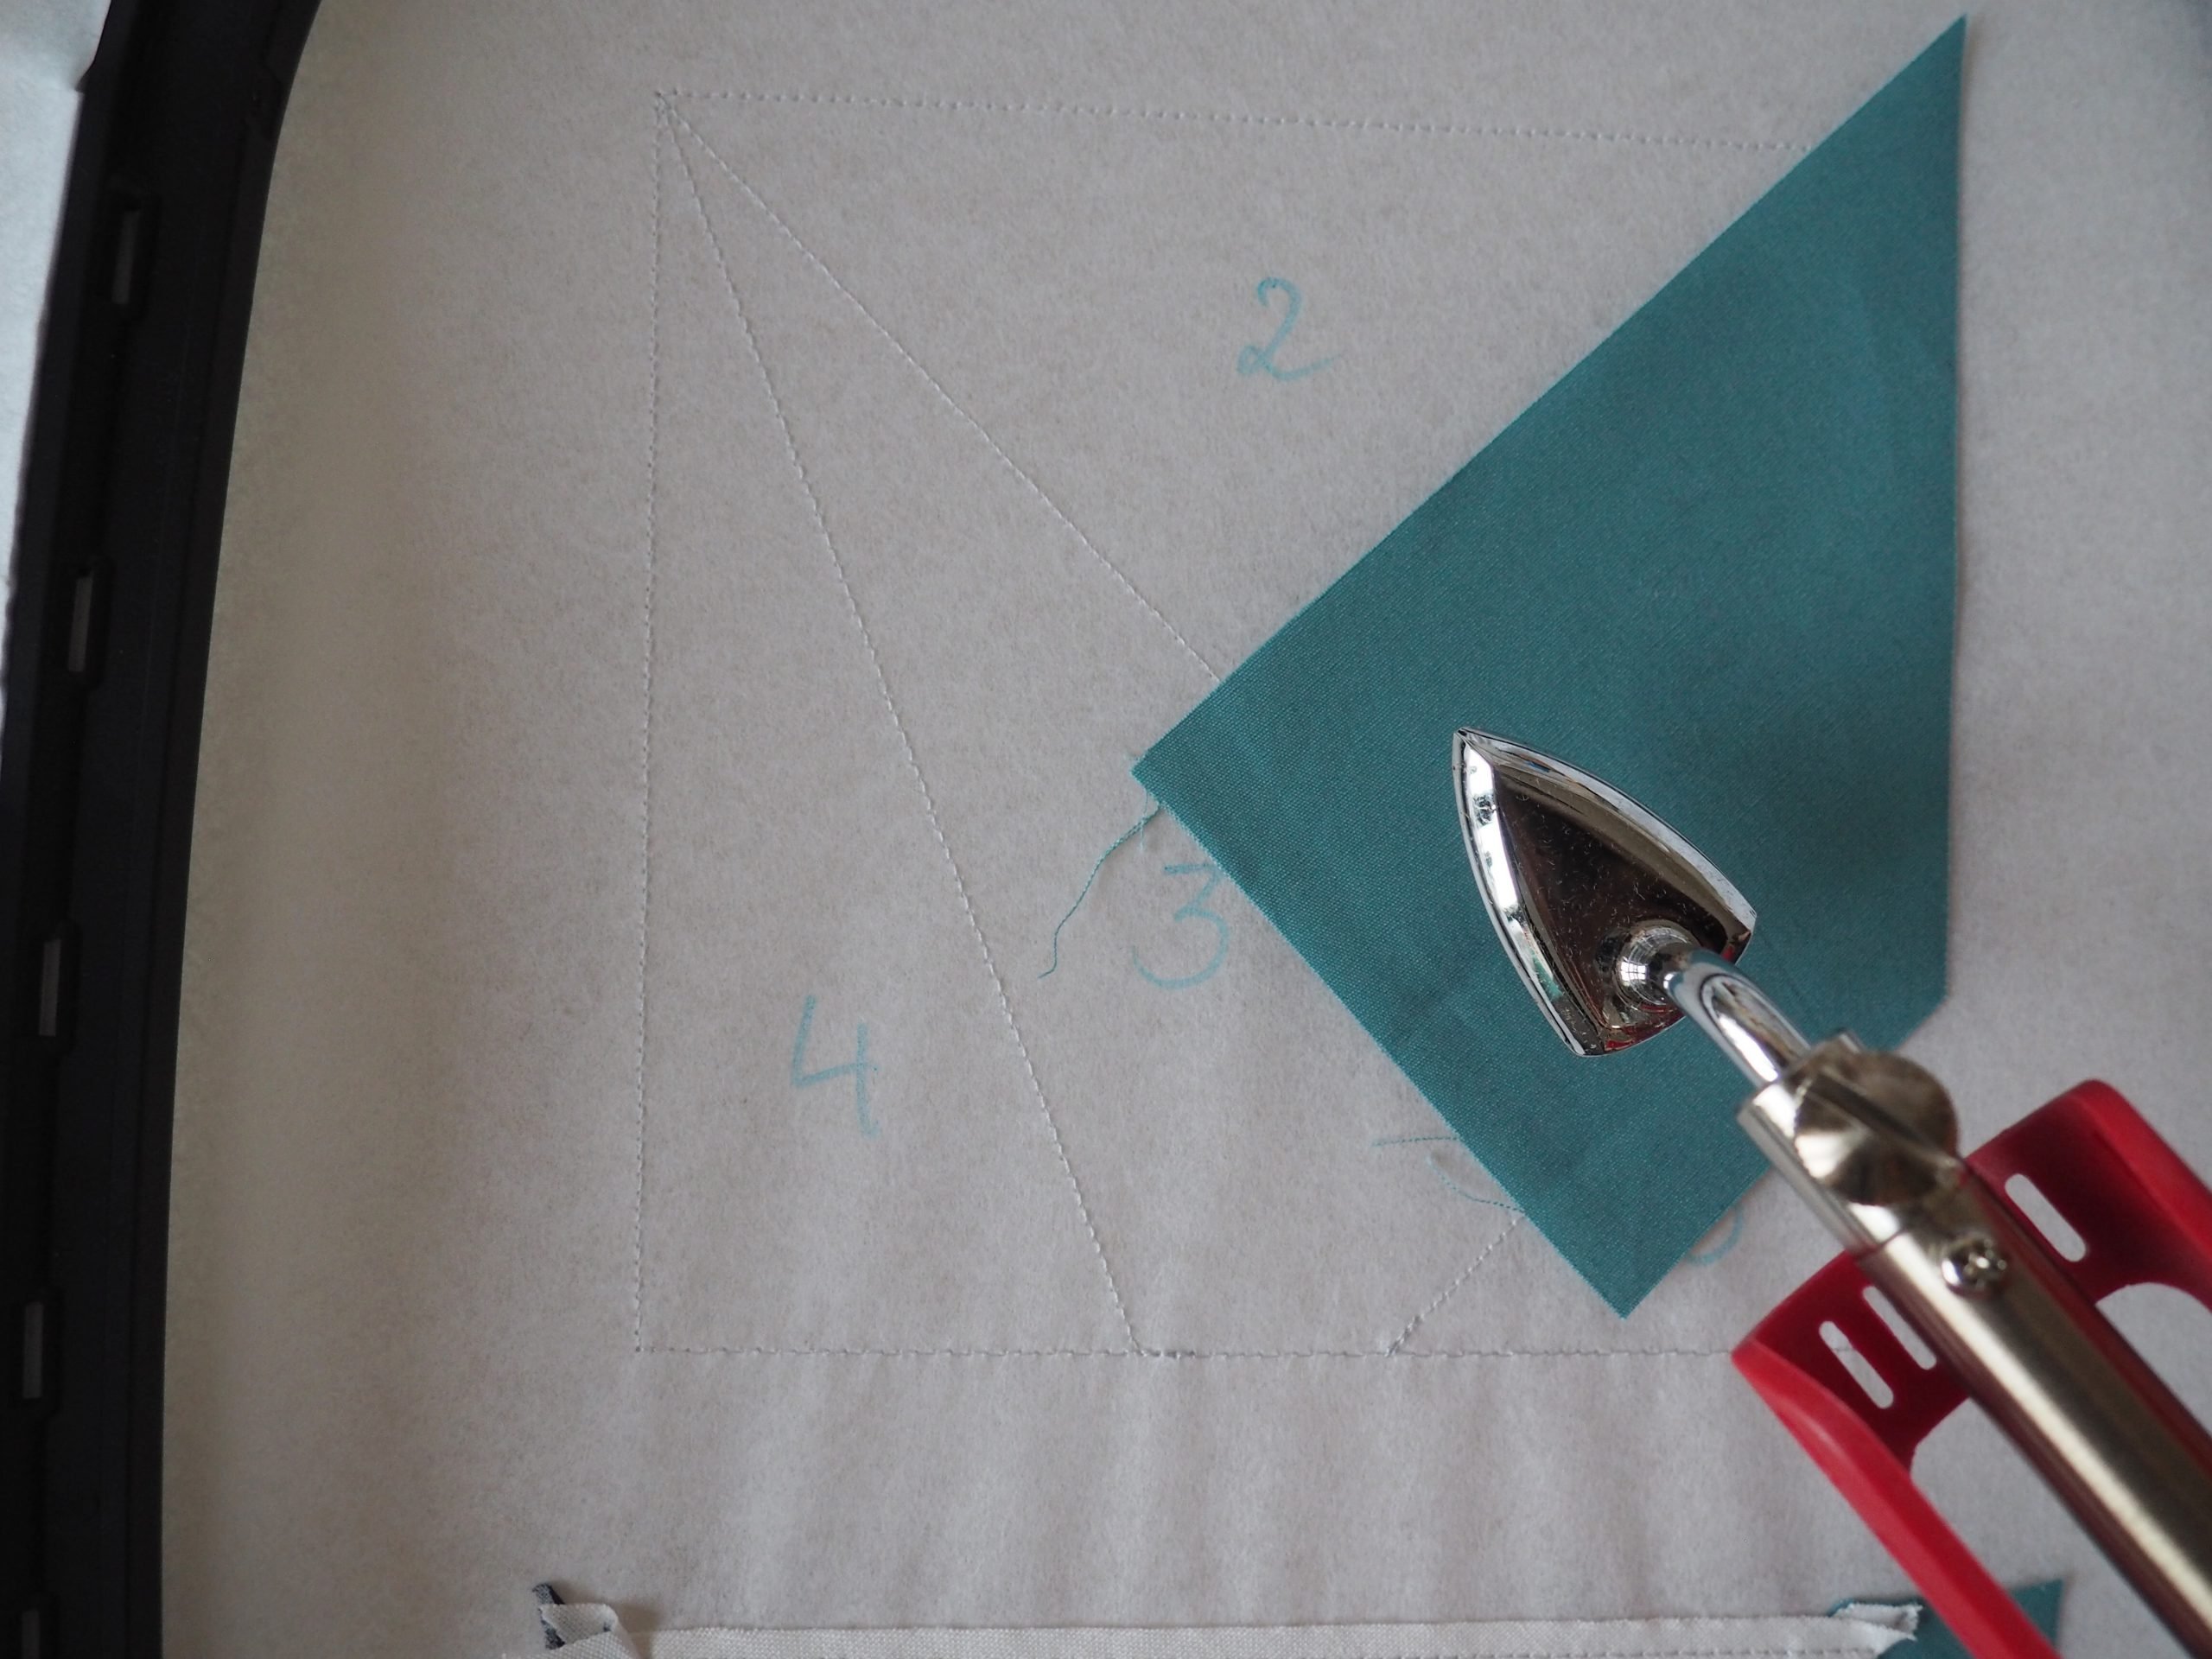
Now iron fabric 1 using the mini iron so that it covers the whole of area 1, including a overlapping edge of approx. 1/4″.
In my case, the mini iron had to be at a high temperature in order for the fabric to stick well. In principle, it is possible to leave the embroidery hoop on the embroidery module. However, I achieved better results when I removed the embroidery hoop from the module and carried out the ironing on an ironing board. I then reattached the hoop to the module.
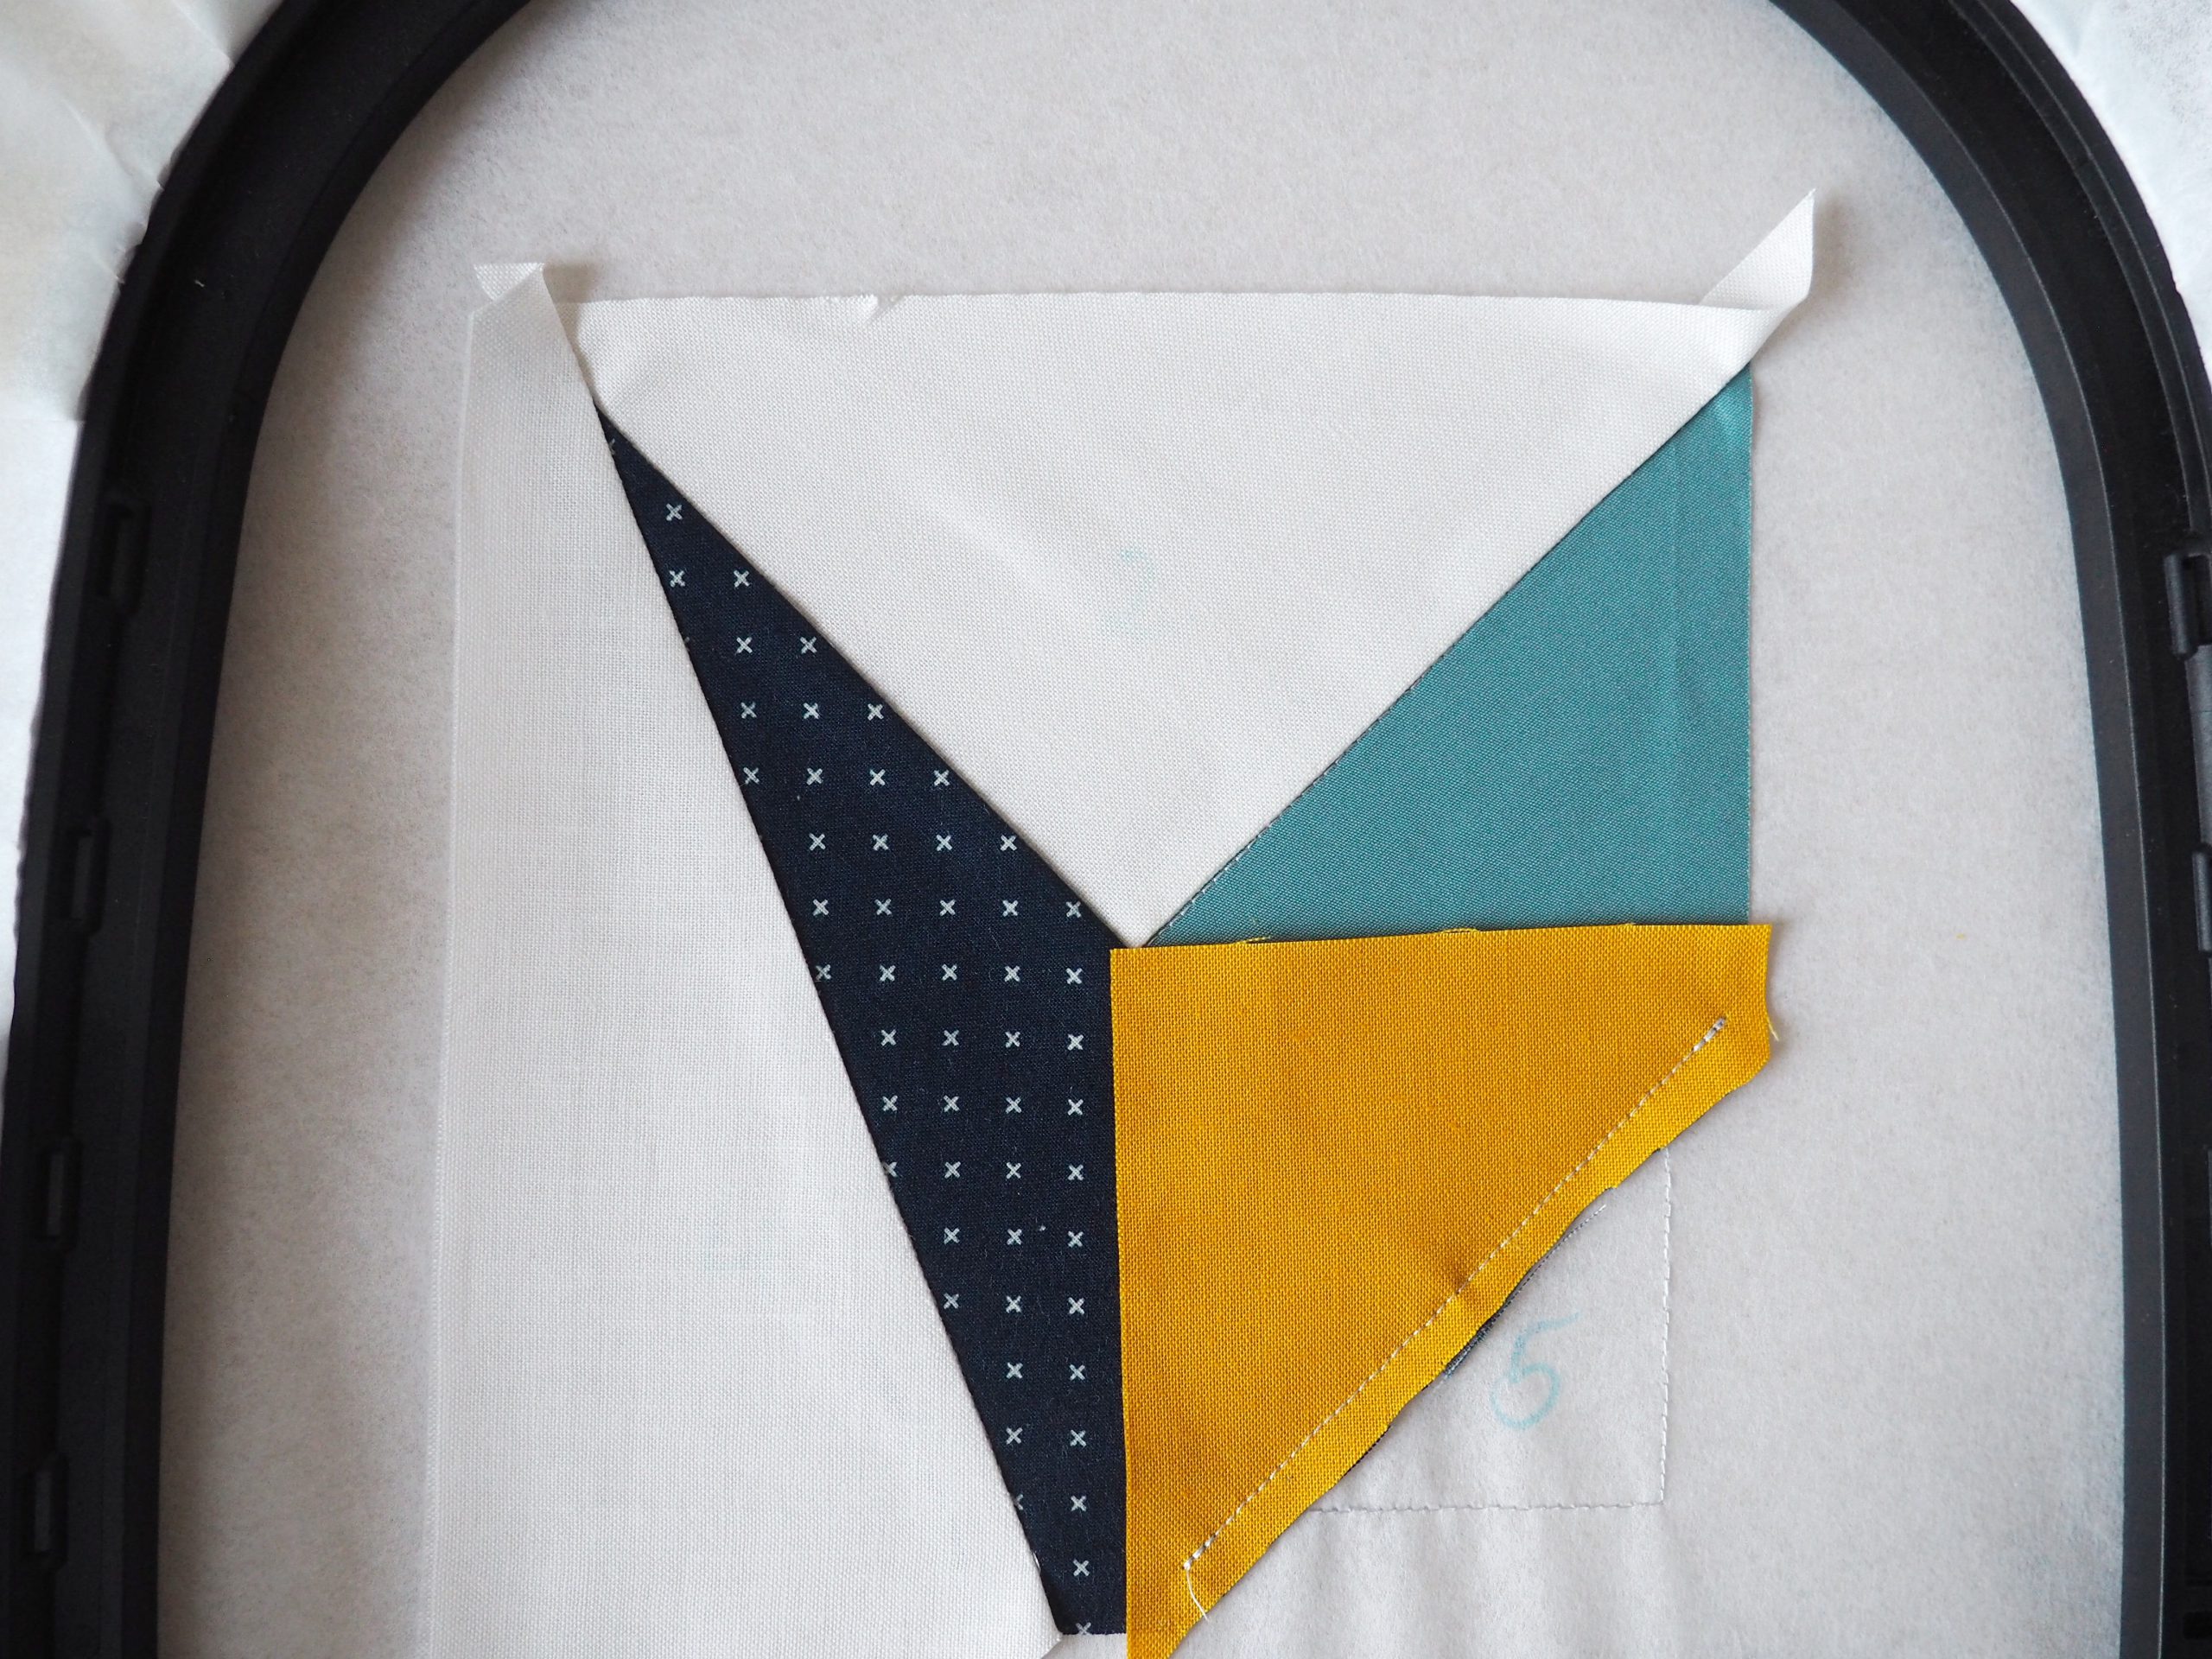
In the second embroidery step, the starting line for fabric 2 is embroidered.

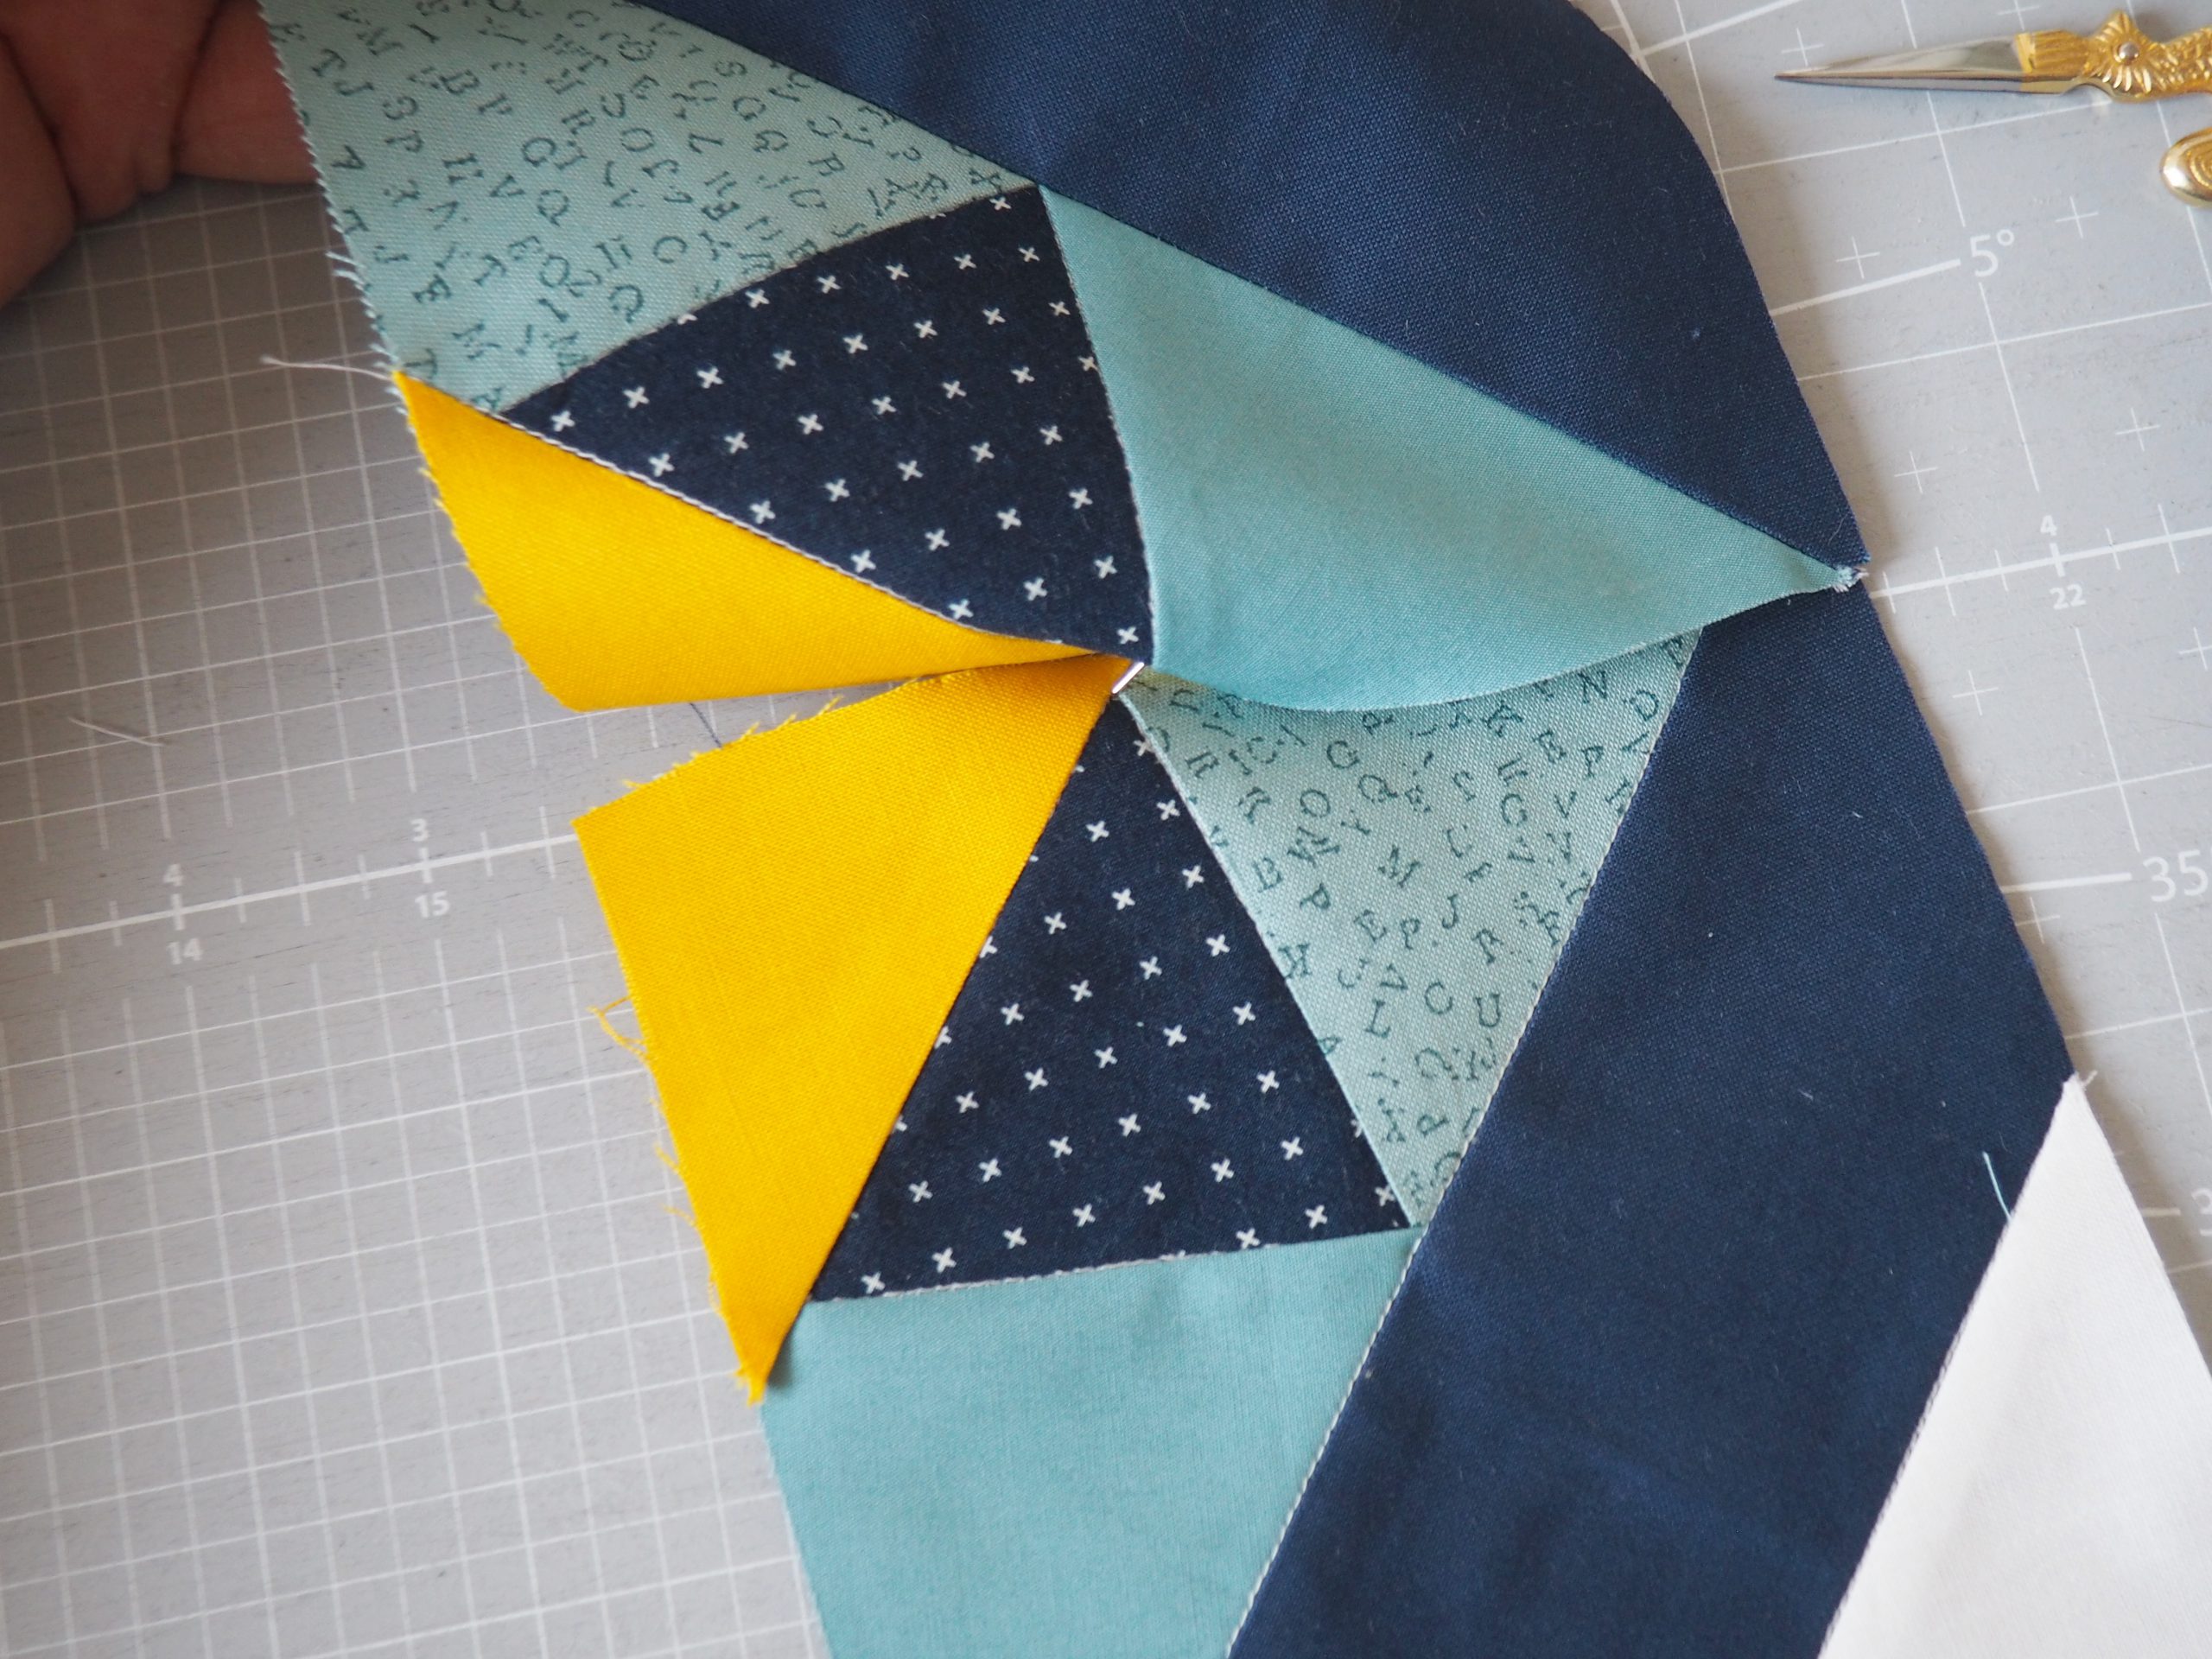
The picture below shows how fabric 2 should be positioned, covering area 2. However, the fabric must not be sewn on like this.
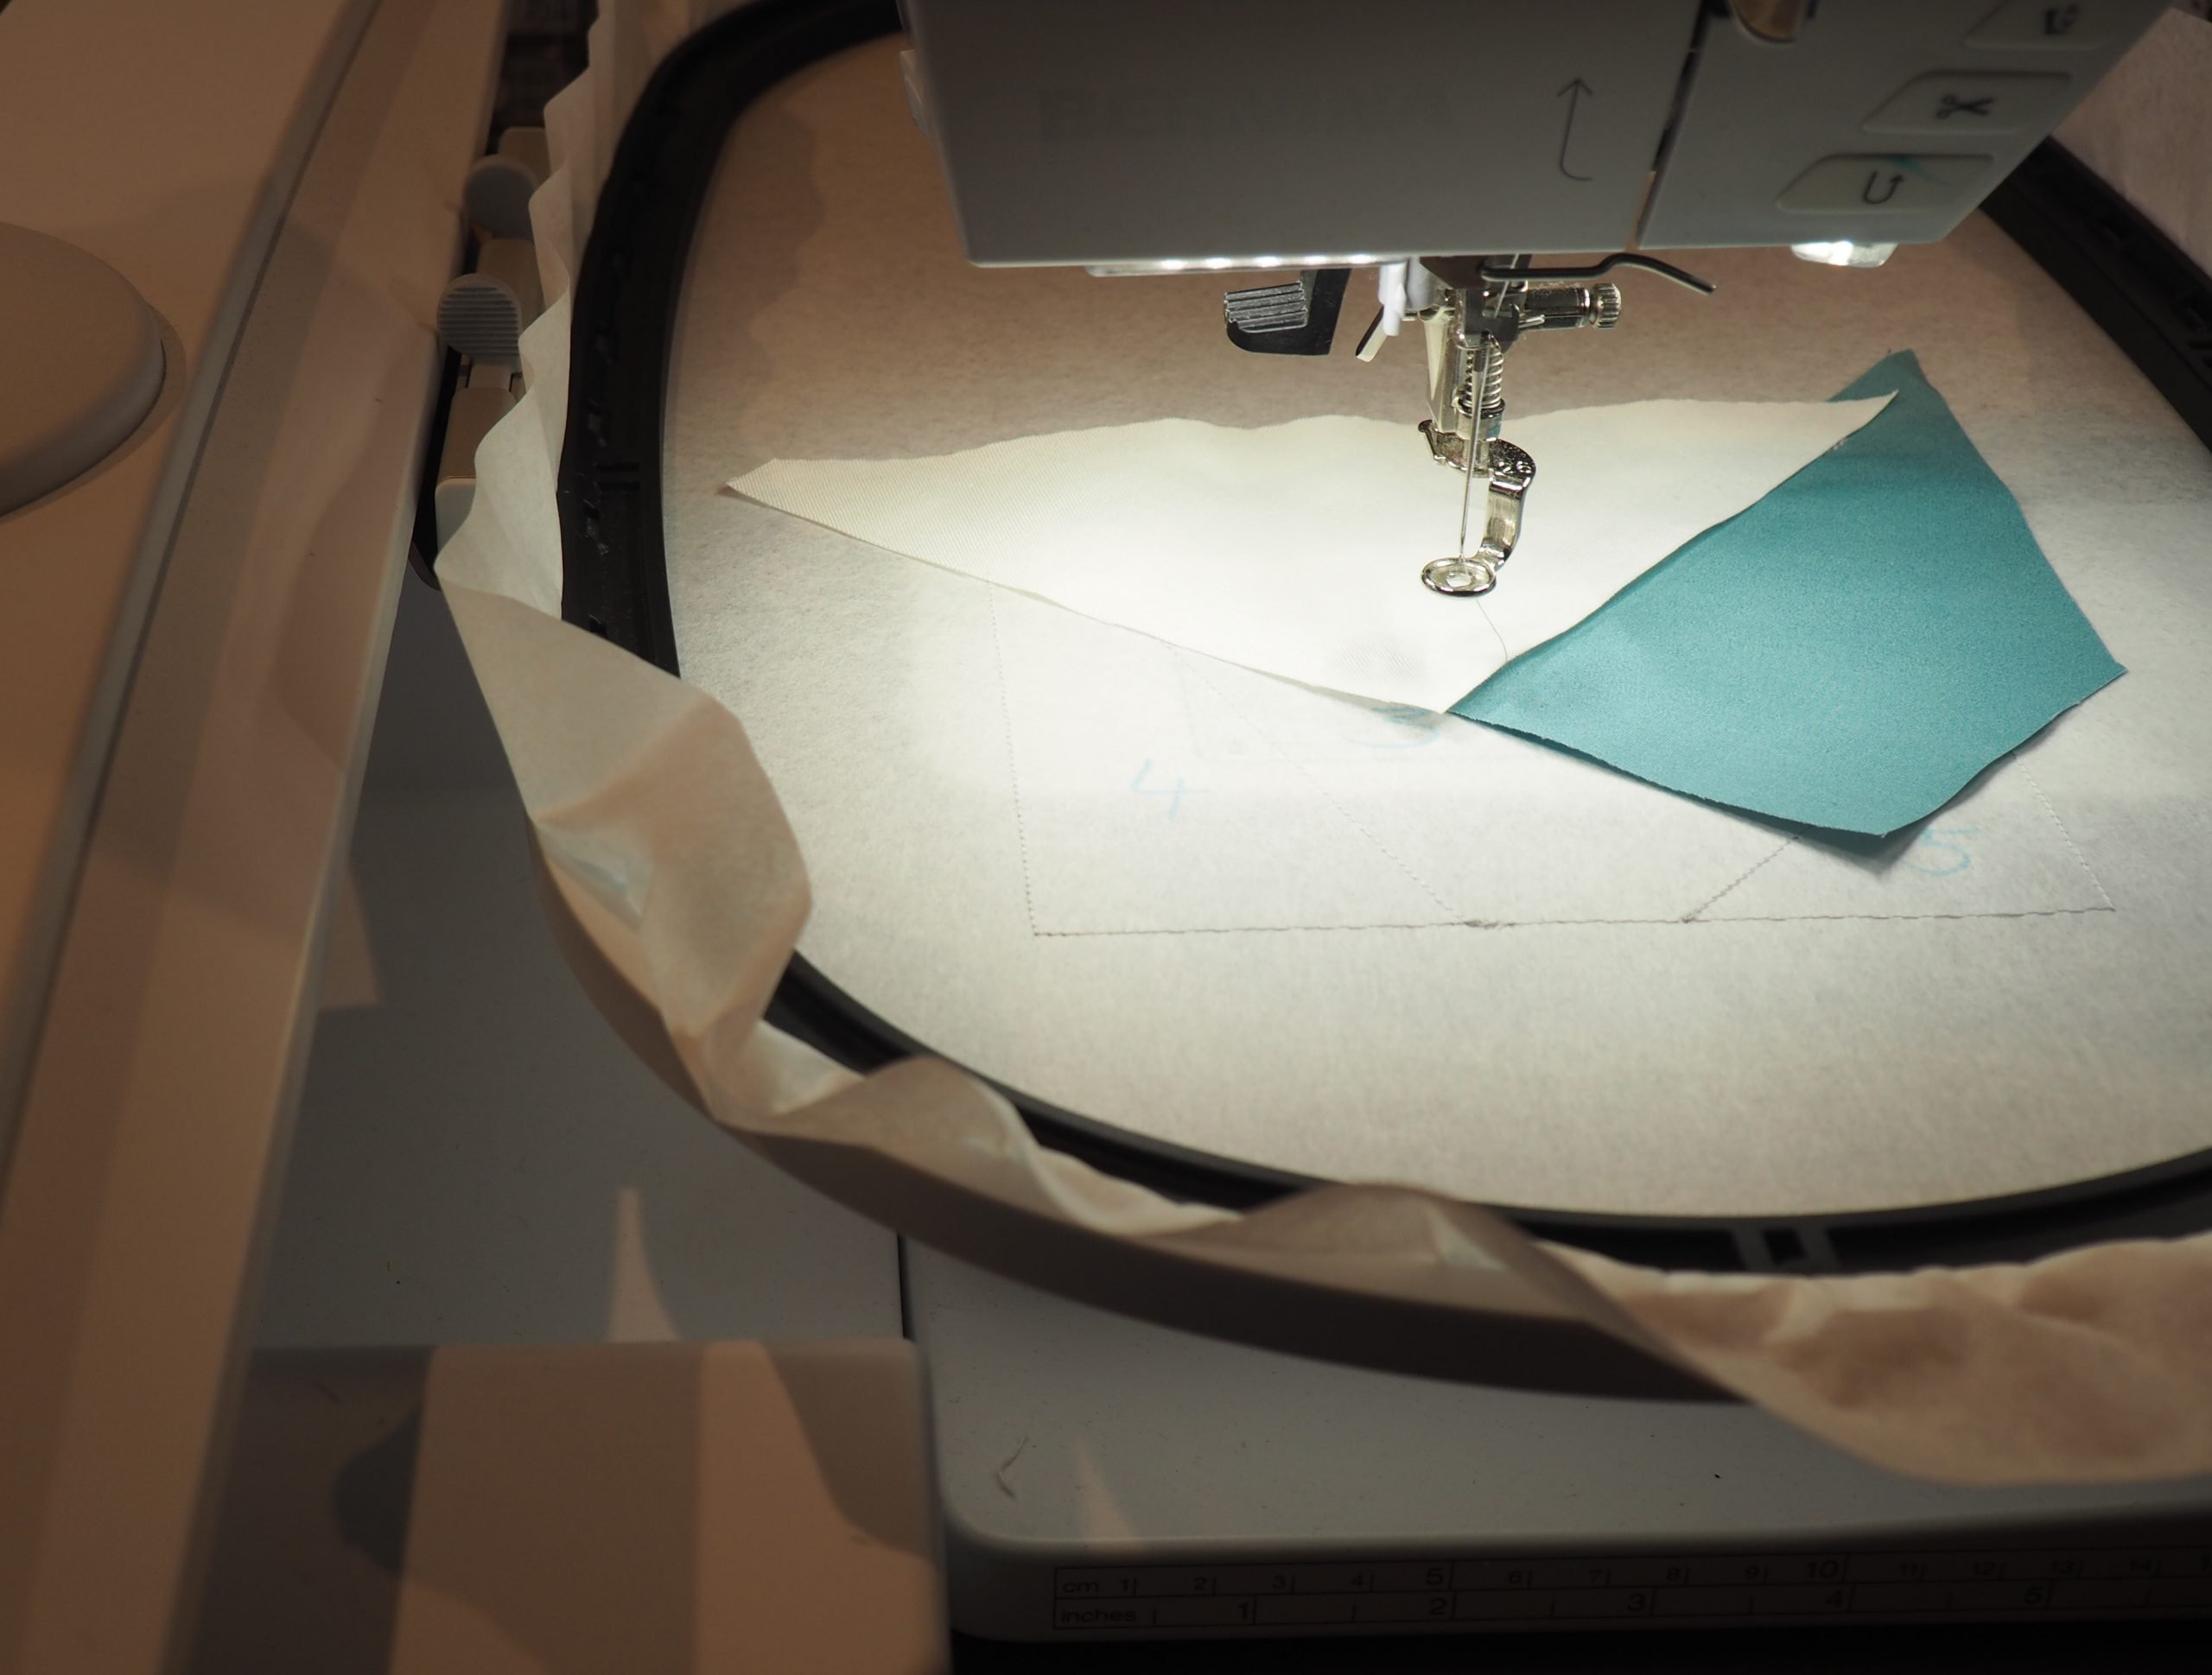
Turn fabric 2 the wrong way up and lay it on top of fabric 1 so that the right sides are together. It should extend at least 1/4″ beyond the previously embroidered starting line.
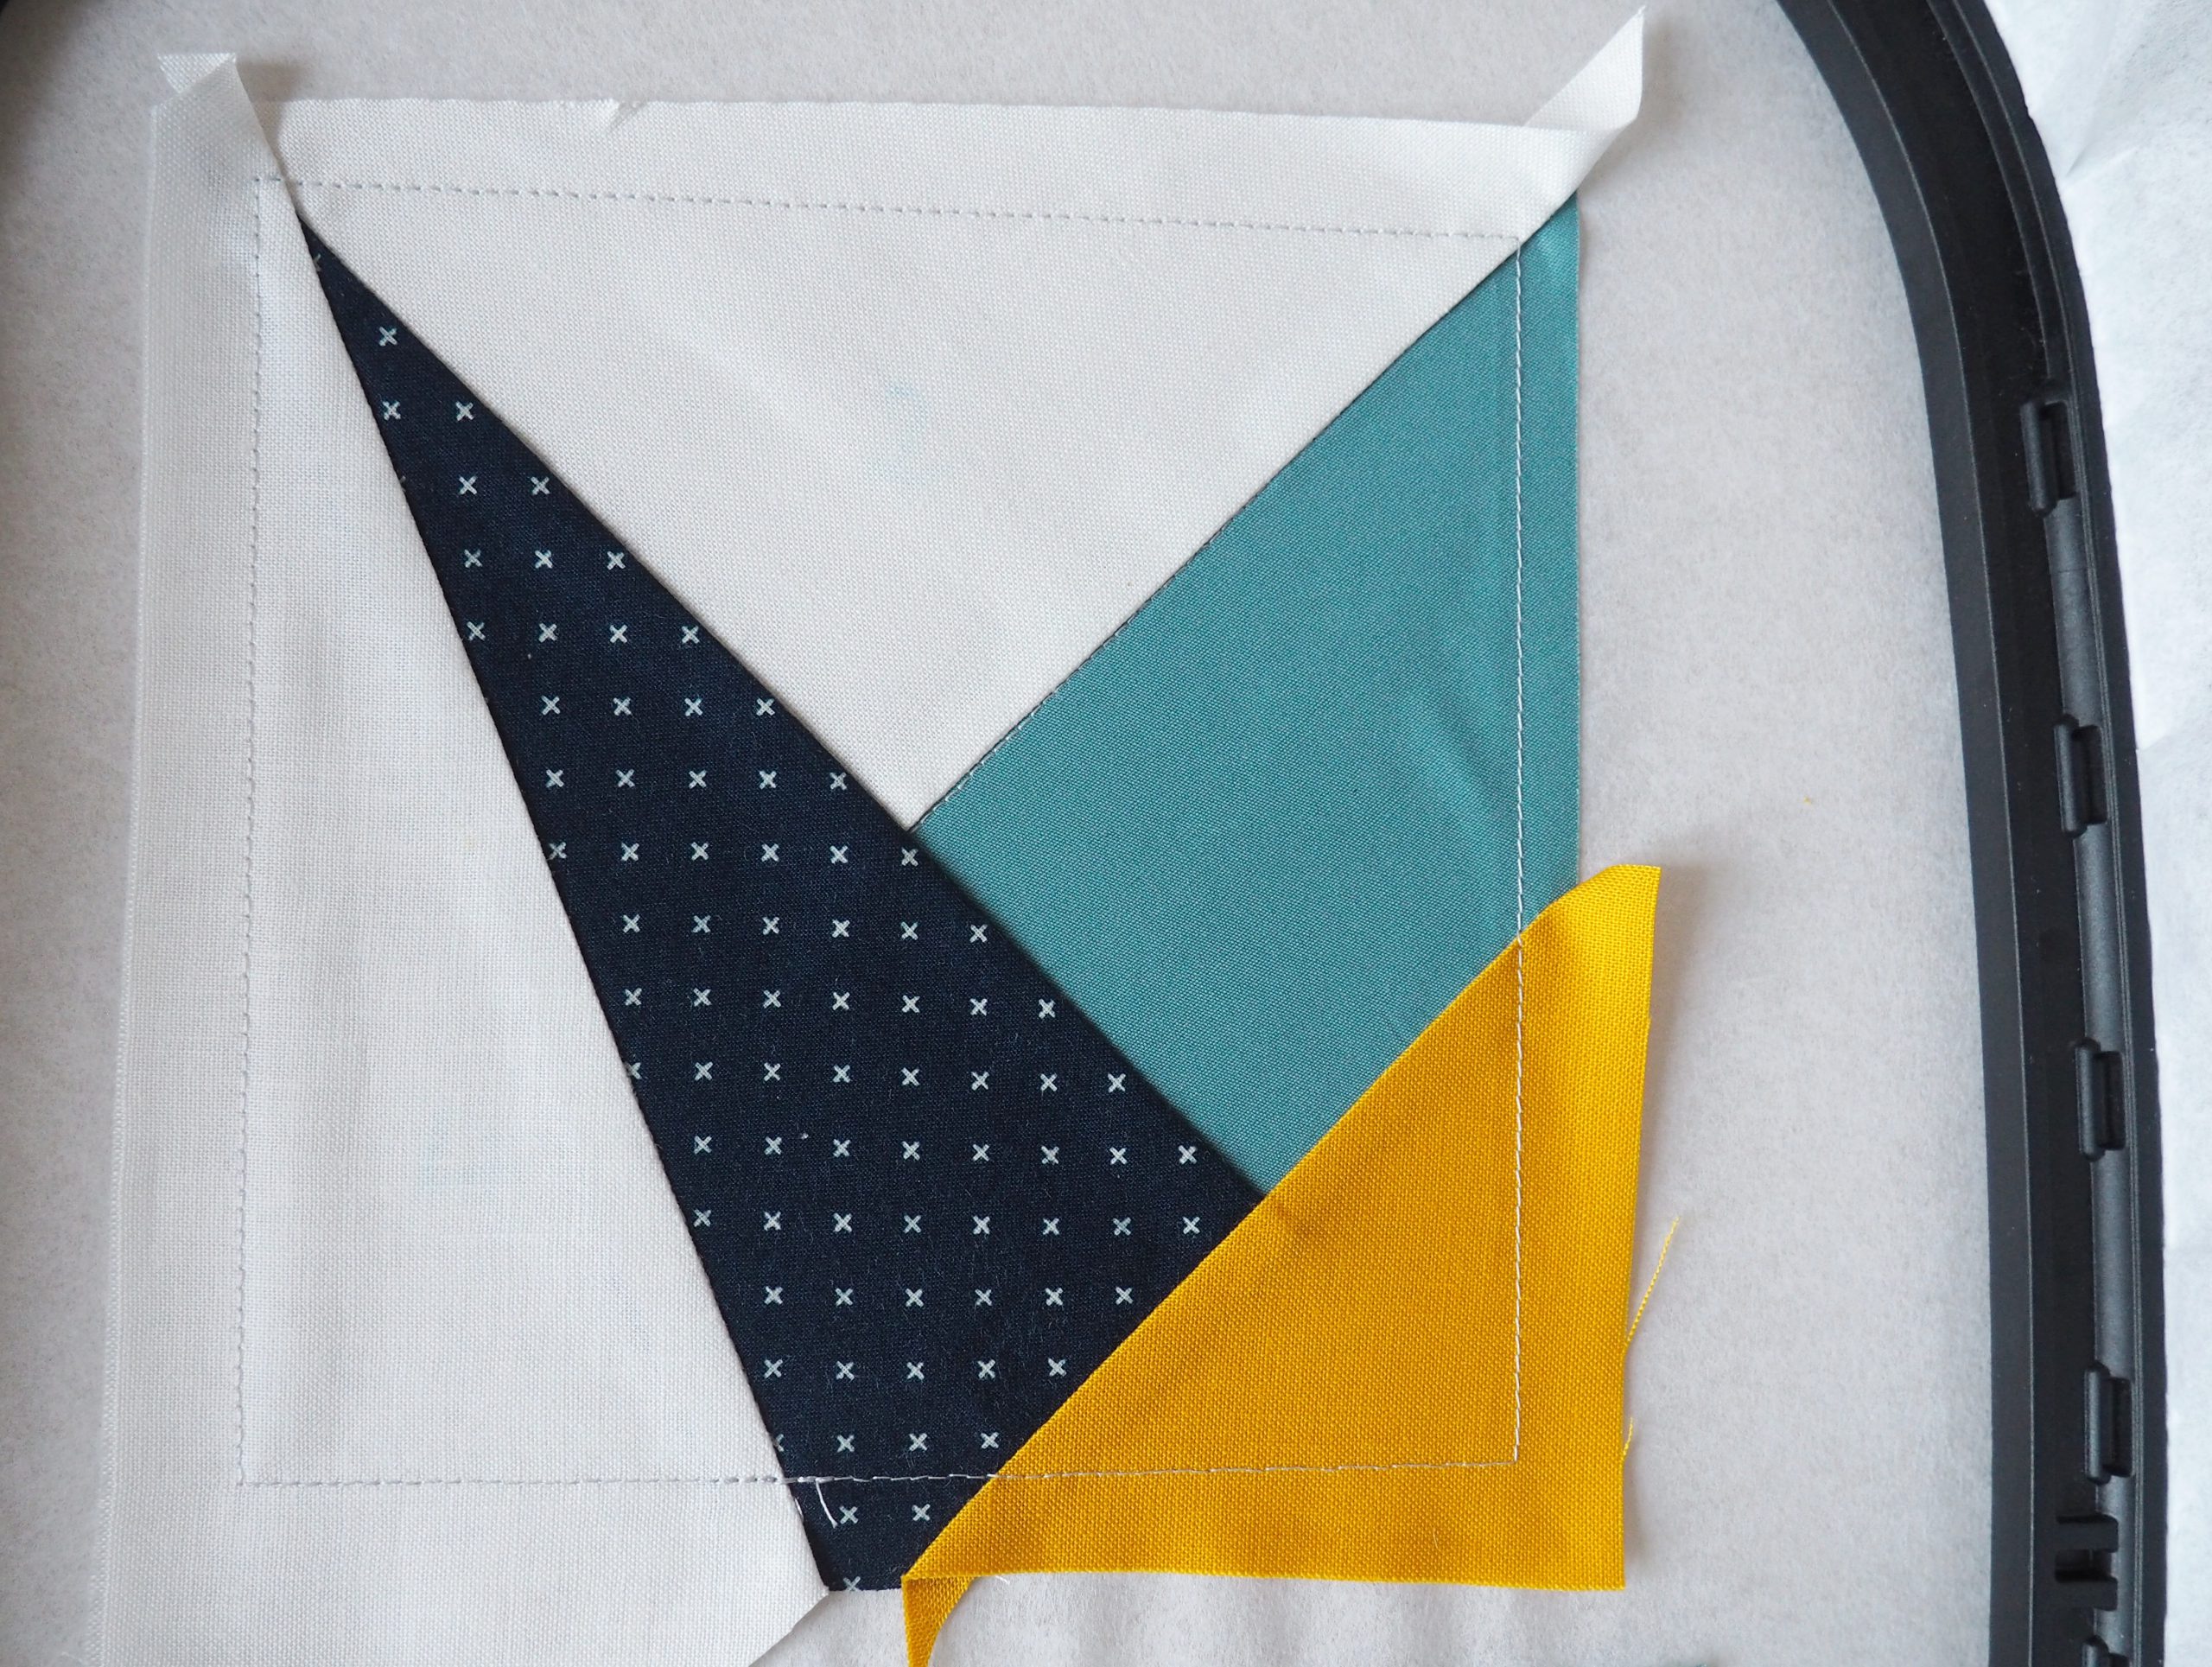
The third embroidery step embroiders exactly the same line as in embroidery step two, sewing fabric 2 in place there.

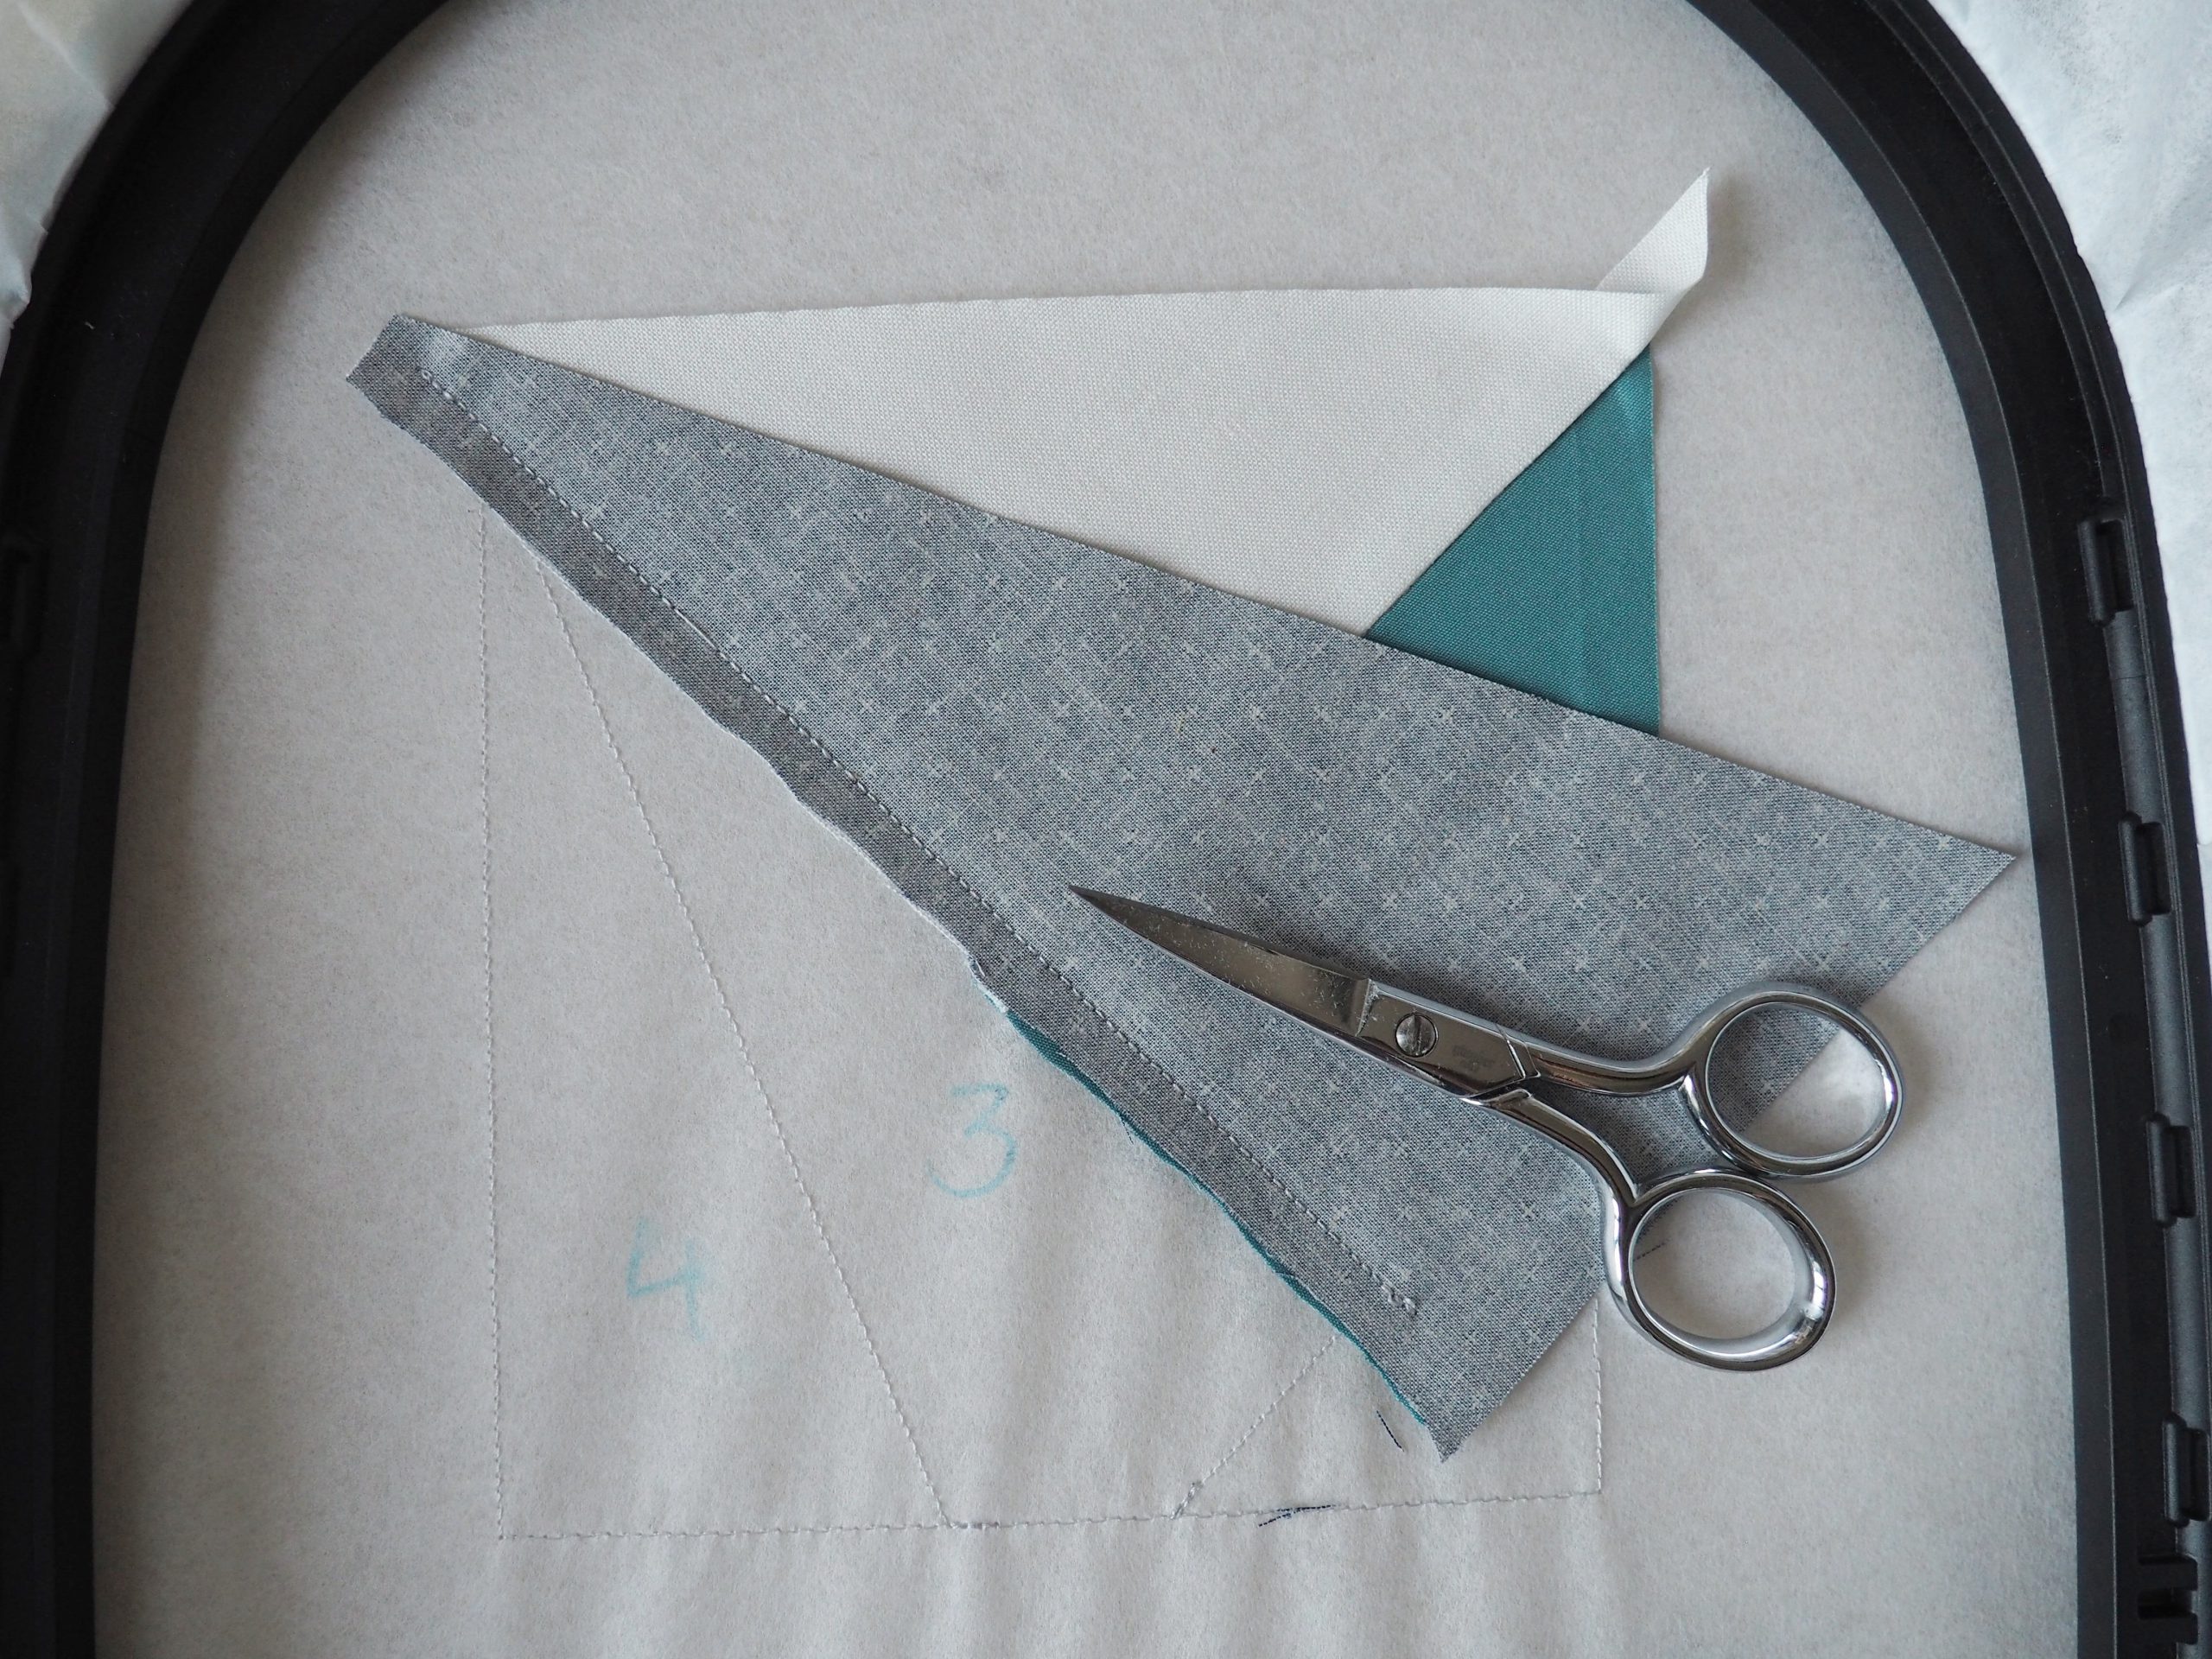
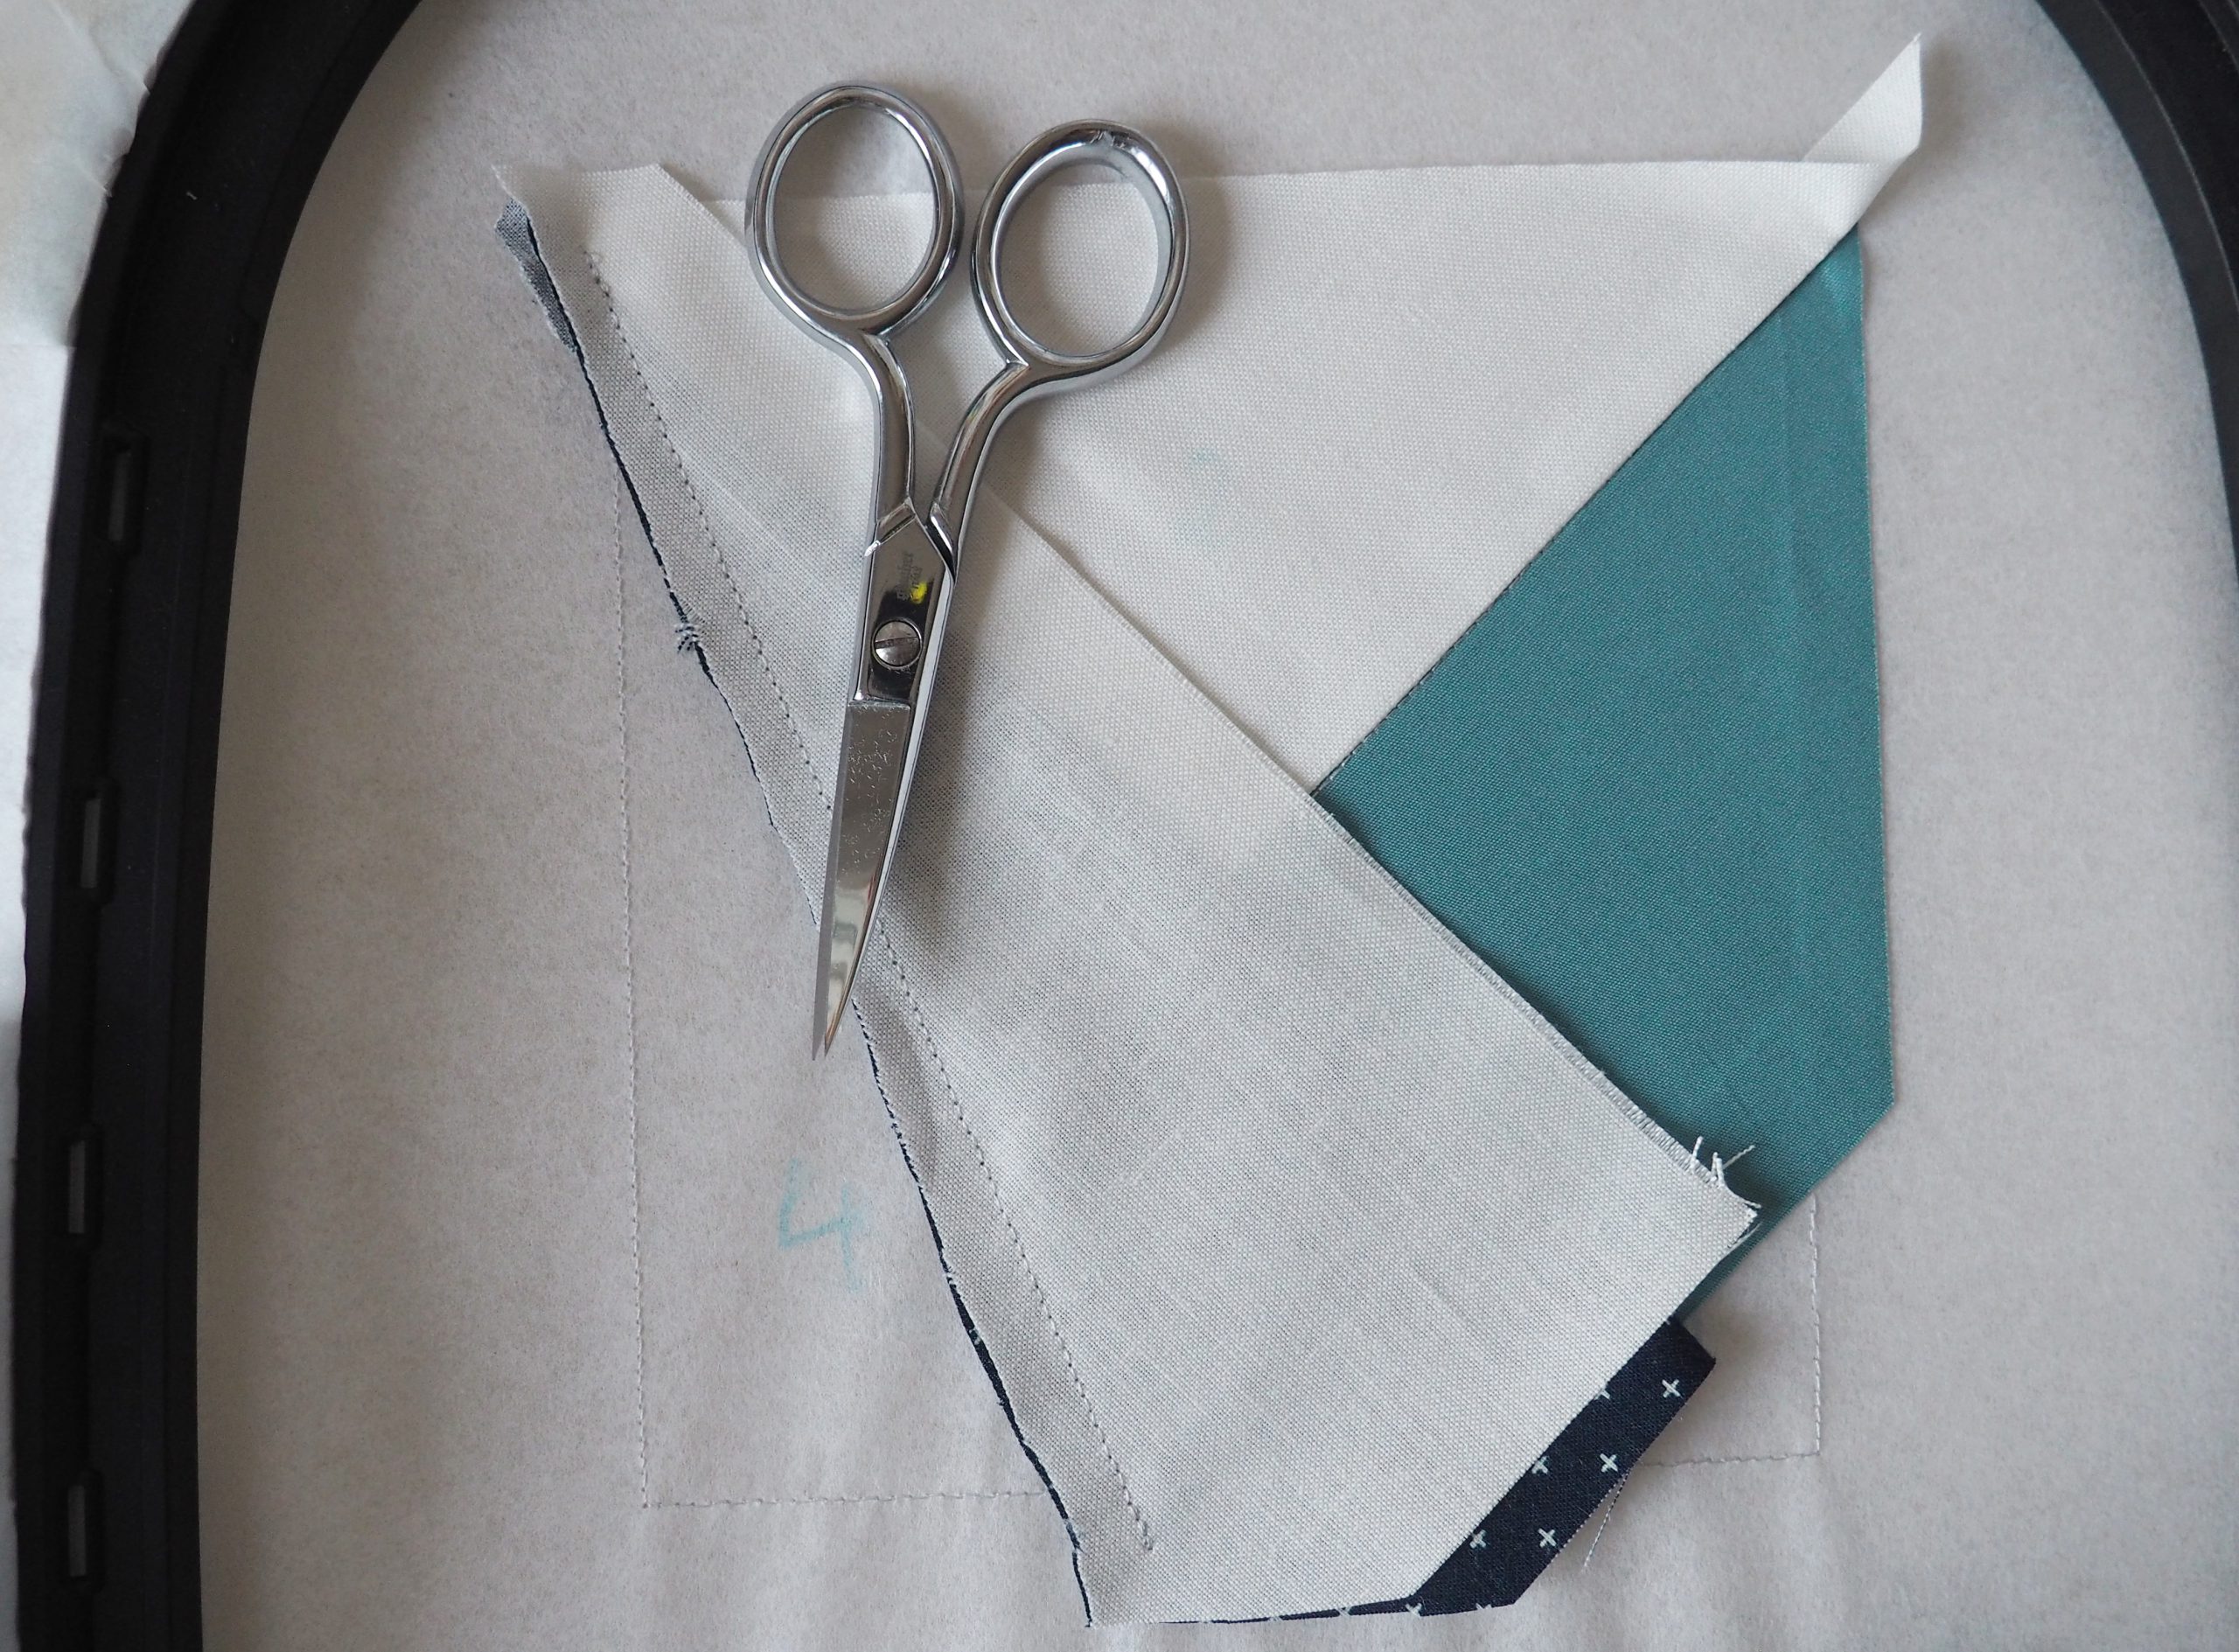
The resulting seam allowance is now trimmed to approx. 1/4″ with scissors.
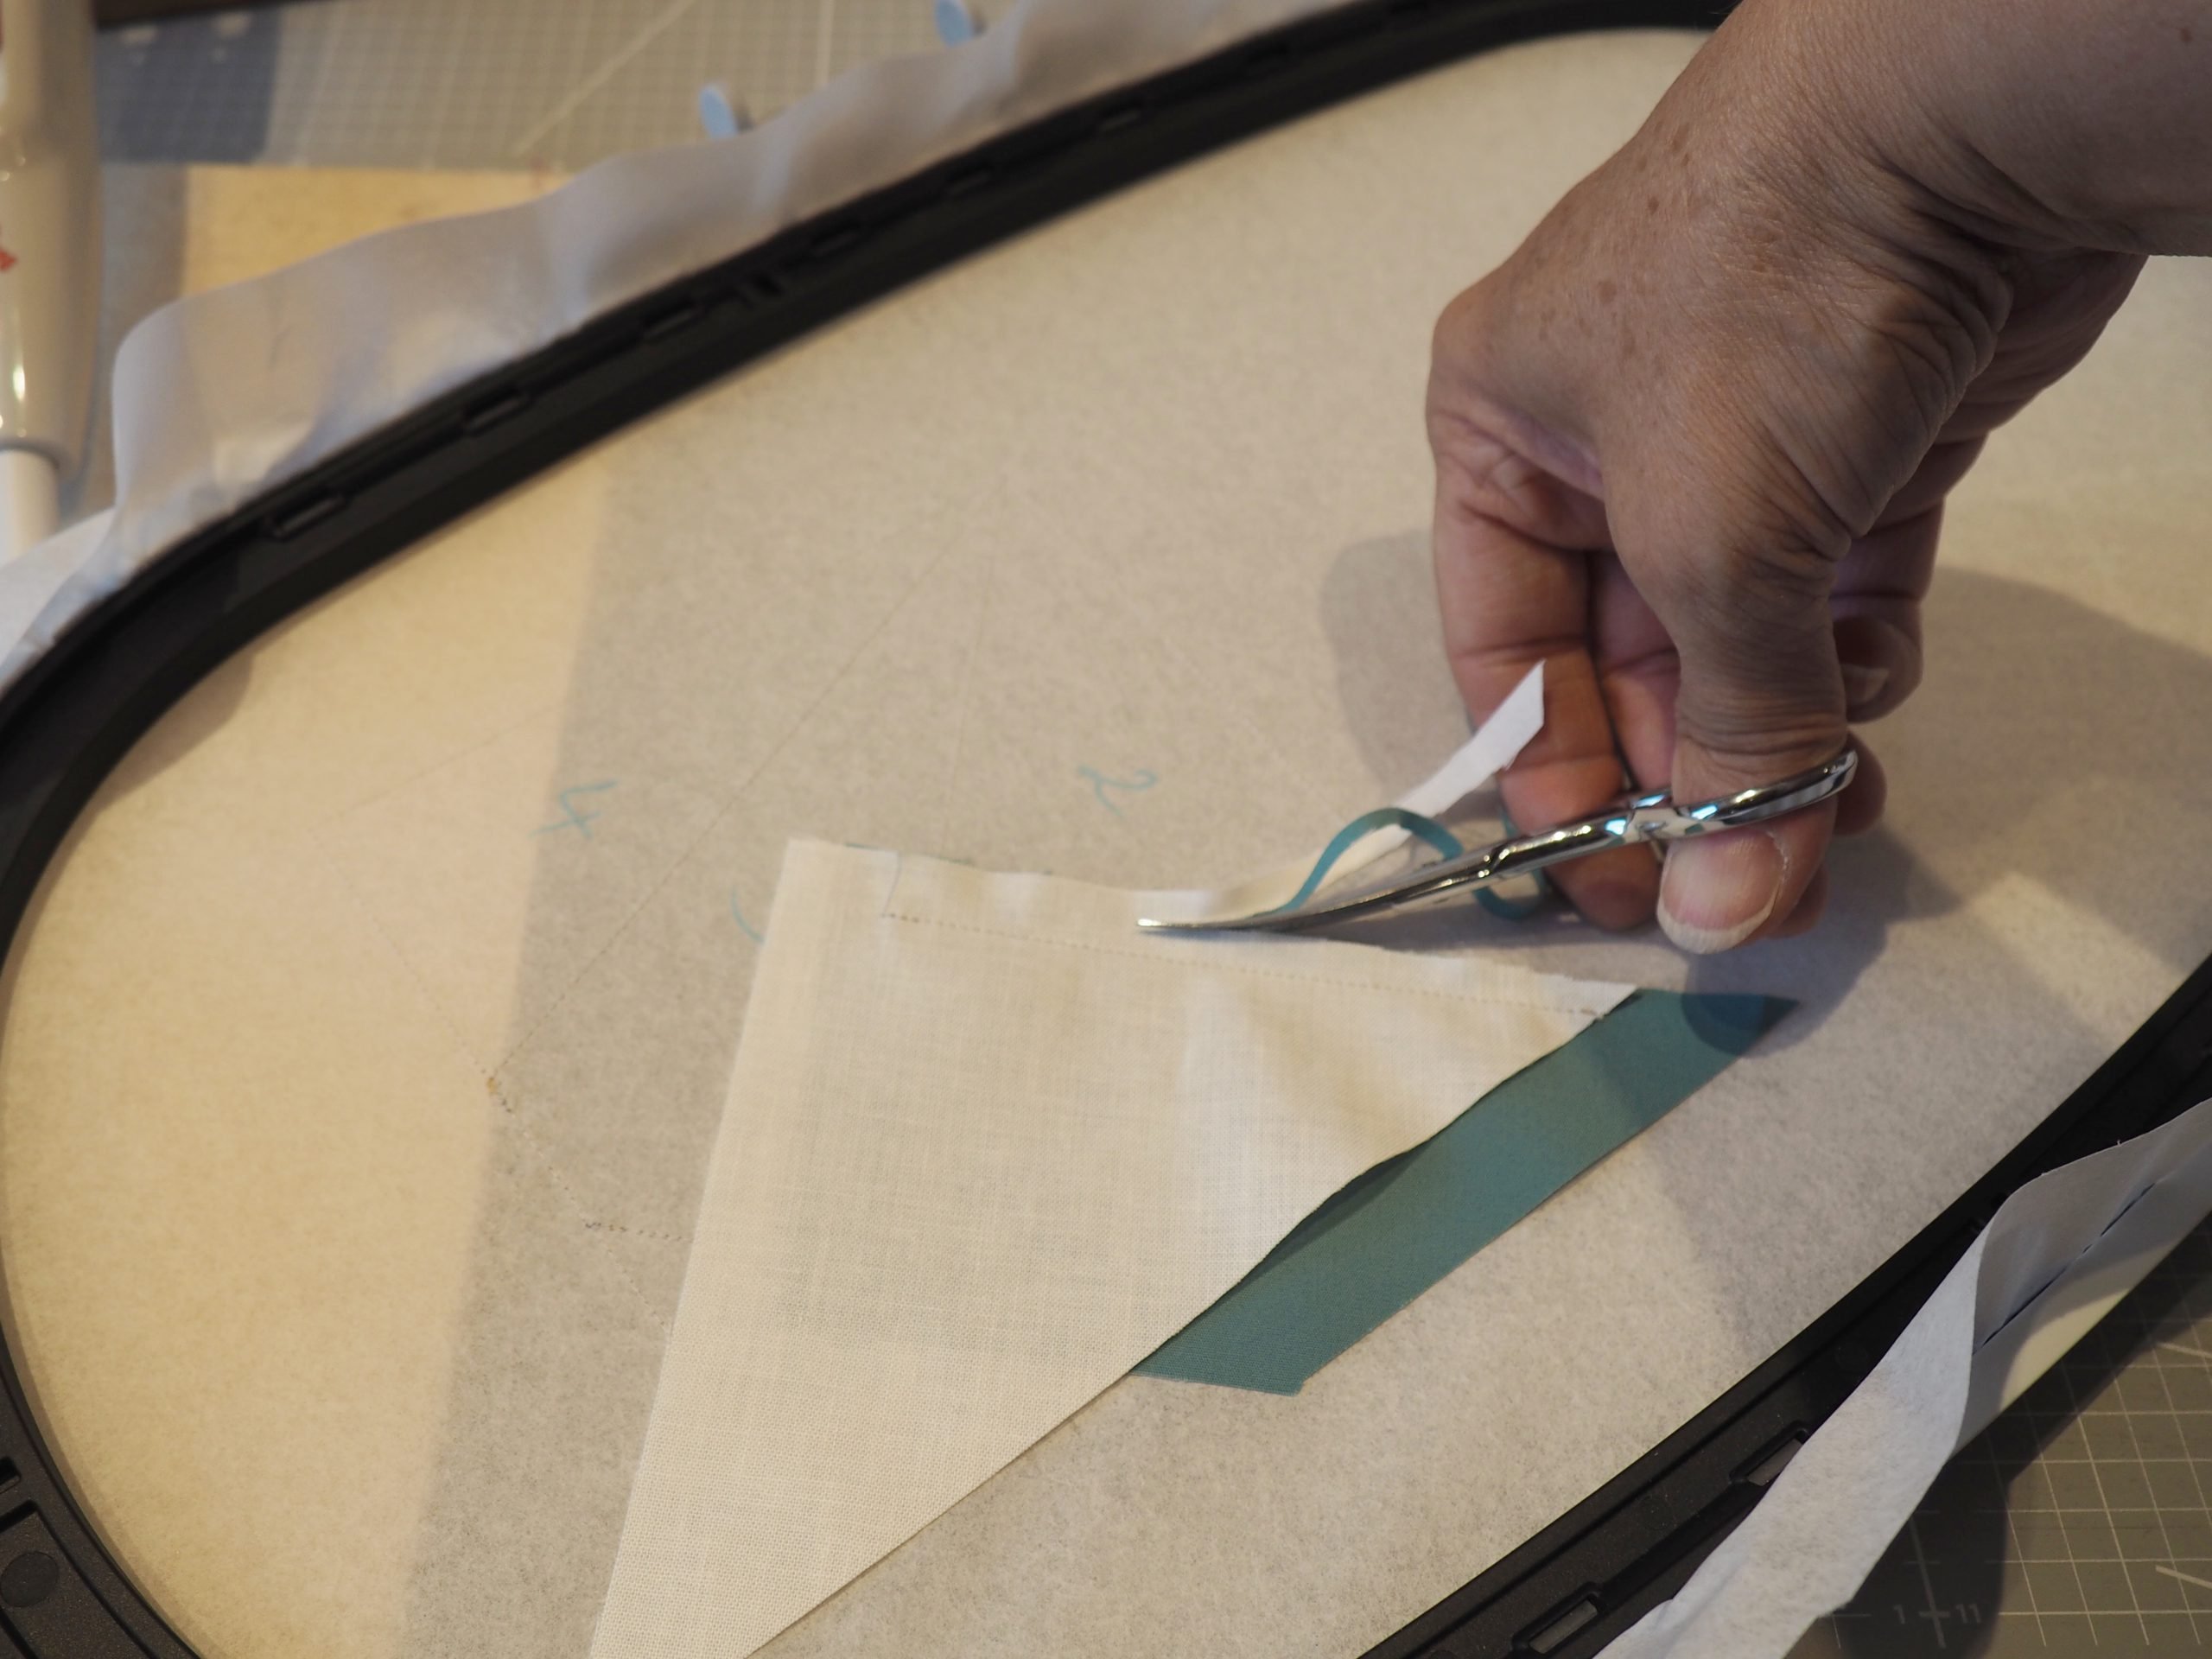
The embroidery hoop should now look like this:
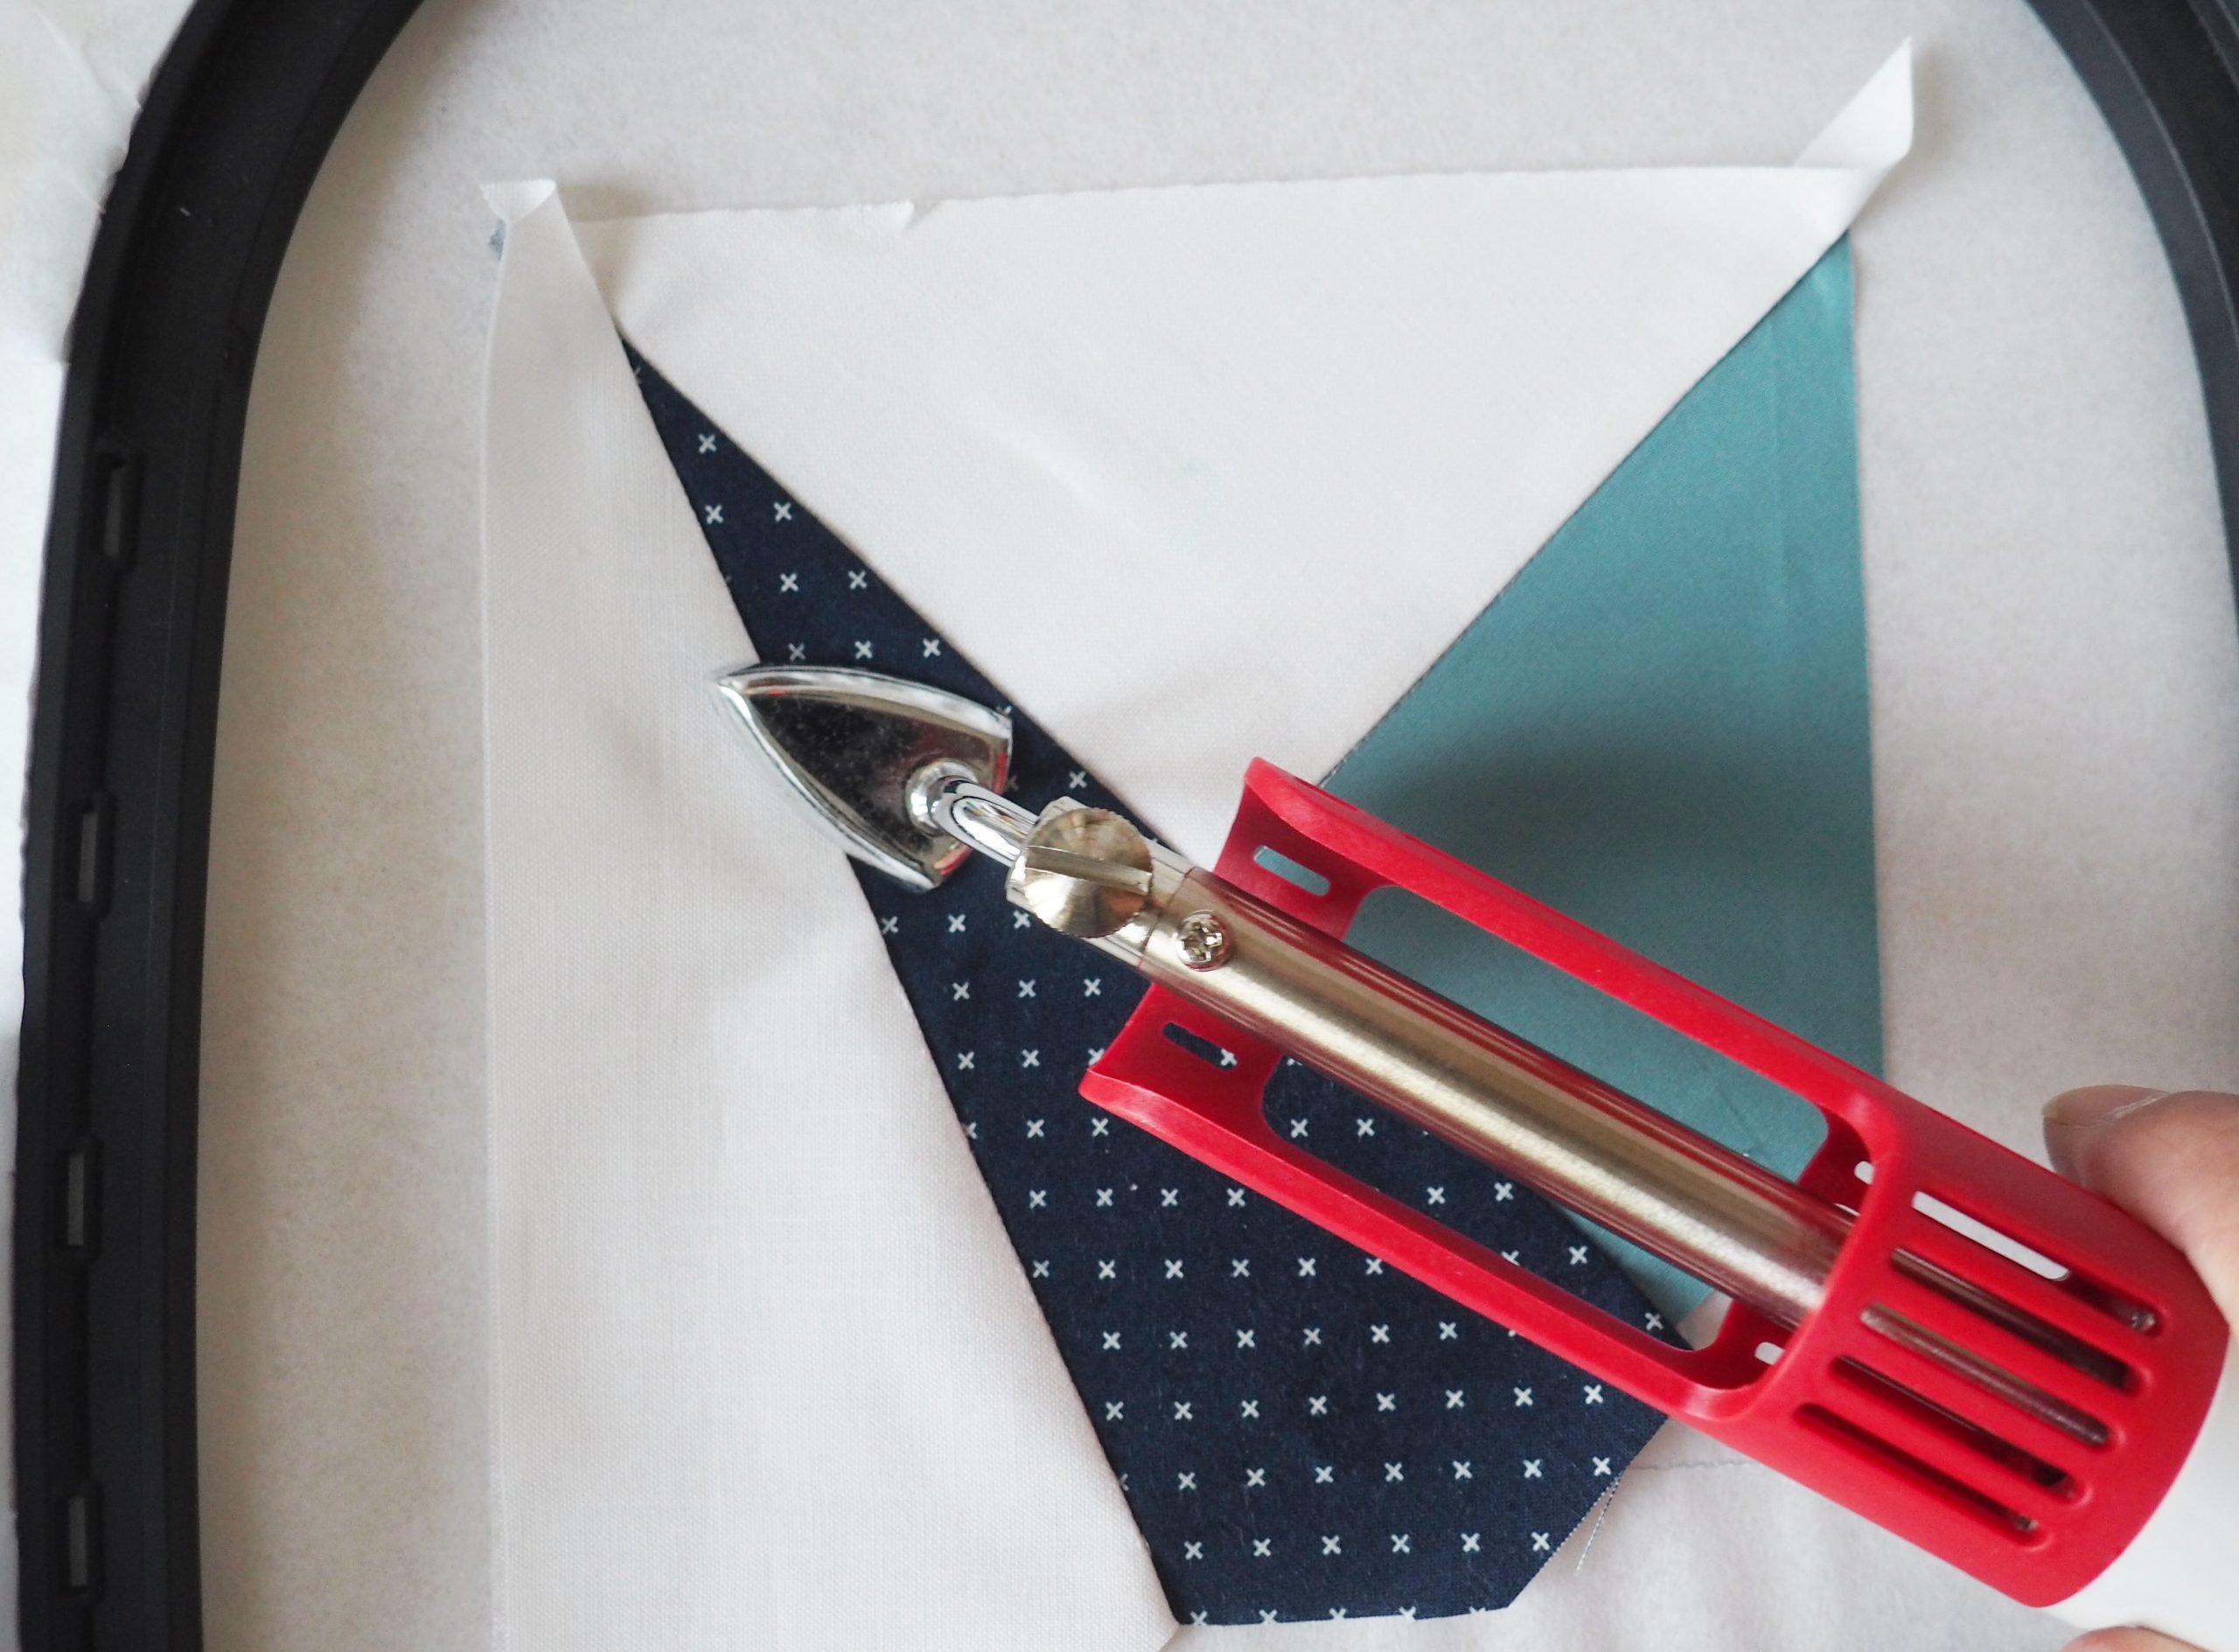
Using the mini iron, now iron fabric 2 along the seam that has just been sewn and onto area 2. Make sure to iron the edge over thoroughly, as it looks much nicer afterwards.

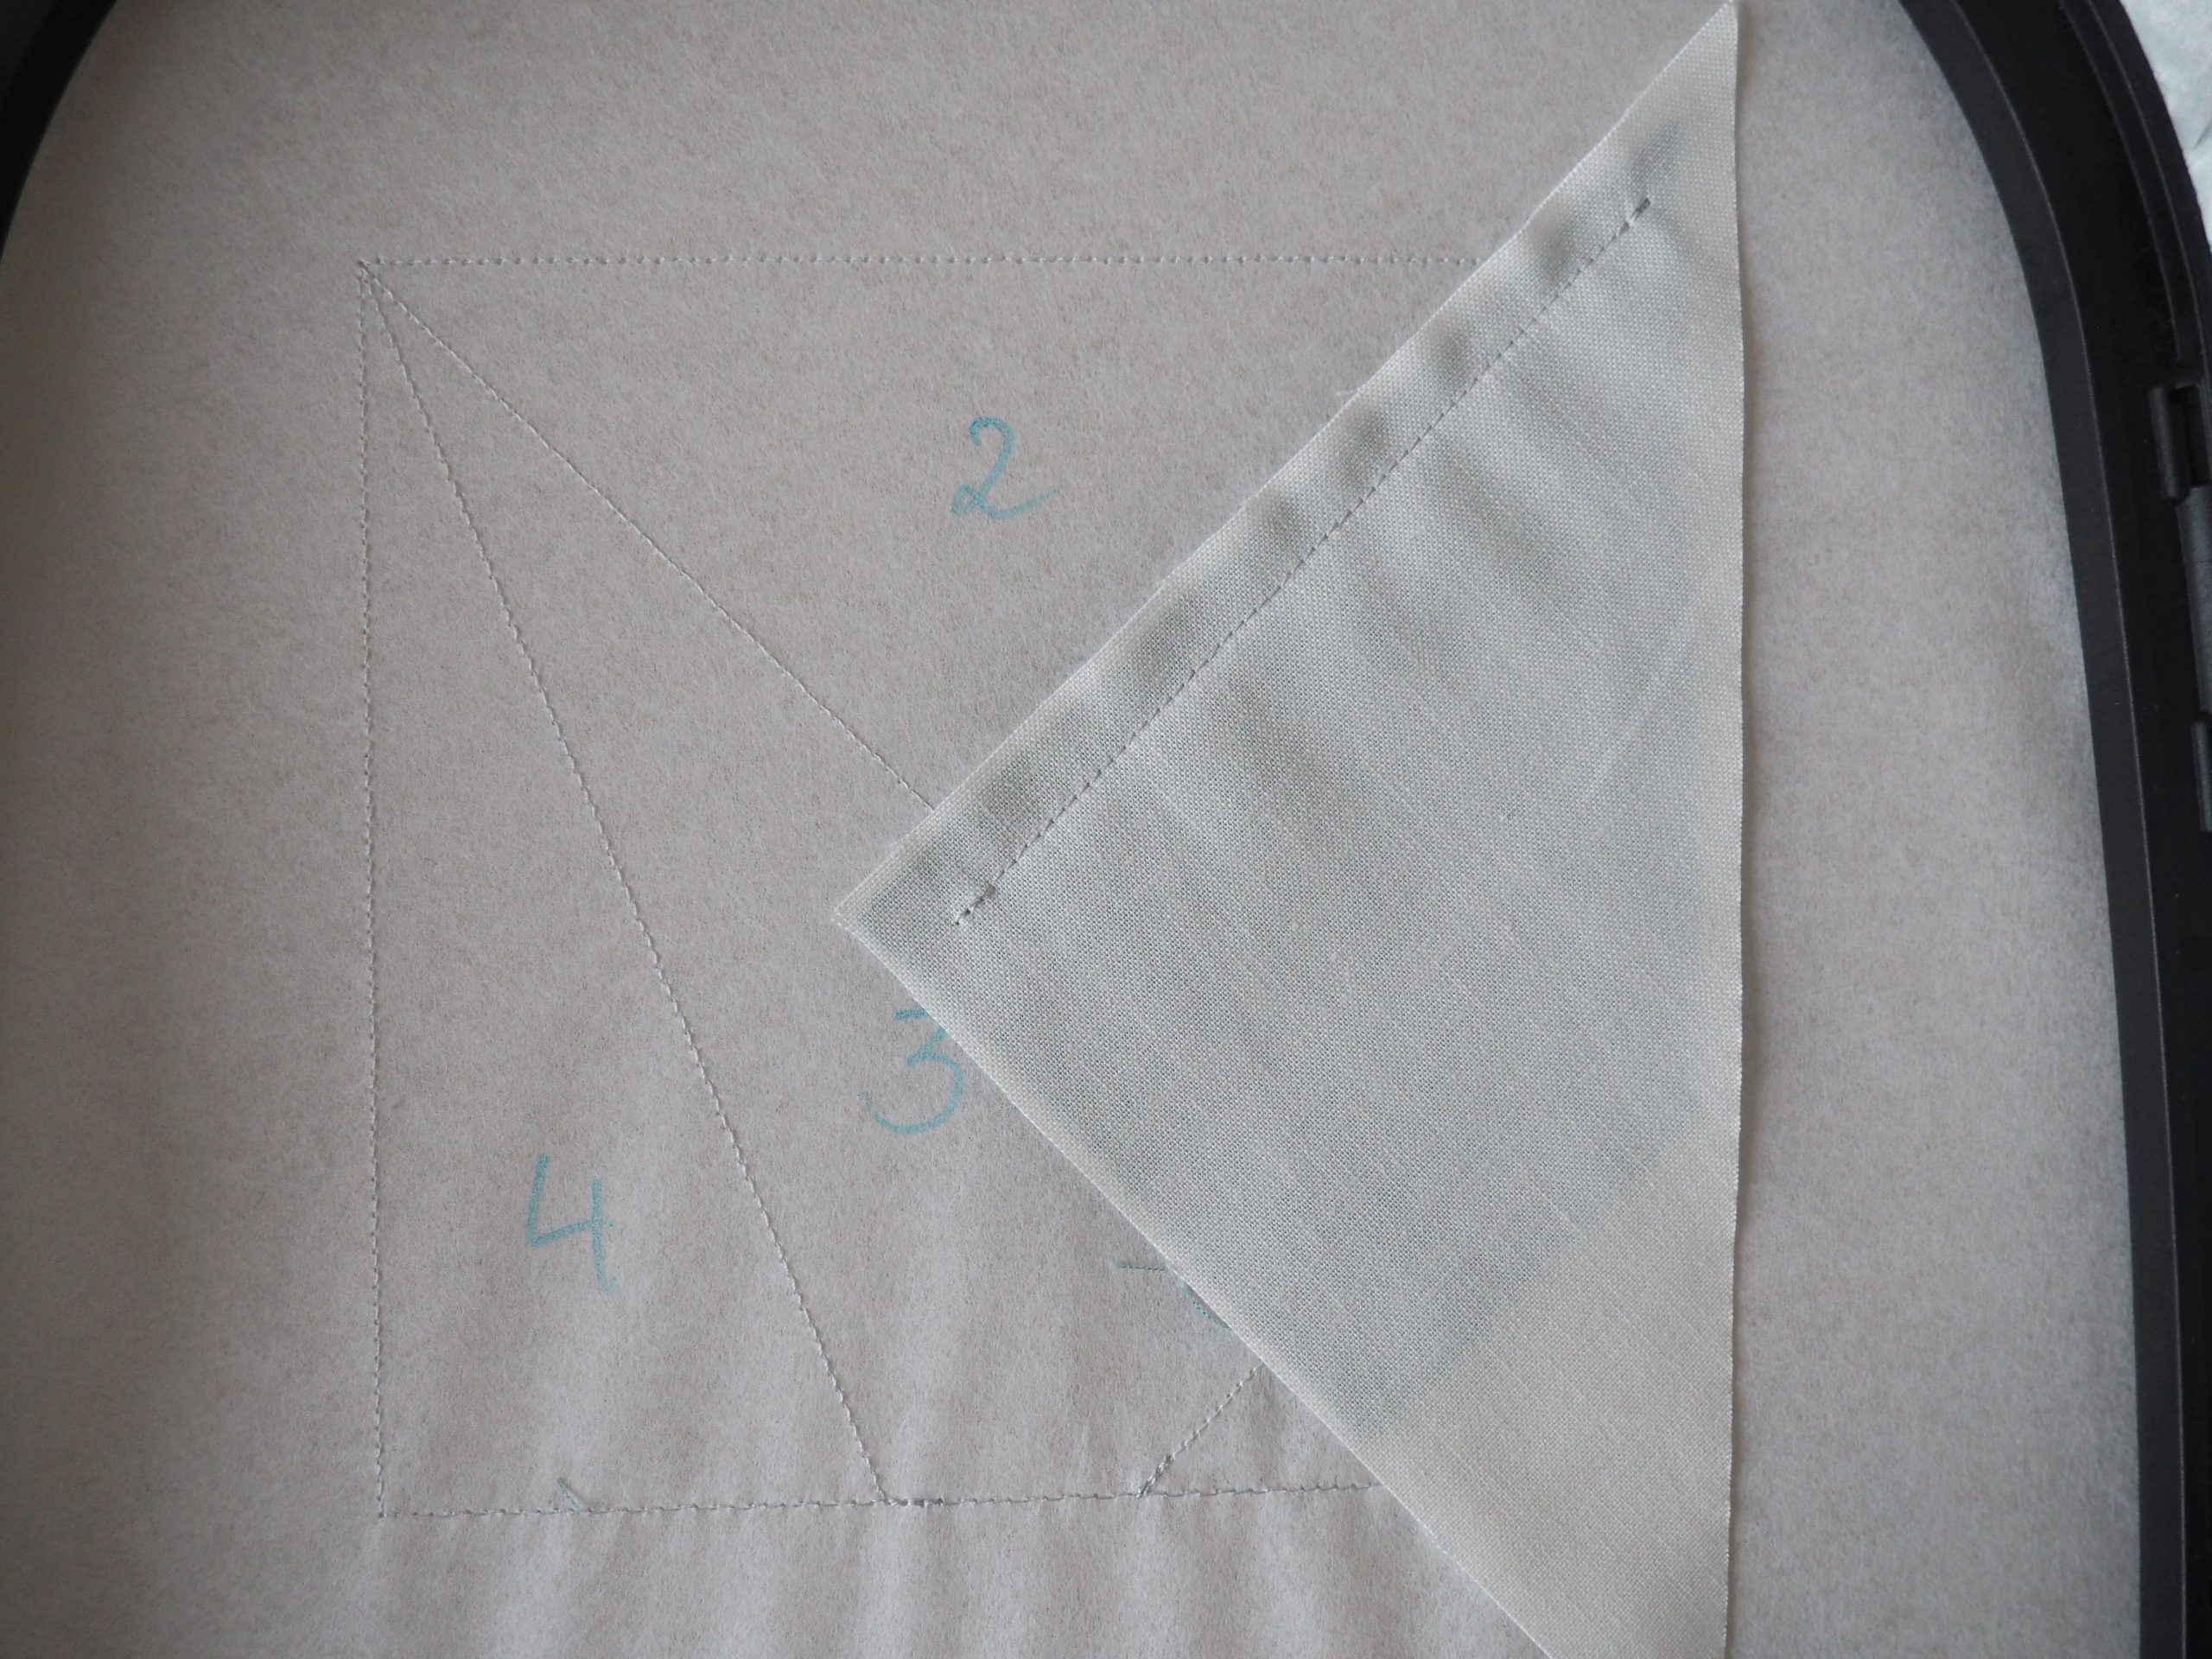
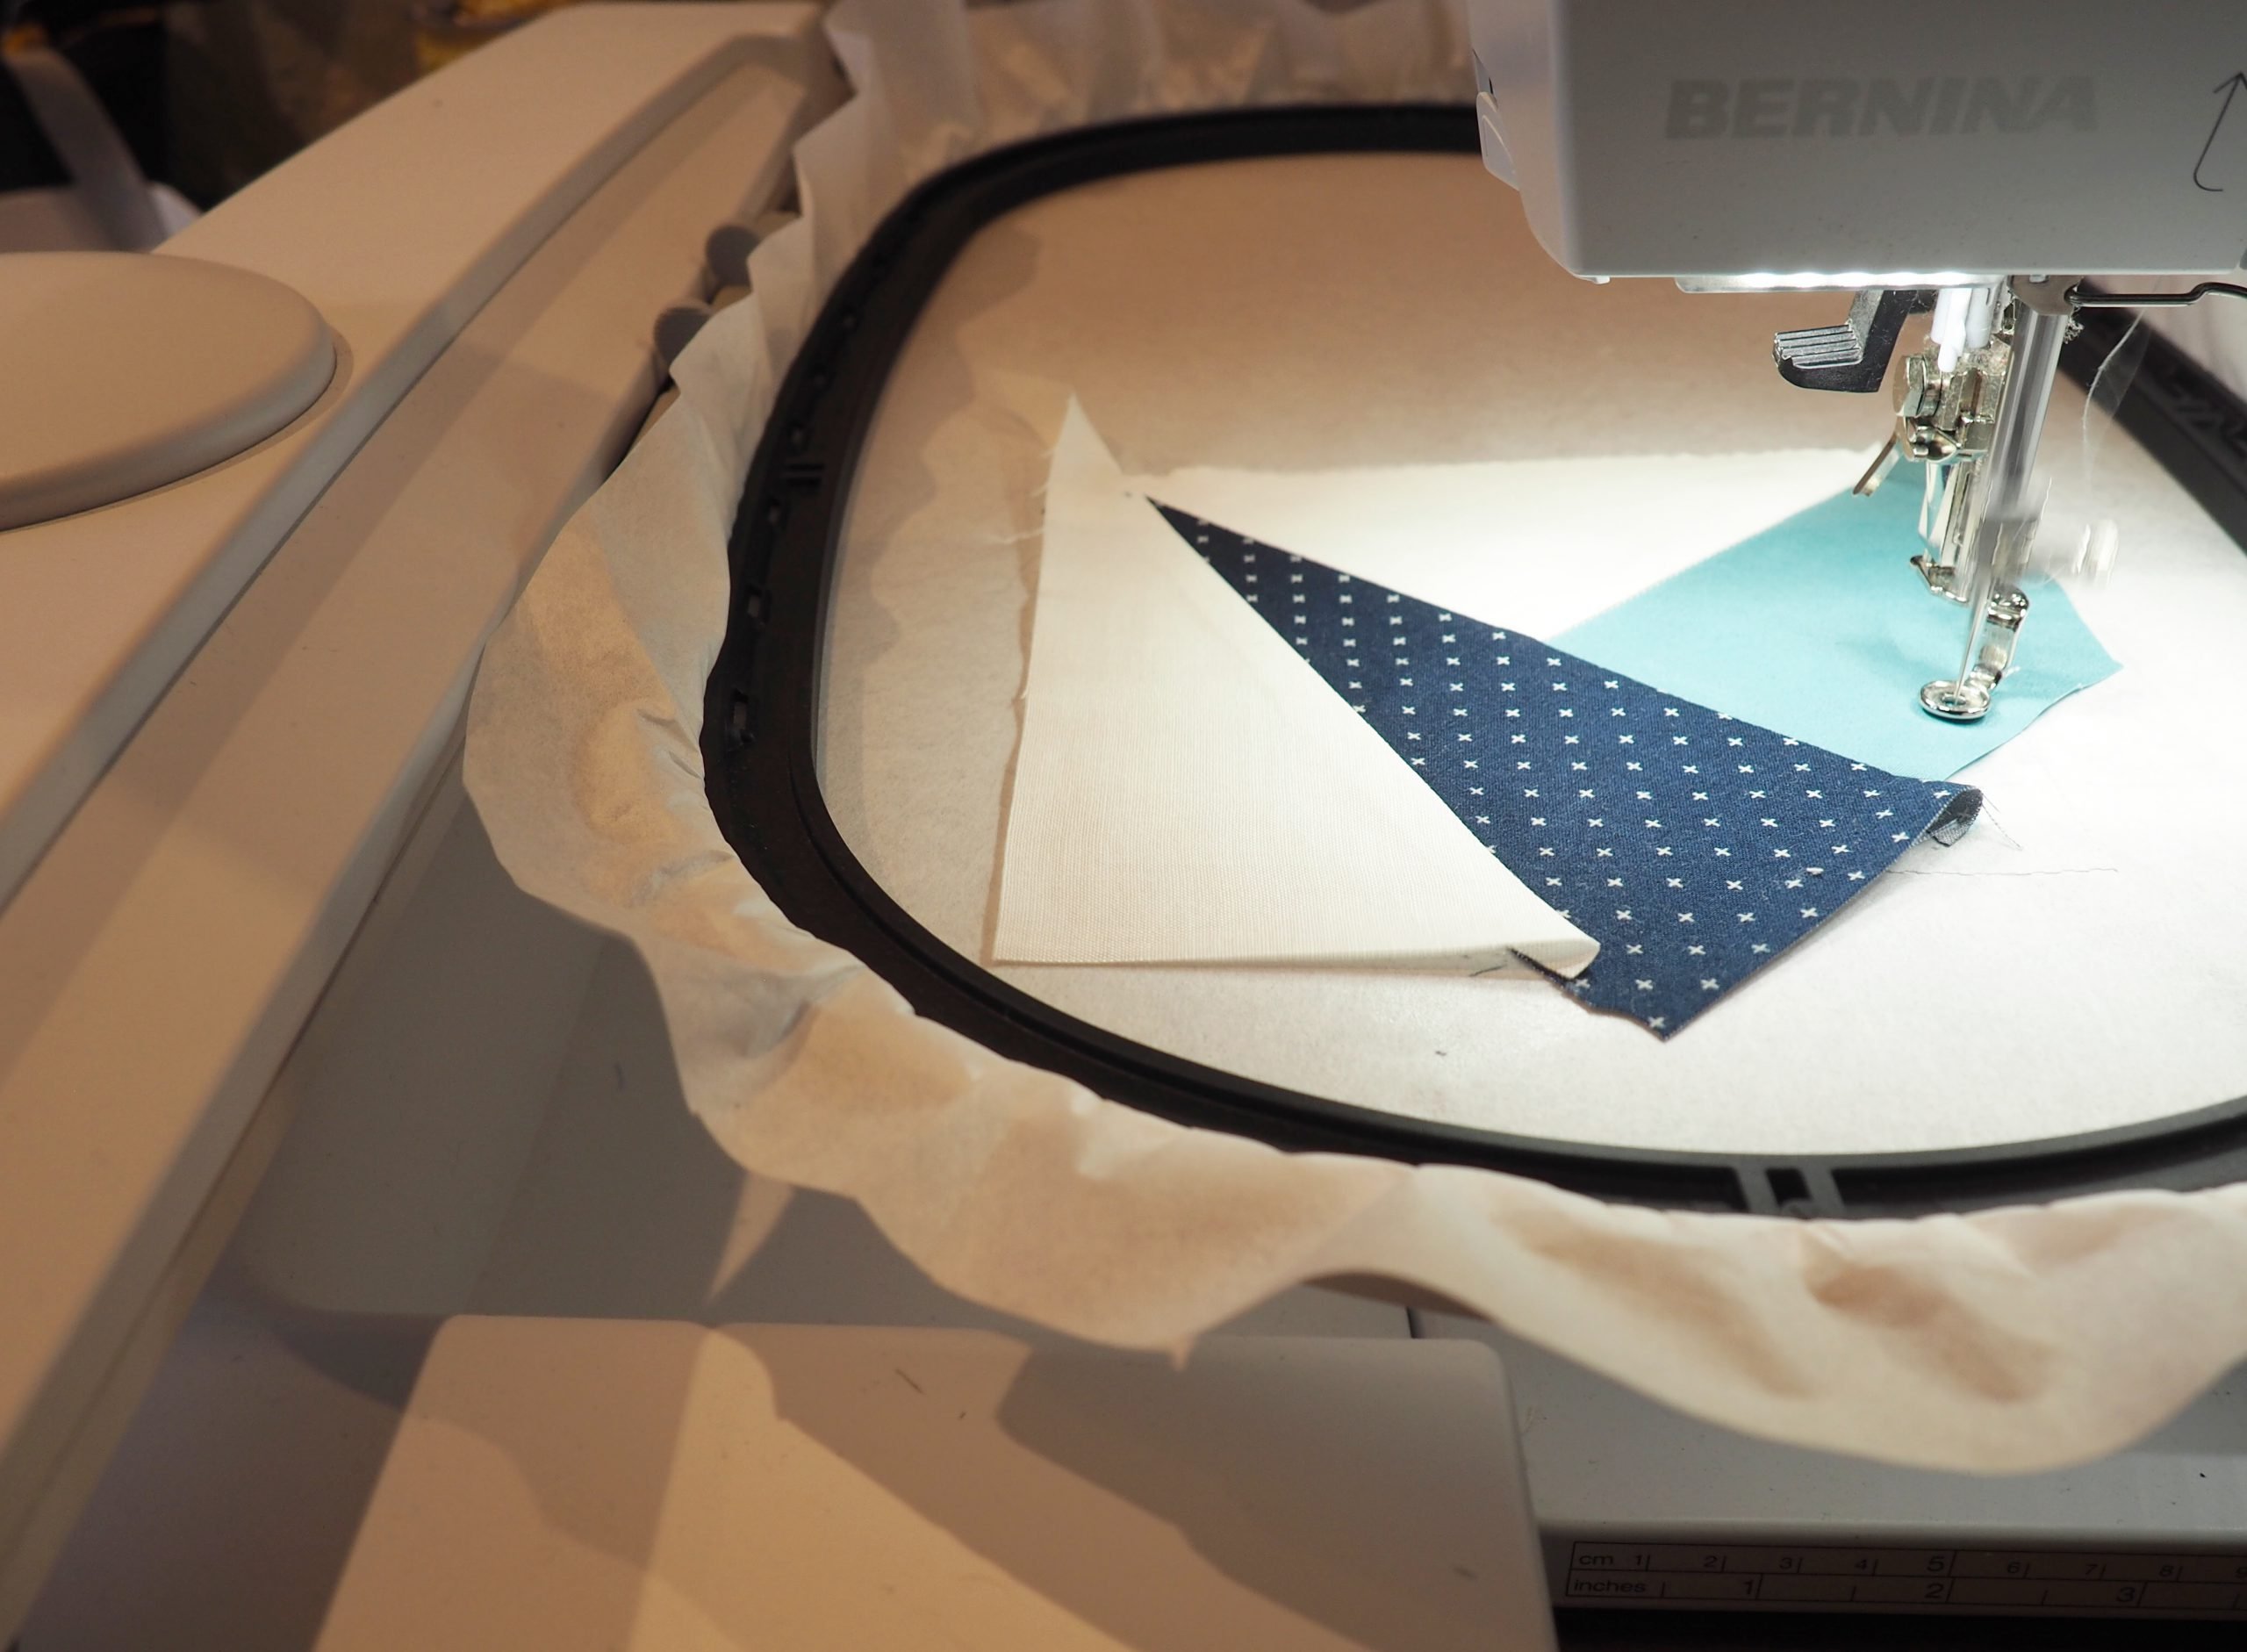
The next embroidery step embroiders the starting line for fabric 3.
Fabric 3 should be positioned on area 3 – but do not sew it on like this…

…instead, as explained above, turn the fabric to the wrong way up so that it covers the starting line by at least 1/4″ and the main part of the rest of fabric 3 is lying on the fabric that has already been attached.

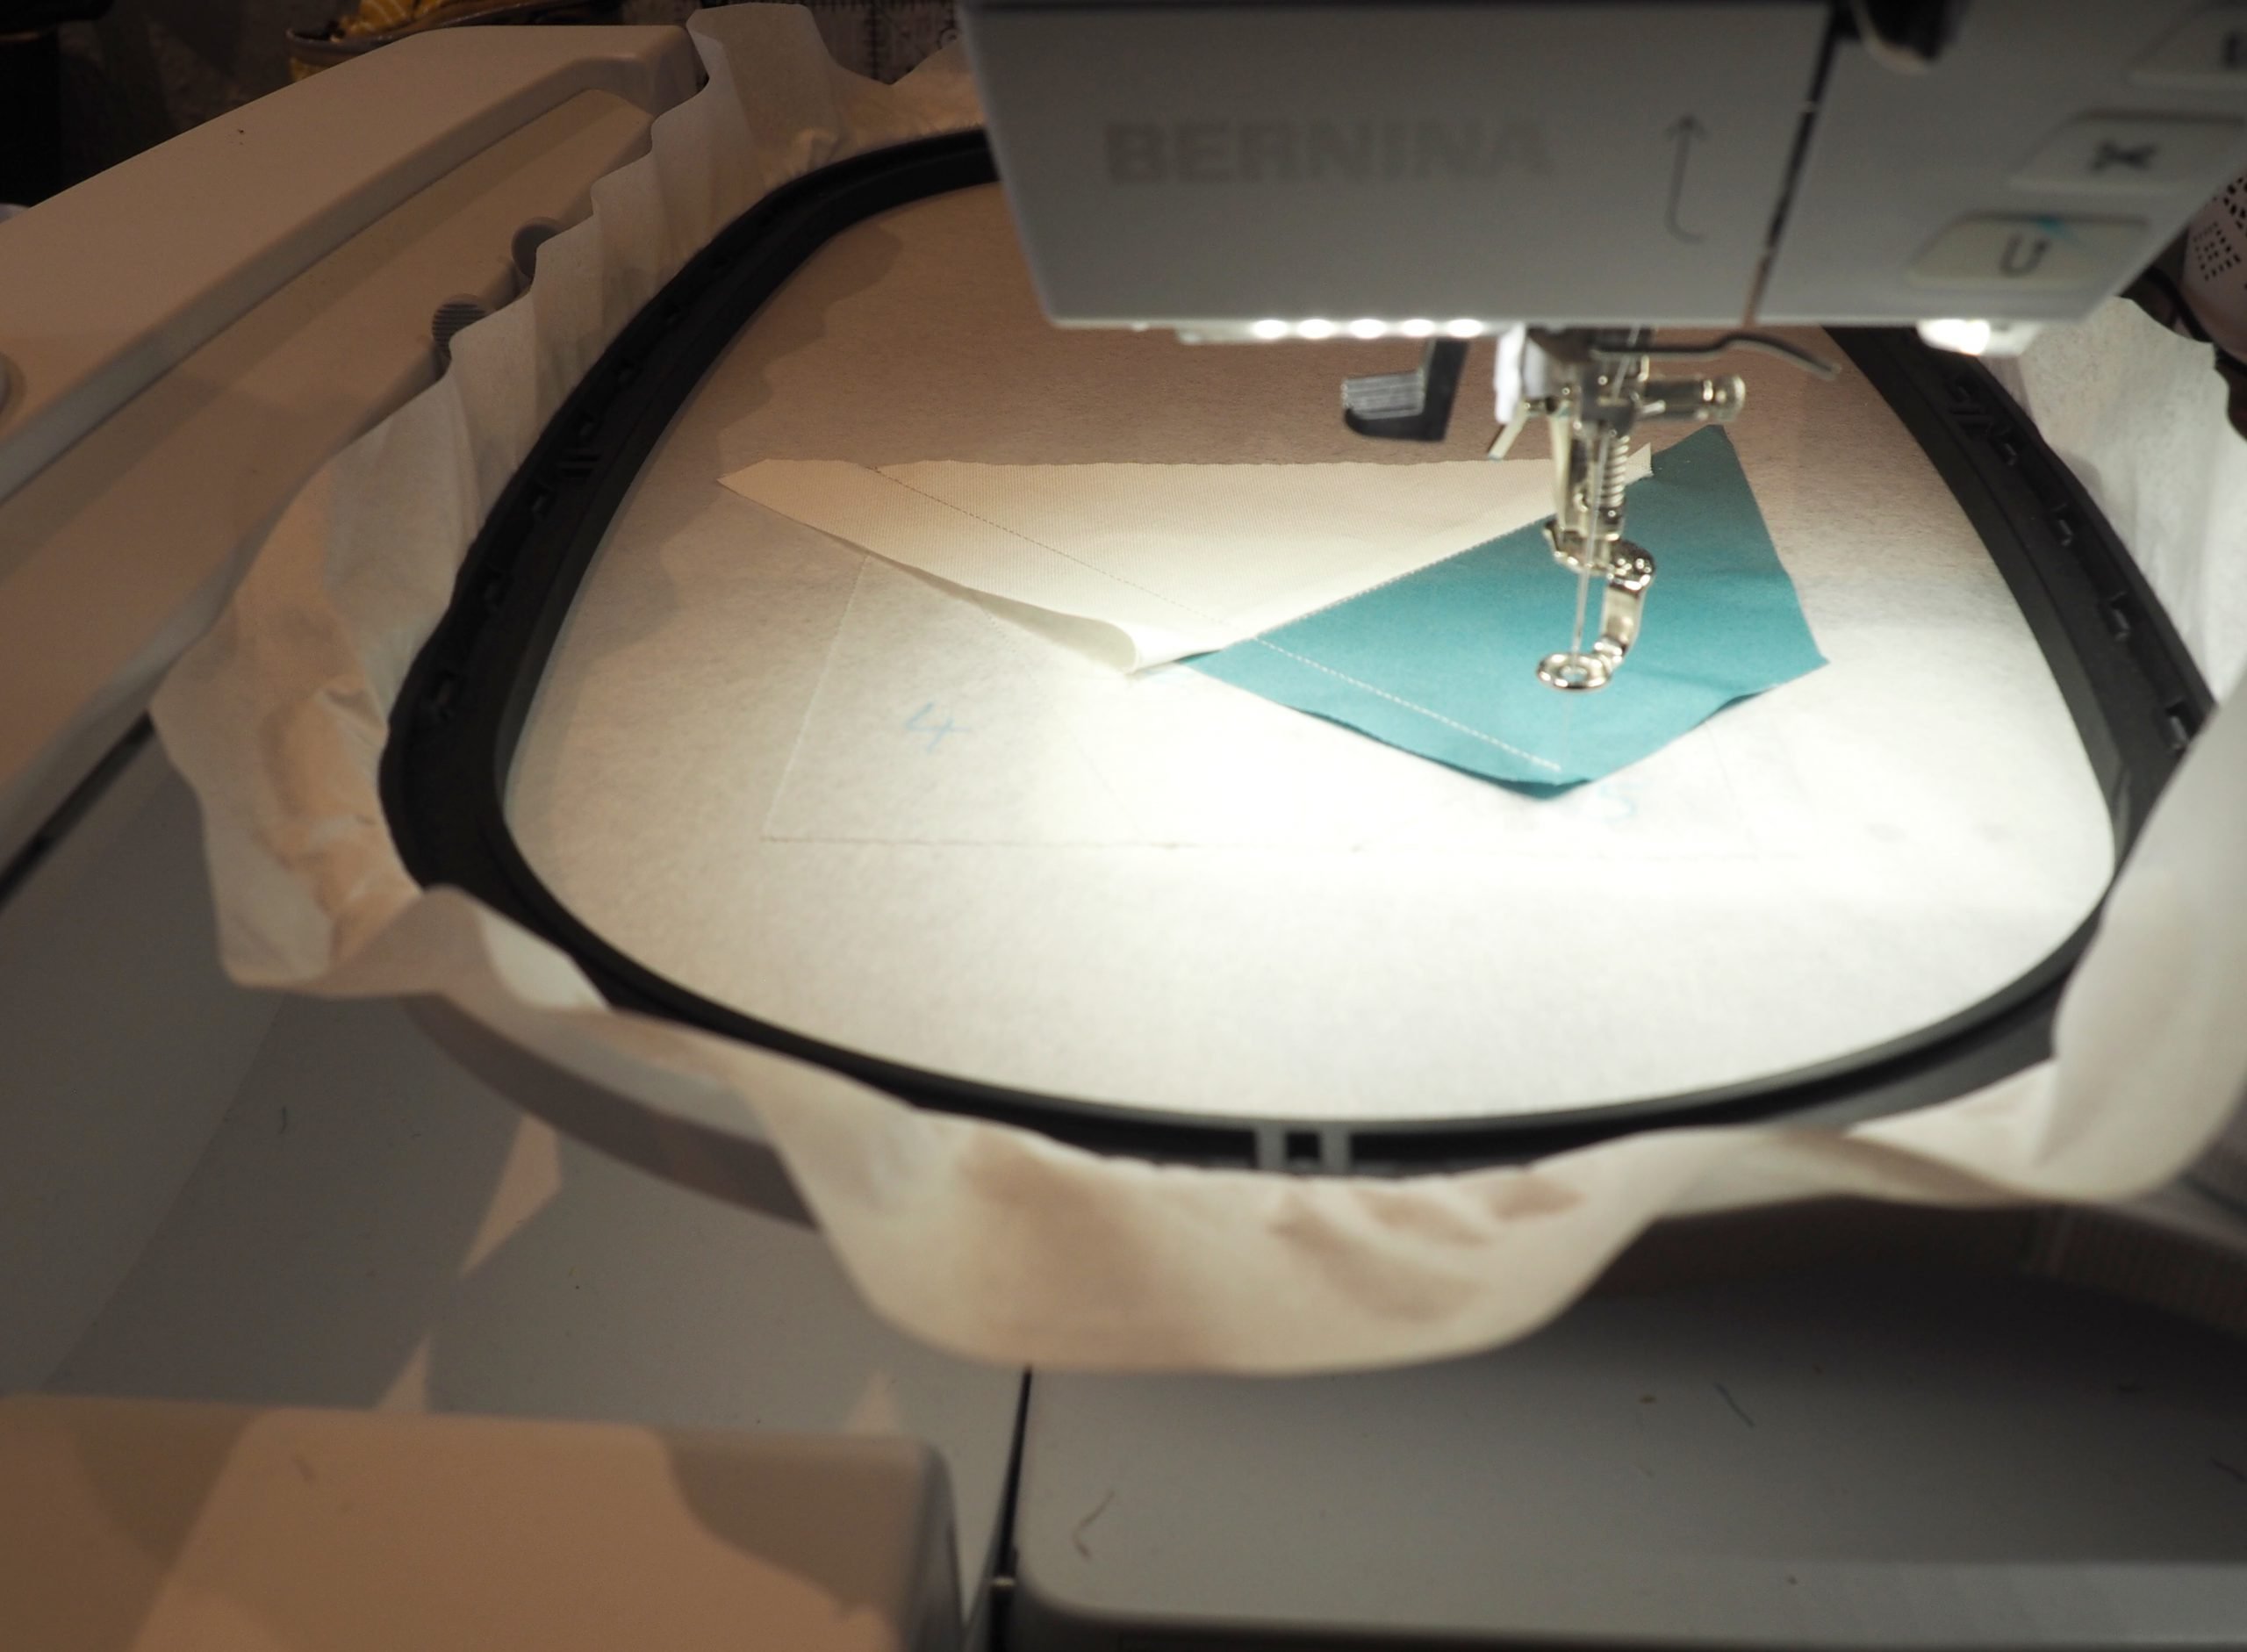
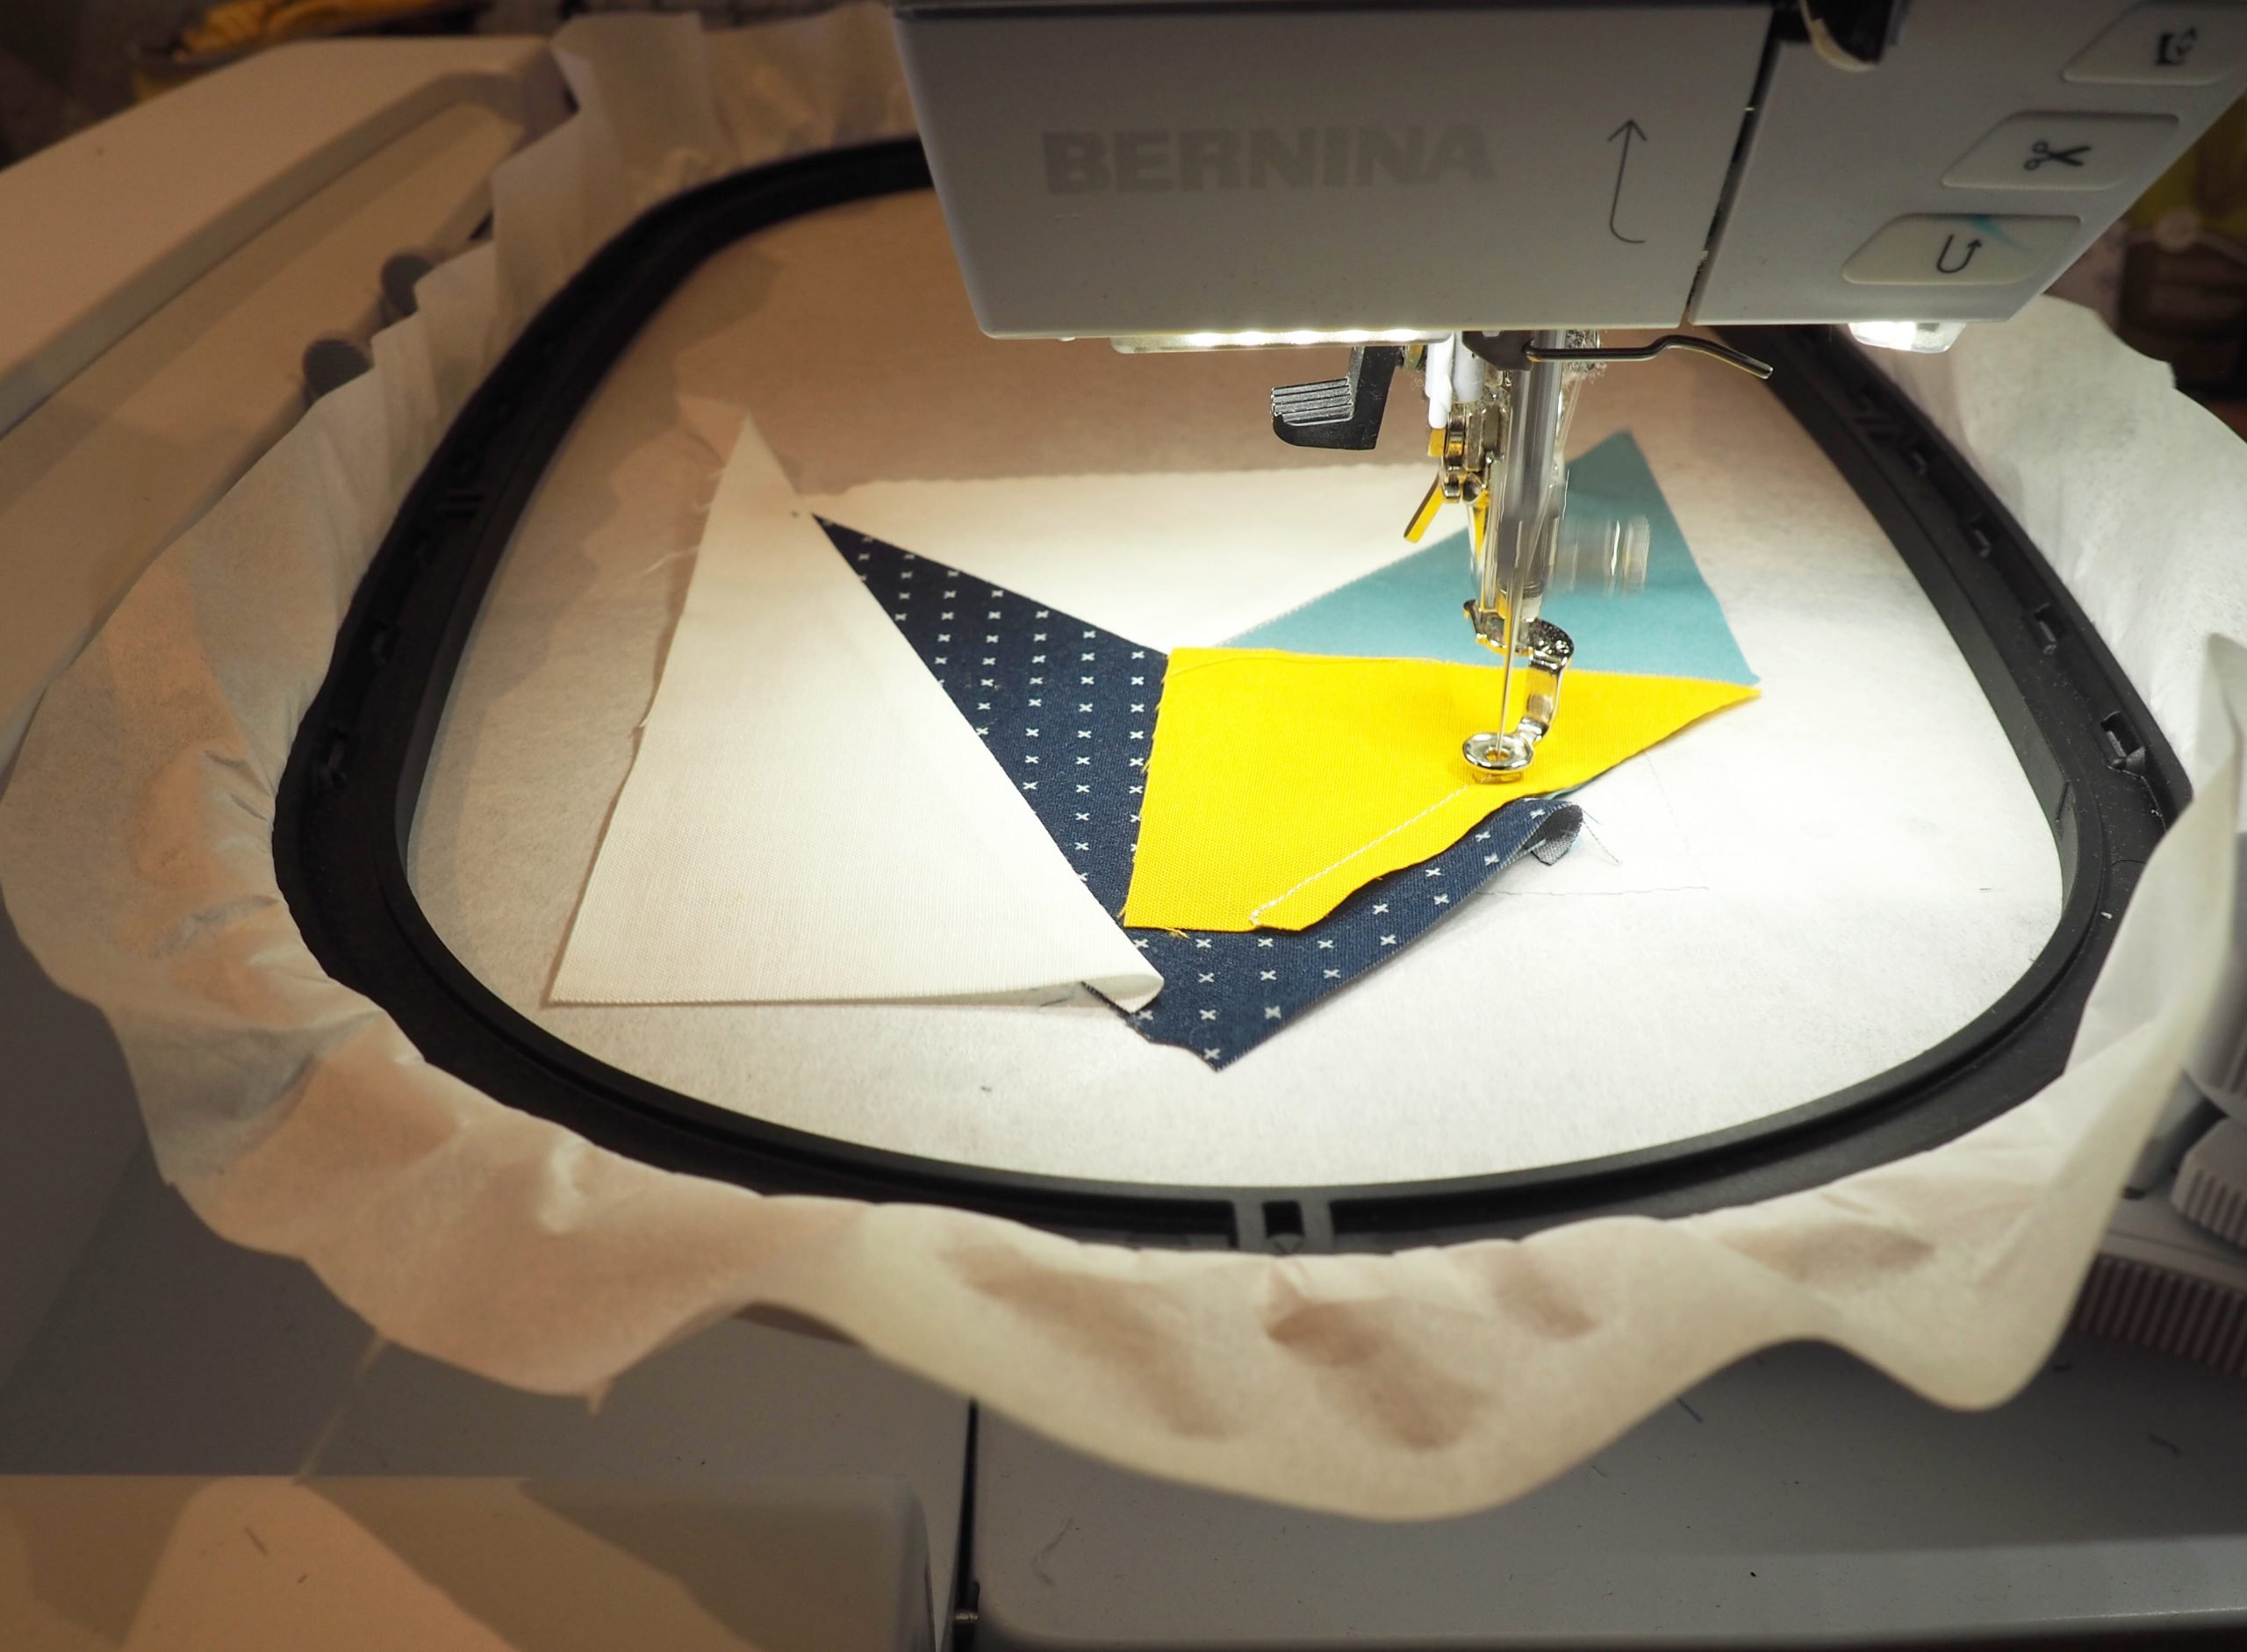
The next embroidery step now sews fabric 3 on along exactly the same line as the starting line. When sewing on the fabric, I like to use my fingers to help me smooth the fabric flat.
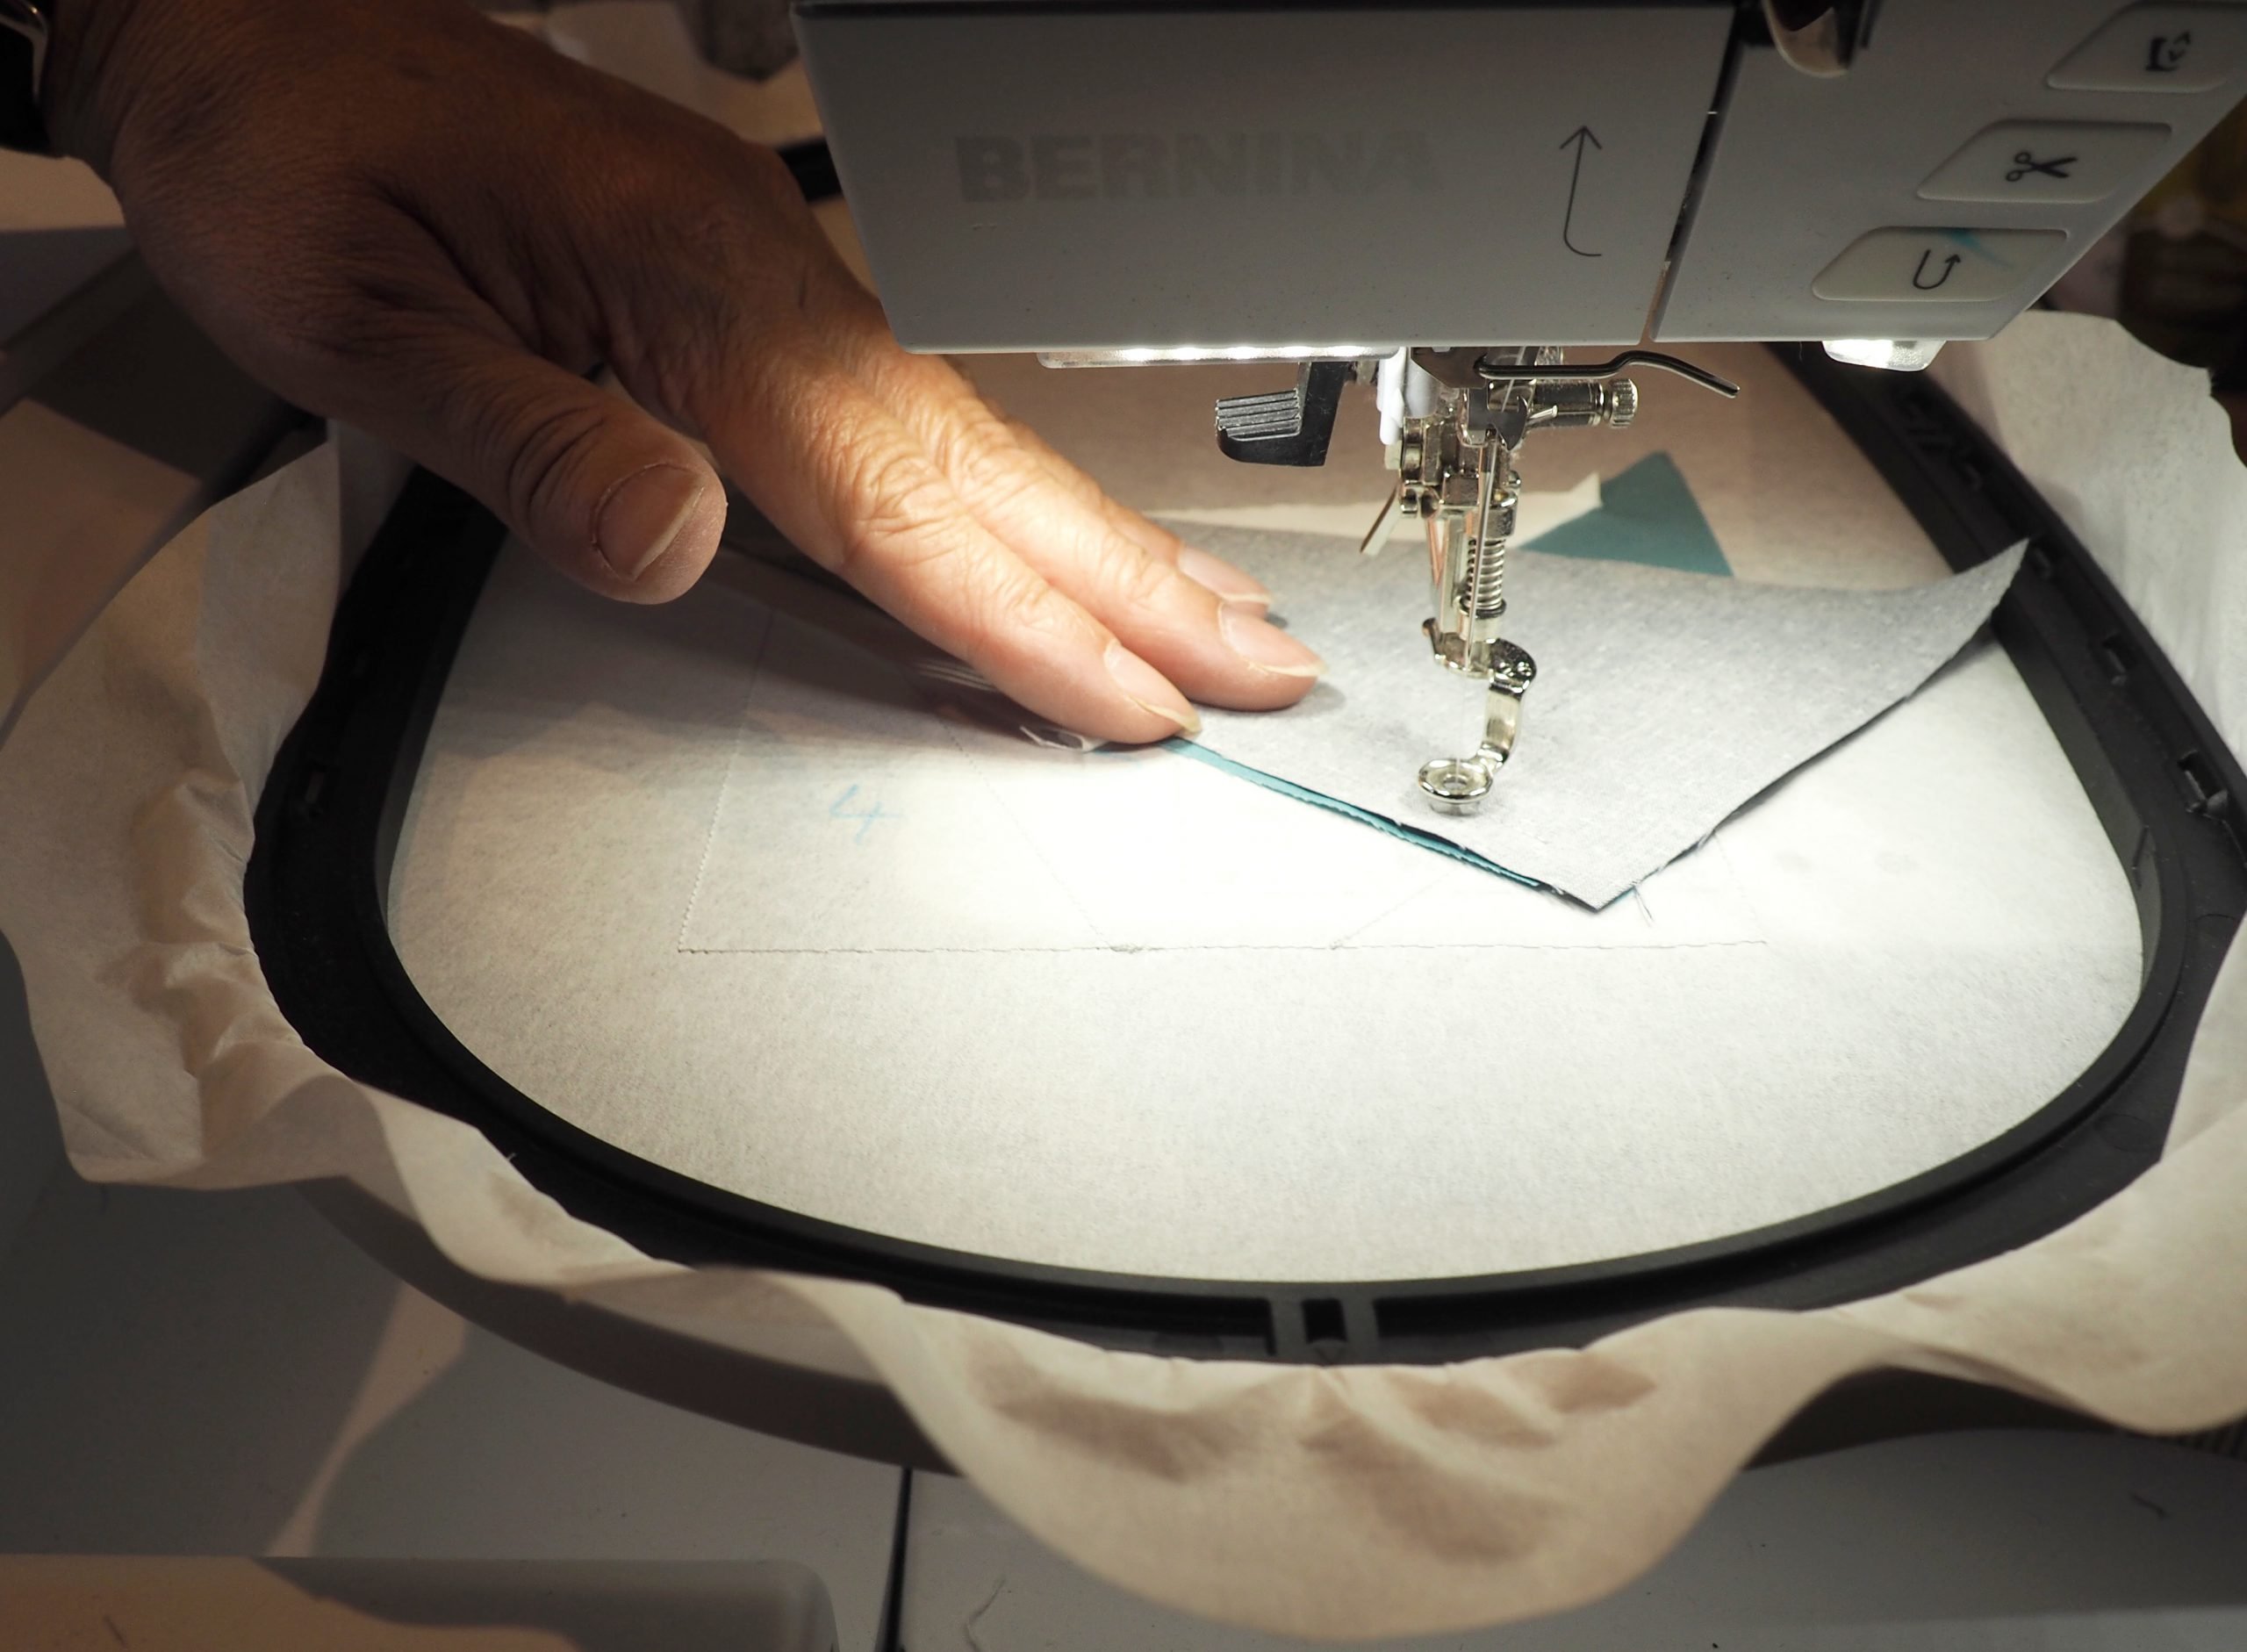
Here, you can see how fabric 3 is sewn in place.

Using scissors, trim the seam allowance.
Then once again, iron the newly sewn fabric over and down.

Continue by embroidering the starting line for fabric 4.
Place fabric 4 so that it has enough seam allowance when it is folded over after being sewn on.
Once again, trim the seam allowance…
…and iron the fabric over and down.
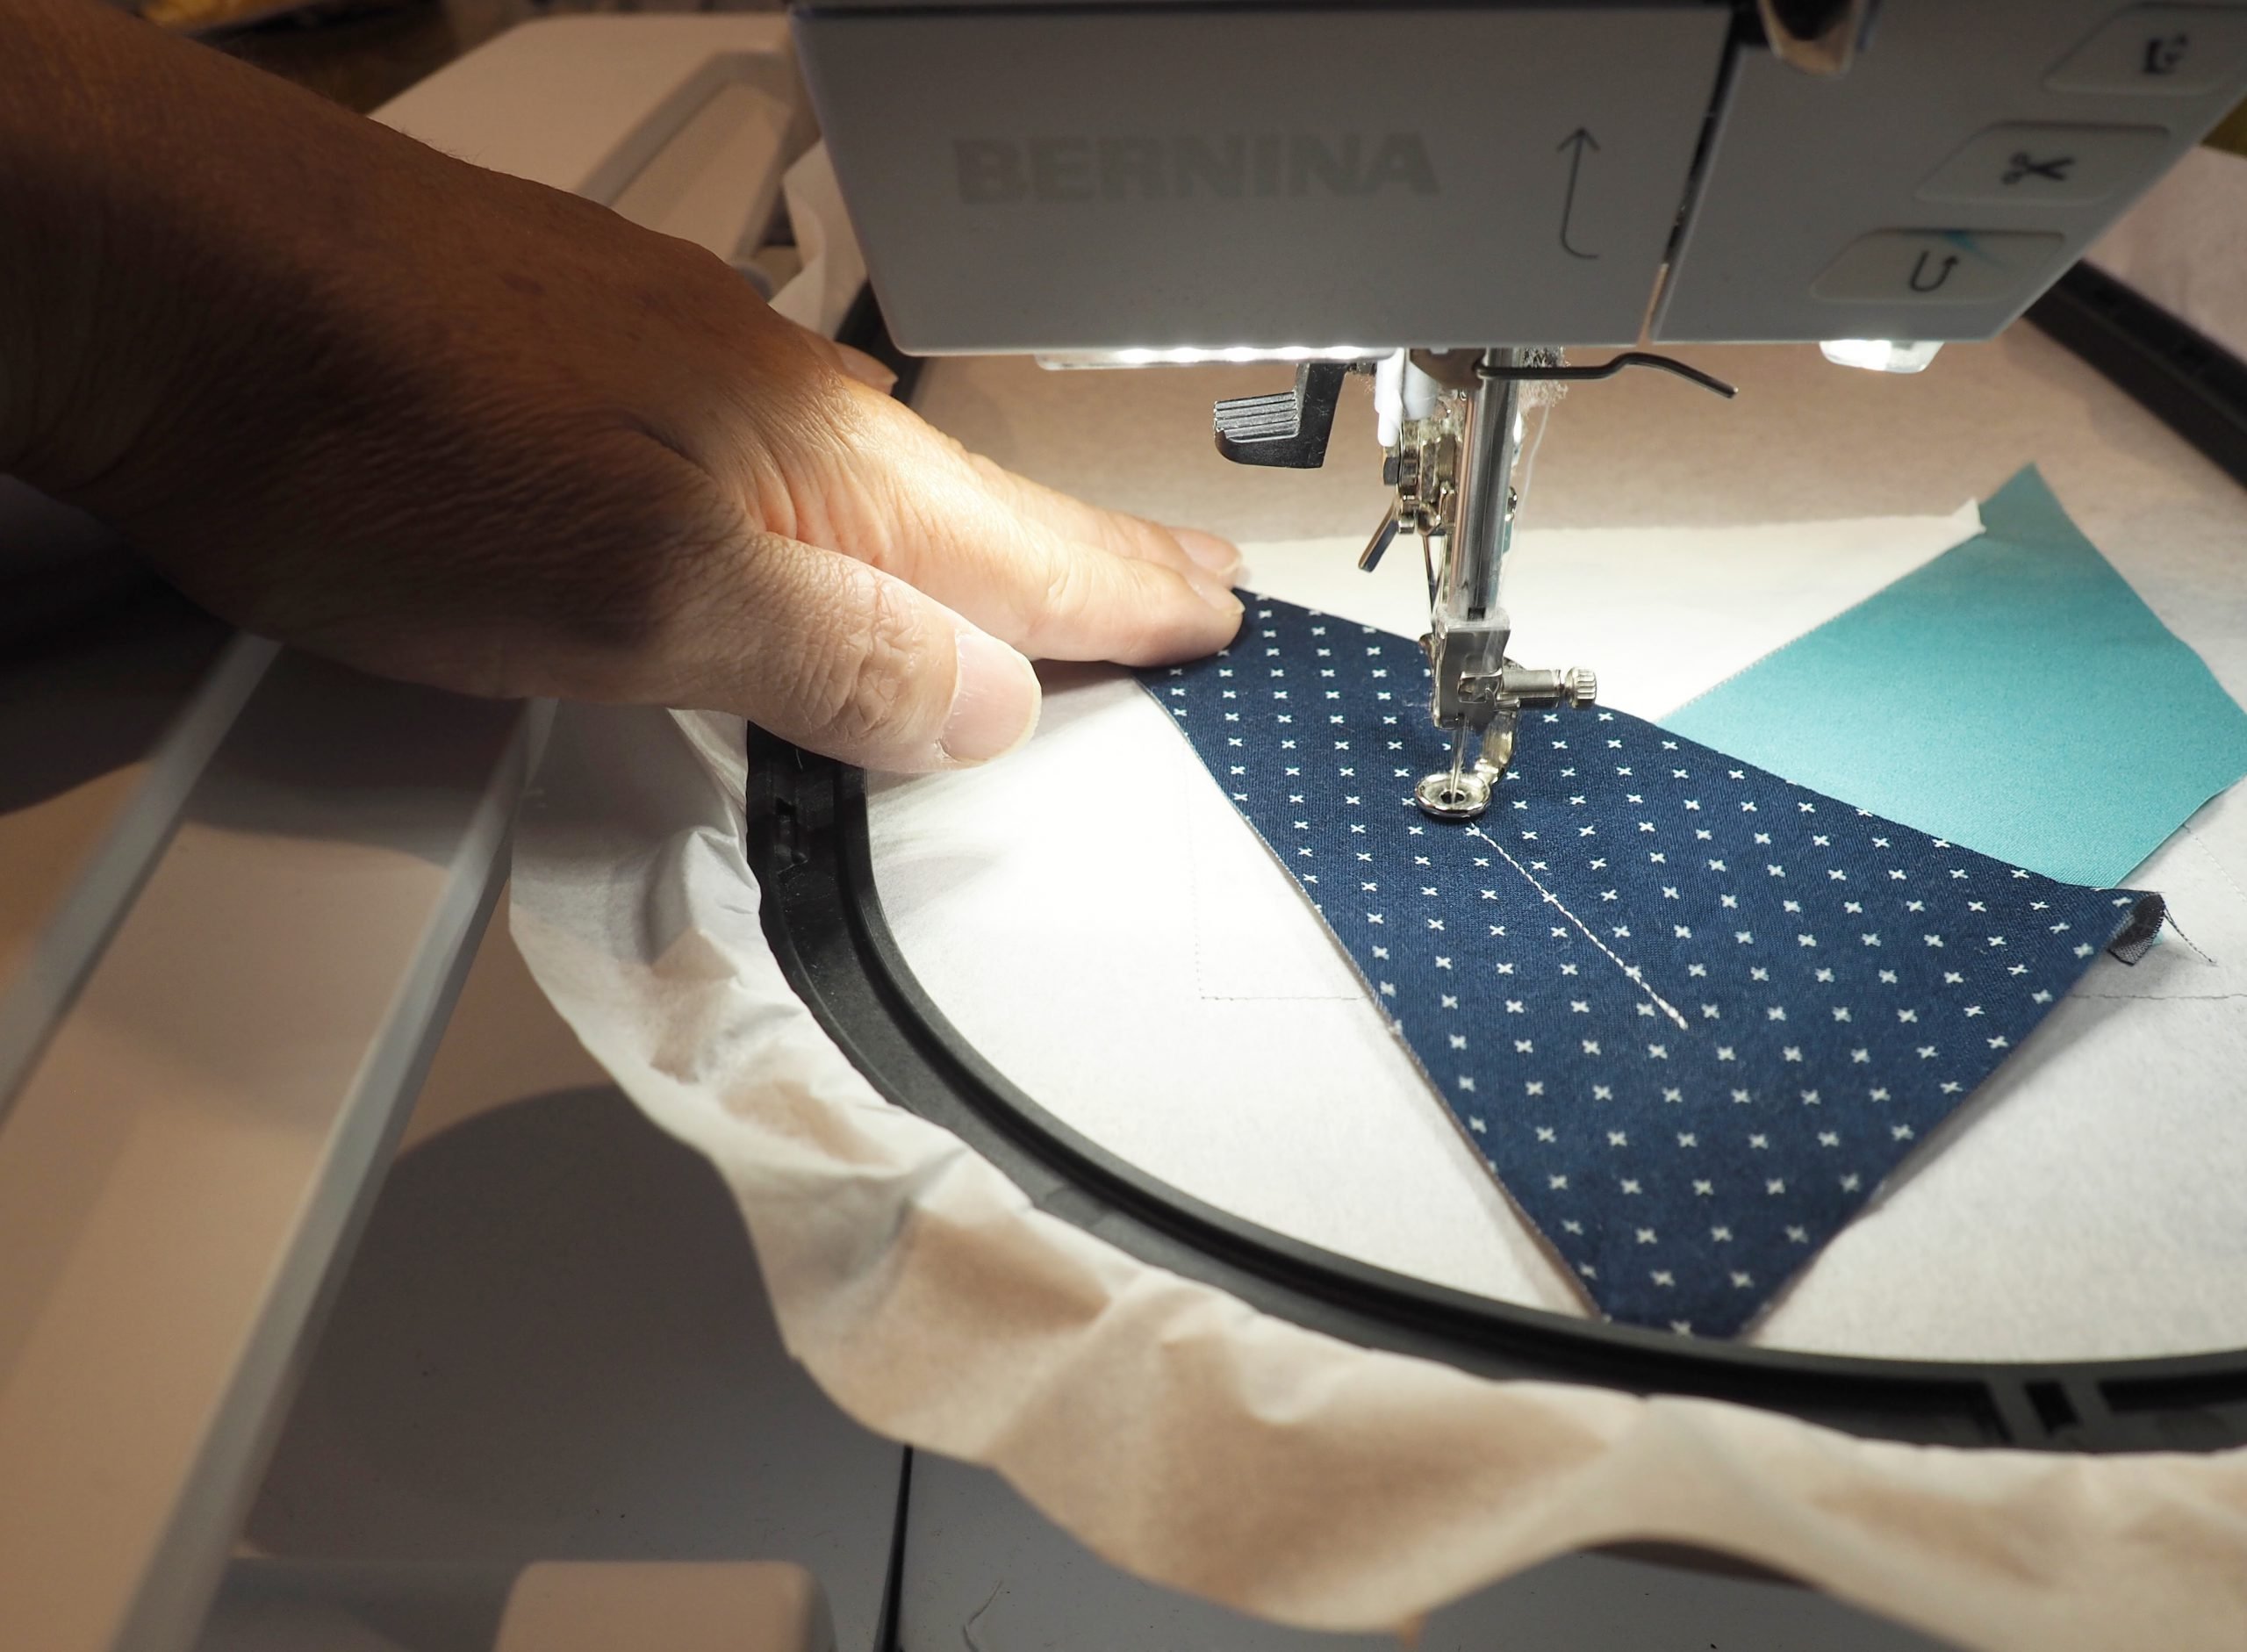
Now all that’s left is the last fabric – fabric 5. The starting line is embroidered.
Position the fabric in the appropriate manner and sew it in place using the next embroidery step.
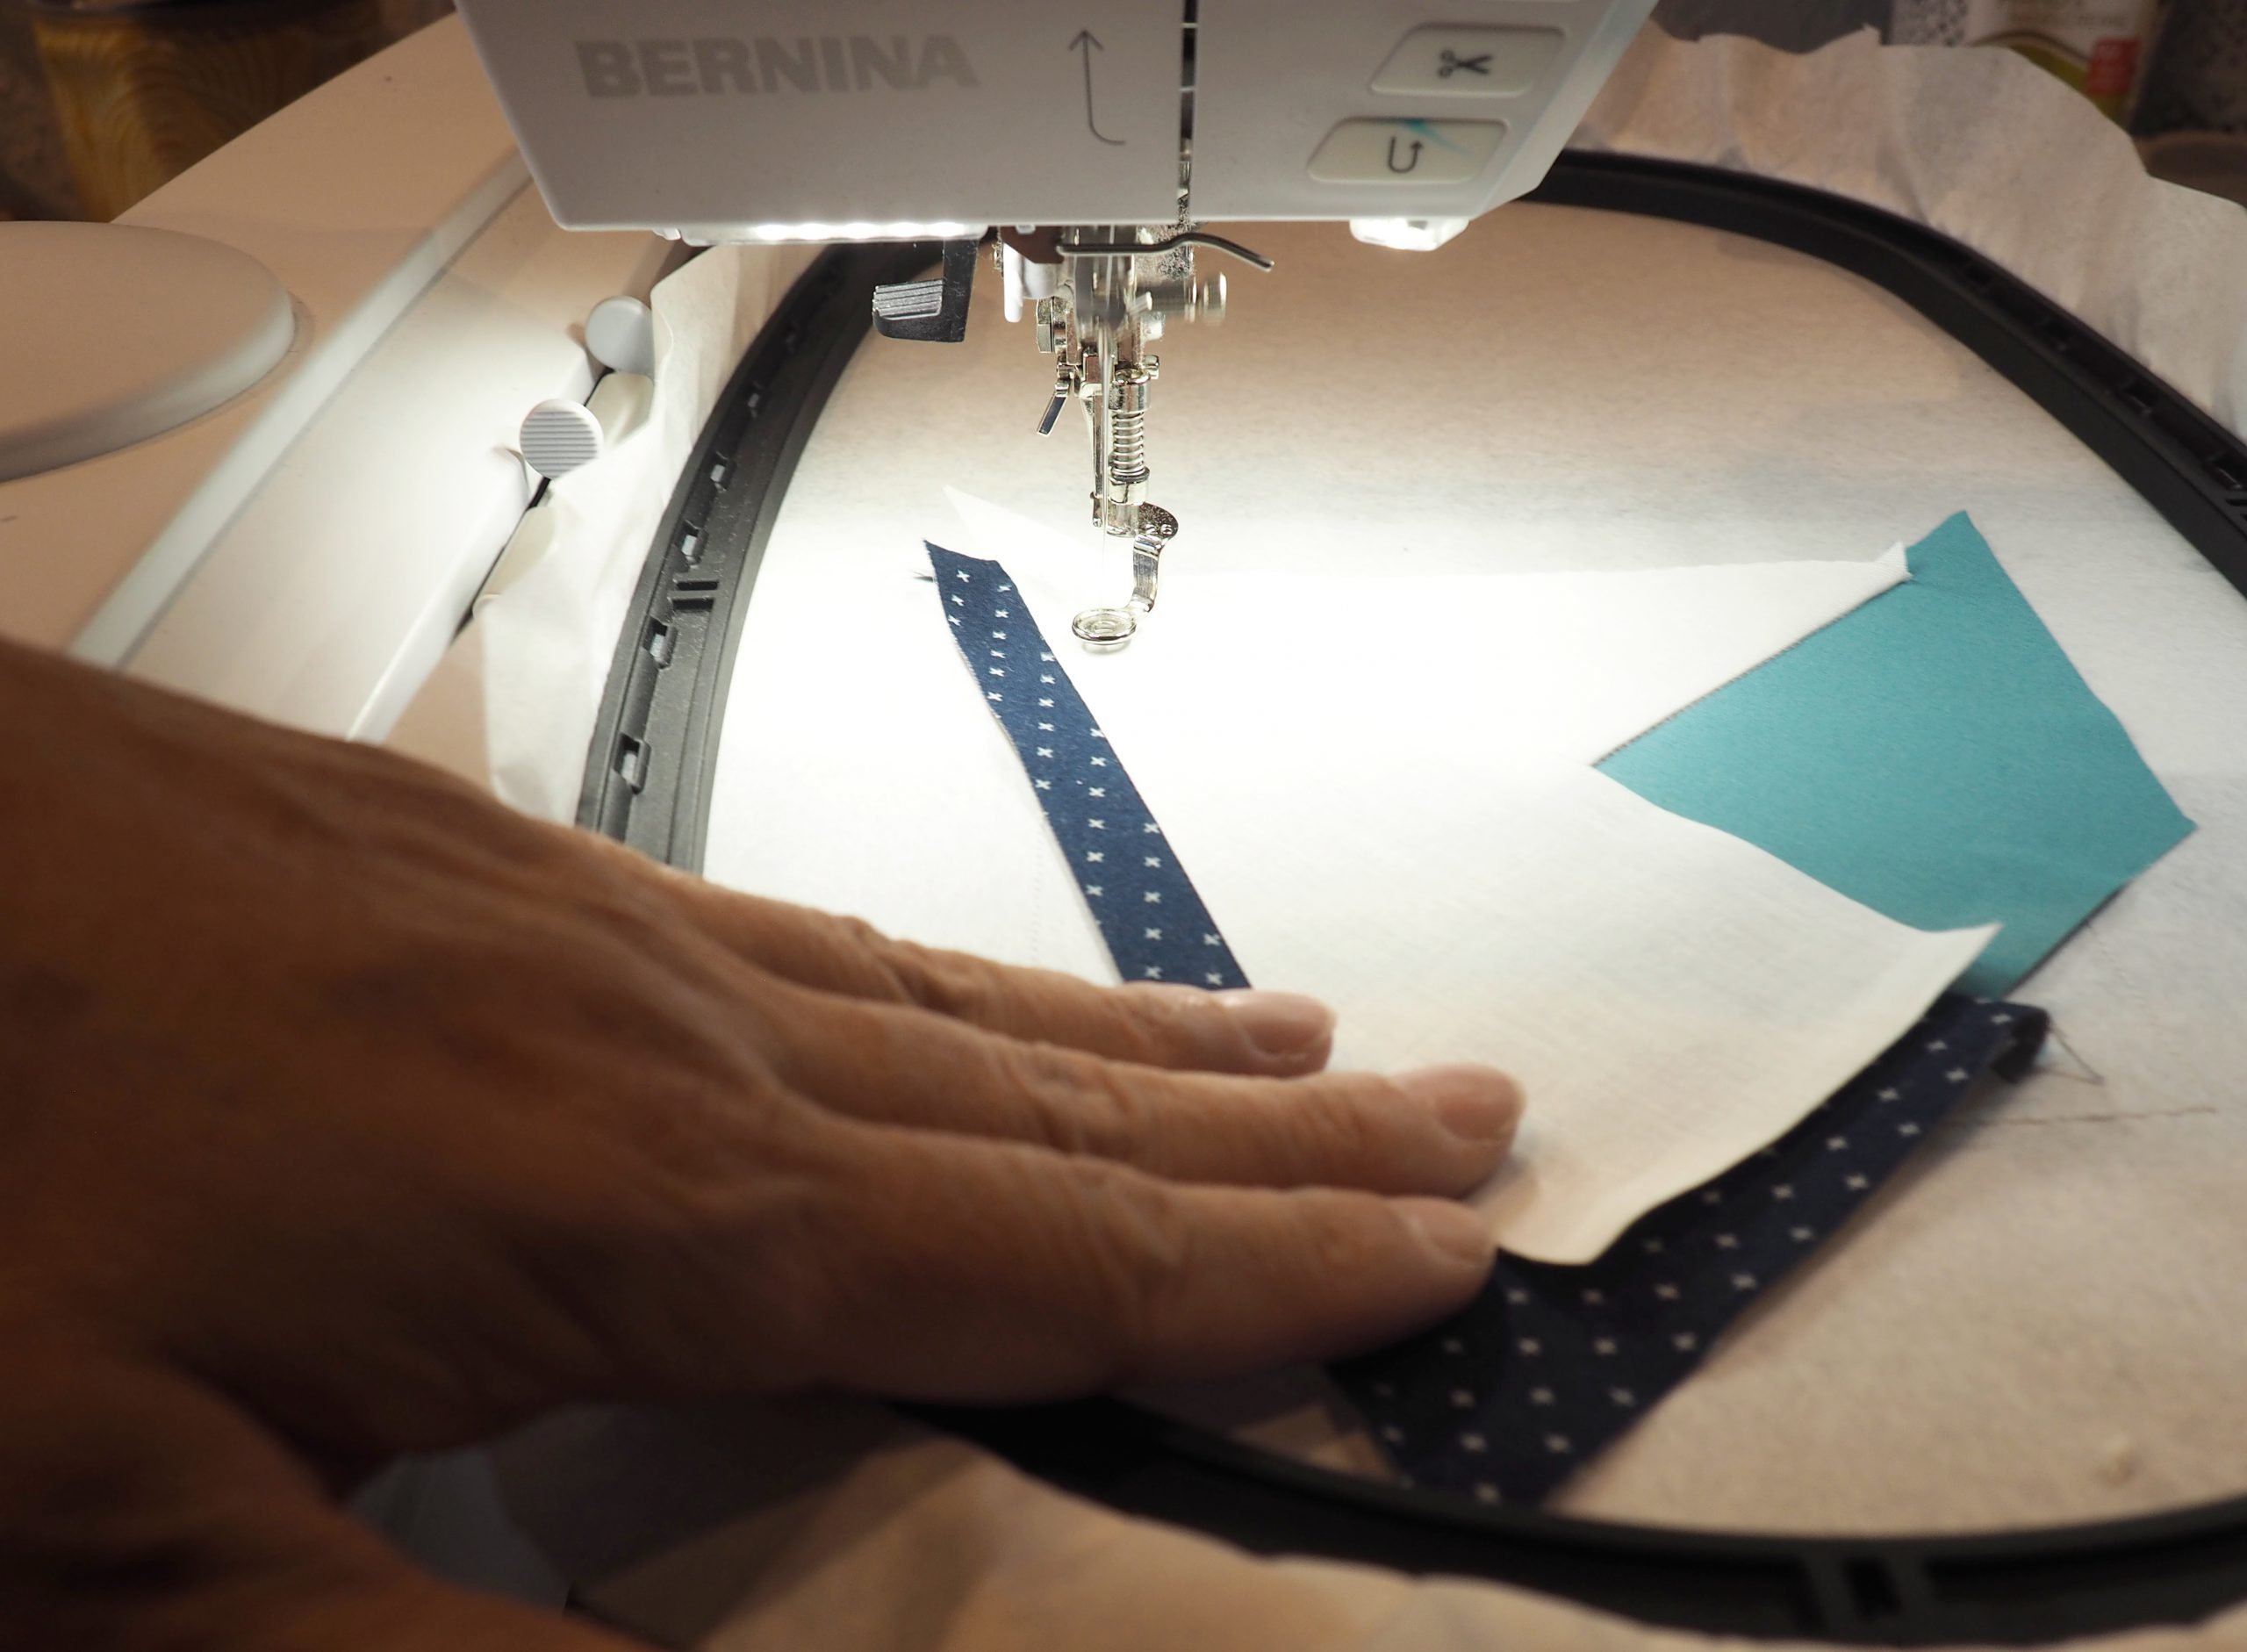
Trim the seam allowance and…
…iron fabric 5 over and down.

The last embroidery step for each of these small blocks is a seam around the outside. Make sure that the fabrics are really flat and free of wrinkles by ironing around the edge well beforehand with the mini iron.

The “quilting in the hoop” block is finished!
To create a large 10.5″ block, make four identical small 5.5″ blocks in this way. I used the Maxi Hoop to embroider two blocks at a time.
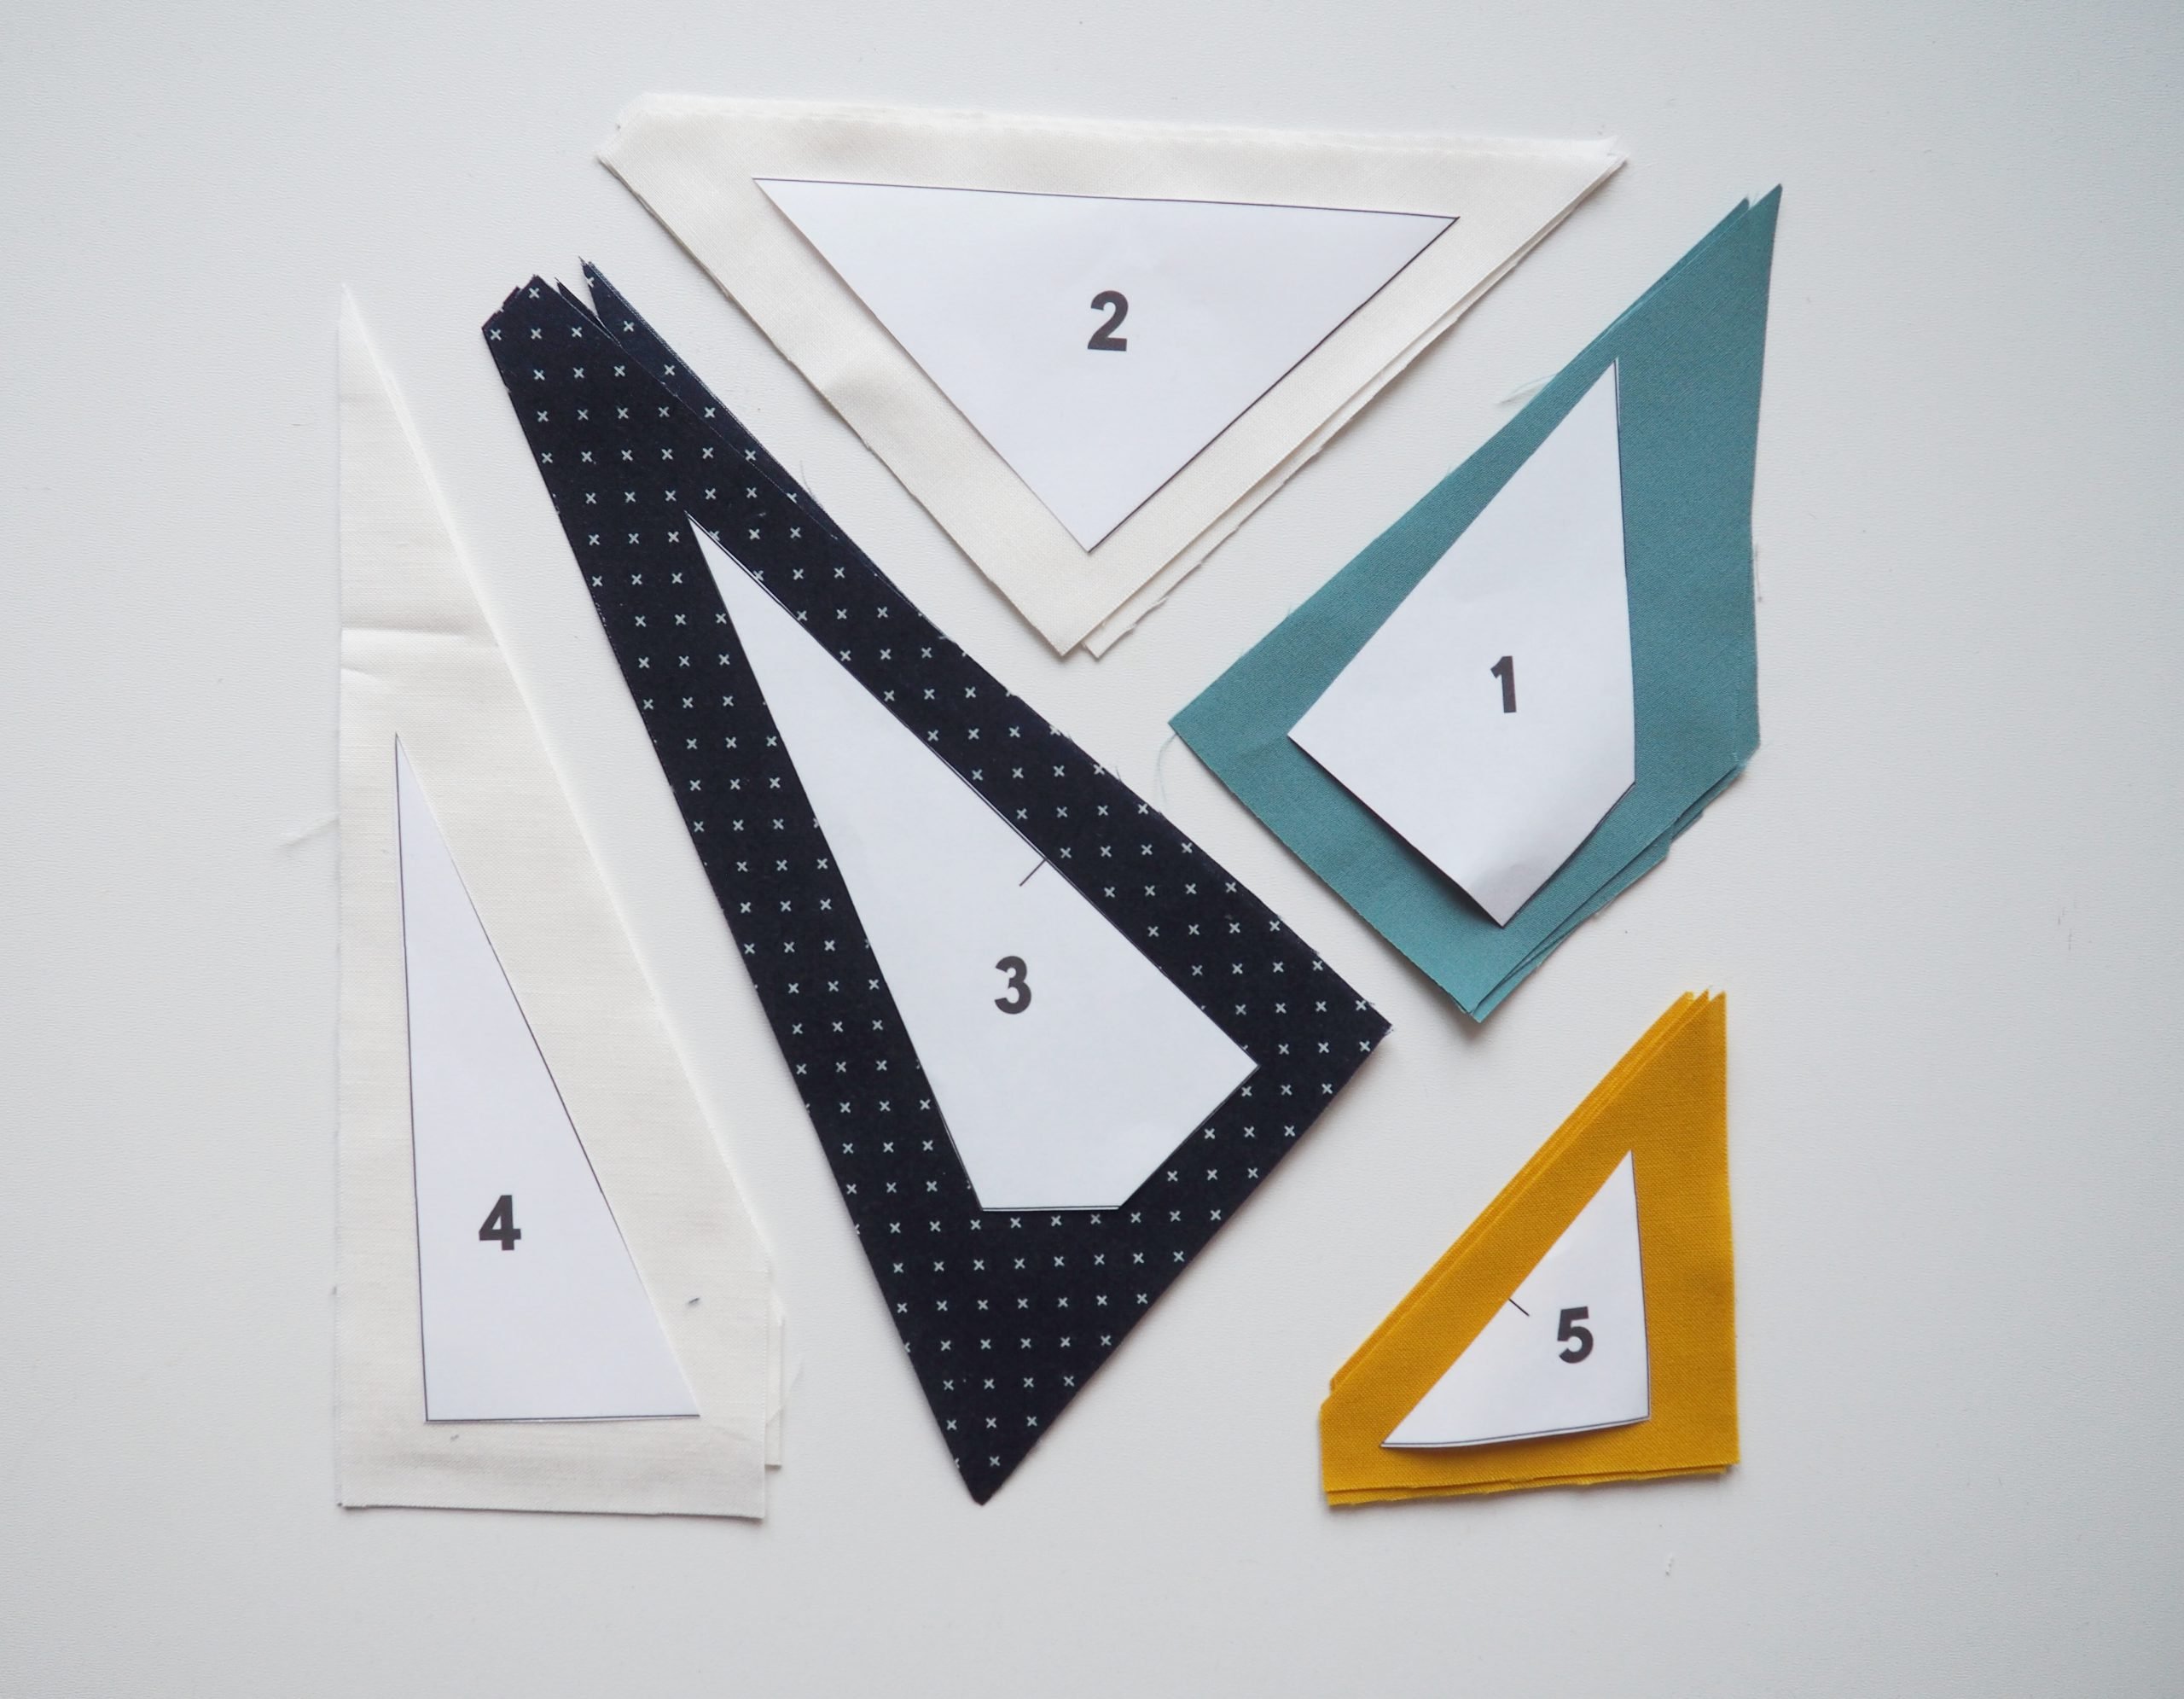
Example of another block
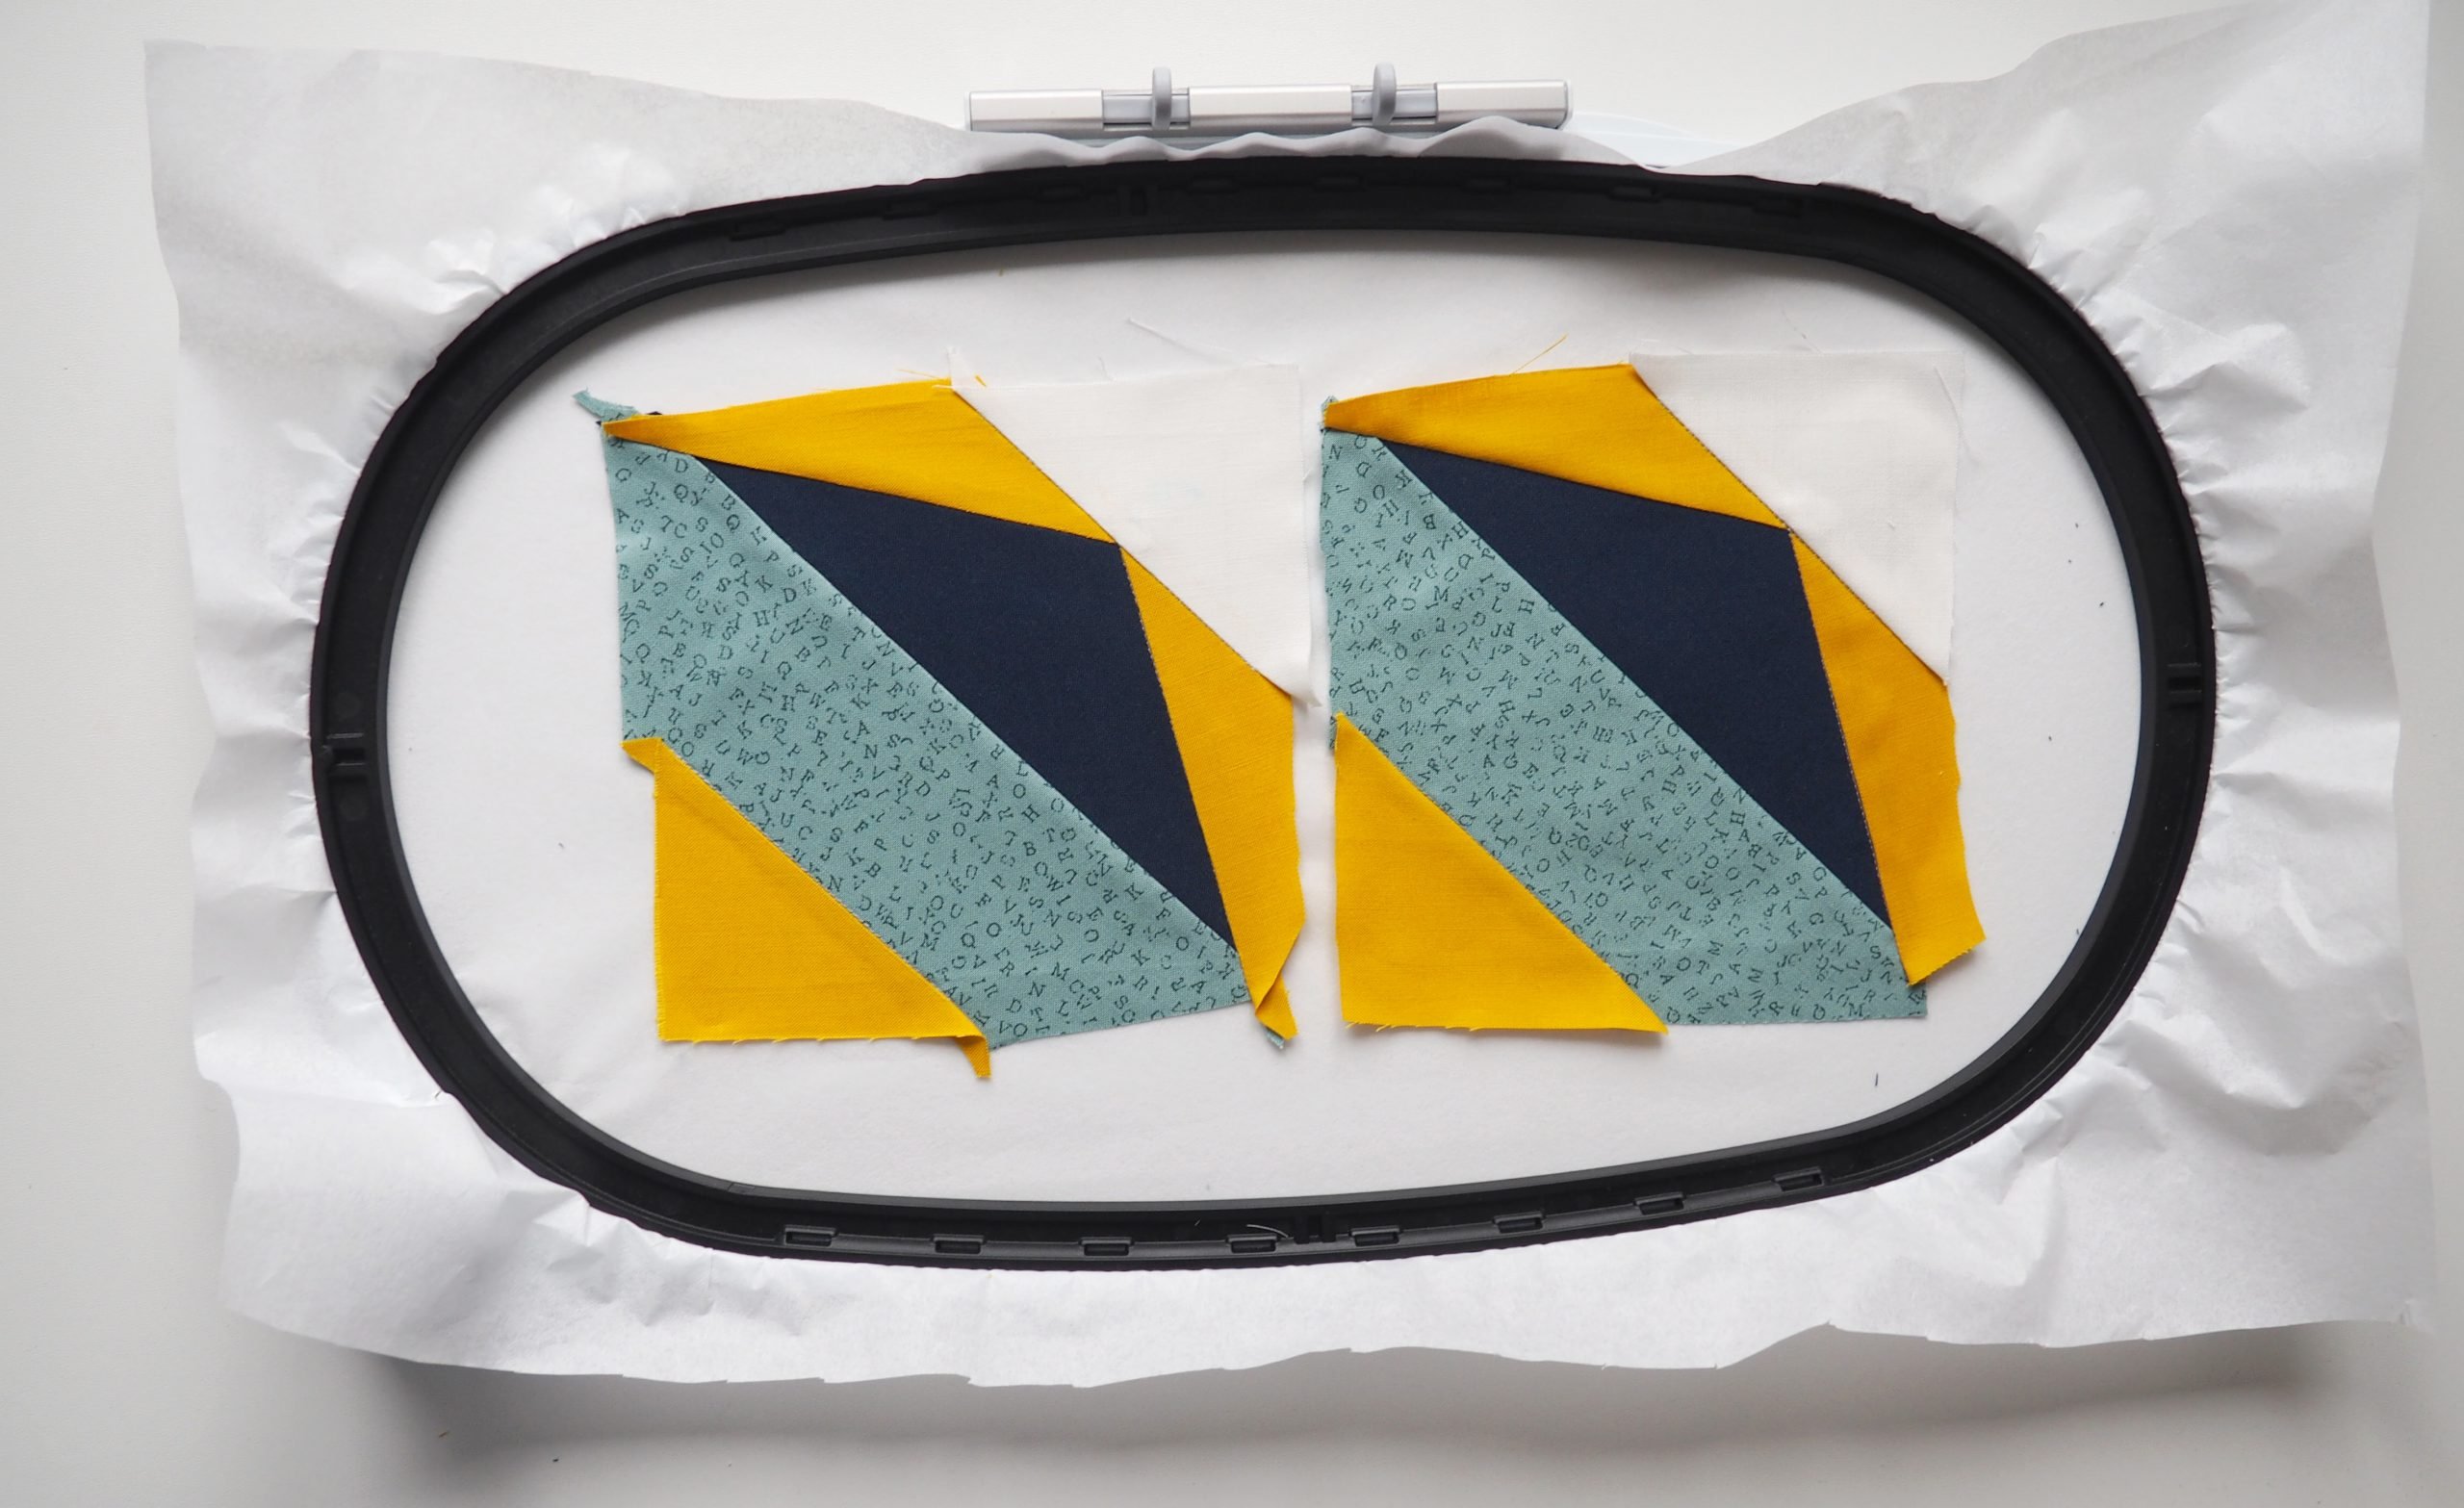
Here you can see the pieces for block no. 3.

With this block, I left out the last embroidery step – sewing around the outside of the square. As you will see later, this makes it much easier for me to remove paper.
It looks like this when embroidered:
Assembling the large 10.5″ block
Cutting out the small 5.5″ blocks
The small 5.5″ blocks must now be cut to a size of exactly 5.5″. To do this, place a block in front of you on the cutting mat with the stabilizer side up.

The outside edge of the square from the first embroidery step (outline of the block) is clearly visible on the back. Cut off the excess fabrics and the stabilizer 1/4″ from the edge using a rotary cutter and an inch ruler.
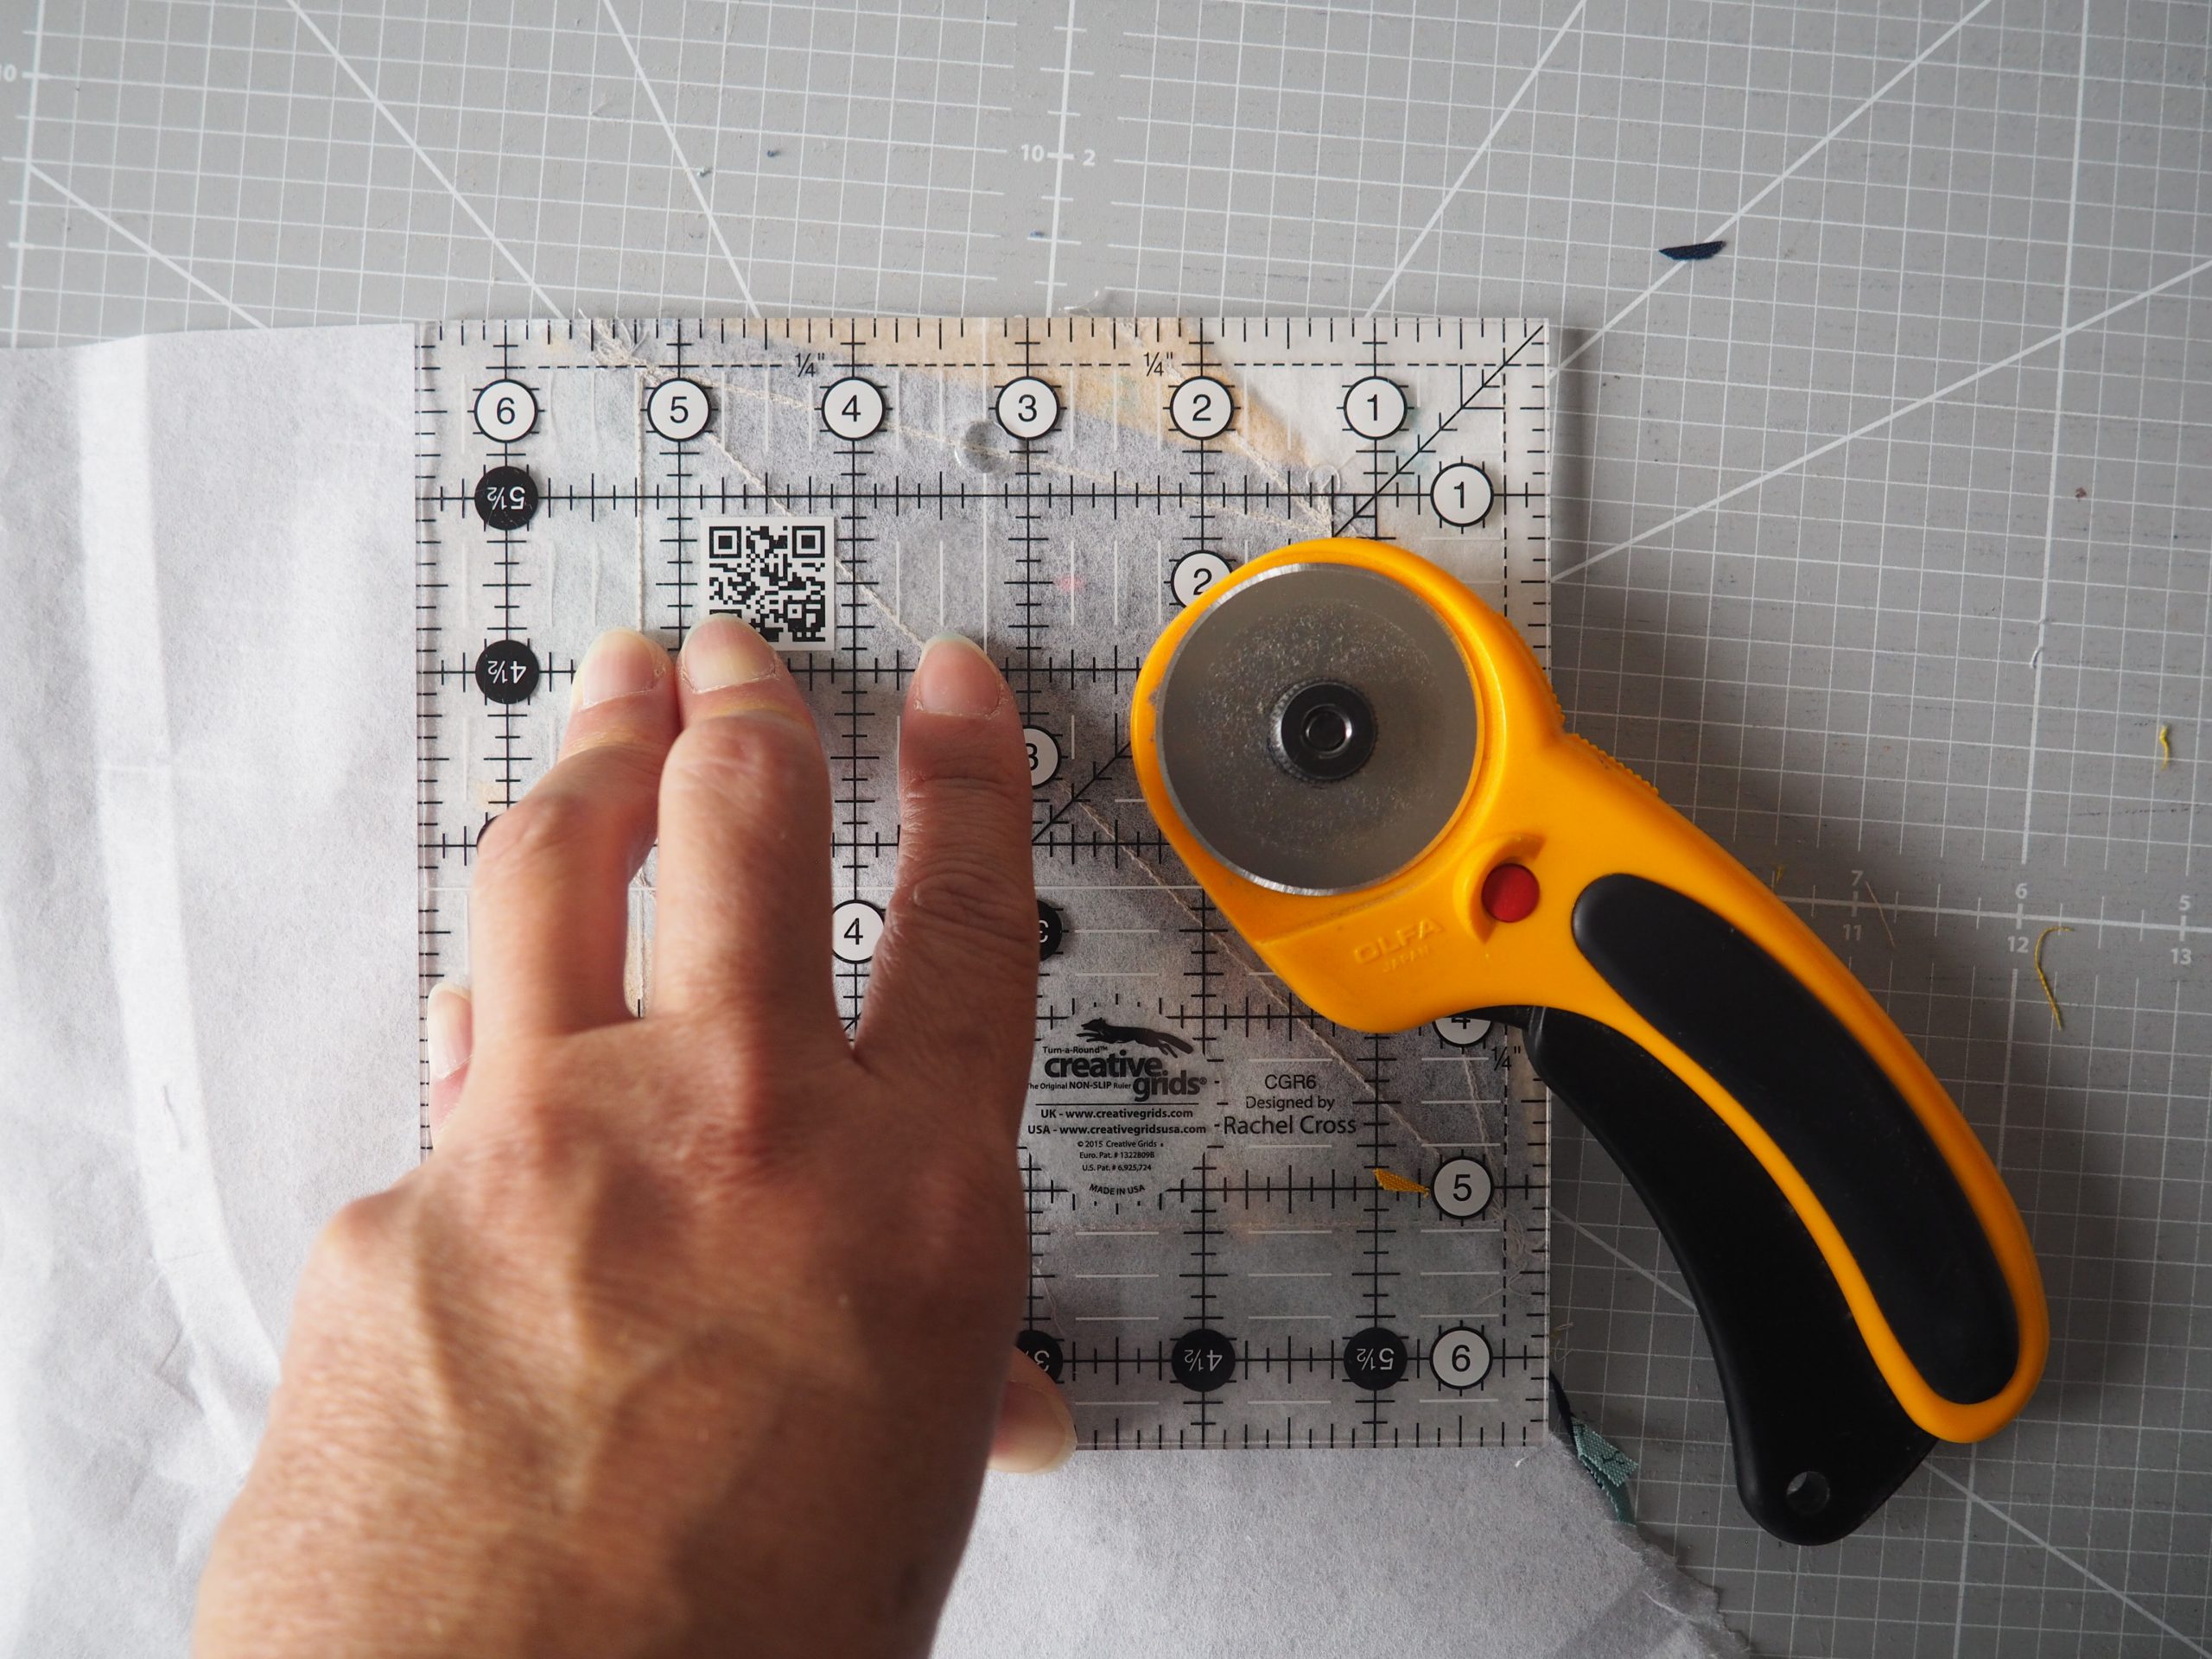
The block should now measure exactly 5.5″ square.

The block now has a nice shape from the right side/front.

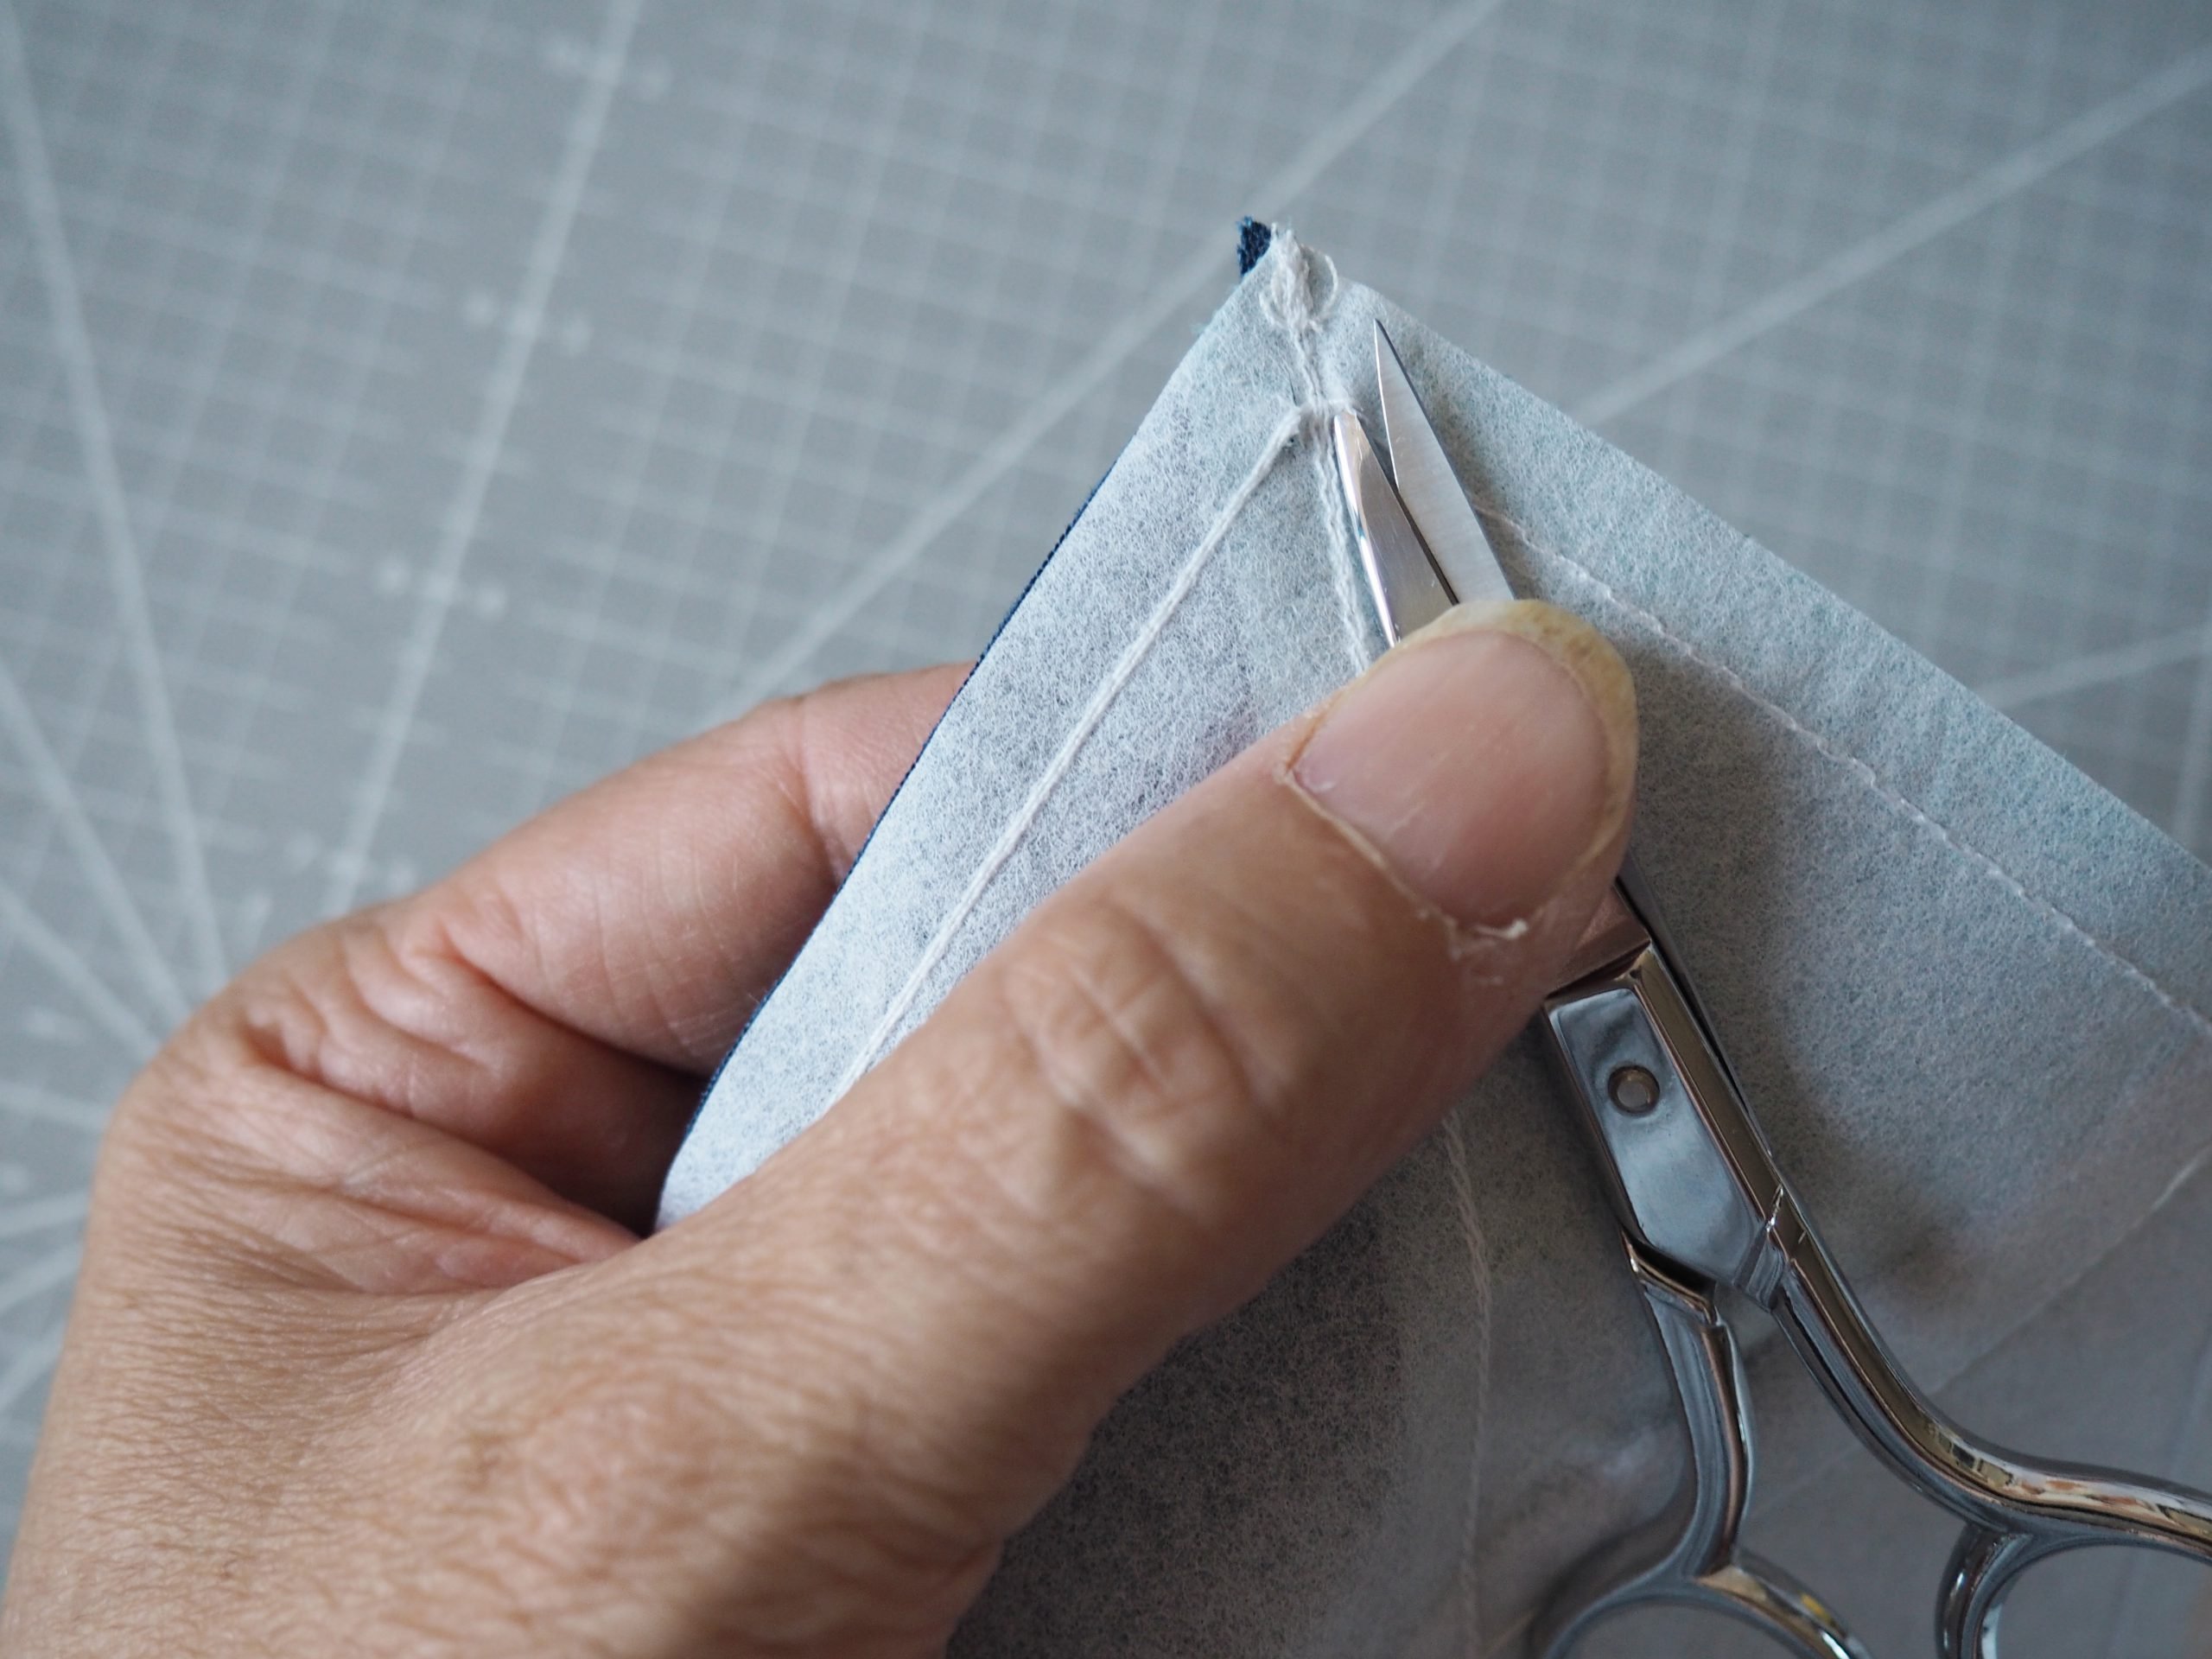
Removing the stabilizer
The next step is to remove the stabilizer. For this, I take a sharp pair of scissors and cut a stitch in the seams from the first embroidery step at the point where they cross other seams. This allows the stabilizer pieces to be easily detached without distorting the block too much.
Sewing the individual blocks together
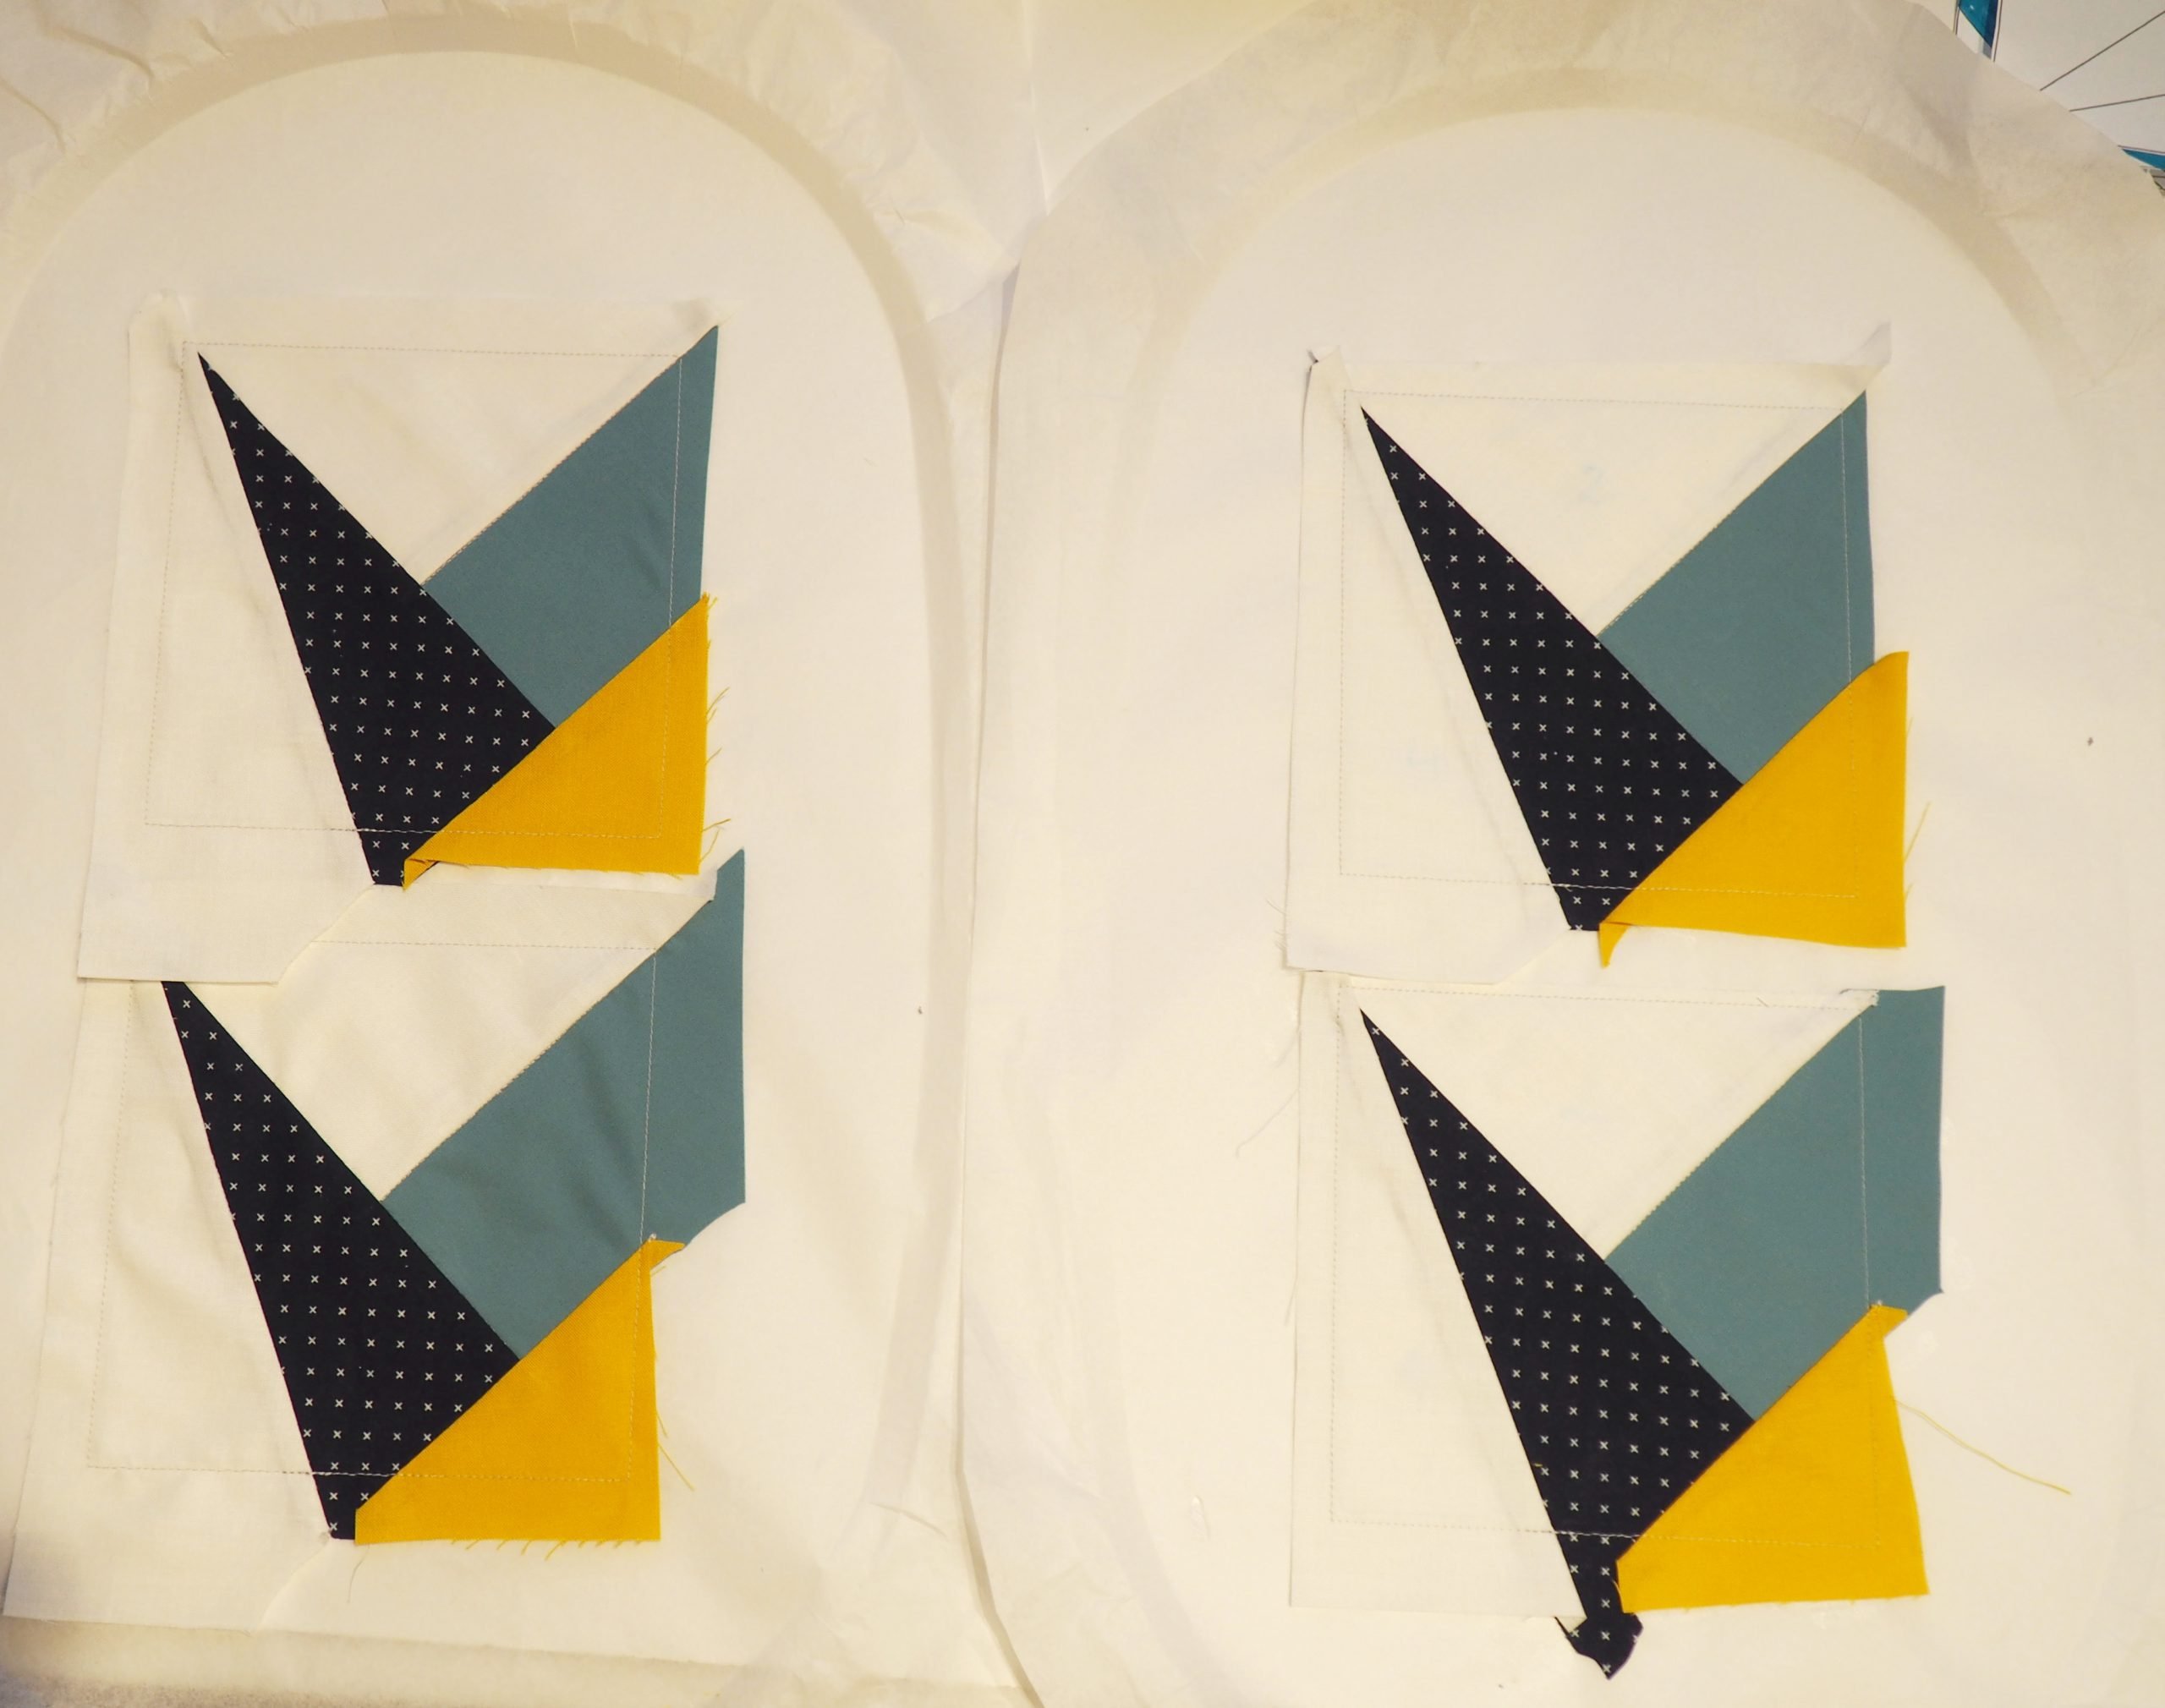
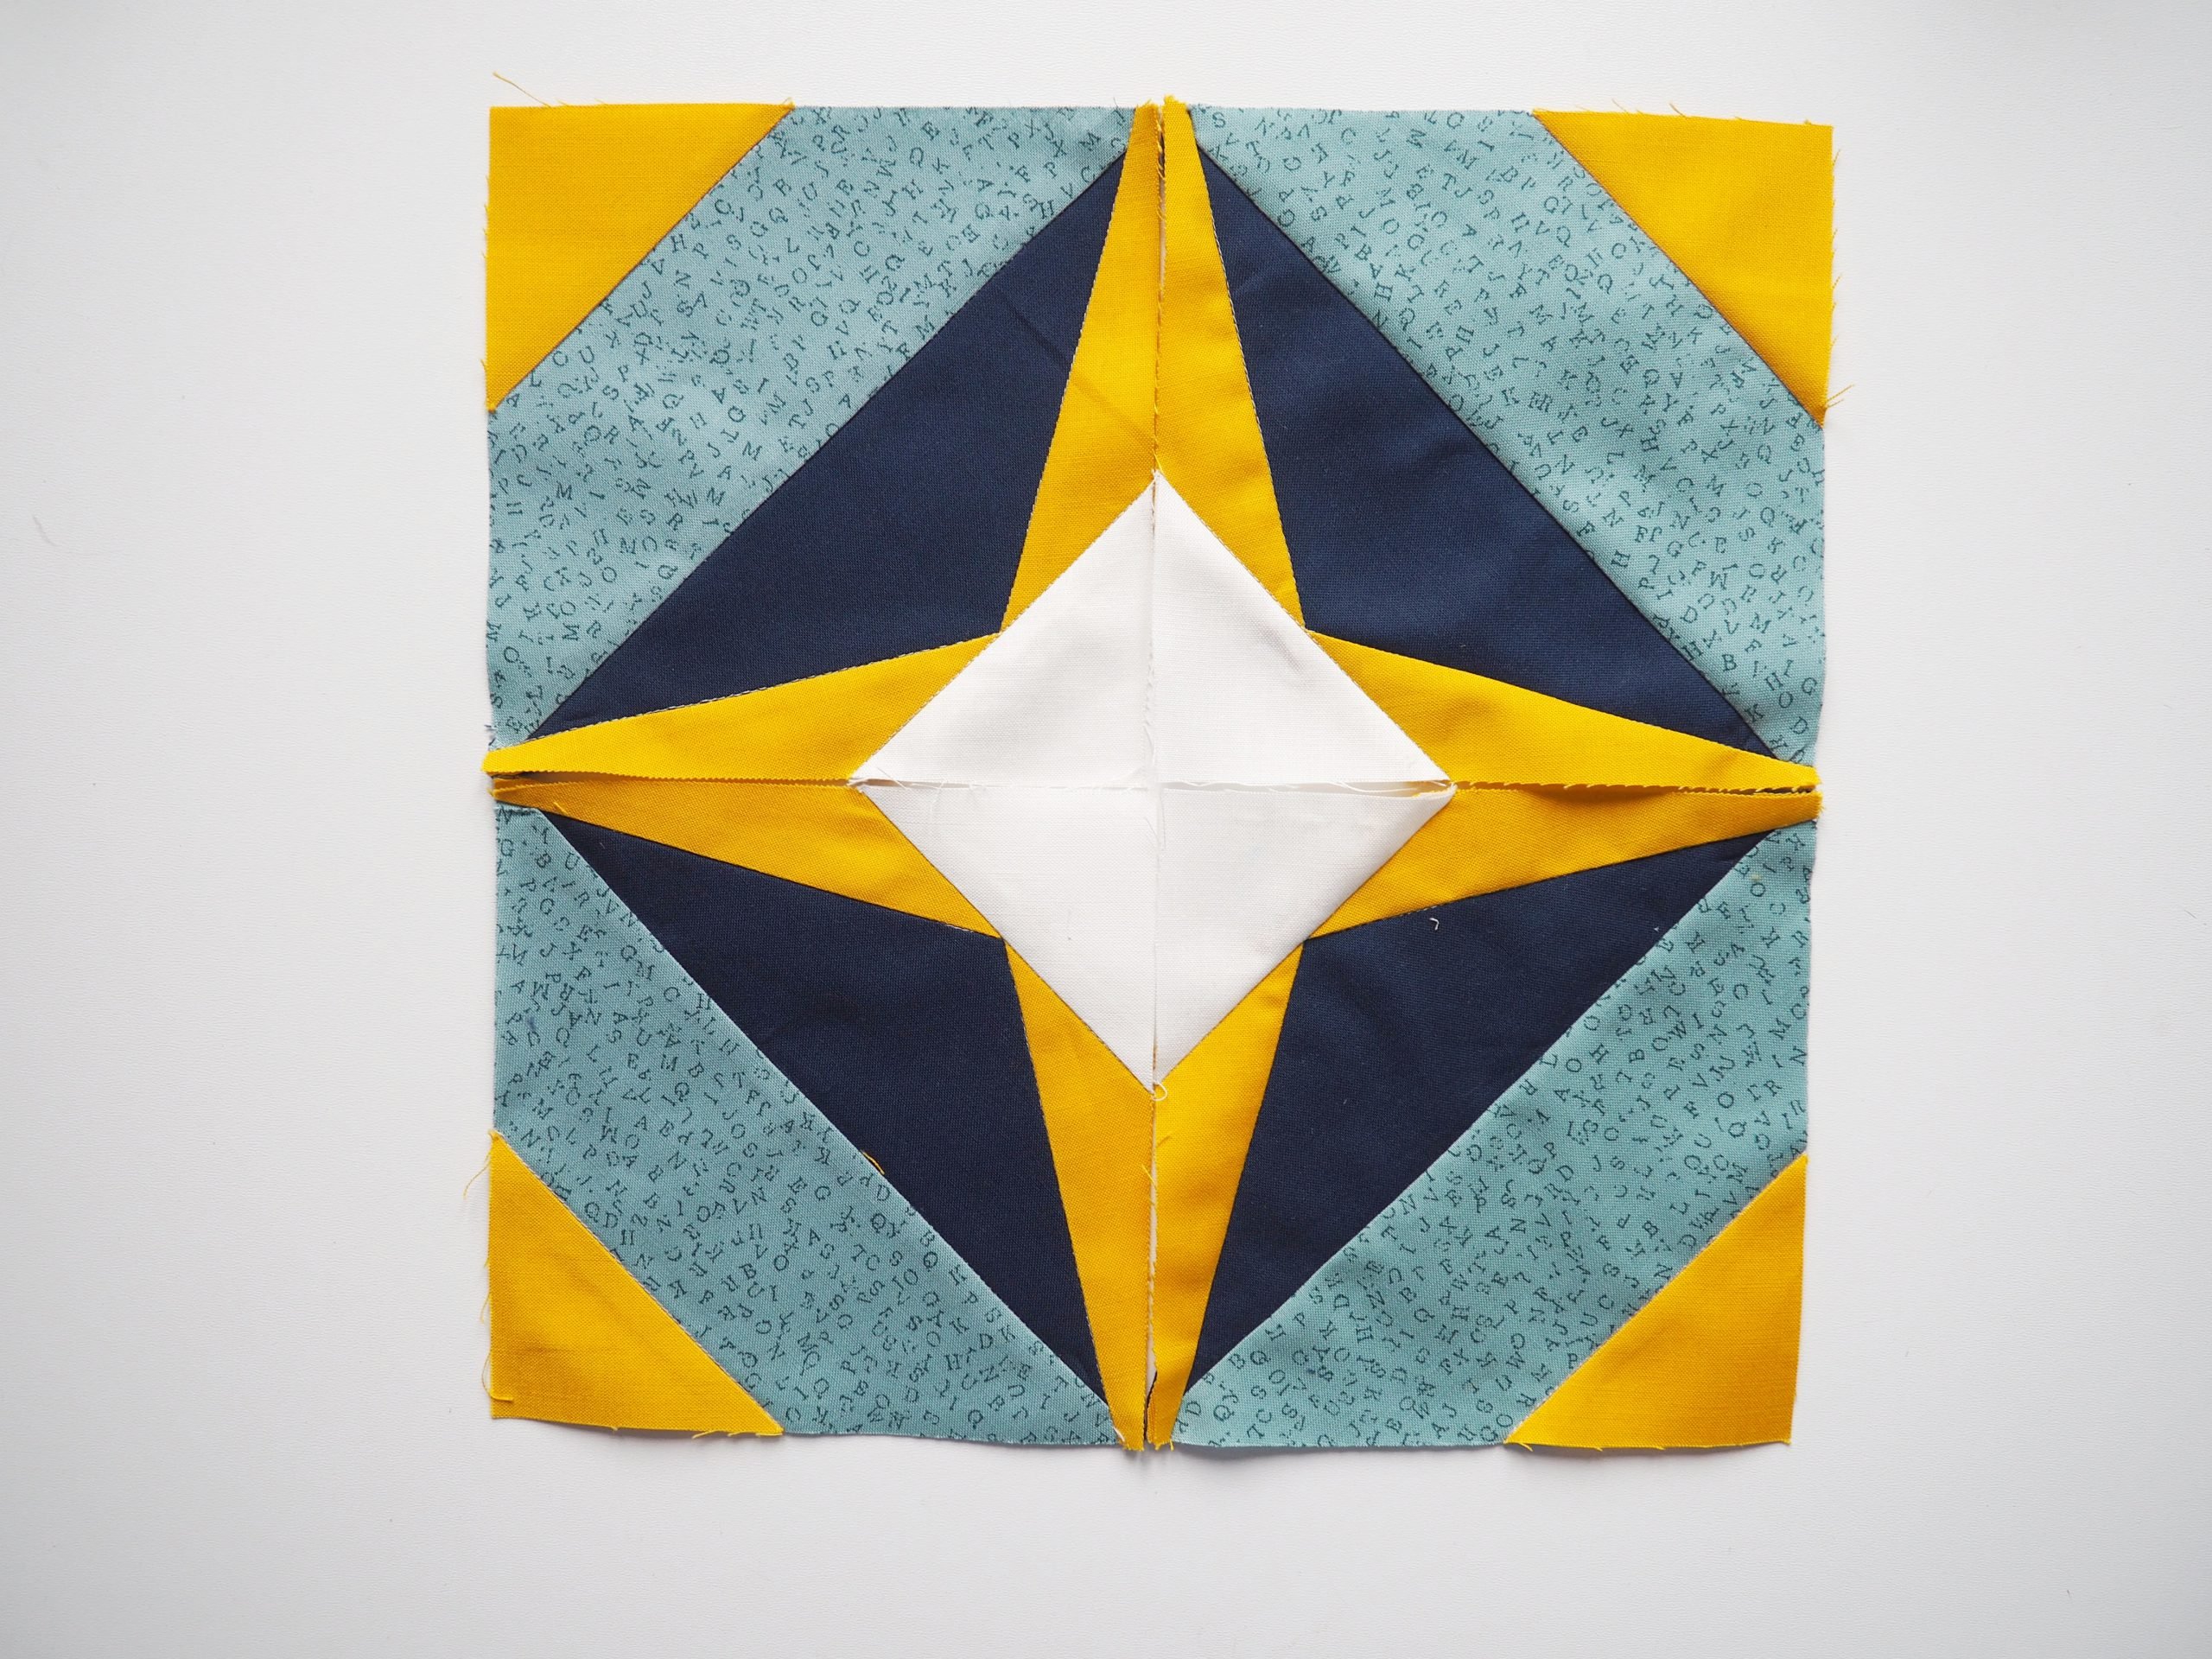
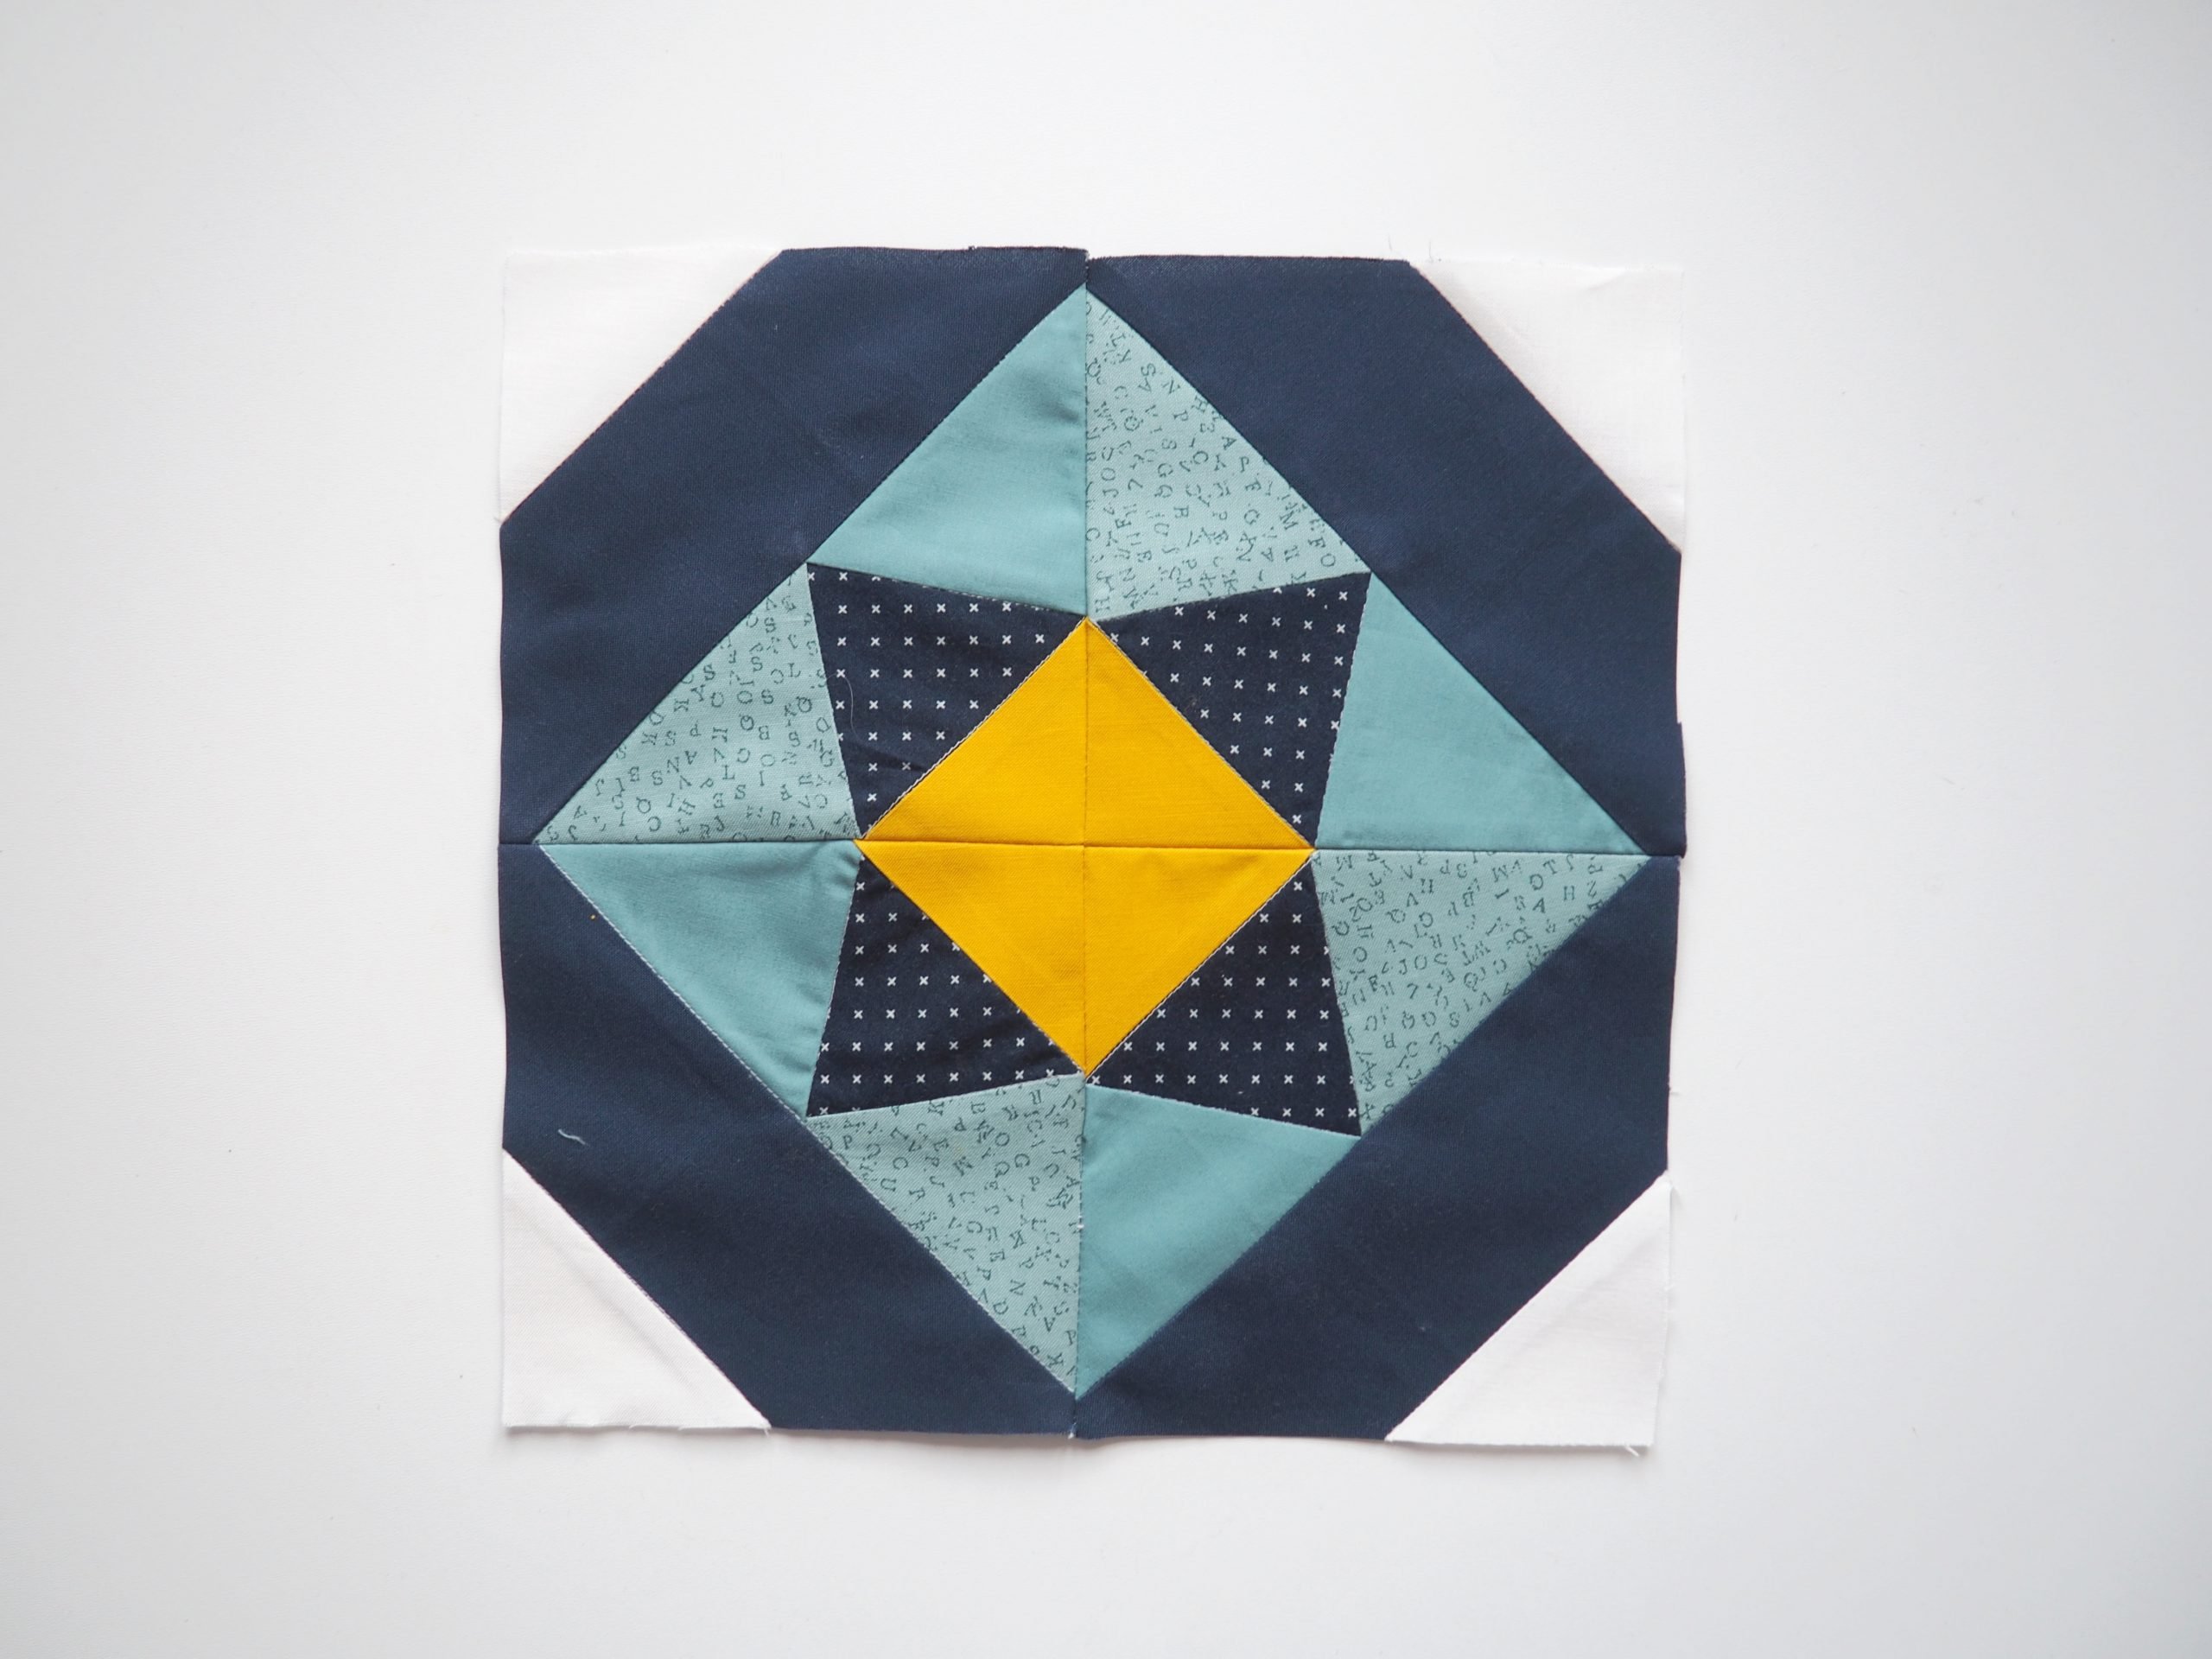
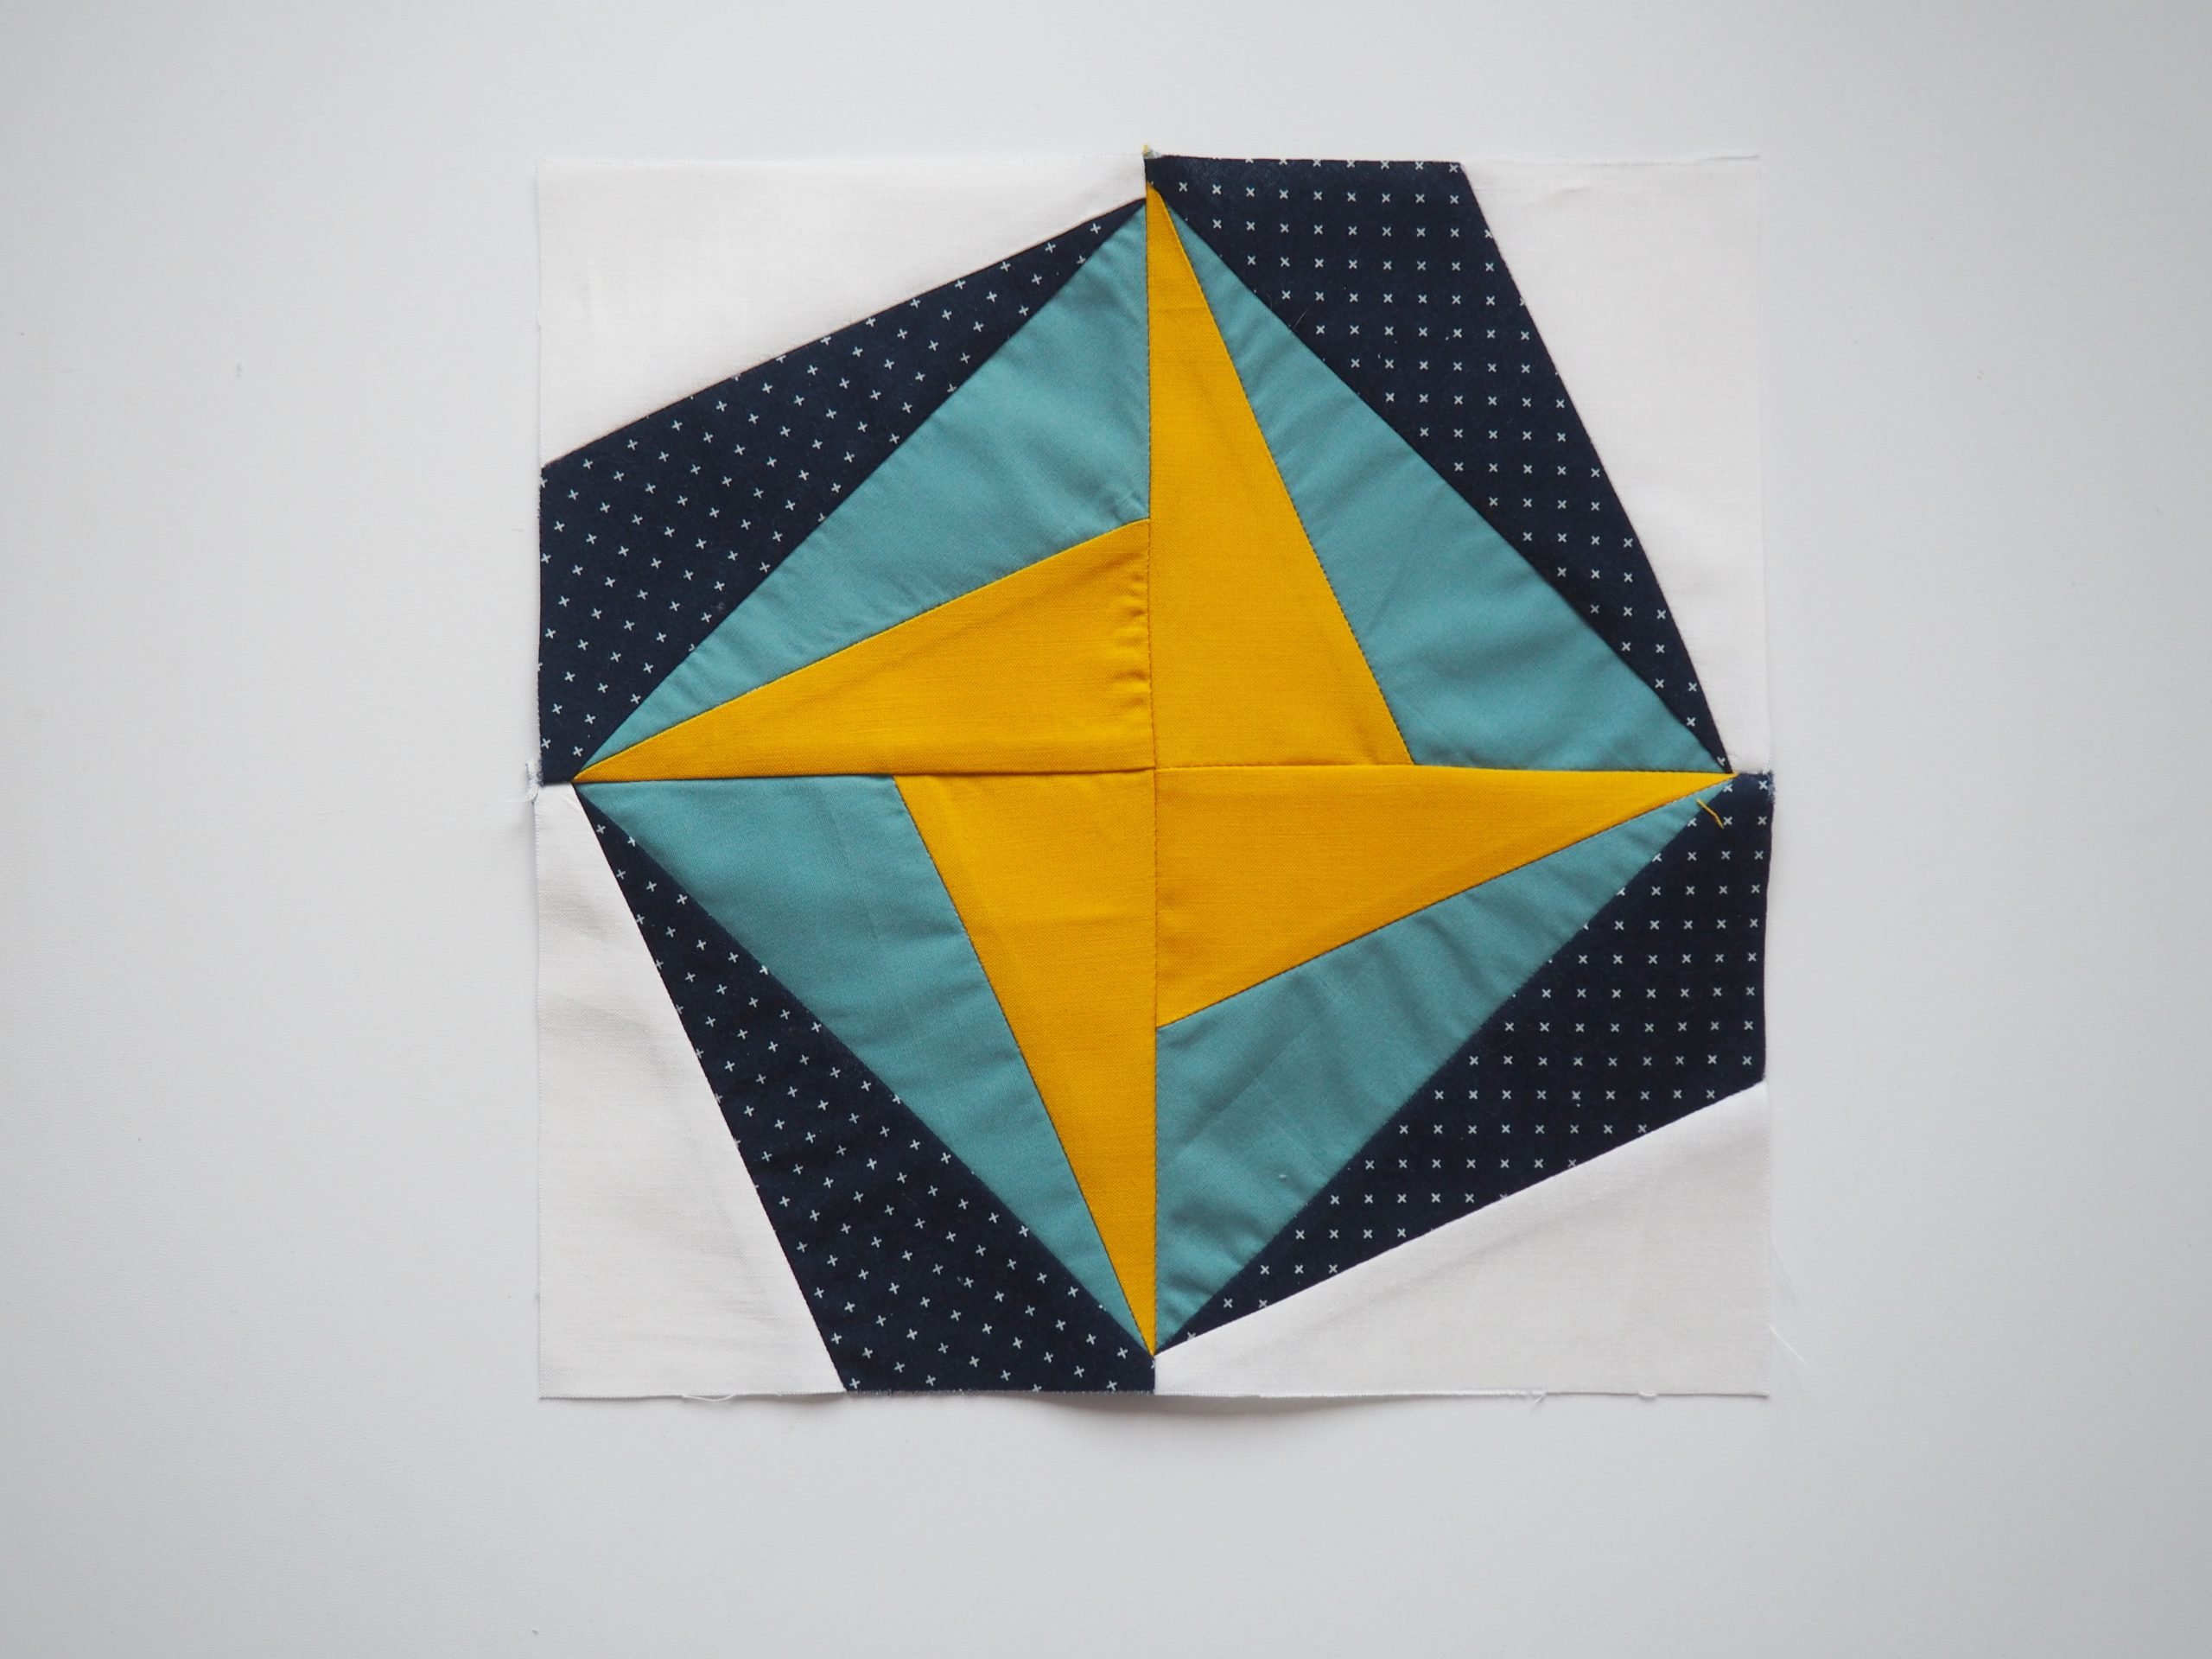
Here, I have arranged four blocks of block no. 3 in different ways to show how different a design can look using the same blocks. One with the yellow corners on the outside –
and one with the yellow corners on the inside.
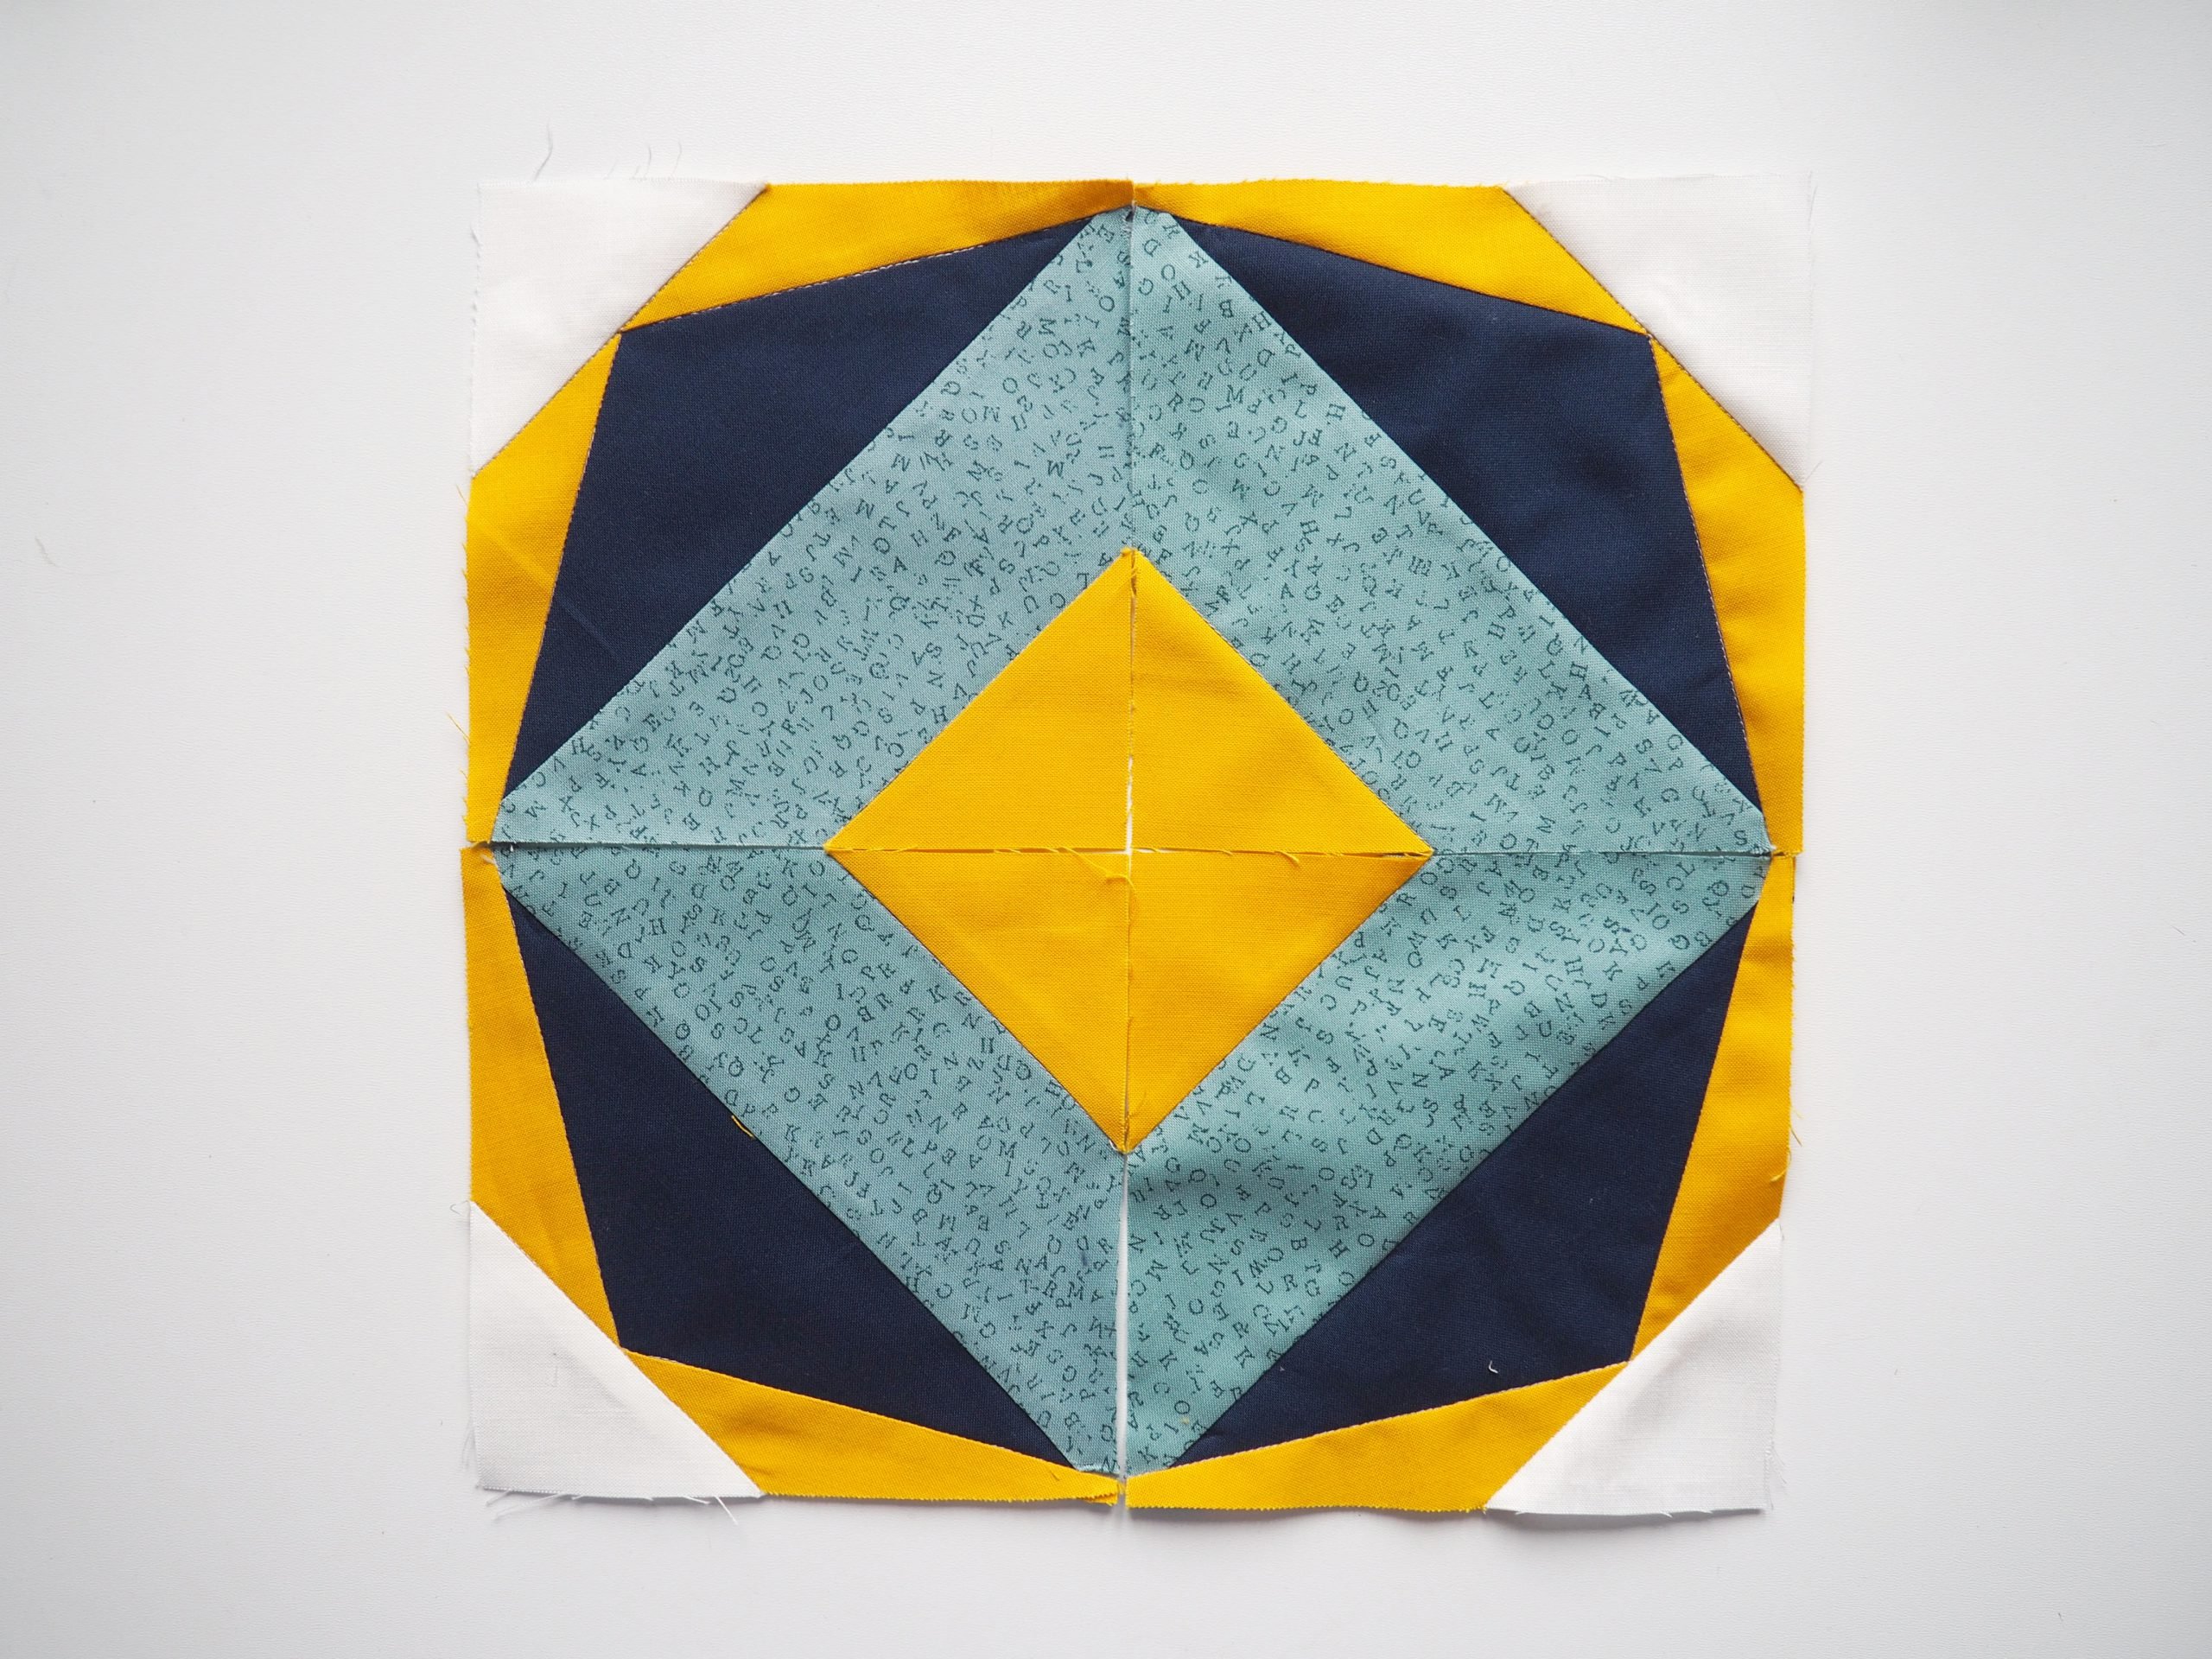
Arrange the four individual blocks as you like or as you planned in advance. When sewing them together, it is important to make sure that the seams at the edges meet up exactly. I like to use a pin to help with this, which I insert precisely into the relevant seams, enabling me to line them up better. The seam allowance is 1/4″.
Depending on your preference, iron the seams apart or to one side. A good tool to help you iron the seams flat is a tailor’s clapper.

A selection of the different blocks
I sewed five different blocks for my table runner. When choosing the colors of the fabrics, I chose the background color of the runner for the areas on the outside.
Block no. 1
Block no. 2
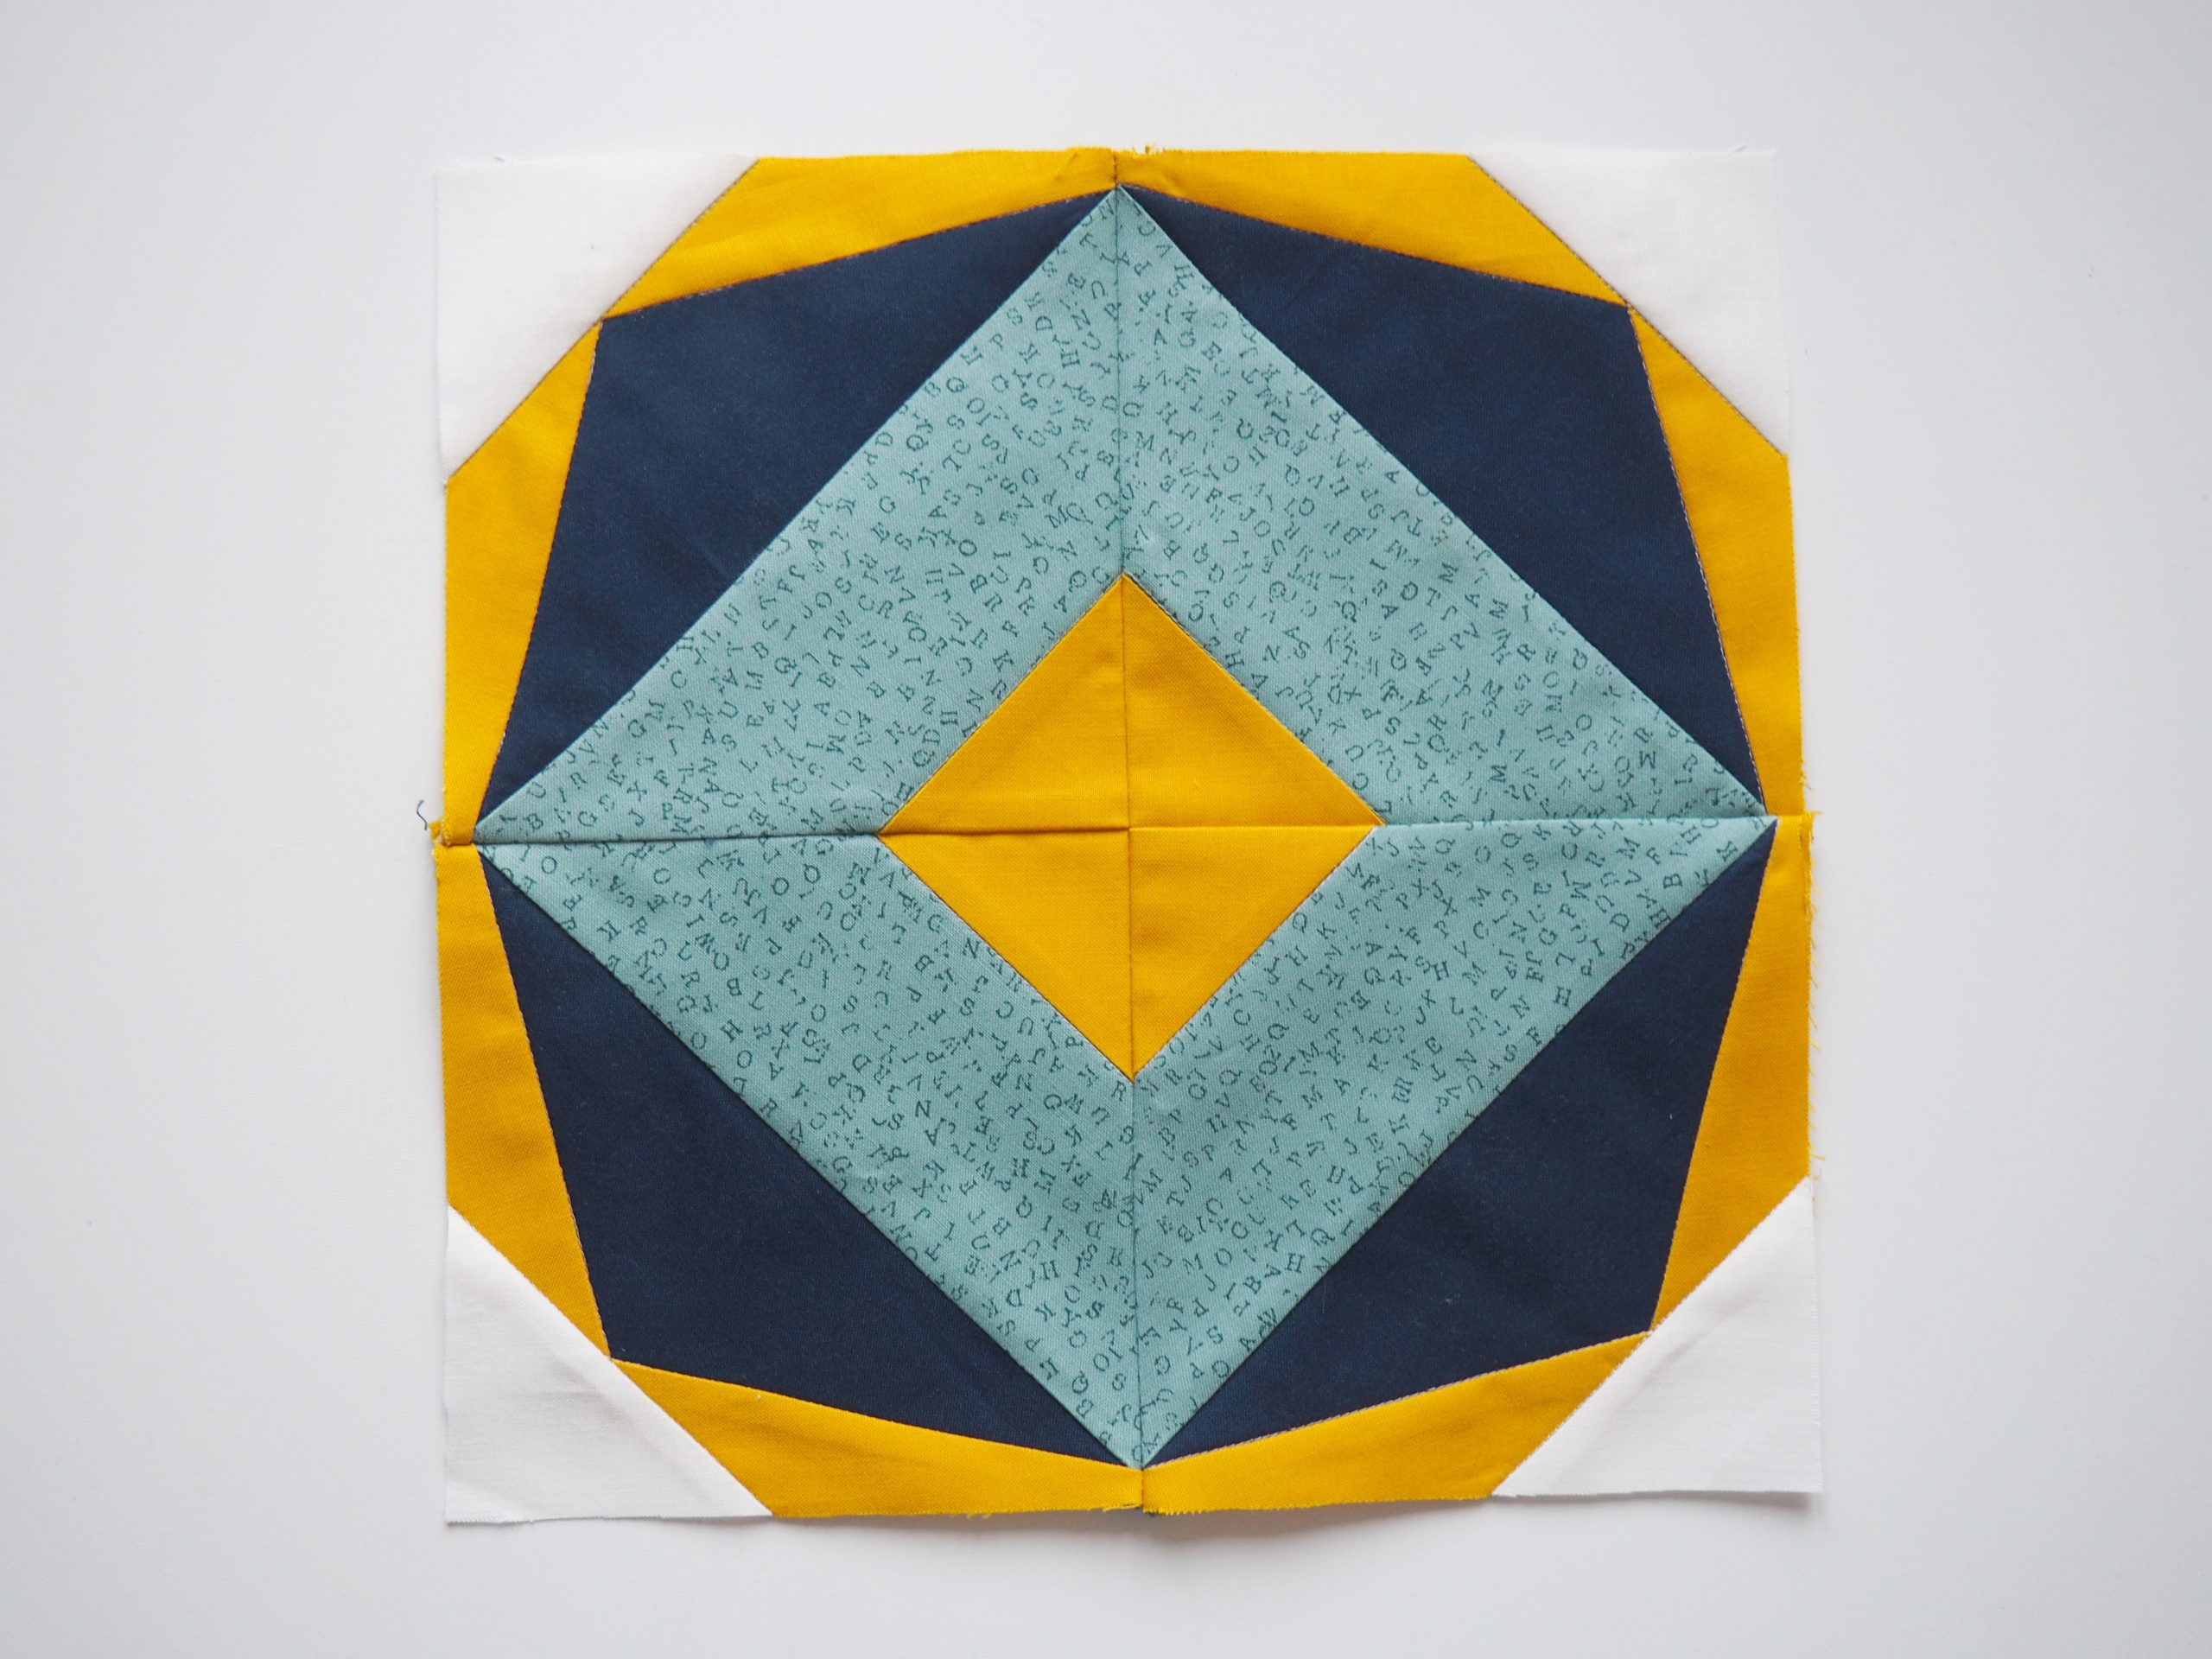
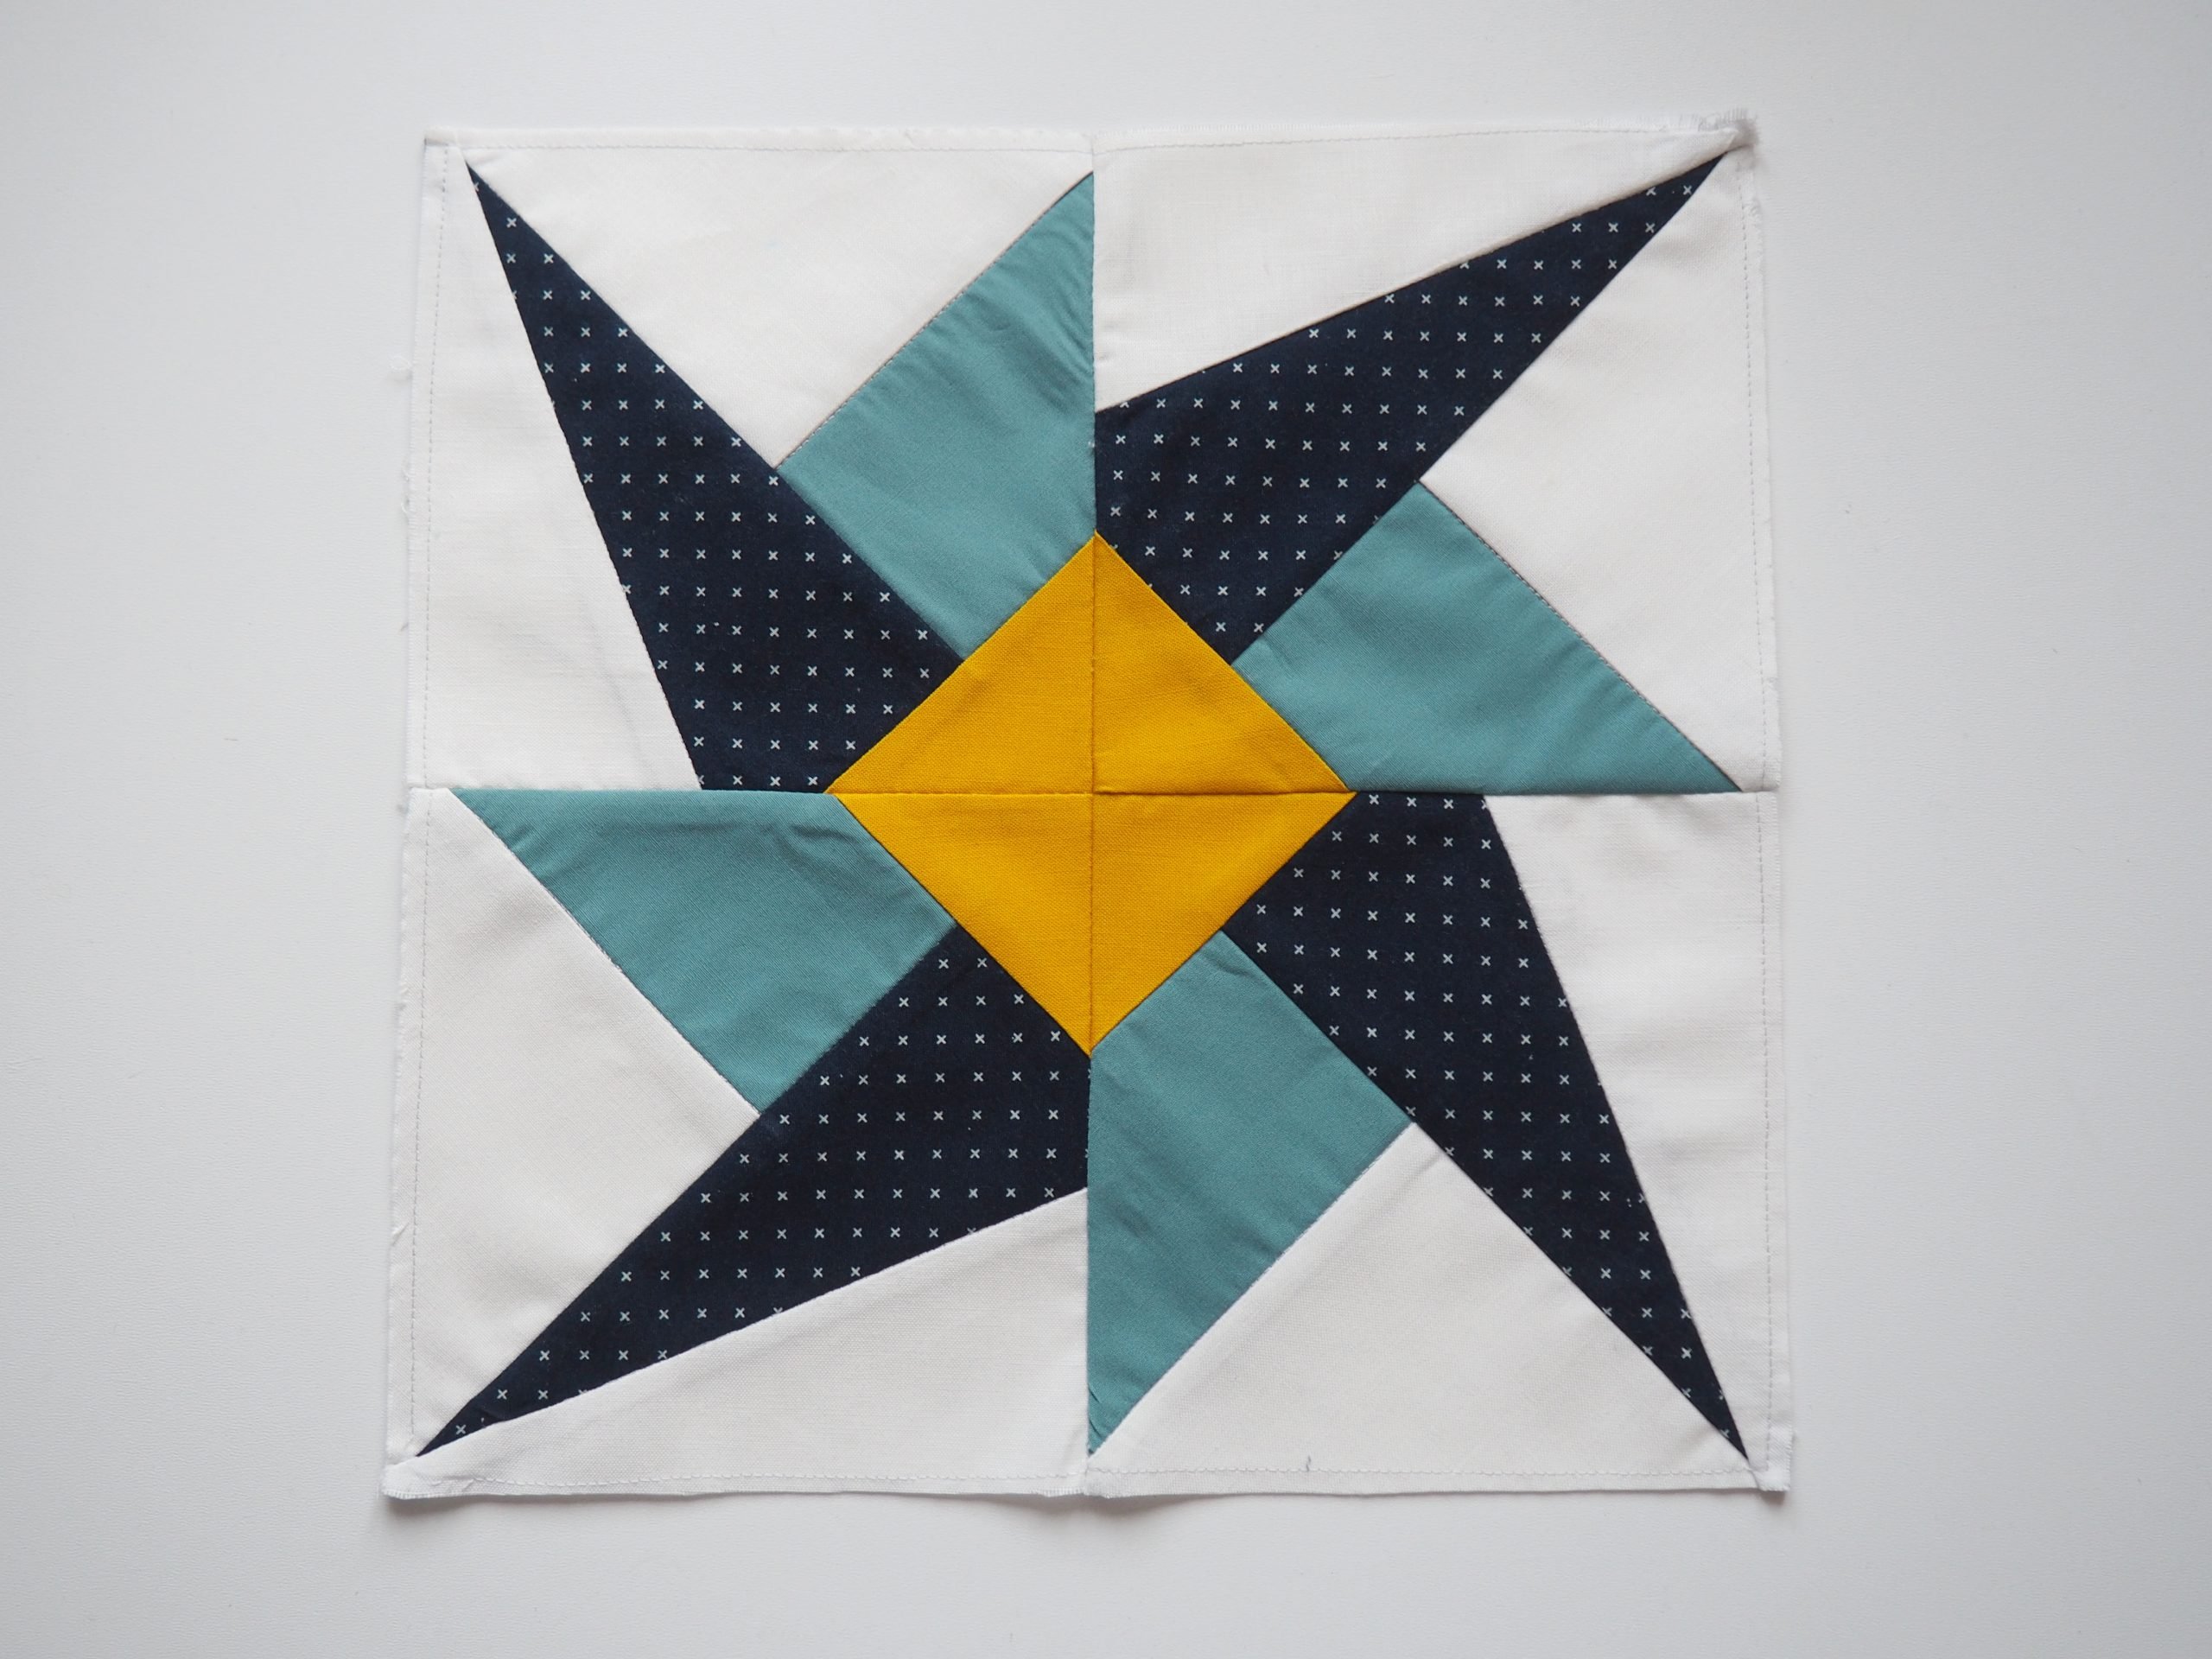
Block no. 3

Block no. 4
Block no 6
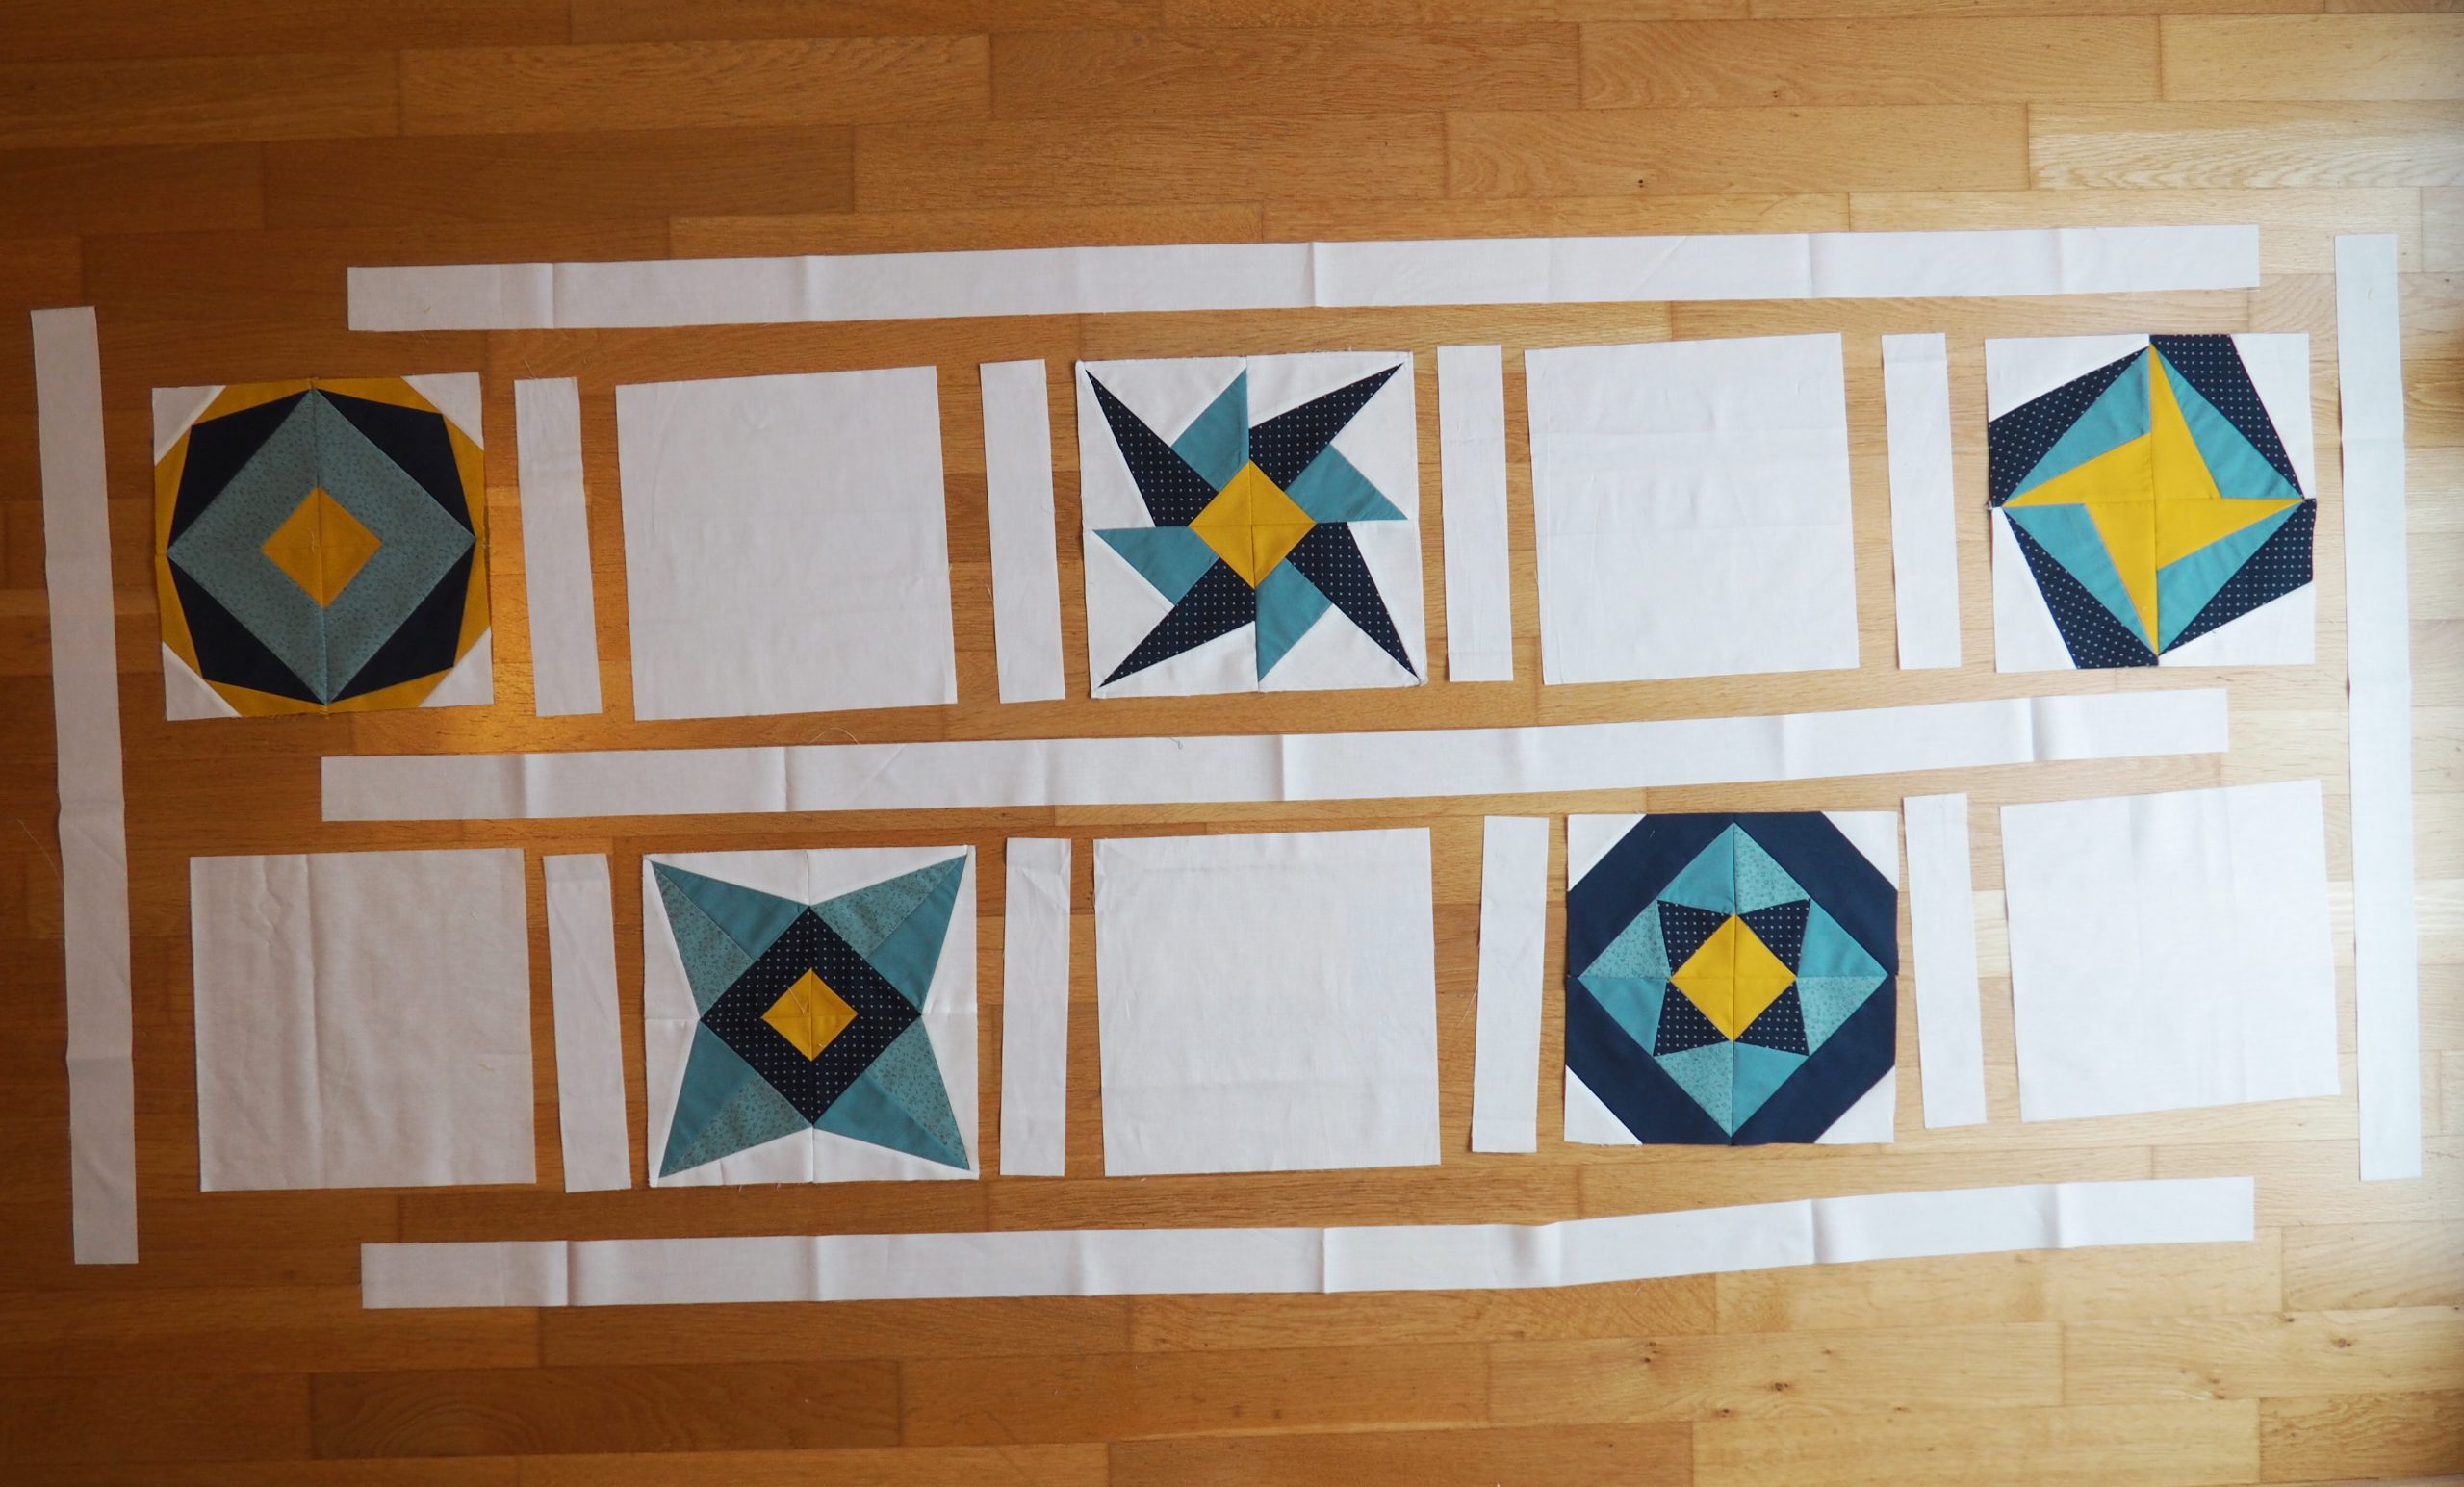
Sewing a table runner out of the patchwork blocks
I joined these five blocks to five more squares and intermediate strips in the background color to form a runner and then quilted them in the embroidery hoop.
If you then want to quilt these blocks in the embroidery hoop as well, be sure to make the blocks “larger” by sewing on fabric so that they can be hooped in an embroidery hoop.
For this, I cut out strips 2″ wide and sewed the runner together according to the following pattern.
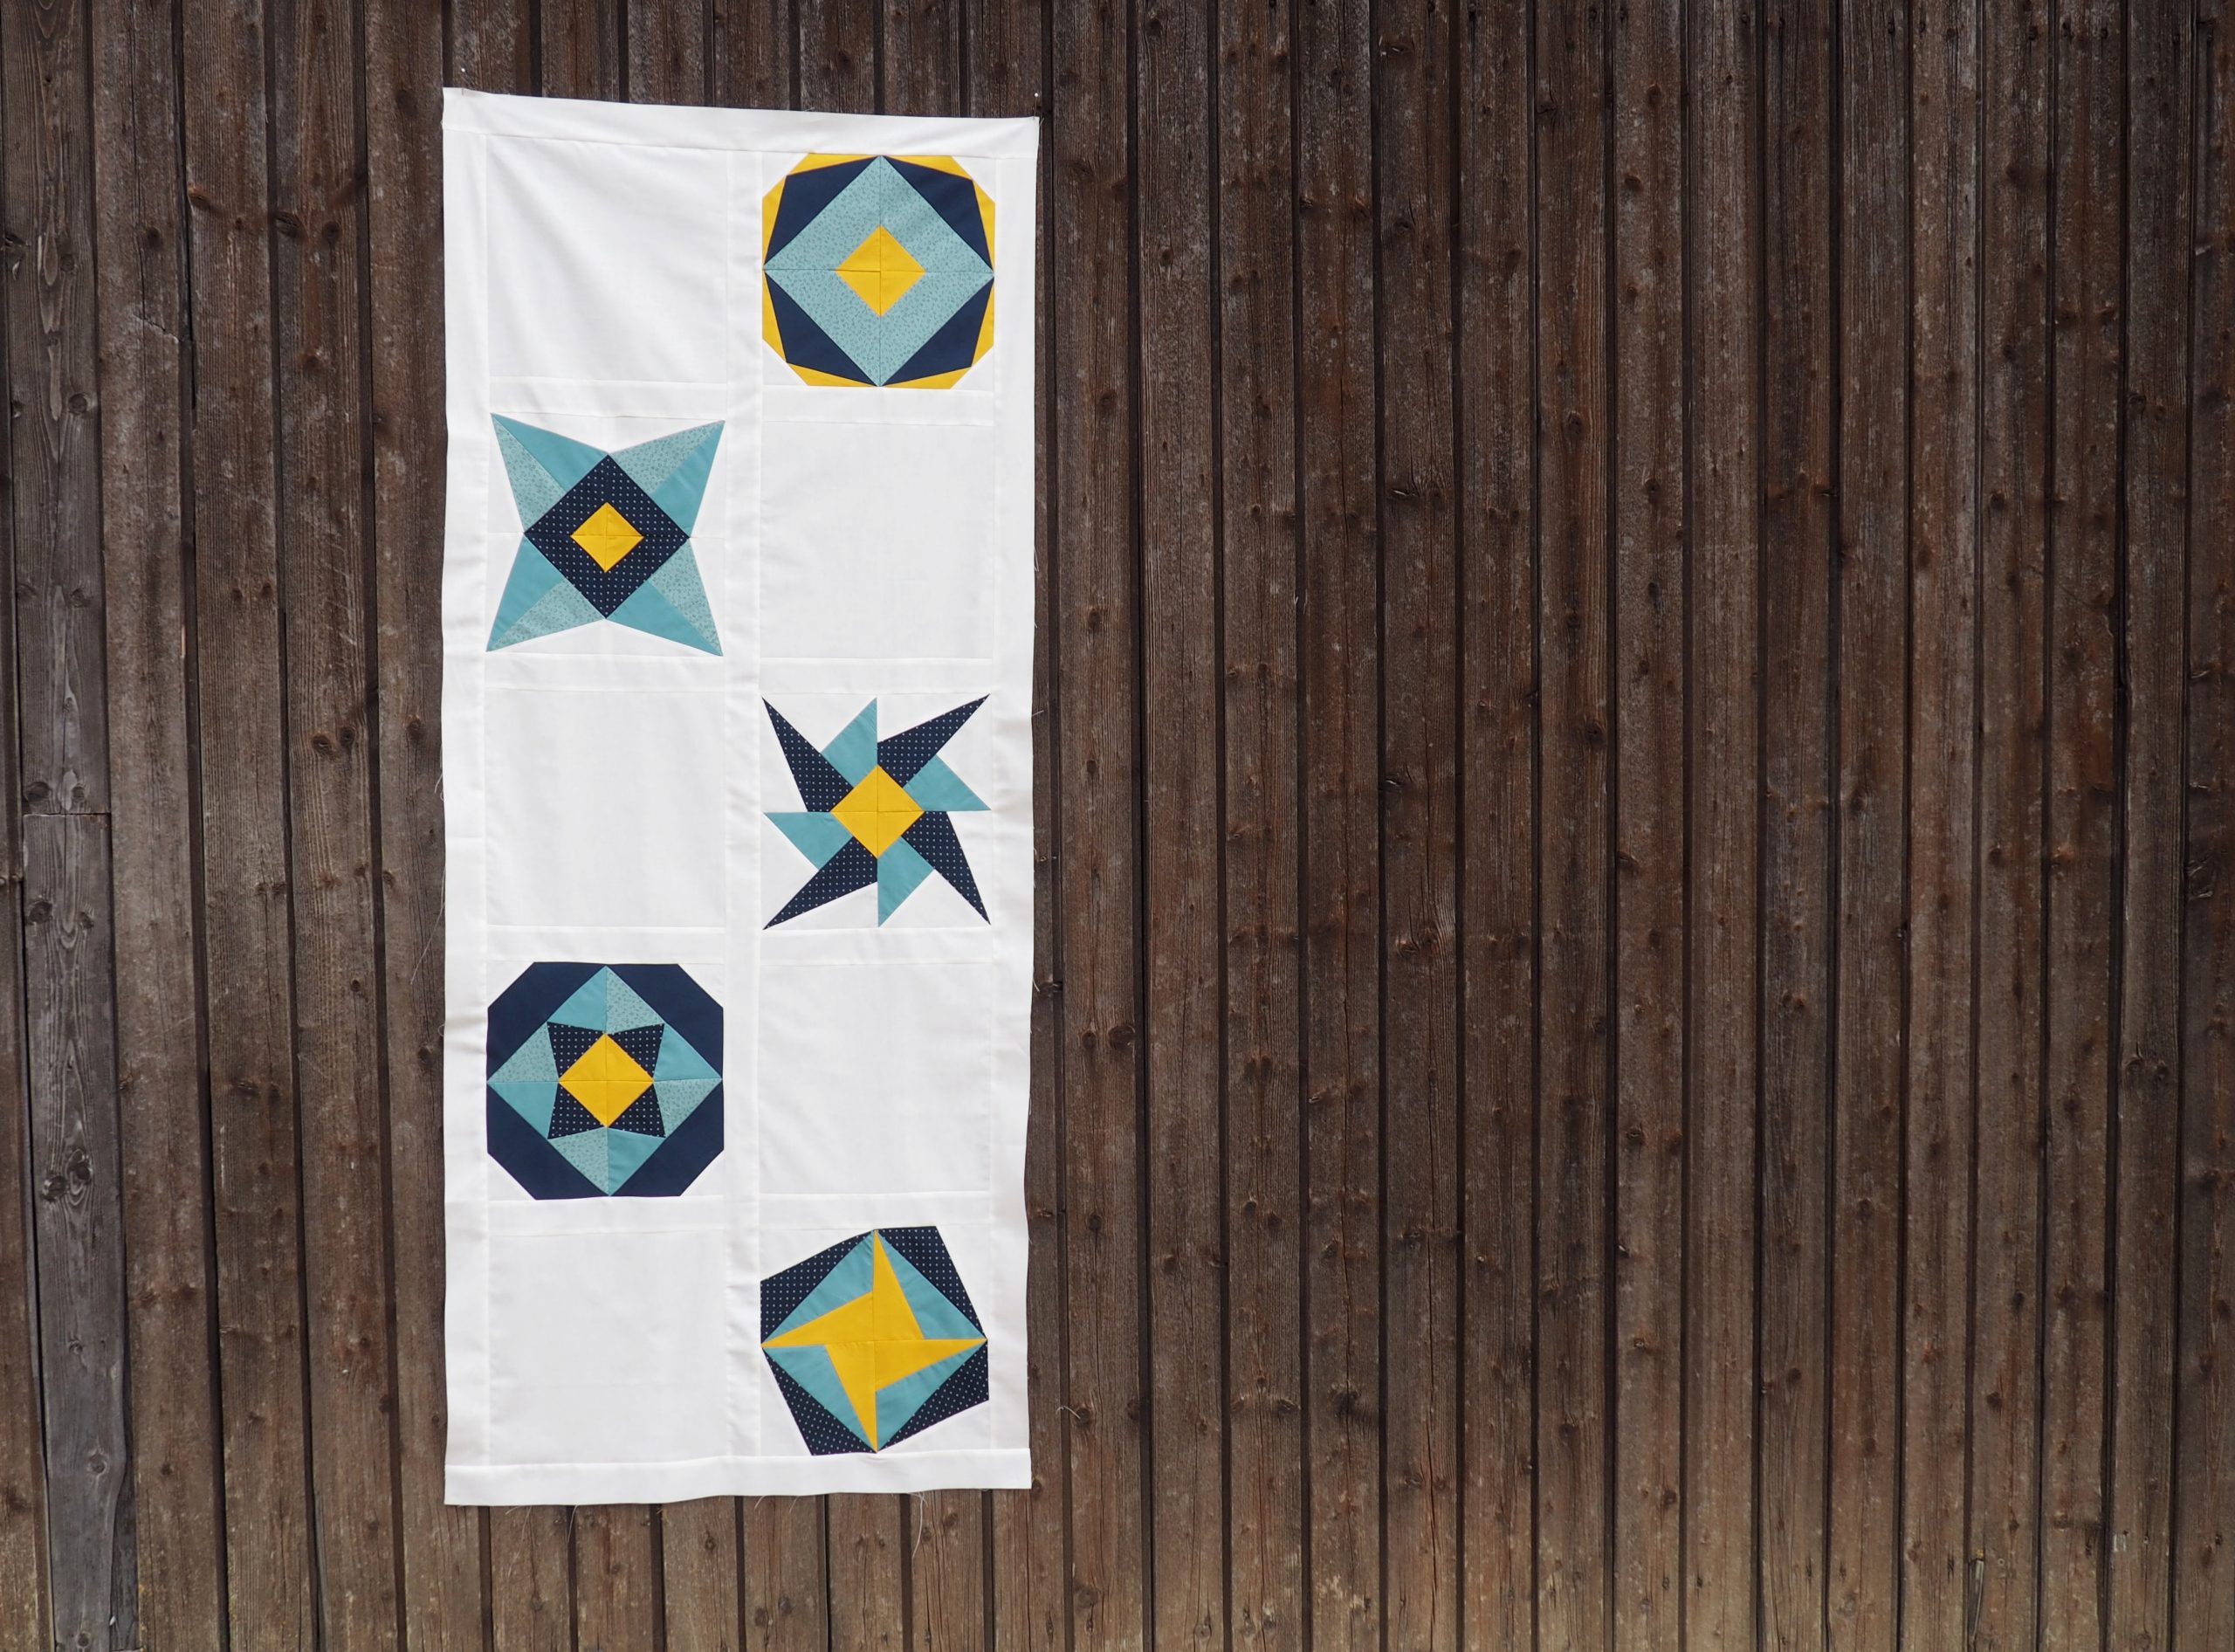
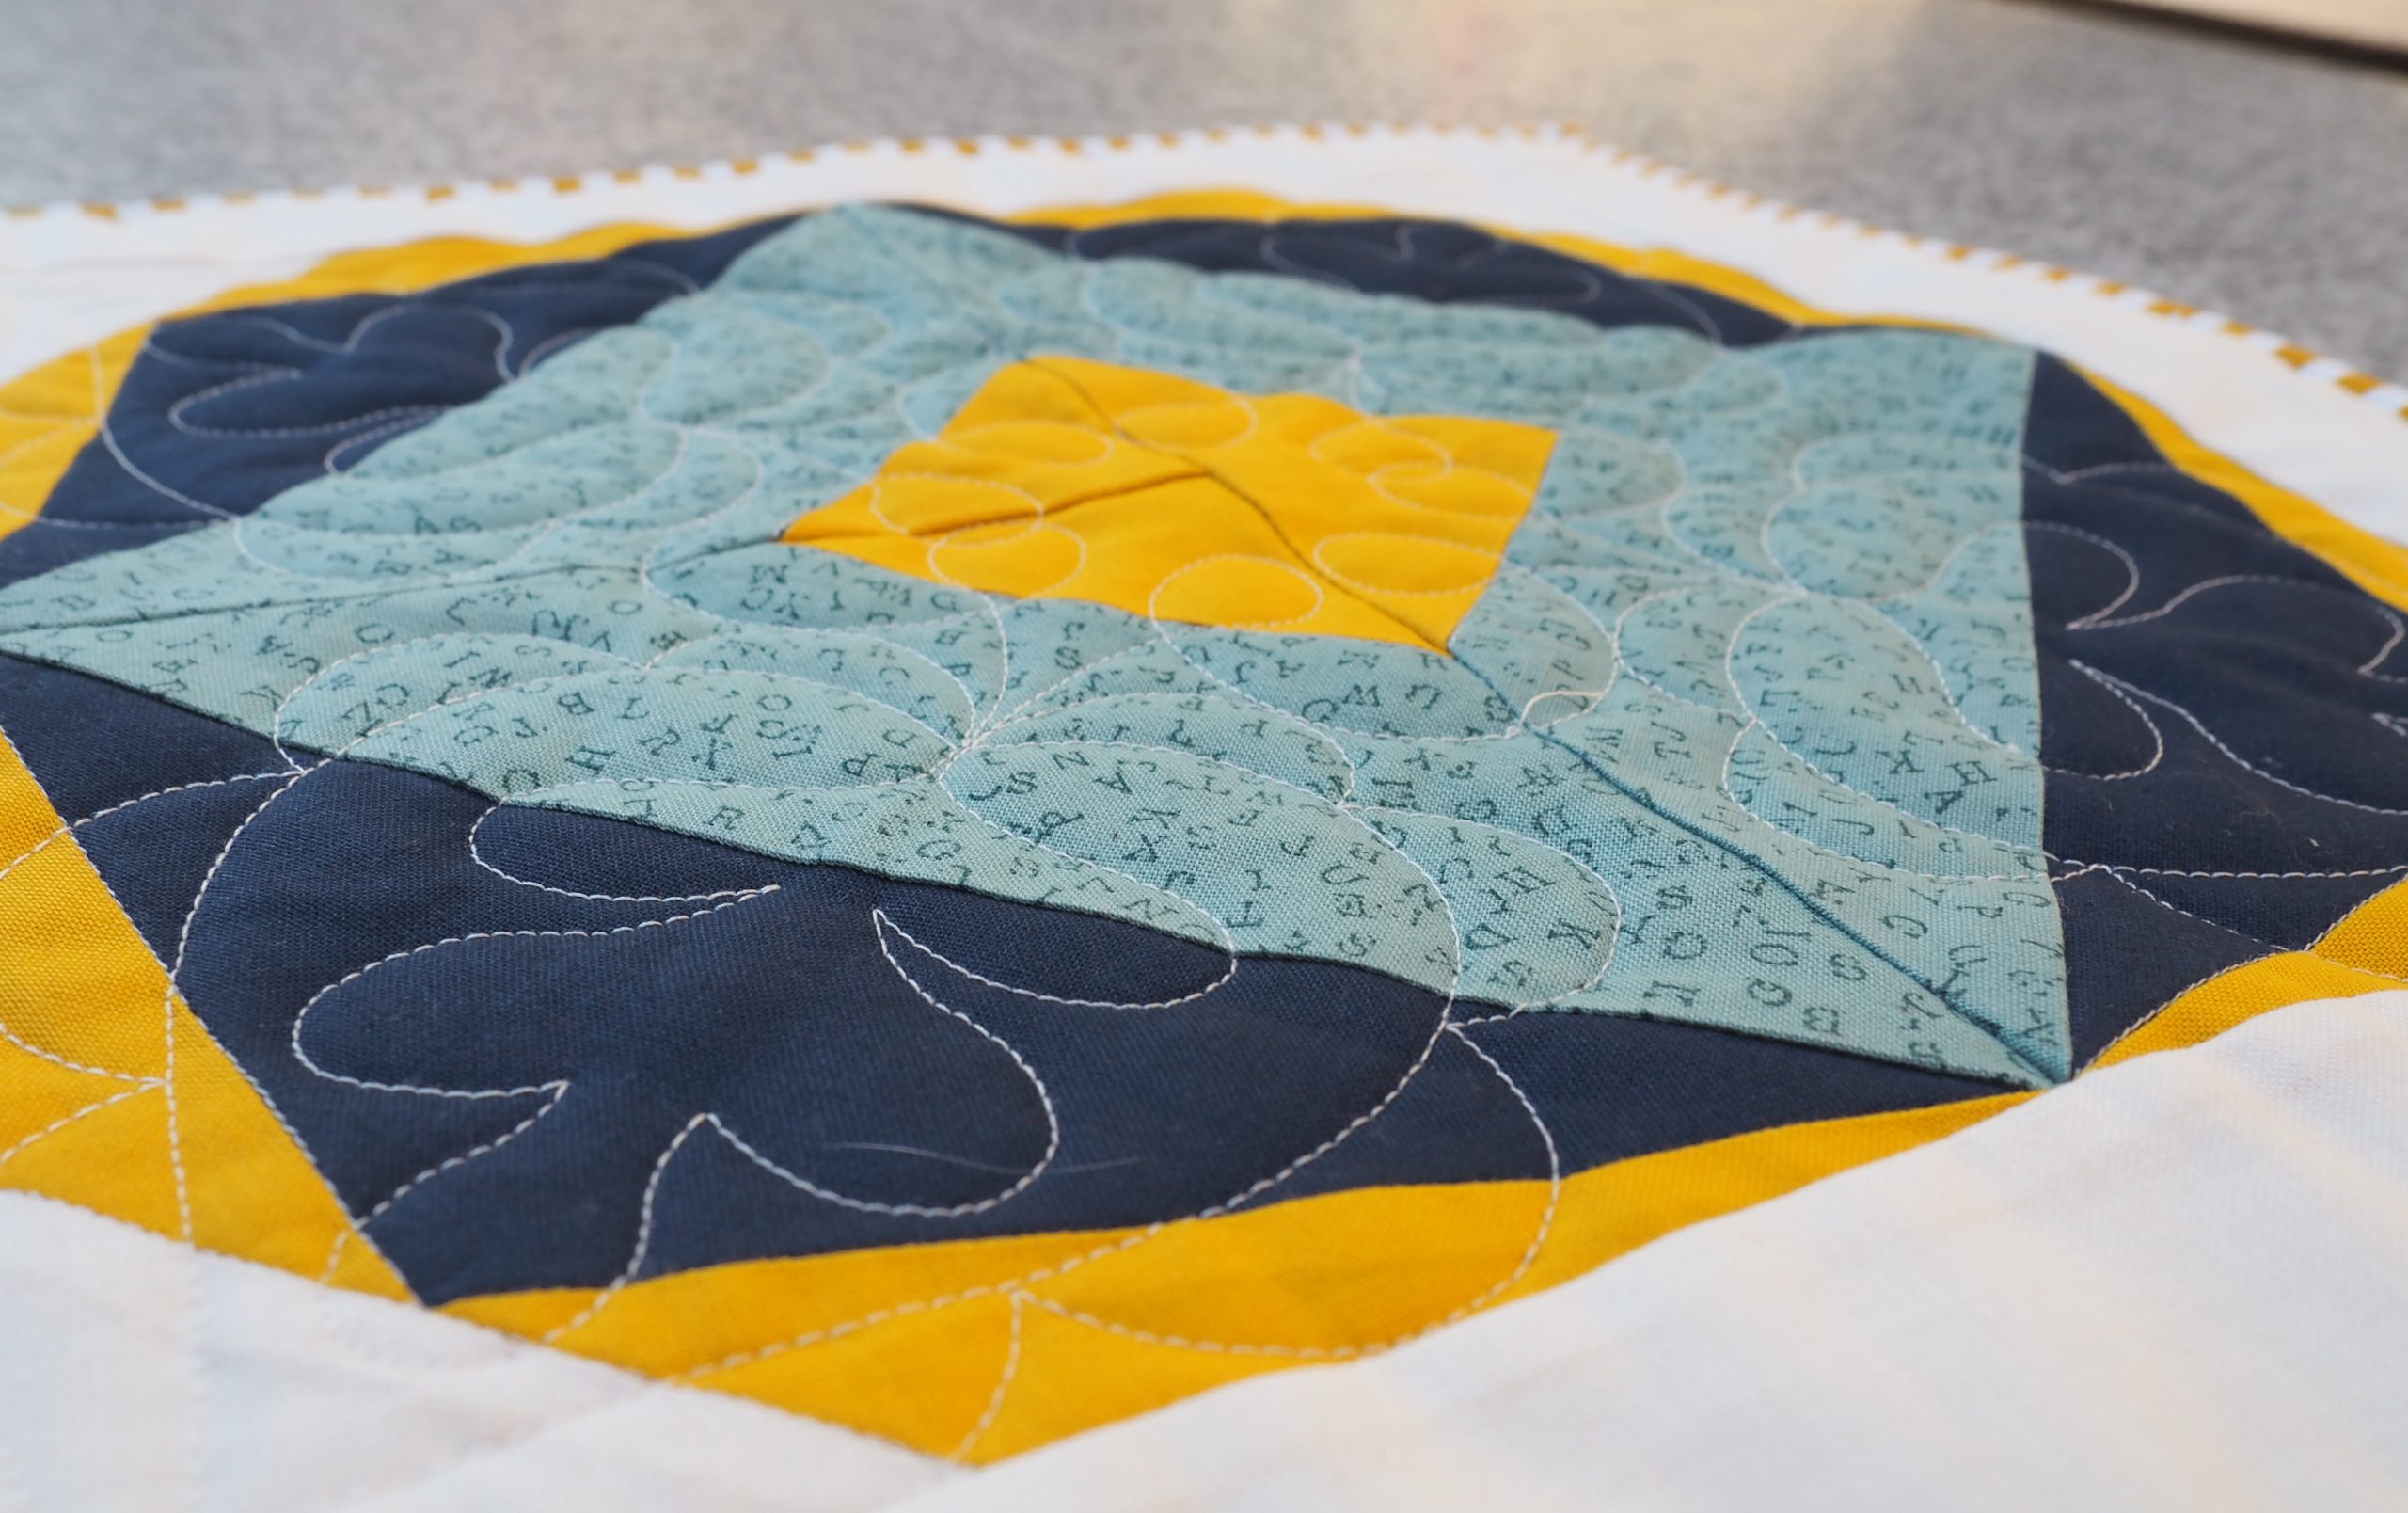
Thanks to the “Pinpoint Placement” of the embroidery designs, which is now possible thanks to the upgrade, it is easy to accurately embroider the quilting designs included in the upgrade – I will show you how to do this in the next post.
Best wishes,
Ines
0 Responses