 BERNINA Corporate Blog -
PRETTY IN PINK (An Abstract Art Quilt)
MY INSPIRATION FOR THIS WORK
The concept of improvisational cutting and sewing has always fascinated me. A while ago, I decided to try my hand at it. When I opened the cupboard with my fabric stash, the colour that ‘jumped’ at me was all the shades of pink. No extra inspiration was needed!
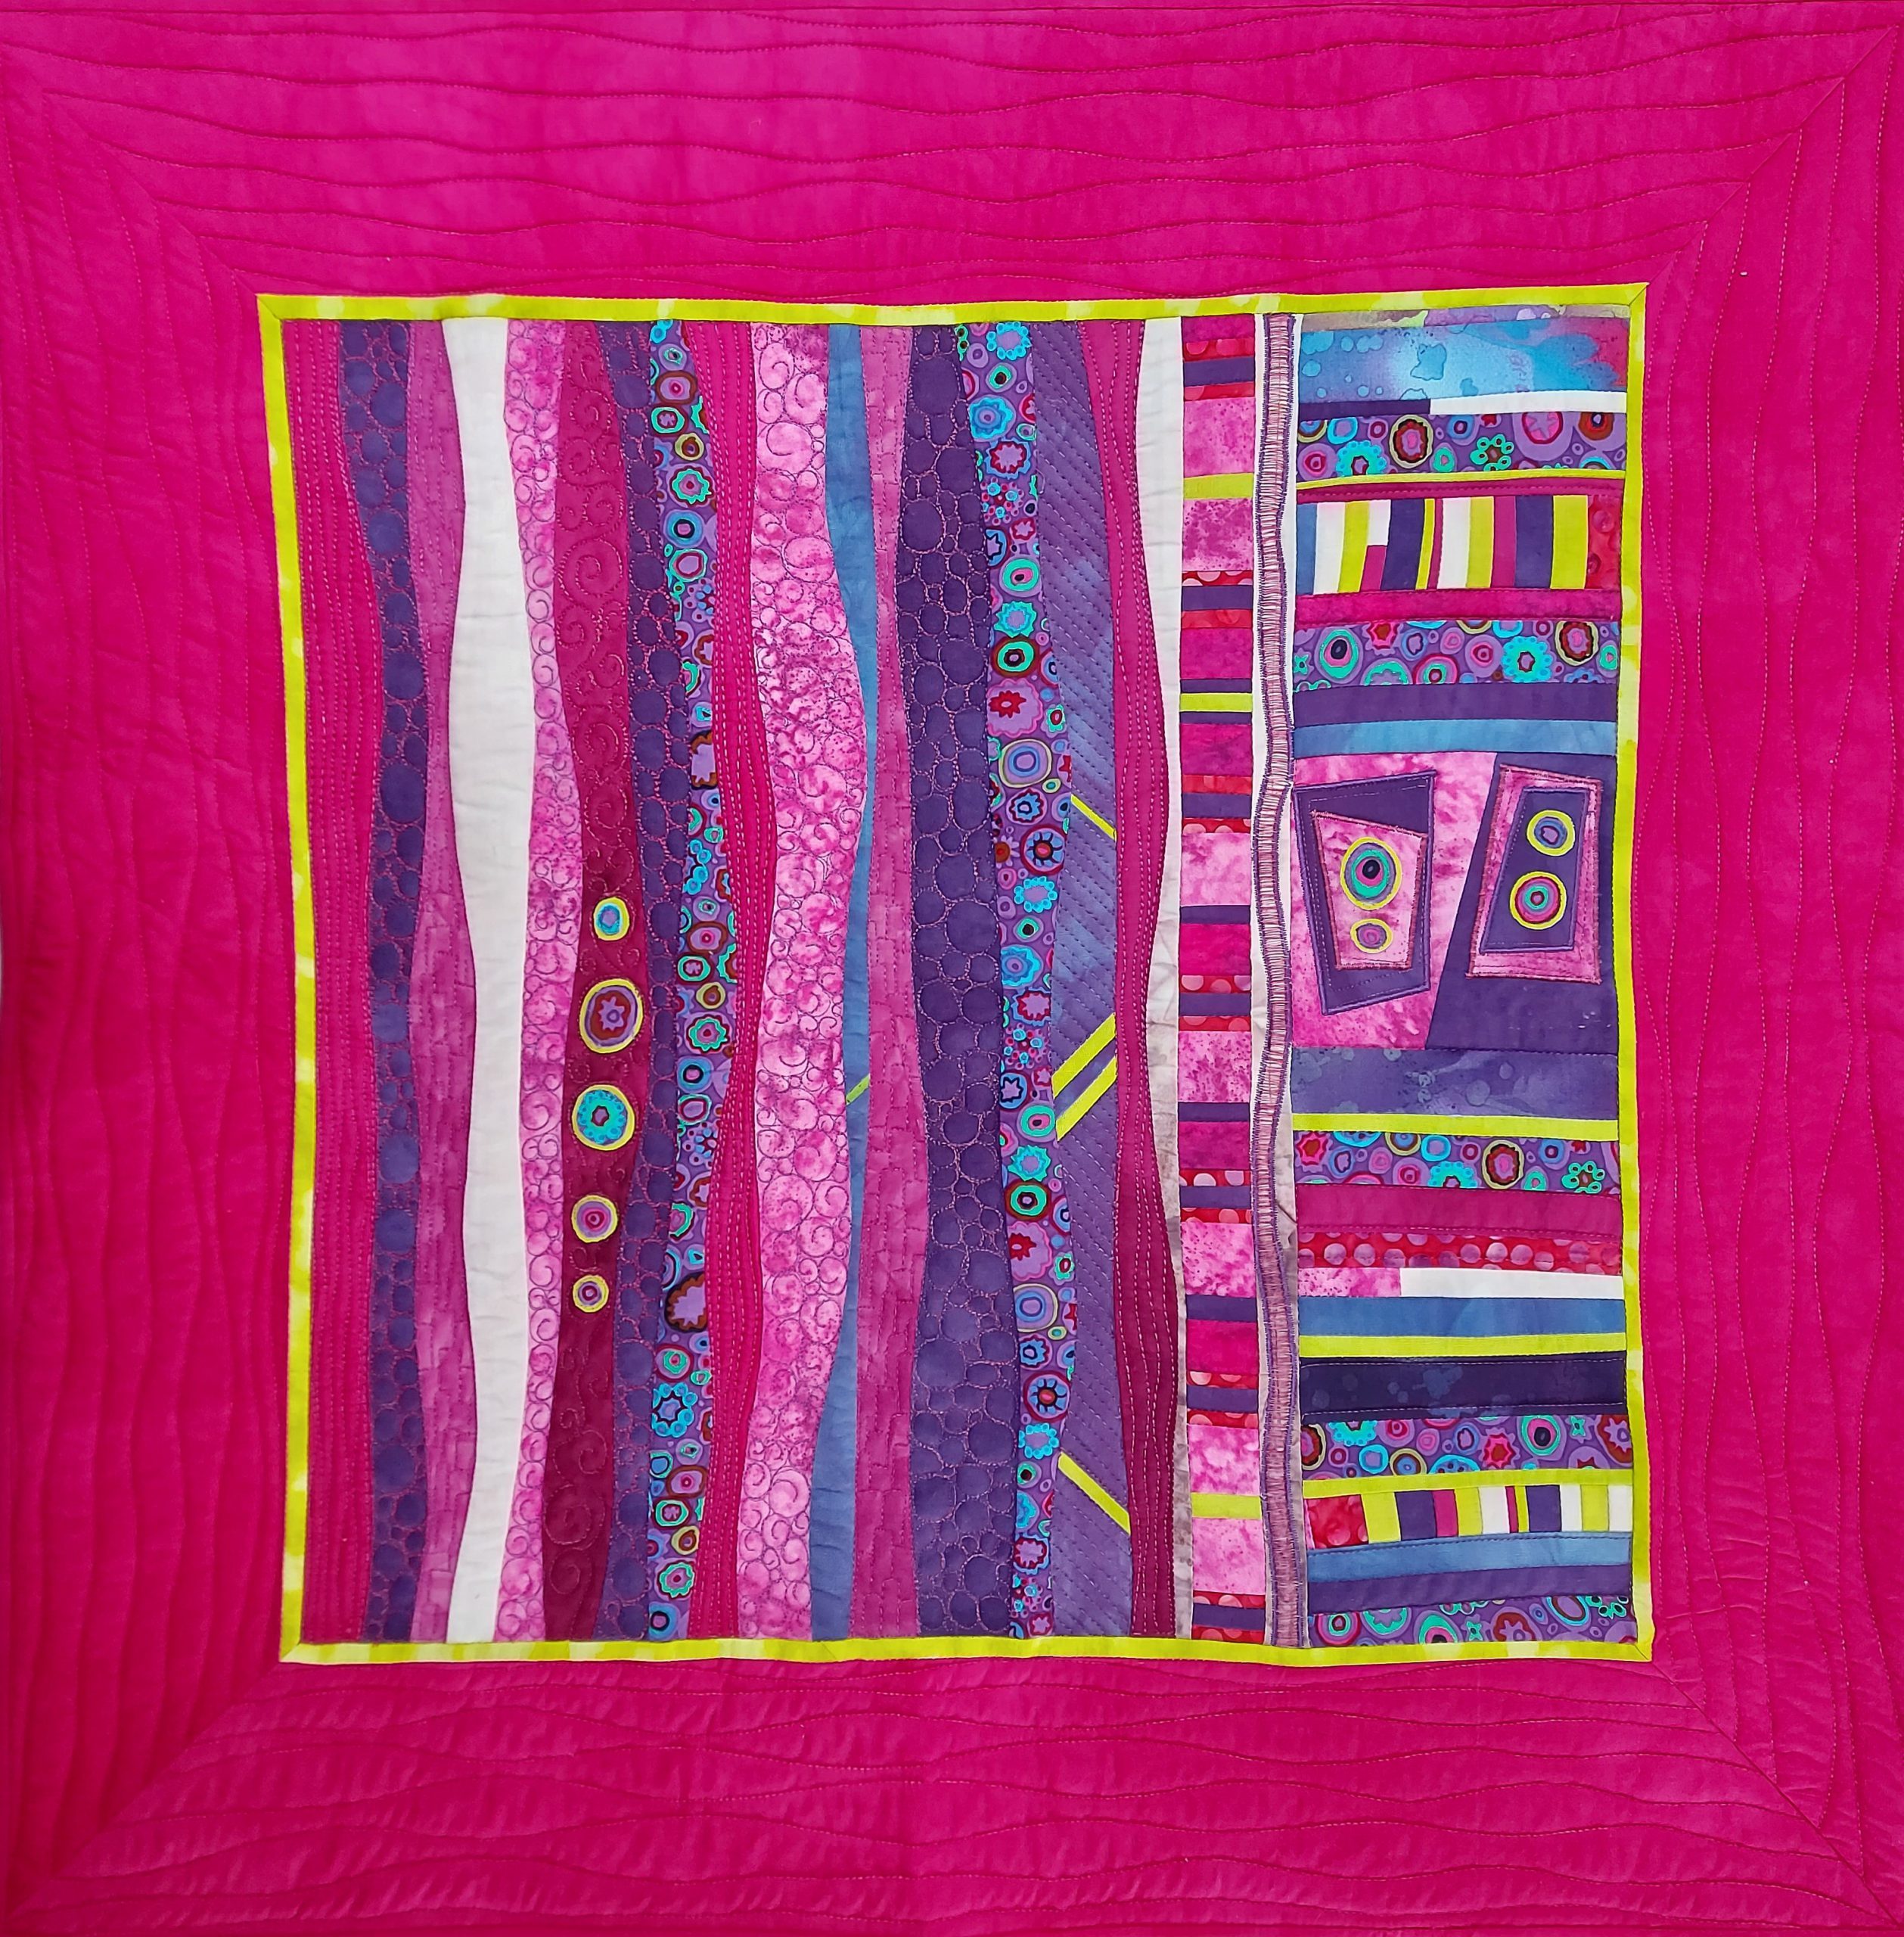
PRETTY IN PINK (An Abstract Art Quilt)
HOW I DESIGNED THIS ABSTRACT QUILT
An abstract fibre artwork must have interesting fabrics, lines, curves and whatever else leads the viewer’s eye around the work. However, I wanted soft, flowing lines, off-set by straight-cut squares and trapezoids with circles in interesting fabric, superimposed on these. The aim was also to have two very definite areas to work in, Panel A and Panel B.

Trapezoids, Circles and Squares.
TO CREATE YOUR PRETTY IN PINK (ABSTRACT QUILT) YOU WILL NEED:
You can choose your own colour scheme but for these instructions, I’ll stick with a pink palette.
- Half a metre cerise pink (Main colour)
- Fat quarters in different shades of pink, purple and bright-coloured fabrics with pink undertone.
- Scraps of the above
- Two inches of a contrasting colour (mine is neon green)
- 1 x 75cm X 75cm Loomtex batting
- 75cm x 75cm pink backing fabric
- Neutral colour all-purpose thread.
- Machine embroidery threads in cerise pink and purple
- Sewing machine of which feed dogs can drop
PUTTING ALL OF THESE TOGETHER:
To create Panel A, layer two contrasting coloured pink or purple 100% cotton fabric on cutting mat.
Using the rotary cutter and with a fluent motion, cut a soft, curving line from bottom to top.
Take these to the machine and without pinning, stitch right sides together with a quarter inch seam allowance. Make sure you don’t stretch either of the strips.
Iron seam to one side
Continue until all the fabrics have been used and work measures about 12” wide.
Square off.
Create the side, Panel B, by improvisational cutting and sewing short but interesting strips together.
Cut interesting shapes eg trapezoids, circles and squares from complementing fabrics and raw-edge applique these on.
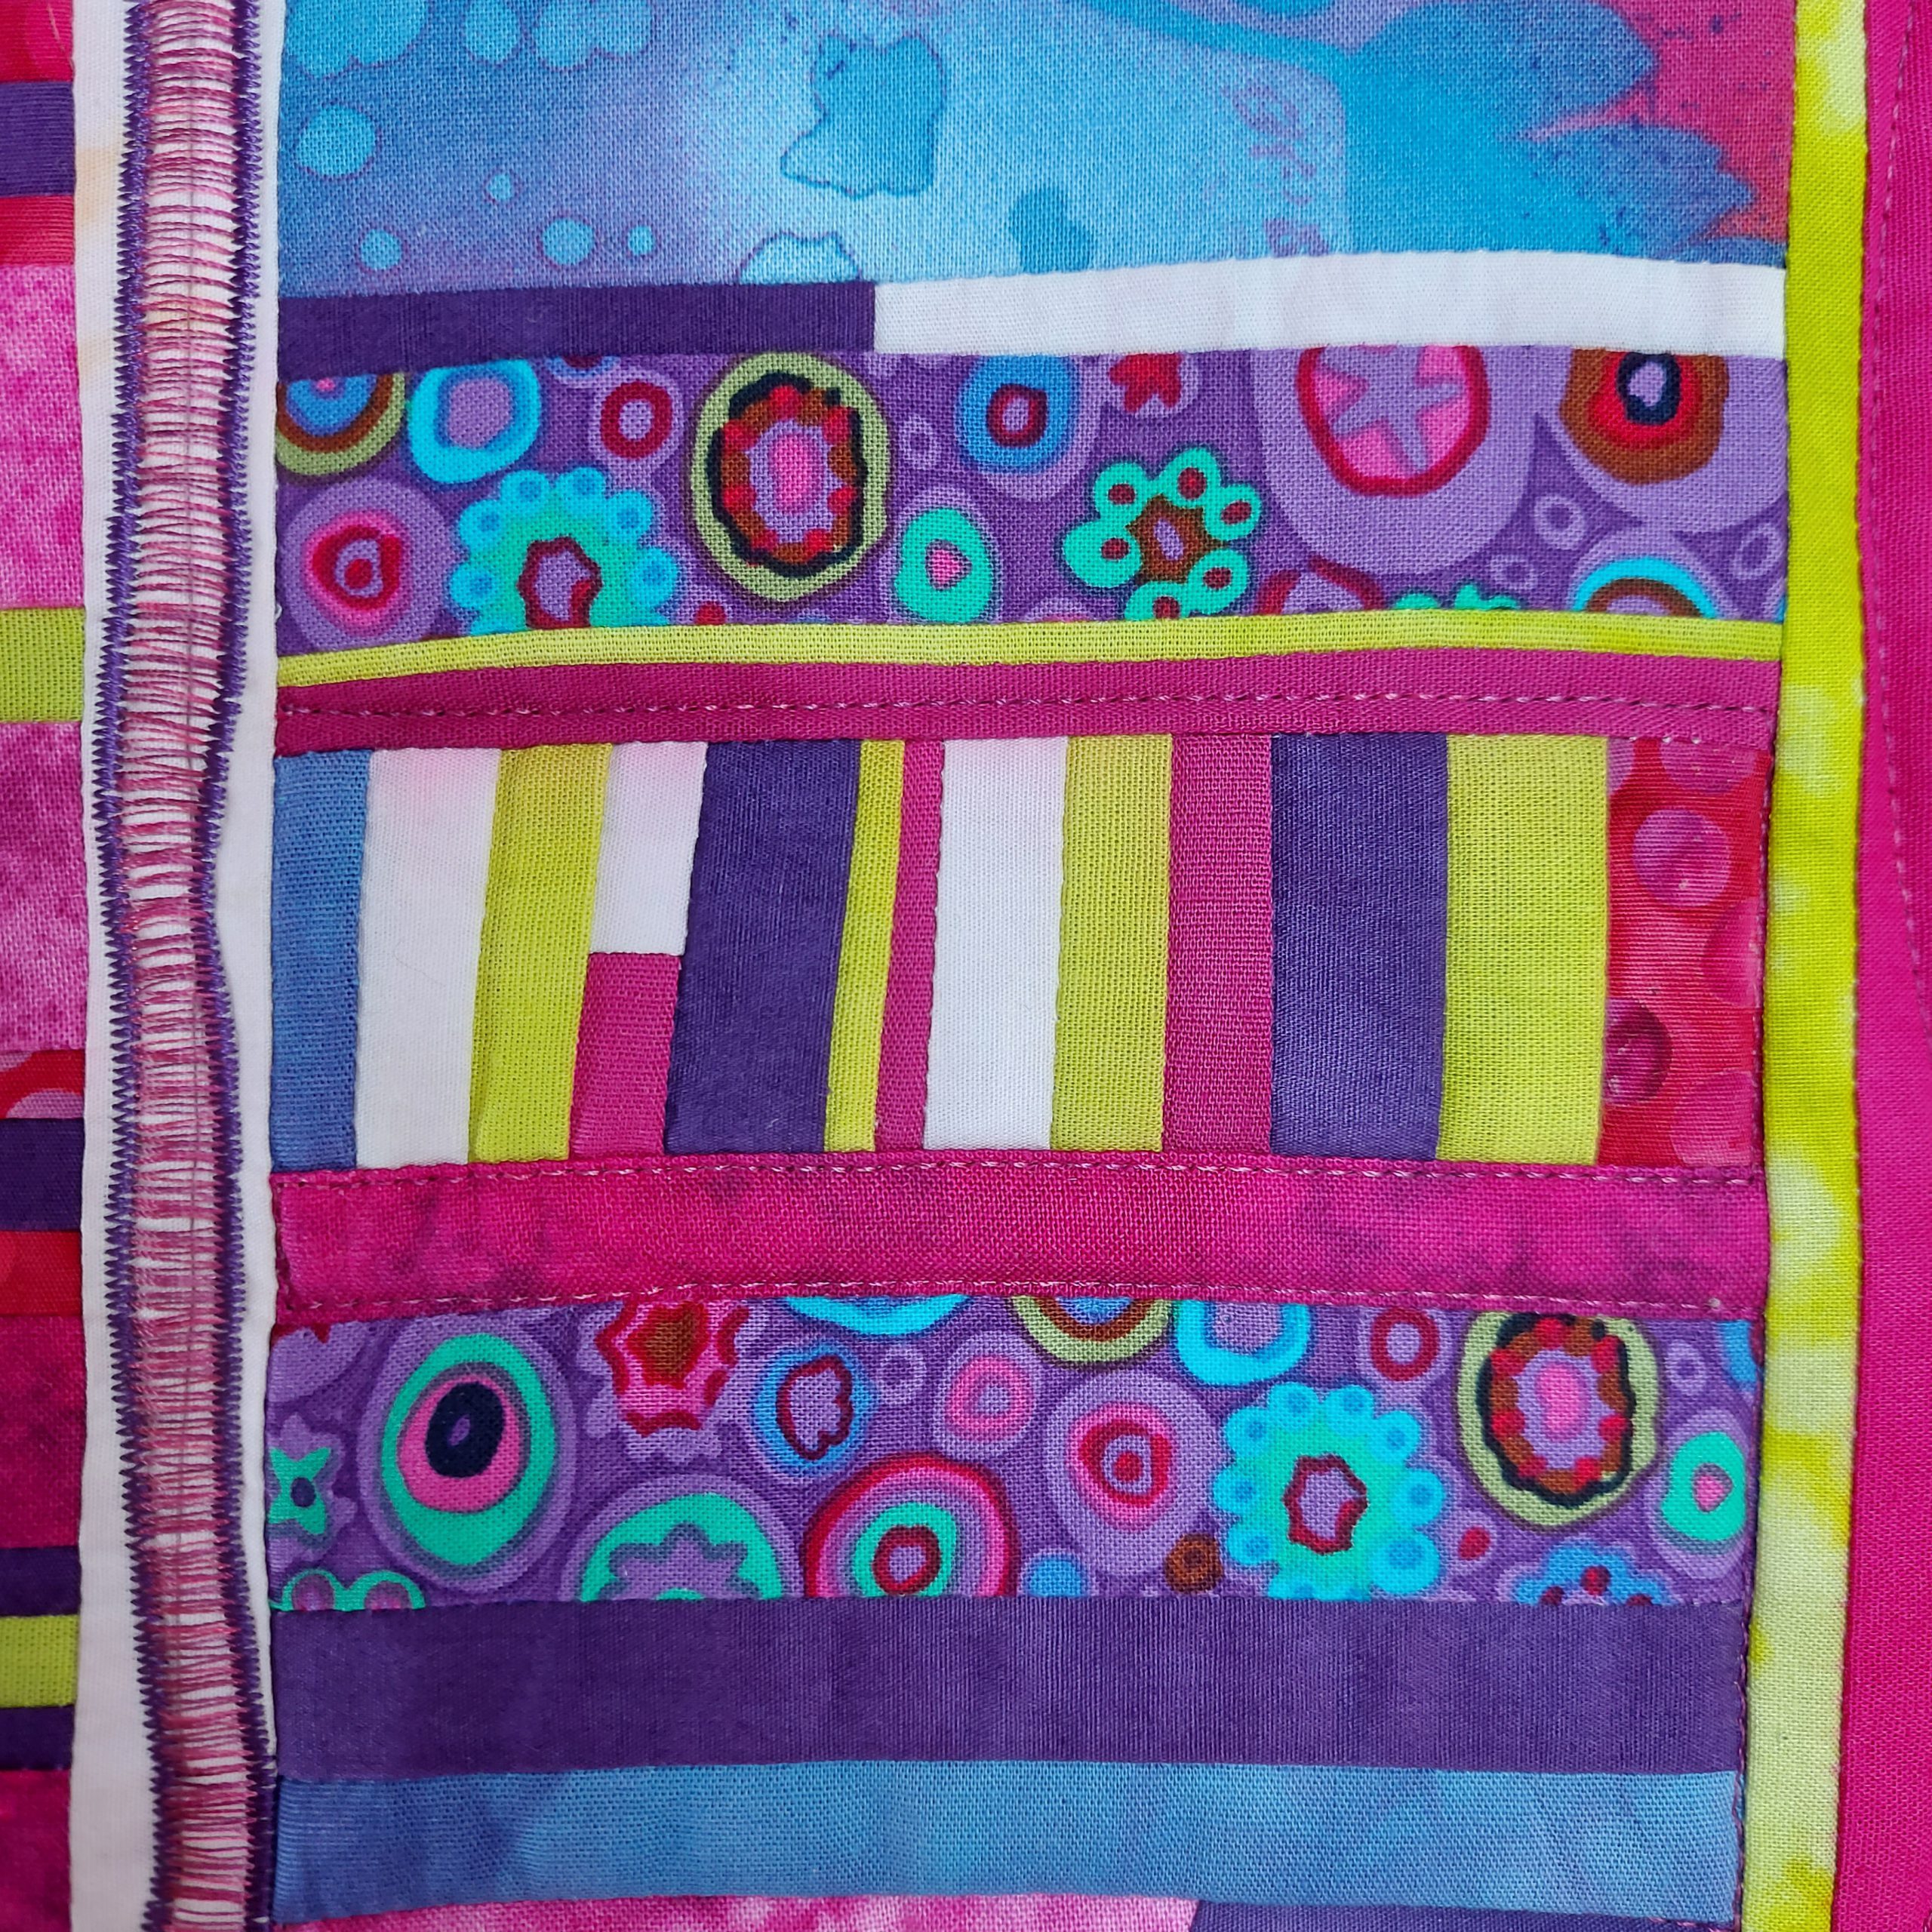
Short Strips are Sewn Together, Squared off and Added
Square Panel B off to 6” wide.
Sew Panel A to Panel B and square off.
MAKING THE BORDER:
Cut 4” strips from cerise pink border fabric. Cut enough to be able to mitre corners.
Then cut strips, three quarter inch wide from neon green fabric but be sure to cut enough to add onto cerise strips before mitering corners.
Sew borders on to background and mitre corners.
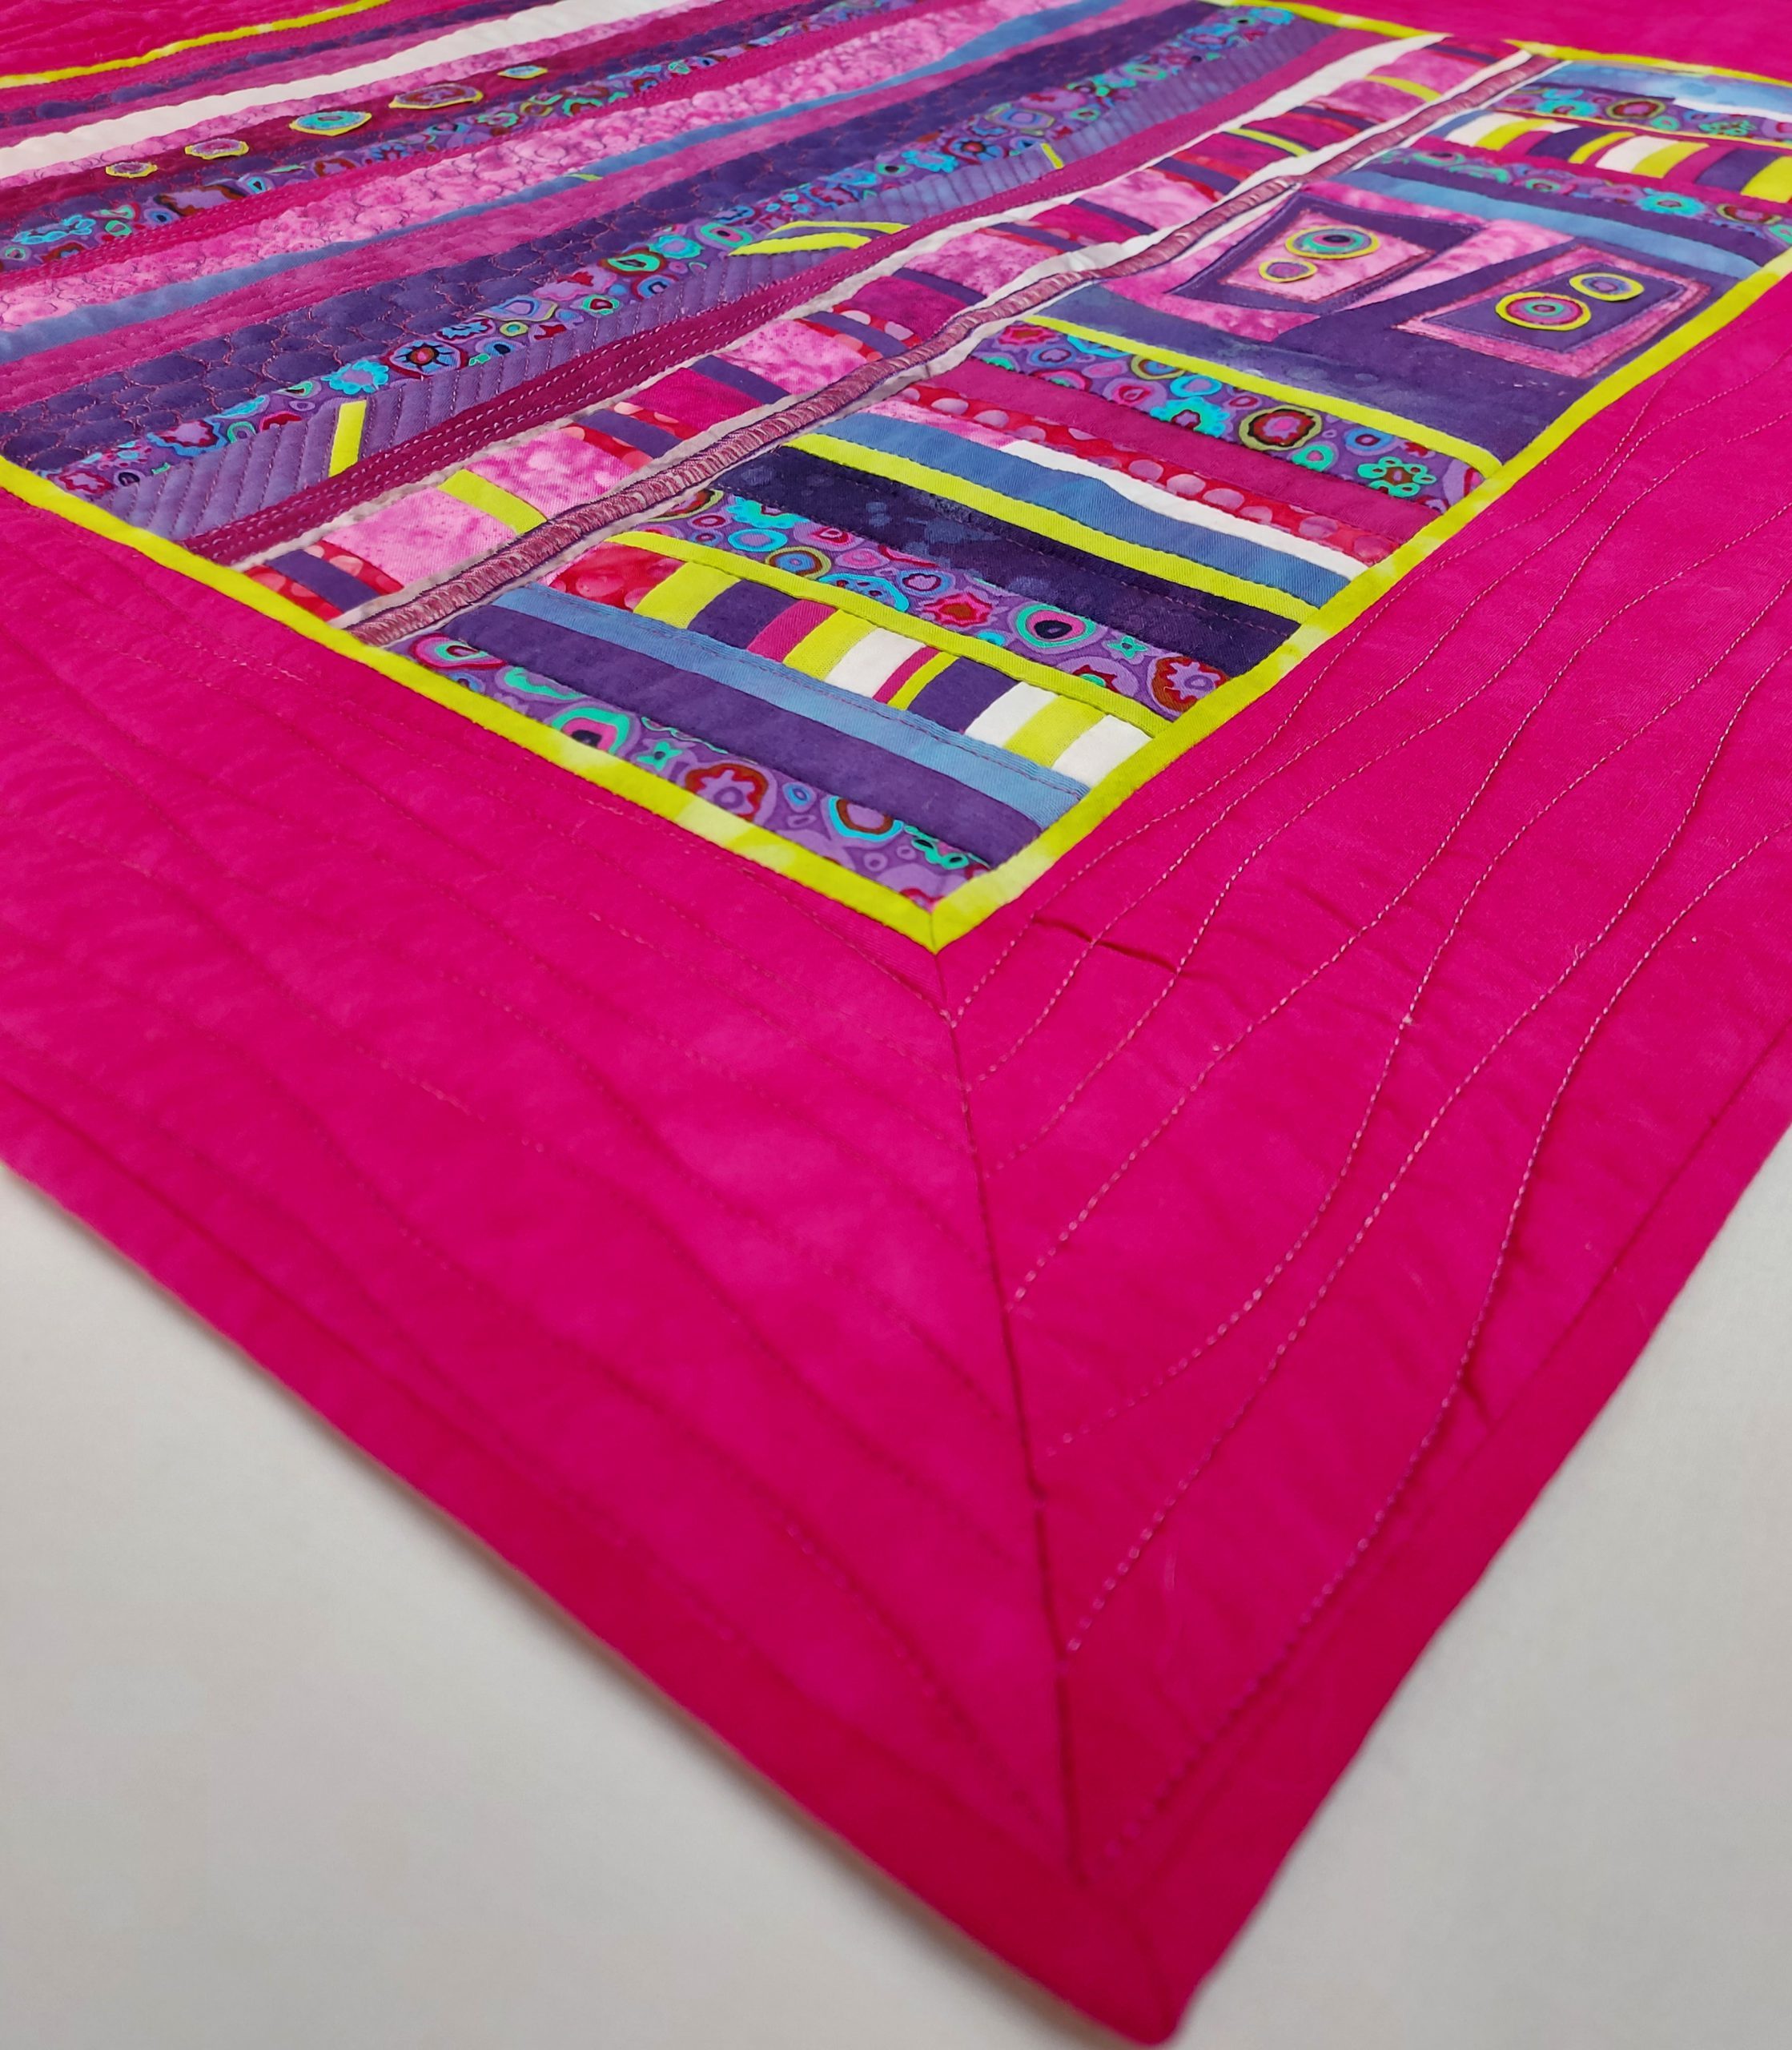
Corners are Mitered Before Border is Added onto Quilt
Layer and lightly spray the quilt top, Loomtex and backing fabric with spray glue.
Quilt each colourful fabric using a different quilting pattern to add interest.
Do a bit of ruler work in areas.
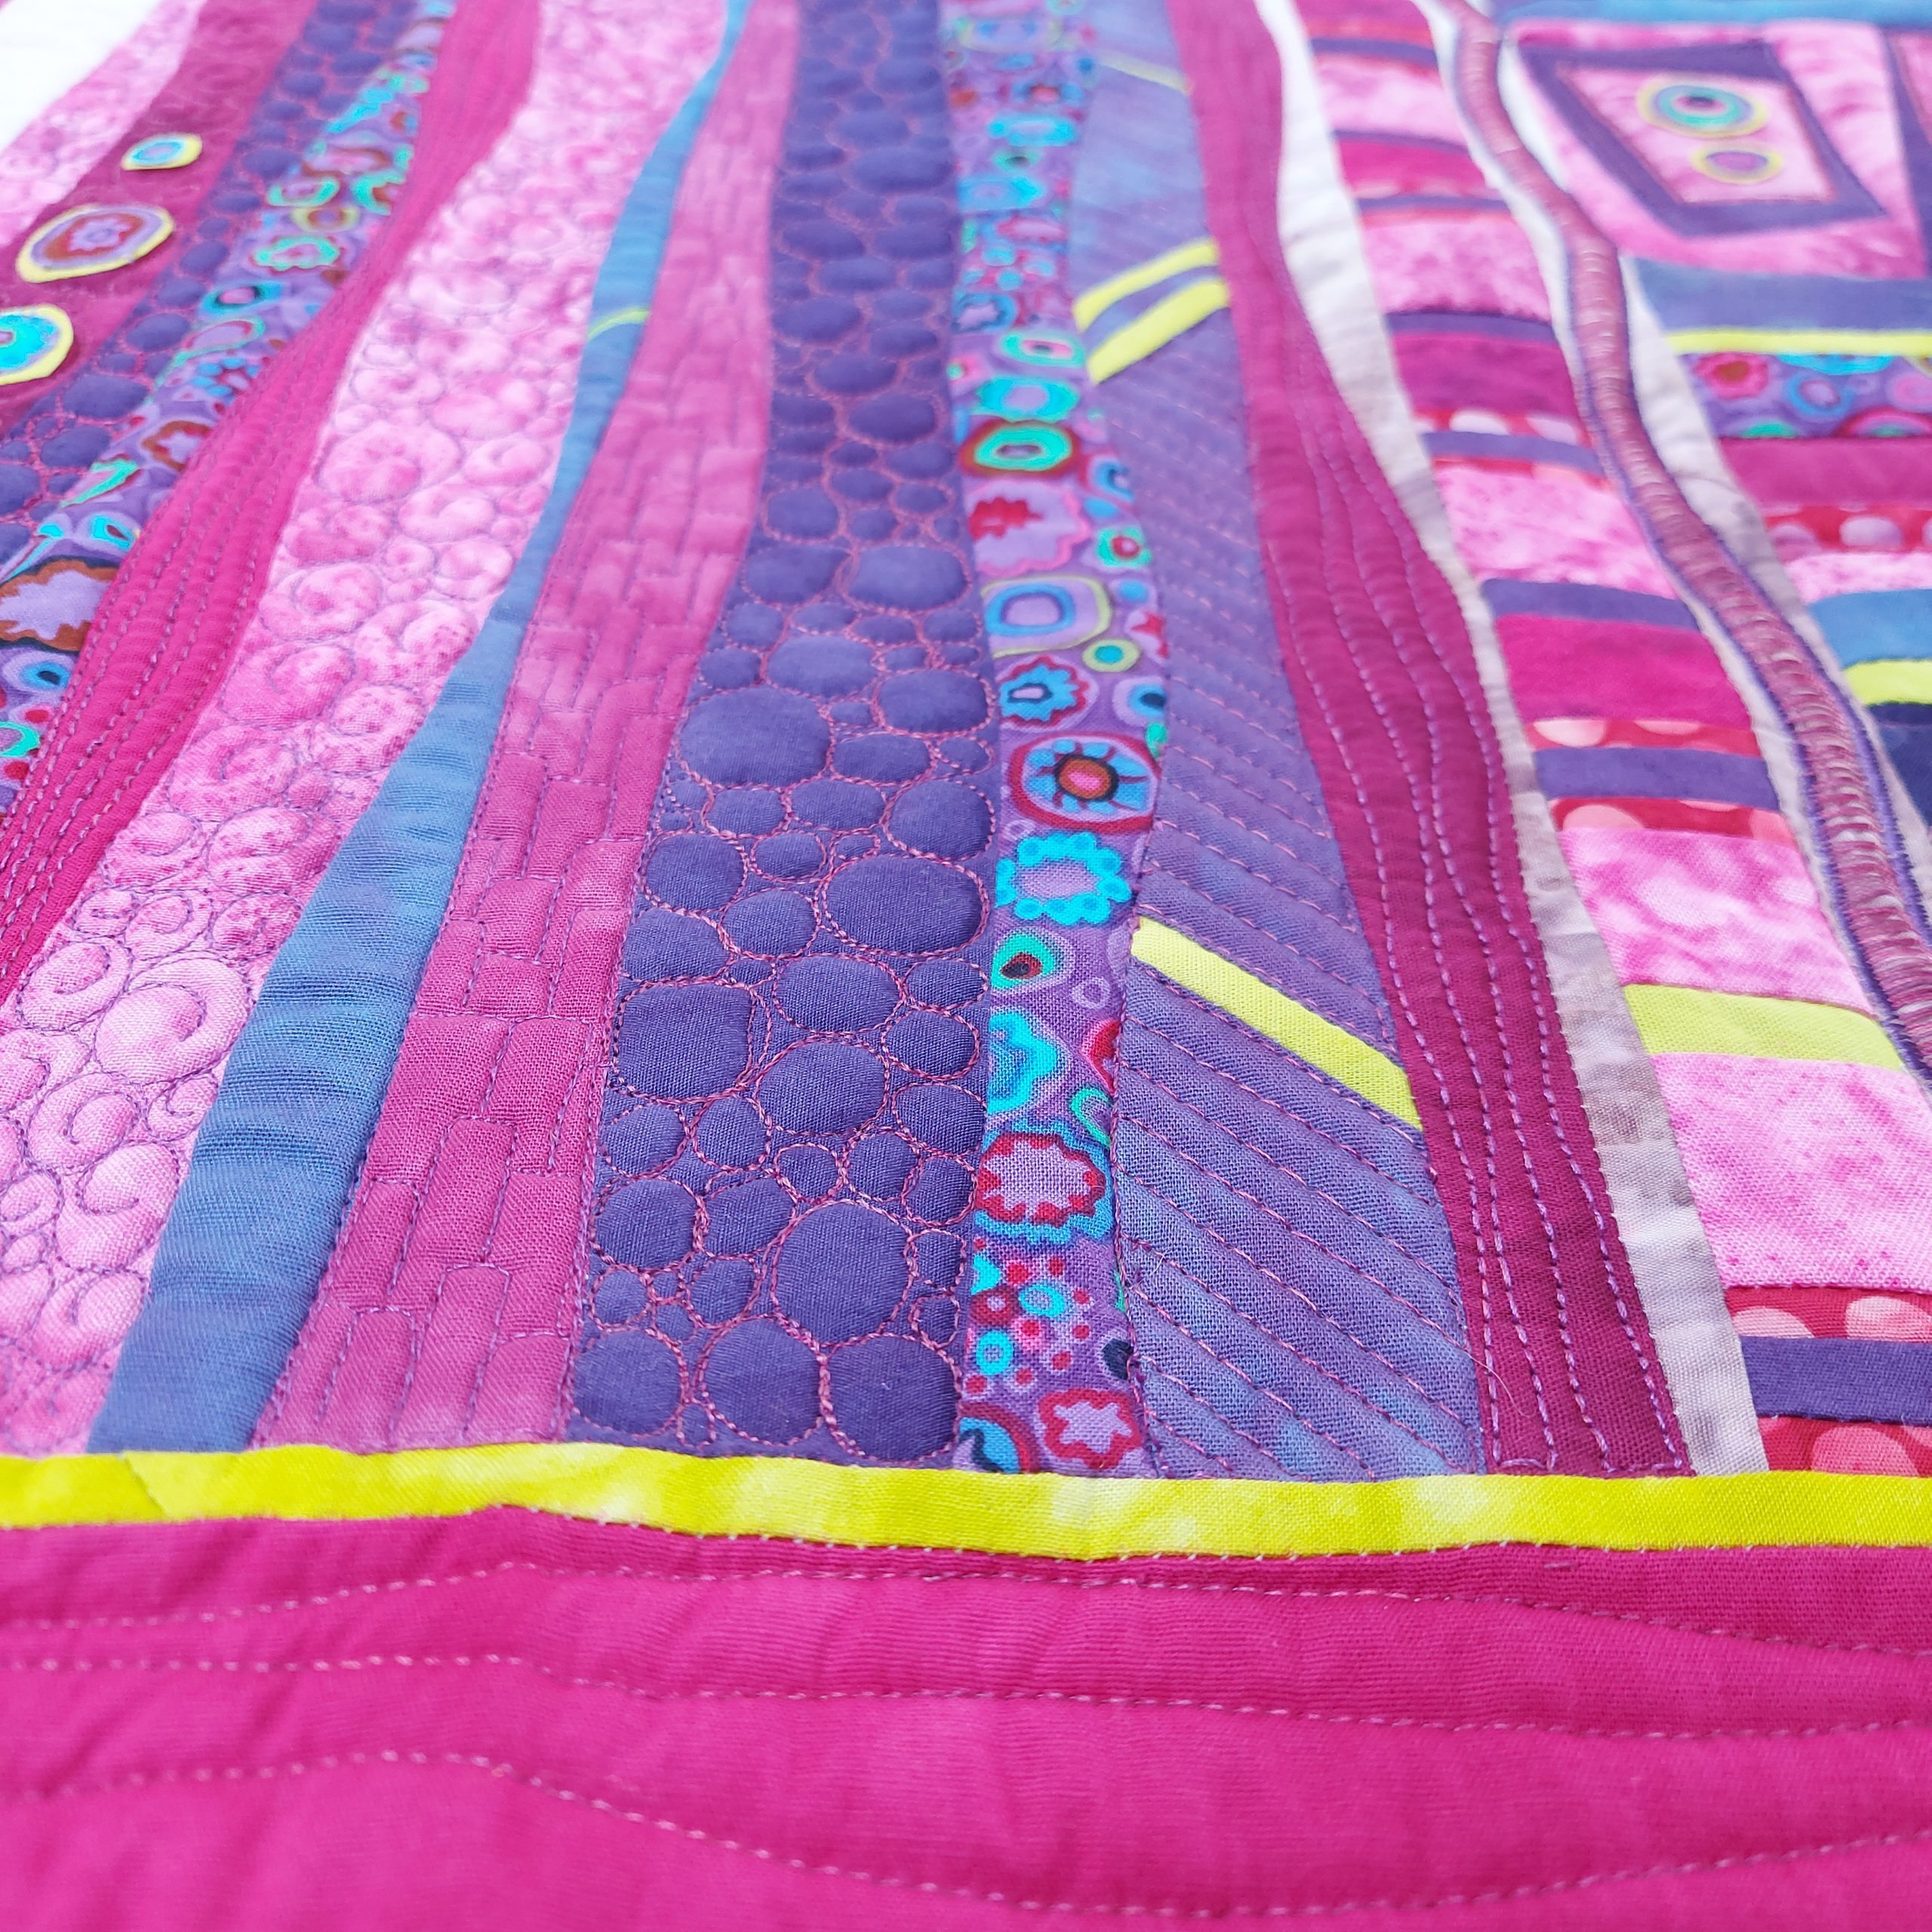
Different Quilting Patterns in Each Strip Plus Some Ruler Work.
Cut strips for binding and sew binding on, mitering the corners after which, turn work over and hand-sew binding in place.
Sew a hanging sleeve and label on the back of your work and enjoy your own quilted abstract wall-hanging!
If you are passionate about textiles and want to learn more about how to incorporate my innovative techniques into your work, follow me on Instagram @tillydeharde and Facebook, Tilly de Harde Fibre Artist & Teacher and visit my website www.tillydeharde.com & subscribe to my mailing list. Please don’t forget to leave a comment in the comment box below!
Brilliant blog which arrived at just the right time. I have been thinking of making a quilted mural but didn’t want a traditional patchwork pattern. This will certainly get my creative juices going, especially as I have a lot of Kaffe Fassett fabrics and scraps.
Hi Carole, I am so pleased to hear that this quilt is inspiring you to get those fabrics out and start creating! It is the nicest feeling to get inspired, go to one’s stash and start immediately! Please share what you create on my Facebook page? Love, Tilly