 BERNINA Corporate Blog -
Hello Bernina Lovers !
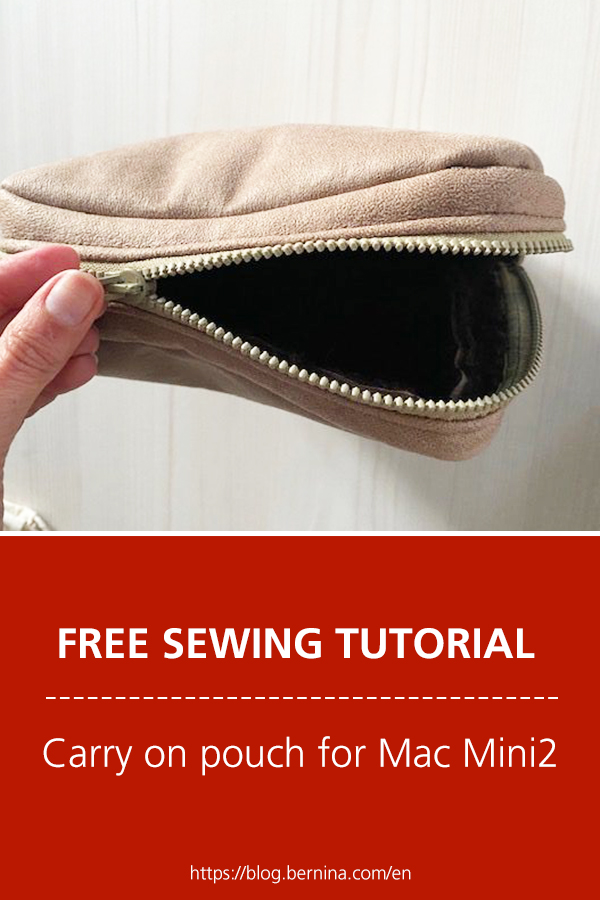
Last weekend was very productive, in a couple of days I was able to sew a bomber jacket in faux mouton fabric, a cargo pant and this pouch.
The 2 first projects were for me 😉 and it was great to get back to sewing garments after of pause period… But the 3rd project I made is for a friend (I am not a not so selfish maker 😉 ). My friend just bought a Mini Mac (computer) and he is going to travel with it. He mentioned he would love to find a carrier that would protect his new machine and not having to carry the box itself every time. I thought I could make a little pouch where he could insert the machine and carry it everywhere while being protected.
So I searched the dimensions of the machine on internet and once I found them I looked at my fabric stash and quickly found the perfect one. A leftover from a biker jacket that I made for my son last year, this is a double-sided faux mouton fabric. Soft inside to protect the machine and nice outside for the look.
I made this project in about an hour and I really love how it looks. So i am going to explain here the few steps in case you want to do a similar pouch. You can use this tutorial for any other format of pouch, just adapt the dimensions of your pieces to it.
Materials needed…
– 50 cm of fabric (better if double sided)
– 50 cm length zipper (if you have a double sided it is even better). The zipper can also be longer, you can cut it to the correct lenght once sewn to the fabric.
Measurements…
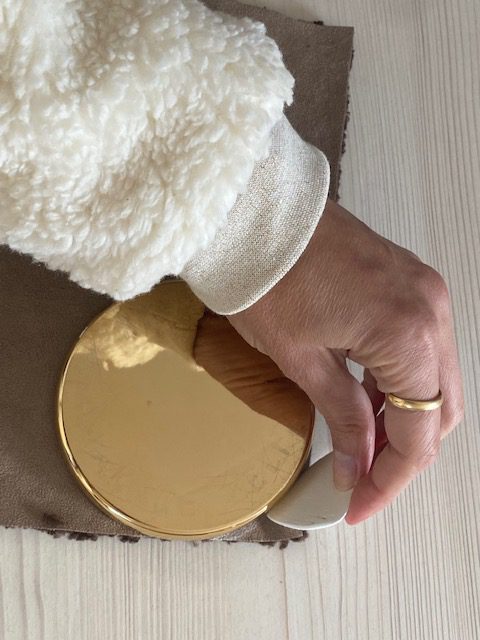
The measurements of the machine are 19,7 X 19,7 X 3,58 cm.
To that I added some extra allowance for the machine to fit nicely (but not too much so it doesn’t move inside). My final measurements, including seam allowances were:
23 X 23 X 7 cm
This may also depend on the thickness of your fabric.
Follow these steps…
I traced 2 squares of 23 X 23 cm on my fabric scrap piece.
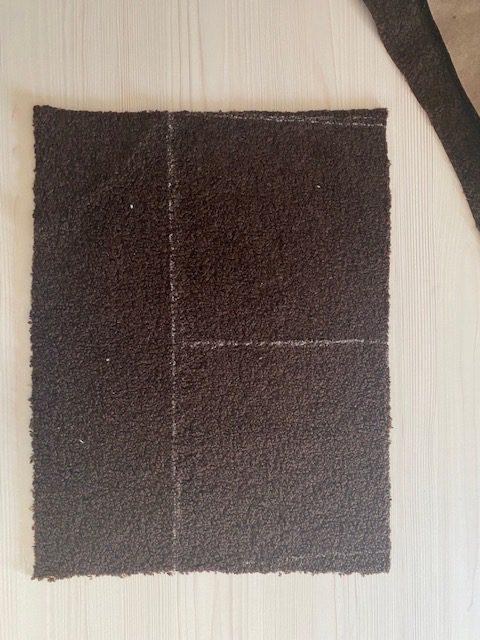
Then, I traced a long strap of 7 cm X 82 m cm long (if you are not sure, you can cut a longer strap and cut it down later on).
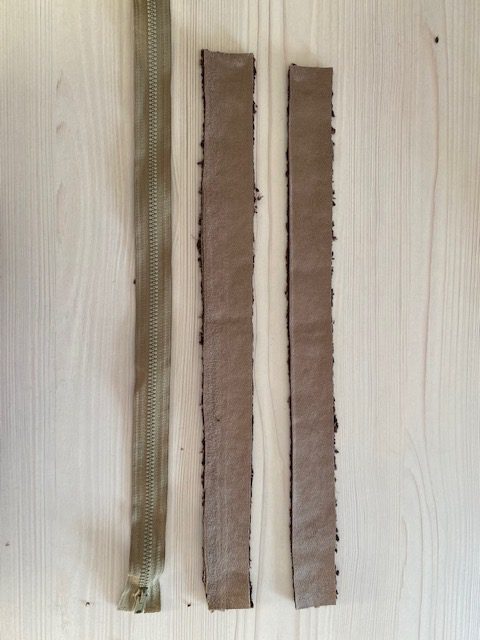
I cut them all. The long strap has to be cut in half.
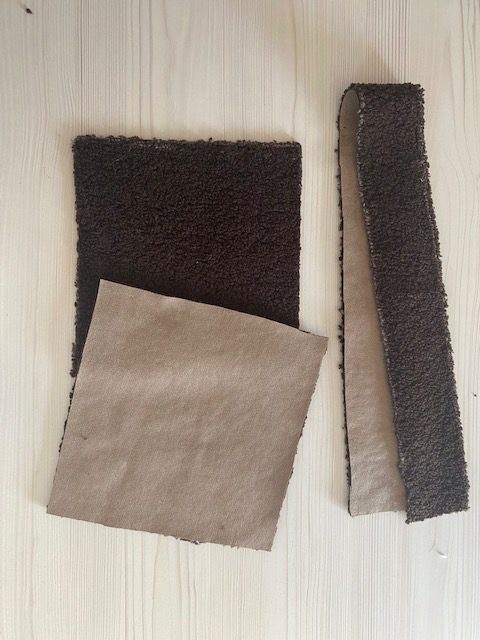
In order to make the round corners, I used a circle base, placed it on the edge of each fabric corner and traced the round shape.
This is what you get once you cut all the pieces.
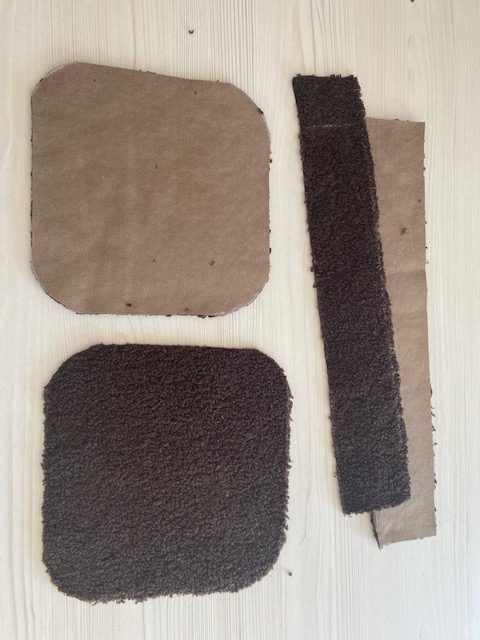
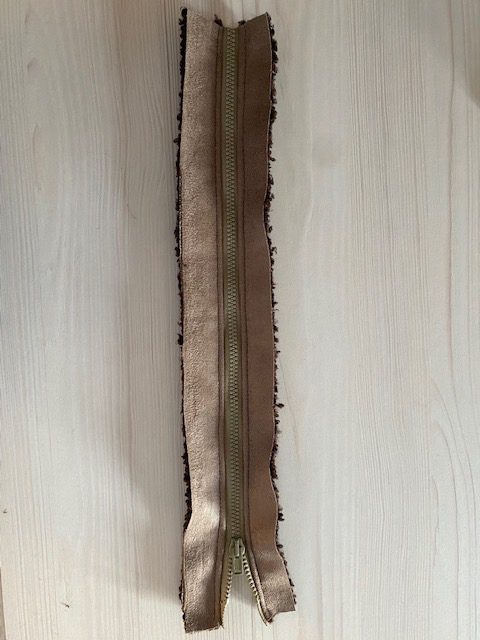
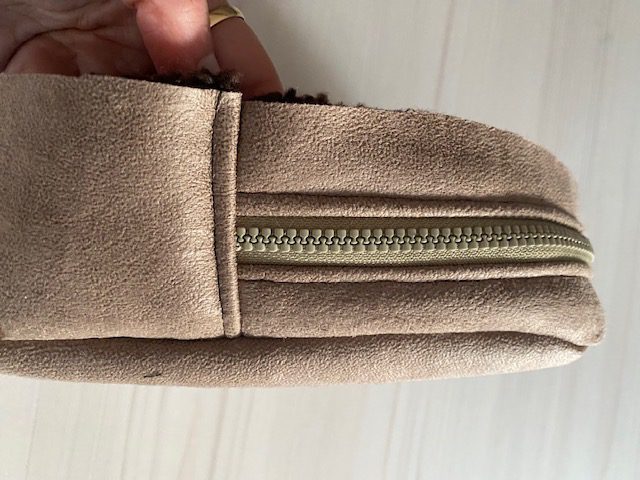
Then, one side of the strap has to be cut in 2, length side. The zipper will be sewn in between both and this will allow the opening of the top part of the pouch.
Sewing in the zipper…
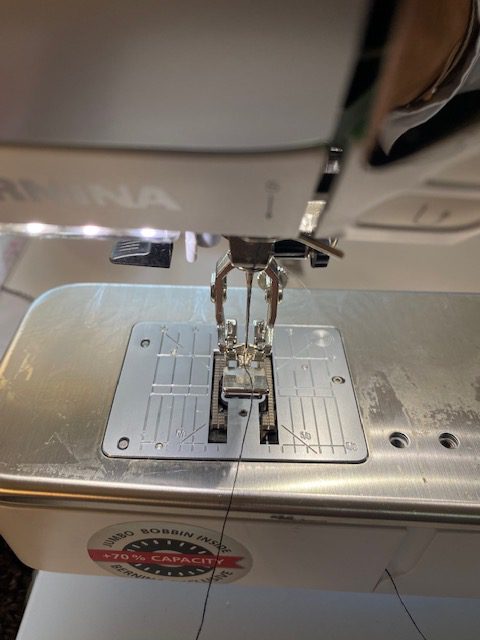
Pin the zipper to one of the strap sides, right side of the fabric towards the right side of the zipper (thus, facing down) and matching the edges.

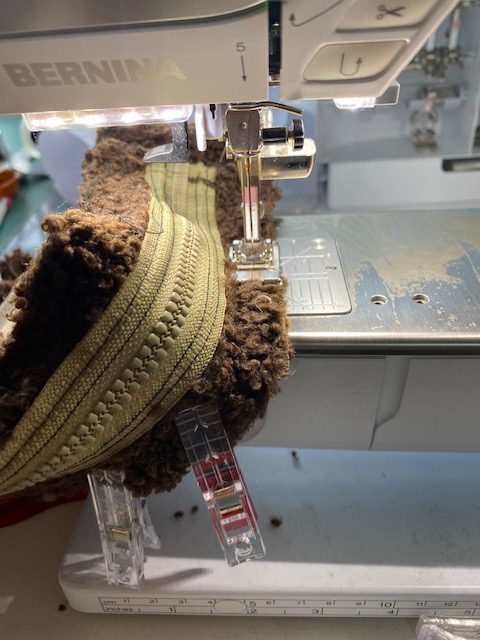
With the zipper foot and placing your needle to the left end side, sew the zipper in place, as close to its teeth as possible, avoiding the head of the zipper (you can start opening the zipper and once you get to the head, you place your needle down, lift your press foot and close the zipper, avoiding moving the zipper).
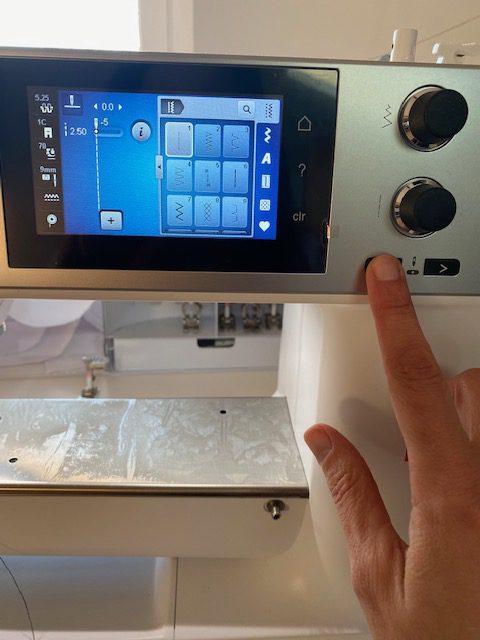
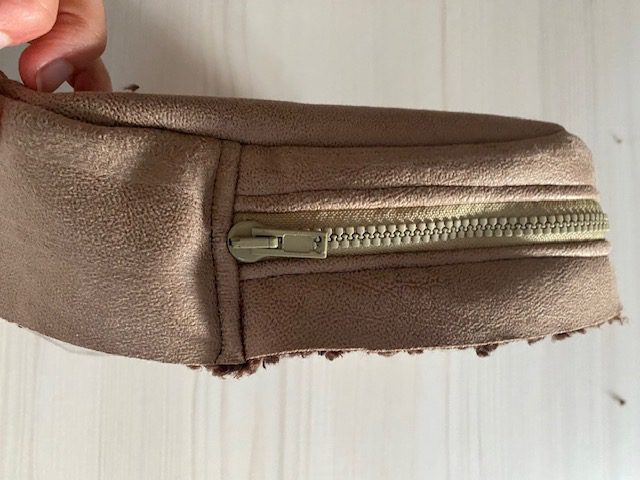
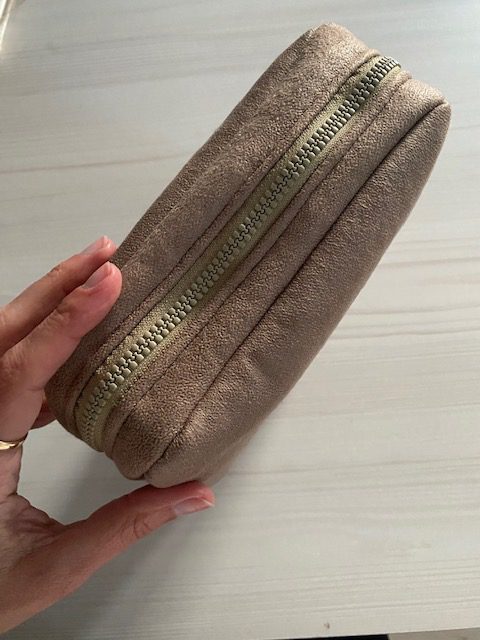
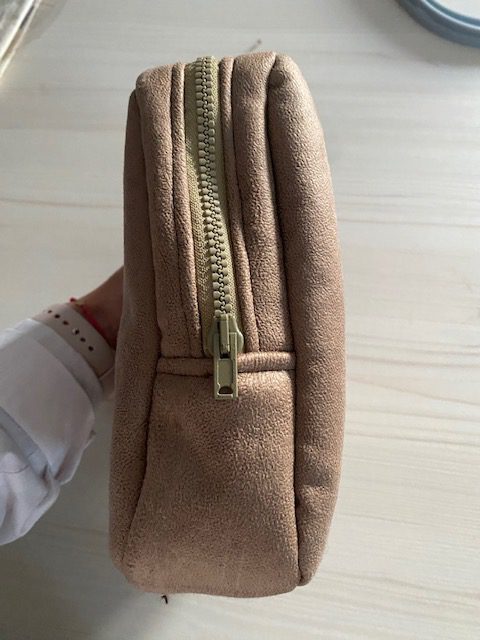
Once one side of the zipper has been sewn to the strap, you can turn it, press it flat and top stitch at 2 mm from the zipper teeth so that the fabric and zipper are nicely placed and sewn.
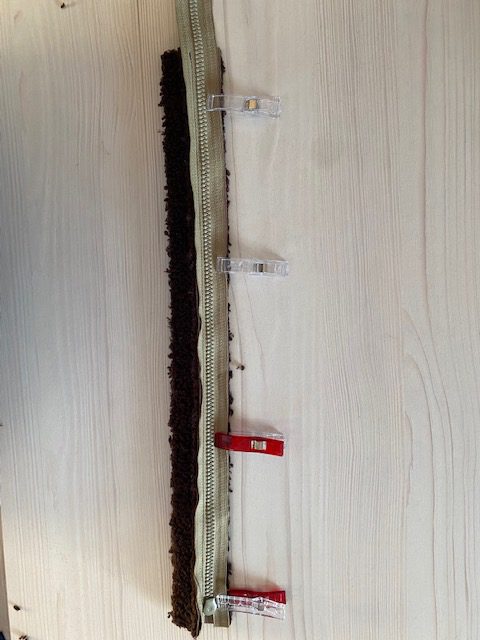
Place then the other side of the zipper, right side of the fabric against the right side of the zipper and repeat the same steps, moving the needle if needed. If your zipper is longer than your fabric, you can trim off the extra bit.
Sew this side of the strap (the top part) to the bottom part of the strap (before sewing both sides together, pin them to the main square of the pouch to see if the strap is long enough or not too long to cover the full square. If it is too long, you can trim the extra.
With the normal foot, sew the 2 pieces together, right sides facing. Then, you can also do a top stitch at 2 mm from the seam, for extra strength.
Now, it is time to sew the strap to one of the main squares of the pouch. Pin it in place, right sides facing, and sew the 2 pieces all around, being careful on the corners.
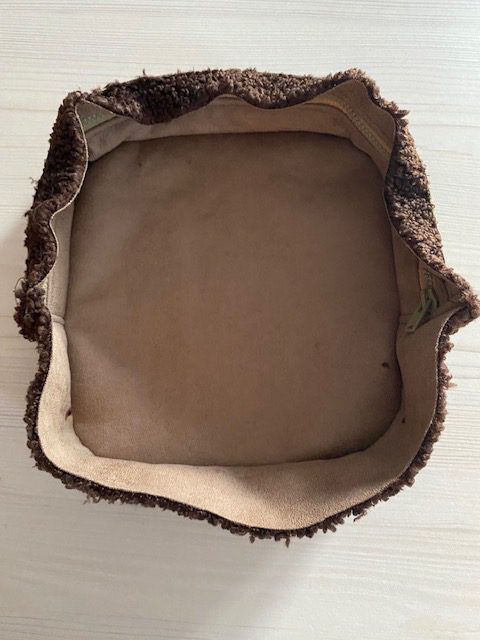
Once the strap is sewn to one of the squares, this is how it should look like.
Ope, the zipper at least 20 cm and then pin the other side of the strap to the other square, right sides facing again.
Sew all around, like you did previously.
Turn the pouch right side out though the zipper opening and voilà! your pouch is finished.
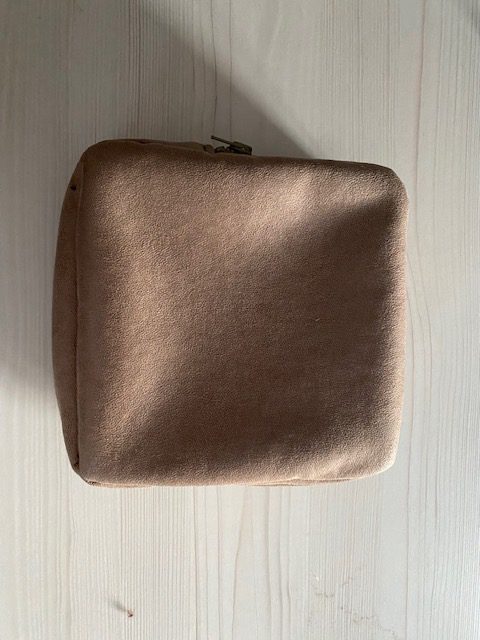


What do you think of it? Honestly at the beginning I was very convinced about the fabric or even if this would look nice, but I loooove this pouch. The way it looks thanks to this double side faux mouton fabric and how easy it was to make.
I want to make more pouches now, and I am thinking about giving the fabric a personal twist buy free hand embroidering on the fabric. I’ll have to give it a try, what do you think?
0 Responses