 BERNINA Corporate Blog -
Hello Bernina lovers!
Today I am going to present you a very fun project that you can do to use your fabric scraps and get beautiful padded fabric for different projects (think of a make up or school case, coasters, a jacket, kimono, vest… and I could go on!).
I must say I had so much fun making this project, it has been one of the most satisfying sewing projects I’ve done in the past years!!
The steps to make padded fabric using fabric scraps are very simple. So just follow them herewith.
Materials needed
Fabric scraps (all sizes are good for this).
2 bigger pieces of fabric (the size will depend on the project you’ll use them for). For this example, I think I used 2 pieces of 30 x 50 cm. And as you can see, both fabrics can be different (and of course they can be the same fabric too 😉 )
You’ll need thread and your Bernina of course.
A Ruler
Iron erasable pen (you can use tailor’s chalk too, but I found very useful to be able to erase the lines traced simply by ironing the fabric at the end of the project).
Ready? Let’s go!
Here are the steps…
Take your fabric scraps, even the tinier ones are useful!
I even used knit and woven fabric.

Start cutting them in tiny pieces. If you have a roller cutter this step will be much easier and faster than with scissors, but believe me, I cut all the pieces with a pair of scissors and I survived!


You can see how little by little the fabric scraps begin to move to the tiny pieces mountain…
And the mix of all the colors was so pretty that I made a heart just for the sake of taking this beautiful pic (am I fabric addicted??).
Put your pieces aside for a moment.

Take one of the largest pieces of fabric and start tracing parallel lines from the center to the outsides.
The ones I traced are 2 cm apart from each other, this gives a nice padding effect to the final fabric.


When all your lines are traced, place the other fabric WRONG side up and start placing the bits of fabric covering it totally.
A little advice, don’t put too much fabric or your padded fabric will be super chunky.
Even the fabric scraps on all the surface so it is not thicker at some points.


Once this bit done, place the previously traced fabric on top of this (as if you were making a sandwich), with the WRONG side of the fabric facing the padding. The RIGHT side will be up, and the traced lines will be visible.
Now, start pining all the layers together, starting again from the center. Put as many pins as possible so that the filling will not fall when sewing. Finish pinning all the edges to make sure the padding stays inside.

Once all pinned, I recommend you to overlock the four sides so that the padding remains inside. If you don’t have an overlock, you can zig zag the edges.


Now, we are ready for the magic to happen!
Sew on the lines you traced previously, starting from the center and moving outwards. You may want to take out the pins as you sew but make sure the padding doesn’t move inside.

Here you can see a few lines sewn.

Keep sewing!

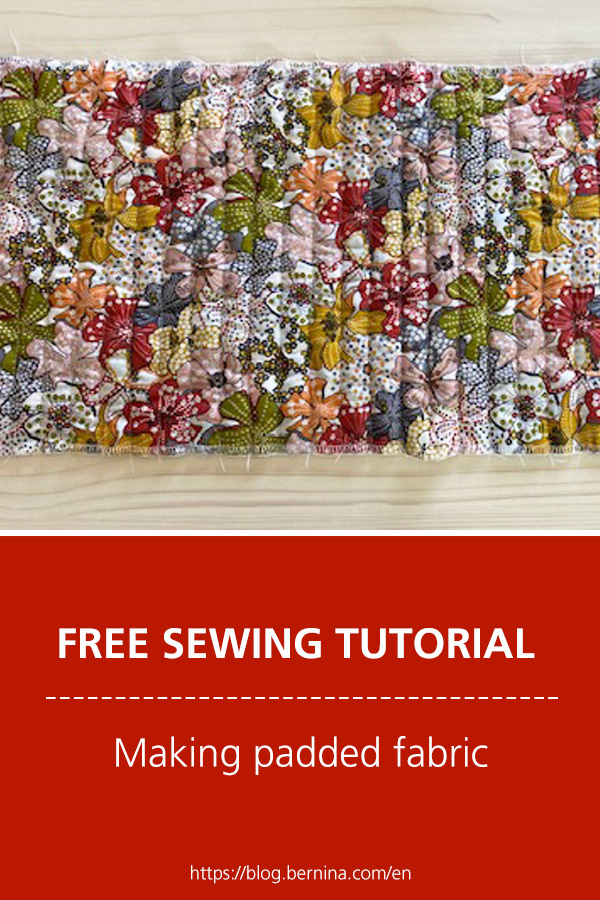
And tadah! Onces you’ve sewn all your lines you’ll have your padded fabric! Here is the inside.

And this is the outside!
I honestly think that the fabric illustration is even cutter thanks to the padding.

If you used an iron erasable pen to trace your lines, you just have to iron your fabric in order for them to disappear.

And your project is finished!!
Tell me what you think of this and what you’d do with the fabric!
I’d love to see your projects!


0 Responses