 BERNINA Corporate Blog -
In this 2 part blog post I will share my 10 tips for sewing with vinyl. BERNINA’s sewing machine settings, stitching & presser feet make all the difference to make an pretty & useful project bag. Check out Part 2 here.
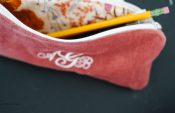
I recently visited many quilt shops as part of my kind of summer fun and noticed some gorgeous designer vinyl project bags at an expensive price point. In fact, I felt that these bags were on trend because I saw them in many stores. It made me have some clear vision, pardon the pun. I know with some clear vinyl and lovely fabric this could be an amazing project.
This bag would be so useful to organize your most recent projects. Also a great bag to take travelling. Do not fear there is a way to sew with vinyl plastic, it’s all in the right equipment!

Enjoy This Free Project Tutorial While Getting to Know The Best BERNINA Feet to Work With Vinyl
Supplies Needed:
- 16 guage vinyl recommended
- Light weight fusible interfacing
- #5 -14″ zipper
- Pretty accent fabric for top of bag & bottom, 1/4 yard
- Lining fabric (light fabric recommended)
- Thread to match accent fabric & lining
- Decorative stitching thread (optional)
- Decorative Stitch #22
- Embroidery Foot #39 with Clear Sole
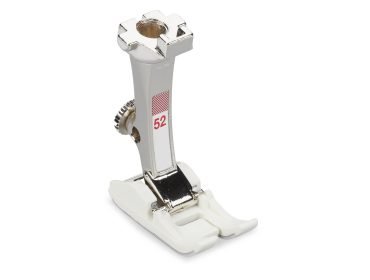
- Roller Foot #51 or Zigzag Foot with Non-Stick Sole #52
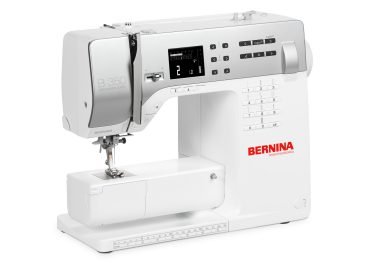
- Sewing machine with the ability to lengthen stitches – Used was a BERNINA 350 PE
- Decorative zipper pull (optional) or checkout my YouTube channel for a free zipper pull tutorial
- Clips (no pins)
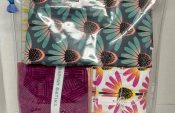
- Sharp sewing needle Non Stick 80 recommended (see in supplies photo)
- Tissue paper (optional)
- Ruler
- Marking pen
- Scissors
- Refer to the 10 Tips to Sew With Vinyl below


Supplies Needed for Vinyl Project Bag
Cutting Instructions:
- Cut 2 pieces of vinyl 13″ x 16″
- Cut 2 pieces of accent fabric 16″ x 2.5″ & cut the same for lining (project bag bottom)
- Cut 2 pieces of fabric 16″ x 1.5″ & cut the same for lining (zipper gusset)
- Cut 2 pieces of interfacing 15.5″ x 2.5″ (lining of bag bottom)
- Cut 2 pieces of interfacing 15.5″ x 1″ (lining of zipper gusset)
- Cut 2 pieces of zipper end tabs from accent fabric 1.25″ x 2.5″
- Cut 2 pieces of interfacing .75″ x 2″(zipper tabs)
10 Tips for Sewing With Vinyl
- Determine gauge size of vinyl. The higher the gauge, the thicker it will be. I’d recommend sewing with 16 guage vinyl for most bags involving clear vinyl.
- Using a rotary cutter and ruler will be the easiest way to cut the vinyl. (If you use scissors you must mark your cutting lines to be accurate).
- Putting your vinyl in the sun or using a hair dryer on low to medium heat is a good way to remove wrinkles.
- A strong, 100% polyester thread works great for sewing clear vinyl.
- Using tissue paper under the vinyl can help feed it through the machine bed if needed.
- Using clips to hold the material together will work better than pins, to avoid creating holes in the vinyl.
- Using a sharp non-stick needle will make the process easier.
- Lengthen the stitches to 3.0 to keep the holes further apart and to avoid tearing.
- Use a Teflon foot.
- Use a Roller foot.
Stay tuned tomorrow when I go through the step by step process to explore the 10 tips for sewing with vinyl while constructing the gorgeous made at home vinyl project bag. ☀️
0 Responses