 BERNINA Corporate Blog -
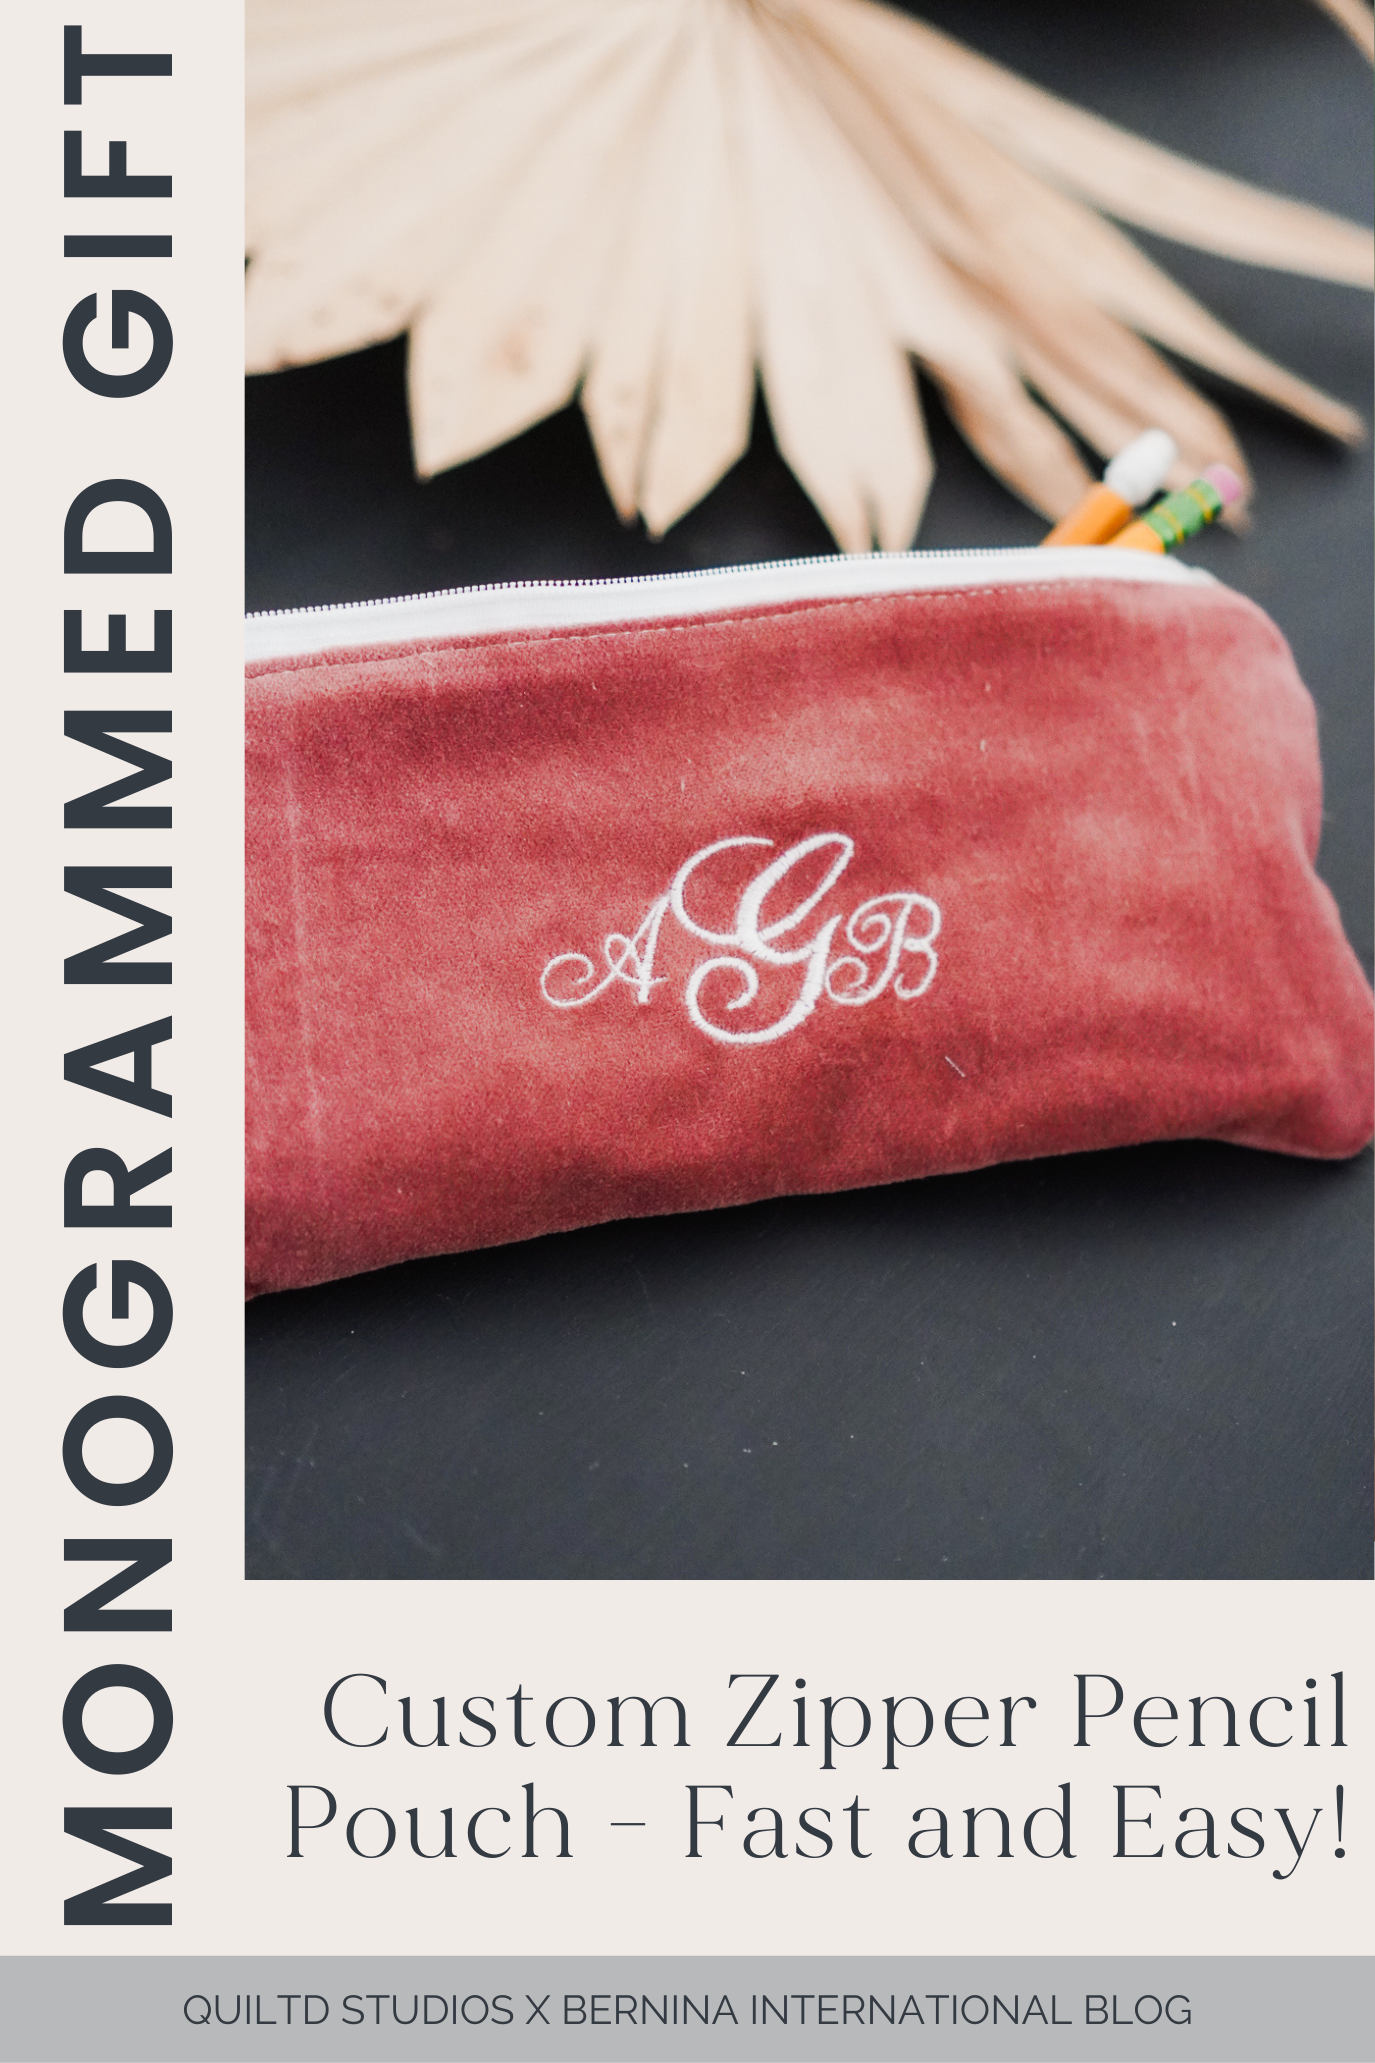
I love Fall. It’s my favorite season: spiced pumpkin everything, crisp mornings, light sweaters, the list goes on! This year was especially exciting because my daughter started Kindergarten (everyone told me time flies, and it really does!).
In the midst of new outfits, shoes and backpacks, I started labeling EVERYTHING.
As much as I trust my daughter to not forget her water bottle or lunchbox.. she’s five.
I really wanted to have something special to take with her and a monogrammed pencil pouch was the perfect answer!


Not only is it useful, it’s SO CUTE. I’ve already made her 2 (I don’t even think she has that many pencils, but they’re addicting).
This lined zipper pouch is super easy to whip up especially if you’ve made any of my other zipper pouches.
Really this was a great excuse to learn how to use my embroidery machine, which I really haven’t touched since getting it 8 months ago (yes my face looks guilty upon writing this).

I’ve wanted to learn, it just seemed a bit overwhelming. I’m pleased to say, it was way easier than I thought, once I figured out the right tension, thread, and interfacing.
I followed a few online videos to learn the basics, and I’ve been whipping up monogrammed items every day since!
If you haven’t had a chance to use your embroidery machine, this is a great opportunity.

Supplies Needed
- (2) 9.5” x 4.5” rectangles of outer fabric (for embroidering, keep it larger to fit the hoop)
- (2) 9.5” x 4.5” rectangles of lining fabric
- (2) 1.3” x 3” rectangles of outer fabric (will be folded over the zipper ends)
- (1) 9.5” zipper (a 9” zipper could work as well if that’s all you have)
- An embroidery machine
BONUS: To see a video tutorial of making this bag – CLICK HERE
Embroidering the Monogram
I chose to use the cursive fonts preinstalled on my Bernina 570 QE. I typed out my daughters initials with the middle initial larger than the other two.
I used a soft velvety fabric with a tear away interfacing. I really like the tear away for these types of projects.


My tension always has to be adjusted in the beginning so I keep my speed really low in the beginning and once the tension looks good, I speed it up.
After embroidering (so cute!) I finished cutting the fabric pieces to match the rest of the cutting requirements.

Sewing The Zipper
This is a really simple zipper pouch, nothing fancy here! Lay the lining fabric right side up, and line the top edge of the zipper with the top edge of the lining rectangle.
It should be centered (you don’t have to be perfect here).
Lay the outside fabric right side down to create a sandwich: lining, zipper, outer fabric.
Sew about ¼” seam allowance next to the zipper. I used my zipper foot to make this step easier.

Open the sandwich up, and flatten it so that both pieces of fabric are on one side and the unsewn zipper edge is on the other side.
Sew a line 1/8” down to secure the fabrics and help keep the seam flat.

Repeat this step for the opposite side of the zipper.
Sandwich the lining right side up, zipper face up, outer fabric rectangle face down.

 Pin or clip and sew ¼” from the zipper to secure the layers.

Open up the layers and flatten with lining on the bottom and the outside fabric face up.
Sew 1/8” from the zipper to flatten/secure the seam.


Finishing the Zipper Bag
Pull the outer fabric rectangles to one side of the zipper, right sides facing each other. Pull the lining fabrics to the other side right sides facing each other.

Pin or clip around the perimeter.
Sew ¼” around the perimeter leaving an opening in the lining side to pull it right side out. (I actually sewed 3/8” when on the lining to make it a little smaller than the outer fabric).

Be sure to go slow while sewing over the zipper. Lower the needle and raise the foot to pivot around corners.

Finishing the Bag
Trim the corners and flip the bag right side out.
Fold in the edges of the lining fabric hole and sew over to close it.
Tuck the lining fabric into the outer fabric, your monogrammed bag is complete!


I recommend you try using a sticky tearaway and float the velvet fabric so you don’t get those creases in the fabric. Also, you can also use a tearaway topping for fabrics with a nap like the velvet. Fun project, though!