Did you know that you can access Skillbuilder Classes for the BERNINA Embroidery Software 9 on bernina.com? In the 12 lessons prepared by embroidery artist Sue O’Very, you will learn the basics of editing and creating your own designs with step-by-step tutorials.
The BERNINA Embroidery Software 9 is the newly developed software with the long time embroiderist and the BERNINA Software newbie in mind. It opens the door to outstanding and creative embroidery and is availale in two levels: DesignerPlus and Creator.
Free 30-Day Trial Version for the BERNINA Embroidery Software 9
If you do not own the sowftare yet and want to try all its features before purchase, you can download a fully functional trial version and test the software 30 days for free. And with the Skillbuilder Classes you can learn the basic techniques in a short time!
What are the Skillbuilder Classes?
12 step-by-step lessons show you how to edit and create designs with various tools. They often provide you with a base graphic to start with and the final embroidery file as reference. You can access all lessons here: Skillbuilder Classes Overview.
Let’s take a closer look at the individual lessons.
Lesson 1: Auto Digitizing
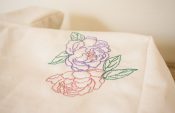
Learn how to change the embroidery hoop size, insert and resize an artwork, use the Auto-Digitizing tool to create a cute flower from a template and export a file to your machine.
Lesson 2: Convert to Appliqué
Use the Auto-Digitizing tool to create a flower shape and make the hole in the middle. The Convert to Appliqué tool will create a placement line, trackdown and a cover stitch. You can even select fabrics to preview your appliqué.
Lesson 3: Lettering
There are so many ways to be creative with lettering. In the third lesson of the Skillbuilder Classes you will learn how to create letters and outlines, change fonts, stitch types and colors and rotate a design.
Lesson 4: Monogram
The Monogramming tools have a lot to offer! You can choose and edit borders, change the text, fonts and size or add ornaments. This lesson will also teach you how to optimize the stitch order.
Lesson 5: Keyboard Design Collection (DesignerPlus only)
The Keyboard Design Collection is a new tool, which is only available for DesignerPlus. It allows you to map a new alphabet design to your keyboard. This means you do not have to load each letter as an embroidery design on its own, but can instead type your lettering in seconds. Lesson 5 of the Skillbuilder Classes will show you how to map letters with the Keyboard Design Collection in the BERNINA Embroidery Software 9 DesignerPlus.
Lesson 6: New Branching Tool
Learn how to create a design from scratch by digitizing lines, curves and closed objects. When digitizing your own design, it is important to keep the stitch order in mind. You want the least amount of jump stitches as possible. Instead of meticulously adjusting the stitch order of all elements individually, the new Branching Tool will calculate the best order for you.
Lesson 7: Perfectly mirrored designs
In this lesson you will learn to rotate a selected shape, use the Mirror-Merge tool to create perfectly mirrored designs and change the stitch type with just one click.
Lesson 8: New Weld Tool
Digitize this needle cushion with various tools, such as the Ellipse, Rechtangle, Mirror-Merge, Wreath tool and more. You can weld all elements into one single shape, resulting in an even fill stitch throughout your design.
Lesson 9: Trapunto
Trapunto is a technique for raised 3D shapes. Lesson 9 of the Skillbuilder Classes will teach you how to create a Trapunto Outline and Quilting Background with echo stitching.
Lesson 10: Lacework
Freestanding lace requires a solid base to keep all stitches together after the stabilizer is washed out. Use the Lacework Fill with two different stitch settings to hold the stitches together.
Lesson 11: Couching
Couching is a fun technique to add some texture to your project. In this lesson you will learn how to rotate the embroidery hoop, create a single outline for Couching and embroider your design.
Lesson 12: In the hoop projects
When creating an “in the hoop” project, it is important to think about the stitch order and placement of your elements. This luggage tag is a simple first project to learn the basics.
We want to see your creations
As you can see, the 12 Skillbuilder Classes teach you a wide variety of techniques with the BERNINA Embroidery Software 9 Creator and DesignerPlus. After working through all the classes you will have learned the basic skills for designing your own embroidery. It certainly is a Big Day when you create your first embroidery design. Let’s celebrate the moment together by sharing your work on Social Media with the #ABIGDAY. We would love to see the ideas you come up with!
 BERNINA Corporate Blog -


0 Responses