 BERNINA Corporate Blog -
It is always the same just before Christmas: The last presents have to be bought and wrapped. The mulling and the hectic search begins…
Today I bring you an idea for a quick sewing project that is packaging and gift all in one: I embroidered wreaths in broderie anglaise style using the Circular Embroidery Attachment and the wing needle to turn simple linen bags into charming gift wrapping. If you fill a jar of a suitable size with small treats and give it as a gift together with an LED tea light in the bag, it can be used as an atmospheric light cover once it is empty.
This is the tenth post in the Blog Advent Calendar 2023. You can find the previous posts here: Blog Advent Calendar.
Instructions: Sewing and embroidering gift bags
This is how to sew the gift bags with these embroidered wreaths:
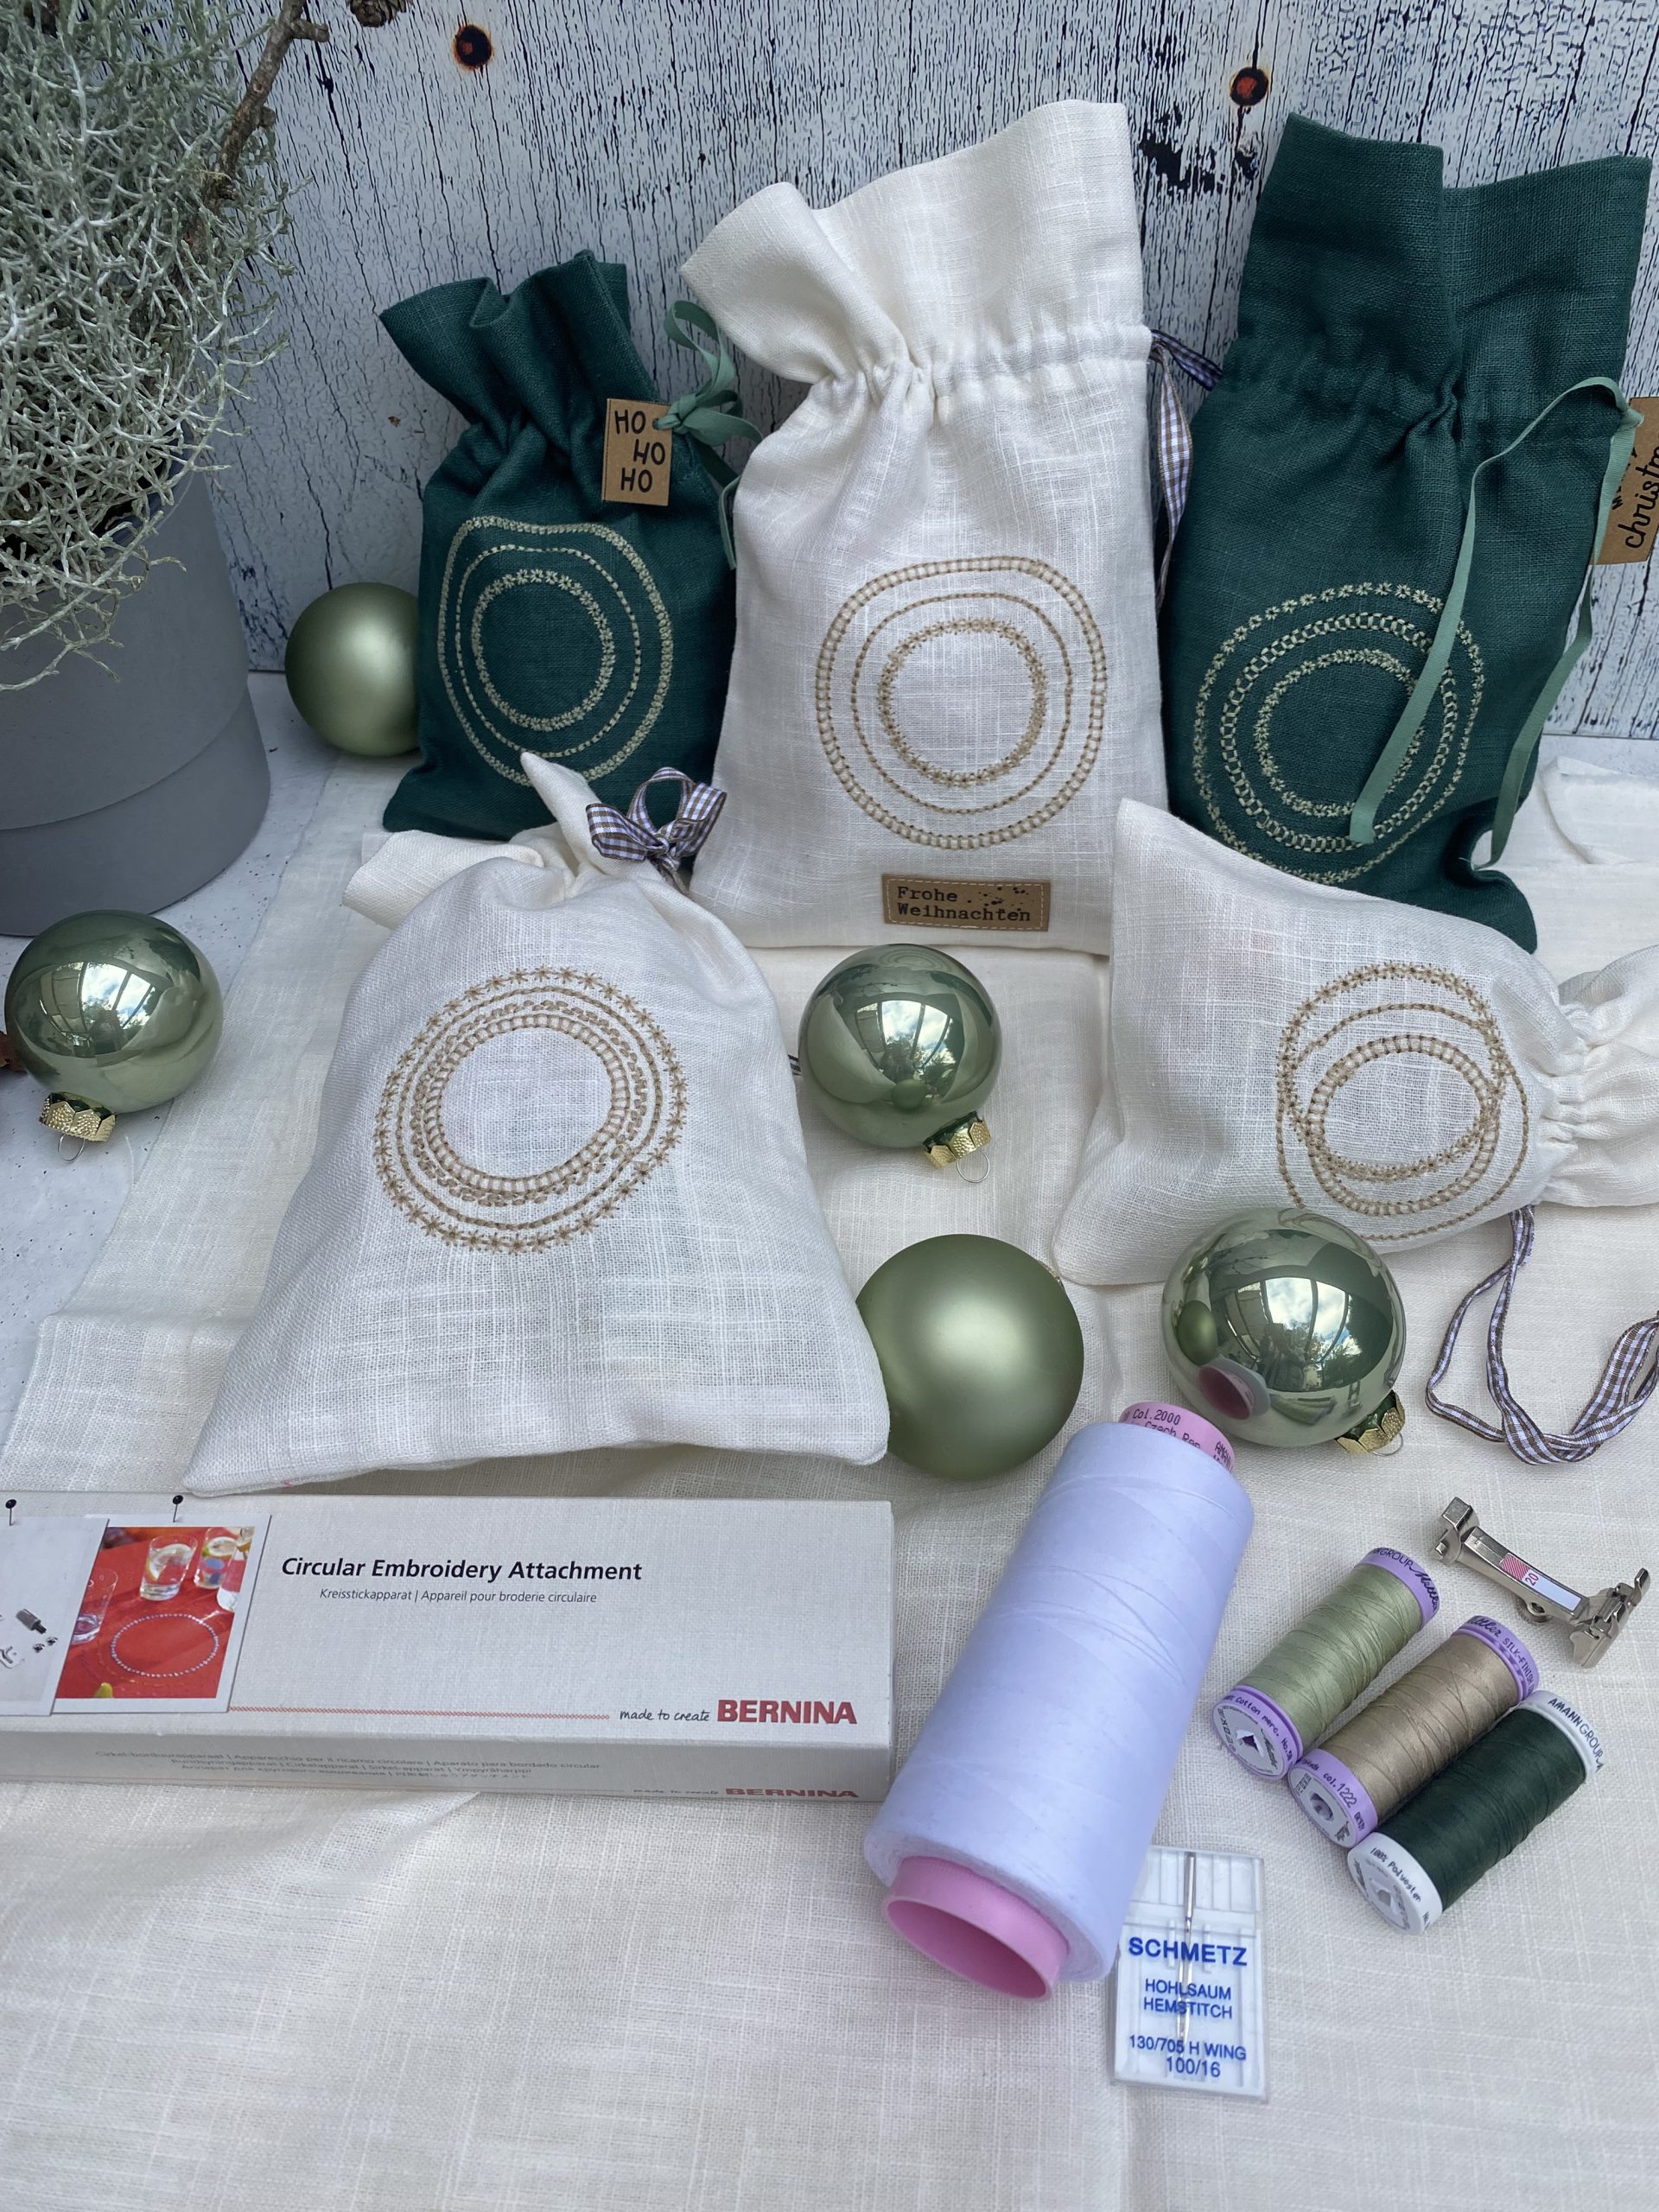
Material supplies – what you need:
- Linen in ecru and bottle green
- Color-matching ribbon
- As appropriate Christmassy SnapPap-Label by snaply
- Silk finish Cotton, Seralon and Seracor by Mettler
- Water-soluble embroidery stabilizer
- Tailor’s chalk or trick marker
- Embroidery hoop (I used a simple hand embroidery hoop)
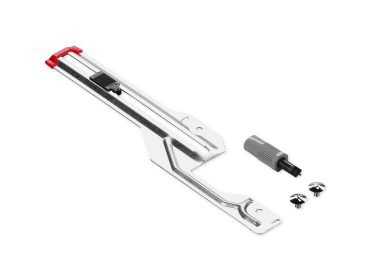
- Circular embroidery attachment # 83
- Open Embroidery Foot #20
- Wing needle, Hemstitch needle by Schmetz
- Punch pliers if necessary
- If required, a suitable sized jar with a lid (for example a yogurt jar)


Cutting and marking the fabric
For a bag measuring 16 cm x 25 cm, cut the fabric to 35 cm x 35 cm. Only woven fabrics are suitable for broderie anglaise. I personally think linen is perfect for this. Then mark the center of the wreaths at a distance of 9.5 cm from the right edge and 10 cm from the bottom edge with tailor’s chalk or a trick marker.

Hooping the fabric and the stabilizer in the hoop
In order to prevent the embroidery from becoming distorted, using stabilizer is recommended. I have decided to use water-soluble stabilizer. Cut this slightly larger than the embroidery hoop, place it under the fabric and hoop everything tightly into the hoop. Position the marking in the center of the hoop.


Preparing the sewing machine
Attach the Circular Embroidery Attachment to the machine according to the instructions. Do not fit the foot yet, but position the hooped fabric first. To do this, slide the pin of Circular Embroidery Attachment all the way to the left, then position the hoop and pierce the pin through the marking. Then attach the protective cap and slide the pin all the way to the right. It may be necessary to push the hoop under the needle at a slightly slanted angle. Alternatively, you can also attach the pin after positioning the hoop.

Here is a video from BERNINA showing step by step how to use the Circular Embroidery Attachment:
Tip Wing needle
Do you already know the wing or hemstitch needle? It looks like a sword and is traditionally used for white embroidery. It pushes the threads in the fabric to the side when sewing, creating decorative holes. But be careful, the hemstitch needle is wide! Turn the handwheel to see if there is enough space.

I used Silk Finish Cotton as upper thread and Seralon as bobbin thread. Please be aware that the embroidery uses quite a lot of thread. Make sure that there is enough thread on the spool as well as on the bobbin.

How to embroider the wreaths
Heirloom stitches are used for broderie anglaise. On my BERNINA, the stitch numbers start with a 7. And off we go with the first wreath! I start with the 711:

Once the first circle has been sewn, move the pin two grooves to the left and start the next round. I didn’t secure the threads, but simply pushed them along which worked without any problems.

In the next round I used stitch 702 and in the last round I used 711 again.


After that, take everything out of the hoop, cut off the thread ends and the connection threads (only on the top side) and wash out the stabilizer. Allow to dry, then iron. With my fabric, I was able to smooth out the hole in the pin so that it had closed again. If this doesn’t work with your fabric, you can sew on a small button to cover it up, for example.

How to sew the bags
Now the bag can be sewn. To do this, finish the fabric all around. I used my overlocker BERNINA L 850 and Seracor by Mettler for this project. If you like, you can sew on a SnapPap label.


Iron the top edge 1 cm to the wrong side.

Close the side seam and bottom seam just at the foot’s width and iron the seam allowance well apart.

Fold the top edge 7 cm inwards and iron it. Make sure that the seam allowance remains separated.


Topstitch the bottom edge of the turn-up at the width of the foot. For the drawstring, topstitch again 2 cm from this seam. The best way to do this is to remove the slide-on table.

Then turn the bag inside out, shape the corners and iron it well. Carefully open the side seam only on the outer layer of the fabric between the two seams using a seam ripper or pointed scissors.

Using a safety pin, thread an approx. 50 cm long ribbon through the tunnel and, if necessary, attach a SnapPap label punched with the hole punch pliers. Then knot the ends.

Now you can fill the bag with presents or sew several of them and use them as an Advent calendar. You can of course also vary the size of the bags.

The bag is also suitable as a light cover. Simply add a fitting glass and an LED as a gift with the bag. Please only use LED lights!


I wish you a great pre-Christmas season with plenty of time to sew your presents!


0 Responses